53-minute skirt for Red Nose Day

red skirt for red nose day

I’m just going to sneak in with a quick post about a speedy skirt I made last night.

Youngest dort announced on Wednesday evening that she needed a red skirt or some red leggings for Red Nose day on Friday.

“No problemo sweetipops,” I said. I happened to be working next to Westfield shopping centre on Thursday and I would have many a ladies clothes shop to bag an emergency red garment.

Famous last words. Would you believe that between five top ladies-wear shops, and one very large sports shop, there was not a red skirt or pair of leggings to be found. Has red gone out of fashion? There was pink, orange, coral and burgundy but not a glimpse of red in sight, save a few t-shirts!

I had already planned a night in with good chums and the Great British Sewing Bee final on Thursday after work. No way was I going to cancel that. There were ‘skanklets’ and everything!

Watching #GBSB final. #skanklette

A photo posted by Tilly Walnes (@tillybuttons) on

So I planned a speedy skirt on the way to Tilly’s and – fuelled by Prosecco and pizza and mini eggs – I raced back to my sewing table before the clock struck midnight. Proper little Cinders, me!

53 minutes later, in true Sewing Bee stylee, I’d made the pattern and stitched up a full circle skirt with an elasticated waist from some leftover red jersey. It scores nothing for couture but fulfilled the brief… and diverted a tantrum.

It’s going to take me a little longer to write and illustrate the tute but I’ll be back with one later, because I quite fancy one of these myself! Till then, have a wonderful weekend, all. Hope you get some quality sewing time in.

ooobop review: Burda Style March 2015

Burda Style March 2015 cover

Can you feel that spring sunshine, desperately trying to squeeze though your bedroom window in the morning? Well if that isn’t happening, the March 2015 issue of Burda Style magazine will do it’s best to brighten your days.

There’s some lively goings-on this month, with all sorts of asymmetric, geometrical, hankerchief-hemmed and draped goodness!

Beach Pearls sets some scenes for a summer wardrobe: I just love that maxi dress (A). It’s not dissimilar to the viscose jersey one I made here, but the bust detail is right on the money! A lot more support I would think and what a flattering silhouette!.

beach pearls burda march 2015

It also translates into a lovely strappy top (B).

Now I like where the asymmetrical skirt (C) is coming from but not quite where it landed up! Way too much like a sack tied round the middle for me. Further on it is redeemed with some better styling, I can assure you.

Nice Jumpsuit (C), btw. If jumpsuits are your thing. You might want to add some ‘fashion tape’ to the list of required notions, though. Click here: Hollywood Fashion Tape if you’re interested in buying any from Amazon!

Flared trouser suits (E)? mmm…and bat wing empire-lines (F)? double mmm… Lets move on to the shirtwaist dress with ‘maxitail in the right seam’ (G). I do like that. And I love the biker-meets-Mao jacket too (H)!

Uh oh. There’s that batwing-empire-line again (I). Swiftly moving on to the Flowers and Stripes section!

Flowers and stripes burda style march 2015

I’ve never made or owned a pair of culottes (A). But I bet they’re a far safer than a full skirt on a windy day. And looks lovely in a largish print. If you like that sort of thing.

And there’s that shirt-waist dress (B) again with ‘cut-on-dipped hem’ like last time! It would be better to use a fabric that has a reverse as good as the good side, I would have thought.

Look how that lovely maxi translates to a cute beach dress too (C).

This month features a chic wrap dress (D). There is some assurance of a button at the side and concealed snap fasteners to keep the wrap in place. Potential for a Bucks Fizz moment there!

The peasant top addict in me (see two of them here and here) is quite drawn to this ‘relaxed tunic’ (E)! Would need a fine drapey jersey to pull off with any sophistication I would have thought.

And there’s some more geometric delight in the shape of a simple v-neck dress with symmetrical ‘cut-on tails’ (F)!

Any weddings occurring this year? Loving both these bridal party dresses (A) in The Big Day section.

The Big Day Burda March 2015

The bride’s dress (B) is the same as (A) with a flowy underskirt of crêpe chiffon. That’s if you haven’t been put off by the chiffon adventures in The Great British Sewing Bee recent episode.

Can’t help thinking this dress (C) is a bit cake-like with all the tiers an’ all.

And although I usually embrace a bit of invention, I still wouldn’t want to look like I’d been dragged behind the wedding car, en-route in this dress (D)!

This fairytale dress (E) is far simpler and much more sophisticated though. Just get rid of the batwing-empire-maid who’s ruining the photo!

Oh this is much better (F). Lovely wide-dipped hem again. Bust darts for shape. Cotton lace overlay, crepe satin underlay. I’d wear it with cowboy boots. Or even DM’s. Or is that just the hippy in me?!

Now there’s that asymmetric skirt again (centre, G), styled much more favourably with a gorgeous jacket: standing collar and 50s style winged lapels. See, it does have potential to work. Nice suit on the right too!

I’ve picked out the following three from the Reader Favourites section:

reader favourites burda march 2015

Jumpsuit (A) made short for all you lovely long-legged people!

Lovely floor-length dress (B) in striped jersey with side slits and a ‘hankerchief hem’. I can definitely feel some more maxi’s coming on this year.

And a cute little dress (C) based on the short lace wedding party dress design. Not my cuppa tea fabric-wise, but I’m always sold on a midriff piece!

Not overly inspired by the plus section this month I’m afraid, though the trench coat is rather amazing, I must say.

plus size trench coat burda march 2015

But, there is cuteness for small people at the back.

Childrens section burda style march 2015

The best design and the garment most fitting to the Colour Splash section by far, is the paint-spattered dress (A) with tying bands that resemble the sleeves of another garment. Hands up who wants an adult version? Genius!

Georgia the party squeeze!

BHL georgia dress

Meet party girl, Georgia! She was meant to be my party dress for last Christmas. But well, you know what happens. I make a plan… and then I make another plan!

But nevertheless, here she is for this season’s line up of parties. Kicked off at London’s Bob Bob Ricard’s no less, for my good friend’s 50th birthday celebrations. I even had the foresight to ensure I coordinated perfectly with the lavish decor of black and gold.

Mr Ooobop wasn’t available to do his paparazzi bit, so many thanks to the lovely @Alphabeckles for this impromptu snap.

Georgia dress at bob bob ricard

The pattern and instructions for the BHL Georgia dress are dead easy to follow. And the online sewalong is a great back up for the finer points.

I made some personal pattern adjustments that included a little FBA, a little shortening of the straps, and a not so little gradation from a 12 at the top to a 16 at the hip (Well that certainly was a surprise!).

I dutifully made the above alterations to a toile but the age old problem was that my toile fabric, although relatively the same weight as my chosen fabric, had a little more give. My gold and black heavy silk-like, embroidered viscose brocade had absolutely none, zilch, diddly-squat!

Yes I know! I know damned well the By Hand London ladies recommended a fabric with a little stretch so please don’t remind me that I totally ignored their perfectly perfect advice!! But you see I got sucked in by the gorgeous tartan version that Sally Bee made! And she used a woven with no stretch!

It must be mentioned that although I was exceedingly honest with my measurements for this dress: over bust, full bust, waist and hip. I neglected to take into consideration my underbust measurement. I think I have a disproportionate bird rib cage to be fair!

And so once I realised that I was going to twist my spine out of alignment or at best pull a muscle doing up the side zip of the actual dress, (which actually wasn’t going anywhere above waist level anyway) I figured I’d have to gain an inch at least from somewhere. So I claimed half inch from each side seam of the skirt side panels and accounted for that in the side-seams of the bodice too.

It fitted. Boy did it fit. No room for sharp intakes of breath but it looked pretty damned good, even though I say it myself.

I grinned and beared it… all day (yes I wore it to work before hand!) and all night.

But at some fateful point over that corsetted period I acquired a little uninvited breathing space!

BHL Georgia rip

This happened of course because I had left the teensiest of seam allowances to glean my inch and although I serged the tiny seam edge, it frayed from the strain!

Lucky I wore a ‘modesty jacket’! Which incidentally was a panic dirty rtw purchase the day before, from Monsoon. I say dirty, not because it is, it’s very clean and lovely in fact, but because there is an element of shame that I broke my routine of only hand made clothes for at least two years. I’ve only allowed myself underwear and cardi purchases from the high street. Anything else to be bought from charity shops. I could so easily have made this jacket. It’s not dissimilar to the Victoria Blazer. But time was not on side and nobody needs to see those fleshy underarm bits in daylight hours!

The jacket did it’s job and clearly hid the naughty side split until I got home too!

So now my dilemma. I want to wear this to at least 2 more parties which are coming up soon. Like next week… eeek! Do I patch it up or do I re-cut two new panels taking new seam allowances into consideration? I do actually have enough fabric.

TBH, I don’t actually know how I’d patch it up. So I think I know the answer. Unless of course anyone has any an amazingly good solution…. please?


Flora in Mitsi Valeria Red

By Hand London Flora dress

How often do you revisit a messed up project to rectify the issues? I can hand on heart say I never have! But in the case of this dress it was wholly necessary and entirely worthwhile.

This is my new By Hand Flora dress and my love for her is as strong as for the other one I posted in March. But this one is the original – the one I pattern tested, and the one I screwed up so much I was embarrassed to send photos of to the girls. I must emphasise that I only had myself to blame. Making wholly unnecessary changes when the pattern clearly needed none!

BHL Flora dress

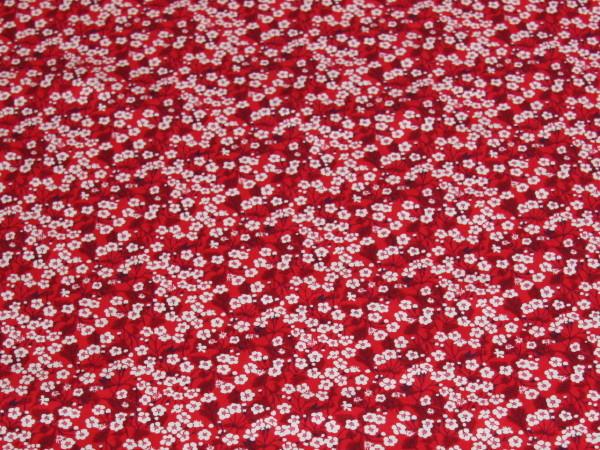
But I had to put things right because I can’t tell you how gorgeous this fabric is. I couldn’t bear for it to go to waste. It is a beautiful lawn from Ray Stitch, called Mitsi Valeria Red. Thankfully I had just enough left to recreate the bodice. I don’t know what took me so long because it comes together so easily.

Flora dress back view

When the fabric arrived, I had to admit that I had doubts about it being weighty enough to give the skirt section the structure it deserves – The polka dot one is quite a heavy synthetic fabric that juts out in all the right places – but I love how this one elegantly drapes, creating a very different look. Plus it feels so silky and special.

Flora dress bodice

Lucky it wasn’t too windy today. It’s so lightweight that the tiniest gust turns this beauty from demure to downright rude in seconds. I gave an elderly chap near heart failure the last time I went out in it. He didn’t know where to look!

Because of it’s delicate nature it didn’t feel right to create bulky serged seams so I pinked them and boy were those open seams satisfying to press. So crisp and neat and because of the ditsy pattern you cannot see the seam joins at all. A bit like the back section of the blue vintage dress I pieced.

Flora dress back view

This was also a particularly useful discovery as I had to cut the front skirt in two pieces owing to the narrow width of the fabric. It’s quite usual for special quality fabrics to come in narrower widths but ideally the front skirt of this Flora skirt should be cut in one piece from a 60″ wide fabric to avoid a centre seam.

And it kind of goes without saying that the By Hand Flora dress is indeed one of the most twirliest dresses around! It’s gotta be done!

twirling in Flora Dress

Photography by Daniel James Photographic 


ooobop’s top 40 tips on how to be an awesome sewist

top 40 tips

I had a little trip down memory lane yesterday, looking back at old projects and it was a real eye opener as to how far I’ve come and how much I’ve learned. There’s plenty more I need to learn and – hoping I’m not teaching too many grandmas to suck eggs, here – I thought I’d share some of the things I’ve learned so far.


1. Never sew when you are tired

It’s a tough rule for those of us who can only sew late at night but really it’s a no-brainer and don’t say I never warned you: Seam allowances will be forgotten, sleeves will be sewn to neck-holes (Ring any bells, Rosie?!) and insides will become outsides quicker than you can shout ‘dunnit!’

2. Measure twice and cut once

I had it said to me all my life by my mum so now I can share this irritating but seriously useful tip with you, my sewing friends. BTW she used to say it in a really squeaky irritating voice too so I’m hoping that will chew into your head as much as it did mine, soz!

3. Invest in a good machine

If you are lucky to inherit a good one then great. But advice from the mother was not to spend anything less than £200 for a newbie. It needs to be heavy enough not to dance all over your table with a reliability factor from a good brand. No fancy stitches needed. Just the usual forward, backwards and zigzags will do. Most have a buttonhole stitch and and a few fancy stitches for that price range too.

4. Learn from the mistakes of others

Stands to reason that you will learn from your own. You will only ever sew a sleeve on back to front once (twice perhaps). You will only ever forget to add seam allowance on a Burda pattern once (well maybe three times). But seriously, before you start sewing from a commercial or indie pattern, or if you are trying a new technique for the first time, have a scout round and see what everyone else came up against. You can always post a comment on a sewing blog and ask how they resolved their issues. Sewing bloggers are always your best friends.

5. Make notes

Either on the pattern piece itself, on a notecard in the envelope or digitally documented if you are that super organised, you will thank yourself later for keeping notes about what you changed from the original. You might think you have the memory of an elephant, but believe me, fellow sewists, I speak the truth when I declare that we have the memory of a goldfish when it comes round to sewing a repeat project. Or is that just me?!

6. Practice, practice, practice. . .

It’s how anyone gets good at anything they are good at. In fact it is the only way. Nobody is born great at anything. But everyone has the opportunity to be brilliant at something if only they practice enough. All you need is the passion for it. It’s not a tough call. Just keep sewing!

7. Change the needle

The word out there is to change your needle after every project. I admit to being a one-needle-two-project rebel but I do change it all the same. It needs to be an appropriate needle for the fabric too. Generally speaking:

70/10 universal  for light/ sheer fabrics
80/12 universal for light to medium cotton/linen/wool/polyester
90/14 universal for medium to heaver cotton/linen/wool/polyester
100/16 jeans for heavy denims or for hemming jeans

And a good idea to take note of the size of the needle that you last left in the machine, or put it back in a box (marked used) so you can remember what size it was. Impossible to tell otherwise.

8. Don’t skip the stay-stitching

It’s tempting I know, but just think how much you will be saved from the embarrassment of a saggy neckline, or a droopy waistline. Don’t even wait for an instruction. Any area cut on a curve or on the bias will need some stabilising or else it’s going to stretch all over the place when you come to sew it. Sew, using a regular stitch, about 1cm or 3/8 inch from the edge of your fabric, within the seamline. Stay-stitching is most effective when sewn from outsides to insides. Ie from shoulder to centre neckline or from side waist to centre waist. Repeat for the other side.

9. Read those instructions

Obvs! I’m going to put my hand up right here and confess to skip reading instructions. I always think I’ve got it. Mostly I have but I’ve also come unstuck by not paying attention. What I tend to do nowadays is take instructions to work, read them on the train, read them again in my lunch hour. Make the garment in my head on the journey home or in the shower the following morning. That way I know ‘exactly’ what I’m doing when I come to make the actual one for real!

10. Be precise in all that you do

I’ve mentioned the ‘measure twice cut once rule’ Ooops there’s that squeaky voice again. But precision is the key to perfection. Cut out your pieces accurately. Make sure your seam allowances are 15mm or 5/8 inch all round. Transfer your pattern markings accurately. It pays off, I promise you!

11. Mark the wrong side

The light in my house is not that great. Even during the day. And the times I’ve sewn right sides to wrong sides is too many for sure. In fairness, sometimes it’s really tricky to tell right from wrong even in broad daylight. It could be argued that in that case it doesn’t matter, but all the same, if you want the consistency, mark the wrong sides with a chalked cross as soon as you have cut the pieces.

12.  Don’t watch the needle

In order to keep that seam allowance at a consistent 1.5cm 5/8inch, align the edge of the fabric to the marker on the foot-plate. There will be various markings on there and if you keep the edge of your fabric lined up against it you will guarantee a consistent allowance. If the markings on your machine are not clear enough, stick down a strip of masking tape to define the guide.

13. Tie off your darts

Never back-stitch at the point of a dart. You will get nipples where you never thought possible! Instead, run the stitch past the end of the point and leave the ends of the thread long so you can tie them together with 2 or 3 knots. Trim the remaining threads to no shorter than an inch.

14. Use a press cloth

Unless you like the scorched and shiny look, always use a press cloth. I generally use a piece of white muslin but a velvet press cloth can be used for velvet so you don’t upset the pile (thank you Scruffy Badger!). A wool cloth will hold moisture and is therefore great for pressing wool that needs a good steam. Silk organza is great because you can see through it. Especially useful when pressing pleats (thanks Karen!)

15. Ditch the blunt pins

Get rid. They only exist to ruin your work. The minute you feel one resisting when you push it through your fabric, throw it away immediately. Don’t just put it at the end of your pincushion, earmarked ‘the end for bad pins’. Yes I’m looking at you, ooobop! OR if it’s not too late, invest in an emery pincushion. What’s one of those? I hear you say. Ever seen the tomato/strawberry pincushion combo and wonder why? The small strawberry counterpart is filled with emery, an abrasive mineral that will sharpen those bad ass pins as you push them in. You can buy a Large Tomato Pin Cushion-With Emery Strawberry from Amazon. And if you crafty sewers fancy making one yourself you can buy the White Emery For Pincushions-4 Ounces especially to fill said pincushion. That way, I guess it doesn’t have to be a tomato or a strawberry if you don’t want it to be.

16. Back tack, back tack!

If only I could incorporate all the silly voices my mum used to do! It’s very duck like, that’s all I can tell you! But yes, Back tack, back tack, beginning and end to secure your stitching… But NEVER at the pointy end of darts!

17. Trim and clip

In the past, I’ve worried that if I clipped the curves, the stitching line would come undone. (yeah right, more like worried about having to do something extra!) So I’ve left that bit out and suffered the ugly, bulky mess as a consequence. It doesn’t come undone. I can assure you. If you trim the seam allowance to about half, snip the curves close-to not in-to the stitching line and give it a good pressing you will have a perfectly neat and professionally finished curved seam. If the curve is on a neckline for instance you have further reassurance if you stay stitch the seam allowance to the lining or facing.

18. It’s not a race

More haste less speed! Another of the very annoying mum comments, sorry, but nonetheless important. You can say it anyway you like but it’s true. It is impossible (unless you are hugely experienced) to get a straight line of stitches when your foot is down to the floor. And there are no prizes for finishing first because you are the only contender! Think each stage through before racing on to the next bit. It’s all to easy to miss a crucial part of the process if you are steaming ahead.

19. Needle position

Don’t forget to move the position of your needle when you change feet. particularly when using a zipper foot. It frightens the life out of me when the needle inadvertently hits the foot!

20. Needle security

Which brings me onto another scary point. Every time before you sew, make sure that needle is securely fastened in the shaft. Turn that screw nice and tight. I’m sure certain stitches make it work loose and I know for a fact that my side cutter foot wobbles it around enough for it to come loose. I’ve taken to checking the needle is secure when I’m using this foot even during a project. An airborne needle tip is a very hazzardous thing!

21. Press and cool

I was very lucky to spend some time with a lovely tailor friend last year. I learned so much in such a short space of time and one thing of the many things I took away with me was this fabulous pressing tip: After steam pressing, use a wooden block to press down on your crease to take the heat away quickly. Don’t move the creased section until it has cooled. Akin to setting ones hair in rollers I guess!

22. Baste away

Hands up who bastes? No takers? Well actually not me very much either. But we all know we should, don’t we?! So let’s do it. Especially if it’s a shiny fabric that’s going to move. Especially if you’ve invested your hard earned dosh in this lavish piece of cloth that is going to be your signature gown. Escpecially if you’re going for Chanel over Primani! It makes sense.

23. Bobbins at the ready

Have a selection of bobbins pre-wound in your most used colours. Particularly black, white and a neutral colour. There’s nothing more irritating than having to stop, mid-flow to wind a bobbin. There is however, great joy in delegating the task to a small child if you have one of those floating around. In fact one of my smalls bought me a fabulous Side Winder – Portable Bobbin Winder for my birthday and still lays claim that it is her job to wind my bobbins. I’m not arguing!

24. Pins pointing in

It’s still not second nature and I still have to make an effort to think about how I am pinning things together. It’s important NOT to sew over pins (broken needles, wonky seams, need I say more?) and so it’s just as important to pin those pins in a way that they are easily removed as you sew up to them. Remember that the bulk of your work is on your left and the seam allowance will be on the right as you sew. Pin along the edge of the seam allowance at right angles to your fabric with the points of the pins facing into your work and the heads of the pins on the outside edge so they can be easily removed as you go. Pinning parallel to the edge means you cannot otherwise sew as close to the pin and if it happens to be in the wrong direction you are at risk of a pin point down the end of your fingernail… and you don’t want that!

25. Trace your pattern pieces

Particularly if they are vintage. They’ve lived this long and don’t deserve the abuse of pins and rips! I learned the lazy way and lived to regret trashing one of my favourite patterns. Half an hour would have been enough to duplicate and would have also been a perfect record for any adjustments. I have no qualms about scribbling on or slashing and spreading a duplicate tissue. Even modern patterns need to be preserved. If they are multi-sized, you’ll kick yourself if ever you needed to return to a smaller or larger grade. More so if you cut the wrong size to start with!

26. Keep distractions to a minimum

Easily said. Especially if children, small animals and musician boyfriends are at large, so choose your sewing time carefully. Interruptions so easily disrupt a chain of thought. Keep the radio to an acceptable level and don’t try to watch Madmen when you are figuring out something tricky!

27. The rotary cutter

Not just for quilting, the rotary cutter and a large self-healing cutting mat are the perfect buddies for cutting fine or slippery material. Add to the equation some decent pattern weights and you can avoid any amount of movement as you cut your delicate fabric.

28. No gathering unravelling

Have you ever suffered the nightmare of gathering up some fabric only to inadvertently pull the whole thread through? Or have you ever struggled to gather a length of fabric to a set length? One way to solve this is to pin a pin at one end of your gathering stitches and wind the ends of the thread around the pin before you pull up the gathers. I sew two parallel lines of long stitches to get even gathers and then when I pull them up to the desired width, I pin another pin at the end and wind the excess threads around that one too. It helps to keep everything in place when for instance, I sew a gathered skirt to a bodice.

29. Handy tip for hand-stitches

I’ve learned to enjoy hand-stitching. It’s taken a while. But I get it now! It’s no longer a chore, more of a treat. But there’s something that makes it just that bit more pleasurable and that’s the nack of having a thread that doesn’t tie itself in knots halfway round your hem. Beeswax is the answer to a gliding knot-free thread. Just run the thread across the block so it becomes coated before you sew.  The lovely Claire over at The Thrifty Stitcher also advises to make sure your thread is no longer than arms length plus half your chest, to avoid the same.

30. Snip loose threads

If you are going to take the time to make something of quality, snip those loose threads. It’s actually quite satisfying if you have a quality pair of Snippers. And your garments will thank you for looking all the more professional.

31. Find your style

Ask yourself why you started sewing. Was it because you wanted to save money? Well you might have got a bum steer there! Was it just because you had hours to fill. I doubt that! Or was it simply because you wanted something original and well-fitting in your wardrobe that nobody else would have? Think about what you like and what you want before you dive headfirst into any old sewing project. Will it suit you? Will you wear it? Where will you wear it and how often? There’s no room in a wardrobe for wasted hours and unworn clothes. Ask yourself ‘is it you’. And if it is . . . go to it!

32. Help 24/7

You are never alone. Never! In those small wee hours in the morning when you are stuck on your final stage or you really cannot for the life of you remember how to use your buttonholer, Google it, go to YouTube, Tweet your problems, ask a blogger on the other side of the globe. You have every learning resource at your fingertips, 24/7. How exciting is that?!

33. Lock up your scissors

Make everyone in your household aware that your fabric scissors are to be used for cutting paper on pain of death! Never use fabric scissors on paper, NOT EVEN PATTERN PAPER. It blunts them and quality tailors scissors are not cheap to sharpen. Have a separate pair of scissors for paper cutting. You will see just how quick they are to blunt. But a quick tip to sharpen paper scissors is to ‘cut’ round the neck of a glass milk bottle or similar. Strange but true!

34. Leave your comfort zone

It’s very easy to stick to what you know. And you might be very happy in your comfort zone but if you want to learn more you need to leave that cosy space and give yourself a little push. Don’t be afraid to tackle things you’ve been too scared to try. You can line a vent, you can bind a buttonhole and there’s no need to be afraid of the big bad welt! Think of all the new possibilities that could grace your wardrobe. Its also a good idea to make for someone else. You learn to gain new fitting skills real quick when you’re aiming to please someone other than yourself! Just remember that nobody knew how to do anything before they learned. And then they practiced and then they got good at it!

35. More than one way to skin a cat

It took me a long time to realise that there are no set rules in sewing. For sure you need some guidance in the beginning but you will quickly learn to trust your own instincts with the more experience you gain. Some methods of instruction can be ridiculously complicated with unnecessary added stages. It’s up to you and your common sense to make life easier for yourself and work in a way that suits you. You only have to Google the methods of inserting a zip to realise how many different ways of simply doing that!

36. Invest in a few choice books

Whilst the internet will deliver everything you will need to know about everything, there’s nothing quite like a collection of inspirational books to hand. Some of my favourites include a New Complete Guide to Sewing: Step-By-Step Techniques for Making Clothes and Home Accessories (Reader’s Digest), a 50s pattern cutting book, Love at First Stitch: Demystifying Dressmaking and a Fit for Real People: Sew Great Clothes Using ANY Pattern (Sewing for Real People). There’s nothing quite like a sit down with a cuppa and a good read! It’s a good idea to check out your local library (if you still have one :-/) or if you are feeling like splashing out, Amazon have some good deals:

37. Prewash your fabric

I know. I’ve been there. Heat of the moment and all that. You just want to get cracking and you really can’t wait another day for the fabric to wash and dry. But I can assure you. If you don’t pre wash your fabric before you sew it, you stand a good chance of not getting more than one wear out of your lovely new dress. Cotton will shrink. It’s a fact. So will wool. Undoubtedly. Even viscose. In fact most fabric will change in some way after a launder at any temperature. So don’t skip the prewash!

38. Don’t trash your scraps

I can’t bear to throw even the tiniest of frayed cut-offs in the bin. Breaks my heart, it does. I cling onto every last piece struggling to find a use. So only the tinyest of pieces meet their demise. I keep hold of decent sized pieces for tops or knickers or scrapbusting gift ideas (that mostly never get realised) but smaller patchwork sized pieces or remnants that I honestly wouldn’t use to make anything else with, get donated to my local after school club. The children love it when I bring in a sack. And it’s so lovely to see all their collages and creations around the classroom when I go to collect my daughter. So check out your local school and ask if they could use your scraps. It’s lovely to know that it doesn’t go to waste.

39. Sewing in the dark

If you have black or dark fabric to sew, save it for a daytime project. Unless you have some seriously good lighting, it truly is a nightmare. You really don’t want to be unpicking black thread from black cloth under substandard lighting. It is not fun. I have got round this of a fashion by sporting Mr O’s camping head torch. It works to a degree but I’ve ended up with a bloomin’ stiff neck before now, where I’ve tried to focus the light on one spot!

40. Love what you do

Not really a tip. More of a reminder to relish every moment of each and every one of your projects. Sewing is therapy. It will keep you sane when everything else is driving you mad. It will bring forth a beautiful wardrobe hand made by you. It will fill you with pride and teach you about ethics and if it hasn’t done already, it will soon lead you to meet some of the most amazing like-minded people that you might never have met otherwise. So savour every stitch and love what you do because you have something really special and that really is all that you need to be an awesome sewist!

Feel free to Tweet, pin, reblog and share. Thank you always, my awesome readers. x

Flora – my new bestie!

Flora dress By Hand London

I can’t tell you how delighted I was to be asked by the By Hand London girls, to pattern-test for them, back in January. All honoured and everything I was!

The package arrived with goodies galore and a link to my fabric of choice from Ray Stitch. How could I resist this gorgeous Liberty Tana Lawn?!
Liberty Tana Lawn

But hang on a minute. The dress in the pictures doesn’t look at all like this fabric!

Well, you see, I kinda messed up a bit. I was clever enough to make a muslin before I cut into this buttery lawn, but I stupidly pre-empted adjustments that so didn’t need to be made. Three more muslins later with differing versions of the same adjustment, I was fast running out of time. What was I thinking? I rushed through the final version before I’d properly corrected MY mistakes. And I emphasise MY mistakes because By Hand London’s Flora pattern is spot on and when I came to make the one you see in the pictures, I made no adjustments whatsoever save a bit of an increase to the waist. Doh! Me and my meddling!!

Thankfully I still have just enough of the lawn to replace the front bodice and I certainly will do that and post it as soon as I can. I just love this dress soooo much!

Flora dress by hand london

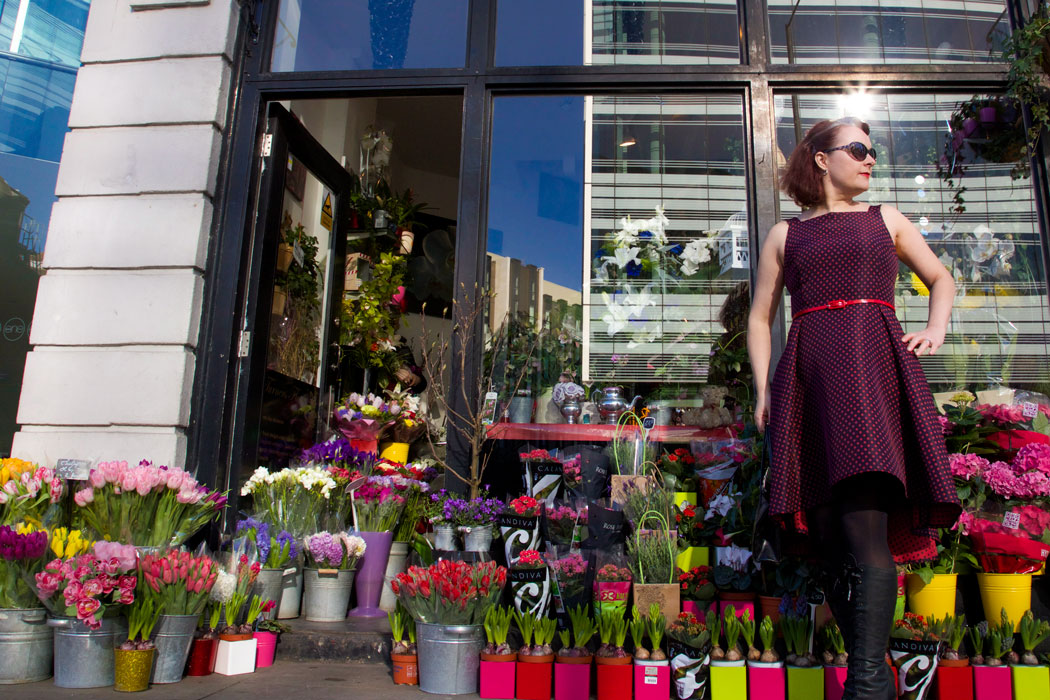
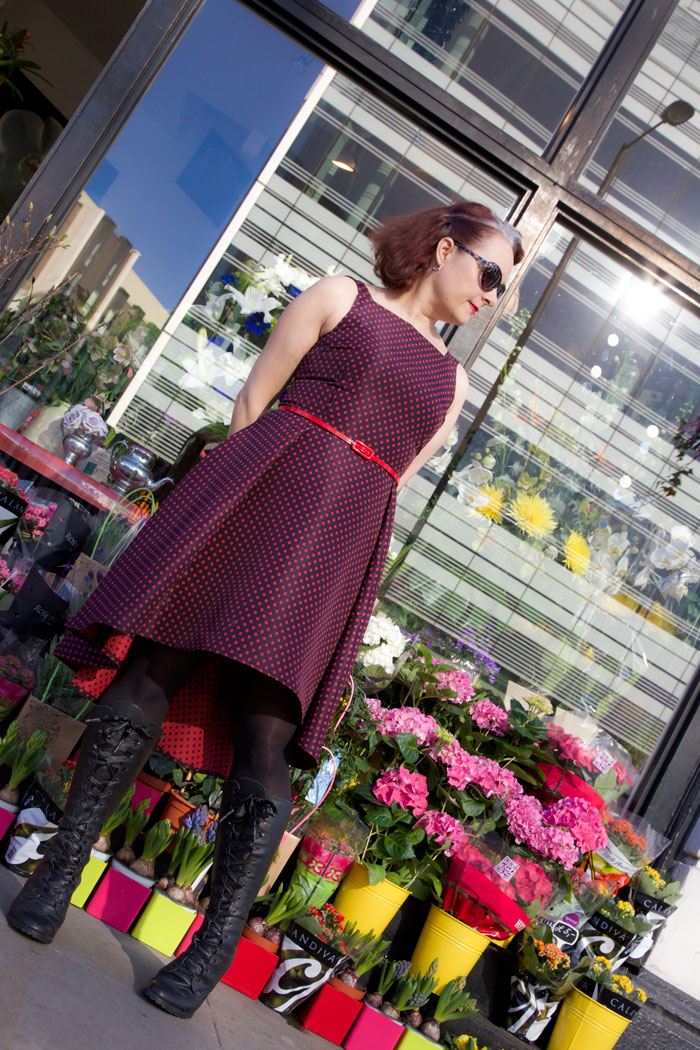
So what is this fabric that isn’t Tana Lawn, then? Well my friends, I should have called this dress the Four Quid Flora because that’s exactly what it is! £1.99/m special dress fabric from Dave the Drapers in Shepherds Bush Market! I had a spare zip and some leftover lining so literally this dress cost me just £4. I can’t vouch for any natural threads going on but do you know what? I really don’t care. It has a sheeeeen! So shiny. It shimmers in the sunshine! And it has body. Enough to hold that beautiful structured shape yet just enough drape to create soft pleats and barely any creases.

flora by hand london dress

The dropped hem is clearly the most striking feature about the skirt section. And so I had to take care to finish it all good and proper. It’s not often your insides are on display to the general public! And hey, another Brucey bonus about this fabric is that the polka dots reproduce beautifully in reverse on the wrong side. Or perhaps it was the right side. Who knows? Dave certainly didn’t!

flora dress by hand london

I must just give a quick shout out to Turners flower shop on Hammersmith Broadway, for kindly letting us shoot outside their pretty shop.

And also add that Mr O was risking life and limb to take these photos. I might have been on the pavement but he was practically lying in the middle of the road. Not ordinarily quiet round this neck of the woods! His dedication knows no bounds!

flora dress

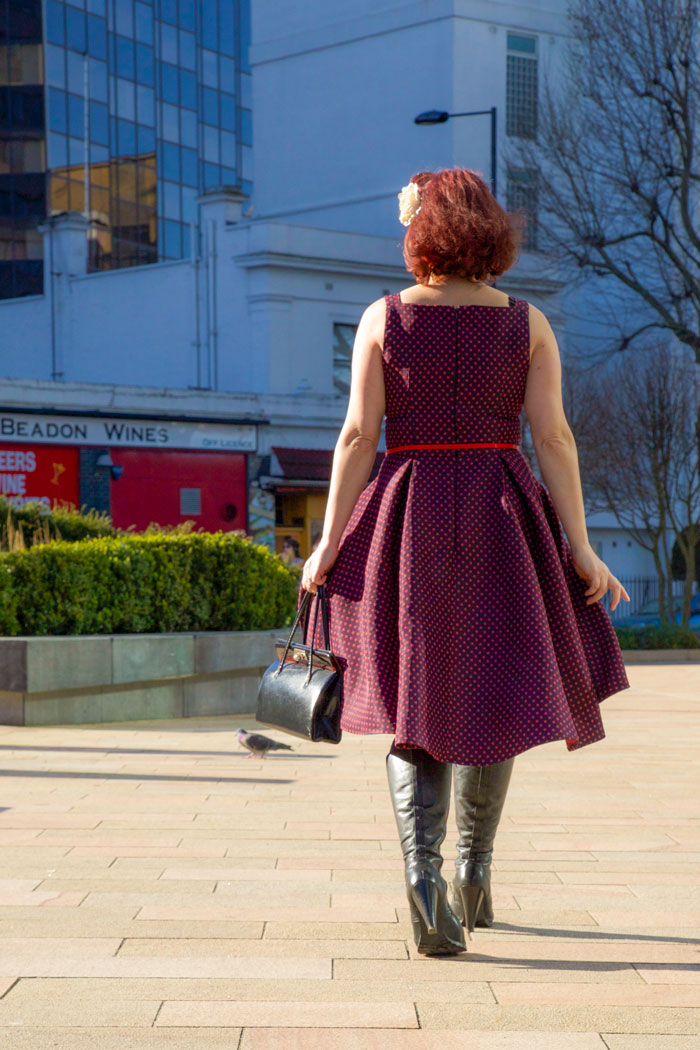
I wholly recommend the Flora dress to anyone. Beginner or advanced. Such little input for such incredible output! And so quick to make… so long as you don’t pre-empt unnecessary adjustments like I did! And boy is it flattering. A lovely vintage style neckline and a full structured skirt. Who could ask for anything more? The first place we stopped at, two ladies commented on how they loved my dress. Ego trip or what?!

flora dress on Hammersmith Bridge

It has been such gorgeous weather in old London Town this week. I’m so loving the brighter mornings and I even got to come home from work in daylight this evening. I feel more energised and ever more ready to get on with some more sewing. I feel a few more Floras coming on for sure.

These last couple of pics were taken on Hammersmith Bridge. My favourite bridge of all the bridges in London. And just so perfect to stroll across at sunset.

flora dress on hammersmith Bridge

Now who remembers the Flora ads? I certainly do! Definitely worth a giggle!

[youtube https://www.youtube.com/watch?v=JmS3t5R3O6M]
[youtube https://www.youtube.com/watch?v=_piSsGckJw8]

Coco

coco top

Now you won’t find many stretchy casuals on my blog as a rule but the beauty of rule of thumbs is that they can be changed in a click of the fingers. Move over wovens, and make way for the Coco that is stretch jersey (of sorts!)

coco top

I thank Tilly for this genius newbie. Not only for it’s ease of make…. 2 hours I tell ya! And that included pattern tracing and childminding! But a casual top with a retro vibe is completely up my street and something that was seriously lacking in my wardrobe.

Over the last few years… 3 years to be precise… I am so proud to say that I have not shopped the high street for anything but undies and cardies. My wardrobe is almost completely handmade by me. But there still resides a few too many black Primani T’s for my liking and this is where Coco could change all!

coco top

I just love the funnel neck and although this fabric doesn’t appear to have more than one single natural fibre, it is a perfect weight to hold the shape. And the cuffs are a wonderful addition to compliment the neckline.

coco funnel neck top

I think I could have gone up a size but I quite like how snug and fitted it is. This top could be serious friends with jeans or capris, with a mini or maxi, and I’m thinking a pair of plaid shorts would partner perfectly. Worn today with an old faithful pencil and a pair of flip flops to do the hockey run!

And it must be mentioned that Mr Ooobop deserves a medal for these photos today. He was in one serious hangover and suffered plenty a head rush when he got up from down low for those creative sky shots!

coco top blossom

Today is just beautiful which is why I’m keeping this short and sweet. Gotta dash to catch those last few rays and Mr O needs a ‘hairy dog’, poor deserved love!

So if you haven’t done already, do pop over to Tilly and the Buttons shop and grab yourself a copy of this pattern. It doubles as a dress pattern,  includes a plain neckline version plus you get to see Tilly herself model the cutest versions of all!

Mom, BurdaStyle is on the Phone for You!!!!!

I am sure that many of you will already have had the pleasure of following the adventures of The Renegade Seamstress – refashionista extraordinaire. No? Then I seriously suggest that you hop over to see some of her amazing posts right now, right here.
As if that isn’t inspiration enough, read down for news of an exciting live web-seminar that she is hosting over at Burdastyle… Over to you Beth!

Wild Thing for World Book Day

Where_The_Wild_Things_Are_costumeI think I may be subject to mass mum-hate if I proclaim a love for World Book Day. But I do. (Eek!) Don’t get me wrong, I get my knickers in a knot as much as anyone else but I secretly relish the challenge. After all, it involves a must-do sewing project. And that’s always a good thing.

My daughter was very clear about what she wanted to be this year. I’ve come to realise recently, how very grateful I am for people who think for me. I constantly have head soup! Someone thinking on my behalf is better than doing the dishes for me or hoovering the stairs. I’d even go as far as saying that it was better than someone cleaning the bathroom for me. Not that I know what that’s like but you catch my drift?

stars

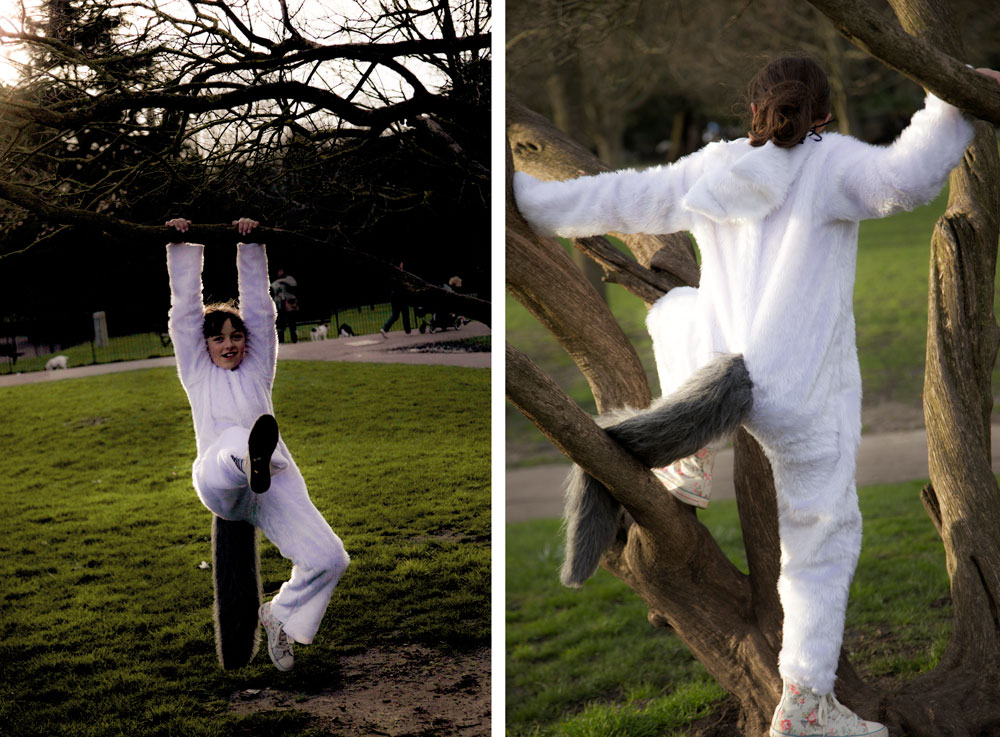
Anyhows, youngest dort was dead set on Max from Where The Wild Things Are. Easy I thought. A white onesie and we are sorted! Not. Not when youngest dort has other plans, like a white onesie in a faux fur of the furriest kind. I kid you not, this stuff is horrid and has left serious evidence throughout the whole house!

Where The Wild Things Are costume

I’ve never attempted one of these before and certainly didn’t have a go-to pattern but this is where I can justify my 3 year collection of Burdastyle magazines.

Low and behold in January 2013’s edition…. a wookie jumpsuit! Thank you Burdastyle. Really. Thank you!!

wookie costume

The only problem I had was that the size only went up to age 8. My daughter is 9 but a good 4 inches taller than a regular 9 year old! And so I cut and spread and taped and so properly graded the jumpsuit pieces. But then I looked and shook my head in disbelief at the sheer size of the pattern and took out an inch and a half.

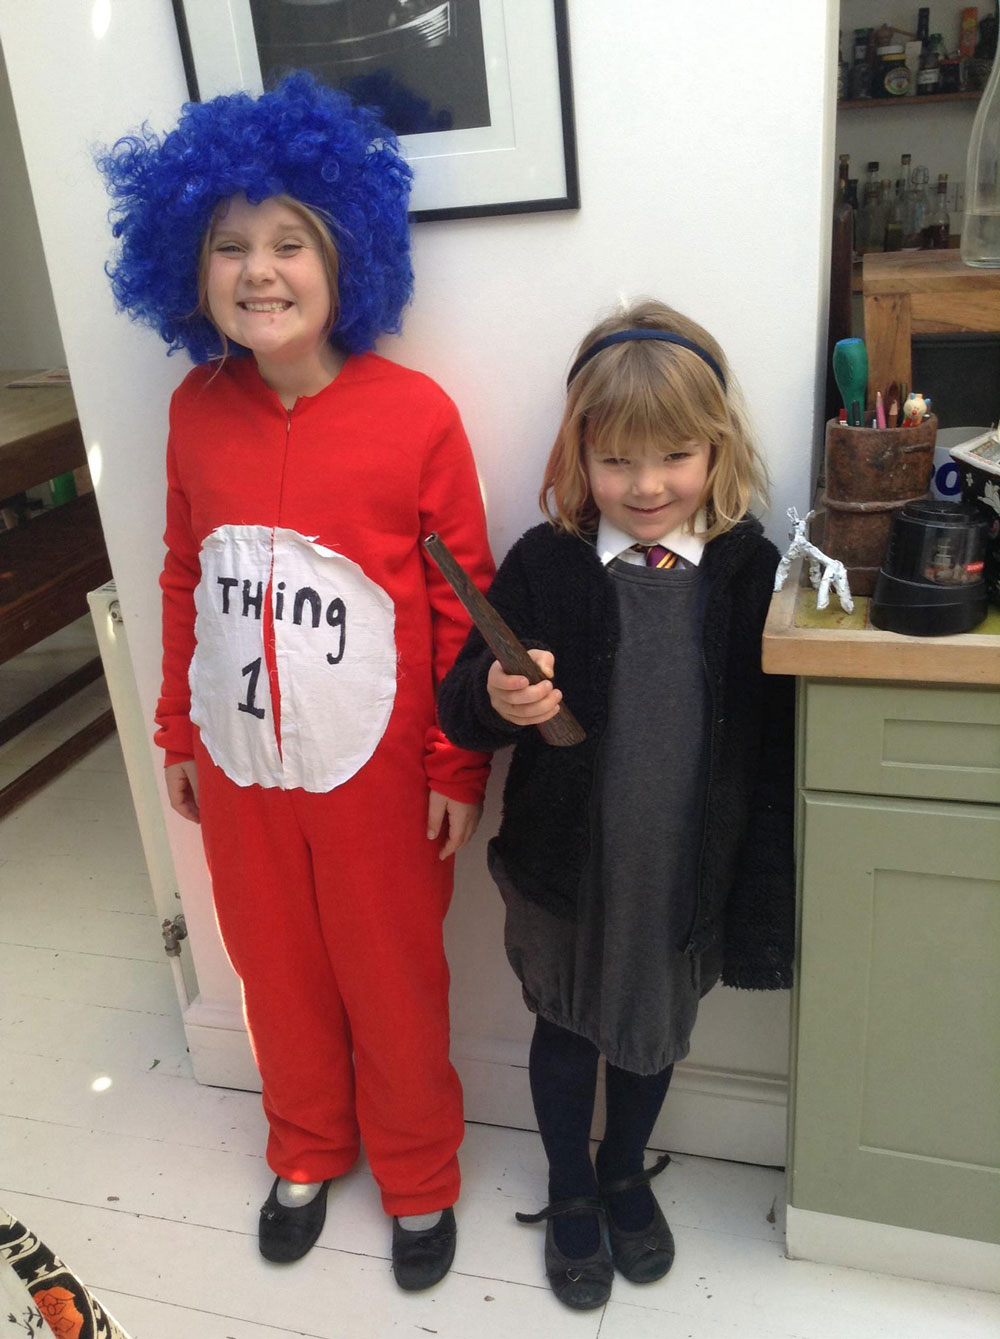
Well you can guess the rest. The first test garment was too small. But no biggie because it was only a tester and better still made the basis of a Thing One costume for her bestie! Bestie’s clever mum did a very fine job of sewing on the the all-important detail as well as taking care of  the gorgeous Hermione Granger!

Thing One costume

So once I added those inches back in I just cut and sewed… and got fluff everywhere!
The good thing about this stuff is there is no necessity for neatening of seams, no hems and no need for careful catch-stitching. I actually did double interface the ears with sew in canvas to make them stand up but not be too stiff. The zip was surprisingly ok to sew in, by hand but trimming the fluff so as not to catch on the teeth was really annoying!

Where The Wild Things Are costume

I can’t take all the credit for this one. LMO made and hand painted her own fabulous crown and check out that wonderfully fluffy tail. A tail that Max himself would have been soooo proud to wear. Mr Ooobop himself took on this task while I was at work. He chose the fur and shaped it perfectly before stitching it with his own fair hands. I am so uber impressed.

Where the Wild Things are CostumeI think we can safely say that Little Miss Ooobop was suitably impressed too! And what better place to hang out after school than the local park, in the trees, being photographed by her multi-talented dad!

Where The Wild Things Are costume

stars

Where The Wild Things Are costume

Hope your tales of World Book Day were as fun!
And wishing you all a lovely sunny weekend wherever you are.

(One can dream!)

stars

My ooobop labels have arrived!

I grumble a lot about my job as a freelance graphic designer. Mostly because it interferes with my sewing time. But I must learn to be more grateful. The perks, for me, still outweigh an employed status. Freelanceness alone means I can juggle jobs and children and blogging and sewing, all at the same time. In fact, my circus skills know no bounds. My great aunt ran away with the circus so it’s in the blood, you know. For real!

And once in a while skill sets cross over too . . .

Look what was waiting for me when I arrived home from the office last night.

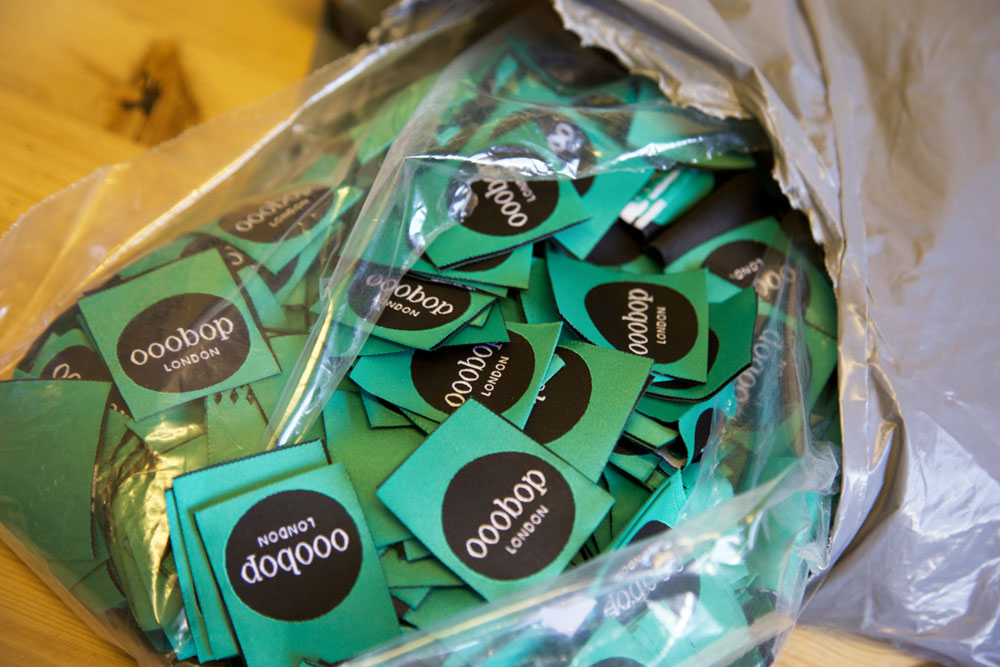
A pillowy parcel oozing 500 folded self-designed, ooobop labels! Thank you Woven Labels UK! I couldn’t be more delighted if I tried!

ooobop labels package

It would be smug of me to say I designed and submitted the artwork in a blink of an eye. Which ordinarily I’ve been known to do. But I think I would be sussed by the likes of Symon Sez who knows just how hard it is to fulfil one’s own brief!

And I must add that I am also doing things back to front. I have a little blog rebrand in progress (or rather in mind) but I just couldn’t wait to see what these looked like in the mean time!

And what a pleasure to sew the first one into an almost finished skirt for my lovely and deserved friend. I can’t wait to present it to her at the end of this week. So proud 🙂

ooobop label sewn in skirt

I must also add that this is not a sponsored post. I could not big up Woven Labels any more if they paid me. Tom’s patience and understanding was untold as he had to deal with a fusspot designer. The worst kind of client for him, I’m sure. I have ordered children’s school name labels from him before but they also do craft labels and custom made designer labels. If you are looking for a real personal service and excellent quality at a great price then this is most definitely the place to go!