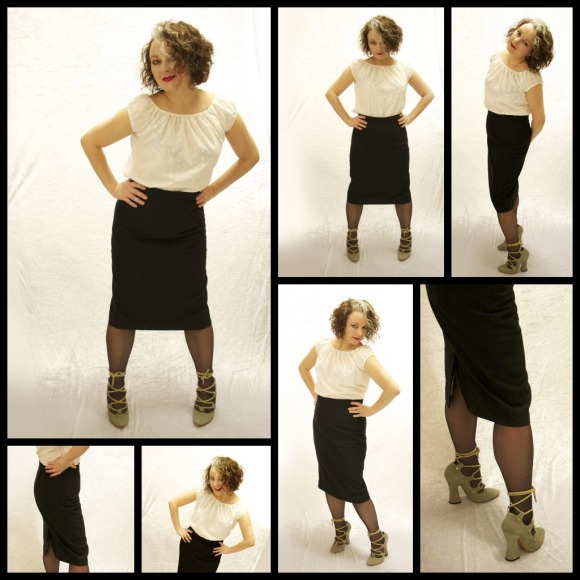
Black pencil skirt and a learning curve

Not the most ground-breaking make but as usual, there is a continued method in my madness!

I have hundreds of really lovely vintage and modern dressmaking patterns and a serious desire to make and wear each one but every so often feel like I’m winging it too much. For sure I get there in the end and it looks great for the camera but as the maker, I know what secrets lie inside!

So I need to rehearse skills on basic garments such as this pencil skirt to improve technique and reassure myself that I am still improving!

Image

I really enjoy going back to the drawing board sometimes, quite literally! The pattern for this skirt is one I drafted back in August 2012. But I have made quite a few adjustments since then, which I really like, and I think make for a better fit.

  • I moved the darts apart slightly on the front.
  • I lengthened the skirt to below the knee (ooo get me and my bravery!)
  • I tapered the skirt by about 2 inches either side for a more pencilled effect.
  • I added a waistband.
  • I included a PROPER vent including mitred corners!
  • I made a much better job of the lining and learned how to line the vent.

What I should also have included:

  • a hand-picked zipper
  • more overlap on the waistband to add a button along with the hook and bar.

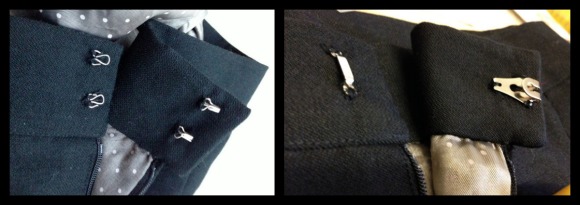
On the subject of hook and bar, even that was a revelation. I first used hook and eyes thinking they would suffice. But they really didn’t! They kept coming undone it wouldn’t be too long before they bent out of shape. So I dutifully replaced them with a sew on hook and bar. It’s much better but even though I sewed it in from the edge of the overlap, it still shows, so I need to set it back a bit further.

Image

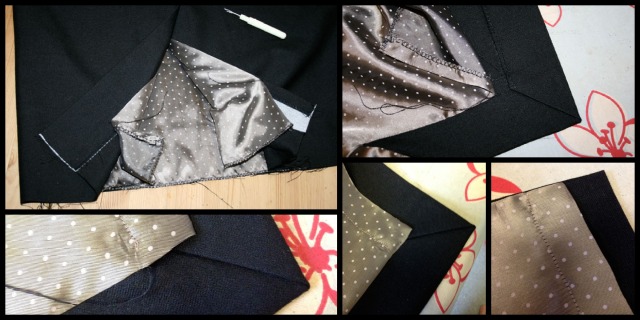
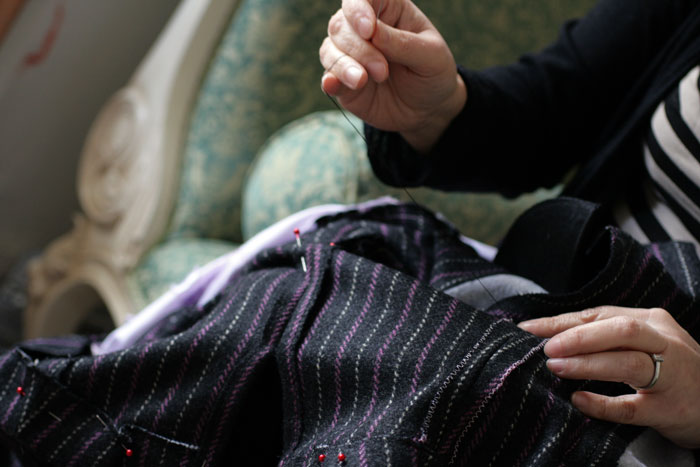
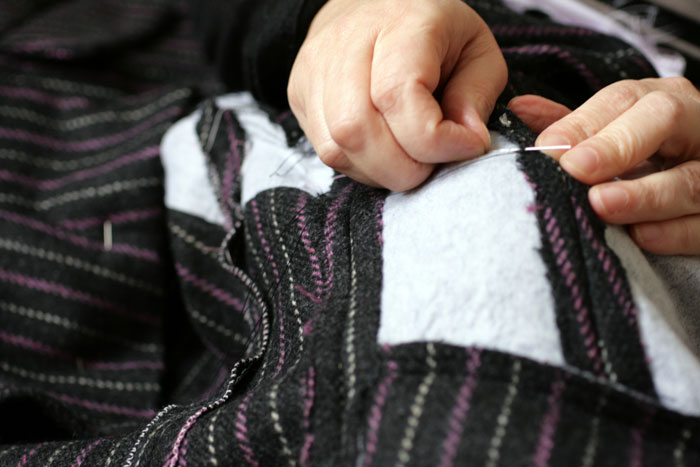
Nearly didn’t make the effort to do a mitred corner on the vent, but jolly glad I did. Before hemming I sewed the lining, right sides together all the way down the vent edges. Before hemming the skirt outer fabric I carefully unpicked the thread using the eye end of a needle. I used that loose thread to sew invisible stitches to attach the remaining lining once I’d trimmed and hemmed it. Such a neat trick! (And a great excuse to show off my mitred corner!)

vent lining

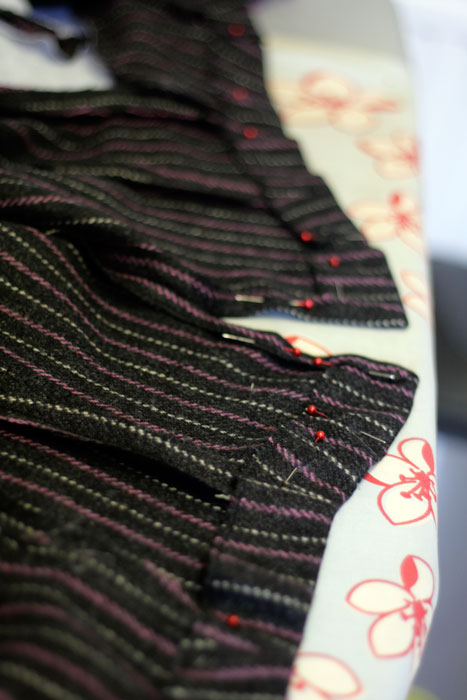
Interfaced waistband and hem using a lovely woven fusible interfacing. Nice and sturdy. Just the ticket!

Interfaced waistband and hem

I didn’t scrimp on the fabric for this skirt. I think you can afford to be a bit more frivolous when you only need a meter of fabric to play with. So I bought some quality British wool and boy does it feel good. A dream to sew up too.

I’m anticipating some questions on lining the vent, and I am really sorry I haven’t included it this time. A combination of no step by step photography and a serious lack of remembering exactly how I did it myself! I know it wasn’t that difficult and I hope to bring that part to you on the next one I make. And I will be making more because it was my original mission to make and own a pencil skirt for every day of the week. Different colours and styles. That would be so cool and not too unachievable!

CREDITS
Mr Ooobop! was of course, my lovely photographer for this and most posts.
Shoes by Vivienne Westwood… oh yes!
Top hand made peasant top that I didn’t get round to blogging!

How to make a Roman blind / shade

And here is the long awaited tutorial. Sorry I took so long. I completely underestimated how long it would take to put together! Despite the lengthy post, this really is a simple sewing project, involving jus a few lines of straight line sewing. Please do a mock up first to check I haven’t given you a bum-steer! And please do point out anything that is unclear or needs adding.

It does, however require some very careful measuring and a few calculations.

No corners must be cut. The accuracy in the measurements will ensure perfectly fitting and super smooth operating blinds.
Remember: Measure twice (at least!) and cut once!

roman shades during day

You will need:
Furnishing weight fabric for the outer
Curtain lining for the backing.
Nylon cord. As a guide I used 9m but yours may be more or less.
Small plastic rings
4 screw eyes
Cleat
Acorn / cord pull.
Strong self adhesive velcro. The width of your window frame or baton.
Wooden doweling or synthetic rods cut to size.


1. Calculate the size and cut your main fabric roman shade step 1
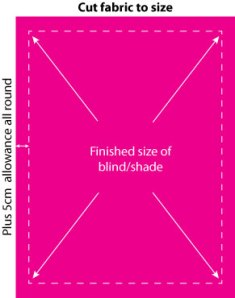
Measure the size that you want your finished blind to be.

Add 5cm side turnings and hem allowances on all sides, to this measurement, and cut your fabric.
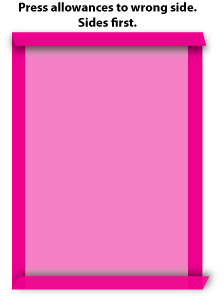

roman shade tutorial step 22. Press Allowances
Press the allowances all round. You could even mitre the corners if you wanted to be really clever… er…I didn’t!
No need to stitch in place at this point. All will become clear!
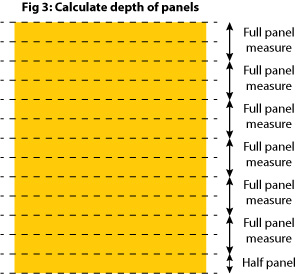


roman shade tutorial step 33. Now to prepare your lining… and some serious sums!
Start with the measurement of the finished size of your blind. This will include allowances of 2.5cm all round.

First work out how many sections/folds you want to incorporate into your blind.
I chose to have 7.
The bottom panel must be half the depth of the others which are equidistant.
To calculate this I doubled 7 (panels) to make 14 and deducted 1 to make 13 and divided this into the finished depth of the blind (150cm in my case)
so:
7 x 2 – 1 = 13
150cm / 13 = 11.5

11.5 is the half size panel at the bottom
The remaining 6 full size panels will be double that at 23cm (see fig 3)

You will also need to accommodate the dowels so extra fabric will be needed to allow for the casings.
Measure the circumference of your dowels and allow a couple of milimeters extra, otherwise you will struggle to get the dowels in the casings.

My casings were 12mm.

12mm x 7 panels = 84mm (8.4cm to be added to the final depth of the lining fabric)

So the finished measurement of the lining fabric to be cut is 80cm (width) x 158.4 (150+8.4)

Always measure twice and cut once!
You can now cut your lining to size.


4. Mark the positions of the panels then hem all round

Mark the positions of the panels, starting with the bottom one, in my case, 11.5cm from the bottom. I chose to mark on the right side with chalk to make the lines easier to follow.

Mark up from this point, the depth of the casing, in my case 12mm. From that point, mark the next full size panel up, in my case, 23cm
Mark the depth of the casing and from that point the next full size panel. Repeat the markings for the rest of the panel.

The side turnings and hem allowance is 2.5cm all round. Fold and press in position.
Sew all round close to the edges of the lining fabric so the rods wont get caught in the seams.
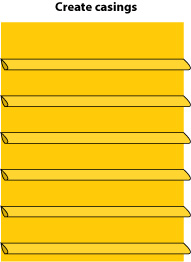

roman shade tutorial step 55. Create casings for rods

With wrong sides together and guide lines matching, fold in between the casing lines and press.

Sew accurately on the marked lines from edge to edge.
Repeat this for the remaining casings.
Your lining is now complete and ready to attach to the main fabric.
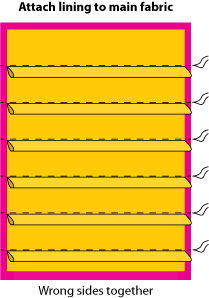

roman shade tutorial step 66. Attach prepared lining to main fabric

Lay the main fabric, as prepared in step 2, wrong side up on a flat surface.

Lay the prepared lining, wrong sides down, on top of the main fabric, making sure it sits 2.5cm in from each edge.

Making sure both layers are perfectly flat, pin together along the casings, so the casings are facing down towards the bottom hem.
Use as many pins as it takes to secure your two pieces together with no bubbles or creases!

Sew neatly and carefully from one side to the other, directly above the casings, sewing both lining and main fabric together.

Hand sew the top edge of the lining to the main fabric. Or machine stitch if you prefer.


7. Attaching the velcro

Stick the loop side (the fluffy side) of the velcro to the top edge of your blind.

Stick the hook side (the spiky side) of the velcro to the top edge of your baton or window.

NB. I used the strongest adhesive velcro I could find, which worked beautifully but to ensure it didn’t separate from the fabric I also hand stitched it.
This is very difficult but worth the effort to strengthen the bond. Do not under any circumstances try to sew it on the machine. The adhesive will totally ruin the needle and get stuck!
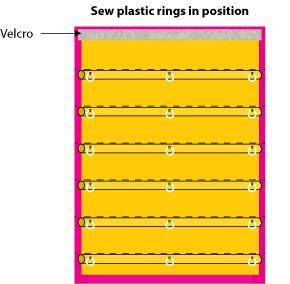

roman shade tutorial step 88. Insert the rods and sew on the rings

Inset a rod into the hem of the main fabric and hand sew the hem of the main fabric to encase it.
This helps to give the base of the blind a bit of weight and keeps it hanging nice and straight.

Hand sew the lining hem over the main fabric hem.

Insert the other rods into the casings and hand stitch the ends closed to stop the dowels falling out.

Hand sew 3 plastic rings to the centre of each dowel casing, one at each end and one in the middle.
It is important that the rings are perfectly aligned with each other.
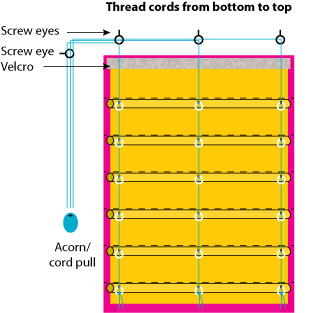

roman shade tutorial step 99. Attaching the cords

Screw 3 screw-eyes into the the underside of your baton or window frame.
They must be aligned with the rings you have attached to your dowel casings.

Attach the 4th screw eye to the side of the window frame, in line with the others.

Attach 3 lengths of nylon cord to the bottom 3 rings. Ensure the knots are tied securely.

Assuming your pull cord is going to be on the right hand side of the window,
run the first length of nylon cord up through the right hand set of rings. It will need to be long enough to do this and then run along the top 3 screw eyes and the side screw eye, down to the cleat, plus a little bit more!
Then run the middle cord up through the rings and allow enough to run through the centre and right hand screw eye, and the side screw eye, down to the cleat, plus a little bit more!
The final cord runs up the rings in the same way, through the top right hand screw eye, through the side screw eye and down to the cleat plus a little bit more!

NB: The screw eyes will sit below the velcro in real life!


10. Attach the blind to the window

You can now attach your blind to the window by pressing the velcro edges together firmly.
Thread the cords as detailed above.
With the blind at the lowered position, carefully make sure that the cords are neatly and precisely lined up. Gently pull on them individually and secure all three cords together at the ends with an ‘acorn’ or cord-pull.
Attach your cleat, proudly raise your blind, marvel at the magical way it folds up and wrap the cord around your cleat. Or lower it and raise it a few more times just for the joyfulness of it all!

ooobop! review: Burda Style January 2013

Burda January 2013 cover

One might be advised to take the following review with a pinch of salt. I am ill and grumpy and should never have ventured out on this cold, wet miserable day to get hold of my belated issue. Belated, not because of any neglect on my part to pick it up sooner but because Smiths clean forgot to put it on the shelves. I think I might have got a poor sales assistant busted as a result.

My glee turned to gloom when I flicked though the first section, before I got to the checkout. The ‘Party’ section. Really? Not my kind of party. What no LBD? No slinky numbers, save the Bacofoil one. Maybe overload of purple has left me unable to think outside of the box. mmmm…. what do you think?

Burda January 2013 partyThere were a couple in this section that left me a little more hopeful. Gosh I am being so negative, soz! Strange though because I don’t really do strides or leggings but quite fancy a pair of leather ones, Given my determination to grow old disgracefully! Still not very partyish though.

Burda January 2013 party in purpleBut hang on. Here we go. This is far more up my street. A section entitled the Aenne Burda Collection. Five reinterpreted dresses and a coat from the 50’s and 60’s. And I love each and every one of them! Though I really want the button band on the pink dress to be narrower. I don’t need my midriff highlighted quite so much!

Aenne Burda collection dresses and coatLoungewear, leisurewear, sporty home knits, whatever… not really a fan of such garments. Even though I could be accused of hypochrisy as I sit here, sniffling in my sloppy pjs and age-old baggy T!

But never say never. These patterns do come in handy from time to time and they whip up quick so long as you don’t have an aversion to stretchy jersey fabrics. I’ve made a few peasant tops but I think one in a lovely drapey viscose jersey with long sleeves might be a more glamourous casual addition.

Home story loungewear

So was the glamour saved for the Plus Section as per usual? Nope! I like the green dress and the waterfall fronts of the jackets. In fact I quite like the layering and the colour palette but I might give the huggy bear waistcoat a miss!

Burda january 2013 plus section

And just in case you need a fancy dress costume…. there is certainly a mixed bag going on here!

Looks like a lot of work to pull of a Hungry Caterpillar costume but wouldn’t that be a hoot?! I always gloss over patterns like these but on closer inspection there is always a bodice or a sleeve pattern that could be borrowed. Not forgetting random dressing up days at school!

Burda January 2013 fancy dressThere are lots of lovely little crafty projects in this issue too, like detatchable collars, a bead-embroidered neck band, bejewelled bangles and shoes plus these adorable teddies made from recycled jumpers and blankets. No actual pattern for these but the instructions and inspiration is all that is necessary.

bunnies from recycled jumpersWell in case I don’t touch base before the new year, here’s wishing you all a fabulous 2013. Thank you for faithfully sticking with me and for all your wonderful comments. It is already so difficult to remember life pre-ooobop! I’m hoping to get more stealthlike in my attempt at stealing sewing time in the new year and so be much more productive. But what good would that be without having you lovely lot to share it with.
Truly Grateful.

Much Love

Janene x

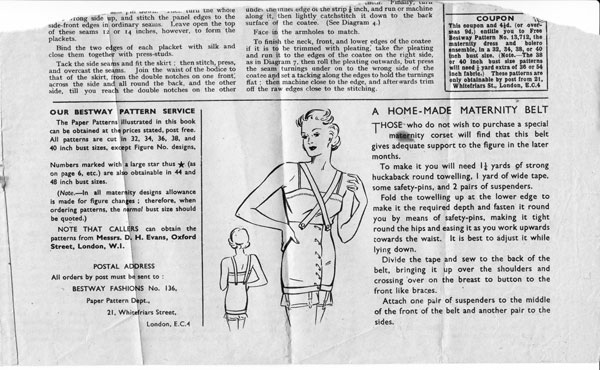
Home-made maternity belt, circa 1940!

I was just searching for a date on this pattern so I could update my vintage pattern collection page with this little beauty…

Du Barry 2479B…when out popped this little cutting which tickled me, I must say:
home made maternity belt circa 1940
home made maternity belt circa 1940 (click on image to enlarge)

If you do try this at home, remember “It is best to adjust it while lying down.”

In the latter months?!! I can just imagine trying to get up off the bed, like some ungainly upside-down tortoise.

And there’s me thinking the 1940s was all about glamour, inside and out! Doh! It’s a wonder all 1940s babies weren’t born squished like Flat Stanley!

Incidentally, I didn’t find an actual date. I’m assuming (once again) that this pattern dates 1940ish but any more accurate hunches are appreciated.

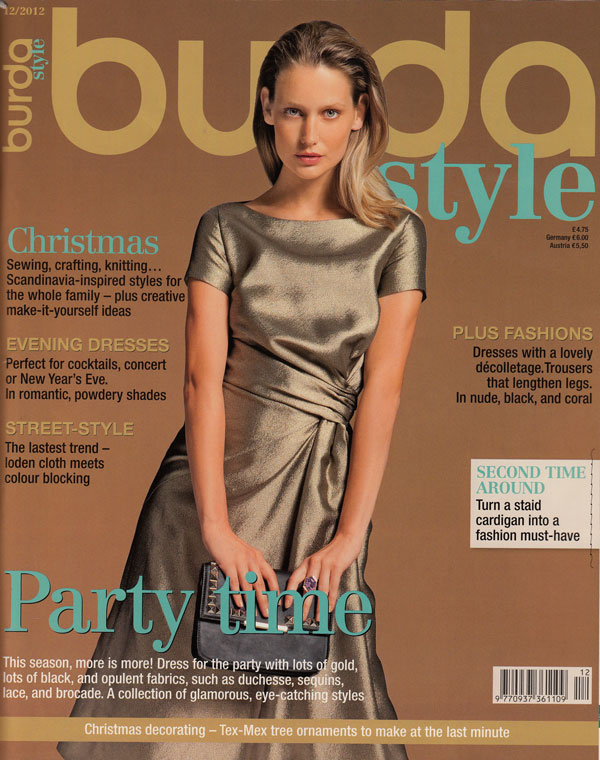
ooobop! review: Burda Style December 2012
Burda december 2012

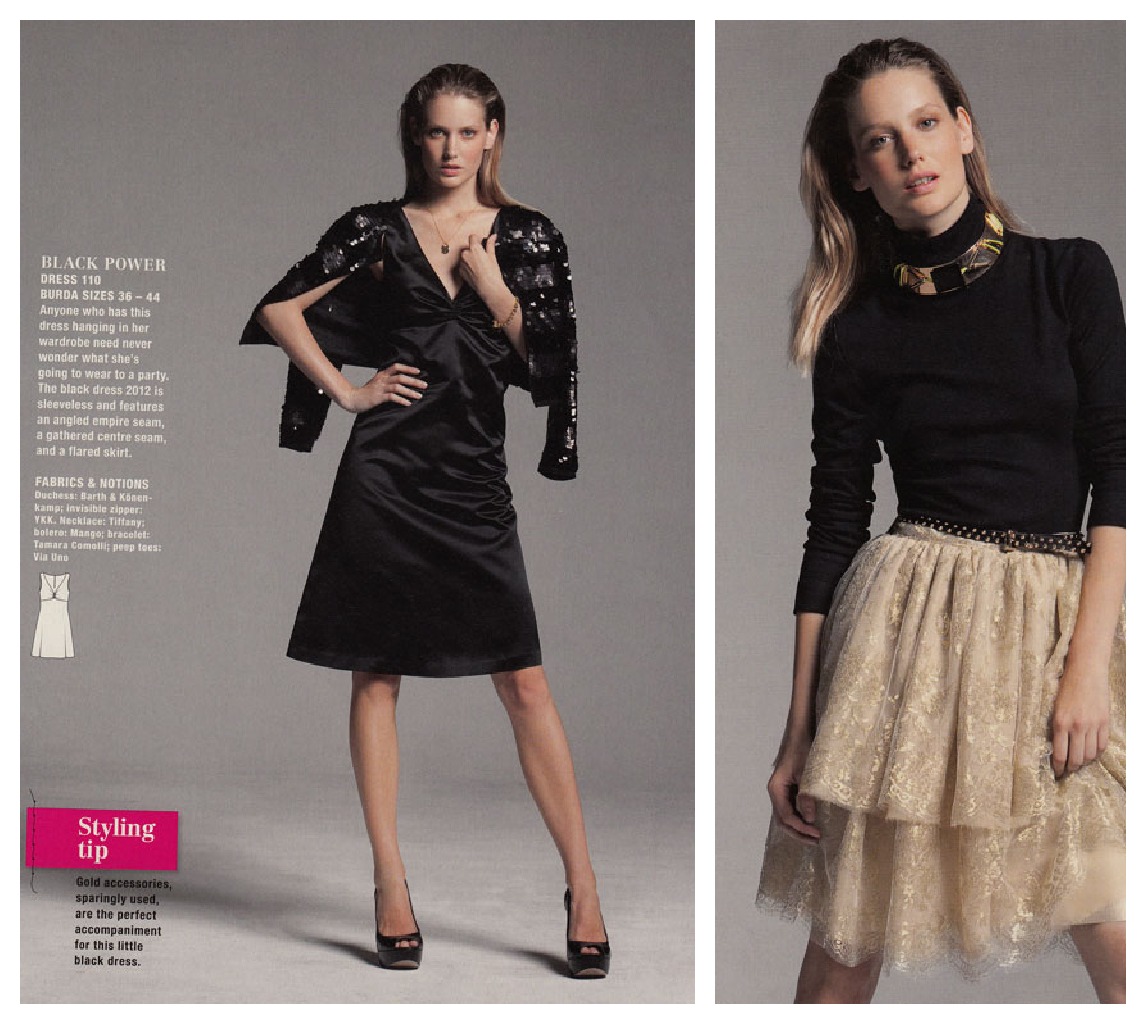
Was beginning to get a bit anxious about the late appearance of this issue on the shelves of Smiths! But was it worth the wait?…. In my humble opinion, if there is just one great pattern in there it’s worth the cover price. Two and I’m laughing. Three and it’s definitely Christmas. But more than three? Oh yes, yes yes!!

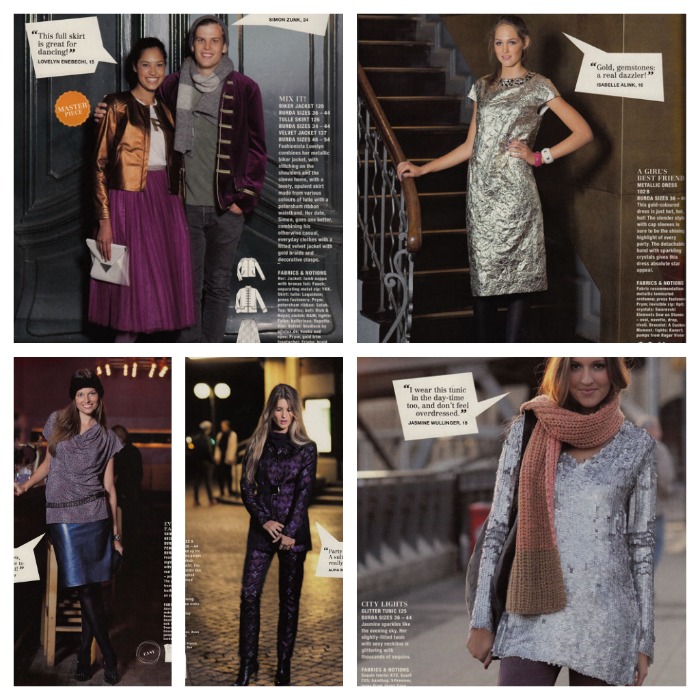
Party Fashions opens with  a great fitted jacket in black and gold. Sling it on over a pair of jeans and a T and you are so ready for the party. And check out the detail on the ‘Master Piece’ dress. Hurts my head a bit wondering how that is created. And it has 3.5 ‘difficulty blobs’ out of a possible 4  but as luck would have it, there is a step-by-step sewing course included, to help you on your way.

party fashions

I love this ‘Black Power’ dress. Shame it is obsured by the jacket in this shot but the line drawing highlights the simple lines. Would be gorgous in silk. In stark contrast, not really a fan of ruffled layered bottom halves. Only because my bottom half doesn’t need bigging up. But this little skirt is pretty with the metallic tulle lace overlay. And incredibly easy to make.

party fashions

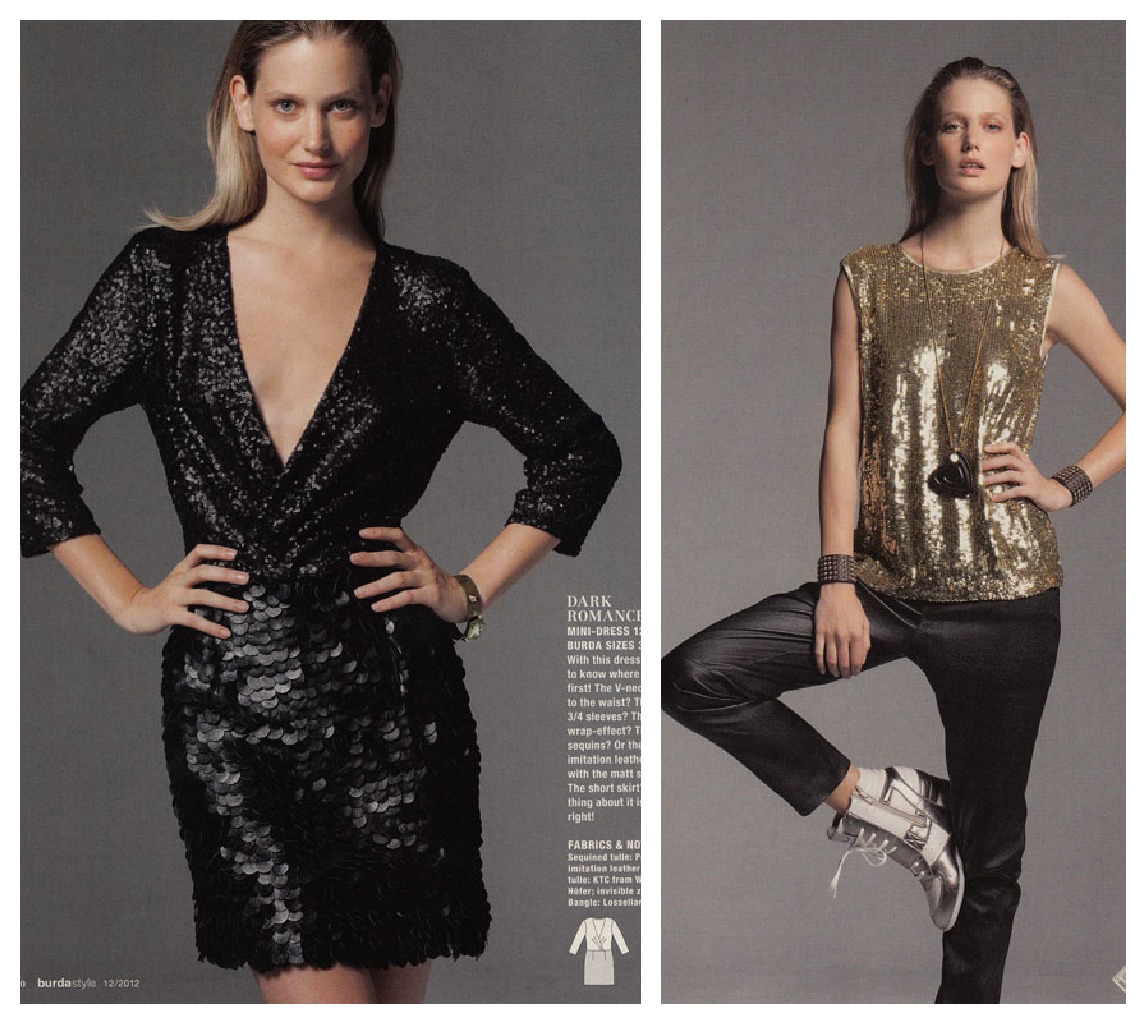
Party Fashions wouldn’t be complete without an adornment of sequins but I can’t help but think how spiky they must be to wear. The skirt part on the black dress however is made from imitation leather scales. Now your’e talking! I don’t tend to do trousers anymore either but stretch nappa leather ones like these are luring me back!

sequins

More sequins and shine…

…. and then we are on to Christmas!!

Boy am I excited about this coat. I was given a decent length of a lime green/chocolate shot silk/wool mix fabric. Quite heavy. Probably intended for furnishing. Certainly not dressmaking. But I instantly had visions of classy and totally original coat. Have been looking for the perfect one. And now, as if by magic, I think I have found it! Just praying there is enough fabric!

burda 12 2012 coat

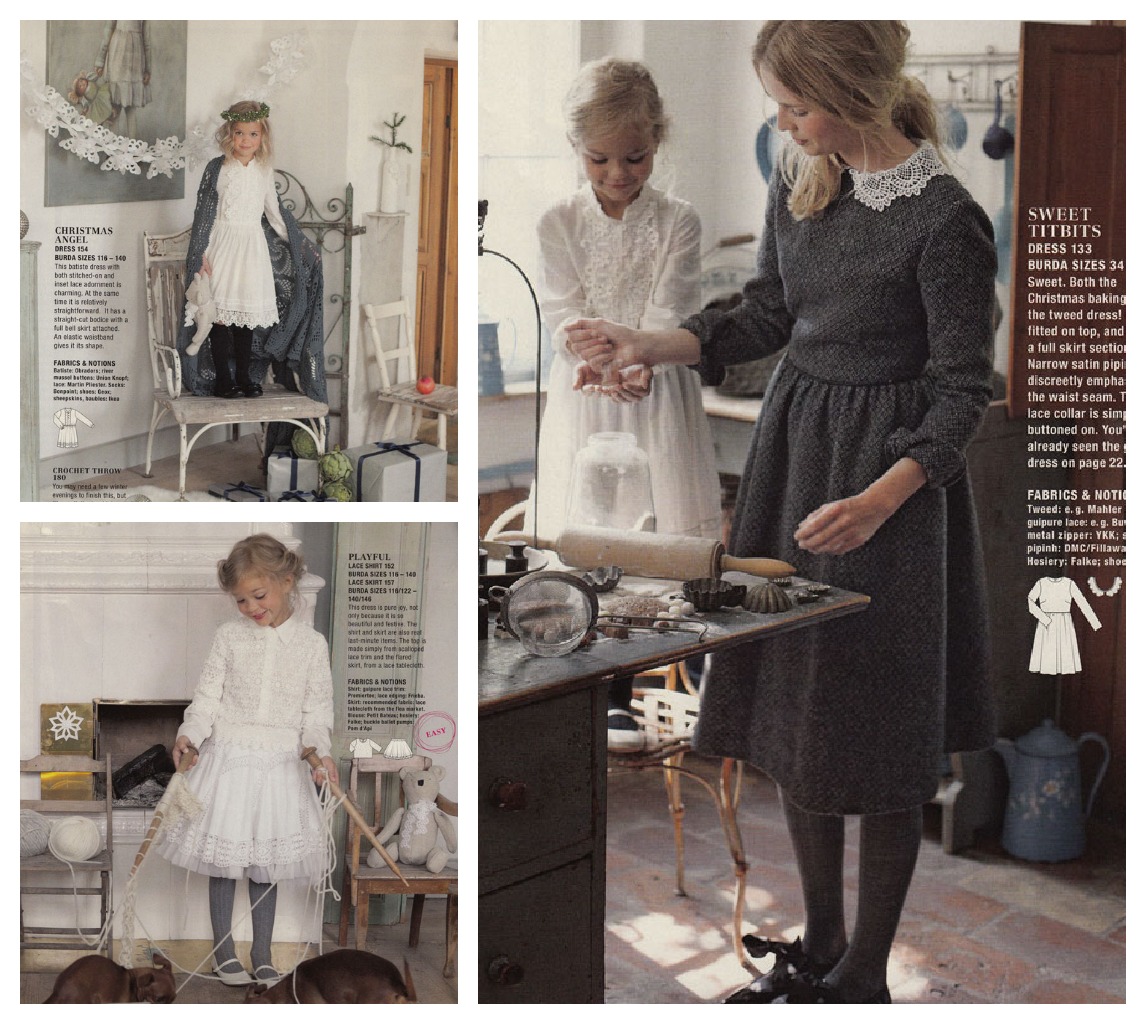
Not sure if I am suited to the following look, though I think the skirt is very interesting. Perhaps its the distraction of the 1D lookalike in the photo. I do however, reeeaaallly like that little girl’s shift dress. And love that it is actually in my daughter’s size. More often than not, the kids patterns are either too small or too large and I’m far too lazy busy for pattern grading!

girls shift dress

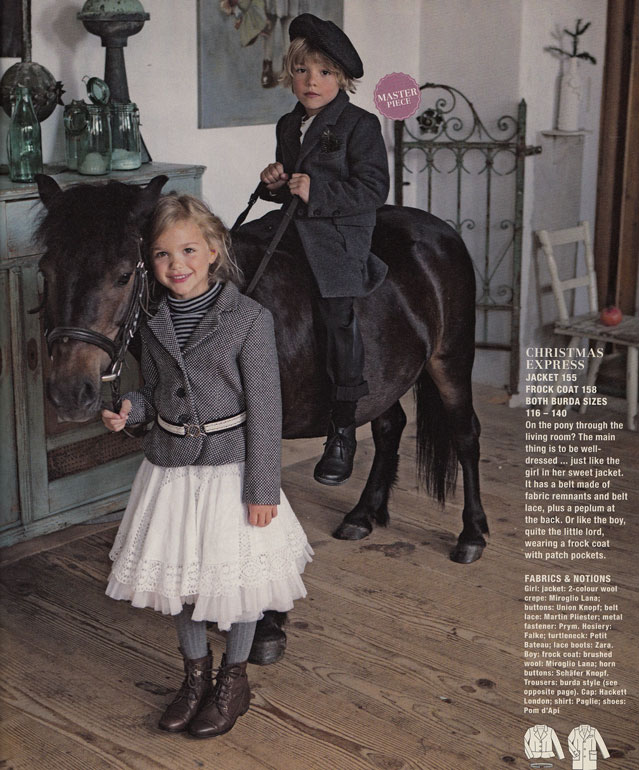
Again. I’m not feeling the puritan look but the jacket with the retro peplum and the little girls coat is totally up my street!

puritan look

The whole sweet angel and tweed look is maybe pushing the boundaries of sweet. Verging almost on sickly, I’d say! I can hear Mr  and Master Ooobop! roaring with laughter as LMO and myself prepare Christmas lunch in such puritanical stylee. The fact that LMO would howl with protest if every I tried to dress her like this is a sure thing too!

angel dress

A good teddy bear pattern always comes in handy as a gift for a small person. Or even a grown up! I do enjoy sewing toys just as much but so far haven’t strayed from the path of Tilda makes. Burda have even included the corochet pattern for the lovely shawl they are sitting on. Oh please don’t get me side-tracked!

teddy pic

I keep coming back to this dress. It’s not instantly my thing but I love how the seam joins have been highlighted in white. Definitely a conversation piece. I quite like the waiscoat too but they can keep their billowy sleeves!

waistcoat

There’s a Master Piece jacket and coat pattern for the smalls too. Very classy. I’m sure I could talk LMO into that jacket, if it meant she could keep her Doc Martens on too!

kids coats

There’s a fun Street Style section with some clever twists on casual using wool. Makes for a more quality look than with the usual jersey. But I have glossed over that because I don’t really do casual street!

This dress certainly makes a ‘Grand Entrance’ when you turn to this spread. Works great as a short dress but soooo elegant as a full length evening dress. It’s made in silk crepe here. Imagine how luxurious it would feel too!

grand entrance dress

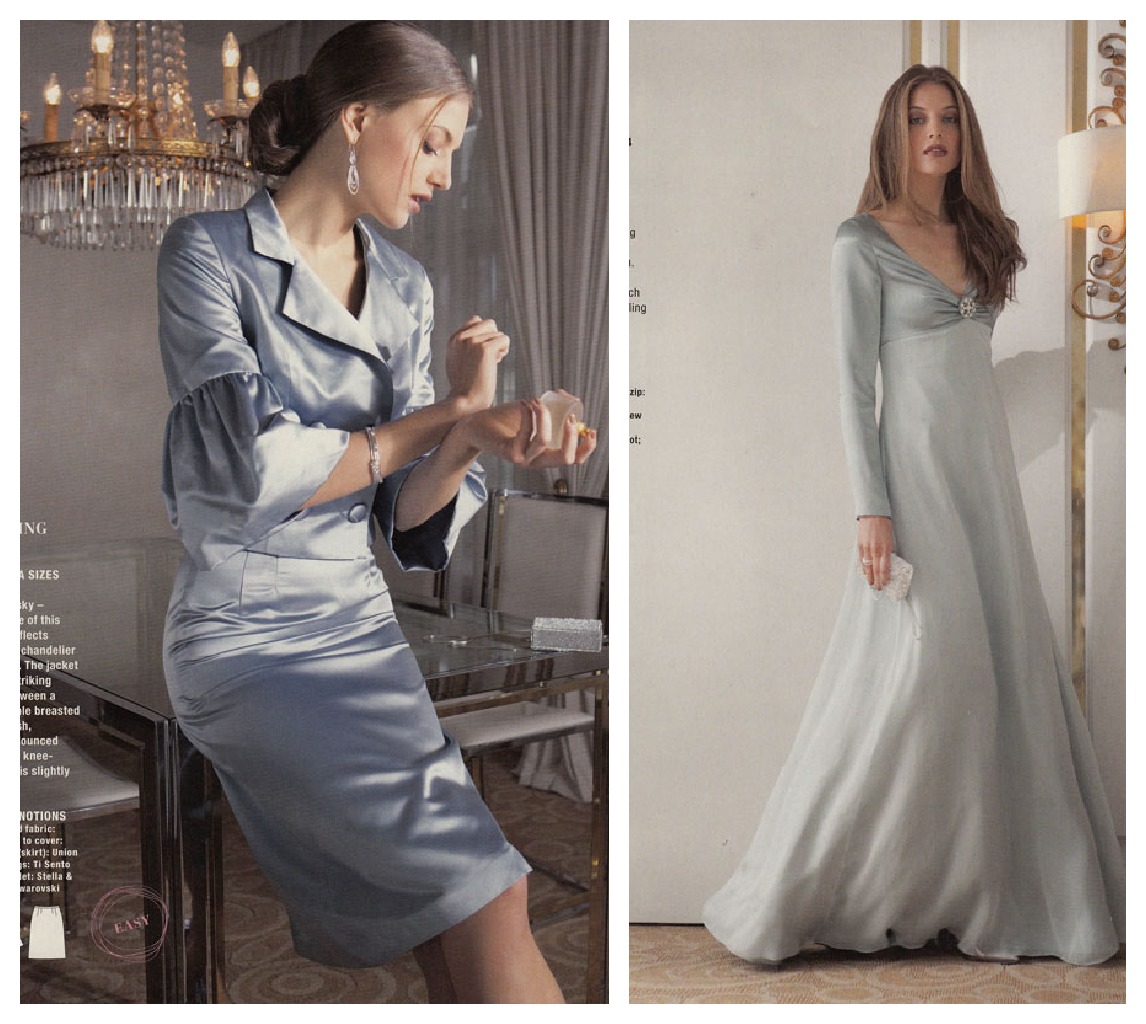
In stark contrast I fear the blue shiny combo on the left is a bit wrong! Luckily there is a pleasant distraction opposite! I really like the simple cut of this dress. A variation of the black dress at the beginning. But with the addition of long sleeves and an overlay of floaty chiffon it is transformed into  and enchanting swoosh of loveliness! I do have a little issue with how the neckline seems to be pulling though. Anyone know why this might be happening?

chiffon dress

Here’s a couple of real simple to put together outfits. Well, Im sure the jacket is a little trickier but I do  think it would be worth any amount of hassle to be snuggled in wool velour. The gathered collar and three-quarter sleeves are gorgeous features. Rose and gold is quite a sophisticated colour combo too.

easy patterns

Oh and here we are. My favourite bit! The Vintage pattern. A very stylish French couture look. Though I like a nice bouclé fabric, especially one with a metallic thread, I think that gorgeous design feature at the front bodice is lost. If or rather when I get round to making this beauty I will definitely be employing a plainer wool fabric and keep it closer to the original.

vintage pattern

There’s  a few treats in the plus section. Not least of all this hot LBD. Flattering sweetheart neckline and some glamourous gathering at the hip. Oh to have those curves!

plus section

Well that just about wraps it up for the clothes section but there are lots of extra crafty projects too, just to get you in the spirit of the season!

Thanks for swinging by. Hope you get some sewing in over this busy time. Till next time, toodlepip! xxx

A cape for Poison Ivy

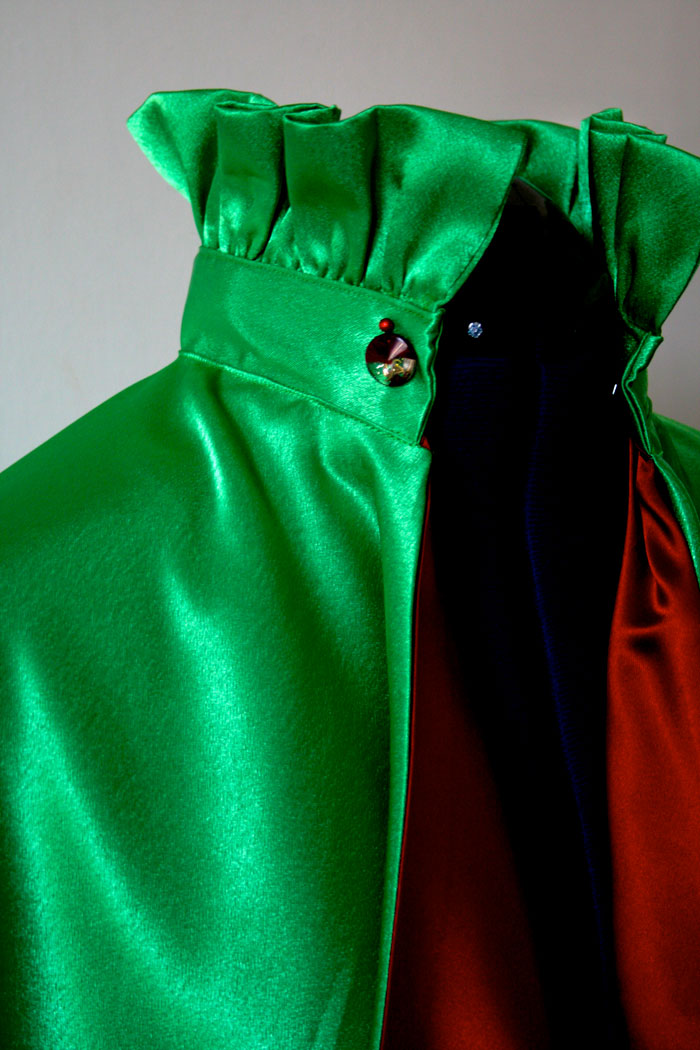
poison ivy front

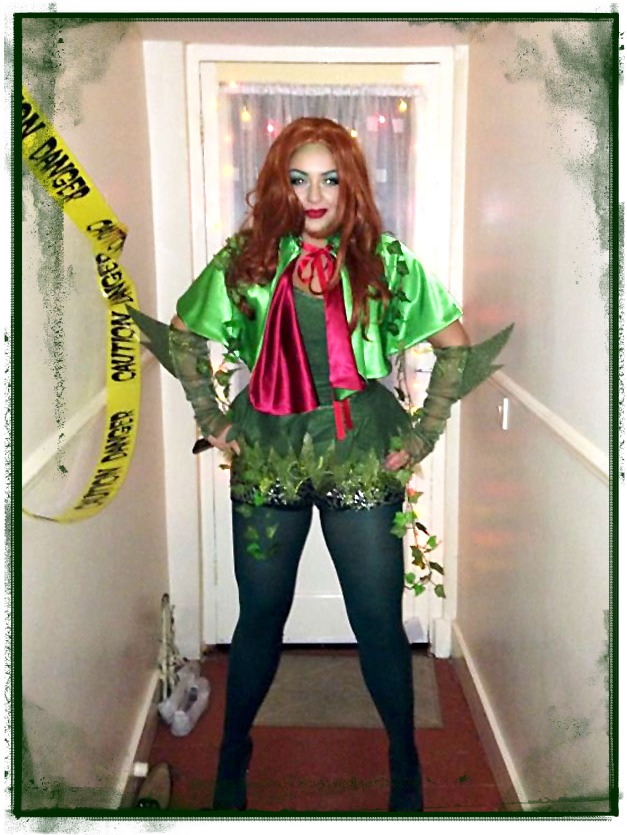
Meet my biggest little girl! Hardly a villain but seriously rocking the whole Poison Ivy thing!

It’s not often I get asked to contribute to her wardrobe. It is in fact never! So I was very honoured by the request to make a capelet for her Halloween costume. Yes I know this is a bit late in the day, soz, but I wasn’t allowed a sneak preview on the day (something to do with me being an embarrassing mum at her last party I would think!) and had to wait patiently for photographic evidence so I could share it with you.

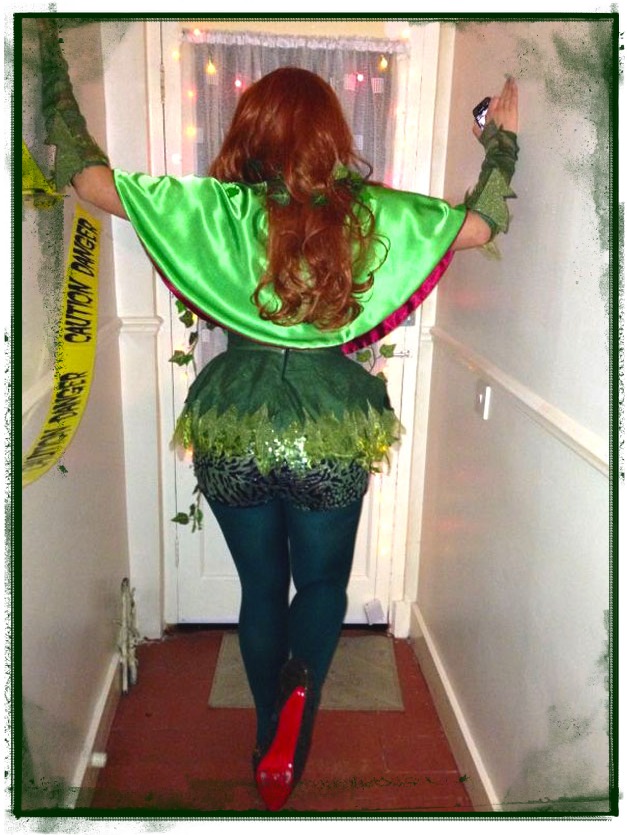
poison ivy back

It was a very fun and quick project and even ‘biggest little’ was impressed! If you knew her like I do you would know how amazing that is!

poison ivy

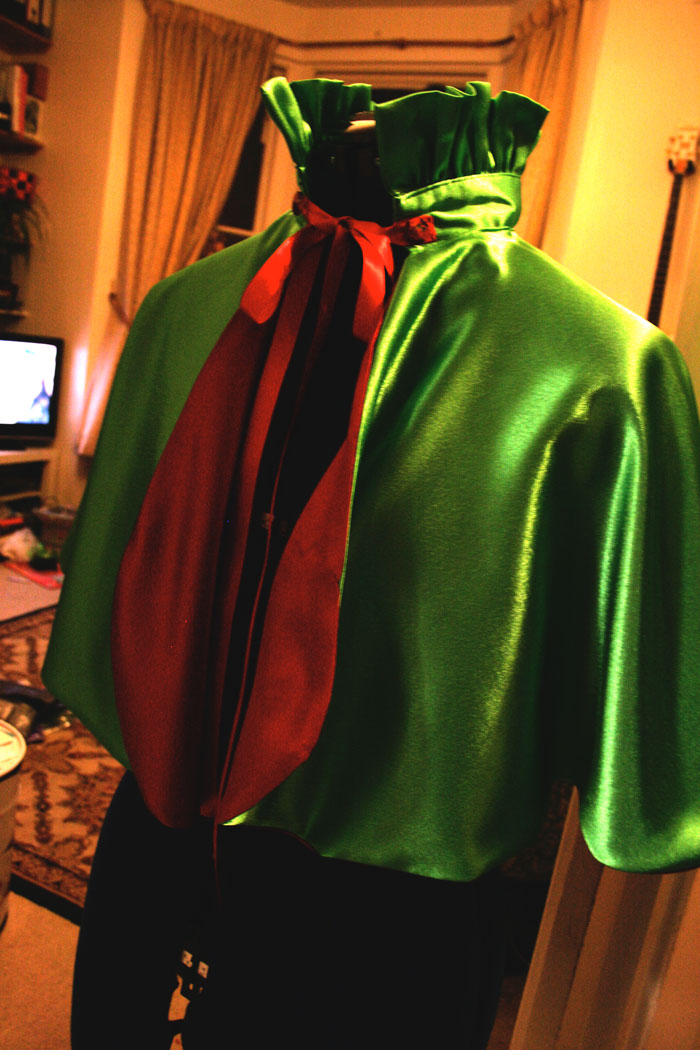
Here’s a better picture of the stand-up collar. You cant see it for all the red luscious locks!

cape on manequin

The exterior is a bright green poly satin fabric with red satin lining and I used some glitzy buttons at the neck to cover the ends of the ribbon. Should have sewn them in the collar stand really!

It was a very simple project for quite an effective fancy dress accessory…

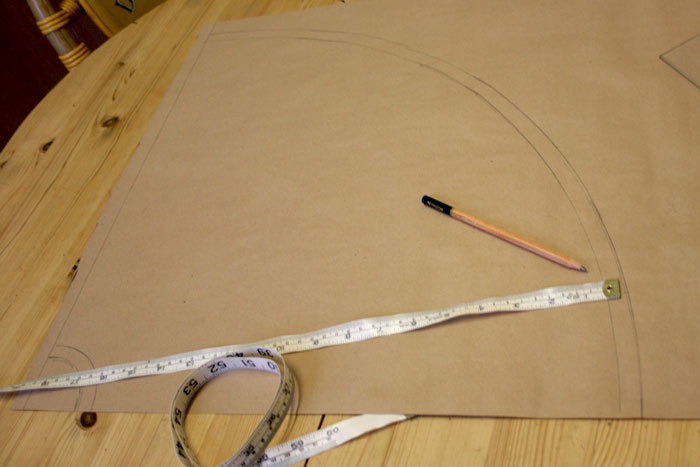
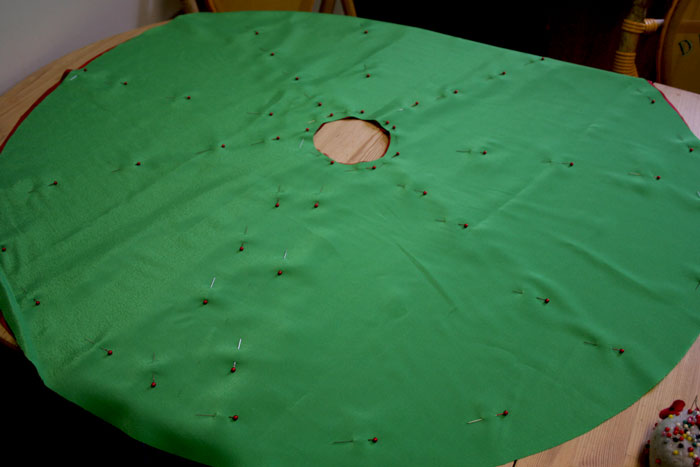
First I measured the neck (plus ease) and the measurement from the neck, over the shoulder to just below the elbow. Using Pi (22/7) I worked out the radius to draw the neck hole and from that circumference I could mark the length of the capelet and draw the circumference at the hem (plus SA)

circumference formula

Have you ever wondered what that little hole is for at the end of your tape measure? Well I sure have found a use. If you position and hold down the tape measure at the distance required, on the centre point, or corner of your paper, you can put the point of a pencil in the hole at the other end and draw the arc of the circle. Its not as accurate as a compass but I don’t have a set of compasses that large and this method was good enough!

draft circle

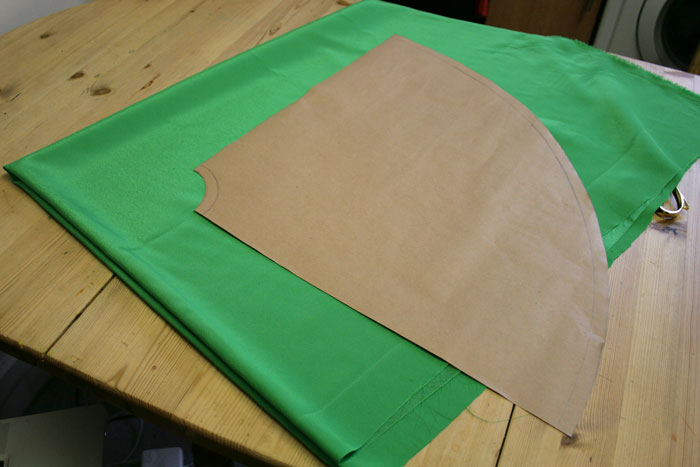
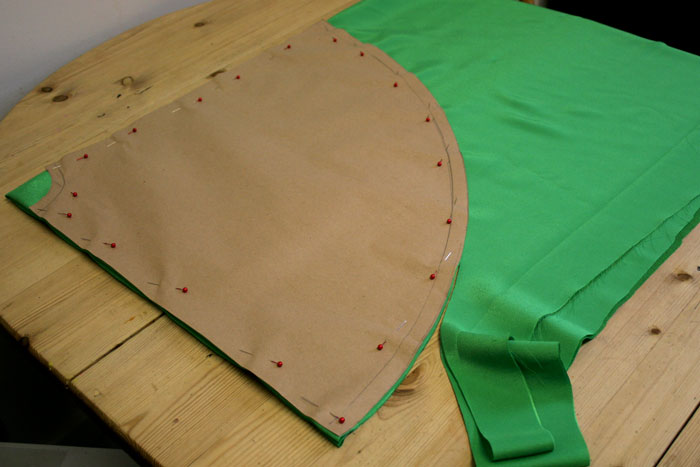
I folded the fabric into quarters and pinned the pattern, making sure it was butted to both adjacent sides.

folded fabric

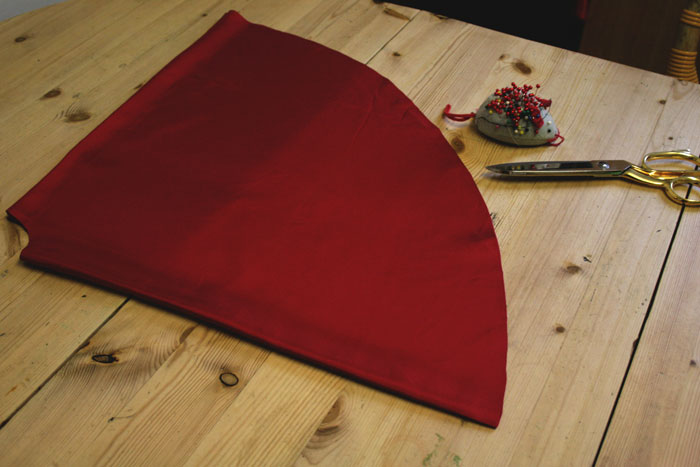
pinned patternI did the same with the lining and cut out. This is not my favourite fabric to work with, I hasten to add!

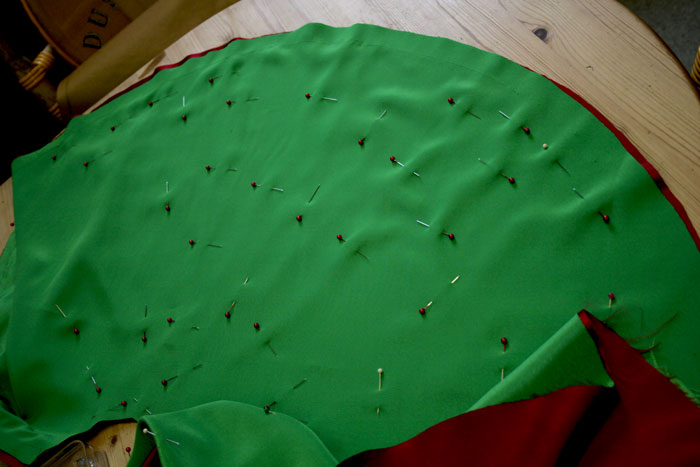
cape liningNext up, I pinned the self to the lining, right sides together, using lots and lots of pins. I am telling you, this is soooo not my favourite fabric to work with. It slipped and slid all over the place!

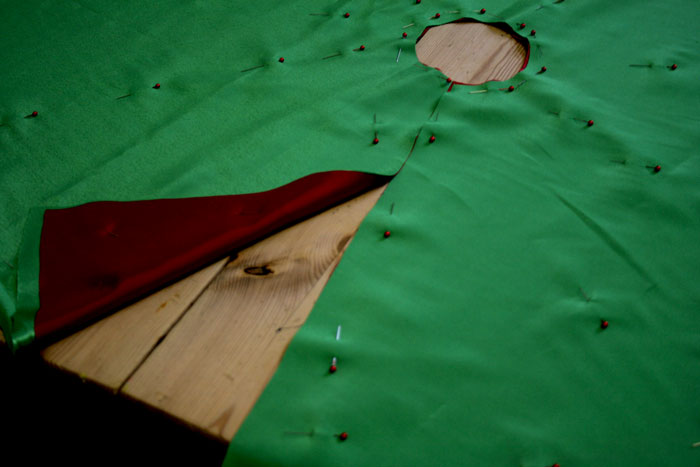
pinned lining and selfThen I cut the front opening. You can see just how far out I was with the cutting/positioning of this slippery stuff!

cut opening

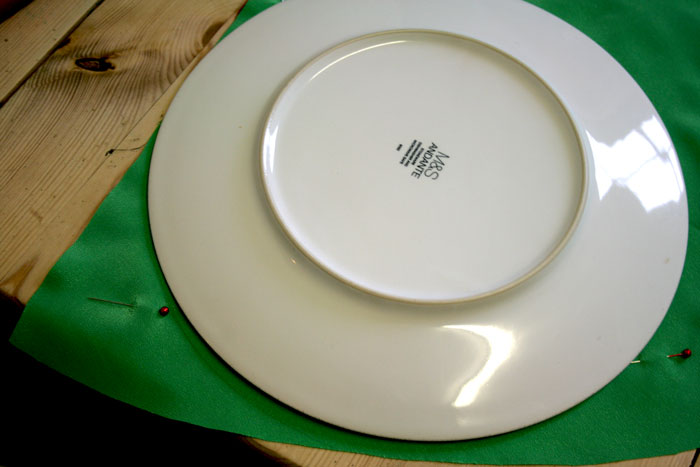
But I saved the situation with a genius idea to round off the corners! And note my next exclusive dressmaking tool…. a dinner plate!

round cornersI stuck in some more pins before I attempted to sew around the base hem and up the front openings. But it still took 3 or 4 attempts. It was like a couple of magnets repelling against each other!

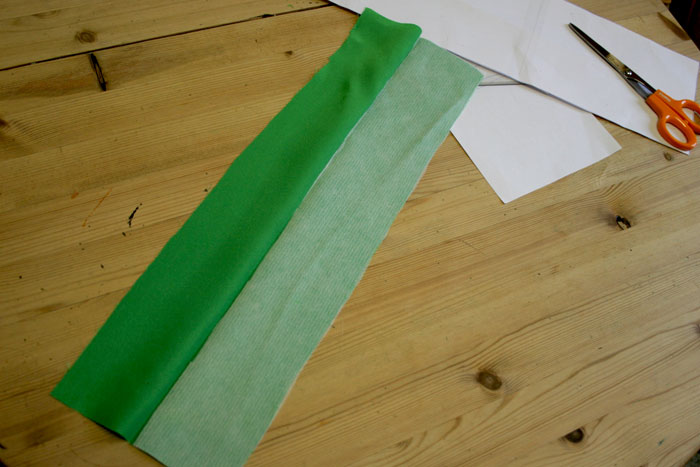
more pinsI left the neckline open while I constructed the collar. First I made the collar stand. The measurement for which was the neck measurement (plus ease) by 5 inches (I think!)

I folded it in half, lengthwise and applied fusible interfacing to one side.

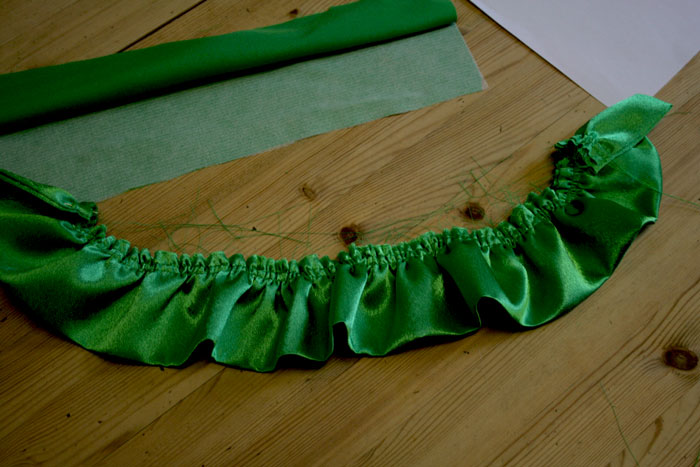
interface collar standTo make the ruffle, I cut a strip the same width only twice as long, folded, pressed and seamed the short ends, right sides facing. I gathered the raw edges to the same length as the collar stand.

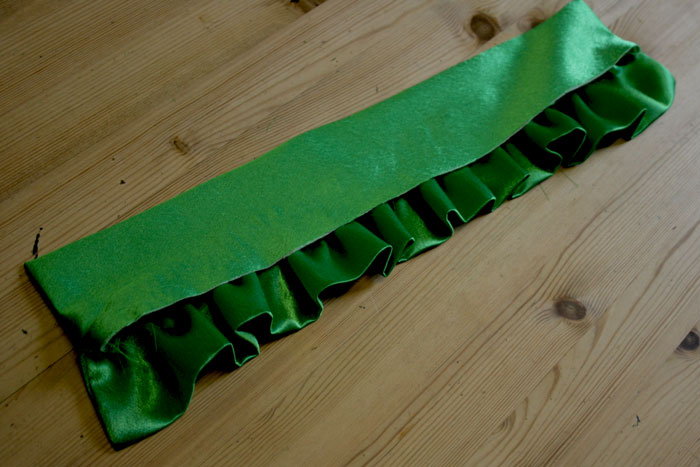
ruffleI don’t have pics for the next stage but hopefully it will make sense. I sewed the short ends of the collar stand together and turned right side out. Matching raw edges, I pinned the ruffle to one side of the collar stand, right sides together, careful not to catch the underside.

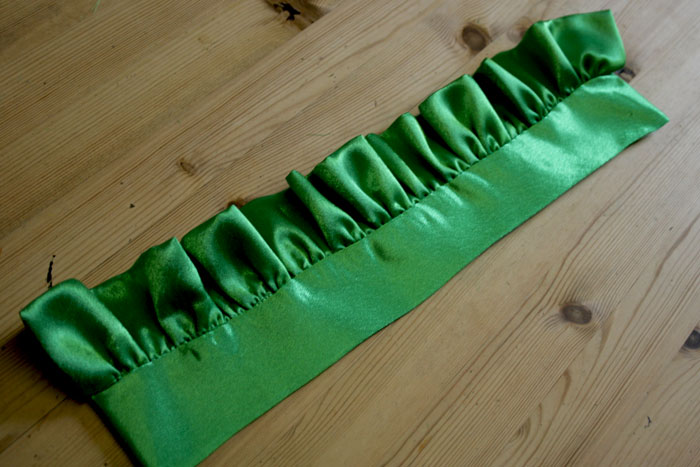
collar ruffleI turned the ruffle up, hiding the raw edges inside and gave it a press to keep it in place. I then folded in the seam allowance from the remaining side and topstitched in place.

finished collarAgain I am missing a few pics, but to finish off I sewed the base of the collar stand (the folded edge), right sides facing, to the neckline of the self side of the cape. I then folded and pressed in the seam allowance on the lining and top stitched to the other side of the collar, very close to the edge.

poison ivy cape

Buttons and ribbons were then sewn in place.

Hope this gives you some insight. So sorry for the missing pics. I will be more diligent with my tutes next time!

This is indeed a very fun and quick make… but I would advise a woven fabric just for sanity’s sake!

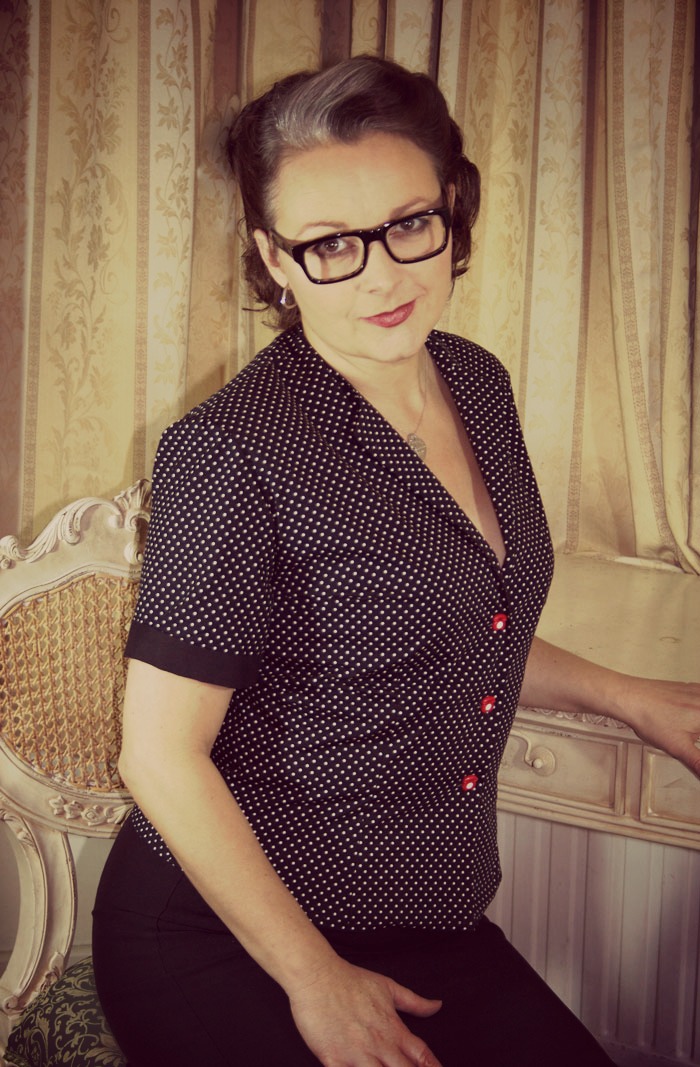
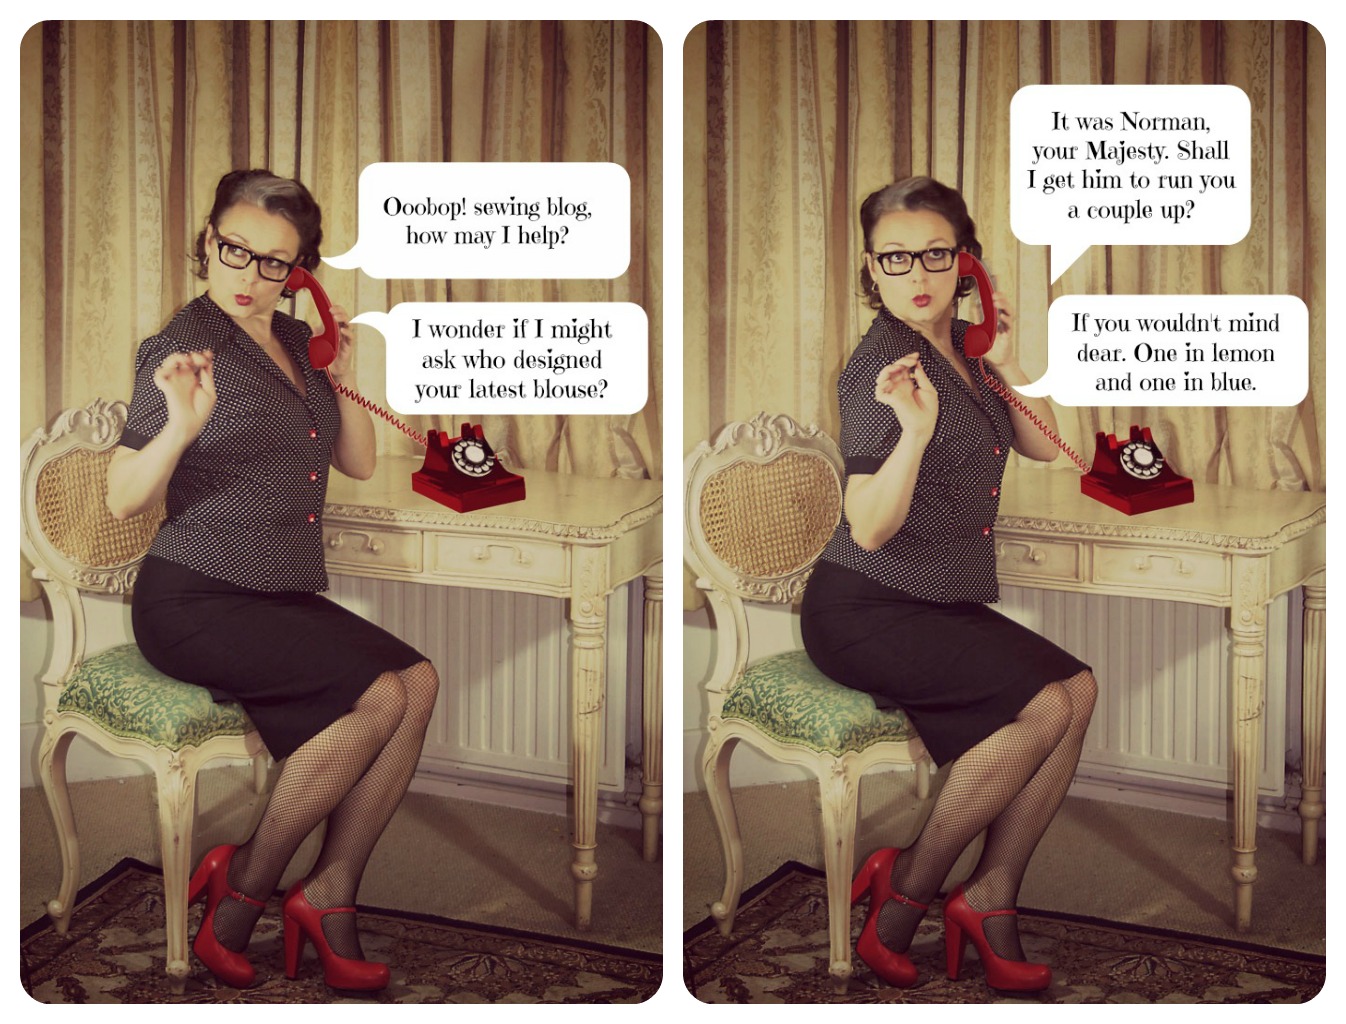
The Norman Hartnell telephone blouse

Norman Harnell telephone blouse

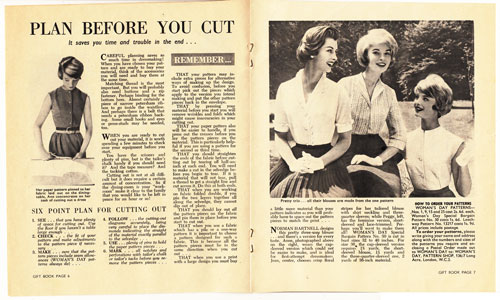
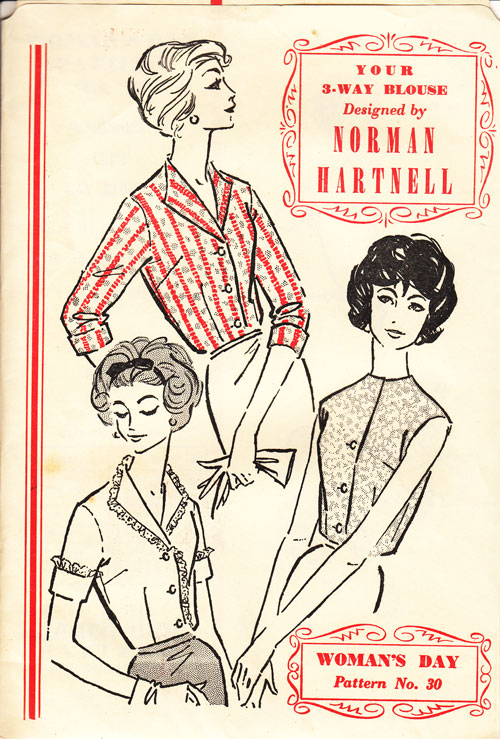
I love a 50s style blouse and this pattern was a definite sell the moment I saw it. The pattern itself was a freebie with Woman’s Day (about 55 years ago!) and as luck would have it, the gift supplement was in that Morrisons bag too. Great to see the blouses modelled and photographed. Sometimes those illustrations on the cover of the envelope give a slightly different impression to what they look like in real life! 😉

womans day gift book spread

Norman Hartnell blouse pattern

Norman Hartnell, or “Sir Norman Bishop HartnellKCVO (12 June 1901, London – 8 June 1979, Windsor) was a British fashion designer. Royal Warrant as Dressmaker to HM The Queen 1940, subsequently Royal Warrant as Dressmaker to HM Queen Elizabeth The Queen Mother. Royal Warrant as Dressmaker to Queen Elizabeth II 1957.”
 
“Although worried that at 46 he was too old for the job, he was commanded by the Queen to create the wedding dress of Princess Elizabeth in 1947 for her marriage to Prince Philip (later the Duke of Edinburgh).[1] With a fashionable sweetheart neckline and a softly folding full skirt it was embroidered with some 10,000 seed-pearls and thousands of white beads. He subsequently became one of the Princesses main designers[2] and so gained a new worldwide younger generation of clients, as the Princess began to take on more duties and visits abroad. The younger Princess Margaret became the obsession of the press and her Hartnell clothes were similarly given huge publicity and received much newsreel coverage.”
 

It’s a worry that he thought he was too old to continue at 46!!!

You can read more about him over at Wikipedia.

Anyhows, I quite fancy ‘a wardrobe of crisp gay blouses’. And if Norman’s are good enough for Queenie, they are good enough for me!

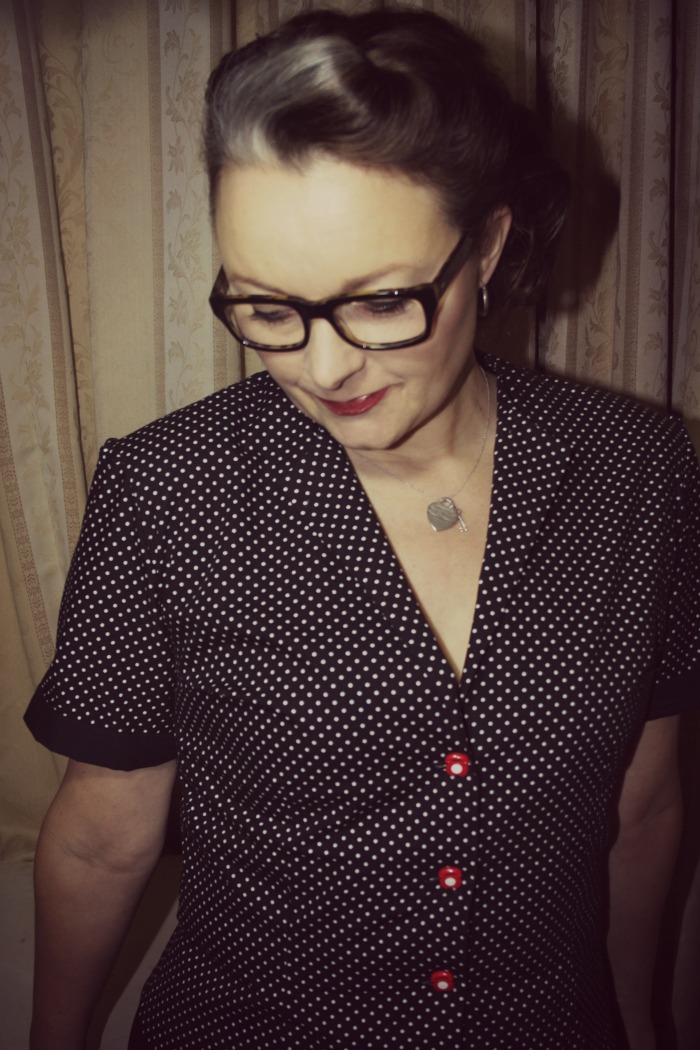
Norman Hartnell telephone shirt

This was on the whole a very simple pattern. I measured off the tissue and figured I could add a bit on the waistline, as I usually do to get a reasonable fit. I made it up in a cotton poly that was semi decent just in case it worked!

But oh no! My measuring skills were unbelievably inaccurate. Either that or I have this illusion that I am the size of a small child!

I considered moving on to another project. But of course that would have been hugely defeatist of me and heaven knows I need to learn to grade a bodice properly so I set about cutting and slashing.

It worked, kind of. Well at least it fits but there are a couple of issues for a blouse so simple.

I think I need to open up on the lines of the hip a bit more. It’s a little snug!

telephone blouse hip

I graded up the sleeve in line with what I had increased on the bodice but there was far too much ease. So I used the original sleeve piece. Still a little too much ease for my liking but that seemed to be solved with the addition of some shoulder pads.  I used the cuffs from the toile for my real one because the dots ran into each other and defeated the object of having cuffs at all!

I have to say, the method suggested for the sleeve cuffs was a bit long-winded and strange. When I do it again I will be cutting on the bias, and attaching in the same way I did to my shorts.

telephone blouse cuffs

The winged-collar effect is not a wing collar at all. It is just the effect of opening up the facings. There is no raised collar stand at the back, just a faced neckline so it is a very flat feature. Next time, I might be inclined to cut the front piece at the start of the inner facing and sew a contrasting colour piece that folds back just to accentuate the shape.

The ‘lapels’ seems substantially smaller than those photographed. Next time I might grade the front and front facing allowance a little, too.

The instructions called for a bias cut strip to finish the back neckline and join the front facings but as luck would have it, the previous owner had cut a ‘back facing’ piece from some newspaper. I checked it against the back piece to make sure it was meant for this pattern. I just had to decrease the depth a bit, otherwise it fitted perfectly. It created a continuous facing too, which is surely a better idea and certainly much neater too. I understitched the adjoining seam, to the point just before it folds back and catch-stitched to the shoulder seams to stop it poking up, willy nilly!

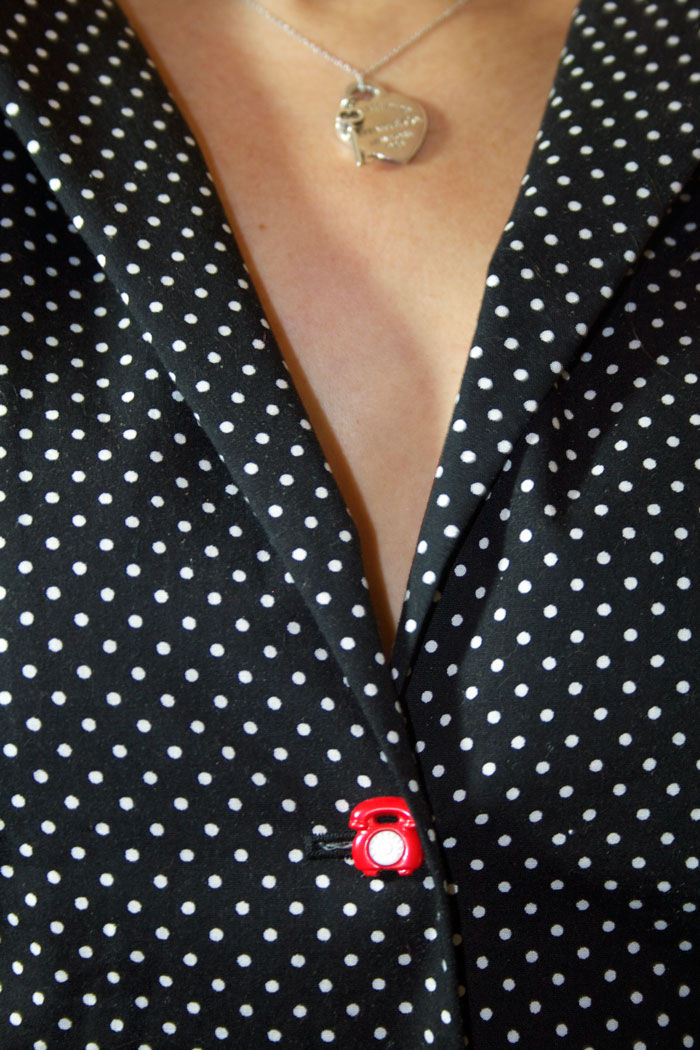
Because the design called for 3 buttons I had an array of odd interesting ones to choose from. My son so kindly remarked that, because the shirt ‘kind of looks quite old, it would be good to use those old fashioned phone buttons’. I am sure he meant that in a good way! 😉

telephone button

So that just about wrapped up my chilly childless Saturday. Amazing what you can achieve in a few hours when the house is vacated. The photographs (care of the wonderful Mr Ooobop!) and the blogging took a little longer… such fun!

ooobop! Lucky Hat

lucky hat

I had the perfect sewing window today – Little Miss O at a party for 4 whole hours and a day far too chilly to hang outside for my liking!

But I wont dis the weather – that would be far too predictable for a Londoner – I will embrace it. And so I hatched  a plan to make a hat. I really don’t know how I get through every winter, convinced I don’t suit a hat, and freezing my poor little pixie ears off for the sake of not looking like (more of) an idiot!

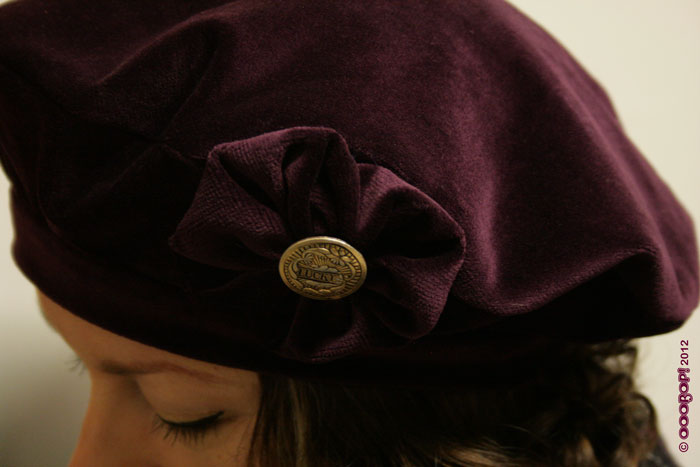
So spurred on by the prospect of a toasty bonce coupled with an opportunity to make a minor stash bust but best of all, make a perfect showcase for one of my favourite buttons, the mini mission began!

lucky hat

Mr O had a similar hat – albeit a bit more manly! – so I set about drafting a pattern. I have quite a big head so this was another good reason to make one. If ever I find a hight street hat that I vaguely like, the chances are it will be too small!

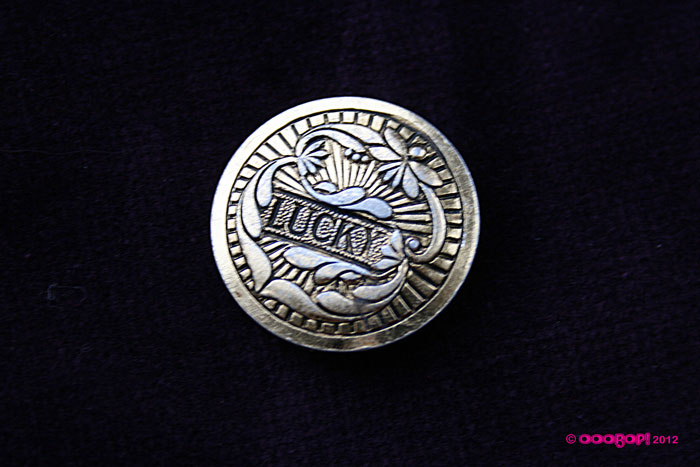
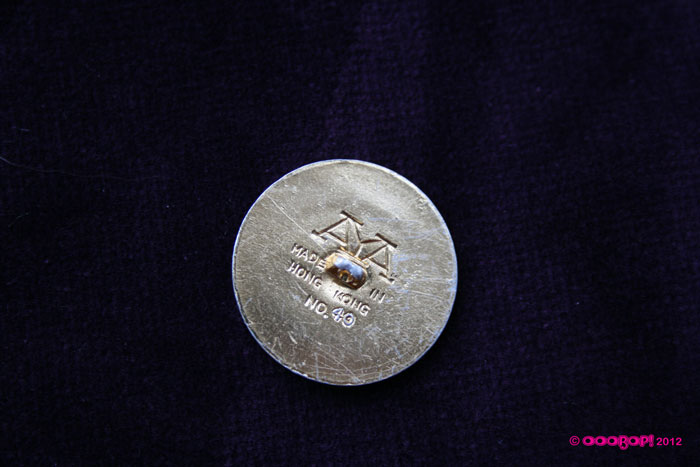
Little Miss O found this button in a biscuit tin at a vintage fair in Islington last year. Just a single lonesome button with the word ‘Lucky’ on it. Could sure do with some of that ‘luck’ stuff right now so here’s hoping!

lucky button

It’s got an interesting stamp on the back but I can’t find any reference on line from where it might have come from.

lucky button

To create the decoration, I made a ‘yoyo’, my first one in fact! For those that don’t know,  a yoyo is a circle of fabric (in this case the circle that was cut out for my head hole!) gathered close to the outer edge and pulled tight. The raw edges are tucked inside and some reinforcement stitched sewn. Of course a statement button is a brilliant idea to cover up the scruffy bit in the middle. Velvet is not as manageable as cotton but a few needle pricks later, the result was very acceptable!

lucky hat decoration

I wore my new hat down to our ‘local’ for dinner tonight but didn’t take it off. I was a bit worried about the hat-hair issue. But hey, guess what happened when I took it off when I got home?! Hair looked better than it did pre-hat!

The outer fabric is a cotton velvet, wonderfully donated to me by a friend who was having a clear out. There are many more metres so I am contemplating a matching jacket! Contemplating I said!!

lucky hat

The inside is fully lined with a matching poly lining so it feels really neat. The band was machine stitched, right sides facing and then turned inside like giant bias trim and hand stitched to the seam line, using an uneven slip stitch. The stitches were quite small and sunk into the pile of the velvet so I am very pleased with the results.

I’m pretty sure this kind of hat will go with vintage or modern styles. Just need to make a few more in different colours!

Thanks to the wonderful Mr Ooobop! (of course) for the fabulous photos!

Pinstripe Spencer Jacket: the inside story

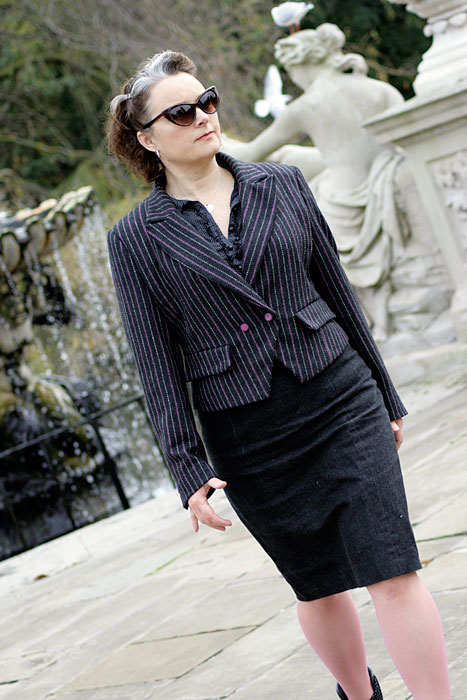
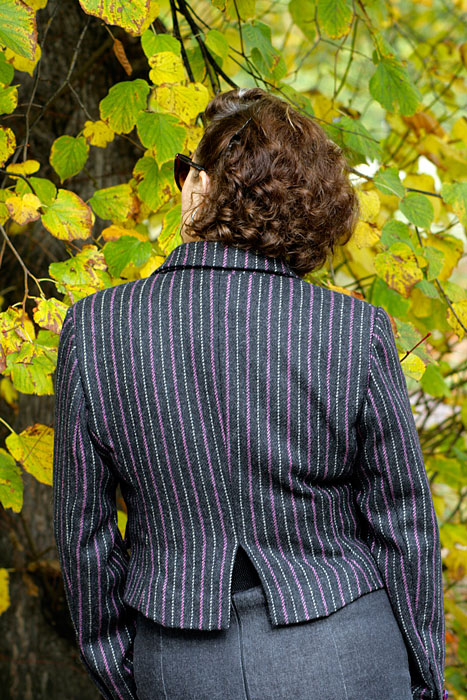
finished jacket by the fountains

First I must thank you all for your lovely comments on my initial post about the finished jacket. I’m so touched and I love that warm and fuzzy feeling I get when they find their way into my mailbox!

So as promised, here is some nitty gritty detail from the project for those that might be considering this jacket for the first time.

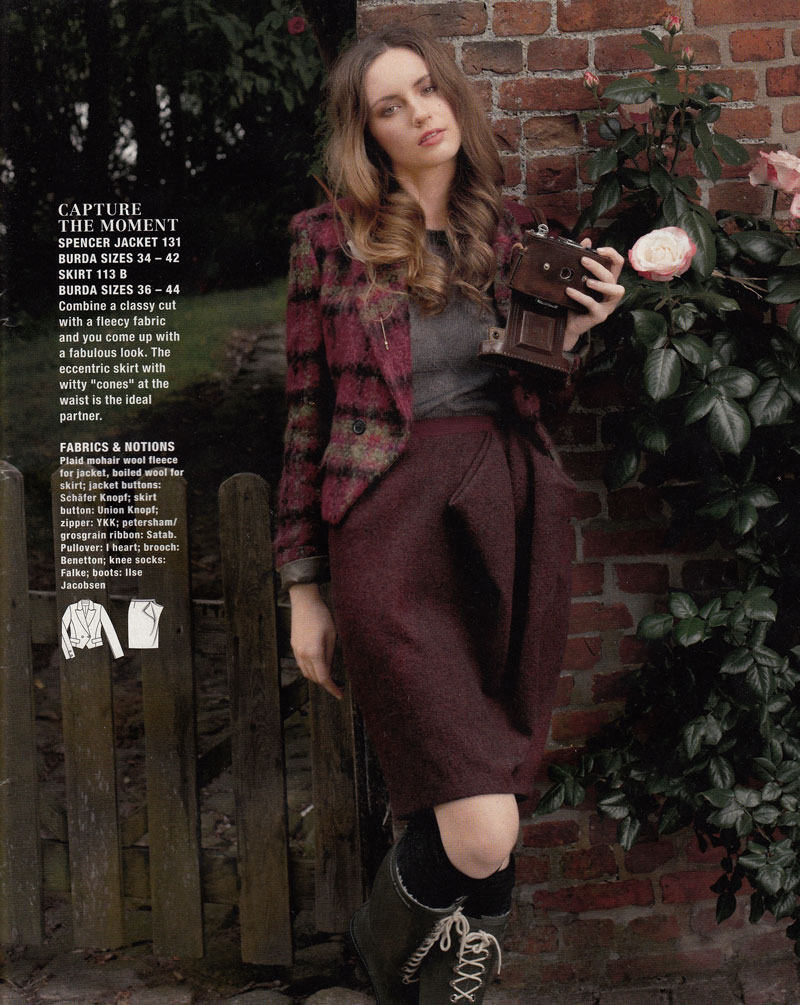
Burda jacket #131 11/2012

Though I am pleased overall, with the results. I can’t help being niggled that more tailoring techniques weren’t employed. I’ve only myself to blame. I could have researched them myself but there’s always a next time!

The jacket is cut from pieces #131, Burda Style magazine 11/2010 but the construction details are from #130. The only difference being that I chose the full length sleeves with vents… and proper working buttonholes… glutton for punishment, me!

I made the toile back in February and was intending to make adjustments to the waist only. But I got worried about it’s ‘snugness’ and just went up a size in the end. A little bit chicken perhaps, but also concerned that I was more likely to be wearing a few layers underneath in the colder months!

It is essential that you make a toile. There is so much work involved in this, you don’t want to get to the end to find it doesn’t fit!!!

My first slip up, that I DIDN’T clock until I got round to dealing with it, was the back vent. I am so used to adding the statutory 15mm seam allowance to each edge that I clean forgot to add 4cm as specified, to the vent openings. Doh. I could kick myself. It doesn’t look so bad in the photos but I know that it isn’t created properly. It is intended as a ‘split’ but would have been so much neater with an interfaced proper allowance. So please remember to do this if and when you cut yours! I would even go as far as to make it a vent rather than a split. But that opens another can of worms with the lining!

back split that really wants to be a vent!

The miniature pattern layouts indicate what pieces are to be interfaced with fusible interfacing. I did toy with the idea of sewing traditional interfacing. I liked the idea of employing some traditional skills but I agreed with myself that I was embarking on a big enough journey and that the fusible stuff would be just as good for what I was trying to achieve.

And so the interfaced pieces included: centre front; side front; outer collar stand; under collar; back facing; outer pocket flap; neck and armhole edge of centre back.

The main construction of the body came together very easily. Darts seams and pressing.

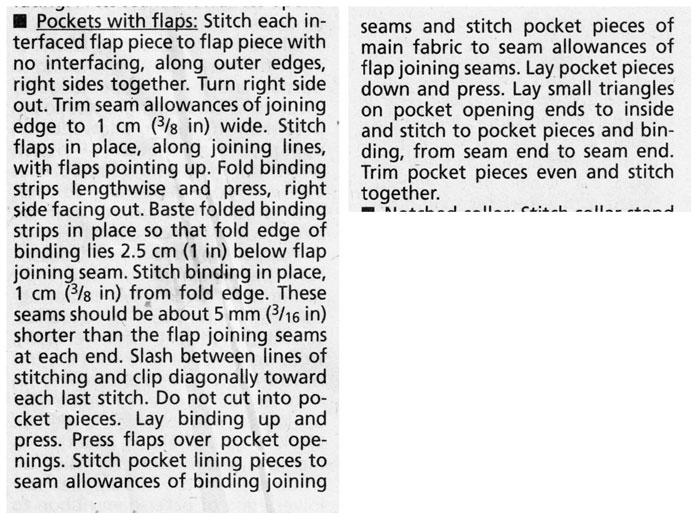
But then came my reality check. Welt pockets with flaps. Needless to say I practiced these before the real thing. You can see how I got on with this here. Well worth checking out YouTube or the Burda site for instructions. I challenge anyone to get the gist of welt pockets from the following instructions!! Or it could be just me!!

pocket instructions

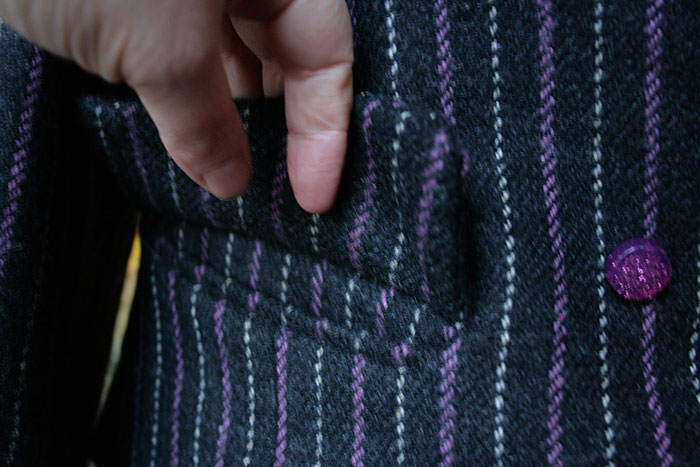
I am over the moon at how they turned out in the finished fabric. I don’t intend to put anything in the pockets, for goodness sakes, don’t want to misshapen them! But I am so proud when I slip my hand inside. Feels so special! And no one gets to see that lovely welt under the flap, except moi! Though I have pointed it out to a few of my friends who smile loyally with raised eyebrows!

welt pocket
welt pocket
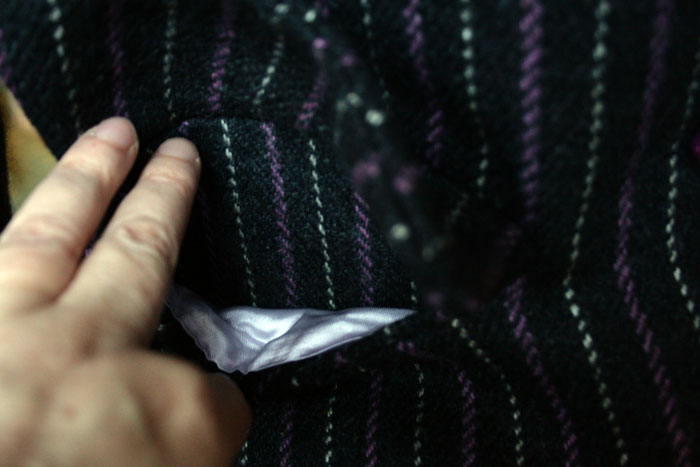
pocket lining
peek at the pocket lining

Next up was the notched collar. This was actually not as scary as I was anticipating. I did pin and I did baste before stitching and it all worked out just fine. The stitches sank invisibly into the wool when I machined the seam so I didn’t want to risk having to unpick at any point! Neat trimming and clipping is essential and it is also important to take care when you ‘push out your points’ Very easy to push a pointed implement through the point of the lapel, (especially if you are using soft wool) and ruin everything. It’s worth being slow and patient with this part because it is such a lovely sharp feature. You’ll be really chuffed when it comes together at this point.

pointy lapel
pointy lapel and notched collar

There was a suggestion to sew the pointed lapels to the underside of the collar to keep them in place but I didn’t really feel this was necessary for the weight of the fabric I used. I like being able to turn up the collar when its chilly!

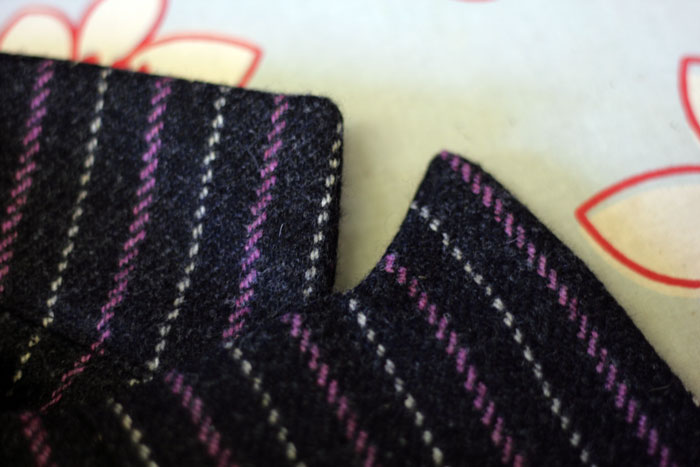
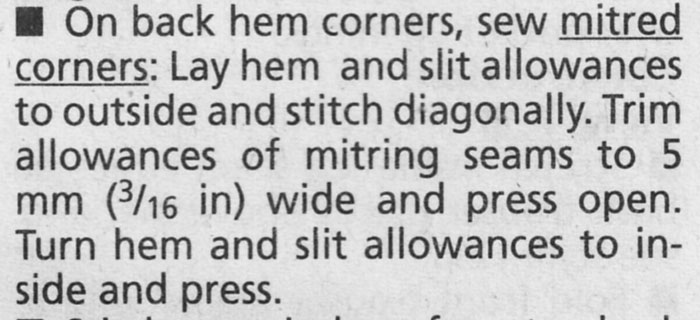
Now shall we talk mitred corners? I’m so glad these were included. It makes so much sense and makes such neat corners. Nothing else will ever do from now on! Of course it goes without saying that you won’t survive with these instructions, especially if this is your first time…!

mitred corner instructions

… so I went with these instead!

[youtube http://www.youtube.com/watch?v=rdOSLpZ37kU]

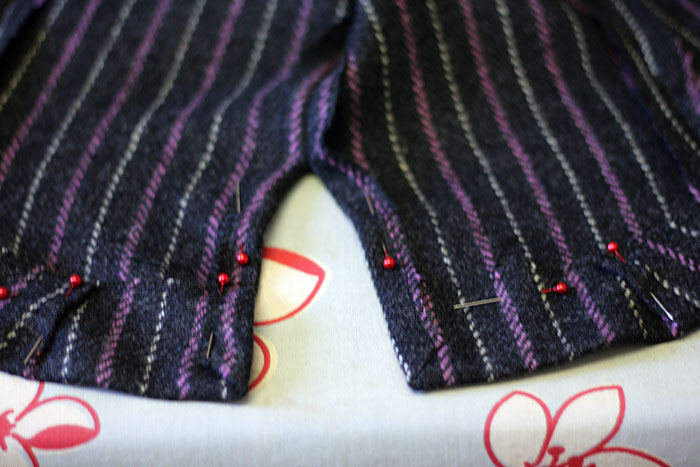
I mitred the sleeve vents and the back vent in the same way. Though I had created a bit of a monster on the back vent by forgetting the extra allowance. Please don’t forget this!!!

back vent mitred corners
not enough SA on the vent but check out those mitred corners baby!

When I came to set in the sleeves I realised I had clean forgot a couple of notches. You will never work out how to inset those sleeves if you forget the notches, I can tell you. Mostly because I tried… and failed… 3 times!!! Till I relented and placed the pattern pieces over the made up sleeves and marked them.

Once I’d put the shoulder pads in, I tried it on and grinned from ear to ear. I was definitely on the home straight! But one niggling factor was that I didn’t like how the sleeve just ‘hung limp’ off the shoulder. I had heard mention of sleeve headings before but obviously never had to take full notice. So I found this little tute in my book Readers Digest: New Complete Guide to Sewing. This book has been so useful and really didn’t let me down this time.

Make a sleeve heading:

Cut 2 pieces of 3 x 5 in (7.3 x 12.5 cm) pieces of lamb’s wool, flannel, or polyester fleece. I had some leftover cotton flannel from my son’s pyjamas. Probably not as weighty or as poofy as lamb’s wool but it was better than nothing!

sleeve cap pieces
sleeve cap pieces

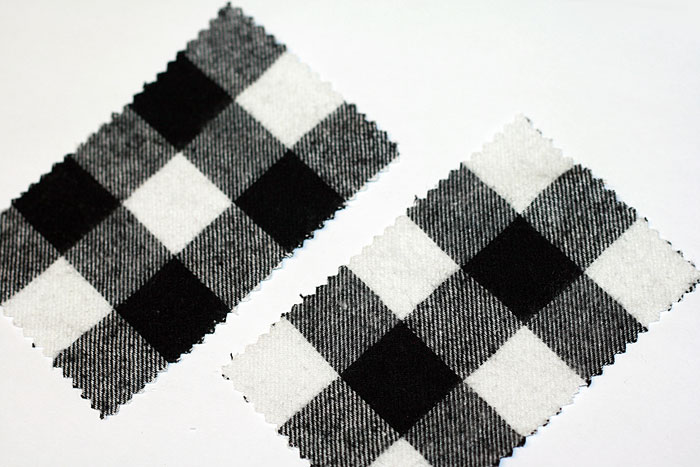
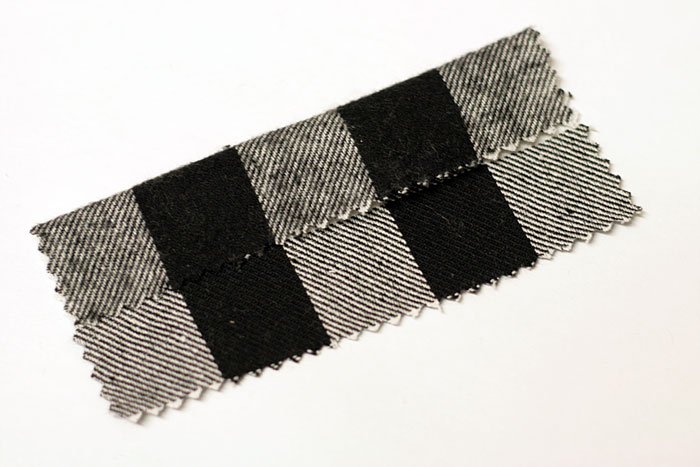
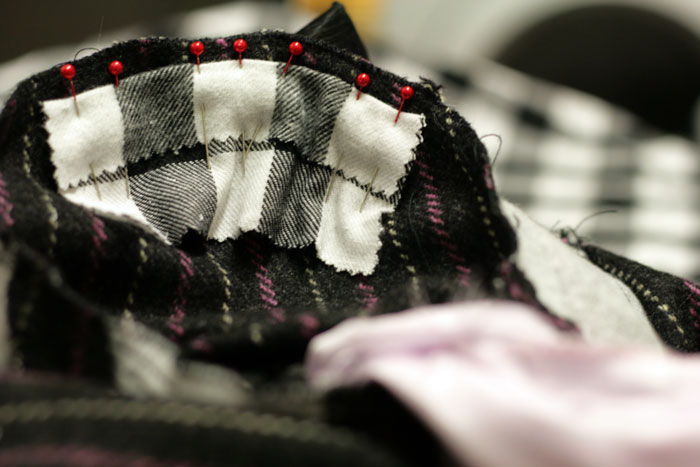
Make a 1 in (2.5 cm) fold on long side of each piece. How lucky is this. My fabric had 1 in square pattern!

sleeve cap fold
sleeve cap fold

Centre and pin heading to wrong side of sleeve cap with fold against seamline, wider half of heading against sleeve.

sleeve cap pinned in position

Whipstitch fold of sleeve heading to sleeve seamline. Heading now supports and rounds out sleeve cap.

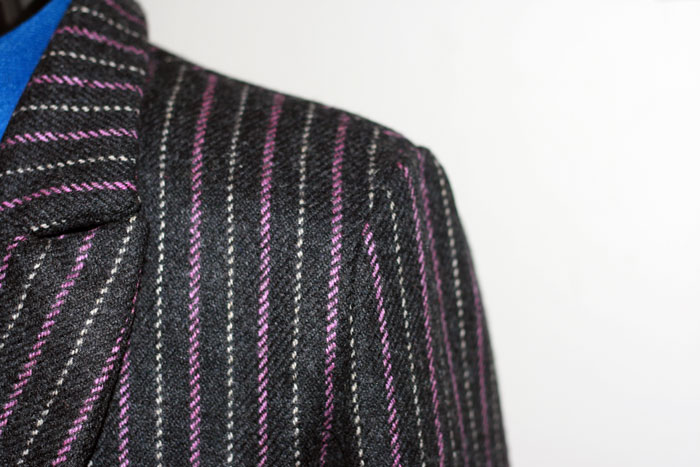
without sleeve cap
without sleeve cap

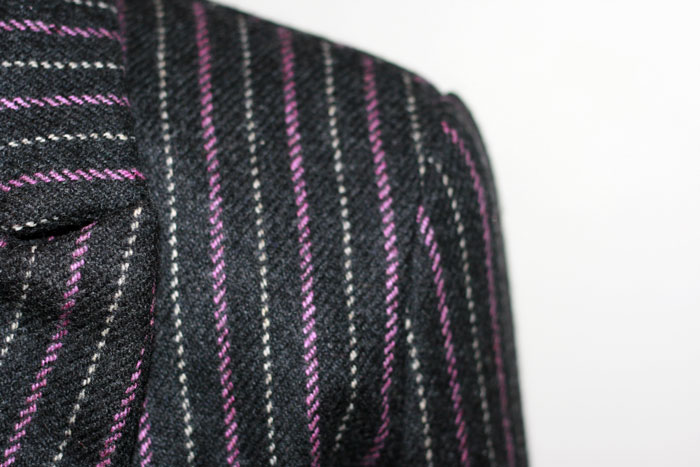
The difference is subtle but is hugely important for my self satisfaction!

with sleeve cap
with sleeve cap

Before I lined the jacket I neatened and pressed all the seams. I did wonder if you have to neaten the raw edges, after all they wont show but I was worried about it fraying inside with wear and if it might eventually have a knock on effect to the seams coming apart. Probably over worrying but better to be safe than sorry was my own conclusion. But here presented my next concern. As much as I pressed this gorgeous wool, the seams would not lie perfectly flat throughout and I knew that would affect the overall shape and create a lumpy lining. And who would want lumpy lining?!

So I decided to stitch the seams down, like a good tailor lady. But hey! Guess what little tailoring trick was missing. NO UNDERLINING!!! Not that I have ever had to underline anything to date. But I have heard about it. I have wondered why you would want to but now it was blindingly obvious. My fabric was sturdy enough to live without it but how much easier would it have been to sew the seams down flat onto an underlining. I will definitely underline next time I make a jacket and I wholly advise you to do this even if you think your fabric is sturdy enough. It makes sense you know!! Fortunately my fabric was quite thick with a forgiving texture!

stitching seams down sans underlining

I found it was much easier to do, over my knee, whilst watching The Paradise! And also safer to stitch onto the interfaced pieces.

stitching seams down on interfaced sections

Hemming was easy with this fabric but be aware that a curvy hemline is naturally created with all those shaped pieces. To take in that excess fabric I just made a couple of tucks either side of the vent, symetrically positioned so that the finished shape was uniform. You’ll notice here that there is no evidence of interfacing. After I hemmed I remembered I was supposed to interface the hems. So I dutifully unpicked all that hand stitching, cut some strips of fusible interfacing, fused it on and re-hemmed. BUT do remember to interface the hem sections of your pieces from the start and NOT at this stage. You know it makes sense 😉

wavy hemline
wavy hemline

So then came the lining. I had pondered a silk lining but the lilac poly satin I found was so lush I looked no further. So long as you remember your ‘ease pleat’ in the centre back, you can’t go far wrong. I can’t give to much advice about this stage because I kind of winged it!!! But what I did remember to do was to push the lining up to the hemline of the outer fabric and roll it down over itself to create more ease and allow for shrinkage. Not that poly lining shrinks but I think its general practice! I did the same on the sleeves. I’m not sure I lined the vents on the sleeves properly but it works… of a fashion!

The buttons were a lucky find, though I was gutted I couldn’t find smaller coconut shell buttons. The two pictured here were way to big even for the front! So sparkly resin shank buttons it was. Lucky to find them in 2 different sizes at Shepherds Bush market. 20p each… a snip!

raspberry buttons
I WILL find a perfect use for those coconut shell buttons!

I created the buttonholes on the machine. Holding my breath as I did so. You know how it is. There’s always a chance of a wayward buttonhole! But next time I would love to try bound buttonholes. Karen did such a beautiful job with hers and I bet it feels far more special to button up with bound ones!

Well here ends my waffly post of niggles. I hope to have been of some help and not too much of a waffling bore!

Have a wonderful weekend all…. wrap up warm!! x

ooobop! review: Burda Style November 2012

Burdastyle magazine november 2012

A little later than usual but I do hope that November 2012’s Burda Style magazine serves to whet your appetite and make your sewing list longer all the same!

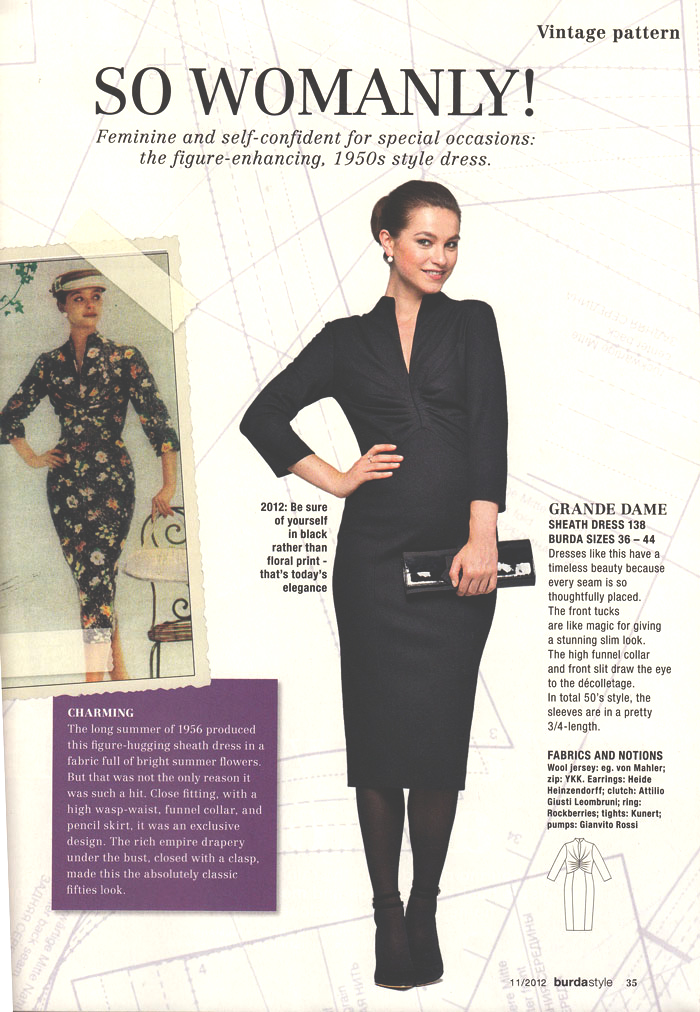
I’m going to jump straight to the Vintage pattern because that is exactly what I did in the shop and it is so totally my favourite and my best! I do like it in black but I also like its original floral form. Such style in the fifties! Bring it back, I say!

burda november 12 vintage

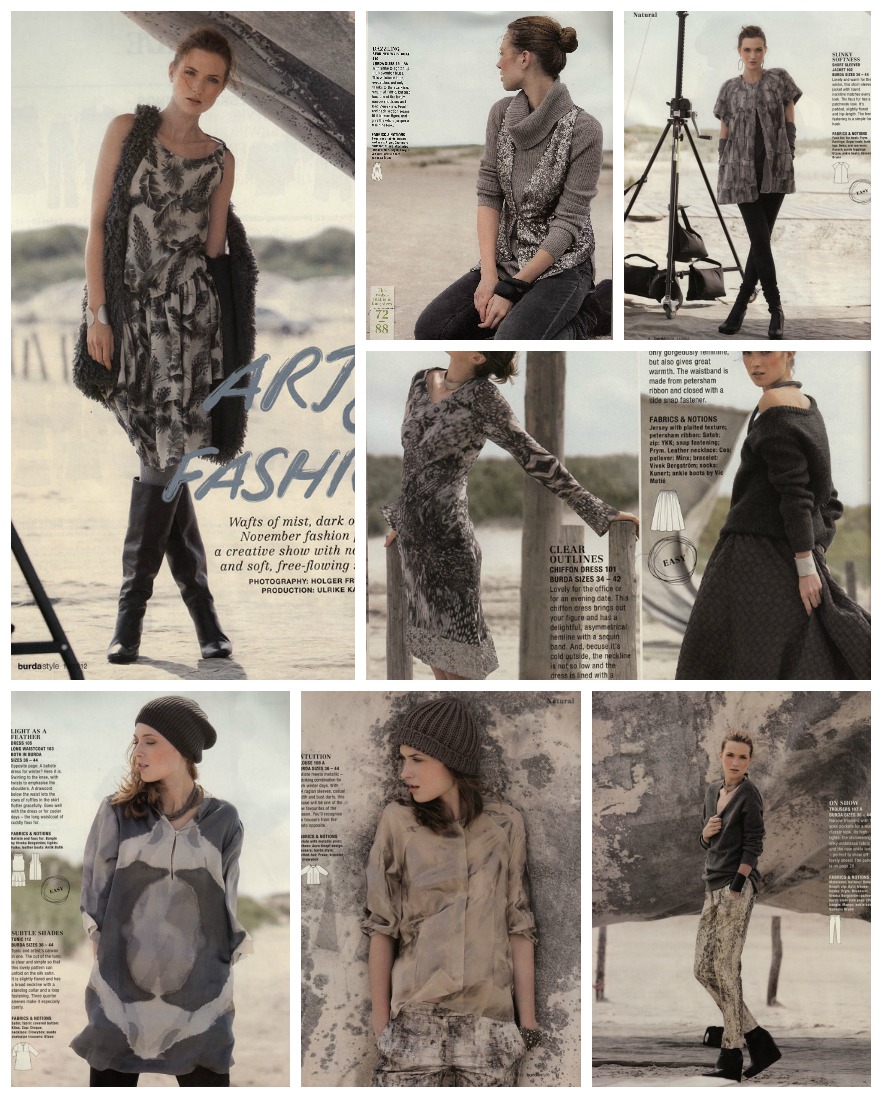
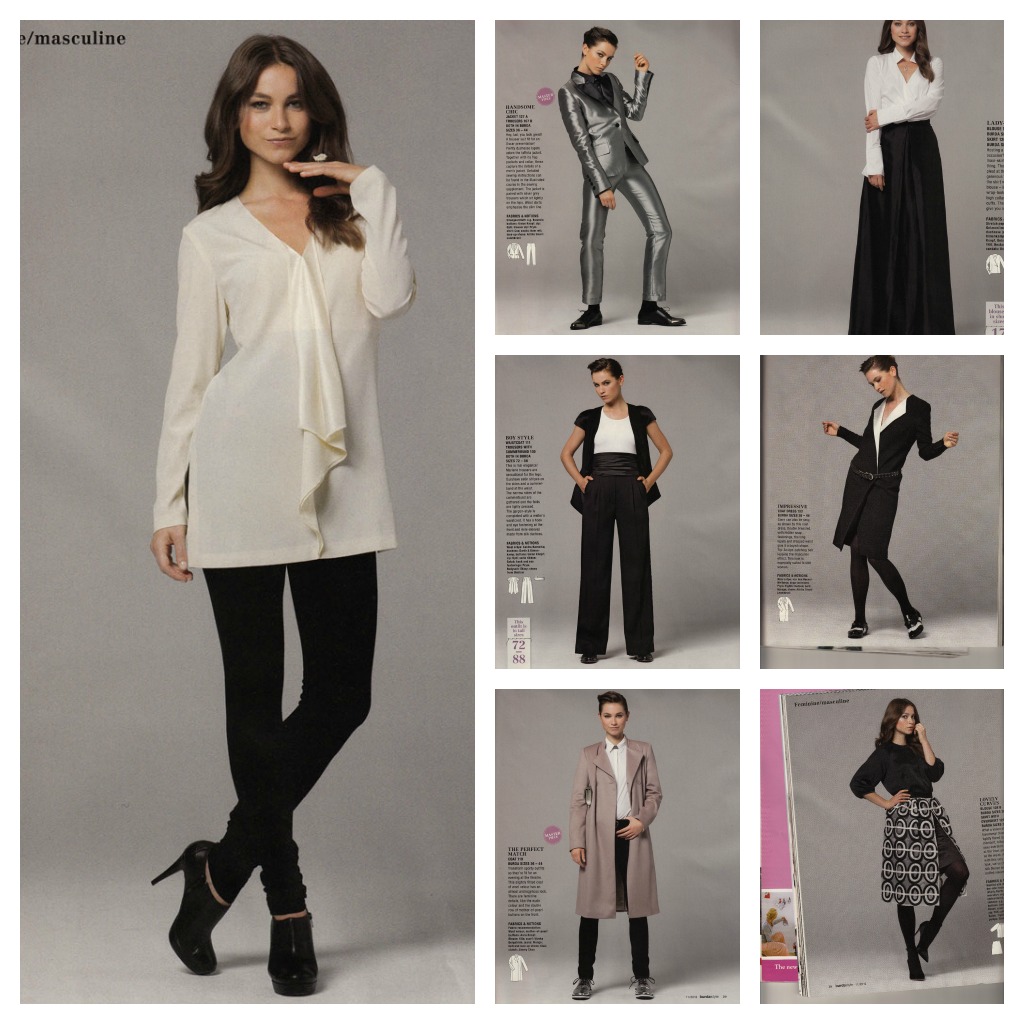
Lots of lovely misty neutrals in the first section this month. I am quite surprised to see a floaty batiste dress (top left, below) considering the chill factor but I like it all the same, especially styled with boots and the faux fur waistcoat. I am also tempted by the blouse, centre bottom row. Batiste with a metallic print…. not sure I will stumble across that fabric choice in the Goldhawk Road, but always worth an ask! It’s got 3/4 raglan sleeves and bust darts so its simple but not completely shapeless.

The trousers (bottom right) are nagging me to attempt my first pair of trousers. These ones have hip yoke pockets and are ankle length to display some fabulous show-off shoes!

art of fashionNext up is the Gem Colours section. You may have already have seen some of these patterns on the Burda web site. They were quick to go up this month.

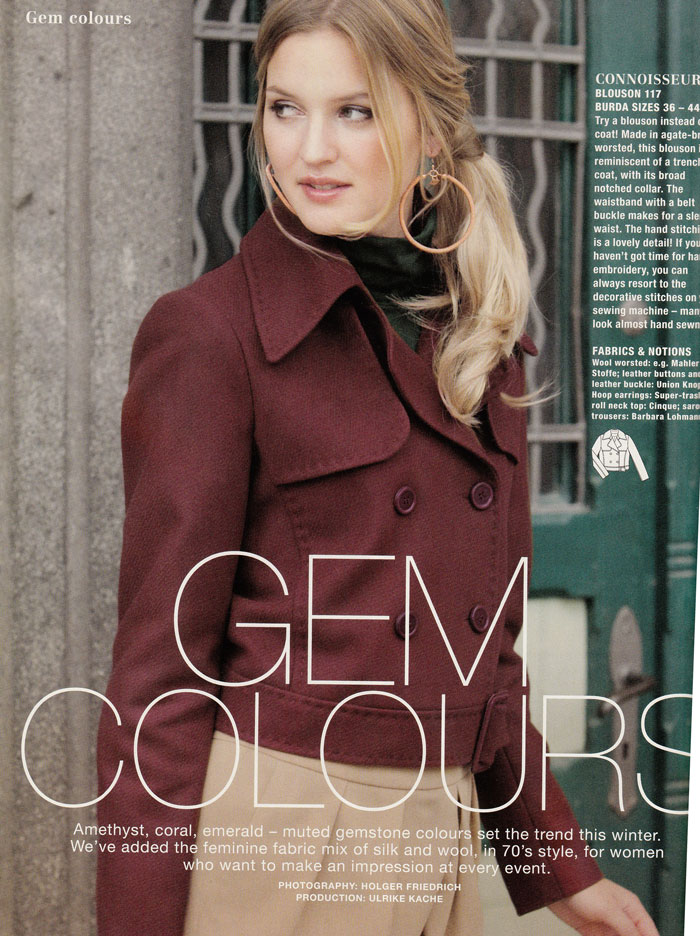
This jacket or ‘blouson’ as its called here, would present such a rewarding project. Having just completed my first proper jacket I’m itching to employ some more tailoring techniques and this one looks like it could present a few more. Its got some beautiful hand stitching going on which gives it such a professional finish.

Gem colours

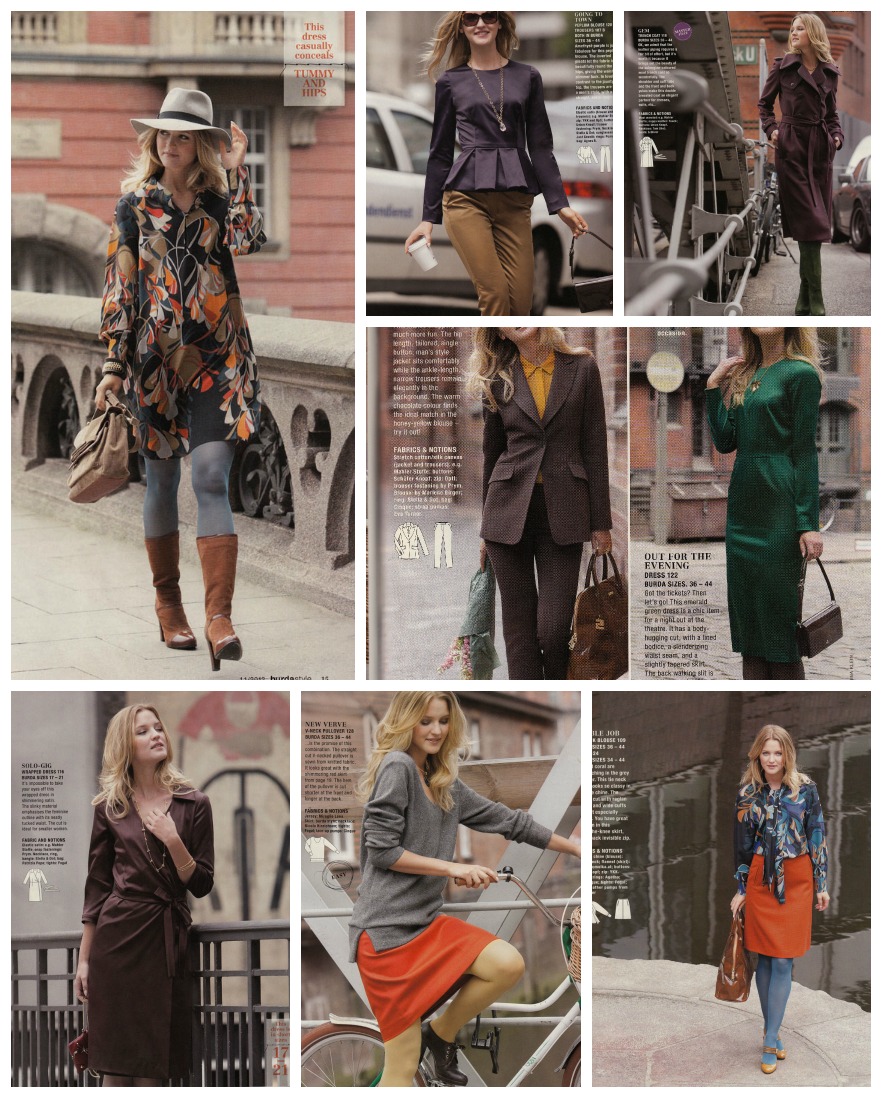
Undertones of the 70s with oranges, purples and browns are the order of the day for Gem Colours. I’ve not worked with crèpe de Chine before but I think the first dress (below, top left) would be a great place to start. It’s semi-fitted and has a wide neckline, with broad sleeves that taper into slip on cuffs. Perfect for those bloaty days or when you just want to throw something over a pair of leggings or sturdy coloured tights before flying out the door.

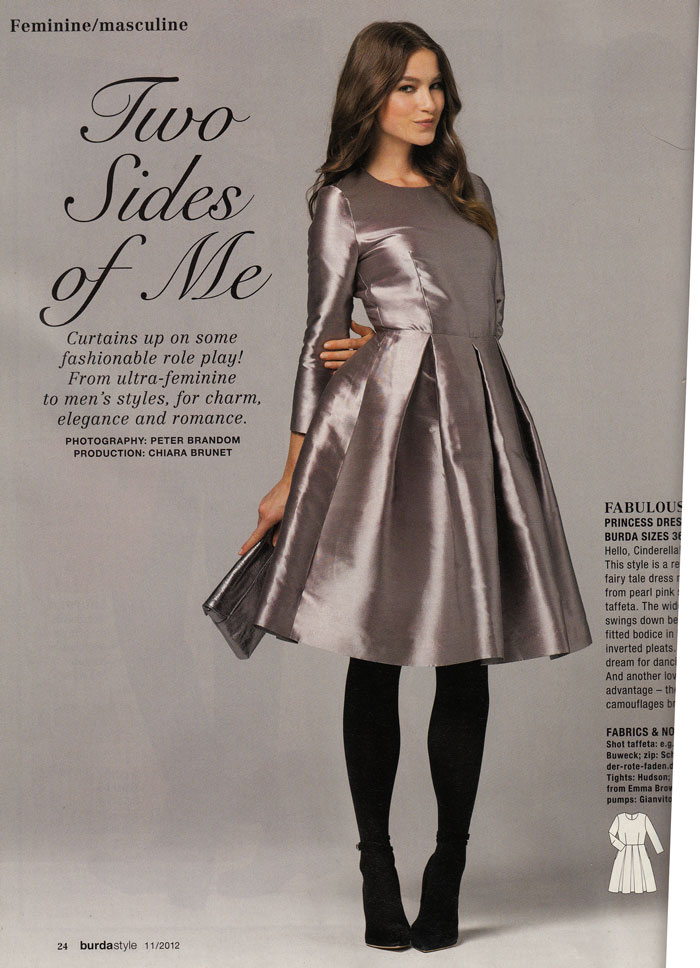
gem coloursTwo Sides of Me is an interesting section this month. I like the dress!

Two sides of meNot too sure about the boyish looks. Bit boyish for me to be honest! But I’m quite drawn to the blouse on the left. Not my usual style but I like the idea that this could be whipped up a couple of hours before a theatre date! It is made of stretch silk satin here. Much like my pin up pants, so I bet it feels gorgeous on!

Two sides of me

I kind of flicked past the Knits section to get to the Kids. Nothing against knits, honest, and I feel bad now for not including them. But they just seemed like staple loungewear. And I need to avoid making stuff that everyone is going to think is from ‘Primani’!

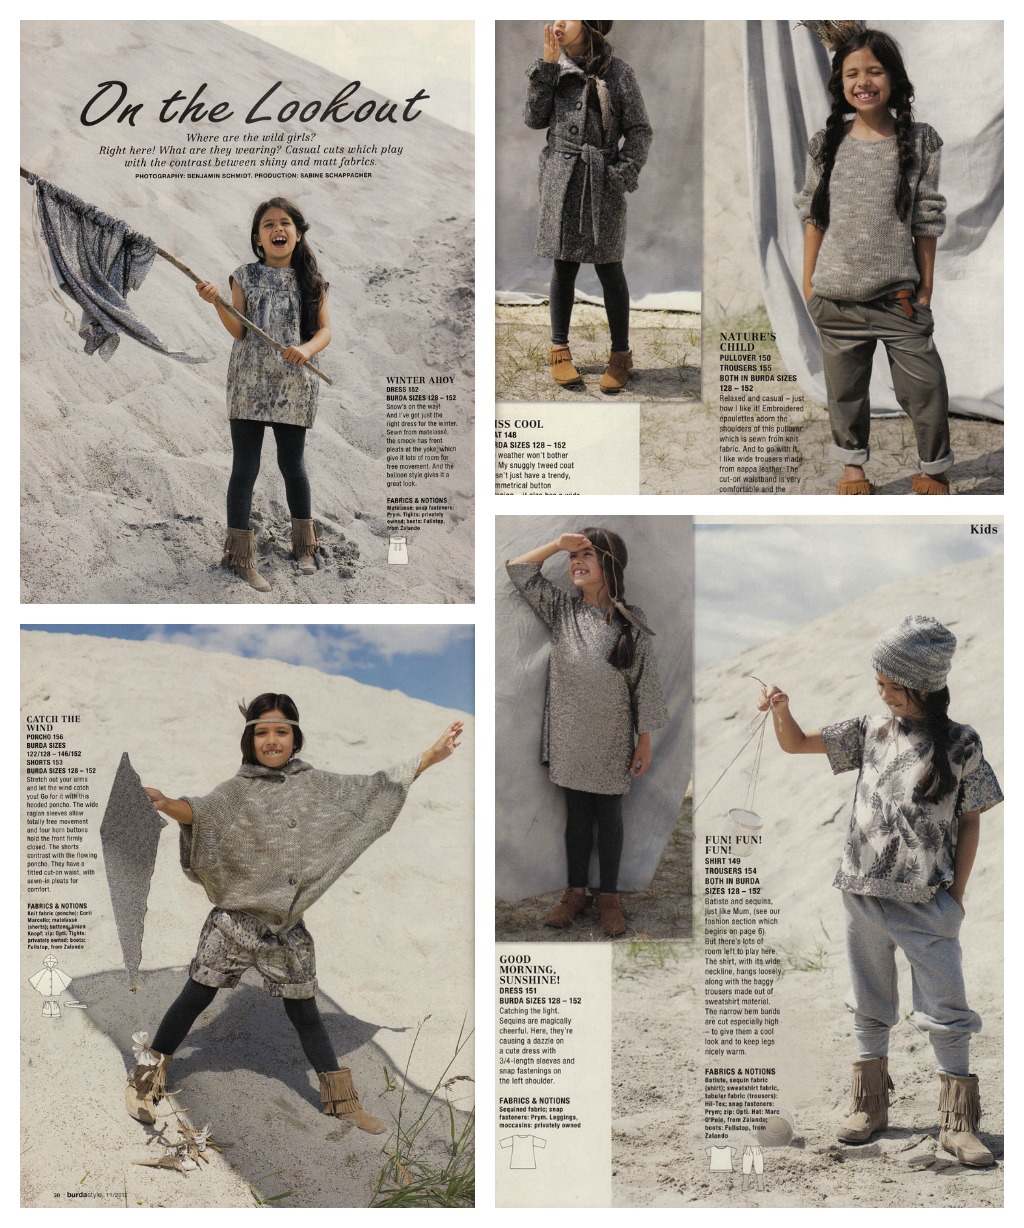
But… there is some totally cool kid stuff as usual. Keeping the neutral theme and mixing up metallics and matte. Lovely textures and fun, chic designs that will even fit Little Miss Ooobop!… hoorah!!

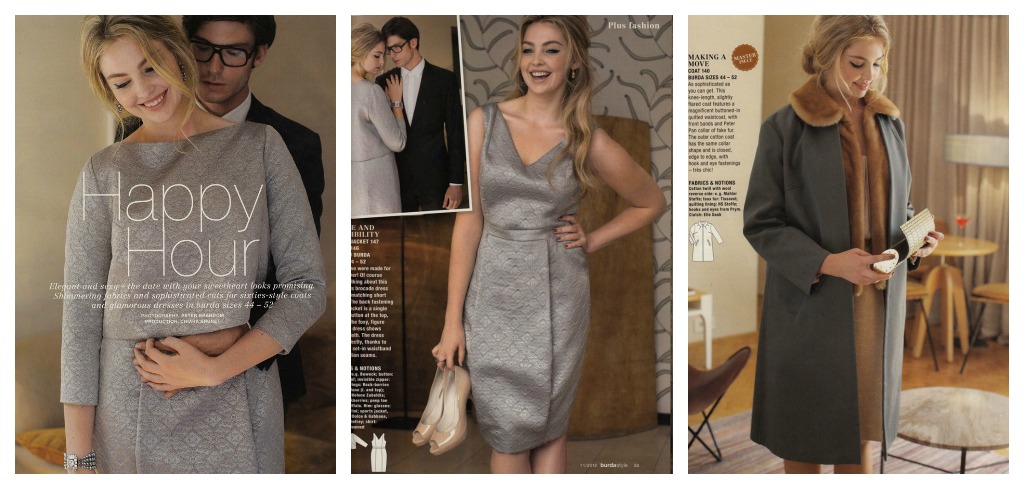
Burda Kids november 12And a Burda mag would never be complete without some hot plus-size gorgeousness. My picks this month are very vintagesque. Creature of habit, moi?! Very elegant and sexy and perfect for a hot wintry date!

plus sectionAny faves? Any dislikes? Feel free to share your thoughts!