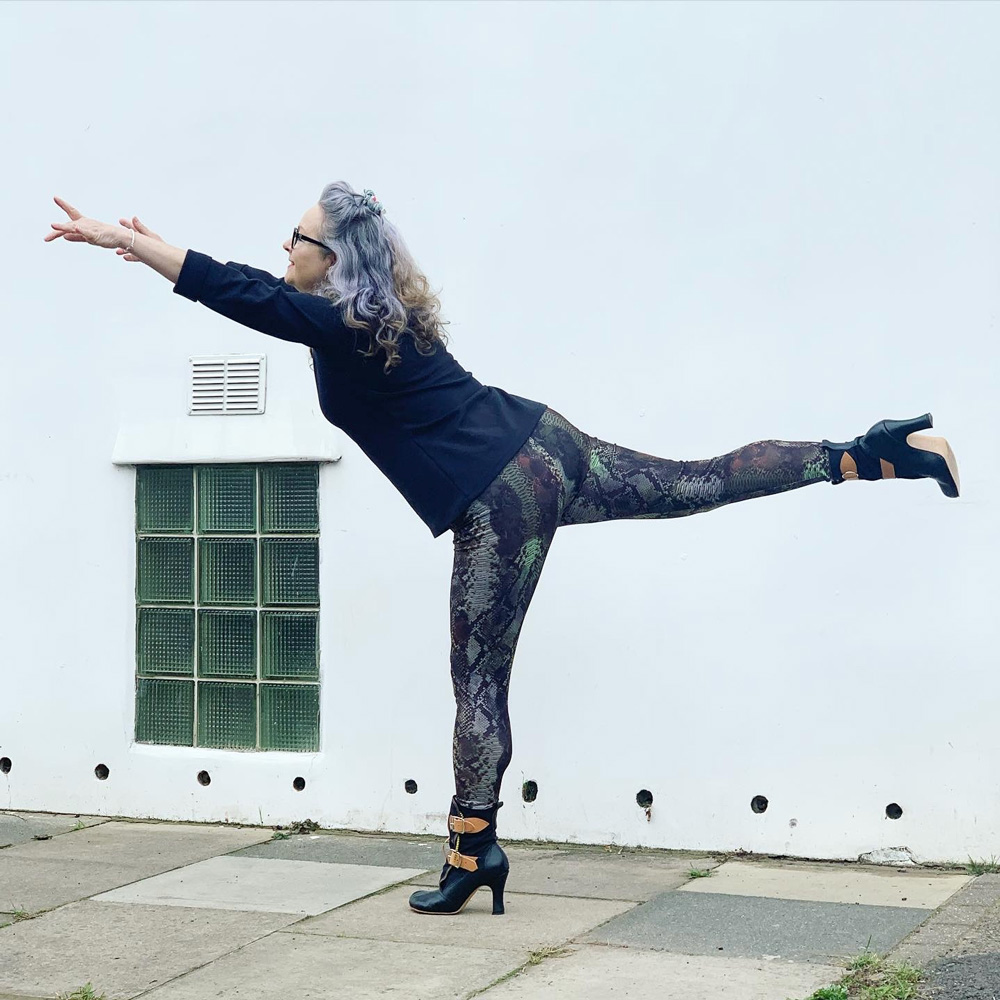
Putting my self-drafted leggings to the test

Janene is posing sideways, standing on one leg with the other leg straight out and arms forward. She is wearing her snakeskin print leggings with high heel boots and a black rollneck top

I remember quite plainly saying I did not see the point in making my own activewear. Where’s the fun? It’s just boring and functional. And let’s face it, there are plenty more interesting and fun things to be sewing up!

But never say never! I did a rain-check on the RTW pieces I already own – after one pair pretty much disolved, despite various fixing attempts – and realised not one single pair of bottoms actually fit me properly. Mostly the rise is the problem but also the waist elasticity.

I spent the best part of an afternoon perusing patterns online. There are heaps! And I’m sure most of them would work a treat. But I would undoubtedly have had to make adjustments to said patterns and so I figured I may as well draft my own if it wasn’t going to work straight out the packet. 

I followed instructions from Winifred Aldrich’s Metric Pattern Cutting for Women’s Wear – a firm fave in the sewing community. And it didn’t take long at all to draft the one single basic pattern piece.
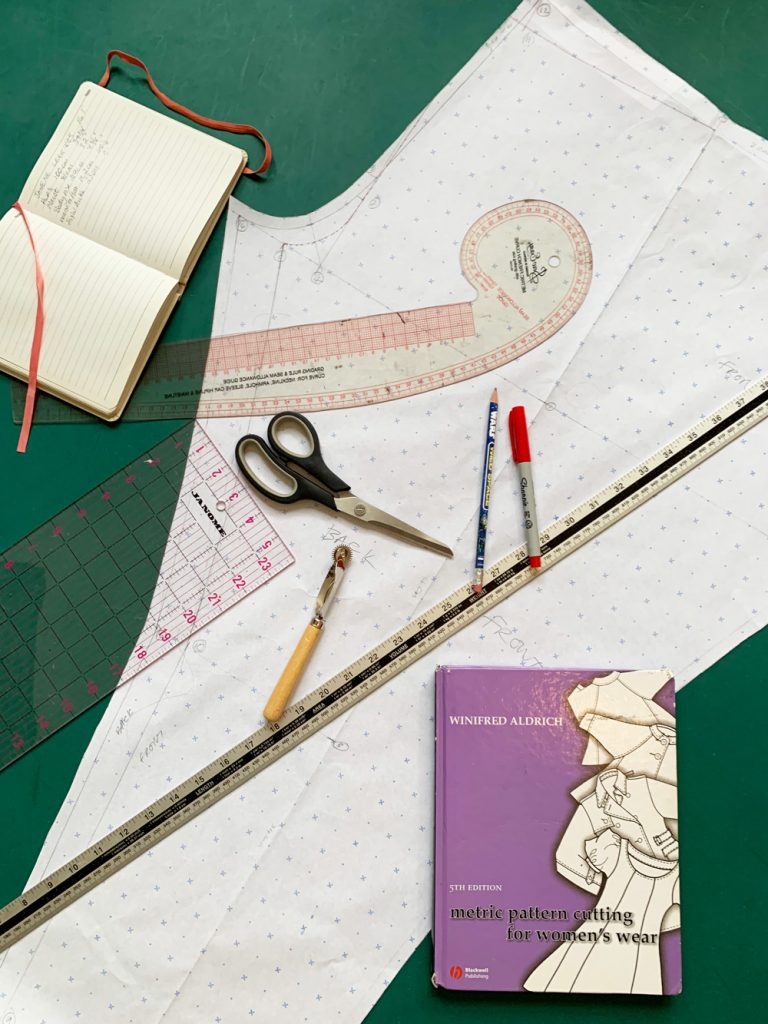
Flatlay of drafted leggings pattern piece, drafting tools, note book and pattern drafting book

In fact it took longer for me to decide how to finish the waistband!

I sewed up the leggings in a lightish weight very stretchy lycra. Took minutes on the overlocker with 4 threads. I didn’t even need to substitute stretch needles.
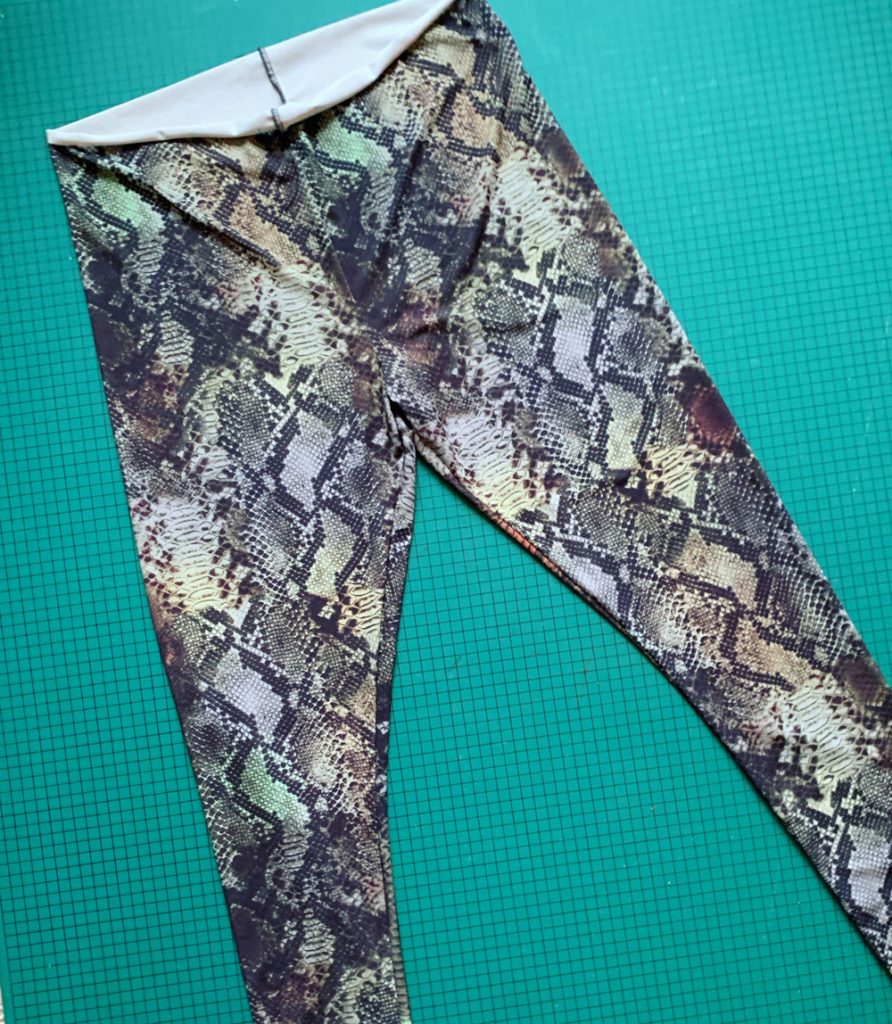
flatlay of partially finished leggings. Just awaiting the waistband.

A quick try-on confirmed the fit was OK apart from quite a lot of ease at the waist – the back waist in particular. I didn’t really clock the excess at the thigh at this point. I was poised to take the waist in, before making a casing and threading elastic through – that totally would have been the quickest waistband solution – but then I visualised some gathering at the waist where the elastic waistband would have cinched it all in. I didn’t like how it looked (in my head!). So I set about another solution.

I measured the depth of the waistband from one of my existing pairs (10cm) and then measured the circumference of the leggings, 10cm down from the natural waistband. I halved that measurement to make a rectangular pattern piece that would ultimately be cut on the fold of the fabric.

I marked top edge, fold and side seam on the pattern piece.

To avoid all the gathering at the waistline I marked 10 equidistant slash lines from top to bottom and closed up the top edge until the top now-curved edge measured approximately 80% of the bottom curve.

I then traced the now-curved rectancle onto another piece of paper to add 1cm seam allowance all round apart from the fold edge.
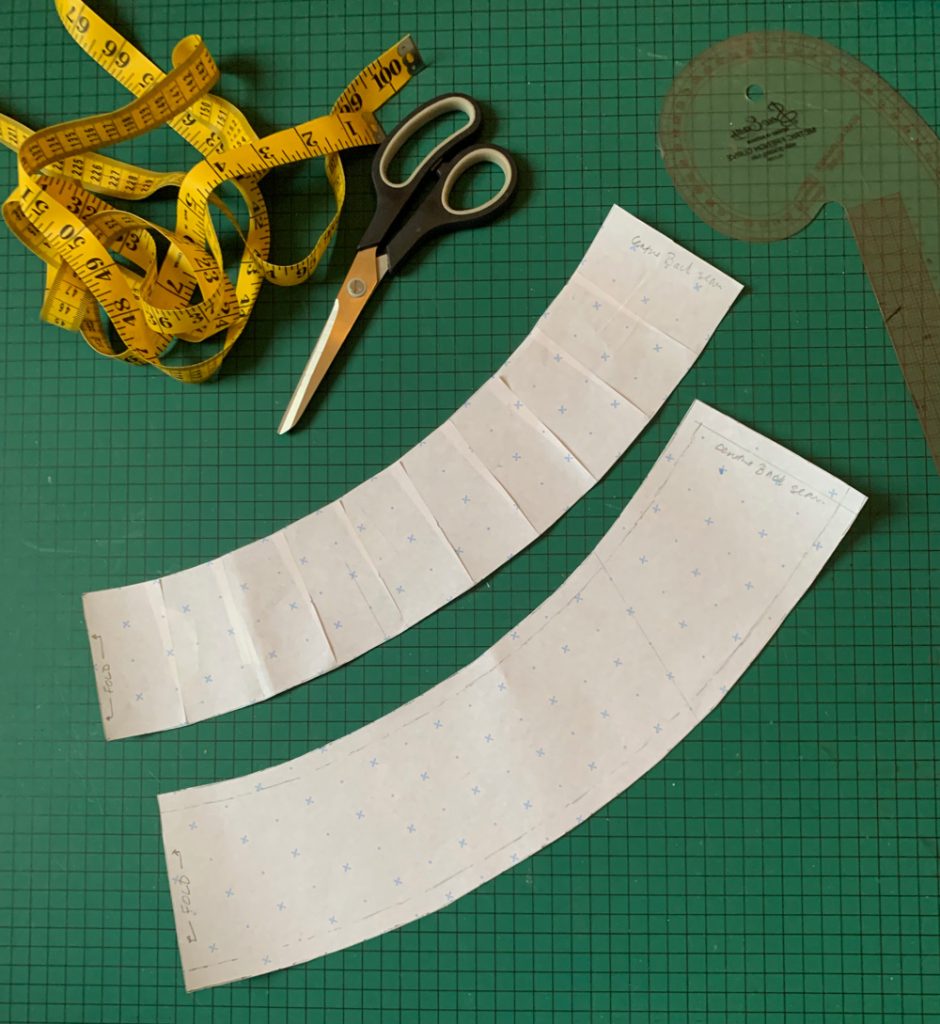
Flatlay of the drafted pattern pieces, one with and one without seam allowance, for the waistband. a tape measure and a pair of scissors are positioned next to the pattern pieces.

I pinned the pattern to the folded fabric and cut 2 fabric pieces. With each piece right sides together, stitched the short edges to make 2 circular bands.

I placed one band inside the other, right sides facing, and stitched along the top (inwardly curved) edge.

I remeasured the top seamed edge of the waistband and cut some narrow (7mm) elastic to that same measurement with no overlap allowed so it would be a wee bit tighter still.

I then overlapped the elastic by 1cm and sewed the ends together to form a circle. I made quarter point markings along the finished top edge of the waistband. And with corresponding marks made on the elastic, I pinned and lightly stretched to fit as I zigzagged the elastic to the seam, making sure the edge of the elastic didn’t go past the actual seam line.

I trimmed 9cm down from the top of the natural waistline of the leggings (to leave 1cm seam allowance) ready to attach the waistband.

Before attaching I gave a quick press to the waistband, right sides out, to shrink the elastic a bit and make sure both pieces were aligned accurately. Then I attached the bottom two edges of the waistband to the top of the right side of the leggings (right sides together). I aligned the seam of the waistband with the centre back seam and clipped the band all round the top of the leggings. There was no need to stretch to fit this time because both measurements were the same. The clips worked a treat by the way, because the pins kept catching on the fabric.
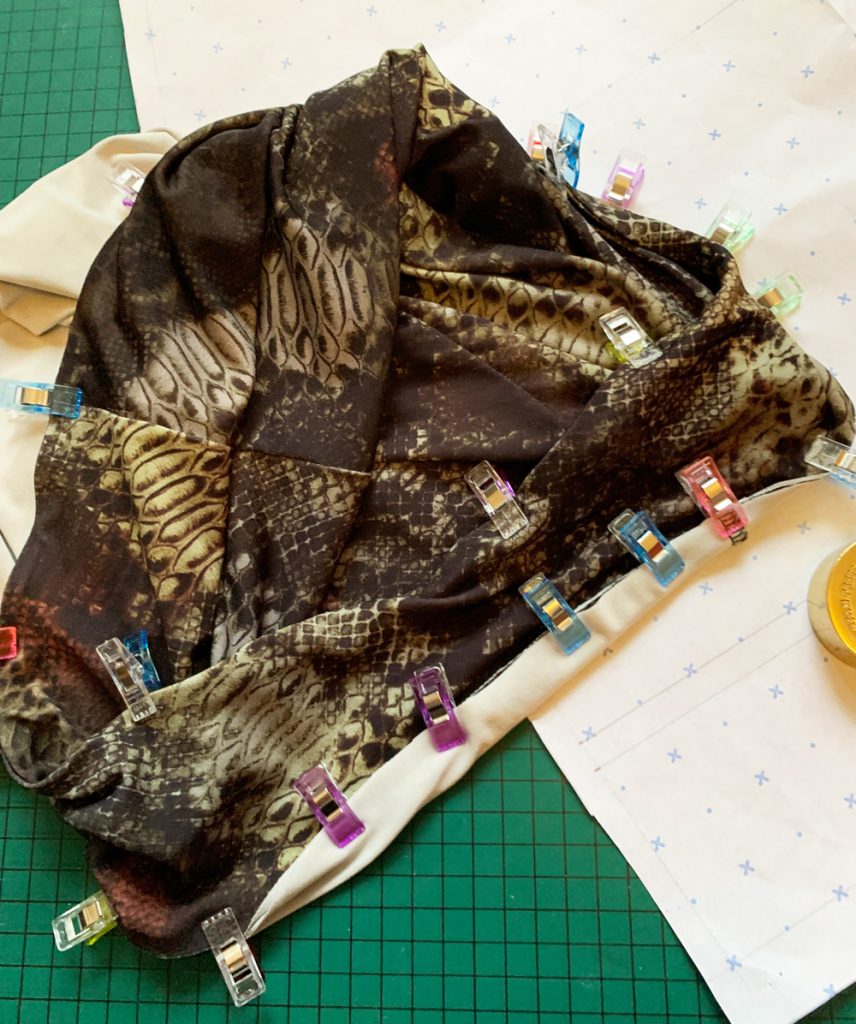
The waistband of the leggings is clipped in position with some colourful plastic clips.

A quick zoom round on the overlocker, and it was clear that all that care taken for accurate positioning paid off.

Now I wouldn’t normally volunteer a photo of my rear end, but I’m so chuffed how those two centre back seams lined up and how nicely that deep waistband hugs my hips and dips into the small of my back!
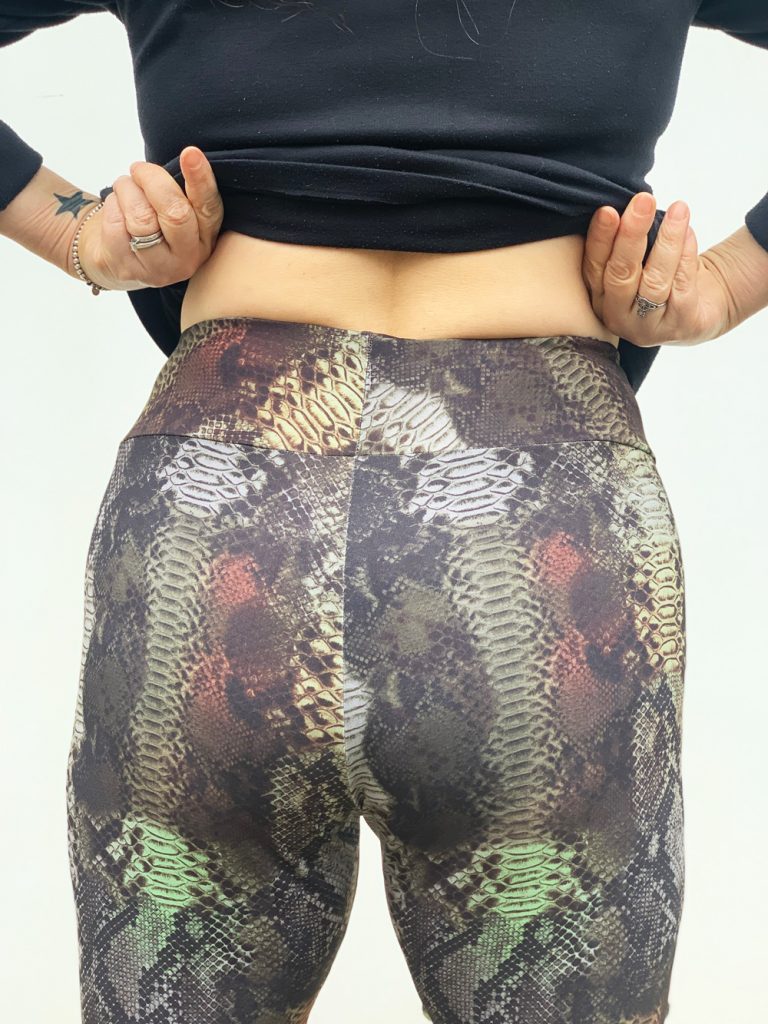
View of Janene's bottom! She is holding up her top a few inches to reveal the back of the waistband and show how it fits very snugly.

The last thing to do was hemming. Believe it or not I found this bit the most tricky! With everything else going to plan and so quickly, I decided to get the twin needle out and do it properly rather than employ my usual lazy zigzag treatment.

I dug out my barely used Millward stretch twin needle and rehearsed a twin stretch stitch on a scrap piece of the fabric. Took a while to perfect before I sewed for real. But then it messed up before I finished the first round. Sooo annoying! I dug out the manual to see if I’d set it up wrongly and the only thing I did was not to use the needle supplied with the machine, doh!

So I changed up the stretch twin for a regular Brother twin needle and tried again on some scraps. Again, seemed ok until I went to sew the real hem and the same thing happened again. It just got jammed and sucked into the feed dog with the bobbin threads all tangled under. I unpicked and managed to re-sew over the last bit but still, sooo annoying!! I’m totally sticking to zig-zagging next time!
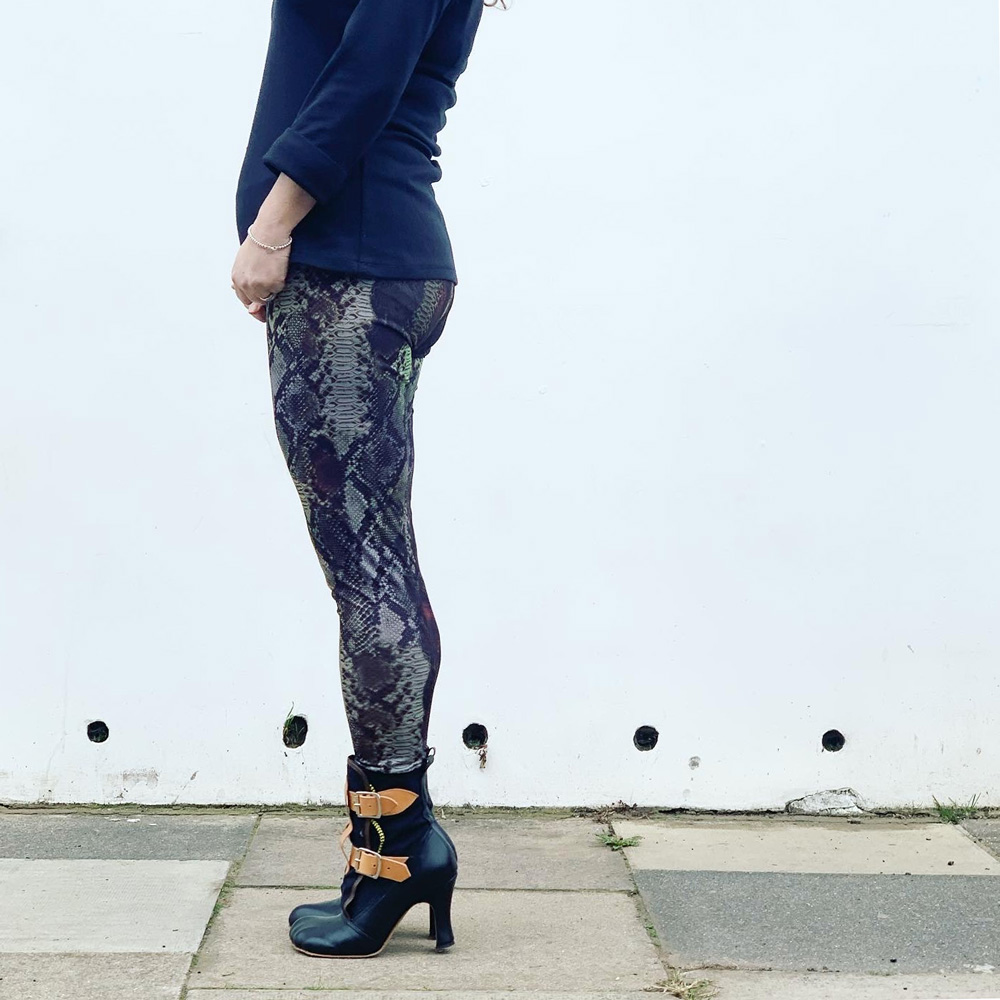
Side view of Janene wearing her handmade snakeskin print leggings and high heel boots. Her head is cropped out of the image.

First test of the finished leggings was at my Zumba class. And I was so chuffed that they didn’t end up round my ankles. However I could feel how loose they were from the knee up the inner thigh and I really didn’t like the wobble factor as I was dancing! I’m so much more used to sturdier fabrics holding me in place!

I’m going to take them in but decided to shoot them as general day wear with heels as inspired by @paulalovestosew! They are entirely fine as… well, tights really!
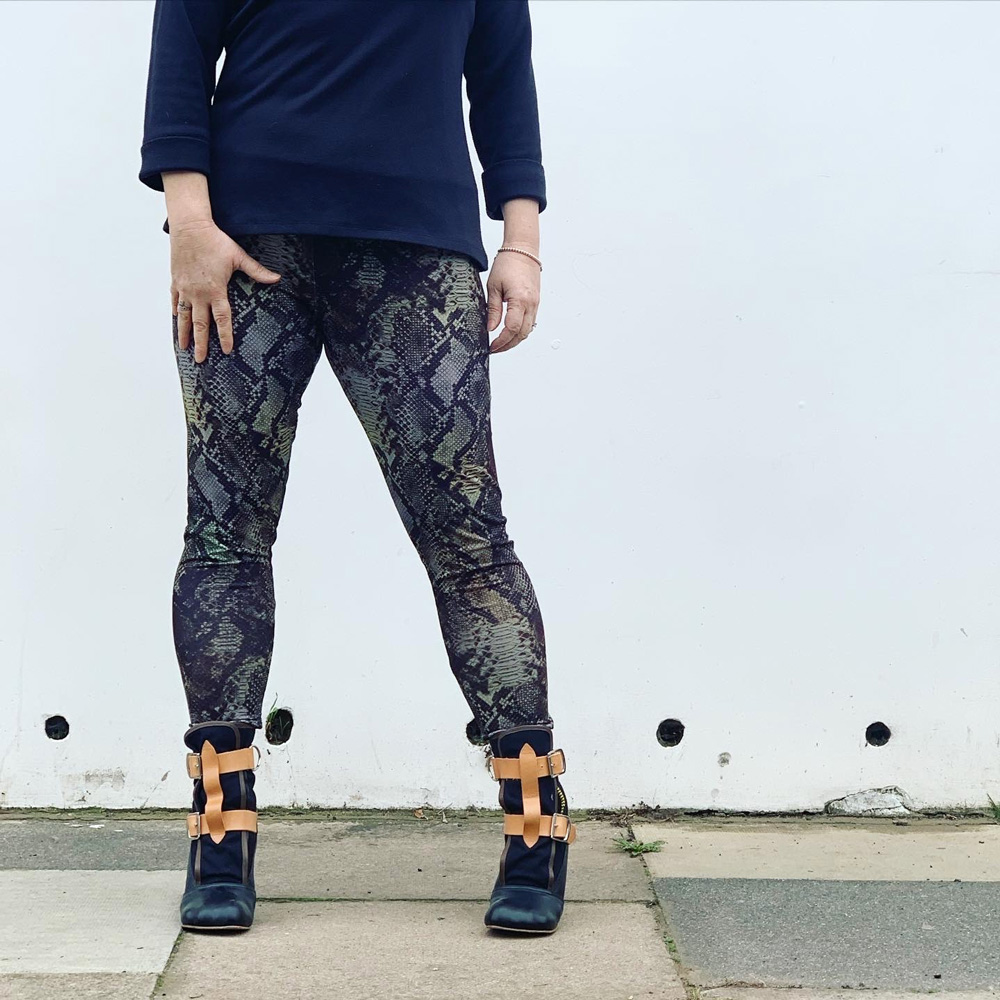
Front view of Janene wearing her handmade snakeskin leggings. Her feet are slightly apart. There are some small wrinkles on the knees.

And now I am on the hunt for some heavier stretch fabric. Thank you to everyone who have given some brilliant suggestions. I now appear to have too much choice!!

From not wanting to ‘waste time’ making my own, I can see how making these will quickly become addictive. So… absolutely… never say never!
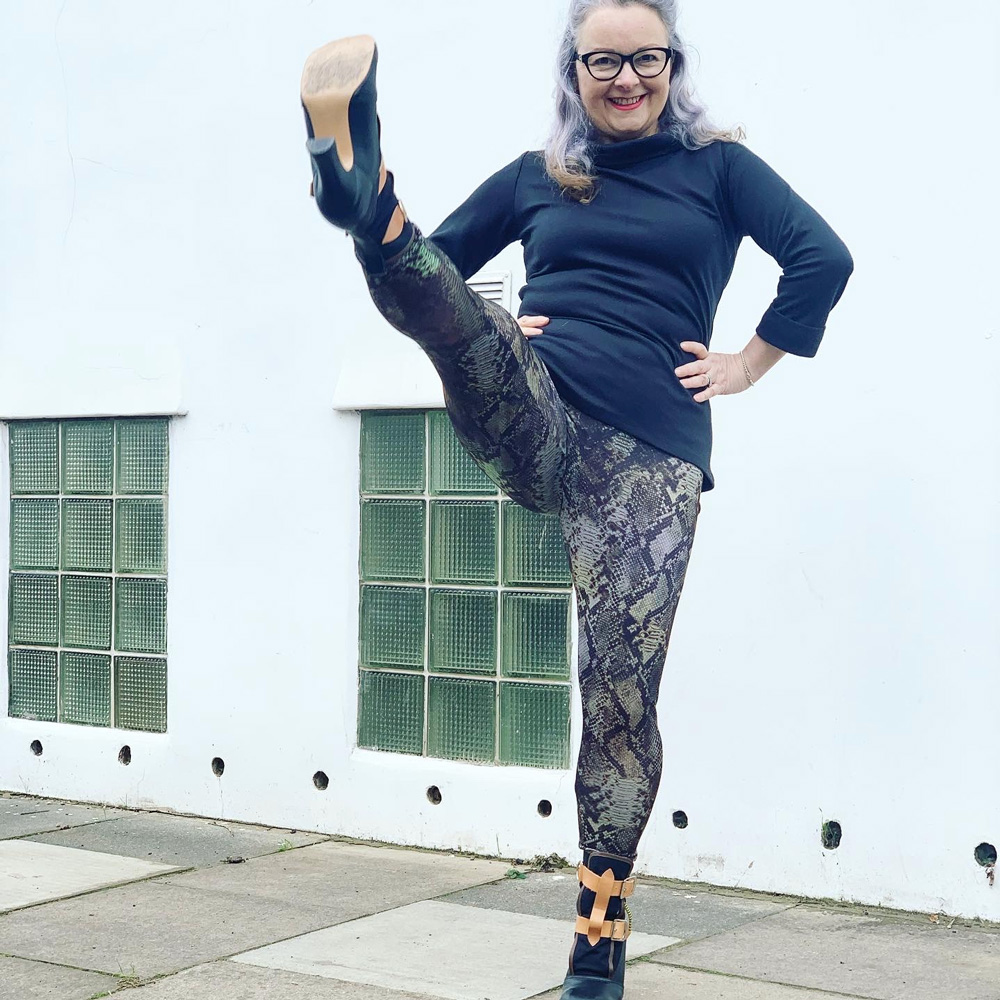
Image of Janene doing a high kick in her handmade snakeskin leggings. She is also wearing high heel boots, a black rollneck top and a pair of black rimmed glasses.

Posed photos by Daniel James

Make a PINsentry card reader case


Barclays PINsentry case

It’s one of those annoying but imperative things that live in the bottom of my handbag. Forced to live there because I need it, always: The PINsentry machine. But the trouble is, there’s all sorts of other stuff residing at the bottom of that bag too: bobby-pins, small coins, powder-puffs, crumbs… you get the picture. And these things are not conducive for a healthy device. It’ll get sick and at somepoint refuse to recognise my card at the most crucial time. Two previous ones have already met with their demise. In justified protest, no doubt.

So after all these years, I decided to do the honourable thing and replace the obligatory deflated bubble-wrap protector for something slightly more glamourous. And I have decided for the good of the nations PINsentry card readers to detail each step in the making so you can give yours a better future too.

Please note that this size fits the regular Barclays Bank PINsentry machine for other sizes you will need to adjust the template.

Materials:

  • 2 small pieces of fabric each measuring at least 320mm x 160mm
    (1 kind for the outer, 1 contrasting piece for the lining)
    I cut mine from Cath Kidston fat quarters
  • Small piece of wadding (final size: 212mm x 137mm)
  • Choice of closure: velcro, button or press stud
  • Matching thread

Step 1

Print out the template from the link here: PINsentry_machine_case_pattern (making sure you print it at actual size) and cut the following pieces from your fabric:
1 x case outer in main fabric
1 x case lining
1 x wadding piece
1 x flap outer in main fabric
1 x flap lining

pieces for pinsentry case

Step 2

With right sides together, sew flap pieces together with 1.5cm seam allowance, leaving the top edge open as shown in (A) below. Trim the edges close to the stitching (B).


Flap construction

Turn the right side out and press. Top-stitch a quarter inch from edge, all round, excluding top edge.

flap topstitched

Step 3

Position the flap with right sides facing to the outer fabric piece as shown below. The flap should sit 20mm in from the left side. Sew along the top, inside the seam allowance. About quarter inch from the top edge.

flap to outer

Step 4:

Now to make a ‘sandwich’ of all the pieces! Following the image below, first place the wadding on the bottom, then your outer case piece with the flap attached, and lastly your lining piece, face down on top.

Stitch all pieces together along the top edge as shown.

fabric sandwich


Fold back the lining piece  and give a good press.

top edge sewn

Trim the wadding so it doesn’t extend past the fabric edges. And also trim the wadding close to the stitching on the reverse seam as below, right.

trim the wadding

Step 5

Fold the assembled pieces over – right sides facing – to make one long tube with lining at one end and the wadding at the other as shown below.  Make sure the central seam matches:

fold over assembled pieces

Now stitch all round, leaving a gap to turn through in the bottom of the lining as shown by the black line below:

stitch all round

Trim seams all round, close to stitching but don’t trim the fabric above the opening (C).

Clip and then ‘box’ the corners of the end with the wadding, as show below (D). Just sew diagonally half a cm or so in from the point.

trim leave opening

Step 6

It’s getting exciting now! Turn through, give a light pressing and sew the open end of the lining closed. You can slip stitch by hand or just machine stitch over the end as no one will ever see inside!

turn through and close end

Push the lining inside the outer case and admire those box corners!

right side out

Step 7

All that’s left to do is to hand sew some velcro or closure of choice and snuggle your PINsentry machine safely inside.

velcro finish


Sure beats a dilapidated placcy bag!

PINsentry machine

Little things like this make me smile and this little thing is no exception. There’s something quite cleansing about stepping away from the larger projects (I’m looking at you, Boer War Jacket) to get a sewing hit from the smaller ones.

But don’t worry. I’m not ditching the bigger stuff. Oh no! Just procrastinating…. just a little! 😉


Make your own Zhivago-inspired fur hat: FREE pattern download

make your own fur hat free patternquick sewing projectHappy new year lovely followers!

I’m so delighted to share this pattern with you as my first post of 2015. It’s a timeless, vintage-style fur hat that will keep you warm and toasty in the most stylish way possible! And it’s a real quick project to sew up for that quick sewing fix when time isn’t on your side!

It really is so super easy to make. Just download and print out the FREE_fur_hat_pattern and follow these few simple instructions. The hardest thing about this hat will be to get your hands on some quality fur of the faux kind!

The pattern corresponds to my head size which is 22.5 inches or 57 cm.
You may need to adjust the pattern to personalise the fit.

You will need:

  • 1/4 m of faux fur (retailers will only usually sell you 1/2m at a time but its often worth an ask!)
  • 1/4 m of lining fabric (or find some scraps in your stash)
  • coordinating thread
  • a vacuum cleaner to hoover up all the fluff!

Instructions:

  • Make sure you print out your FREE_fur_hat_pattern at actual size, and check with the test square (on page 4 of the pdf) that it has printed correctly. Cut out and paste the sheets together to match the layout on page 1 of the pdf. Complete the hat band and crown sections as full pieces as instructed on the pattern then cut out.

NOTE: Before you pin the pattern to your fur fabric, think about what direction you prefer the fur to lie. On this particular hat I made, the pile strokes downwards on the band, from the top of the crown, down towards my eyebrows! On the top circular piece, it strokes from front to back. Incidentally, the centre back of the hat is where the band is seamed.

TIP: When cutting your fur pieces, cut on the reverse and just snip carefully through the backing fabric so as not to cut through to the actual fur on the right side. You will achieve a much better finish on the seams.

  • Pin the pattern to your fur pieces and cut out, paying heed to the tip above.
  • Pin and cut out your lining pieces. It doesn’t matter for the circular lining piece but make sure the band is cut on a straight grain to avoid stretching.
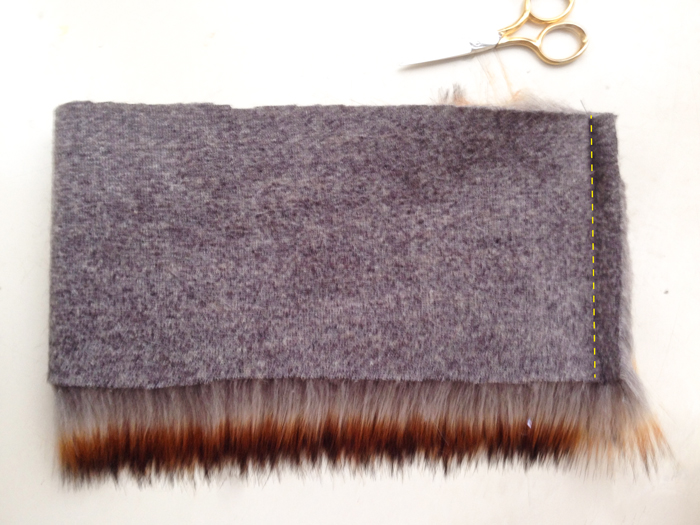
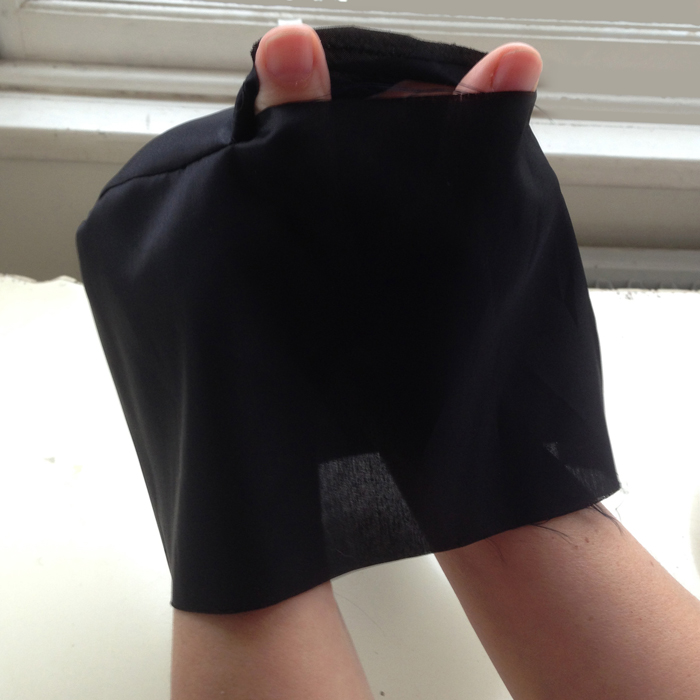
  • Take your fur band piece and fold in half, right sides together. Pin the short ends together, making sure the fur is tucked inside, and stitch using a 1.5 cm seam allowance following the direction of the fur.

seam fur band

TIP: When sewing fur fabric, Increase your stitch length a little so prevent thread tangling.

  • Finger-press the seam open and hold in place with a couple of tacking stitches top and bottom of seam.
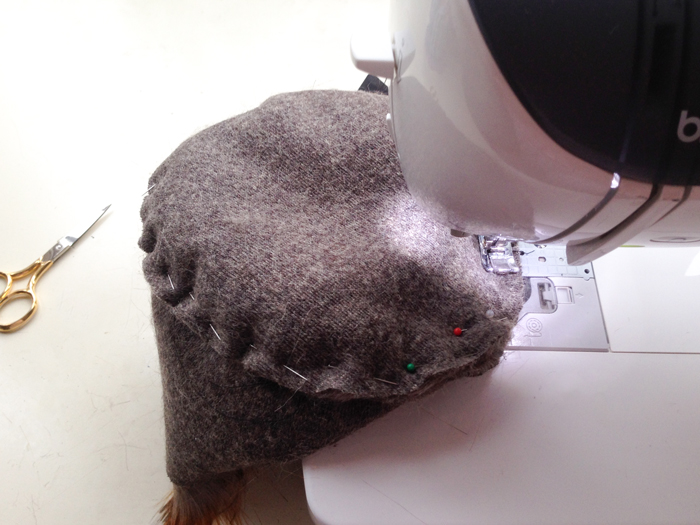
  • Pin the fur circular crown piece to the hat band, making sure the fur is tucked in and checking the direction of the fur is correct. See note above. Sew the seam using a 1.5 cm seam allowance.

pin and stitch crown to band
Pin and stitch crown to band

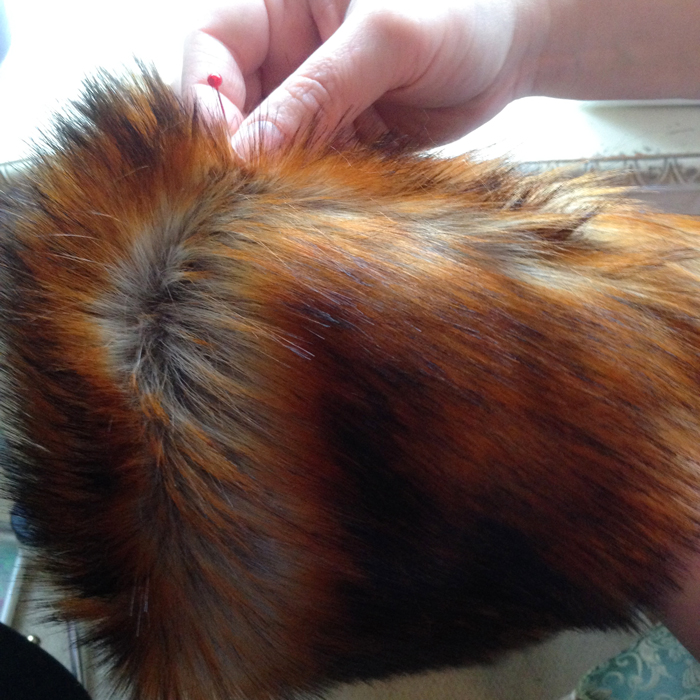
  • Turn right side out. Using a long craft pin (a normal pin or needle will do) drag it along the seam allowance to free the fur that has got caught in the seam.

picked trapped fur from seam with pin
Pick trapped fur from seam with pin

  • Now take your lining piece for the band, pin the short edges together as above and stitch with a regular stitch length and a 1.5 cm seam allowance. Press seam open.
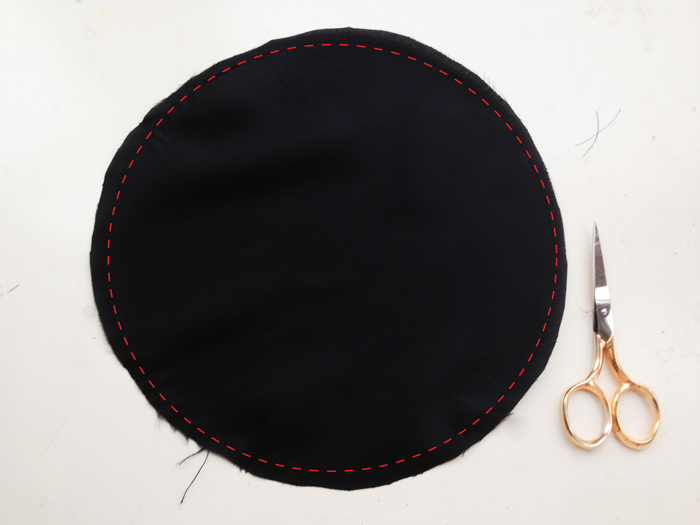
  • Stay stitch the circular lining piece within the seam allowance, to prevent stretching.

Stay-stitch circular lining piece

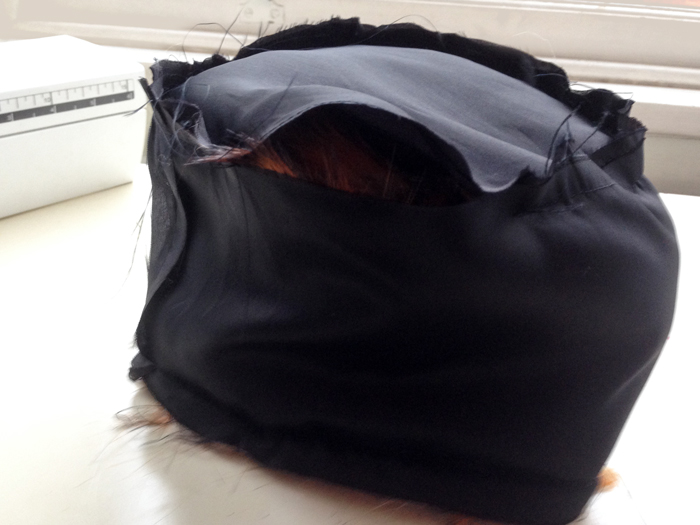
  • Pin the lining piece for the crown along one edge of the band and seam together, leaving a about 4 inches / 10cm open for turning.

leave opening in lining
Leave opening in lining

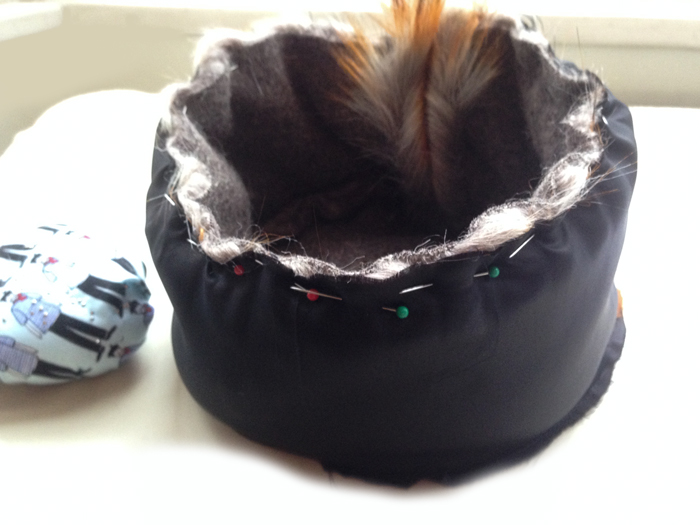
  • With right sides together pin the rims of the lining and the fur hat together. Effectively the fur hat will be sitting inside the lining. Pin together, matching the two centre back seams and stitch along the entire edge, securing the stitching, beginning and end.

Sew lining to outer fabric
Pin and sew lining to outer fabric

  • Turn the hat to the right side through the opening left in the lining, and you’re almost done!

Turn hat to the right side through this opening

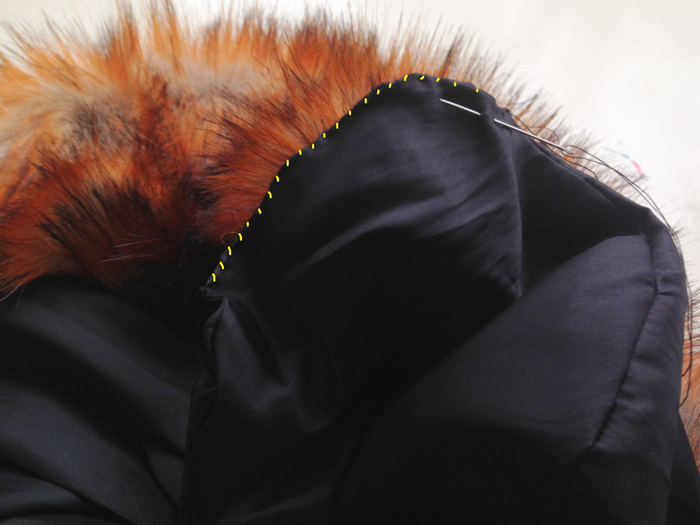
  • Pin the lining opening together, tucking in the seam allowance, and slip-stitch closed. With matching thread, obvs!

Slip stitch the to close the opening in the lining
Slip stitch to close the opening in the lining. With matching thread obvs!

Now all that is left to do is to don your new fancy fur hat, step out in the snow and hum the theme tune to Doctor Zhivago!

Please shout if anything is unclear. I’d be delighted to hear how you get on.

How to make a Roman blind / shade

And here is the long awaited tutorial. Sorry I took so long. I completely underestimated how long it would take to put together! Despite the lengthy post, this really is a simple sewing project, involving jus a few lines of straight line sewing. Please do a mock up first to check I haven’t given you a bum-steer! And please do point out anything that is unclear or needs adding.

It does, however require some very careful measuring and a few calculations.

No corners must be cut. The accuracy in the measurements will ensure perfectly fitting and super smooth operating blinds.
Remember: Measure twice (at least!) and cut once!

roman shades during day

You will need:
Furnishing weight fabric for the outer
Curtain lining for the backing.
Nylon cord. As a guide I used 9m but yours may be more or less.
Small plastic rings
4 screw eyes
Cleat
Acorn / cord pull.
Strong self adhesive velcro. The width of your window frame or baton.
Wooden doweling or synthetic rods cut to size.


1. Calculate the size and cut your main fabric roman shade step 1
Measure the size that you want your finished blind to be.

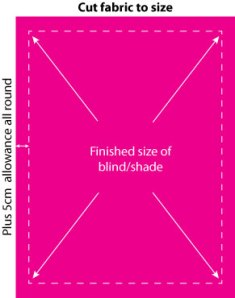
Add 5cm side turnings and hem allowances on all sides, to this measurement, and cut your fabric.


roman shade tutorial step 22. Press Allowances
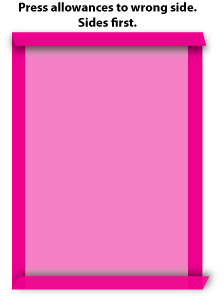
Press the allowances all round. You could even mitre the corners if you wanted to be really clever… er…I didn’t!
No need to stitch in place at this point. All will become clear!


roman shade tutorial step 33. Now to prepare your lining… and some serious sums!
Start with the measurement of the finished size of your blind. This will include allowances of 2.5cm all round.

First work out how many sections/folds you want to incorporate into your blind.
I chose to have 7.
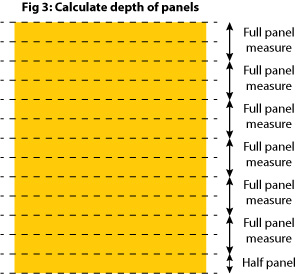
The bottom panel must be half the depth of the others which are equidistant.
To calculate this I doubled 7 (panels) to make 14 and deducted 1 to make 13 and divided this into the finished depth of the blind (150cm in my case)
so:
7 x 2 – 1 = 13
150cm / 13 = 11.5

11.5 is the half size panel at the bottom
The remaining 6 full size panels will be double that at 23cm (see fig 3)

You will also need to accommodate the dowels so extra fabric will be needed to allow for the casings.
Measure the circumference of your dowels and allow a couple of milimeters extra, otherwise you will struggle to get the dowels in the casings.

My casings were 12mm.

12mm x 7 panels = 84mm (8.4cm to be added to the final depth of the lining fabric)

So the finished measurement of the lining fabric to be cut is 80cm (width) x 158.4 (150+8.4)

Always measure twice and cut once!
You can now cut your lining to size.


4. Mark the positions of the panels then hem all round

Mark the positions of the panels, starting with the bottom one, in my case, 11.5cm from the bottom. I chose to mark on the right side with chalk to make the lines easier to follow.

Mark up from this point, the depth of the casing, in my case 12mm. From that point, mark the next full size panel up, in my case, 23cm
Mark the depth of the casing and from that point the next full size panel. Repeat the markings for the rest of the panel.

The side turnings and hem allowance is 2.5cm all round. Fold and press in position.
Sew all round close to the edges of the lining fabric so the rods wont get caught in the seams.


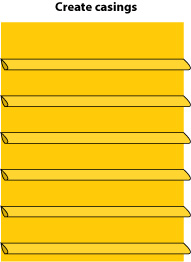
roman shade tutorial step 55. Create casings for rods

With wrong sides together and guide lines matching, fold in between the casing lines and press.

Sew accurately on the marked lines from edge to edge.
Repeat this for the remaining casings.
Your lining is now complete and ready to attach to the main fabric.


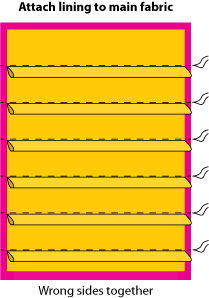
roman shade tutorial step 66. Attach prepared lining to main fabric

Lay the main fabric, as prepared in step 2, wrong side up on a flat surface.

Lay the prepared lining, wrong sides down, on top of the main fabric, making sure it sits 2.5cm in from each edge.

Making sure both layers are perfectly flat, pin together along the casings, so the casings are facing down towards the bottom hem.
Use as many pins as it takes to secure your two pieces together with no bubbles or creases!

Sew neatly and carefully from one side to the other, directly above the casings, sewing both lining and main fabric together.

Hand sew the top edge of the lining to the main fabric. Or machine stitch if you prefer.


7. Attaching the velcro

Stick the loop side (the fluffy side) of the velcro to the top edge of your blind.

Stick the hook side (the spiky side) of the velcro to the top edge of your baton or window.

NB. I used the strongest adhesive velcro I could find, which worked beautifully but to ensure it didn’t separate from the fabric I also hand stitched it.
This is very difficult but worth the effort to strengthen the bond. Do not under any circumstances try to sew it on the machine. The adhesive will totally ruin the needle and get stuck!


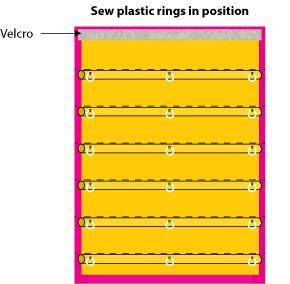
roman shade tutorial step 88. Insert the rods and sew on the rings

Inset a rod into the hem of the main fabric and hand sew the hem of the main fabric to encase it.
This helps to give the base of the blind a bit of weight and keeps it hanging nice and straight.

Hand sew the lining hem over the main fabric hem.

Insert the other rods into the casings and hand stitch the ends closed to stop the dowels falling out.

Hand sew 3 plastic rings to the centre of each dowel casing, one at each end and one in the middle.
It is important that the rings are perfectly aligned with each other.


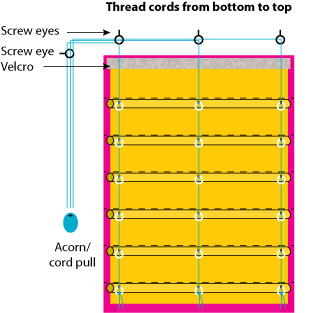
roman shade tutorial step 99. Attaching the cords

Screw 3 screw-eyes into the the underside of your baton or window frame.
They must be aligned with the rings you have attached to your dowel casings.

Attach the 4th screw eye to the side of the window frame, in line with the others.

Attach 3 lengths of nylon cord to the bottom 3 rings. Ensure the knots are tied securely.

Assuming your pull cord is going to be on the right hand side of the window,
run the first length of nylon cord up through the right hand set of rings. It will need to be long enough to do this and then run along the top 3 screw eyes and the side screw eye, down to the cleat, plus a little bit more!
Then run the middle cord up through the rings and allow enough to run through the centre and right hand screw eye, and the side screw eye, down to the cleat, plus a little bit more!
The final cord runs up the rings in the same way, through the top right hand screw eye, through the side screw eye and down to the cleat plus a little bit more!

NB: The screw eyes will sit below the velcro in real life!


10. Attach the blind to the window

You can now attach your blind to the window by pressing the velcro edges together firmly.
Thread the cords as detailed above.
With the blind at the lowered position, carefully make sure that the cords are neatly and precisely lined up. Gently pull on them individually and secure all three cords together at the ends with an ‘acorn’ or cord-pull.
Attach your cleat, proudly raise your blind, marvel at the magical way it folds up and wrap the cord around your cleat. Or lower it and raise it a few more times just for the joyfulness of it all!

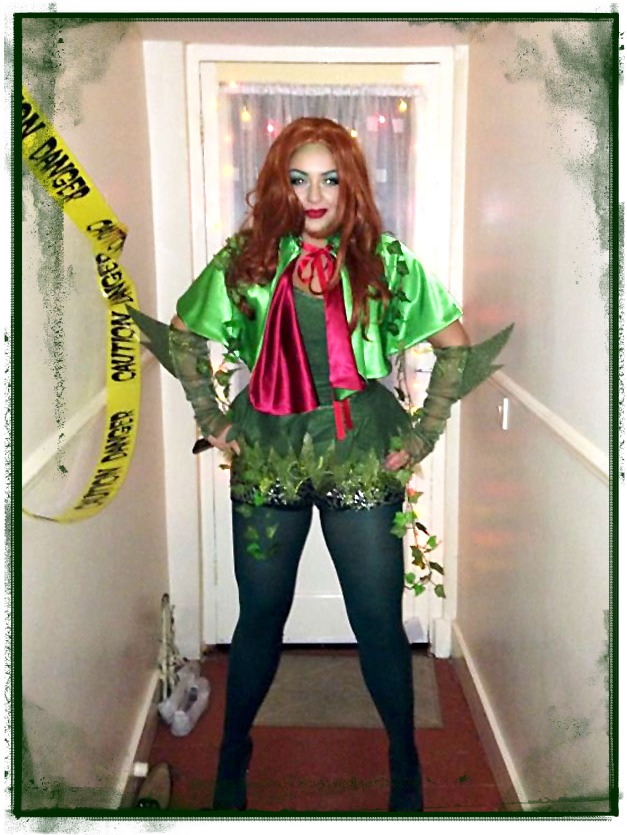
A cape for Poison Ivy

poison ivy front

Meet my biggest little girl! Hardly a villain but seriously rocking the whole Poison Ivy thing!

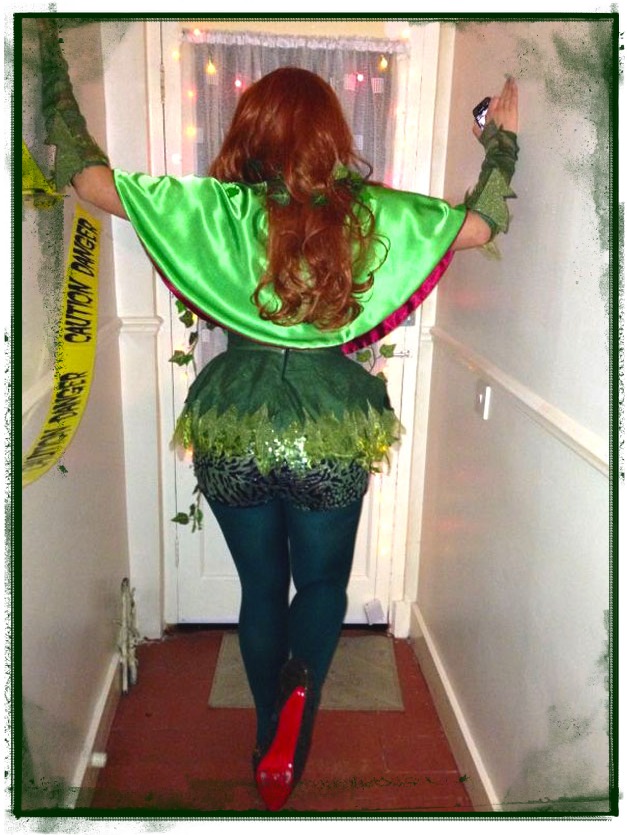
It’s not often I get asked to contribute to her wardrobe. It is in fact never! So I was very honoured by the request to make a capelet for her Halloween costume. Yes I know this is a bit late in the day, soz, but I wasn’t allowed a sneak preview on the day (something to do with me being an embarrassing mum at her last party I would think!) and had to wait patiently for photographic evidence so I could share it with you.

poison ivy back

It was a very fun and quick project and even ‘biggest little’ was impressed! If you knew her like I do you would know how amazing that is!

poison ivy

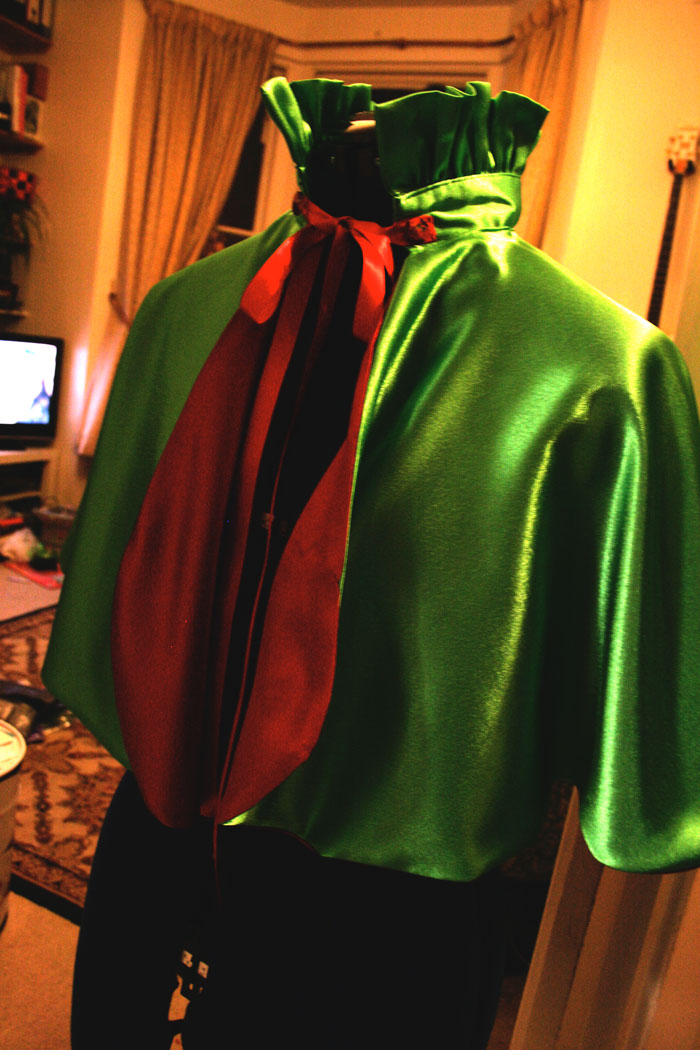
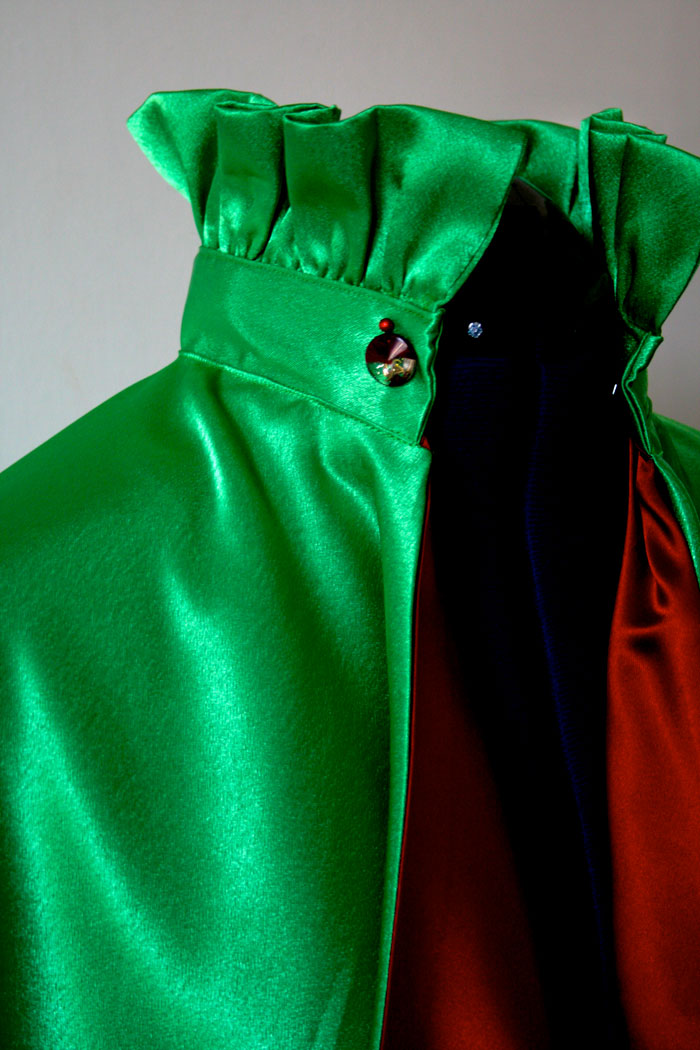
Here’s a better picture of the stand-up collar. You cant see it for all the red luscious locks!

cape on manequin

The exterior is a bright green poly satin fabric with red satin lining and I used some glitzy buttons at the neck to cover the ends of the ribbon. Should have sewn them in the collar stand really!

It was a very simple project for quite an effective fancy dress accessory…

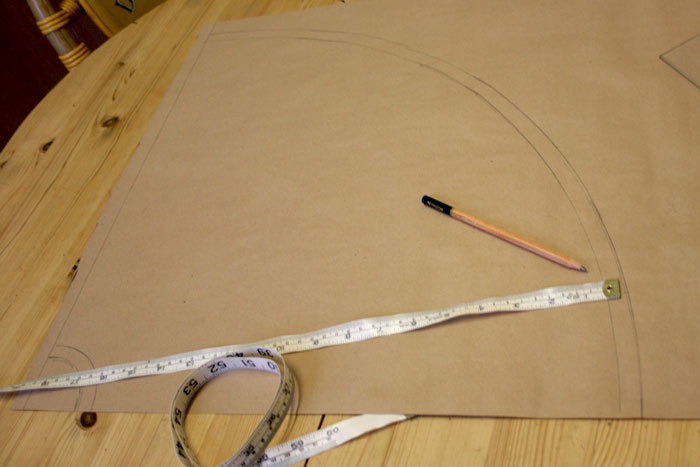
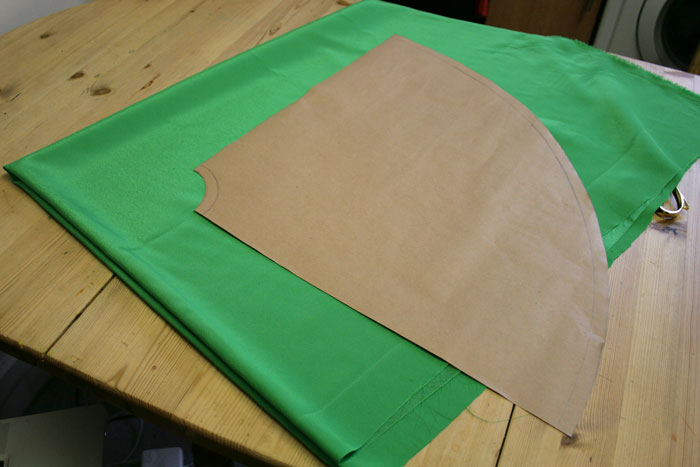
First I measured the neck (plus ease) and the measurement from the neck, over the shoulder to just below the elbow. Using Pi (22/7) I worked out the radius to draw the neck hole and from that circumference I could mark the length of the capelet and draw the circumference at the hem (plus SA)

circumference formula

Have you ever wondered what that little hole is for at the end of your tape measure? Well I sure have found a use. If you position and hold down the tape measure at the distance required, on the centre point, or corner of your paper, you can put the point of a pencil in the hole at the other end and draw the arc of the circle. Its not as accurate as a compass but I don’t have a set of compasses that large and this method was good enough!

draft circle

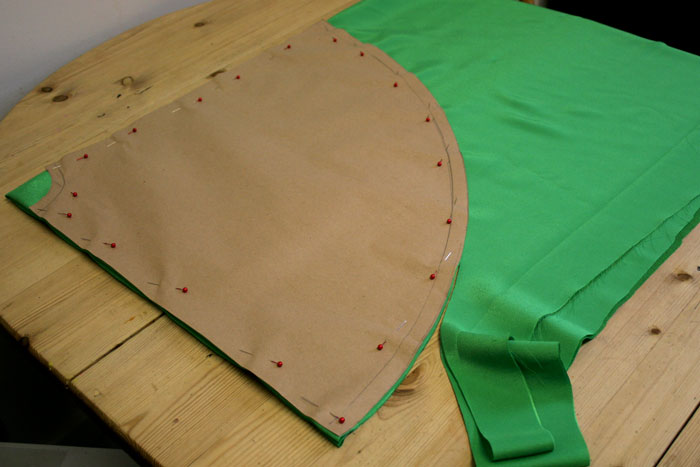
I folded the fabric into quarters and pinned the pattern, making sure it was butted to both adjacent sides.

folded fabric

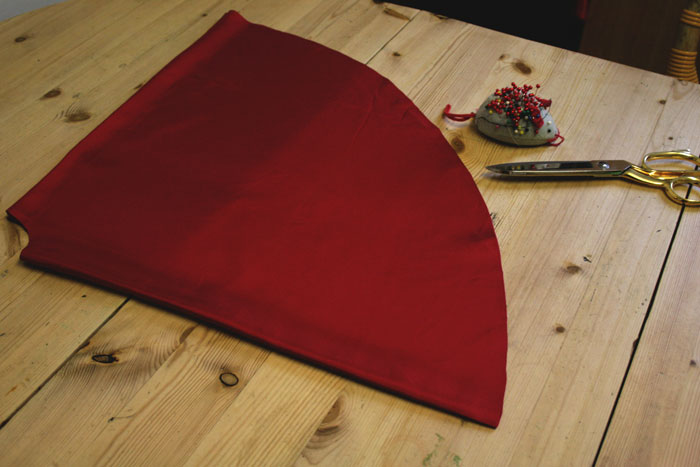
pinned patternI did the same with the lining and cut out. This is not my favourite fabric to work with, I hasten to add!

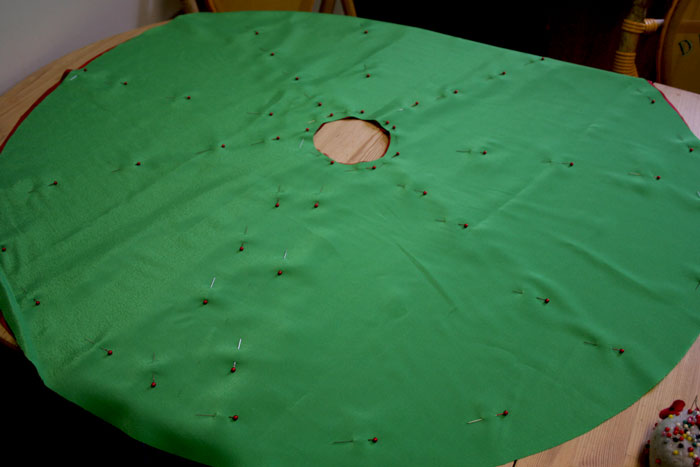
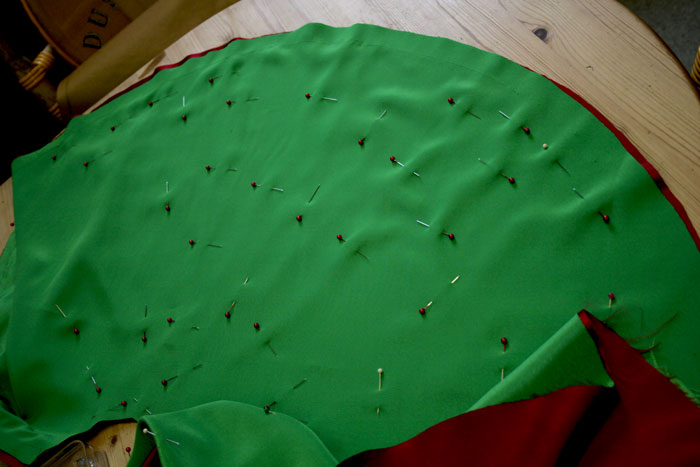
cape liningNext up, I pinned the self to the lining, right sides together, using lots and lots of pins. I am telling you, this is soooo not my favourite fabric to work with. It slipped and slid all over the place!

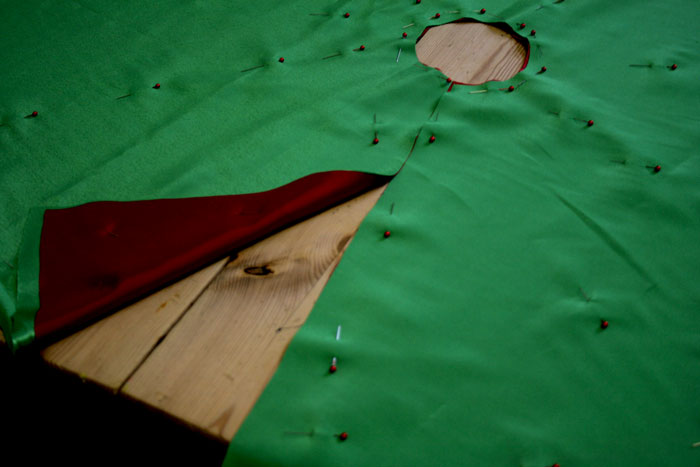
pinned lining and selfThen I cut the front opening. You can see just how far out I was with the cutting/positioning of this slippery stuff!

cut opening

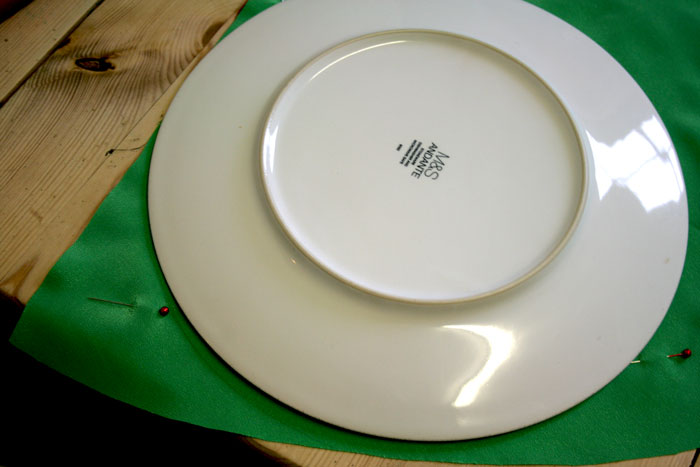
But I saved the situation with a genius idea to round off the corners! And note my next exclusive dressmaking tool…. a dinner plate!

round cornersI stuck in some more pins before I attempted to sew around the base hem and up the front openings. But it still took 3 or 4 attempts. It was like a couple of magnets repelling against each other!

more pinsI left the neckline open while I constructed the collar. First I made the collar stand. The measurement for which was the neck measurement (plus ease) by 5 inches (I think!)

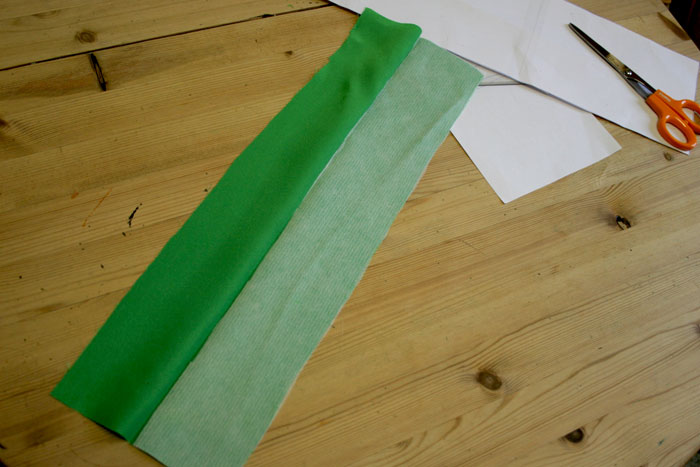
I folded it in half, lengthwise and applied fusible interfacing to one side.

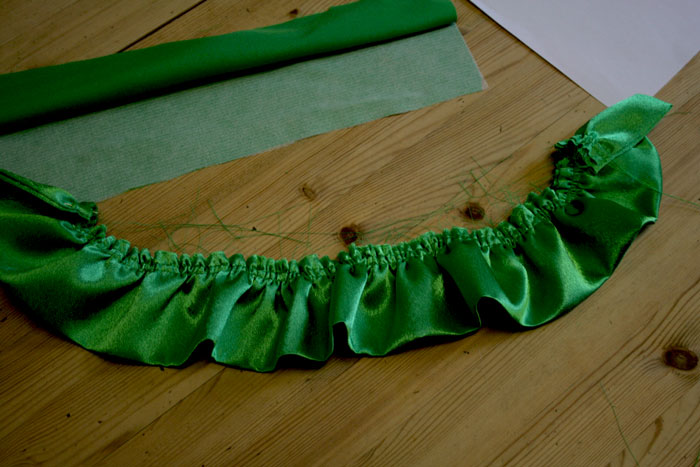
interface collar standTo make the ruffle, I cut a strip the same width only twice as long, folded, pressed and seamed the short ends, right sides facing. I gathered the raw edges to the same length as the collar stand.

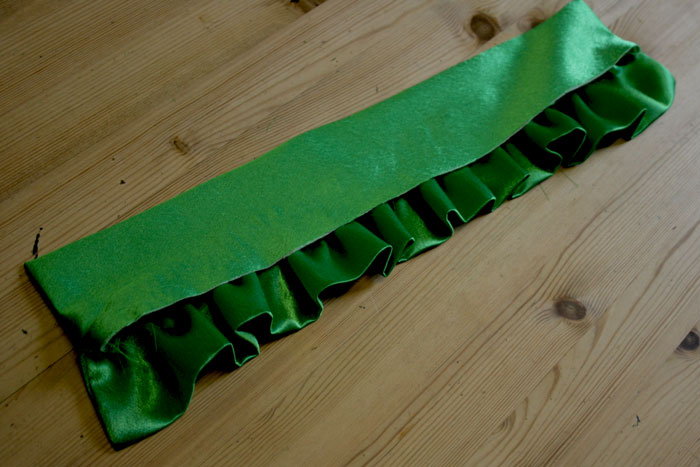
ruffleI don’t have pics for the next stage but hopefully it will make sense. I sewed the short ends of the collar stand together and turned right side out. Matching raw edges, I pinned the ruffle to one side of the collar stand, right sides together, careful not to catch the underside.

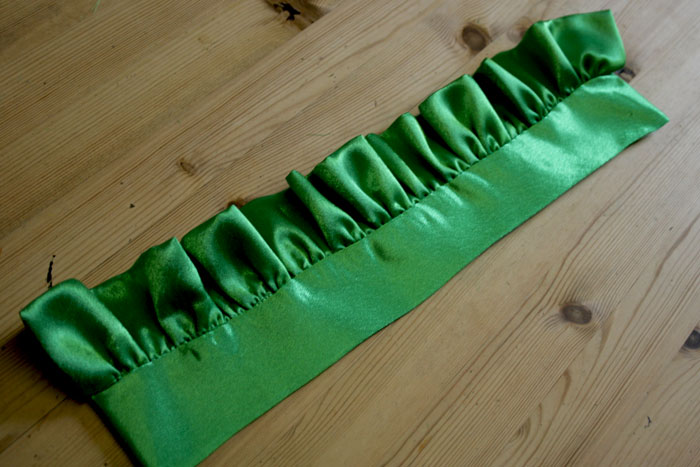
collar ruffleI turned the ruffle up, hiding the raw edges inside and gave it a press to keep it in place. I then folded in the seam allowance from the remaining side and topstitched in place.

finished collarAgain I am missing a few pics, but to finish off I sewed the base of the collar stand (the folded edge), right sides facing, to the neckline of the self side of the cape. I then folded and pressed in the seam allowance on the lining and top stitched to the other side of the collar, very close to the edge.

poison ivy cape

Buttons and ribbons were then sewn in place.

Hope this gives you some insight. So sorry for the missing pics. I will be more diligent with my tutes next time!

This is indeed a very fun and quick make… but I would advise a woven fabric just for sanity’s sake!

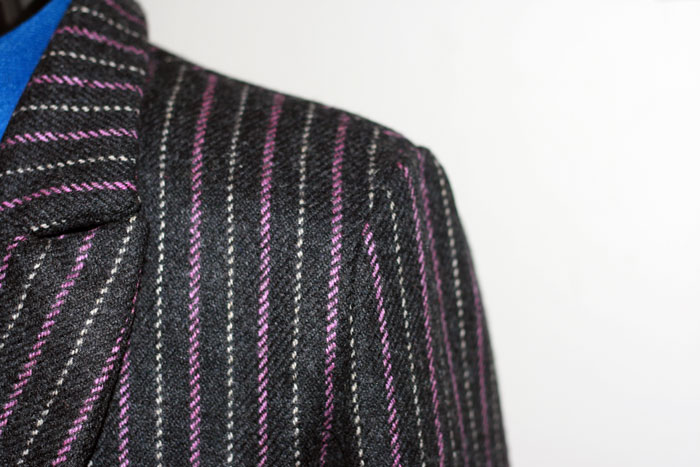
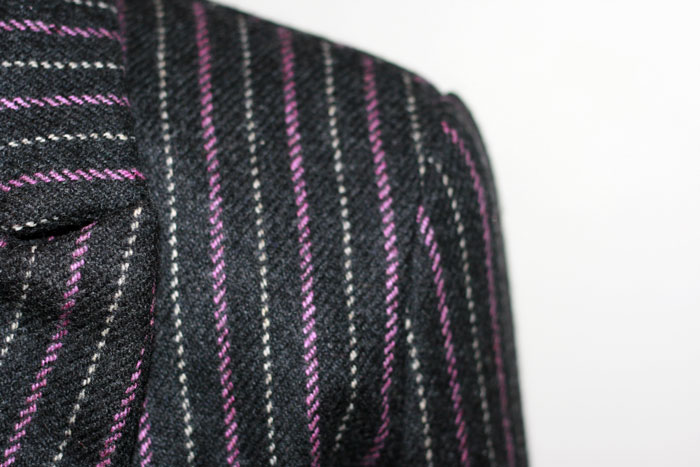
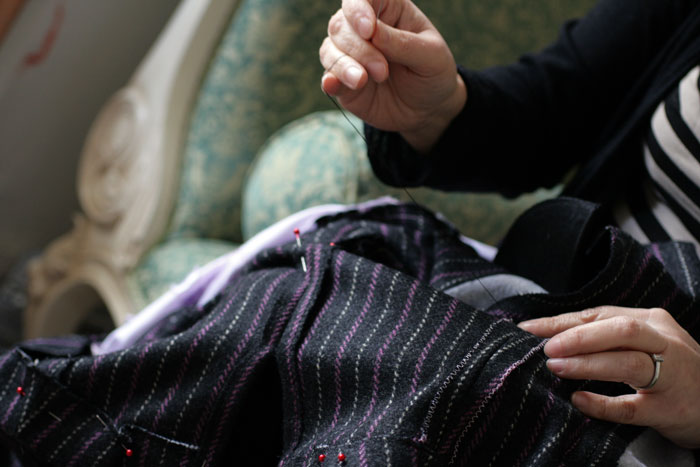
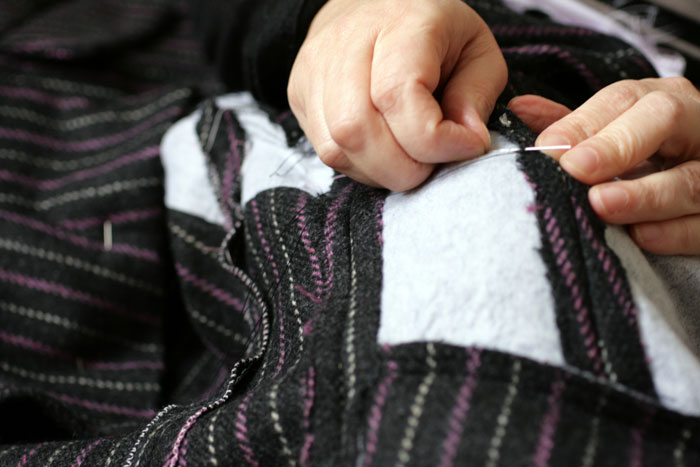
Pinstripe Spencer Jacket: the inside story

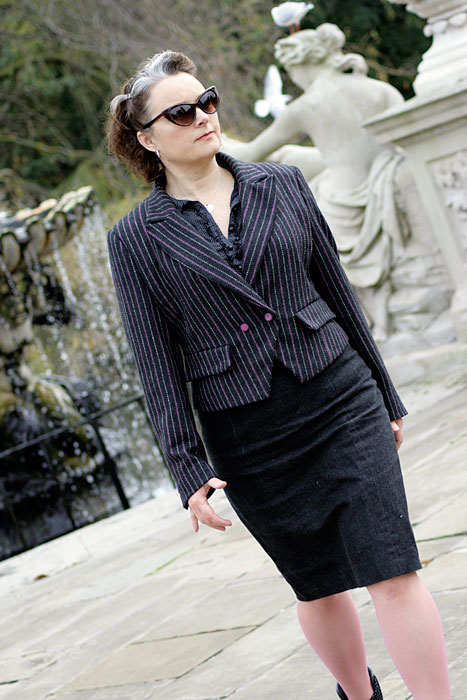
finished jacket by the fountains

First I must thank you all for your lovely comments on my initial post about the finished jacket. I’m so touched and I love that warm and fuzzy feeling I get when they find their way into my mailbox!

So as promised, here is some nitty gritty detail from the project for those that might be considering this jacket for the first time.

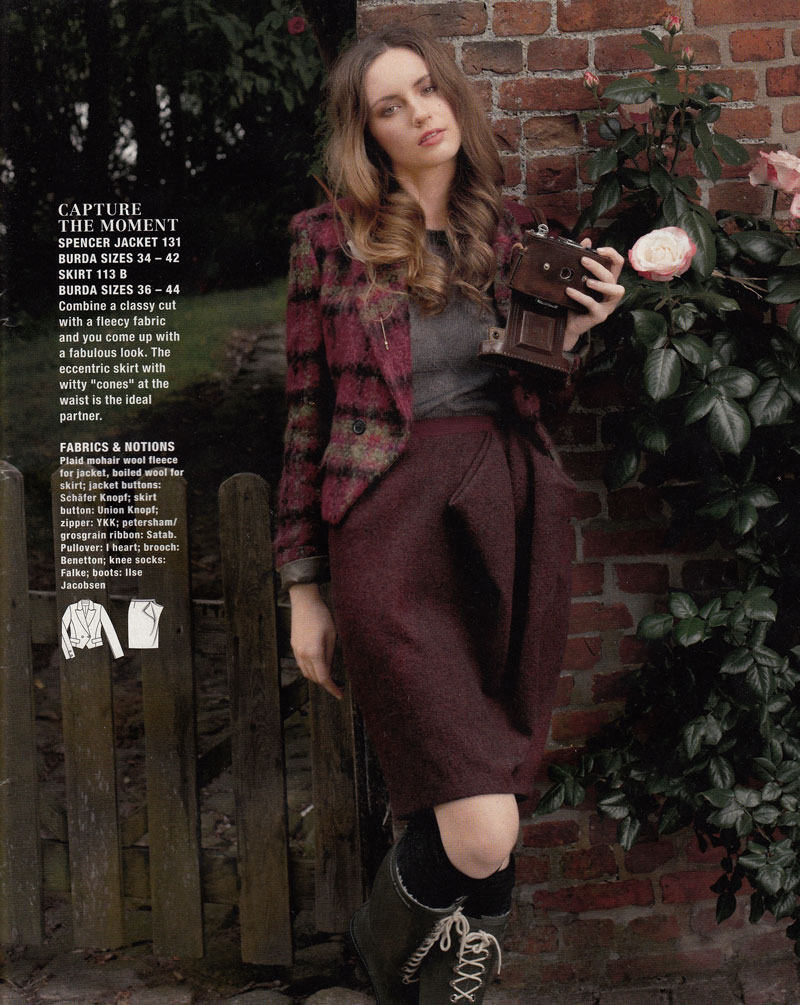
Burda jacket #131 11/2012

Though I am pleased overall, with the results. I can’t help being niggled that more tailoring techniques weren’t employed. I’ve only myself to blame. I could have researched them myself but there’s always a next time!

The jacket is cut from pieces #131, Burda Style magazine 11/2010 but the construction details are from #130. The only difference being that I chose the full length sleeves with vents… and proper working buttonholes… glutton for punishment, me!

I made the toile back in February and was intending to make adjustments to the waist only. But I got worried about it’s ‘snugness’ and just went up a size in the end. A little bit chicken perhaps, but also concerned that I was more likely to be wearing a few layers underneath in the colder months!

It is essential that you make a toile. There is so much work involved in this, you don’t want to get to the end to find it doesn’t fit!!!

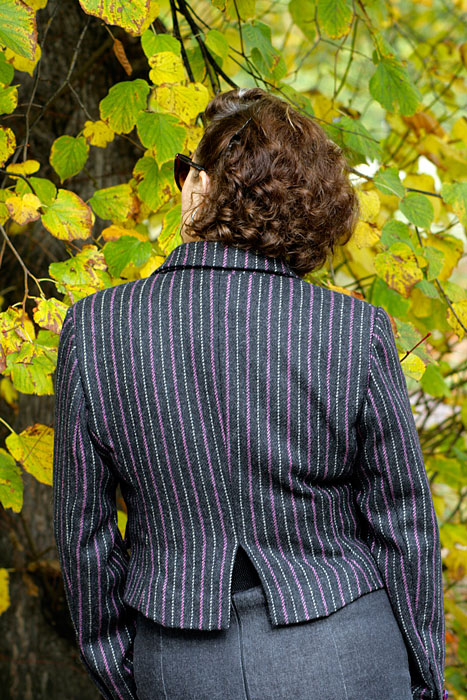
My first slip up, that I DIDN’T clock until I got round to dealing with it, was the back vent. I am so used to adding the statutory 15mm seam allowance to each edge that I clean forgot to add 4cm as specified, to the vent openings. Doh. I could kick myself. It doesn’t look so bad in the photos but I know that it isn’t created properly. It is intended as a ‘split’ but would have been so much neater with an interfaced proper allowance. So please remember to do this if and when you cut yours! I would even go as far as to make it a vent rather than a split. But that opens another can of worms with the lining!

back split that really wants to be a vent!

The miniature pattern layouts indicate what pieces are to be interfaced with fusible interfacing. I did toy with the idea of sewing traditional interfacing. I liked the idea of employing some traditional skills but I agreed with myself that I was embarking on a big enough journey and that the fusible stuff would be just as good for what I was trying to achieve.

And so the interfaced pieces included: centre front; side front; outer collar stand; under collar; back facing; outer pocket flap; neck and armhole edge of centre back.

The main construction of the body came together very easily. Darts seams and pressing.

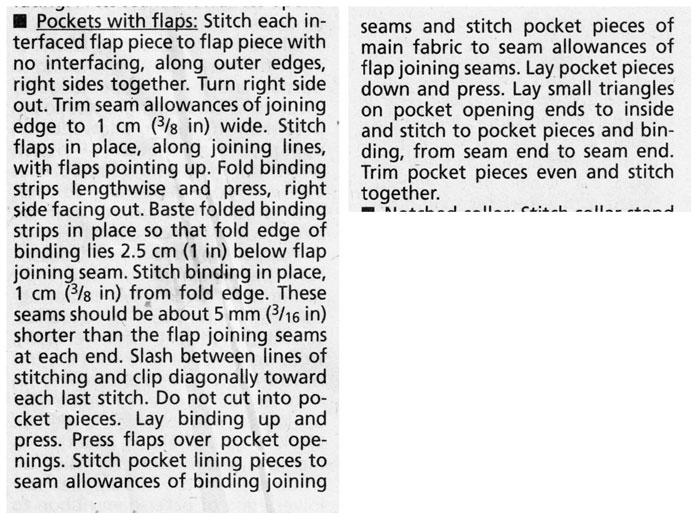
But then came my reality check. Welt pockets with flaps. Needless to say I practiced these before the real thing. You can see how I got on with this here. Well worth checking out YouTube or the Burda site for instructions. I challenge anyone to get the gist of welt pockets from the following instructions!! Or it could be just me!!

pocket instructions

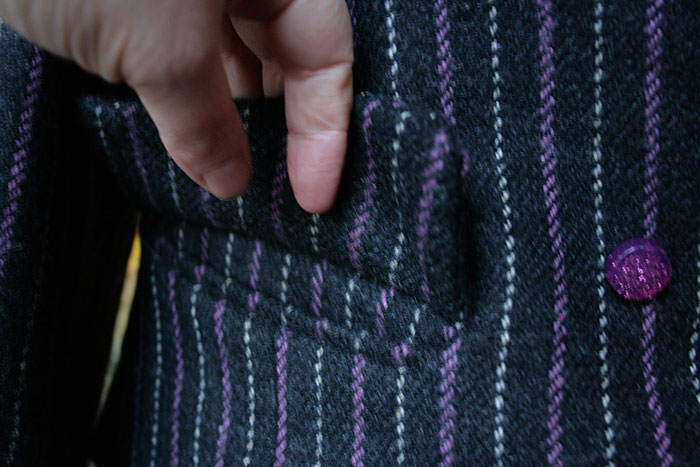
I am over the moon at how they turned out in the finished fabric. I don’t intend to put anything in the pockets, for goodness sakes, don’t want to misshapen them! But I am so proud when I slip my hand inside. Feels so special! And no one gets to see that lovely welt under the flap, except moi! Though I have pointed it out to a few of my friends who smile loyally with raised eyebrows!

welt pocket
welt pocket

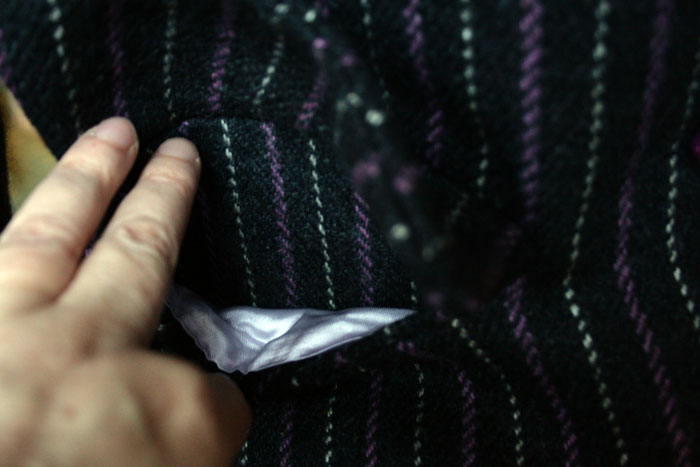
pocket lining
peek at the pocket lining

Next up was the notched collar. This was actually not as scary as I was anticipating. I did pin and I did baste before stitching and it all worked out just fine. The stitches sank invisibly into the wool when I machined the seam so I didn’t want to risk having to unpick at any point! Neat trimming and clipping is essential and it is also important to take care when you ‘push out your points’ Very easy to push a pointed implement through the point of the lapel, (especially if you are using soft wool) and ruin everything. It’s worth being slow and patient with this part because it is such a lovely sharp feature. You’ll be really chuffed when it comes together at this point.

pointy lapel
pointy lapel and notched collar

There was a suggestion to sew the pointed lapels to the underside of the collar to keep them in place but I didn’t really feel this was necessary for the weight of the fabric I used. I like being able to turn up the collar when its chilly!

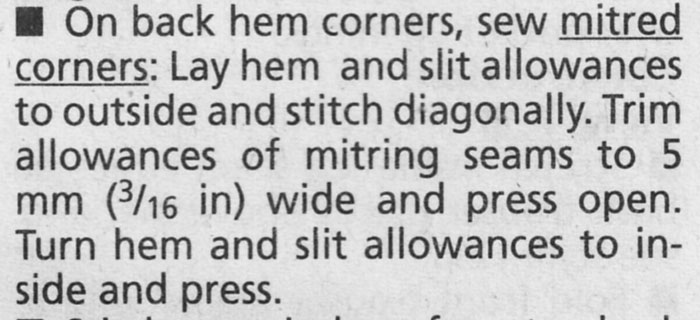
Now shall we talk mitred corners? I’m so glad these were included. It makes so much sense and makes such neat corners. Nothing else will ever do from now on! Of course it goes without saying that you won’t survive with these instructions, especially if this is your first time…!

mitred corner instructions

… so I went with these instead!

[youtube http://www.youtube.com/watch?v=rdOSLpZ37kU]

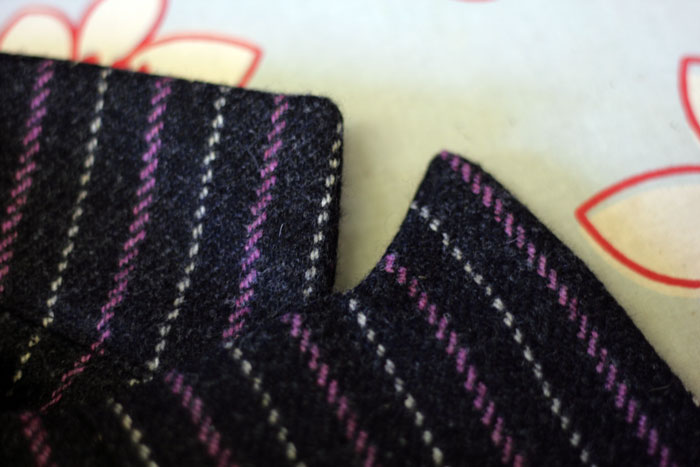
I mitred the sleeve vents and the back vent in the same way. Though I had created a bit of a monster on the back vent by forgetting the extra allowance. Please don’t forget this!!!

back vent mitred corners
not enough SA on the vent but check out those mitred corners baby!

When I came to set in the sleeves I realised I had clean forgot a couple of notches. You will never work out how to inset those sleeves if you forget the notches, I can tell you. Mostly because I tried… and failed… 3 times!!! Till I relented and placed the pattern pieces over the made up sleeves and marked them.

Once I’d put the shoulder pads in, I tried it on and grinned from ear to ear. I was definitely on the home straight! But one niggling factor was that I didn’t like how the sleeve just ‘hung limp’ off the shoulder. I had heard mention of sleeve headings before but obviously never had to take full notice. So I found this little tute in my book Readers Digest: New Complete Guide to Sewing. This book has been so useful and really didn’t let me down this time.

Make a sleeve heading:

Cut 2 pieces of 3 x 5 in (7.3 x 12.5 cm) pieces of lamb’s wool, flannel, or polyester fleece. I had some leftover cotton flannel from my son’s pyjamas. Probably not as weighty or as poofy as lamb’s wool but it was better than nothing!

sleeve cap pieces
sleeve cap pieces

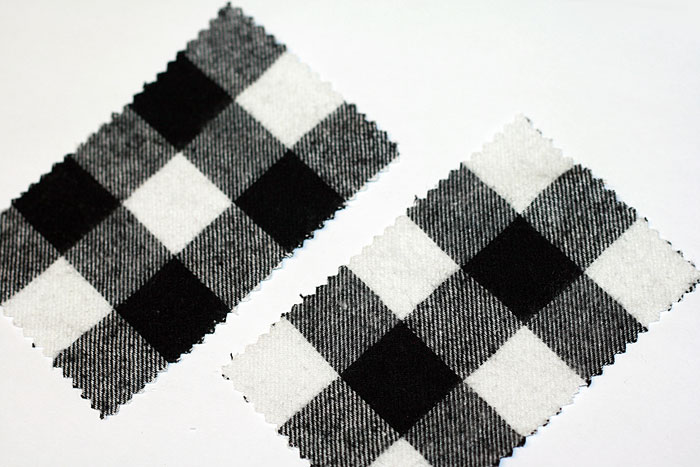
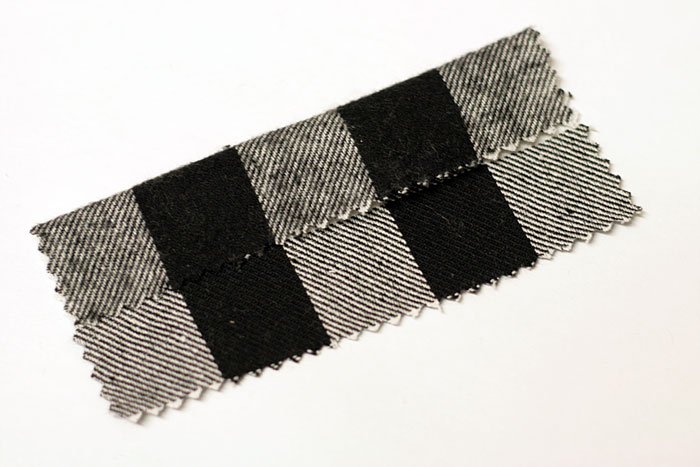
Make a 1 in (2.5 cm) fold on long side of each piece. How lucky is this. My fabric had 1 in square pattern!

sleeve cap fold
sleeve cap fold

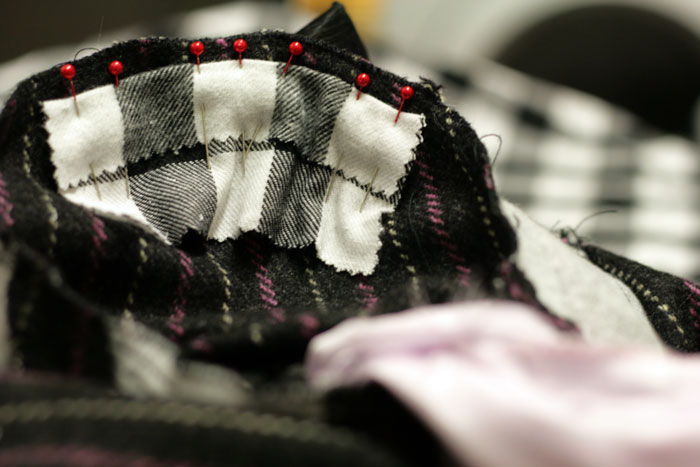
Centre and pin heading to wrong side of sleeve cap with fold against seamline, wider half of heading against sleeve.

sleeve cap pinned in position

Whipstitch fold of sleeve heading to sleeve seamline. Heading now supports and rounds out sleeve cap.

without sleeve cap
without sleeve cap

The difference is subtle but is hugely important for my self satisfaction!

with sleeve cap
with sleeve cap

Before I lined the jacket I neatened and pressed all the seams. I did wonder if you have to neaten the raw edges, after all they wont show but I was worried about it fraying inside with wear and if it might eventually have a knock on effect to the seams coming apart. Probably over worrying but better to be safe than sorry was my own conclusion. But here presented my next concern. As much as I pressed this gorgeous wool, the seams would not lie perfectly flat throughout and I knew that would affect the overall shape and create a lumpy lining. And who would want lumpy lining?!

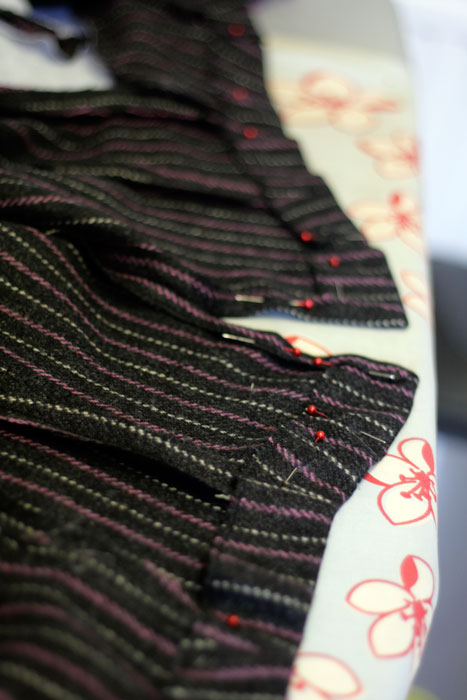
So I decided to stitch the seams down, like a good tailor lady. But hey! Guess what little tailoring trick was missing. NO UNDERLINING!!! Not that I have ever had to underline anything to date. But I have heard about it. I have wondered why you would want to but now it was blindingly obvious. My fabric was sturdy enough to live without it but how much easier would it have been to sew the seams down flat onto an underlining. I will definitely underline next time I make a jacket and I wholly advise you to do this even if you think your fabric is sturdy enough. It makes sense you know!! Fortunately my fabric was quite thick with a forgiving texture!

stitching seams down sans underlining

I found it was much easier to do, over my knee, whilst watching The Paradise! And also safer to stitch onto the interfaced pieces.

stitching seams down on interfaced sections

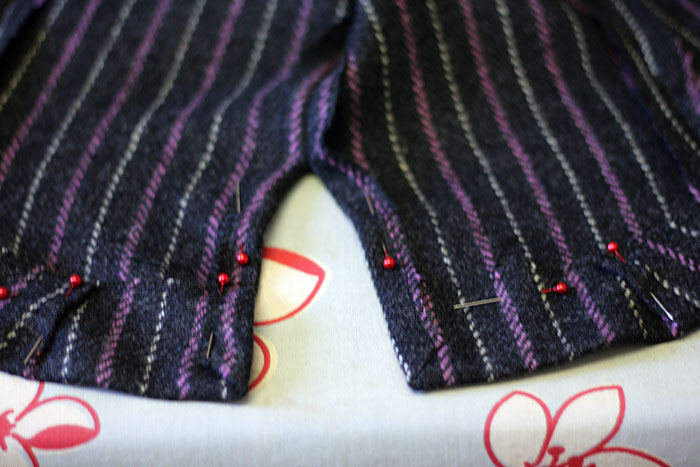
Hemming was easy with this fabric but be aware that a curvy hemline is naturally created with all those shaped pieces. To take in that excess fabric I just made a couple of tucks either side of the vent, symetrically positioned so that the finished shape was uniform. You’ll notice here that there is no evidence of interfacing. After I hemmed I remembered I was supposed to interface the hems. So I dutifully unpicked all that hand stitching, cut some strips of fusible interfacing, fused it on and re-hemmed. BUT do remember to interface the hem sections of your pieces from the start and NOT at this stage. You know it makes sense 😉

wavy hemline
wavy hemline

So then came the lining. I had pondered a silk lining but the lilac poly satin I found was so lush I looked no further. So long as you remember your ‘ease pleat’ in the centre back, you can’t go far wrong. I can’t give to much advice about this stage because I kind of winged it!!! But what I did remember to do was to push the lining up to the hemline of the outer fabric and roll it down over itself to create more ease and allow for shrinkage. Not that poly lining shrinks but I think its general practice! I did the same on the sleeves. I’m not sure I lined the vents on the sleeves properly but it works… of a fashion!

The buttons were a lucky find, though I was gutted I couldn’t find smaller coconut shell buttons. The two pictured here were way to big even for the front! So sparkly resin shank buttons it was. Lucky to find them in 2 different sizes at Shepherds Bush market. 20p each… a snip!

raspberry buttons
I WILL find a perfect use for those coconut shell buttons!

I created the buttonholes on the machine. Holding my breath as I did so. You know how it is. There’s always a chance of a wayward buttonhole! But next time I would love to try bound buttonholes. Karen did such a beautiful job with hers and I bet it feels far more special to button up with bound ones!

Well here ends my waffly post of niggles. I hope to have been of some help and not too much of a waffling bore!

Have a wonderful weekend all…. wrap up warm!! x

Vintage western shirt #2… the flowery kind

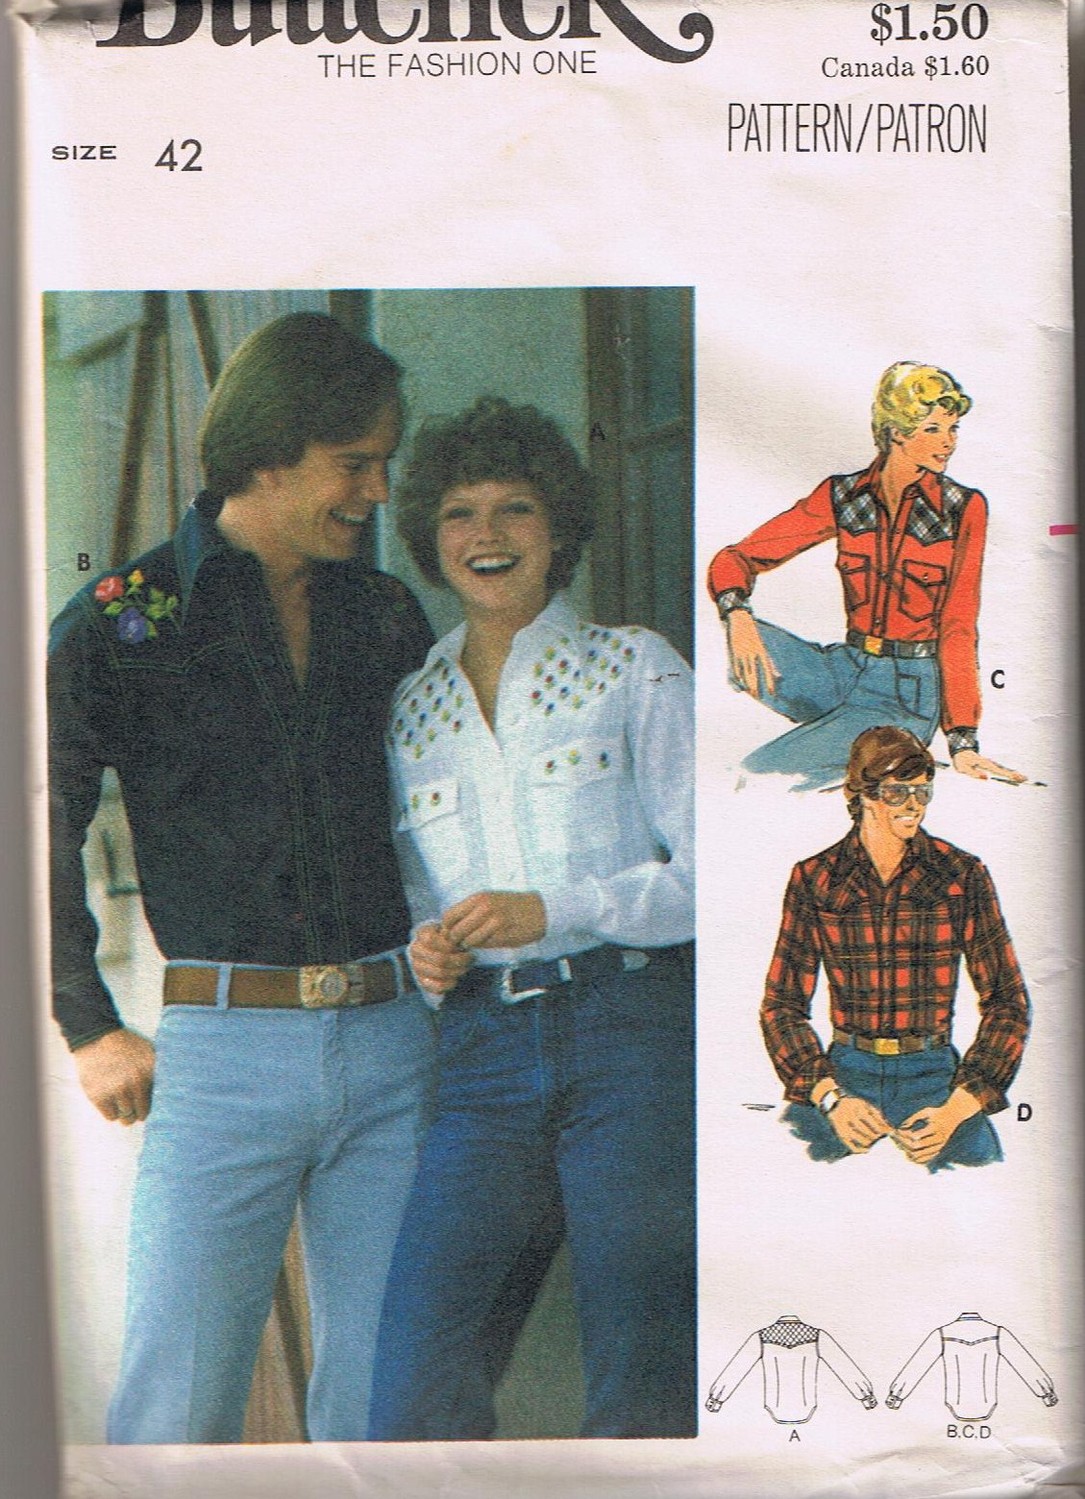
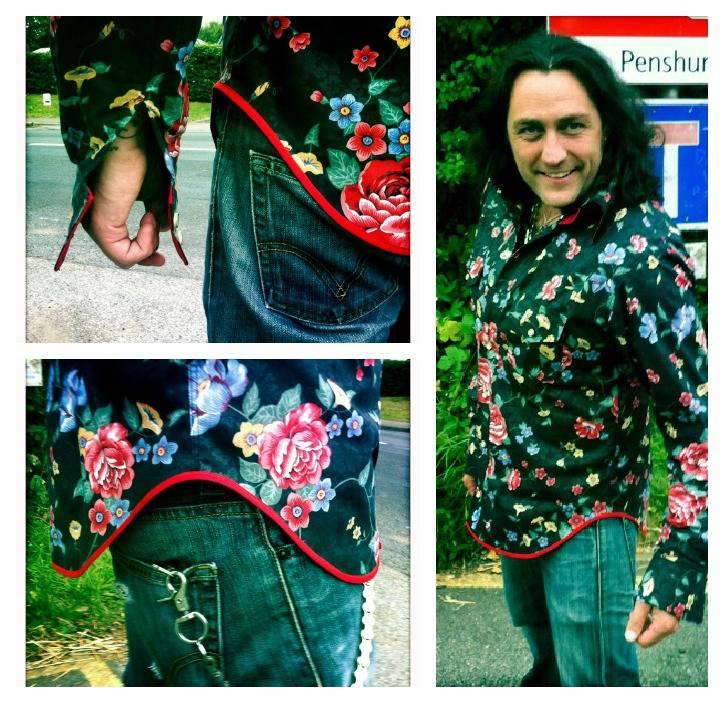
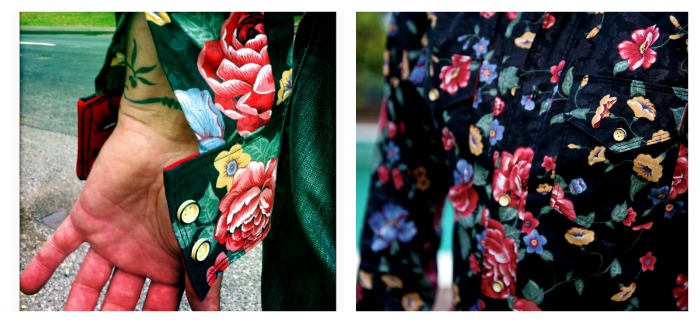
Flowery vintage western shirtAs promised, here is the finished shirt. It is a revisit to the same shirt I made for Mr Ooobop! almost a year ago. On first inspection I thought it must be 70s, given the flappy collars and slim fit. But one reader clocked the hairstyles on the pattern envelope and said it was probably more 1980s. Either way, its another vintage make that has been a valuable learning curve and keeps the old chap happy at the same time… double whammy!

Butterick 5007

I made some brave adjustments to the pattern this time. (Well, brave for me, that is!) Namely to the chest, shoulders and sleeve length. Of course there is a knock on effect for each change, given the many different pieces to this pattern, so I had to keep on my toes!

I have said it before, and I am very conscious of blowing Mr. Ooobop’s trumpet, but he is very good at knowing what fabric suits and especially good at choosing buttons. Check these out…

yellow buttons with black outline

They are little chunky white buttons with a yellow fill and a black outline. They are indeed a trifle camouflaged here but I can’t imagine any other button being better on this shirt. I have mastered buttonholes, which is a good thing seeing as there were 13 of the damned things to make, but I did get a bit over confident and had to unpick two of them because they weren’t perfectly centred in the placket. I really don’t want to be doing that on a regular basis. Took as much time to unpick 2 buttonholes as it did to sew 13 of them AND hand sew on all of the buttons!

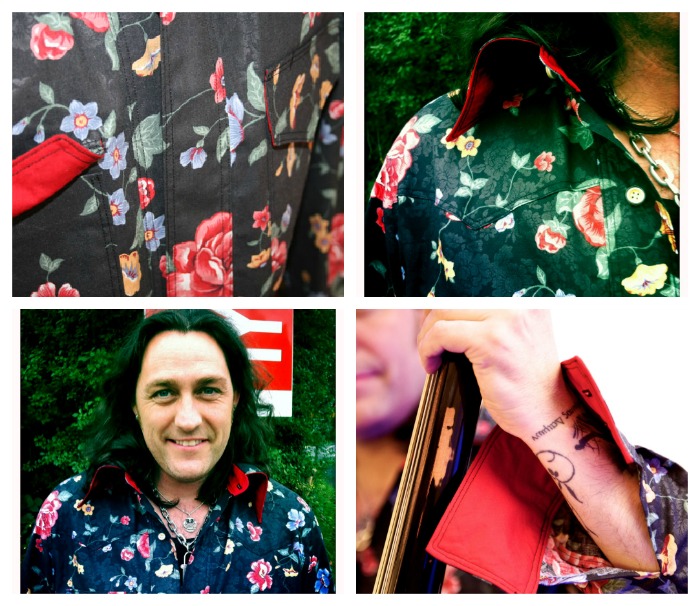
I couldn’t resist adding a couple of new features to this one. I underlined the collar, the collar stand and the under flaps of the pockets in a plain red cotton…

collar cuffs and pockets with red contrast lining… and I added some bias trim to the curved shirt hem. Mostly because Mr. Ooobop! wanted to preserve the length. It was an obvious solution but I think it makes for a lovely finish too, highlighting the shirt-tails!

bound hem

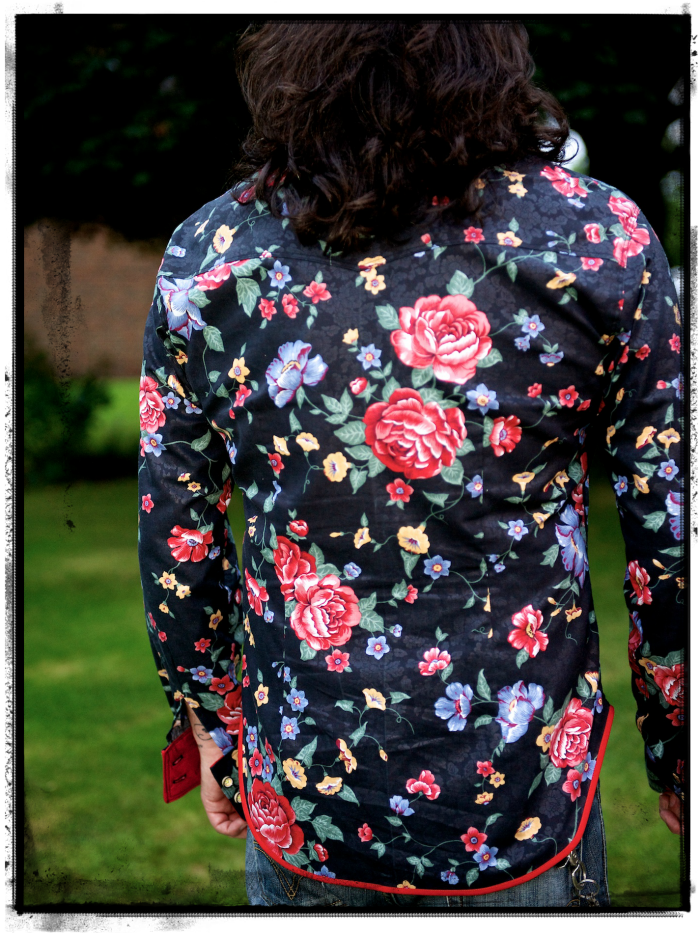
I am really happy with the fit on this one.

vintage western shirt back

Mr Oobop! got a fair few comments when he turned up at his last gig.

Mr Ooobop playing double bass

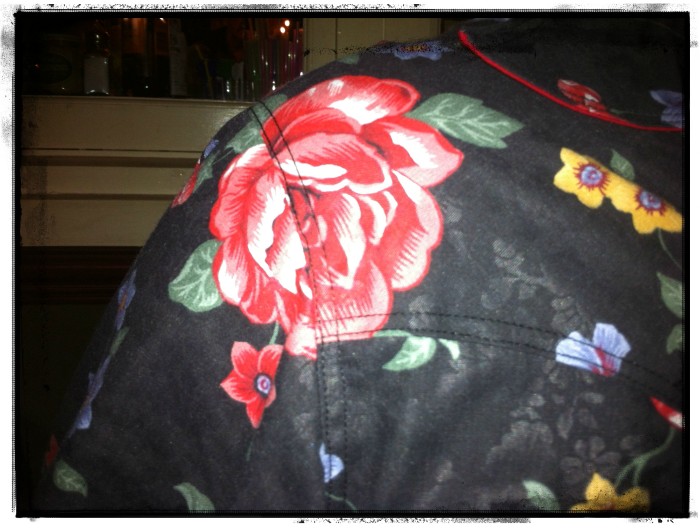
The finishing on this shirt – all the topstitching and flat felled seams –  was the time consuming bit. but imagine how long it took me to match that rose on the shoulder?! (wink, wink, nudge, nudge 😉 )

matching up the pattern on the shoulderSpecial thanks to George, Tom and Cat of The Redfords for the fabulous photography.

Drafting a skirt block made clearer

self drafted skirt front view

Why on earth would I want to go to the bother of drafting a skirt block when I already posess a pattern collection of monster proportions? Good question.

Well apart from the fact that I am the world’s greatest procrastinator, it’s mostly because I plainly just don’t like not knowing about stuff! Well, that plus the fact that I wanted to create a perfectly fitted skirt! I have managed it once or twice before, by adjusting patterns, but only by the power of ‘flook’ and not by any knowledgable means.

Making a fitted skirt pattern is something I have been wanting to do for such a long time. I looked into taking a course but was really shocked by the prices. I guess I set my hopes high starting with the London College of Fashion!  Getting a course to fit in nicely with work and children is a bit tricky too. So I set out on a mission to self-teach! It has taken me a long time to get my head round it (the old grey matter aint what it used to be!)… and get round to actually doing it.

The truth is, I am quite impatient and the idea of some mountainous mathematical process leading up to the joyful part of sewing wasn’t very enticing to say the least. But if I am ever to realise some of these far fetched designs I carry round in my head then I have to start learning to draft a properly fitted skirt block at the very least!

To be honest. Now that I have sussed it, it seems remarkably easy!

The hardest part of this process was being totally honest about my own body measurements! I’m forever thinking I’m smaller than I am or believing that if I make anything at least a half a size smaller I will loose some pounds to fit into it properly! But I had to be true to myself this time if I was going to go to the effort of making something to properly fit.
The following instructions have been compiled from various sources and put together here in a fashion that is clearer to me. I can’t claim this as the best way forward for everyone. So if you are going to use these instructions and make a skirt from the pattern, please make a toile first! I needed, in any case to document the instructions as a note to self because even after my first attempt, I forgot some of the process! This method really did work for me and it would make me such a happy bunny if they work for you too, so be sure to let me know!

All measurements are in inches (sorry). I use millimetres in all that I do at work but I can’t break away from imperial measurements for sewing and cooking!

Drafting the basic skirt block

First make a note of your measurements.
It is easier if someone does it for you. Less chance of cheating!
Make sure the tape measure is comfortable and not tight.

You will need 3 measurements:

  • Waist
  • Hip
  • Length

and the following materials:

  • A large piece of paper, that is just over half of your hip measurement by just over how long you want your skirt to be. (Tape pieces together if necessary)
  • A long ruler
  • A pencil
  • A right angled triangle/set square.

NB: this pattern allows for 1 inch of ease which can be altered to suit.

(Click on the images to enlarge)

STEP 1:

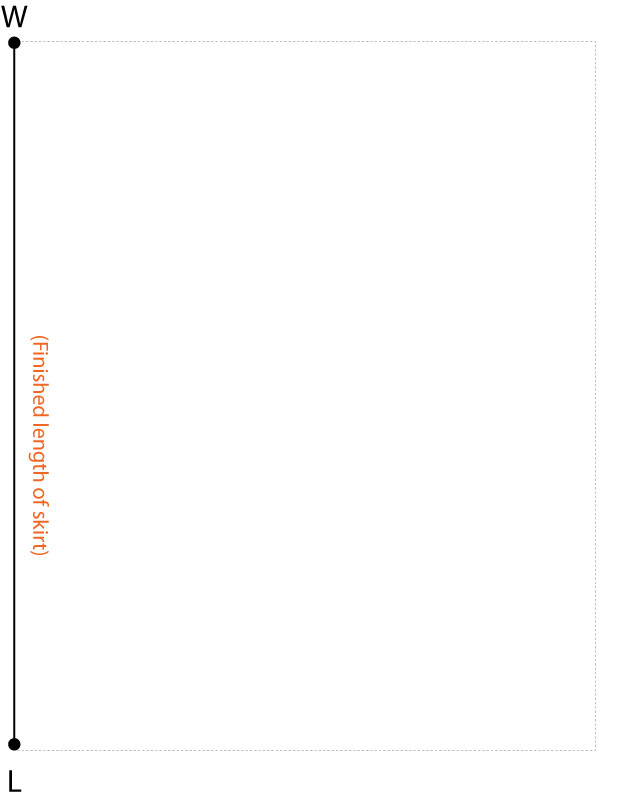
On the left hand side, draw a vertical line the length you would like your skirt to be.
Mark the top point as W. (W to L = length of skirt)

drafting a skirt block step 1

STEP 2:

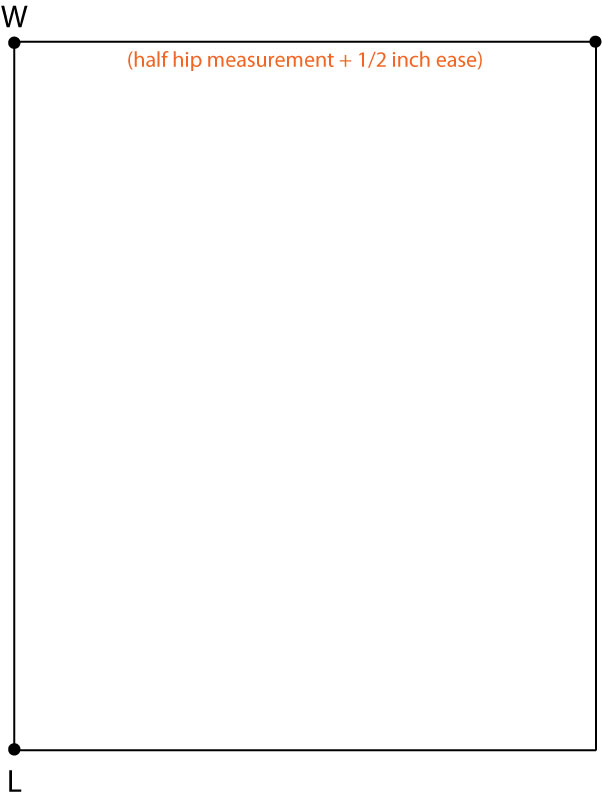
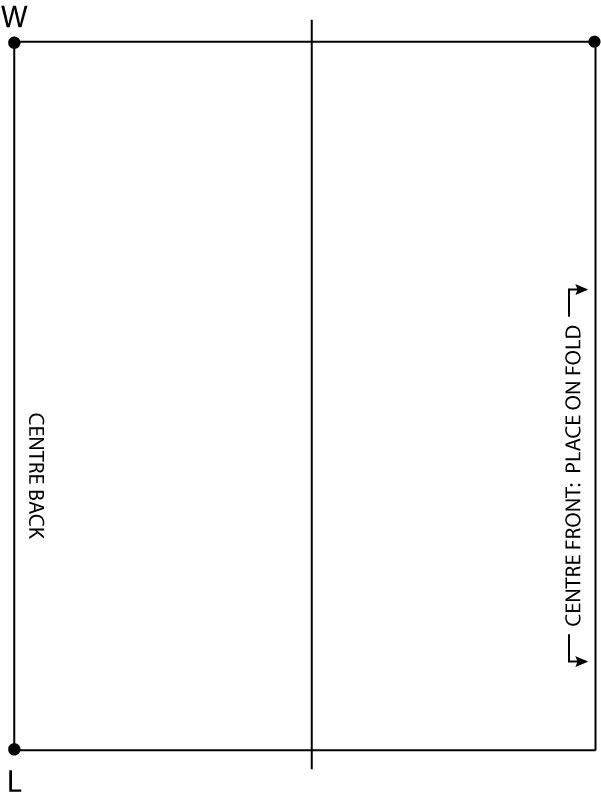
Draw a line at right angles to point W, to the length of half your hip measurement + 1/2 inch ease.
Complete the rectangle.

drafting a skirt block step 2

STEP 3:

Draw a vertical line between the two outside edges, at a distance that measures 1/4 hip measurement plus 1/2 inch ease, from the centre back seam. This will separate the front from the back pieces.
Mark the left vertical line as centre back and the right vertical line as centre front. Draw arrows on centre front to remind you to position centre front on fold.

skirt block step 3

STEP 4:

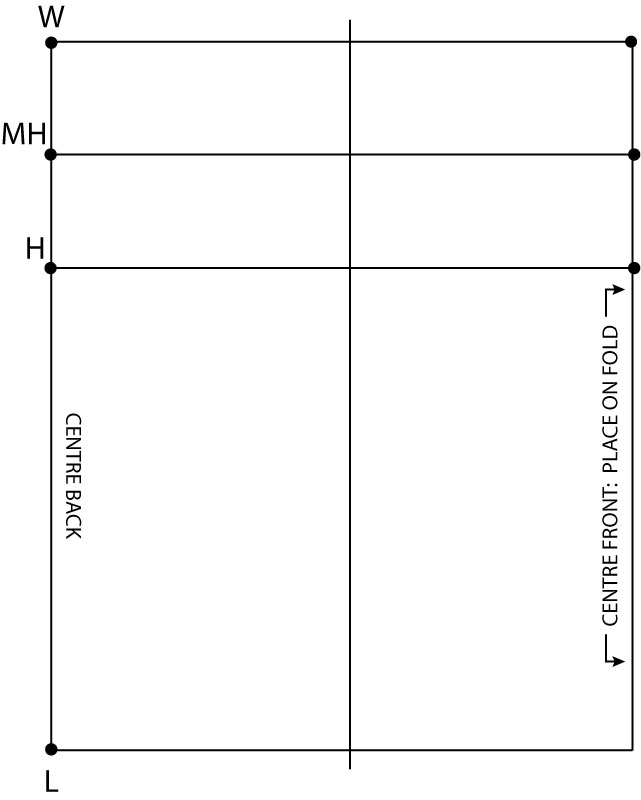
Measure 8 inches down from the W point. Mark this new point with H. Draw in the horizontal Hip Line.
Measure half way between the Waist Line and the Hip Line and draw a line across. This is the Middle Hip Line. Mark it MH.

drafting a skirt pattern step 4

STEP 5:

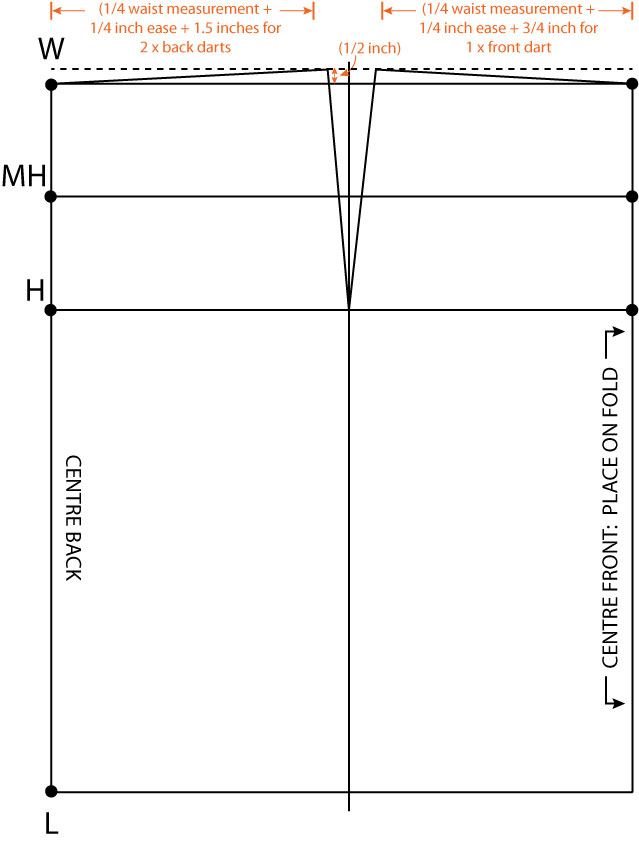
Draw a line from point W that rises to half an inch above the Waist Line.

Measure across from point W, diagonally up to the new guide line, the distance of 1/4 waist measurement + 1/4 inch ease + 1.5 inches for 2 back darts. From that end point, draw a line down to the point where the Hip Line meets the centreline. This creates the hip curve and a shape to the waist.

Repeat the process for the front pattern piece to create the hip curve for the front side. The diagonal waist line for the front piece will be 1/4 waist measurement + 1/4 inch ease + 3/4 inch for 1 front dart.

You can use a french curve or freehand to give a smoother curve at the end.

make a skirt pattern step 5

STEP 6:

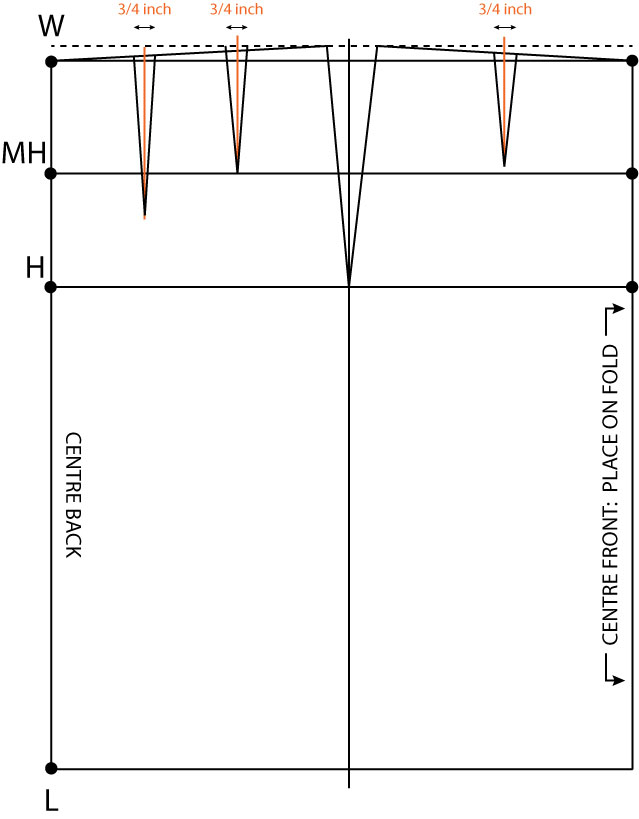
To create the front dart: find the centre point of the wast line on the front piece and draw a vertical line, from the Waist Line to just before the Middle Hip Line. This is the central fold of your 3/4 inch wide dart. Draw in the dart as shown below.

To create the back darts: draw 2 vertical lines equidistant across the Waist Line. The dart nearest the centre back line extends to an inch and a quarter down past the Middle Hip Line. The other back dart, nearest the side seam, extends just to the Middle Hip Line. Draw in the two darts, each 3/4 inch wide at the top, as shown in the diagram below.

NB: please note that although these darts appear to be standard measurements, you may very well have to alter them to suit your own body shape. Making a toile will highlight if this is necessary for you or not.

adding darts to skirt pattern step 6

Et voila! The tricksy bit is done!

All that remains is to smooth those curves, cut the front and back pieces apart and add seam allowance. You should be familiar with this process if you regularly use Burda Style patterns from the magazine! 5/8 inch is usual. A good hem allowance is between 1.5 and 2 inches.

Remember not to add seam allowance to the centre front, but do add it to the centre back.

To create the facing, I traced from the Middle Hip Line up to the Waist Line on both pieces, cut out and folded the paper on the dart lines to create the curve at the waist. But you could alternatively make a waist band, whereby a facing piece is not necessary.

I do hope this is of help and that I didn’t make it too confusing. Do shout if I’ve missed anything or if there is anything you don’t understand.

First skirt from the self-drafted pattern

self drafted skirt side view

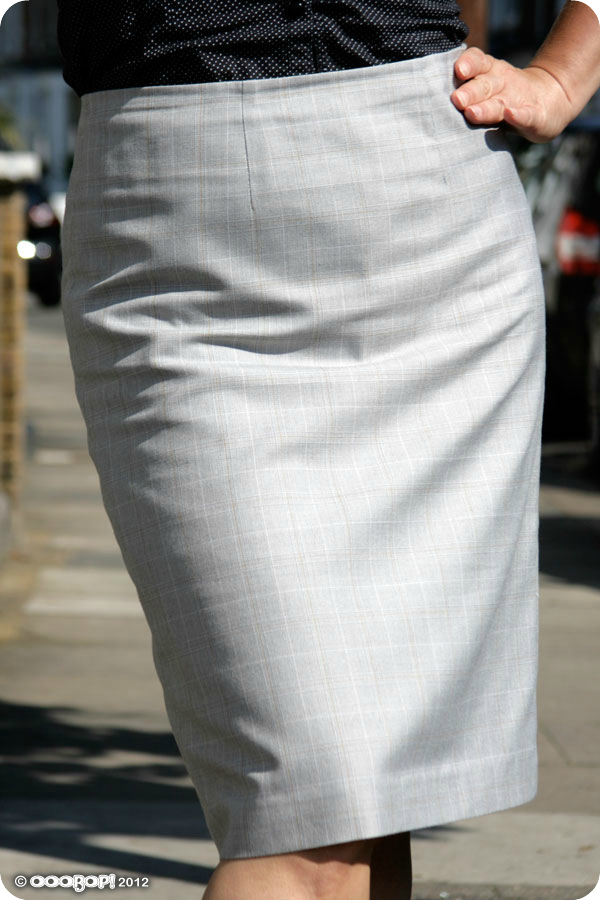
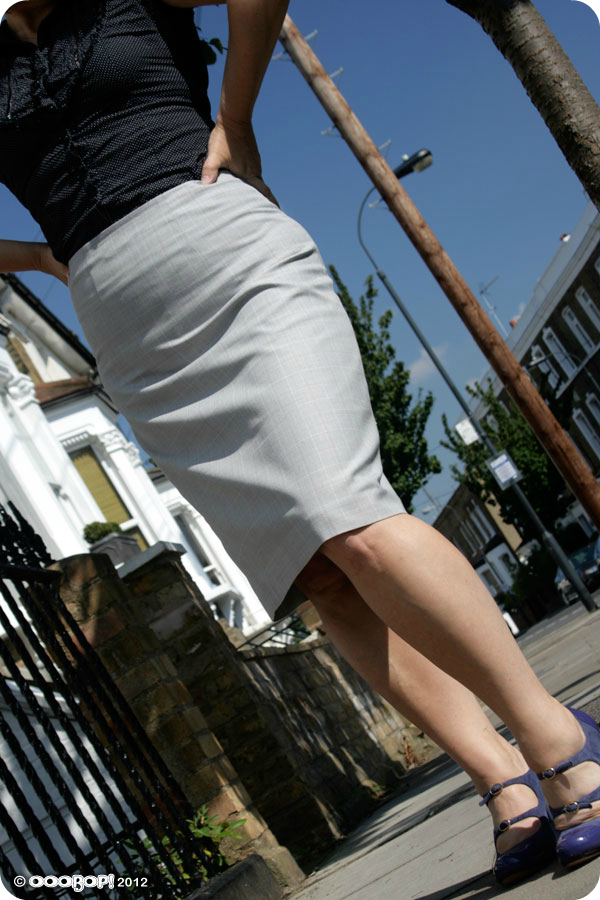
Probably the most boring skirt I have ever made, re. choice of fabric, lack of features… not even a walking slit, standard length etc. BUT, by the same token, probably the biggest learning curve so far!

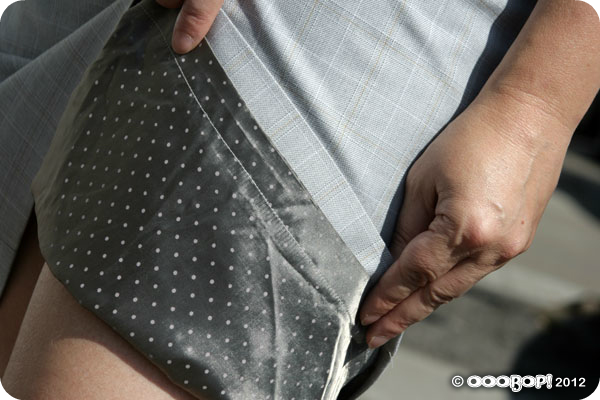
This is a very wearable toile. I’m so glad I did this. Pencil skirts are a great go-to for work. Especially in neutral colours. This is a very lightweight, cheap suiting fabric and I never thought it would be wearable but with the addition of a lining it gained a bit more structure. To create the lining pieces, I cut the same skirt pieces from below the line of the facing and added a couple of inches across the width of front and back for ease, which was incorporated as a pleat along the top seam line. Incidentally the two-tone polka dot lining is far more interesting than the self fabric! I found 3 metres of it in a Charity shop recently for £1!

polka dot lining

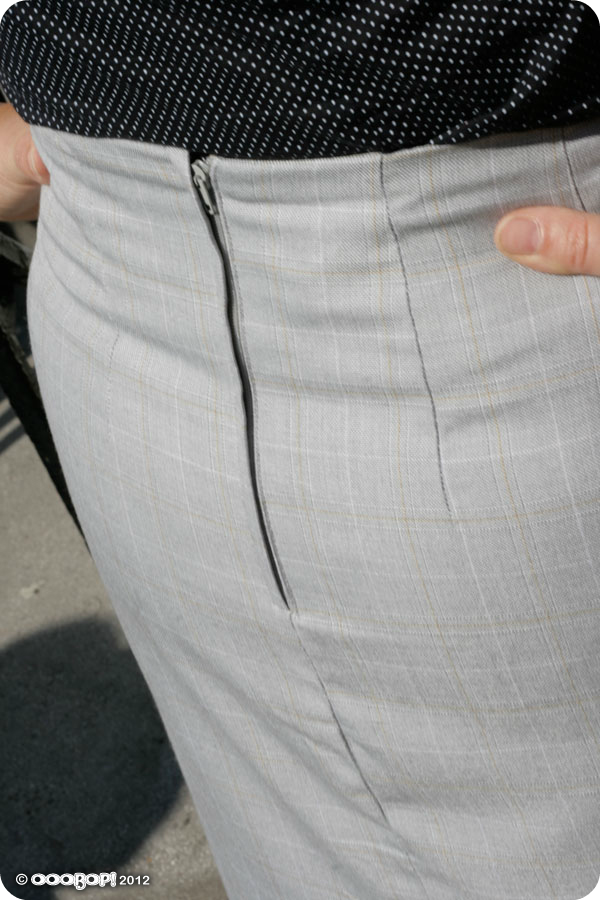
I inserted a lapped zipper but I still need a little practice in that department! One great tip I picked up along the way, however was to take the loose thread from the baseline stitching of the zip, thread a needle and take the thread to the inside of the garment. You can then either knot the ends together with the bobbin thread or, in the case where the bobbin thread is too short ( I have an automatic cutter and this often happens) you can just do a couple of reinforcement stitches and snip. It  all helps to create a flawless finish on the outside.

lapped zipper

I love the idea that I am on my way to making custom fitted garments. Im sure it will be a very rewarding journey.

I am going to experiment a bit more with variations on this block before I steam into the creation of a bodice block. I like the idea of changing the darts to princess seams, perhaps with piped seams, making it more of a wiggle skirt with a vent, and making a high-waisted version too. Oh hours in the day… where art thou?!

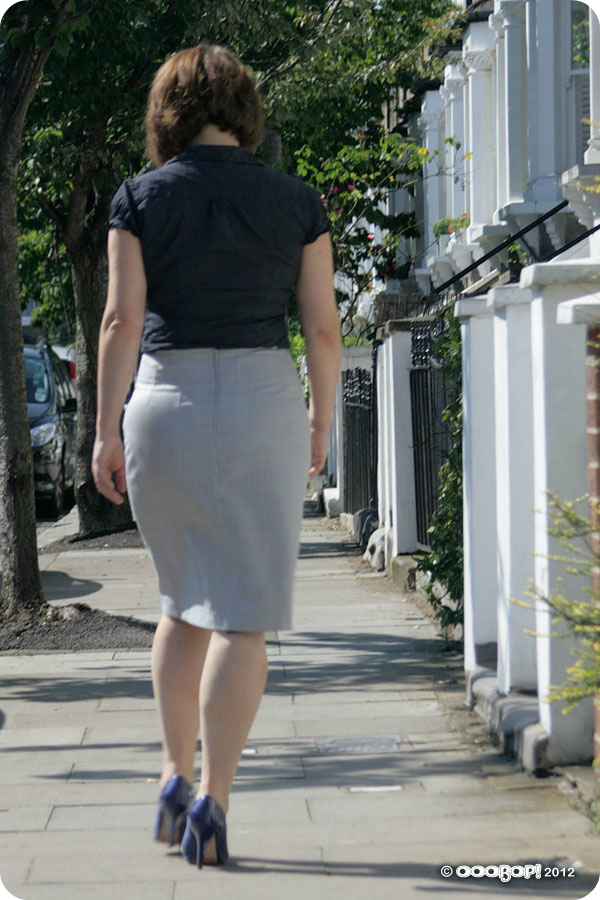
back of skirt