Drafting a skirt block made clearer

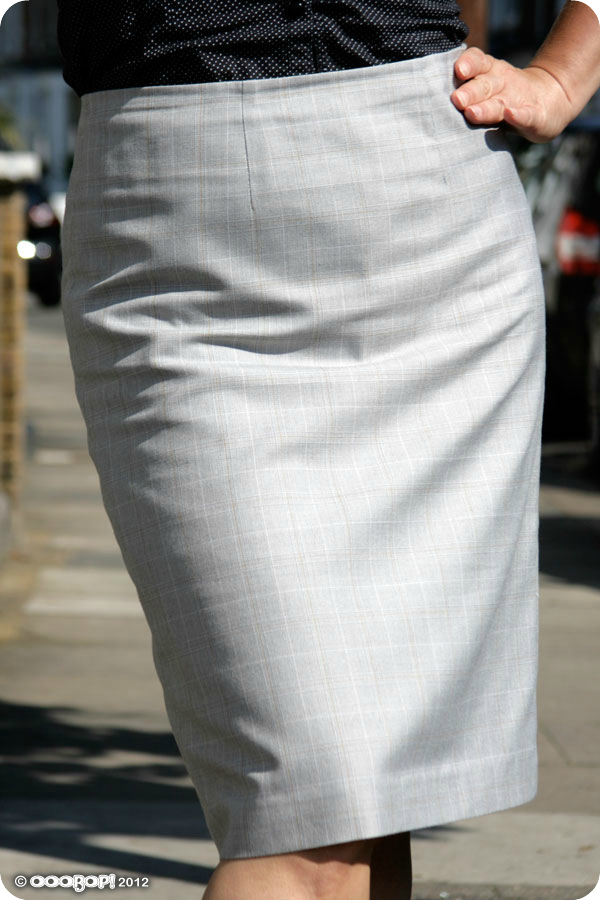
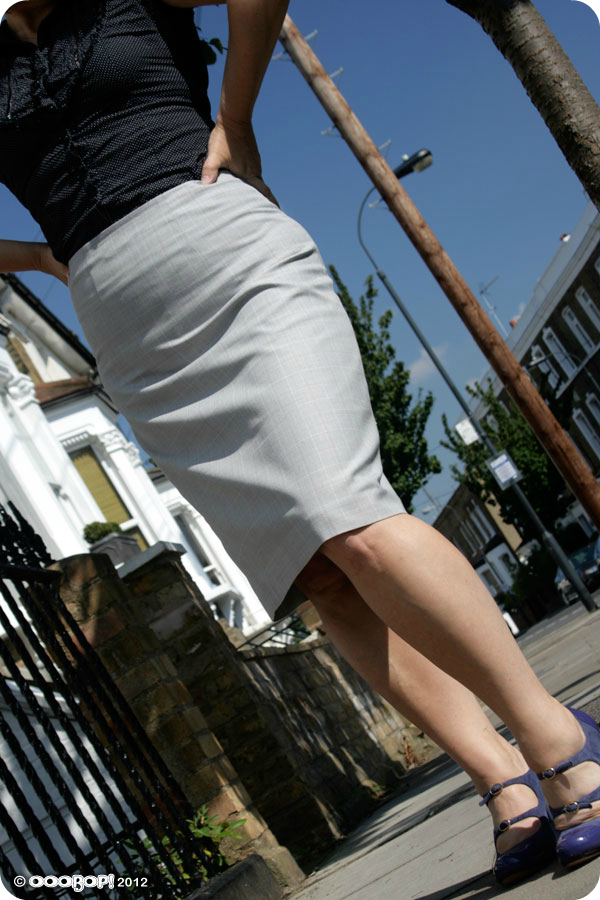
self drafted skirt front view

Why on earth would I want to go to the bother of drafting a skirt block when I already posess a pattern collection of monster proportions? Good question.

Well apart from the fact that I am the world’s greatest procrastinator, it’s mostly because I plainly just don’t like not knowing about stuff! Well, that plus the fact that I wanted to create a perfectly fitted skirt! I have managed it once or twice before, by adjusting patterns, but only by the power of ‘flook’ and not by any knowledgable means.

Making a fitted skirt pattern is something I have been wanting to do for such a long time. I looked into taking a course but was really shocked by the prices. I guess I set my hopes high starting with the London College of Fashion!  Getting a course to fit in nicely with work and children is a bit tricky too. So I set out on a mission to self-teach! It has taken me a long time to get my head round it (the old grey matter aint what it used to be!)… and get round to actually doing it.

The truth is, I am quite impatient and the idea of some mountainous mathematical process leading up to the joyful part of sewing wasn’t very enticing to say the least. But if I am ever to realise some of these far fetched designs I carry round in my head then I have to start learning to draft a properly fitted skirt block at the very least!

To be honest. Now that I have sussed it, it seems remarkably easy!

The hardest part of this process was being totally honest about my own body measurements! I’m forever thinking I’m smaller than I am or believing that if I make anything at least a half a size smaller I will loose some pounds to fit into it properly! But I had to be true to myself this time if I was going to go to the effort of making something to properly fit.

The following instructions have been compiled from various sources and put together here in a fashion that is clearer to me. I can’t claim this as the best way forward for everyone. So if you are going to use these instructions and make a skirt from the pattern, please make a toile first! I needed, in any case to document the instructions as a note to self because even after my first attempt, I forgot some of the process! This method really did work for me and it would make me such a happy bunny if they work for you too, so be sure to let me know!

All measurements are in inches (sorry). I use millimetres in all that I do at work but I can’t break away from imperial measurements for sewing and cooking!

Drafting the basic skirt block

First make a note of your measurements.
It is easier if someone does it for you. Less chance of cheating!
Make sure the tape measure is comfortable and not tight.

You will need 3 measurements:

  • Waist
  • Hip
  • Length

and the following materials:

  • A large piece of paper, that is just over half of your hip measurement by just over how long you want your skirt to be. (Tape pieces together if necessary)
  • A long ruler
  • A pencil
  • A right angled triangle/set square.

NB: this pattern allows for 1 inch of ease which can be altered to suit.

(Click on the images to enlarge)

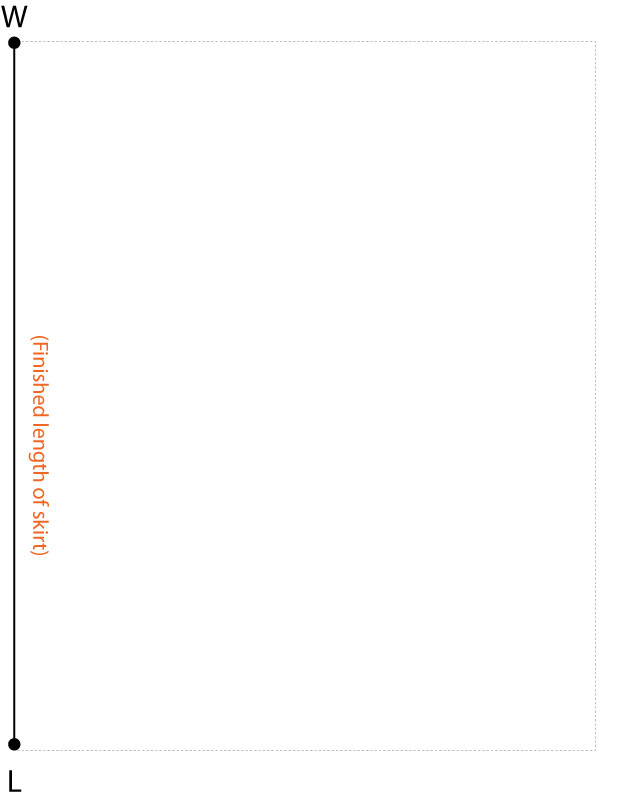
STEP 1:

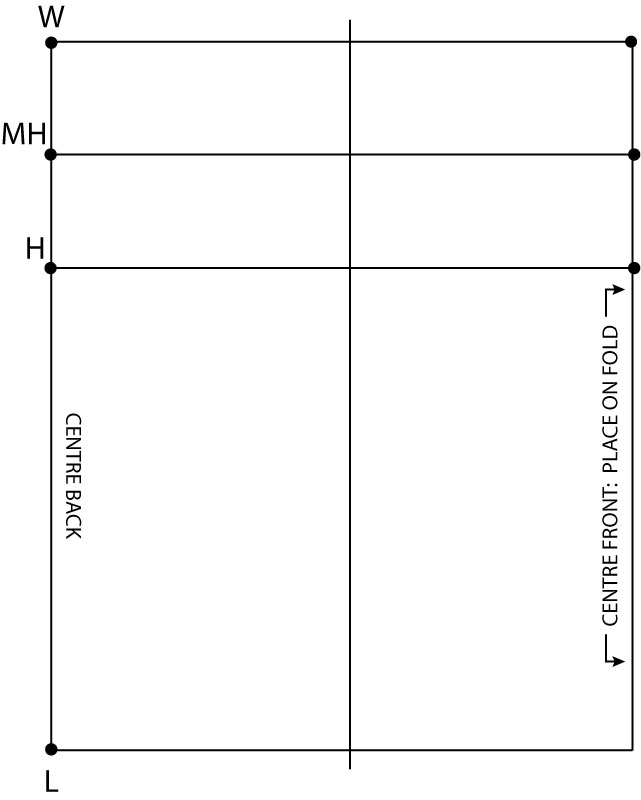
On the left hand side, draw a vertical line the length you would like your skirt to be.
Mark the top point as W. (W to L = length of skirt)

drafting a skirt block step 1

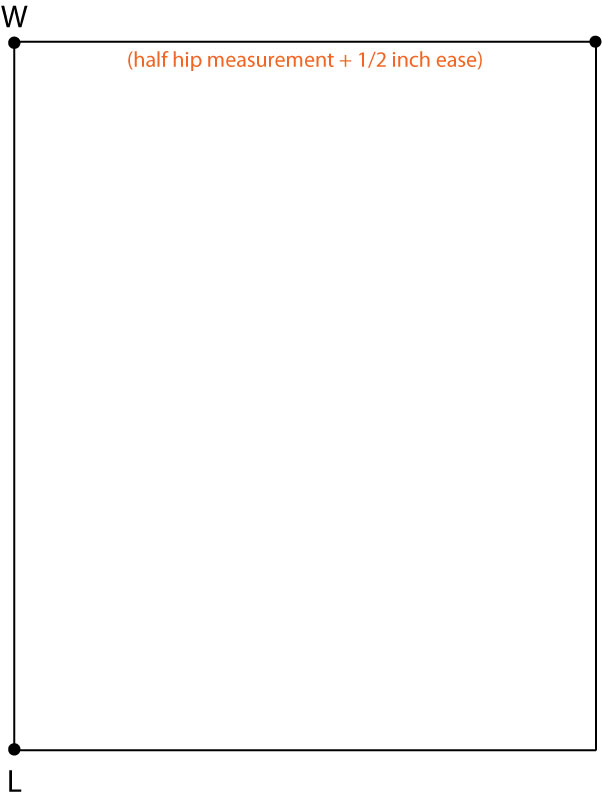
STEP 2:

Draw a line at right angles to point W, to the length of half your hip measurement + 1/2 inch ease.
Complete the rectangle.

drafting a skirt block step 2

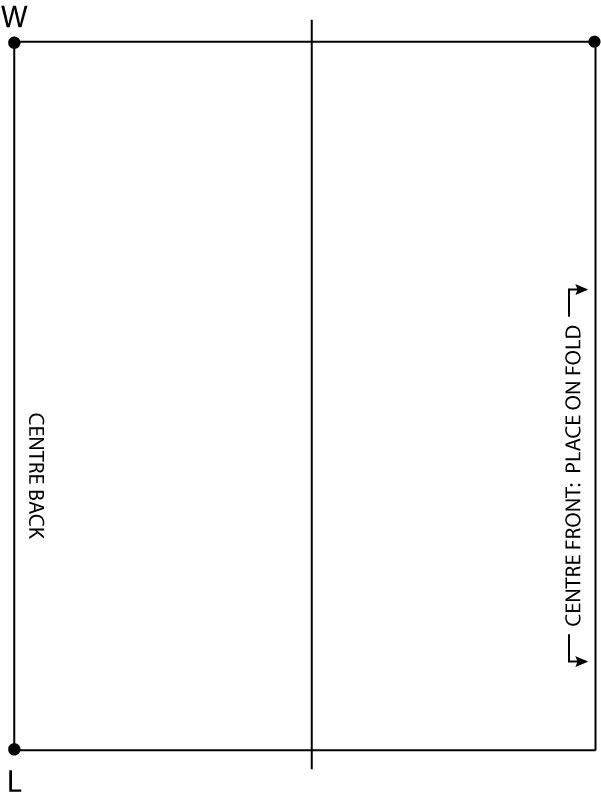
STEP 3:

Draw a vertical line between the two outside edges, at a distance that measures 1/4 hip measurement plus 1/2 inch ease, from the centre back seam. This will separate the front from the back pieces.
Mark the left vertical line as centre back and the right vertical line as centre front. Draw arrows on centre front to remind you to position centre front on fold.

skirt block step 3

STEP 4:

Measure 8 inches down from the W point. Mark this new point with H. Draw in the horizontal Hip Line.
Measure half way between the Waist Line and the Hip Line and draw a line across. This is the Middle Hip Line. Mark it MH.

drafting a skirt pattern step 4

STEP 5:

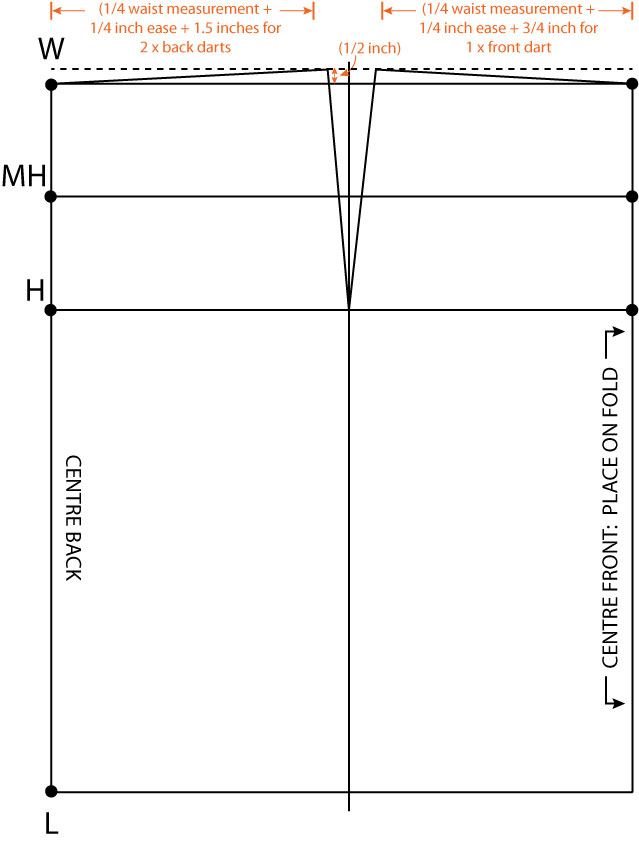
Draw a line from point W that rises to half an inch above the Waist Line.

Measure across from point W, diagonally up to the new guide line, the distance of 1/4 waist measurement + 1/4 inch ease + 1.5 inches for 2 back darts. From that end point, draw a line down to the point where the Hip Line meets the centreline. This creates the hip curve and a shape to the waist.

Repeat the process for the front pattern piece to create the hip curve for the front side. The diagonal waist line for the front piece will be 1/4 waist measurement + 1/4 inch ease + 3/4 inch for 1 front dart.

You can use a french curve or freehand to give a smoother curve at the end.

make a skirt pattern step 5

STEP 6:

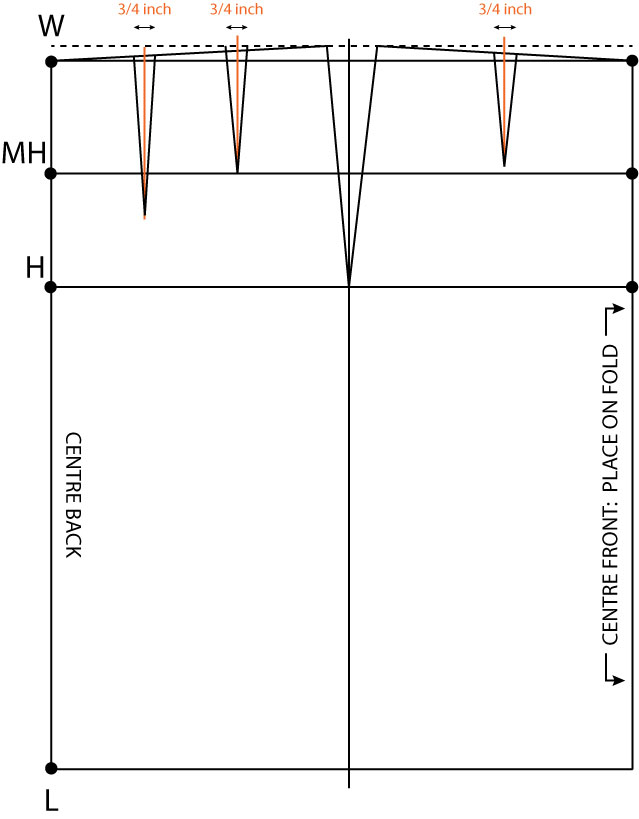
To create the front dart: find the centre point of the wast line on the front piece and draw a vertical line, from the Waist Line to just before the Middle Hip Line. This is the central fold of your 3/4 inch wide dart. Draw in the dart as shown below.

To create the back darts: draw 2 vertical lines equidistant across the Waist Line. The dart nearest the centre back line extends to an inch and a quarter down past the Middle Hip Line. The other back dart, nearest the side seam, extends just to the Middle Hip Line. Draw in the two darts, each 3/4 inch wide at the top, as shown in the diagram below.

NB: please note that although these darts appear to be standard measurements, you may very well have to alter them to suit your own body shape. Making a toile will highlight if this is necessary for you or not.

adding darts to skirt pattern step 6

Et voila! The tricksy bit is done!

All that remains is to smooth those curves, cut the front and back pieces apart and add seam allowance. You should be familiar with this process if you regularly use Burda Style patterns from the magazine! 5/8 inch is usual. A good hem allowance is between 1.5 and 2 inches.

Remember not to add seam allowance to the centre front, but do add it to the centre back.

To create the facing, I traced from the Middle Hip Line up to the Waist Line on both pieces, cut out and folded the paper on the dart lines to create the curve at the waist. But you could alternatively make a waist band, whereby a facing piece is not necessary.

I do hope this is of help and that I didn’t make it too confusing. Do shout if I’ve missed anything or if there is anything you don’t understand.

First skirt from the self-drafted pattern

self drafted skirt side view

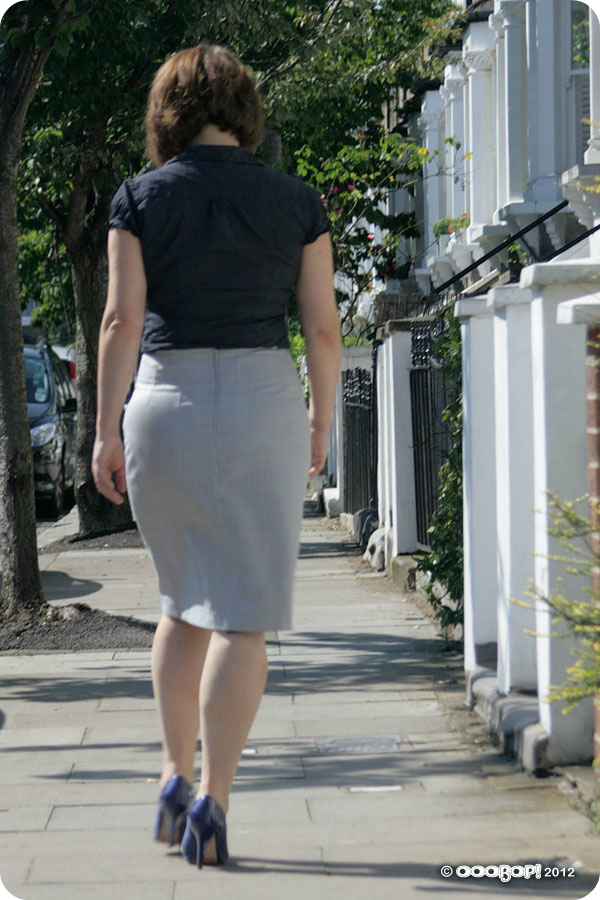
Probably the most boring skirt I have ever made, re. choice of fabric, lack of features… not even a walking slit, standard length etc. BUT, by the same token, probably the biggest learning curve so far!

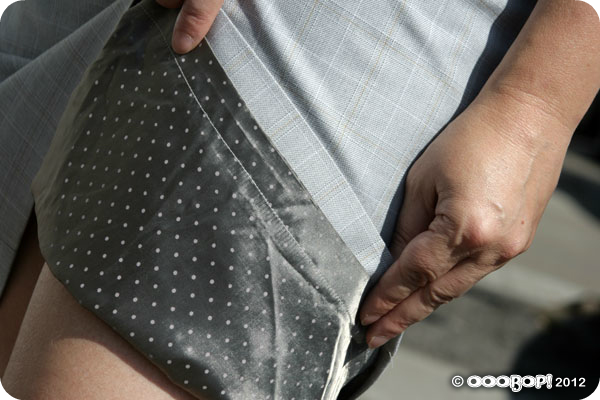
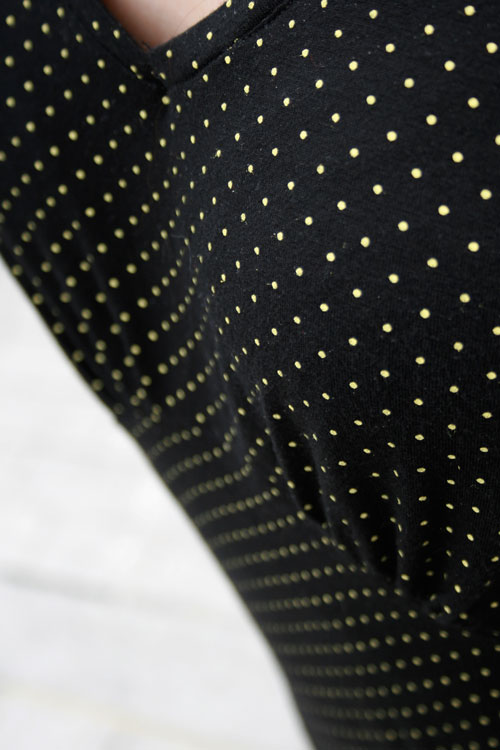
This is a very wearable toile. I’m so glad I did this. Pencil skirts are a great go-to for work. Especially in neutral colours. This is a very lightweight, cheap suiting fabric and I never thought it would be wearable but with the addition of a lining it gained a bit more structure. To create the lining pieces, I cut the same skirt pieces from below the line of the facing and added a couple of inches across the width of front and back for ease, which was incorporated as a pleat along the top seam line. Incidentally the two-tone polka dot lining is far more interesting than the self fabric! I found 3 metres of it in a Charity shop recently for £1!

polka dot lining

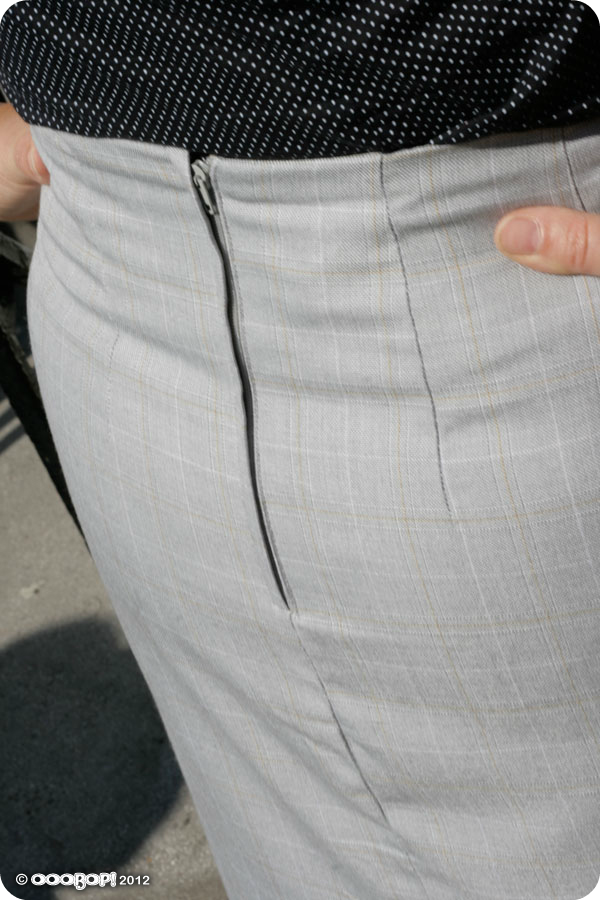
I inserted a lapped zipper but I still need a little practice in that department! One great tip I picked up along the way, however was to take the loose thread from the baseline stitching of the zip, thread a needle and take the thread to the inside of the garment. You can then either knot the ends together with the bobbin thread or, in the case where the bobbin thread is too short ( I have an automatic cutter and this often happens) you can just do a couple of reinforcement stitches and snip. It  all helps to create a flawless finish on the outside.

lapped zipper

I love the idea that I am on my way to making custom fitted garments. Im sure it will be a very rewarding journey.

I am going to experiment a bit more with variations on this block before I steam into the creation of a bodice block. I like the idea of changing the darts to princess seams, perhaps with piped seams, making it more of a wiggle skirt with a vent, and making a high-waisted version too. Oh hours in the day… where art thou?!

back of skirt

Vintage patterns on Ebay… but not for the faint-hearted.

Mostly I am not very good at bidding on Ebay. Which is a good thing because I could very easily spend a fortune on vintage patterns and fabric. Don’t get me wrong. I do win bids, but at a price. The original quest for a vintage pattern at a bargain becomes a fight with an undisclosed bidder whom I  won’t let get the better of me. And thus the whole bargain thing goes right out the window.

Well it depends how you look at it I guess. I am currently ‘watching’ Vintage 1940s, 1950s job lot of sewing patterns & ephemera 30+ patterns.

My original bid was for £30. That’s what I was willing to pay and if I lost then that should have been the end of it. But no. Somebody had the cheek to outbid me. So I upped it to £42.02. That should trick ’em, I thought! Then, when they up their bid to £40 they will think I’ve bid a lot higher, and give up, and let me have all those lovely patterns. But no. They’ve gone to £52.69 and there is 13 minutes remaining. I am actually biting my nails. What do I do? Hang on in there? Bid at the last minute? But at what price? That’s £22.69 more than I wanted to spend. But they’ve got to be worth at least £5 each, surely. That makes £150. I’m so not paying that. Going to go for £70 top whack.12 minutes, 30 seconds to go. My heart thinks I’ve just run around the block at least 5 times. £75.27 in the maximum bid box. That should do the trick…..just in case they’ve got plans on £70. 10 minutes 36, shall I ‘place bid’ now? No. Hold tight. They might be thinking the same. Its been a while since I’ve bid. They will think I’ve lost interest. 7 minutes 8 seconds. Do I really want these. Haven’t I got enough already? Maybe. But I wont be beat. Especially by someone who refuses to reveal their identity! 6 m 9s. Not yet. Hold back. Don’t give them time to respond…

I left it ’til 20 seconds to go. And I confirmed my max bid at £75.27… knowing I shouldn’t really. £53.69 accepted. Phew! glad it wasn’t the full max bid…and I pipped that bidder to the post… oh yeah… oh yeah!

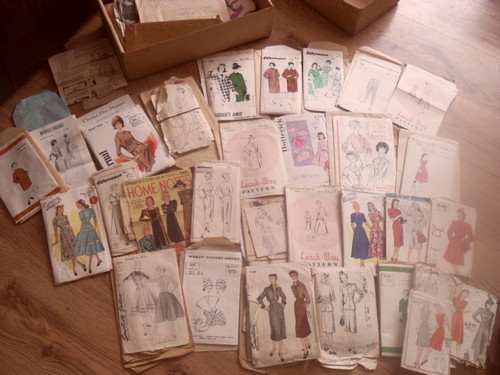
Here is a section of my prize haul which I won, just now, fair and square (… oh yeah!):

1940s and 1950s patterns won on EbayWhen they arrive for real I will give them the proper photoshoot they deserve. Not sure I can cope with that amount of stress again in a hurry. And really, I do now have enough patterns… I do now have enough patterns… I do now have enough patterns… don’t I?


1940s shirt dress revisited

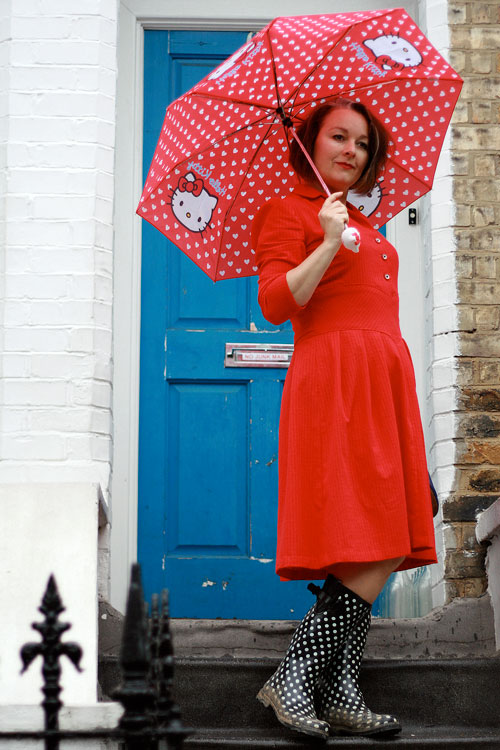
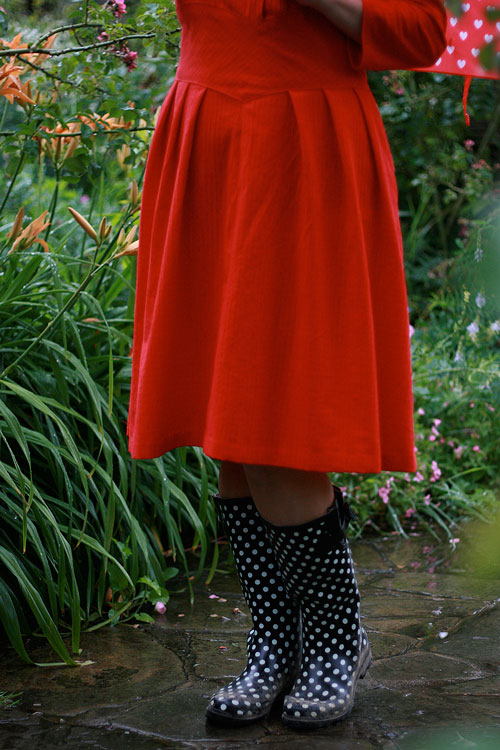
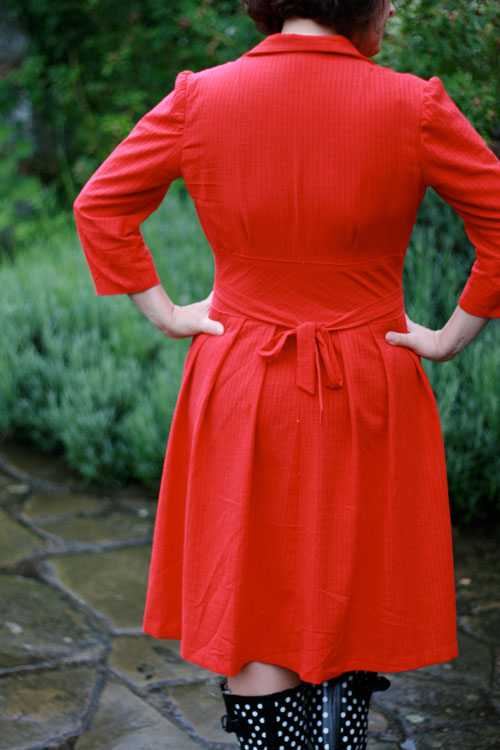
1940s red shirt dress

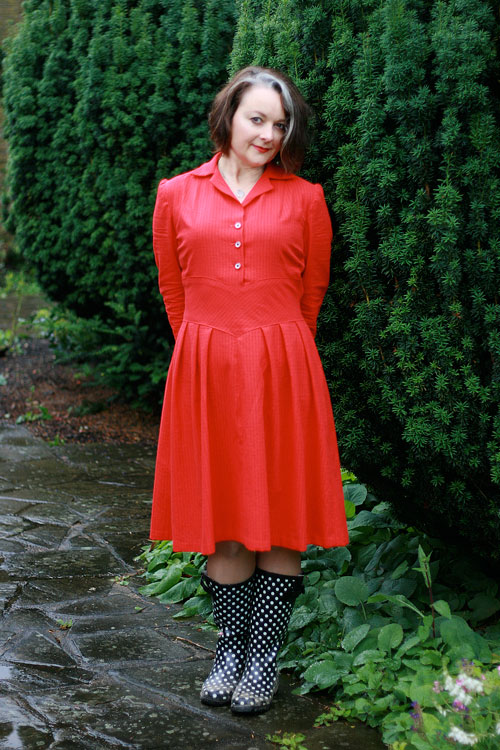
I always wondered why, with all the patterns in the world, would I ever make one twice? In the case of my peasant tops, here and here, I can only say it was because they were dead easy and required little brainpower, perfect for a late night sew. But in the case of this dress, the rationale was purely because I’ve never had a dress I feel so at home in! I had in my head, that I was a simple shift dress girl but actually I think I’m more of a shirt-dress girl!

1940s red shirt dress

Without the association of the pattern, I wonder if anyone would guess it dated back to the 1940s? Do you think it’s obvious? Or have I been looking at vintage patterns for so long now, I think they are the norm?! Perhaps if I were to style it with appropriate accessories: hat, bag and gloves, it might give the game away, but – dressed traditionally sporting wellies and a brolly – I think it also crosses over as a modern shirt dress too.

I’d like to tell you what this fabric is but I have no idea! It’s red and it’s 100% cotton for sure. Kind of like a cheesecloth seersucker but not, and vaguely reminiscent of my candlewick beadspread I had as a child… without the little soft threads that pulled out oh-so satisfyingly easily! I thought it might be ribbed cotton. I’ve heard that mentioned before but I really haven’t a clue. It was kindly donated to me by a friend who desperately needed to get rid of a big bag of fabric… I could never be like that! And I knew what ‘the red’ was destined for immediately.

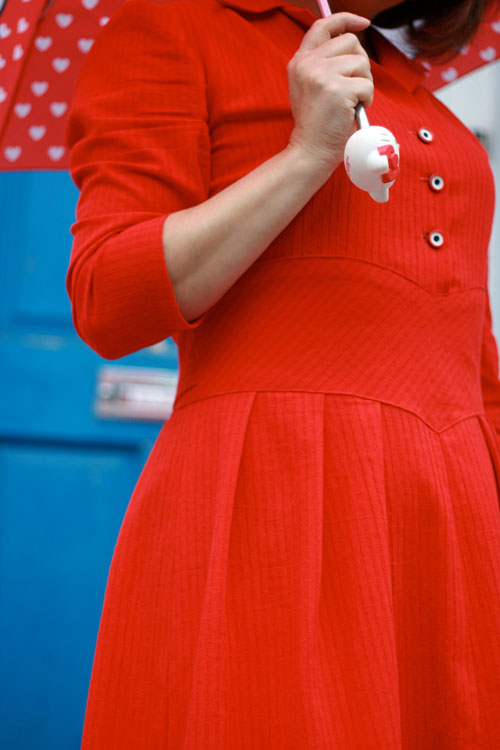
1940s shirt dress detail

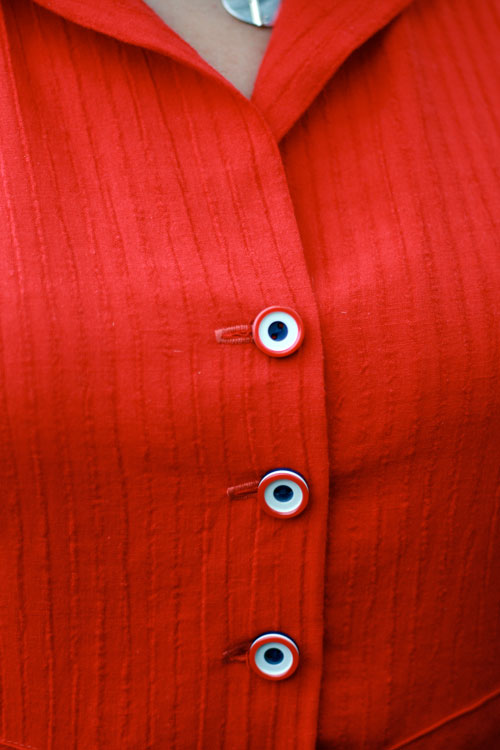
It came together sweetly as before with the addition of a few minor changes. I added a third button just because I love the little ‘targets’ and two didn’t showcase them enough. They cost £2.45 for six, bought at the London Vintage Fashion, Textiles and Accessories Fair, September 2011 and I think they are vey happy on this dress!

target button detail

I made it an extra inch longer, but really could have gone for 2 inches… oooh, I am getting brave in my old age!

length of skirt

I also added an extra inch around the midriff, knowing the struggle I have to get the dress on, over my head and judging by the photos of the last dress, it does look a bit snug. But it was highly unnecessary on this version. The mystery fabric, unlike the shoe fabric, has a lot more give and resulted in little poofy bits at the sides. I put it on the mannequin and looked at it for a few days, wondering if I could get away with it. I probably could have done, but it would have annoyed the hell out of me!

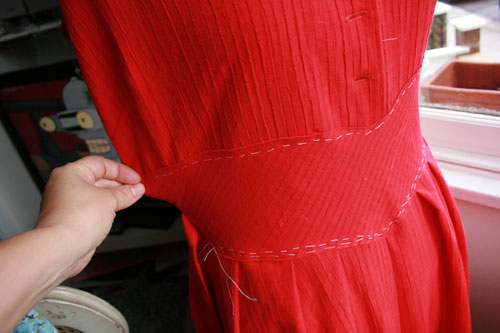
dress before alteration

And so… I sensibly turned the dress inside out and chalked and basted where I wanted the new line of stitching to be. Namely half an inch in from the original seam, starting from just above the waist, in a straight line up to the armscye. I tried it on again and was much happier with the silhouette.

Dutifully, I removed the basting and unpicked the topstitching where the midriff meets the bodice. I sewed the new side seams on the bodice over the chalkines. Sewed the new side seam on the right side of the midriff section and trimmed the left side opening to match (where the zipper goes).

I must be getting better at this. I would never have had the patience to do that a few years ago! But it was of course, worth it and now I am a happier bunny!

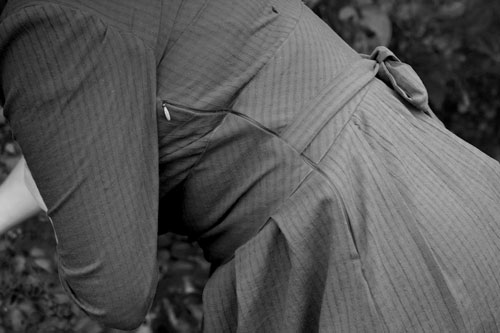
Here is a picture of the zip in the side seam. Once I’d sewn one size of the zipper in place, I made sure to make chalk marks where the midriff needed to line up. I pinned the second side of the zip to those marks first and then pinned the rest. Worked like a treat!

zipper detail

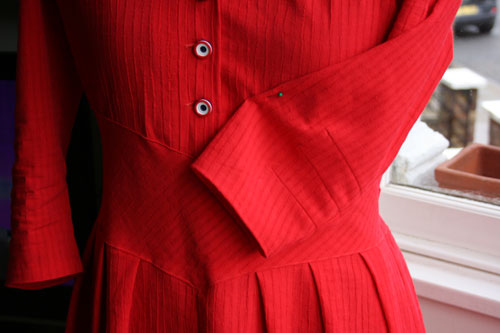
I opted for longer sleeves this time. Not full length, just three quarters. Mr Ooobop! thinks they will annoy me being so fitted and I have a little tendency to agree but I wanted to see how it affected the overall look.

I’m intrigied by the construction of the sleeve with darts to shape the lower arm. I guess this is a vintage thing because, to date, I have not come across these in a modern pattern.

vintage sleeve darts

Allowing for adjustments, this dress did seem to take longer than the first. About 5 evenings after work, spread over a couple of weeks. I have been really keen to see it finished but not so keen that I wanted to rush it and ruin it! And in any case I had to wait for Mr Ooobop! to be around to do his usual photo magic . . . and for the sun to come out! Well, we gave up waiting for the sunshine!

1940s red dress in the rain

I’m sure that this little revisitation wont be the last but I do have an incredibly long list of other ‘wannamakes’ to tend to first, so its back into the envelope and into the box ’til next time!

Do you like to revisit a favourite pattern or do you prefer to try something new every time?

back of dress

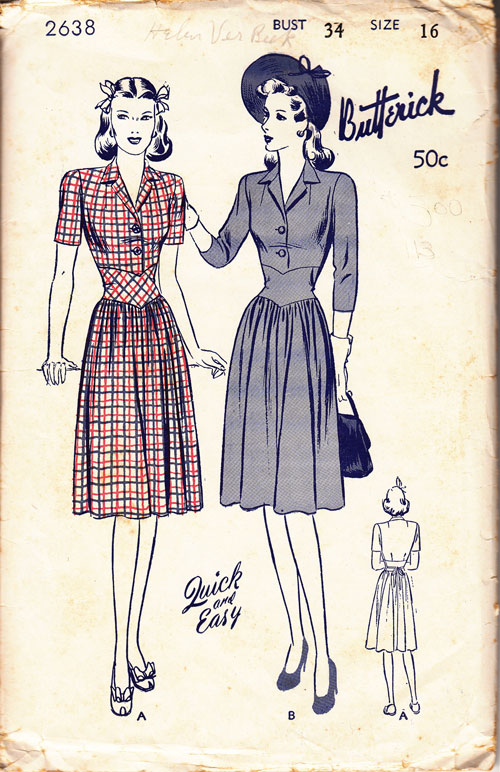
butterick 2638

Vintage pattern treat time!

I know, I know, I know… I have enough patterns to sink a battleship. Well that’s what I’m contantly being told. But it’s not strictly true, is it? I would need quite a few more, actually, to really make that happen! Plus, I haven’t bought any in aaaages!

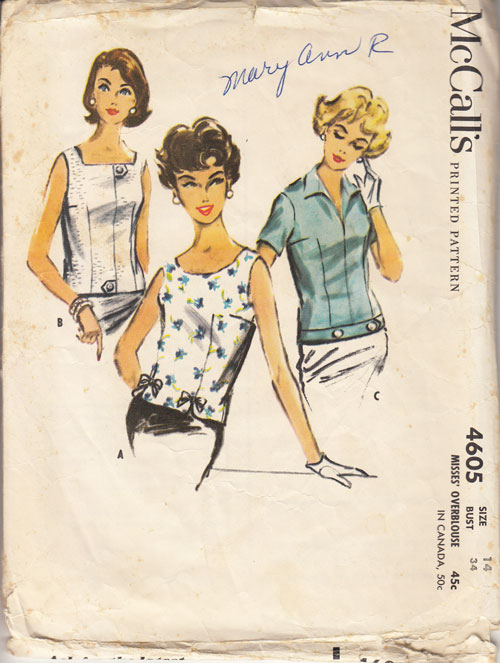
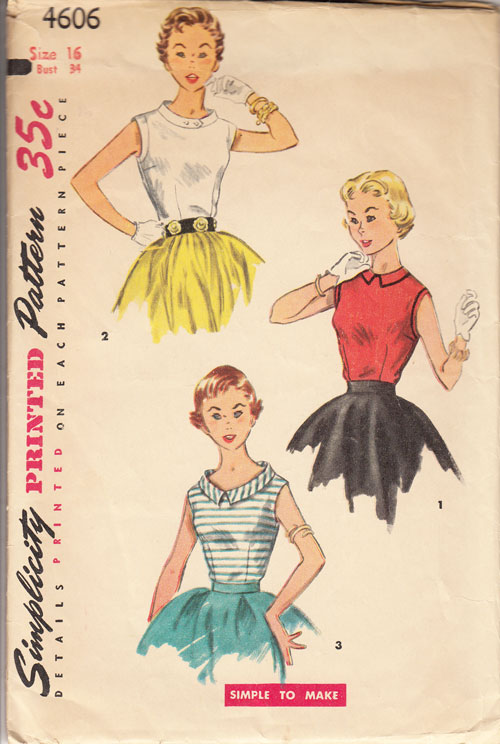
Truth is, I really (honestly) didn’t have many cool blouse and top patterns. But now I have!!

McCalls 5605 vintage pattern tops

Somplicity 2195 vintage blouse pattern

Simplicity 4606 vintage blouse pattern

I’m hoping these vintage top patterns will transform into a lovely collection of go-to tops for those panic mornings when I’ve come flying out the shower to find an outfit in 5 minutes for work! They all call for polka dots, stripes and gingham and I will find it hard to go outside of those boxes but will have fun trying!

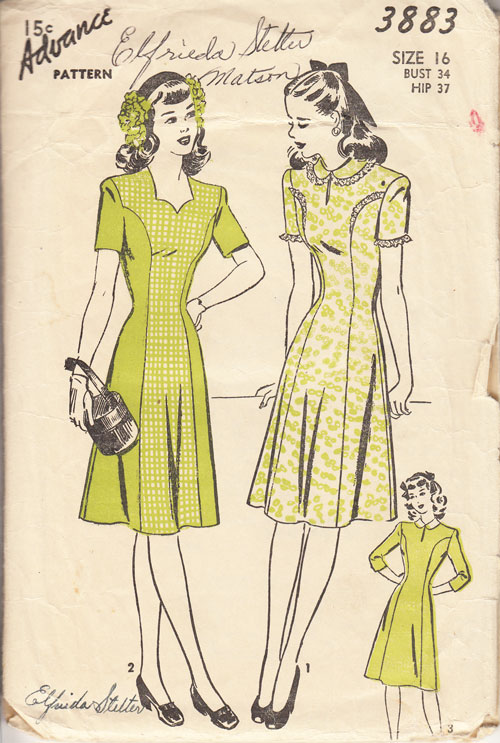
Oh and this little 40s dress was just waiting to be ‘saved’ by me. Would have been plain rude not to!

Advance 3883 40s dress pattern

1940s dress styles are fast becoming my favourite and my best! I love how fitting they are without being too saucy!  I have only made this one to date but it happens to be the most comfortable and flattering dress and always gets lovely compliments. I am currently working on another version in a solid colour and I am also reminded how simple the pattern is too, thank goodness!

What is your favourite era for patterns? Or do you prefer modern ones?

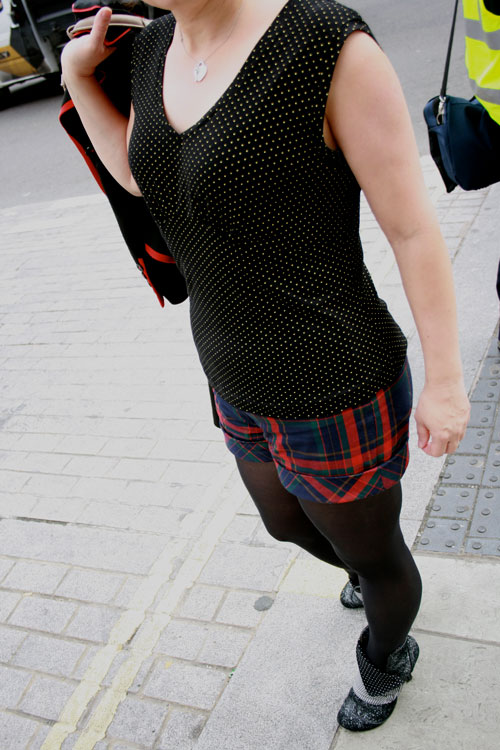
easy peasy spotty top

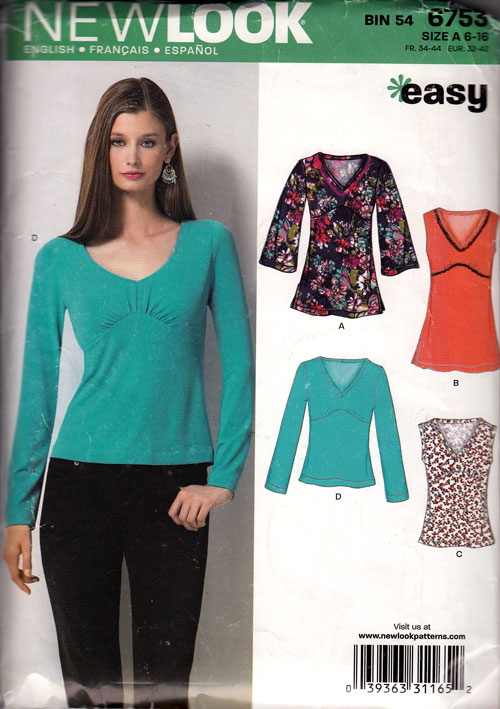
new look 6753 top

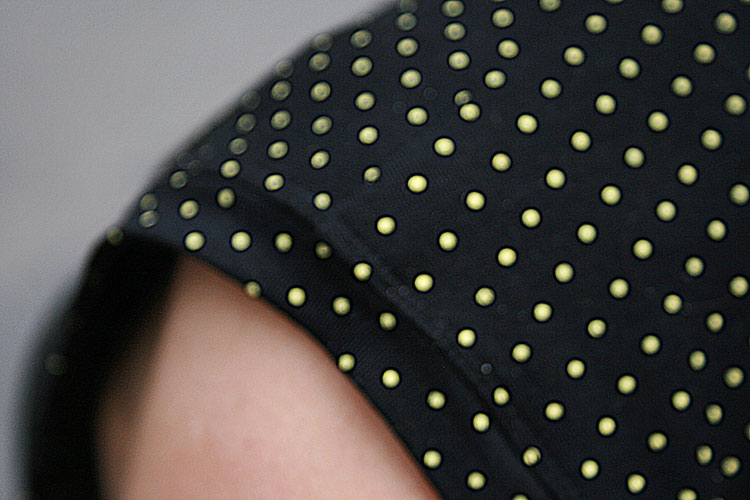
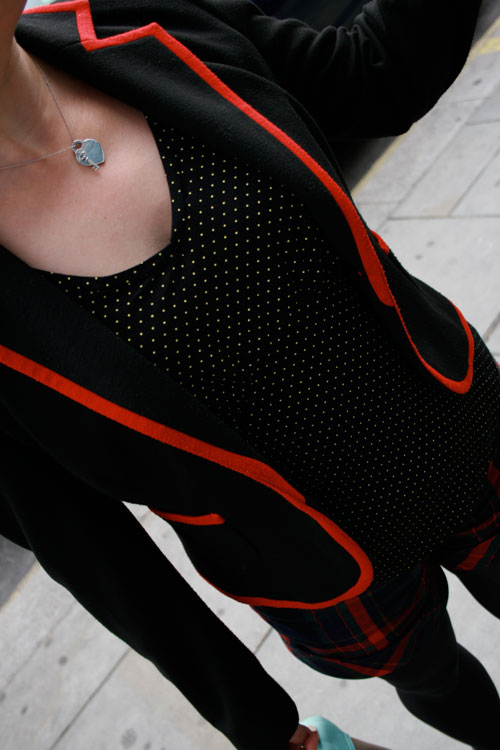
Despite sewing at every available opportunity, my wardrobe is still lacking in basics. Tops mostly. And particularly ones that go with everything. I spotted this pin dot jersey in a remnant box for 99p and imagined it as a top right there and then. I’m still quite scared of sewing with stretchy fabric but only because I don’t do it enough, and that is probably why I have a serious shortage of go-to tops. But I have to say, this pattern: New Look 6753 really was as ‘easy’ as it said on the packet.

new look 6753 sewing pattern

I remembered to use a ball point needle and set the stretch stitch and a couple of hours later it was ready to go. No notions, no sleeves, no lining… just the ticket for a brain addled by a weekend of pure self-indulgence!

The binding on the armholes and neckline looked to be a bit tricky from the instructions, mostly because I hadn’t done this before but it was painless, I can assure you. The binding strips are cut on the cross grain and not on the bias because, hey!… it’s stretchy already! The strips are seamed with right sides together on the short ends to make a loop and then pressed, long edges and wrong sides together. The binding is sewn, raw edges and right sides together and then the seam is pressed down towards the garment and a row of stitching made close to the seam from the right side, to stop the binding from rolling out.

new look 6753 armhole binding

To retain the ‘v’ shape neckline, before the binding is attached a small snip is made at the point of the raw edge of the ‘v’ and opened up to sew the binding on. When seamed and top stitched, a little dart is sewn on the wrong side of the binding to pinch the shape back into the neckline. All clever stuff!

new look 6753 neckline

As you can see from the picture above there is a top and a bottom bodice section. The top is subtly gathered to give some shape and create a bit of detail. This particular jersey fabric is very fine. Not sure of its content but I’m sure the shaping would have worked better on a sturdier stretch fabric. Not complaining at all for 99p though. This was a fabulous outcome for what really was a test drive.

I’m also sure that it is possible to go down 2 sizes in this style. I went down one size and it is still very roomy, though to be fair I haven’t washed it yet and if there is any amount of cotton present it is bound to shrink a bit, I hope!

I wore it today with my shorts which incidentally didn’t coordinate at all! Ironically, it appears I don’t have anything at all to go with this top so I now have some plain skirts to add to the project list. I did however have a snazzy M&S jacket to pick out the red of the shorts. Should have worn the blue shoes too I guess… doh!

new look 6753 top with jacket

The 1940s Shoe Dress

1940s shoe dress

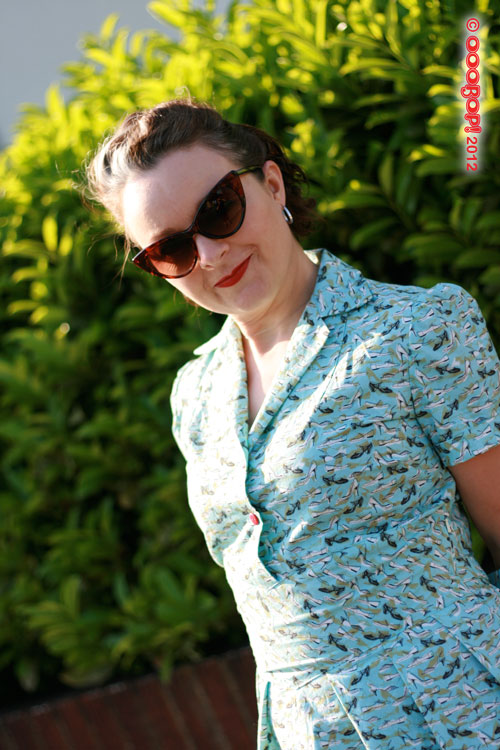
I do believe I have just made my most fitting and appropriate dress for this lovely hot summer we have just entered into. And it’s covered in shoes! And it fits in with this weeks Sew Weekly challenge, ‘Inspired by the 1940s’. And I just realised it matches my Ooobop header too! I am just a little bit happy!

1940s shoe dress

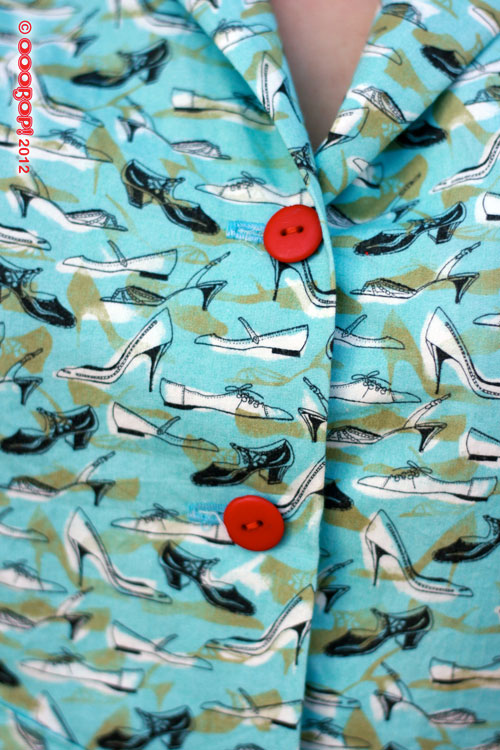
Last July, I posted about the ‘shoe fabric’, quite sure it was destined to be a 1950s shirt buttoned dress. The pattern had to be just right. I wasn’t going to waste that fabric, even if it did only cost a fiver! That was until I found this amazing pattern for a 1940s shirt buttoned dress which was spot on.

butterick 2638

I was sold on the midriff! I knew it would be flattering, it was just a question of how the shirt top would fit. Well it all went together like a dream. I took 5 inches off the length, worried as usual about the granny factor but actually I might be inclined to leave it a bit longer next time. And yes, there will so totally be a next time! The other alterations I made included adding 2 inches to the waist, being careful to add it to the shirt top and the midriff and the top of the skirt.

1940s shoe dress pleats

I was a bit worried about the gathering ‘poofing’ out the skirt section so I replaced the gathers with soft pleats. I know it kind of takes away a bit of the authenticity but I think its a lot more flattering. I also included a little turn up on the sleeves, as I did with my wing collar shirt. Just a little detail but I think it finishes a short sleeve much better and gives a little more interest.

1940s shoe dress front

I so enjoy a good old rummage in the button tin. I quite often had my whole head in my mum’s button tin when I was little and so the whole searching for the right button thing generates such a nostalgic feeling which escalates to pure joy when you find the perfect ones! These two little red beauties were 2 of a little set so kindly gifted to me by Rachel at House of Pinheiro as a thank you for doing a little guest spot over at her place! Gotta love this whole blogging thing!

1940s shirt dress buttons

The back of the dress is finished off nicely with side-ties that tie in a little bow at the back which also serve as a great device to hide the near invisible side zip.

1940s shirt dress back

Of course, there are no prizes for guessing who took the lovely photos! Mr Ooobop! is so clever and so willing and so lovely. My blog would be truly rubbish without his wonderful photos.

1940s dress yellow backgroundWe had such fun taking these today, en route to lunch in a local pub garden…. and then onto dinner at our local Italian restaurant, Casa Mia. Totally indulgent day today but it wasn’t our fault. It was all sunny and everything and we were seriously confused into thinking we were on holiday!

1940s dress sunshine

Sewing, Sunshine, park life, Prosecco and pizza….and more sunshine! I am so easily pleased!

Happy birthday Mr Ooobop!

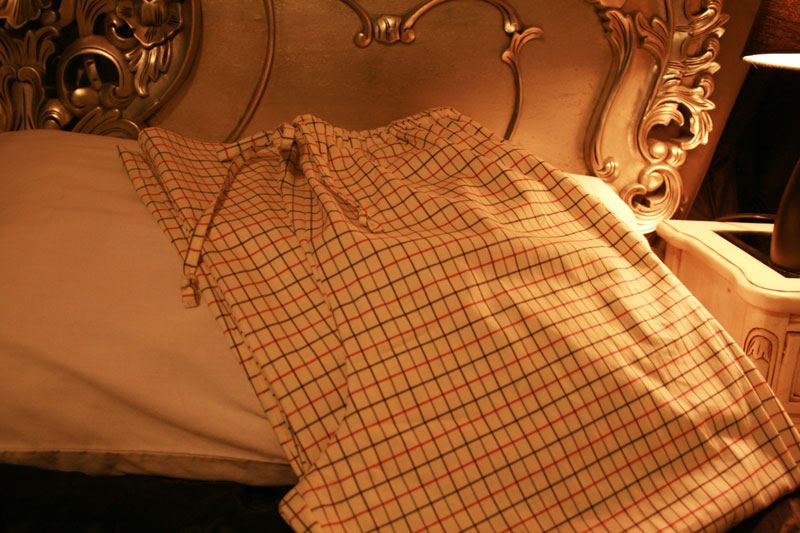
dans pyjamas

Rocking up, fashionably late for Karen’s pyjama party but with good reason. This pair of pjs was one of Mr Ooobop’s birthday pressies and couldn’t be properly revealed until yesterday.

I sewed them in secret and so I was over the moon when they were so gratefully received! This was my first sewalong and my first pair of pjs… and my first time using a side-cutter!

ooobop pjs

Karen did a great job of providing a stress-free and leisurely sewalong. Just the ticket for someone who, like me, has taken on far too much recently… but who can’t resist an extra sewing project! And hey… it helped to solve what to buy the most-difficult-to-buy-for boyf, for his birthday.

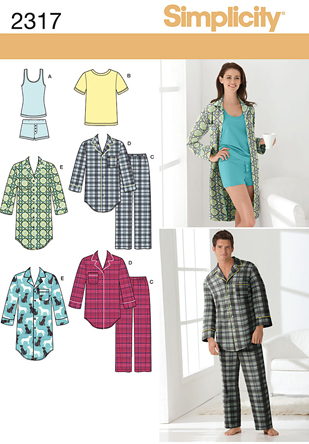
I started the project armed with lots of tracing paper and an old pair of pjs from ‘Marks Expensives’, intending to draw round them and create my own pattern but this proved to be trickier than I thought so I headed to Jaycotts sewing patterns for an easier option. I don’t know if you’ve ever checked out the envelopes in the general nightwear section but there are some hilarious options even ones that include doggie loungewear!

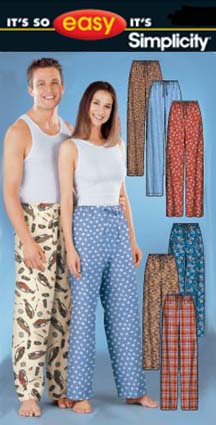
Anyhows I narrowed the selection down to these two:

Simplicity S2317
simplicity s9871
Simplicity S9871

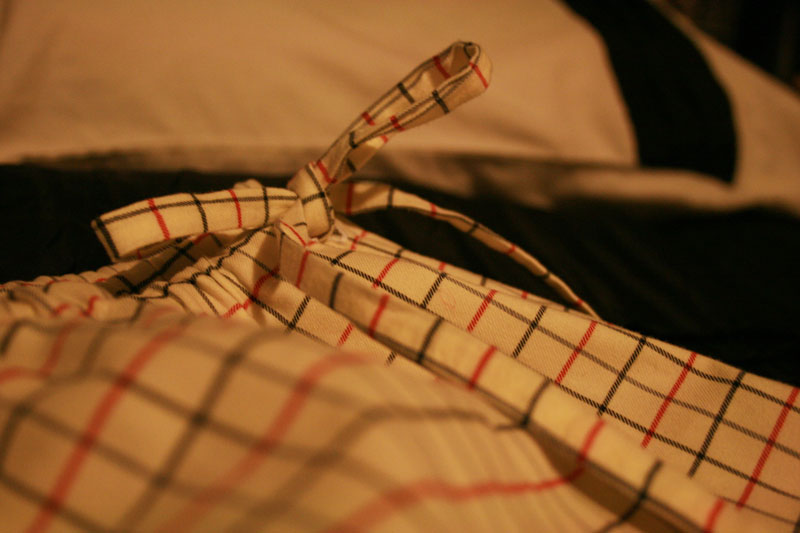
I set out to use Simplicity S9871 but when I realised how big that one pattern piece was, I changed my mind! My kitchen table just wasn’t big enough! So I decided on Simplicity S2317 instead, only real difference being, it had front and back leg, with side seams. But what I did like about S9871 was the drawstring feature. It just involved adding a couple of vertical buttonholes at the front, before making the casing. The drawstring was threaded through after the elastic. Turning a 1cm wide tube of 66 inch fabric inside out, I’m sure took longer than making the pjs themselves!

ooobop pjs

I used a lovely brushed cotton shirting fabric, cream with red and navy checks. It feels so lovely and reminds me of my bedsheets when I was little! It sewed up beautifully. I enjoyed using my side cutter foot for this project. It acts like a serger and cuts 1cm of fabric as it ‘overlocks’…genius! The only not-genius thing about it was unpicking an overlocked seam when I realised I’d sewed wrong sides together, doh! Wont be making that mistake again!

The 4-birds-with-one-stone plaid shorts!

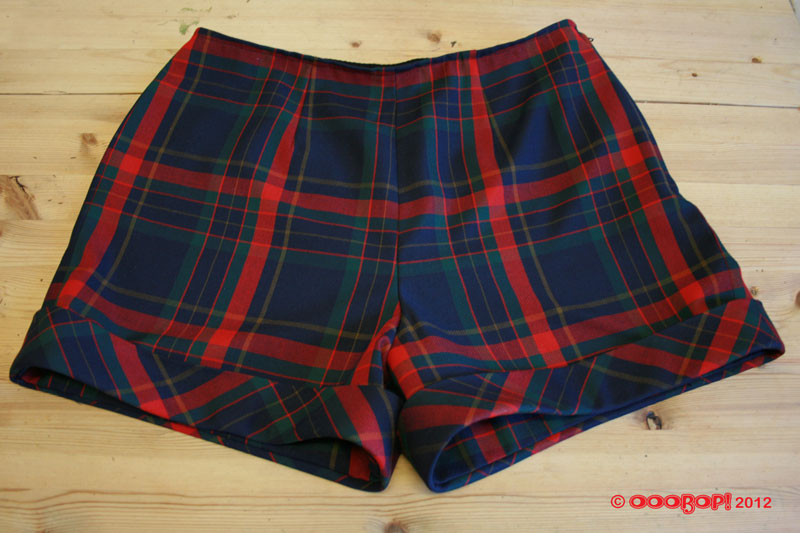
plaid shorts simplicity 2659A little bit of sunshine was all it took to inspire these shorts. Don’t panic! I’m not about to get those pasty pins out just yet! I much prefer to wear shorts as spring attire with a pair of 60 dernier tights and the trusty Docs! That photo will have to wait until I can grab Mr Ooobop! to work his photographic magic. In the meantime, I’m afraid we’ll have to make do with my boring pics.

The 4-birds-ness came about as follows:

  1. After my recent pleasure working with and deciding to invest in better fabric (re the audition dress) I also made a conscious decision to wade into ‘stash mountain’ for practice projects and toiles rather than buy any more substandard material. This plaid/tartan fabric was quite a large piece left over from my vintage plaid dress. Its totally synthetic, I’m sure, but it was a good weight for these shorts and so minor stash bust #1 achieved!
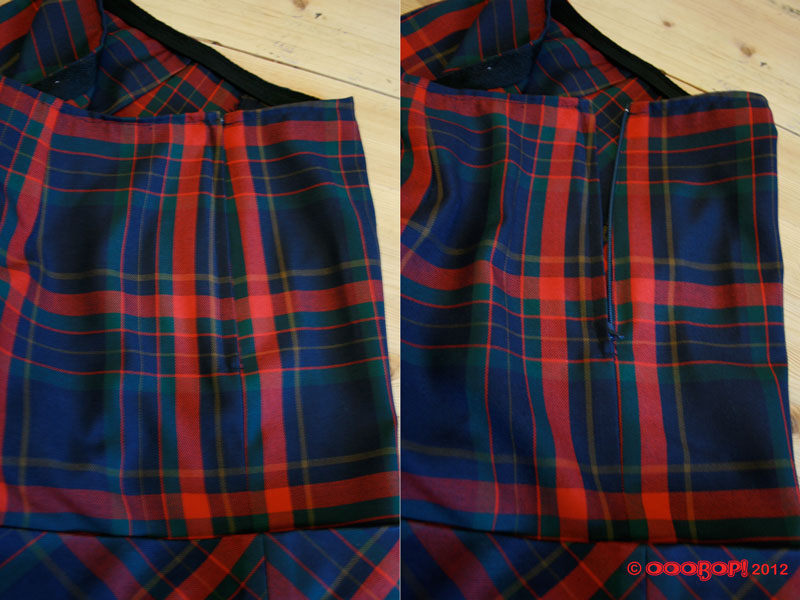
  2. I’ve been hearing the words ‘lapped zipper’ on other peoples blogs and in sewing mags quite a lot recently. And I figured it should be something I should know how to do by now. Since getting the hang of the ‘invisible one’ (after some practice, mind) I have kind of forgotten that there is any other way of inserting a zip. Of course I headed straight to YouTube as my first love of demos. I am far more receptive to watching someone demonstrate it for real! Turns out that this was the perfect kind of zipper for these shorts. I think I did it properly. Well, the zip goes up and down and the lapped bit covers the teeth so that’ll do me and will also tick the box of having mastered a new (for me) zip technique.
    plaid shorts side zip
  3. Plaid matching has always been a bit flooky for me, I have to say, and using this fabric on a small, uncomplicated project gave me the chance to practice matching up those seams. Both left and right side seams are as near as dammit and at least across the front and the butt the horizontal stripes line up. Shame I couldn’t do the maths on the side seam of the cuff. I have to say though, having the checks line up across the zipper had me doing a little dance round the ironing board!
    plaid shorts side
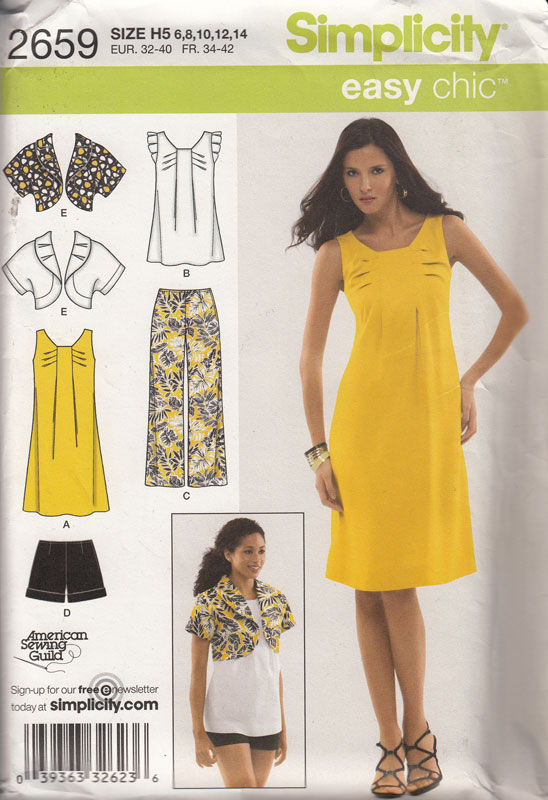
  4. And finally the fourth birdie was the mere fact that I have never made a pair of shorts before. This pattern is Simplicity 2659 and I’m pretty sure it came free with an issue of Sew magazine. I’m not sure I would ever make the dress. I can make my belly stick out without any extra help thank you very much, but the top could be cute and I’m sure the bolero would work with a classic dress! Anyhows, one baby step closer to making a pair of trousers but its defo a baby step I am very likely to repeat with some different fabric.
    simplicity 2659 pattern

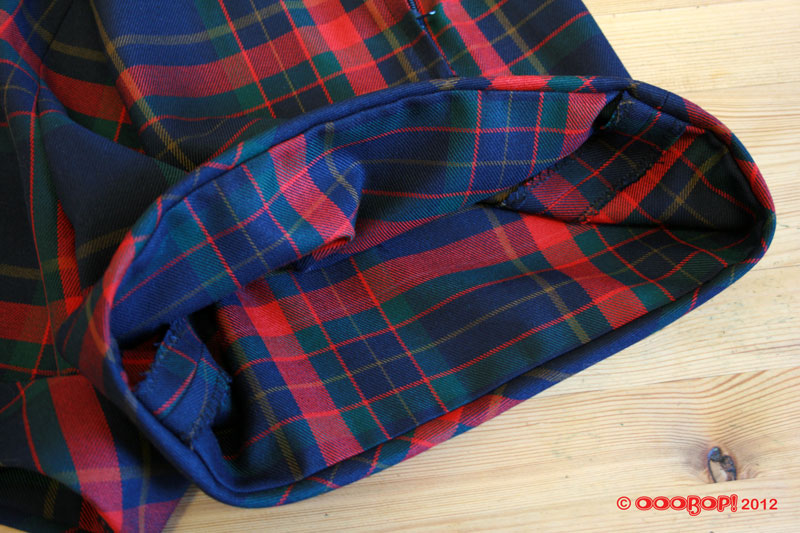
The cuffs of these shorts are my favourite addition. I love that they are separate and cut on the bias. I wasn’t expecting that as the turn ups on the sleeves I did for my wing collar blouse were technically a very deep hem, turned back on itself. The bias of any sort of checked/plaid/tartan fabric is fabulous against a straight grain of its own kind and I think it really looks neat. Finishes off the hem inside perfectly too.

plaid shorts cuff

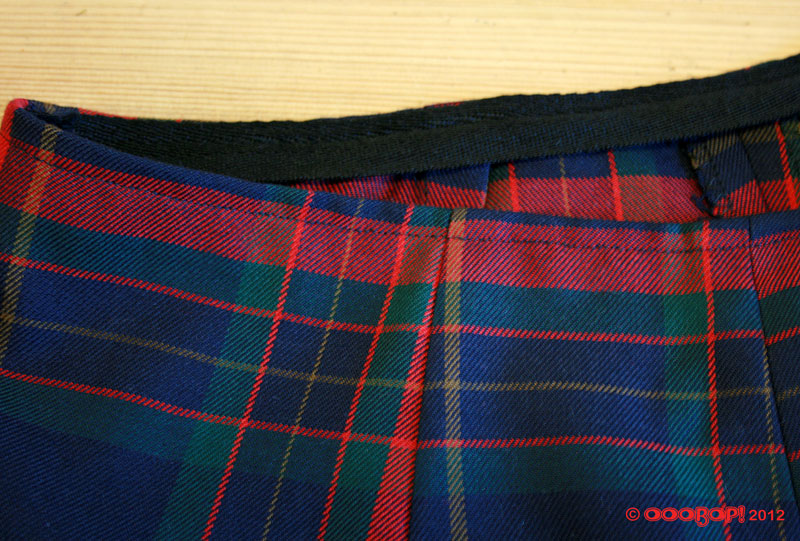
I would say that I lost big points on the waist finishing. I have never finished a waist without facing or waistband before and this pattern called for the use of twill tape at the inner waist edge. Very simple to understand and to achieve but I really must remember to stitch from the top when I’m doing things like this. That way I will get a much neater and straighter line. It won’t get noticed, I know, as my children will be horrified if I start tucking my tops into shorts but I know I could have done better. I just find it very amusing, and everso slightly annoying, that a little bit of topstitching is my main cause for concern on this tiny project!

plaid shorts waist

I highly recommend this shorts pattern for anyone wanting a little project to run up in an evening. I’m sure they would look great (on someone else) in a more summery linen or gingham… ooo gingham… imagine the cuffs!

The audition dress!

V8280 audition dress

I made this dress last weekend to wear to an audition on Friday. I’m afraid I can not speak of the adventures it had or the reaction it got as I am sworn to a confidentiality agreement so I can only tell of the making of the dress itself!

V8280 Roland Mouret dress

I’m sure, for most of you lovely sewing people out there, you have already guessed it to be the Roland Mouret knock off by Vogue – pattern no V8280 – the Galaxy Dress. But perhaps it wasn’t instantly recognisable without its signature sleeves.

V8280 galaxy dress

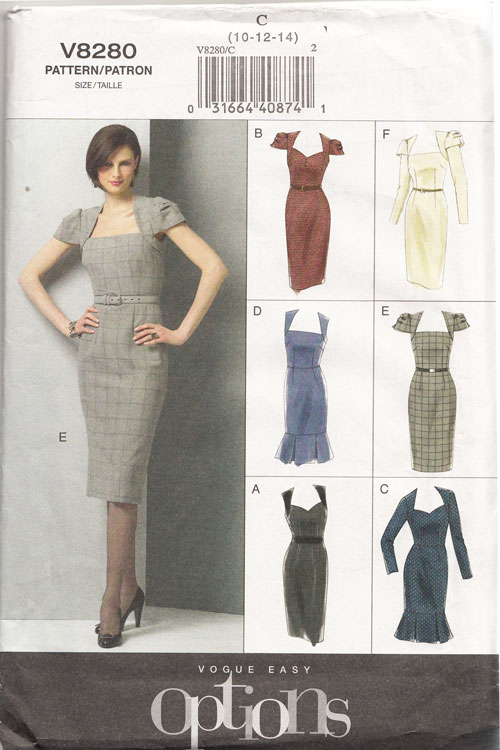
On reading lots of reviews about how the sleeves would be best placed on a pitch against the New York Giants, I did run up a quick toile to test out their outrageousness. I wasn’t too scared by them but I wanted this dress to be right and not feel too self-conscious in it! So I went for Vew A. It looks a bit boring on the envelope but I do believe this is probably the classiest dress I’ve made to date.

v8280 sewing pattern

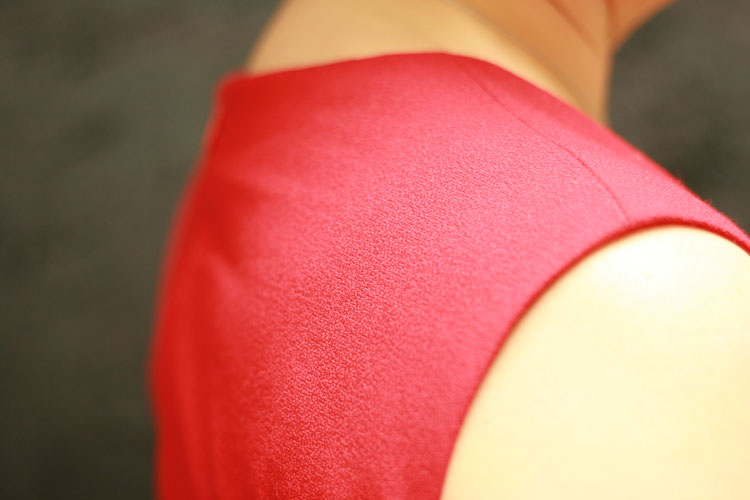
Might have something to do with fabric choice though. I’ve come to realise that the longer I keep up this sewing lark, the more choosy I’m getting about quality of materials. For sure I still love a charity shop find but in truth, nothing beats shopping specifically for the most appropriate fabric. I needed to impress with this dress so it had to be good stuff. I chose wool crepe and silk lining. Oh what luxury! I have really started something now! Just look at the texture in that wool…

wool crepe texture

I love the way that it pressed so beautifully yet didn’t crease too much when it was worn.The wool crepe was £15.99 and the silk lining £6.99 a metre from one of my favourite fabric shops in the Goldhawk Road. Probably my most expensive make, around £42 in total but the blow was softened after I checked the prices of similar wool and silk in Berwick Street, London…. more like £30 – £80 a metre!!!!

If I’d have had the time, I would have made a full toile to check the sizing properly. I overestimated the sizing of the bodice and ended up taking it in by 3 inches under the arms. I will definitely take it down a size next time. And oh yes, there will be a next time!

This is also my first experience working with a modern Vogue pattern. I have heeded the warning of others about their ‘vague’ instructions, but I found this one to be very simple to put together. Bearing in mind I didn’t go for the sleeves!

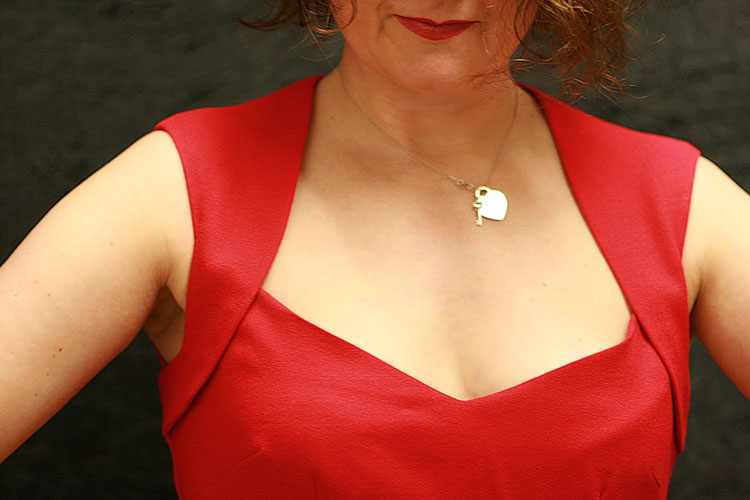
Once you get the hang of the ‘flanges’… lol – or once you get used to calling them ‘flanges’ – it will all make perfect sense. And they do help to create a very flattering neckline. I chose the sweetheart neckline just because I think its more feminine and reminiscent of  glamourous ’40s ladies.

sweetheart neckline

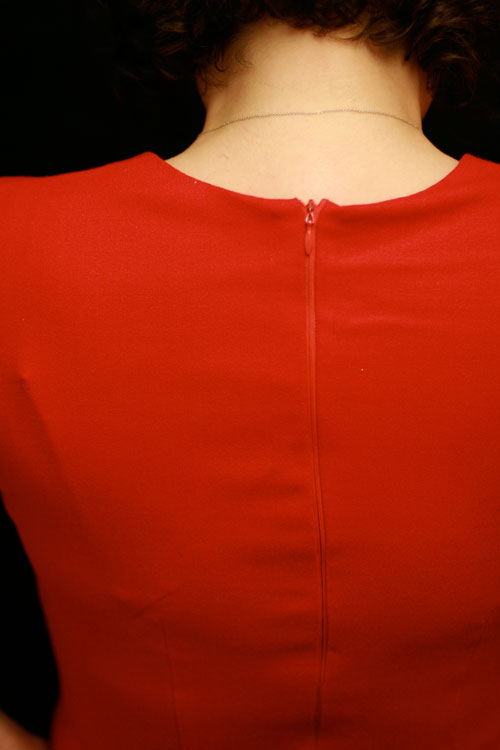
Working with this fabric was a dream and made inserting a zip and lining up darts and seams, a breeze.

v8280 back view

invisible zipper

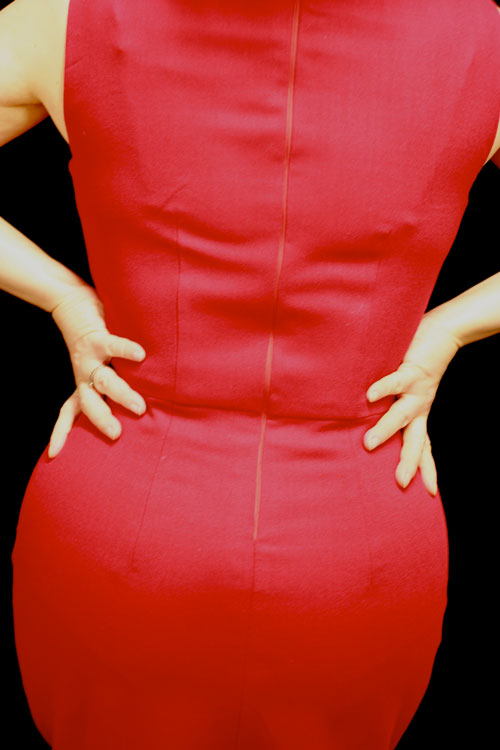
There were no instructions to fully line the dress, only to line the bodice. But from past experience I know I will never get away with an unlined skirt. My biggest fashion blunder was to take my coat off in the entrance to a party only to find out my unlined dress had ridden all the way up to my armpits. The worst (or most life-saving moment) of that was that another guest had to tell me. Otherwise I’d have strutted my stuff onto the dance floor like a complete fool, outdoing any Bridget Jones moment! And so I cut the lining, the same as the skirt but with an additional half inch added to the side of each piece. I sewed the back seam from the zipper opening to the top of the vent and the side seams but didn’t make the darts. I pinned the waist of the lining to seam allowance of the skirt section, first pinning at the side seams, then to the back openings, with one pin at the centre front. I then folded pleats at the dart positions and pinned those in place before sewing to the seam allowance all round.

I’m not entirely sure this was the best way forward. There may be more professional ways of doing this but it worked, for me, anyhows!

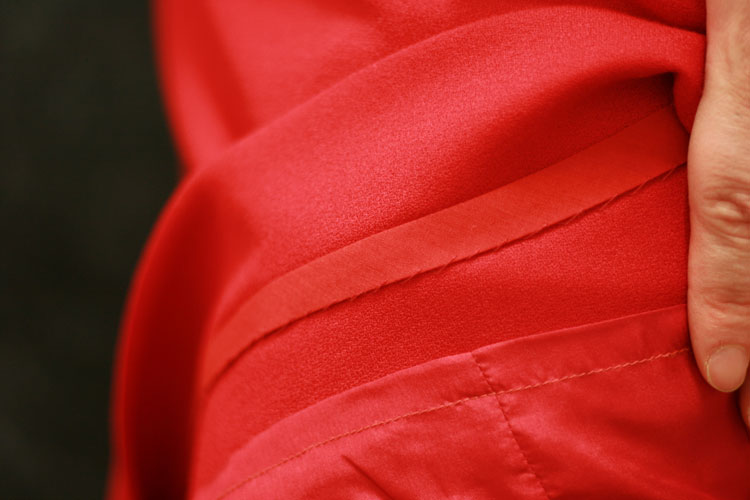
I bound the hem with bias tape and machine hemmed the lining. Tricky old stuff, silk lining. Seems to carry far more static than poly lining, when ironed. But boy does it feel good! Raising one’s own standards is very amusing!!

bound hem

And all that is left to say is thank you once again to Mr Ooobop! for being amazing in every way. Not only does he dutifully take lovely photos for me, he is the most amazing support for my often waining morale and makes me so happy… gush gush!

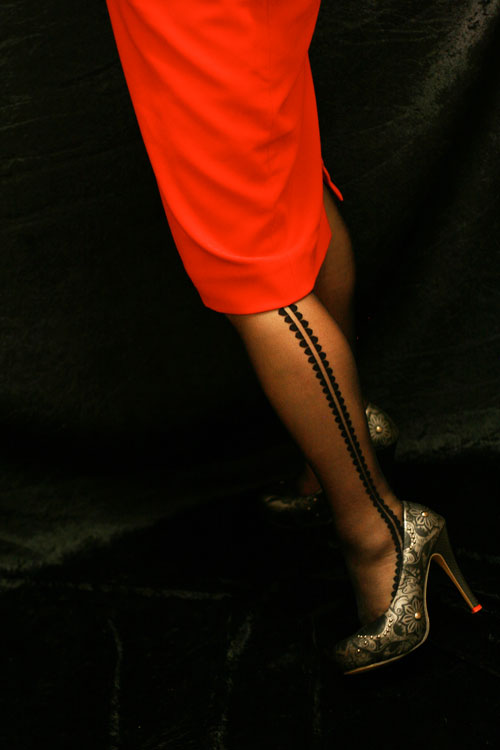
He will insist on a leg shot though!

side detail on tights

ooobop! gypsy top #2

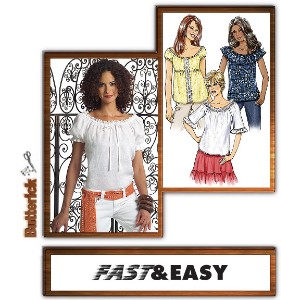
gypsy top frontThere is something quite comforting about visiting an old pattern. I made my first gypsy top almost a year ago and not only have I had great use out of it, it made a great addition to Dorothy’s ensemble too! Once again I used Butterick B4685, Fast and Easy… and indeed it was.

butterick b4685 sewing pattern

I used view D this time but omitted the front lace panel. I did originally include the underbust elastic but when I tried it on, tucked in a skirt, which is mostly how I intend to wear it, I looked a little (more) like the Michelin Man! So out came the elastic, quicker than when it went in!

I used a remnant of cotton gingham that I picked up from Oxfam, and used every last bit of it! So very satisfying especially as I’ve since found that 100% cotton gingham isn’t that easy to get hold of. Well not in a choice of colours. Despite my local plethora of fabric shops, they all stock poly cotton gingham, for the demand of school dresses, apparently. It looks just as pretty for sure but pure cotton feels so much nicer against my skin.

I prefer the sleeves and the simplicity of this style. Its less fussy and so quick to make up. I am going to make a few more, lined up for summer, and my eldest daughter has put an order in for one too.

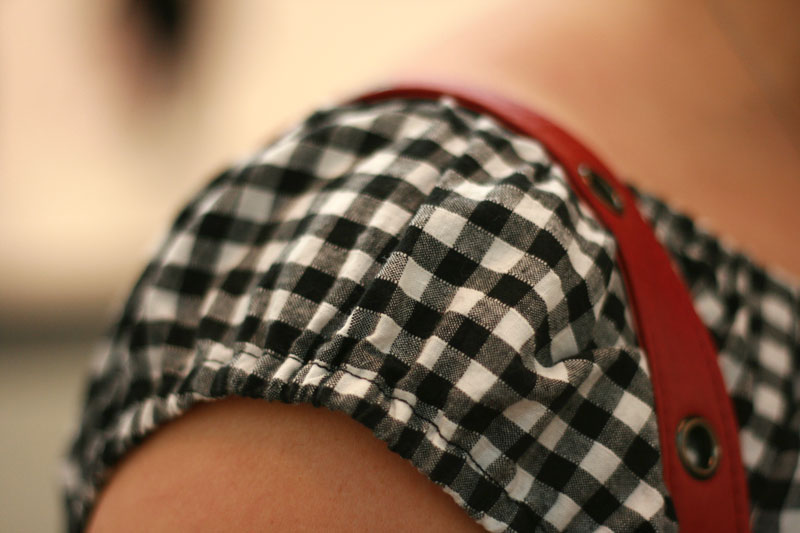
gypsy top sleeve detail

It also made sense to enter this into Made by Rae’s Spring Top Sewalong 2012, just as I did last time round. Its not nearly up to the standards of most of the beautiful tops over there but I’m liking the annual inspiration of creating a new tops for Spring all the same! You can see this and all the other entries over at Flickr. My entry has been successful so I will keep you posted when it is time to vote! 😉

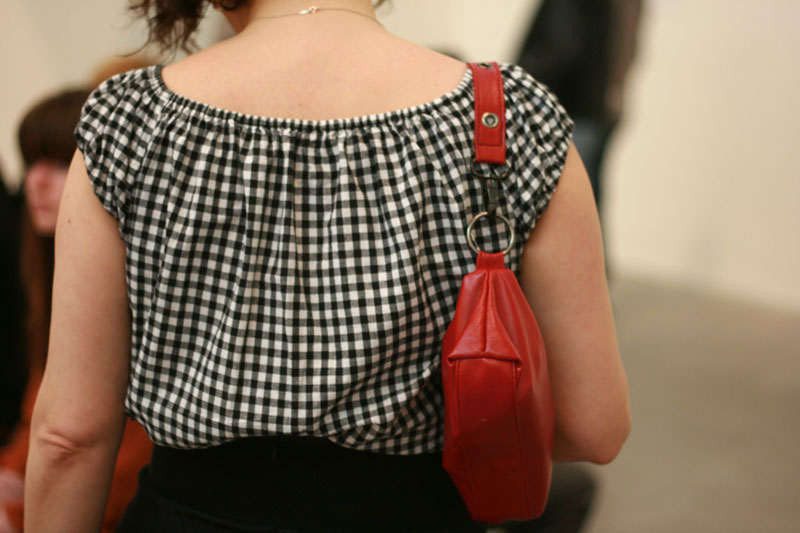
gypsy top back view

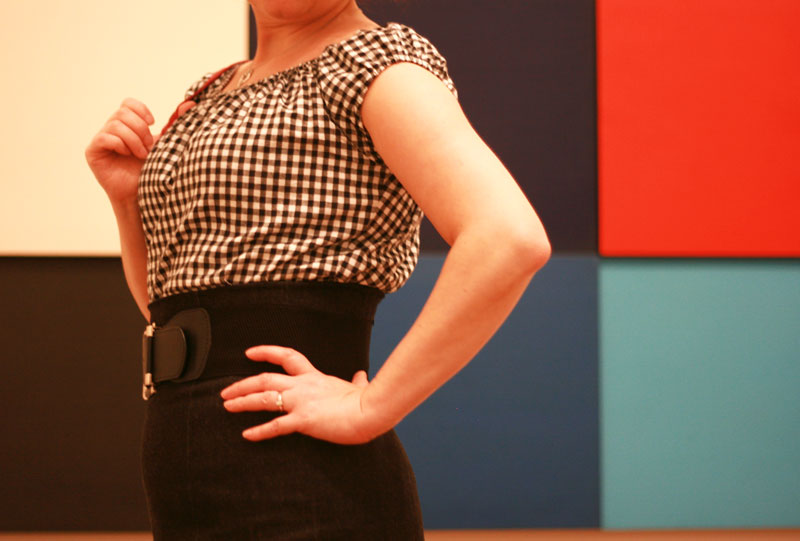
I wore it out to a trip to the Tate Modern yesterday with Mr and Little Miss Ooobop! and I have to say it is perfect gallery wear. It’s always soooo hot and stuffy in the galleries. The artwork made for a choice back drop too!

gypsy top side view

Hope you are all having a wonderful Easter break 🙂