ooobop! review: Burda Style March 2013

burda style Magazine March 2013

If springtime Burda loveliness is what you are after then you should go grab yourself a March issue right now! The cover pic itself says it all. The goodies far outweigh the oddities this month. But as we know, it would be wrong to omit them completely! And no less than 12  ‘easy makes’ included. Great news for those who love a quick-fix project.

First up is Spring Fashion itself. It’s still sub-zero in the UK as far as I’m concerned. It read 2 degrees on the dashboard this afternoon but I’m sure that was a mechanical fault. I couldn’t speak for a frozen face when I got home from the shops! But the following pretties are a good reminder that Spring is on its way. Just feast your eyes.

spring fashions

The cover dress as I’ve already harped on about, was so going to be my first make. But she doth hideth one of those aforementioned oddities behind her back, that I will reveal when we get to the wedding!

I love the floaty dress next to it, second in from the top. The line drawing makes it look like an awkward piece but this lady wears it well and I love the choice of vintagy fabric.

In fact its true to say, I would love to make every piece from this section. I think that would just about get me through springtime… oh how a girl can wish!

If the mag ended there I would be happy but still, there’s more. I’d like to think I was a festival-goer. But I’m not really. Have never managed to dress down with much conviction and that is quite essential really! So these ‘Festival Styles’ don’t grab me as much apart from that little tiered mini skirt. I’ve never owned one but always wanted one. And now I have the know-how so no more excuses! Teamed with some statement tights and a pair of Docs… and Bob’s yer lobster!

festival styles

And here come the Wedding Belles! Not sure I like the strange ‘boob wrap’ on the title page. I can see where they are coming from and all, a kind of romantic Jane Austen empire type-ness I guess. But a little bit odd don’t you think? I do like the casual lacy top meets lacy skirt weddingy or not outfit. Very simple and very pretty. And there we have that odd back of the dress that kind of looks like you might be wearing an apron (top right). I have stared long and hard and tried to make myself like it. I admire the attempt to be a little bit surprising but I don’t want to be surprised that much. I just want a back to the lovely front of that lovely spring cover dress! I guess I’ll have to go figure!

Wedding Belles

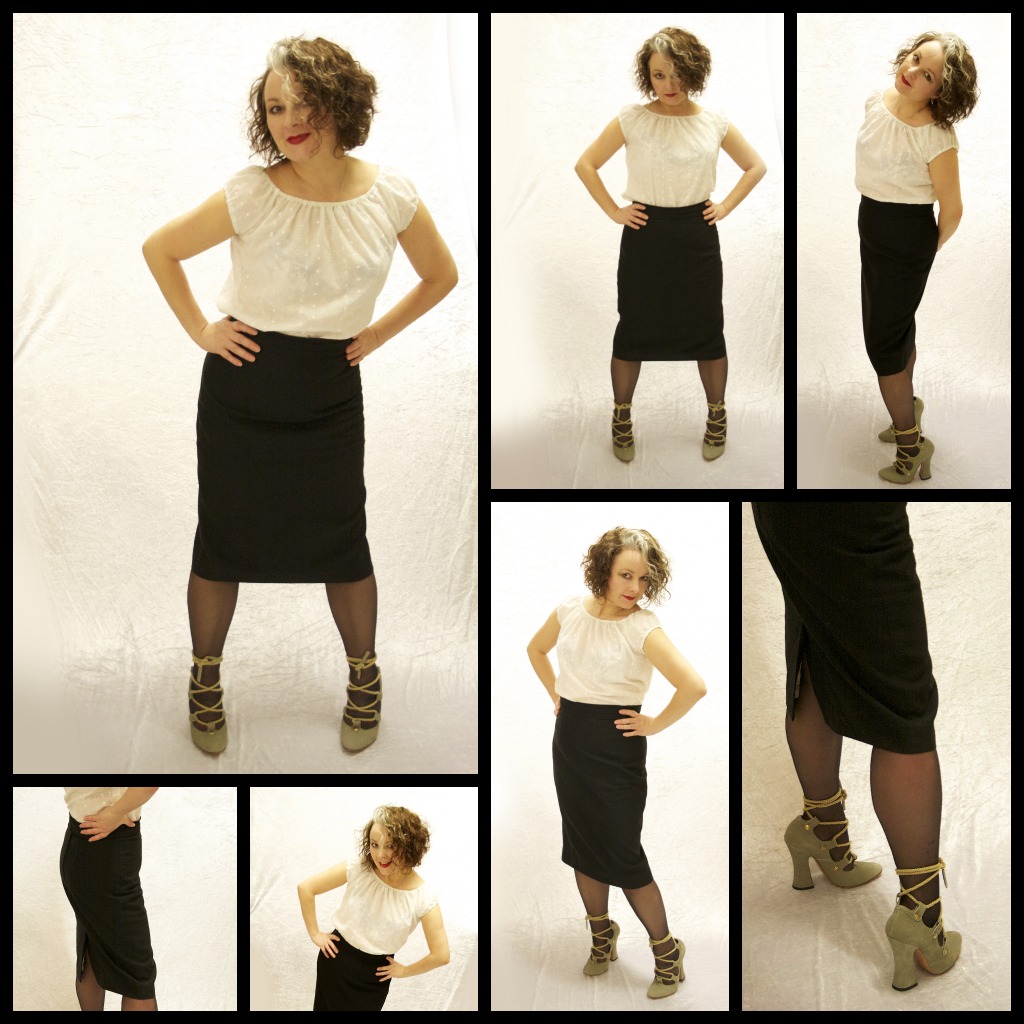
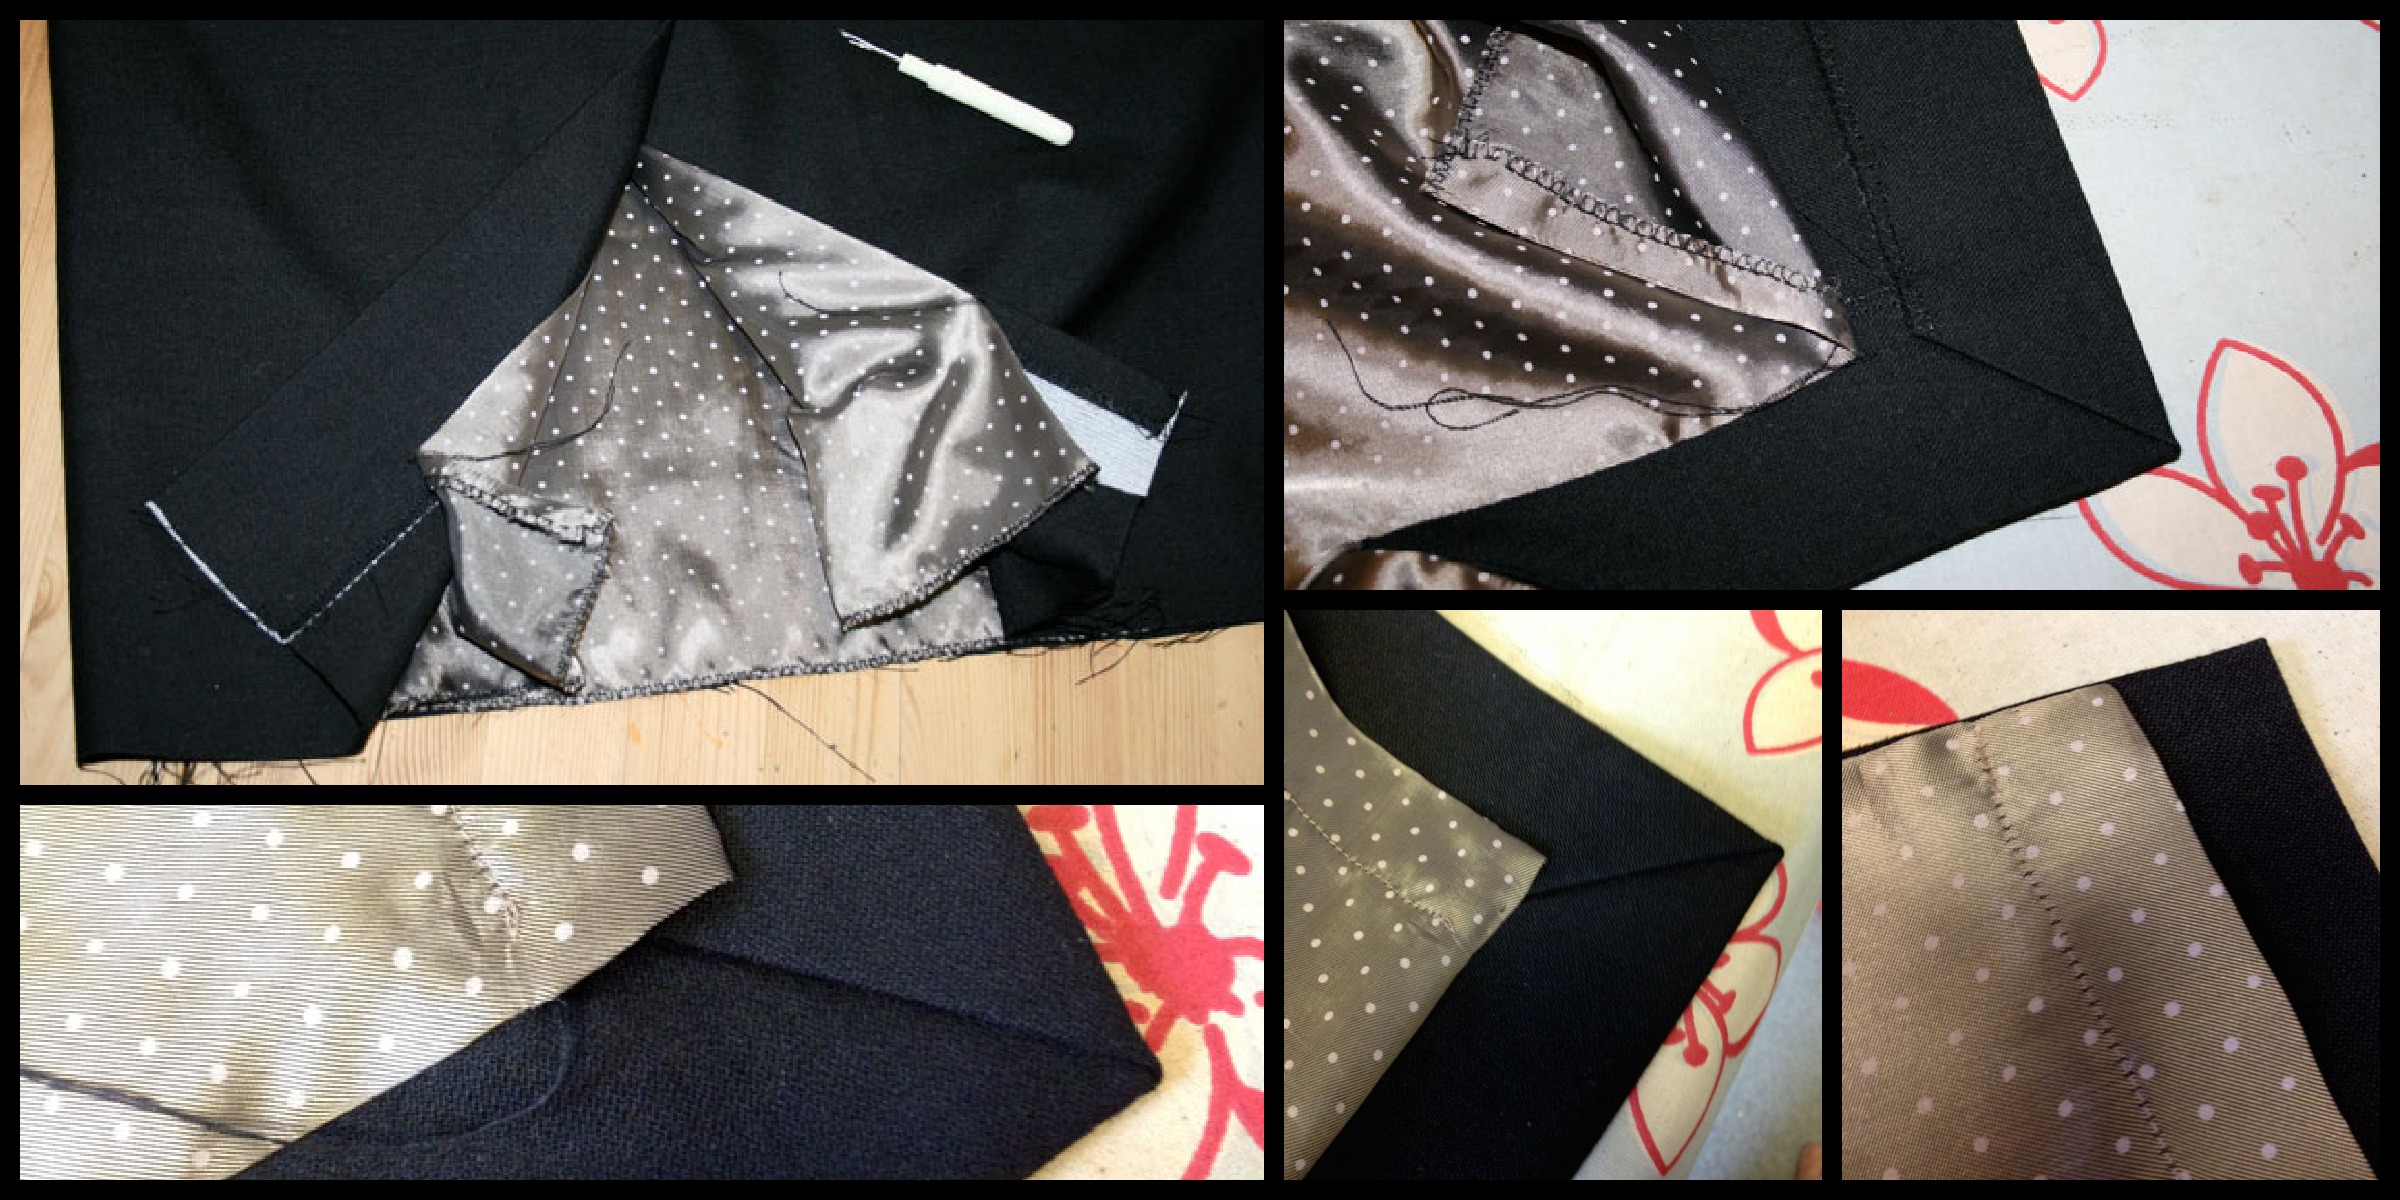
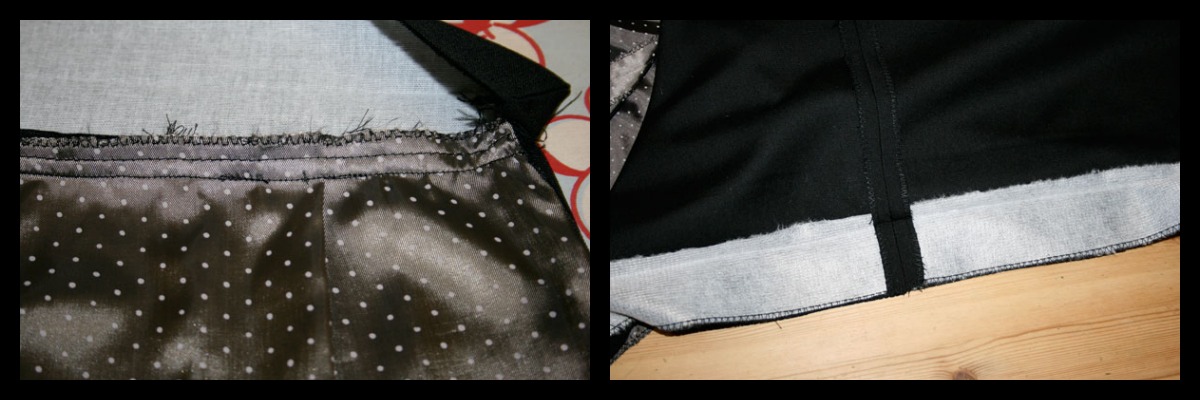
But I have singled out a very timely dress from this section. Despite her drinking problem, this lady has provided great inspiration for a prom dress I have been asked to make for my friend’s daughter. I was a bit nervous at the prospect. Still am to be honest. But I am hoping she will like this little beauty, with a shorter skirt of course. Because not only will she look stunning in it, the pattern and the instructions look none too complex!

prom dress idea

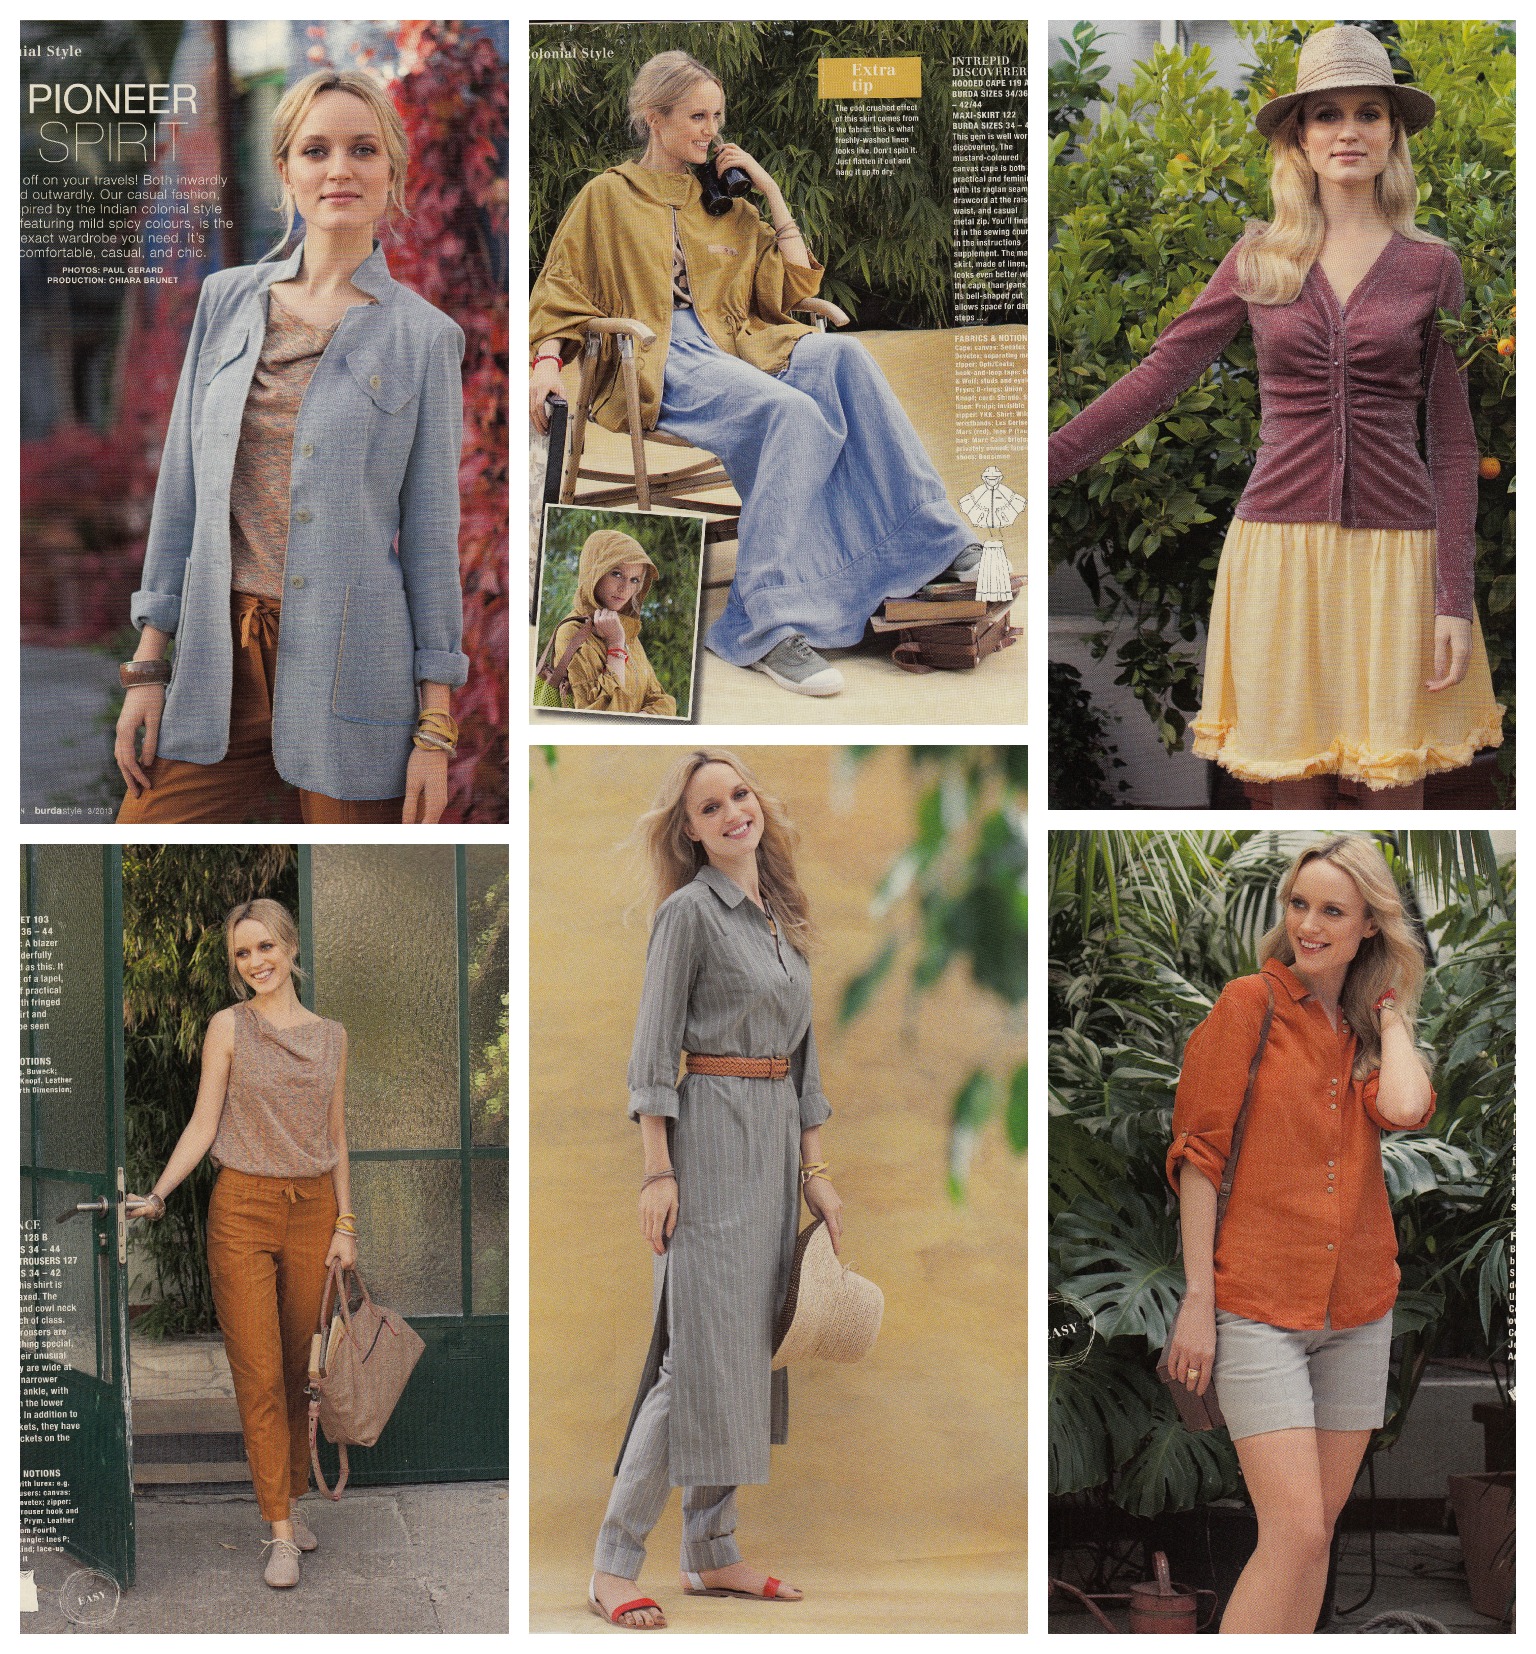
Colonial Style features some casual fashions inspired by the Indian colonial style. Comfortable and chic. Now I’m all up for that kind of irony but I think there is more comfort than chic going on here. Do love that little rouched cardi though. And the placement of the buttons on the spicy orange shirt!

pioneer spirit

Vintage Pattern time is always a joy. I love how this one has been perfectly recreated from the 1952 lace blouse. But I wore one of these in the 80s when I was a New Romantic and I’m not sure I’m ready to repeat just yet. But it is very pretty!

vintage blouse pattern

The Plus Fashions really make their mark this month. Very bold, very monochrome and very stylish. Not so cashing in on voluptuousness this time but very strong and impressionable all the same

Plus Fashions

And if you are looking for some funky cool kid stuff, that’s all here too.

kids fashion

There are heaps of other styling ideas and easter crafts that you will have to seek out for yourself but I can’t leave without showing you these two cute ideas. Whomever would have dreamed up a cute carrot cushion? Only Burda! And I’m not hot on crochet – I don’t ever leave banging eggs hanging around long enough to need a hat – but just what joy would these little fellas bring to a breakfast table?!

easter craftsThank you Burda Style, for reminding me there is a Spring. There is a glimmer of warmth on the horizon and of course for these brilliant patterns that will serve to keep me pleasantly occupied in the meantime!

Happy sewing everyone x

Pin-up pants and procrastination

black pin-up pants with red lace

I made my first pair of pin-up pants last September 2012 and I knew I would have to make more. For one, that stretch silk doesn’t come cheap and I WILL use every last piece! But moreover they are divine to wear!

Even though they look as massive as the last pair, they are in fact a bit shorter. So they come just under the belly button now! I found some fabulous red lingerie lace at my local haberdashery stall and remembered that Mr. O had bought me a packet of little red bows some time ago. Perfect for some cheeky vintage-style knicks!

Not much more to say about these other than they are well worth a go. I love working with smaller projects especially as I don’t have a dedicated sewing room. It means I can have everything contained and to hand… and don’t have to clear the decks in order to lay everything out!

As you might have noticed, this is the 2nd little project I’ve posted today, after starting a toile for Mr. O’s waistcoat this morning. One might think I was seriously procrastinating and avoiding doing the welt pockets on some very expensive silk satin. One might be quite right!!

waistcoat toileGosh! Is that the time? Sorry must dash! Got a date with Mr Selfridge! 😉

Windblown Square quilt block

Windblown Square quilt block

Now we are getting interesting… if you like this sort of thing! Meet the Windblown Square block. Number 23 from issue 25, The Art of Quilting.

It required all of the techniques that have been employed in the previous blocks. Diamonds were sewn along each edge of the Brighton Pavilion square, then the small green gingham triangles were inset in between the red diamonds to make a square. The remaining large triangles were joined in pairs and then sewn to the outside edges of the block to make a larger square… simples! Or not… if you try and rush it.

I completely forgot that I had previously cut these pieces out, so all I had to do was whip them up. But as the old saying goes, more haste, less speed. Indeed! I sewed the outer pairs the wrong way round which resulted in the gingham pieces sitting together. I thought I might get away with it but it would have been a forever niggle. So I unpicked, albeit sulkily!

windblown square quilt block wrong

Apart from concentrating to make sure all the right pieces are sewn on the right way, you also need to be so accurate and consistent with those seams. One wayward line of stitching and it all goes belly up!

Block Facts:

Name: Windblown Square or Star.
History: Also known as Balkan Puzzle. Nancy Cabot recorded this name in the Chicago Tribune in the 1930s. Thought to reflect the complex politics of Eastern Europe in the early 20th century.
Level: Straightforward to assemble but accuracy with set in seams is a must.
No. of pieces: 17

Progress report:

Block 1: The Double Four Patch
Block 2: The Whirlwind
Block 3: The Sailboat
Block 4: The Shoo-fly
Block 5: The Trafalgar
Block 6: The Windmill
Block 7: The Chequer Square
Block 8: The Diamond Square
Block 9: The Cactus Pot
Block 10: The Sawtooth Star
Block 11: To come!
Block 12: The Windmill Sails block
Block 13: The Basket of Flowers block
Block 14: Susannah
Block 15: Road to Oklhahoma
Block 16: Chequer Star
Block 17: Nelson’s Victory
Block 18: Fair and Square
Block 19: Diamond Pinwheel
Block 20: Whirligig
Block 21: Old Maid’s Puzzle
Block 22: Whirlwind Square
Block 23: Windblown Square

Lucky Lucille? Lucky Me!

This post is hugely late but nevertheless essential and heartfelt!

I won a giveaway! Oh yes, oh yes… lucky me indeed!

rochelles bag

Back in November 2012, Tilly held a sewing social on Twitter which was such a hoot! It was here that I met Rochelle and boy was I glad I did. Have you seen her blog, Lucky Lucille? I have no idea how I managed to miss that one. Her styling, her content, her beautiful photography…. not forgetting her adorable loving pupster! I could go on forever or at least until I exhaust the dictionary of gorgeous adjectives but I really think you should have a look for yourself and then add it to your favourites because it deserves to be no place else!

Anyhoos, as if finding her blog wasn’t exciting enough, in December I won a giveaway on the Lucky Lucille blog – in time for my birthday! What a treat!

The packaging was the first delight. I almost didn’t want to open it. Almost, I said. There was only the tiniest hesitation, out of politeness, before I steamed into that package knowing exactly what was inside!

Lucky Lucille packagingWanna see?!

Not only this beautiful hand made bag, made by her own fair hand…

rochelles bag

But also this amazing 40s pattern, Butterick B5281, which I have had my eye on for far too long. I can’t believe I actually have it in my own mitts now. And check out the gorgeous buttons too, as if this wasn’t spoilt behaviour enough!

butterick b5281 and buttons

I am so huuuuugely grateful Rochelle, not just for this amazingly generous giveaway gift, but for the absolute joy your blog brings!

Now go people, GO… check it out… but mind you don’t drool on your keyboard!

Black pencil skirt and a learning curve

Not the most ground-breaking make but as usual, there is a continued method in my madness!

I have hundreds of really lovely vintage and modern dressmaking patterns and a serious desire to make and wear each one but every so often feel like I’m winging it too much. For sure I get there in the end and it looks great for the camera but as the maker, I know what secrets lie inside!

So I need to rehearse skills on basic garments such as this pencil skirt to improve technique and reassure myself that I am still improving!

Image

I really enjoy going back to the drawing board sometimes, quite literally! The pattern for this skirt is one I drafted back in August 2012. But I have made quite a few adjustments since then, which I really like, and I think make for a better fit.

  • I moved the darts apart slightly on the front.
  • I lengthened the skirt to below the knee (ooo get me and my bravery!)
  • I tapered the skirt by about 2 inches either side for a more pencilled effect.
  • I added a waistband.
  • I included a PROPER vent including mitred corners!
  • I made a much better job of the lining and learned how to line the vent.

What I should also have included:

  • a hand-picked zipper
  • more overlap on the waistband to add a button along with the hook and bar.

On the subject of hook and bar, even that was a revelation. I first used hook and eyes thinking they would suffice. But they really didn’t! They kept coming undone it wouldn’t be too long before they bent out of shape. So I dutifully replaced them with a sew on hook and bar. It’s much better but even though I sewed it in from the edge of the overlap, it still shows, so I need to set it back a bit further.

Image

Nearly didn’t make the effort to do a mitred corner on the vent, but jolly glad I did. Before hemming I sewed the lining, right sides together all the way down the vent edges. Before hemming the skirt outer fabric I carefully unpicked the thread using the eye end of a needle. I used that loose thread to sew invisible stitches to attach the remaining lining once I’d trimmed and hemmed it. Such a neat trick! (And a great excuse to show off my mitred corner!)

vent lining

Interfaced waistband and hem using a lovely woven fusible interfacing. Nice and sturdy. Just the ticket!

Interfaced waistband and hem

I didn’t scrimp on the fabric for this skirt. I think you can afford to be a bit more frivolous when you only need a meter of fabric to play with. So I bought some quality British wool and boy does it feel good. A dream to sew up too.

I’m anticipating some questions on lining the vent, and I am really sorry I haven’t included it this time. A combination of no step by step photography and a serious lack of remembering exactly how I did it myself! I know it wasn’t that difficult and I hope to bring that part to you on the next one I make. And I will be making more because it was my original mission to make and own a pencil skirt for every day of the week. Different colours and styles. That would be so cool and not too unachievable!

CREDITS
Mr Ooobop! was of course, my lovely photographer for this and most posts.
Shoes by Vivienne Westwood… oh yes!
Top hand made peasant top that I didn’t get round to blogging!

Home-made maternity belt, circa 1940!

I was just searching for a date on this pattern so I could update my vintage pattern collection page with this little beauty…

Du Barry 2479B
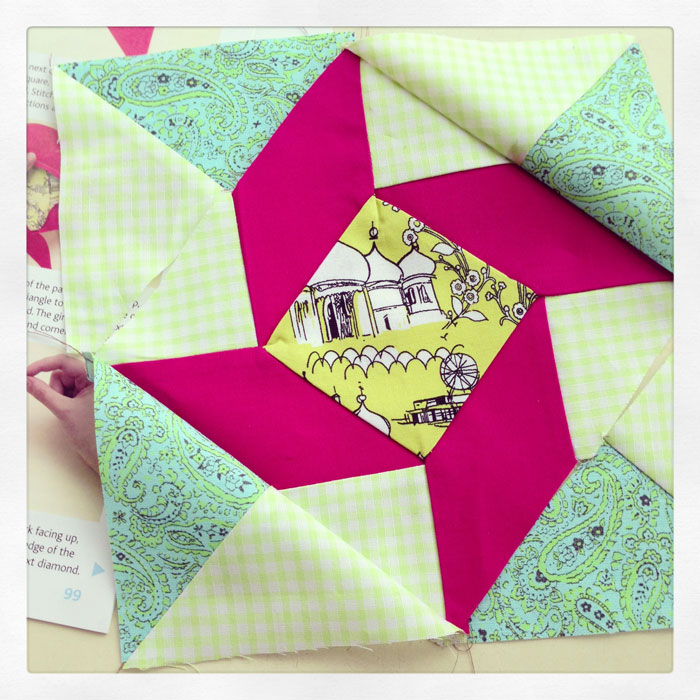
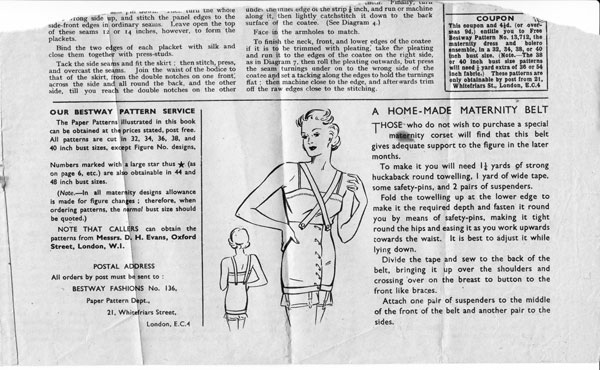
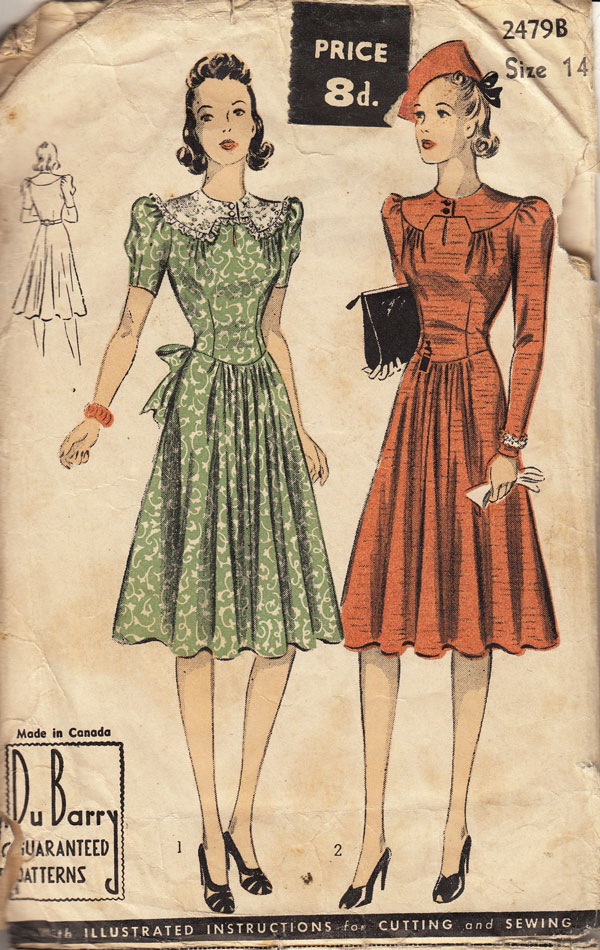
…when out popped this little cutting which tickled me, I must say:

home made maternity belt circa 1940
home made maternity belt circa 1940 (click on image to enlarge)

If you do try this at home, remember “It is best to adjust it while lying down.”

In the latter months?!! I can just imagine trying to get up off the bed, like some ungainly upside-down tortoise.

And there’s me thinking the 1940s was all about glamour, inside and out! Doh! It’s a wonder all 1940s babies weren’t born squished like Flat Stanley!

Incidentally, I didn’t find an actual date. I’m assuming (once again) that this pattern dates 1940ish but any more accurate hunches are appreciated.

Roman blinds/shades for the landing

Well I’ve certainly got that winter nesty feeling. Never thought I’d say it but the rain can tip down as much as it likes. The wind can howl till it’s heart content and who cares if it’s cold as a polar bear’s nose. I am happily inside, toasty and warm, making bread, watching old movies, sewing and putting up my freshly made Roman blinds, or Roman shades if you are anywhere but the UK!

roman shades during day

I’m assuming the fabric is vintage. It had that musty attic smell about it when I landed 5 metres of it, for £10 at a charity shop. But nothing a spruce in the washing machine couldn’t sort.

The hardest thing about these darn blinds (or shades) is photographing them! Too light outside and you get too much show through. Too dark and you see nothing!

roman shades in the dark

Too long trying to be arty farty with it all and you get cat-hassle!

roman shade with cat interference

I’ve made these on a couple of occasions before but only posted on Burda. This set I made for Little Miss Ooobop’s room using an remnant of fabric I picked up in a discount fabric store for a fiver:

Roman blinds in rose fabric

And these black ones I made for my eldest daughter… for considerably more pounds:

black roman blinds

This is a great sewing project for a beginner because it only involves sewing in straight lines. But as many times as you make them you still have to measure twice and cut once. Or in my case, five or six times. It’s all in the maths.

For anyone who’s interested I will compile a tutorial. I didn’t take in-progress shots, mainly because I worked in such a horrendous way, spread all out on the living room floor with cats jeopardising the project every step of the way! But I will create some diagrams which should be a lot easier to follow. Just not tonight, ’cause I’m pooped!

The Norman Hartnell telephone blouse

Norman Harnell telephone blouse

I love a 50s style blouse and this pattern was a definite sell the moment I saw it. The pattern itself was a freebie with Woman’s Day (about 55 years ago!) and as luck would have it, the gift supplement was in that Morrisons bag too. Great to see the blouses modelled and photographed. Sometimes those illustrations on the cover of the envelope give a slightly different impression to what they look like in real life! 😉

womans day gift book spread

Norman Hartnell blouse pattern

Norman Hartnell, or “Sir Norman Bishop HartnellKCVO (12 June 1901, London – 8 June 1979, Windsor) was a British fashion designer. Royal Warrant as Dressmaker to HM The Queen 1940, subsequently Royal Warrant as Dressmaker to HM Queen Elizabeth The Queen Mother. Royal Warrant as Dressmaker to Queen Elizabeth II 1957.”
 
“Although worried that at 46 he was too old for the job, he was commanded by the Queen to create the wedding dress of Princess Elizabeth in 1947 for her marriage to Prince Philip (later the Duke of Edinburgh).[1] With a fashionable sweetheart neckline and a softly folding full skirt it was embroidered with some 10,000 seed-pearls and thousands of white beads. He subsequently became one of the Princesses main designers[2] and so gained a new worldwide younger generation of clients, as the Princess began to take on more duties and visits abroad. The younger Princess Margaret became the obsession of the press and her Hartnell clothes were similarly given huge publicity and received much newsreel coverage.”
 

It’s a worry that he thought he was too old to continue at 46!!!

You can read more about him over at Wikipedia.

Anyhows, I quite fancy ‘a wardrobe of crisp gay blouses’. And if Norman’s are good enough for Queenie, they are good enough for me!

Norman Hartnell telephone shirt

This was on the whole a very simple pattern. I measured off the tissue and figured I could add a bit on the waistline, as I usually do to get a reasonable fit. I made it up in a cotton poly that was semi decent just in case it worked!

But oh no! My measuring skills were unbelievably inaccurate. Either that or I have this illusion that I am the size of a small child!

I considered moving on to another project. But of course that would have been hugely defeatist of me and heaven knows I need to learn to grade a bodice properly so I set about cutting and slashing.

It worked, kind of. Well at least it fits but there are a couple of issues for a blouse so simple.

I think I need to open up on the lines of the hip a bit more. It’s a little snug!

telephone blouse hip

I graded up the sleeve in line with what I had increased on the bodice but there was far too much ease. So I used the original sleeve piece. Still a little too much ease for my liking but that seemed to be solved with the addition of some shoulder pads.  I used the cuffs from the toile for my real one because the dots ran into each other and defeated the object of having cuffs at all!

I have to say, the method suggested for the sleeve cuffs was a bit long-winded and strange. When I do it again I will be cutting on the bias, and attaching in the same way I did to my shorts.

telephone blouse cuffs

The winged-collar effect is not a wing collar at all. It is just the effect of opening up the facings. There is no raised collar stand at the back, just a faced neckline so it is a very flat feature. Next time, I might be inclined to cut the front piece at the start of the inner facing and sew a contrasting colour piece that folds back just to accentuate the shape.

The ‘lapels’ seems substantially smaller than those photographed. Next time I might grade the front and front facing allowance a little, too.

The instructions called for a bias cut strip to finish the back neckline and join the front facings but as luck would have it, the previous owner had cut a ‘back facing’ piece from some newspaper. I checked it against the back piece to make sure it was meant for this pattern. I just had to decrease the depth a bit, otherwise it fitted perfectly. It created a continuous facing too, which is surely a better idea and certainly much neater too. I understitched the adjoining seam, to the point just before it folds back and catch-stitched to the shoulder seams to stop it poking up, willy nilly!

Because the design called for 3 buttons I had an array of odd interesting ones to choose from. My son so kindly remarked that, because the shirt ‘kind of looks quite old, it would be good to use those old fashioned phone buttons’. I am sure he meant that in a good way! 😉

telephone button

So that just about wrapped up my chilly childless Saturday. Amazing what you can achieve in a few hours when the house is vacated. The photographs (care of the wonderful Mr Ooobop!) and the blogging took a little longer… such fun!

ooobop! Lucky Hat

lucky hat

I had the perfect sewing window today – Little Miss O at a party for 4 whole hours and a day far too chilly to hang outside for my liking!

But I wont dis the weather – that would be far too predictable for a Londoner – I will embrace it. And so I hatched  a plan to make a hat. I really don’t know how I get through every winter, convinced I don’t suit a hat, and freezing my poor little pixie ears off for the sake of not looking like (more of) an idiot!

So spurred on by the prospect of a toasty bonce coupled with an opportunity to make a minor stash bust but best of all, make a perfect showcase for one of my favourite buttons, the mini mission began!

lucky hat

Mr O had a similar hat – albeit a bit more manly! – so I set about drafting a pattern. I have quite a big head so this was another good reason to make one. If ever I find a hight street hat that I vaguely like, the chances are it will be too small!

Little Miss O found this button in a biscuit tin at a vintage fair in Islington last year. Just a single lonesome button with the word ‘Lucky’ on it. Could sure do with some of that ‘luck’ stuff right now so here’s hoping!

lucky button

It’s got an interesting stamp on the back but I can’t find any reference on line from where it might have come from.

lucky button

To create the decoration, I made a ‘yoyo’, my first one in fact! For those that don’t know,  a yoyo is a circle of fabric (in this case the circle that was cut out for my head hole!) gathered close to the outer edge and pulled tight. The raw edges are tucked inside and some reinforcement stitched sewn. Of course a statement button is a brilliant idea to cover up the scruffy bit in the middle. Velvet is not as manageable as cotton but a few needle pricks later, the result was very acceptable!

lucky hat decoration

I wore my new hat down to our ‘local’ for dinner tonight but didn’t take it off. I was a bit worried about the hat-hair issue. But hey, guess what happened when I took it off when I got home?! Hair looked better than it did pre-hat!

The outer fabric is a cotton velvet, wonderfully donated to me by a friend who was having a clear out. There are many more metres so I am contemplating a matching jacket! Contemplating I said!!

lucky hat

The inside is fully lined with a matching poly lining so it feels really neat. The band was machine stitched, right sides facing and then turned inside like giant bias trim and hand stitched to the seam line, using an uneven slip stitch. The stitches were quite small and sunk into the pile of the velvet so I am very pleased with the results.

I’m pretty sure this kind of hat will go with vintage or modern styles. Just need to make a few more in different colours!

Thanks to the wonderful Mr Ooobop! (of course) for the fabulous photos!