Using Evernote to catalogue patterns & fabric stash

vintage sewing patterns

In my head, I’m a very organised and methodical person. In reality I’m not!

Actually, that’s not entirely fair. I do put things in piles labelled ‘to action’, ‘to file’, ‘to put away’ and I have even been known to put things in boxes but there remains an ongoing issue with finding things!

My precious sewing patterns, new and old, are safely filed put away in boxes. I love to get them out and look through them every now and then, just for that warm fuzzy feeling. And sometimes I even put them to work. But with the ever growing tower of pattern boxes it is true to say that I often forget what I’ve got.

But last week I discovered Evernote! I cannot claim to be the authority on this app because, by all accounts, it does so much. However, I can tell you how it has revolutionised the organisation of my sewing pattern collection.

How Evernote works for me

  • Firstly, it’s on my phone which means when I find myself in a fabric shop, I can instantly find out how much fabric/what notions I need, or if a particular fabric is suitable for the job just by scrolling through my instantly available files.
Evernote screenshot
How my sewing pattern list appears on my phone screen
  • Equally if I’m in a charity shop and there’s an amazing remnant of fabric shouting out I can see if it matches up to the requirements.
  • I can instantly check to see if I already own the pattern or not – Despite my tower of patterns equalling my own height, I still get a little buzz from an Ebay bargain!
  • You can share your ‘notes’ on social networks or via message or Email which will be a handy way of me creating a new pinboard on Pinterest or consulting fellow sewists via Twitter or Facebook.
  • You can also print straight from your device. Assuming you’d need a wireless system for that though.
  • You can tag the patterns making for a brilliant search system. I generally tag mine with: size, bust-size, era, garment style, pattern name/number and exact date of publication if I can find it.
  • You can also stack notebooks. So for instance:
    1 ‘note’ effectively consists of front and back of pattern envelope plus any notes I’ve made from previous experience.
    ‘Notes’ are grouped together to form a ‘notebook’, for instance one ‘notebook’ could be titled Vintage another could be Modern.
    ‘Notebooks’ can then be stacked under a title of Sewing patterns.
    I am currently just putting all ‘notes’ (individual patterns) in one ‘notebook’ called Sewing patterns and tagging them for easy searching. I like being able to scroll down a long list.
  • You can view each pattern as a thumbnail with it’s title alongside. It’s a little bit diddy, even on a larger than average phone screen but it syncs perfectly online and I find this is an easier way of viewing and editing from the comfort of a desk and the luxury of a larger screen.

Evernote online

And the best thing about Evernote?

  • It’s absolutely FREE! I haven’t felt the need to upgrade to a premium version yet. The benefits of which include: more space allocation, an offline editing option, multiple author permission, and pdf search facility. But even if and when I feel I’m ready to upgrade, its only about £35 per year!

Evernote is so easy to use

To upload a pattern I simply take a photo of the cover using the inbuilt camera and then take a ‘document’ shot of the back cover text. This text can be enlarged for perfect readability even on a tiny screen. I then give it a title: The pattern company and number reference. And then I tag it so It can be searched for. I currently only have the one notebook titled, Sewing Patterns and I make sure they live in there but if you had other notebooks you’d just have to check it’s in the right place.

Evernote phone screenshot
This is what the pattern cover image looks like within a ‘note’


Evernote screen shot scroll down
This is what the screen looks like when I scroll down for further info
Evernote zoomed in
This is what the back cover info looks like, zoomed-in on my phone

Teething problems with Evernote

I have only come up against a couple of teething problems. No biggies but worth bearing in mind to save you from pulling out your hair!

I did get excited when I saw the ‘Location’ entry box. But longitude and latitude won’t help me to find where the actual pattern is so I guess I will have to add the location to the file name (ie box 1 etc)

For a short while I didn’t understand how Evernote randomly selected an image to use as the cover thumbnail. It doesn’t select them according to first in the list, moreover the largest image.
So just make sure that the cover image is larger than the back cover document image. I do this by taking a close up of the pictorial cover and holding the camera a bit further away when I shoot the back cover. When using the document shooting facility it will naturally crop into the document text area and automatically exclude external background content, which keeps it smaller.

Using Evernote to catalogue fabric mountain

Once I’ve finished cataloguing my sewing patterns, I’m thinking of filing my fabric stash too. By taking a photo of the fabric and adding some notes and searchable tags relating to size, fabric content and potential usage. But one thing at a time, hey?!

Has anybody else tried Evernote? Are there any features I’ve missed? Or do you use another filing system?

For anyone interested in getting this app, you can either download it from the App Store or let me know, and I’ll Email you a link. Another great feature is that if you recommend a friend you earn points to upgrade for free! So once you are signed up for the free app don’t forget to recommend Evernote to your friends too.

Footnote: This is not a sponsored post, despite my enthusiasm. It is an honest review of a product that works very well for me and my purposes.

Make your own Zhivago-inspired fur hat: FREE pattern download

make your own fur hat free patternquick sewing projectHappy new year lovely followers!

I’m so delighted to share this pattern with you as my first post of 2015. It’s a timeless, vintage-style fur hat that will keep you warm and toasty in the most stylish way possible! And it’s a real quick project to sew up for that quick sewing fix when time isn’t on your side!

It really is so super easy to make. Just download and print out the FREE_fur_hat_pattern and follow these few simple instructions. The hardest thing about this hat will be to get your hands on some quality fur of the faux kind!

The pattern corresponds to my head size which is 22.5 inches or 57 cm.
You may need to adjust the pattern to personalise the fit.

You will need:

  • 1/4 m of faux fur (retailers will only usually sell you 1/2m at a time but its often worth an ask!)
  • 1/4 m of lining fabric (or find some scraps in your stash)
  • coordinating thread
  • a vacuum cleaner to hoover up all the fluff!

Instructions:

  • Make sure you print out your FREE_fur_hat_pattern at actual size, and check with the test square (on page 4 of the pdf) that it has printed correctly. Cut out and paste the sheets together to match the layout on page 1 of the pdf. Complete the hat band and crown sections as full pieces as instructed on the pattern then cut out.

NOTE: Before you pin the pattern to your fur fabric, think about what direction you prefer the fur to lie. On this particular hat I made, the pile strokes downwards on the band, from the top of the crown, down towards my eyebrows! On the top circular piece, it strokes from front to back. Incidentally, the centre back of the hat is where the band is seamed.

TIP: When cutting your fur pieces, cut on the reverse and just snip carefully through the backing fabric so as not to cut through to the actual fur on the right side. You will achieve a much better finish on the seams.

  • Pin the pattern to your fur pieces and cut out, paying heed to the tip above.
  • Pin and cut out your lining pieces. It doesn’t matter for the circular lining piece but make sure the band is cut on a straight grain to avoid stretching.
  • Take your fur band piece and fold in half, right sides together. Pin the short ends together, making sure the fur is tucked inside, and stitch using a 1.5 cm seam allowance following the direction of the fur.

seam fur band

TIP: When sewing fur fabric, Increase your stitch length a little so prevent thread tangling.

  • Finger-press the seam open and hold in place with a couple of tacking stitches top and bottom of seam.
  • Pin the fur circular crown piece to the hat band, making sure the fur is tucked in and checking the direction of the fur is correct. See note above. Sew the seam using a 1.5 cm seam allowance.
pin and stitch crown to band
Pin and stitch crown to band
  • Turn right side out. Using a long craft pin (a normal pin or needle will do) drag it along the seam allowance to free the fur that has got caught in the seam.
picked trapped fur from seam with pin
Pick trapped fur from seam with pin
  • Now take your lining piece for the band, pin the short edges together as above and stitch with a regular stitch length and a 1.5 cm seam allowance. Press seam open.
  • Stay stitch the circular lining piece within the seam allowance, to prevent stretching.
Stay-stitch circular lining piece
  • Pin the lining piece for the crown along one edge of the band and seam together, leaving a about 4 inches / 10cm open for turning.
leave opening in lining
Leave opening in lining
  • With right sides together pin the rims of the lining and the fur hat together. Effectively the fur hat will be sitting inside the lining. Pin together, matching the two centre back seams and stitch along the entire edge, securing the stitching, beginning and end.
Sew lining to outer fabric
Pin and sew lining to outer fabric
  • Turn the hat to the right side through the opening left in the lining, and you’re almost done!
Turn hat to the right side through this opening
  • Pin the lining opening together, tucking in the seam allowance, and slip-stitch closed. With matching thread, obvs!
Slip stitch the to close the opening in the lining
Slip stitch to close the opening in the lining. With matching thread obvs!

Now all that is left to do is to don your new fancy fur hat, step out in the snow and hum the theme tune to Doctor Zhivago!

Please shout if anything is unclear. I’d be delighted to hear how you get on.

Faux Zhivago: handmade retro-style fur hat

handmade fur hat

I watched the film, Doctor Zhivago lots of years ago, snuggled up on the sofa with my mum. Can’t say I remember much about the plot but the music and the coats and the hats stayed with me for sure!

So when I found a crazy retro-style furry black hat in Oxfam, I knew I could and should shamelessly copy and create one of my own even if I didn’t have the lips to pull of a sultry pout, Julie Christie style.

So here is the Ooobop faux fur, Zhivagoesque, vintage-style hat that will laugh in the face of any Russian-style snowfall that threatens over the next few days.

handmade vintage style fur hat

I care not if my children walk ten paces behind me.

I care not if Mr O likens me to Rab C Nesbitt’s Wife.

And I care even less for all those sideways glances in the high street. They are just jealous eyes!

My ears are warm. My bad hair day is irrelevant. And Lara’s Theme tune is on loop!

handmade fur hat Doctor Zhivago style

The faux fox fur – I keep having to state faux because it actually feels too real to be faux! – was a bit pricey but it was a justified birthday spend up gifted by my lovely mum. I got it in A-One Fabrics in the Goldhawk Road and it is such good silky quality. Only needed half a metre and that was enough for a trial one that went wrong, this one which didn’t, and perhaps a matching fur muff to come! Do people even wear those nowadays?

I probably don’t need to declare that it was Mr O that took these fab photos – late last night, with next to no light but one of those god-awful energy saving bulbs and a few fairy twinkles. I certainly wouldn’t have had the patience. Very happy to sit with a glass of bubbly under the Christmas tree while he worked it though!

I was hoping to have a little tute prepared for you to accompany this post but that was serious wishful thinking on my behalf! Working on it nonetheless. And for anyone who fancies a furry head warmer like mine I’ll be posting a pattern and a tute next post, post-haste!

Till then lovely followers, I wish you all the loveliest of wishes; Wrap up warm, keep safe and beware the nutters on the road!  x

handmade fur hat

Vintage wrap-blouse

vintage wrap blouse

In the olden days I used to worry that I wouldn’t have enough to blog about but now it seems I’m capable of even forgetting that I’ve made stuff to blog about!

This lovely pattern was generously gifted to me by Anne of Mercury Handmade. Not only did she post me a much-wanted, missing copy of Burda Style magazine back in August but she also enclosed two surprise gorgeous vintage patterns. This being one of them. If you’ve not caught up with Anne yet, I seriously advise you to pop over to her blog for all the inspiring and perfectly made clothes she makes for herself and her two lucky daughters

Bestway D.3,109 blouse pattern

The pattern is Bestway D.3,109. One of those mail order sorts, by the looks of it. And I’m thinking early 1950s.

I love the flattering neckline and the extended sleeves. The back is just one piece which incorporates the sleeves and there are interesting yoke pieces which incorporate them on the front. The ‘collar’ lays flat, sitting on the collar bone to create that lovely opening. And its beautifully shaped to nip in at the waist.

It’s held closed with just two vintage buttons. The third is for decorational purposes but at some point I would add an internal button or snap to keep the under-wrap in position. For the time being I generally tuck it into my pants!

lighthouse blouse buttons

I used a nice crisp cotton from the goldhawk road. It’s printed with lighthouses which seemed a perfect choice for this blouse.

vintage lighthouse blouse

I love wearing vintage style blouses. There’s always something a little bit quirky about them. And they are so easily paired up with a circle or pencil skirt. I’m slowly getting away from the easy-to-wear jersey tops that I used to wear all the time. Just need to make a couple more so I can ditch the rest of my tatty go-tos!

vintage lighthouse blouseAnd in case any of you are wondering. I wouldn’t ordinarily be out in December without a coat. It is winter as I post this and it is very, very nippy out! We just ran across the road while the sun was out to take these shots and ran back in before the goosebumps set in!!

I’m now about to add about 10 more layers and head out into the wild and crazy world of Christmas shoppers! I’ve not even scratched the surface yet. Please don’t tell me you’ve all done yours!


Handmade Secret Santa pressies

gold bag on the railingsWhen I saw this bag in December’s Burda Style magazine, I just knew it was the one I’d been storing in my head for over a year! I’d seen a very similar 1940s Vogue pattern floating around on the web, time and again but never for sale, at least not with a reasonable sale ticket!

vogue bag hat pattern v9837
Source: http://vintagepatterns.wikia.com/wiki/Vogue_9837

I’d almost resigned to self-draft my own but couldn’t quite get my head around the order of sewing. Didn’t really try hard enough tbh! But Burda saved the day yet again with another simple well-drafted design.

burda pouch bag
Source: Burda Style magazine December 2014

And so when I found out I was to make a Secret Santa pressie for the adorable vintage-wearing Emmie Ink Fairy, it was a given!

The instructions suggested leather, which I did originally go looking for. And believe it or not there is such a great colour choice as well in the Goldhawk Rd! But even after a good rummage, I couldn’t find a gold piece big enough to fit the pieces. I thought two pieces of gold lamb was a bit excessive and then gave up on leather altogether when I couldn’t remember if Emmie was a veggie/vegan. That might have gone down like a lead flipper!

As always it was A1 Fabrics that presented me with a better fabric solution: some lovely soft, gold ‘pleather’. Perfect!
It was an education to work with. A leather needle made light work but boy did we have a fight to press the stuff! Didn’t really think that through properly.

Gold pouch bag

Pleather is plastic, fundamentally, and will melt if it comes into direct contact with a hot iron. I’m not that daft. I did use some parchment paper as a pressing cloth. But it just boinged back the minute I stopped pressing. The heat was being retained and making it too pliable. So I grabbed the nearest ‘clapper’ I could find, in the shape of a heavy book, to slap down on the fabric once I lifted the iron off. It did the job in cooling down the fabric quicker and so holding the press a bit better. Not nearly as well as a woven fabric would have pressed but better than a poke in the eye for sure!

gold pouch bag

Burda’s instructions stopped at a facing but I wanted neater than that, so I made a lining to attach to the bottom of the facing, and of course included an ooobop label! Not such a secret now but I liked it as a finishing touch!

inside gold pouch bag

I stupidly didn’t get a picture of Emmie with it adorning her wrist but it didn’t look out of place with her beautiful pink sparkly dress.

We were at a lovely Christmassy do hosted by the BHL girls. So honoured to be part of the evening with so many wonderfully familiar faces.

We dined and beered at a local-to-me Polish restaurant called Patio. I seriously don’t know how those girls catered so brilliantly for over 30 of us with so many different menu choices. They were amazing.

And look what some gorgeous and not-so-secret Santa made for me!

quilted cup and saucer

I seriously couldn’t believe that someone could have made this quilted cup and saucer but when I realised it was the uber talented Rachel Pinheiro, it all made blinding sense!!

What’s not to love about the colours, the french men in their Breton tops, the moustaches and the candy stripes? Perfect to keep all my sewing notions from rolling around the table while I’m sewing and also for sticking pins and needles in as I go.

Earlier in the day I had been to a work Christmas lunch. Yes I know, 2 Christmas do’s in one day. And I was still standing! One of my secret-santa friends bought me this gorgeous sewing pattern. She is so bloody clever and so thoughtful! I can totally see myself in this dress already!

Vogue V2410 vintage dress pattern

I consider myself truly spoilt. Not just with do’s and gifts but with the plethora of amazing friends that bring me so much joy and make me laugh so much. That’s got to be the best part of any time of the year.

Have you made any gifts this year or is it all just too much?


Burda Brigitte Blouse

First I must apologise for those who have had issues trying to comment on my blog over the last week or so. I won’t bore you with the tecchie issues but suffice to say all is now good at Ooobop HQ! (touch wood!) Thanks for bearing with.

It feels so good to be able to write a post. I knew how much this blog meant to me but didn’t realise quite how much. I found out quick enough when I thought I’d lost nearly 2.5 years of work! I’ve been such a bloomin’ grumpy pants all week, Mr O will tell you for nothing!

I feel like I should be making a bit more of a dramatic re-entrance, but I’m afraid we’ll just have to make do with a humble gingham peasant blouse.

burda gingham boatneck blouse

It’s a very nice gingham peasant blouse though. Care of Burda’s June 2011 edition Mag. It’s also available for download here where it’s featured in a sheer fabric.

I’ve made three sleeveless ones before but this one has long sleeves and no elastic. And it presented a fine oopportunity to create some bias gingham binding around the neckline and cuffs which is always lovely!

burda gingham peasant blouseThe fabric was sold to me as Egyptian cotton, which I had no reason to dispute. It is smooth and cool to the touch and feels like fine quality. But the pyromaniac in me is compelled to do a burn test, always. And the little black crumbly ash that resulted, confirmed the fibres as a poly blend, doh! Win some lose some. Should’ve sniffed a rat at £5.99 really!

But not a worry as it still feels nice against my skin and it’s not snug on the pits so remains a good choice for a warm summer’s day or an office with failed air-con.

The instructions suggested a gathered hem into another bias band but I was nervous about too much poof around my middle and given that I almost always tuck in my tops I just did a standard hem. But, note to self, I didn’t increase the length enough to compensate, and with one wave across the street, it comes untucked, whether I’ve tucked it in my pants or not!

burda gingham peasant blouse

It’s very quick to make if you can even up your gathers quickly. I faffed a bit too much with my gathers as usual, but it still got completed in an evening.

I love the raglan sleeves and the boatneck. So easy to wear. Great with a pencil and equally a circle skirt. And the plan is to make some capri pants one day, just like Burda’s styling, to come somewhere close to that retro Brigitte look.

burda gingham peasant blouse

Peasant blouse: Burda pattern, handmade by ooobop
Skirt: self-drafted & handmade by ooobop
Belt: H&M
Shoes: Rocket Originals
Photography: © Daniel James Photographic


1939 Vintage Simplicity Dress

vintage 1939 dress

It’s been a while since I sewed a proper vintage dress and when I spied 5 gorgeous yards of pretty blue and white print fabric in a charity shop for a fiver, it was a sure sign to unwrap one of my favourite patterns. I bought the fabric thinking that if I screwed up, a fiver was worth the risk. But actually I loved the fabric so much I used some other polycotton, from stash mountain, to rehearse a toile for the bodice first.

Very few alterations were needed. I did a slight FBA to add a bit of shape and added an extra inch to the waistline. I think it fair to say that I manage to pack away a few more calories than those svelte 30s women!

simplicity 3302 pattern pieces

The pattern is a vintage original from 1939: Simplicity 3302. And the condition of the pieces was impeccable. Factory folded and clean. Such an honour to be working with such precious pieces that are 75 years old!

The most surprising thing about this dress is that it takes 5 yards of fabric. At 35 inches wide that is. But it really doesn’t look that extravagant. I’m used to 50s style dresses taking up miles of fabric but the skirt section of this one isn’t even a full circle!

vintage dress simplicity 3302

I kept to the instructions, like the good GTS I am, and I created a neck facing instead of lining. I also decided against overlocking the seams. It somehow seemed wrong! The fabric behaved beautifully and frayed very little so I opted for a spot of pinking! Feels far more authentic and it pressed beautifully flat.

I’m not totally sure what the fabric content is. But on doing a burn test, I was left with a very silky white dust. So the consensus is that it is 100% natural fibre and top notch quality I reckon! It has quite a good drape going on and doesn’t crease too much either which makes me wonder if it is cotton or not. I made a decision not to line it. Mostly because of the gorgeously warm weather we’ve been experiencing but also because it always seems a bit mad to line a natural fabric with a synthetic lining. And I wasn’t about to splash out on silk!

sitting pretty in vintage dress

Having said that. I did use a silk organza for the sleeve stiffeners. You didn’t think those puffs stick out like that, unaided did you?! Quite a clever little trick that involves a circular piece of fabric like tafetta or flannel or organza, folded in half and sewn to the sleeve head before the gathering is done.

silk organza sleeve stiffener

vintage_1939_dress_sleeve_head
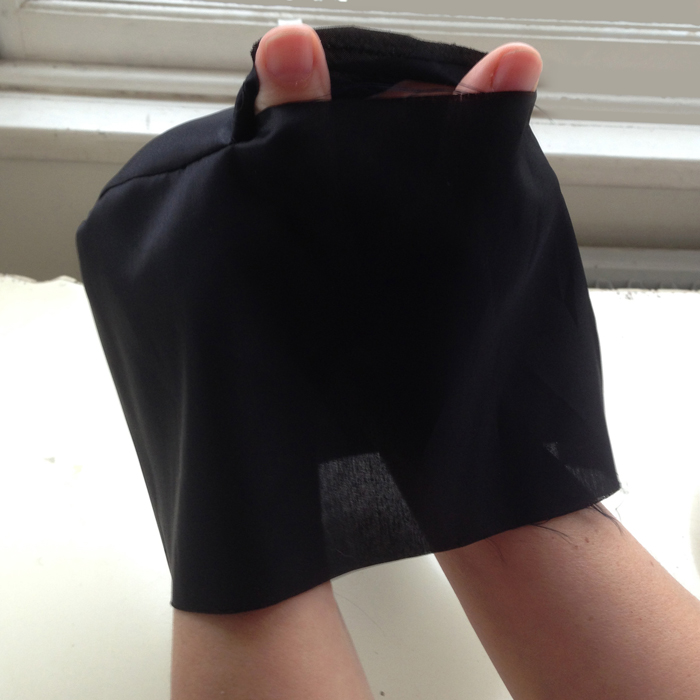
It looks a bit comical until you press the seam onto the sleeve and not onto the bodice which I did at first. Didn’t get a shot of that but the look on Dan’s face was priceless!

There is also an inverted pleat that is topstitched at the hem of the sleeve. So neat.

pleat on sleeve

I’d like to say it all went swimmingly but I made quite a big boo boo when I inadvertently cut the back as two pieces and not on the fold. Very easily done when patterns of that era are unprinted, but, regardless, I needed a quick solution as it would have come up too small once I’d seamed it and also, I didn’t have a large enough leftover piece to cut another back piece. Quite a big issue when you get your hands on a unique piece of fabric from a charity shop. It’s not like you can go back and bag another metre!

So… This is a bit bodgie… I made an inch wide length of bias tape from a 2 inch strip that I’d rescued from the selvedge, using my trusty Simplicity Bias Tape Maker Machine. And with half inch seam allowance I sewed it on each centre seam of the back. That effectively joined the back pieces together where they would have sat had there had been a fold!

Luckily the seams are disguised by the busy print so I think I got away with it!

back of vintage 1939 dress

I know my hair do isn’t strictly 1930s and the shoes are far from authentic but it needed a little bit of vintage styling to pull it off. Especially as youngest dort decided it was ‘lovely but very 80s!!’

vintage simplicity 3302 dress

I love the sweetheart neckline. So discreet and so pretty. It doesn’t have any added interfacing so I’m surprised it holds so well. I did clip into those curves good and proper though!

vintage sweetheart necklineI wrestled a bit with the zip. I knew I didn’t want an invisible zip. That seemed a bit wrong too so I opted for a lapped style zip insert. But could I get my head around it… No I bloomin’ couldn’t! I can do it with my eyes closed in the back of a pencil skirt but for some reason I just couldn’t pull it off. So I went for a straightforward zip insertion whereby I basted the seam shut, centred the zip and sewed to seam allowance. I did however prick stitch close to the teeth on the right side.

side zipper

I reluctantly wore my new dress a to a party on Sunday. I didn’t know any of the guests and was a bit worried I’d stick out like a sore thumb (in my 80s dress…. thanks dort!). But my assumptions were way off. Such wonderful food and great music and the most amazing people. My ‘wallflower status’ was upheld!

candy from Black Dwarf Designs
With Candy from Black Dwarf Designs

Oh and hats off to my wonderful fella, Daniel Selway who took the photos and who now finally has a site to host his pictures. Right here, in fact!


Mono dress & faux film noir!

self drafted dress film noir
10.30pm.
The air is heavy.
Rain spatters relentlessly against the rattling windows.
Daniel and Janene each propped horizontally on opposite sofas. Mood is low. The bank holiday weekend is nearing it’s end…

Daniel: Got anything you need to shoot?

Me: Actually yes. But nothing fancy. Just need some pics of that trial dress I self-drafted.

Daniel: Ok. Go to it. Heavy on the make up. Big on the heels. And find a hat.

Me: But . . .


And that’s how these crazy shots came about! Quite literally out of not wanting to end our soggy bank holiday with the grumps!

So this is the dress:

mono dress full length

It’s my next leap on from my first ‘proper’ foray into pattern drafting. I’d tweaked the bodice and I’ve drafted a few pencil skirts to know the drill, and so I thought I’d pair the two together and make me a dress!

There were a few toiles along the way I can tell you! And this one still isn’t perfect. Goodness knows how but I think I need to take at least 2 inches out of the back bodice. My thoughts on this were confirmed at the time of drafting the back skirt section when I noticed there was precious little difference from the hip line to the waist line! I measured the bodice and double checked all measurements and just assumed it was meant to be.

However. I did have to do some trimming just under the waist line after I’d tacked it all together. And I thought I could live with it until I realised the side seams were a little bit too forward.

This really is no big shakes. In fact this is such a giant leap forward for me, the knowledge I’m gaining all the way is so totally rewarding. And luckily I have a heap load more of this fabric that was so kindly given to me by my fabulously talented milliner friend, Jayne Hepsibah. She wasn’t sure what it was but I’ve given it a burn test and it burns to a very fine pale dust. I wasn’t expecting that at all as it’s quite a weighty, almost upholstery style fabric with a bit of stretch! So I’ll make another soon to confirm my findings and rectify the problems.

The other niggling thing is that the armholes on the front could do with widening a bit. I wore this dress to a party a couple of weeks ago and all that dancing and waving of arms resulted in a little chafing round the sleeve edges.

I have some very similar fabric, but in crazy tropical colour, waiting in the wings once I’ve sorted out the issues. Can’t be neglecting the crazy inside when it’s raining outside!

self-drafted dress film noir style

There’s a fair few influences going on with this dress. The neckline I poached from a 40s pattern in my stash. The bold crazy fabric has echos of Kazz the Spazz who still continues to be one of my heroes despite her blog being no more *sniff*, though I’m sure she’d do it more justice with colour! And the overall design came about whilst doodling in my Fashionary book and watching Madmen!

Even though it’s far from perfect and hardly a ground-breaking design, there’s a huge amount of satisfaction that it didn’t come out of a commercial pattern envelope and that I had to make it up to my own instruction!

I self-lined the bodice. And considering the weight of the fabric, it behaved beautifully. With a bit of understitching round the armholes and neckline of course. A good test for the next run when I intend to make that neckline a little bit deeper, but still keep those nice angles.

self-drafted monochrome dress

And the hat! Let me tell you about the hat. Well I don’t happen to have any vintage hats just lying around. I’m sure Mr. Ooobop is convinced I have an actual ‘wardrobe department’ upstairs. I don’t sadly. But what I did have was this cheapie fascinator that I got from the pound shop, onto which I gathered some glittery tulle. Genius, non?! I’m sure some Russian veiling would have been classier but I’ll happily settle for this one… for a quid!

customised fascinator
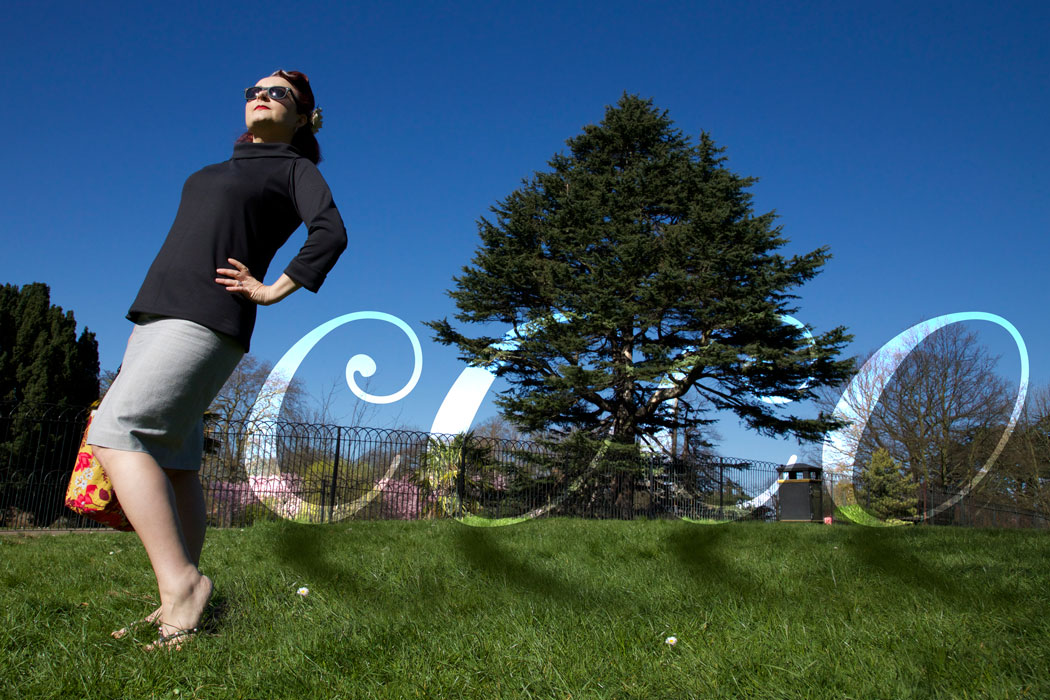
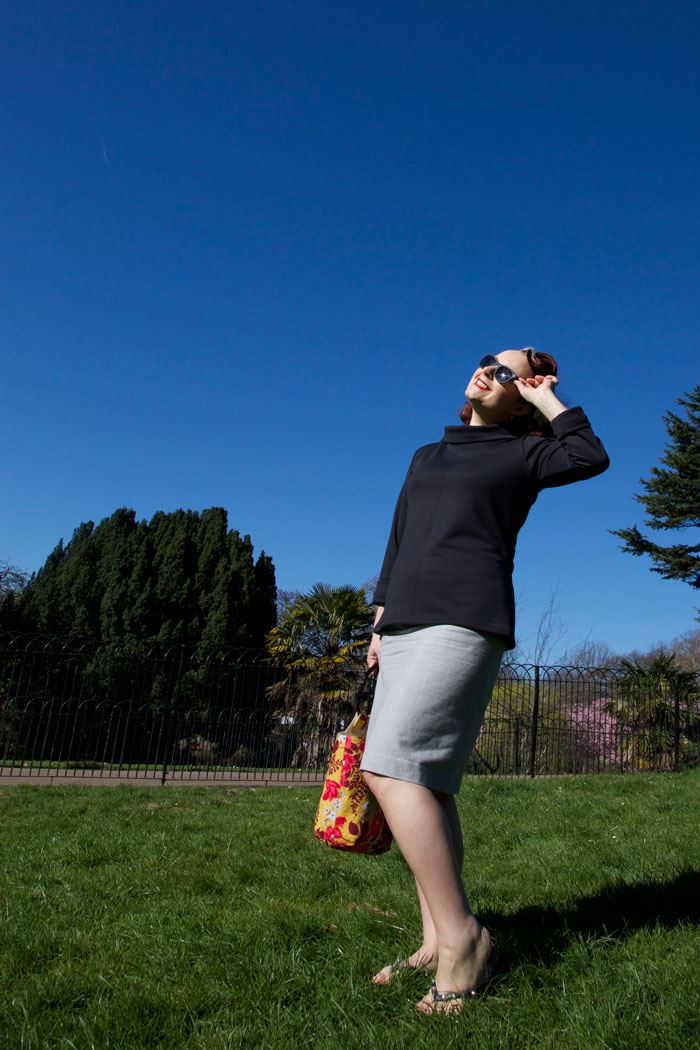
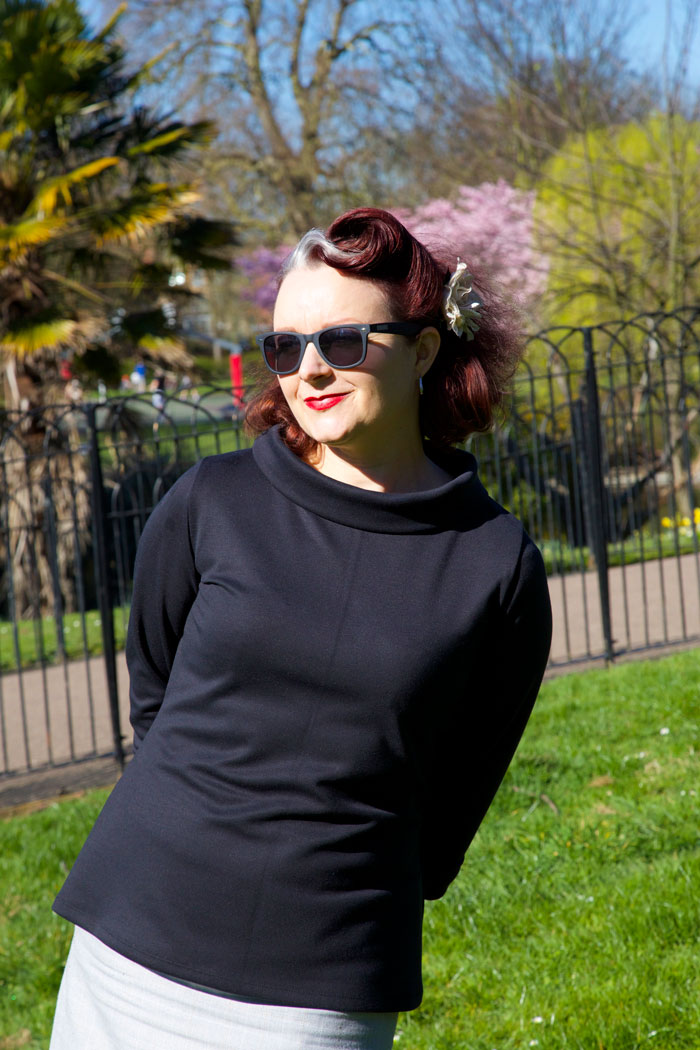
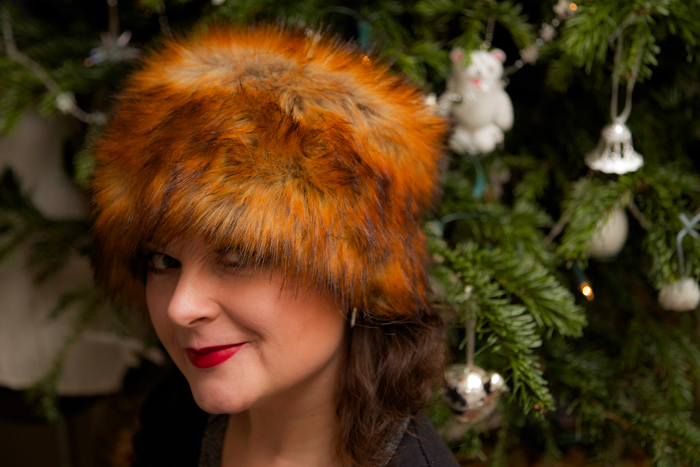
We had such a hoot doing these photos. Mr O was able to practice with his new birthday flash attachment and I couldn’t resist the addition little faux film noir-ness with my magic Photoshop wand!

This dress totally called for black and white pics and I wasn’t about to protest. I find black and white photography considerably kinder, compared to full on colour, especially at the end of a knackering weekend!

I’m so glad I’ve got such a pushy boyf, really! I’d never have got the get up and go let alone the camera skills to do this by myself! We really did have a lot of fun with this.

Shame neither of us smoke anymore, otherwise we could have got some proper authenticity going. However we did manage to fashion some obligatory venetian blind shadows!

head shot blind shadows

And it’s a fine way to capture the drama after the last glass of Prosecco got spilled!

vintage scream film noir

I do hope you all had a restful weekend with some making going on, of course!

Brigitte (over)exposed!

brigitte scarf at the brackenbury

I may have missed the party (sorry Tilly) but that doesn’t mean I was going to miss out all of the Brigitte action, oh no!

This is my animal-print chiffon version of the Brigitte Scarf from Tilly and the Buttons‘ gorgeous book: Love At First Stitch. I was so honoured to be invited to the book launch and get me a signed copy. (Managed to make that bash, obvs!) Seriously, if you haven’t invested in this book yet then I whole-heartedly advise you to do so, tout de suite. The photography is amazing, its got real patterns at the back and it goes without saying that the designs are to-Tilly-beautiful! (soz)

brigitte_exposed_3

I’m trying desperately to grow my hair out a bit. It’s taking an age. So while it’s at that God-awful in-between stage, it makes perfect sense to adorn said mop with a beautiful distraction. Cue Brigitte!

brigitte scarf

If it’s good enough for Bardot it’s most certainly good enough for me!

It truly, only took a jiffy! I cut it out and whipped it up while I was waiting for dinner to cook. The suspicious among you, on Twitter… yes I’m looking at you, O Doubting Thomasina – Ms Seams Odd Louise…. suspected dinner was being cooked for me. A girl can only wish but must also remember to be grateful for small mercies when your boyf already has the compulsory skills of music, dance, shoe-shopping and of course… photography!

Brigitte over exposed image

I adore these shots Dan took today. He was practicing an over-exposed technique and I personally think he hit that nail right on the head. No pesky wrinkles or blemishes and lovely bright colours to boot. More o’ these please Mr O!


Coco

coco top

Now you won’t find many stretchy casuals on my blog as a rule but the beauty of rule of thumbs is that they can be changed in a click of the fingers. Move over wovens, and make way for the Coco that is stretch jersey (of sorts!)

coco top

I thank Tilly for this genius newbie. Not only for it’s ease of make…. 2 hours I tell ya! And that included pattern tracing and childminding! But a casual top with a retro vibe is completely up my street and something that was seriously lacking in my wardrobe.

Over the last few years… 3 years to be precise… I am so proud to say that I have not shopped the high street for anything but undies and cardies. My wardrobe is almost completely handmade by me. But there still resides a few too many black Primani T’s for my liking and this is where Coco could change all!

coco top

I just love the funnel neck and although this fabric doesn’t appear to have more than one single natural fibre, it is a perfect weight to hold the shape. And the cuffs are a wonderful addition to compliment the neckline.

coco funnel neck top

I think I could have gone up a size but I quite like how snug and fitted it is. This top could be serious friends with jeans or capris, with a mini or maxi, and I’m thinking a pair of plaid shorts would partner perfectly. Worn today with an old faithful pencil and a pair of flip flops to do the hockey run!

And it must be mentioned that Mr Ooobop deserves a medal for these photos today. He was in one serious hangover and suffered plenty a head rush when he got up from down low for those creative sky shots!

coco top blossom

Today is just beautiful which is why I’m keeping this short and sweet. Gotta dash to catch those last few rays and Mr O needs a ‘hairy dog’, poor deserved love!

So if you haven’t done already, do pop over to Tilly and the Buttons shop and grab yourself a copy of this pattern. It doubles as a dress pattern,  includes a plain neckline version plus you get to see Tilly herself model the cutest versions of all!