Me Made May 13: My first week

Not so very long ago I signed up to So Zo’s Me Made May ’13. Whereby I pledged to wear something handmade, every day throughout the month of May 2013. I did leave it till the very last minute, knowing what a flake I can be. And to be honest I could do without creating extra work for myself. I really do have plenty ’nuff on my plate right now! But… what fun! And what revelations…

So here is what I pledged:

‘I, ooobop!, sign up as a participant of Me-Made-May ’13. I endeavour to wear at least one handmade garment each day for the duration of May 2013’.

There was still a big pause before I pressed the ‘publish’ button. I don’t have an issue with wearing something handmade every day. In fact that it an ultimate goal. I would love to own an entirely handmade wardrobe. It’s having enough to last a month that’s the issue right now! So I think you might be seeing a few repeats unless I can rustle up some emergency quick-makes!

Here are the first 7 days along with my discoveries:

Blouse pattern from Burda Magazine September 2011 issue

DAY 1: Gingham Burda Blouse
Have since learned that this shirt is too long and hence too tight on the hips.
An easy fix… if I get round to it! Would love to try one in a block colour
to make use of those fabulous shoulder darts. Should also wear it with a belt.
It’s not the shapeliest of blouses!

day2_norman_hartnell_top_mmay13

DAY 2: Norman Hartnell blouse
Very fond of this blouse. Very easy to wear. Perfect for work or going out.
And given that it was a relatively simple make, I need to make more!

day3_1940s_red_dress_mmm13

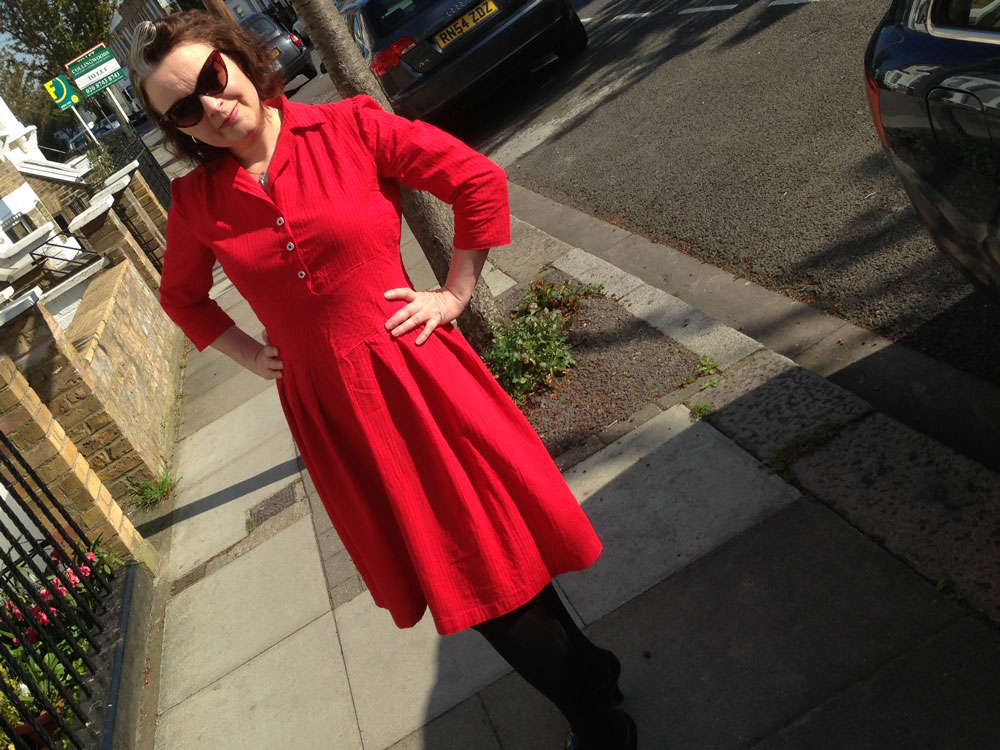
DAY 3: 1940s Shirt-waist dress
I still love this dress. Any dress with a midriff gets my seal of approval.
Have since learned to be more precise when sewing buttons in position.

Day4_70s_dress_mmm13

DAY 4: 1970s Dress
I have neglected this dress. I didn’t line it and so I can’t successfully wear it with tights
which is kind of a necessary requirement in the UK!
Would happily make this one again. The shape is very cute and I do love
the statement collar!

Day5_NewLook6750_mmm13

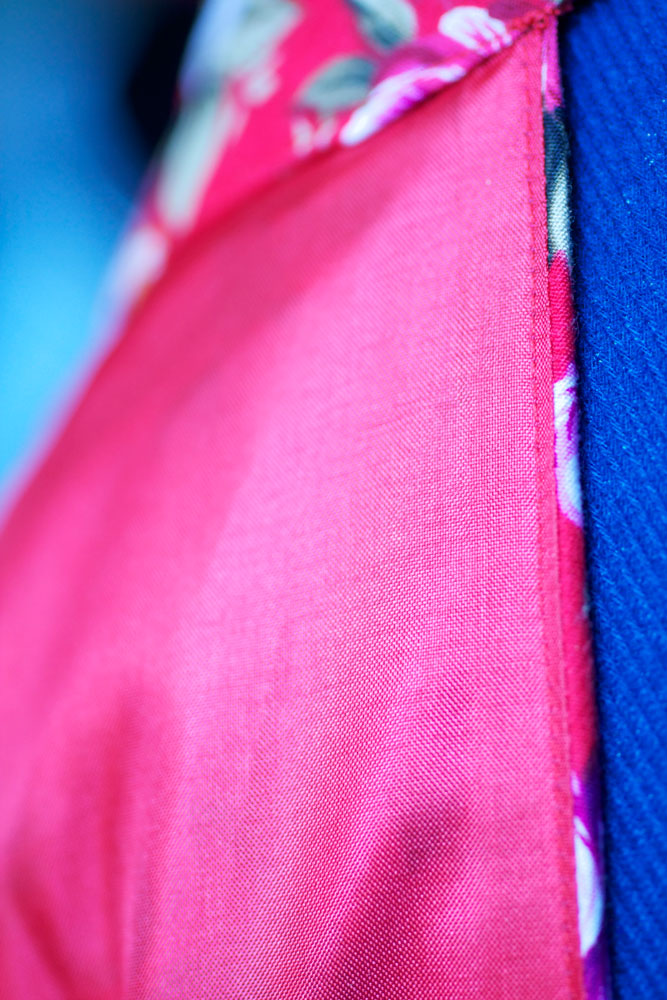
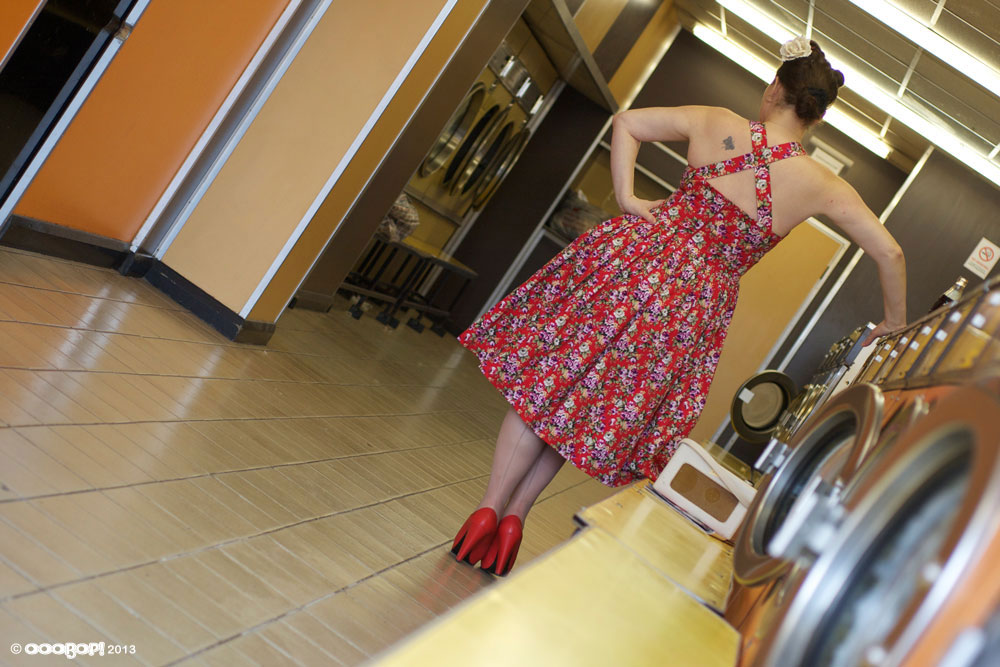
DAY 5: Daisy dress with red bias trim
New Look 6750. One of the first dresses I made, hence not blogged.
Note to self: As lovely as cotton voile is, it’s not very good at
hiding all those lumps and bumps, expecially if one has made the dress a tight fit!
Also must remember to allow a bit of ease when binding sleeve hems.
Near cut off the circulation in my arms!
Only dress so far I am not entirely comfortable wearing.

Day6_Elisalex_mmm13

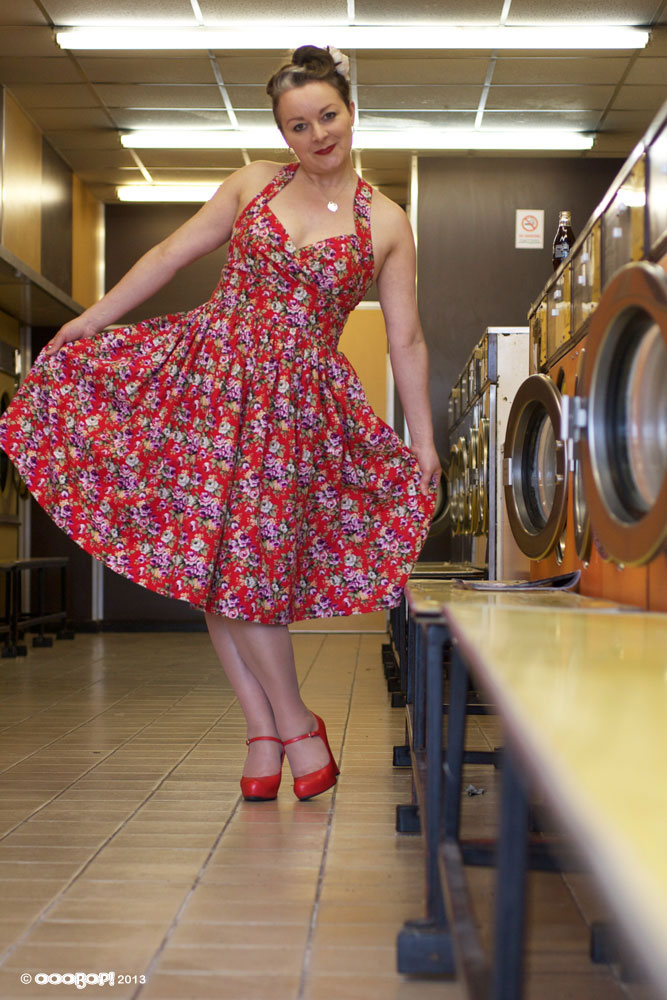
DAY 6: Elisalex dress
Dress completed and worn to a picnic on this day. By far my most
favourite dress. incredibly comfortable. Very stylish and very satisfying to make.
It’s a keeper!

Day7_gingham_-peasant_mmm13

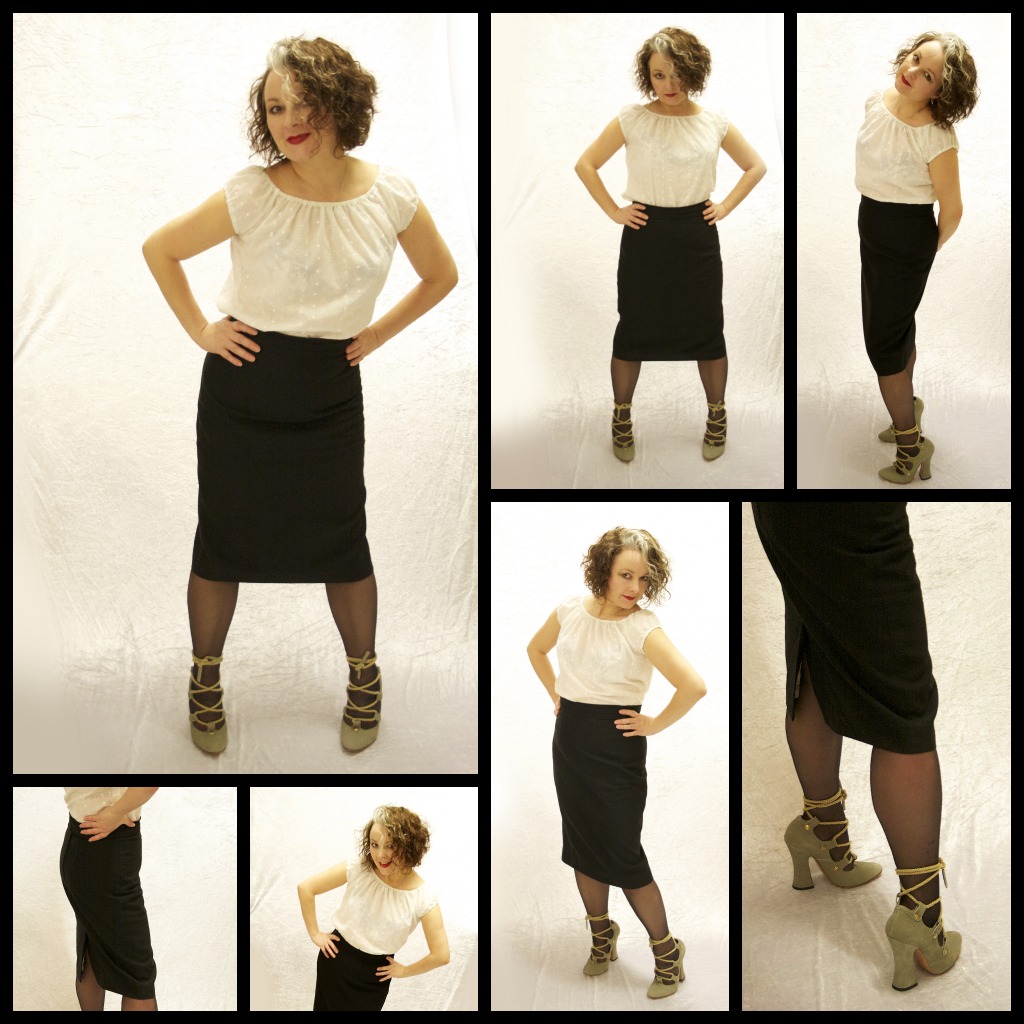
DAY 7: Gingham peasant top
One of the easiest tops I’ve ever made. Love wearing it with a pencil skirt.
Need to make some capri pants to pull off that Doris Day look.
Keep meaning to add a tiny black bow to the front neckline!

One of the great things about this challenge for me, is having some proper attention focussed on each garment. I usually throw things on without a thought, especially when I’m off to work, in a ‘that’ll do’ kinda way. I’ve been wearing far too many rubbish Primani T-shirts when I don’t really need to. If I just make a few more tops, I can ditch them altogether, especially if I include a quality t-shirt or two on my project list. Wearing me-mades on a daily basis really does have a feel good factor.

I’m sure the next few weeks will get more and more challenging and probably with some new revealations but so far so good and lessons learned already. Cheers Zo!

ooobop! review: Burda Style May 2013

May 2013 Burda cover

Well this review very nearly didn’t happen. Firstly because I was in a grump when I bought May’s issue – there was no way that anything was going to impress me that day – and secondly the usual onslaught of work that is always determined to steal my blogging/sewing time!

But do you know what? The delay in between purchasing the mag until now has been enlightening. I am seeing much more potential in designs that I had initially dissed and I am seeing some valuable ‘easy makes’ that might just dig me out of a hole for Zo’s ‘Me Made May ’13’! Admittedly I am in a better mood now the sun is shining so that also helps the different slant!

So without further ado, let me present Full Bloom, the Flower Fashion section.

Lots of pretty lightweight floral loveliness going on here. I so wish I had the guts to go for one of these jumpsuits/playsuits whatever you like to call them. They look such fun. I just don’t think I could take the heckling from the smalls!

May 2013 burda playsuits

A bit difficult to see the detail, but the gathered drawstring top (below, top left corner) looks to be one of those easy ones. I have a fine bit of floral chiffon that I think should do it justice. The bikini below that looks a bit homemade if you ask me. Possibly the fabric – metallic poplin? But that aside I do think with a long skirt attached to the bikini top, it could be transformed into a gorgeous maxi. But my fave by far, out of all these flowery numbers, is the green print dress, on the right. It has a flattering midriff section which I love and some cheeky patch pockets on the skirt front. Total win!

Burda May 2013 flower fashion tops and dresses

The top (below, top left corner) is a super easy make. Its a tulle lace top over a shorter jersey one, sewn together at the bateau neckline. If you don’t fancy the belly button action, you can always make it longer and I’m sure it would be just as pretty. The denim shorts are included too, though surely easier to cut some jeans down?

I keep coming back to the green, v-back flounce dress but I’m not sure I’ve got Twiggy enough bod for that. Pretty though.

The dress at the end couldn’t be simpler. A long straight cut shirt with low-cut armholes. Pretty much 4 rectangles! Made from transparent chiffon and worn with an underdress. In fact the underdress is far more complicated! Perfect for the beach or a picnic or wherever the sun shines!

Burda May 2013 flower fashion

Top Stars is next up. A great little collection of funky tops. The gathered draw-string top features again, in a plain brown crepe this time. Not much of a variation except for the length, I think but great to see it in a block colour. If it really is quick to whip up, I would love a few of these to stick in a holiday suitcase.

Burda May 2013 topsIt wouldn’t be a summer issue without a ‘whites’ section. So here are some of the more romantic looks this month. I personally could never leave the house in a dress as white as this and certainly wouldn’t survive more than half an hour in London if I did, but they would be well-placed on a sunny beach. The dress on the right probably shows in more detail how the upper section of the green print floral dress works.

Burda May 2013 white dresses

Add some blue to the white and behold my favourite section of the mag. The Vintage Style. This little beauty gets away with being so stylishly modern despite its top spot in the fashion charts circa 1965. Tricky to see but underneath the deep V-neck, it has a fabulous seamed empire line, finished with a cutesy bow.

Burda May 2013 Vintage dress

Given that my chances of a tropical holiday are very slim this year (or any year to be fair!) I’m finding it a bit hard to relate to the styles and colours in the Tropical section. 10 out of 10 for innovation though. I’ll wait till someone else tries that green knotted skirt!

Burda May 2013 Tropical

But I did pick a few tropical delights. Check out the gorgeous Maxi dress (below, left) in large print satin! How divine would that be as you floated off for a pina colada all tingly from a day on the beach! The centre top is a must-have too. I love all the rouched detail is in the back. And the dress on the right is such fun!

Burda May 2013 tropical favouritesI think the kids section is a little strange this month:

May 2013 Burda kidsApart from this little red number that I’m trying to persuade LMO to like!:

Burda May 2013 kids

But hey! I’m not going to push it too much. It’s not like I haven’t got enough on my list already!

And last but not least is the Plus Section. Not so hot this month. But some pretty functional pastels all the same. I really don’t think the shot of the pink jersey top and the grey taffeta skirt (bottom left) best portrays these styles. They both have fabulous details. The top has side gathers just over the bust and to the hem. And the skirt is a double layer, the over-skirt being pretty much a square which creates those lovely flounces. It also has a jersey waistband which would add a bit of comfort to the class!

Burda May 2013 Plus sizeSo there we have it, lovely readers. I do so apologise for the delay in getting this to you. No doubt most of you already have it in your clutches. But for those that don’t yet, I do hope it helps to bridge the gap until you get hold of your copy.

Happy sewing everyone! x

First summer dress of 2013

What a gorgeous day it was in London today. I couldn’t believe that I actually didn’t need a coat for the first time this year. I can even feel a little after-sun tingle on my skin.

And what perfect timing I might add, to showcase my first summer dress of 2013!

simplicity 2442 dress by Hammersmith BridgeMy Mister and I, along with our trusty assistant, LMO, decided to take a walk over Hammersmith Bridge to take the photos. And to stop for some lovely lunch at The Bridge in Barnes. (highly recommended, I might add!)

Hammersmith Bridge is my favourite bridge of all. A Shame we didn’t get any of it in its entirety but if you Google it, there are a gazillion great pictures of it out there.

simplicity_2442 on hammersmith Bridge

What I didn’t know about it was that there are some ‘viewing benches’ on the bridge itself. Scarily placed right up to the roadside but with such a lovely view of the river. And obvs a great place to take a picture!

simplicity 2442 dress on hammersmith bridgeAmazing how much prettier the Thames looks when there’s a bit of sunshine!

simplicity 2442 bodice section

simplicity 2442 on hammersmith bridge

From Hammersmith Bridge Mr Ooobop insisted we take some shots in the Launderette. Not the most glamourous of locations but I’m so happy that it helped to project the vintage feel of the dress.

vintage style summer dress in the launderette

The dress itself is half derived from Simplicity 2442. I used this pattern for the bodice section:

simplicity 2442 patternI was the lucky recipient of this, plus a whole bunch of other goodies from Sew Magazine when I won Star Letter, back in October 2011. You can see the generous prize haul here.

I did have my doubts concerning gaping necklines and dodgy pleat placements but all it took to get over the fear was one toile, which also helped to reassure that it wasn’t going to take too long to whip up either. I can’t say exactly how long it took because I have been sewing in such little bursts over the last few weeks, in between shed loads of work.

I love the crossover straps at the back but I must find me a decent strapless bra. I’ve just tucked in the straps of my regular bra so they don’t show. But there was a going concern that it would end up round my waist at one point!

vintage summer dress front and back

This pic is Mr O’s fave. Personally I think I look a little psychotic!

vintage style floral dress in the launderette

After much deliberation, mostly on Twitter, I decided to add a dirndl skirt to the bodice. I didn’t like how the suggested skirt was neither full nor straight. I felt it wasn’t extreme enough for the fabric I’d chosen or the vintage vibe that I wanted. I considered a circle skirt and nearly went for that, fearing too much bulk around my waist but I needed more than 3m to achieve that.

vintage floral dress in the launderette

A dirndl still gives a great shape. I think you just have to make sure that the bodice is not too long otherwise the fullness sits over the belly and that’s not a good look on anyone!

vintage floral dress with dirndl skirt

ooobop vintage floral summer dress

I lined the whole dress in red. I wasn’t going to line the skirt section at first but I remembered how, as full as skirts are, if they are made of cotton they cling like Billy-o to your tights! I also added a bit of ease in the depth of the midriff lining to prevent the outer fabric of the midriff from puckering.

dress lining

I also took great care in under-stitching the lining on the bodice top edge so it didn’t peek out.

under-stitching

I’m so happy with how this dress turned out. The bodice fits and feels great. Can’t wait to try with a circle skirt and perhaps even a long evening dress in some silk velvet? As if my list isn’t long enough!!

back view of summer dress

I can’t possibly round off this post without a shout out to the amazing Dolly Clacket. She without doubt has been a massive inspiration whilst I’ve been dreaming up this dress. If you haven’t had the pleasure of seeing her wonderful 50s style tea dresses, hop over and have an oggle. They are gorgeous!

Vintage patterns: 2 new additions

I have just added the following two lovely patterns to my Vintage Pattern Collection page and while at it, couldn’t resist a shout out to the fantabulous Pretty Grievances. I would imagine she hasn’t slipped under your radar but just on the off chance, there you will find some of the most entertaining posts out there! Wednesday Wearables is my most favourite. I’m so glad to have been  Twittering at the right time and place when the lovely Anne announced she was having a clear out. I actually was hopping up and down on my seat and mentally pointing at the sky shouting ‘me, me!’, when this little beauty popped up:

Advance 6702 1950sI don’t think I’d change a thing about this dress. Rather inclined to keep it in blue, too!

As if that wasn’t treat time enough, this Brucey bonus was inside too. I’m assuming 1960s, Just going by the hairstyles. I do love a shirt dress.

Simplicity 4673 1962

And gingham is certainly the way forward with this one. Let’s hope I win Didyoumakethat‘s pink silk taffeta at her Great British Sewing Bee giveaway!! 😉 But get in there quick. You need to enter before 19th April!

So, thank you Anne. I am truly grateful and planning on stealing some sewing real soon xxx

Jeepers Creepers, where d’ya get those peepers?

I always fancied the idea of some face furniture. Not the furry kind, you understand. And I certainly was never brave enough to go down the road of facial piercings. But a good old pair of bins / Gregorys (specs) / glasses – whatever you like to call them – have always been on my wish list. Well you know what they say… be careful of what you wish for and all that.

The time came with the realisation that my arms were no longer long enough to read the back of a sewing pattern. Let alone the inside instructions! I’ll reserve that excuse for some of my mishaps!

I dutifully set off for Specsavers. Was told the price of the test and dutifully walked out! Since when did that happen? Then I remembered the voucher that was on the reverse of a receipt from a recent purchase from Boots. A fiver for an eyetest? That’s more like it!

I’m sure you don’t need me to talk you through an eye test. It’s clearly only me who hasn’t been for 20 years or more!

The results weren’t too harrowing, though keeping ones eyes open while air is puffed onto your pupils IS! The diagnosis was a very slight stigmatism in one eye and the need only for low strength reading glasses.

The reality (and a little bit of excitement) set in. I actually need to wear glasses! I marched straight over to the designer frames. £280 for a pair of bins might just be a little too much but honestly and truthfully that Prada pair was the only pair that didn’t make me look like a complete dork! Vain? Moi? Well maybe just a titchy bit! Even the sales assistant was politely ushering me over to the £5 specials in little plastic tubes. Ugh! Really? There’s got to be more choice than this.

So I went home to Google… some goggles! (sorry) And promptly found this wonderful site called Retro Peepers. There was choice. There were cool frames and they weren’t a million squids… hoorah! I emailed with a couple of queries and do you know, the lovely Annie got right back to me. She was even replying to an Email I sent later at 11.30pm. That’s proper dedication to the cause.

Anyway. Here they are, in all their cheeky nerdy retro glory. Introducing the Peggy frames. A snip at £18.

retro spectacles

The ordering/delivery service is amazing. I placed the order online one afternoon and they arrived, properly packaged and cozied up in their free case, the following morning! Don’t you just love a smooth operator?

And before anyone asks, this is not a sponsored post. Retro Peepers won’t even know I’ve blogged this unless anyone clicks through to them. But I jolly hope they do in their hundreds and give them all the business they deserve because quite frankly there aren’t many companies out there that I’d give a free shout out to unless I truly believe in the service.

There is just one tiny flaw with them though. It doesn’t stop at £18 for a pair of readers because you will be back to order another pair in a different colour or style and then theres the retro sunnies, the reader shades and of course I will need another pair with a proper prescription…. oh well. At least I’ll be a while, and a fair few pairs before I get to Prada prices!

In other news. I have been sewing, honest I have. Though very little I have to say. Too much work maketh a dull Ooobop! Working on Mr O to take some pictures of my latest frock this weekend. So keep yer peeper peeled. There’ll be a more interesting and sewing-related post coming up soon.

Kiki’s vintage cushion cover

When my good friend Kiki asked me to make a cushion cover from her late mother’s Biba skirt, I kind of refused. Big time! I love my friend Kiki so much and would do anything for her but cut up a Biba skirt?! She was going to have to drug me first!!!

She texted to say she was on her way with said skirt. It didn’t look like I had a choice. In fact she was at mine before I got back myself! Mr O had a cuppa on the go. I went straight for the wine. This was going to be painful.

Luckily for me, Kiki gets things muddled all the time. (I really should write a dictionary of exclusive Kiki words and terms. I’m sure it would be a best-seller!) What she meant was that the skirt was a Biba-esque-style maxi skirt that her mum had hand-made in the 70s. She couldn’t see herself in it and to be honest, neither of us could get it over our thighs!

Jean's original skirt

Well. That was a relief but still didn’t make for easy cutting up. But I warmed to the idea that Kiki would get daily pleasure from it being on her sofa instead of folding it away in the attic forever.

There’s quite a lot of fabric going on in a maxi A-line skirt. Plenty enough for a 50cm cushion pad!

But there was a moth-hole. Typically right in the middle of where I needed to cut.

moth hole

I’ve not used the darning stitch on my machine before now.

darning stitch

It doesn’t mend totally invisibly but far better than a poke in the eye and a fraying hole!

darned hole

Nothing complicated about the cushion cover itself. Just two squares. Zipper sewn to top edges first. Seamed all round. And Bob’s yer uncle!

Such a great geometric design on this fabric. It’s great quality cotton furnishing fabric of some kind.

geometric fabric detail

And I have to say – I think it looks great on my sofa! Kiki can take as long as she likes coming to collect it!

finished cushion

Pin-up pants and procrastination

black pin-up pants with red lace

I made my first pair of pin-up pants last September 2012 and I knew I would have to make more. For one, that stretch silk doesn’t come cheap and I WILL use every last piece! But moreover they are divine to wear!

Even though they look as massive as the last pair, they are in fact a bit shorter. So they come just under the belly button now! I found some fabulous red lingerie lace at my local haberdashery stall and remembered that Mr. O had bought me a packet of little red bows some time ago. Perfect for some cheeky vintage-style knicks!

Not much more to say about these other than they are well worth a go. I love working with smaller projects especially as I don’t have a dedicated sewing room. It means I can have everything contained and to hand… and don’t have to clear the decks in order to lay everything out!

As you might have noticed, this is the 2nd little project I’ve posted today, after starting a toile for Mr. O’s waistcoat this morning. One might think I was seriously procrastinating and avoiding doing the welt pockets on some very expensive silk satin. One might be quite right!!

waistcoat toileGosh! Is that the time? Sorry must dash! Got a date with Mr Selfridge! 😉

Lucky Lucille? Lucky Me!

This post is hugely late but nevertheless essential and heartfelt!

I won a giveaway! Oh yes, oh yes… lucky me indeed!

rochelles bag

Back in November 2012, Tilly held a sewing social on Twitter which was such a hoot! It was here that I met Rochelle and boy was I glad I did. Have you seen her blog, Lucky Lucille? I have no idea how I managed to miss that one. Her styling, her content, her beautiful photography…. not forgetting her adorable loving pupster! I could go on forever or at least until I exhaust the dictionary of gorgeous adjectives but I really think you should have a look for yourself and then add it to your favourites because it deserves to be no place else!

Anyhoos, as if finding her blog wasn’t exciting enough, in December I won a giveaway on the Lucky Lucille blog – in time for my birthday! What a treat!

The packaging was the first delight. I almost didn’t want to open it. Almost, I said. There was only the tiniest hesitation, out of politeness, before I steamed into that package knowing exactly what was inside!

Lucky Lucille packagingWanna see?!

Not only this beautiful hand made bag, made by her own fair hand…

rochelles bag

But also this amazing 40s pattern, Butterick B5281, which I have had my eye on for far too long. I can’t believe I actually have it in my own mitts now. And check out the gorgeous buttons too, as if this wasn’t spoilt behaviour enough!

butterick b5281 and buttons

I am so huuuuugely grateful Rochelle, not just for this amazingly generous giveaway gift, but for the absolute joy your blog brings!

Now go people, GO… check it out… but mind you don’t drool on your keyboard!

Black pencil skirt and a learning curve

Not the most ground-breaking make but as usual, there is a continued method in my madness!

I have hundreds of really lovely vintage and modern dressmaking patterns and a serious desire to make and wear each one but every so often feel like I’m winging it too much. For sure I get there in the end and it looks great for the camera but as the maker, I know what secrets lie inside!

So I need to rehearse skills on basic garments such as this pencil skirt to improve technique and reassure myself that I am still improving!

Image

I really enjoy going back to the drawing board sometimes, quite literally! The pattern for this skirt is one I drafted back in August 2012. But I have made quite a few adjustments since then, which I really like, and I think make for a better fit.

  • I moved the darts apart slightly on the front.
  • I lengthened the skirt to below the knee (ooo get me and my bravery!)
  • I tapered the skirt by about 2 inches either side for a more pencilled effect.
  • I added a waistband.
  • I included a PROPER vent including mitred corners!
  • I made a much better job of the lining and learned how to line the vent.

What I should also have included:

  • a hand-picked zipper
  • more overlap on the waistband to add a button along with the hook and bar.

On the subject of hook and bar, even that was a revelation. I first used hook and eyes thinking they would suffice. But they really didn’t! They kept coming undone it wouldn’t be too long before they bent out of shape. So I dutifully replaced them with a sew on hook and bar. It’s much better but even though I sewed it in from the edge of the overlap, it still shows, so I need to set it back a bit further.

Image

Nearly didn’t make the effort to do a mitred corner on the vent, but jolly glad I did. Before hemming I sewed the lining, right sides together all the way down the vent edges. Before hemming the skirt outer fabric I carefully unpicked the thread using the eye end of a needle. I used that loose thread to sew invisible stitches to attach the remaining lining once I’d trimmed and hemmed it. Such a neat trick! (And a great excuse to show off my mitred corner!)

vent lining

Interfaced waistband and hem using a lovely woven fusible interfacing. Nice and sturdy. Just the ticket!

Interfaced waistband and hem

I didn’t scrimp on the fabric for this skirt. I think you can afford to be a bit more frivolous when you only need a meter of fabric to play with. So I bought some quality British wool and boy does it feel good. A dream to sew up too.

I’m anticipating some questions on lining the vent, and I am really sorry I haven’t included it this time. A combination of no step by step photography and a serious lack of remembering exactly how I did it myself! I know it wasn’t that difficult and I hope to bring that part to you on the next one I make. And I will be making more because it was my original mission to make and own a pencil skirt for every day of the week. Different colours and styles. That would be so cool and not too unachievable!

CREDITS
Mr Ooobop! was of course, my lovely photographer for this and most posts.
Shoes by Vivienne Westwood… oh yes!
Top hand made peasant top that I didn’t get round to blogging!

Home-made maternity belt, circa 1940!

I was just searching for a date on this pattern so I could update my vintage pattern collection page with this little beauty…

Du Barry 2479B
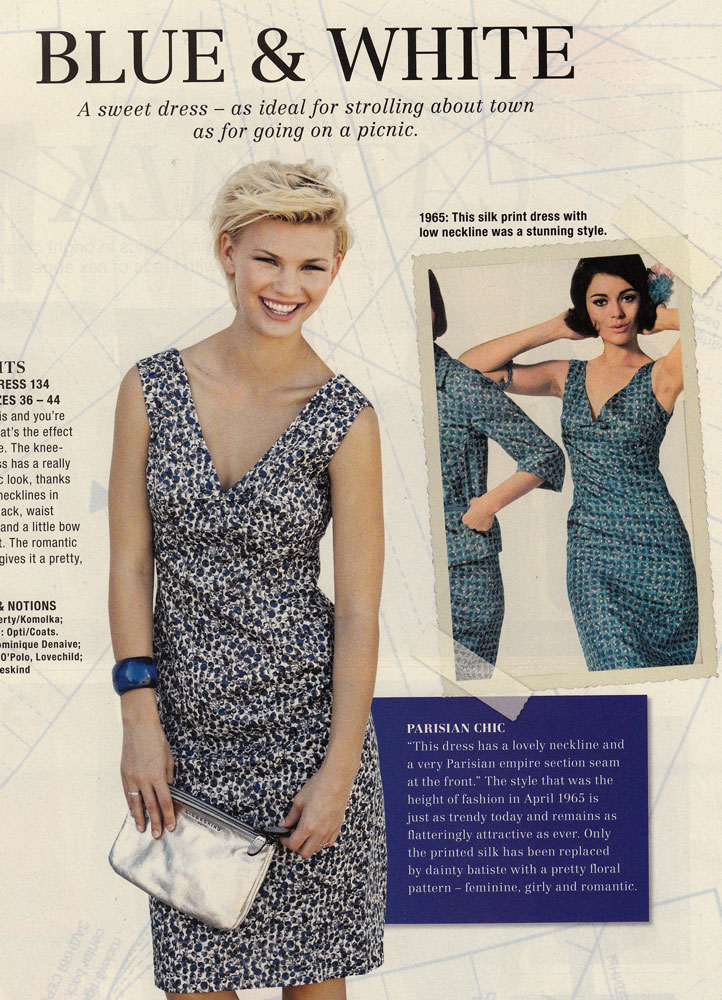
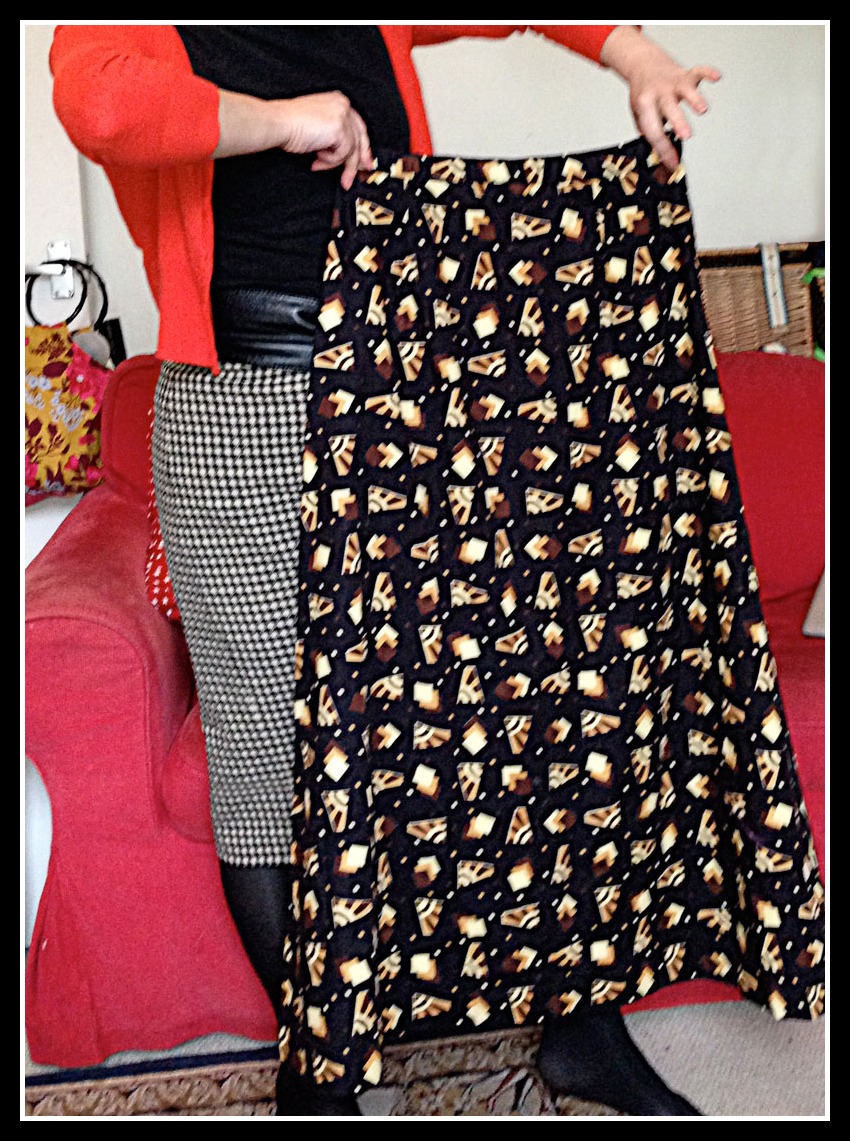
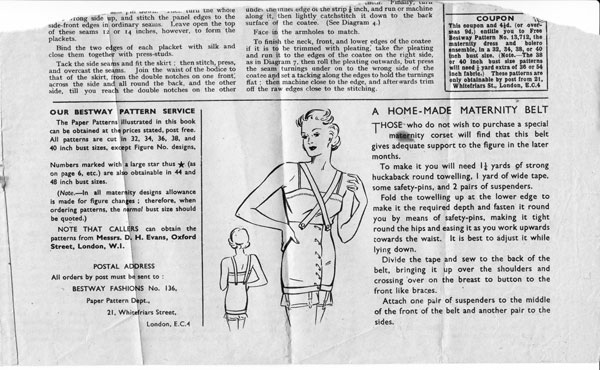
…when out popped this little cutting which tickled me, I must say:

home made maternity belt circa 1940
home made maternity belt circa 1940 (click on image to enlarge)

If you do try this at home, remember “It is best to adjust it while lying down.”

In the latter months?!! I can just imagine trying to get up off the bed, like some ungainly upside-down tortoise.

And there’s me thinking the 1940s was all about glamour, inside and out! Doh! It’s a wonder all 1940s babies weren’t born squished like Flat Stanley!

Incidentally, I didn’t find an actual date. I’m assuming (once again) that this pattern dates 1940ish but any more accurate hunches are appreciated.