Brigitte (over)exposed!

brigitte scarf at the brackenbury

I may have missed the party (sorry Tilly) but that doesn’t mean I was going to miss out all of the Brigitte action, oh no!

This is my animal-print chiffon version of the Brigitte Scarf from Tilly and the Buttons‘ gorgeous book: Love At First Stitch. I was so honoured to be invited to the book launch and get me a signed copy. (Managed to make that bash, obvs!) Seriously, if you haven’t invested in this book yet then I whole-heartedly advise you to do so, tout de suite. The photography is amazing, its got real patterns at the back and it goes without saying that the designs are to-Tilly-beautiful! (soz)

brigitte_exposed_3

I’m trying desperately to grow my hair out a bit. It’s taking an age. So while it’s at that God-awful in-between stage, it makes perfect sense to adorn said mop with a beautiful distraction. Cue Brigitte!

brigitte scarf

If it’s good enough for Bardot it’s most certainly good enough for me!

It truly, only took a jiffy! I cut it out and whipped it up while I was waiting for dinner to cook. The suspicious among you, on Twitter… yes I’m looking at you, O Doubting Thomasina – Ms Seams Odd Louise…. suspected dinner was being cooked for me. A girl can only wish but must also remember to be grateful for small mercies when your boyf already has the compulsory skills of music, dance, shoe-shopping and of course… photography!

Brigitte over exposed image

I adore these shots Dan took today. He was practicing an over-exposed technique and I personally think he hit that nail right on the head. No pesky wrinkles or blemishes and lovely bright colours to boot. More o’ these please Mr O!


And the winner of the mystery giveaway is . . . !

Before I deliver the news that you’ve all been so patiently waiting for, I must first thank you all so much for your wonderful comments. So many kind and inspirational words. Blushworthy to say the least. And big thank you’s also for the newbies who recently subscribed. A big lovely Oooboppie welcome to you all! 🙂

Ok. Get on with it. I hear you say. Well I guess you should know what was in that mystery black box . . .
giveaway prizeHere it is, in all it’s mysteriousness! The contents of which include:

Burda Magazine, May 2014 issue
Handy service kit for sewing machines and overlockers
3m of novelty London print fabric
2m of polka dot turquoise fabric
3m of black lace
3 spools of Moon thread
3 different coloured pencil chalks

In order to get some fairness and squareness going on, I needed a trusty assistant. And I could think of noone better than Little Miss Ooobop herself. She just got a new haircut so is looking extra cute too!
A little shake of the entries . . .
shaking the entries

A little blindfolded stirring of the entries . . .

blindfolded and stirring the entries

A winner is picked . . .

A winner is picked

And the winner is . . .

and the winner is

Congratulations lovely Simona from Sewing adventures in the attick
The goodies are all yours!

close up winner
I’ll Email you shortly to retrieve a delivery address and will deliver it post-haste!

Self-drafted retro top

retro check top

A couple of months ago, I signed up for a local adult education course to learn how to draft a bodice. The need for a go-to-template is great now. My need to save hours in a day is bigger than ever and so the idea is, that if I have a master block, I won’t have to keep reinventing the wheel, each and every time by having to make alterations to a preprinted bodice pattern. I would also very much like to realise some of these gazillion designs floating around my head and create them for other people too.

The course was cheap. Just £85 for four Saturdays, 10-3. And the teacher was lovely. There were 5 other students at first class and 3 at the last. So we pretty much had one to one teaching for the last session. pattern-drafting tools

To begin, we were instructed to pick a set of body measurements from a table of standardised sizes, that matched closest to our own body measurements. My first furrowing of brow. The whole point of me wanting a custom fit is that I don’t fit standard. Even my shoulders dropped an inch with that first instruction! As is usual for me I just kept shtum. But someone else in the class just couldn’t, and with gusto unabashed, questioned the task out loud! Hoorah for the confident ones!

The teacher assured us it was easier and quicker to go from a standard set of measurements whereby most of the calculations were done already and then make alterations to fit, afterwards.

And so I did as was asked. But the confident one did not! She used her own measurements and although, indeed I finished drafting first, she had a better fitting first toile. Funny, that!

But, with fear of the wind changing, I relaxed my jealous scowl and approached the teacher with questions on how to fit this bodice… that really didn’t fit at all!

She drew on me with red pen. The neckline needed to be made deeper. The side seams taken in; the bust point needed to be moved; the fullness taken out of the bust; the back bodice needed shortening; and the shoulders were too long. Mmmmm…..!

first bodice muslin

OK. Not a problem. In fact quite a few extra lessons in alterations were absorbed in the process so I didn’t feel too robbed.

I made the above adustments and sewed another toile. A better fit but it still needed changes. A third toile and although I knew it still wasn’t perfect. I was determined to draft my actual top and make it before the end of the course. I thought it would be useful to have the teacher hold my way throughout the process. And it was.

I ended up with a completely wearable top. She helped me to draft the collar and showed me how to create the facings. I based the design on a pattern I already owned. Did I just state a distain for reinventing wheels?! There is a method in my madness. I want to be able to create things that I see in pictures, everywhere, armed with a knowledge base of skills to custom fit, rather than have to have a standardised pattern that doesn’t ever fit. And of course this top is a great vintage design and I love it!

self-drafted retro-style top

But there are issues. The underbust is too big and it doesn’t feel perfect enough. In fact it’s true to say that it’s too big all over.

back view of top


The material was a cheap soft cotton with quite a loose weave so that probably didn’t help my fitting issues either. But it is comfy!

I added the zipper at the side, in true vintage stylee and owing to the bias cut funnel-like collar that rolls over the back. I also added a shaped extension to the waistline so that I can tuck it in without bulgy lumps round my middle. I usually wear it tucked in with a wide belt but I wanted to show it in full for the post. I’m quite happy with it hanging out too!

retro check top full length

self-drafted top side view

I made another one up last night, with some alterations. I took a little out of the side seam allowance and made the waist darts more concave at the point. There wasn’t much improvement to be honest. In effect I made the best of a bad job and went to bed in a huff!

I am irritated that with all of the alterations that were made in order that this bodice fits, the pattern pieces are really irregularly shaped now. And owing to the massive darts that were removed horizontally from the back pieces (to reduce the excess fabric), I won’t ever be able to pattern match across the back 🙁

There is no way I am going to be beat though. With renewed vigour, I got up early this morning to draft another from scratch. I used my real body measurements along with some armhole standards, and low and behold it was a pretty close match. I just have to make a couple of small amendments. The armhole gapes at the front and there is a bit too much excess over the bust and so I have cut and closed a dart at the armhole on the pattern, to reduce the gape. The mid-armhole at the back gapes a little too, and I have smoothed the excess up to the shoulder, and remarked the shoulder seam to both front and back pieces.

And best of all, with this new draft I get to have a perfectly straight back seam so I can have a continued pattern across the back if I so please, yay!

Wow! this really is a learning curve.

Hope to share some more new Ooobop designs soon. Ones that actually fit! So come back soon and in the meantime, don’t forget to enter the Giveaway if you haven’t done already. Only 3 days to go!

TTFN x

PS. All credit to Mr O, of course, for the lovely photos and a lovely day out with the children on the Southbank


Burda Shorts

Burda Shorts

It’s amazing what just one metre of fabric can turn into. Give me a morning off work and a pile of Burda back issues and who knows what will fly off the sewing machine! This is a great little pattern from February 2013 Burda Style magazine. They work so beautifully in linen but I think they are a bit more rebellious in wool tartan! The fabric was bought for another pencil skirt but – yawn – I fancied something a bit more casual.

Burda Tartan shorts

It’s still parky enough for 60 derniers and boots but the nip’s not enough to deter a rising hemline. And shorts are a safer option over a short skirt. Far less stressful when it’s still a bit blowy!

Hip pockets

The pockets are a great added extra. They help to define the shape and add a point of interest. Plus they are deep enough for keys, purse and phone… hands free! I took time to understitch the lining and of course the wool pressed beautifully flat.

Of course, there is a pattern-matching issue when one has limitage yardage. But I did manage to match across the front and back seam, which I decided was most important.

burda tartan shorts front

burda tartan shorts back view

I need to tinker with the fit a bit, if I’m to make these again. The waist is a bit big in proportion to the hips for me. And the back needs shortening a bit. I’m still faffing with getting a perfect self-drafted bodice so trouser/short drafts are on the far back-burner. But one day, all knowledge WILL be mine and then there’ll be no stopping me, bwhahahahaha!

burda tartan shorts


burda tartan shorts

The photos were of course taken by my wonderful Mister. And these beautiful pastel-coloured London houses are just a few streets down from us. I love how everyone keeps their front gardens ship shape and the colours so fresh. Helps to my pics look great too!

Coloured houses in Wingate Road


Flora – my new bestie!

Flora dress By Hand London

I can’t tell you how delighted I was to be asked by the By Hand London girls, to pattern-test for them, back in January. All honoured and everything I was!

The package arrived with goodies galore and a link to my fabric of choice from Ray Stitch. How could I resist this gorgeous Liberty Tana Lawn?!
Liberty Tana Lawn

But hang on a minute. The dress in the pictures doesn’t look at all like this fabric!

Well, you see, I kinda messed up a bit. I was clever enough to make a muslin before I cut into this buttery lawn, but I stupidly pre-empted adjustments that so didn’t need to be made. Three more muslins later with differing versions of the same adjustment, I was fast running out of time. What was I thinking? I rushed through the final version before I’d properly corrected MY mistakes. And I emphasise MY mistakes because By Hand London’s Flora pattern is spot on and when I came to make the one you see in the pictures, I made no adjustments whatsoever save a bit of an increase to the waist. Doh! Me and my meddling!!

Thankfully I still have just enough of the lawn to replace the front bodice and I certainly will do that and post it as soon as I can. I just love this dress soooo much!

Flora dress by hand london

So what is this fabric that isn’t Tana Lawn, then? Well my friends, I should have called this dress the Four Quid Flora because that’s exactly what it is! £1.99/m special dress fabric from Dave the Drapers in Shepherds Bush Market! I had a spare zip and some leftover lining so literally this dress cost me just £4. I can’t vouch for any natural threads going on but do you know what? I really don’t care. It has a sheeeeen! So shiny. It shimmers in the sunshine! And it has body. Enough to hold that beautiful structured shape yet just enough drape to create soft pleats and barely any creases.

flora by hand london dress

The dropped hem is clearly the most striking feature about the skirt section. And so I had to take care to finish it all good and proper. It’s not often your insides are on display to the general public! And hey, another Brucey bonus about this fabric is that the polka dots reproduce beautifully in reverse on the wrong side. Or perhaps it was the right side. Who knows? Dave certainly didn’t!

flora dress by hand london

I must just give a quick shout out to Turners flower shop on Hammersmith Broadway, for kindly letting us shoot outside their pretty shop.

And also add that Mr O was risking life and limb to take these photos. I might have been on the pavement but he was practically lying in the middle of the road. Not ordinarily quiet round this neck of the woods! His dedication knows no bounds!

flora dress

I wholly recommend the Flora dress to anyone. Beginner or advanced. Such little input for such incredible output! And so quick to make… so long as you don’t pre-empt unnecessary adjustments like I did! And boy is it flattering. A lovely vintage style neckline and a full structured skirt. Who could ask for anything more? The first place we stopped at, two ladies commented on how they loved my dress. Ego trip or what?!

flora dress on Hammersmith Bridge

It has been such gorgeous weather in old London Town this week. I’m so loving the brighter mornings and I even got to come home from work in daylight this evening. I feel more energised and ever more ready to get on with some more sewing. I feel a few more Floras coming on for sure.

These last couple of pics were taken on Hammersmith Bridge. My favourite bridge of all the bridges in London. And just so perfect to stroll across at sunset.

flora dress on hammersmith Bridge

Now who remembers the Flora ads? I certainly do! Definitely worth a giggle!

[youtube https://www.youtube.com/watch?v=JmS3t5R3O6M]
[youtube https://www.youtube.com/watch?v=_piSsGckJw8]

My Vintage Dreamcoat!

My vintage Dreamcoat

And so I present the focus of all my dreams since first bidding all my hard-earned pennies pounds on vintage Butterick 547. It’s taken nearly seven months to realise the nagging vision that was persistent even throughout my busiest months.

At least 2 of the 7 months, were taken up with searching for the ideal fabric. Quite incredible seeing as I’m a stone’s throw from the Goldhawk Road. I watched London folk on a daily basis, as they paraded their neutral tones around town, and that was inspiration enough to fuel a rebellious approach and lead me to an online supplier of ‘quality coating fabric’ – Fabric Dreams. Of all the samples I requested (which were incidentally free of charge and free of postage!) this non-wool, fabric was my favourite. I confused myself with this choice at first believing a quality coat must be in wool. But I went with gut and gut came good!

vintage Butterick 547

The hardest bit about the construction was having enough space to lay out the pieces. They were huge. I knew I was going to have to lob off the usual 4 inches from the bottom but I wanted to construct the original length in case I had a later moment of maxi-madness!

vintage coat butterick 547

This coat was seriously made in hourly bursts. If I had no hours left at the end of the day, sleep was stolen. I could not have done it any other way. Full time freelanceness which often runs into the evenings, with school runs and domestic chores to boot, means little or no time to sew. But UK weather waits for no seamstress and I was seriously going to freeze my butt off unless I got a wriggle on. Good enough motivation wouldn’t you say?!

vintage coat B547

The only issue with working in hundreds of little shifts is that I probably spend as much time getting stuff out and putting it away as I do on actual sewing time. But hey ho. Got there in the end. I really must stop dreaming about one of the children’s bedrooms being a sewing room. Terrible mother!

vintage dreamcoat

I interrupt this post to big up my amazing and wonderful bestest friend and boyf in the whole world, Daniel. I swear this coat wouldn’t look half as good if it wasn’t for his amazing photography skillz! I owe him so many waistcoats, it’s untrue!!

The other great thing about him being chief Ooobop photographer, is that we get to mooch around London together finding lovely locations. Today was mostly the British Museum. Feel like a bit of a fraud for not actually looking at one single exhibit. But we did have a cultural day at the V&A yesterday, honest guv!

vintage dreamcoat back

The coat is made of eight panels which create such a lovely shape. There was stacks of ease and I think I could have pinched out a bit more but I like how it feels and I wouldn’t want to feel restricted in it at all. Interestingly enough, even though the ‘skirt’ is not a circle, letting it hang overnight, the hemline dropped in the same way. A lengthy process to level up the hem, and check it at least 5 times before cutting, was quite painful but worth it.

vintage coat at the British MuseumLining this coat was quite a chore. Even though I chose a real quality, strong, gold lining, it frayed like Billy-O. So I serged every open seam. Because I can. Because I now have an overlocker BTW!! But because I am a newbie overlockerist I got all smug and complacent with the speed and completely hacked through the side-back panel. I swore a bit. But didn’t have time for a proper sulk. I’d come far too far enough down the line to be crying over torn lining. Luckily for my sanity, I had over-bought said gold lining by a metre and a half and so I cut another piece, dutifully unpicked the ruined one and half an hour or so later it was as if nothing had happened!

An entire evening and a morning was spent entirely hand-sewing in the lining with tiny stitches. Around the armholes, down the side seams, all around the facings and neckline and of course the hems. What joy!

But what warmth!

warm vintage coat

I’ve stubbonly been walking around in my draughty Vogue jacket, lovely as it is, refusing to buy a coat, lest it meant I would never finish this one. But now I have. And boy, it feels good to be warm. Bring on the snow!

Of course the warmth may not have been totally down to the coat. Mr O insisted this was a great photo of me having a cheeky snifter! He’s such a bad influence.

cheeky_snifter

A little wander into Covent Garden was lovely on such a bright winter’s day. This coat is great for twirling in too!

twirling vintage coatAnd a little venture into Neal’s Yard to soak up some more colour, if that was at all possible!

vintage Coat Neals YardThank you all for your support and patience throughout my first coat-making venture. It feels amazing to be wearing something so functional, yet so strikingly original and properly fitted. I won’t divulge cost of this project as it has scared the living pants off me but I can honestly say it was worth every single penny pound!

Pinstripes & parasols

pinstripe skirt

Now there’s nowt very exciting to say about a pinstripe pencil skirt. It’s pinstripy and pencilly… and that’s about it really. But it can’t possibly go without documentation, especially since Mr O and his buddy the camera made it look more interesting than it actually is!

pinstripe skirt outside St. Pancras station

I self-drafted the pattern so it fits well and it used up just under a metre of leftover wool-mix fabric and  a piece of purple stash lining which makes it cost-free, sort of!

pinstripe skirt and parasol

The main reason for making a garment so dull, was to rehearse the fitting process before I make a long awaited-skirt for my friend, who bid for it in the school auction! (More about that soon hopefully). But dull and boring as it may be, this skirt does make for a great go-to for work.

back of skirt

I made it a last week but needed some divine inspiration before shooting it. And then I spotted these beautiful brollies over at Masato Studio Boutique! (Yes, they are brollies and not parasols but that would kind of ruin the whole alliteration thing, don’t you think?)

Red Umbrella

It was well worth the investment. Total distraction from skirt but much more interesting photos… win! My little red beauty is made by Love Umbrellas. They do some really cute heart shaped ones too. Rainy days most certainly wont get me down any more!!

pinstripe skirt

Mr O took these shots around St Pancras Station, London, today, Just after I had the most lovely lunch with some of my favourite sewing ladies: Amy, Sally, Clare, Rehanon and Alison. They had all done their fabric shopping in the morning and I was so pleased to catch them for a couple of hours and a couple of G&Ts over at Drink Shop & Do. Boy I love that place! Should have really got Mr O up earlier to get an impromptu shot of us all but heyho can’t have it all!

St Pancras Station

Couture Inside Out

I’m fresh back from the ‘Couture Inside Out – 1950s Paris and London’ workshop at the London Fashion and Textile Museum.

Must blog straight away for fear of forgetting anything! After all I forgot notebook and pen in the first place!

First treat of the day was that I got to meet and enjoy this experience with Handmade Jane. It’s always so good to have like-minded people to raise your eyebrows at, make ‘ooo faces’ with, and give knowing looks to, during a lecture!

It was a very informal 2-hour affair with such amazing content divulged by the lovely Dennis. We donned our white cotton gloves and prepared to soak up all the info we could.

The first thing I learned (and remembered) was the definition of ‘haute couture’. (please spare me if I’ve got this wrong!) It is a term used to describe the highest level of hand-sewn, bespoke garments, in Paris by a delegated team of incredibly experienced seamstresses to strict regulations. Interestingly enough it was a term that was originally associated with the fine work of Charles Worth who was an Englishman.

Of course we have couture in the UK but with much more relaxed rules, apparently!

As the garments were presented, on a white covered table, the polite student audience jostled for position to get a better view and a feel and a photo.

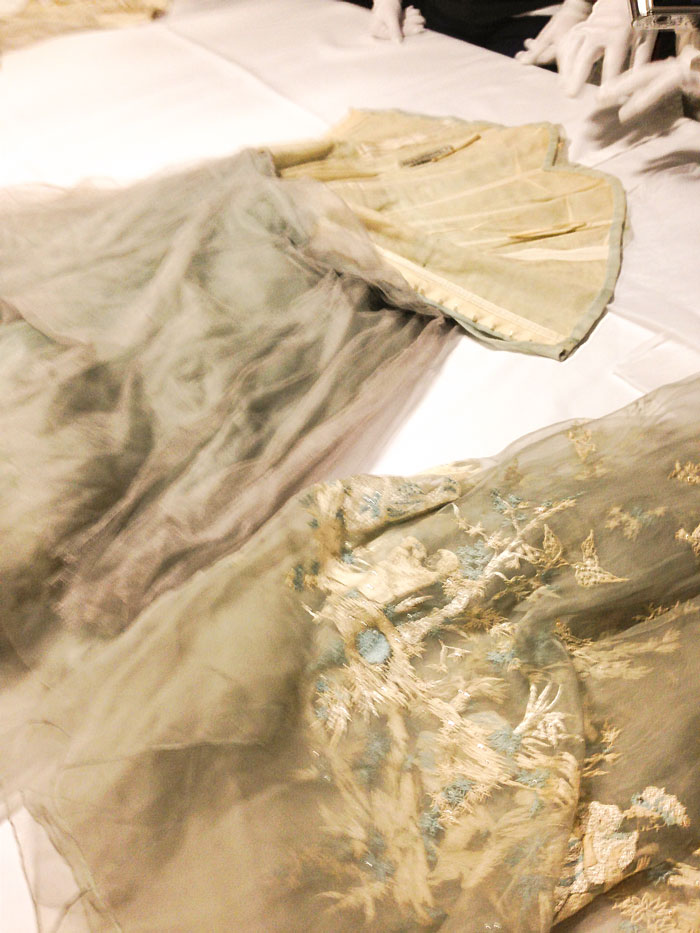
First up was Dior. A gasp as the two Dior creations were revealed from under the tissue.

The fact that both were aged: faded, stained and torn, did not deter from the unanimous awe.

Both dresses were in two pieces which was intriguing. Nothing like a skirt and a top. So much clever scaffolding with fine underskirts attached to the bodices. No waist-stay required.

dior cream dress

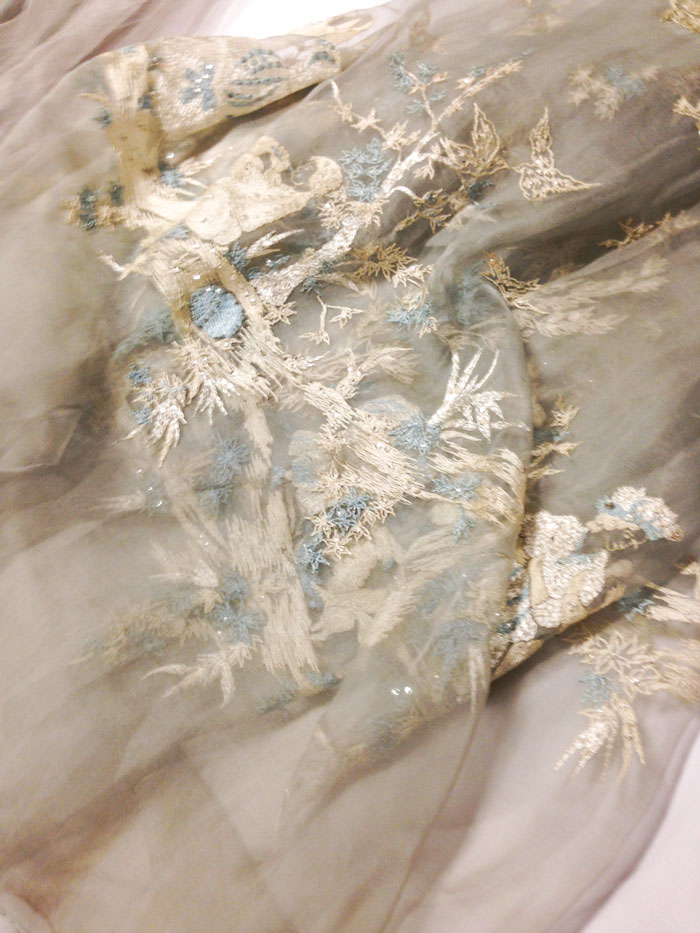
Every little bit of both of these dresses were hand-stitched!! Including the tiny rolled hems on all the chiffon layers. Beggars belief!

Please excuse the fuzzy photos taken on a phone whilst being too polite to jostle too much!

dior embroidered dress

dior embroidered dress detail

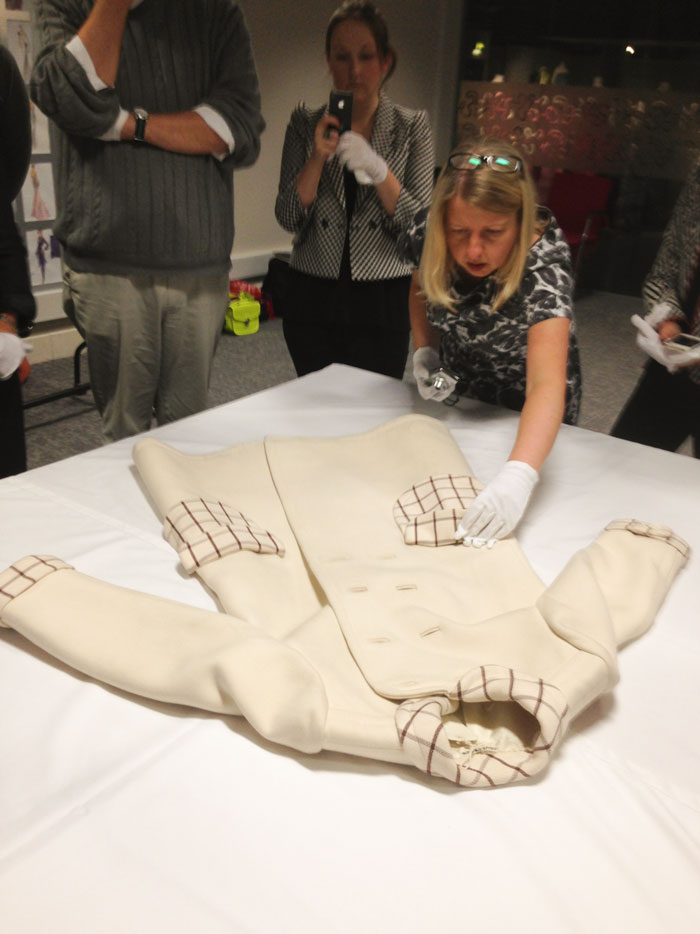
Next up was a later Dior in a really heavy weight fabric. I will be looking at furnishing fabrics in a totally different light from now on. This was heavier than any curtaining I have ever felt.

It was laid out on the table, ready for inspection! A gorgeously shaped one-piece dress. Made for someone who clearly didn’t eat that much. The waist was super tiny. The seam allowances on the other hand were enormous. At least one and a half inches. All pressed open and hand finished. The fabric had a ridged, pin-tuck like texture. All the rows of which lined up perfectly on the side seams.

dior later dress

No lining, which was a surprise. Though the dress was underlined and interfaced.

dior dress inside

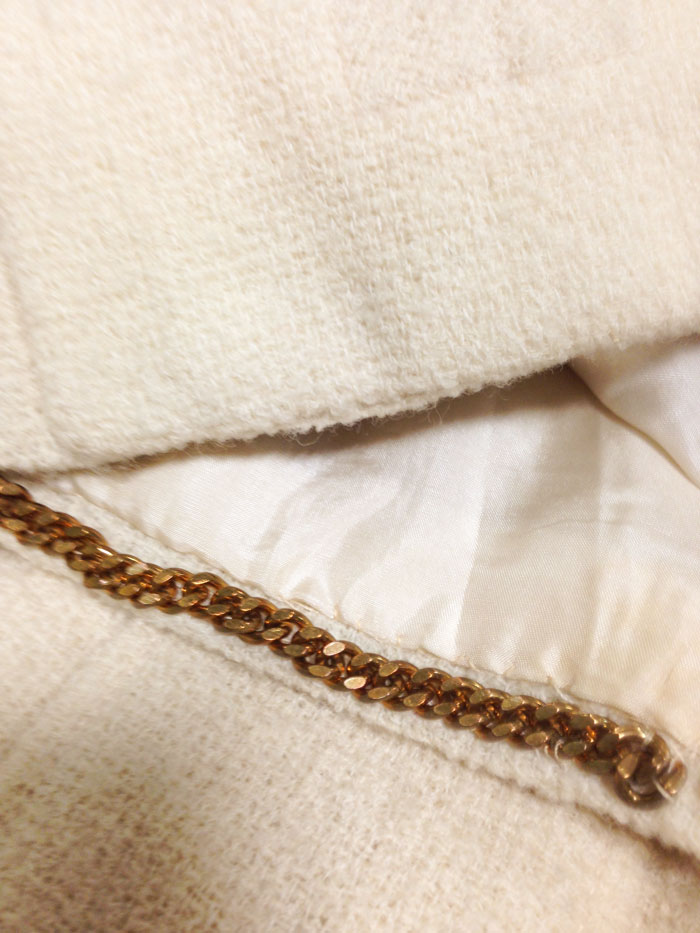
Chanel then graced the table with black contrast dress and two piece skirt suit. Both very classically Chanel.

Chanel black dress

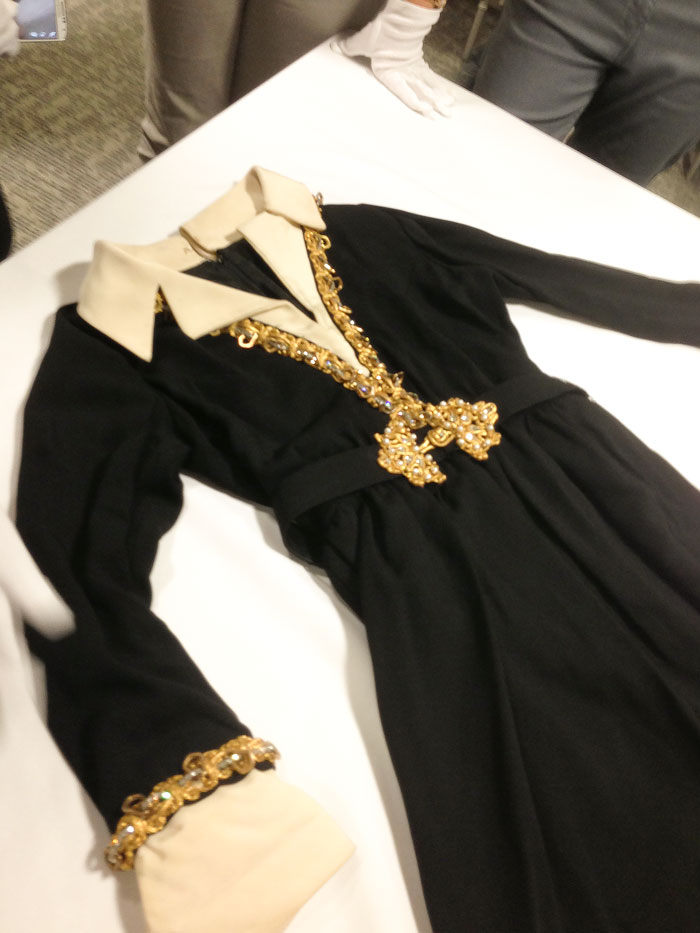
The bling was upfront and out loud on this one but only took shape as a collar detail and chain weight in the hem on the set below.

chanel skirt suit

Chanel only incorporated details if they worked and if they were functional. The little ‘petal’ pockets sit at the hemline, precisely centred with the seams. The chain weights are typically seen in Chanel hemlines. She was obsessed with the way that fabric hung and remained throughout wear and this little trick became one of her many signatures.

chanel_hem_weight

Far removed from the finer details of Chanel but not to be sniffed at, is the work of Balenciaga. This Spanish master draped most of his designs and employed much fewer seams than other designers.

This coat was A blooming Mazing. My rubbishy i-phone photos do not do it any justice whatsoever. Firstly the colour. Secondly the texture of this fabric… OMG. It was hand created to get this incredible effect. And yet the design remained oh so simple. I can’t tell you how much I want this coat!

balenciaga green coat

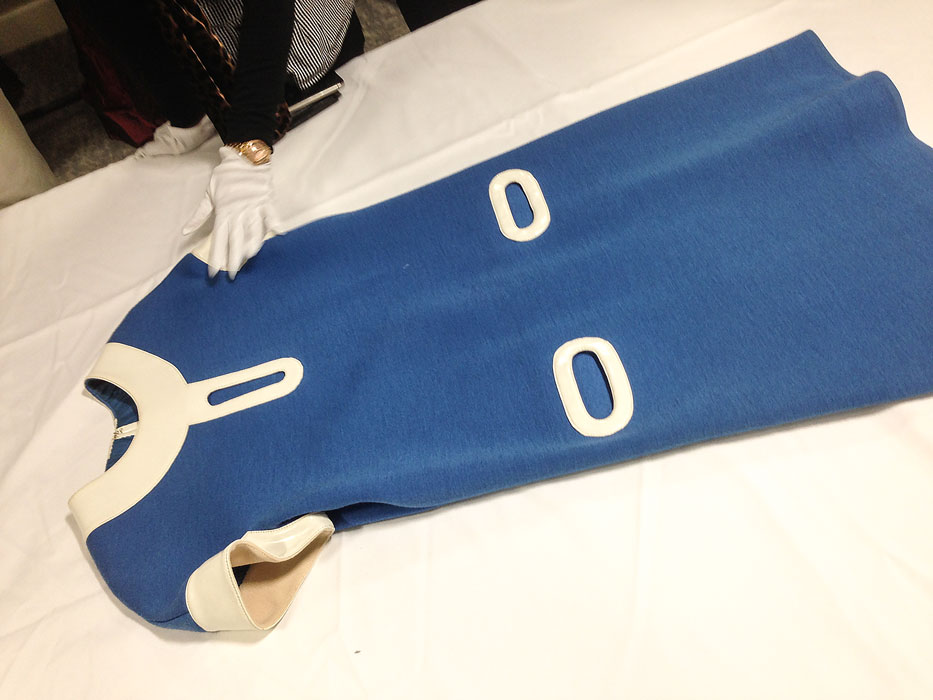
I didn’t care too much for Balenciaga’s Sarong Dress. But you gotta take your hat off to someone who incorporates so much into the under-scaffolding of something that fundamentally looks like a sarong!

balenciaga sarong

Now, will I get shot for not having heard of Courréges? Probably. As these designs were pretty iconic!

courreges blue dress

Jane got right in there! Impressed by those perfectly bound buttonholes.

courreges coat

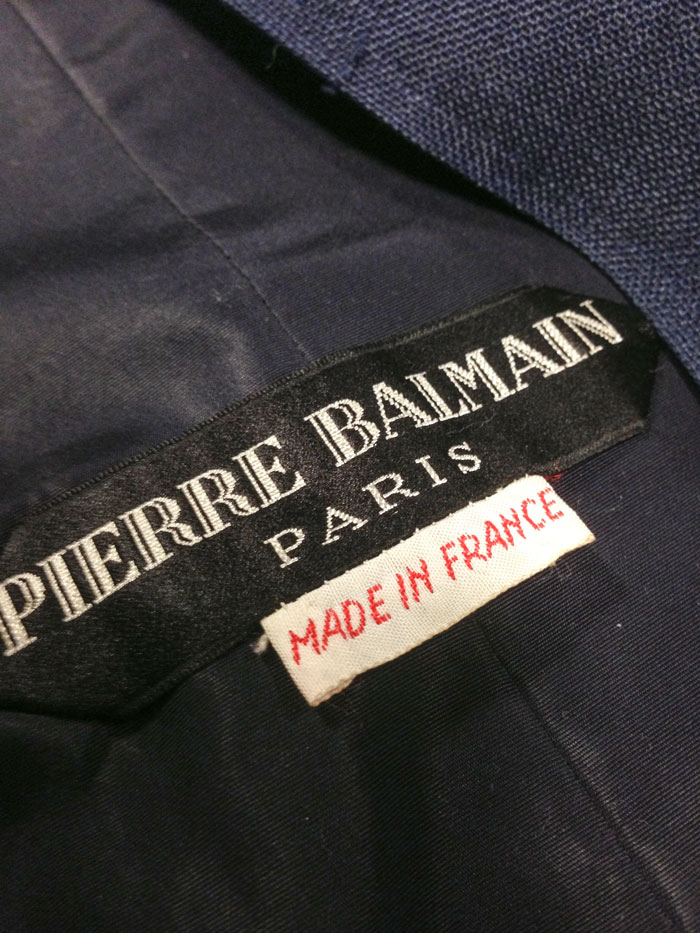
Dennis couldn’t be sure of the fabric that this Pierre Balman dress was made. It kind of felt like the sew in canvas that I recently used to interface my jacket! But it was gorgeous and necessary to keep that amazing shape. There were cutouts trimmed with velvet at the hemline and on the sleeves.

pierre balman dress

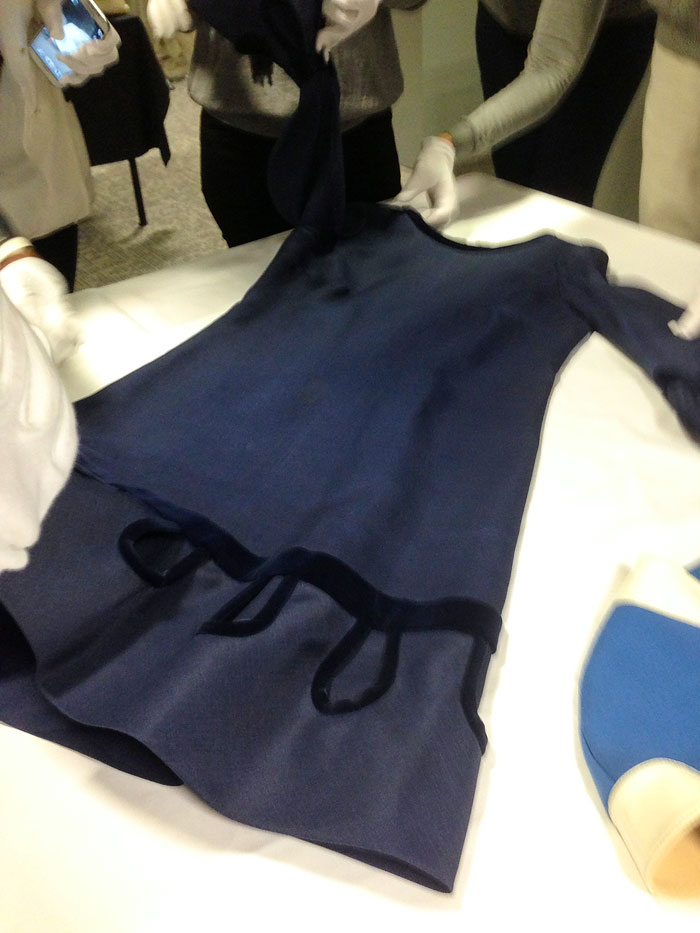
Of course it goes without saying that every detail counts. Balman even ensured that his labels were mitred.

Pierre Balman labels

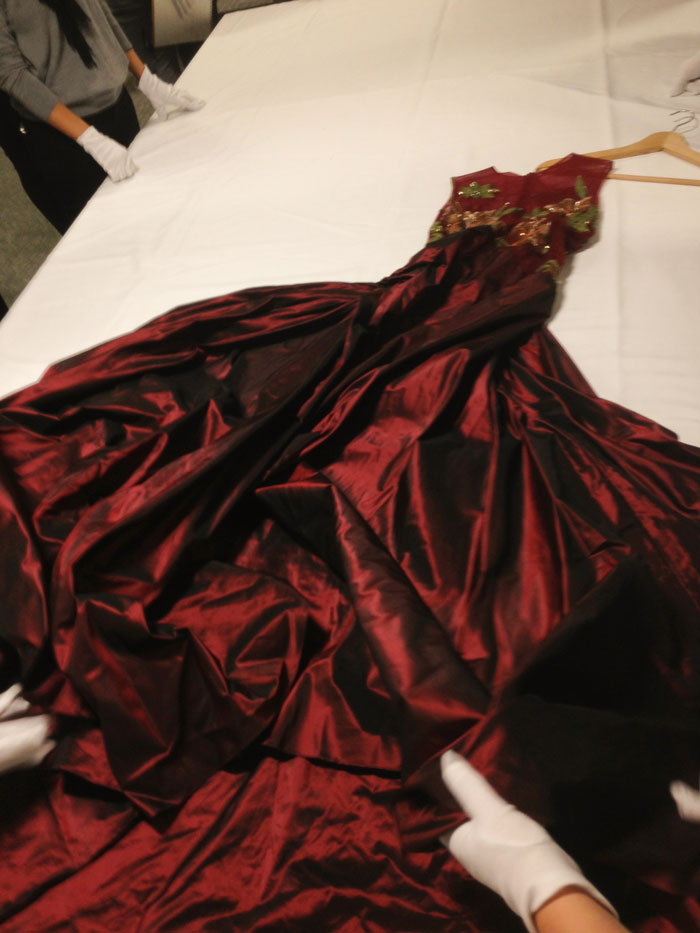
The following is a really bad picture of the Ellie Saab dress that Halle Berry wore to the Oscars for Best Actress, The Monsters Ball. In stark contrast to the dresses that were 50/60 years older you can see no seam allowances, no underskirts and no hand stitches to speak of. It is undeniably a gorgeous dress and she looked amazing in it, but it is incredible how standards have changed over the years!

Ellie Saab dress

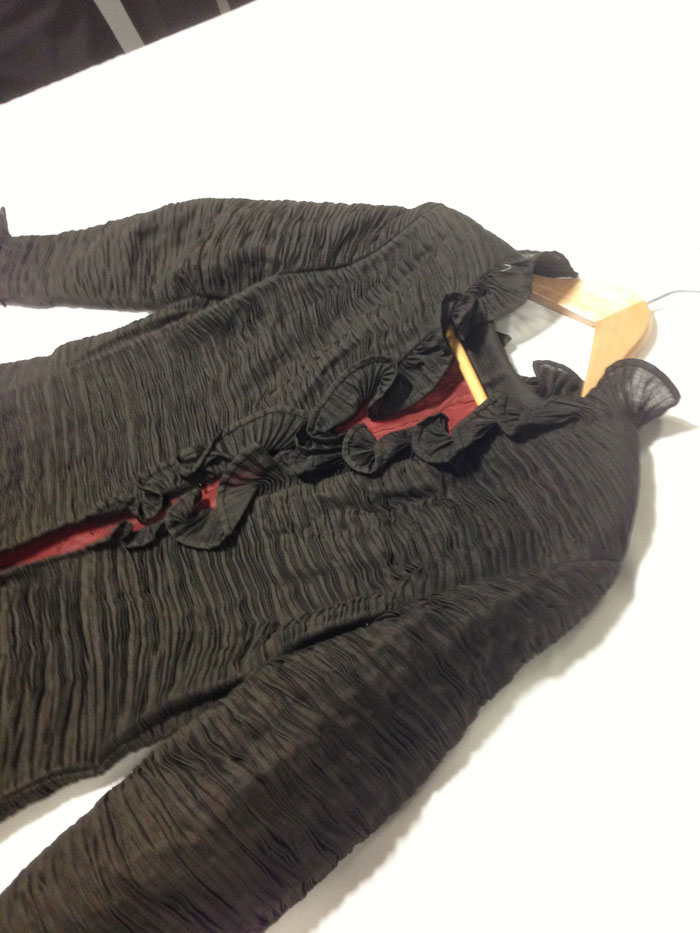
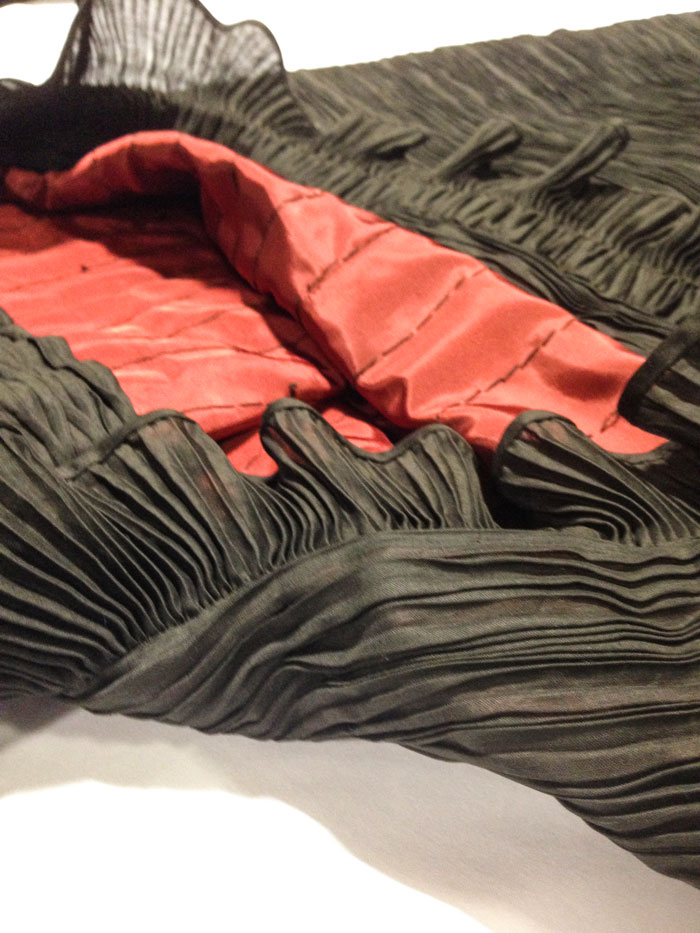
I cannot for the life of me remember who designed this dress but the fine pleating in the linen was unbelievable. An underlayer of shimmering copper gave a depth to the translucent linen and you could also see where the pleating was tacked.

(Thanks to the lovely Angela, I can now confirm it was Sybil Connolly!)

pleated linen dress

detail of pleat dress

Just when you thought you’d seen it all, something very little left me lost for words. If you look closely at all those painstakingly sewn on eyes, you will see that they are all oversewn with thread!

bound eyes

Now it would have been rude not to have mentioned Zandra Rhodes creations at this very museum. She is the founder, after all!

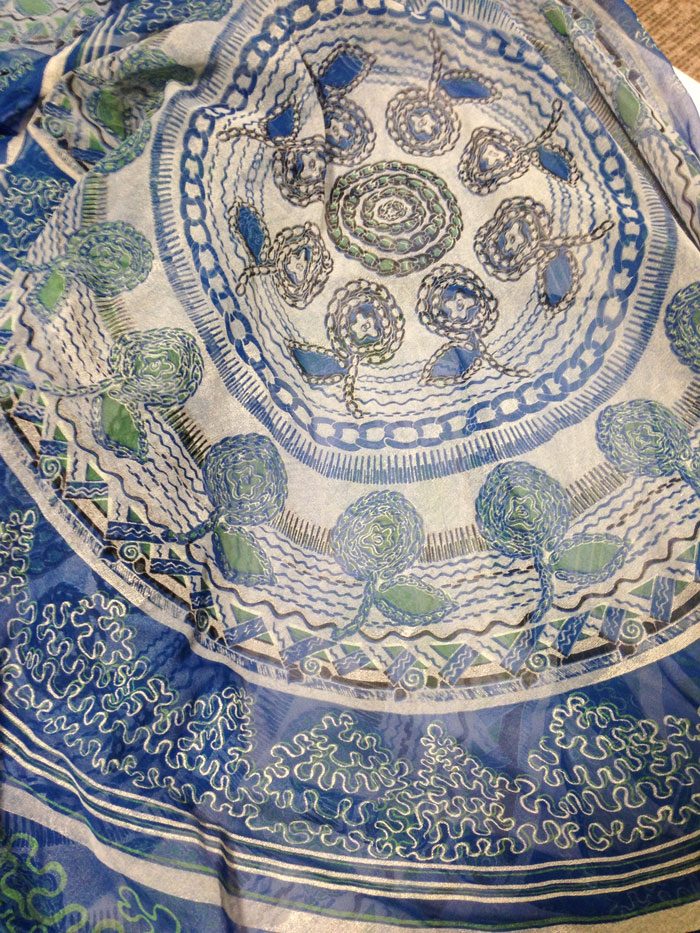
She entered the fashion world as a textile designer and the following two garments are testament to her designs. I’d never be able to carry these off in a million years but you have to admire her total originality in the way that she designed around the design of the fabric instead of sourcing suitable fabrics for a pre-determined design.

zandra Rhodes tunic

Here is her Knitted Circle dress. So called because the fabric design is made up of graphic knitting stitches. I swear there is more fabric in one of the sleeves than in the whole dress!

Zandra Rhodes circular knitted dress

knitted circle design

Both Jane and I left the workshop in a fuzzy reassured kinda way. It made us proud that we hand made our own clothes, albeit perhaps not to the same level of lavishness but there was nothing on show that we could not have handled. Give us a year or two for a deadline and we would gladly knock one up. But perhaps we might delegate the binding of the hook and eyes to someone else!

I did wonder whether I should have posted in so much detail so as not to spoil the experience for future visitors but really, you have to be there to actually see it. You have to feel and you have to hang onto every word that Dennis speaks because he knows everything there is to know!

Vintage 1950 Vogue Jacket

vogue 2934 jacket

And here it is, at last, that tasty little Vogue jacket as inspired by that classy little lady, Ms Nicole Needles. It had to be done. I couldn’t resist!

The pattern is V2934, a reproduction of an original 1950 design. Such a clever and very simple pattern that would whip together so quickly if it weren’t for all the hand stitching. Which, strangely enough, I didn’t mind at all.

vogue 2934 jacket

I’m loving the dolman sleeves and the big cuffs which nicely balance out the short cropped cape-like body.

vogue 2934 jacket

I used sew-in canvas for the interfacing. Really great stuff! It molded beautifully around the neck and shoulders and was the perfect weight to maintain the shape whilst still allowing drape at the front.

vogue 2934 jacket

Initially, I had a slight concern that this shape might make me look like a Weeble, given my lack o height, but I do believe it does nothing of the sort! In fact quite the opposite. It is amazingly flattering for a jacket that is more like a cropped cape and I love it!

vogue 2934 jacket

It is also so warm and so snug. The outer fabric is a wool blend, exact content unknown but at £6 per metre I’m not really that concerned!

But the inside fabric, however…

vogue 2934 jacket

It is the most lavish lining I have ever used. 100% red silk satin, baby! Costing more than the main fabric –but boy does it feel lush.

vogue 2934 jacket

Did you know these things were called frogs? Neither did I till very recently. But they do the job so perfectly. Takes a while to do them up but I’m sure I’ll get quicker with practice!

vogue 2934 jacket

vogue 2934 jacket

vogue 2934 jacket

OK. That’s quite enough of that serious posing Janene. What this jacket really speaks, (apart from sugar-gliders) is aeroplanes!

vogue 2934 jacket

vogue 2934 jacket

vogue 2934 jacket

vogue 2934 jacket

So never let it be said that black jackets are boring! Or indeed difficult to make. If you don’t mind a spot of hand-sewing the old fashioned way this is such a walk in the park.

vogue 2934 jacket

vogue 2934 jacket

Before I sign off I’d just like to give Little Miss O a mention. While we were busy being crazy she was so patiently sitting and drawing the most beautiful picture that I just have to share with you.

drawing at the Park

Pictures by Daniel James Photographic

Half-circle chic

half-circle skirt

This is my first self-drafted half circle skirt. Made from the finest poly-crepe and lined with some heavy stretch satin because gravity ain’t that clever!

I nearly went for wool crepe which I think would have worked even more beautifully, but the idea of messing up 2 metres @£40 was a little bit more daunting than @£9!

half circle skirt front view

The drape is lovely on the poly and I’m so chuffed with how flattering it is around the hips, but my oh my does that cause nasty stretchy bias hemline issues.

To draft the skirt, cut and sew together is child’s play. And it was a perfect project to practice a lapped zipper too. But to get an even hem on this skirt required patience of some saints. I blogged the other day about my time-starved, light-rationed sewing time so I won’t harp on any more about that but lets just say a massive learning curve was attained with the help of some basic tools, a bit of determination and a few swear words!

half circle skirt with jacket

half circle skirt front

I incorporated 2 buttons as a closure instead of the usual hook and bar and used black bias binding to finish the hem. And no I did not do it by hand!

half circle skirt detail

I so needed another black go-to skirt. And it feels right to go back to black. I do love a pencil skirt but I also love how swishy and elegant this one feels. A little bit Grease and a little bit Mad Men but also very much me. I can even run for the bus in it! Just need a few more 50s style blouses or peasant tops to go with it now.

twirling in half circle skirtAmazing photographs by Daniel Selway