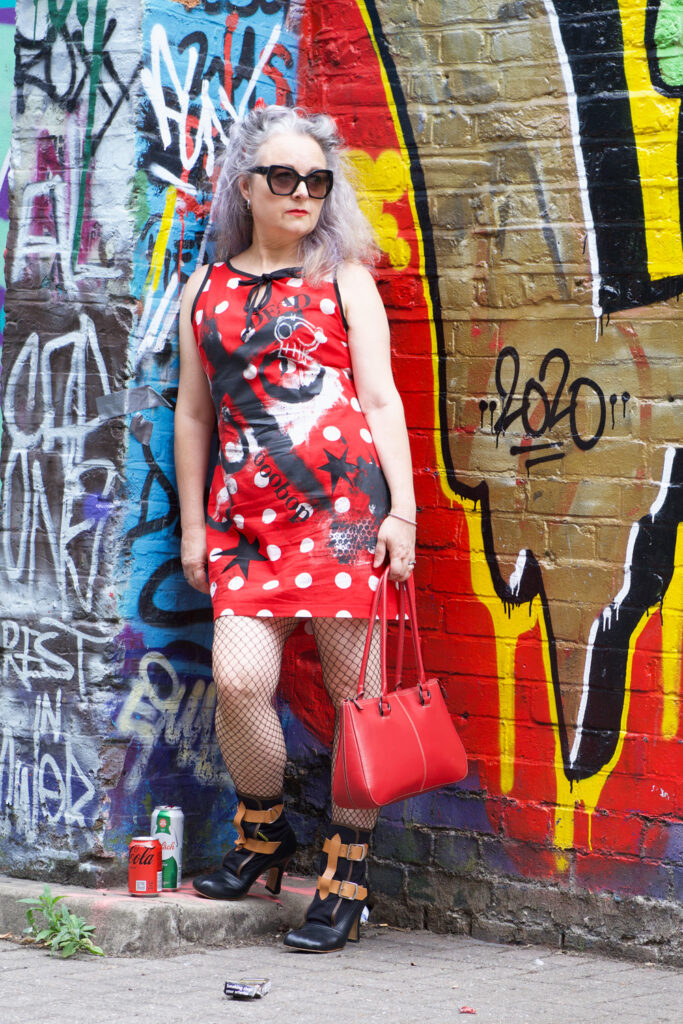
How to make a cute dress ‘dead cute’

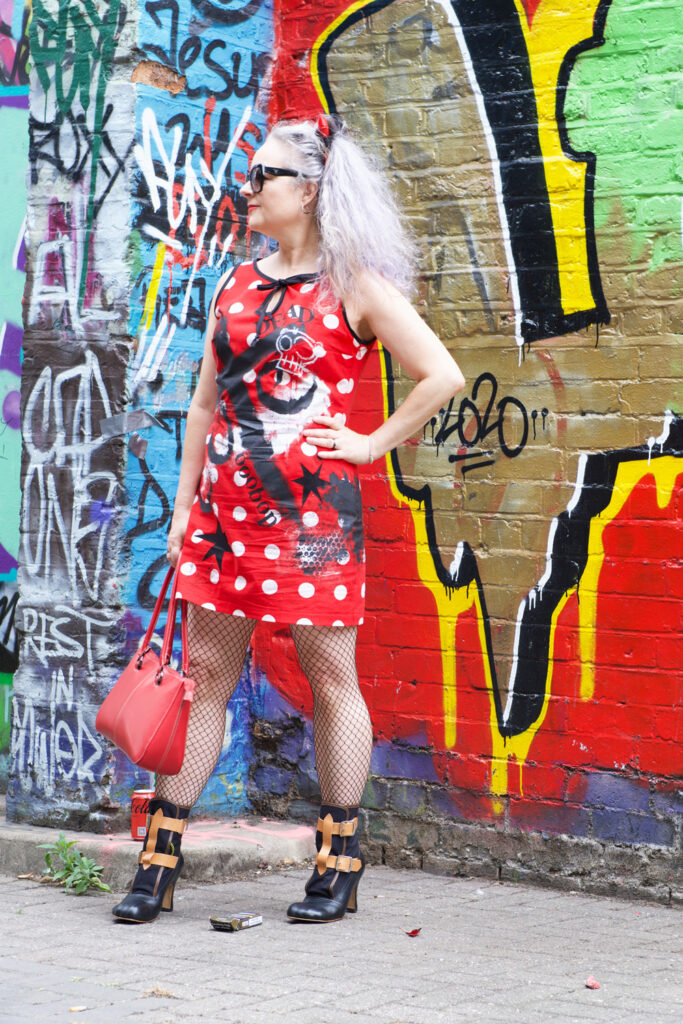
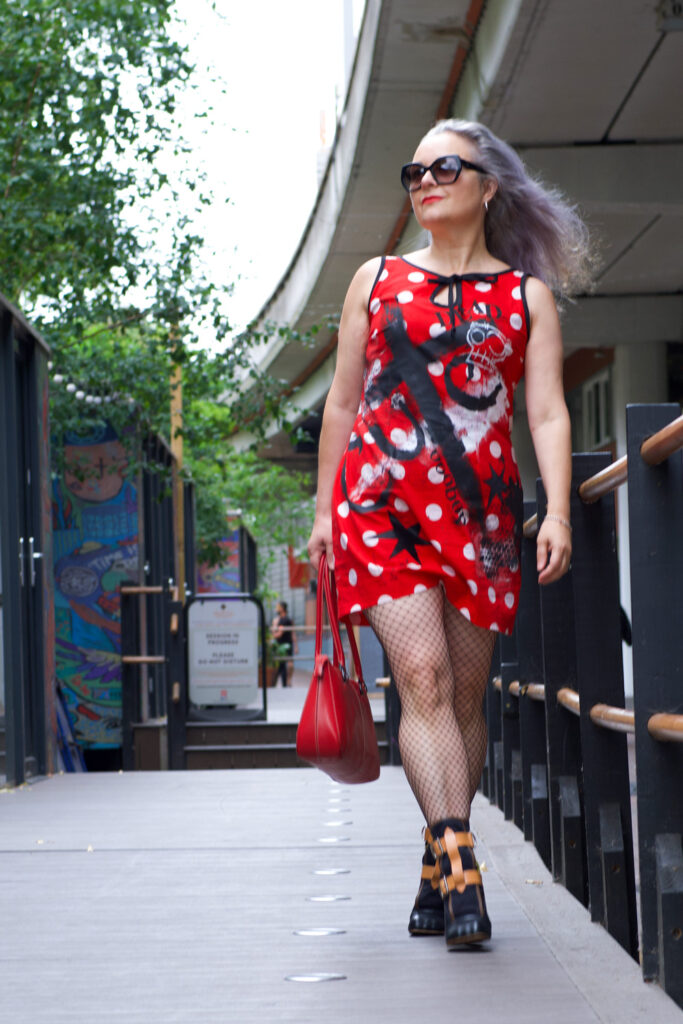
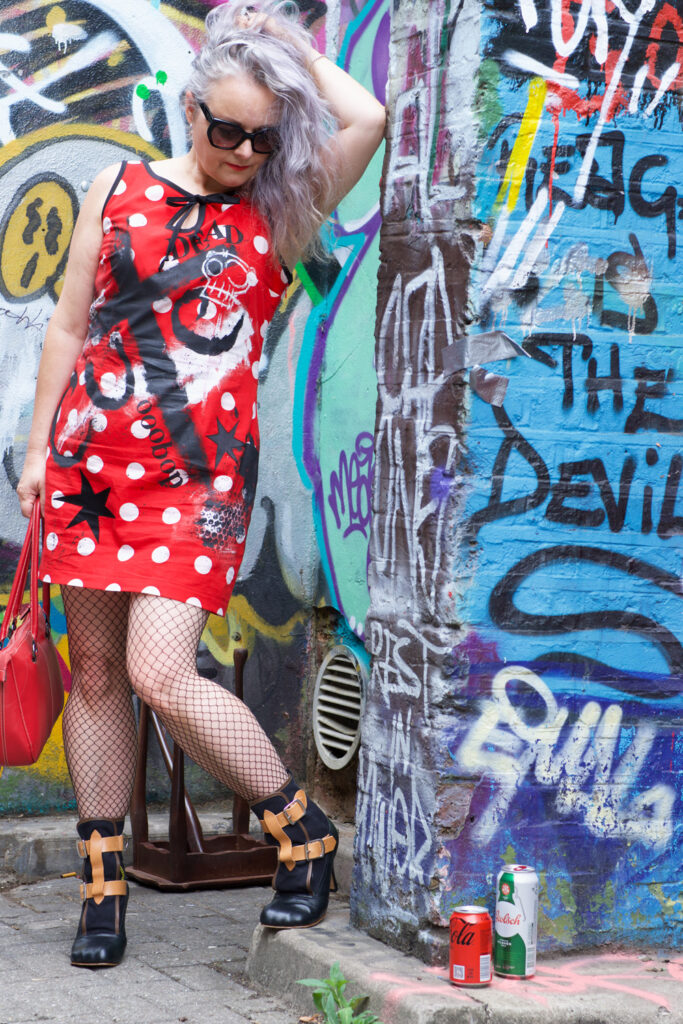
I basically made a cute dress… and de-cuted it!

But why, Janene, why? Well since you asked, I’d grab a cuppa and pull up a comfy cushion if I were you, because there’s no short answer.

I’ve had the inclination to ‘mess things up’ for a while now. Not exclusively for moments of therapy when prompted by frustration, but because I’ve felt a bit caged. As if I’ve been blinkered and strapped down. Like I’ve had my wings clipped. I know this sounds a bit over dramatic. Especially since I lead a very nice life am surrounded by gorgeous friends and family and have a very desirable job. But I guess everything I do is, on the whole, well-behaved, expected, accurate and rule abiding. My work as a graphic designer permits a modicum of out-of-the-box thinking but largely there are rules, whatever industry I’m creating for. And the same goes for my ‘until now’ sewing: Cutting is precise, seams are consistent, fit is important and placement of design is key, etc etc. 
I documented my failed consideration of the neckline-keyhole placement on Instagram, how it  bugged the hell out of me that it wasn’t properly centred between spots. Most people agreed. Some shrugged it off and said it didn’t bother them. I was quite jealous of those people because caring so much about the finer detail is IMHO partly responsible for my lack of adventure! I’m not sure I can ever change that up though. I’ll just have to add the wilder stuff on top… or on the bottom!
In March this year, my wish to have a studio finally came true and I moved in with more than 60 other artists. My requirements were very basic – I had dreamed of having a cutting table as its quite tricky to get back up of the floor after a long cutting session nowadays – And faster wifi so that my graphic files would deliver as soon as I sent them. Little things, generally speaking, but actually, massive things to me, that would make a real difference to my productivity. 

Within days of settling in, I relished the added advantage of being able to leave a project out on the table overnight so that you can just come in and crack straight on with it the following morning, how awesome it was having a whole space to myself (apart from when Dan comes in) but yet there is often a friendly knock at the door, an invitation to lunch at the lovely cafe and advice and inspiration on tap.
I’ll admit to having big old imposter syndrome at first. Like ‘how can I possibly match up to the artistry that is resident here?’ I’m a graphic designer not a fine artist and I’m a dressmaker not a fashion designer. But therein lay the problem! I had labelled myself with titles of position, boxed myself in by definition and process. I design books and I make dresses for sure but that’s not all that I am or the end of the story by any stretch of the words, I can now feel all the other possibilities rising to the surface. Its sooo hard not to be inspired here! Next door to me is a wonderful poet, artist and mentor, the other side a painter and an interior designer, an amazing costumier upstairs with photographers, textile artists, musicians, set designers and an entomologist to boot!
The initial stage of the dress came about as I wandered around a charity shop in Shoreham. I found the red polka dot fabric there. Vintage most probably and slightly marked in place, approximately 5 metres of it and cheap. London prices are set as much as new fabric in some cases so it was straight in the bag without even considering what it would be used for. A regular habit and sometimes I think its a bad one until I think of a use and then I think its a good habit, hahaha!
I love the idea of rescuing fabric as much as I love purchasing brand new fabric that matches the exact Idea I have in my head so it helps to have a balance so I don’t feel too bad about buying new all the time. I think this must have been used as a table cloth or such like in its previous life but whatever it was I couldn’t really envisage me in a twee dress. So as I walked out of the shop with a bargain of a buy, I started to dream up the dress.

It didn’t take long. It needed black, that’s all. Just black. The ‘colour’ I always come running home to. My safety zone.  I used to only wear black when I was younger, not because I was goth or punk, I was very much on board with the New Romantics and if I bought anything black (sometimes white) I could guaranteee that the garments would layer and mix and match quite successfully – cheaper that way too. A black dress would render me invisible and cool at the same time. I could be part of the crowd yet not stand out at all, seeing as most of my peers were wearing black too! A kind of invisibility cloak, if you like.
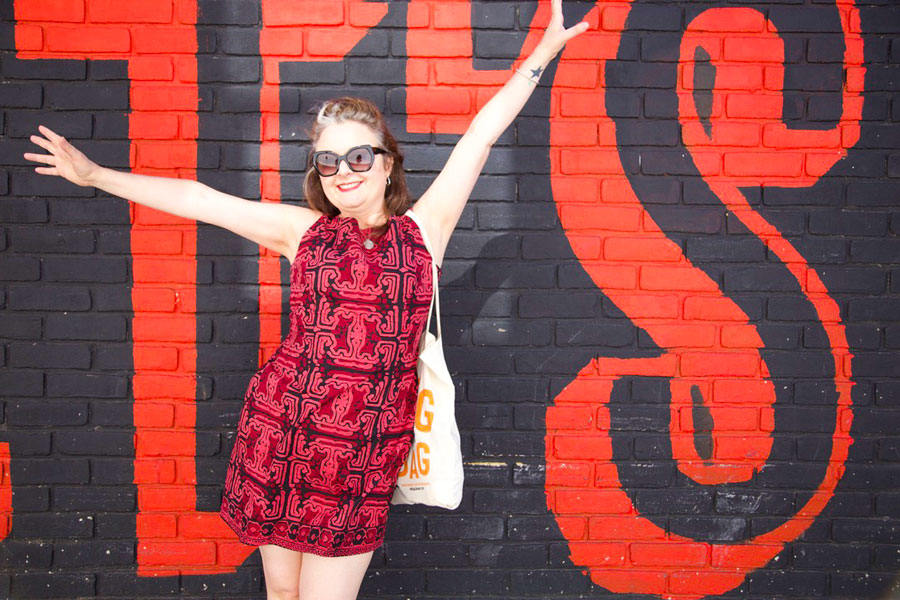
When I returned to sewing (more seriously) about 20 years ago I wanted to sew all the colours, all the flowery fabric and all the frills. Because I could. Because I could affford to. And because I found a wonderful sewing community and I wanted to be just like them. But now I feel like I’ve come full circle armed with a fresh load of knowledge and Inspo, from the job that I do – I just love typography and graphic imagery – from my surrounding artist friends – I’m going large on the brush strokes – and a new found sense of brave. I just want to try new things. Not worry whether it fits in with anyone elses vibe and certainly not fashion as a whole. I don’t think I ever worried about that too much anyhoos but I just want to explore more possibilities 
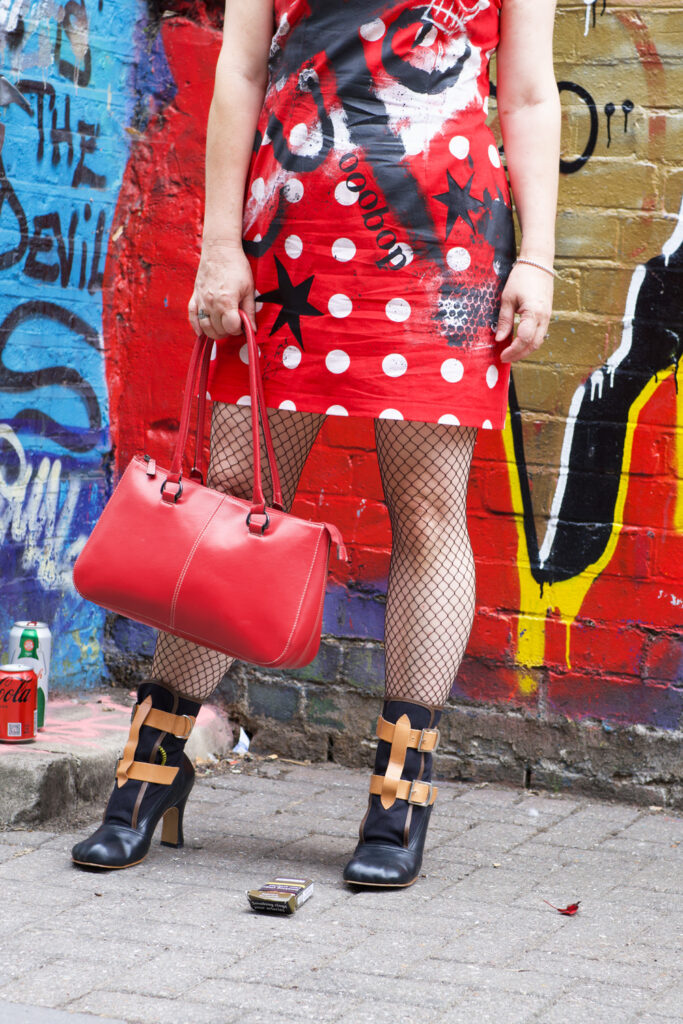
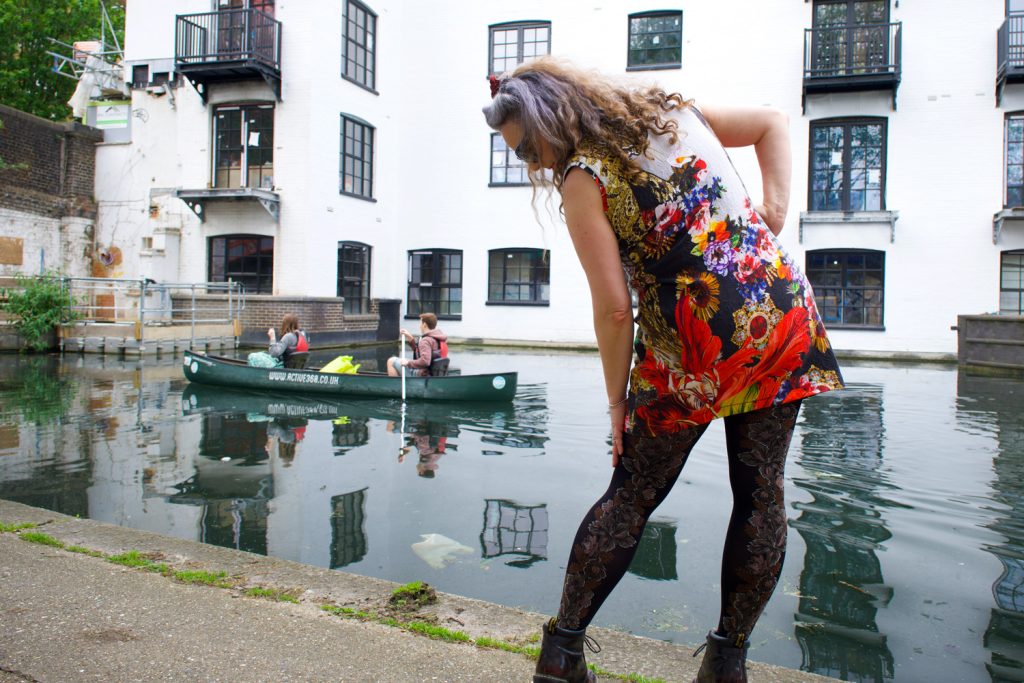
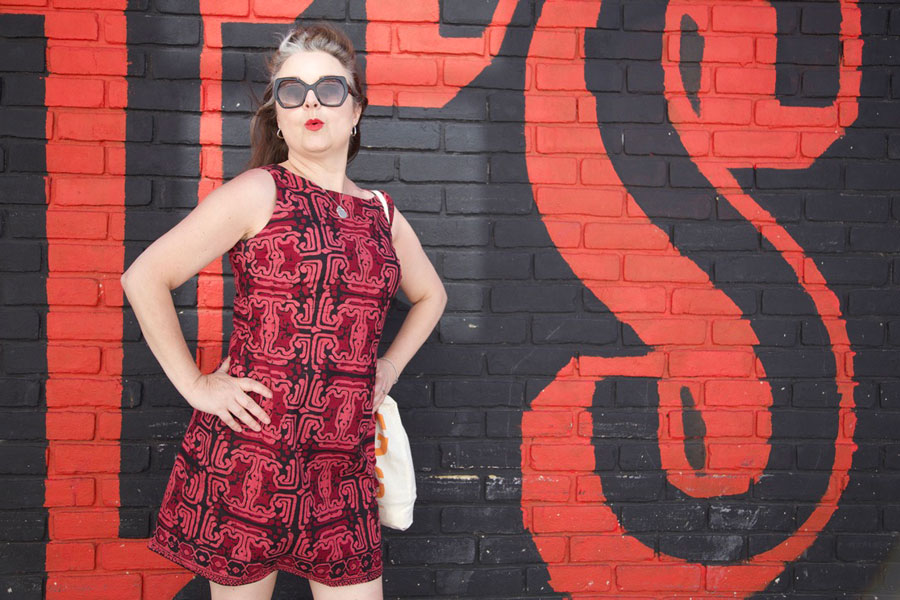
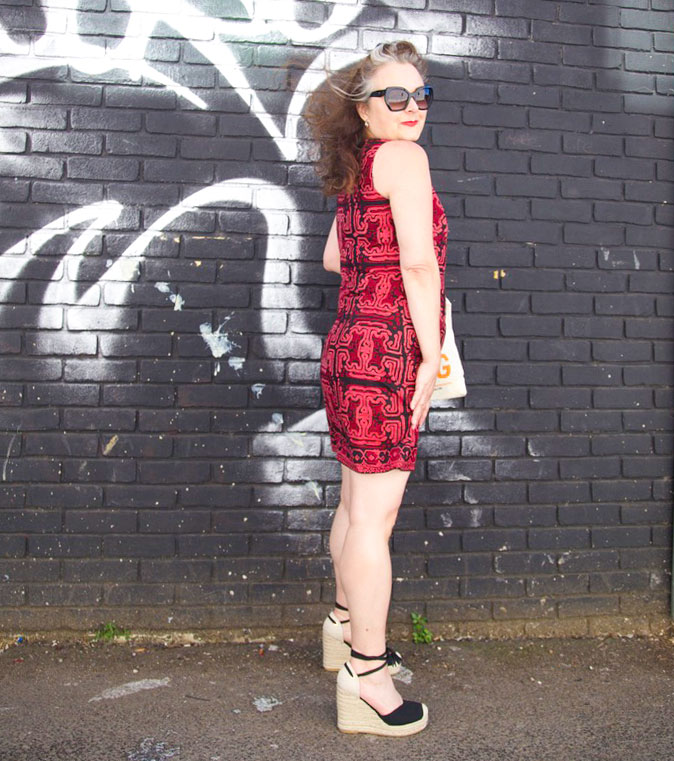
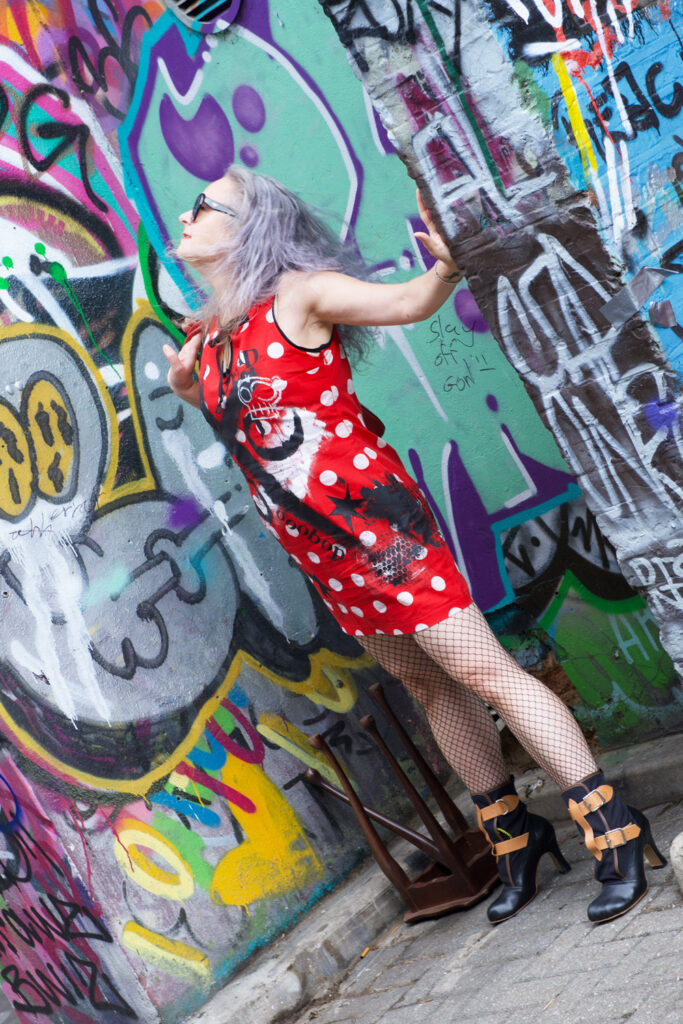
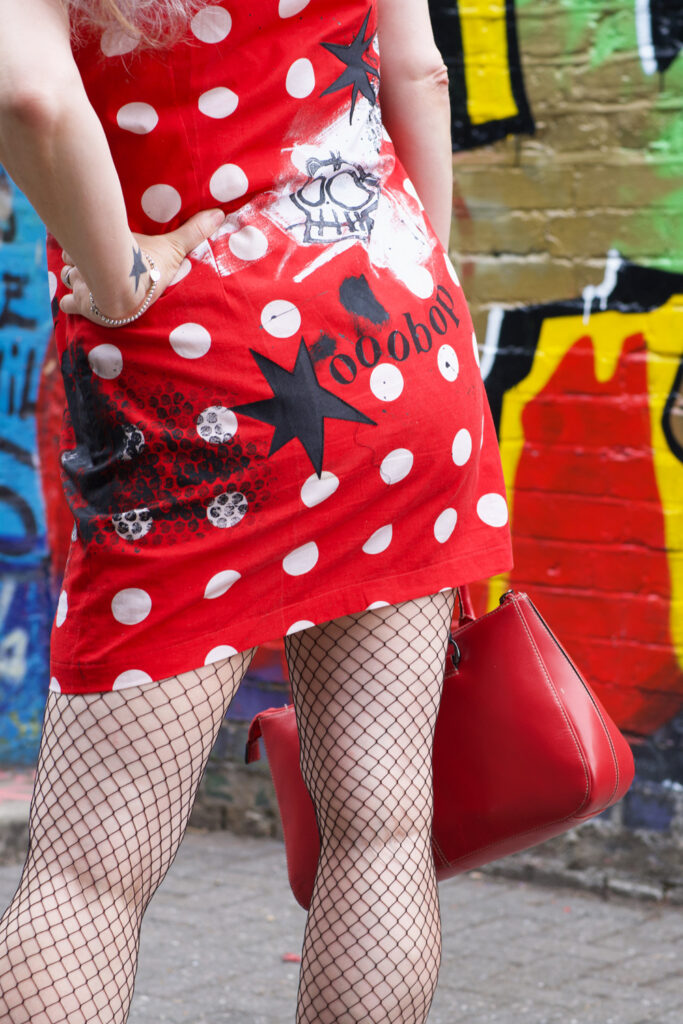
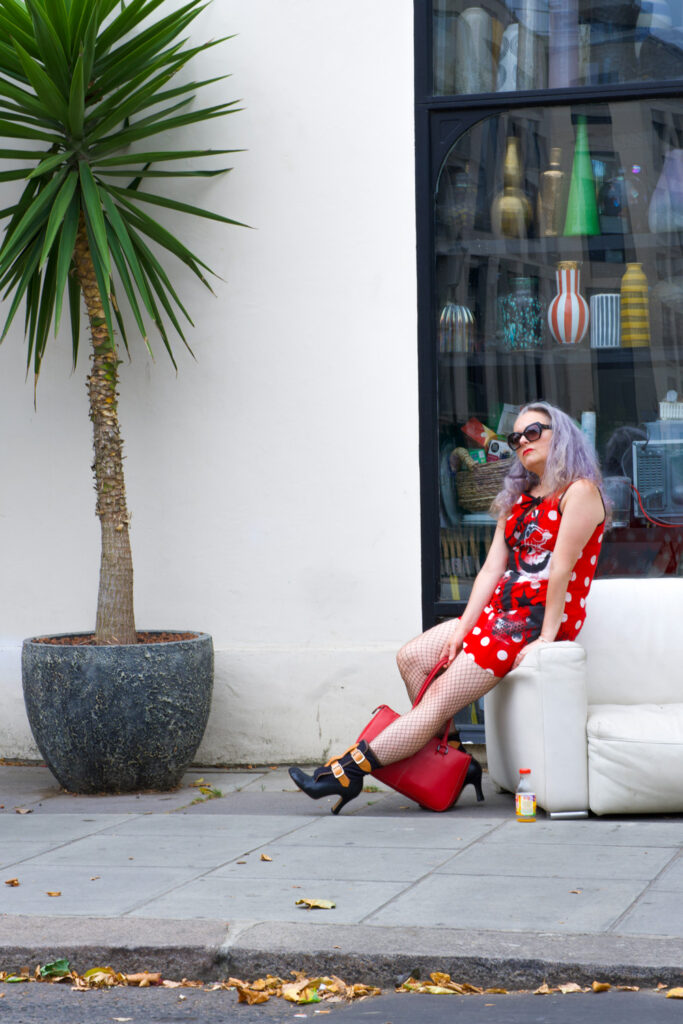
And so this dress was created from a pattern I designed from my own drafted pattern block. I used a vintage reclaimed fabric and painted on it with large black and white brush strokes, I carved a Lino piece to print the skulls, I used rubber letter stamps for some of the wording and I appliquéd the stars with scrap satin. Bubble wrap mono print and brush flicks were added for  texture. I used a fabric paint called Pebeo Setacolor which was fixed with heat, and I’ll report back with the results on how it laundered! Its not my best work yet, but I am proud and relieved to have finally released one of those crazy ideas from my head and put it into practice.
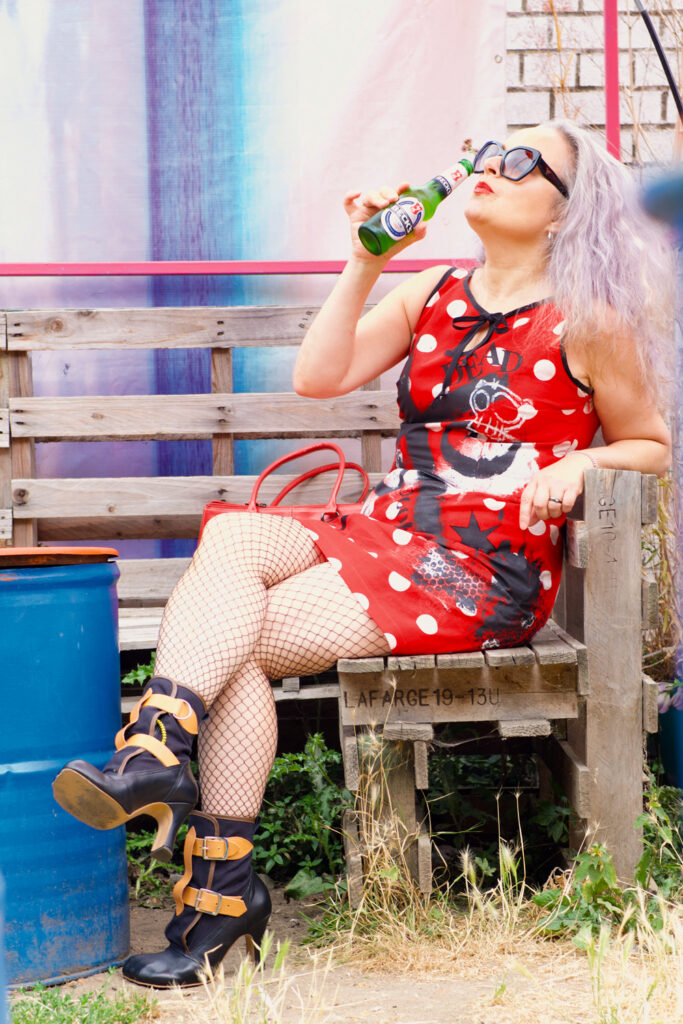
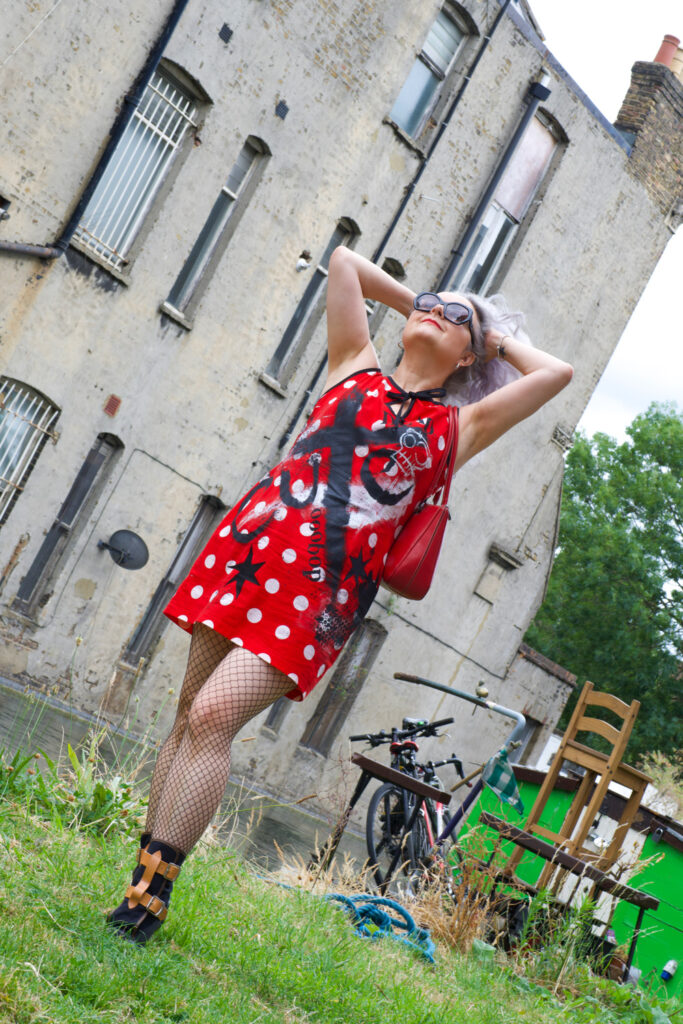
If I’d have made this dress as a youngster, my mum would definitely have walked ten paces behind me, worried about all the disapproving looks from people in the neighbourhood. It’s still kind of like that where she lives. Although she’s more used to me being ‘whacky’ now lol. But by stark comparison, Dan and I wandered around Portobello and the Grand Union Canal in West London, blending in perfectly with the surroundings and not a soul batting an eyelid. This is one of the main reason I love London. Another is that you come across free location set ups like this!
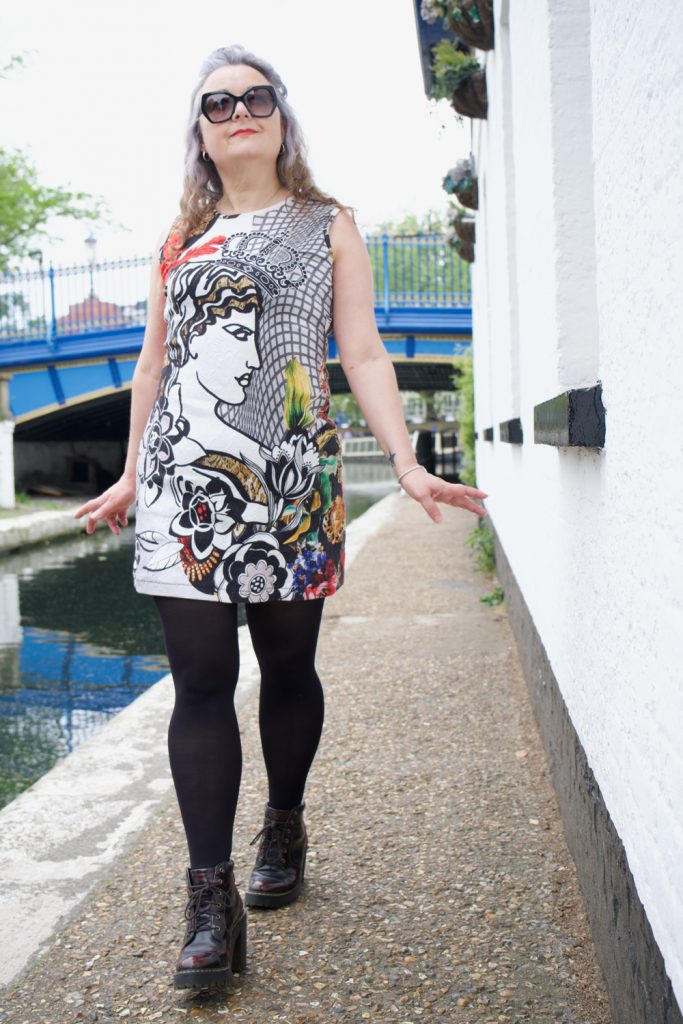
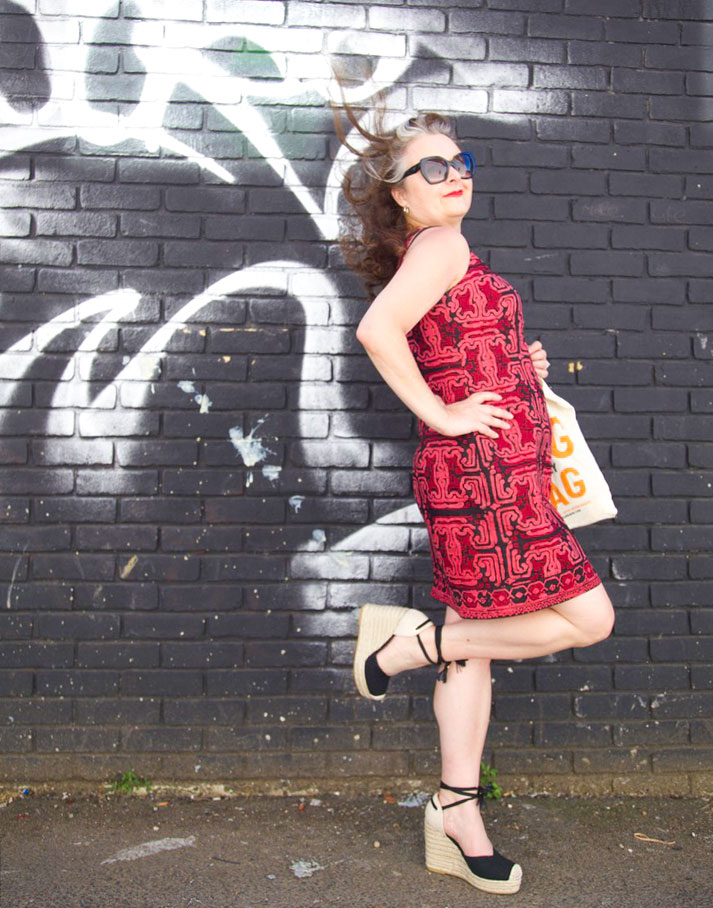
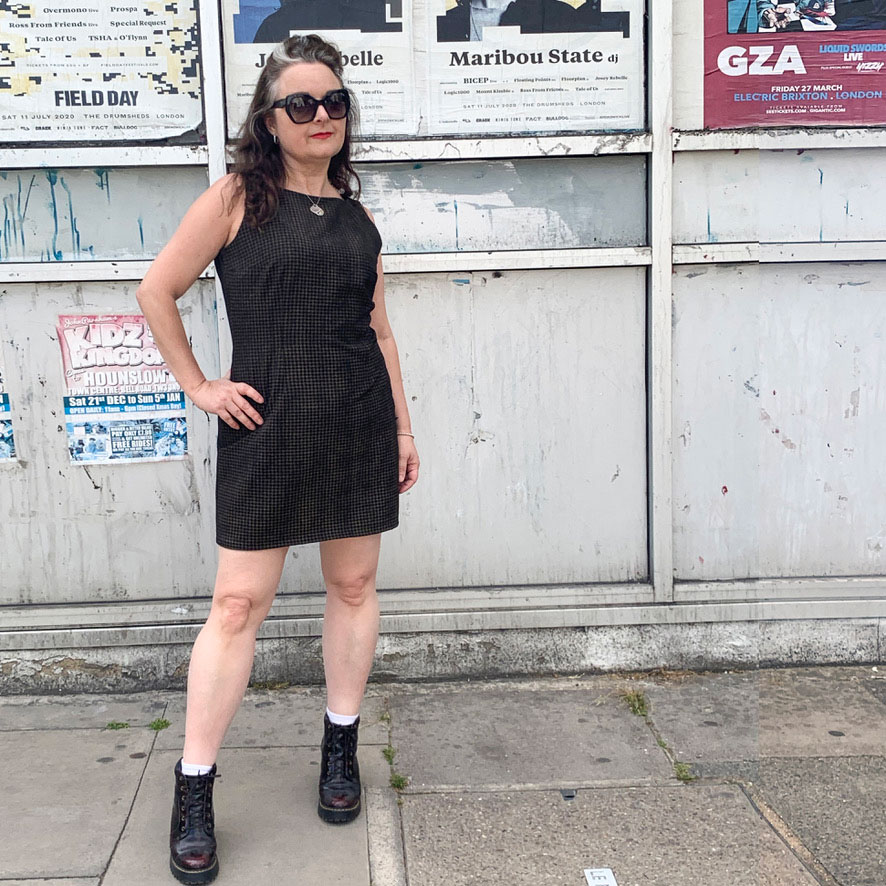
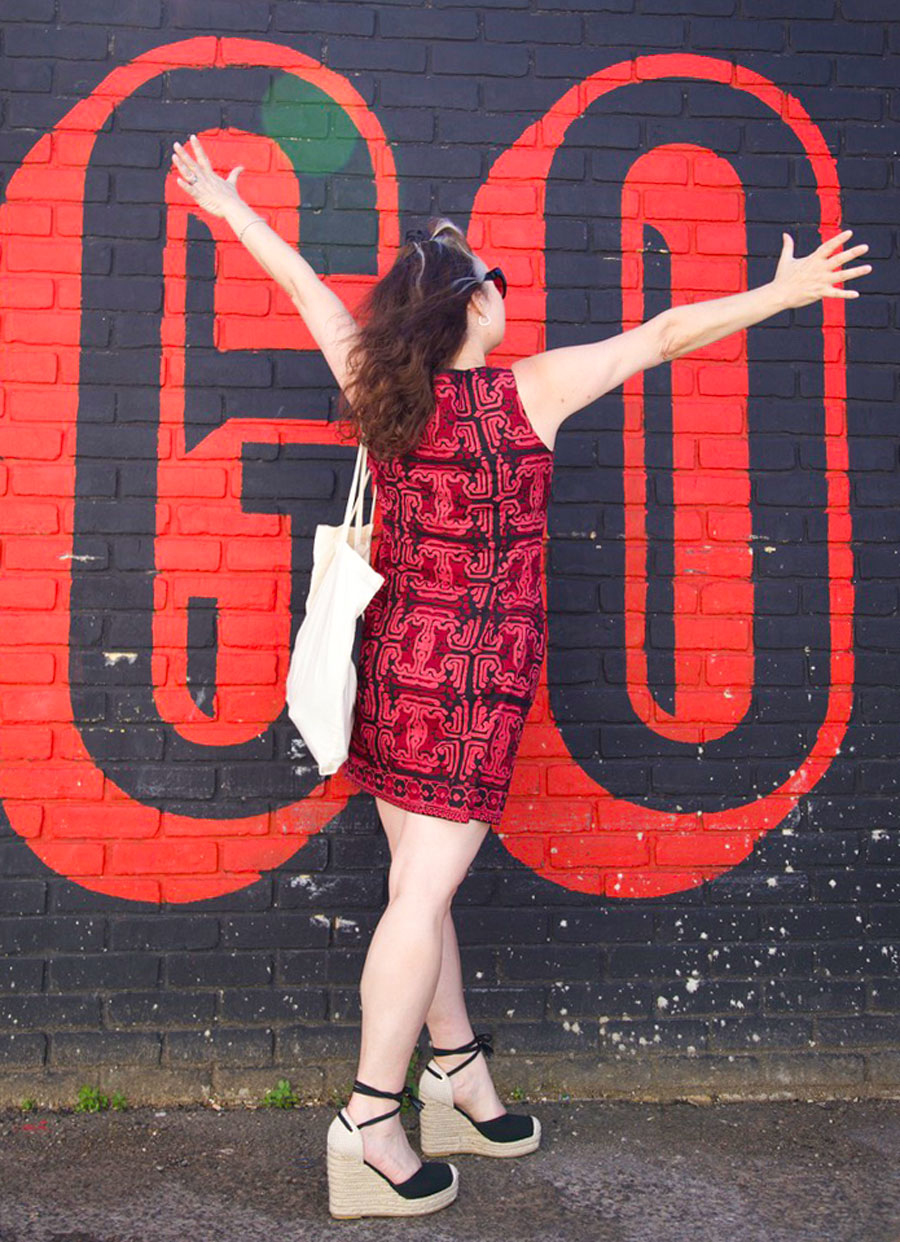
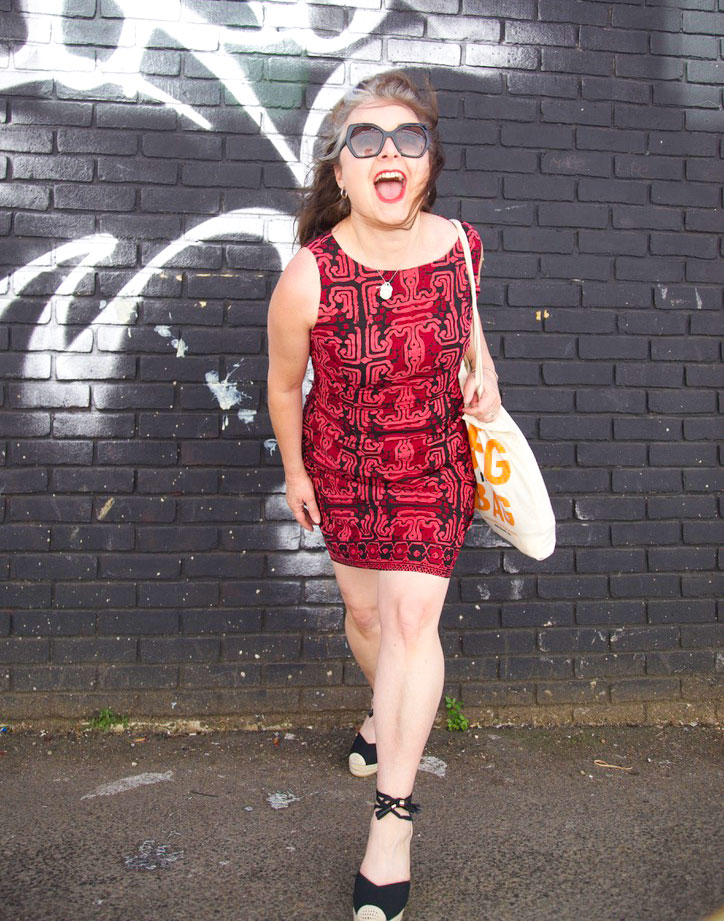
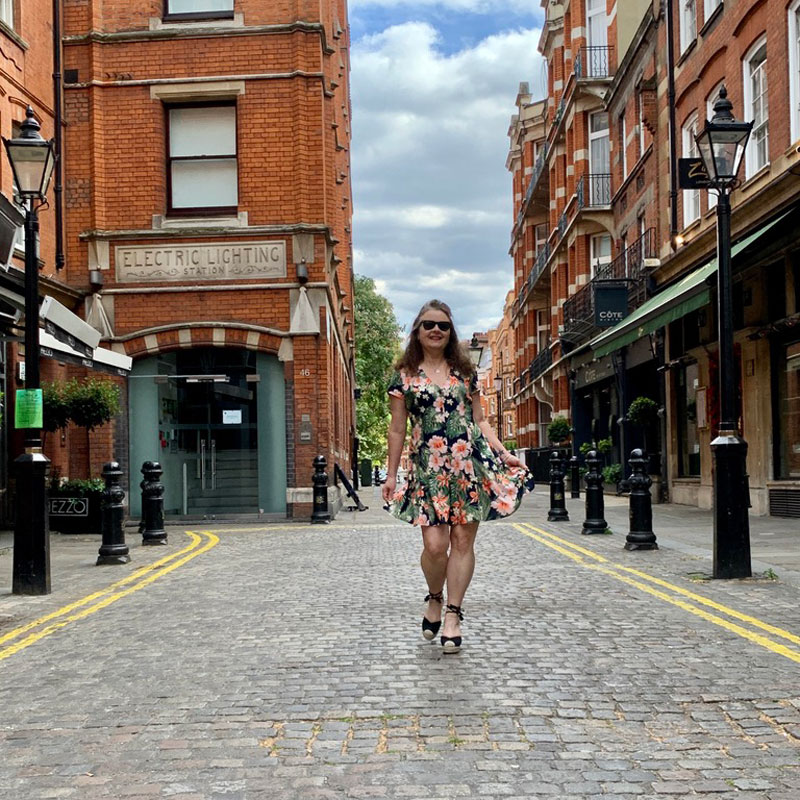
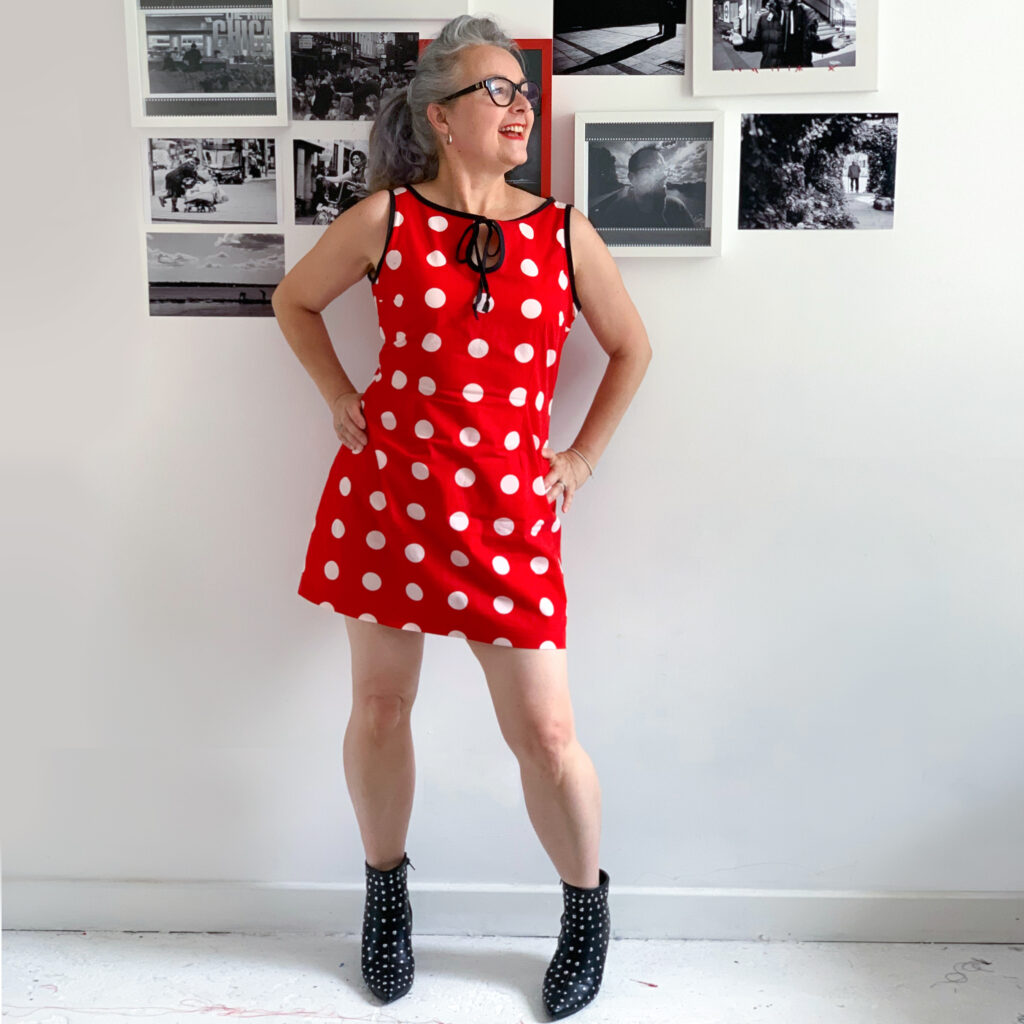
Oh, and this is how reasonably cute the dress was before:
I’ve got more ideas bubbling and more reclaimed fabric that will be perfect for purpose so I hope to share those once they are realised. There will also be a more demure wedding guest outfit to share soon too so do hit the subscribe pattern to be notified by Email of a new post.

Thanks to Dan for these amazing photos. Thanks to all the inspiring people in my life and many thanks too for you reading my waffle all the way to the end. Im forever grateful for your support and comments.

So much love for the self-drafted Dolce dress of dreams

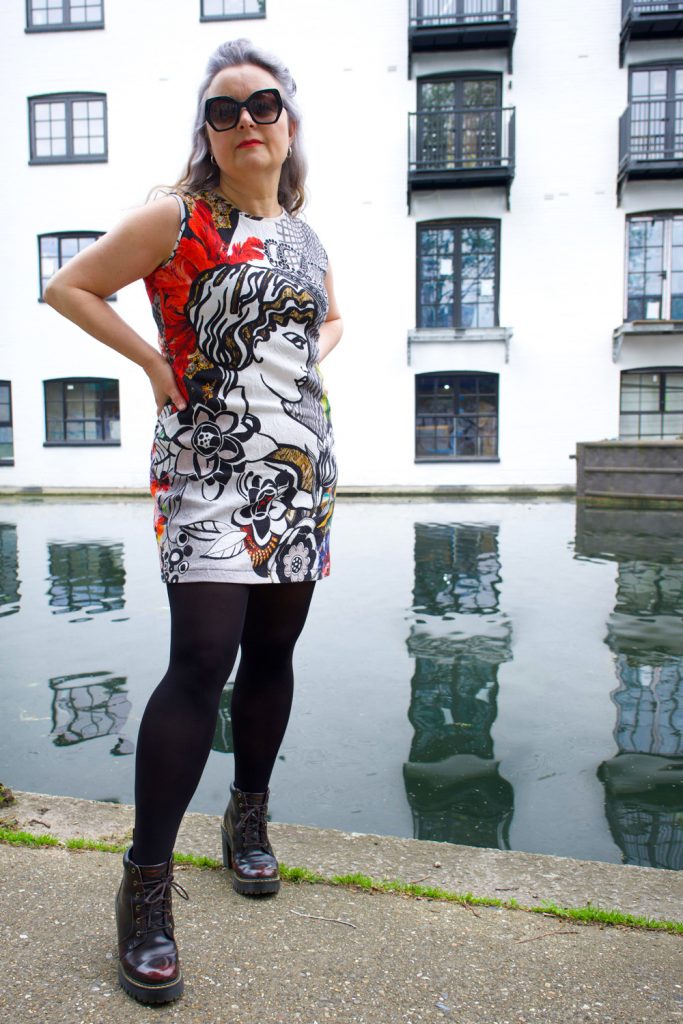
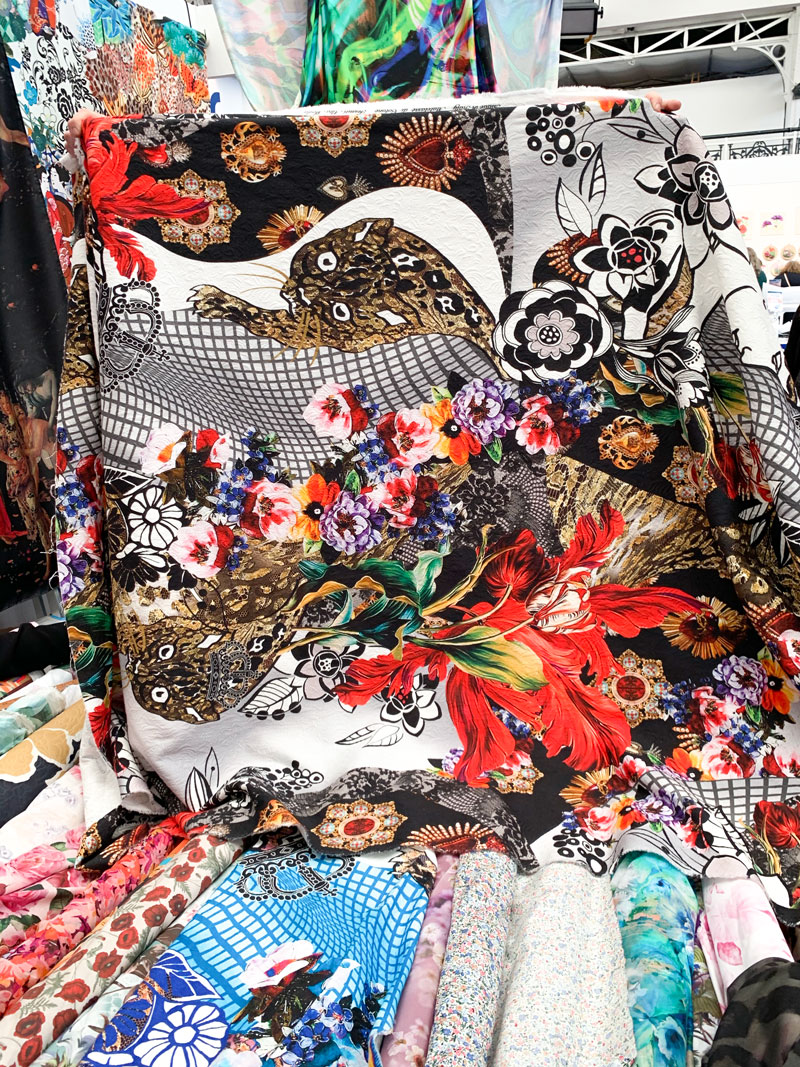
Remember that divine Dolce fabric I was compelled to buy, back at The Stitch Festival 2020? Well it just got stitched up. And boy oh boy it didn’t disappoint. 

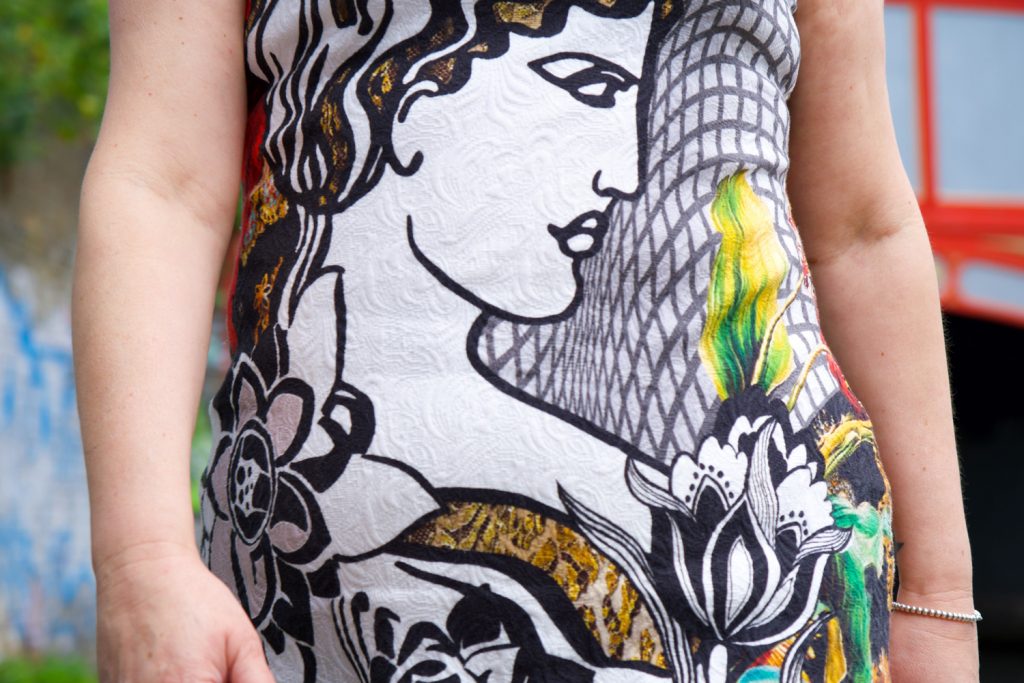
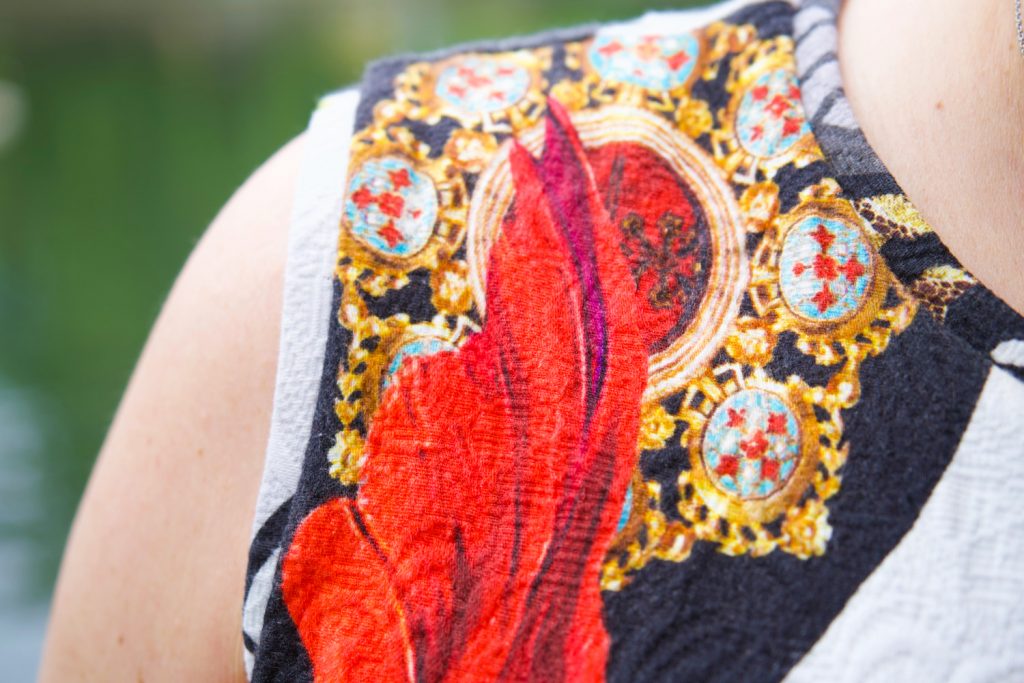
I had absolutely no idea what I was going to do with it at the time. But I knew it was going to be fabulous, even if I simply draped and cinched with a belt! It’s an Italian cotton metalassé according to the selvedge – a cotton and lycra Jacquard according to M. Rosenberg’s web listing. But all the same a quality weighty, textured stretch fabric of dreams. BTW, I pre-washed at 40 degrees and those colours still popped! And heads up, there are 3 singular metres left remaining on their site if you’re a sucker for a crazy-ass in-yer-face designer print as much as me!

Despite the try-hard distraction of the print, the texture of the metalassé holds it’s own

Ultimately, I decided to let the design speak for itself. Any clever design lines were going to get lost and I wasn’t going to jeopardise one bit of that amazing artwork if I could help it. That meant no darts, no pleats, no tucks, no waist seam. Mmmmm. A full length maxi dress for ultimate impact. That is the end goal. But first to trial a short sheath to test the fit. I bought enough to have a long and a short version, psychically of course!

I’ve drafted a few woven dresses in the past, for me and others, but I’ve only recently worked a knit sloper. So earlier this year I practised on some turtle neck rib-knit tops to test the fit – see black one here, and red one there. All I had to do was extend the bodice pieces to a dress length and omit the sleeves. I didn’t want a turtleneck but I did want a jewel neckline so I didn’t alter that much either.

Though I was happy with the results I knew that the template might not translate in this weightier stretch. Comparatively, the rib-knit was light weight and had way more stretch. I should really have trialled a sleeveless version too but impatient me couldn’t wait any more and I just went for it.

The pattern pieces simply consist of a back a front and some self binding for the neckline and the armholes. And cutting it out was a joy. Not only because is was dead quick with a rotary cutter and all, but it was so satisfying – no slippage, no stretching… just a lovely little satisfying crunch as that blade sliced through!

I first sewed the shoulder seams, after applying my favourite iron-on stabilising tape [aff-link] to limit any stretching, then I sewed the side seams using my overlocker. The first try-on highlighted a bit too much ease in the armholes so I nipped 1cm (so 2cm in total) off the end of the shoulder and graduated to zero at the neckline. 

Happy with the rest of the fit I pondered the effect of facings over bindings. I have a love-hate relationship with separate facings – they always flap around and need ironing flat. The only ironing I don’t begrudge is pre-cutting out, and not post assembly! I much prefer an all in one neck and armhole facing that curves over or under bust. But this fabric is quite heavy and I feared the result would be too chunky.

So I decided on bindings which would mean trimming the seam allowances back a bit to allow for the additional 1cm wide strips to sit comfortably.

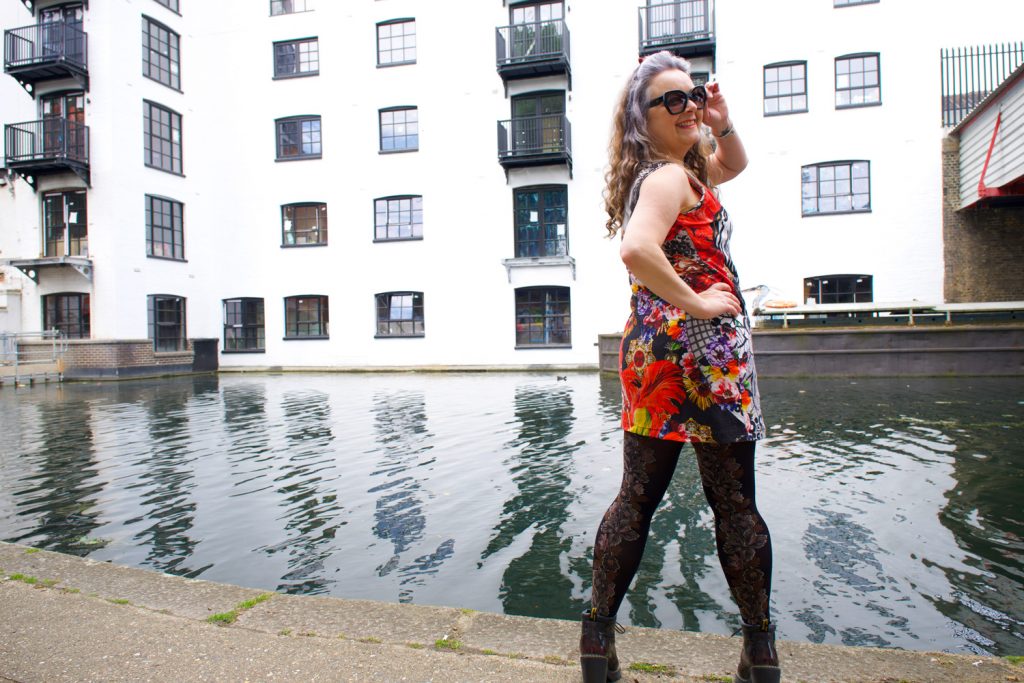
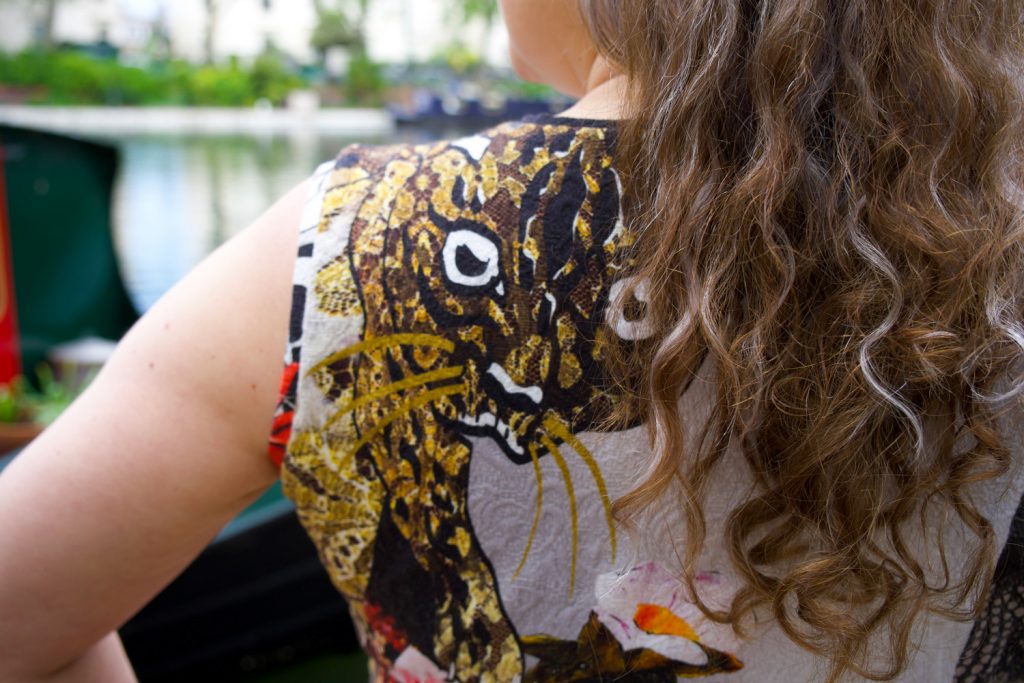
Looking at the back I can see that  I would need to lower the armscyce next time. It’s comfortable and all but the knock on effect of taking out the ease on the shoulder has raised the underarm. Not a biggie though. That leopard over my shoulder is a dammed fine distraction!

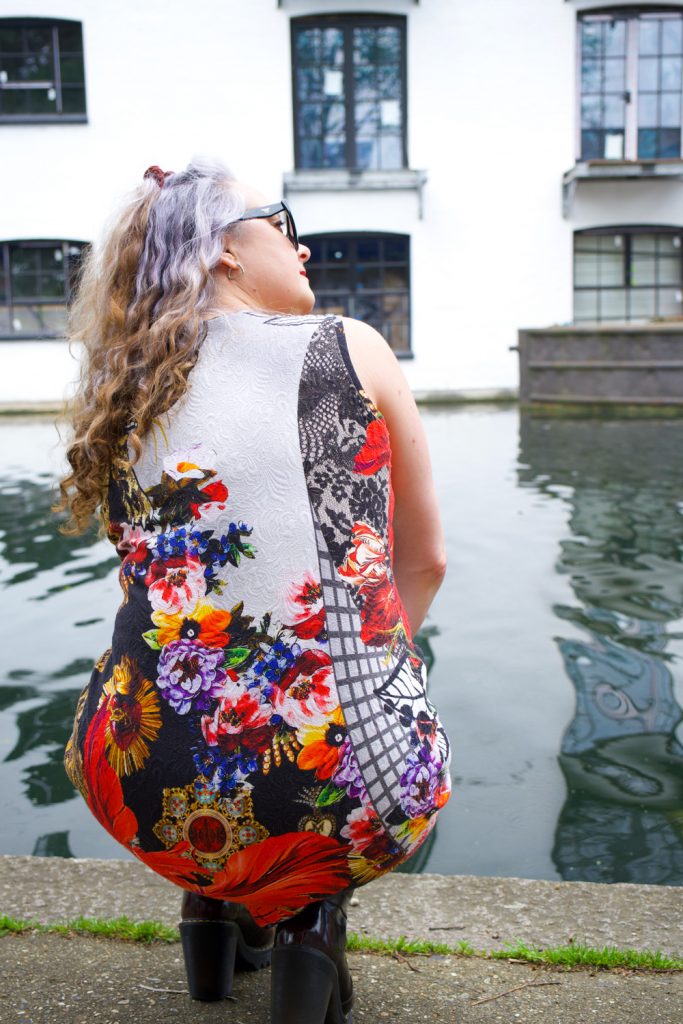
As you might imagine, the thing that took the longest with this dress was consideration of placement. Both back and front are good. Like stupendously good! There was no pattern matching necessary. It was just plain choice. Well, and the want to not decapitate the chap on the front! I decided I didn’t like the idea of someone on my back but I did like the possibility of the back side being prettier than the front. So that’s the way the cookie crumbled.

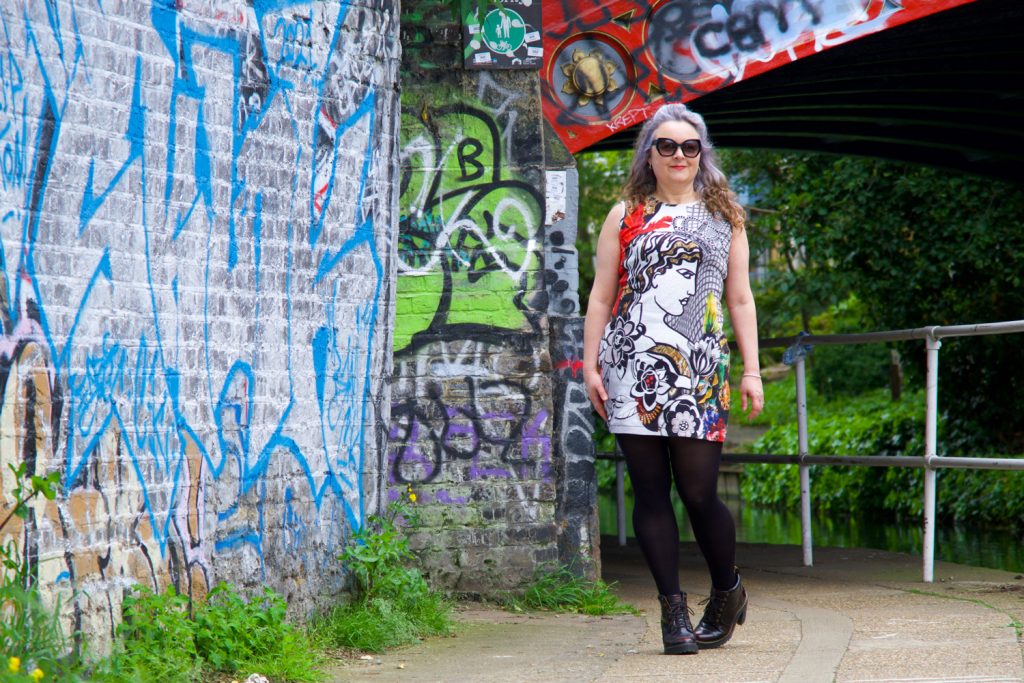
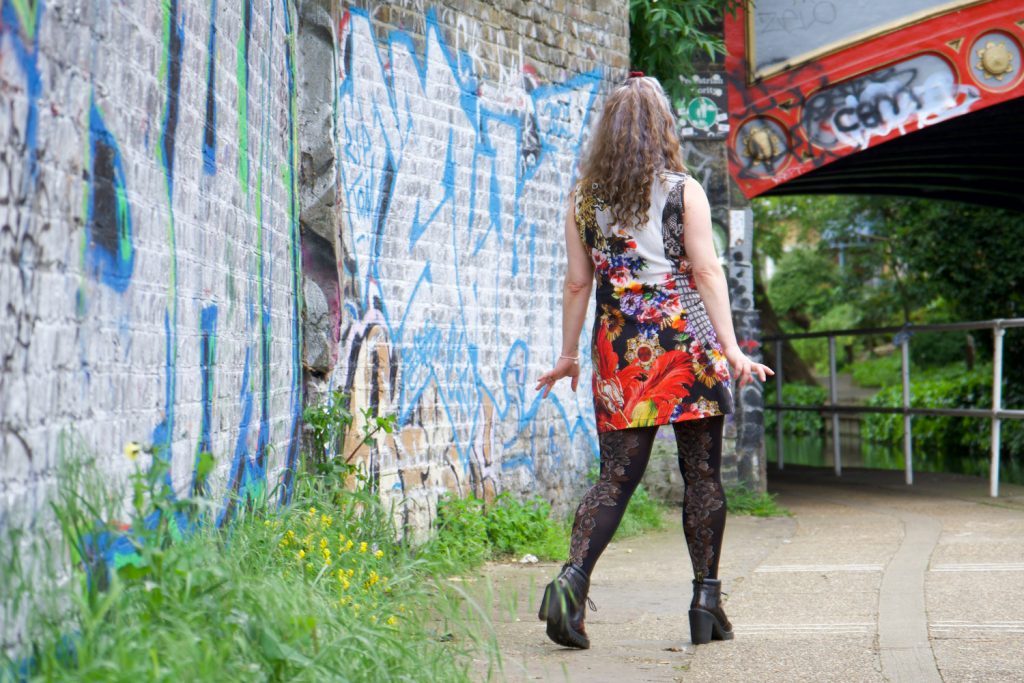
We had such fun taking these shots yesterday. Dan had recently been on a walk shooting birds along the Grand Union canal and suggested it might throw up some lovely backgrounds for the shoot. He wasn’t wrong and I was very humbled by all the wonderful comments from passing strangers, about my dress. It’s so effortless to wear. Though not quite the weather to wear without tights yet. No-one needs to be blinded by the intensity of my pale pins so soon into the year! In any case. It’s very short. I’m sure the world isn’t ready for my pants either!

More is more, when it comes to tights!

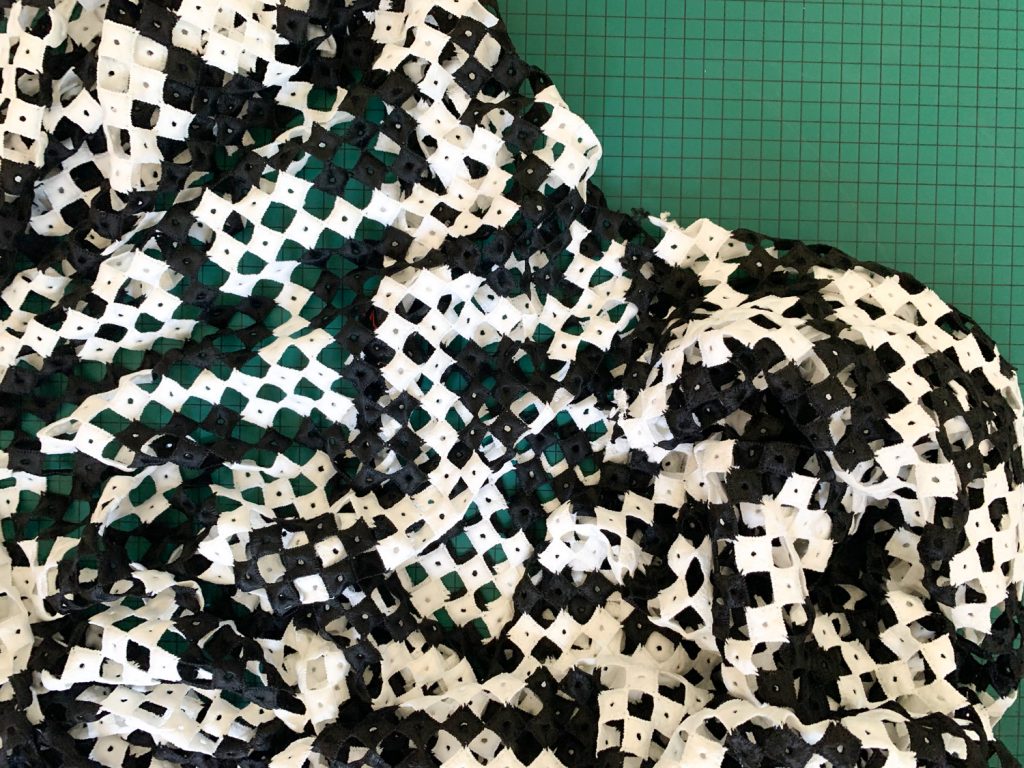
We walked to Westbourne Park, with a cheeky peek at some market stalls in Portobello along the way. Couldn’t resist this odd fabric from a vintage stall. Anyone want to hazard a guess as to what this is?!

If you can bear to watch this space for another year or so, who knows what kind of crazy dress this will turn into!

And there we started our walk, all the way to Paddington basin where we sat for a lovely lunch and a cheeky beer or two in a beautiful Victorian pub. 

A bus ride back through the remnants of a demonstration in Hyde Park was quite exciting. A few more beers and a takeaway to round off a fabulous day of doing what we both love. Bring on the sunshine – we want more London days like this!

So a gazillion thanks to Daniel James Photographic and not forgetting Dibs who blogs at Dibs and the Machine , sells incredible designer fabric at Selvedge and Bolts and who was instrumental in making me buy this fabric in the first place!

Shift in the right direction!

ooobop self-drafted shift dress

I’m so happy right now. Doesn’t take much – just a shed load of sunshine, some quality time with the fam and success at last with the fit of my shift dress.

In case you’ve missed any part of me whittling on about this process, my mission has been to achieve the best fit I can using my own dress pattern with minimal seam lines – ie a darted dress with both front and back pieces cut on the fold – so as not to disturb the print of a very boldly designed fabric that I have in mind to sew next!

self-drafted shift dress in a vintage batik fabric

The fabric I used here was the best test so far because it too required careful pattern placement. You can see the first version I made here and I just realised I didn’t even get round to blogging the second so here is an actual shot, instead!

Self-drafted dogtooth shift dress

I was gifted the gorgeous batik fabric a few years back, by a lovely friend who had inherited it from her parents. When she saw it featured in my instagram post she was so happy to see it again and so pleased that it was being put to good use. I kinda felt duty bound as I remember her telling me that her parents used to travel for to Thailand and Indonesia  quite a lot in the 60s and 70s for work and that they always returned with gorgeous authentic fabrics. Proper sentimental value and vintage, too!

ooobop self-drafted batik shift dress

This piece in particular is undoubtedly a hand-blocked batik. Though this is based purely on my own research and I could be wrong so please correct me if you think different.

It wasn’t very wide but I knew it would be perfect for the third trial of my shift dress, knowing I was very nearly there with the fit. I wouldn’t have risked it otherwise!

It’s such a fine quality cotton. Actually feels so natural against my skin, which is an odd thing to say but I have worn cotton before that doesn’t feel nearly as good. And it completely stood up to a stroll in 24° of Shepherds Bush sunshine today.

ooobop self-drafted batik shift dress

I was intrigued by the selvedge of this fabric. Why would it have just one edge of border decoration? I put out to the wonderful, ever obliging sewing community on Instagram and the very clever Meg from @cookinandcraftin suggested it was very likely to be used for a hemline and a centre front detail for a sarong when wrapped. I loved knowing this and was determined not to waste this detail so I set about cutting my pieces on the cross grain in order to make the best use of the design.

ooobop_self-drafted shift dress in batik

But I hit a snag and realised just in time that the cross grain had absolutely no give at all, and considering the style and fit, it could have been a disastrous move. So I cut on the long grain, as I have trialled twice before (if it ain’t broke and all that) and cut the border separately to seam along the hemline with a generous seam allowance which is overlocked and pressed down on the wrong side. It actually helps to add a bit of weight to the bottom of the dress too.

ooobop shift dress and shades

I made a few other tweaks to the pattern since version 2:

  1. I widened the shoulder straps by 1cm having struggled to pull the dress through the facing during construction, as per the ‘burrito-method’! The fabric I am going to use for the next one is much thicker and I don’t want to risk damaging it or pulling out any stitches in the process.
  2. There was still an element of pooling at the back (swayback issues as usual). And even though I added a quarter of an inch more at the hips since last time – with some improvement – it didn’t seem to solve the issue as much as I’d like.
  3. Then, just this morning, I saw that Cortney from @s.is.for.sew on Insta detailed how she lengthened her back darts to resolve a similar issue. So I moved the bottom point of the diamond dart down 2.25″ and continued the widest part down longer before tapering off. It worked a bloody treat!

ooobop self-drafted batik shift dress

ooobop batik shift dress

And so I do believe I’m ready to cut into that prize D&G fabric that I got from The Stitch Festival 2020 – only dilemma now being, how the hell do I choose my favourite placement of the design? I anticipate this being the longest part of the process!

Dolce and Gabbana fabric at M Rosenberg's stall
Dolce and Gabbana fabric at M Rosenberg’s stall

Thank you as always to Daniel for these amazing shots down the alley of the Laundry Yard in Shepherds Bush, London. For anyone who knows, you’ll know what a brave move this was!

Self-drafted Batik shift dress by ooobop

Tropical Shelby

ooobop shelby romper in tropical print
What bliss, when you have precious little time to play with, but you have a sewing pattern that you know fits straight out of the packet! I’m back again with another True Bias Shelby Romper suit. And I love it just as much as the star version… don’t make me choose!

The fabric is a beautiful quality viscose from SewSewSew. Once again the sewing community came to my aid when I asked if anyone knew where I could get my hands on some tropical print. And Amy from Almond Rock so kindly pointed me in exactly the right direction

Tropical print version of True Bias Shelby Romper

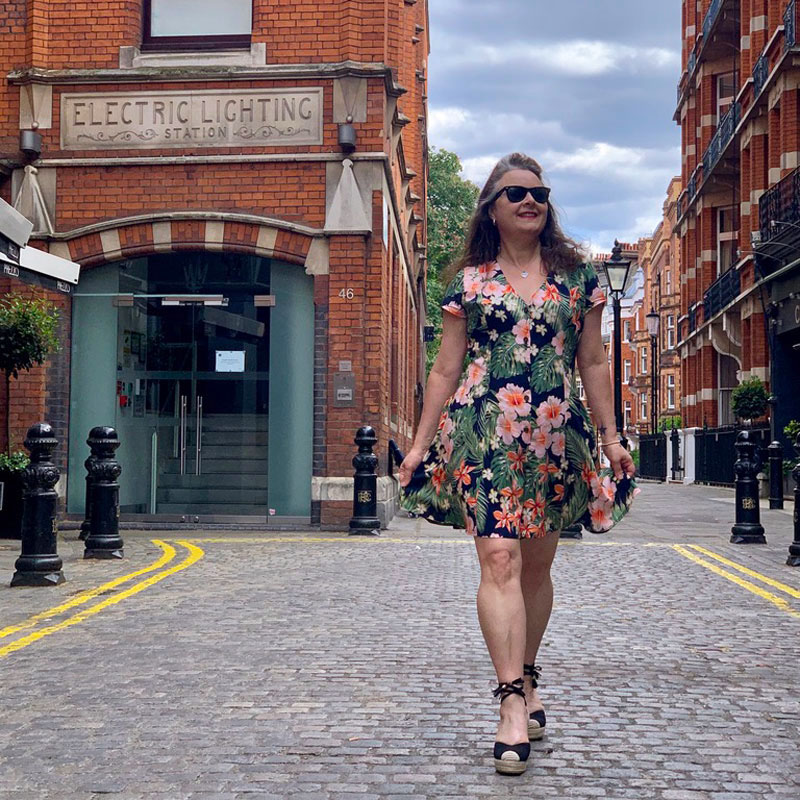
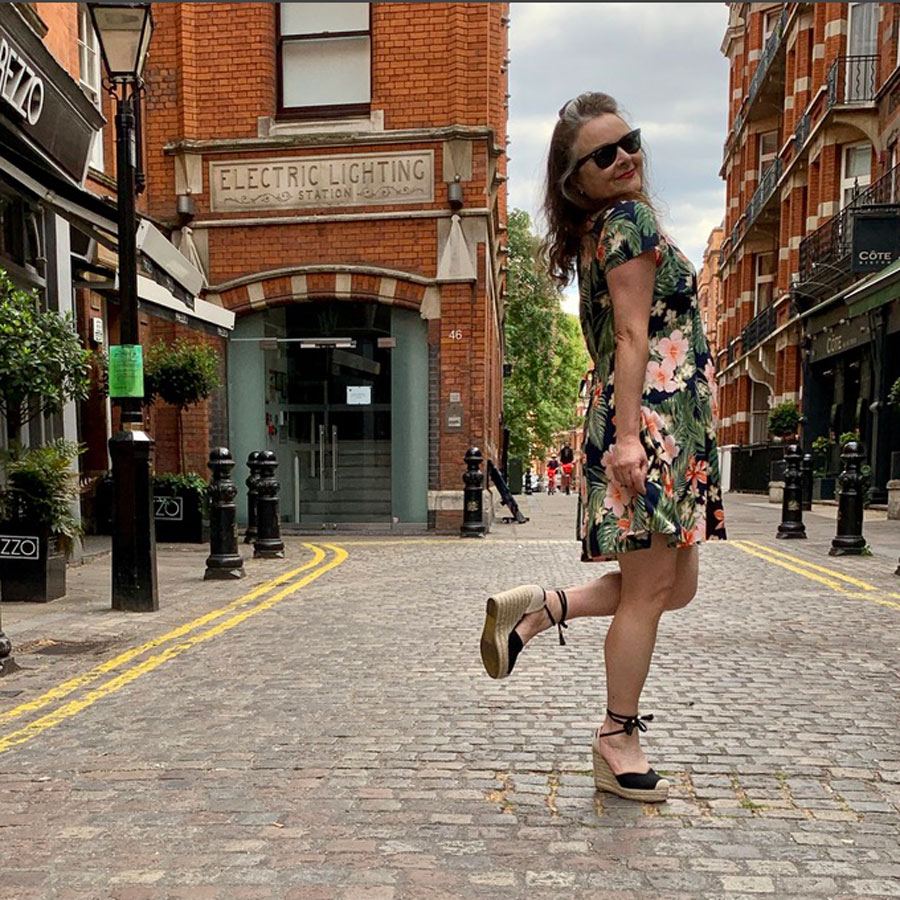
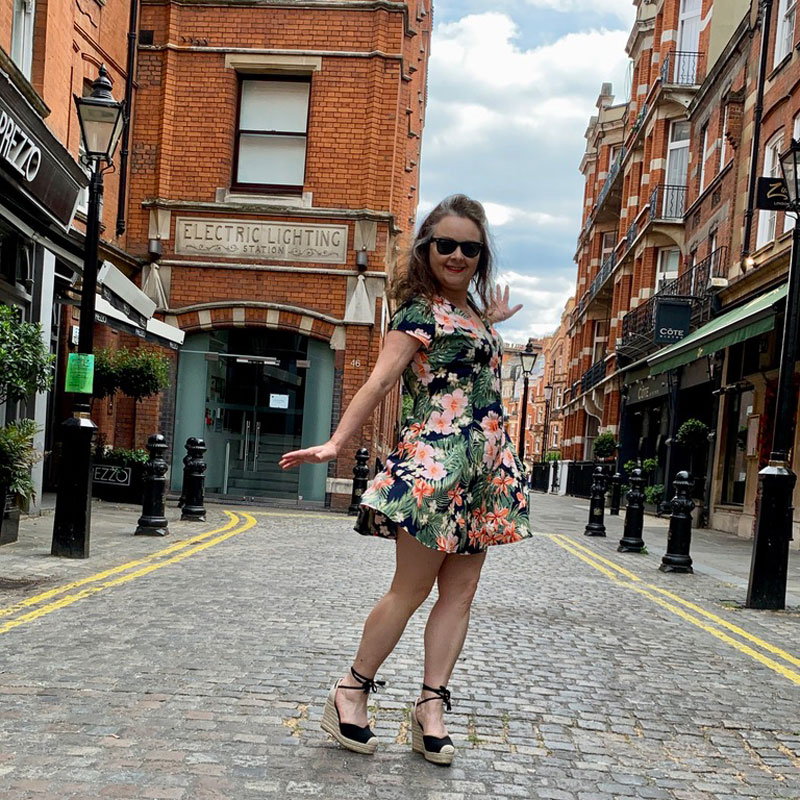
I feel all ‘holiday’ in this one, ditching the Docs for a pair of espadrilles. Believe it or not, I’ve never owned a pair owing to my fat feet and inability to squeeze my toots into them. But Asos have a wide-fitting shoe section and I thought I’d give them a shot. Mostly very happy, especially with the fit. I just have to learn to walk in them and keep my heels from lifting out. Any tips?

Ooobop Shelby Romper

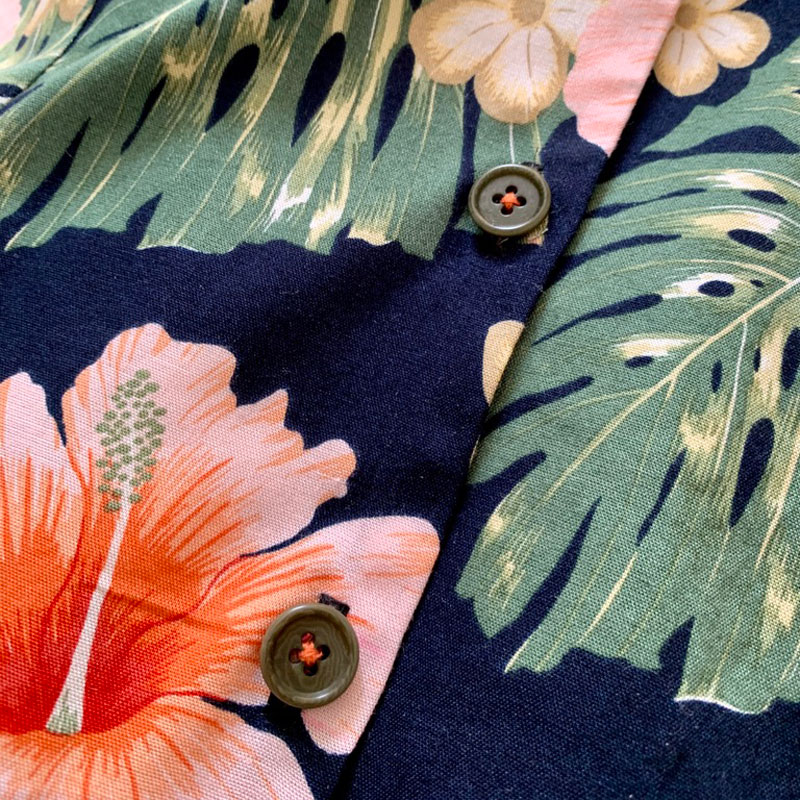
Despite having a mahoosive collection of salvaged and inherited buttons, I still couldn’t muster up five that were just right, so I bought from a seller on Ebay Number-Sixty – who have a huge selection of buttons at very reasonable prices. You can’t really see from the photo but they are olive green with subtle swirls and following the last episode of The Great British Sewing Bee, I was totally inspired by one of the contestants, Nicole,  to sew them on with a pop of contrasting orange thread.

close up of buttons sewn on with orange thread

There was one little tip I forgot to share last time which is so helpful. The instructions advise to stitch in the ditch on top of the shoulder seams and centre back seam to secure the facing piece down. I can’t believe up until now I have been painstakingly handstitching the facing to the seams. This advice will be carried through to all my projects where applicable. It’s so much more effective. And quicker!

I really do love this pattern – the ease at which it sews up right through to finished romper suit. It truly is so much fun to wear. So much so that I can’t wait for my next order of fabric to arrive so I can make my next one. Haha… I make no apologies. It really is that good!

ooobop Shelby Romper

Lovely photos of course by Daniel Selway


DIY Dior-inspired tulle skirt

tulle skirt front

I’ve been inspired to make a tulle skirt for a very long time. I’ve made a few for others – my favourite was an orange one for ‘Amelia Fang’ – but still I wondered long and hard about what kind of tulle skirt would I make for me. And where on earth would I wear it tbh! A lot of what I make might be considered a #sewfrosting entry but I often wear party clothes as office attire so it would never go underworn. So long as I didn’t go for ‘sugar-plumb fairy’ all would be good.

tulle skirt back view

And then one day, whilst browsing the ‘glossies’ in my local hairdressers, I spotted that Dior tulle skirt. I gasped once at the skirt and twice at the price – a whopping great £3,100!

Now I don’t doubt the craftsmanship and experience deployed at House of Dior and I am totally au fait with the arduous task of gathering grief and the time it takes, but still that price point means I’ll just have to make my own. Lifelong story of life!

dior style tulle skirt

It would be unfair to say that Dior was the original designer inspiration. It was more Molly Goddard that initially sold me, with her transparent chiffon baby doll dresses worn over jeans with clompy boots. But still that image prompted the action.

dior style tulle skirt

I love the cheeky transparency of the tulle and the sideways looks it attracts from passing strangers. I do have modesty shorts underneath by the way –  I’m not brave enough to show the world my actual pants! But should the occasion arise for less cheek, I can always rustle up a simple petticoat of black lining.

It’s so much fun to wear. Currently loving it styled as shown with fitted jacket and high-heel Doc Martens but can also see it with a T-shirt and trainers, versus a corset and some sparkly shoes. In your face, repeat-wear shame… I’m even wearing this skirt to Sainsbos!

And it’s perfect for twirling in. Doesn’t take much to release my inner gypsy spirit. I could dance all day!

twirling in tulle skirt

ooobop tulle flamenco pose

I’ve been reining in my fabric buying for a wee while now but with a firm idea of what I was going to immediately make, I could justify a few metres of tulle. I just had to endure a few eye-rolls!

The construction at House of Ooobop was very basic: there are fundamentally two layers of two gathered tiers of tulle. The top layer is a soft pin-dot tulle. It has a bit of stretch cross-wise so I made sure to keep the ‘straight grain’ long! The under layer is a mid-weight tulle – not too stiff, not too soft – so it gives the necessary structure to the floppy tulle on top.

dancing in a tulle skirt

Once gathered, the top edges are attached to a satin waistband with button closure. And the beauty of tulle is that there is no need to hem – thank goodness. I was clean out of black thread at the end of this! But should anyone want a more detailed tutorial, please leave me a comment below and I’ll gladly do a follow up post.

ooobop tulle skirt with London bus

Mr O (aka Daniel James Photographic) took these amazing photos of course. His patience and dedication to the cause unruffled by my whinging about the cold (and the smell of horse poo!) … and that my feet hurt from all the walking we did.

wearing tulle skirt in Trafalgar Square

But the latter is largely due to wearing my new Christmas Docs from my lovely hubby, fresh out the box without wearing-in first. No pain no gain though!

Doctor Martens with tulle skirt

So I’m totally New Year’s Eve ready, and of course I am also appropriately ready for  the much awaited Christian Dior: Designer of Dreams exhibition at the V&A museum in February… which is really soon. And I’m so excited! Who’s coming?

ooobop tulle skirt front view

Thank you so much for reading this post, and for all your lovely words of encouragement over the years. I have been a little lapse in the writing dept of late but I’m not stopping blogging any time soon. I’ve got some lovely projects coming up in 2019 already and some I didn’t even get round to posting from this year. So keep tuned and all will be revealed!

Wishing you all an amazing New Year, fuelled with happiness and good health and all things sewing of course! xxx

Vogue Cocktail Hour dress V9241

V9241 cocktail dress

cocktail hour eve appeal

The first time I’d heard of the Eve Appeal was when I took part in last year’s Vintage Sewalong campaign. They are the ONLY UK  national charity that raises awareness and funding research into the five gynaecological cancers so it wasn’t too much of an ask for me to join in the Cocktail Hour once again, and help McCalls promote a range of Vogue patterns that raise good money for such a great cause.

Last year I made Retro Butterick 5813 for the Big Vintage Sewalong 2016. This year I chose Vogue 9241, a fabulous design by Kathryn Brenne.

V9241_PATTERN_COVER

A little bit Helena Bonham Carter, A little bit Anne Robinson, perhaps… but totally full of character and no doubt a talking point at a cocktail party. Sadly the only cocktail party I’ve ever been invited to was the one at The Knitting and Stitching Show at Ally Pally and I was typically too busy with work to attend. Though I prefer to think that I have been to loads and they were so good, I’ve clean forgotten all about them!

But if I do ever get another invite (nudge, nudge) I would be proud to wear this dress. It would rock a room of standard LBDs and not leave without comment.

I chose this design because of that awesome collar, of course, and because it reminded me of my birthday dress – the skirt section at least – and I considered using silk dupion, the same. But not only do I not like doing things twice, I find the suction of creativity too much to bear if I copy what’s on the packet. ie a red silk dress. I felt like black would have hidden too  much of the detail so I went a bit off piste and used a pinstripe suiting fabric instead, lol!

V9241_cocktail_dress_4

I wanted those pinstripes to emphasise the godets and that collar. Actual stripes would have been a bit too cray-cray (mmmm…. maybe next time though?!) I really wasn’t 100% sure it would turn out as special in what is effectively a boring cheap suiting fabric!

But it did. And I am so happy. Which is lucky really because I hadn’t left any time to change it up!
This dress really isn’t as complicated as it looks. I wouldn’t go as far as to say it’s a doddle but really just more time-consuming than anything. It needs a fair bit of yardage too so watch out if you’ve got any big ideas on fancy pants fabric. It could end up costing an arm and both legs!
V9241_cocktail_dress_5
One thing which I must point out is that there is an error on the layout and pattern pieces. The instructions say to cut 2 of front which threw me a bit because there was no reference to use it anywhere. The layout plan indicated the same. I wondered if it could be a facing/lining of sorts but a quick Tweet message to McCalls confirmed it was an error and that they had contacted the US office to amend.
This pattern has a massive amount of ease. It’s so helpful to have body measurements and corresponding size table on the packet but better still to clock the ease on the pattern pieces themselves. Not all pattern companies do this so kudos to Vogue. With that info at hand, I realised I could afford to drop a whole dress size. I’d suspected I might have to do this because the pattern image itself looks a little bit roomy. I like things more snug, like a hug!
V9241_cocktail_dress_6
The collar is sewn front to facing, then the wire is sewn to the seam allowance of the outer curved edge before turning out. The wire is sewn in using a wide-ish zigzag stitch making sure to keep the needle either side of the wire. Requires a fair bit of concentration. Frightened the bloody life out of me when I took my eye off the ball and the needle clonked on the wire!
V9241_wired_collar
This is the second time in a month that I’ve had the need for animation wire, the first being for the wings of Amelia Fangs outfit. I ordered some more off Amazon. Affiliate link here:

I ordered all three weights as I really wasn’t sure what constituted ‘medium weight’. Initially I tried the lightest one but it was a bit flimsy so I opted for the 2mm diameter.
I’ve been having a lot of fun positioning the collar in all sorts of ways. But there would be more fun I’m sure if my fabric was sturdier or interfaced to give it a bit more structure. I could go totally could go totally Maleficent! This pinstripe stuff is very soft with quite a bit of drape which still works well, mind.
V9241_cocktail_dress collar
The skirt is all about the godets. How do you even say that? Godettes or godays? A little care is needed to insert the points accurately into the open seams of the bodice but if you’ve ever made quilt blocks with inset seams you will be walking it!
I noted the length was kinda granny for me. So I lobbed 4 inches off before I cut it out. And it reaches just shy of knee length now. But by nature of how the godets are tied up inside, I can just as easily lower the hem a couple of inches or so if I must be more demure!
I pretty much followed the instructions to the T but I could have done with taking some of the excess out of the back bodice length – that’s always an issue for me. But skirt seciton moves around and drapes so unusually, I don’t think it’s a biggie! And I hand stitched the bias facings of the armholes, rather than topstitch as instructed. Call me old fashioned!
V9241_cocktail_dress_3
So I am the last entry on the Vogue Patterns Bloggers Calendar 2017. I initially thought that was the best position to be in but the mash-up of anxiety and inspiration was building with each gorgeous post that popped up, every month.  In case you didn’t catch them all, click here to the amazing contributions from all the fabulous sewing bloggers. I just love how everyone has put an individual spin on their own cocktail dresses.
I do hope that some or one of these at least will inspire you to buy a pattern from the Cocktail Hour selection and rustle one up for yourself. Or maybe even buy one for a gift for a sewing friend. All helps towards the amazing work done by the Eve Appeal.
Thanks to The Foldline for including me in the line up, to Dan for the fabulous photos and also to Aska and Tom at the Thatched House in Hammersmith for allowing us to shoot them in their lovely pub.
 

An outfit for Amelia Fang

Laura Ellen Anderson with ooobop

Not for the first time, my day job and passion for dressmaking have come together and partied!

Like when I made an apron for Ellie Simmons to celebrate the launch of her book Ellie’s Magical Bakery, and when I made myself an outfit for Gemma Cairney’s launch party for Open the book. And it only bloody happened again!

Imagine my excitement when Laura Ellen Anderson asked me to make her an outfit for her book launch of Amelia Fang and the Barbaric Ball!

I’d seen the cover of the book already – designed by the super talented Tiffany Leeson at Egmont Children’s Books  – and was called in for a meeting with Laura to discuss the outfit. There wasn’t too much to discuss to be honest, because Laura’s adorable illustrations gave me all the information I needed. So I took a few measurements, scribbled a few plans and couldn’t wait to get started.

If you follow Laura on Twitter – @Lillustrator – you will know how busy she is, not just with her marathon illustration and writing sessions but also flying from workshops to events like nobody’s business! This lady needed some wings at the very least!

Amelia Fang takes the starring role of this ‘terrifying’ tale. She’s fun, fiesty and loyally flanked by her friends, Florence the yeti, Grimaldi the reaper and Squashy her adorable pet pumpkin. When spoilt-brat Prince Tangine captures Squashy they must escape the party to plan a daring rescue! In their race against time, they come to realise things in Nocturnia may not be quite what they seem . . .

It really is such a fun read. The characters are so endearing and I loved it! And so say loads of other readers… it was voted book of the month at Waterstones in October, too!

I started with the petticoat. I figured it was going to take the longest to make. But also the colour of that tangerine made me so happy! It has a poly satin lining and waistband and three double-tiered layers of netting. The joins are prettied with orange satin ribbon and hemlines are finished with orange satin bias binding. I created the waistband to include 4 channels of narrow elastic. I find this helps to move the gathers around if you want to position the volume more at the back or at the sides. I’m not a fan of too much poof at the front! It looks way better, too!

tangerine petticoat

Next was the skirt. I cut a full circle from some black duchesse satin as the overskirt and box pleated some black and white striped cotton for the underskirt. I just love it’s Tim Burtonesque edge. The best find was the orange foil-like fabric for the detail on the overskirt. Oh how it tied in perfectly with the orange foil detail on the cover!

To prevent the shiny bits from fraying, I faced the pointy tips and just pressed under the long sides before topstitching to the skirt. A duchesse waistband sealed in the top edges and an invisible zip at the back was the only notion needed.

Amelia Fang with Unicorn

And then the wings. I have my milliner friend, Jayne Hepsibah Sullivan of the Hepsibah Gallery to thank for the introduction to animation wire. And for a genius solution to making a posable framework that I could cover with bat-like faux leather. They attach as a neck piece that ties at the front with black satin ribbon. The wire has no memory so the wings can be positioned at will. Oh, and I couldn’t resist adding a few cockerel feathers left over from my significant birthday dress. Such fun!!

Amelia Fang wings

The launch party was just fabulous. Held at The Crypt of St Pancras Parish Church, London which was originally designed and used for coffin burials from 1822, when the Church was opened, to 1854, when the crypts of all London churches were closed to burials. It was the perfect choice of venue. And everyone looked amazing… Prince Tangine especially!

Prince Tagine

Laura Ellen Anderson with Sarah McIntyre

Gutted I didn’t get to say hello to Sarah McIntyre. She looked incredible!

But I did get to meet so many other lovely people at the launch. It was such a coven of creative talent – writers, illustrators, art directors, musicians and photographers… It inspires me so much to hear others talk so passionately about their work. And it was thrilling to get so many compliments on Laura’s outfit. I loved making it as much as I loved seeing her wear it. And I was just buzzing with pride.

Amelia Fang launch party

I have clean forgotten that I ever said I couldn’t imagine sewing for anyone else. I guess its a very different story when your customer is so cool and perfectly lovely and you get to make a one-off, bespoke, fun outfit for her. I take it all back…

“This is most definitely my favourite kinda ‘work’!”

Big massive thank yous to Tiffany for putting me forward, to Laura for such an awesome opportunity and to Laura’s mum for the fabulous photos.

And Squashy would like to remind you that he is not just for Halloween… Amelia Fang and the Barbaric Ball would make a perfect Christmas pressie for 7-9 year olds. And it’s on Amazon right here! (affiliate image link below) Along with the next book in the series, Amelia Fang and the Unicorn Lords:


Shiny Burda Maxi

Shiny Burda Maxi dress

Introducing my most shiny dress to date!

I’m all up for revisiting patterns of late. Especially ones that just work and need little or no revisions. This was one of those.

It’s a hankerchief hem maxi dress from March 2015 edition of Burda Style magazine – one of my absolute faves. I first made it almost two years ago, and blogged it here! Clearly a dress befitting of the London summer climes!

silver burda maxi dress overexposed

I knew I was going to make another. It’s such an easy one to put together. And when I stumbled across a similar ruffle fabric but in silver, it was pinned and cut in a jiffy. A lovely sewing afternoon at Tilly and the Buttons studio got it all sewed up but it was proper sweaty work with all those metres of metal fabric draped over my knees, so I saved the hand-finishing till… this morning!

metal burda maxi dress over exposed

By hand-sewing, I mean the armholes and neckline which I finished with bias binding. I couldn’t be arsed with a flappy facings!

The fabric has a little stretch and has no need for finishing of hems or edges. Which is lucky, because there’s lots of them going on with the hanky-hem! Feels a little like cheating but when I see it photographed I’m assured it matters not.

It is also strangely transparent when you hold it to the light. But thankfully the metalic silver finish reflects with such distraction that you can’t see my pants!

wearing burda silver dress laughing

The original Burda pattern includes sleeves. But I much prefer it sleeveless. It seems to work better with the v-neckline and creates a bit more elegance.

Dan took these wonderful shots, of course. Assisted by a dose of delightful sunshine at the ‘New Way In’ at the Victoria and Albert Museum. I get so excited by new space. Much like my printed design work, I’ve learned over the years, that space doesn’t always have to be filled with stuff! People were gathering and marvelling… at the space! All helped of course by the awesome stone work, some cleverly conflicting angles and some lovely reflecting glass and metals. I felt quite at home in my new dress and didn’t mind the attention it got, for once!

Silver Burda maxi dress


At one point, another photographer not only asked to take my photo but asked who the designer of my dress was. Oh the flattery. But oh the awkward pose for her!

Silver burda dress being shot

The satisfaction of finding an edgy fabric and pairing it with a quirky pattern definitely floats my boat and it’s something I should definitely dedicate more time to. It gives me such a little buzz of butterflies when it works.

And of course Burda mags are a fantastic resource for inspiration. All those issues I dissed for abject weirdity will definitely be revisited in a new light!

Fun in a Burda Maxi dress

That said, I have some lovely commissions for other people that will have to take precedence over any new dresses for moi over the next coming weeks. I’m not complaining at all. They are really exciting projects so keep tuned!

Silver Burda dress at the V&A

Silver Burda Maxi dress front view

And where will I wear this dress – apart from to wander around the creative white spaces of London? I’m thinking festivals, parties, gigs and galleries. Maybe the office doesn’t get graced this time round!

Metal burda dress sitting on a wall

silver burda dress at the Victoria and Albert Museum


Self-drafted wax print dress

wax cotton dress side view
I’m not entirely sure how this post got shot and written today. We arrived home from Glastonbury Festival at 6am this morning – a little tired and emotional to say the least! Thank goodness for a great set of shades picked up for a tenner on site, from a pop up vintage shop (ironically, usually based in Portobello… just up the road from me!)

So, the dress… It’s mine, all mine! No pattern, vintage or otherwise was used in the making-of and I’m just a little bit proud.

I really wanted a new dress but without any faff. I really, really wasn’t in the mood for trialling various test versions – I’m getting so impatient in my old age! – And then I remembered that somewhere, in some pile or other, there was a pre-existing bodice block from a class I took about 3 years ago. To date I’ve only used it once, for a retro-style top, which is madness. Because it fits!

I only wanted a sleeveless bodice for the top, nothing fancy so it seemed daft to reinvent the wheel. I simply lowered the armscye and the neckline. Luck was on my side because this resulted in precious little gaping as often happens without any contouring. But I will nip a bit off the upper back neckline next time.

wax cotton dress self-drafted

My usual sway-back adjustment was already done and most importantly the bust area was a perfect fit.

Whilst we focus on that area, can we just talk placement? I’d love to be able to claim absolute intentions but the truth is, I was led my a small issue of just the right amount of fabric and nothing more, so I can only claim a happy accident – the likes of which Madonna would champion, I’m sure!

I just love this wax fabric. And I knew there would be further adventures when I made Lucy’s jumpsuit and Amelia’s baby dress.

wax print dress back

One of the most incredible things about this fabric is the price. A 6 yard bolt of Wax cotton can vary in price between £10 and £150, depending on quality, print, manufacturer etc. That said, this lovely red cloth was just £10 and retained all colour and structure after a regular 40° cycle and spin in the machine and it was so satisfying to sew with. More importantly I landed a fabulous handmade dress for a fiver!

The skirt section is simply a half circle, the same self-drafted pattern I used for my black and my blue crepe skirts.

african wax print dress skirt

The zipper is inserted on the left side, like most of my vintage-style dresses but also because I didn’t want the seam of the skirt to go down the front with the focus on broken up print. No excess for pattern matching either!

The belt I’m wearing was a steal from Oxfam at £1.50 and does a perfect job of hiding the connecting waist seam which obviously is interrupted and mismatched but I’m not so sure there’d be any way round that anyway. It’s not actually that bad but still annoys the pants of me enough to cover it up!

wax print dress side view

Daniel came up trumps again with these fantastic photos. They were taken at Freemasons’ Hall in Covent Garden, today. Such an awesome building with a massive star on the steps for me to stand in the middle of! I can’t believe how he gathered up the energy to do this after that long drive back. Or how he made me look so respectable after nought hours of sleep. He is such a superstar. So supportive. I am one lucky lady!


Blackmore 9266 So-Easy!

vintage blackmore 9266 dress

I’ve been neglecting my vintage patterns of late. But that did allow for some exciting rummaging and little squeals of delight when I found some treasures I’d completely forgotten about. And I just love that ‘aha moment’ when found pattern meets perfect stash fabric. Proper romance that is!

This is Blackmore So-Easy 9266. Not sure if it’s 50s or 60s as it’s not dated. The instructions were a little more explained compared to the last 40s Blackmore pattern I used but I enjoyed making both just the same.

vintage blackmore 9266 sewing pattern

I knew this dress wasn’t going to fit straight out of the packet. It was already too small and any dodgy fitting on this was going to shout from the rooftops. So it needed time and patience to grade it up properly and work through 3 toiles before I was ready to cut into the real stuff.

Once all the adjustments were transferred to the pattern pieces – grading up, shortening the back bodice substantially, taking out some excess from the overbust and increasing the waist – it was fundamentally a very easy to sew dress.

vintage blackmore 9266 dress

There’s no lining. The bodice is simply faced at the top edge. I must remember to tack this down in a couple of places on the inside, as the photos totally reveal how it peaks out at the back if it’s not poked in to start with.

I do so love recreating an original vintage dress but I should know by now how the drawings on the cover cheat so much! The skirt on the cover looks tapered and very fitted but in actual fact, not only is cut straight, it has a wide kick pleat allowance which gives the visual appearance of being even wider at the hemline.

I took it in quite substantially to arrive at this shape – like 4 inches each side seam! – and I sewed the kick pleat down too. I hated the granny hemline. Not flattering on my vertically challenged frame for sure. This does, however, mean that I have to walk very lady-like and in heels and therefore one helluva lot slower than normal. Not such a bad thing when for most of the time I’m rushing around like a lunatic with giant strides in Docs or trainers.

vintage blackmore 9266 dress

The fabric is bark cloth. Found in a little basement fabric shop in Waterloo ages ago. I love the texture so much, the colours are fabulous and it sews up beautifully. I made a Martini dress from bark cloth of the vintage kind but I have to say, this modern weave was definitely more grain-stable and less prone to stretch. It’s not usual to find this stuff in any old fabric store. Certainly a void of it in the Goldhawk Road. So if anyone has a link to a favourite UK store, please let me know. By the time shipping is added to the original Hawaiian brands, the price is rocketed!

Now, I would just like to touch upon the issue of straps. Fally down straps!! I felt sure that I had sussed the right width, length, the right position and before sewing them down, I walked around the house for a few hours with them pinned to make sure of their position. Ulitmately the ends of the straps would be sandwiched between the facing and the top bodice so better to get them in the right position first. I thought I’d cracked it. Made sure to sew exactly as pinned. But the buggers still fall down!! It really is the bane of my strappy-dress life.

vintage blackmore dress

To be fair, It doesn’t help that I’ve got sloping shoulders. But I do think also that I made the bodice a touch too wide for my over-bust and so the straps sit too close to the edge of my shoulders. Another little adjustment to bear in mind for next time.

Clever lady Clare, from River Elliot Bridal also had a great solution which was to sew a narrow elastic inside the strap to generate a little more grip. Must give that a go too.

I’m hoping the stormy skies keep at bay and glorious sunshine keeps coming over the next few months so my current favourite newbie gets more outings. But all the same, the fickle in me is furiously flicking through the collection to find the next new fave to make… because I can!

vintage blackmore 9266 dress

Photos by Daniel James Photography
Location: Hammersmith
Shoes: Lola Ramona