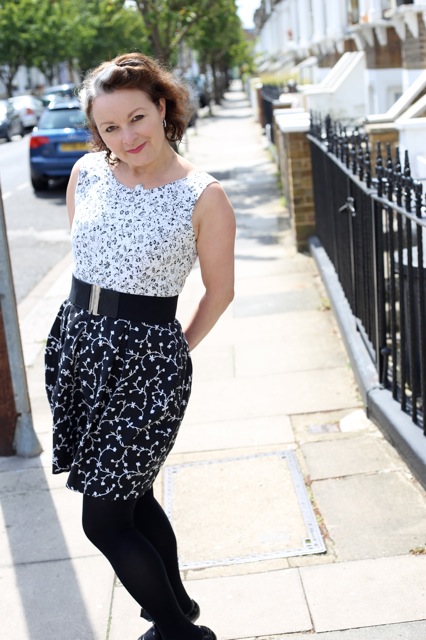
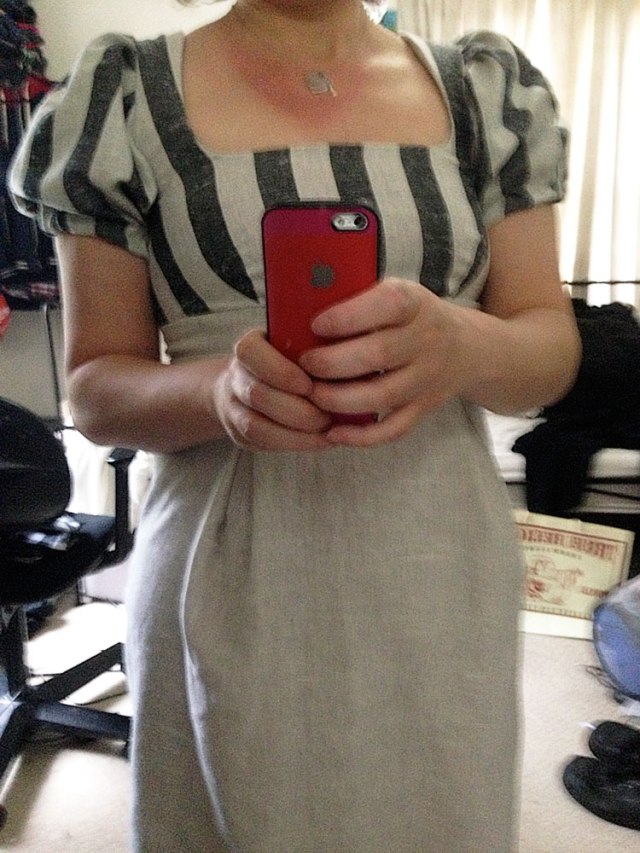
Burda cap-sleeve top and a bit of a whinge-up!

burda style cap sleeve top

Once in a while a sewing project is sent to try us. This particular little smart-arse of a sewing project first lured me from the glossy pages of Burda Style around this time 3 years ago. It presented a cool, stylish-looking basic that could rock any skirt, shorts or pair of strides. Edgy with its contrasting shiny sleeve caps, close-fitting for sleekness of style and a raised neckline for a fierce, designer don’t mess with me touch. I should have got that message first time round really!

My self-imposed rule not to impart cash for cheaply made RTW clothes has been obeyed for a good few years now. And I’d say it’s largely been very easy and fun and rewarding. But to summon up the motivation to make what is fundamentally a basic black staple is much harder than making a pretty dress. That’s way more fun.

I cannot even begin to recount the hours spent on this tiny little top. It was definitely a test of patience. Largely because I didn’t do a muslin so no surprises really.

I decided to stick to the suggested fabric which was crepe satin – luckily there was little needed because this fabric didn’t come cheap either. Read on if you can really bear to listen to my gripes!

burda style 2012 cap sleeve top

First gripe: crepe satin. I will think twice before sewing those stupid shiny sides together in a hurry. They move! But having said that, lucky the shiny sides were inside because they also catch on just about anything that is vaguely rough. Like hands, unfiled nails, pins etc etc. It also frays. And so every seam, every edge had to be overlocked. Do not even attempt this top, in this fabric if you don’t have sufficient means to finish every single edge. And OMG, static alert! I tried this top on at least 10 times to check fit and shape of sleeve etc and the electricity ran at least 240v from root to tip of hair. This firmly remains one of it’s unforgiving factors!

The bust darts are way too low for me. I know, I know, I didn’t toile!

There are two zips involved in this top, or else you’d never get it on. One from the neck edge down the top of the left sleeve. And another under the left arm and down to the hem. Fine in principle, definitely not fine if you want two matching shaped sleeves! I bought a couple of quality invisible zippers from Dalston Mill. I remember thinking at the time that I should perhaps invest in more quality notions. I usually get them from Shepherds Bush market for a snip of the price. But it wasn’t such a good call ater all. Sadly the teeth were metal and so the zips less flexible coupled with the instructions to end the zipper a couple of inches from the hem, I ended up with one sleeve fit for a Gary Glitter tribute and another as a deflated floppy thing. Zipper aside, at that point I realised the sleeves were far too roomy in any case. They seemed to fit snugly on the model which is confusing given my substantial arm girth. So I removed said sleeve zipper and shaved a bit off each of the top sleeve seams to ‘smallen’ the sleeve cap.

Removing the zipper was a mare. Black on black, mostly with a crap lightbulb overhead and from hostile fabric that was just goading me to be snagged.

I put a new cheapo lightweight zipper in but made it run from top to bottom this time. Better but still not brilliant. Plus it took 2 goes to insert. Don’t ask! In hindsight I should have sewed another just to the seam allowance on the wrong side of the opposite sleeve to match the shape better. I may still do this.

The sleeve hems are hand sewn. Catching 1 of those damned threads at a time so it doesn’t make a mess of the right side. And the underarm seams are finished with a self made bias strip, hand sewn to the inside also. Slowly, slowly, catchy monkey!

So then there was the neck facing. Could well have been me but I’m totally blaming those Burda-style translations. I have such a problem with visualising even the simplest written instructions. Give me pictures every time. So after the umpteenth read, I gave up trying to understand and went ahead governed by my own hunches! They were rubbish hunches and I ended up sewing the bottom bit of the facing to the shoulder/top sleeve seam. What is wrong with me? I was all twisted and distorted and I was convinced the facing was the wrong shape!

A right proper meltdown ensued. Foot on the pedal-bin pedal, lid raised, dangled over the sprout peelings and prosecco foils, the whole thing was about to meet its demise!

Saved by a flash of possibility. I spared the wretched thing and spread it inside out on the ironing board to instantly see the issue: The lower end of the facing was meant to be sewn around the armhole… of course!!

cap sleeve top back view

More unpicking. More hand sewing. It worked. Kind of. But even though I’d used a stretch interfacing (My own recommendation, not Burda’s) it doesn’t behave the same as the outer and there is still an element of ‘pull’.

Although the sleeves are too big, the body is a touch too small. I clearly overestimated the stretch in this fabric and underestimated the difference in a petite sizing, which this pattern was. I might possibly get away with it in a dark room with a jacket on!


The hours involved to create something that is at best a black top, have completely taken me by surprise. I seriously could have whipped up a whole dress in as much time!

If I did it again, I’d go up a size and definitely redraft the sleeves.

I’m glad I didn’t give in though and I’m glad I found a way to solve the main issues. I hate being defeated at anything. I don’t often work with fine fabrics and clearly this is something I need more practice in next year. But for now I’m rifling though some good old fashioned vintage dress patterns where suiting and furnishing fabrics are my favourite friends. Onwards and upwards!

Happy New Years Eve, my wonderful readers. Wishing you all a healthy, productive and successful 2016.
With lots of love thrown in for good measure

Janene xxx

ooobop review: Burda Style August 2015

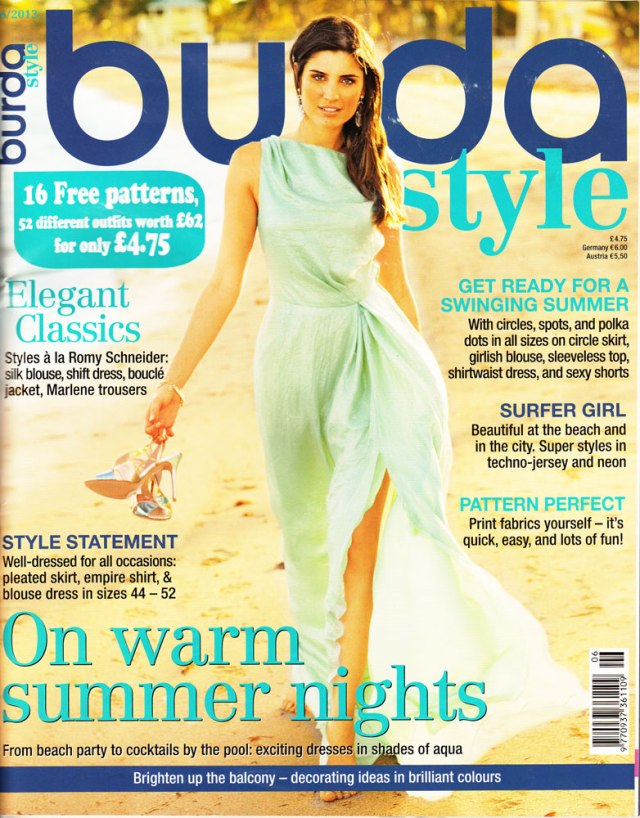
Burda Style August 2015 cover

Grab yourself a cuppa, some delicious snacks and pull up a chair. This may take some time. The little gasp of joy I inhaled when I picked up the latest issue of Burdastyle is about to manifest itself as an exhalation of excitable word spray!

That said, the cover is probably the least inspiring of images. I don’t know, something to do with a grubby looking pink jumper teamed with a skirt that doesn’t make much sense but don’t diss that skirt till you see it later on…

The first section is titled ‘Call of the Wild’. It’s mostly about animal print but get behind that if it scares you, to see some of the sophisticated lines that are very camouflaged by it.

Burda Style August 2015 magazine
For instance this sheath dress (A). The print totally hides it’s streamlined seamlines but what a shape. Further on you’ll see some colour blocking to illustrate them. I love the neckline. Not too dissimilar to the BHL Flora dress which we all know and love. Skirt (B) is a classic pencil with gold buttons along the front two dart lines as far as I can make out. They are kind of hidden in that print too but it’s a nice detail all the same.

The choice of contrasting blue pleated panel with the print on dress (C) is a little mind boggling to say the least. I don’t hate it, I don’t think. Just not really sure about it. It’s an add-on rather than an inset. I much prefer the version that comes later.

Animal print parka (D) I can deal with though. This one’s made from polyester poplin so it’s very lightweight and it’s got lots of pockets too!

I’m loving the contrast of ribbing against animal print chiffon in this shirt (E). I’m loving that it’s described as easy to put together too!

So here is that skirt from the cover (F), teamed with a top that also has ‘an enhanced added panel’. It makes much more sense altogether, if you like that sort of thing. Definitely better balanced. But perhaps still a little odd!

Not so keen on this flared jacket (G) though. I think I’d prefer a more cropped look like the Vogue jacket I made (and have since lost… I’m so gutted!!). It kind of looks a bit maternity at this length.

Next section is Western. Fringe, kilim, wool and leather. Not generally my style but there are still some lovely things going on here.

Burda August 2015 Western

I can just picture the envy of all my camping buddies if I were to turn up in that blanket coat (H) Its made of Jacquard and leather. A most special kind of parka!

The dress (I) is all a bit too much for me. The kilim design and the long bodice. I’m sure if the accented rib knit sat on the actual waistline it might appeal more. In a different fabric though.

This funny little garment (J) is classed as a waistcoat. It’s not for me, I’m afraid. But the urban western leather suit (K) totally is! I’ve only ever done an alteration on a leather skirt, never sewn one from scratch so all the topstitching on those panels scares me but excites me in the same breath! There’s a sewing class included for the jacket too.

And could this tailored blazer (L) be any more stylish if it tried? I properly love this jacket!! And I don’t even mind the ruffles that poke out on the little top (M) Though I foresee a nightmare and an expensive tantrum if 100% silk chiffon were indeed to be used! The ruffles on top (N) only decorate the front.  but looking at the back view, I quite like the way that only the sleeves are ruffled.

Loving the dropped hem on this midi skirt (O) and especially how the centre front seam is embraced with diagonal stripes. A cotton/wool mix – I bet this skirt feels amazing.

The Timeless Beauty section brings forth polished cuts, sophisticated fabrics and delicate colours…

Burda August 2015 Timeless Beauty

Here’s that funny little waistcoat again (P). A little more classically acceptable in leather, wouldn’t you agree? But I don’t like ruffles enough to deal with a full length dress worth of them! This dress  (Q) just says ‘pain in the backside from beginning to end’ or ‘patience of a saint’ however you look at it!

Here’s another version of that top and skirt (R). A touch more casual but still very elegant. The sweater/slacks combo (S) is not really my thing though.

And just look how much more elegant that kilim dress gets to be in grey poly crepe (T)!

Shirt with accent and skirt with buttons (U) are a good office combo and I even like the variation on that blazer in velvet with details (V). Or do I?! Maybe it is a bit odd. But the classic sheath dress (W) is not only good as a classic staple, it’s designed for tall sizes too. This issue is definitely teaching me that there is sophistication to be found in plain colour dresses. Step away from the print!

There’s some cute little Cowgirl tunics and dresses in this issue. Some lovely details going on and I adore the fox purse. Surely that’s not for children alone?!

Burda August 2015 Cowgirls

The next section is called The Art of Colour. Lots of colour blocking with high tech fabrics.

Burda Style August 2015 Colour

For instance you can now see some of those seamlines in that first sheath dress that were previously hidden by animal print, in this colour blocked version (1). It’s made from a high-tech reversable jersey, though you’d have to have darned neat seamwork to reverse this I would have thought! I find the blocking of this top (3) is quite jarring and unnecessary. It’s like one of those optical illusion vase pictures where you’re not sure whether to look at the black or the white bits. But, strange as it still is, because of the different colours employed, I’m quite diggin’ the weird pleated panel on this dress (4) now.

Whilst dress with no pleats is refreshingly, classically simple (5).

The giant pleat of fabric in the teal top (7) quite appeals now. Just with that contrasting neckline. Turns a very ordinary T shirt into something far more interesting.

There’s a lovely choice in the Plus Fashion section this month.

Burda Style August 2015 plus fashion

Who doesn’t love a shirt-waist dress (9) ? I’m currently working on a second version of the 60s shirt dress I made but I’ve already got sleeve and pocket envy, looking at this one.

The pretty cape collar dress (10) is so pretty but this fabulous bohemian knitted coat (11) is a total winner. Just imagine how cosy that would be in Astrakhan (71% new wool, 19% mohair).

I love the lace cuffs on that blouse too (13). Guipure lace in case you can’t see. Totally poshes up a peasant blouse! That neckline is repeated on the tunic dress (15) and the short sleeved version (16) too which incidentally works beautifully with leather strides. I think I want some.

And that just about wraps it up as far as this months gorgeous garments are concerned.

Did you get your issue yet? Any thoughts? Any faves?

BHL Zena dress tested

bhl zeena dress front

So here is my version of the newly released Zeena dress pattern by the By Hand London girls!

It’s had so many wears since I sewed it I’m sure most of you have seen it already but it wasn’t quite right to post deets until the official launch date, which is today, hooray!

This dress is a seriously easy sew. There are no sleeves to inset, It is not lined, having just a neck facing, and you could even skip the pockets if you wanted to make it faster. Though I kept them in as a useful device for holding the skirt down on a blustery day!

The fabric I’ve used is very lightweight and drapey. A lovely donation from Handmade Jane. Hot orange with metallic gold spots. And why not?!

I foresaw issues with the sleeves and the tucks on the bodice if I were to use anything firmer. The skirt would probably be great though. Perhaps another option is to have lightweight bodice and midweight skirt. Those pleats would certainly stand to attention then!

bhl zeena dress back viewBut the more casual nature of this dress is what sold it to me. Especially on balmy days like today. Whilst I do love the fitted princess-seamed bodice of the Elisalex dress, (For the Love of Lawn, The Dress that Nearly Wasn’t, Speed Sewing for Sumer ) It feels more relaxed and cooler when the fabric isn’t so close to ones bod.

There’s lots of fabric going on in that skirt but the classy box-pleats take away that awful poof at the belly as is sometimes caused by gathering. I didn’t take a closer side view shot but I can tell you that the in-seam pockets sit hidden, perfectly inside those pleats. I don’t usually get the whole love affair with pockets but it does seem right somehow for a Zeena. I’ve only ever sewn them in one other dress I think, my Burda Maxi. But that was all together for more practical reasons!

bhl zeena dress side front view

It’s a bit shorter than I’d usually go for but I quite like that. I’ll like it better still once my pins have got some colour on them. They don’t get out very often these days! But there is a longer skirt option included in the pattern if you are after something a little more demur, along with three-quarter sleeves as a choice too.

I can’t guarantee what changes were made to the pattern once I’d tested it but I can say that I had no major issues with this one as I tested it. When I make it again I’m going to go crazy with French seams. Which I should have actually have done this time to save on the finishing!

One tip for those pleats though. Make sure you baste them along the top and down the pleat a bit to properly hold them in position before you sew skirt to bodice. I was a bit lazy with the basting and the pleats separated a little bit. Other than that it was a breeze. And I totally recommend it.

Here’s a link to the By Hand London Page where you can buy the Zeena Dress pdf download if you fancy one yourself. Happy sewing!

Photography by Daniel James Photographic

Wild Thing for World Book Day

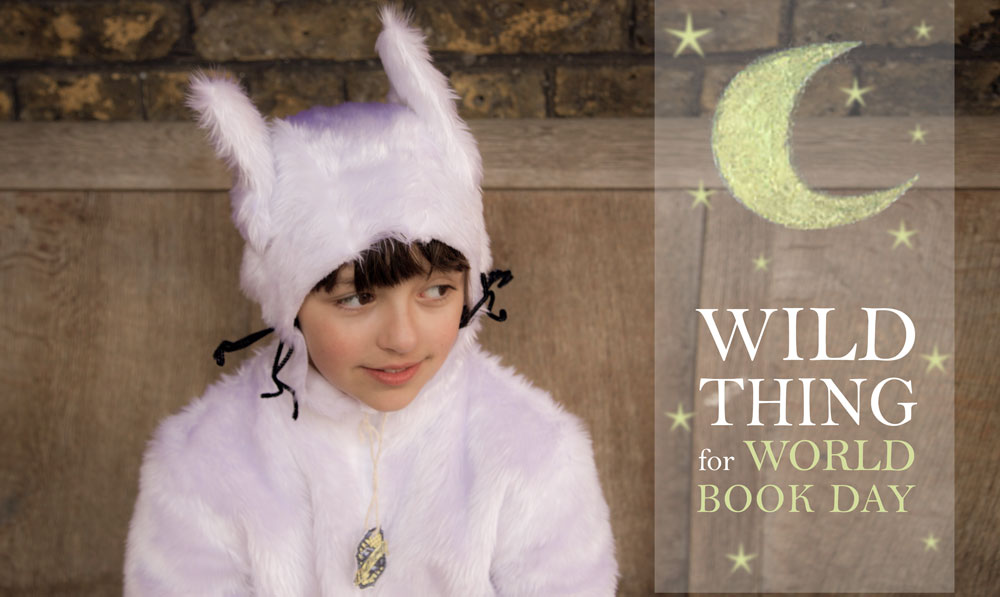
Where_The_Wild_Things_Are_costumeI think I may be subject to mass mum-hate if I proclaim a love for World Book Day. But I do. (Eek!) Don’t get me wrong, I get my knickers in a knot as much as anyone else but I secretly relish the challenge. After all, it involves a must-do sewing project. And that’s always a good thing.

My daughter was very clear about what she wanted to be this year. I’ve come to realise recently, how very grateful I am for people who think for me. I constantly have head soup! Someone thinking on my behalf is better than doing the dishes for me or hoovering the stairs. I’d even go as far as saying that it was better than someone cleaning the bathroom for me. Not that I know what that’s like but you catch my drift?

stars

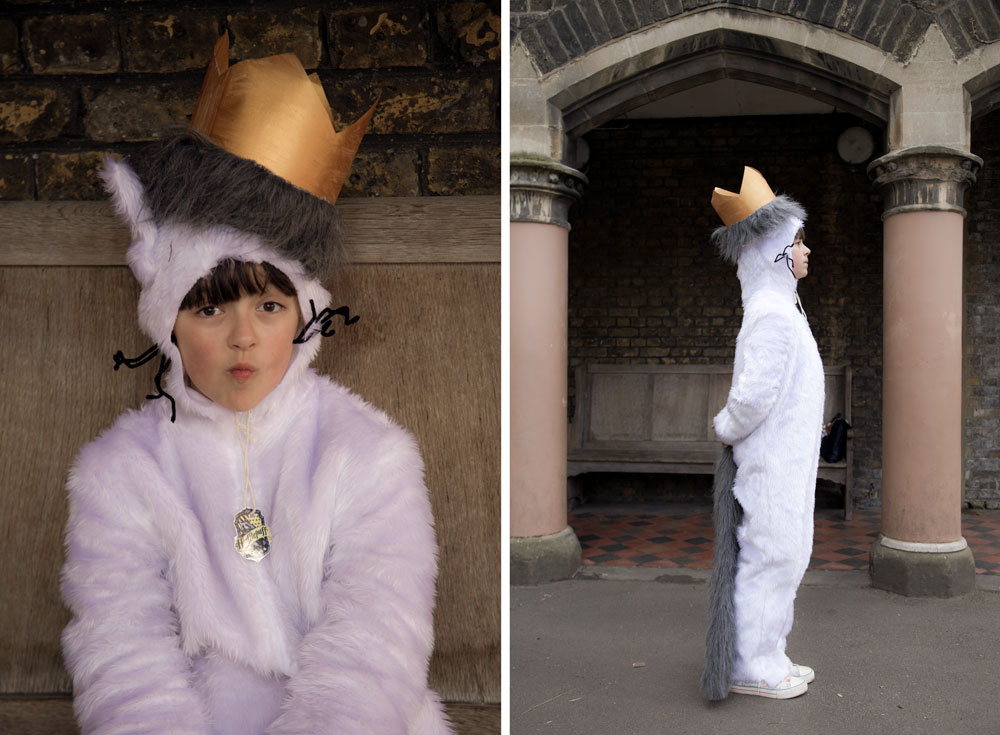
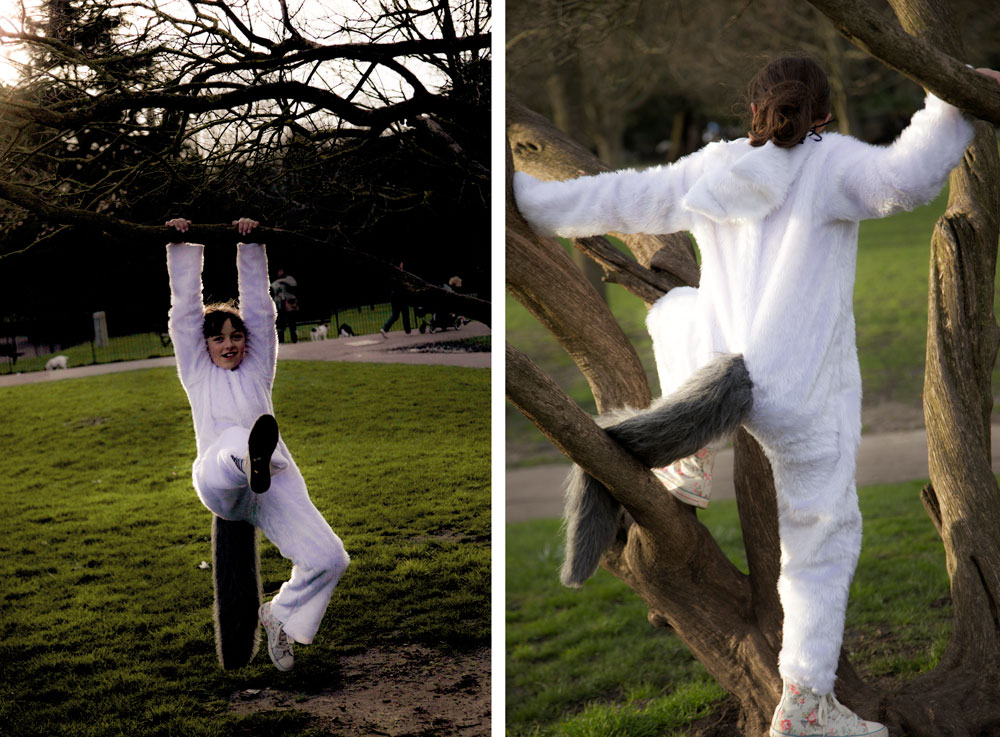
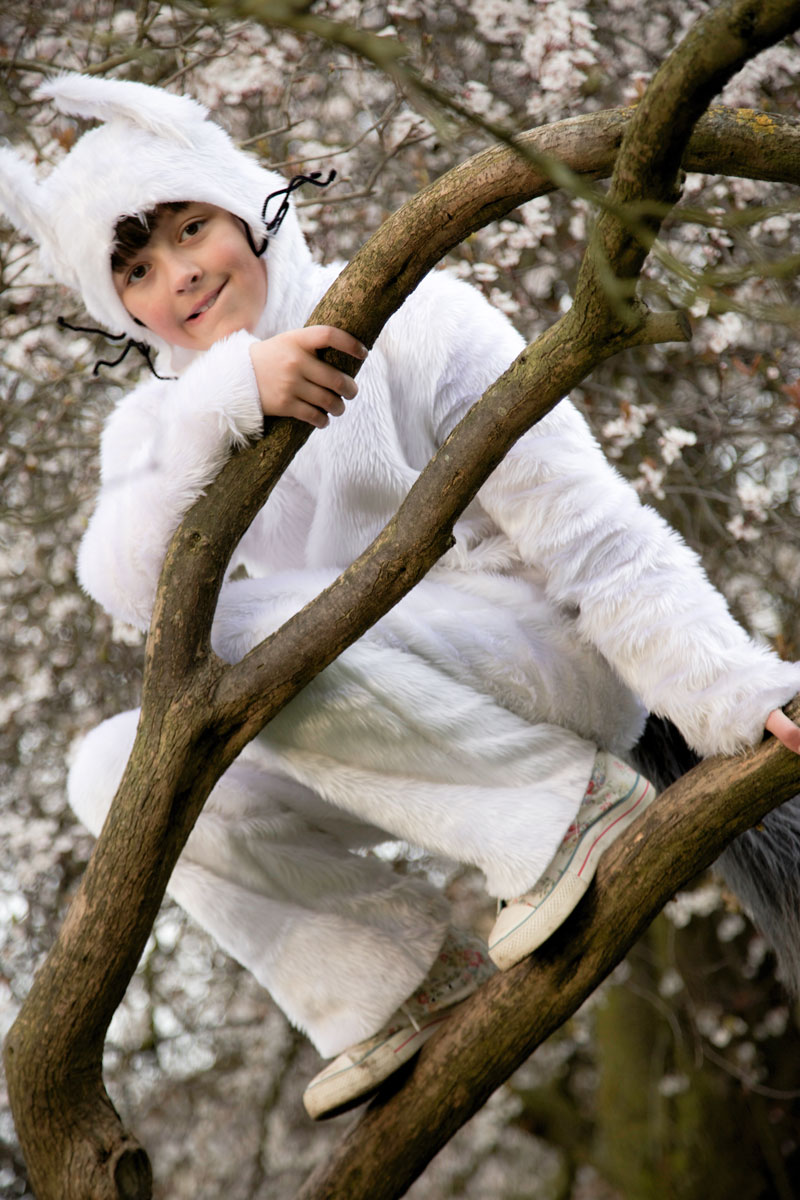
Anyhows, youngest dort was dead set on Max from Where The Wild Things Are. Easy I thought. A white onesie and we are sorted! Not. Not when youngest dort has other plans, like a white onesie in a faux fur of the furriest kind. I kid you not, this stuff is horrid and has left serious evidence throughout the whole house!

Where The Wild Things Are costume

I’ve never attempted one of these before and certainly didn’t have a go-to pattern but this is where I can justify my 3 year collection of Burdastyle magazines.

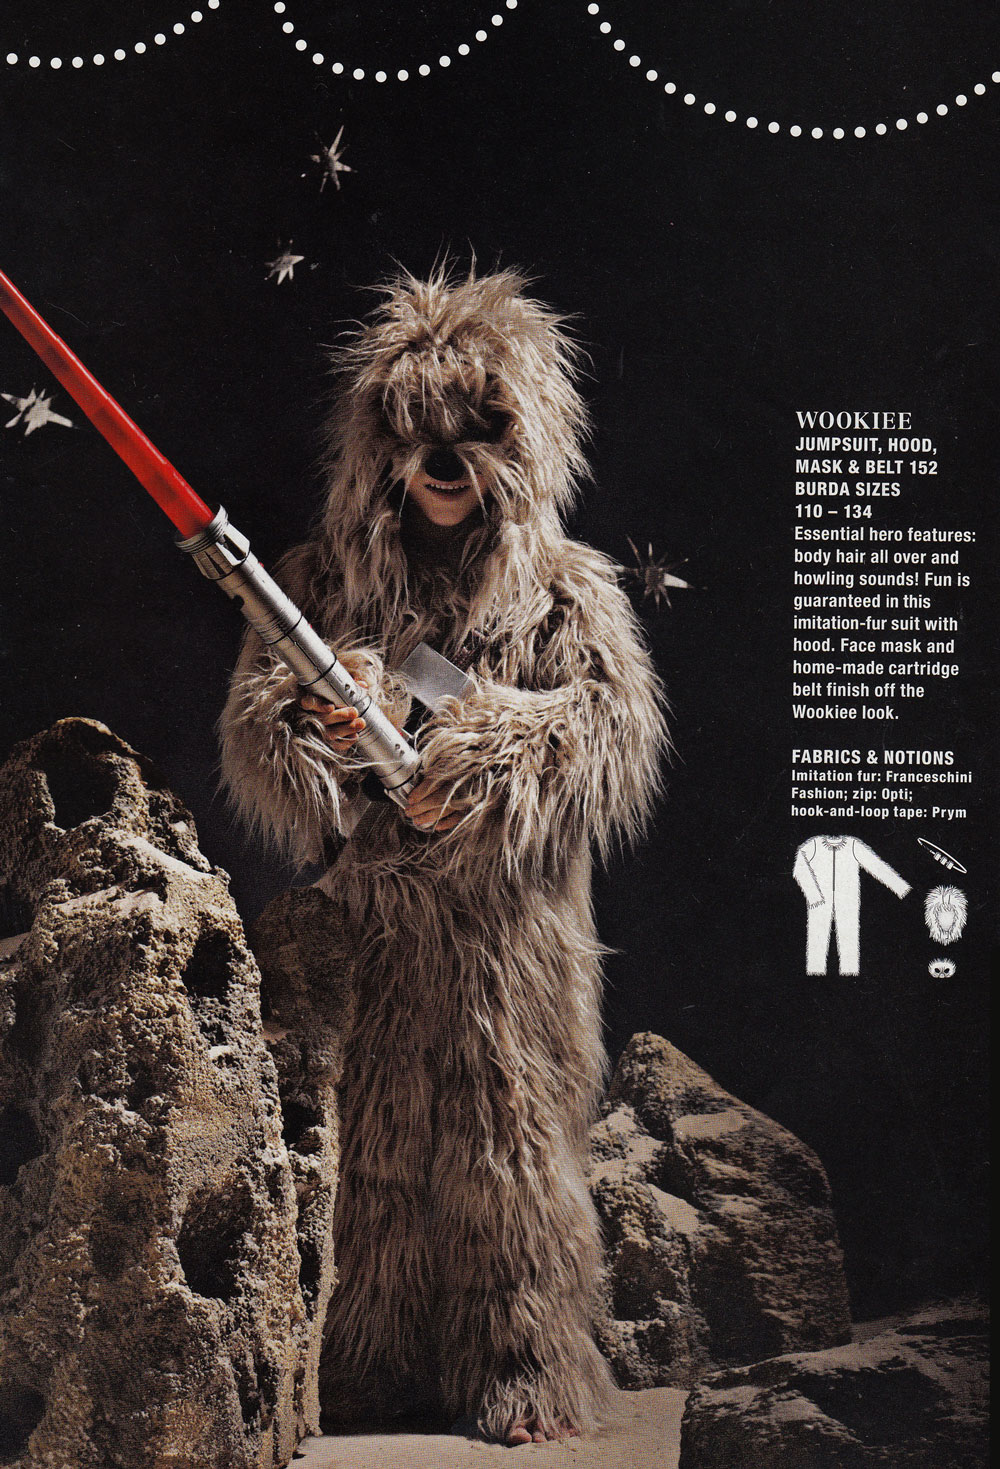
Low and behold in January 2013’s edition…. a wookie jumpsuit! Thank you Burdastyle. Really. Thank you!!

wookie costume

The only problem I had was that the size only went up to age 8. My daughter is 9 but a good 4 inches taller than a regular 9 year old! And so I cut and spread and taped and so properly graded the jumpsuit pieces. But then I looked and shook my head in disbelief at the sheer size of the pattern and took out an inch and a half.

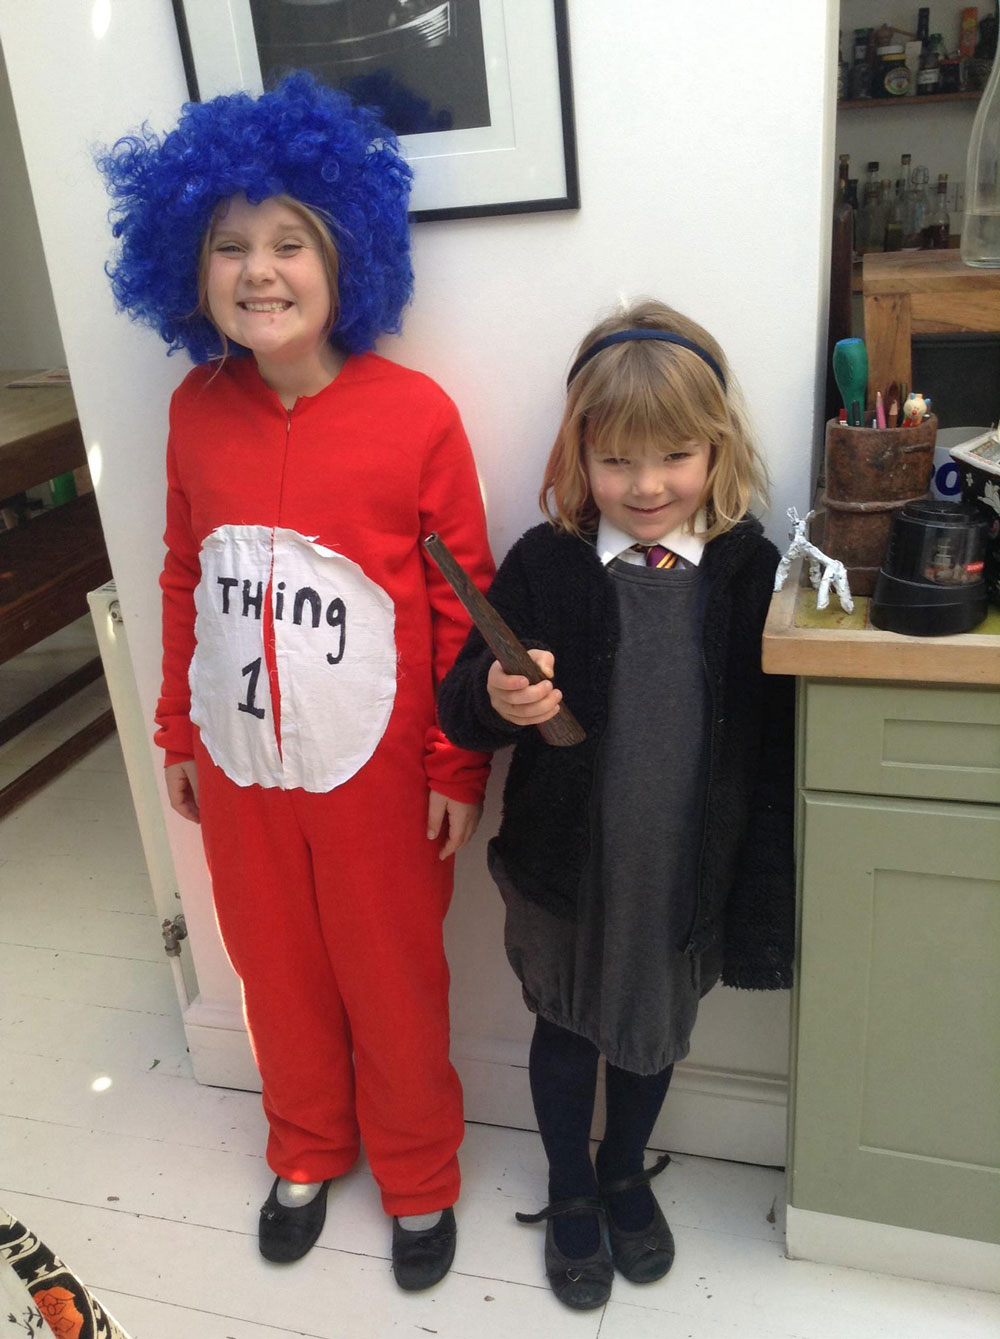
Well you can guess the rest. The first test garment was too small. But no biggie because it was only a tester and better still made the basis of a Thing One costume for her bestie! Bestie’s clever mum did a very fine job of sewing on the the all-important detail as well as taking care of  the gorgeous Hermione Granger!

Thing One costume

So once I added those inches back in I just cut and sewed… and got fluff everywhere!
The good thing about this stuff is there is no necessity for neatening of seams, no hems and no need for careful catch-stitching. I actually did double interface the ears with sew in canvas to make them stand up but not be too stiff. The zip was surprisingly ok to sew in, by hand but trimming the fluff so as not to catch on the teeth was really annoying!

Where The Wild Things Are costume

I can’t take all the credit for this one. LMO made and hand painted her own fabulous crown and check out that wonderfully fluffy tail. A tail that Max himself would have been soooo proud to wear. Mr Ooobop himself took on this task while I was at work. He chose the fur and shaped it perfectly before stitching it with his own fair hands. I am so uber impressed.

Where the Wild Things are CostumeI think we can safely say that Little Miss Ooobop was suitably impressed too! And what better place to hang out after school than the local park, in the trees, being photographed by her multi-talented dad!

Where The Wild Things Are costume

stars

Where The Wild Things Are costume

Hope your tales of World Book Day were as fun!
And wishing you all a lovely sunny weekend wherever you are.

(One can dream!)

stars

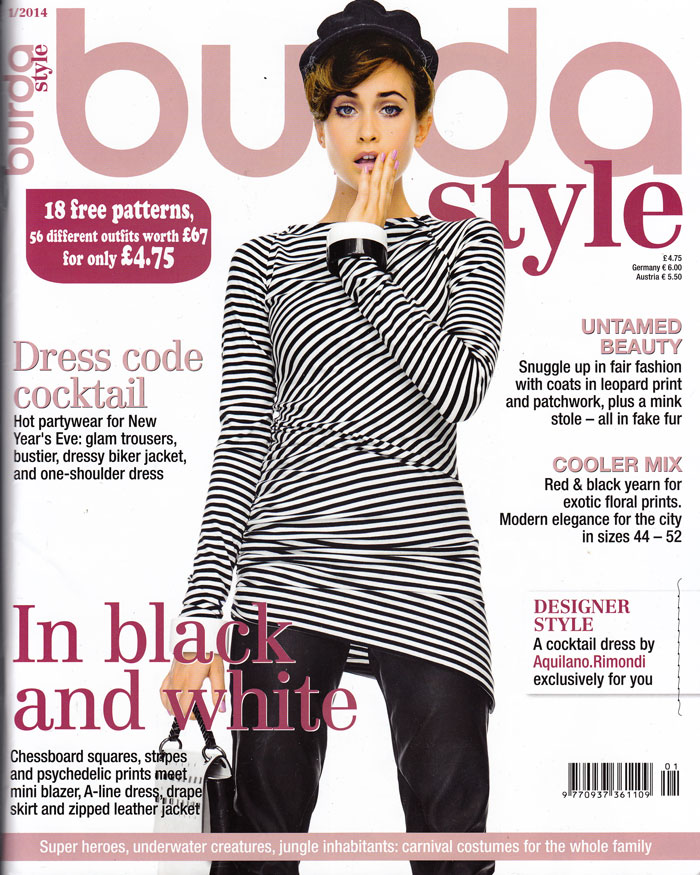
ooobop! review: Burda Style January 2014

Burda Style Mag January 2014

I had secretly planned to make the December 2013 issue of Burda, my last review. It takes an age to put together. And if I’m ever to make a new years resolution, it must be to claim back more time for more sewing. But it proved to be a rubbish plan. And it appears that I am indeed a love-struck addict of  all that is Burda Style magazine!

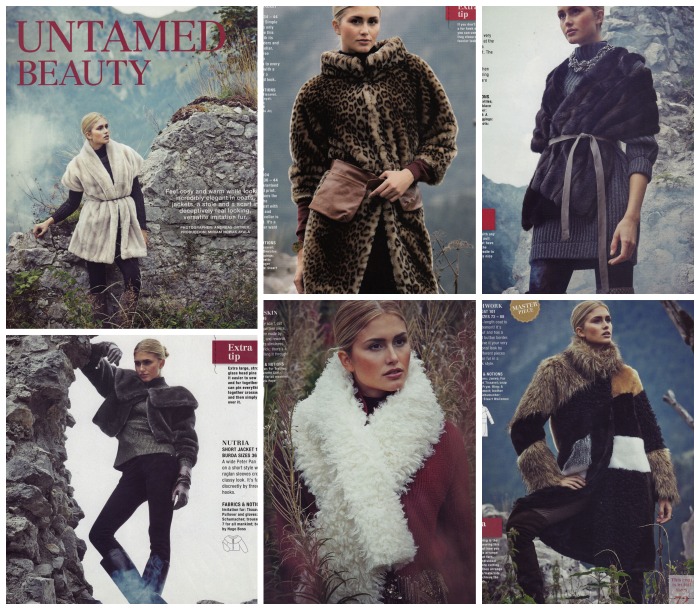
So here I duly kick off with some snuggly 2014 fashions of the faux furry kind…

faux fur burda Jan 2014

As much as I want to, I can’t possibly  dive into one of these projects. My pattern is traced, my fabric ordered and delivered and my instructions await for a vintage 50s masterpiece. I just need some time… and space! Boy will the pinned pattern pieces take up a whole of the living room floor!

Have well and proper earmarked that little furry cropped jacket, though (above, bottom, left) . I can totally see myself in it! (innit!)

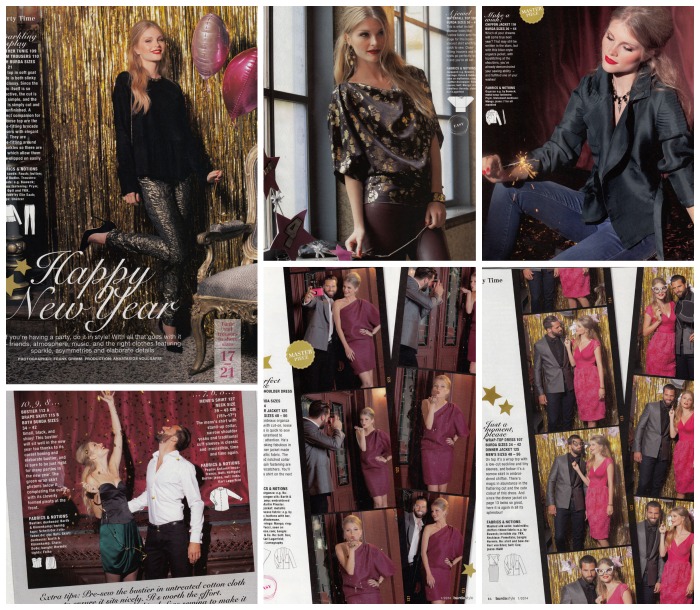
Happy New Year is the next section. Reporting a bit late for a New Years Eve number but really some goodies here for any party any time… or just any time really!

party clothes burda January 2014

Loving the batwing waterfall top (1st row, 2nd col) which comes with an ‘easy to sew’ verification. I’ve just got a few tension issues to sort on my newly inherited overlocker and I am well on my way to knocking a few of these beauties out, I tell ya!

The o-so-cute bustier (bottom row, col 1) is a fabulous party separate. In a quality shiny black, it would rescue any old skirt or trouser in a jiffy. But it would be exceedingly traitorous of me to detract from the Georgia dress before I’d even started!

Another ‘easy’ option is the cerise one-shoulder dress (row 2, col 2). Big attention seeking effect incorporating scant sewing time equals massive win!

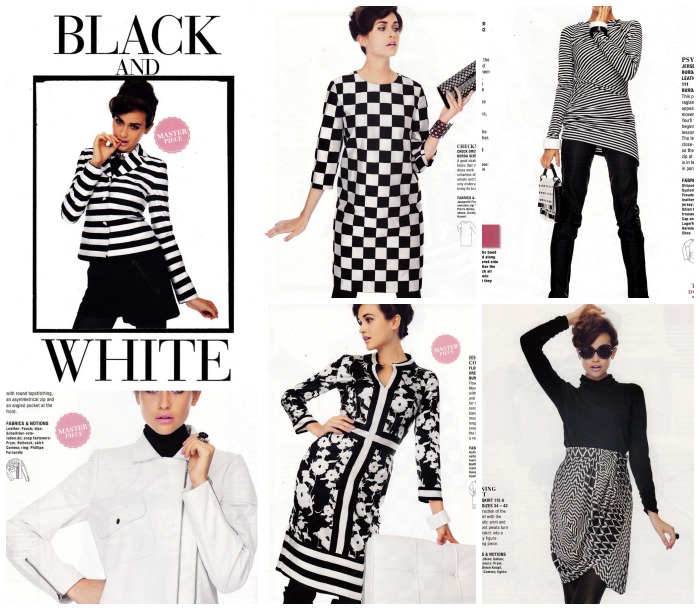
Now I’m forever trying to stray from all that is monochrome. It doesn’t make for a very colourful blog, for one. But how can I ever move on when such striking temptation is blatently bowled in my general direction?

black and white burda january 2014

I love the neat mod look, I love the fat stripes of that jacket in the first pic and I love how the skinny stripes behave in the long sleeved jersey shirt. Some interesting points of gathering to achieve all that psychedelia! Thinking this may well be a job for my overlocker too!

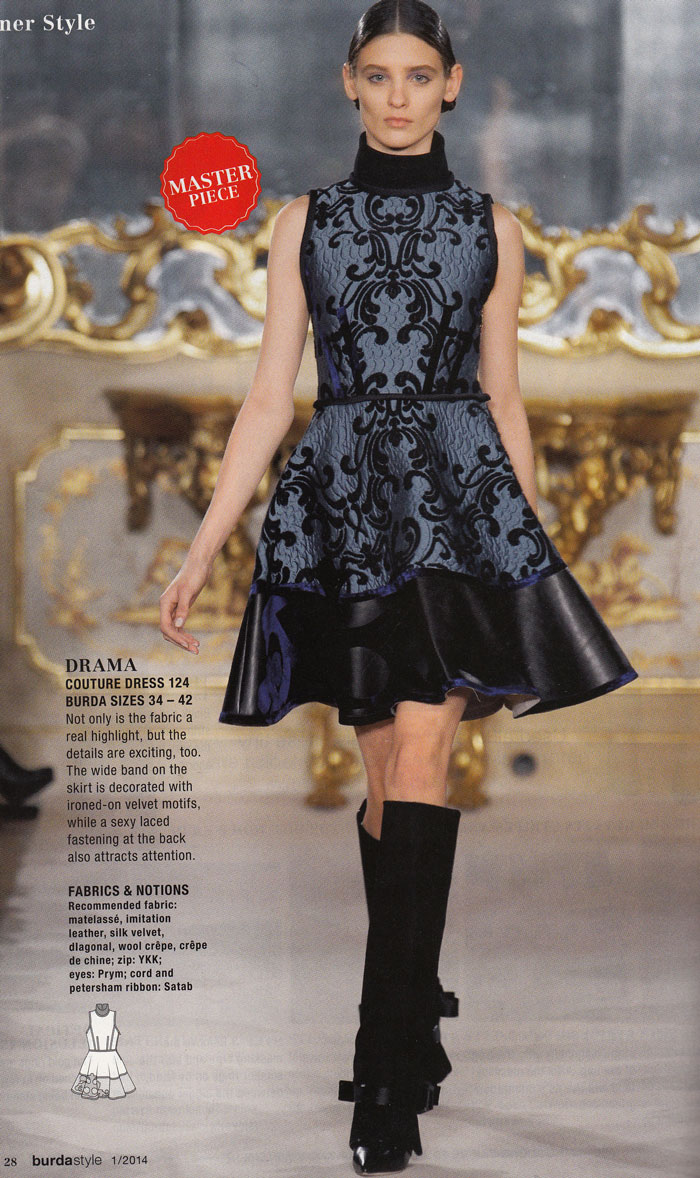
Now even if I hated each and every one of this issues patterns (which I don’t, obvs), I would pay double the cover price. Double I tell ya! Just to get this Master piece pattern of ultimate gorgeousness….

aquilano rimondi dress

Such a flatering shape. I love the neck. I love the colour. I love the contrasting leather. I will make this dress. At some point!

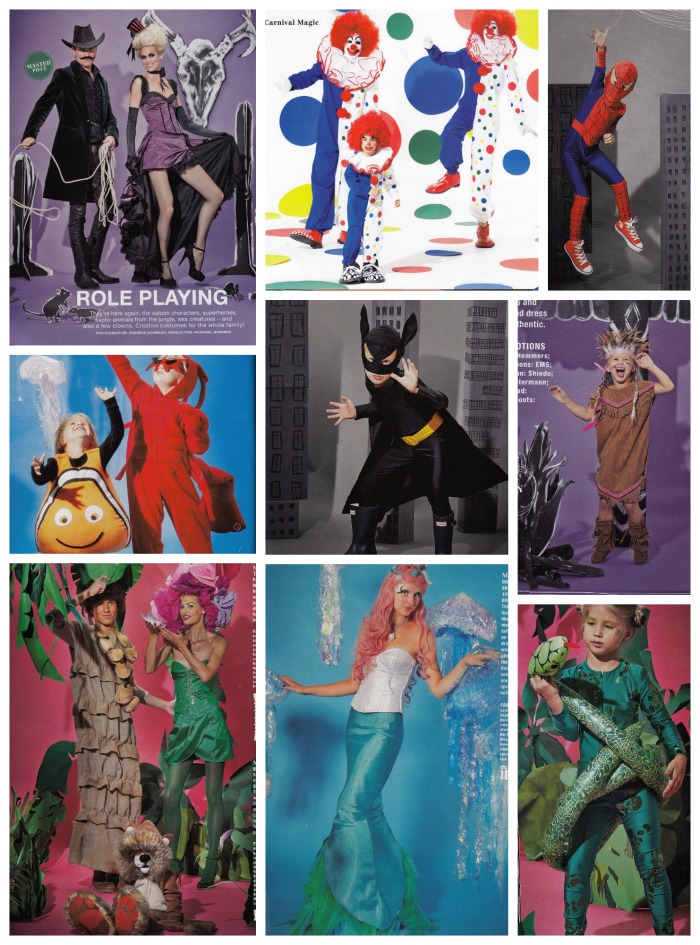
Now I’m not really one for fancy dress. But Burda certainly does us proud each and every time there’s an excuse for dress-up. No exception with this months selection of saloon characters, superheroes and exotic animals from the jungle, the sea and even the circus! Take your pick. Creative costuming for the whole fam!

role play burda jan 2014

And if mermaids and snakes don’t do it for you then feast your eyes on all that is classy and plus size.

plus fashion burda jan 2014Burda love a bit of Asiatic influence and I’m personally loving the black and the red (obvs) but I’ll leave the rest of the commentary to you, my lovelies.

Here’s hoping that 2014 buys us all some more precious time to sew some more wonderful creations. Love and luck and the very best of health to you all. Now go party your lil sock off!! xxx

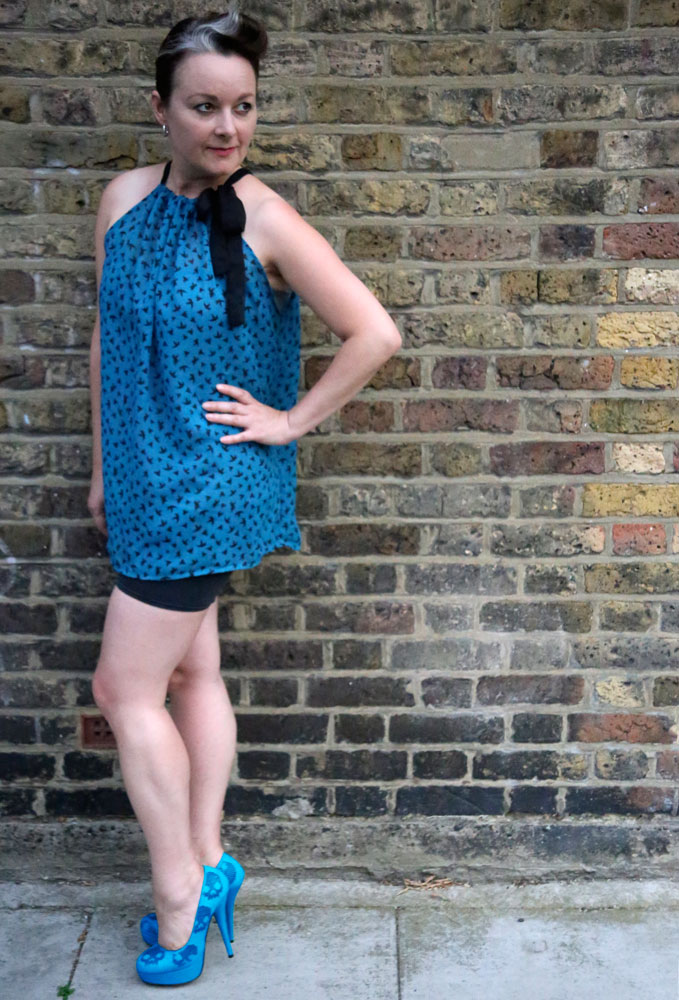
Burda birdie drawstring top

blue bird drawstring top

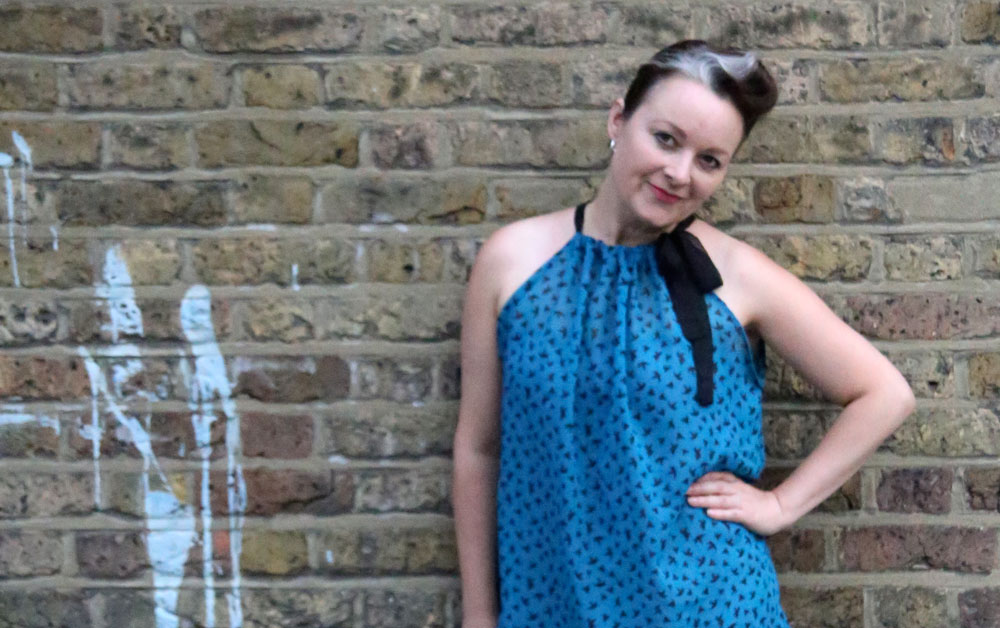
I knew I’d make another one of these. I just needed another metre of fun chiffon and this little birdie print was perfect. All totally synthetic of course but I’m learning not to be such a fabric snob in my old age and hey… you can’t argue at £2.50 a metre!

I had a couple of issues with the last one I made, namely the size of the armholes. It transpires that this was partially due to the stretch in the other fabric because the alterations I made – namely ditching the side seam allowance and raising the underarm point by 1 inch – have made a larger difference than anticipated. But its all good and there will be no fashion faux pas when wearing this one!
blue bird drawstring top

Advisable to seam the sides with French seams. It gives a very satisfying finish but the instructions provided are otherwise very simple to follow.

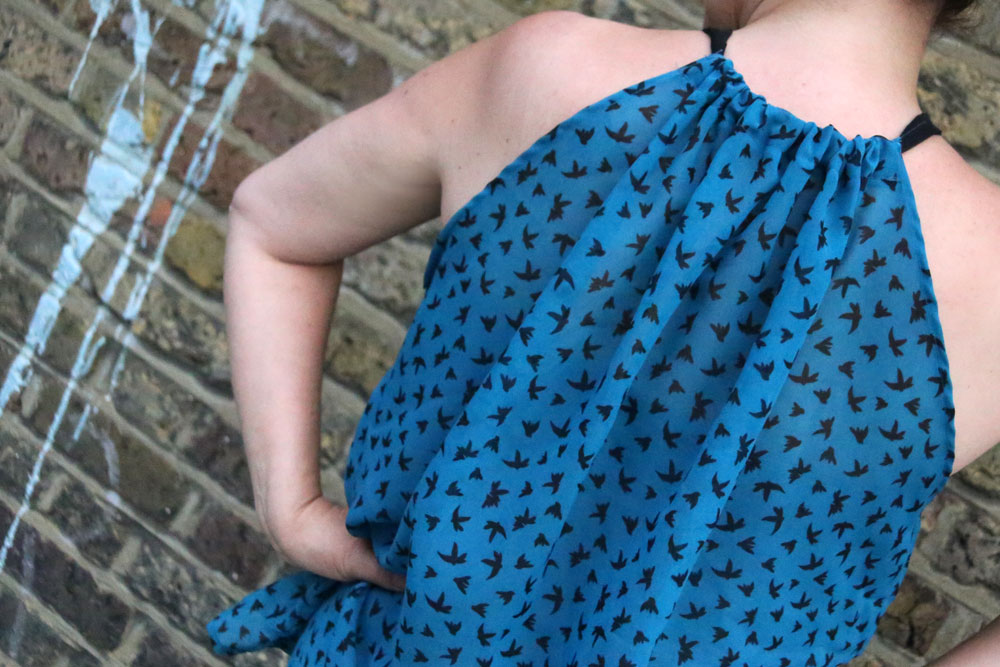
Below is a pic of the back view as requested. Exactly the same as the front, in case you thought I might have the ability to rotate my head a whole 180 degrees! And you also get to see the print a bit better here too.

blue bird drawstring top back view

Actually. Maybe they’re not birdies. Maybe they are the little fluffy bits from a dandelion clock. Hey ho. Cute all the same!

Since my last post, the instructions for the pattern are free to download from Burdastyle here. It’s called the Summer Tank 05/2013. If you are not already a member I can assure you it’s worth the registration with this site. The gallery is constantly being updated with inspirational uploads from fellow sewists and there are plenty of other free pattern downlads available among the great ones you can purchase.

Thanks as always to Mr O for the great photography. He snapped these literally in seconds this evening. That birthday camera was worth its weight in gold! 😉

Princess Jessica’s Prom Dress

I think I have kept you all in suspense for quite long enough. This evening is Jessica and Tom’s leavers prom and so I am allowed to reveal the dress I have been working on for the last few weeks.

I was feeling a bit poorly today so Mr Ooobop, like the knight in shining armour he is, set off with his new birthday camera without sparing the horses. The following photos are some of the loveliest he has taken. And I think you will agree that the beautiful subjects contribute somewhat to the awesomeness too.

Meet Jessica. The most wonderful 16 year old daughter of my friend Tina. Can you now picture the pressure that was to create her a prom dress fitting for such a beautiful princess?!

Jessica having hair styled

Tayla Harris was in-house hairdresser for the evening and styled Jessie’s hair beautifully. Complete with little jewels to match her necklace.

Hair jewels
Hair jewels

And ooo… look. A cheeky first glance of the bodice! Such a tease, I know!

Hair styled with jewels to match necklace

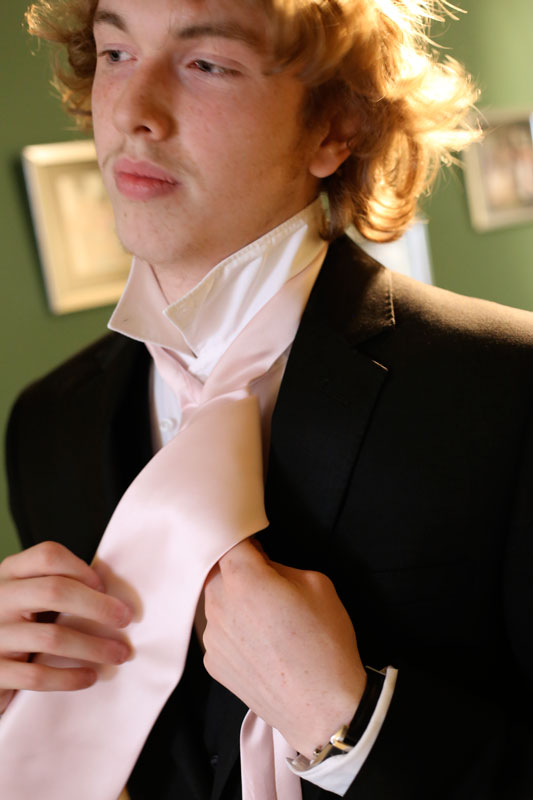
With make-up, hair and outfit complete, enter Jessie’s Prince Charming – the lovely Tom. I’m so pleased he liked his tie. He didn’t really have much choice in the matter, bless him. It was delivered seconds before this photo was taken. I only finished it this morning! And here we also have a side view of the prom dress. I’m getting there, honest!

Tom's arrival and receiving the tie
Tom’s arrival and receiving the tie

The tie was made to match Jessie’s sash as you can see. And Tom did a much better job of tying it than I did!

Tom putting on his tie
Tom looking more like Prince Charming every minute!

So now they were both dressed to impress, Mr O worked his magic and took some awesome shots of them together. Don’t they look adorable?

Jessica and Tom
Jessica and Tom
A beautiful portrait of the prom Princess and her Prince

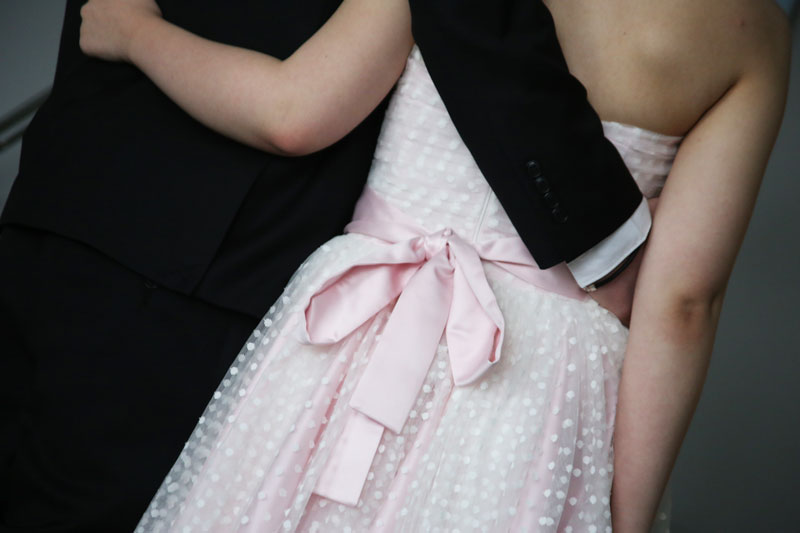
I would love to be a fly on the wall tonight and take a picture of them dancing together. The dress is a circle skirt underneath 10 layers of gathered polkadot tulle so you can imagine just how twirly and frothy it would be.

A little dance to limber up!

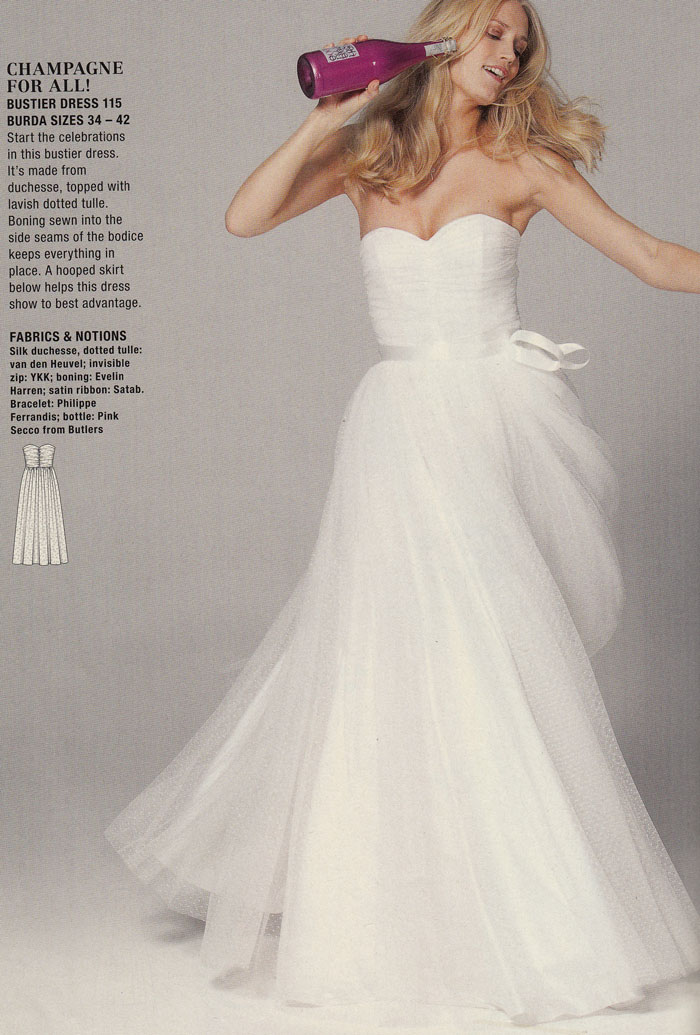
Jessie came to me with a firm idea of what she wanted and luckily for me there was a very similar pattern in one of my old Burda magazines. I’ve got quite a hefty collection now. It’s always a joy to go through back issues and see patterns you didn’t notice first time round. But this one was on the money! The only thing I had to do, knowing how standard the sizing works, was to do an FBA. And I had to learn how to do it pretty quick!

prom dress idea

Thankfully for me, and for Jess, I had recently come across a great set of instructions on the By Hand London site. These totally took the fear factor out of the whole process. And I learned so much. Not least of all to come down 2 sizes for Jessies petite body and then doing an FBA. It took just 4 fittings to get it right but oh it was so worth it.

Side view of the dress

The strapless bodice section of the dress is boned. For good reason! This was a first for me too. Though I did discover some fantastic boning in my local haberdashery department that sold pre-cased boning. I just had to sew it directly onto the open seams.

The front and back have rouched tulle stretched across 2 panels

The front and back have rouched tulle stretched taught across 2 panels. I love the way they ‘butterfly’ out from the centre seam. And I love how classic and timeless they both look here. Reminiscent of the 1950s.

Full skirt. 3 layers.

The tulle overlay is ivory in colour and works so well to soften the pink. Kind of like a frothy strawberry milkshake, don’t ya think?! Of all the techniques involved in making this dress, funnily (or not so funnily) the most tricksy part was gathering all those 10 metres into a 27 inch waist. I even made several gathering threads to avoid breakage but it was still a nightmare. I ended up gathering small sections at a time and pinning it on the underskirt, on the mannequin and then hand tacked it all together before I even thought of taking it to the machine!

The bodice and skirt are lined in full with a slightly darker pink lining. That was one of the easier bits! Unlike the Burda instructions, I sewed the circle skirt lining to the waist seam and then once the bodice lining was seamed at the top, I turned under and hand-stiched the waist seam of the lining over the raw edge of the skirt lining.

Oh yes! How could I forget? The shoes!! Check out these amazing Kurt Geiger shoes that Jessie snapped up in the sale for a mere £29! Pink patent leather with bows and bling!

Kurt Geiger shoes
Kurt Geiger shoes: Pink patent leather with bows and bling!

Have you got loveliness overload yet? I think I have. But hang on I forgot to show you the back. Pretty bow sash and all

back view of the dress

And so the ‘royals’, unfazed by their impromptu photoshoot, bade their farewells and headed off to the prom.

En route to the prom

I would so love to have seen everyone’s faces as they walked in together.

Outside the venue
Outside the venue

A massively big thank you to Mr Ooobop for these amazingly professional photos. I would never have got these together myself. I also have to thank Tina for asking me to make this dress for her beautiful princess. It has been such a huge learning curve for me. I don’t deny there was a fear factor involved. I had no choice but to get it right. But that’s how we learn fast, right?!

And last but not least for the ever obliging Jessica and Tom. You make just the perfect models and have brought such beauty to my blog! I am being totally honest when I say that these pictures brought a tear to my eye. I hope you guys had the time of your life! x

Burda drawstring top

‘Well about bloomin’ time!’ I hear you say… again! After all those reviews, all those bigging-up posts harping on about what I fully intended to make, you’d think I’d have rustled up at least one of those Burda goodies by now.

Well here it is. Care of Burdastyle Magazine, May 2013 issue, the drawstring top.

drawstring top
Fashioned from a lovely piece of chiffon that was hanging around after the fabric swap at Rachel’s meet up back in April. Incidentally, if anyone can put their hands up as to whom was the kind donor I would be so happy to know.

I had no idea it was destined for this top but I was secretly hoping that whatever I made, it was going to incorporate a flower placement, both front and back. And guess what? It does!

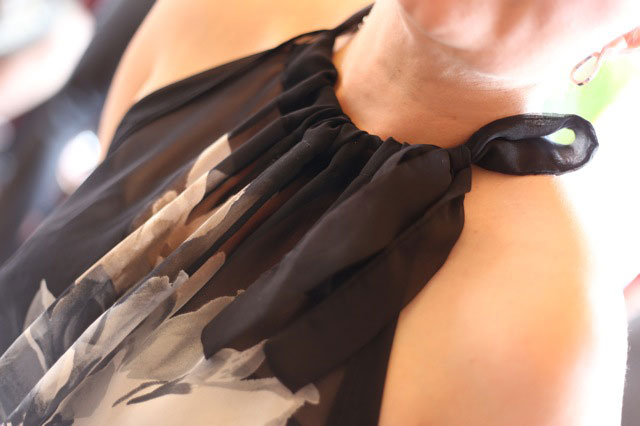
drawstring neck
It is the most simplest top in the world. One you have to draft yourself, mind! And I don’t mind that at all as it goes.

I’ve been tinkering with all sorts of pattern adjustments recently, including an FBA. Not for me, you understand. Which is why it’s far more exciting. I am making a prom dress for my friend’s gorgeous daughter. But more news about that in a couple of weeks. The dress is a big secret until her big day!

Anyway, I digress. Back to the top. Well, actually there is nothing much more to add, other than I figured out how to cut chiffon in a straight line after I had cut it on the wonk! I thought I was being clever by pulling a thread at the hem to make sure I hemmed it even. But actually I’d cut it completely on the wonk and the whole thing ended up being about 2 inches shorter than planned as a result :-/

I used a rolled hem… not by using my rubbish rolled hem foot… but by hand. It was a slow but sure process but it worked just fine.

The pieces consist of a front and a back, seamed only at the sides, with a drawstring around the neck. The raglan armholes are rather large – much larger than the photographs show – and you will therefore require a modesty garment underneath unless you reduce them beforehand.

This is how it appears in the mag:

chiffon drawstring top from Burda May 2013I made it in a panic when I thought I was running out of Me-Made-May garments but never actually got round to wearing it because of this stupid pretend summer we are having. But it was perfect for today’s Father’s day date at Café Rouge and even got the seal of approval from my eldest daughter…Win!

drawstring chiffon top

Now, back to that prom dress…

Me Made May 13: My final days

So here we are. The final days of Me Made May ’13! I feel quite sad in a way. But relieved. And accomplished. And enlightened. So thank you SoZo for setting this brilliant challenge. I didn’t realize quite what a knock on effect it would have. Or how it would make me feel. I wholly recommend this challenge to anyone who has yet to take the plunge. 

I really didn’t think I would make it to the end of the month. For sure there were repeats and some days no photo evidence at all. In reality, taking a photo of yourself every day is really difficult. Easy at first with all the initial enthusiasm for the challenge but then harder each day as the sun disappears, the hubby sets of earlier for work and the outfits get more tight-fitting the older they are!

But the journey was worth it. It was fantastic to focus each day on each hand made garment and realise where I’ve come from and what I’ve arrived at. Confirmation on what I’ve learned and achieved was invaluable. I don’t have time to stop and think properly about most things these days, especially what I’m going to wear on any particular day. So this was a fantastic excuse for self-indulged focussing, on past experience as well as some future plans. Oh yes, of course the flip side of the coin has meant my project list has increased ten-fold. But hey that list always makes for sweet dreams, if nothing else!

So to wrap up… the final days of  Me Made May ’13.

Jersey cowl neck top

DAY 22: Silk touch jersey cowl top and wool pencil skirt
Neither of these are blogged, I made them so long ago. But the cowl top is made from a free pattern on Burdastyle by Ichigogirl. Its the same as the stripy one I made. The skirt is a Simplicity pattern that my mum gave me to kick start my sewing antics. It has a little vent on the front knee. I didn’t line it, unfortunately and this is something I would never do with wool now. I should really go back and line it. It would hang much better and not stick to my tights!

Day 23 black self-drafted pencil skirt

DAY 23: Black self-drafted pencil skirt
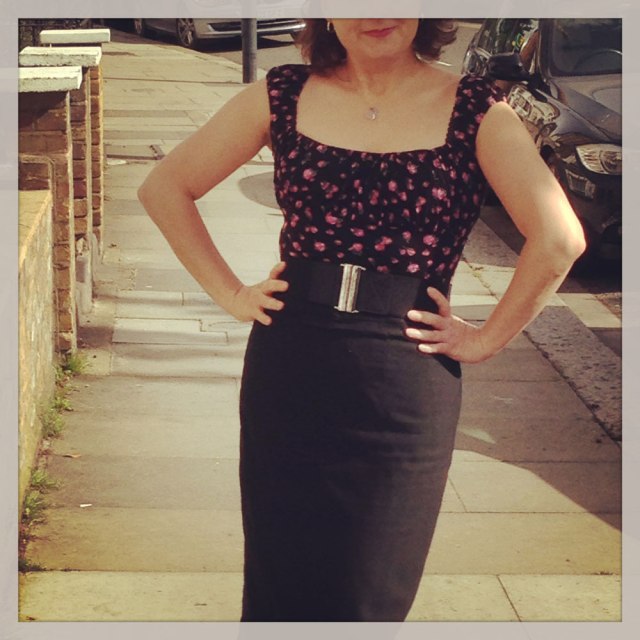
This is possibly the most worn and practical of garments in my wardrobe. It fits like a glove, because I drafted it to my exact measurements. It’s properly lined and the lining is even properly attached to the vent. The waistband incorporates a woven interfacing so it doesn’t roll and is fastened by a hook and bar instead of a rubbish ‘eye’! It was a fantastic learning curve making this skirt. So absolutely worth all the effort that it feels fantastic to wear. I always imagined a whole weeks worth of these to choose from and I still think that is highly necessary. They are perfect work skirts and glam up nicely for a spontaneous evening out too!

DAY 24: Stripy wool mini A-line skirt
A miserable day. No sunshine at all, so the woolly skirt came back out. No photographer today I’m afraid. I’ve come to realise how much I wear this skirt. Mostly when I can’t think of anything else to wear. It fits; it’s comfortable; it goes with DMs… and it keeps my butt warm!

Day 25 mmm13 Elisalex shortened

DAY 25: The shortened Elisalex
Today was the 20th anniversary of the day my dad died. Always a sad day. But always a good excuse to don a pretty dress and catch up with my wonderful brothers and sisters, nieces and nephews. The cemetery is a bit of a trek from the bus stop so I needed to sport something easy to walk in. Small heels means small skirt in my world so there was only one thing to do. And that was to chop the bottom off my test Elisalex dress! So glad I did. The duvet cover did good! Although I love my longer rosy version, it’s kind of ‘for best’ but this cheeky little version is now a great little throw-on when-the-sun-shines-and-go dress!

DAY 26: Grey pencil skirt
No photographic evidence today. I wore the first pencil skirt I ever drafted which still fits pretty well. Its lined but has no vent. I was taking things one step at a time back then and to learn to create a vent was information overload! I have to take pigeon steps but it still works. It’s a good staple, though a little boring. It’s days are numbered as soon as the others are on the cutting table!

Day 27 goat eating dress

DAY 27: First summer dress of the year
Today we went to the Surrey County Show. An ideal place to sport a full on flowery frock. Not such a great idea to wear in the goat tent though! Note that Mr O sought his photo opportunity before letting me know what was occurring! I still love this dress but I need to take some volume out of the back. I didn’t notice before but it gapes at the zip. I’m pretty sure its a simple fix. And hopefully it will fit better.

Day 28 Danielle dress

DAY 28: Danielle dress
Now here’s a blast from the past. Almost 2 years ago to the day. It was a bit of a squeeze, I can tell you. So much wrong with this dress but I still like the vibe of it. The fabric was a charity shop find, unsure of the content but it’s soooo itchy and scratchy. I thought I was being out there by using red lining but that turned out to be a no-no with the pale open weave fabric on the skirt! I can’t really breathe in this dress and you can tell by the pull across my chest but this dress is a lovely reminder that I should make another that fits in a much lovelier fabric.

Day 29 button back top

DAY 29: Button back retro top
I was fast running out on day 29 so it was a great propmt to rectify some issues with some garments I don’t tend to wear any more. This one in particular was really annoying to wear because I made the neckhole too small. I really liked the jewel neckline but in reality it kind of chokes you to death. Only problem was that the first buttonhole started right at the top, so to lob a centimetre off the neckline would halve my first buttonhole. My need to wear a me-made top spurred on a quick fix and I replaced the buttonhole with a press-stud and sewed the button on top so nobody will ever know!

Day 30 vintage pencil skirt with pockets

DAY 30: Vintage pencil skirt with pockets
Not yet blogged but again, a hurried make out of desperation but boy I’m glad. I’ve been meaning to make this for yonks! It still needs some fine tuning and this is really just a test garment but I will fill in the details when I blog it. But what’s more to say? Its a pencil skirt with pleats and front pockets… hooray!

Day 31 1940s shoe dress

DAY 31: 1940s shoe dress again!
A shameless repeat but one I’m prepared to wear again and again. This is by far one of my favourite dresses. It gets comments from total strangers as I stroll down to Sainsbo’s. It’s cool and comfy and is covered in shoes! This is the item of clothing that I need at least 5 more of. Along with 7 pencils skirts, my wardrobe should have at least 7 of these too!

And so we leave the month of May and venture on to pastures new. A prom dress for my friend’s daughter is on the go, FBA’s and all, a bespoke pencil skirt for my daughter’s birthday present and another that was bid on by my friend at the school auction. (Far too nervous to ask what she bid!)

Thank you as always for your wonderful comments and support x

Me-made May’13: My first week
Me-made May’13: My second week/
Me-made May’13: My third week/

ooobop! review: Burda Style June 2013

Burda magazine June 2013

Can you believe this is the summer edition of June 2013? I can’t. I’m wrapped in my fleecy blanky, fingerless gloves no less, shivering my butt off as I point blank refuse to turn the heating on. My toes are curled for no other reason other than I can’t uncurl them because they are frozen solid. Is this weather for real?

I really want to get excited about summer clothes, really I do. But I’m struggling. So if you hear a slightly less enthusiastic tone this month, please bear with!

First section up is… Summer Fashion… ha! “Keep looking stylish, even in the heat…” is the opening line of the first intro copy.  Ha bloody ha! Rub it in why don’t ya!

Summer fashion Burda June 2013Ok. I’m going to try. I actually do really like the hand finishing on the brown shift dress, bottom left (above). Its a great couture technique that I’m thinking of employing on a future wool crepe dress I have planned.

The shorts, centre, bottom row, are not dissimilar to the plaid shorts I made. These ones are made with stretch pique which sounds more comfy. I will defo give these a go as one of my gripes was the lack of facing with with Simplicity ones. I know I could probably draft one but hey, I don’t need to now! A bit difficult to see in the photo (top row, centre pic) but that t-shirt looks to be a good fit with side panels and neat little sleeves. Don’t have an overlocker as yet and I’m wincing at the thought of messy insides so I’ll just hang on a bit for that one until I win the lottery. Boy I can’t believe how much those overlockers are!

My dislikes are the pink pants, bottom right. I love this look on the right kind of body. I don’t have that kind of body, unfortunately so they won’t be appearing on my list anytime soon. As won’t that dress top left corner, funnily enough. I say funnily enough because at first glance it looks like a classy dress. Save the pompoms! But it’s not even the pompoms that are putting me off. I quite like them. Its more the “artfully laid little pleats” that appear on the right shoulder aligned with the left hip. Even from the photo I can see some annoying crosswise folds that would annoy the heck outa me!

So who doesn’t like lots of dots? That’s the theme for the next section:

Lots of dots Burda June 2013I think I can safely say I like everything in this section save the long shorts, first column middle row. Just a bit unflattering and boyish for me. I love the shirt-dress top right, most of all. If Me-Made-May’13 has taught me anything it’s that I need more shirt dresses. I love how comfortable and stylish and edgy they can be. It’s not to do with cutting edge design. More clever choice of fabric that makes a great shirt dress. And I’d love to have one for every day of the week. This is quite a slim-fit one and it sure fits the bill as far as I’m concerned.

The shift dress, bottom right corner, has some great side panels that are piped. I still haven’t attempted piping but this would be a great opportunity to practice. It would also be a great chance to practise some colour blocking too. Employing some block colour in those panels would create a great slimming effect.

The cowl top with gathered sides (top left corner) is a firm fave too. Much more stylish to wear than a plain old T! And I love the yellow swinging full skirt. Perhaps not in yellow though. It’s got plenty inset godets on top of all the gathering. And a big bow at the waistband. Dead funky!

The next section is all about beach wedding/party dresses. I truly have goosebumps right now thinking about how the chiffons and georgettes might feel next to my skin, but there are some pretties…

beach beauty section burda June 2013The cowl neck dress, bottom left corner, is my favourite here. With its side gathers and simple shape I think it could be really flattering and perfect for a few evening cocktails on the beach. The dress, top right, is quite stunning and doesn’t look that difficult to construct but there is some yardage of crèpe satin going on here, so it’s not really for the ‘thrifties’ among us!

I don’t dislike the others. They all have their place. Apart from the strange diagonal pleated bodice dress, top left corner – same issues as that purple dress in the first section. Oh, and that one sleeve wonder dress bottom right corner. Not sure I could handle that!

So, swiftly we move on to ‘Surfer Girl’. Not me. Not any part of it. I have noted there are a lot of runners that sew. Or sewists that run! I wish I could say I was one of those. But I’m not so I will leave judgement in the hands of the “Sporty Spices” of the sewing blogger nation…

surfer girl section June 2013That said, the little jersey skirt in the centre, bottom row, could be a quick and easy casual make for holidays and weekends. The jacket is a bit 80s for me, mind!

The Mother & Daughter section is at the very least tweeee!

Mother and Daughter section June 2013Would anyone ever consider dressing to match their daughter?

I quite like the dress, top centre. Though it looks a bit starchy in the batiste. I might be inclined to use something slightly drapier. I do really like the idea of printing on the fabric though. That would totally seal the uniqueness of the garments. You could really create some signature pieces with a clever use of design. I just made a skirt, similar to the star-print one, top right corner, but from an old vintage curtain. I love the deep waistband. I need to finish mine but I hope it looks as good as it does on this mummy!

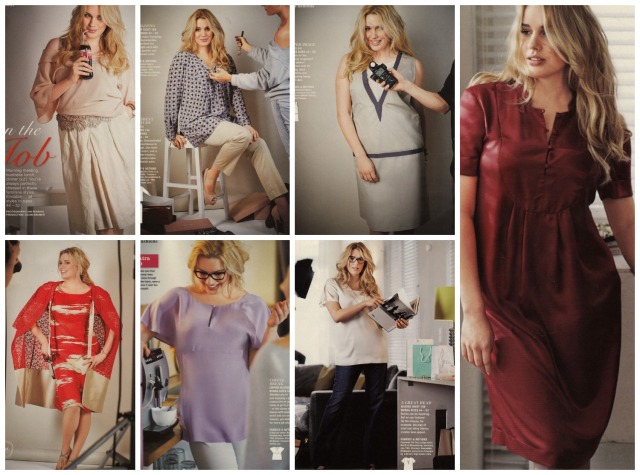
The Plus Section gets as much attention, if not more this month:

Plus fashions June 2013I love how each of these designs incorporate clever structured detail to flatter the curviest of bods. Simple lines and crepe satin exude the elegance and the loose cut sleeves and empire waistline of that red dress, bottom left is simple yet stunning. But the one I like most is the red dress on the right. Cute standy up collar and dinky button loops on a fabulous yoke bodice add perfect detail to really versatile dress.

So what do you all think? Any faves? Any absolute disses?

I’m off up the wooden hill to Bedforshire right now. I’ve given up trying to keep warm. But I’m still thinking shirt dress. Perhaps in some rockabilly print that I have in a box somewhere. I’ll dream about it and see how it looks!

Night all. And thanks so much for keeping up with my ramblings x