Curtain call for the Dressmaker’s Ballgown

Gold damask ballgown front of York Watergate

The Dressmaker’s Ball is an amazing annual event hosted by Crafty Sew and So in Leicester and presents a perfect opportunity to sew and wear whatever you damn like.

A free brief is pretty much unheard of in my work as a graphic designer. There are always rules – a style guide and house styles to abide by at the very least and so it is very refreshing indeed to be granted such freedom to create. Until of course, you start weighing up the possibilities which are endless!

Gold damask ballgown front of York Watergate

One thing I was sure of was that mine was going to be self-drafted. I decided earlier this year that if I’m ever to get really good at designing and pattern-drafting, I would need to practise it a lot more – figures, right?! So that narrowed things down a bit (not)! Secondly, knowing the chances of me going to another ball quite so soon after, or even wanting to wear the same dress twice in any chase, were pretty slim, I wanted to make sure my fabric choice was a sustainable one.

Weirdly enough as I sketched out my design, I did imagine a damask curtaining of sorts. I just didn’t know I was literally going to strike gold in my local charity shop!

One pair of vintage gold damask curtains = £6 – Just enough fabric for a ball gown it transpires!

The design started out as a summer halter neck dress which I designed and made last year. I basically hacked the hip sections to create a silhouette similar to dresses of the 1700s. I can’t tell you why. I just did! Although if there was ever a wardrobe I could covet, it would most definitely belong to Marie Antoinette!

Gold damask ballgown outisde The Nell Gwynne Tavern

The styling of the dress was nailed quite soon and sewing it up was a relatively simple task, too but it was evident I needed some ‘scaffolding’ of sorts to make great shapes. There’s a lot of weight hinging on that halter neck and from past experience wearing my summer version, the back sags with its lack of support. So I created boning channels on the back and side seams to help it stay upright. I used plastic coated steel bones for no other reason other than I wanted to try something other than Rigilene. And I think I made totally the right choice. It felt very grown up to be cutting and filing them and sliding them in place. And I’m sure I’ll be finding more excuses to use them again soon.

Gold damask ballgown in Covent Garden

And then of course I had to find a way to give some body to those hip sections!

I first tried to gather some doubled-over strips of double organza and sewed to the curved upper seam, in a similar way that I did with the puffed sleeves on my Alice in Wonderland dress. I didn’t get round to blogging that but here’s a link to my Insta reel which explains it a little. This method gave a little boost but ultimately, the weight of the curtain fabric just flattened it down.

The second experiment was very nearly the one I settled on, which was to use sections of crinoline. I found it in Classic Textiles in Goldhawk Road – I had no idea you could buy it by the metre. And I wasn’t entirely sure this was what it was for, but I tried to make gathered side panels again to sew along that top curved edge of the side sections. It was in need of boning too.

I mean it was ok but made the dress very difficult to fold without hard-creasing the crin. Plus, it was very scratchy and would need another layer of lining at least. I just knew I could do better. There had to be a way. And then the penny dropped that I just had to go trad with full on 18th century panniers!

I Googled and YouTubed until I’d gleaned enough know-how to draft and sew a pair of pannier pockets from the leftover lining of the curtains. I already had some black bias binding, some white ribbon and some herringbone tape in stash so I thankfully didn’t have to fork out for any more materials. Not that I spent much on the curtains anyway!

There are three horizontal boning channels formed by the black tape, the top one is slightly shorter to create a gradual slope up to the hip and the whole ‘device’ ties around my waist and around each leg. Well, to be fair, it was Dan who suggested I tie the ribbons round my legs because for the do itself, I tied the front ones in front and the back ones in the back and it worked fine but restricted movement a little, especially going up and down the stairs but toilet trips were infinitely easier with this method!

I did end up lining the skirt section. And Im glad I did because it created a little buffer between the understructure and the fabric, smoothing out some lines and also made it feel more special to swoosh about in. I attached the section seams of the lining to the main fabric with French tacks to keep it from twisting round. That was a fun thing to do in the hotel room earlier in the day!

Gold damask ballgown in Covent Garden

The panniers are collapsible by the way, and fold flat which made for easy transportation to the ball and the dress itself didn’t even need an iron when I took it out of the case

Gold damask ballgown outside the Sarastro

I’ve shown a few in situ photos on insta and I’m sure the official event shots will be ready soon but I so wanted `Dan to do a separate London Shoot and I’m so pleased I manage to grab him for a session before he went away for work again and we are so very lucky that London presents so many wonderful locations for us to choose from. It turned out to be quite the history lesson too!

Gold damask ballgown outside the Sarastro

The first location was in front of York Watergate, once the river entrance to the Duke of Buckingham’s London mansion, and now stranded some distance from the water in Victoria Embankment Gardens. The impressive watergate is just a short walk into the gardens from Embankment tube station and was built in 1626. 

The second, outside the Nell Gwynne Tavern: Built on the site of the Old Bull Inn, It was named after the infamous mistress of Charles II. Nell, born and raised in the locality at St Martin in the Fields, sold fruit in the nearby Covent Garden market before gaining fame as an actress on the Drury Lane stage. Samuel Pepys describes seeing “the mighty pretty Nell” on his way to the Strand in 1667.

Next we went to Covent Garden which has been in existence since the early 1600s too!

Gold damask ballgown outside the Sarastro

The leafy shots above were taken outside Sarastro restaurant in Drury Lane. I went there years ago and it was an amazing feast for the eyes! Outside presents curiosity shop styled windows, framed in gold. Inside is the stuff of theatre dreams!

Before I sign off I must also mention my headpeice, hat, fascinator… I still don’t know the correct way to adddress it. But I made it. And I’m proud of it. And it was also formed from materials I already had to hand, ticking that sustainability box once more!

The plume is actually a piece of Pampass grass that I snaffled from the studio garden! The heart shaped pincushion is made from the leftover scraps of the dress, stuffed with overlocked offcuts and adorned with a gold lonesome vintage button from stash. I sprayed the pin heads gold, of course. The remaining flowers are made from scraps of the dress and lining fabric and the gold netting is also reclaimed.

I must also include this photo of me and my mum, taken at the ball. She is the reason I sew. I’m so privileged to have inherited so many skills from her and I’m so proud that at 80 years young she is still sewing and finally took some time out of making for everyone else to make herself a gorgeous gown too.

And all that remains to be said is thank you. If indeed you reached the end of this marathon post. Or even if you didn’t, I totally appreciate your time and support. If you have any thoughts or questions please leave them in the comment box below and I will very happily get back to you. I can talk about this outfit till the cows come home. Just in case you didn’t gather that already!

Portrait tote bag

personalised tote bag

What do you gift an incredibly lovely, clever, successful and well-travelled friend who doesn’t really care for ‘stuff’?

I didn’t know either but I figured something handmade and personalised would be the answer. So I set about creating a tote bag with an appliquéd portrait of the ‘birthday girl’ on the front.

To be fair I’m sure this bag still counts as ‘stuff’ but with a nod to usefulness at least!

I took the photo of Katy at the pub where we met before we set off for the wedding of our mutual friends. She looked amazing in her gorgeous hat that was made by our amazing milliner friend, Jayne Hepsibah. And it seemed to me an all-round perfect pose for a stitched portrait.

portrait of Katy

This project has been on my reminder list for weeks. But (note to self) January is a ridiculously busy month in the world of children’s publishing and in my capacity as a freelancer this basically results in all work and absolutely no play. Read no sewing time at all!!

So, true to form, I started making it in the morning and had it ready for the party that evening!

It’s a pretty time-consuming but relatively simple process.

I enlarged the image to the correct size, on screen and then flipped it (so she was facing in the opposite direction) before printing out a copy on regular plain printer paper. I scribbled on the reverse with an HB pencil to create a carbon layer and then drew around the key areas of the image to leave a traced line onto the backing paper of some double-sided fusible webbing.

I cut around these pieces with extra allowance before ironing into the reverse of my selected fabric pieces. That way, when they were trimmed, each piece was as accurate as poss and the sticky bit reached to all the edges and points.

applique pieces arranged

Then I ironed them in position on the bag front piece  in order that there was a little overlap in places. It was so satisfying to see it come together at this point.

And then for the machine embroidery I used a regular black polyester thread. (Moon brand) with a white embroidery bobbin thread. I believe you can get it in black too but white seemed to work fine with no show-through. I also delighted in using some water-soluble stabiliser which is just amazing.

I used a Sharpie pen to draw the linework onto the stabiliser and then overlaid it onto the working area before sandwiching all into an embroidery hoop. Luckily my hoop just about fits under the presser foot so I could ‘draw’ all the finer detail using the freehand embroidery foot. Black thread  for the most part. And then silver metalic thread for the ring and watch, metallic red for the feathers. Worked a treat. No puckering. No skipped Stitches.

machine embroidery detail of feathers

Even more satisfying was the action of peeling away the stabiliser. The little remaining fragments are washed away with cold water. Like magic!

stabilizer peeled away

Once dried, I sewed up the bag using some black cotton twill from stash and included a gingham lining and an ooobop label of authenticity, of course!

inside of lined tote bag

I’m so pleased with the result. Not least of all because it documents  fond memory of a lovely day we spent together, but it includes some memories in the fabric, too:

The calico is from a toile of a favourite dress; the hat is leftover from the red corduroy dress I made for my granddaughter and the silk lips are from my memade 50th birthday dress. All small scraps I couldn’t bear to part with but that now have the best use!

I loved making this so so much. Guilt-ridden in fact, for the joy it’s given me in the process of creating and giving.  Add to that all the memories that bubbled to the surface along the way and you end up with a bag full of sentimentality.

Here’s to good friends, great parties and an eternal basket of spectacularly inspired sewing projects!

Other things I’ve created employing appliqué

Martini dress

Personalised bunting

More personalised bunting

Zipper pouch

Why buy a dressform, tailors dummy, mannequin, dressmaker’s stand thing?

Adjustoform lady valet dressform bust

I managed a good few years of dressmaking without a dressform… tailors dummy… dressmakers mannequin… whatchamacallit! I didn’t consider myself at all worthy of such a professional tool. I don’t have room enough to swing a mouse in my house let alone space to accommodate an extra lodger, with a price tag.

But one day I took surprise delivery of a delightful pair of such assistants – one male and one female. Mr O had sought to surprise me with this very generous gift. Strings attached of course.

I’d always contested that it would be too tricky to make him shirts what with him being the illusive musician and the need for checking fit and all. So hats off to his persistence and problem solving skills!

I did make him a few shirts. Years ago, mind. And the tailors dummy was great for checking all the aspects of shirtmaking. It’s become a little redundant of late though.

But the female dressmaker stand  was dressed and draped repeatedly and undoubtedly earned her keep. The main issues I had with the female one were the colour and all the plastic bits. When I stood back from the mannequin and looked at my displayed work I couldn’t help wishing she was more classy – more graceful and more like those neutral coloured dressmaker stands with the tiny wooden ‘heads’ that didn’t distract from the garment and had better pinnability to boot! I also had illusions of practicing draping techniques to create some crazy unique styles and I just wasn’t inspired to work on this blue, now-rickety dressform.

She didn’t age well. The adjustment cogs became stiff. I think they were quite tight to start with. The covering got a bit patchy and loose in places. it wasn’t particularly padded, was difficult to pin to and the hem gauge accessory at the bottom just broke off one day. I never managed to use that part of it to be honest. Ended up with a more wiggly line than I would have created without it!. Instead I would stand her on a table and measure the hemline up from the table with a metal ruler, turning as I went.

But that in itself was a bit of a disaster one day when I realised the body had become loose on the stand and was spiralling down as I turned it.

She almost got her marching orders that day but guilt set in when the more caring me realised how ungrateful and wasteful I was being. She did the job… but she wasn’t nice to work with. That’s all. But that’s such a thing!

Well they do say ‘be careful what you wish for’. (I wished so much to have a nicer dressform, I can’t tell you.) One fateful day earlier this year my ‘delightful’ son had a proper tantrum and vented spleen on blue lady dressform. Rather her than me to be honest, though to be fair, the ensuing bisection was way more of a shock to him than it was me. He had no idea I was upstairs and had witnessed the attack and that I spied on him as he tried to reassemble the twisted wreck, quite-rightly panic-stricken.

Oh the joy on two counts of asking ‘does anyone know how my dressform came to be broken?’. He fessed up, with shameful apology and offered to contribute to a new one. I couldn’t take his dosh. I was too happy that I now had an excuse for a replacement.

May I introduce Adjustoform FG202 | Lady Valet Small 8-Part Adjustable Dressmaker’s Dummy. Naked as the day she arrived. And almost perfect in every way…

Dressform tailors dummy

I first caught sight of her at John Lewis Department store. And I know you shouldn’t judge on looks but that is definitely what drew me in for a closer inspection. The adjustment wheels turned easily – way easier than my previous model. The wooden stand is way more attractive and sturdier than the flailing metal legs of before and the ecru body covering is much easier on the eye and conducive to shooting garments of all colours. Best of all it has boobs!

adjustoform dummy from side

Well, kind of… I do exaggerate! But there is definitely more boob than I had before which helps immensely when checking, shooting or simply displaying a garment. As expected there is no means to change a cup size so a good workaround is a bra stuffed with a pair of two of secret socks! Or I have seen more accurate ways of padding the body with batting to create a more closely replicated size.

Although I was sold already, I’ve learned to reccy online and resist an impulse buy. In any case it wasn’t available to buy in store at the Westfield branch so I found one – a whole £40 cheaper – on Amazon. I took full advantage of the free delivery with my Amazon Prime subscription and she arrived box fresh the following day.

Assembly was a doddle. I didn’t question that there was no instruction booklet, deeming it superfluous to requirement in any case: The body slots into the pole and is tightened with a screw and the feet slot into the base.

lady valet wooden base

I later found said booklet under the flap of the box as I crushed it for recycling. But I’m glad I did as I would have never guessed to rotate the metal device at the base of the stand to hold the feet on. If you don’t do this the feet fall out of their slots when you pick up the dummy!

dressform metal device

So was it worth the investment I hear you ask?

Yes is the short answer. I definitely needed one since more often I am dressmaking professionally. I can leave a circle skirt to hang for the bias to drop, I can achieve a level hem in the absence of a client. I can stand back and see how the garment looks and hangs and I can rotate the body to see how it works at all angles.

The only shred of doubt in my mind is that I know that my Adjustoform Lady Valet is only a slight upgrade, mostly for aethetic reasons and will never be a substitute for a real person’s proportions

This isn’t a one size fits all. And so even with padding will only ever be as near as dammit. Only when I progress to super successful fashion designer extraordinaire status (in my dreams) can I afford the space and the expense of an army of models in varying sizes.

There is better padding on this dressform compared to the blue one but only of marginal difference. You still hit underlying plastic unless you go in at an angle with those pins.

The gaps in the adjustment areas not conducive for draping. For the records I haven’t ventured down that road properly yet. I tend to work with existing or self-drafted flat patterns, but if I wanted to drape and pin a design I would be better off with one of those other kinds of dressform/tailors dummy/mannequin/dressmaker’s stand things with collapsable shoulders like they had on the Great British Sewing Bee.

Do you use one of the aforementioned? What are your views? And pray tell… what on earth do you call it?

Personalised baby bunting banner

Lucas bunting banner

Welcome to the world, baby Lucas – our new gorgeous nephew!

I got a sneak preview of the nursery before he was born so I already knew the colour scheme. And he has cool rock ‘n’ roll parents so skull and crossbones were totally acceptable!

I attached the letters with double-sided bondaweb as I did before on Maddie and Charlie’s bunting but this time, instead of using the appliqué stitch, I used a regular straight stitch, quite close to the edge, to secure the letters in black. Appliqué stitch on my machine is slow and unless its visible – in a slightly or fully contrasting colour – there’s not much need to waste time or thread!

bunting banner stitching

There was a slight contrast issue with the letters against the background fabrics. So I sewed another line of white stitching around the letters to make them stand out more.

Lucas with his mum and dad, live across the waters in the sunnier climes of Florida (not jealous, much!) and so I was delighted to receive this picture of the bunting in situ, not long after posting the parcel.

lucas banner bunting in the nursery

Fancy that. My handiwork travelling all that way to hang in an American nursery! And incidentally, no longer bearing the name ‘bunting’. It’s now called a banner! Bunting in the US is more akin to a baby’s snowsuit. Interesting to compare the search results for ‘bunting’ on Amazon.com v Amazon.co.uk! Learn something new everyday!

Leaf buckle fabric belt and how I made it

leaf buckle belt

One of the many selling points of a vintage-style dress is the addition of a matching or co-ordinated fabric belt with a cute buckle. But as much as I love the look, I’ve always gone for the belt-free view just to avoid the extra work. What a shirker!

Until now that is. Until I made the Sew Over It Joan Dress. Apologies up front for the lack of said Joan shots but Mr O has done a bunk again and left me void of quality photography services. She’s all class is Joan, and no selfie is going to cut it, I’m afraid. Hoping to nab some shots in the next few days, though.

I found this cute little buckle, at my first visit to the Hammersmith Vintage Fair a few years ago. I’m not entirely sure how old it is or what it’s made of but it’s a weighty metal, inlayed with tiny turquoise and teal mosaic pieces. Shamefully I don’t even know what kind of leaf it is. Sycamore, grape vine? Any Girl Guides out there? It’s not cannabis thank goodness. That would be far too tacky!

The eureka moment to use it came in tandem with another when I remembered the lovely jade green wool crepe I’d squirrelled away for a vintage Hardy Amies number that I (ahem) put into Karen’s (DidYouMakeThat) Sewlution Jar just as many moons ago. So what a result. A pattern gifted by the lovely Alex at Sew Over It, perfect fabric in stash plus the prize jewel of a perfectly coordinated buckle!

So here’s how I made it. . .

Materials:

Fabric (waist measurement plus 4 inches x width to fit in buckle, plus seam allowance)

A length of Petersham waistband stiffener, 1 inch shy of fabric length and width to match

Velcro

matching thread.


Instructions:

With right sides together, pin fabric along the length, marking a gap either side of the centre point for turning. Sew along length with a regular stitch and then change to a longer length stitch or basting stitch for the gap:

pin fabric along length

Trim seam but leave the full allowance along the basted section:

trim seam allowance

Roll the seam from the edge to the centre of the tube and press the seams open:

press seam open

Unpick the central basting stitches to open the gap:

unpick stitching at gap

Turn the tube right side out, pulling each end through the central gap. You can do this by attaching a safety pin at one end and pulling through or if you don’t have one already, I wholly advise you to get one of these loop-turners! You just clip one open end and push the fabric over itself, like so:

loop turner

Give a good press, making sure that seam stays open and pressing the gap closed too.


give a good press

Insert the Petersham belt stiffener by attaching a large safety pin to one end and feeding through the central opening to one end. Repeat for the other end.

insert petersham belt stiffener

Ladder stitch the central and end openings closed and give another press:

ladder stitch

Top stitch on the right side. I find the stitch-in-the-ditch foot works a treat for this:

stitch in the ditch foot

Take a moment to admire said top-stitching. It’s the little things, you know! 😉

topstitching

Fold over and hand sew one end to the buckle. All buckles differ but same in principle:

attach one end to buckle

The next step is totally unsympathetic to any vintage techniques but I make no apologies because it works for me. I hand-sewed velcro to the other end to make it adjustable:

attach velcro

It’s foresight you see. There’ll be a few Christmas dinners before the year is out and I’m erring on the side of caution. Should have been a Girl Guide!

Hope you found this tutorial of some use I’ll be back soon to show how it in situ, on Joan!

TTFN x


Make a PINsentry card reader case


Barclays PINsentry case

It’s one of those annoying but imperative things that live in the bottom of my handbag. Forced to live there because I need it, always: The PINsentry machine. But the trouble is, there’s all sorts of other stuff residing at the bottom of that bag too: bobby-pins, small coins, powder-puffs, crumbs… you get the picture. And these things are not conducive for a healthy device. It’ll get sick and at somepoint refuse to recognise my card at the most crucial time. Two previous ones have already met with their demise. In justified protest, no doubt.

So after all these years, I decided to do the honourable thing and replace the obligatory deflated bubble-wrap protector for something slightly more glamourous. And I have decided for the good of the nations PINsentry card readers to detail each step in the making so you can give yours a better future too.

Please note that this size fits the regular Barclays Bank PINsentry machine for other sizes you will need to adjust the template.

Materials:

  • 2 small pieces of fabric each measuring at least 320mm x 160mm
    (1 kind for the outer, 1 contrasting piece for the lining)
    I cut mine from Cath Kidston fat quarters
  • Small piece of wadding (final size: 212mm x 137mm)
  • Choice of closure: velcro, button or press stud
  • Matching thread

Step 1

Print out the template from the link here: PINsentry_machine_case_pattern (making sure you print it at actual size) and cut the following pieces from your fabric:
1 x case outer in main fabric
1 x case lining
1 x wadding piece
1 x flap outer in main fabric
1 x flap lining

pieces for pinsentry case

Step 2

With right sides together, sew flap pieces together with 1.5cm seam allowance, leaving the top edge open as shown in (A) below. Trim the edges close to the stitching (B).


Flap construction

Turn the right side out and press. Top-stitch a quarter inch from edge, all round, excluding top edge.

flap topstitched

Step 3

Position the flap with right sides facing to the outer fabric piece as shown below. The flap should sit 20mm in from the left side. Sew along the top, inside the seam allowance. About quarter inch from the top edge.

flap to outer

Step 4:

Now to make a ‘sandwich’ of all the pieces! Following the image below, first place the wadding on the bottom, then your outer case piece with the flap attached, and lastly your lining piece, face down on top.

Stitch all pieces together along the top edge as shown.

fabric sandwich


Fold back the lining piece  and give a good press.

top edge sewn

Trim the wadding so it doesn’t extend past the fabric edges. And also trim the wadding close to the stitching on the reverse seam as below, right.

trim the wadding

Step 5

Fold the assembled pieces over – right sides facing – to make one long tube with lining at one end and the wadding at the other as shown below.  Make sure the central seam matches:

fold over assembled pieces

Now stitch all round, leaving a gap to turn through in the bottom of the lining as shown by the black line below:

stitch all round

Trim seams all round, close to stitching but don’t trim the fabric above the opening (C).

Clip and then ‘box’ the corners of the end with the wadding, as show below (D). Just sew diagonally half a cm or so in from the point.

trim leave opening

Step 6

It’s getting exciting now! Turn through, give a light pressing and sew the open end of the lining closed. You can slip stitch by hand or just machine stitch over the end as no one will ever see inside!

turn through and close end

Push the lining inside the outer case and admire those box corners!

right side out

Step 7

All that’s left to do is to hand sew some velcro or closure of choice and snuggle your PINsentry machine safely inside.

velcro finish


Sure beats a dilapidated placcy bag!

PINsentry machine

Little things like this make me smile and this little thing is no exception. There’s something quite cleansing about stepping away from the larger projects (I’m looking at you, Boer War Jacket) to get a sewing hit from the smaller ones.

But don’t worry. I’m not ditching the bigger stuff. Oh no! Just procrastinating…. just a little! 😉


Make your own Zhivago-inspired fur hat: FREE pattern download

make your own fur hat free patternquick sewing projectHappy new year lovely followers!

I’m so delighted to share this pattern with you as my first post of 2015. It’s a timeless, vintage-style fur hat that will keep you warm and toasty in the most stylish way possible! And it’s a real quick project to sew up for that quick sewing fix when time isn’t on your side!

It really is so super easy to make. Just download and print out the FREE_fur_hat_pattern and follow these few simple instructions. The hardest thing about this hat will be to get your hands on some quality fur of the faux kind!

The pattern corresponds to my head size which is 22.5 inches or 57 cm.
You may need to adjust the pattern to personalise the fit.

You will need:

  • 1/4 m of faux fur (retailers will only usually sell you 1/2m at a time but its often worth an ask!)
  • 1/4 m of lining fabric (or find some scraps in your stash)
  • coordinating thread
  • a vacuum cleaner to hoover up all the fluff!

Instructions:

  • Make sure you print out your FREE_fur_hat_pattern at actual size, and check with the test square (on page 4 of the pdf) that it has printed correctly. Cut out and paste the sheets together to match the layout on page 1 of the pdf. Complete the hat band and crown sections as full pieces as instructed on the pattern then cut out.

NOTE: Before you pin the pattern to your fur fabric, think about what direction you prefer the fur to lie. On this particular hat I made, the pile strokes downwards on the band, from the top of the crown, down towards my eyebrows! On the top circular piece, it strokes from front to back. Incidentally, the centre back of the hat is where the band is seamed.

TIP: When cutting your fur pieces, cut on the reverse and just snip carefully through the backing fabric so as not to cut through to the actual fur on the right side. You will achieve a much better finish on the seams.

  • Pin the pattern to your fur pieces and cut out, paying heed to the tip above.
  • Pin and cut out your lining pieces. It doesn’t matter for the circular lining piece but make sure the band is cut on a straight grain to avoid stretching.
  • Take your fur band piece and fold in half, right sides together. Pin the short ends together, making sure the fur is tucked inside, and stitch using a 1.5 cm seam allowance following the direction of the fur.

seam fur band

TIP: When sewing fur fabric, Increase your stitch length a little so prevent thread tangling.

  • Finger-press the seam open and hold in place with a couple of tacking stitches top and bottom of seam.
  • Pin the fur circular crown piece to the hat band, making sure the fur is tucked in and checking the direction of the fur is correct. See note above. Sew the seam using a 1.5 cm seam allowance.

pin and stitch crown to band
Pin and stitch crown to band

  • Turn right side out. Using a long craft pin (a normal pin or needle will do) drag it along the seam allowance to free the fur that has got caught in the seam.

picked trapped fur from seam with pin
Pick trapped fur from seam with pin

  • Now take your lining piece for the band, pin the short edges together as above and stitch with a regular stitch length and a 1.5 cm seam allowance. Press seam open.
  • Stay stitch the circular lining piece within the seam allowance, to prevent stretching.

Stay-stitch circular lining piece

  • Pin the lining piece for the crown along one edge of the band and seam together, leaving a about 4 inches / 10cm open for turning.

leave opening in lining
Leave opening in lining

  • With right sides together pin the rims of the lining and the fur hat together. Effectively the fur hat will be sitting inside the lining. Pin together, matching the two centre back seams and stitch along the entire edge, securing the stitching, beginning and end.

Sew lining to outer fabric
Pin and sew lining to outer fabric

  • Turn the hat to the right side through the opening left in the lining, and you’re almost done!

Turn hat to the right side through this opening

  • Pin the lining opening together, tucking in the seam allowance, and slip-stitch closed. With matching thread, obvs!

Slip stitch the to close the opening in the lining
Slip stitch to close the opening in the lining. With matching thread obvs!

Now all that is left to do is to don your new fancy fur hat, step out in the snow and hum the theme tune to Doctor Zhivago!

Please shout if anything is unclear. I’d be delighted to hear how you get on.

Faux Zhivago: handmade retro-style fur hat

handmade fur hat

I watched the film, Doctor Zhivago lots of years ago, snuggled up on the sofa with my mum. Can’t say I remember much about the plot but the music and the coats and the hats stayed with me for sure!

So when I found a crazy retro-style furry black hat in Oxfam, I knew I could and should shamelessly copy and create one of my own even if I didn’t have the lips to pull of a sultry pout, Julie Christie style.

So here is the Ooobop faux fur, Zhivagoesque, vintage-style hat that will laugh in the face of any Russian-style snowfall that threatens over the next few days.

handmade vintage style fur hat

I care not if my children walk ten paces behind me.

I care not if Mr O likens me to Rab C Nesbitt’s Wife.

And I care even less for all those sideways glances in the high street. They are just jealous eyes!

My ears are warm. My bad hair day is irrelevant. And Lara’s Theme tune is on loop!

handmade fur hat Doctor Zhivago style

The faux fox fur – I keep having to state faux because it actually feels too real to be faux! – was a bit pricey but it was a justified birthday spend up gifted by my lovely mum. I got it in A-One Fabrics in the Goldhawk Road and it is such good silky quality. Only needed half a metre and that was enough for a trial one that went wrong, this one which didn’t, and perhaps a matching fur muff to come! Do people even wear those nowadays?

I probably don’t need to declare that it was Mr O that took these fab photos – late last night, with next to no light but one of those god-awful energy saving bulbs and a few fairy twinkles. I certainly wouldn’t have had the patience. Very happy to sit with a glass of bubbly under the Christmas tree while he worked it though!

I was hoping to have a little tute prepared for you to accompany this post but that was serious wishful thinking on my behalf! Working on it nonetheless. And for anyone who fancies a furry head warmer like mine I’ll be posting a pattern and a tute next post, post-haste!

Till then lovely followers, I wish you all the loveliest of wishes; Wrap up warm, keep safe and beware the nutters on the road!  x

handmade fur hat

Handmade Secret Santa pressies

gold bag on the railingsWhen I saw this bag in December’s Burda Style magazine, I just knew it was the one I’d been storing in my head for over a year! I’d seen a very similar 1940s Vogue pattern floating around on the web, time and again but never for sale, at least not with a reasonable sale ticket!

vogue bag hat pattern v9837
Source: http://vintagepatterns.wikia.com/wiki/Vogue_9837

I’d almost resigned to self-draft my own but couldn’t quite get my head around the order of sewing. Didn’t really try hard enough tbh! But Burda saved the day yet again with another simple well-drafted design.

burda pouch bag
Source: Burda Style magazine December 2014

And so when I found out I was to make a Secret Santa pressie for the adorable vintage-wearing Emmie Ink Fairy, it was a given!

The instructions suggested leather, which I did originally go looking for. And believe it or not there is such a great colour choice as well in the Goldhawk Rd! But even after a good rummage, I couldn’t find a gold piece big enough to fit the pieces. I thought two pieces of gold lamb was a bit excessive and then gave up on leather altogether when I couldn’t remember if Emmie was a veggie/vegan. That might have gone down like a lead flipper!

As always it was A1 Fabrics that presented me with a better fabric solution: some lovely soft, gold ‘pleather’. Perfect!
It was an education to work with. A leather needle made light work but boy did we have a fight to press the stuff! Didn’t really think that through properly.

Gold pouch bag

Pleather is plastic, fundamentally, and will melt if it comes into direct contact with a hot iron. I’m not that daft. I did use some parchment paper as a pressing cloth. But it just boinged back the minute I stopped pressing. The heat was being retained and making it too pliable. So I grabbed the nearest ‘clapper’ I could find, in the shape of a heavy book, to slap down on the fabric once I lifted the iron off. It did the job in cooling down the fabric quicker and so holding the press a bit better. Not nearly as well as a woven fabric would have pressed but better than a poke in the eye for sure!

gold pouch bag

Burda’s instructions stopped at a facing but I wanted neater than that, so I made a lining to attach to the bottom of the facing, and of course included an ooobop label! Not such a secret now but I liked it as a finishing touch!

inside gold pouch bag

I stupidly didn’t get a picture of Emmie with it adorning her wrist but it didn’t look out of place with her beautiful pink sparkly dress.

We were at a lovely Christmassy do hosted by the BHL girls. So honoured to be part of the evening with so many wonderfully familiar faces.

We dined and beered at a local-to-me Polish restaurant called Patio. I seriously don’t know how those girls catered so brilliantly for over 30 of us with so many different menu choices. They were amazing.

And look what some gorgeous and not-so-secret Santa made for me!

quilted cup and saucer

I seriously couldn’t believe that someone could have made this quilted cup and saucer but when I realised it was the uber talented Rachel Pinheiro, it all made blinding sense!!

What’s not to love about the colours, the french men in their Breton tops, the moustaches and the candy stripes? Perfect to keep all my sewing notions from rolling around the table while I’m sewing and also for sticking pins and needles in as I go.

Earlier in the day I had been to a work Christmas lunch. Yes I know, 2 Christmas do’s in one day. And I was still standing! One of my secret-santa friends bought me this gorgeous sewing pattern. She is so bloody clever and so thoughtful! I can totally see myself in this dress already!

Vogue V2410 vintage dress pattern

I consider myself truly spoilt. Not just with do’s and gifts but with the plethora of amazing friends that bring me so much joy and make me laugh so much. That’s got to be the best part of any time of the year.

Have you made any gifts this year or is it all just too much?


ooobop’s top 40 tips on how to be an awesome sewist

top 40 tips

I had a little trip down memory lane yesterday, looking back at old projects and it was a real eye opener as to how far I’ve come and how much I’ve learned. There’s plenty more I need to learn and – hoping I’m not teaching too many grandmas to suck eggs, here – I thought I’d share some of the things I’ve learned so far.


1. Never sew when you are tired

It’s a tough rule for those of us who can only sew late at night but really it’s a no-brainer and don’t say I never warned you: Seam allowances will be forgotten, sleeves will be sewn to neck-holes (Ring any bells, Rosie?!) and insides will become outsides quicker than you can shout ‘dunnit!’

2. Measure twice and cut once

I had it said to me all my life by my mum so now I can share this irritating but seriously useful tip with you, my sewing friends. BTW she used to say it in a really squeaky irritating voice too so I’m hoping that will chew into your head as much as it did mine, soz!

3. Invest in a good machine

If you are lucky to inherit a good one then great. But advice from the mother was not to spend anything less than £200 for a newbie. It needs to be heavy enough not to dance all over your table with a reliability factor from a good brand. No fancy stitches needed. Just the usual forward, backwards and zigzags will do. Most have a buttonhole stitch and and a few fancy stitches for that price range too.

4. Learn from the mistakes of others

Stands to reason that you will learn from your own. You will only ever sew a sleeve on back to front once (twice perhaps). You will only ever forget to add seam allowance on a Burda pattern once (well maybe three times). But seriously, before you start sewing from a commercial or indie pattern, or if you are trying a new technique for the first time, have a scout round and see what everyone else came up against. You can always post a comment on a sewing blog and ask how they resolved their issues. Sewing bloggers are always your best friends.

5. Make notes

Either on the pattern piece itself, on a notecard in the envelope or digitally documented if you are that super organised, you will thank yourself later for keeping notes about what you changed from the original. You might think you have the memory of an elephant, but believe me, fellow sewists, I speak the truth when I declare that we have the memory of a goldfish when it comes round to sewing a repeat project. Or is that just me?!

6. Practice, practice, practice. . .

It’s how anyone gets good at anything they are good at. In fact it is the only way. Nobody is born great at anything. But everyone has the opportunity to be brilliant at something if only they practice enough. All you need is the passion for it. It’s not a tough call. Just keep sewing!

7. Change the needle

The word out there is to change your needle after every project. I admit to being a one-needle-two-project rebel but I do change it all the same. It needs to be an appropriate needle for the fabric too. Generally speaking:

70/10 universal  for light/ sheer fabrics
80/12 universal for light to medium cotton/linen/wool/polyester
90/14 universal for medium to heaver cotton/linen/wool/polyester
100/16 jeans for heavy denims or for hemming jeans

And a good idea to take note of the size of the needle that you last left in the machine, or put it back in a box (marked used) so you can remember what size it was. Impossible to tell otherwise.

8. Don’t skip the stay-stitching

It’s tempting I know, but just think how much you will be saved from the embarrassment of a saggy neckline, or a droopy waistline. Don’t even wait for an instruction. Any area cut on a curve or on the bias will need some stabilising or else it’s going to stretch all over the place when you come to sew it. Sew, using a regular stitch, about 1cm or 3/8 inch from the edge of your fabric, within the seamline. Stay-stitching is most effective when sewn from outsides to insides. Ie from shoulder to centre neckline or from side waist to centre waist. Repeat for the other side.

9. Read those instructions

Obvs! I’m going to put my hand up right here and confess to skip reading instructions. I always think I’ve got it. Mostly I have but I’ve also come unstuck by not paying attention. What I tend to do nowadays is take instructions to work, read them on the train, read them again in my lunch hour. Make the garment in my head on the journey home or in the shower the following morning. That way I know ‘exactly’ what I’m doing when I come to make the actual one for real!

10. Be precise in all that you do

I’ve mentioned the ‘measure twice cut once rule’ Ooops there’s that squeaky voice again. But precision is the key to perfection. Cut out your pieces accurately. Make sure your seam allowances are 15mm or 5/8 inch all round. Transfer your pattern markings accurately. It pays off, I promise you!

11. Mark the wrong side

The light in my house is not that great. Even during the day. And the times I’ve sewn right sides to wrong sides is too many for sure. In fairness, sometimes it’s really tricky to tell right from wrong even in broad daylight. It could be argued that in that case it doesn’t matter, but all the same, if you want the consistency, mark the wrong sides with a chalked cross as soon as you have cut the pieces.

12.  Don’t watch the needle

In order to keep that seam allowance at a consistent 1.5cm 5/8inch, align the edge of the fabric to the marker on the foot-plate. There will be various markings on there and if you keep the edge of your fabric lined up against it you will guarantee a consistent allowance. If the markings on your machine are not clear enough, stick down a strip of masking tape to define the guide.

13. Tie off your darts

Never back-stitch at the point of a dart. You will get nipples where you never thought possible! Instead, run the stitch past the end of the point and leave the ends of the thread long so you can tie them together with 2 or 3 knots. Trim the remaining threads to no shorter than an inch.

14. Use a press cloth

Unless you like the scorched and shiny look, always use a press cloth. I generally use a piece of white muslin but a velvet press cloth can be used for velvet so you don’t upset the pile (thank you Scruffy Badger!). A wool cloth will hold moisture and is therefore great for pressing wool that needs a good steam. Silk organza is great because you can see through it. Especially useful when pressing pleats (thanks Karen!)

15. Ditch the blunt pins

Get rid. They only exist to ruin your work. The minute you feel one resisting when you push it through your fabric, throw it away immediately. Don’t just put it at the end of your pincushion, earmarked ‘the end for bad pins’. Yes I’m looking at you, ooobop! OR if it’s not too late, invest in an emery pincushion. What’s one of those? I hear you say. Ever seen the tomato/strawberry pincushion combo and wonder why? The small strawberry counterpart is filled with emery, an abrasive mineral that will sharpen those bad ass pins as you push them in. You can buy a Large Tomato Pin Cushion-With Emery Strawberry from Amazon. And if you crafty sewers fancy making one yourself you can buy the White Emery For Pincushions-4 Ounces especially to fill said pincushion. That way, I guess it doesn’t have to be a tomato or a strawberry if you don’t want it to be.

16. Back tack, back tack!

If only I could incorporate all the silly voices my mum used to do! It’s very duck like, that’s all I can tell you! But yes, Back tack, back tack, beginning and end to secure your stitching… But NEVER at the pointy end of darts!

17. Trim and clip

In the past, I’ve worried that if I clipped the curves, the stitching line would come undone. (yeah right, more like worried about having to do something extra!) So I’ve left that bit out and suffered the ugly, bulky mess as a consequence. It doesn’t come undone. I can assure you. If you trim the seam allowance to about half, snip the curves close-to not in-to the stitching line and give it a good pressing you will have a perfectly neat and professionally finished curved seam. If the curve is on a neckline for instance you have further reassurance if you stay stitch the seam allowance to the lining or facing.

18. It’s not a race

More haste less speed! Another of the very annoying mum comments, sorry, but nonetheless important. You can say it anyway you like but it’s true. It is impossible (unless you are hugely experienced) to get a straight line of stitches when your foot is down to the floor. And there are no prizes for finishing first because you are the only contender! Think each stage through before racing on to the next bit. It’s all to easy to miss a crucial part of the process if you are steaming ahead.

19. Needle position

Don’t forget to move the position of your needle when you change feet. particularly when using a zipper foot. It frightens the life out of me when the needle inadvertently hits the foot!

20. Needle security

Which brings me onto another scary point. Every time before you sew, make sure that needle is securely fastened in the shaft. Turn that screw nice and tight. I’m sure certain stitches make it work loose and I know for a fact that my side cutter foot wobbles it around enough for it to come loose. I’ve taken to checking the needle is secure when I’m using this foot even during a project. An airborne needle tip is a very hazzardous thing!

21. Press and cool

I was very lucky to spend some time with a lovely tailor friend last year. I learned so much in such a short space of time and one thing of the many things I took away with me was this fabulous pressing tip: After steam pressing, use a wooden block to press down on your crease to take the heat away quickly. Don’t move the creased section until it has cooled. Akin to setting ones hair in rollers I guess!

22. Baste away

Hands up who bastes? No takers? Well actually not me very much either. But we all know we should, don’t we?! So let’s do it. Especially if it’s a shiny fabric that’s going to move. Especially if you’ve invested your hard earned dosh in this lavish piece of cloth that is going to be your signature gown. Escpecially if you’re going for Chanel over Primani! It makes sense.

23. Bobbins at the ready

Have a selection of bobbins pre-wound in your most used colours. Particularly black, white and a neutral colour. There’s nothing more irritating than having to stop, mid-flow to wind a bobbin. There is however, great joy in delegating the task to a small child if you have one of those floating around. In fact one of my smalls bought me a fabulous Side Winder – Portable Bobbin Winder for my birthday and still lays claim that it is her job to wind my bobbins. I’m not arguing!

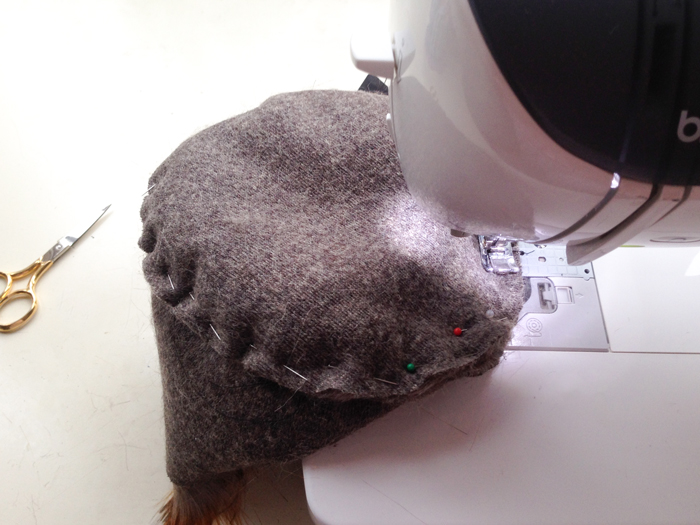
24. Pins pointing in

It’s still not second nature and I still have to make an effort to think about how I am pinning things together. It’s important NOT to sew over pins (broken needles, wonky seams, need I say more?) and so it’s just as important to pin those pins in a way that they are easily removed as you sew up to them. Remember that the bulk of your work is on your left and the seam allowance will be on the right as you sew. Pin along the edge of the seam allowance at right angles to your fabric with the points of the pins facing into your work and the heads of the pins on the outside edge so they can be easily removed as you go. Pinning parallel to the edge means you cannot otherwise sew as close to the pin and if it happens to be in the wrong direction you are at risk of a pin point down the end of your fingernail… and you don’t want that!

25. Trace your pattern pieces

Particularly if they are vintage. They’ve lived this long and don’t deserve the abuse of pins and rips! I learned the lazy way and lived to regret trashing one of my favourite patterns. Half an hour would have been enough to duplicate and would have also been a perfect record for any adjustments. I have no qualms about scribbling on or slashing and spreading a duplicate tissue. Even modern patterns need to be preserved. If they are multi-sized, you’ll kick yourself if ever you needed to return to a smaller or larger grade. More so if you cut the wrong size to start with!

26. Keep distractions to a minimum

Easily said. Especially if children, small animals and musician boyfriends are at large, so choose your sewing time carefully. Interruptions so easily disrupt a chain of thought. Keep the radio to an acceptable level and don’t try to watch Madmen when you are figuring out something tricky!

27. The rotary cutter

Not just for quilting, the rotary cutter and a large self-healing cutting mat are the perfect buddies for cutting fine or slippery material. Add to the equation some decent pattern weights and you can avoid any amount of movement as you cut your delicate fabric.

28. No gathering unravelling

Have you ever suffered the nightmare of gathering up some fabric only to inadvertently pull the whole thread through? Or have you ever struggled to gather a length of fabric to a set length? One way to solve this is to pin a pin at one end of your gathering stitches and wind the ends of the thread around the pin before you pull up the gathers. I sew two parallel lines of long stitches to get even gathers and then when I pull them up to the desired width, I pin another pin at the end and wind the excess threads around that one too. It helps to keep everything in place when for instance, I sew a gathered skirt to a bodice.

29. Handy tip for hand-stitches

I’ve learned to enjoy hand-stitching. It’s taken a while. But I get it now! It’s no longer a chore, more of a treat. But there’s something that makes it just that bit more pleasurable and that’s the nack of having a thread that doesn’t tie itself in knots halfway round your hem. Beeswax is the answer to a gliding knot-free thread. Just run the thread across the block so it becomes coated before you sew.  The lovely Claire over at The Thrifty Stitcher also advises to make sure your thread is no longer than arms length plus half your chest, to avoid the same.

30. Snip loose threads

If you are going to take the time to make something of quality, snip those loose threads. It’s actually quite satisfying if you have a quality pair of Snippers. And your garments will thank you for looking all the more professional.

31. Find your style

Ask yourself why you started sewing. Was it because you wanted to save money? Well you might have got a bum steer there! Was it just because you had hours to fill. I doubt that! Or was it simply because you wanted something original and well-fitting in your wardrobe that nobody else would have? Think about what you like and what you want before you dive headfirst into any old sewing project. Will it suit you? Will you wear it? Where will you wear it and how often? There’s no room in a wardrobe for wasted hours and unworn clothes. Ask yourself ‘is it you’. And if it is . . . go to it!

32. Help 24/7

You are never alone. Never! In those small wee hours in the morning when you are stuck on your final stage or you really cannot for the life of you remember how to use your buttonholer, Google it, go to YouTube, Tweet your problems, ask a blogger on the other side of the globe. You have every learning resource at your fingertips, 24/7. How exciting is that?!

33. Lock up your scissors

Make everyone in your household aware that your fabric scissors are to be used for cutting paper on pain of death! Never use fabric scissors on paper, NOT EVEN PATTERN PAPER. It blunts them and quality tailors scissors are not cheap to sharpen. Have a separate pair of scissors for paper cutting. You will see just how quick they are to blunt. But a quick tip to sharpen paper scissors is to ‘cut’ round the neck of a glass milk bottle or similar. Strange but true!

34. Leave your comfort zone

It’s very easy to stick to what you know. And you might be very happy in your comfort zone but if you want to learn more you need to leave that cosy space and give yourself a little push. Don’t be afraid to tackle things you’ve been too scared to try. You can line a vent, you can bind a buttonhole and there’s no need to be afraid of the big bad welt! Think of all the new possibilities that could grace your wardrobe. Its also a good idea to make for someone else. You learn to gain new fitting skills real quick when you’re aiming to please someone other than yourself! Just remember that nobody knew how to do anything before they learned. And then they practiced and then they got good at it!

35. More than one way to skin a cat

It took me a long time to realise that there are no set rules in sewing. For sure you need some guidance in the beginning but you will quickly learn to trust your own instincts with the more experience you gain. Some methods of instruction can be ridiculously complicated with unnecessary added stages. It’s up to you and your common sense to make life easier for yourself and work in a way that suits you. You only have to Google the methods of inserting a zip to realise how many different ways of simply doing that!

36. Invest in a few choice books

Whilst the internet will deliver everything you will need to know about everything, there’s nothing quite like a collection of inspirational books to hand. Some of my favourites include a New Complete Guide to Sewing: Step-By-Step Techniques for Making Clothes and Home Accessories (Reader’s Digest), a 50s pattern cutting book, Love at First Stitch: Demystifying Dressmaking and a Fit for Real People: Sew Great Clothes Using ANY Pattern (Sewing for Real People). There’s nothing quite like a sit down with a cuppa and a good read! It’s a good idea to check out your local library (if you still have one :-/) or if you are feeling like splashing out, Amazon have some good deals:

37. Prewash your fabric

I know. I’ve been there. Heat of the moment and all that. You just want to get cracking and you really can’t wait another day for the fabric to wash and dry. But I can assure you. If you don’t pre wash your fabric before you sew it, you stand a good chance of not getting more than one wear out of your lovely new dress. Cotton will shrink. It’s a fact. So will wool. Undoubtedly. Even viscose. In fact most fabric will change in some way after a launder at any temperature. So don’t skip the prewash!

38. Don’t trash your scraps

I can’t bear to throw even the tiniest of frayed cut-offs in the bin. Breaks my heart, it does. I cling onto every last piece struggling to find a use. So only the tinyest of pieces meet their demise. I keep hold of decent sized pieces for tops or knickers or scrapbusting gift ideas (that mostly never get realised) but smaller patchwork sized pieces or remnants that I honestly wouldn’t use to make anything else with, get donated to my local after school club. The children love it when I bring in a sack. And it’s so lovely to see all their collages and creations around the classroom when I go to collect my daughter. So check out your local school and ask if they could use your scraps. It’s lovely to know that it doesn’t go to waste.

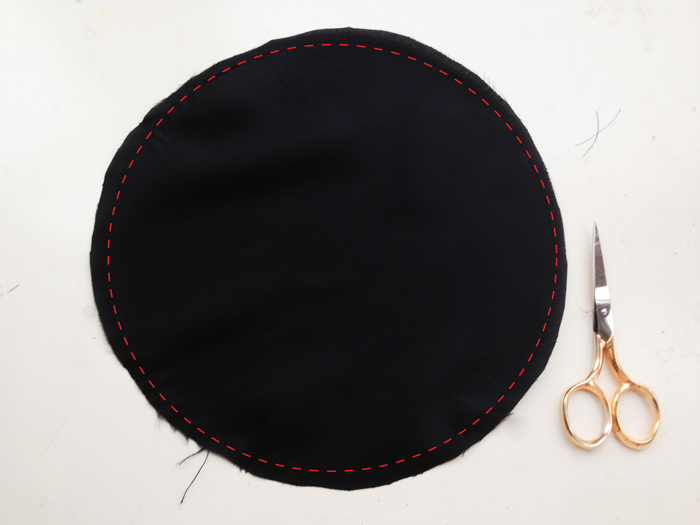
39. Sewing in the dark

If you have black or dark fabric to sew, save it for a daytime project. Unless you have some seriously good lighting, it truly is a nightmare. You really don’t want to be unpicking black thread from black cloth under substandard lighting. It is not fun. I have got round this of a fashion by sporting Mr O’s camping head torch. It works to a degree but I’ve ended up with a bloomin’ stiff neck before now, where I’ve tried to focus the light on one spot!

40. Love what you do

Not really a tip. More of a reminder to relish every moment of each and every one of your projects. Sewing is therapy. It will keep you sane when everything else is driving you mad. It will bring forth a beautiful wardrobe hand made by you. It will fill you with pride and teach you about ethics and if it hasn’t done already, it will soon lead you to meet some of the most amazing like-minded people that you might never have met otherwise. So savour every stitch and love what you do because you have something really special and that really is all that you need to be an awesome sewist!

Feel free to Tweet, pin, reblog and share. Thank you always, my awesome readers. x