A proper pencil skirt

pencil skirt

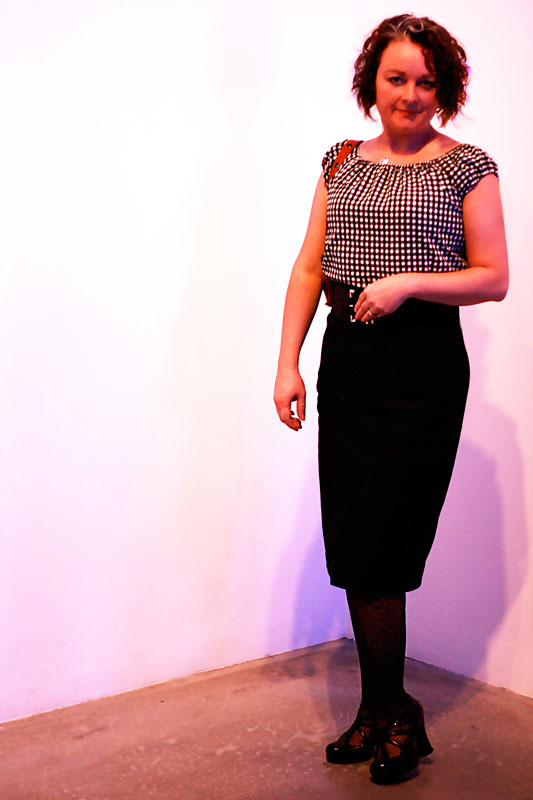
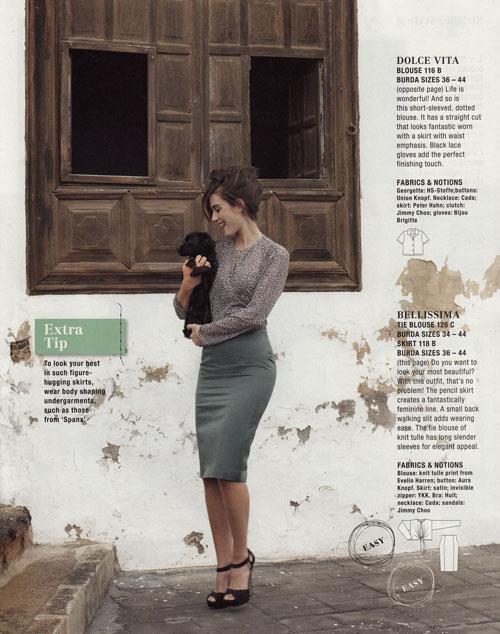
I do believe I have sewn a garment in the same month as the current Burdastyle! Not sure that has happened before. But I was very excited about April’s edition and I knew I would make this skirt.

burda_april_2012_puppy

I love classic, timeless styles. And the pencil skirt is no exception. Worn anywear, anytime, dressed up or down, it makes getting dressed for work or an evening out, a mindless operation! I also love that it can be modern or vintage, whatever you team it with.

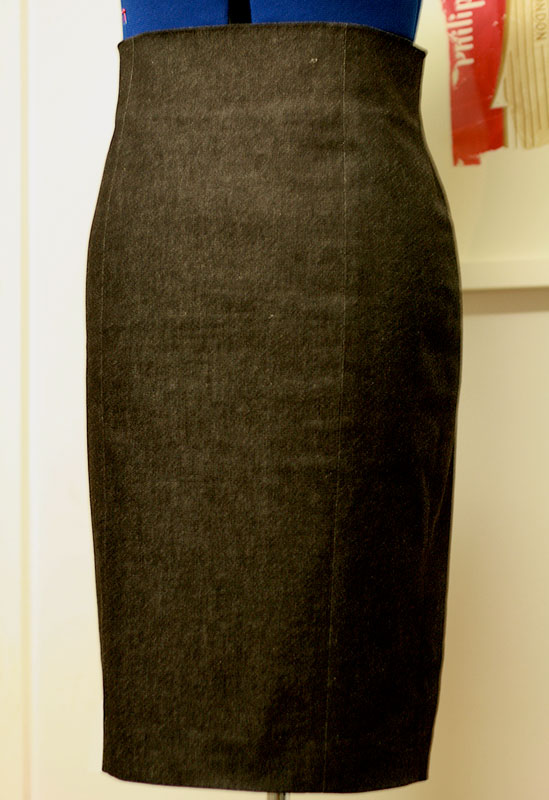
Satin was the suggestion for this particular version but there was another one with a gabardine recommendation. Satin is a bit too posh for work and everyday so I set off to get some gabardine. I bought some but wasn’t filled with the usual glee once I’d parted with my cash. Praps it will soften a bit in the wash, I thought! But just as I was on my way out of the shop my eyes continued searching – as they always do – and I spotted some black stretch denim. That’s the stuff, I thought. And I was right. Comfy, casual but smart and sturdy enough to hold me in, in all the right places!

pencil skirt

This is possibly the shapeliest pencil skirt pattern I have come across. Largely due to the panels and princess seams I would assume. It is really high waisted and a lack of waistband allows for a shapely top at the waist, or near under-bust!

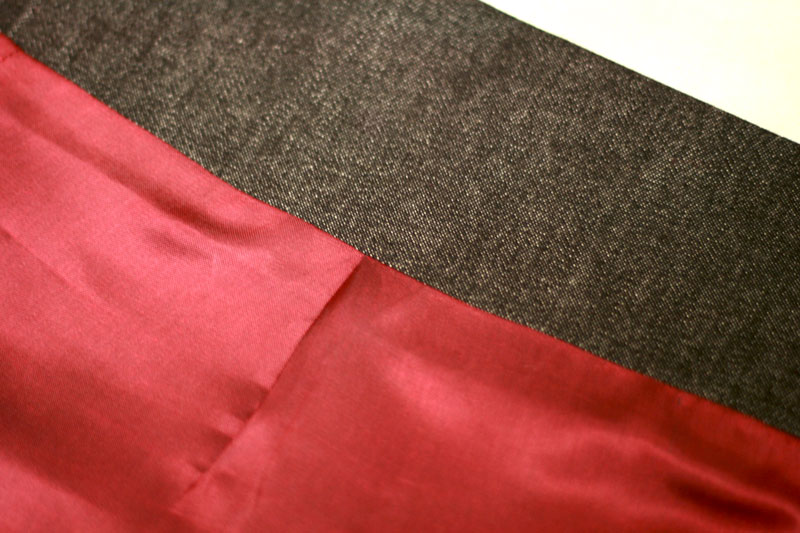
The instructions didn’t relay details of a lining and I have learned hard lessons from not including one so I dug out some deep red poly lining, cut the same pieces as the skirt, minus the facing and allowed a pleat in the front.

lining pleat

I felt quite pleased with myself for remembering this trick but alas it wasn’t enough ease to have just the one in the front. I should have really allowed for another two, one at the top of each back panel. It really is a very snug fit!

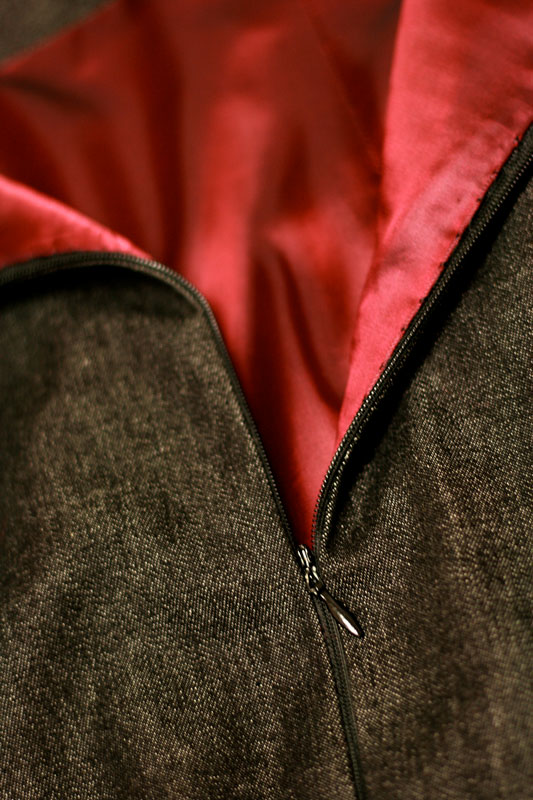
The invisible zip went in without any probs. It lines up and everything!

invisible zip

I will definitely return to this pattern at some point and would love to make a posh version and include the couture techniques suggested on the Burda Style website, namely adding boning, underlining etc.

But I seriously must not veer off the project list any more than I already have! I have much more interesting projects to fry, not least of all my jacket! I can report that it is, at last, taking shape, all be it in the initial stages, but it has a body, nonetheless, and some welt pockets with flaps and a collar ready and waiting its turn….. honest! 😉

ooobop! gypsy top #2

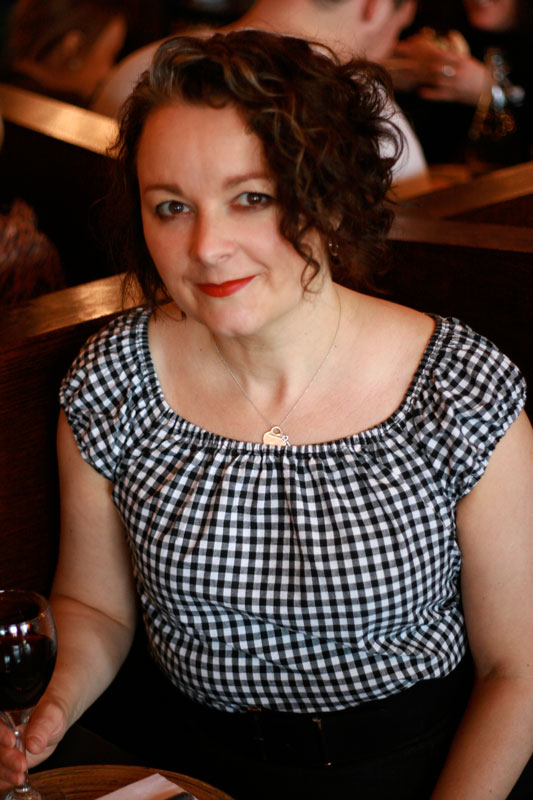
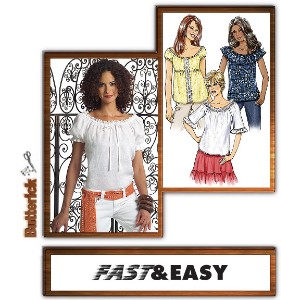
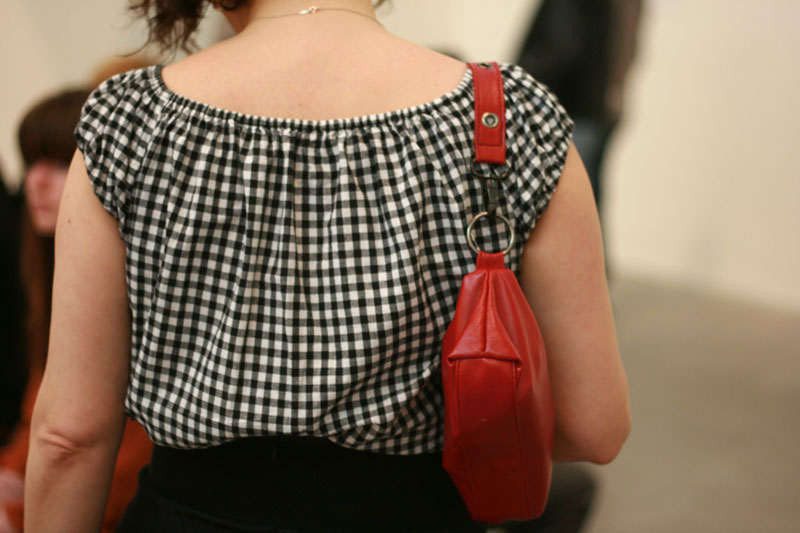
gypsy top frontThere is something quite comforting about visiting an old pattern. I made my first gypsy top almost a year ago and not only have I had great use out of it, it made a great addition to Dorothy’s ensemble too! Once again I used Butterick B4685, Fast and Easy… and indeed it was.

butterick b4685 sewing pattern

I used view D this time but omitted the front lace panel. I did originally include the underbust elastic but when I tried it on, tucked in a skirt, which is mostly how I intend to wear it, I looked a little (more) like the Michelin Man! So out came the elastic, quicker than when it went in!

I used a remnant of cotton gingham that I picked up from Oxfam, and used every last bit of it! So very satisfying especially as I’ve since found that 100% cotton gingham isn’t that easy to get hold of. Well not in a choice of colours. Despite my local plethora of fabric shops, they all stock poly cotton gingham, for the demand of school dresses, apparently. It looks just as pretty for sure but pure cotton feels so much nicer against my skin.

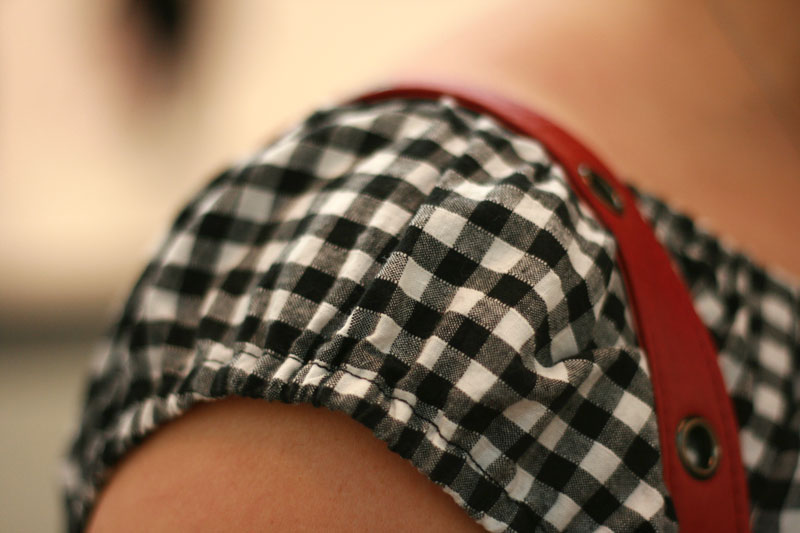
I prefer the sleeves and the simplicity of this style. Its less fussy and so quick to make up. I am going to make a few more, lined up for summer, and my eldest daughter has put an order in for one too.

gypsy top sleeve detail

It also made sense to enter this into Made by Rae’s Spring Top Sewalong 2012, just as I did last time round. Its not nearly up to the standards of most of the beautiful tops over there but I’m liking the annual inspiration of creating a new tops for Spring all the same! You can see this and all the other entries over at Flickr. My entry has been successful so I will keep you posted when it is time to vote! 😉

gypsy top back view

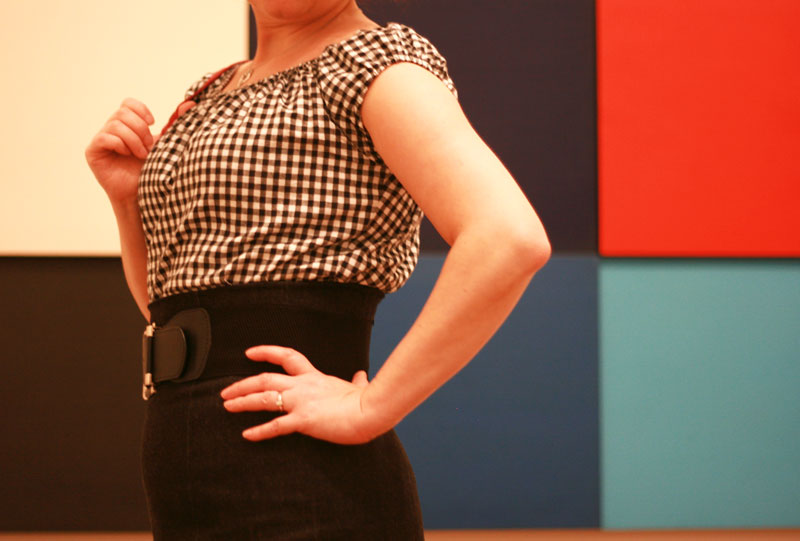
I wore it out to a trip to the Tate Modern yesterday with Mr and Little Miss Ooobop! and I have to say it is perfect gallery wear. It’s always soooo hot and stuffy in the galleries. The artwork made for a choice back drop too!

gypsy top side view

Hope you are all having a wonderful Easter break 🙂

The Diamond Square block

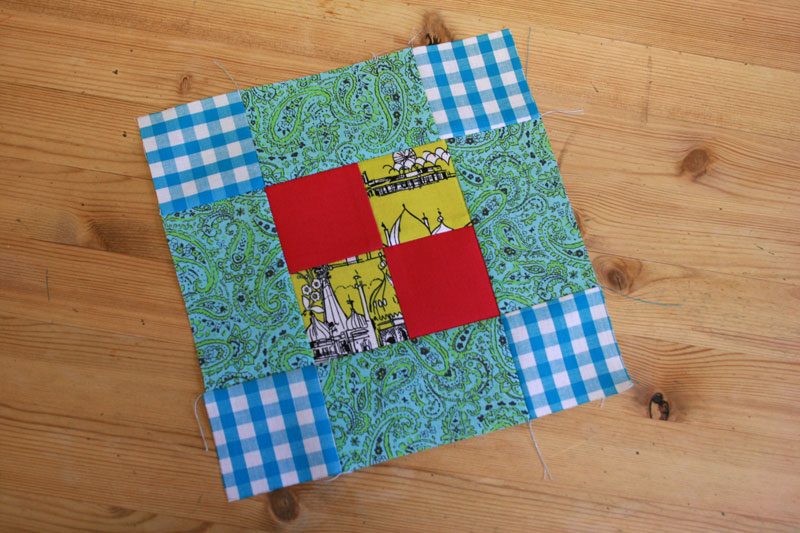
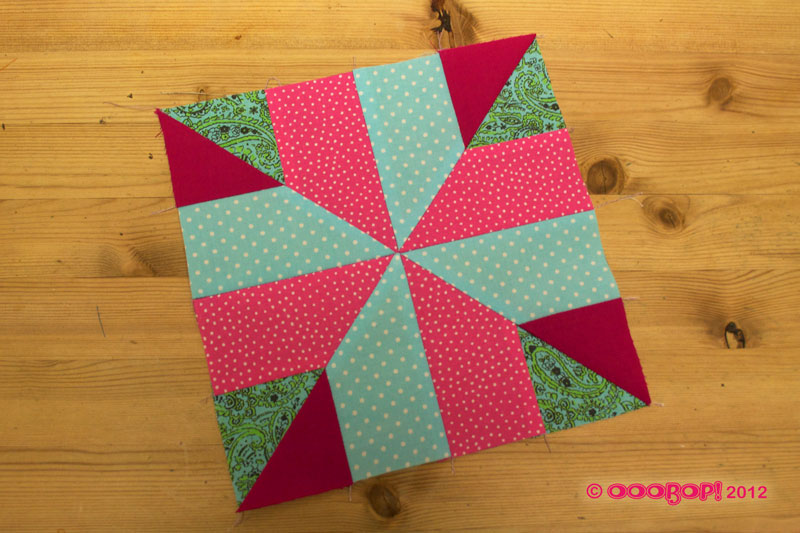
Diamond square quilt block

The Diamond Square block is number 8. That makes me a tenth of the way there… woohoo!! I wasn’t joking when I said this was going to take me over a year to make! The ‘pile’ (if you can call it that) of completed blocks is slowly growing. and issue 11 of the Art of Quilting has supplied the first batch of sashing (the white fabric that will join them altogether). I have yet to complete blocks 9 and 10 before I begin that task, when I shall then present them as one – a far more interesting post I’m sure!

I am happy to report that this particular block was a breeze. It is based on 2 sets of triangles around a central square. The central square allows for the use of bigger print and with the contrasting outer levels gives a great illusion of a square in a square in a square. All points matched up this time and I particularly like how it worked on the reverse!

diamond square quilt block reverse

Block Facts:

Name: Diamond Square block
History: This block design appears on quilts dating back to the 1870s. It is also known as ‘Pride of Holland’ or ‘Night and Day’
Level: beginner
No. of pieces: 9

Progress report:

Block 1: The Double Four Patch
Block 2: The Whirlwind
Block 3: The Sailboat
Block 4: The Shoo-fly
Block 5: The Trafalgar
Block 6: The Windmill
Block 7: The Chequer Square
Block 8: The Diamond Square

The Chequer Square quilt block

chequer square block

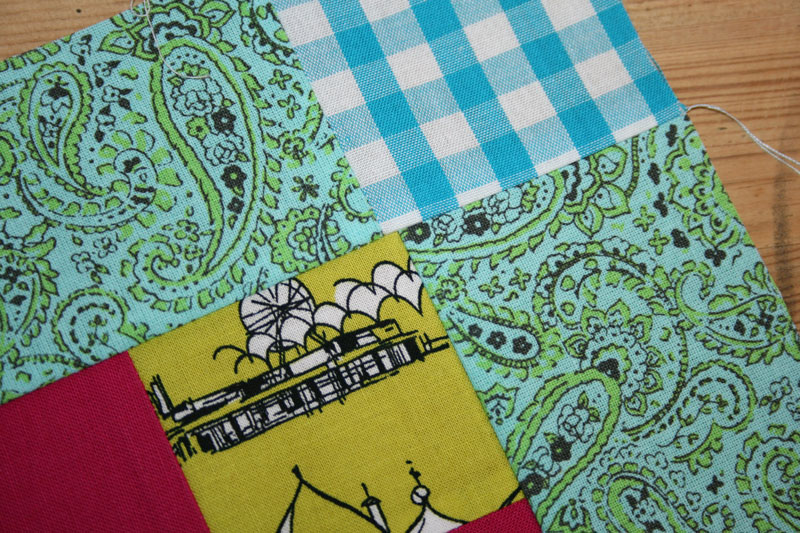
‘A simple combination of squares and rectangles makes this block easy to piece…’ For some, may be! This is the Chequer Square block, number 7 in the series from The Art of Quilting. For sure, it looked easy enough and I was quite looking forward to not having any triangles and points to line up. But I still messed up, doh!

chequer spare block detail

I am trying really hard to ignore the misalignment as I proceed with the other blocks but it is really niggling and I might possibly go back and sort it out… but then again… who’s going to notice this in amongst the other 79 quilt blocks?! 😉 I guess that’s what handmade quilts are all about!

Block Facts:

Name: Chequer Square Block
History: Similar designs, of different dimensions but all based on a simple arrangement of squares and rectangles, can be found on some of the earliest surviving quilts.
Level: beginner
No. of pieces: 12

Progress report:

Block 1: The Double Four Patch
Block 2: The Whirlwind
Block 3: The Sailboat
Block 4: The Shoo-fly
Block 5: The Trafalgar
Block 6: The Windmill
Block 7: The Chequer Square

Post War British Textile design

fashion and textile museum

Today, I took full advantage of my freelance status, ditched the children for a couple of hours and headed off to the Fashion and Textile Museum, near London Bridge, to see Designing Women: Post War British Textiles exhibition. What a totally self-indulgent treat!

The intro to the exhibition:

“Britain was at the forefront of international textile design in the 1950s and 1960s. The art of textile design radically changed after the Second World War and three women artists working in England in the 1950s were pivotal in this artistic revolution. The drab days of the War were transformed by the fresh, progressive designs of Lucienne Day (1917–2010), Jacqueline Groag (1903–86) and Marian Mahler (1911– 83). Designing Women: Post-war British textiles showcases their work beginning with Lucienne Day’s ‘Calyx’ pattern of 1951, featured at the Festival of Britain, and moving through textile commissions of the 1960s and 70s. The exhibition features more than 100 works.

Original artist designs with bold abstract pattern, as well as the use of saturated colour, marked a dramatic departure from conventional furnishing fabrics. This new wave of bold textile designs, helped to bring the influences of the art world, in its most recent, refreshing, and largely abstract forms, into the contemporary home.”

The influence of modern art is so strong in all the designs of this period. Its very easy to spot some iconic inspiration from Joan Miró, Alexander Calder and Kandinsky.

Lucienne Day, wife of Robin Day, was the most prolific and successful of the designers having kick started the ‘revolution’  with her ‘Calyx’ print in 1951.

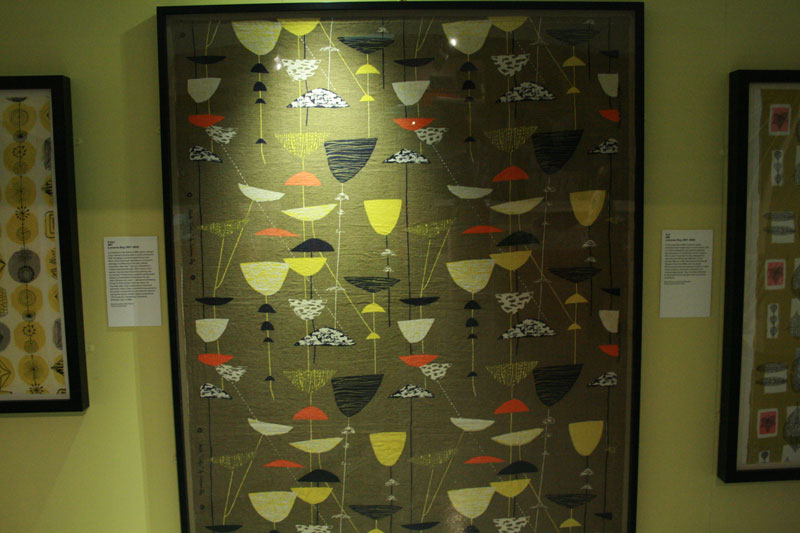
'Calyx', Lucienne Day  1951
'Calyx', Lucienne Day 1951

Heals, though at first very sceptical, was her first client. The work was considered too modern but the risk proved to be a good and profitable move for both parties. Lucienne Day was the first artist to be credited on the fabric itself.

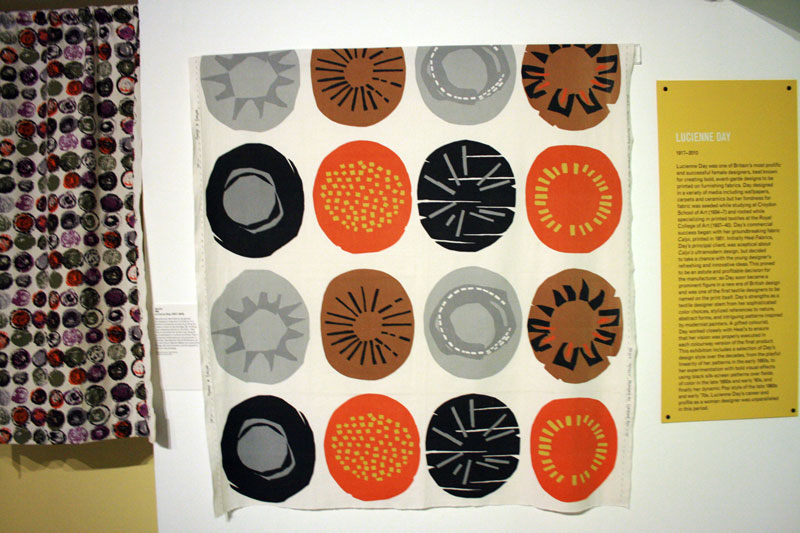
'Diablo', Lucienne Day, 1962/3
'Apollo', Lucienne Day
'Good Food', Lucienne Day
'Trio', Lucienne Day, 1952

Lucienne didn’t limit herself to fabric, wallpaper and carpet design…

Tea/coffee set, Lucienne Day

Jacqueline Groag was born in Czechoslovakia and emigrated from Vienna to London in 1939. She is one of the key designers in Mid Century Britain having worked with some of the foremost  textile manufacturers and retailers, including John Lewis, Associated American Artists and David Whitehead Ltd. She also produced laminated surface designs for British Overseas Airways Corporation (BOAC). The same company my mum used to make pilots suits for!

Untitled, (Traffic Lights), Jacqueline Goag, 1952
Untitled (Bottles), Jacqueline Groag

This ‘Pebbles’ design by Jacqueline Groag is so nostalgic for me. As I stood in front of it, it took me back to my home in the 1970s. I can’t be sure that it was exactly this design but similar enough to generate some serious flashbacks!  My mum had great taste!

Untitled (Pebbles), Jacqueline Groag, 1952

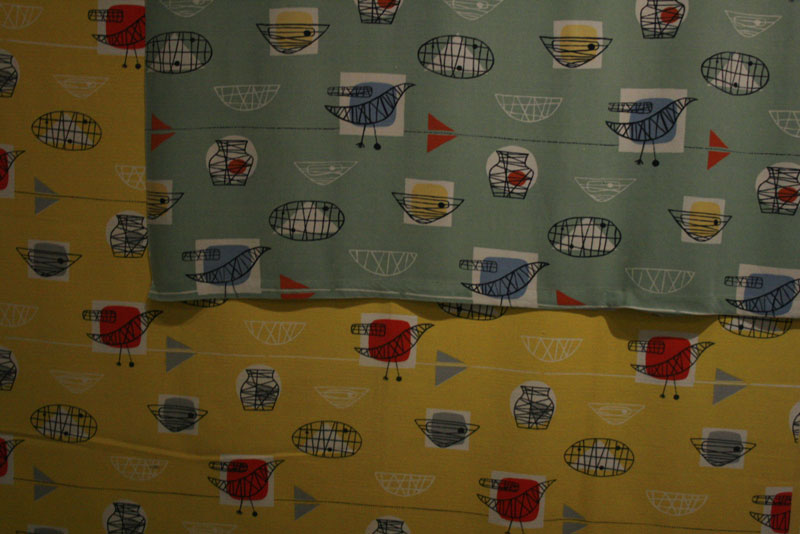
Marian Mahler was Austrian and emigrated to Britain in 1937. As artist and illustrator she combined both skills to generate designs for the younger, yet sophisticated clientele who were looking to create a stylish home. The fabrics were mostly rayon or cotton and the roller printing process made for fast production and an affordable end product. I just love the birds!

'Bird Chair', Marian Mahler, 1952

The temptation to ‘touch’ was too much!!!

'Linear Flowers', Marian Mahler
'Mobiles', Marian Mahler, 1952
Untitled (Sails), Marian Mahler, 1952/3

Paule Vézelay was a painter and her skills transferred beautifully to fabric design. So much so that I think a certain Ms Kiely looks to have drawn some serious inspiration, don’t you think?!

'Composure', Paule Vézelay, 1967
'Crescents', Paule Vézelay, 1956

And I wasn’t expecting to see any of these fabrics in dress form but just look…

Marian Mahler, Linear Flowers dress

dress

I hope you have enjoyed this little preview. I do apologise for the quality of the photos. No flash photography was allowed so they are a bit grainy and really do not give any of the fabrics the justice they deserve!

Well, best I get on with my real work now… the downside of freelanceness!

Ooobop! party dress

party dress back view

I have been designing this dress in my head for quite some time. I design a lot of things in my head –in the shower, on the bus, when I’m meant to be doing something else and when I’m nodding off to sleep – it’s a busy old head!

Anyhows, an invitation to the gorgeous Rhonda’s 30th bitthday party was a great prompt to put some of these ideas into action. I met Rhonda’s mum, Tina many moons ago when we moved next door to her and she soon became more than a neighbour. More confidante, great friend and the most wonderful childminder to my son. So this party was really a family affair and I needed a dress.

party dress full skirt

I’ve got real issues with buying clothes from high street shops nowadays. I haven’t bought anything new (save underwear and shoes, of course!) in over a year and get much more satisfaction in making something myself or striking lucky in charity shops. I did think about making it a conscious decision when I started this blog but I know how flaky I can be and I didn’t think I could stick to that rule. Turns out I didn’t have to make it a rule. It happened quite naturally. I much prefer dreaming of what I want and making it or ‘rescuing’ from charity shops rather than settling for what’s out there. And now I really feel like I’ve moved on.

party dress twirl

This is my first dreamt of, self-designed and handmade dress. And I am chuffed to bits. The bodice pattern is slightly modified from Burda Style’s Wedding Special, issue March 2011. It has a v-back, a high neckline and is perfectly fitted with waist and bust darts. Below is the bridesmaid dress as featured in the magazine.

burda bridesmaid dress

The skirt section is self-drafted. It is a circle skirt with the inner circumference double the waist. The fabric is either silk or cotton, a silky cotton… or maybe a cotton silk! I did a burn test and it burnt to dust so its definitely void of any synthetic fibres! I had enough of it to self-line the bodice and it feels lovely against my skin and was cool enough under the flashing lights on the dance floor!

party dress front

I made the sash from a 3 metre, double layer length of chiffon, tapered at the ends and top-stitched.

party dress sash detail

The rose print allowed for some interesting placement on the back. Quite happy about that!

party dress back

The dress is worn over an organza petticoat, again, self-drafted, which although not complicated, was more of a test of my patience than the dress. I will blog the petticoat separately given that I haven’t taken any photos of it yet.

Unsurprisingly I didn’t get chance to hem the skirt by hand. And in a way, I’m quite glad I didn’t spend the time – can’t imagine how long it would take – I went for a machined baby hem instead.  First I ran a line of stitching, a seam width, along the hemline. I used this as a pressing guide and it pressed up beautifully. I then tucked in the raw edge to the fold and machined again, using my quarter inch foot which made it really easy to keep a small and consistent hem. I was careful not to stretch the fabric as I went round so it didn’t pucker. I pressed it again… this fabric really is a pleasure to iron!

The most amazing thing about this dress is that it cost £3.50! £3 on the fabric – an incredibly lucky find in a charity shop – and 50p on the invisible zip. The sash cost much the same!

The fabric was a little slippery and needed lots of pins to hold in place. This is my first dress in a silky fabric and I anticipated it being troublesome. That said, I really worked fast on this dress. Mostly because I had a party to go to and I suppose because there was no expense at stake… apart from my time! It irons beautifully and hangs so effortlessly so I can forgive the grief it gave!

It took one evening to draft the skirt pattern, cut the fabric and assemble/line the bodice; a couple of hours to sew the skirt on to the bodice (I am really not a fan of gathering!!) and putting in the zip. I hand finished the inside lining, hemmed the skirt and made the sash the morning of the party.

I’m very pleased with how it turned out. I love the fabric and Im happy that a special stash piece got used for an appropriate project. It was just waiting for the right moment!

Thank you to Mr Ooobop! for the ‘action photos’ and lots of lovely birthday wishes to Rhonda x

Maudella 1223, button wrap skirt

maudella 1223 pattern

This pattern is one of Audrey’s collection which I singled out immediately as a great skirt to dress up or down. I’m assuming it’s 1960s but certainly a classic and timeless style in my book! It has been waiting patiently in line to be made and completely jumped the project queue when I remembered the amazing buttons that Mr Ooobop! found for me in Portobello Market.

maudella 1223 skirt

I didn’t want anything more complicated than black for the skirt and so I set out for a metre of cotton sateen. It has a little bit of stretch in it which makes for a comfy fit. But it is a bit of a collector of cat fluff I’ve since discovered!

The instructions didn’t call for a lining and so I didn’t make one. But that was clearly a bad move. It sticks horribly to my tights and rides up when I’m walking so I am either going to have to go back and line it at a later date or get me a slip! My mum would think this highly amusing as I did my very best to avoid wearing one when I was younger… tantrums and all!

I shortened it by 5 inches which seems to be usual for me when it comes to a vintage patterns. That said, it is still below my knee, a conscious decision, to keep it a vintage length but I’m more used to shorter length skirts and this length takes a bit of getting used to. I will have to wear it with heels so it doesn’t look to ‘grannyish’!

maudella 1223 skirt front

I wasn’t too sure how to measure off the pattern to check for any adjustments needed but given the button wrap around detail, the position of the buttons can be moved to add or take away an inch or two. I must learn to sew buttons on with my machine. This was the only tedious part but other than that I managed to whip it up in a couple of hours. I do regret not binding the hem or the seams. I think it would look much nicer. But I did sew the hem by hand. It would have been sacrilegious to machine hem in any case!

maudella 1223 button detail

I have worn the skirt to work already and got some lovely comments. But I really must decide on lining/slip before I wear it again. Just don’t tell my mum!

The Trafalgar quilt block

Trafalgar quilt block

Introducing the Trafalgar quilt block. I knew there was a reason for skipping this one last week… tricky little thing that it was. I can’t believe something so small took a whole hour to achieve!

I’m beginning to recognise the order that these blocks must be sewn but I really had to keep my wits about me for this one. The pink and the blue tapered rectangles must be laid out in opposite directions before they are cut and attention really must be paid to all those points meeting.

I had a bit of trouble ‘chaining’ the triangle pieces as the point of the triangle kept getting ‘chewed’ by the feed dog! I had to make sure the needle was down into the fabric rather than just run into it from the last.

For those not in the know, ‘chaining’ or ‘chain-piecing’ is an efficient way of sewing lots of pairs of pieces together by running them under the presser foot, one after the other, without stopping, taking a few stitches in between each pair. The pairs are then snipped apart with a pair of sharp scissors. I have found this works easiest with squares rather than triangles!

And a big lesson learned for rushing straight into things… I forgot to adjust the position of my needle for the hole in the quarter inch foot is central, one position only. Needless to say the needle snapped on the foot and made me jump!

But I got there in the end with a big sigh of relief. I really was holding my breath for each section join!

Block Facts:

Name: Trafalgar
History: It is a variation on the traditional Nelson’s Victory, which commemorates the British admiral, but in 1945 it was listed as ‘End of the Day’.
Level: Some experience needed to achieve neat joins. (;D)
No. of pieces: 16

Progress report:

Block 1: The Double Four Patch
Block 2: The Whirlwind
Block 3: The Sailboat
Block 4: The Shoo-fly
Block 5: The Trafalgar
Block 6: The Windmill

Peggy Pickles Pillowcase Post…

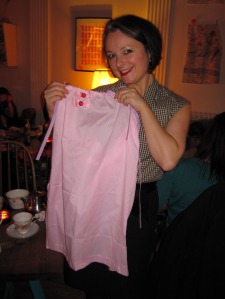
What a great post on Peggy Pickle’s blog this morning. Lots of lovely images showing the children of Great Mercy school and orphanage, western Kenya, wearing their pillowcase dresses. Alison did such a fab job organising this and a lot of fun was had in the making and embellishing of them. I have so enjoyed following her progress and seeing what a difference it makes.

I really wasn’t expecting to see any of the few that I made among the hundreds that were made and shipped but to my surprise, peeking out from the back row, 2nd in from the left, I do believe that’s one that I embellished at the Pillowcase Embellishment party.

pink pillowcase dress

pink bows

Dead chuffed to see it in situ and so very glad to have played my tiny part in this fabulous project. Well done Peggy Pickles. You are a star!

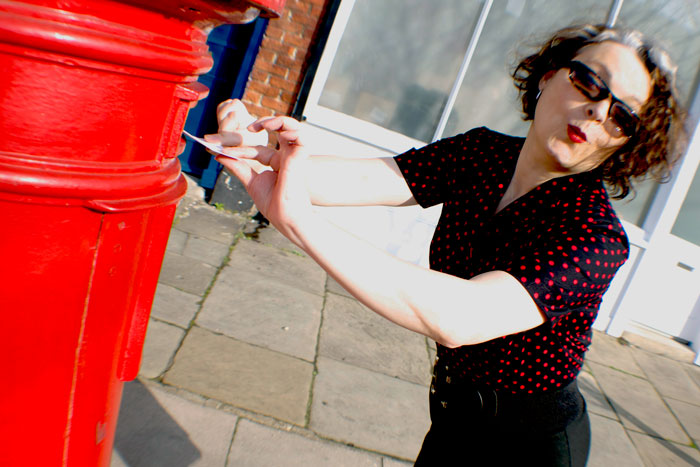
Vintage post: The Wing Collar Blouse

wing collar blouse posting letter

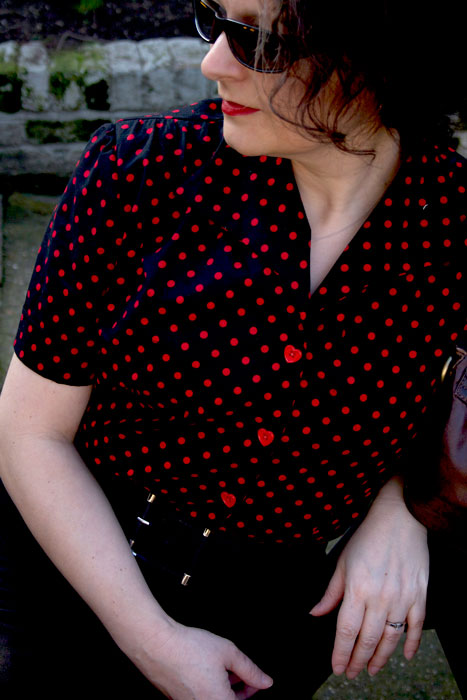
I know, I know… I am meant to be making a jacket! But I have made an amazing discovery! If I embark on a complicated project (like my jacket) and I allow myself to be interrupted by other smaller projects (like a quilt block, a Dorothy dress and this blouse) the smaller projects all get done in really speedy record time due to the over-riding pressure of guilt waves, shooting out from underneath a pile of cut out jacket pieces! Its magic!

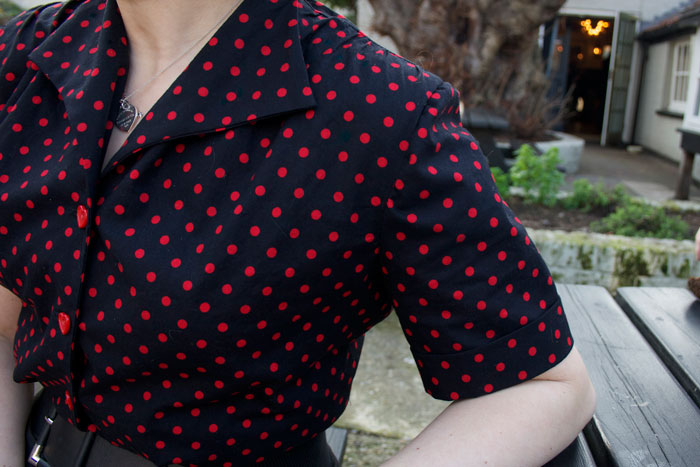
wing collar blouse at pub

Its difficult enough for me to stay on track but it’s harder still when one is snared by such inspiration

as this . . .

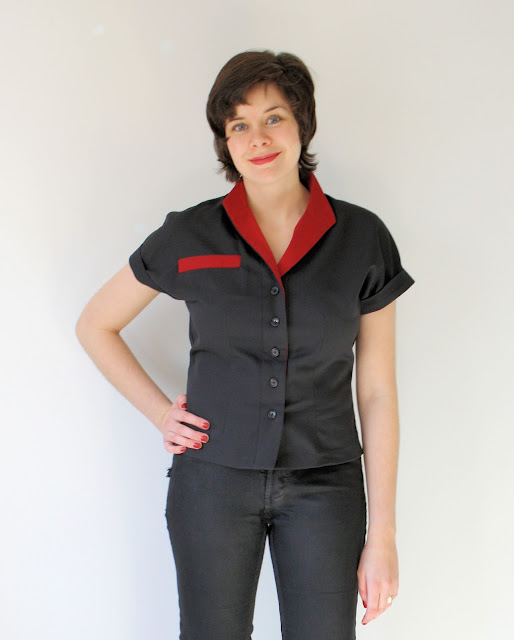
clash blouse
Clash Blouse by Lady Danbury

This fantastic Clash Blouse was created by Lady Danbury over at Thinking In Shapes and it was a struggle not to rip it off (copy it) completely I can tell you. Red and black is one of my favourite colour combos and that shirt is soooo cool.

So the nearest I could get to it was this…

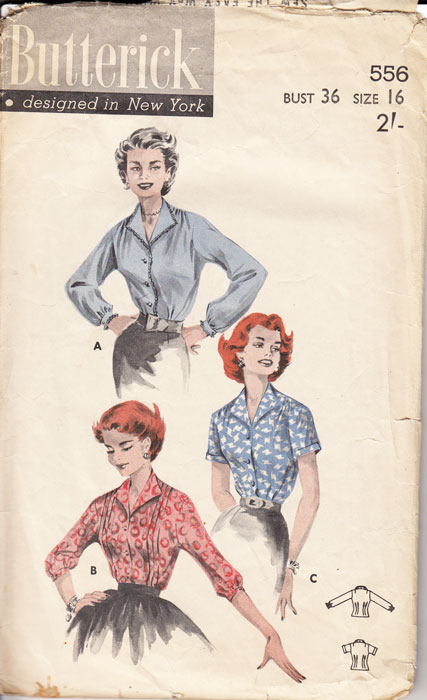
B556 Butterick pattern

I bought the pattern, Butterick 556, on Etsy. Mainly because I am not as clever and talented enough (yet) to draft a pattern like LD! But also because, believe it or not, considering the hundreds of patterns that insulate my bedroom walls, I didn’t posses a patten anywhere near similar to a wing collar blouse! I’m assuming it’s 1950s. I never can find a date on these vintage ones. Can anyone shed any light?

That ‘over-riding pressure’ convinced me I shouldn’t bother with a toile as the fabric was cheap enough if it didn’t work out. And hey, I only had to add an inch round the waist, (admittedly, after I had put it all together), but I am quite pleased with the end result. Pleased enough to have lined up some more fabric for another! I’m a bit gutted I didn’t incorporate some red piping around the collar and sleeve cuffs to highlight the detail but rest assured I will be doing that with the next one!

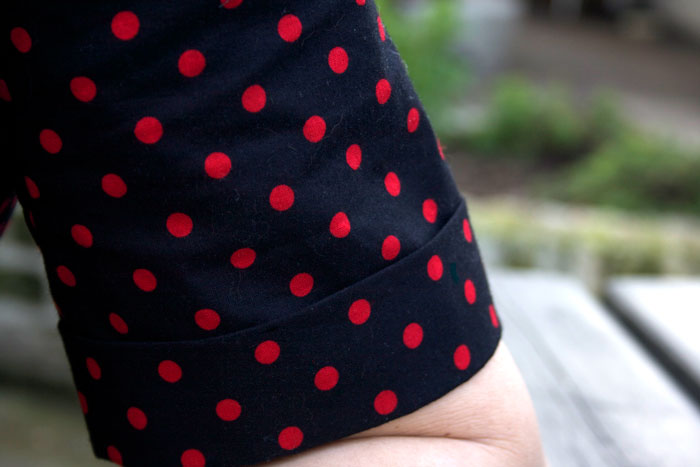
sleeve detail

I decided against a machined hem in favour of red binding for a proper vintage finish.

red hem binding

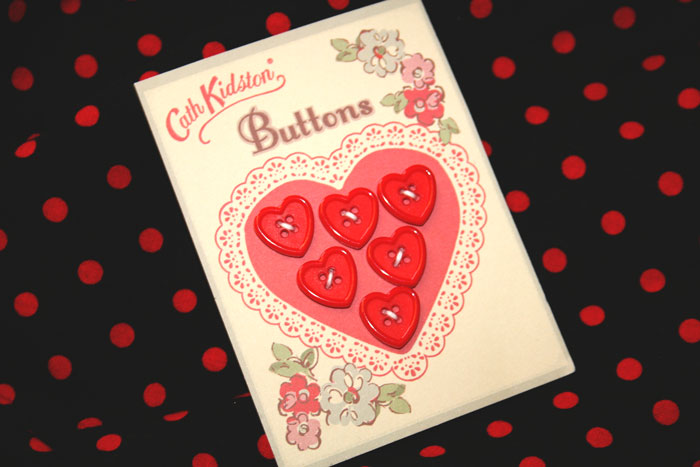
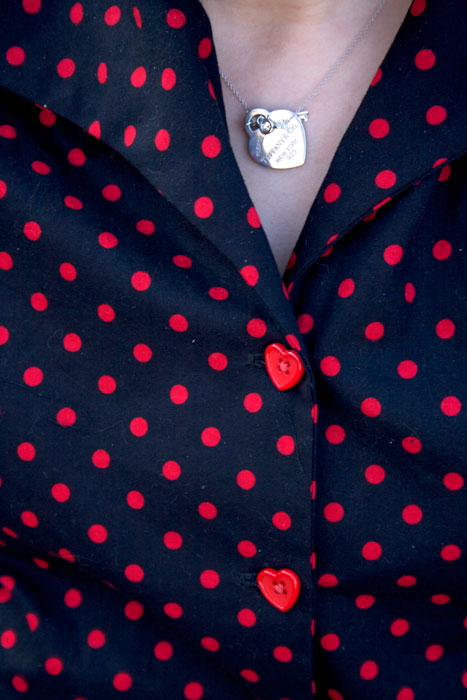
And those lovely heart buttons were part of a birthday gift from my eldest daughter.

Cath kidston heart buttons

That Cath Kidston doesn’t miss a trick, does she?!

wing collar button detail

Initially I mocked the idea of padded shoulders – as much as I love Joanie – but then relented as they do indeed give a more authentic and sharper look. Im sure too that the pattern has accounted for the extra space for a bit of wadding. It certainly looks more structured with them in.

wing collar blouse shoulder

This really is a great pattern. Very simple to follow and a really comfortable and flattering fit. The eight darts… 4 in the front, 4 in the back might have something to do with that!

wing collar blouse profile

I feel a high-waisted pencil skirt coming on now…. ooops I just did… ok just that one, then I promise I’ll carry on with the jacket!!

Photo credits of course to the very lovely Mr Ooobop!