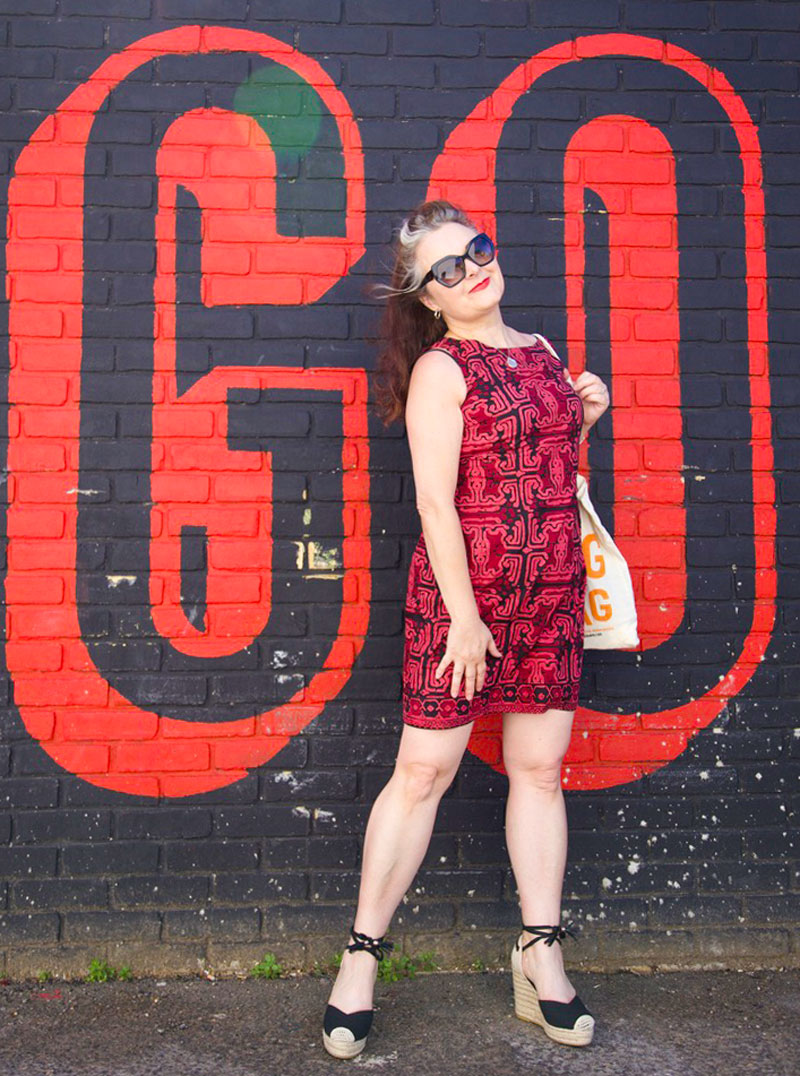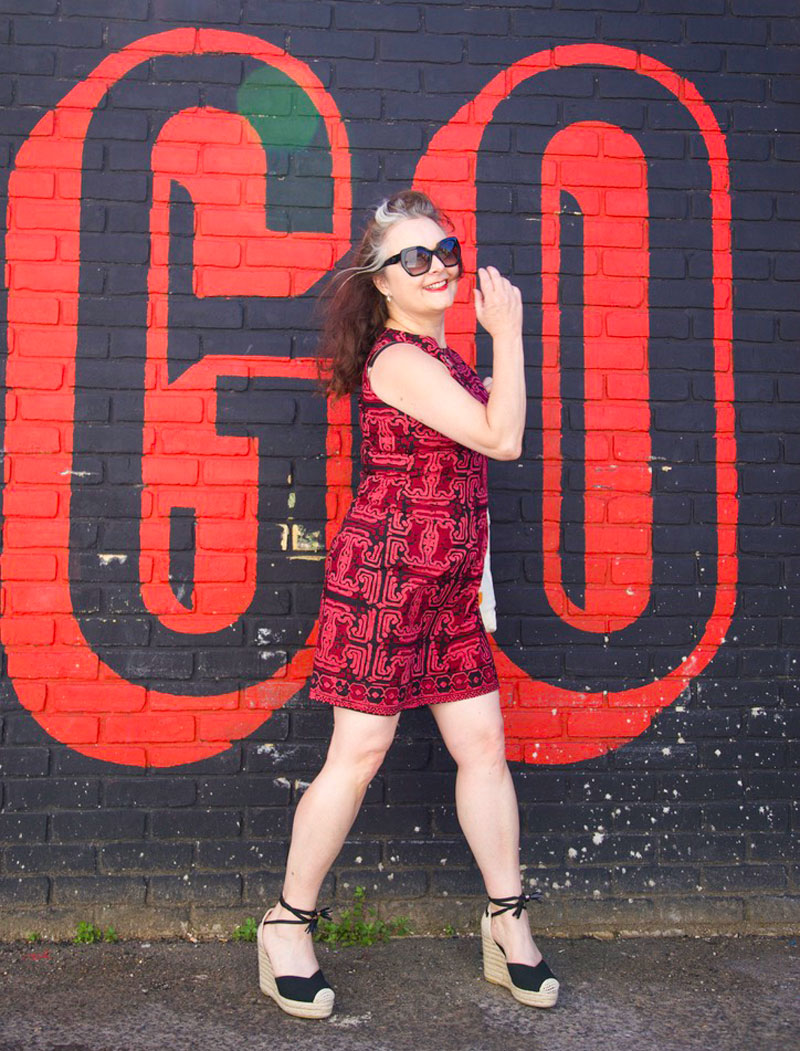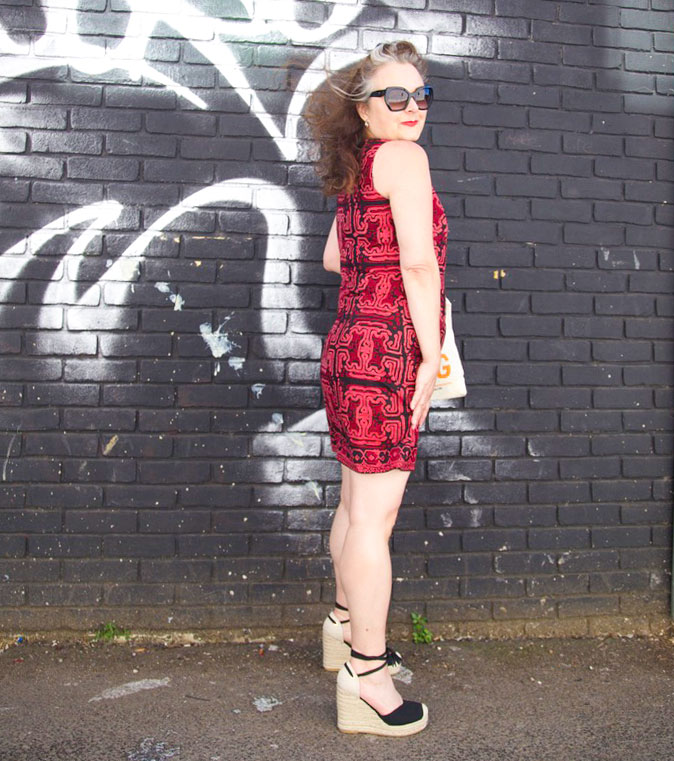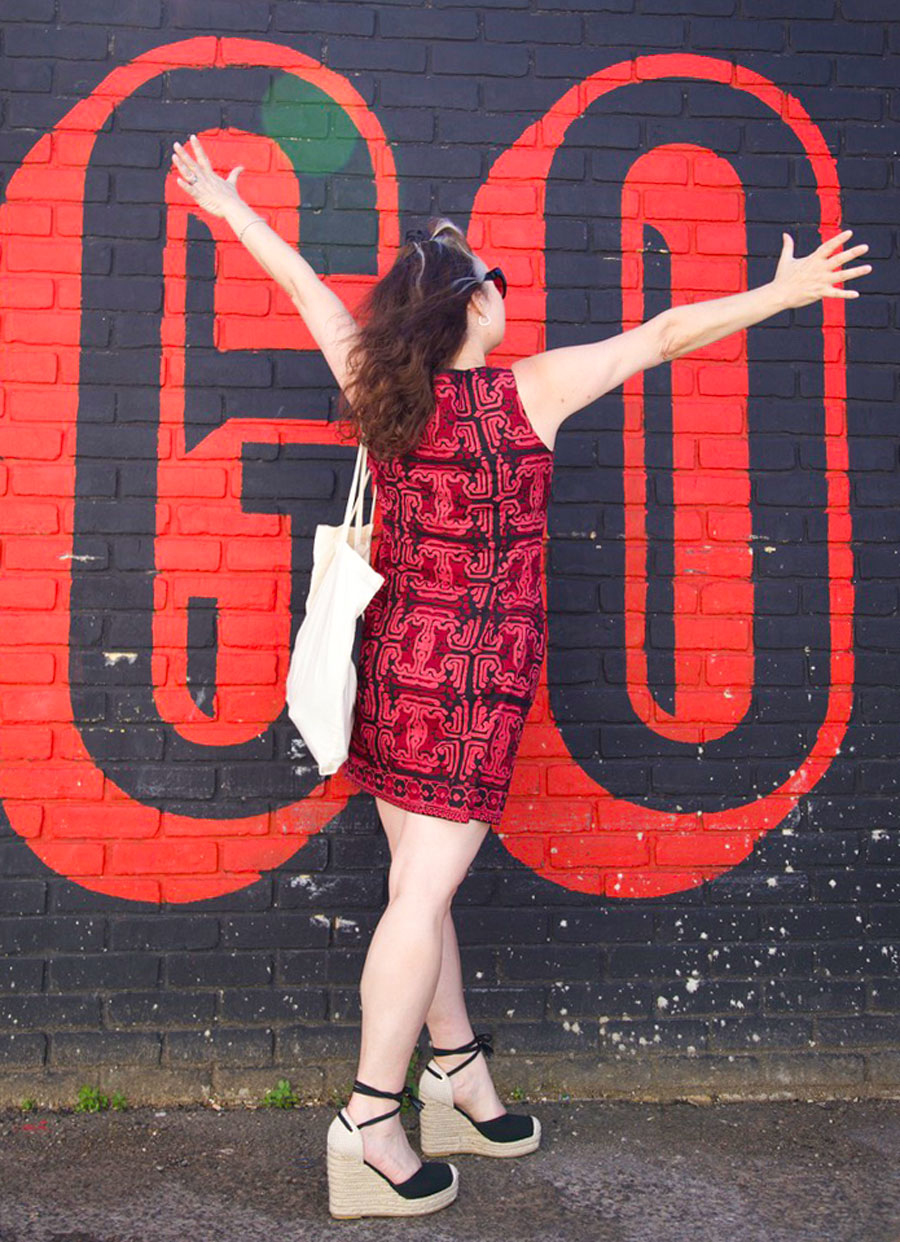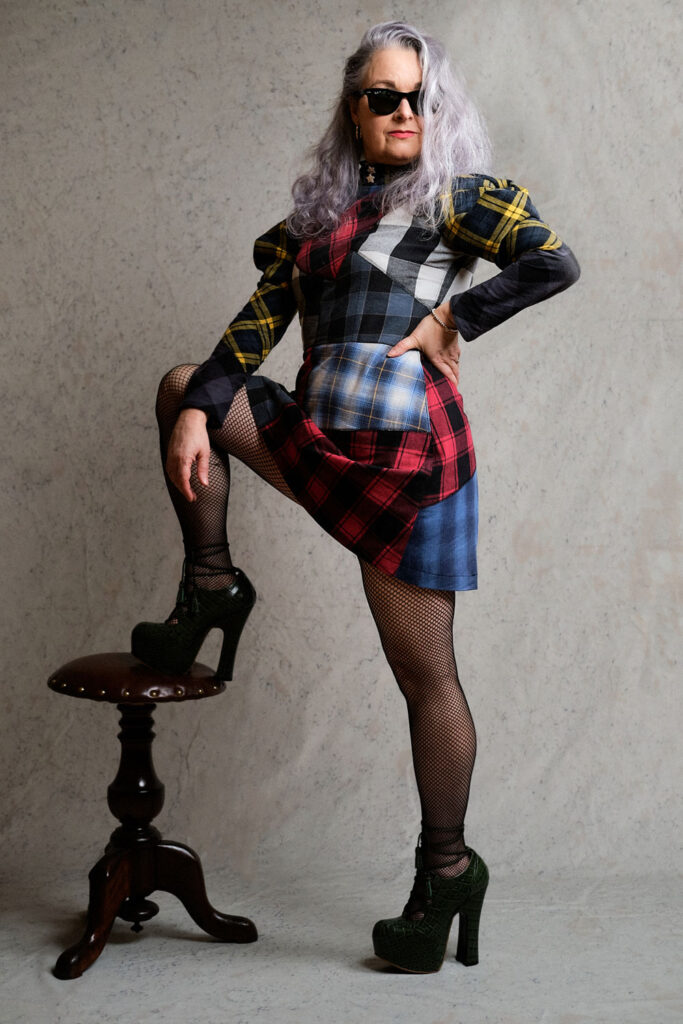
A patchwork dress made of sleeves!

Yes you read that right! This is a dress made entirely of sleeves – those that were cut off of Dan’s RTW shirts after he got fed up with how tight and annoying they were when he was working in them!

I intercepted his route to the bin when I spied a couple of them poking out of the bag. And there then ensued a tussle, with Dan persisting that I had quite enough fabric already. What does that even mean – ‘quite enough fabric’?!
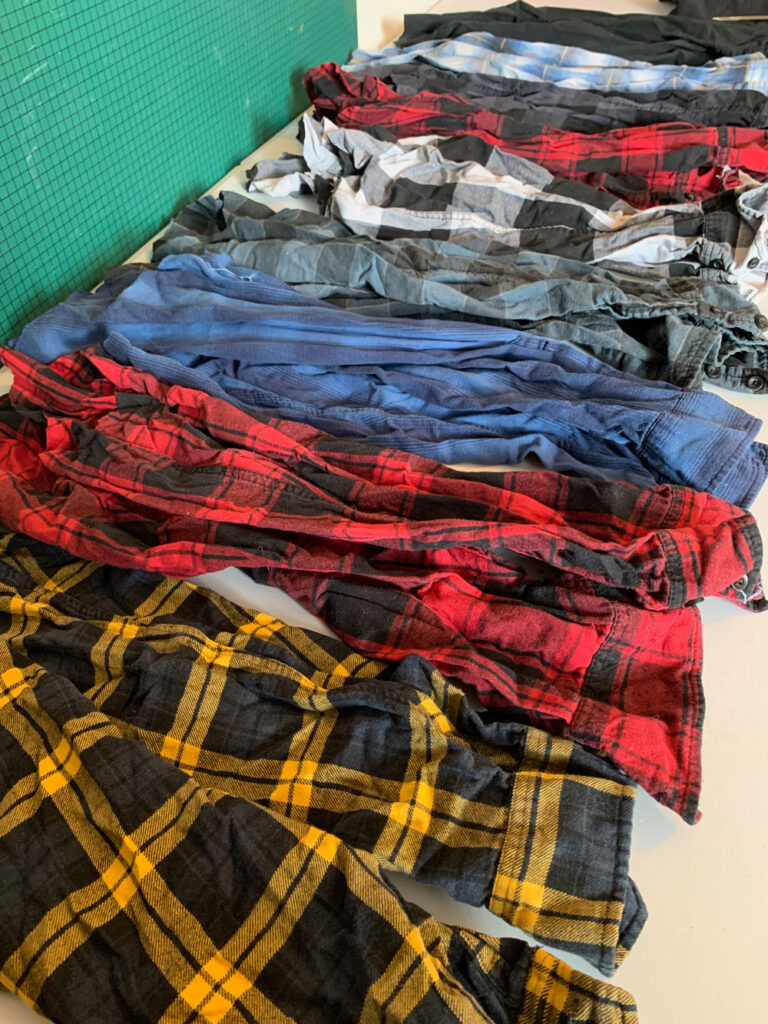
He laid the gauntlet, firmly before me – challenged me that unless I could cite good use, they should not be added to the peak of ‘stash mountain’ !

‘A dress!’ Was my comeback ‘A cool patchwork dress!’ It raised an eyebrow of disbelief but I grabbed that bag and literally ran to the studio with it and hid it under the cutting table. 
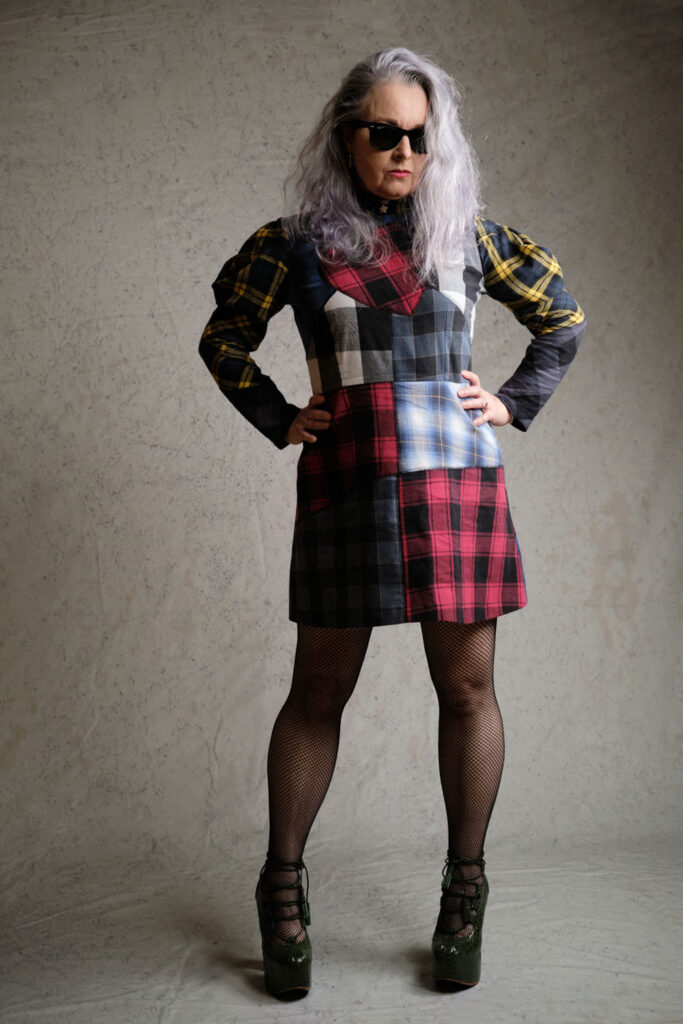
It remained there for quite a while, mostly because I had other projects going on, but in that safe space of time I was able to hatch a plan in my head. I didn’t want a crafty kind of patchwork dress. I mean they can look cool and boho but that isn’t me. And lumberjack plaid certainly doesn’t lend that vibe! I spent hours dividing up sketched outlines of dresses with small squares, big squares and randomly sized squares. None floated my boat. 

Then I tried random shapes to really over complicate a simple idea and then I realised it was the persistence of the vertical and the horizontal lines that were irritating me.
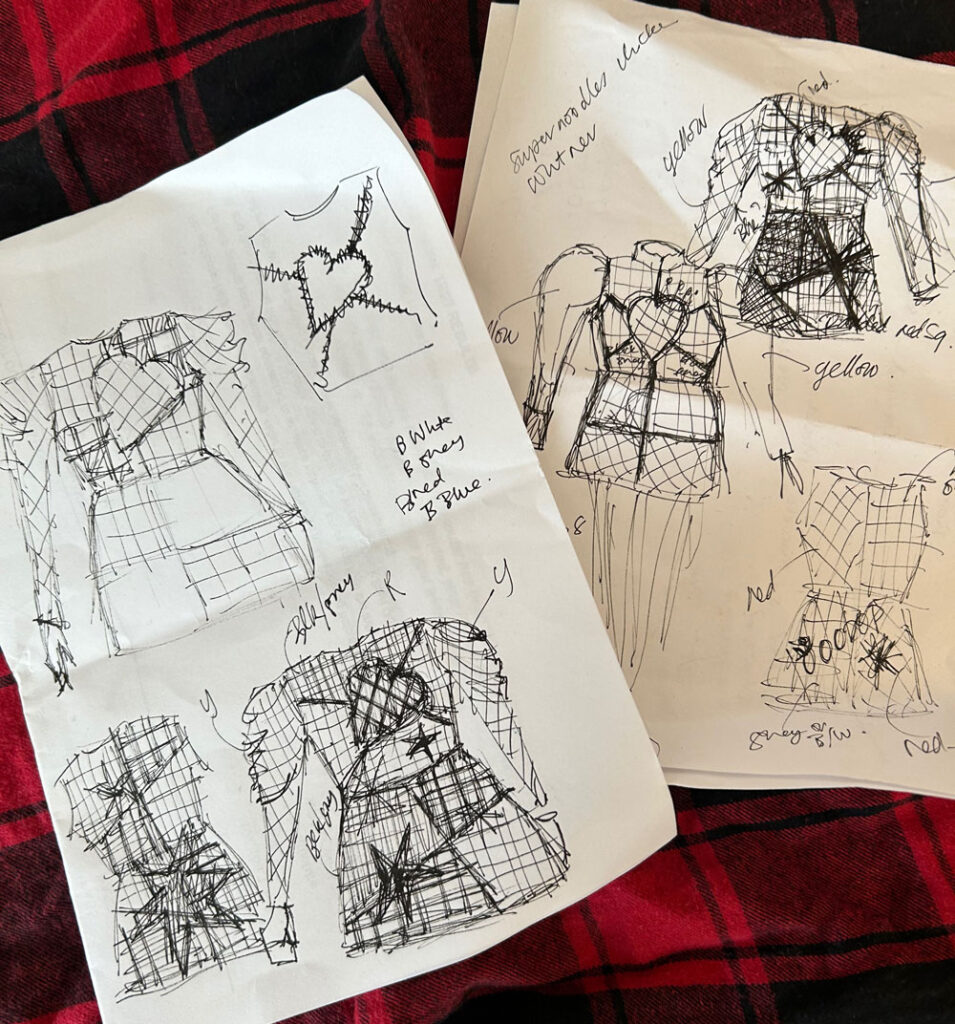
So I tried with some angular shapes and I was beginning to get somewhere. I already knew a heart was going to feature. It is after all a nod to Westwood. Someone who totally wore her heart on sleeve. And I’d be lying if I said I wasn’t inspired by her. She taught me it was ok to dress differently, not to care (so much) about what anyone else thinks and to do it boldly. To buy less and choose well and to take care of our planet. 

‘Fashion is very important. It is life-enhancing and, like everything that gives pleasure, it is worth doing well’ – Vivienne Westwood

I don’t always sew as sustainably as I could but I like to reuse and recycle and rewear whenever I can. Read to the end for some more of my sustainable projects.

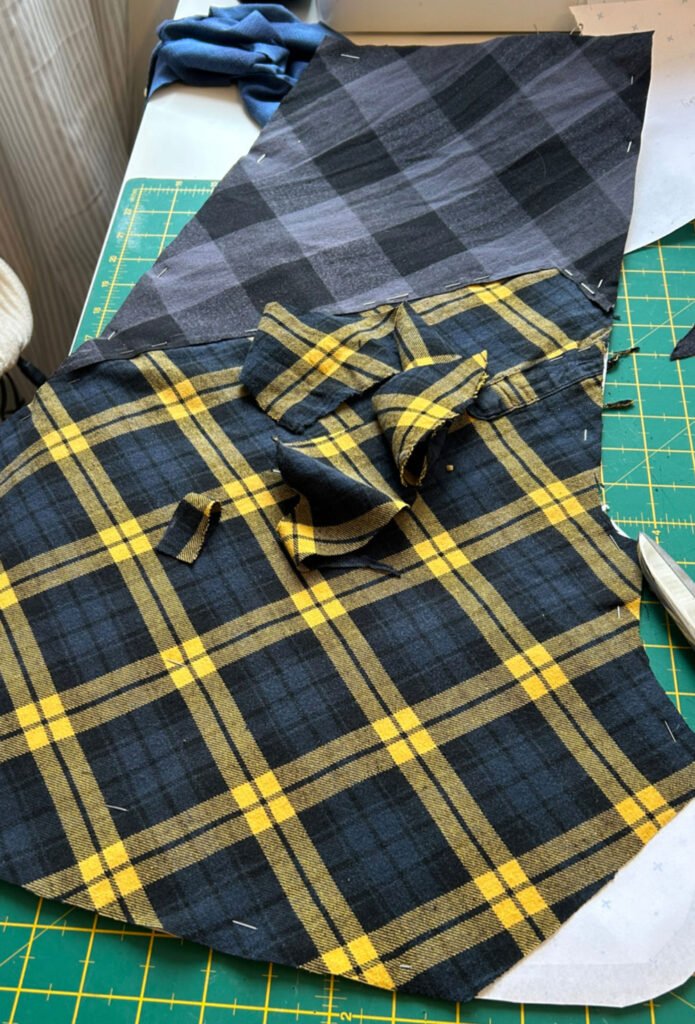
Once the sketch was finalised, I pondered how I was going to sew them together. These sleeves are made of cotton – a flannel I think – and they are soft and drapey. That was going to work wonderfully for the bias cowl sleeve I had in mind but not so well for the actual body of the dress. So it had to be stabilised somehow. I considered using a double sided fusible interfacing but I really didn’t want the extra weight so I simply sewed the pieces onto some black cotton I had in stash. I used a self-drafted pattern from my baby cord dress and cut the black cotton pieces first, before mounting the cutout shapes. I made sure to overlap them slightly and I zigzagged, first on the absolute edge and then again each side of each piece to make sure it was secured but also to make the black lines of stitching look intentional and a little like stained glass panels.
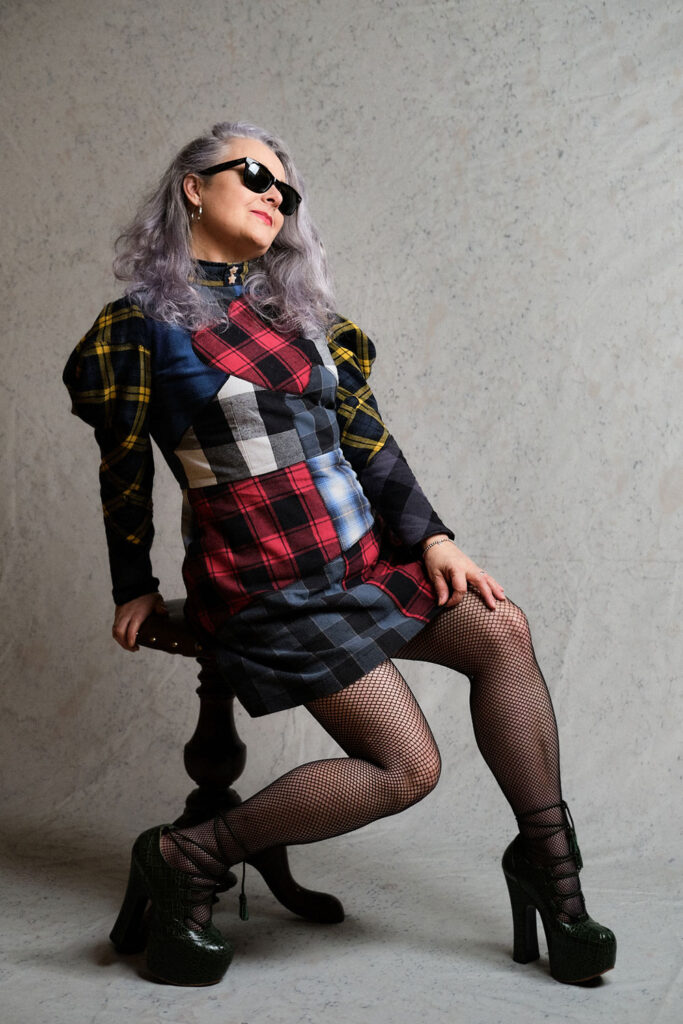
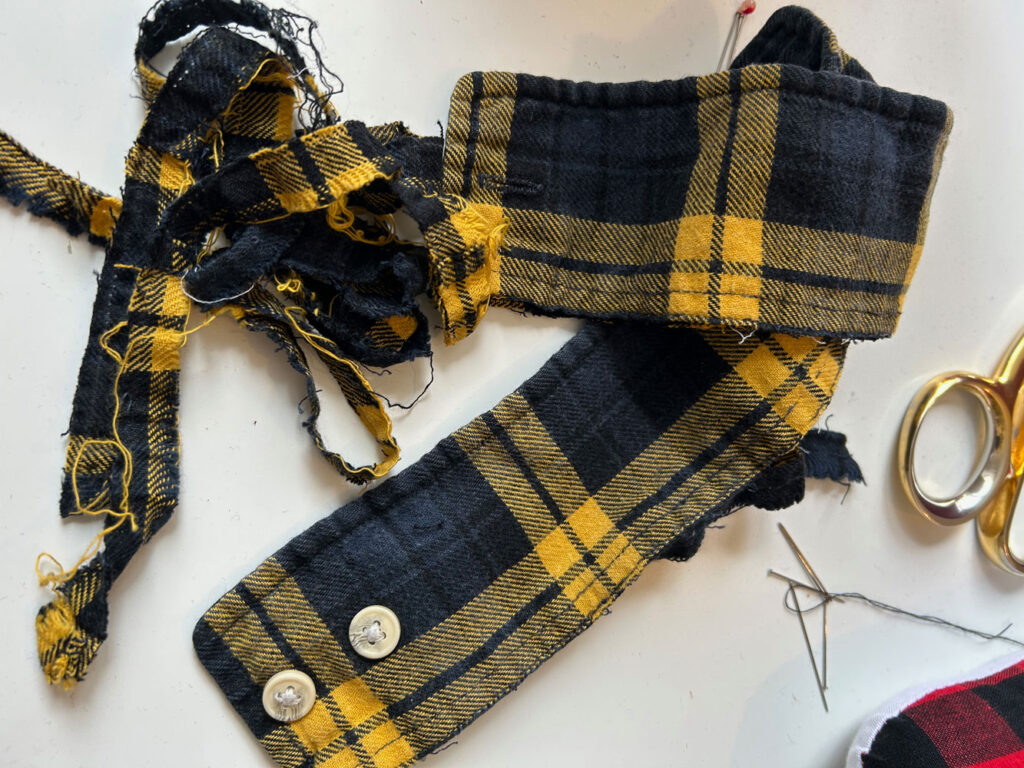
I managed to glean all the fabric I needed from 9 shirts worth of sleeves. I came a bit unstuck on the actual sleeves because I was so intent on featuring the yellow ones with as much coverage as possible. And that meant including the sleeve plackets! I’ve left the buttons on for context and again to make it intentional.

The collar is made from the cuffs of the yellow sleeves. Two of them, buttoned up, fitted perfectly around the necline. Again I was going to use the original buttons, but the Pigeon Wishes star buttons were cooing me. Loudly!
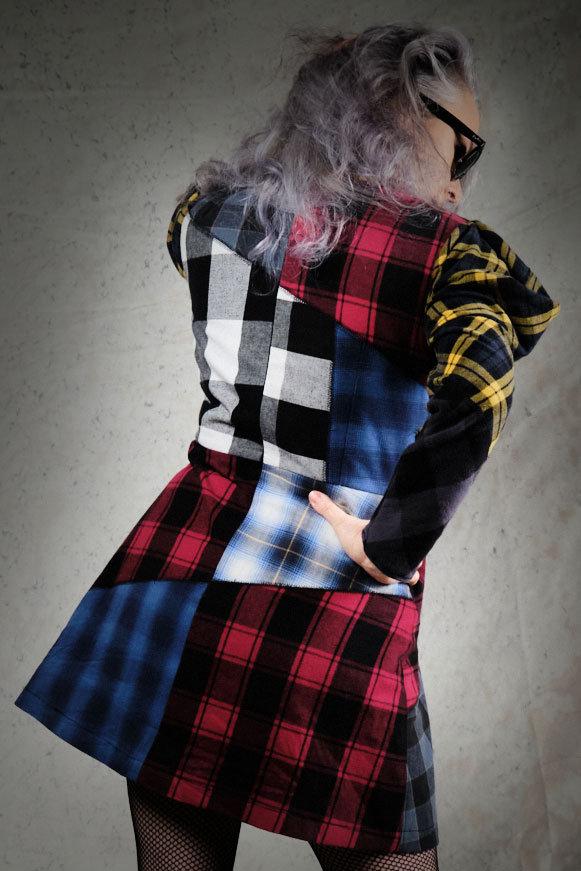
I considered making this dress sleeveless in the beginning. Oh the irony! But reconsidered at the prospect of not wasting any of those sleeves, to create one with statement sleeves instead. I took a draping class a while back with Mr O and he taught us how to draft a cowl sleeve, I’ve tried a few sleeve-drafting tutorials in the past but his was so much simpler and I’m slowly learning that long-winded old school methods aren’t always the best – controversial, I know!

I winced at the prospect of having to patch in some small pieces at the top of the sleeve but actually it adds to the punky charm and I love it. It feels like I’ve broken a whole heap of rules in the making of this dress, yet at the same time, none!
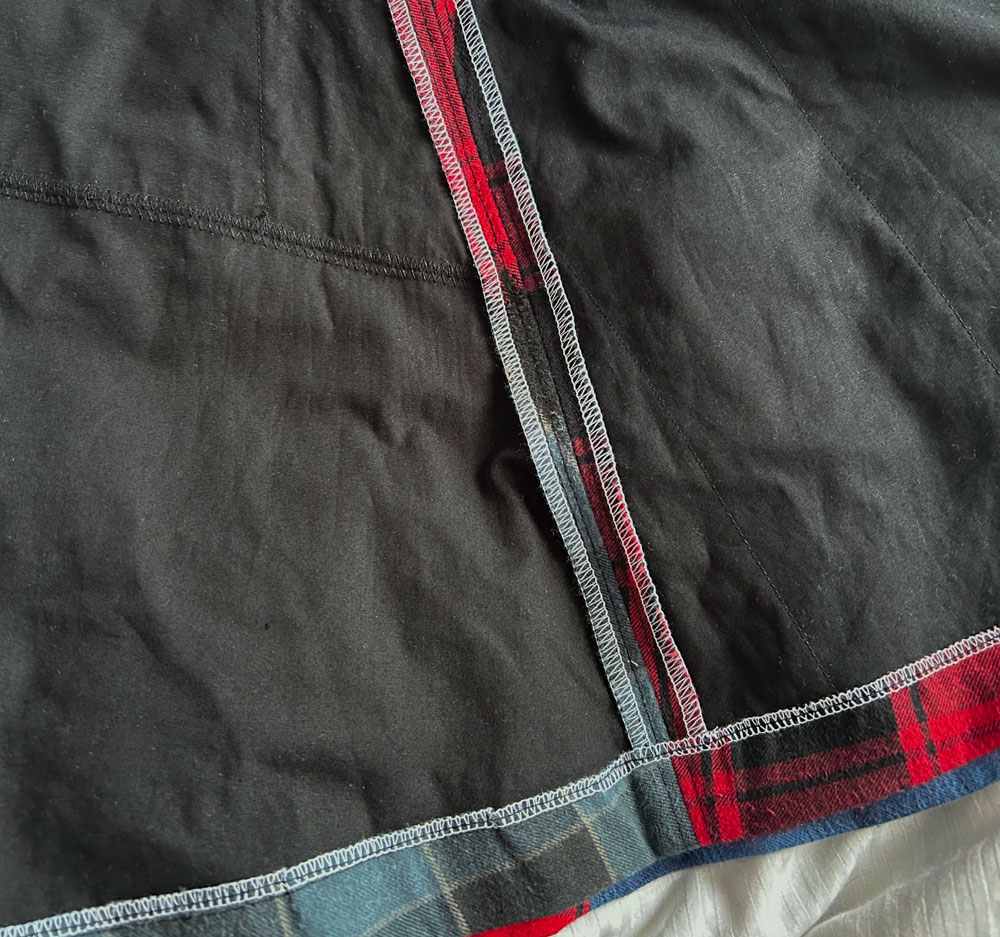
The good thing about having mounted all those pieces on black fabric is that the insides are clean (ish) and everything hangs as it should. Once I sewed up the side-seams, the shoulders, the skirt to the waist-seam and inserted the sleeves, I pressed open the overlocked seams on the inside so everything laid perfectly flat. (Couldn’t be arsed to change the thread from white to black but hey, who is going to see?!) I really must invest in some rainbow overlock thread. I think that would have looked even better to be fair. 
The collar went on next. I just had to cut off the seam bulk but of course the interfacing and the topstitching along the top and front edges was already in place – bonus!

And then I sewed in an invisible zipper. Also from stash. I made sure to align the waist seam before sewing up the second side of the zip because as punk as this is, I have standards you know, haha!
Having said that, standards went a bit out of the window with machined hemming. I toyed with hand-sewed ones, but… well… hours in the day and all that!

Dan was in the studio with me when it was all sewed up and finished. And suggested we shoot it that same night. So we went back home for tea grabbed some tights, shoes, shades and a skateboard (of course!) and just went for it. No time for a hair wash – just scruffed it up, just as I did in the 80s. And it couldn’t have gone better.
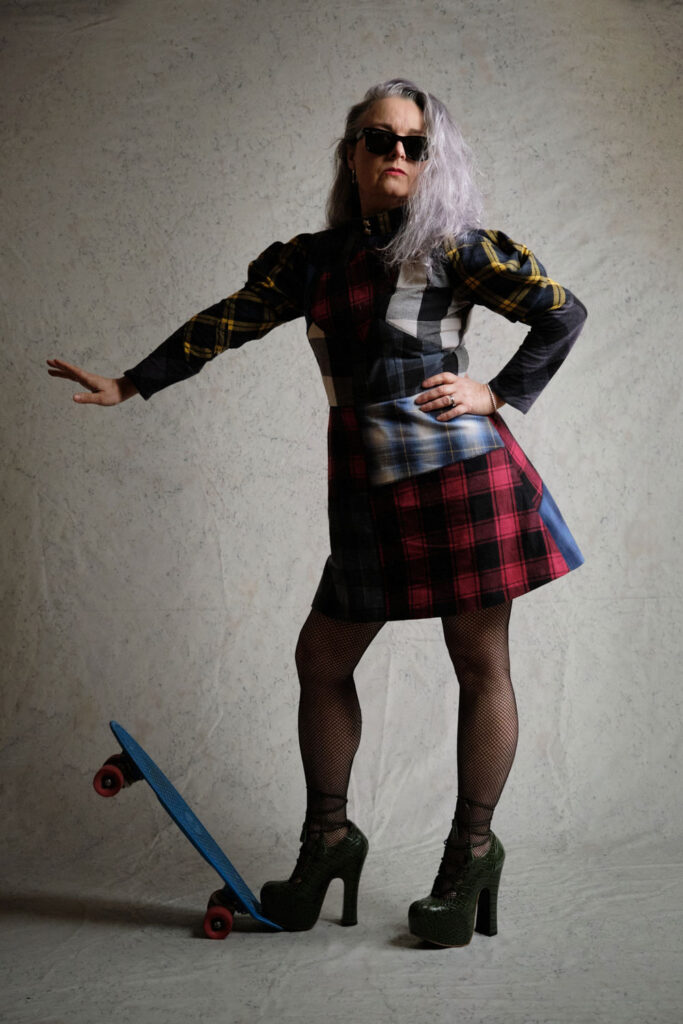
I am so over the moon with the shots that he took. He has forever championed my creations and has been so obliging with photographing them over the years – often more eagerly than me! But he totally knocked it out of the park this time. Do look him up if you are ever thinking of getting some professional shots done at danieljamesphotographic. I know I’m biased and all but he is bloody good!
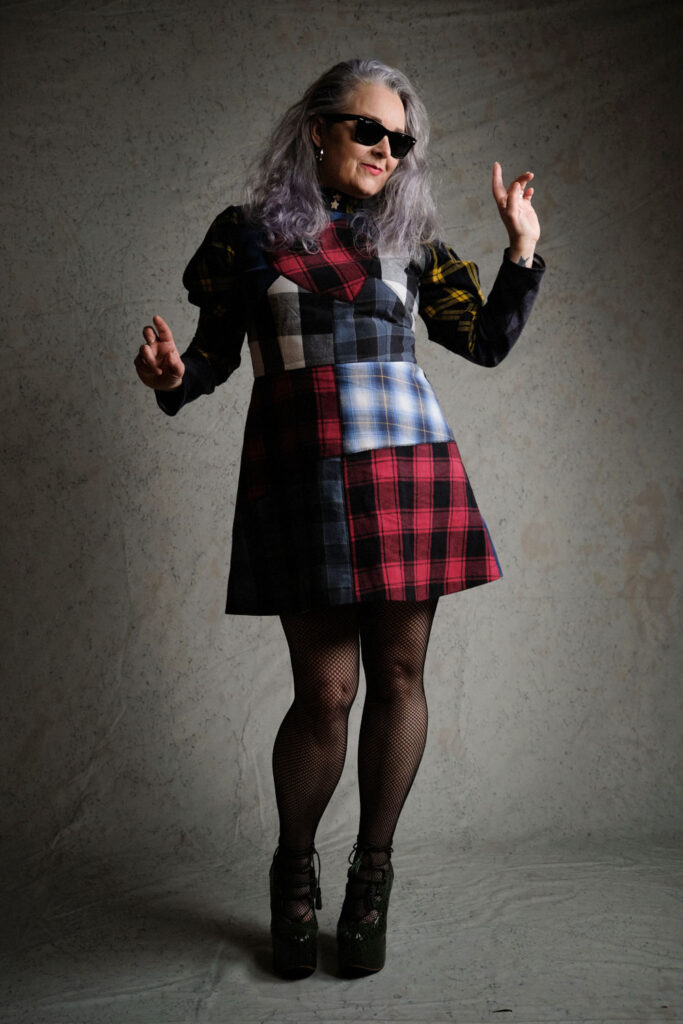
I posted some of them on Instagram a few days ago and the comments have been both humbling and mindblowing. It feels so good to have created something that is all me. Well, a bit of Dan and a bit of Viv too! And to have it appreciated by so many. I am so very very grateful and the whole process from bin-interception to reception of the photos has been incredible. And It’s just made me want to do more of the same. 
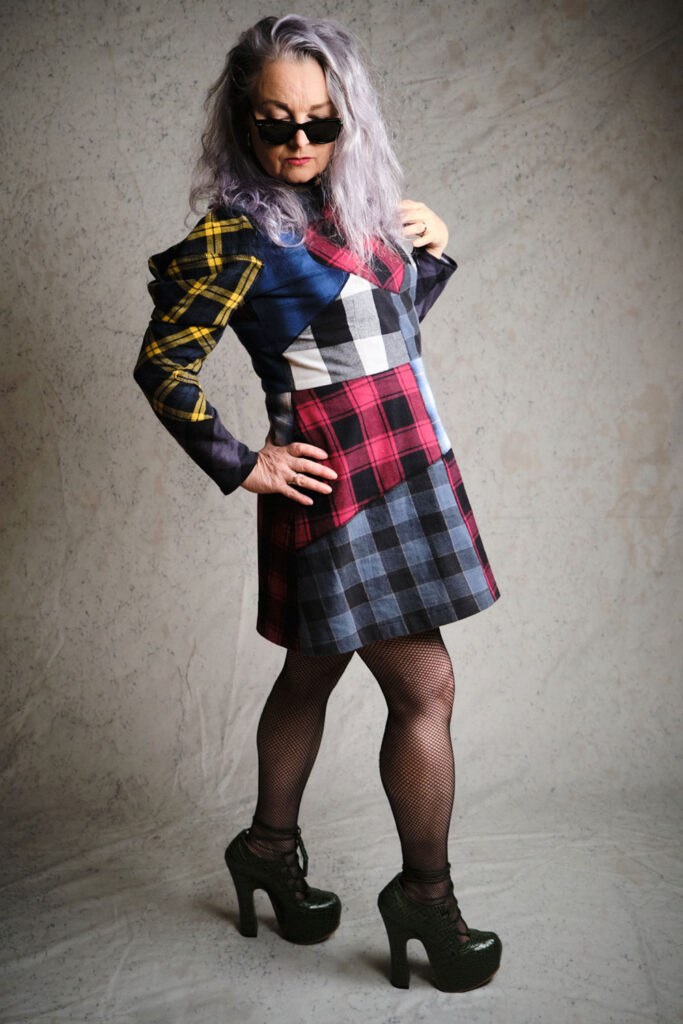
I have some really small scraps left over. I didn’t throw any cut-offs away. (Don’t tell Dan!) And I have another cool little project in mind so watch this space or follow along on Insta to find out more, soon.

Other favourite upcycled makes:
Dressmakers ball gown
Martini dress
Romper suit
Portrait tote bag
Lacroix Roman blinds
Ooobop Original jumper

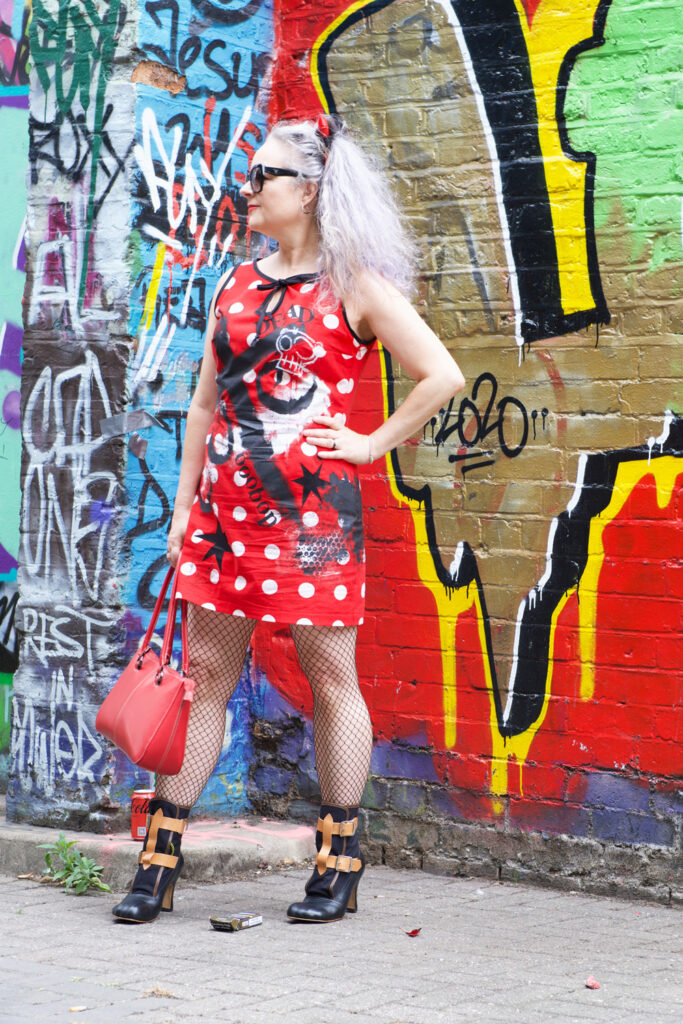
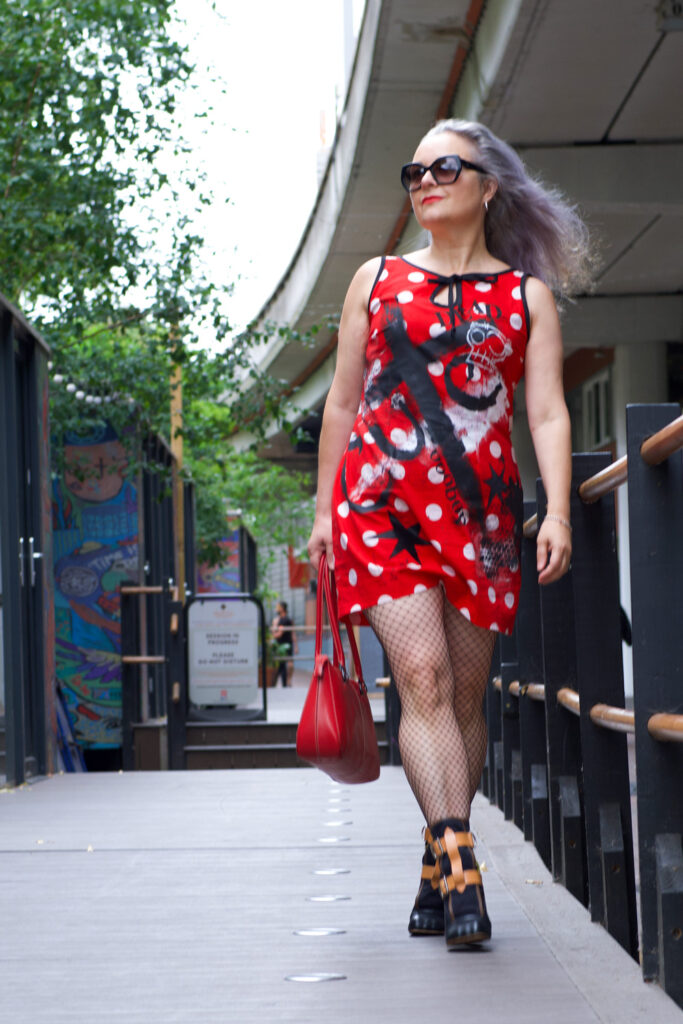
How to make a cute dress ‘dead cute’

I basically made a cute dress… and de-cuted it!

But why, Janene, why? Well since you asked, I’d grab a cuppa and pull up a comfy cushion if I were you, because there’s no short answer.

I’ve had the inclination to ‘mess things up’ for a while now. Not exclusively for moments of therapy when prompted by frustration, but because I’ve felt a bit caged. As if I’ve been blinkered and strapped down. Like I’ve had my wings clipped. I know this sounds a bit over dramatic. Especially since I lead a very nice life am surrounded by gorgeous friends and family and have a very desirable job. But I guess everything I do is, on the whole, well-behaved, expected, accurate and rule abiding. My work as a graphic designer permits a modicum of out-of-the-box thinking but largely there are rules, whatever industry I’m creating for. And the same goes for my ‘until now’ sewing: Cutting is precise, seams are consistent, fit is important and placement of design is key, etc etc. 

I documented my failed consideration of the neckline-keyhole placement on Instagram, how it  bugged the hell out of me that it wasn’t properly centred between spots. Most people agreed. Some shrugged it off and said it didn’t bother them. I was quite jealous of those people because caring so much about the finer detail is IMHO partly responsible for my lack of adventure! I’m not sure I can ever change that up though. I’ll just have to add the wilder stuff on top… or on the bottom!

In March this year, my wish to have a studio finally came true and I moved in with more than 60 other artists. My requirements were very basic – I had dreamed of having a cutting table as its quite tricky to get back up of the floor after a long cutting session nowadays – And faster wifi so that my graphic files would deliver as soon as I sent them. Little things, generally speaking, but actually, massive things to me, that would make a real difference to my productivity. 

Within days of settling in, I relished the added advantage of being able to leave a project out on the table overnight so that you can just come in and crack straight on with it the following morning, how awesome it was having a whole space to myself (apart from when Dan comes in) but yet there is often a friendly knock at the door, an invitation to lunch at the lovely cafe and advice and inspiration on tap.

I’ll admit to having big old imposter syndrome at first. Like ‘how can I possibly match up to the artistry that is resident here?’ I’m a graphic designer not a fine artist and I’m a dressmaker not a fashion designer. But therein lay the problem! I had labelled myself with titles of position, boxed myself in by definition and process. I design books and I make dresses for sure but that’s not all that I am or the end of the story by any stretch of the words, I can now feel all the other possibilities rising to the surface. Its sooo hard not to be inspired here! Next door to me is a wonderful poet, artist and mentor, the other side a painter and an interior designer, an amazing costumier upstairs with photographers, textile artists, musicians, set designers and an entomologist to boot!

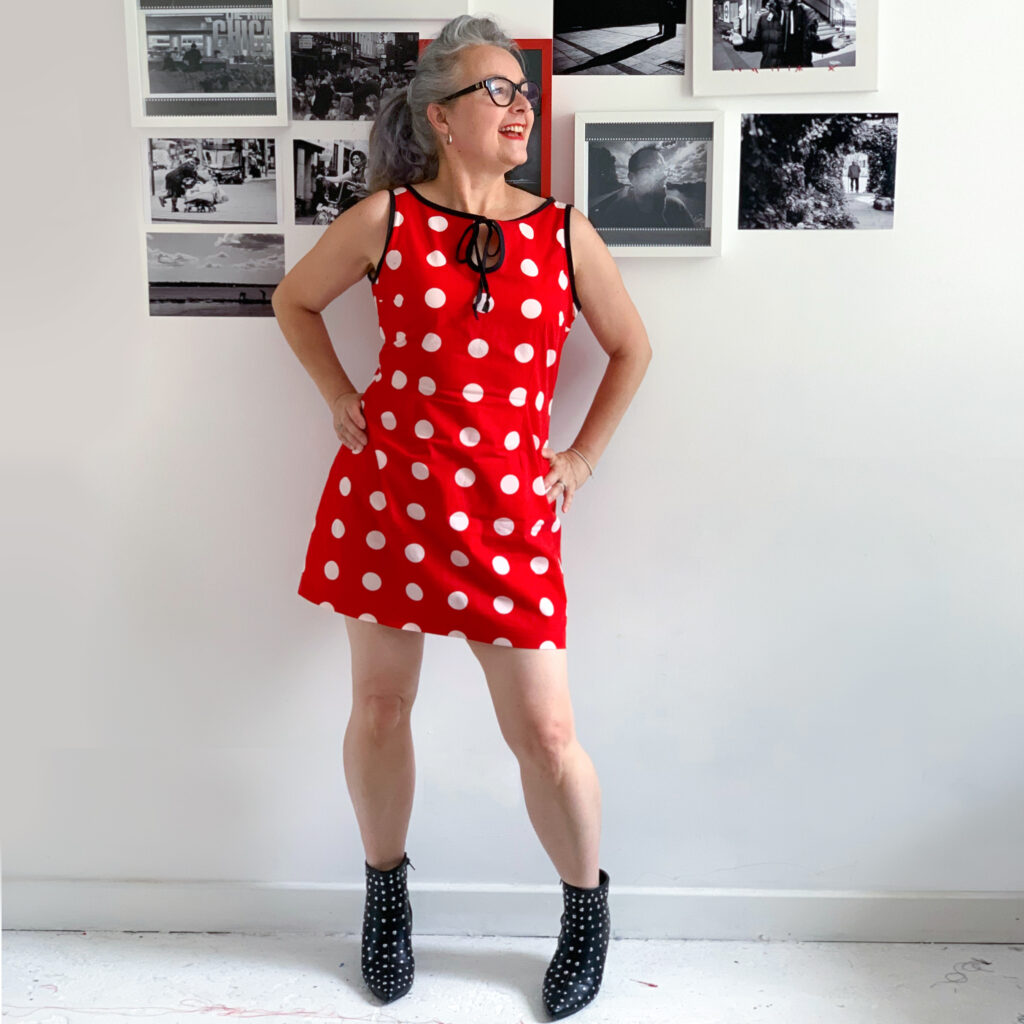
The initial stage of the dress came about as I wandered around a charity shop in Shoreham. I found the red polka dot fabric there. Vintage most probably and slightly marked in place, approximately 5 metres of it and cheap. London prices are set as much as new fabric in some cases so it was straight in the bag without even considering what it would be used for. A regular habit and sometimes I think its a bad one until I think of a use and then I think its a good habit, hahaha!

I love the idea of rescuing fabric as much as I love purchasing brand new fabric that matches the exact Idea I have in my head so it helps to have a balance so I don’t feel too bad about buying new all the time. I think this must have been used as a table cloth or such like in its previous life but whatever it was I couldn’t really envisage me in a twee dress. So as I walked out of the shop with a bargain of a buy, I started to dream up the dress.

It didn’t take long. It needed black, that’s all. Just black. The ‘colour’ I always come running home to. My safety zone.  I used to only wear black when I was younger, not because I was goth or punk, I was very much on board with the New Romantics and if I bought anything black (sometimes white) I could guaranteee that the garments would layer and mix and match quite successfully – cheaper that way too. A black dress would render me invisible and cool at the same time. I could be part of the crowd yet not stand out at all, seeing as most of my peers were wearing black too! A kind of invisibility cloak, if you like.
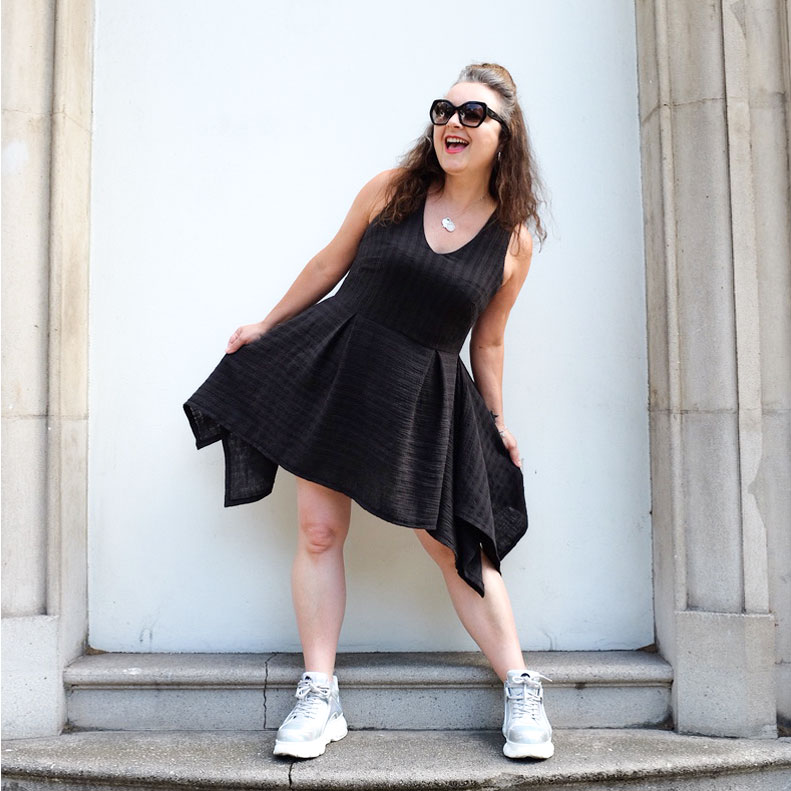
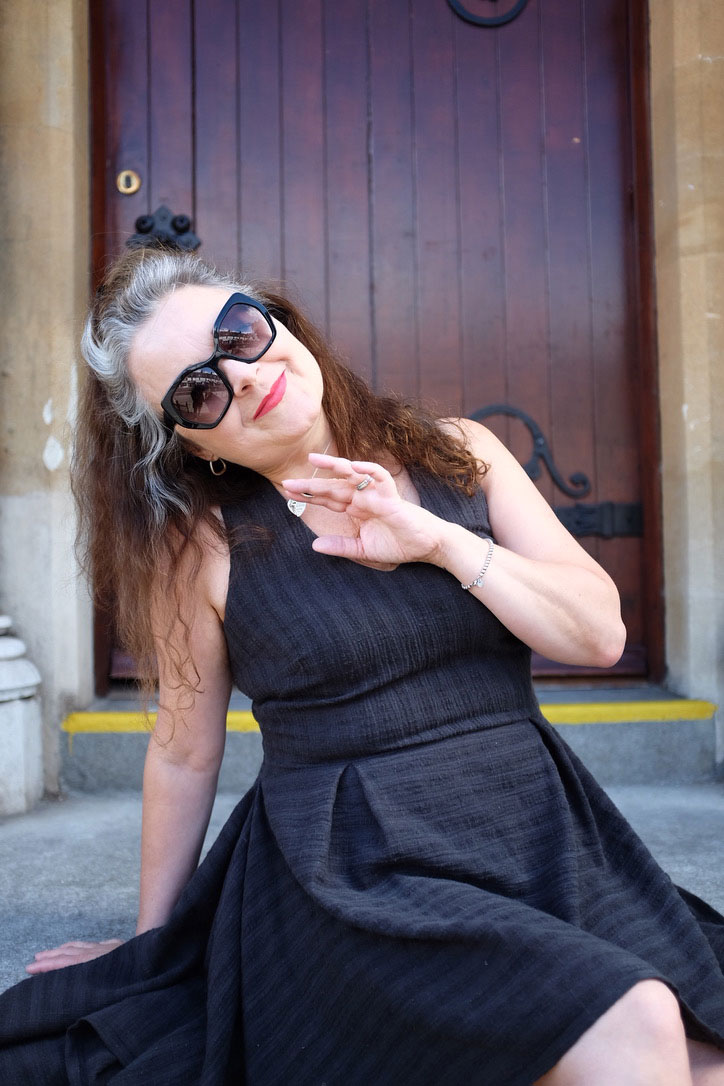
When I returned to sewing (more seriously) about 20 years ago I wanted to sew all the colours, all the flowery fabric and all the frills. Because I could. Because I could affford to. And because I found a wonderful sewing community and I wanted to be just like them. But now I feel like I’ve come full circle armed with a fresh load of knowledge and Inspo, from the job that I do – I just love typography and graphic imagery – from my surrounding artist friends – I’m going large on the brush strokes – and a new found sense of brave. I just want to try new things. Not worry whether it fits in with anyone elses vibe and certainly not fashion as a whole. I don’t think I ever worried about that too much anyhoos but I just want to explore more possibilities 
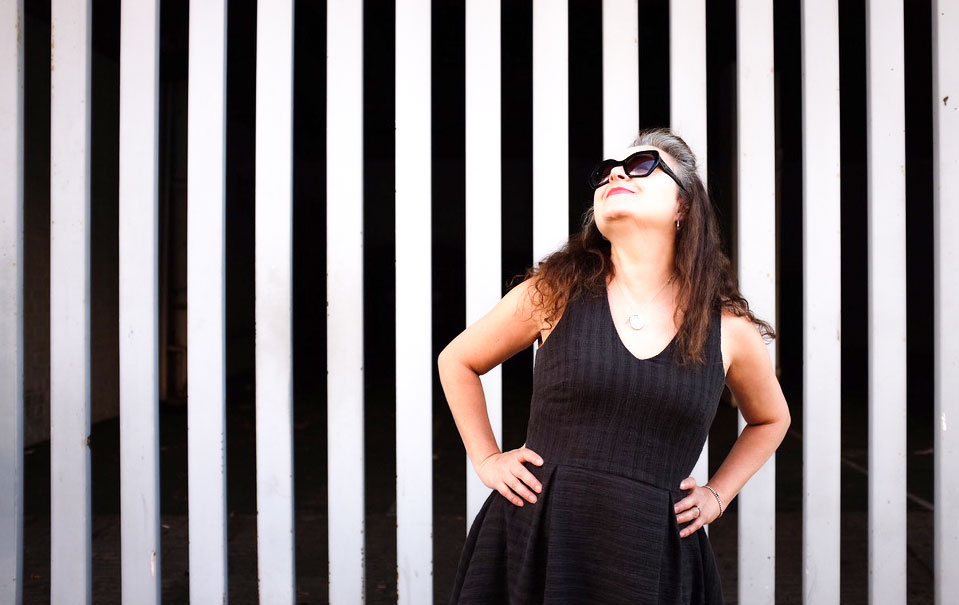
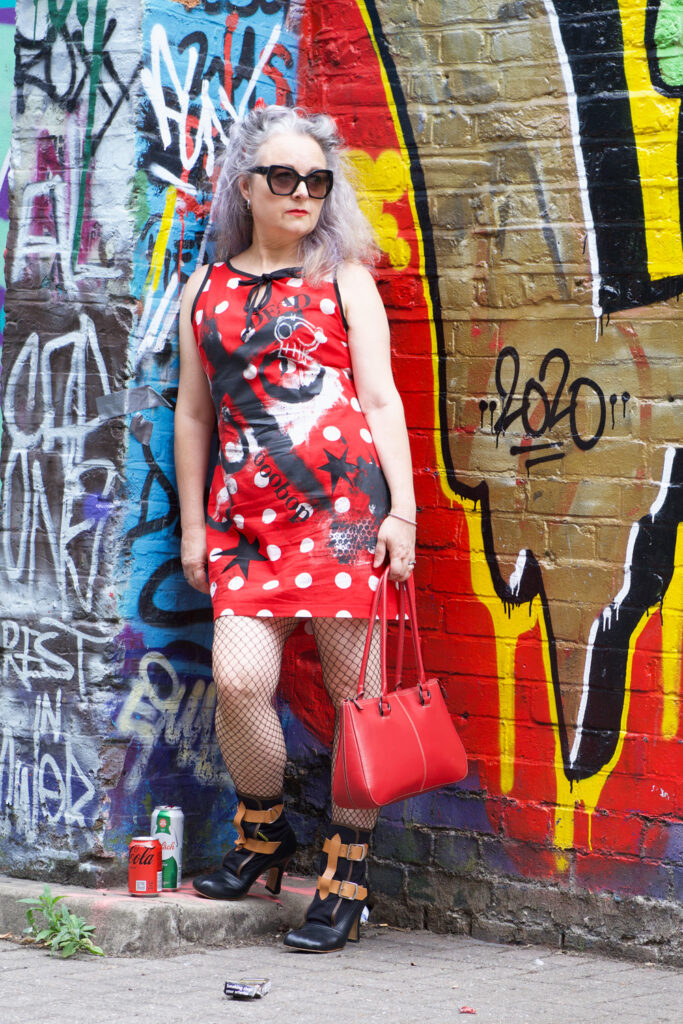
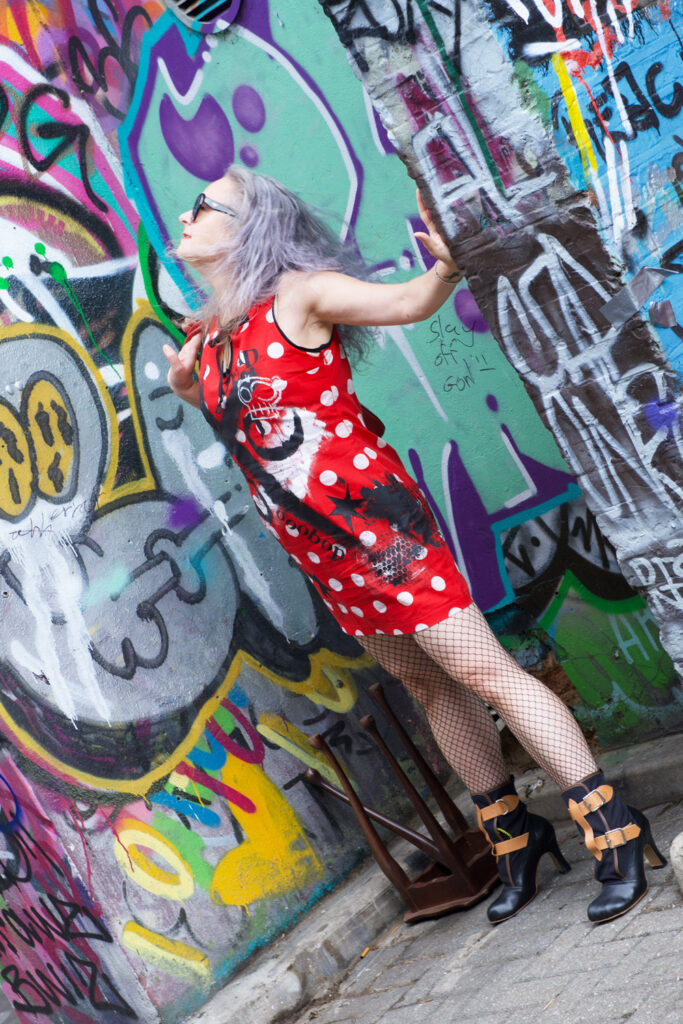
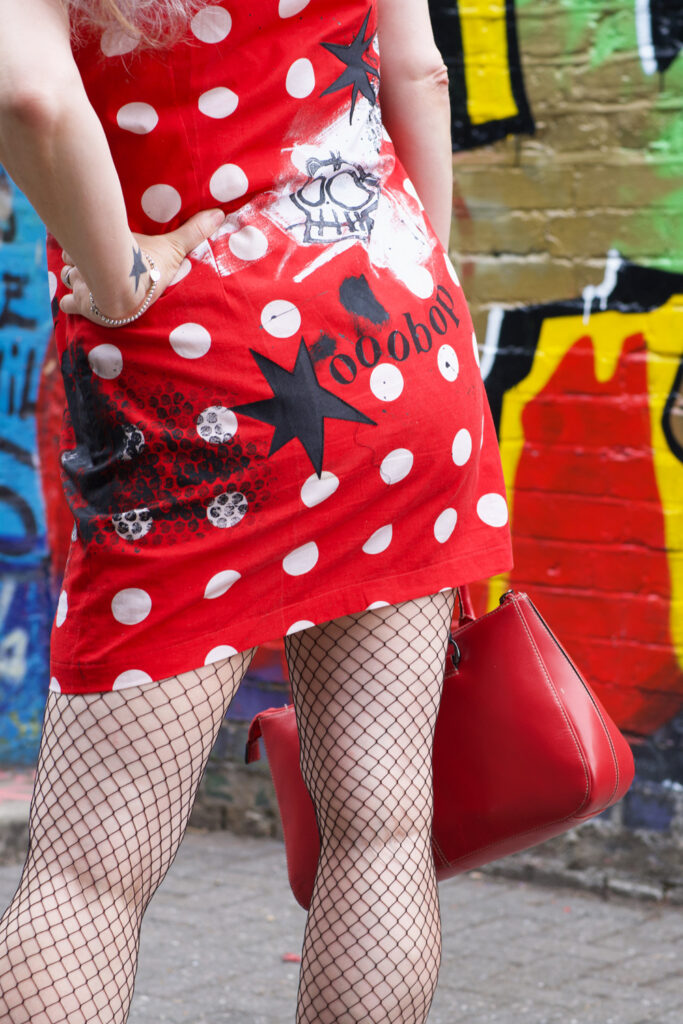
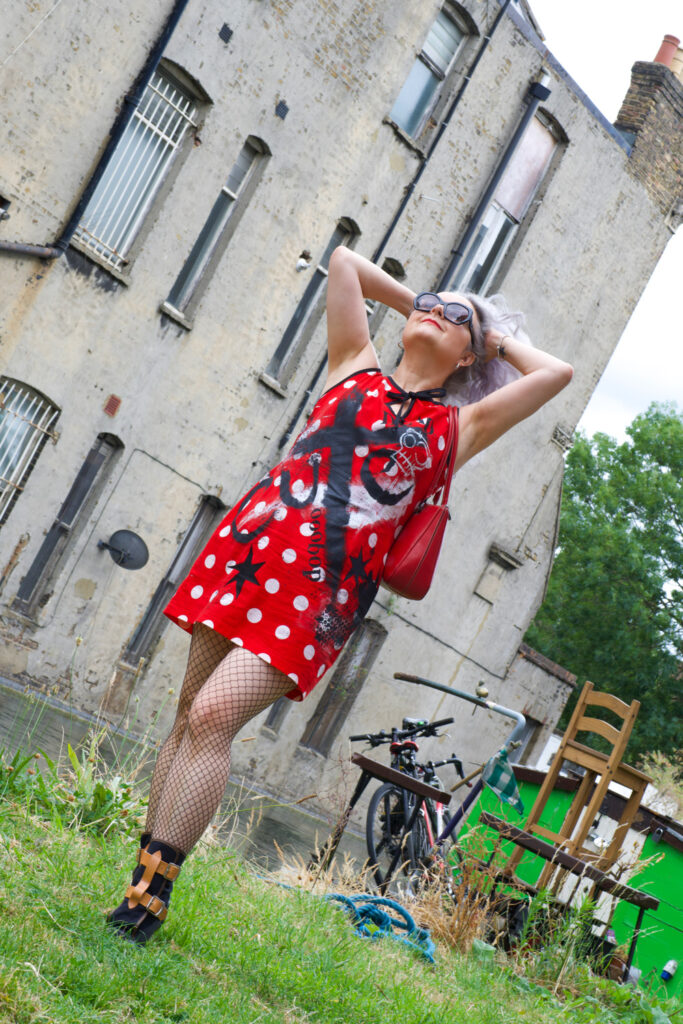
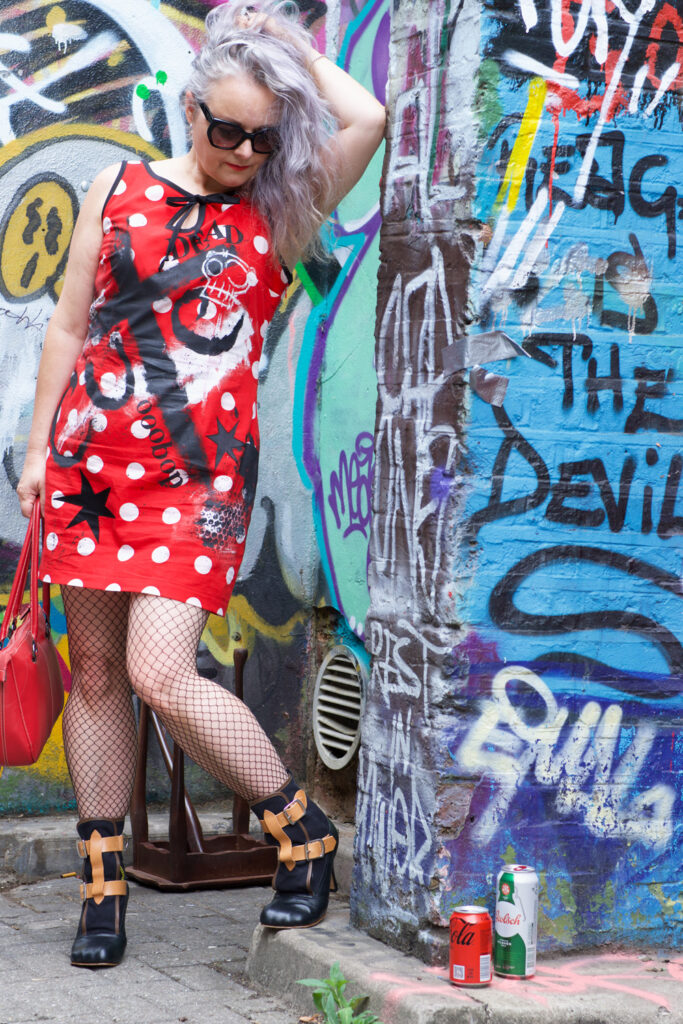
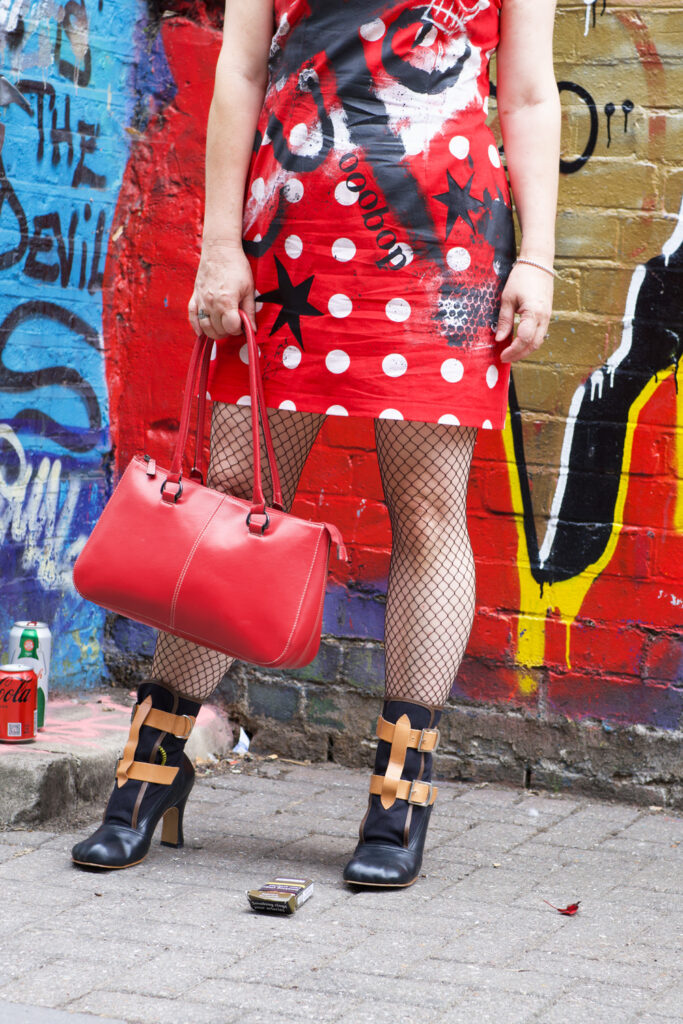
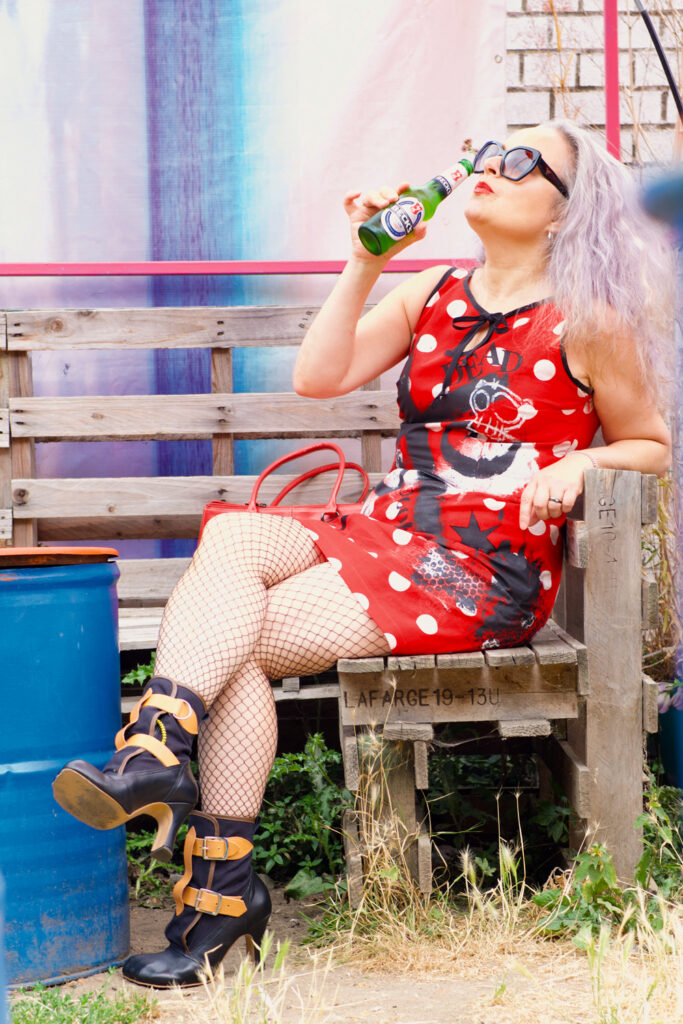
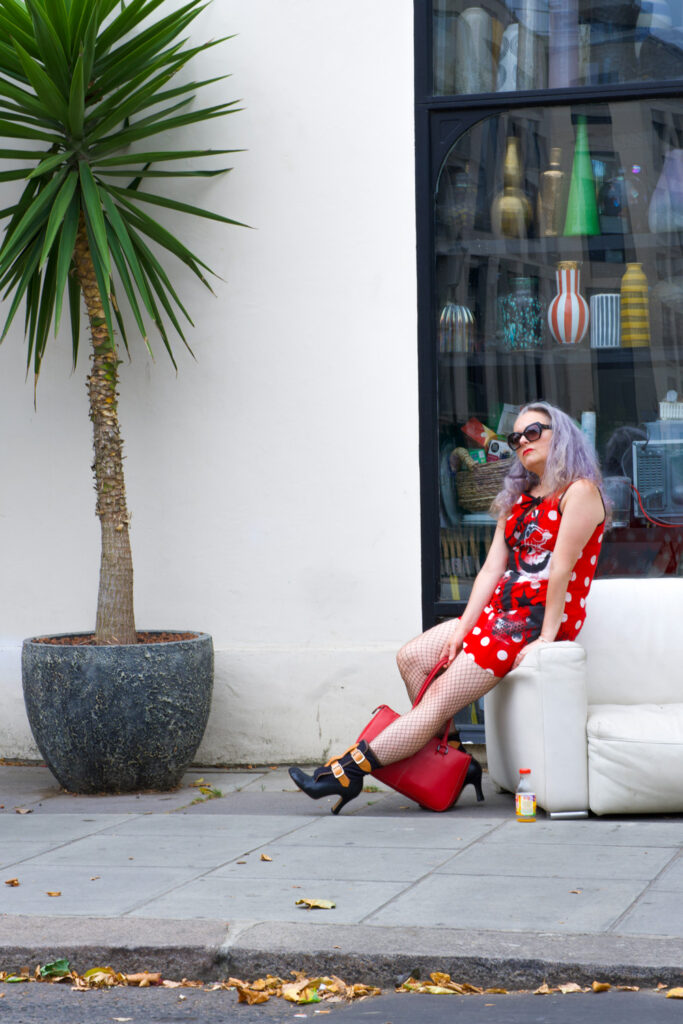
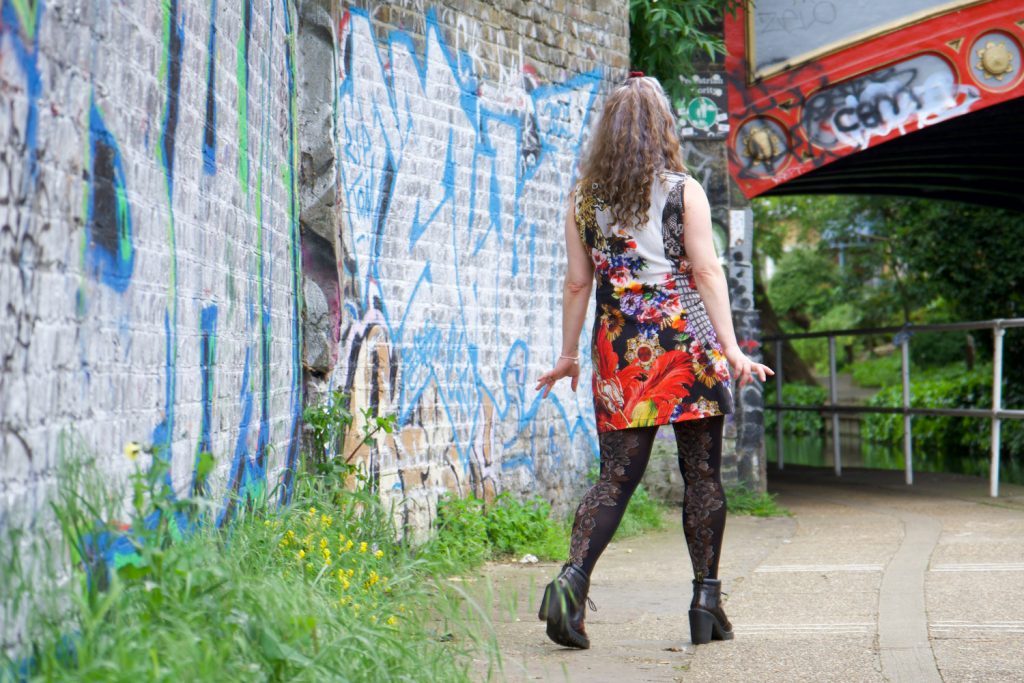
And so this dress was created from a pattern I designed from my own drafted pattern block. I used a vintage reclaimed fabric and painted on it with large black and white brush strokes, I carved a Lino piece to print the skulls, I used rubber letter stamps for some of the wording and I appliquéd the stars with scrap satin. Bubble wrap mono print and brush flicks were added for  texture. I used a fabric paint called Pebeo Setacolor which was fixed with heat, and I’ll report back with the results on how it laundered! Its not my best work yet, but I am proud and relieved to have finally released one of those crazy ideas from my head and put it into practice.

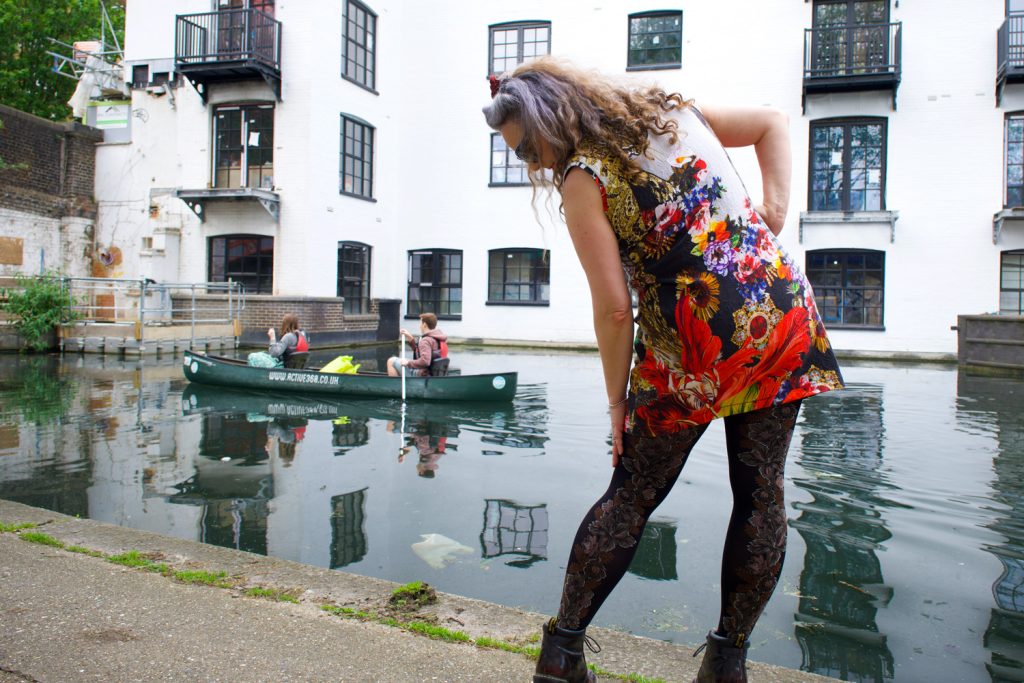
If I’d have made this dress as a youngster, my mum would definitely have walked ten paces behind me, worried about all the disapproving looks from people in the neighbourhood. It’s still kind of like that where she lives. Although she’s more used to me being ‘whacky’ now lol. But by stark comparison, Dan and I wandered around Portobello and the Grand Union Canal in West London, blending in perfectly with the surroundings and not a soul batting an eyelid. This is one of the main reason I love London. Another is that you come across free location set ups like this!

Oh, and this is how reasonably cute the dress was before:

I’ve got more ideas bubbling and more reclaimed fabric that will be perfect for purpose so I hope to share those once they are realised. There will also be a more demure wedding guest outfit to share soon too so do hit the subscribe pattern to be notified by Email of a new post.

Thanks to Dan for these amazing photos. Thanks to all the inspiring people in my life and many thanks too for you reading my waffle all the way to the end. Im forever grateful for your support and comments.

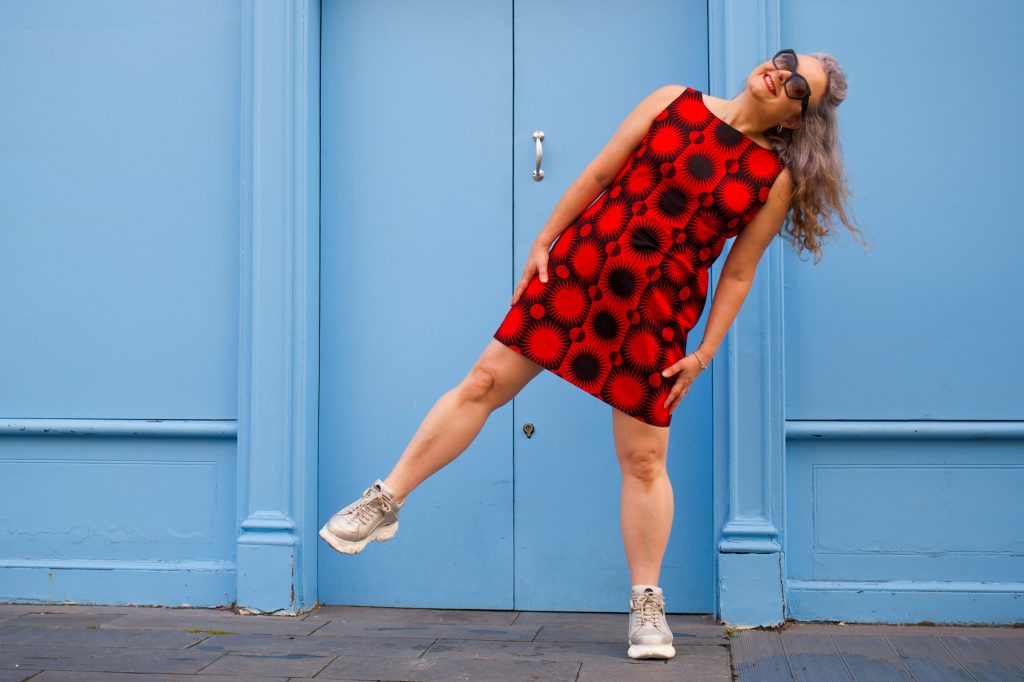
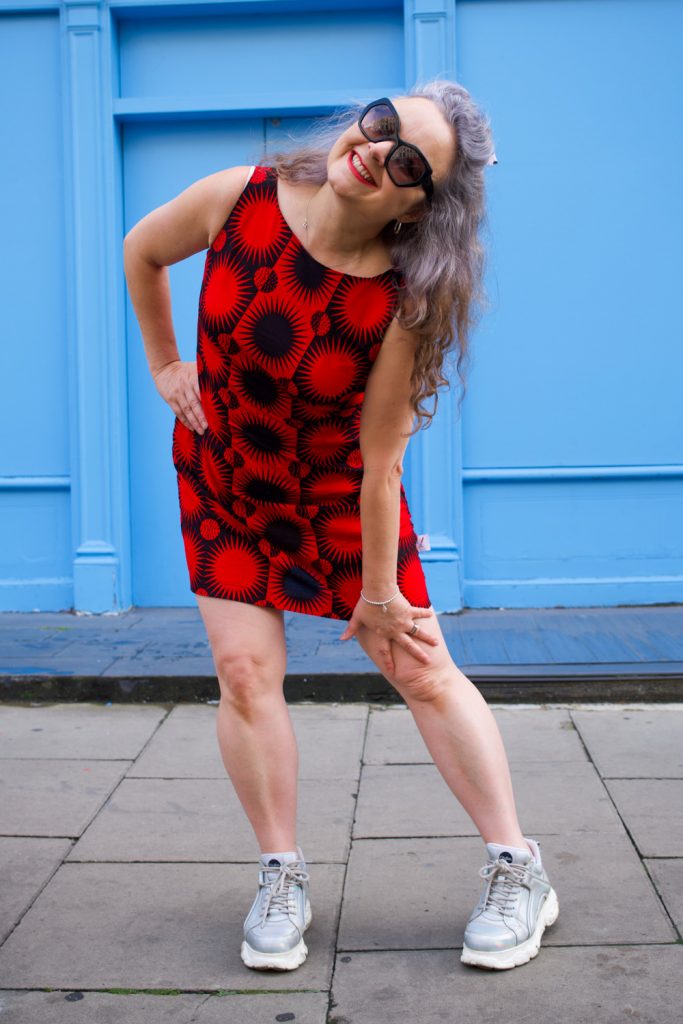
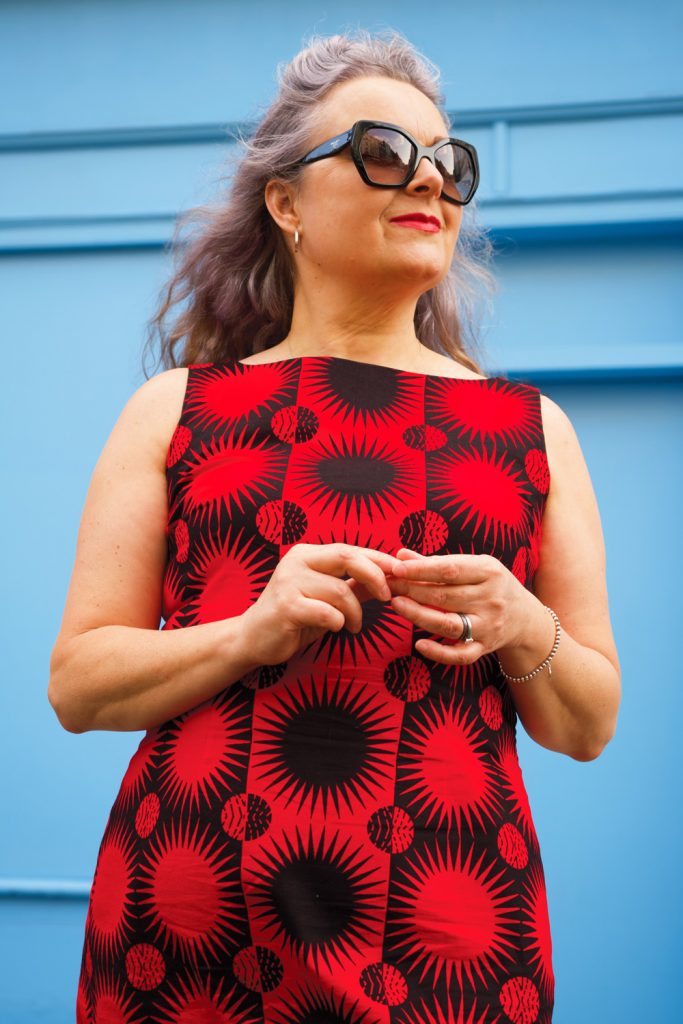
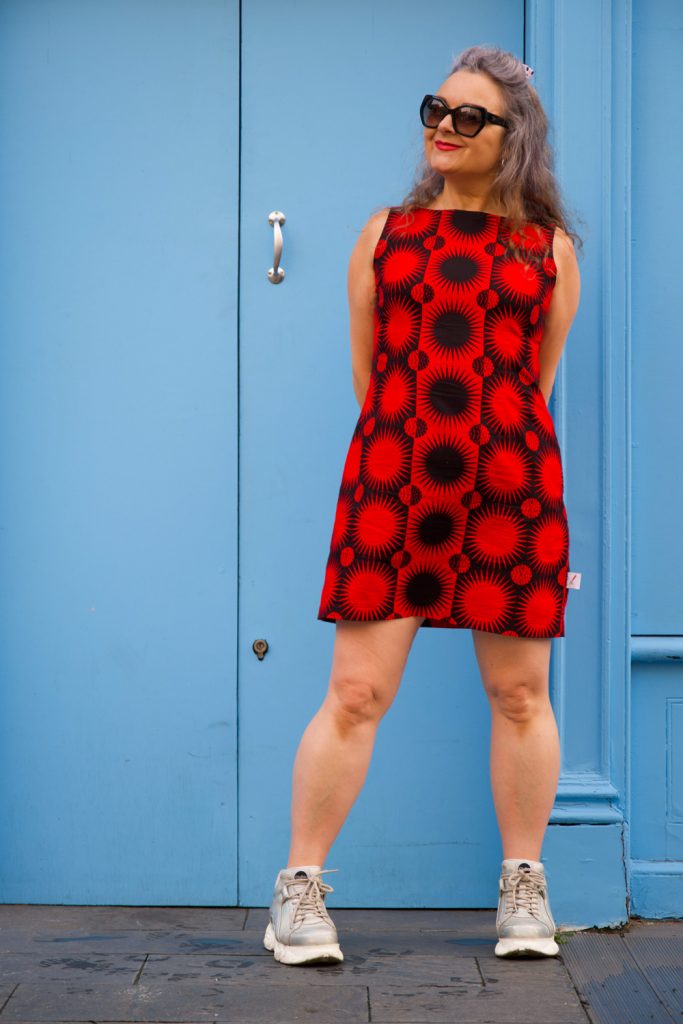
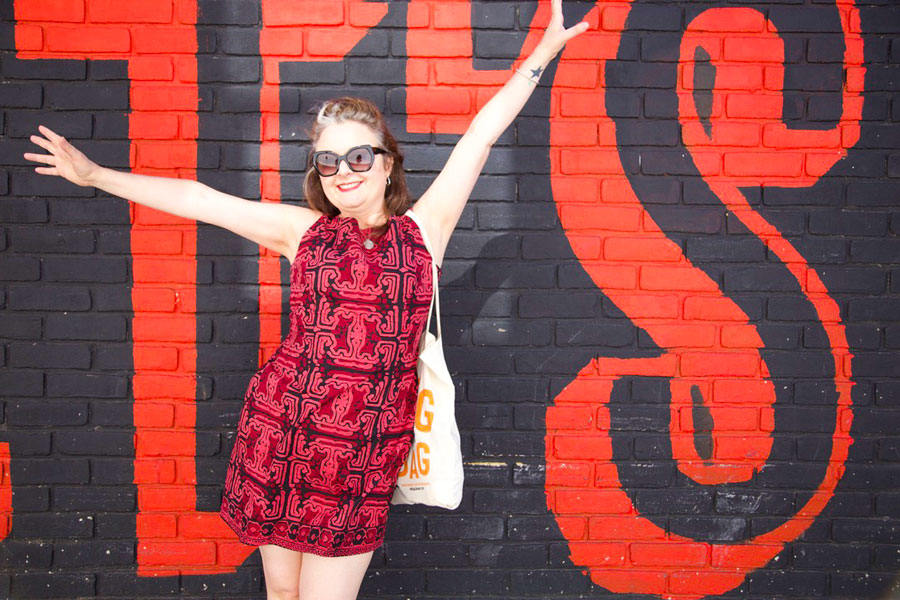
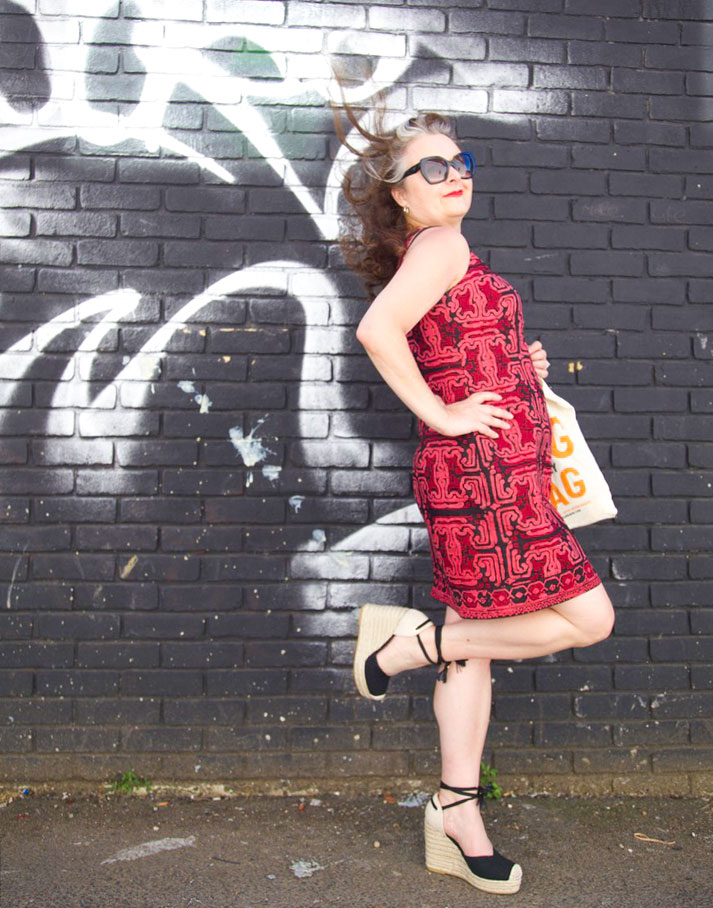
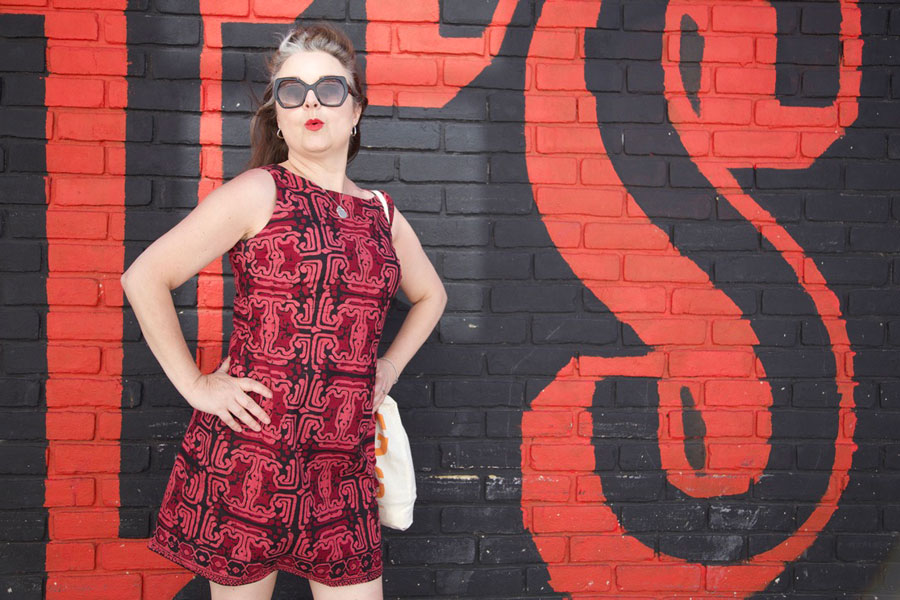
Fitted sheath dress in a graphic Ankara fabric

This is the dress I completed at the Crafty Sew and So camp, weekend before last which feels like a dreamy distant memory already, since I’ve been buried deep in work projects ever since. Thank goodness I realised the importance of taking a simple no-brainer project with me as I had anticipated a lot of chat and I didn’t want to be getting stressed out by fiddly details… or miss out on all the goss!

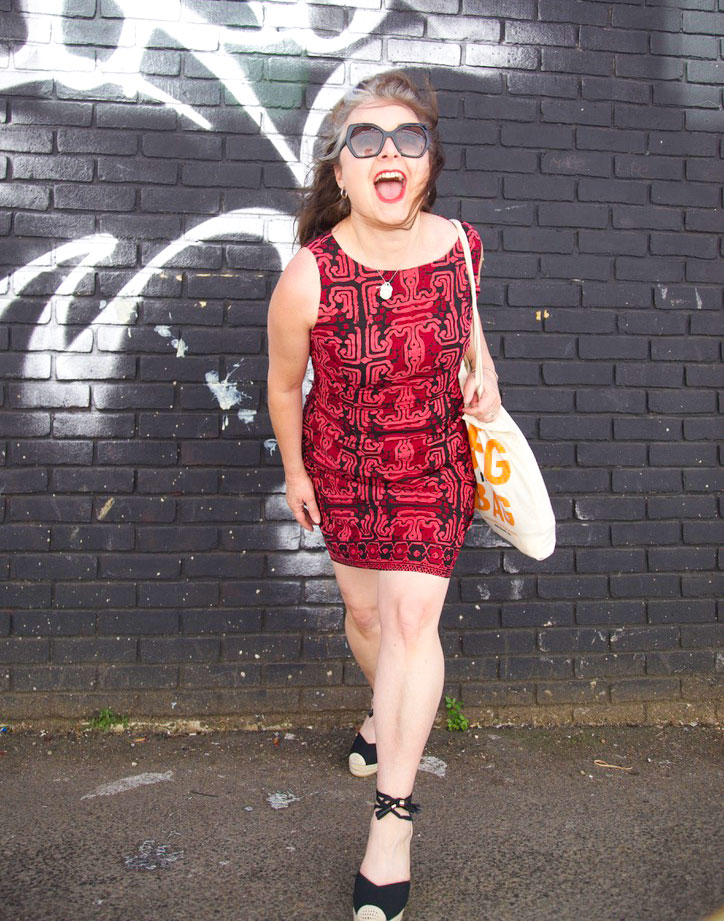
Sewing a sheath dress is a good test of fine tuning a fit as woven fabric has no forgiveness whatsoever! And I’m pretty sure I’ve nailed it now. It feels like it fits in all the right places and its amazing how that feeling transmits a confidence when I wear it. Well I can hardly blend into the background with this graphic print in any case!

I was hoping the Ankara fabric, with its strength and weight, would give good structure and I wasn’t disappointed. If you’ve sewn with it before, you’ll appreciate how your shears slice so accurately through the threads and the joy of ironing those sharp seams – especially helpful when pressing those understitched facings. They are so never going to pop out!

The dress pattern is simply a front and a back piece and an all in one facing to finish the armholes and the neckline. The zip is at the left side – something I learned from sewing a lot of vintage dresses and a method that means the back piece stays as one so there is no need to pattern match across a zip.

I would normally have tried harder to match across the side seams but I was working with a remnant here, left over from this crazy cowl skirt project, so I was limited with my placement options. Very happy that I used stash fabric though!

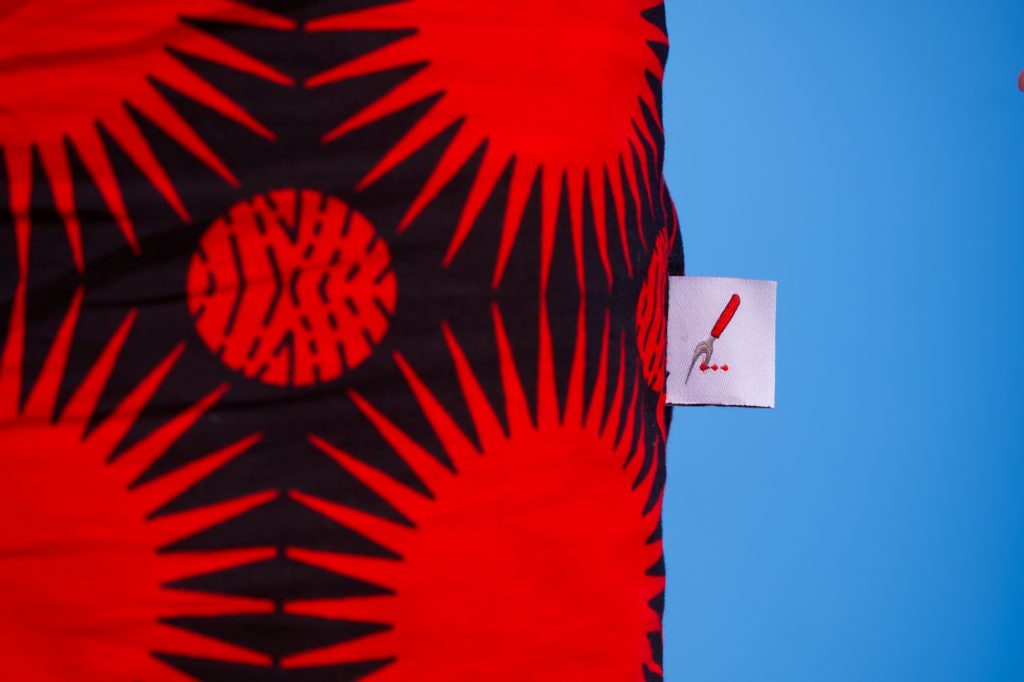
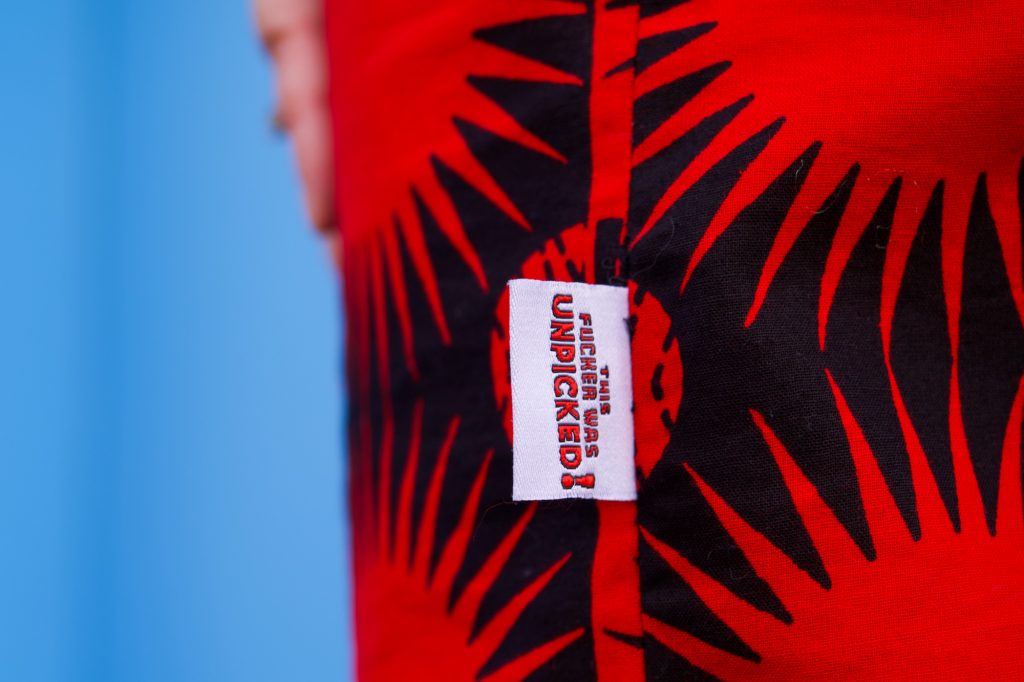
And whilst we are on the subject of side seams, I’d like to draw attention to the sweary label that Manisha from Manisha’s Fancy Fabrics kindly and appropriately gifted me from Sew Me In (explicit) Labels. Because, despite the simplicity of this dress, I had to unpick 3 seams at least due to distraction of talking and mostly laughing my head off. In case you need any confirmation, sewing alongside likeminded makers who share as much passion about dressmaking, is incredibly good for the soul but a little bit detrimental to productivity!

This won’t be my last sheath dress for a number of reasons:

  • Its a lovely no-brainer of a sew, once the fit is mastered
  • It uses precious little fabric
  • Its can be office-appropriate in a suiting fabric, casual in a cotton, dressy in a satin
  • It can be customised so easily

Thanks to Dan for these lovely photos. We were in Charlotte Street, and very much drawn in by the blue of the shopfront. We haven’t been up town for a long while and it was good to see the buzz is still there, with lots more pedestrianised areas for al-fresco drinking and dining.

Keep tuned for some more of my pattern drafting adventures. I’ve got a few plans up my sleeve!

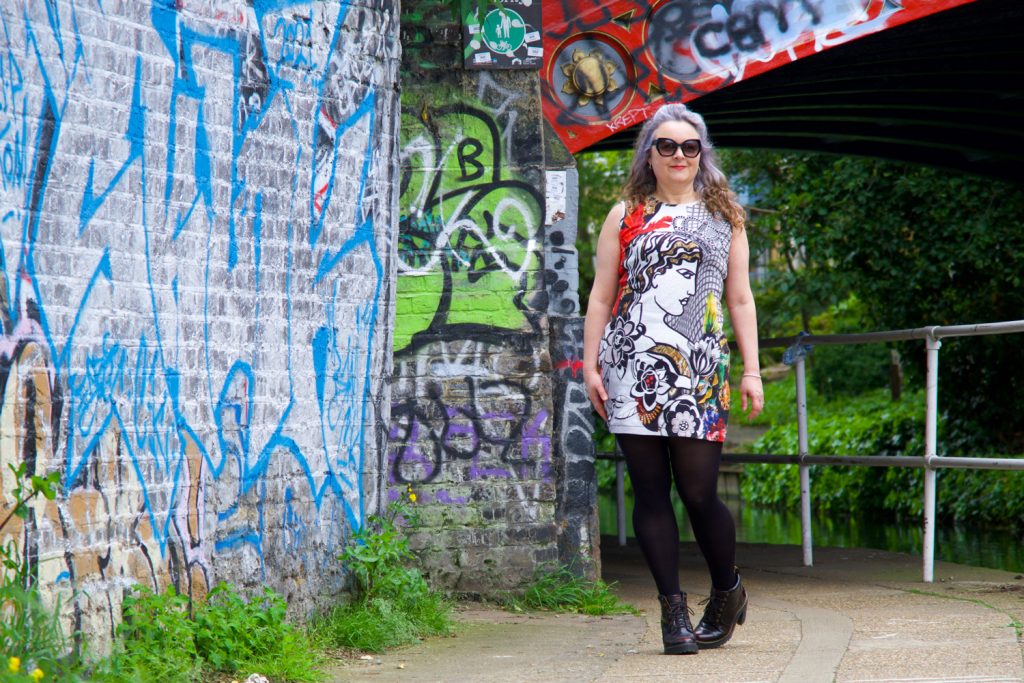
So much love for the self-drafted Dolce dress of dreams

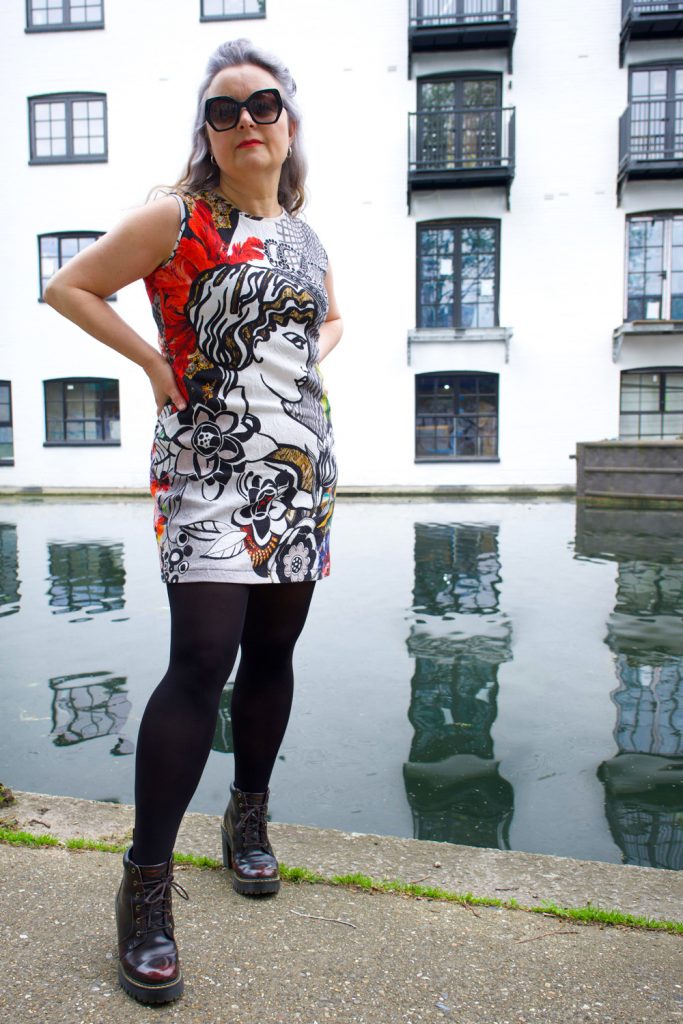
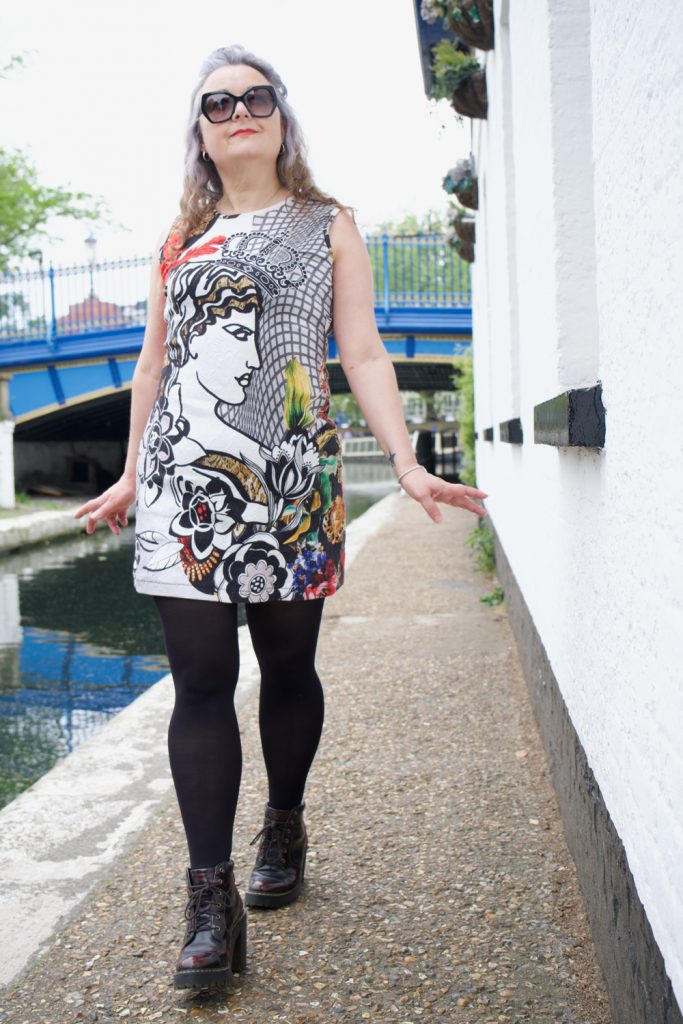
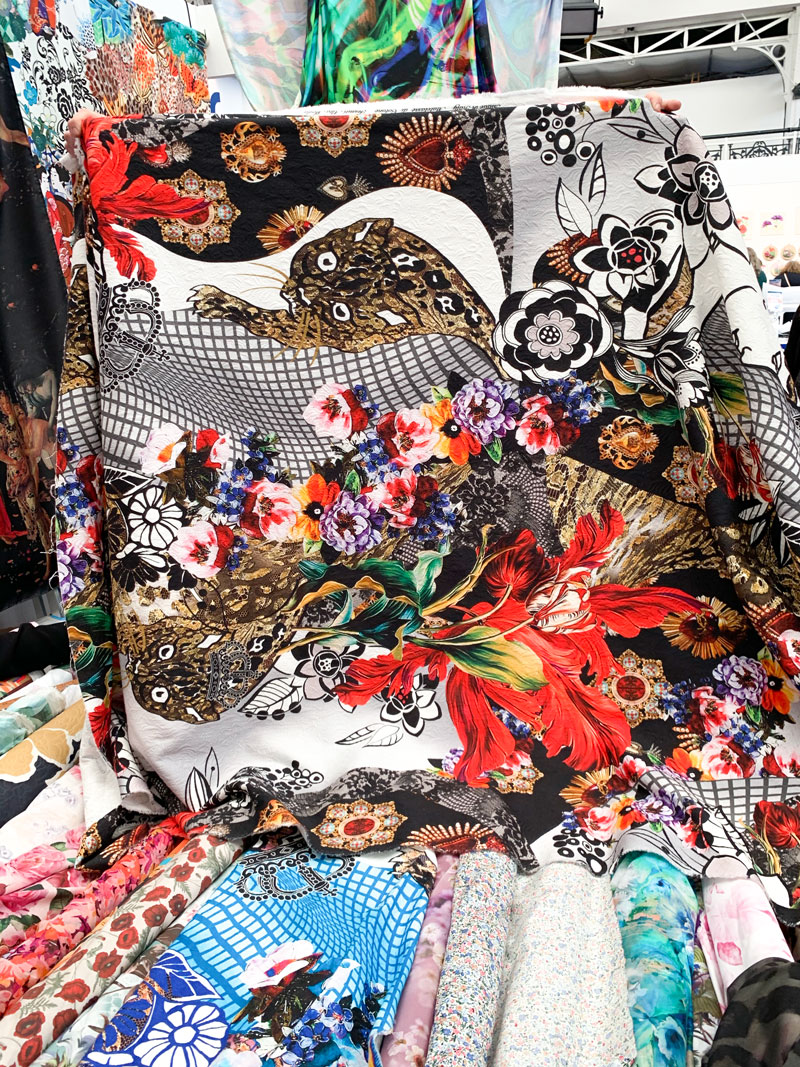
Remember that divine Dolce fabric I was compelled to buy, back at The Stitch Festival 2020? Well it just got stitched up. And boy oh boy it didn’t disappoint. 

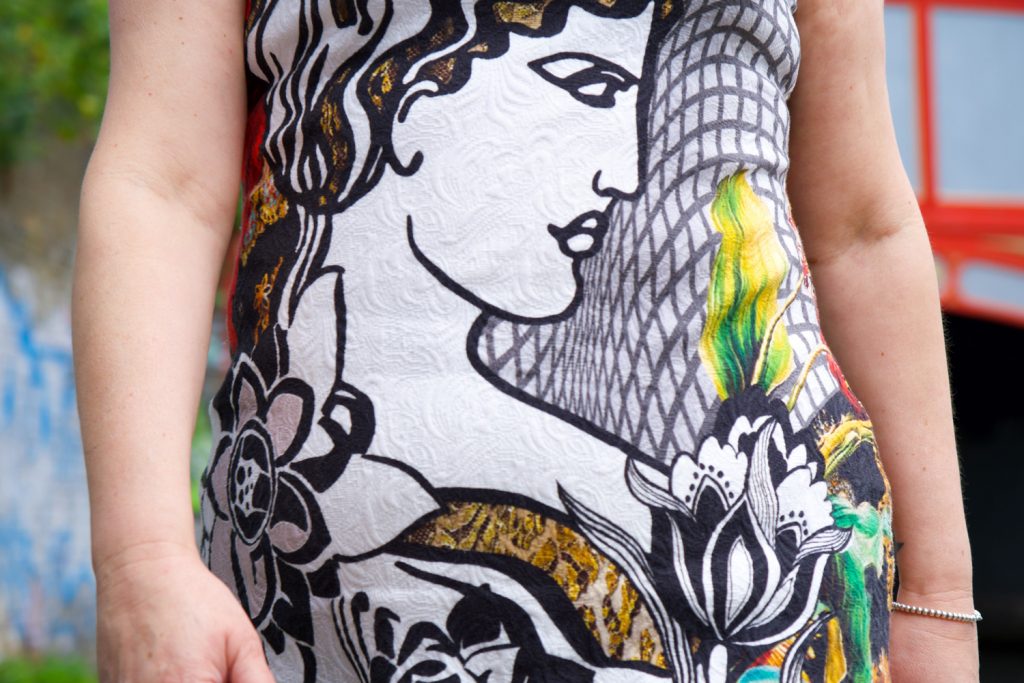
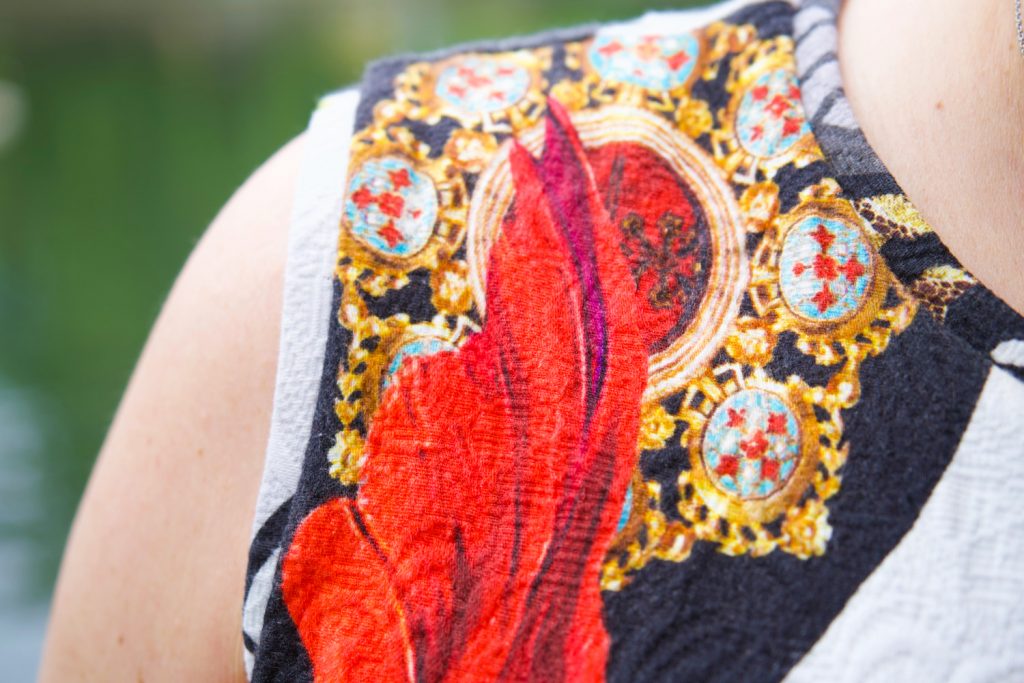
I had absolutely no idea what I was going to do with it at the time. But I knew it was going to be fabulous, even if I simply draped and cinched with a belt! It’s an Italian cotton metalassé according to the selvedge – a cotton and lycra Jacquard according to M. Rosenberg’s web listing. But all the same a quality weighty, textured stretch fabric of dreams. BTW, I pre-washed at 40 degrees and those colours still popped! And heads up, there are 3 singular metres left remaining on their site if you’re a sucker for a crazy-ass in-yer-face designer print as much as me!

Despite the try-hard distraction of the print, the texture of the metalassé holds it’s own

Ultimately, I decided to let the design speak for itself. Any clever design lines were going to get lost and I wasn’t going to jeopardise one bit of that amazing artwork if I could help it. That meant no darts, no pleats, no tucks, no waist seam. Mmmmm. A full length maxi dress for ultimate impact. That is the end goal. But first to trial a short sheath to test the fit. I bought enough to have a long and a short version, psychically of course!

I’ve drafted a few woven dresses in the past, for me and others, but I’ve only recently worked a knit sloper. So earlier this year I practised on some turtle neck rib-knit tops to test the fit – see black one here, and red one there. All I had to do was extend the bodice pieces to a dress length and omit the sleeves. I didn’t want a turtleneck but I did want a jewel neckline so I didn’t alter that much either.

Though I was happy with the results I knew that the template might not translate in this weightier stretch. Comparatively, the rib-knit was light weight and had way more stretch. I should really have trialled a sleeveless version too but impatient me couldn’t wait any more and I just went for it.

The pattern pieces simply consist of a back a front and some self binding for the neckline and the armholes. And cutting it out was a joy. Not only because is was dead quick with a rotary cutter and all, but it was so satisfying – no slippage, no stretching… just a lovely little satisfying crunch as that blade sliced through!

I first sewed the shoulder seams, after applying my favourite iron-on stabilising tape [aff-link] to limit any stretching, then I sewed the side seams using my overlocker. The first try-on highlighted a bit too much ease in the armholes so I nipped 1cm (so 2cm in total) off the end of the shoulder and graduated to zero at the neckline. 

Happy with the rest of the fit I pondered the effect of facings over bindings. I have a love-hate relationship with separate facings – they always flap around and need ironing flat. The only ironing I don’t begrudge is pre-cutting out, and not post assembly! I much prefer an all in one neck and armhole facing that curves over or under bust. But this fabric is quite heavy and I feared the result would be too chunky.

So I decided on bindings which would mean trimming the seam allowances back a bit to allow for the additional 1cm wide strips to sit comfortably.

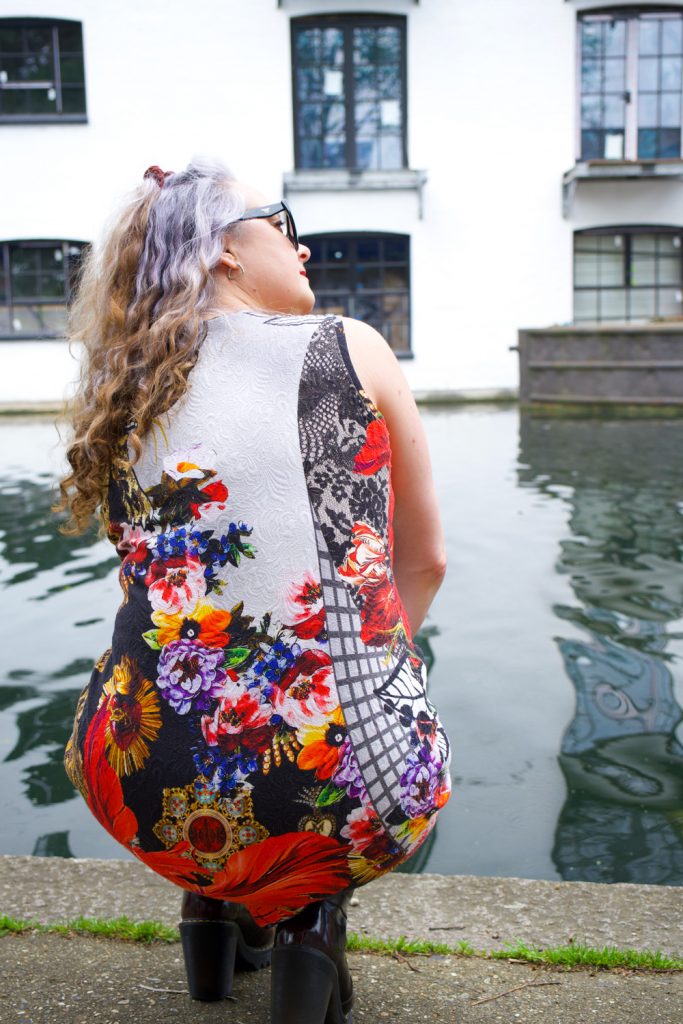
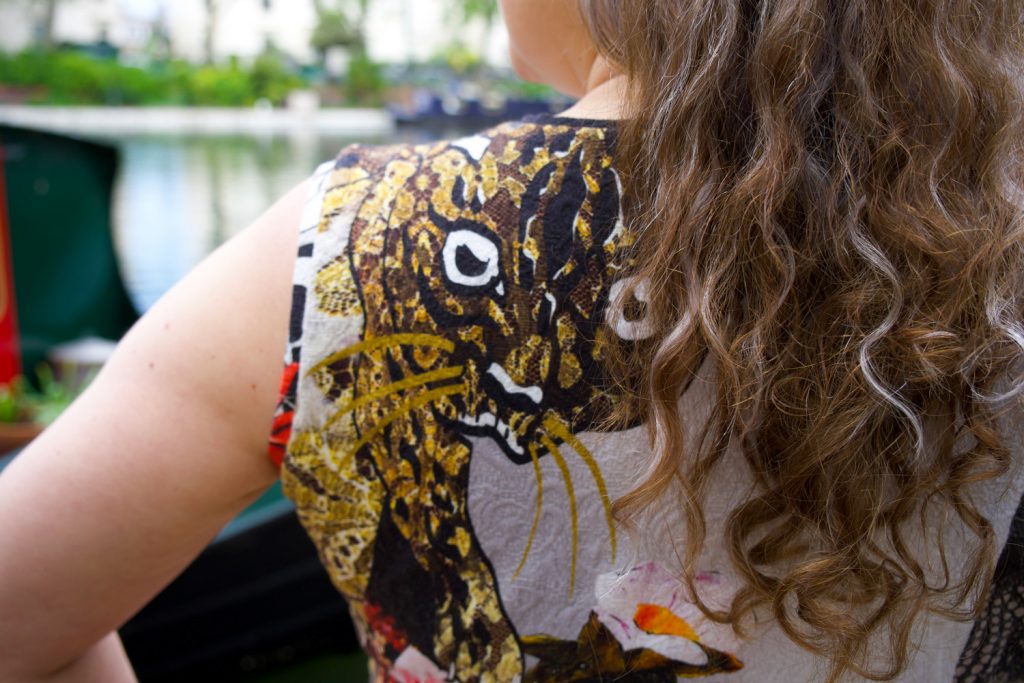
Looking at the back I can see that  I would need to lower the armscyce next time. It’s comfortable and all but the knock on effect of taking out the ease on the shoulder has raised the underarm. Not a biggie though. That leopard over my shoulder is a dammed fine distraction!

As you might imagine, the thing that took the longest with this dress was consideration of placement. Both back and front are good. Like stupendously good! There was no pattern matching necessary. It was just plain choice. Well, and the want to not decapitate the chap on the front! I decided I didn’t like the idea of someone on my back but I did like the possibility of the back side being prettier than the front. So that’s the way the cookie crumbled.

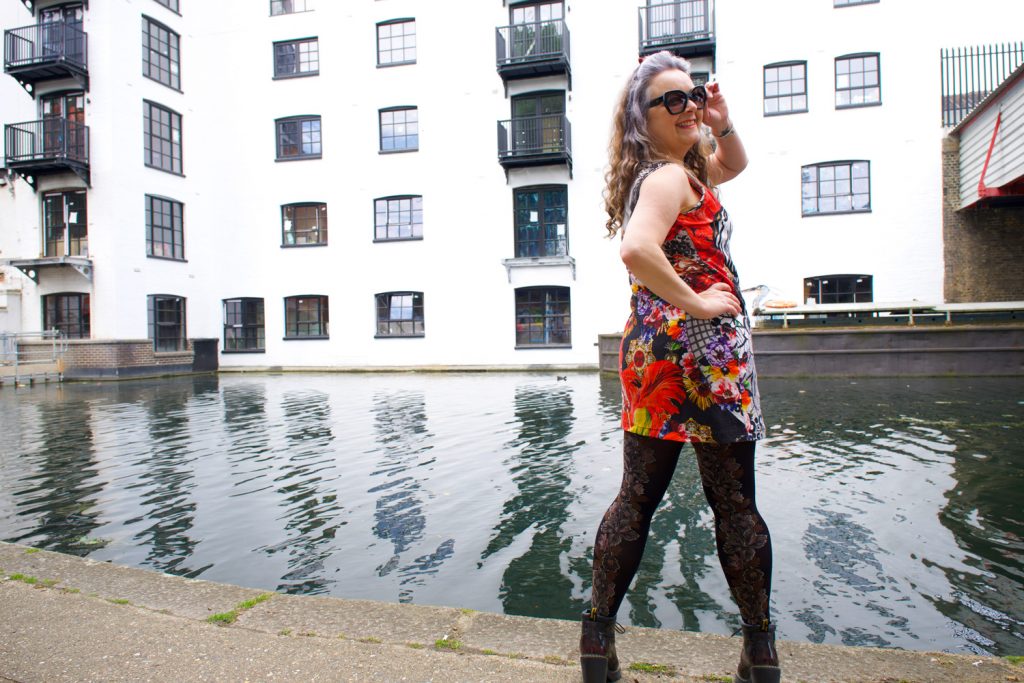
We had such fun taking these shots yesterday. Dan had recently been on a walk shooting birds along the Grand Union canal and suggested it might throw up some lovely backgrounds for the shoot. He wasn’t wrong and I was very humbled by all the wonderful comments from passing strangers, about my dress. It’s so effortless to wear. Though not quite the weather to wear without tights yet. No-one needs to be blinded by the intensity of my pale pins so soon into the year! In any case. It’s very short. I’m sure the world isn’t ready for my pants either!

More is more, when it comes to tights!

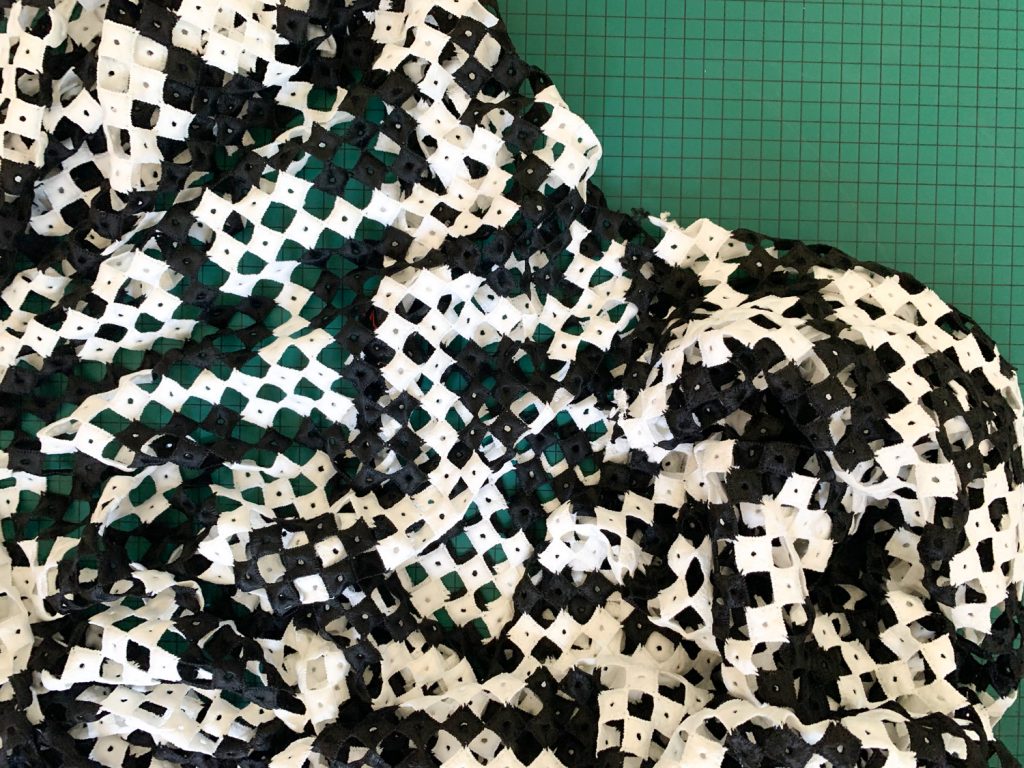
We walked to Westbourne Park, with a cheeky peek at some market stalls in Portobello along the way. Couldn’t resist this odd fabric from a vintage stall. Anyone want to hazard a guess as to what this is?!

If you can bear to watch this space for another year or so, who knows what kind of crazy dress this will turn into!

And there we started our walk, all the way to Paddington basin where we sat for a lovely lunch and a cheeky beer or two in a beautiful Victorian pub. 

A bus ride back through the remnants of a demonstration in Hyde Park was quite exciting. A few more beers and a takeaway to round off a fabulous day of doing what we both love. Bring on the sunshine – we want more London days like this!

So a gazillion thanks to Daniel James Photographic and not forgetting Dibs who blogs at Dibs and the Machine , sells incredible designer fabric at Selvedge and Bolts and who was instrumental in making me buy this fabric in the first place!

Another turtle neck top complete – in time for MemadeMay

May is one of my favourite months for many a reason. The weather is warming – I so can’t bear the cold – and I’m more likely to get out more for walks and to visit my favourite places and people after a long hibernation period. It’s also the month that the lovely So, Zo What Do you Know? hosts the #MemadeMay challenge. Now it’s fair to say that each year this flurry of instagram selfie shoots gets easier for me as my wardrobe becomes fuller. But Lockdown has narrowed my choices somewhat by what fits and I’m going to have to make some more clothes. Shame, eh?!

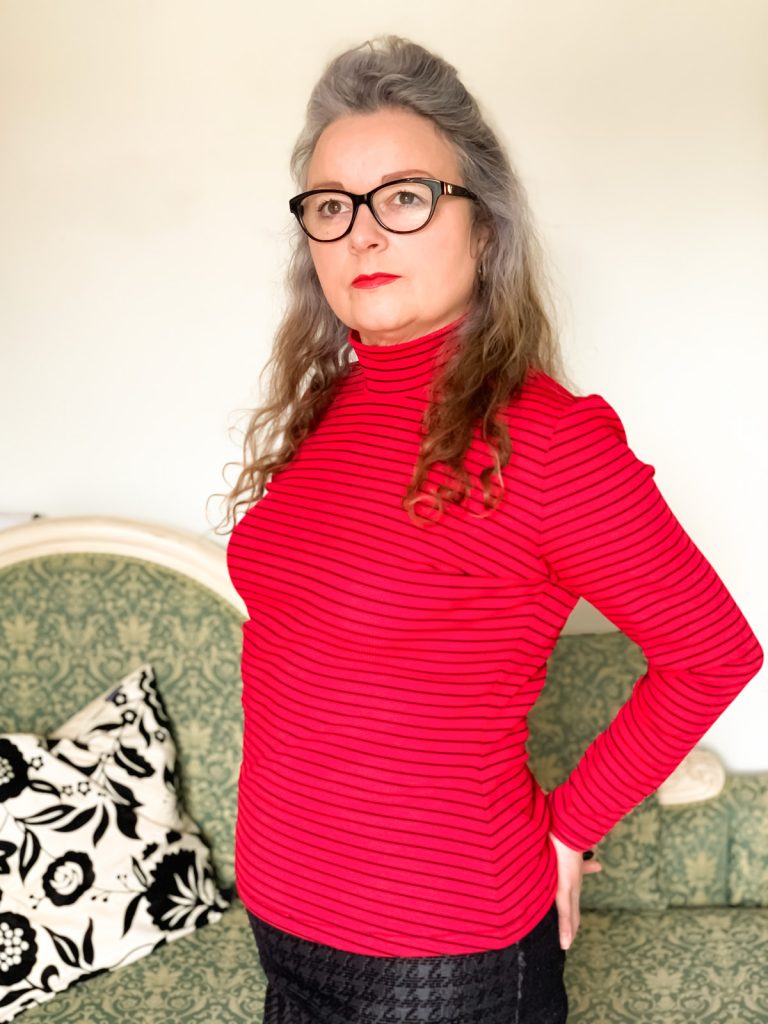
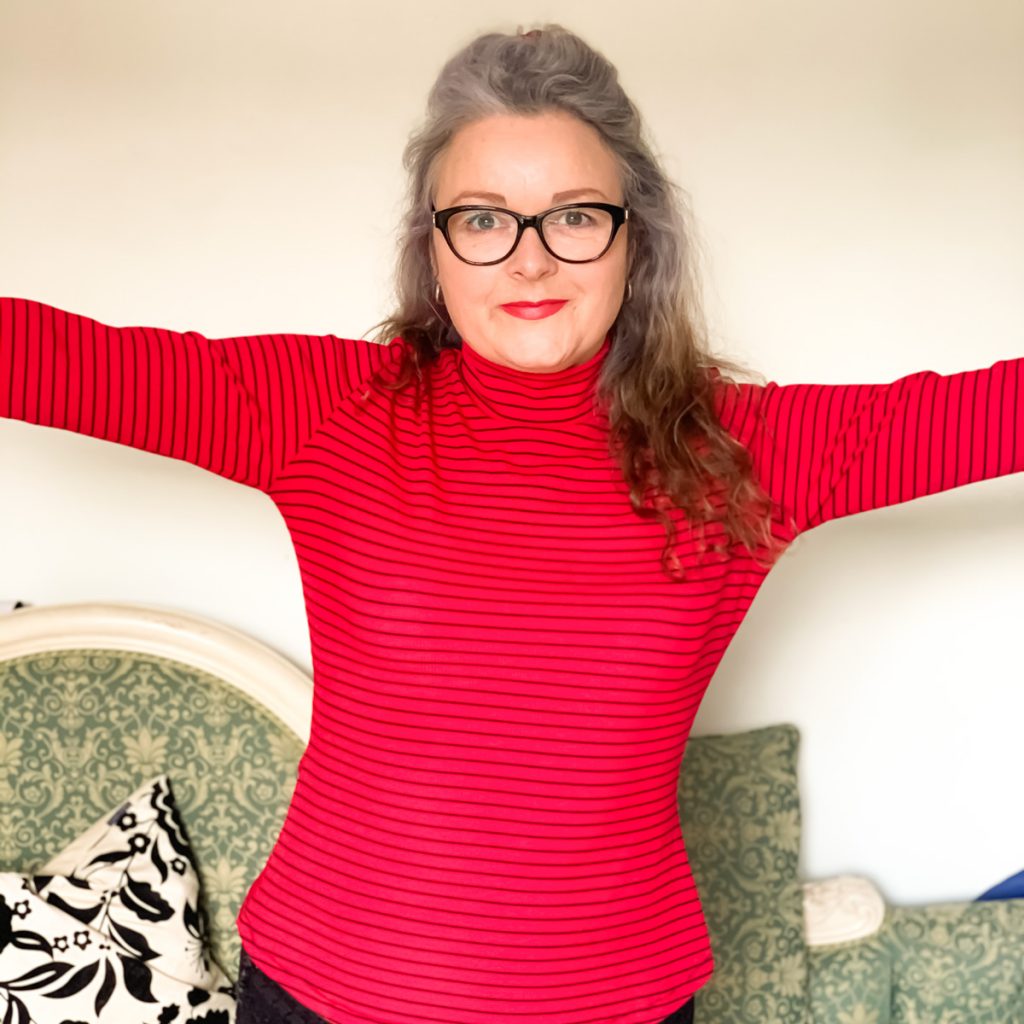
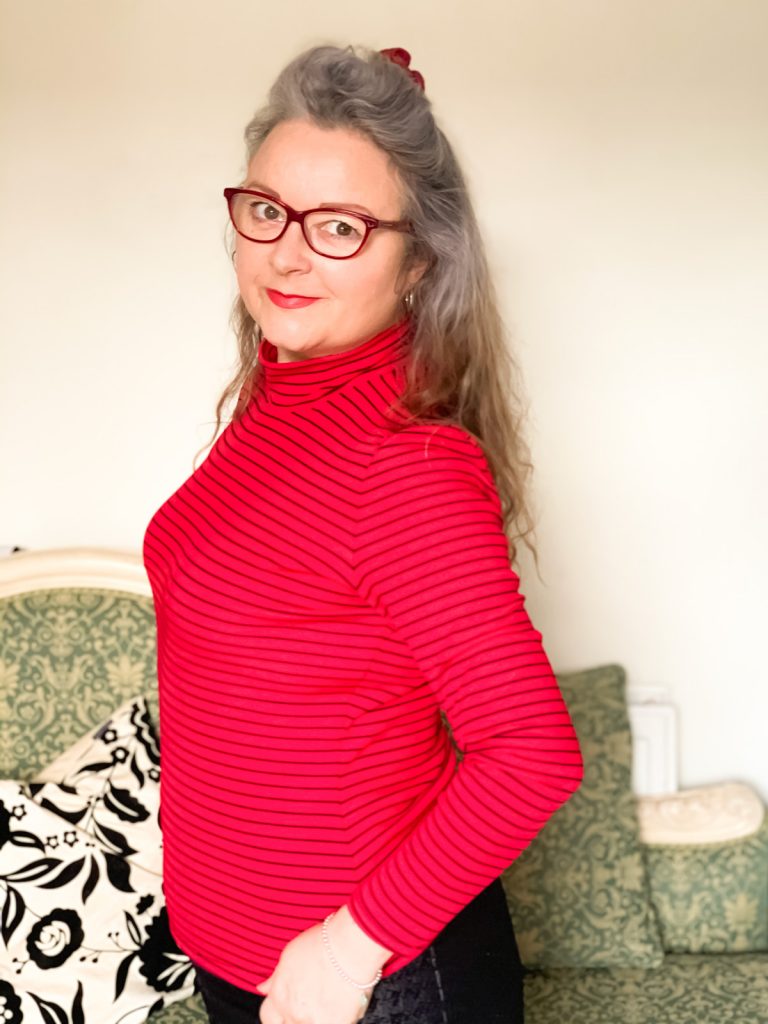
I’m kicking off with a new turtle-neck top, using the same self-drafted pattern as the black one I made not so long ago, which I might add might possible be my most worn thing ever, already!

Nothing needed to change but I really wanted to see if I could elimate some little folds from the underarm, across the bust. I figured that underarm armhold point might be sitting a bit high, so I lowered it a quarter of an inch and adjusted the sleeve to match.

It does fit a bit more comfortably but didn’t reduce the wrinkles! Haha. Still a lesson learned though. I luckily only adjusted the paper pattern. The digital version remains. But I am going to flatten off the sleeve head. It does seem to force my shoulder end to sit a little too high and it does measure a couple of mm’s longer than the armhole and because its a stretch knit there is no need for ease, so it will probably help. I do like the power of being able to tweak patterns here and there. It gives me a little buzz of control!

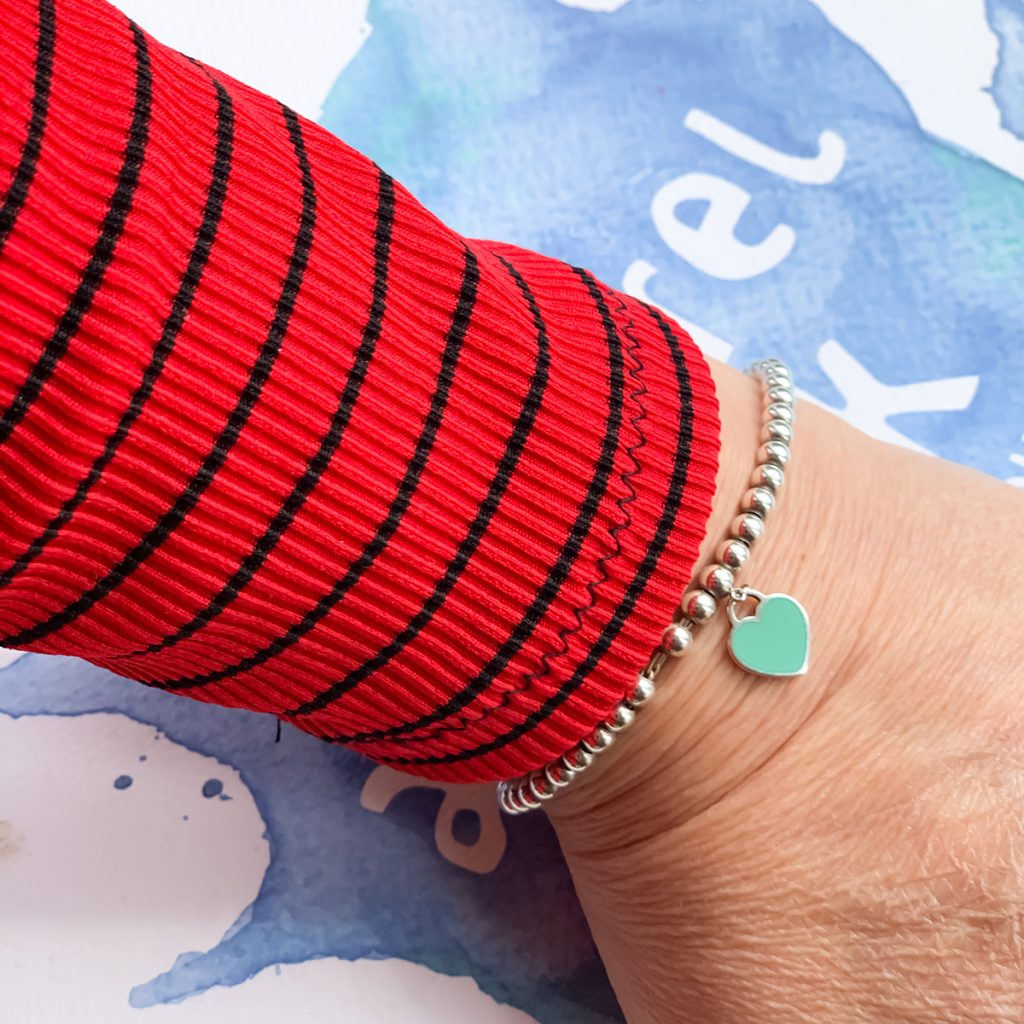
Once again the lazy in me couldn’t be arsed to set up another spool let alone the twin needle for the hems. So I zigzagged as usual. I kind of like the contrast of the zigs in between the black lines.

And I got the neck right this time! No silly amount of stretching. Just enough to fit. And its even more comfortable than the last.

The fabric is once again from Minerva.com. It’s a polyester rib knit in a lovely bright red colour with a narrow black stripe running round. I even made sure to match the stripes at the side. To be fair I wasn’t going to worry about it but the fabric behaved so well, it was harder not to!

This isn’t the end of stretchy tops. I definitely need them right now. And there is still room for improvement, and welcome opportunity for experimenting with different fabrics. Watch this space!

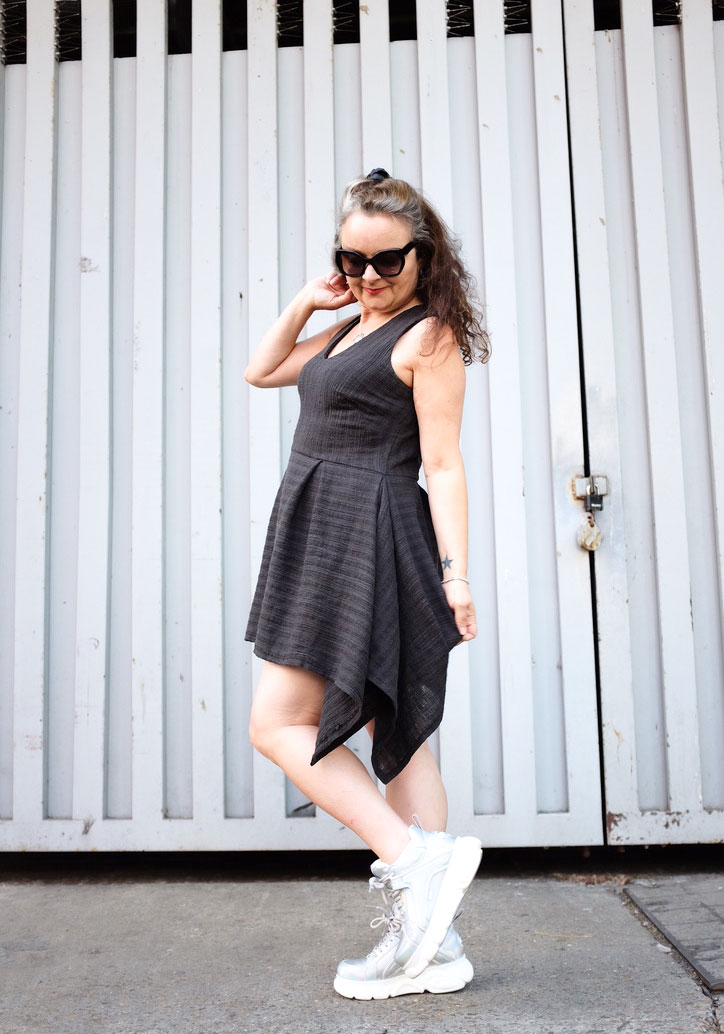
Handkerchief hem dress

ooobop design hankerchief hem dress

Lockdown forced me to buy fabric online. Not my favourite thing to do but needs must when Covid pulls the rug!

I headed straight to Minerva – amazing selection; easy to navigate website and very competitive prices. I’m also a fan of the accompanying videos that showcase the fabric in action so you can get a fair impression of the weight and drape.

I was on a roll with the Shelby rompers, having made a starry one, a tropical one and an upcycled one in relatively quick succession, and my plan was to make a plain one that was a bit more casual and downplayed for those days when you want to be slightly less visible. Read: any excuse to go back to black!

I’m a sucker for black. But even moreso for a black fabric with a texture. And linen is a firm favourite. So I figured this crinkle cotton striped linen gauze would tick all the boxes. Black was sold out unsurprisingly, so I went for charcoal which actually champions those slubs with way more contrast.

But when it arrived I was a bit miffed. It wasn’t at all as I’d imagined. It was a bit scratchy, a bit wonky with it’s loose weave and worst of all, following a prewash it contracted to half the width! That lovely slubby texture totally worked against me, didn’t behave at all like regular linen and was almost elastic! – I was dead scared to make it into a romper. What if one leg ended up longer than the other, lol!

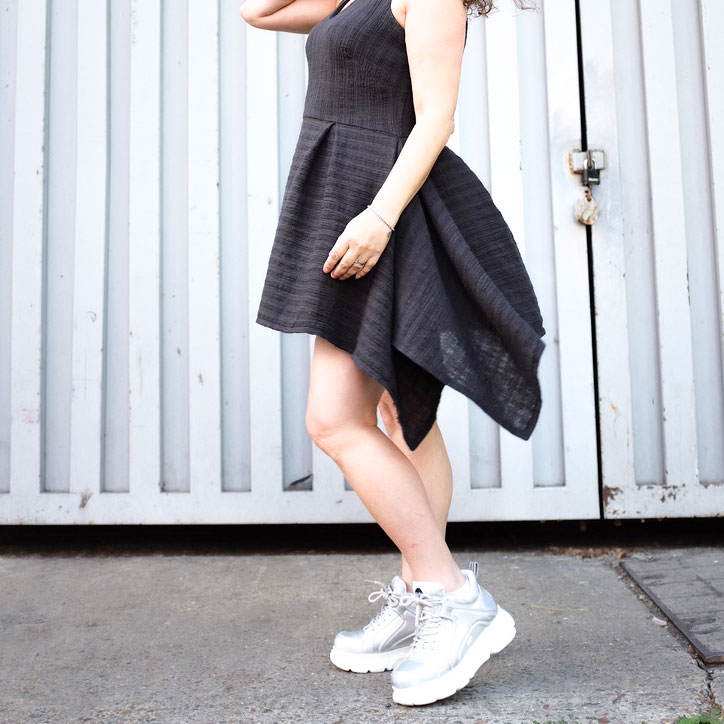
ooobop hankerchief hem dress
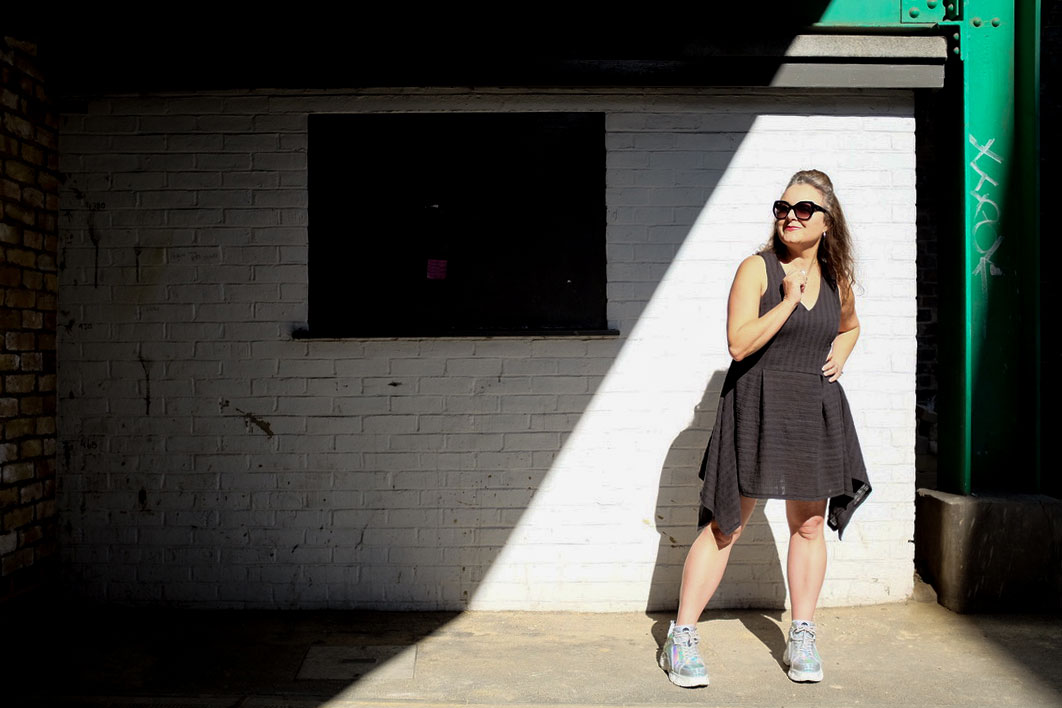
Channeling Blondie and Parallel Lines!

Despite the disappointment I rejoiced in the realisation that I’ve come far enough into my dressmaking journey to know when a fabric isn’t going to cut it. And the tantrums are few and far between now, because I’m quicker at finding solutions. Also the fabric completely softened after a prewash and I was more determined than ever to let this fabric do the talking.

So I went off piste. Not accidentally I’m sure because I’ve always got a catalogue of crazy designs in my head and sometimes they make it to a page in my Fashionary book so they’ve got a better chance of being realised. A summer linen dress incorporating a fitted sleeveless bodice, with a v-necklline and a handkerchief skirt would be it’s destiny.

ooobop hankerchief hem dress

I reached for my bodice sloper, added a v-neckline and narrowed the shoulders. I also swung the darts to fashion a double French dart for no good reason other than I’ve never done it before. And I really like the result!

The vertical stripes of this linen lend themselves perfectly to the bodice but I decided to switch the stripes horizontally for the skirt section because I much prefer how horizontal lines fall at the sides. There was precious little worry how it would all hang for cutting it on the cross because I was playing to it’s wonky nature in any case. And it turned out good. In fact more than good. I love it!!

ooobop design hankerchief hem skirt detail

I have to cite a few influences here: Liz from this year’s GBSB for sticking to her alternative fashion style. I realised I was drifting away from mine and she’s unknowingly reeled me right back in! My bestie Laura Bird who loves an All Saints asymmetric number, always sporting an ‘interesting’ dress and Burda Style for first introducing me to a hanky hem!  I made my first maxi dress here and a second silver one here  and they are still my favourites though this is my first short dress with a handkerchief hem.

So how did I cut the skirt?

I decided on the length of the skirt (the depth) and factored in seam allowance and hem.

I made the width of the skirt to the following calculation:

Front piece (cut 1) = half waist measurement + (2x length of skirt) + 8inches for 2 box pleats + (2x hem allowance)

Back piece (cut 2) = quarter waist measurement + (1x length of skirt) + 4inches for 1 box pleat + seam allowance + hem allowance

I marked the centre of the front piece and 4 inches either side to tack the box pleats. I overlocked the bottom of the bodice piece and the top of the skirt pieces before pinning and sewing in place. I sewed up to the side seam on each piece and then sewed the seam allowance of the extra fabric along the top edge. After the centre back edges were overlocked, I inserted an invisible zip and enclosed the top part of the zip with the facing.

Finally I hemmed all four edges of the skirt and mitred the corners. And oh what a neat little finish that is!

ooobop hankerchief hem dress

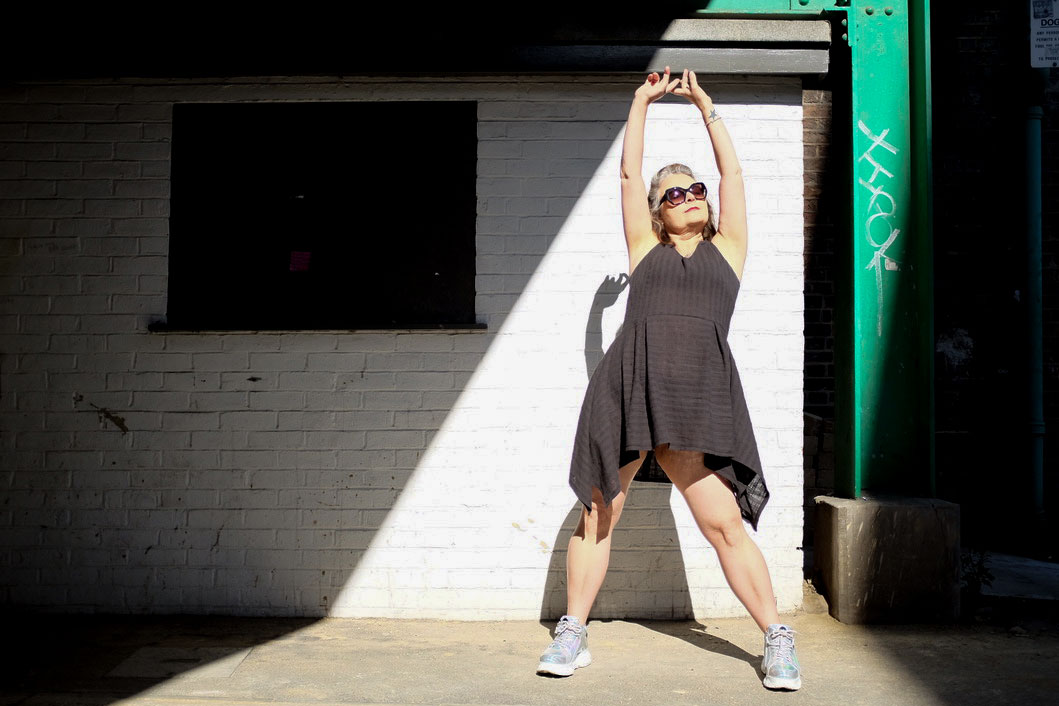
I know it’s not the most groundbreaking dress. But I made it to my own order and an image in my head and it really feels good. The fabric feels good against my skin in this heat and I love how carefree it is.

I finished up sewing it yesterday morning in good time for Dan to have a practice with his new camera. (Clever, hey?!) And I’m delighted with the results. Thank you oh clever talented husband of mine!

ooobop hankerchief hem dress

Also…new shoes!!  Buffalo hologram numbers that literally turn rainbow in the sunshine. And yes I know I’m probably channelling 90s Spice Girl. And no… I’m not about to grow up anytime fast!

Shift in the right direction!

ooobop self-drafted shift dress

I’m so happy right now. Doesn’t take much – just a shed load of sunshine, some quality time with the fam and success at last with the fit of my shift dress.

In case you’ve missed any part of me whittling on about this process, my mission has been to achieve the best fit I can using my own dress pattern with minimal seam lines – ie a darted dress with both front and back pieces cut on the fold – so as not to disturb the print of a very boldly designed fabric that I have in mind to sew next!

self-drafted shift dress in a vintage batik fabric

The fabric I used here was the best test so far because it too required careful pattern placement. You can see the first version I made here and I just realised I didn’t even get round to blogging the second so here is an actual shot, instead!

Self-drafted dogtooth shift dress

I was gifted the gorgeous batik fabric a few years back, by a lovely friend who had inherited it from her parents. When she saw it featured in my instagram post she was so happy to see it again and so pleased that it was being put to good use. I kinda felt duty bound as I remember her telling me that her parents used to travel for to Thailand and Indonesia  quite a lot in the 60s and 70s for work and that they always returned with gorgeous authentic fabrics. Proper sentimental value and vintage, too!

ooobop self-drafted batik shift dress

This piece in particular is undoubtedly a hand-blocked batik. Though this is based purely on my own research and I could be wrong so please correct me if you think different.

It wasn’t very wide but I knew it would be perfect for the third trial of my shift dress, knowing I was very nearly there with the fit. I wouldn’t have risked it otherwise!

It’s such a fine quality cotton. Actually feels so natural against my skin, which is an odd thing to say but I have worn cotton before that doesn’t feel nearly as good. And it completely stood up to a stroll in 24° of Shepherds Bush sunshine today.

ooobop self-drafted batik shift dress

I was intrigued by the selvedge of this fabric. Why would it have just one edge of border decoration? I put out to the wonderful, ever obliging sewing community on Instagram and the very clever Meg from @cookinandcraftin suggested it was very likely to be used for a hemline and a centre front detail for a sarong when wrapped. I loved knowing this and was determined not to waste this detail so I set about cutting my pieces on the cross grain in order to make the best use of the design.

ooobop_self-drafted shift dress in batik

But I hit a snag and realised just in time that the cross grain had absolutely no give at all, and considering the style and fit, it could have been a disastrous move. So I cut on the long grain, as I have trialled twice before (if it ain’t broke and all that) and cut the border separately to seam along the hemline with a generous seam allowance which is overlocked and pressed down on the wrong side. It actually helps to add a bit of weight to the bottom of the dress too.

ooobop shift dress and shades

I made a few other tweaks to the pattern since version 2:

  1. I widened the shoulder straps by 1cm having struggled to pull the dress through the facing during construction, as per the ‘burrito-method’! The fabric I am going to use for the next one is much thicker and I don’t want to risk damaging it or pulling out any stitches in the process.
  2. There was still an element of pooling at the back (swayback issues as usual). And even though I added a quarter of an inch more at the hips since last time – with some improvement – it didn’t seem to solve the issue as much as I’d like.
  3. Then, just this morning, I saw that Cortney from @s.is.for.sew on Insta detailed how she lengthened her back darts to resolve a similar issue. So I moved the bottom point of the diamond dart down 2.25″ and continued the widest part down longer before tapering off. It worked a bloody treat!

ooobop self-drafted batik shift dress

ooobop batik shift dress

And so I do believe I’m ready to cut into that prize D&G fabric that I got from The Stitch Festival 2020 – only dilemma now being, how the hell do I choose my favourite placement of the design? I anticipate this being the longest part of the process!

Dolce and Gabbana fabric at M Rosenberg's stall
Dolce and Gabbana fabric at M Rosenberg’s stall

Thank you as always to Daniel for these amazing shots down the alley of the Laundry Yard in Shepherds Bush, London. For anyone who knows, you’ll know what a brave move this was!

Self-drafted Batik shift dress by ooobop

A blue half circle skirt

blue half circle skirt

This is my new half circle skirt. Self-drafted and made in a cobalt blue poly crepe.

Sounds pretty simple hey? Well to be honest, in principle it was. And it would have been a swifty project if I’d have remembered a couple of simple things.

ALWAYS MARK YOUR SELF-DRAFTED PATTERN PIECES AS SOON AS YOU’VE DRAWN THEM

Why? Well in my case, I have a fair few circle and half-circle skirt pieces that I’ve not only drafted for myself, but for others too. And in my haste I’d just labelled them ‘skirt front’ or ‘full circle’ and one just said ‘circle skirt piece no SA’. The latter was helpful, at least to know that I needed to add a seam allowance but none were any help at all to know if it was the right waist measurement, the right length, a full or half circle etc. What a twit!

blue half circle skirt

So first job was to redraft another, to my size. And second job was to ensure all that info was written bold and clear on the pattern piece for future use.

I’d already prewashed my fabric, so that was a win. The number of times I’ve been fired up to sew and didn’t have prepared fabric to hand is way too many to count. But swifty projects aren’t very swifty at all if you haven’t factored in to…

ALLOW A CIRCLE SKIRT TO HANG AT LEAST OVERNIGHT BEFORE HEMMING

Sewing a circle or half circle really doesn’t take that long but don’t bank on whipping one up, hours before a party because it has to hang at least overnight to allow the weight of the bias fabric to drop. This will almost definitely result in an uneven hem and will need levelling before hemming. I put mine on a dressmakers dummy but I’m sure if it was hung evenly on a pegged coathanger, you would achieve the same result.

So next there’s the levelling. I put the dressmakers dummy, wearing the skirt, on a table so that the hem is at eye-level. I use a metal rule from table top to my desired length and then mark all round with chalk or pins, rotating the whole dummy rather than spinning it (that’s another long story). I then go round a 2nd time to double check the measurements.

Once trimmed I sewed a quarter inch line of stitches from the edge and pressed up a hem. I stitched and in this case didn’t need to turn over again. But that might be necessary if fabric is more fraying.

blue half circle skirt

The lining of course needs the same treatment.

I rarely hate on any aspect of sewing, but I discovered this morning that I truly hate levelling, trimming and narrow-hemming lining fabric for a circle skirt, like massively!

It appears I’ve only made one other half circle skirt before, but it was so long ago, it’s well and truly worn out! So as much as I love this colour blue – quite unusual for me actually, don’t you think?! – I feel I must make a replacement black one too. And maybe a red as well!

I must at this point just big up my 12 year-old daughter who took these lovely photos for me. It was a very impromtu shoot as I was doing some shots of my eldest daughter who was face-painting in the park. Little Miss O brought her own camera along for some practice and certainly did me proud. Look out dad, someone’s hot on your heels!

A skirt most fitting for my friend

Fitted pencil skirt

Meet Ms Moneypenny. AKA my lovely friend, Katy. Modelling the skirt she won in the school auction, made by yours truly.

And prepare for a whole host of lovely shots taken by Mr Ooobop, AKA Daniel who I am nagging like mad to get his portfolio up and live so I can share more of his lovely photography with you.

fitted pencil skirt modelled in the garden

Getting the fit right on ones own self is one thing but the pressure to get it right for someone else is far more terrifying! I suppose it’s a good kind of terrifying because it does make you learn very fast and not settle for anything less than a good fit.

I got a bit lucky with Katy. One measuring session, one draft of the pieces, one test skirt for a fitting, and one final fitting for the actual skirt. Probably by the power of flook but selling it in as skill!

Katy happy in her new skirt

This lovely little impromptu shoot revealed Katy’s hidden modelling talents. Took to it like a duck to water, she did. And check out those pins… we don’t get to see them very often!

sitting pretty with flowers

Such a pretty garden too. Could easily be confused for one in the Med! I wish I’d have taken a shot of Mr O as he was clicking away. He was revelling in the whole session. Lying on the floor, up in a tree, peeping round Grecian columns…! I was blissed out with G&T in one hand and hot dog in the other!

Katy modelling pencil skirt

And of course there were props…

back view with Frankie the puppy

Meet Frankie Knuckles, Katy’s 11-week old border terrier puppy. She has stolen everyone’s heart, obvs!

Holding Frankie the puppy

And there was photobombing, of course!

photobombed by children

Oh how I love this shot…

Katy modelling with her daughter

It’s such a great feeling to make something for someone who means so much to you. Especially when it fits them so well. It’s also the only time you can really get away with unashamedly staring at your mate’s bum.

You can just about see where I hand-picked the lapped zipper, and of course where I – ahem – matched the checks across the back seam (*polishes nails*)

See now, you’re all looking at her bum!

back view of skirt

The waistband pattern runs through centre front but waist darts rather mess up the plan. When I next make a skirt with this kind of fabric (it’s 100% gorgeous wool by the way) I might be inclined to create side seams on the waistband, as on properly tailored skirts, so that I can match the checks on the back too. This would also allow for expansion if ever needed.

front detail of skirt

I leave you all with a parting shot of the adorable Frankie. A fine model herself and because I just know she stole your heart too!

puppy border terrier

Here’s to more sunshiny days, fabulous photos, cute puppy dogs, fantastic friends and great opportunities for wonderful sewing projects. Cheers all x

Mono dress & faux film noir!

self drafted dress film noir
10.30pm.
The air is heavy.
Rain spatters relentlessly against the rattling windows.
Daniel and Janene each propped horizontally on opposite sofas. Mood is low. The bank holiday weekend is nearing it’s end…

Daniel: Got anything you need to shoot?

Me: Actually yes. But nothing fancy. Just need some pics of that trial dress I self-drafted.

Daniel: Ok. Go to it. Heavy on the make up. Big on the heels. And find a hat.

Me: But . . .


And that’s how these crazy shots came about! Quite literally out of not wanting to end our soggy bank holiday with the grumps!

So this is the dress:

mono dress full length

It’s my next leap on from my first ‘proper’ foray into pattern drafting. I’d tweaked the bodice and I’ve drafted a few pencil skirts to know the drill, and so I thought I’d pair the two together and make me a dress!

There were a few toiles along the way I can tell you! And this one still isn’t perfect. Goodness knows how but I think I need to take at least 2 inches out of the back bodice. My thoughts on this were confirmed at the time of drafting the back skirt section when I noticed there was precious little difference from the hip line to the waist line! I measured the bodice and double checked all measurements and just assumed it was meant to be.

However. I did have to do some trimming just under the waist line after I’d tacked it all together. And I thought I could live with it until I realised the side seams were a little bit too forward.

This really is no big shakes. In fact this is such a giant leap forward for me, the knowledge I’m gaining all the way is so totally rewarding. And luckily I have a heap load more of this fabric that was so kindly given to me by my fabulously talented milliner friend, Jayne Hepsibah. She wasn’t sure what it was but I’ve given it a burn test and it burns to a very fine pale dust. I wasn’t expecting that at all as it’s quite a weighty, almost upholstery style fabric with a bit of stretch! So I’ll make another soon to confirm my findings and rectify the problems.

The other niggling thing is that the armholes on the front could do with widening a bit. I wore this dress to a party a couple of weeks ago and all that dancing and waving of arms resulted in a little chafing round the sleeve edges.

I have some very similar fabric, but in crazy tropical colour, waiting in the wings once I’ve sorted out the issues. Can’t be neglecting the crazy inside when it’s raining outside!

self-drafted dress film noir style

There’s a fair few influences going on with this dress. The neckline I poached from a 40s pattern in my stash. The bold crazy fabric has echos of Kazz the Spazz who still continues to be one of my heroes despite her blog being no more *sniff*, though I’m sure she’d do it more justice with colour! And the overall design came about whilst doodling in my Fashionary book and watching Madmen!

Even though it’s far from perfect and hardly a ground-breaking design, there’s a huge amount of satisfaction that it didn’t come out of a commercial pattern envelope and that I had to make it up to my own instruction!

I self-lined the bodice. And considering the weight of the fabric, it behaved beautifully. With a bit of understitching round the armholes and neckline of course. A good test for the next run when I intend to make that neckline a little bit deeper, but still keep those nice angles.

self-drafted monochrome dress

And the hat! Let me tell you about the hat. Well I don’t happen to have any vintage hats just lying around. I’m sure Mr. Ooobop is convinced I have an actual ‘wardrobe department’ upstairs. I don’t sadly. But what I did have was this cheapie fascinator that I got from the pound shop, onto which I gathered some glittery tulle. Genius, non?! I’m sure some Russian veiling would have been classier but I’ll happily settle for this one… for a quid!

customised fascinatorWe had such a hoot doing these photos. Mr O was able to practice with his new birthday flash attachment and I couldn’t resist the addition little faux film noir-ness with my magic Photoshop wand!

This dress totally called for black and white pics and I wasn’t about to protest. I find black and white photography considerably kinder, compared to full on colour, especially at the end of a knackering weekend!

I’m so glad I’ve got such a pushy boyf, really! I’d never have got the get up and go let alone the camera skills to do this by myself! We really did have a lot of fun with this.

Shame neither of us smoke anymore, otherwise we could have got some proper authenticity going. However we did manage to fashion some obligatory venetian blind shadows!

head shot blind shadows

And it’s a fine way to capture the drama after the last glass of Prosecco got spilled!

vintage scream film noir

I do hope you all had a restful weekend with some making going on, of course!