

 Happy new year lovely followers!
I’m so delighted to share this pattern with you as my first post of 2015. It’s a timeless, vintage-style fur hat that will keep you warm and toasty in the most stylish way possible! And it’s a real quick project to sew up for that quick sewing fix when time isn’t on your side!
It really is so super easy to make. Just download and print out the FREE_fur_hat_pattern and follow these few simple instructions. The hardest thing about this hat will be to get your hands on some quality fur of the faux kind!
The pattern corresponds to my head size which is 22.5 inches or 57 cm.
You may need to adjust the pattern to personalise the fit.
You will need:
- 1/4 m of faux fur (retailers will only usually sell you 1/2m at a time but its often worth an ask!)
- 1/4 m of lining fabric (or find some scraps in your stash)
- coordinating thread
- a vacuum cleaner to hoover up all the fluff!
Instructions:
- Make sure you print out your FREE_fur_hat_pattern at actual size, and check with the test square (on page 4 of the pdf) that it has printed correctly. Cut out and paste the sheets together to match the layout on page 1 of the pdf. Complete the hat band and crown sections as full pieces as instructed on the pattern then cut out.
NOTE: Before you pin the pattern to your fur fabric, think about what direction you prefer the fur to lie. On this particular hat I made, the pile strokes downwards on the band, from the top of the crown, down towards my eyebrows! On the top circular piece, it strokes from front to back. Incidentally, the centre back of the hat is where the band is seamed.
TIP: When cutting your fur pieces, cut on the reverse and just snip carefully through the backing fabric so as not to cut through to the actual fur on the right side. You will achieve a much better finish on the seams.
- Pin the pattern to your fur pieces and cut out, paying heed to the tip above.
- Pin and cut out your lining pieces. It doesn’t matter for the circular lining piece but make sure the band is cut on a straight grain to avoid stretching.
- Take your fur band piece and fold in half, right sides together. Pin the short ends together, making sure the fur is tucked inside, and stitch using a 1.5 cm seam allowance following the direction of the fur.
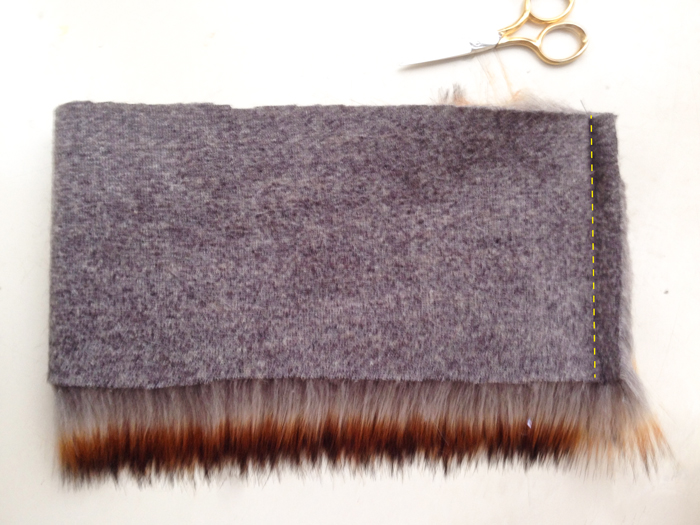
TIP: When sewing fur fabric, Increase your stitch length a little so prevent thread tangling.
- Finger-press the seam open and hold in place with a couple of tacking stitches top and bottom of seam.
- Pin the fur circular crown piece to the hat band, making sure the fur is tucked in and checking the direction of the fur is correct. See note above. Sew the seam using a 1.5 cm seam allowance.
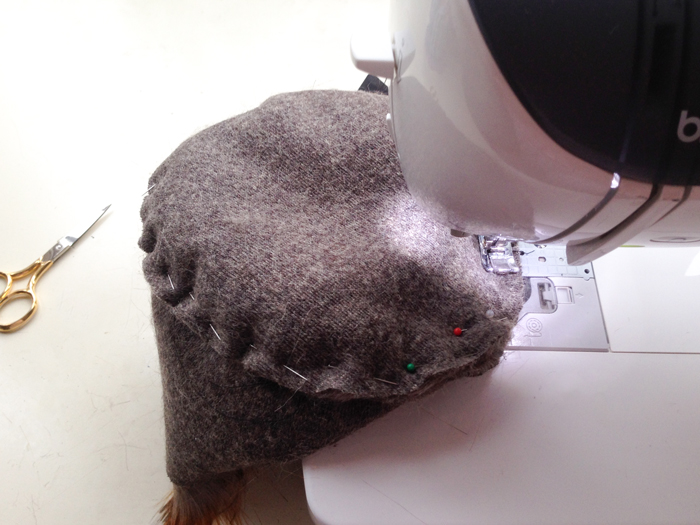
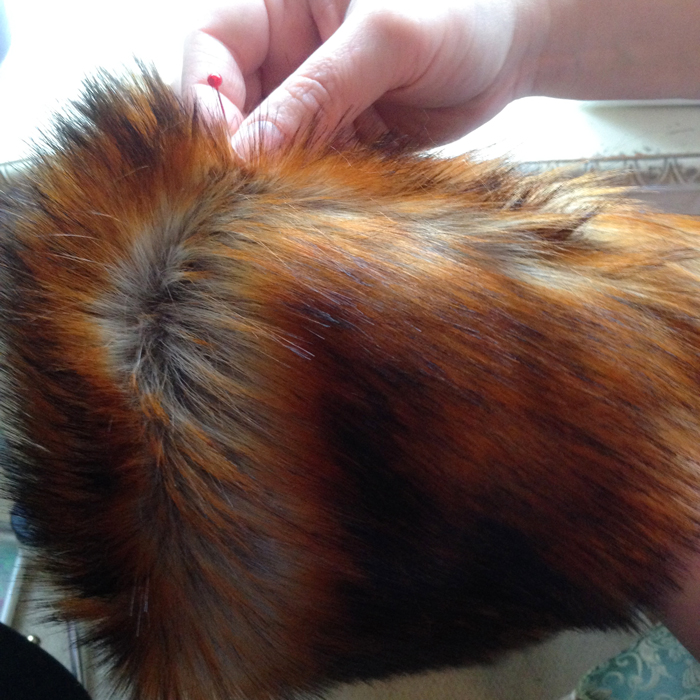
- Turn right side out. Using a long craft pin (a normal pin or needle will do) drag it along the seam allowance to free the fur that has got caught in the seam.
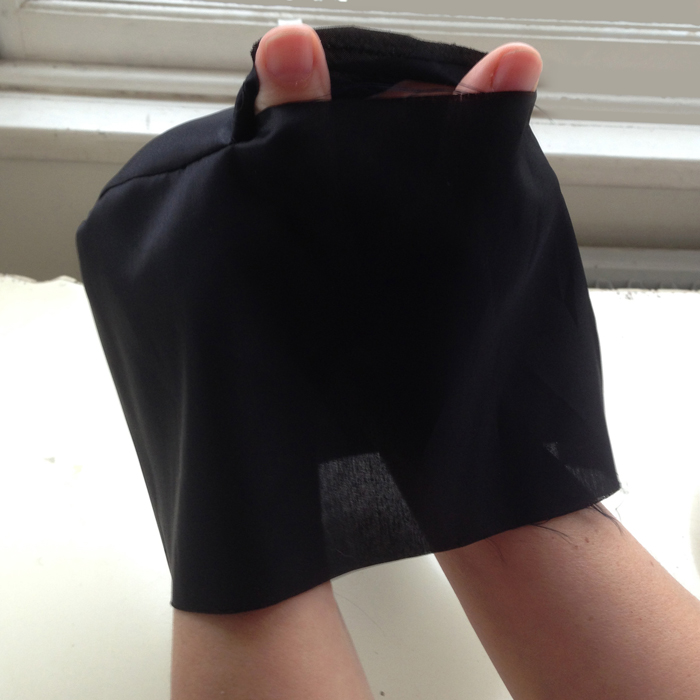
- Now take your lining piece for the band, pin the short edges together as above and stitch with a regular stitch length and a 1.5 cm seam allowance. Press seam open.
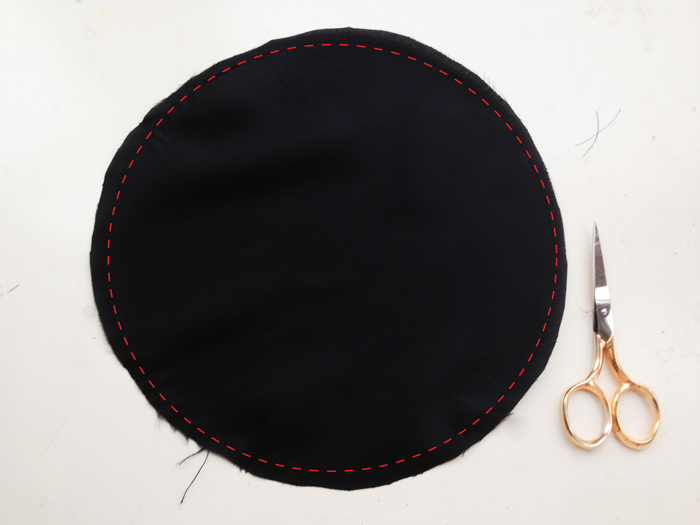
- Stay stitch the circular lining piece within the seam allowance, to prevent stretching.
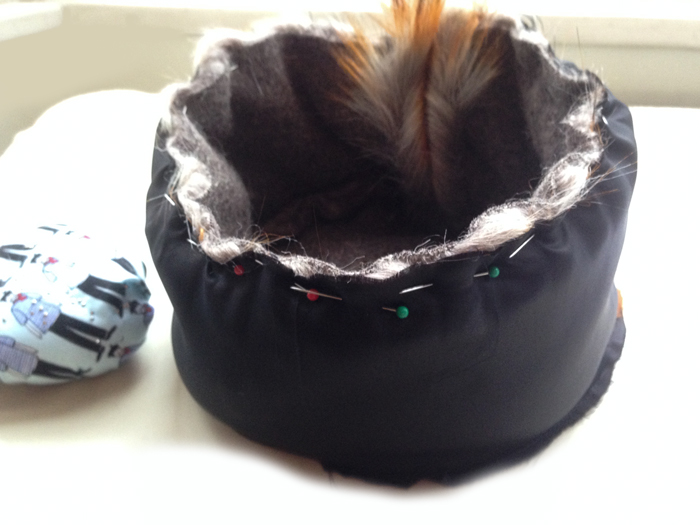
- Pin the lining piece for the crown along one edge of the band and seam together, leaving a about 4 inches / 10cm open for turning.
- With right sides together pin the rims of the lining and the fur hat together. Effectively the fur hat will be sitting inside the lining. Pin together, matching the two centre back seams and stitch along the entire edge, securing the stitching, beginning and end.
- Turn the hat to the right side through the opening left in the lining, and you’re almost done!
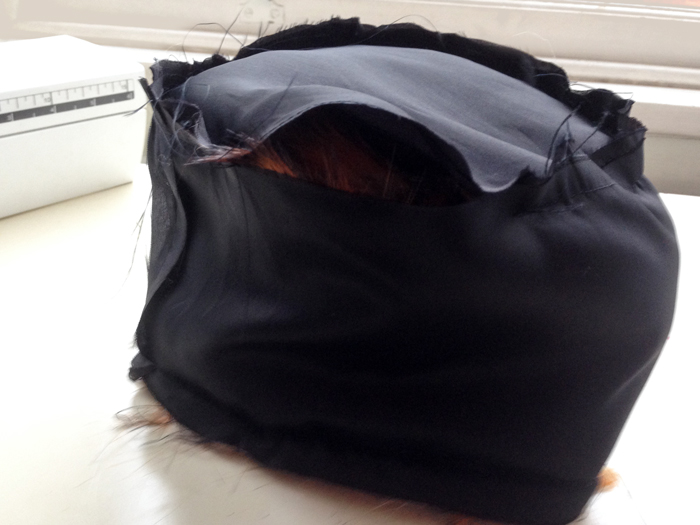
- Pin the lining opening together, tucking in the seam allowance, and slip-stitch closed. With matching thread, obvs!

Now all that is left to do is to don your new fancy fur hat, step out in the snow and hum the theme tune to Doctor Zhivago!
Please shout if anything is unclear. I’d be delighted to hear how you get on.