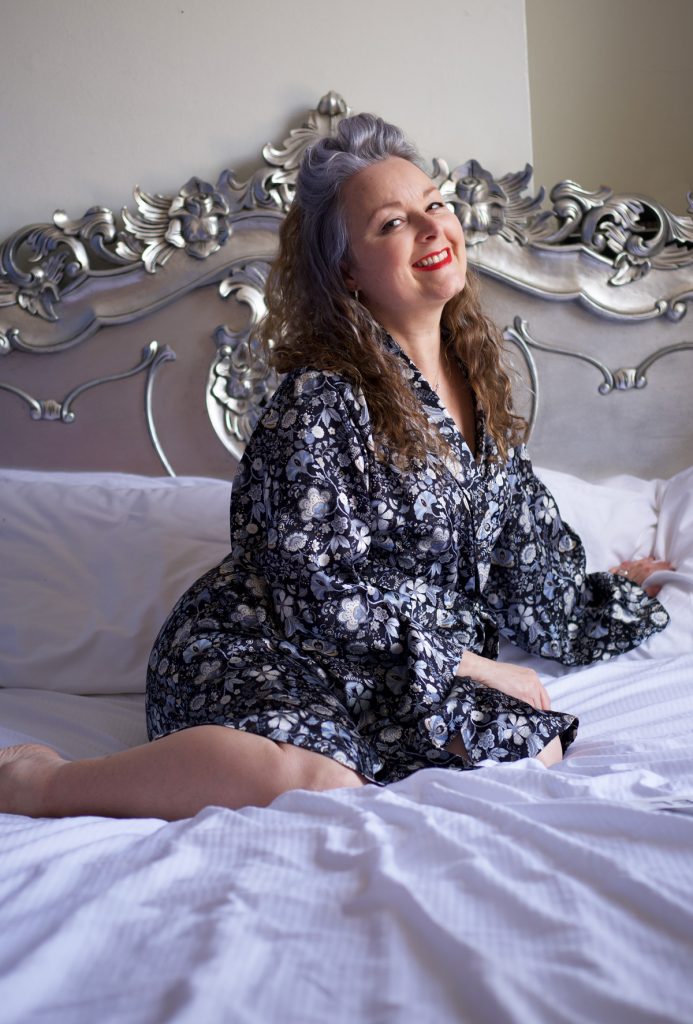
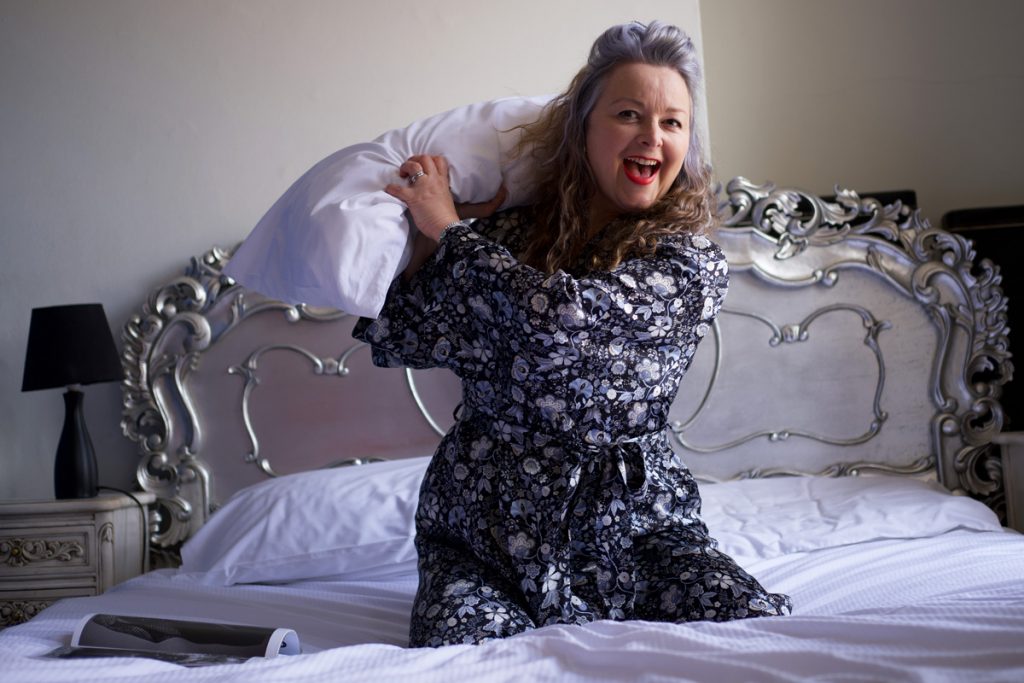
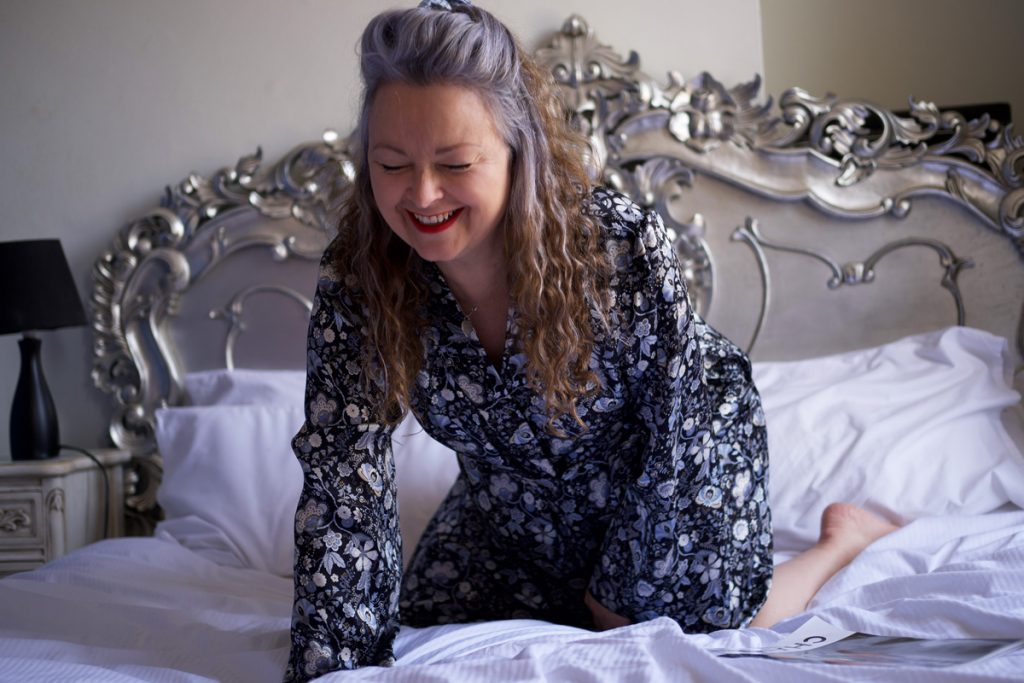
Vogue robe in a luxurious Liberty silk – my wfh wardrobe is looking better already!

I generally don’t have a go-to order for dressmaking. My thought processes vary according to mood, need and weather. Sometimes choosing pattern first and then pairing an appropriate fabric, sometimes the other way round, especially if I’m fabric shopping in real shops and then an idea will spring to mind while I’m stroking and bouncing and draping and holding all the materials aloft. The latter is a dangerous game though, and hasn’t helped stash mountain at all!

But when Minerva approached me with some Liberty silk offerings I was quick to choose which fabric but wasn’t so quick to pair a pattern. What a gift! But wow… what a blooming responsibility! What pattern would best showcase this heavenly fabric?

I needed a project with damage limitations. It had already arrived at a super work-busy point in time and there was only room for assignment within small allocated time-slots throughout the weeks.

Mood and need and weather came to the fore. I was so tired of shuffling round the house in my tatty old dressing gown. Sometimes I don’t even bother getting out of it to work – there’s actually no need when I’m working from home and nobody is going to see me. But a silk robe would have me sitting more upright, feeling so much better about myself, plus it’s getting warmer so I really don’t need to be enveloped in velour anymore. I had a need to swan around in silk! And a robe would be simple, right?!

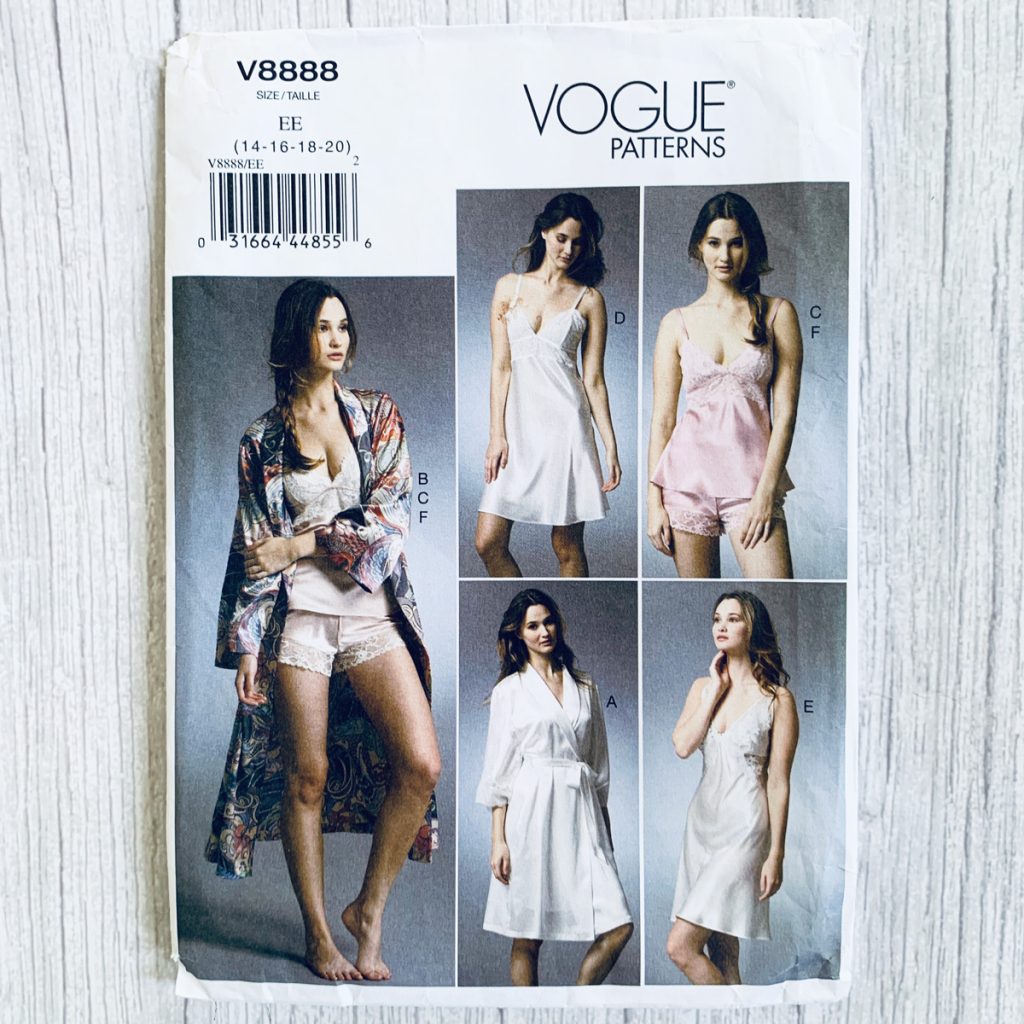
In an ideal world I’d have drafted the pattern myself. I’m getting quite fond of the maths. But with time not on my side that wasn’t going to be a great option because it would need toiling, too. So a quick scout on the web presented me with V8888. A delightful selection of nightwear to accompany a very stylish robe. I ordered it from Minerva.
I also ordered a very large cutting mat and a new blade for my Fiskars rotary cutter. I’ve worked with silk satin only once before and it was a slippery beast. My scissors slid around the dining room table and I was cursing at every snip. But weighted down and cut slowly and carefully with said cutter, this time I had no problems at all. I was amazed at how little it frayed, especially with all the extra handling involved. Most of the seams except for the armholes are sewn with a French seam. And because I only had one shot of this, I checked and double-checked and triple-checked each side and pairing of seams before sewing. It was totally worth it of course because the inside is so neat and the robe so much stronger as a result.
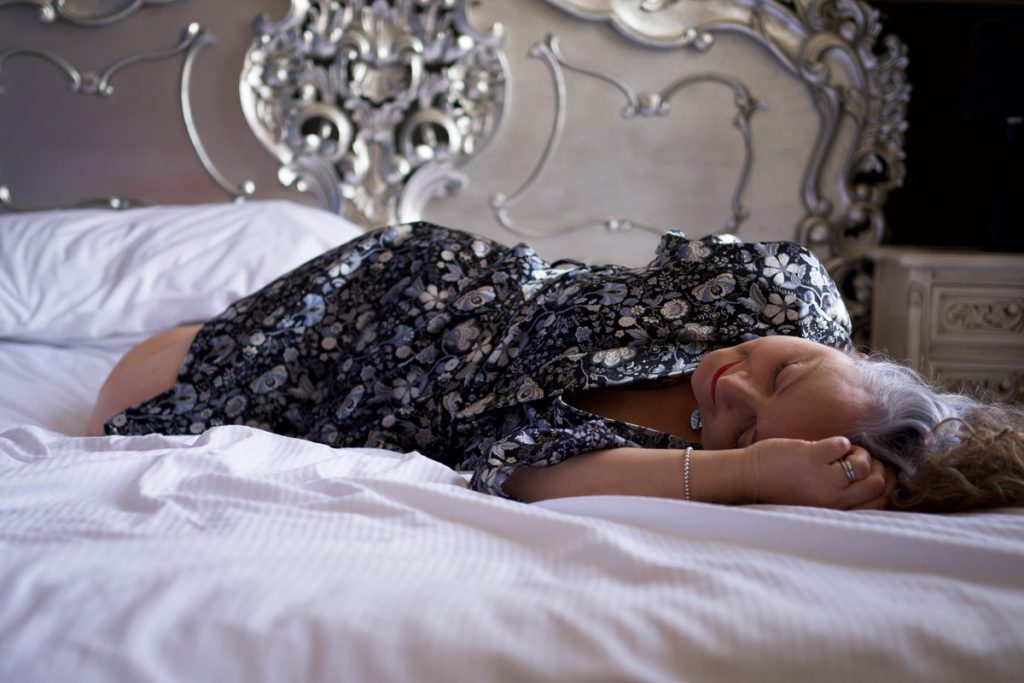
I chose the longer sleeves for the shorter version of the robe. Because I like that look and it’s way more classy. The shorter sleeves involved a band of lace at the hem and that would have been far too fussy for the design of this fabric. I wanted to keep it as simple as possible.

But I had not anticipated all the rouleau loops. Haha. There was me, thinking simple robe tied at the waist with a belt. The belt was actually such a joy to make and press. So satisfying. But the loops I left for another day. And another day. Until I didn’t really have many days left to submit the finished article!
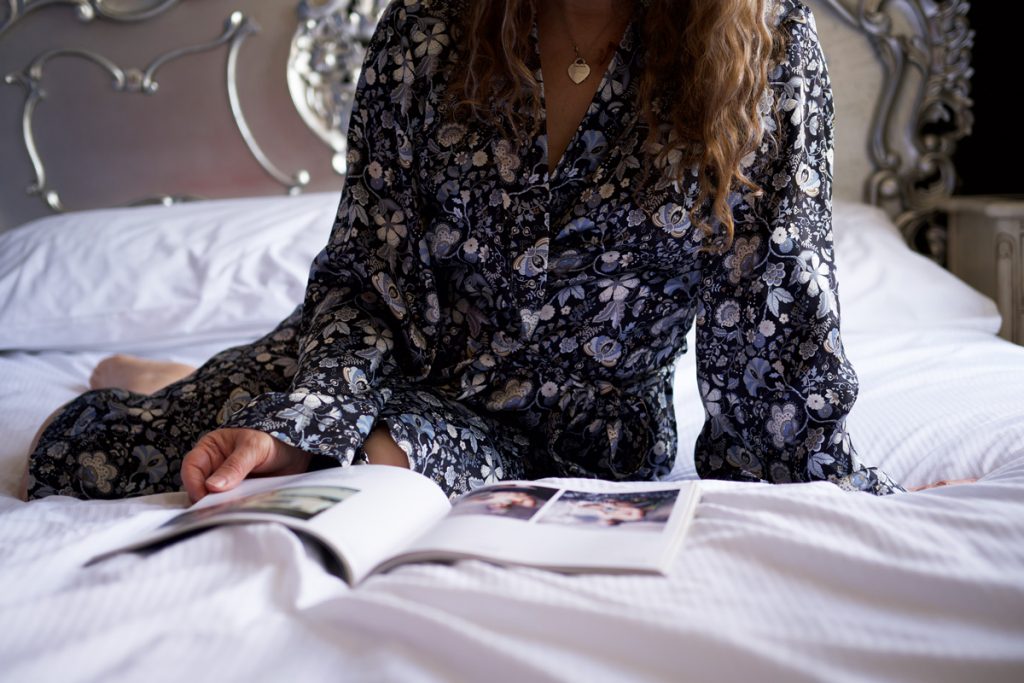
So I cracked on. And fell at the first hurdle. My smallest loop turner was too fat. The smallest drinking straw I had in the kitchen drawer (for the drinking straw/kebab stick trick) was too fat as well. So I remembered a trick my mum taught me, by tying the long threads left at the end of the seam to the end of a bodkin, or large-eye needle, and pulling through, eye of needle first. So satisfying that I was weirdly excited to do the rest and even made a little graphic tutorial for my sister in law!
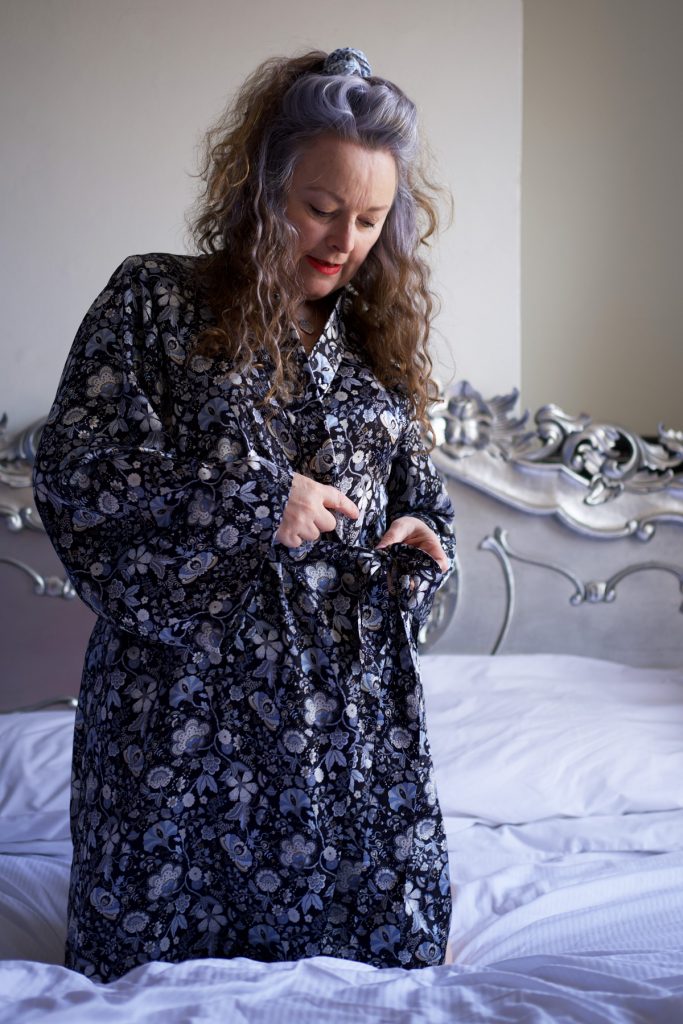
There are two inside ties – one front left and the other inside right side seam. There are two belt loops inset on each side seam and there is a thread loop at the right front opening. I’m thinking of doing a tutorial for that too as it was quite fun to do.

I am so grateful to Minerva for the opportunity to sew with this fabric because it has definitely delivered some more valuable experience as well as a super luxurious wfh outfit! I must admit I was terrified of cutting into it at first but once I got going, any fear was allayed, largely due to the quality of those threads. It’s so stable, on grain and not at all like the silk I previously sewed that was fragile enough to catch on the rough skin of my hands! Liberty silk is most definitely worth its price point.

And just to note, it does make me sit straighter, it feels amazing to wear and it has got me out of doing the washing up!

Daniel is of course the man behind the lens and this was such a fun shoot. The look on my daughter’s face was priceless when she poked her head around the bedroom door to see what we were up to. Even more so when Dan said ‘Its not what it looks like’!! Haha. We are so doing our best at being embarrassing parents!
Please note: I am an Ambassador for Minerva and the fabric was given to me free of charge in exchange for a review. I purchased the pattern and all notions required. To see the original article and more of my Minerva Makes. Please visit my Minerva profile.

Almost naked in a McCall’s M7542 Lace top!

M7542 lace top

It won’t surprise you to know that this wasn’t an intended ‘next one on the list’. In fact, to be fair there is no ooobop project list that remains unedited for more than a minute. I even announced a break from self-sewing in my previous post. I am indeed an experienced saboteur of my own plans.

But in this instance I am totally blaming Sam, editor at Sew Now magazine for the delightful interruption of production. She kindly sent me a copy of issue 11, thinking the free pattern, McCall’s M7542 would be ‘very me’. She was very spot on. And I was instantly drawn to view B


The pattern itself is very simple, non-fitted – save a couple of side bust darts, and even though those view B sleeves look dramatically difficult, they are nothing less than a kind of dropped hem circle skirt that falls from the elbow instead of the waist!

So a quick scan of the instructions reaffirmed my plans for not toiling! I just picked the closest size to me and cut the tissue pieces straight out. I didn’t even trace them first. That felt a bit rebellious to be honest. I always trace things off. ‘Just in case’. You know. Or maybe you don’t!

M7542 handmade lace top

All the same, I wasn’t going to go all guns out on some fancy expensive fabric, mind… just in case. So a little trip to Dave the Drapers in Shepherds Bush Market, found me some cheap lace in case it didn’t quite go to plan. And yes that lace is cheap. £1.25m cheap! And. Plus. A gazzillion volts of static electricity told me so!

M7542 handmade lace top

But… hand cream saved the day! I kid you not, just rubbed some in my hands – which are always dry as some bones – and ran the fabric through newly moisturised hands. Just to see. And guess what? Not one single, tiny crackle!

M7542 lace top detail

Now as you can see, the fabric has a fair bit of show-through so my main concern was keeping those seams neat – not so much that my bra would show. Priorities, right?! French-seaming was the way forward and with narrow zigzag stitch to account for a bit of stretch in the lace. I had to concentrate and take time over this as the prospect of unpicking was terrifying and probably impossible tbh. All the little stitches properly embedded and camou’d in the lace. But worth the effort. I just love how the joins are visible.

M7542 lace top and short skirt

The only thing I changed up was substituting the neck facing for a satin bias edging. The binding also edges the opening at the back and I sewed a single large popper at the back for the closure. I had originally considered a rouleau button loop but that seemed like a lot of effort for such little exposure – I wear my hair down most of the time so it’s covered up anyway.

The lace trim just finishes it off nicely. I had no fraying issues, but I didn’t like the harsh edge once cut. The mad thing was that the trim cost nearly twice as much as the fabric, ha!

M7542 lace top

When I first showed Dan this top, on the hanger, his response was Cool! Very Stevie Nicks! But when I put it on, he said Mmmm… too much skin! I agreed and bought a black cami top the next day to up the modesty factor. But then there was a disappointingly lack of detail. So back to the bra and off to Horseguards parade at 6am on Friday morning to shoot it.

M7542 lace top side view

I wore a jacket for the tube journey but still felt, full pelt, the commuter looks of: someone didn’t go home last night! 60 derniers and my handmade quilted skirt ensured decent coverage to my lower half at least.

The walk from Westminster station to St. James’ Park and Horseguards Parade at that time of the morning was just lovely. The morning light was so glorious and the buildings were lit beautifully all around us. So worth getting up at the crack of sparrows!

M7542 lace top and sunglasses

It’s quite incredible that the on same spot where I was being photographed, jousting was once a thing for Henry VIIIs entertainment! There was a fancy guard at the entrance of the arch – one of the Queen’s Lifeguards – but we spared him of early morning hassle, sure that he would need a little break before onslaught of tourist attention.

There were hardly any people around, save the guard, a few (heavily armed) policemen and a few boldly striding city workers. So thankfully no gawpers as I stood, near-naked in the morning light. We took some more alongside the pillared Mall Galleries and a wolf-whistling cyclist signalled it was time to put the jacket back on!

M7542 lace top in Mall

I’ll happily wear it like this to dimly lit gigs and parties but I will have to rethink an undergarment for any day time wear. Maybe it’s a red cami or a boob tube or suchlike. Suggestions very welcome!

I’ve also just managed to enter this in time for #Sleevefest2017, hosted on Instagram by Valentine and Stitch and dream.cut.sew .The challenge runs from now until August 31st 2017 so you’ve still got time to submit your creative sleeve designs. And here’s a link (affiliate) in case you get the same calling for McCalls Ladies Easy Sewing Pattern 7542 Tops with Sleeve Variations.

Happy sewing, everyone! x

M7542 lace top back view


Sewing Dots for RNIB

Tilly and the Buttons Fifi pyjamas

I get so resentful when I don’t get any sewing time. And I don’t sport a good grumpy look either. So with back-to-back work deadlines this month, I needed to find a little sewing project that I could tap into in between marathon stints in front of the screen to retain balance and sanity… for everyone concerned!

#sewdots was brought to my attention on Instagram. Instigated by the brilliant Rosie of DIY Couture and writer of No Patterns Needed. She also works for the RNIB – Royal National Institute for the Blind – where she learned about their campaign that runs every October called Wear Dots Raise Lots. It highlights the impact of Braille and raises money for their services. It encourages the wearing of dots to raise awareness, encouraging people to hold dotty parties, or coordinate with colleagues and pick a ‘wear dots’ day for the office.

So Rosie has upped the ante to encourage the sewing of dots too!

The idea was to use fabric from stash and donate what you would have spent via the JustGiving page she has set up. Simples!

This was all shaping up nicely. I had two pieces of coordinating red and white polkadot fabric. And I had a Tilly and the Buttons Fifi pyjama pattern on my to do list. A pattern that needs little space to cut out and can certainly be achieved in manageable chunks of sewing time.

The Shorts took 40 mins, including cutting out time. And including unpicking my first elastic attachment!
The camisole happened a week later… over 3 days: The cutting and stay stitching in one shift, the main body sections sewn together in another, and the binding made and sewn on before work one morning. I sewed on the bow and attached the back straps just now!
But I’m sure if you had dedicated and uninterrupted sewing time, you could easily rustle this set up in a couple of hours.

handmade polkadot bias binding
Handmade polkadot bias binding

This is such a neat and gratifying garment to make. all the seams are ‘Frenched’ and it’s as neat inside as it is out. It really doesn’t need much fabric and if you are lucky enough to have coordinating scraps, the design possibilities are endless.

French seams
Lovely neat French seams!

And to boot, I have a lovely set of PJs at last! It appears I’ve made them for everyone in the household except me. I know they are slightly out of season but I really don’t care. I’m going to make more.

Theres still days left this month if you’d like to participate. There’s some great prizes up for grabs too!

Doesn’t have to be a garment of course. Could be a much smaller project still,  like a sleep mask or a headband or a scarf!

I can totally assure you that sewing and giving is a great self-indulgent, feel-good combo too. Good work Rosie!


Knickers big and knickers small

It’s been a while since I made knickers – I made some Burda pin up pants here and here. But this week I had a go at some other varieties from this book: The Secrets of Sewing Lingerie by Katherine Sheers and Laura Standford.

The Secrets of Sewing LIngerie

One of my lovely work colleagues was given this book, but as a knitter rather than a sewer, she thought it would be better placed in my hands and who was I to argue?! It pays to let the whole world know that you are a crazy sewing blogging lady: beautiful sewing things seem to gravitate towards you from all angles! And what a beautiful book this truly is. The photography is gorgeously inspirational and leaves you wanting to make everything in it.

So I started from the beginning, intending to work to the end. And I still might. I just need to overcome a few hurdles.

The first pattern is for a pair of cotton minis, entitled Pretty as a Picnic and they truly are. The fabric suggestion is cotton lawn and I could just imagine how lovely they would be to wear. It’s not my usual style. I’m more partial to a pair of stretchy big pants but ‘pretty’ won me over. I also have a fair bit of printed cotton in my stash and it struck me as a good project to use it up.

cotton minis

I painstakingly followed every instruction which incidentally was very clear and I even basted where suggested, like a good girl – I’m not usually that fastidious! But I had to abandon mission before completion when it became apparent how small they were! Far too mini for me. I think the photo in the book is a shot at an angle which makes them look wider at the sides than they actually are.

So I adjusted the pattern: I added an inch to the depth and a bit extra across the width too. (Gawd knows why I just didn’t trace a size up!) And so I made another pair. Seemed to do the trick but lets just say I’ve worn better. The recovery of the elastic is a bit slack (my bad, probs) and where the fabric is cut on grain there is just no give, so they do feel and look a bit strange. I may give them a third go, cut on the bias and see what happens. I WILL have a pair of pretty minis!

But rather than have a go straight away. I got lured by the cotton French knickers. After all. What could go wrong with those? And even if anything did, I could wear them to bed where no one would see. They are described as natural bed-fellows in any case.

cotton knickers

But why don’t I learn? These are cut on grain too. And I didn’t even pay heed to the need to size up either. I’m seriously such a bozo sometimes!

They look dreadful on me. They are simply too small but yet the waistband extends at least an inch above my natural waistline despite being sold as a ‘softly-fitted style sitting between the natural waist and the hips’. I checked that I’d traced the pattern correctly and I had, so I think that may be an issue with the pattern itself.

That said, I loved the implementation of some of the techniques used. There are French seams throughout. No rtw-style serged seams going on here and the centre front and centre back are pressed in opposite directions so there’s no bulk at the crotch.

knickers french seam

The top edge of the waistband is top-stitched at the fold and at the base of the elastic casing with gives such a neat and professional finish. Exact measurements are given for the casing and the size of the elastic which seems to prevent the elastic from twisting too. Little things certainly please my little mind!

knickers waistband

The coquettish vent is a lovely touch too. There seemed to be a notch missing off the pattern so I just allowed 3 inches which worked just fine.

knickers side vent

But if only they fit!! I’m convinced that these also would be made far better by being cut on the bias and then I realised that there was a version of bias cut silk satin French knickers further on in the book, doh! They use different pattern pieces with shaping at the centre front and back and appear to be much wider in size. I’m confused by this. Why would the bias cut ones need to be bigger? Surely the on-grain version would need to be bigger to account for lack of stretch. Am I missing something?

Anyhoos. I’ll report back once I’ve had a mo to try them out. Because I really really want these to work.

I’ve had a scout round to see if anyone else has had experience in sewing undies from this book but mostly the reviews are of the book itself and not any real findings. So please let me know if you’ve made any and what the outcome was. I’m really keen to know how these patterns have worked for for you.

Oh, and don’t forget to enter the Classic Tailoring Techniques for Menswear book Giveaway if you haven’t done already. Good luck all!


BHL Sarah Shirt in cotton silk

BHL Sarah Shirt

This is By Hand London‘s latest lady, Sarah. Released just last week. A classy swingy shirt to interpret any way you fancy. She’s a dress up or down kinda girl with gorgeous sleeves so I snatched that offer of pattern-testing and got straight on it.

The sleeves are what I love most about this shirt. Nicely full but not so much that they’d trail in your soup. And with a subtle puff on the shoulder, it makes for a great shape. But there’s an alternative short sleeve design with a cuffed hem, if you’d prefer.

BHL Sarah Shirt sleeves

The Peter Pan collar has a roundy and a pointy option too. I went for sharp corners because, well, that’s just the way I was rolling that day. But the roundy collar looks just as good on all the others I’ve seen.

Sarah Shirt collar

Sarah calls for a light to medium weight fabric and I do believe I hit the nail on the head with this black cotton silk. I’ll never get away with not ironing it but it doesn’t crease to madly, even when I’ve left it on ‘one of the piles’. Of course that meant French seams all the way, but that’s ok because it looks dead neat inside and out. the only seams I had to trim and serge were the armholes. The yoke is designed in such a way that it encloses all seams too and with some tiny hand-stitchery to the undercollar, it’s beautifully neat all round. Note that I chickened out of any top-stitching, though!

BHL Sarah Shirt

I used poppers/press-studs for the cuffs though I was very tempted to extend the cuff beyond the sleeve end to make for faux cufflinks or maybe even real ones. There’s always a next time!

BHL Sarah Shirt cuffs

Theres a lot of button holes to sew down the front placket. Instructions call for 10-15 and mine has 12. But they are necessary to get that neat flat finish. My buttonhole action decided to wreak havoc and I ended up having to redo 2 of them. One for bad positioning and one that was just an oversewn mess. Out came a brand new scalpel blade. I wasn’t going to loose a fight over a final detail. Took a lot of patience to unpick but successfully managed to create new ones and dead chuffed I was about that too!

BHL Sarah Shirt

I love the pleats on the front yokes and at the centre back but I was quite surprised at how much swing was involved. It’s not normally a silhouette that I’d go for. I’m usually a ‘tucker-in’ of blouses, but once I saw how it looked, when I wore it loose for the photos I really liked it. Nothing ventured, nothing gained and all that!

Sarah Shirt back view

This isn’t a quick one to run up. But it’s none too taxing either. I’d say the only difficulty with this pattern lies with however challenging your fabric is. Mine required a bit of careful handling and I imagine chiffon or the likes would need a bit of a talking to but a more stable cotton would have been much easier and quicker to work with, I think.

If, like me, you’re sold on Sarah, she’s up for grabs over at By Hand London.


Photography: Daniel Selway
Shirt: BHL Sarah
Skirt: handmade (yet to be blogged)
Tights: M&S (I think!)
Boots: Irregular Choice
Handbag: Fara charity shop, Ealing
Sunglasses: Retro Peepers

BHL Zena dress tested

bhl zeena dress front

So here is my version of the newly released Zeena dress pattern by the By Hand London girls!

It’s had so many wears since I sewed it I’m sure most of you have seen it already but it wasn’t quite right to post deets until the official launch date, which is today, hooray!

This dress is a seriously easy sew. There are no sleeves to inset, It is not lined, having just a neck facing, and you could even skip the pockets if you wanted to make it faster. Though I kept them in as a useful device for holding the skirt down on a blustery day!

The fabric I’ve used is very lightweight and drapey. A lovely donation from Handmade Jane. Hot orange with metallic gold spots. And why not?!

I foresaw issues with the sleeves and the tucks on the bodice if I were to use anything firmer. The skirt would probably be great though. Perhaps another option is to have lightweight bodice and midweight skirt. Those pleats would certainly stand to attention then!

bhl zeena dress back viewBut the more casual nature of this dress is what sold it to me. Especially on balmy days like today. Whilst I do love the fitted princess-seamed bodice of the Elisalex dress, (For the Love of Lawn, The Dress that Nearly Wasn’t, Speed Sewing for Sumer ) It feels more relaxed and cooler when the fabric isn’t so close to ones bod.

There’s lots of fabric going on in that skirt but the classy box-pleats take away that awful poof at the belly as is sometimes caused by gathering. I didn’t take a closer side view shot but I can tell you that the in-seam pockets sit hidden, perfectly inside those pleats. I don’t usually get the whole love affair with pockets but it does seem right somehow for a Zeena. I’ve only ever sewn them in one other dress I think, my Burda Maxi. But that was all together for more practical reasons!

bhl zeena dress side front view

It’s a bit shorter than I’d usually go for but I quite like that. I’ll like it better still once my pins have got some colour on them. They don’t get out very often these days! But there is a longer skirt option included in the pattern if you are after something a little more demur, along with three-quarter sleeves as a choice too.

I can’t guarantee what changes were made to the pattern once I’d tested it but I can say that I had no major issues with this one as I tested it. When I make it again I’m going to go crazy with French seams. Which I should have actually have done this time to save on the finishing!

One tip for those pleats though. Make sure you baste them along the top and down the pleat a bit to properly hold them in position before you sew skirt to bodice. I was a bit lazy with the basting and the pleats separated a little bit. Other than that it was a breeze. And I totally recommend it.

Here’s a link to the By Hand London Page where you can buy the Zeena Dress pdf download if you fancy one yourself. Happy sewing!

Photography by Daniel James Photographic

Burda birdie drawstring top

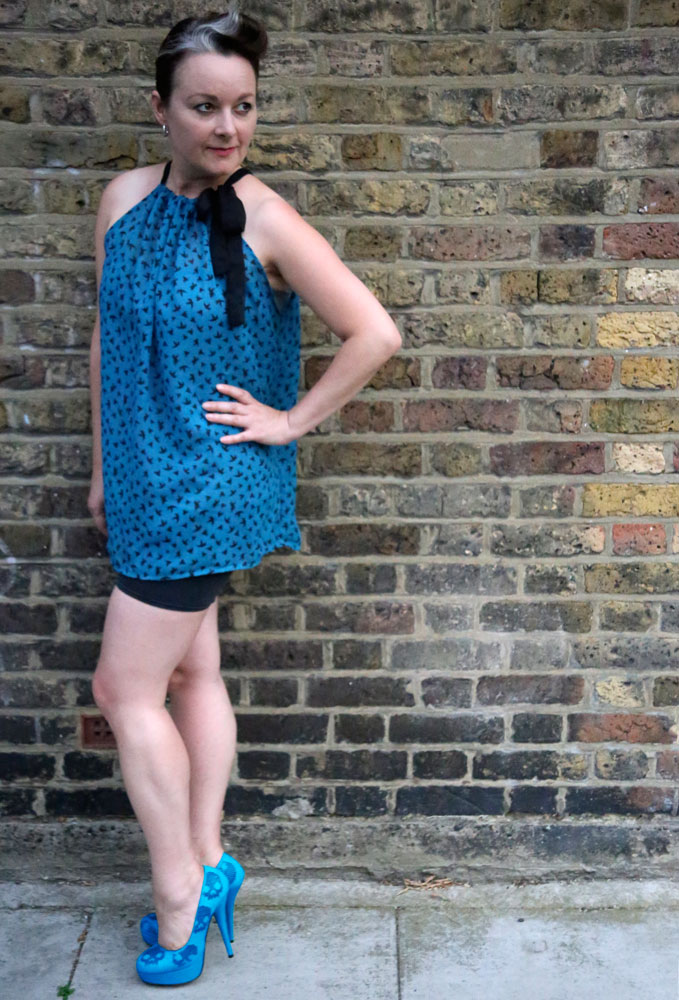
blue bird drawstring top

I knew I’d make another one of these. I just needed another metre of fun chiffon and this little birdie print was perfect. All totally synthetic of course but I’m learning not to be such a fabric snob in my old age and hey… you can’t argue at £2.50 a metre!

I had a couple of issues with the last one I made, namely the size of the armholes. It transpires that this was partially due to the stretch in the other fabric because the alterations I made – namely ditching the side seam allowance and raising the underarm point by 1 inch – have made a larger difference than anticipated. But its all good and there will be no fashion faux pas when wearing this one!

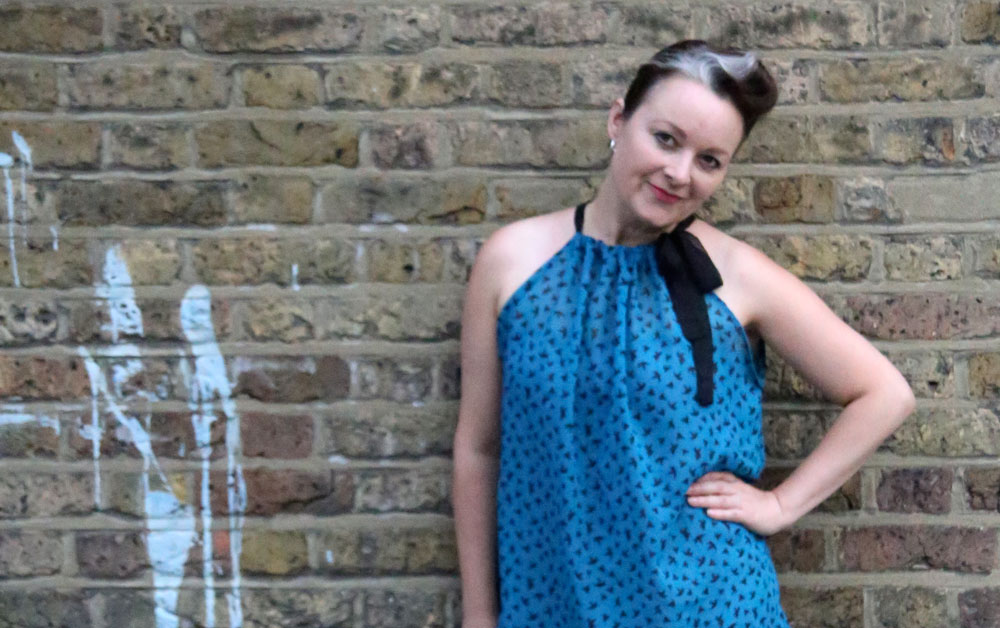
blue bird drawstring top

Advisable to seam the sides with French seams. It gives a very satisfying finish but the instructions provided are otherwise very simple to follow.

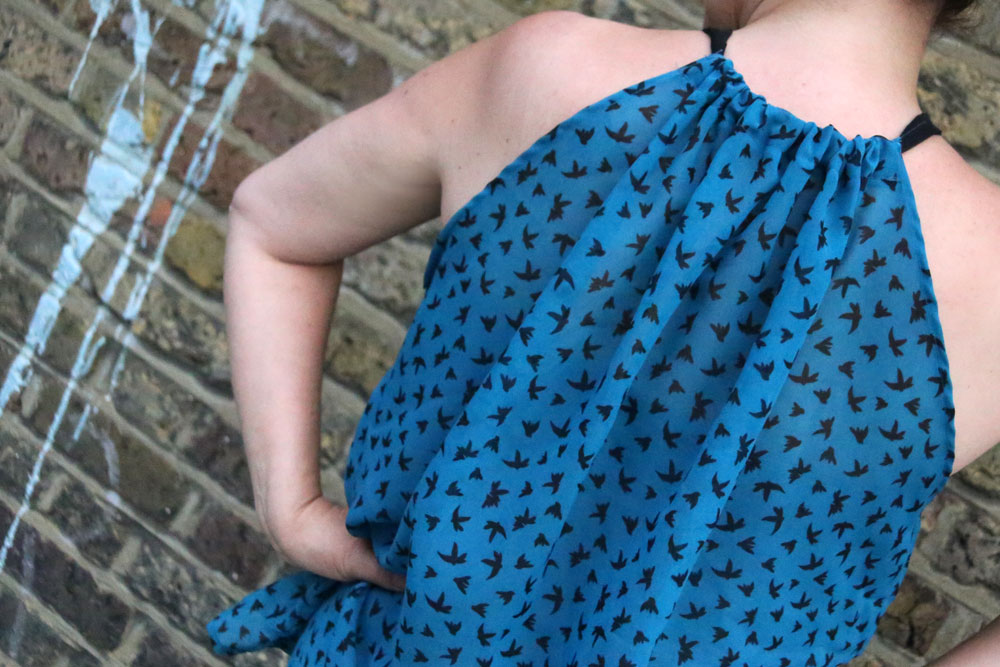
Below is a pic of the back view as requested. Exactly the same as the front, in case you thought I might have the ability to rotate my head a whole 180 degrees! And you also get to see the print a bit better here too.

blue bird drawstring top back view

Actually. Maybe they’re not birdies. Maybe they are the little fluffy bits from a dandelion clock. Hey ho. Cute all the same!

Since my last post, the instructions for the pattern are free to download from Burdastyle here. It’s called the Summer Tank 05/2013. If you are not already a member I can assure you it’s worth the registration with this site. The gallery is constantly being updated with inspirational uploads from fellow sewists and there are plenty of other free pattern downlads available among the great ones you can purchase.

Thanks as always to Mr O for the great photography. He snapped these literally in seconds this evening. That birthday camera was worth its weight in gold! 😉