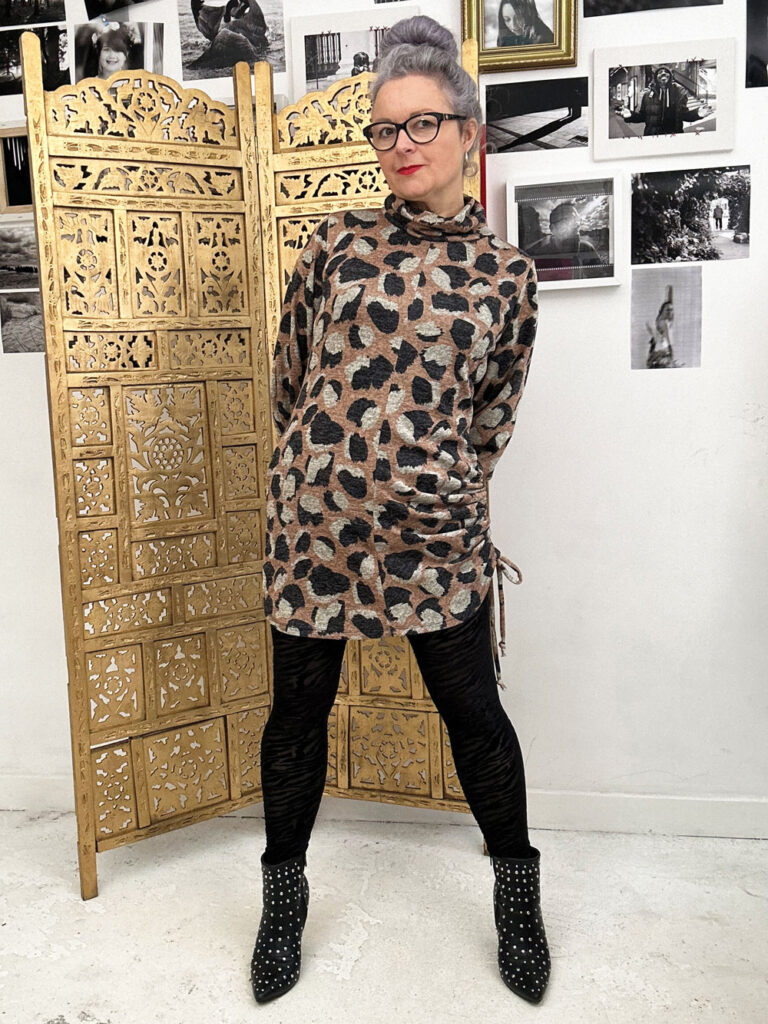
Swag dress in a Minerva exclusive sweater knit

When Minerva presented their range of exclusive sweater knits to me I was very curious to know what they were like and when this piece of brushwork/giant animal print arrived I wasn’t disappointed. It’s a generous medium weight, very soft and super smooth to touch.

It was definitely worthy of a unique design so I got sketching in my Fashionary book. It’s fair to say that the natural drape of this fabric is what inspired the design. I wanted something cosy with long sleeves and and a high neck for chillier days. My skirts get shorter in the winter so I can embrace statement tights but I wanted a cheeky side detail to make it something other than just a fitted sweater dress.
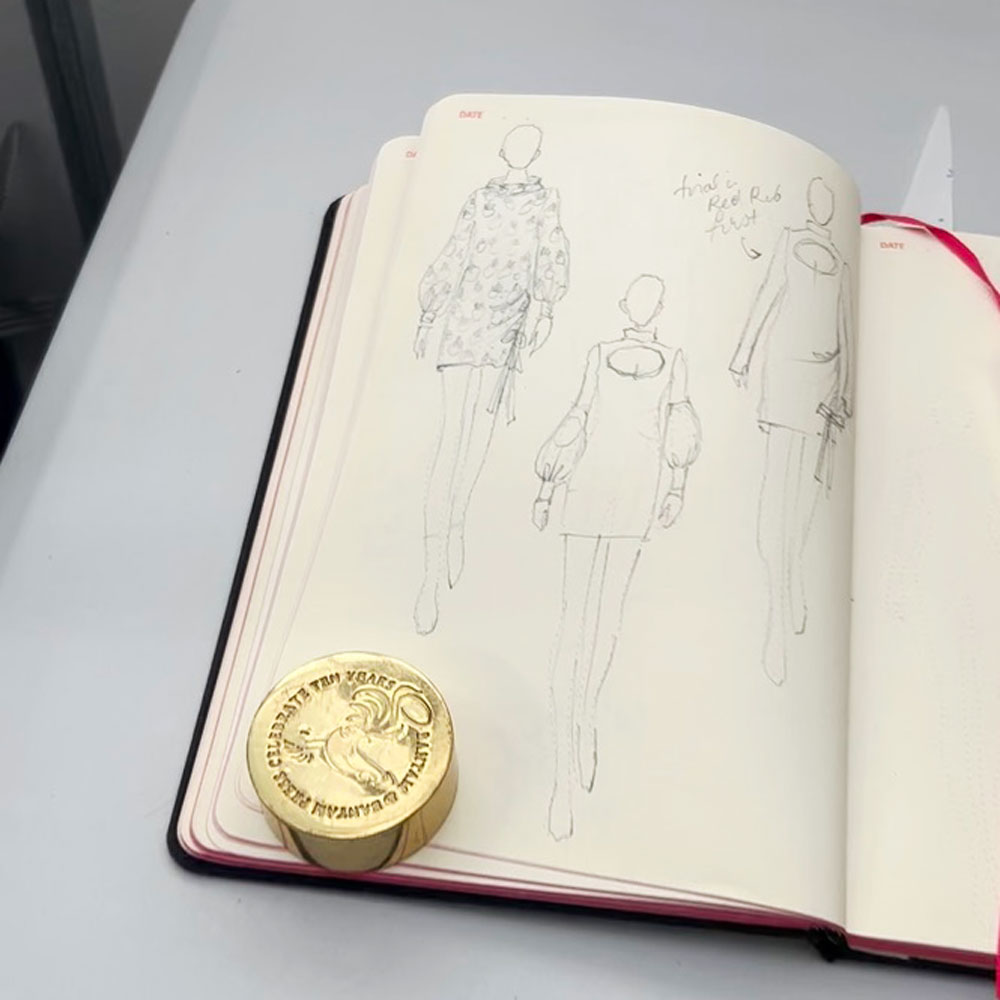
I made a test garment before cutting into the lovely new fabric and I usually make the tester in the same or similar material at least but I had to settle for a cotton jersey as I couldn’t find anything remotely similar in my usual local shops. And needless to say, it didn’t behave in quite the same way. Luckily the Minerva fabric was much more conforming to my design, especially when it came to the funnel neck. I wanted it to crumple down, to reflect the draping at the left hip and it worked sooo much better than on the test version!
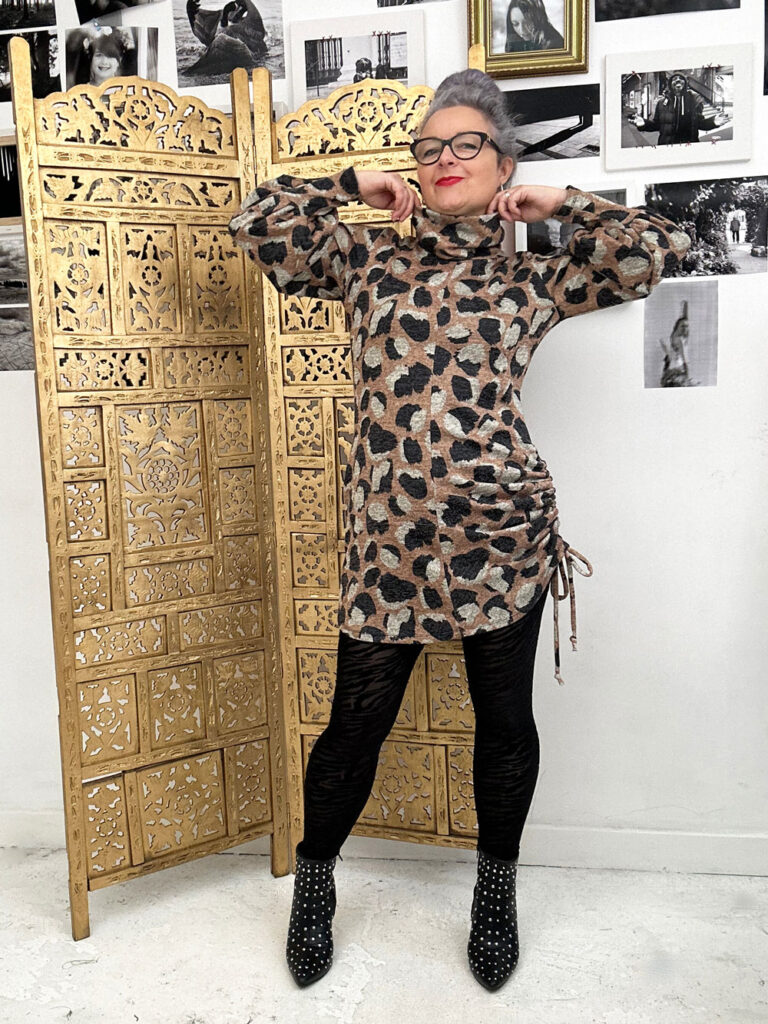
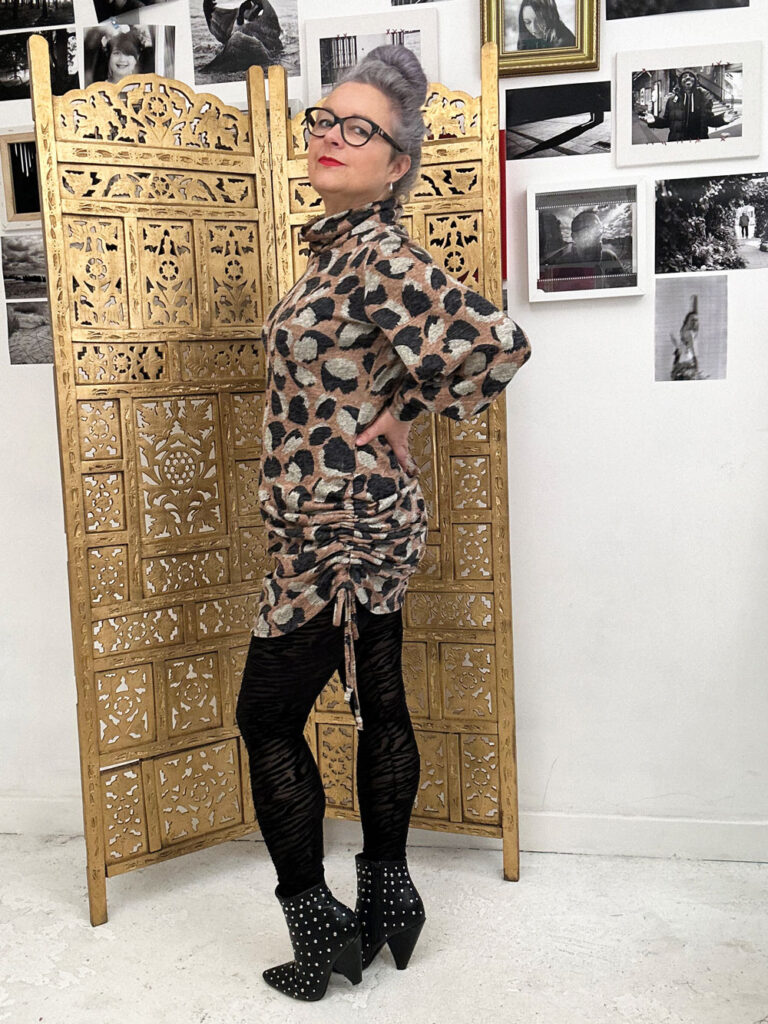
To achieve the side drapes, I created channels on the inside for two parallel ties which I secured at the tops. They are simply pulled and tied at the bottom which creates the draped look across the left front and across my left butt cheek! The ties were instrumental in creating an intentional detail rather than a look of ‘I simply haven’t pulled my dress down properly’!
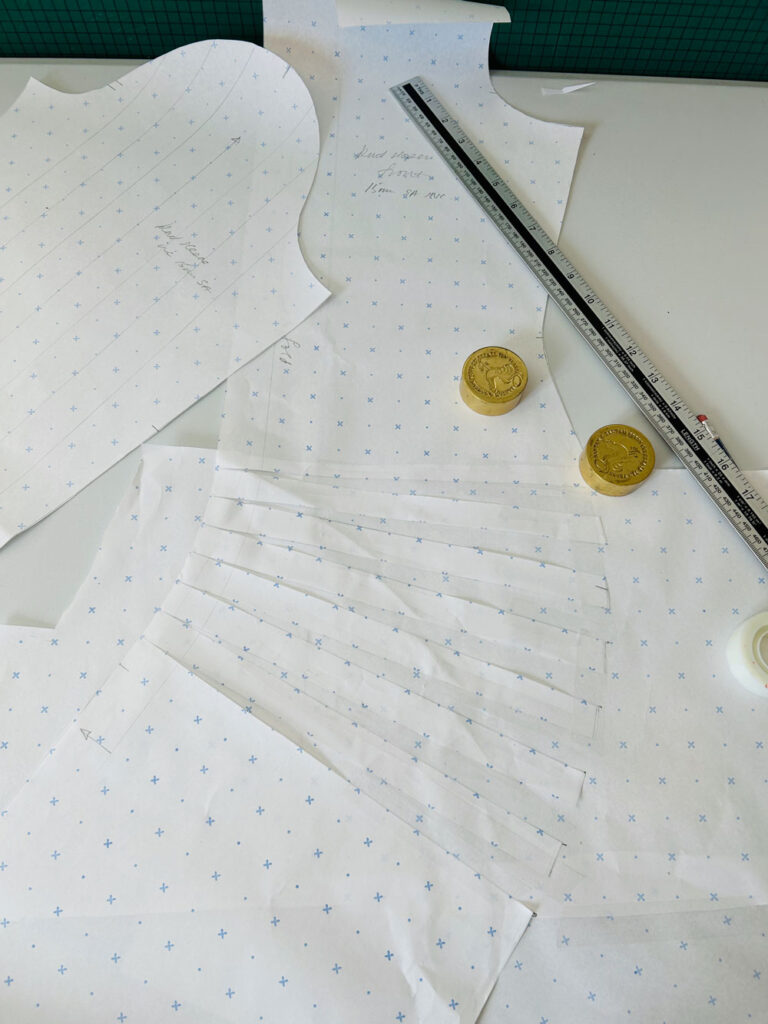
I knew I wanted a statement sleeve of sorts but I didn’t want to go large on the shoulders so bishop sleeves were the best option and this fabric performed perfectly for the job. Incidentally I realised I hadn’t changed my sewing machine needle to a ball point one half way through and that a regular size 80 had done the job just as well. Having said that, the advice is to use a ball-point so best not do as I did, just in case!
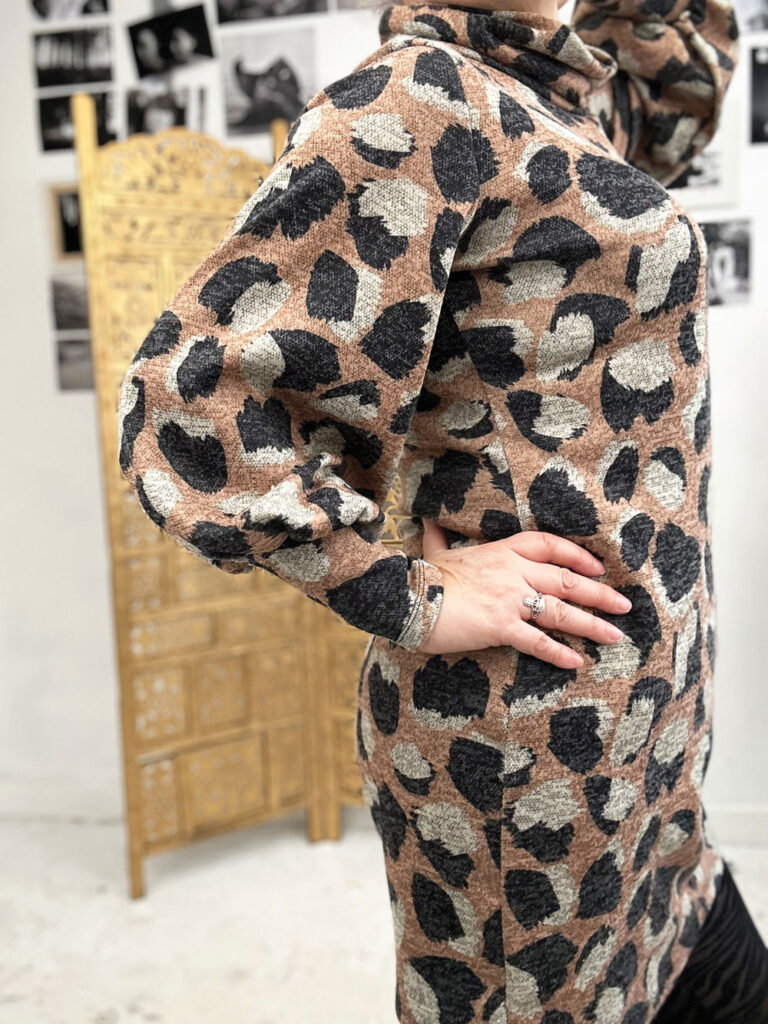
I sewed the whole dress with a combo of a wide zigzag and the lightning bolt stitch. All seams were serged afterwards. I find it’s easier to make fit adjustments if needed this way. Although now I’ve nailed the fit, chances are I’ll sew it all up on the overlocker next time for an extra speedy sewing fix!
The hems including sleeves got special treatment with a twin stretch needle. Although, as always that didn’t come without grief! I’ve never managed to make a neat job of it first time. I’ve always ended up with a knotty bobbin thread or clunky stitches. But I was super determined not to end up with a lamo zigzag hem this time. So I addjusted the foot pressure, changed up the stitch length and basically threaded and unthreaded about sixteen times before it finally worked. And I’m so glad I persevered because it looks so much more finished.
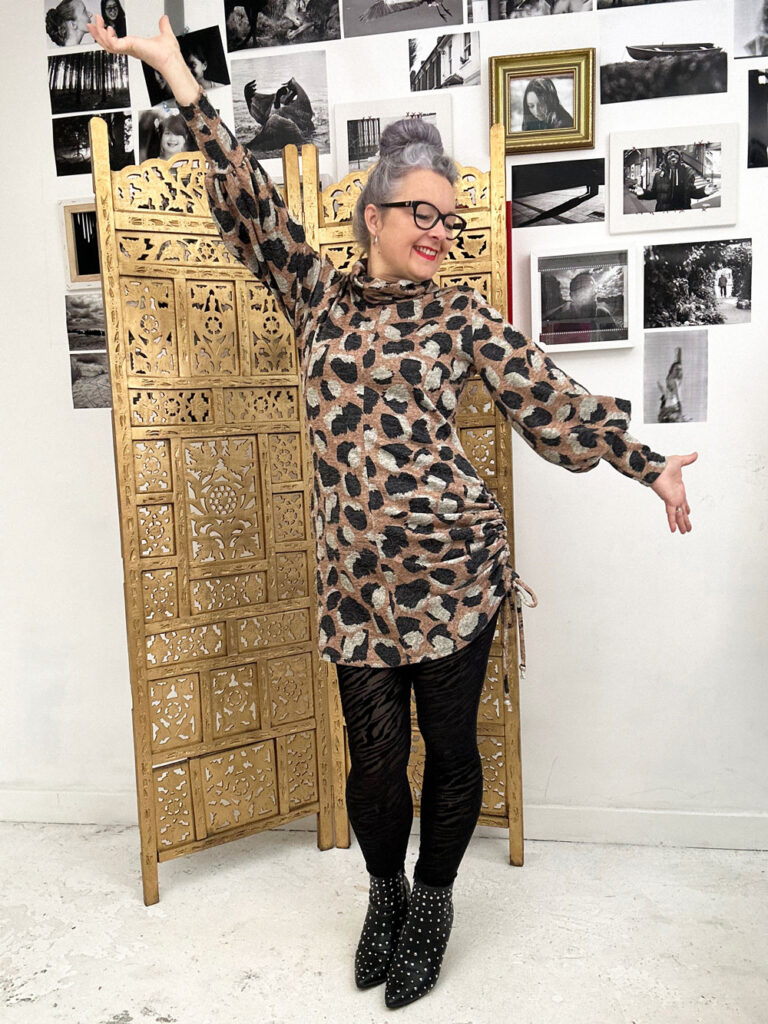
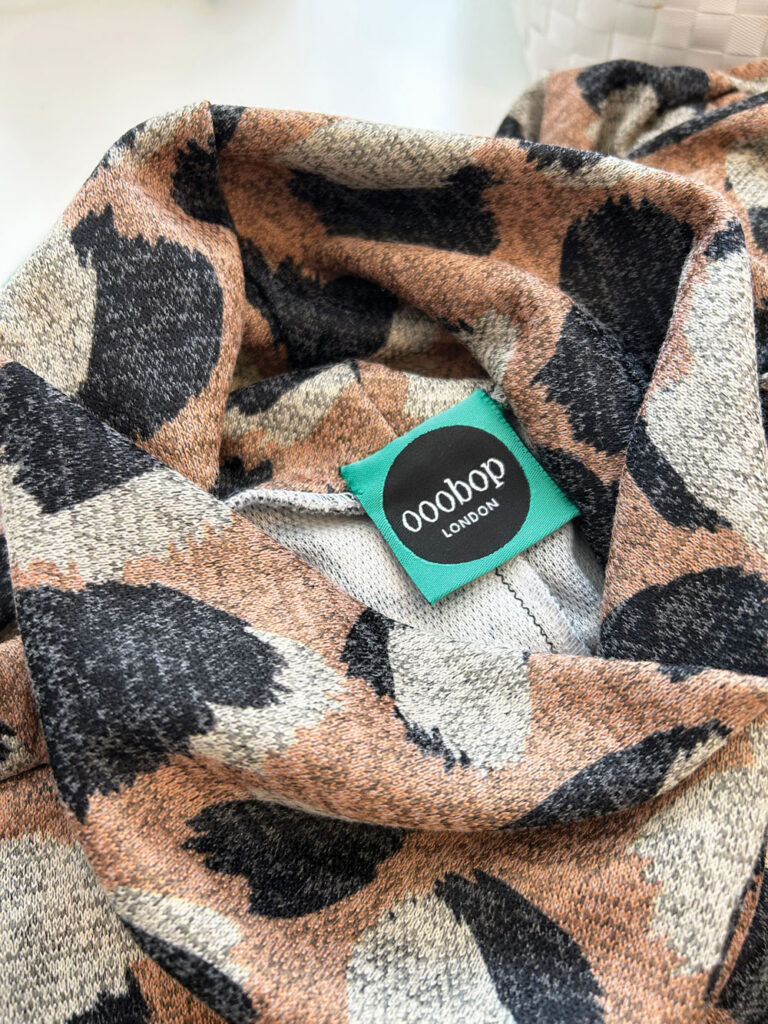
I’m so happy with the result. And I’m warm and toasty and very proud of my exclusive self drafted dress. So much so that it bears not only my ooobop seal of approval label but the lovely Minerva Maker label too! Thanks Minerva. This fabric was such a treat to sew!
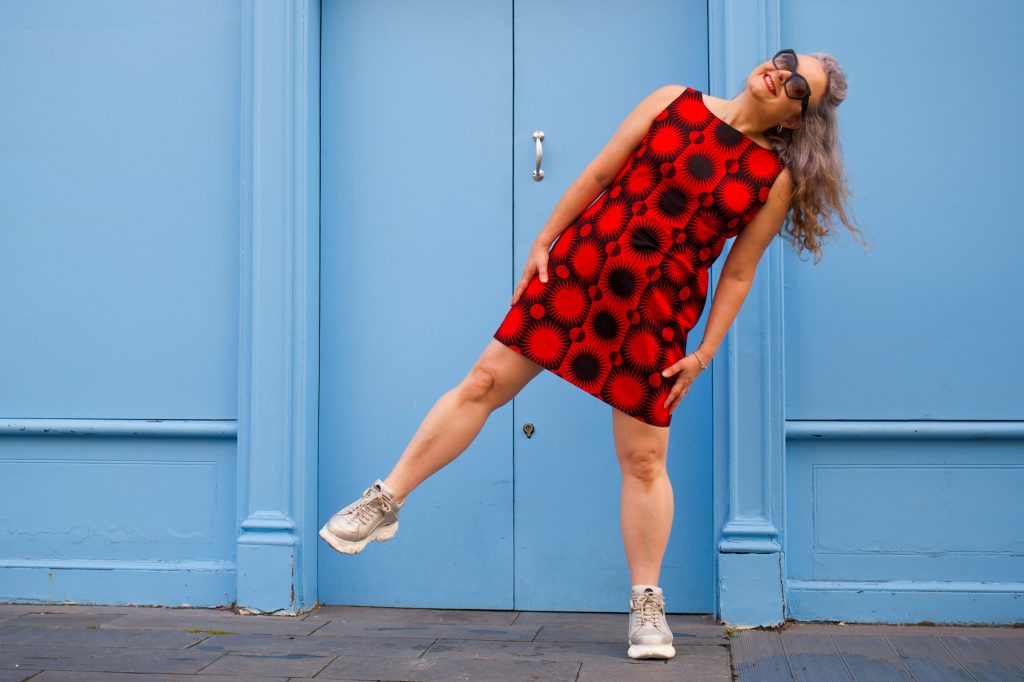
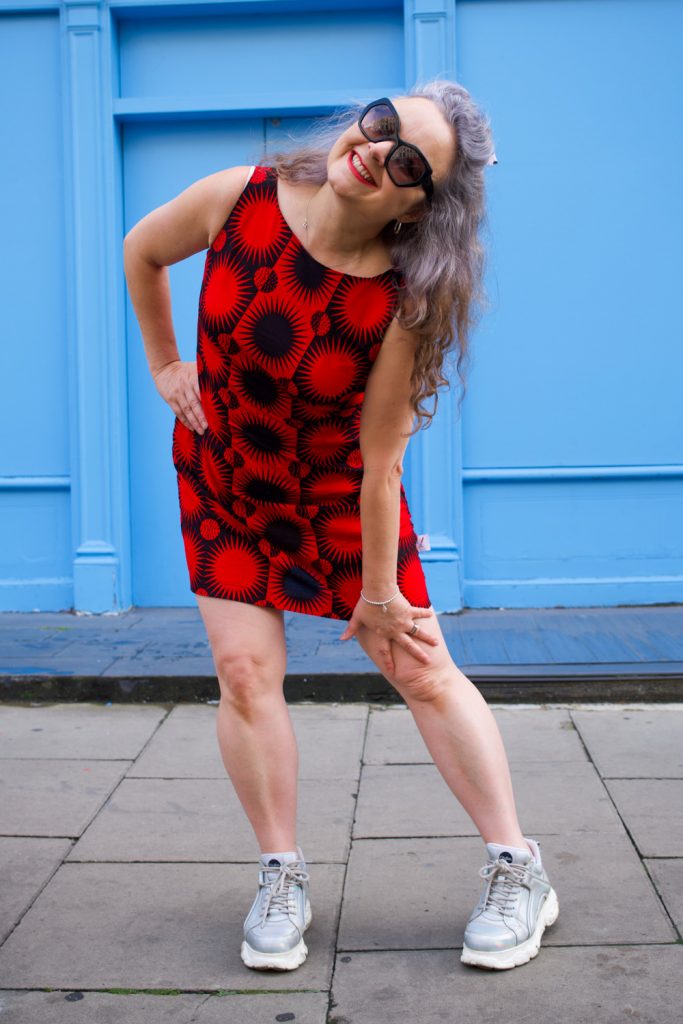
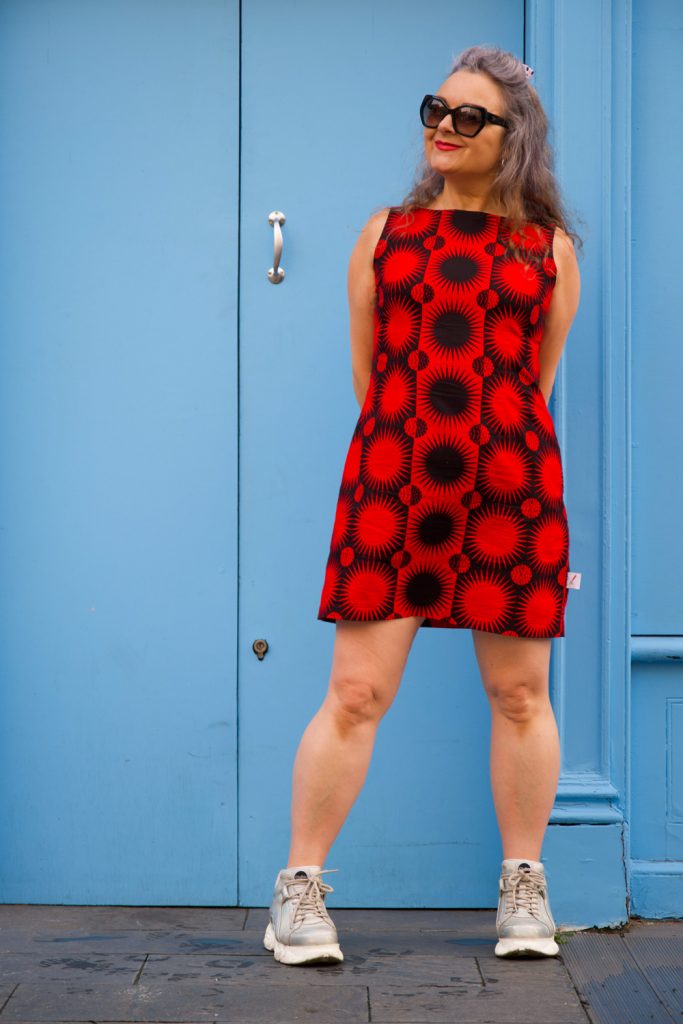
Fitted sheath dress in a graphic Ankara fabric

This is the dress I completed at the Crafty Sew and So camp, weekend before last which feels like a dreamy distant memory already, since I’ve been buried deep in work projects ever since. Thank goodness I realised the importance of taking a simple no-brainer project with me as I had anticipated a lot of chat and I didn’t want to be getting stressed out by fiddly details… or miss out on all the goss!

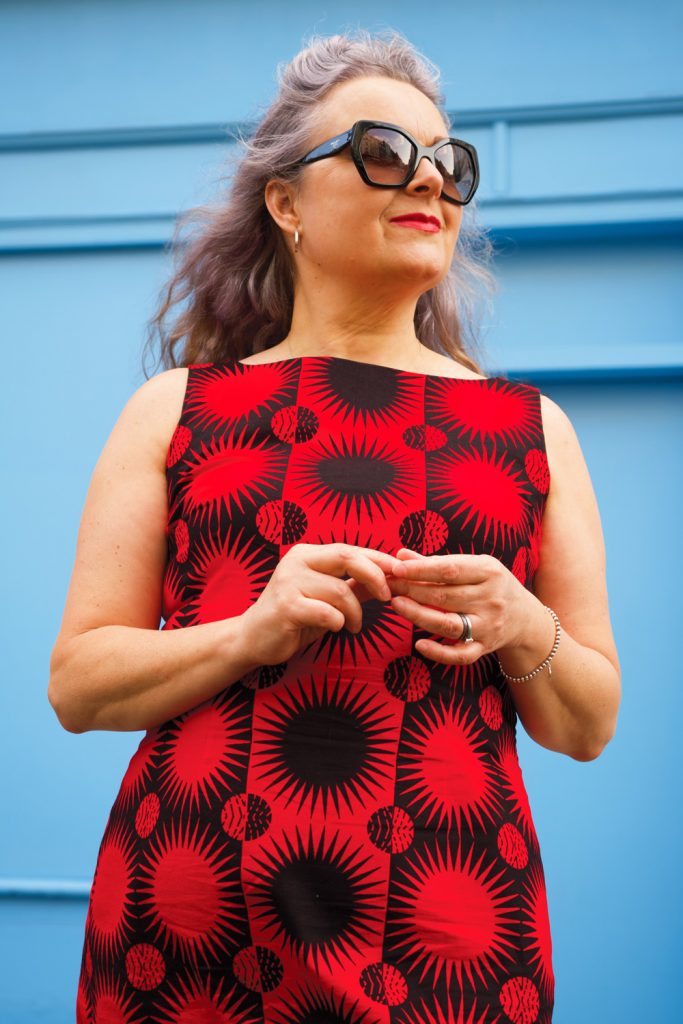
Sewing a sheath dress is a good test of fine tuning a fit as woven fabric has no forgiveness whatsoever! And I’m pretty sure I’ve nailed it now. It feels like it fits in all the right places and its amazing how that feeling transmits a confidence when I wear it. Well I can hardly blend into the background with this graphic print in any case!

I was hoping the Ankara fabric, with its strength and weight, would give good structure and I wasn’t disappointed. If you’ve sewn with it before, you’ll appreciate how your shears slice so accurately through the threads and the joy of ironing those sharp seams – especially helpful when pressing those understitched facings. They are so never going to pop out!

The dress pattern is simply a front and a back piece and an all in one facing to finish the armholes and the neckline. The zip is at the left side – something I learned from sewing a lot of vintage dresses and a method that means the back piece stays as one so there is no need to pattern match across a zip.

I would normally have tried harder to match across the side seams but I was working with a remnant here, left over from this crazy cowl skirt project, so I was limited with my placement options. Very happy that I used stash fabric though!

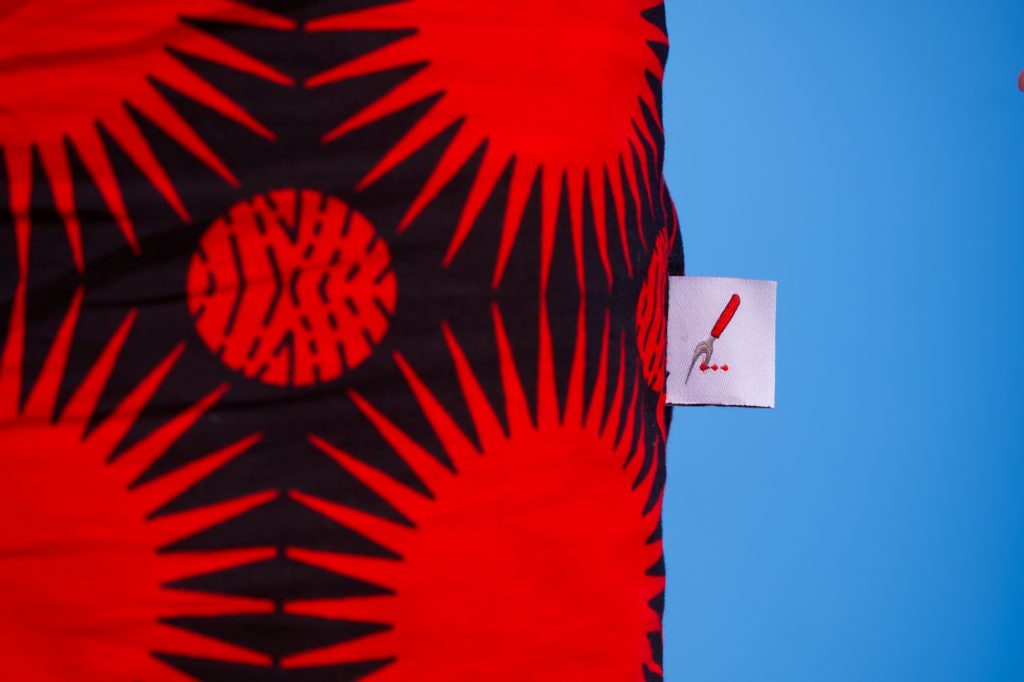
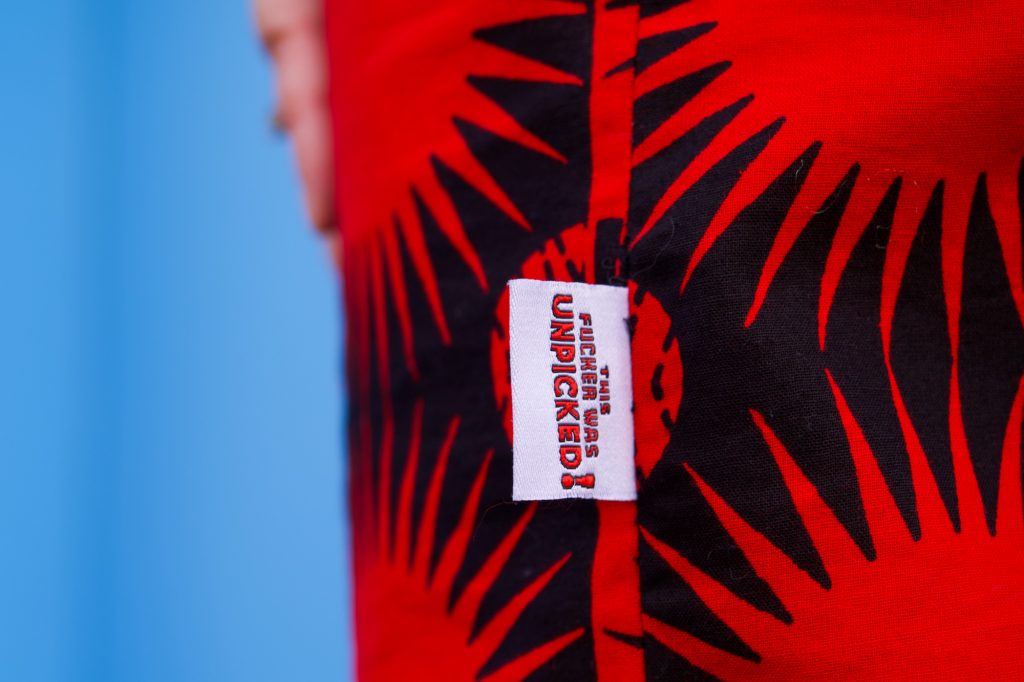
And whilst we are on the subject of side seams, I’d like to draw attention to the sweary label that Manisha from Manisha’s Fancy Fabrics kindly and appropriately gifted me from Sew Me In (explicit) Labels. Because, despite the simplicity of this dress, I had to unpick 3 seams at least due to distraction of talking and mostly laughing my head off. In case you need any confirmation, sewing alongside likeminded makers who share as much passion about dressmaking, is incredibly good for the soul but a little bit detrimental to productivity!

This won’t be my last sheath dress for a number of reasons:

  • Its a lovely no-brainer of a sew, once the fit is mastered
  • It uses precious little fabric
  • Its can be office-appropriate in a suiting fabric, casual in a cotton, dressy in a satin
  • It can be customised so easily

Thanks to Dan for these lovely photos. We were in Charlotte Street, and very much drawn in by the blue of the shopfront. We haven’t been up town for a long while and it was good to see the buzz is still there, with lots more pedestrianised areas for al-fresco drinking and dining.

Keep tuned for some more of my pattern drafting adventures. I’ve got a few plans up my sleeve!

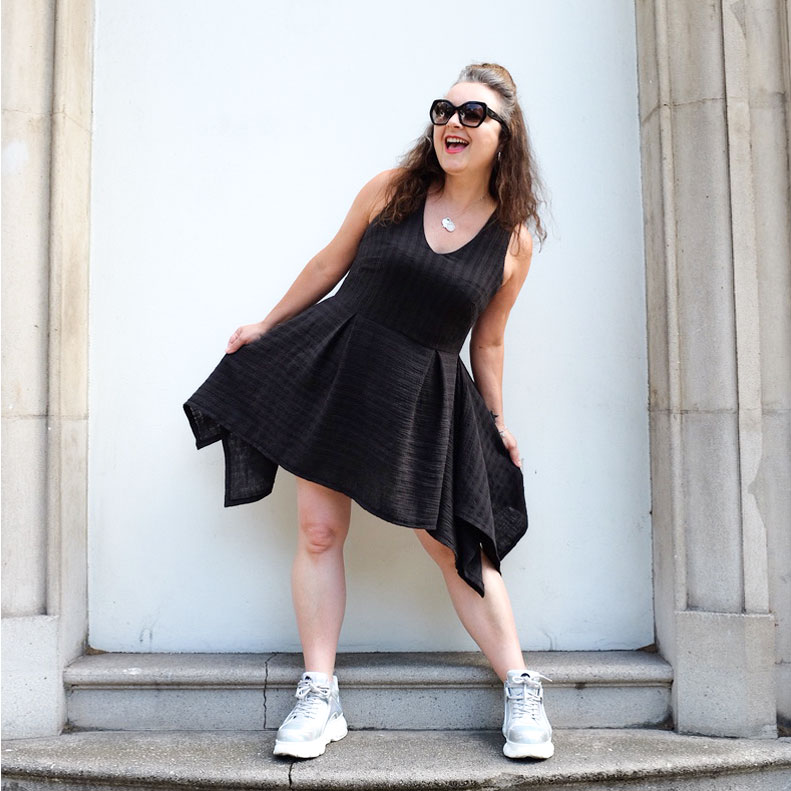
Handkerchief hem dress

ooobop design hankerchief hem dress

Lockdown forced me to buy fabric online. Not my favourite thing to do but needs must when Covid pulls the rug!

I headed straight to Minerva – amazing selection; easy to navigate website and very competitive prices. I’m also a fan of the accompanying videos that showcase the fabric in action so you can get a fair impression of the weight and drape.

I was on a roll with the Shelby rompers, having made a starry one, a tropical one and an upcycled one in relatively quick succession, and my plan was to make a plain one that was a bit more casual and downplayed for those days when you want to be slightly less visible. Read: any excuse to go back to black!

I’m a sucker for black. But even moreso for a black fabric with a texture. And linen is a firm favourite. So I figured this crinkle cotton striped linen gauze would tick all the boxes. Black was sold out unsurprisingly, so I went for charcoal which actually champions those slubs with way more contrast.

But when it arrived I was a bit miffed. It wasn’t at all as I’d imagined. It was a bit scratchy, a bit wonky with it’s loose weave and worst of all, following a prewash it contracted to half the width! That lovely slubby texture totally worked against me, didn’t behave at all like regular linen and was almost elastic! – I was dead scared to make it into a romper. What if one leg ended up longer than the other, lol!

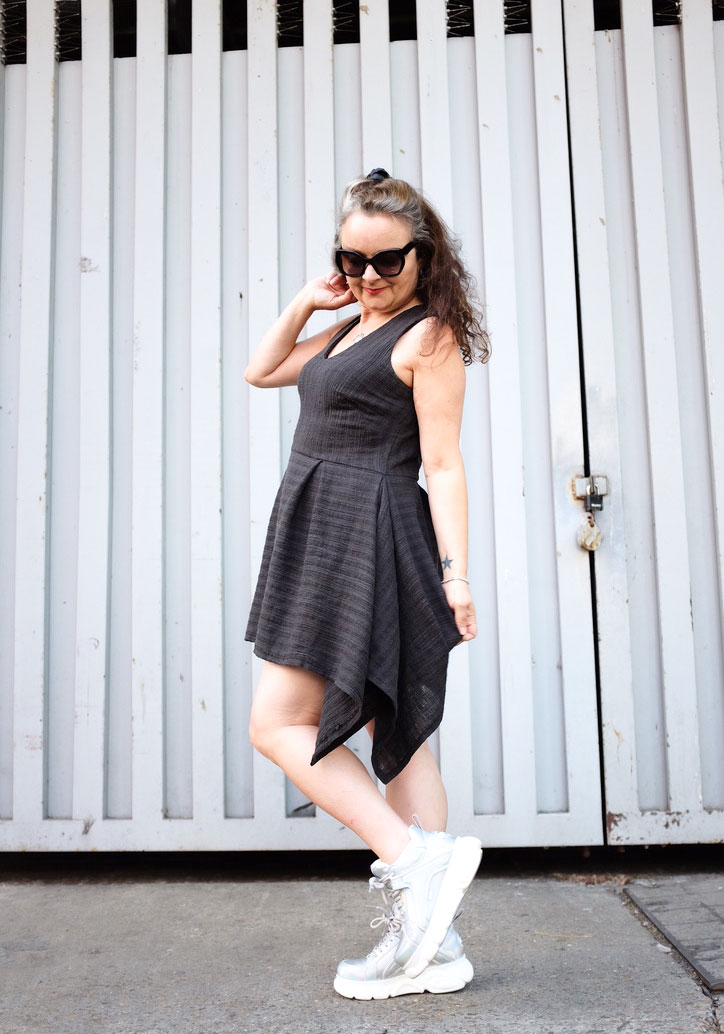
ooobop hankerchief hem dress
Channeling Blondie and Parallel Lines!

Despite the disappointment I rejoiced in the realisation that I’ve come far enough into my dressmaking journey to know when a fabric isn’t going to cut it. And the tantrums are few and far between now, because I’m quicker at finding solutions. Also the fabric completely softened after a prewash and I was more determined than ever to let this fabric do the talking.

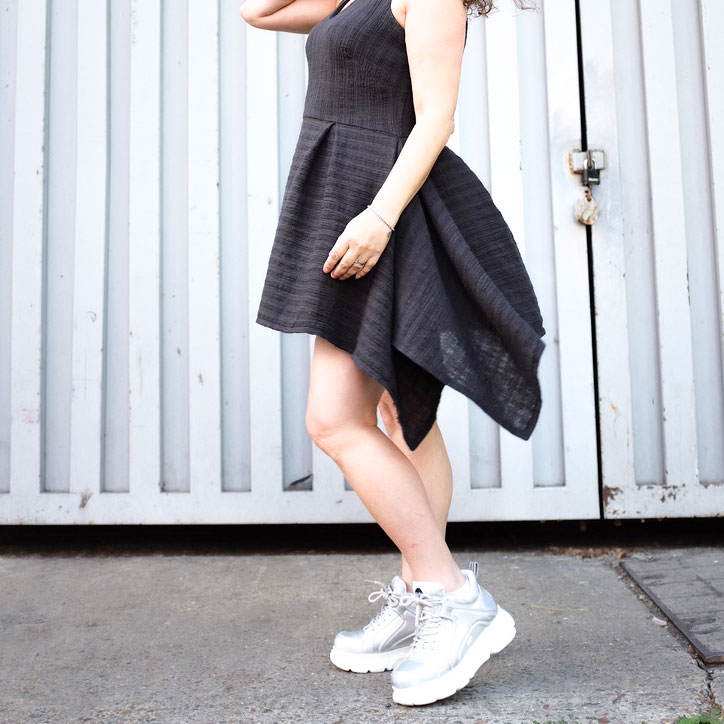
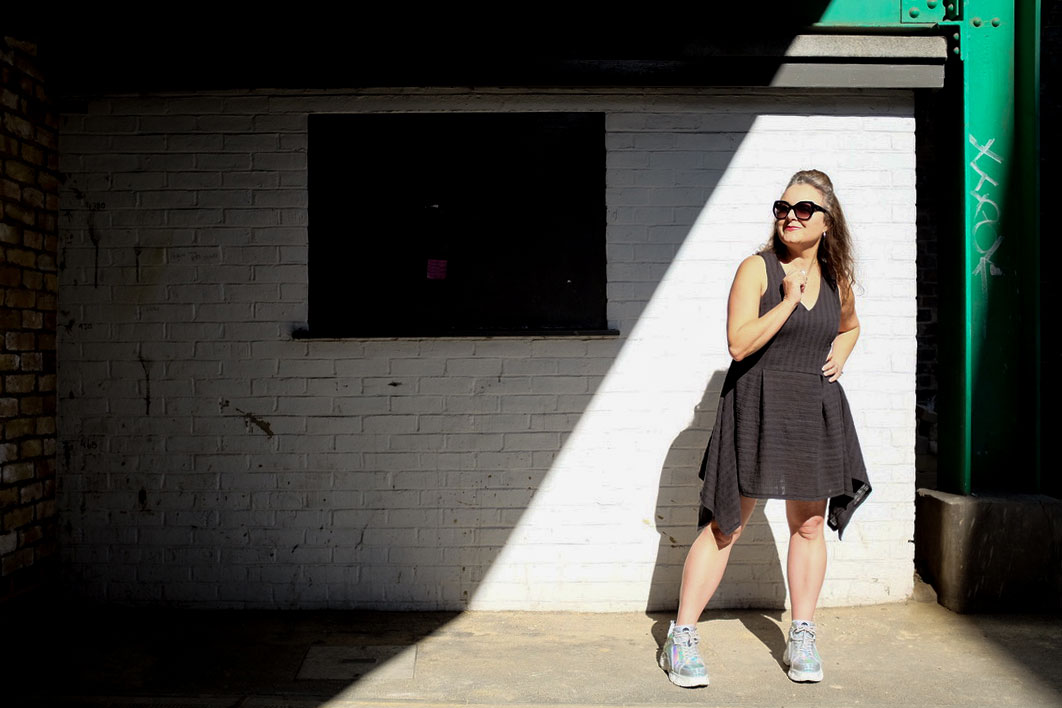
So I went off piste. Not accidentally I’m sure because I’ve always got a catalogue of crazy designs in my head and sometimes they make it to a page in my Fashionary book so they’ve got a better chance of being realised. A summer linen dress incorporating a fitted sleeveless bodice, with a v-necklline and a handkerchief skirt would be it’s destiny.

ooobop hankerchief hem dress

I reached for my bodice sloper, added a v-neckline and narrowed the shoulders. I also swung the darts to fashion a double French dart for no good reason other than I’ve never done it before. And I really like the result!

The vertical stripes of this linen lend themselves perfectly to the bodice but I decided to switch the stripes horizontally for the skirt section because I much prefer how horizontal lines fall at the sides. There was precious little worry how it would all hang for cutting it on the cross because I was playing to it’s wonky nature in any case. And it turned out good. In fact more than good. I love it!!

ooobop design hankerchief hem skirt detail

I have to cite a few influences here: Liz from this year’s GBSB for sticking to her alternative fashion style. I realised I was drifting away from mine and she’s unknowingly reeled me right back in! My bestie Laura Bird who loves an All Saints asymmetric number, always sporting an ‘interesting’ dress and Burda Style for first introducing me to a hanky hem!  I made my first maxi dress here and a second silver one here  and they are still my favourites though this is my first short dress with a handkerchief hem.

So how did I cut the skirt?

I decided on the length of the skirt (the depth) and factored in seam allowance and hem.

I made the width of the skirt to the following calculation:

Front piece (cut 1) = half waist measurement + (2x length of skirt) + 8inches for 2 box pleats + (2x hem allowance)

Back piece (cut 2) = quarter waist measurement + (1x length of skirt) + 4inches for 1 box pleat + seam allowance + hem allowance

I marked the centre of the front piece and 4 inches either side to tack the box pleats. I overlocked the bottom of the bodice piece and the top of the skirt pieces before pinning and sewing in place. I sewed up to the side seam on each piece and then sewed the seam allowance of the extra fabric along the top edge. After the centre back edges were overlocked, I inserted an invisible zip and enclosed the top part of the zip with the facing.

Finally I hemmed all four edges of the skirt and mitred the corners. And oh what a neat little finish that is!

ooobop hankerchief hem dress

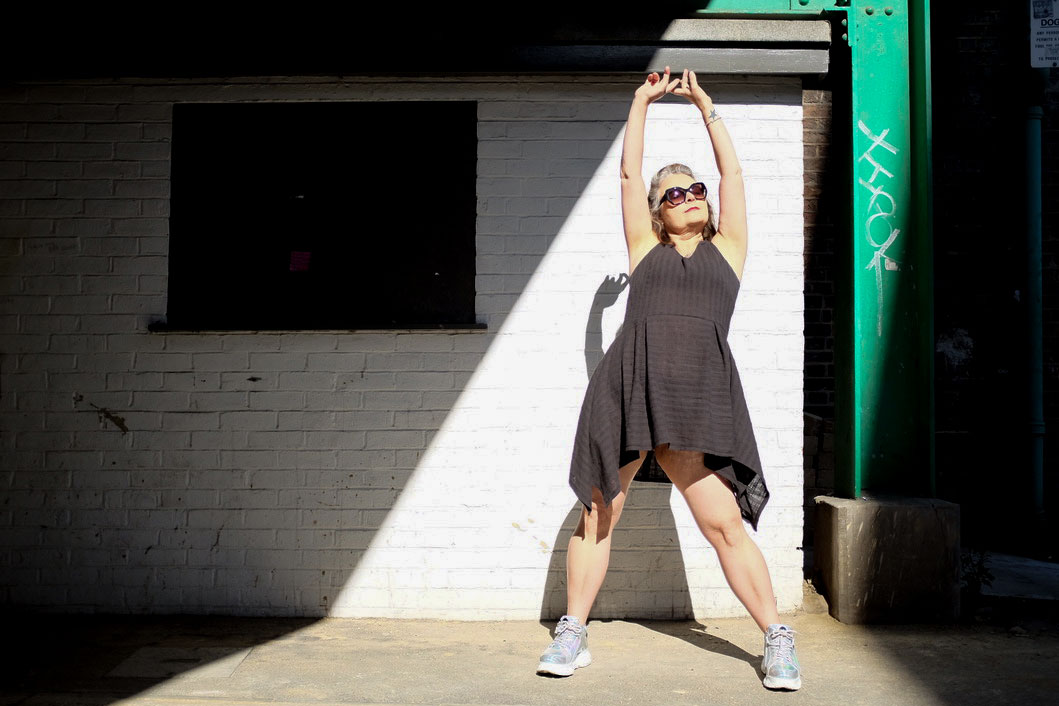
I know it’s not the most groundbreaking dress. But I made it to my own order and an image in my head and it really feels good. The fabric feels good against my skin in this heat and I love how carefree it is.

I finished up sewing it yesterday morning in good time for Dan to have a practice with his new camera. (Clever, hey?!) And I’m delighted with the results. Thank you oh clever talented husband of mine!

ooobop hankerchief hem dress

Also…new shoes!!  Buffalo hologram numbers that literally turn rainbow in the sunshine. And yes I know I’m probably channelling 90s Spice Girl. And no… I’m not about to grow up anytime fast!

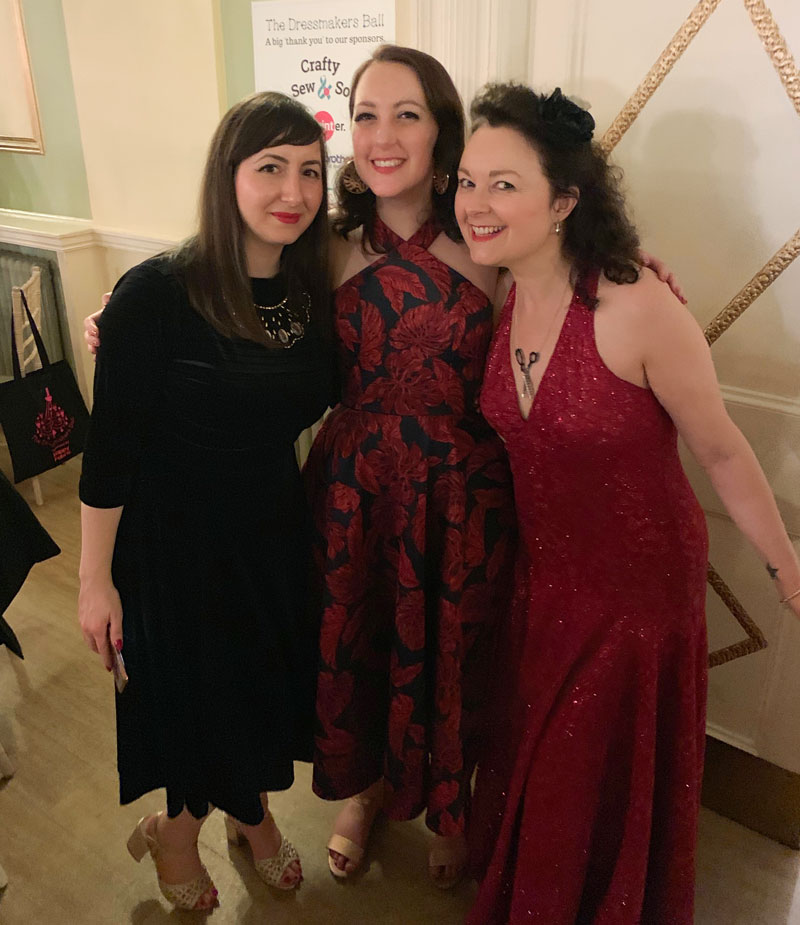
What I wore to the Dressmaker’s Ball 2019

ooobop wearing V8814 dress

‘Get me to the Ball!
‘There is a Disco at the Palace!
‘The rest have gone and I am jealous!’

Just like Roald Dahl’s Revolting Rhyme about Cinderella when she was stropping out about a lack of invite, this is exactly how I was feeling when I learned too late about the first dressmakers ball in 2017.

Needless to say I subscribed to all the hashtags and signed up to get news of the next one and snapped up that ticket as soon as it was live.

The event is organised by team Crafty Sew and So and this year’s was at The City Rooms in Leicester.

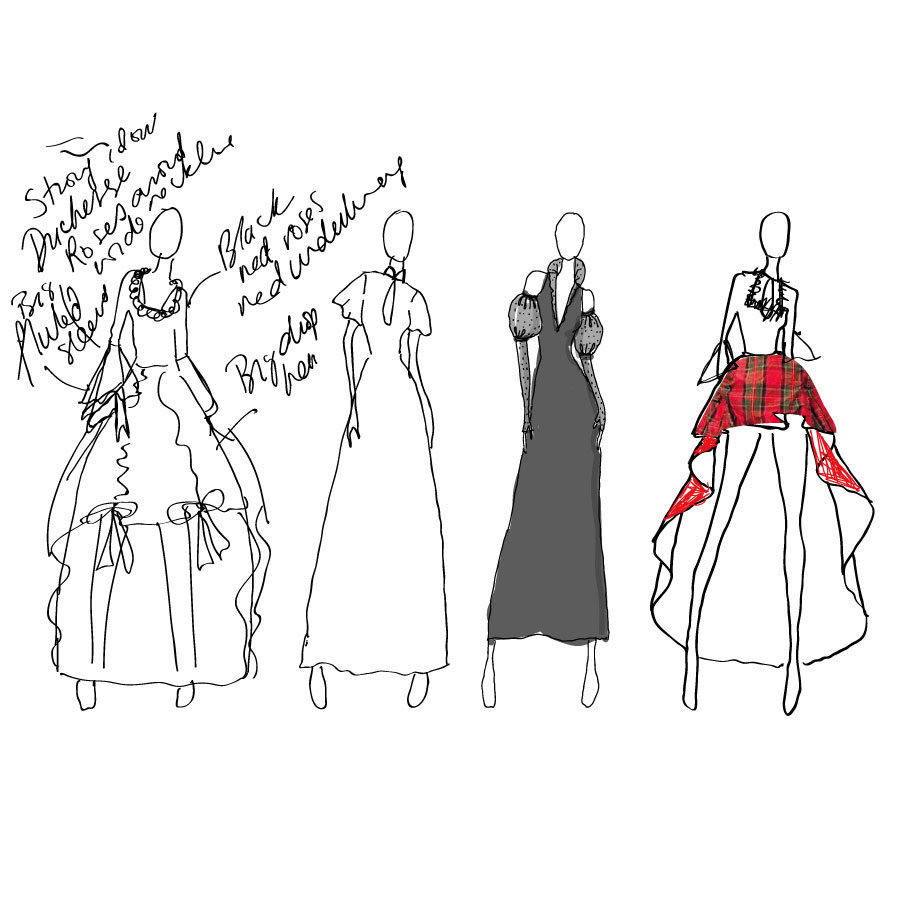
The minute I had that ticket secured, my head flooded with all the possibilities for a free range, self drafted no holds barred gown of dreams, all for me. Elizabethan ruffs, balloon organza sleeves. Crinoline skirt. Bustle perhaps? I had a year after all.

designs for ooobop ballgownTruth be told and no surprises here, I decided on the dress with just over 10 days to go. You know how it goes ~ work, family, work and more work. And I’m a little bit sad to say that my all time avant-garde number ended up straight out of a packet.

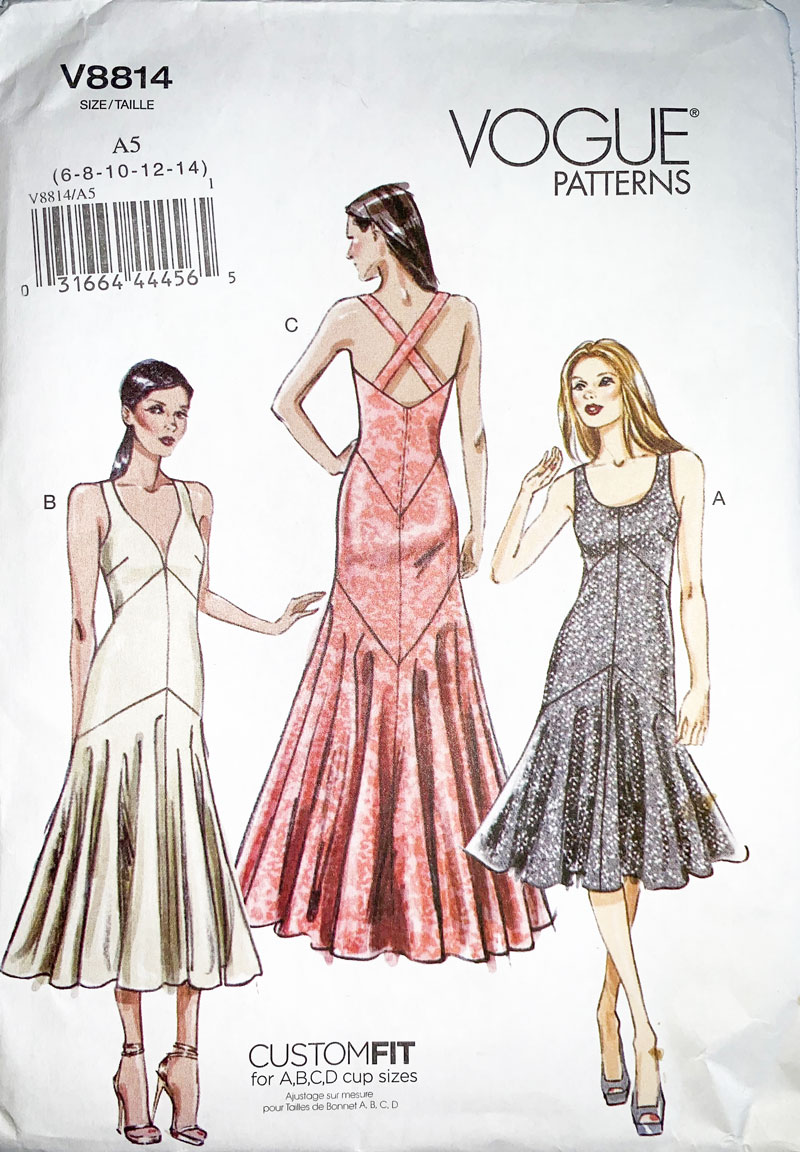
Vogue pattern V8814

A lovely pattern for sure but the proof was in the making: No toile time. No anything time. Time? Definitely a thing of the past. Enjoy it while you can kiddos. It passes you by on the blink of an eye with every added birthday.

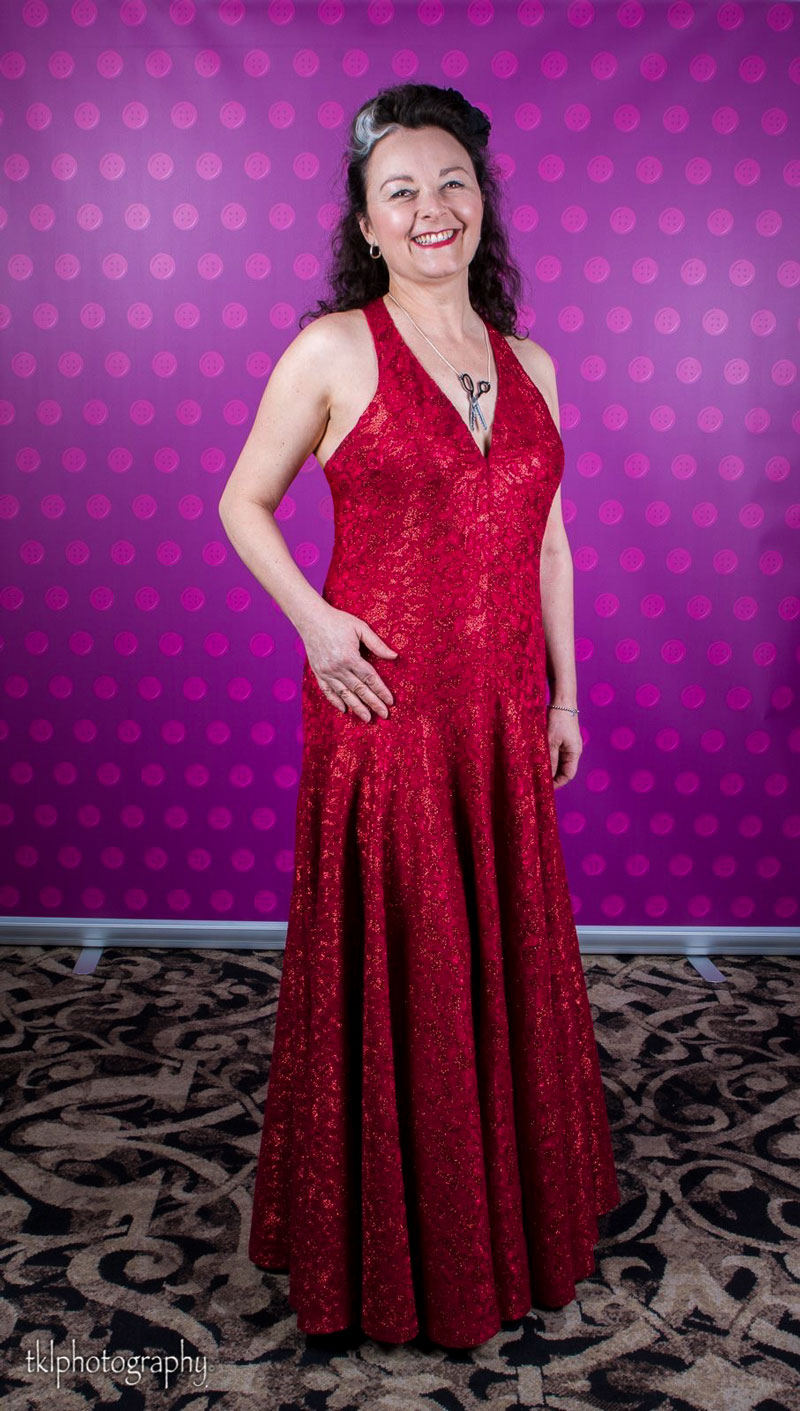
Now let’s discuss this slinky Vogue number V8814. I chose floor length, version C. I was going to a ball after all and visions of slow-mo sweeping skirt-motions danced in my head. I opted for the one with plunging neckline and crossover straps at the back. The bodice is snug to the hips and then all the volley is in the circular skirt.

I am so grateful to those pattern companies who display the finished sizes on the pattern pieces. Lord only knows why quite so much ease has to be added. I’d have swum in the suggested size according to actual stats!

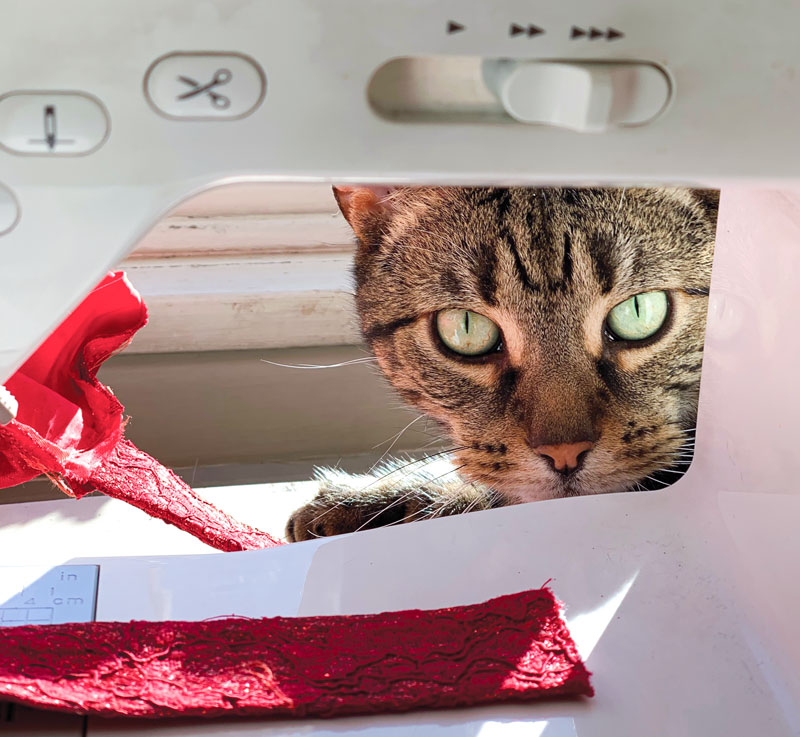
And I am so delighted to have chanced upon a pattern that for all it’s sophistication was a total breeze to put together! The only area that needed fixing was the neckline which gaped a little so I hand-sewed some 5mm wide elastic along the inside of the neckline, stretching slightly to pull it in more to the chest. And the only tricky bit was convincing Pants I didn’t need his help!

Pants the cat helping me sew

I’d bought a singular ticket to the ball just because I worry about making plans with people and then have to cancel due to work commitments. Plus I knew that I would meet people there. The sewing community is such a welcoming and fun place, of that I was certain.

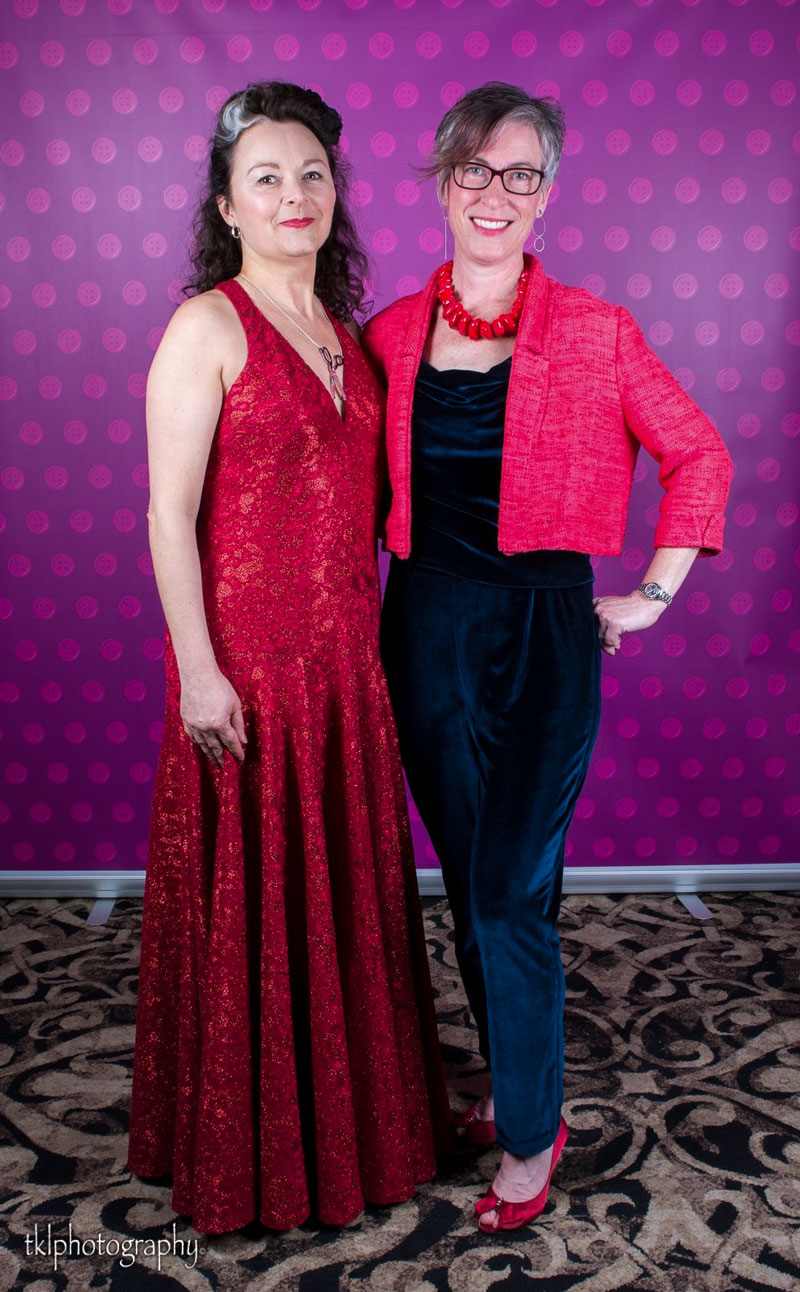
But that didn’t stop me from being self-conscious in front of the photographer. I’m so spoilt by Mr O’s awesome willingness to oblige my blog shots that I forget what it’s like to stand and pose in front of someone you don’t know! Thank you TKL Photography for bearing with me and thank you Tamsin, for posing with me and making me feel a little less awkward!

ooobop with Tamsin from Pimp my Curtains

We decided upon fishbowls of gin to relax us even more!

Tamsin and ooobop drinking gin

It was such an amazing evening. A ballroom brimming with stunning guests all adorned in bespoke, handmade attire, dancing to some really cool covers by a brilliant live jazz band. I spent most of the evening gawping at stunning outfits and discussing them, clinking and raising a glass at every opportunity to the brilliant hosts and the awesome sewing community.

And look who else I found: Marie from A Stitching Odyssey and Amy, blogger at Almond Rock and editor of Love Sewing Magazine.

judges at the dressmakers ball 2019

Not at all trying to fraternise with the judges before the catwalk competition – honest, guv!

So why have I taken so long to blog about this dress?

In short.

The fabric.

I’m ashamed by my panic purchase of glittery fabric.

‘I want a dress! I want a coach!
‘And earrings and a diamond brooch!
‘And silver slippers, two of those!
‘And lovely nylon panty hose!

Perfectly weighty and with great drape for the skirt, I chanced upon it in the Goldhawk Road. It appears to be a red lace bonded over a synthetic satin with glitter glued in the gaps of the lace.  I joked about the fire-hazzard potential should I stand too close to a candle, given the probability of not a single natural fibre involved. But it was met with a straight face. The seller was already was unhappy that my need for five yards meant discarding the first couple of metres on the roll as the lace was clearly bonded in sections. Lucky I noticed the join because he sure as hell wasn’t going to point it out!

But I did not question the glitter. 

Recently, my day job has involved lots of work relating to the harmful effects of plastic on the environment, and though I haven’t come across any reference to glitter in the books as yet, this quote by Alice Horton, a research associate at the UK’s Centre for Ecology and Hydrology, jumped out at me and touched a nerve:

“While there is currently no evidence specifically on glitter being bad for the environment, it is likely that studies on glitter would show similar results to those on other microplastics”.

And now I feel bad. For not thinking it through. For the trail of glitter I literally left behind. I don’t exaggerate when I say that I left a red glittery bum shape on my seat when I stood up after dinner. And I’m sorry for anyone who sat in my place afterwards and took a little piece of me home with them.

To this day I’m finding that damned stuff on my shoes, in the carpet, on the cat… It’s never going to go away. And then it’ll end up in the sea and all the poor fishes will be lunching on it.

And I know I can’t un-do it. But I can not-do it again. No more more glitter for me. I need to think before I buy. I just can’t cope with the guilt! Or do you think I’m over-reacting?

Red glitter dress with bell sleeves

red glitter bell sleeve dress

Oh what a difference a sunny day makes. Meant I could withstand a shoot for a whole 15 minutes without a coat! And I’m so happy that Daniel could do them as he did such a fab job and I’m hopeless and impatient at the whole remote thing.


This dress is a bit late to the blog but was well on time for the party. It’s the Burdastyle bell sleeve dress that I made for New Years Eve. I clearly had a bit of time on my hands because I made two of these up in the space of that week between Christmas and New Year. You can see my black glittery version in the previous blog post, here.

red litter bell sleeve dress full length

This one is way more glittery and more red and more suitable for a dance at the disco than mooch down the Marks and Spencer aisles but I think its very likely I’ll be breaking those kinda rules.


The fabric doesn’t have as much stretch as the last one but I still managed to forgo a zip, just the same. It’s a lot less snuggly on account of the high metallic thread-count but that also means it doesn’t need an iron. I only tend to press seams during the making-of, these days and avoid at all cost those mum-style marathon ironing sessions in front of the telly. I’d sooner sew than iron!

red glitter bell sleeve dress Burda style

The downside of a fabric that won’t behave under pressure (and low heat) is of course the issue of pesky popping-out facings. I tacked them down at the shoulders and at the centre back seam and still they found an escape route. So I sewed by hand, tiny little stitches close to the neckline. It’s vaguely visible but way less annoying than flappy bits of fabric spoiling the picture!

red glittery bell sleeve dress

Because I was in a rush with this one, I didn’t overlock the seams. They are ‘pressed’ open. In the loosest sense of the word, lol. But the fabric isn’t ever going to fray because I tested that by giving it a bit of rough treatment and it remained calm and intact under pressure!

red glittery bell sleeve dress

The temptation is to make another 5 of these, so then I will have one for every day of the week. It give’s no grief to sew and it gets so many compliments in return for such little effort. I haven’t really styled it much here but chokers, big floppy 70s hats, a neck-tie, a faux fur scarf or some massive earrings, could all transform this dress for a totally different look.

red glittery bell sleeve dress by the fence

Bell sleeve dress burdastyle pattern

I still might make another one at least, though! I’d like to make it in a woven – with a zip of course – just to test the difference.


Burda bell sleeve dress

burda bell sleeve dress

Happy new year my lovelies! I do hope you’ve all had a fabulous time and that January 2018 hasn’t arrived with too much shock to the system.

Such a weird time of year this first week of Jan. My lead up to Christmas – probably much like everyone else’s – was a flurry of work and panic shopping, drinking and feasting to excess like crazy bear people and without so much of a sniff of sewing time, and then… it’s all back to normal. Or as normal as it gets. And now I’m left in a constant state of thinking I’ve forgotten to do something, or that I’m meant to be somewhere. And it’s really hard to to rein in the graze and remember to go for the tap and not the wine bottle. Sound familiar?!


I awarded myself some sewing time between Christmas and New Year and the balance is still good so far, following week one in the work-house so I’ve signed up to Rochelle’s #2018makenine on Instagram – an easy enough challenge whereby we are encouraged to declare nine things we’d love to make throughout the year. And last night I managed to strike one of my intended projects off the list. Well two, actually, if the one I made for New Years eve counts!

ooobop 2018makenine

This dress a very gentle casual-style ease back into the sewing game kind of project: Burda Style Issue 12/2016 Bell-sleeve dress. It’s been a long while since I made anything Burda and I forgot all about wanting to make this dress till I had a had a sort out of my magazine collection. I’ve been collecting them since December 2010. I’m sure it would be easier to search up what I wanted on the site and download the pdf pattern but I quite like that I always have the pattern already and don’t mind tracing it off too much. Especially when there’s not too many pieces involved.

Burda bell sleeve dress in magazine

Really not very much to report on construction: A couple of bust darts and a neckline facing with a bit of understitching being the only faffs. And then my usual alterations. A sway back adjustment for one. So I just located the waistline and effectively took a horizontal dart 5cms from the back seam tapering to nothing at the side seam. It’s amazing how much of a difference this makes.

burdastyle bell sleeve dress by ooobop

I used a stretch jersey as recommended but was confused by the need for a zip. So I tacked the back pieces together to check the fit before I went and sunk those tiny stretch stitches into the fabric.

It was a good bit of hindsight and proved that I didn’t need a zip at all so I hi-fived myself and stitched it down.

The only other adjustment I made was to nip it in at the waistline a bit by marking in an inch and tapering back out to the side seams. Not too much of an issue as I was going to overlock a small seam allowance afterwards.

The fabric is a very soft, substantial jersey knit with a bit of glitter action so I can still carry a bit of a party round with me even though the season is done and dusted.

burda bell sleeve dress full length

The funnel sleeves are what sold me. They add a bit of fun and create a great silhouette to what is otherwise a very simple V-neck dress. The flounce is added to the sleeve before sewing up the under arm seam and insetting.  And not for the first time, I am so impressed with the perfect amount of ease Burda gets right on the sleeve cap every single time. Not a pucker in sight!

Well this dress has definitely filled a gap in the wardrobe: It’s perfect for work, 80 deniers and boots; worked great with a pair of Doc Martens (and a warm coat) for a river walk today and I’m sure a pair of heels and some twinkly earrings will transform it from a day to night-out dress. All bases covered!

It really does feel so good to be back behind the machine. I was so busy with work leading up to Christmas that there was no time for sewing and I missed it so much. I’m hoping to cut into the next one on my list soon and keep up a bit of wardrobe re-stocking while I can.


Skulls and roses dress

Ooobop Skulls and Roses dress

This dress is round three of my strive to perfect a self-drafted bodice pattern. It follows on from a self-drafted retro top, blogged in 2014 and my recent wax cotton print dress.

There’s something wholly satisfying about returning so soon to a pattern that you know will work. And I’m sure it will be even better to come back to following a few more tweaks.

The neckline on the wax cotton dress gaped just a little so I fixed that and refined the curve of the neckline too. There was also some gaping at the back bodice armholes, so I took out some excess and transferred it to the back waist darts.

Ooobop Skulls and Roses dress

The fit is much better but V3 dress – already underway – will have a little more fine tuning and then all I need to do is stay the same shape… forever! 😀

The skirt on this one is a simple gathered dirndl. Easy to make, easy to wear, easy to dance in. And also a little less of a Marilyn fashion risk than a circle skirt on a blustery day.

The invisible zip is set on the left side of the bodice as before, but this time I remembered to keep the back piece as one, so the pattern isn’t split. And plus, I’m rather digging the burrito method of self-lining. Have you tried this yet?

I’m chuffed that this was another piece of fabric that emerged from from the bottom of stash mountain. I’m sure Dan had his eye on this for a shirt at some point but I think he forgot. And I shamelessly neglected to remind him! The colour scheme is my favourite kind and I love a little nod to rockabilly.

This dress has been worn and snapped to death already with no time to blog until now. It’s been my go-to for all number of events – clubs, festivals, gigs and even the office. I’ve got to put it to the back of the wardrobe for a bit now, though, because I’m sure I’ve clocked the look that says: “Someone didn’t make it home last night!” 😮 I did. Obvs!

Daniel took these photos for me, on our date night last night. Multitasking. Always! I’m standing in front of St Paul’s church in Hammersmith. Such a beautiful grade II listed building among all the modern architecture and the hustle and bustle over and under the flyover at the broadway. It’s been a place of worship since the 1600s! So much history on a little patch of green.

Ooobop Skulls and Roses Dress

Light was fading and our tummies were rumbling as we snapped these in a hurry en route to The Gate – one of my favourite veggie restaurants. Dan agreed that there was no lack of meat on the plate. My only regret was that I didn’t have enough room for desert. They looked so awesome! Perhaps my next dress version ought to be of expandable material!

Ooobop Skulls and Roses dress


Self-drafted wax print dress

wax cotton dress side view
I’m not entirely sure how this post got shot and written today. We arrived home from Glastonbury Festival at 6am this morning – a little tired and emotional to say the least! Thank goodness for a great set of shades picked up for a tenner on site, from a pop up vintage shop (ironically, usually based in Portobello… just up the road from me!)

So, the dress… It’s mine, all mine! No pattern, vintage or otherwise was used in the making-of and I’m just a little bit proud.

I really wanted a new dress but without any faff. I really, really wasn’t in the mood for trialling various test versions – I’m getting so impatient in my old age! – And then I remembered that somewhere, in some pile or other, there was a pre-existing bodice block from a class I took about 3 years ago. To date I’ve only used it once, for a retro-style top, which is madness. Because it fits!

I only wanted a sleeveless bodice for the top, nothing fancy so it seemed daft to reinvent the wheel. I simply lowered the armscye and the neckline. Luck was on my side because this resulted in precious little gaping as often happens without any contouring. But I will nip a bit off the upper back neckline next time.

wax cotton dress self-drafted

My usual sway-back adjustment was already done and most importantly the bust area was a perfect fit.

Whilst we focus on that area, can we just talk placement? I’d love to be able to claim absolute intentions but the truth is, I was led my a small issue of just the right amount of fabric and nothing more, so I can only claim a happy accident – the likes of which Madonna would champion, I’m sure!

I just love this wax fabric. And I knew there would be further adventures when I made Lucy’s jumpsuit and Amelia’s baby dress.

wax print dress back

One of the most incredible things about this fabric is the price. A 6 yard bolt of Wax cotton can vary in price between £10 and £150, depending on quality, print, manufacturer etc. That said, this lovely red cloth was just £10 and retained all colour and structure after a regular 40° cycle and spin in the machine and it was so satisfying to sew with. More importantly I landed a fabulous handmade dress for a fiver!

The skirt section is simply a half circle, the same self-drafted pattern I used for my black and my blue crepe skirts.

african wax print dress skirt

The zipper is inserted on the left side, like most of my vintage-style dresses but also because I didn’t want the seam of the skirt to go down the front with the focus on broken up print. No excess for pattern matching either!

The belt I’m wearing was a steal from Oxfam at £1.50 and does a perfect job of hiding the connecting waist seam which obviously is interrupted and mismatched but I’m not so sure there’d be any way round that anyway. It’s not actually that bad but still annoys the pants of me enough to cover it up!

wax print dress side view

Daniel came up trumps again with these fantastic photos. They were taken at Freemasons’ Hall in Covent Garden, today. Such an awesome building with a massive star on the steps for me to stand in the middle of! I can’t believe how he gathered up the energy to do this after that long drive back. Or how he made me look so respectable after nought hours of sleep. He is such a superstar. So supportive. I am one lucky lady!


Alix in Black Watch

BHL Alix dress in Black Watch tartan

This is my second version of the By Hand London Alix Dress. The first was a test version that I didn’t get round to blogging but in any case this one is way better!

Alix is such a great design. Echoes of the 70s and of the 40s even, with its flattering midriff and gathered bustline. Incidentally, the first version I pattern tested had box pleats at the bust line which didn’t work for me so the gathered option is way better.

I love the full sleeves, made possible by the shoulder pleat and the elasticated wrists. Pays to be a bit generous with the elastic though. The first one I made pretty much turned my hands blue!

Another plus for this dress is that there are no fussy closures. No zips, no hook and eyes, no buttons… nada! Just a lovely long sash to tie as tight or as loose as you like. The neckline is perfectly wide enough to get over even my moon head and theres a pleat at the back to balance out the fullness of the front.

Alix in black watch back

And no lining! Just good old serged seams. Which works fabulously for this poly viscose tartan. I have been meaning to use Black Watch variety for some time, since I made my BHL Sabrina dress back in 2014. I loved how it made a contrast against the Royal Stewart tartan but still remain nervous that someone will shoot me down for mixing of the clans!

I’ve been wearing this to work – a lot – and it is perfectly comfortable to wear sitting down, standing up, running for the bus and climbing stairs. And its a no brainer for getting ready in the morning. Cue plenty dernier tights and a trusty pair of Doc Martens!

Tilly and the Buttons Rosa Dress

Tilly and the Buttons Rosa Dress

Introducing my new Tilly and the Buttons Rosa dress.

I was delighted when Tilly asked me if I’d like to test this pattern. I was excited by just the line drawing alone. All I could see was piping and matching buttons and I didn’t falter when the pattern arrived.

I won’t go into construction details, mostly because so many weeks have passed, I’ve quite forgotten them, but also I think it only fair to do that with a tried and tested one.

That said, I love it and its had so many outings already. The legs are still bare, making the most of this warm September, but I have another styled vision of red tights and black patent DMs for the colder months ahead!

I love the 3/4 rolled up sleeves with the tab. It adds such a lovely detail. I’m always doing stuff and sometimes a full length sleeve just irritates me and feels so restrictive. Rolled sleeves makes me feel like I mean business even if I actually don’t!

tilly_rosa_dress_4

I’m pretty sure I jumped at this pattern after making Mr O a few vintage western shirts (See two of them here and here). And I’m pretty sure the only shirt I’ve ever made myself – with a proper collar – is my 50s bowling shirt.

So I was due one. Even if it’s actually a dress! It still has that lovely vintage front and back yoke that I adore.

Tilly and the Buttons Rosa dress back yoke

I used a cheap washed out denim from A-One fabrics in the Goldhawk Road. Was a bit worried about the thickness, with piping sandwiched in the seams, but it worked just fine. Incidentally, the only piping I managed to get my hands on is upholstery piping for sure. It’s not dainty in the least. But hey I wanted statement red piping and I got it!

I apologise to anyone with a phobia of wrinkled clothing. I do have an iron – honest, guvs! But denim is just one of those tricksy fabrics I guess and in any case there is no official term for such phobia so I might just get away with it!

Tilly and the Buttons Rosa dress pockets

I actually sewed down the pockets, whilst sewing on the buttons (intentionally of course ;-)) to save me putting anything in them. Which I obviously would if they were functional. This will ultimately limit unnecessary boob distortion and minimize wrinkle action.

Another thing I really like about this pattern is the in-outness of the waist to hip. Such a lovely shape. And really helpful when one’s waistline is increasingly difficult to define!

Tilly and the buttons rosa dress

I should really declare that I took these shots myself. Not the usual quality delivered by Mr O, because he is away, gigging with his new band. It isn’t my favourite thing to do at all but needs must when your children declare they have better things to do, like walking someone else’s dog or doing Latin homework. Yeah, right!

Happy weekend everyone. Hope you get some sewing in! xxx