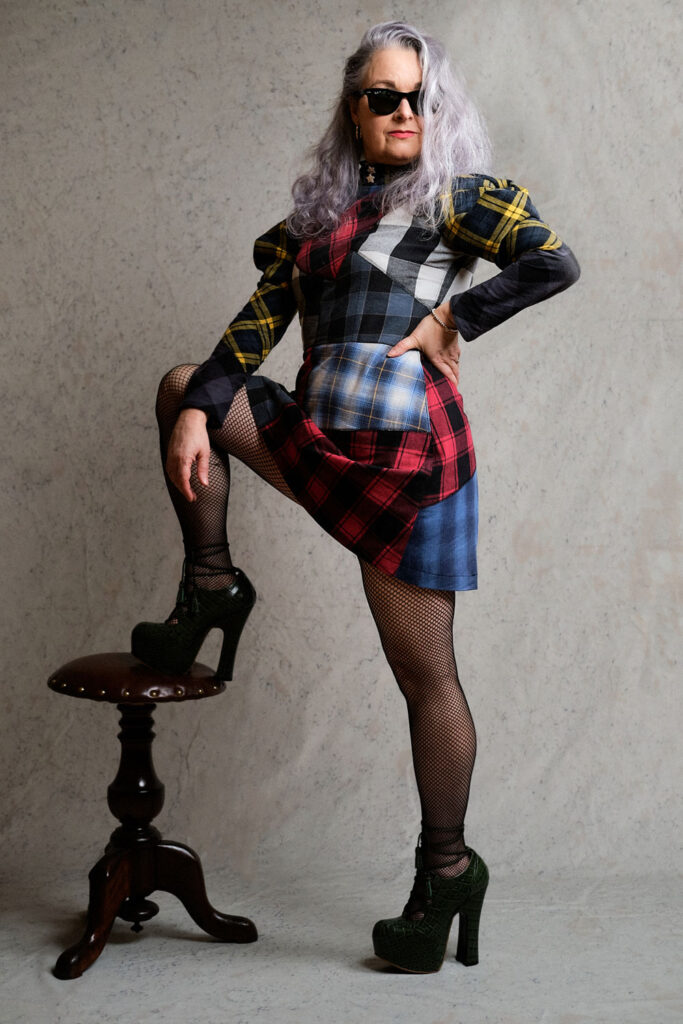
A patchwork dress made of sleeves!

Yes you read that right! This is a dress made entirely of sleeves – those that were cut off of Dan’s RTW shirts after he got fed up with how tight and annoying they were when he was working in them!

I intercepted his route to the bin when I spied a couple of them poking out of the bag. And there then ensued a tussle, with Dan persisting that I had quite enough fabric already. What does that even mean – ‘quite enough fabric’?!
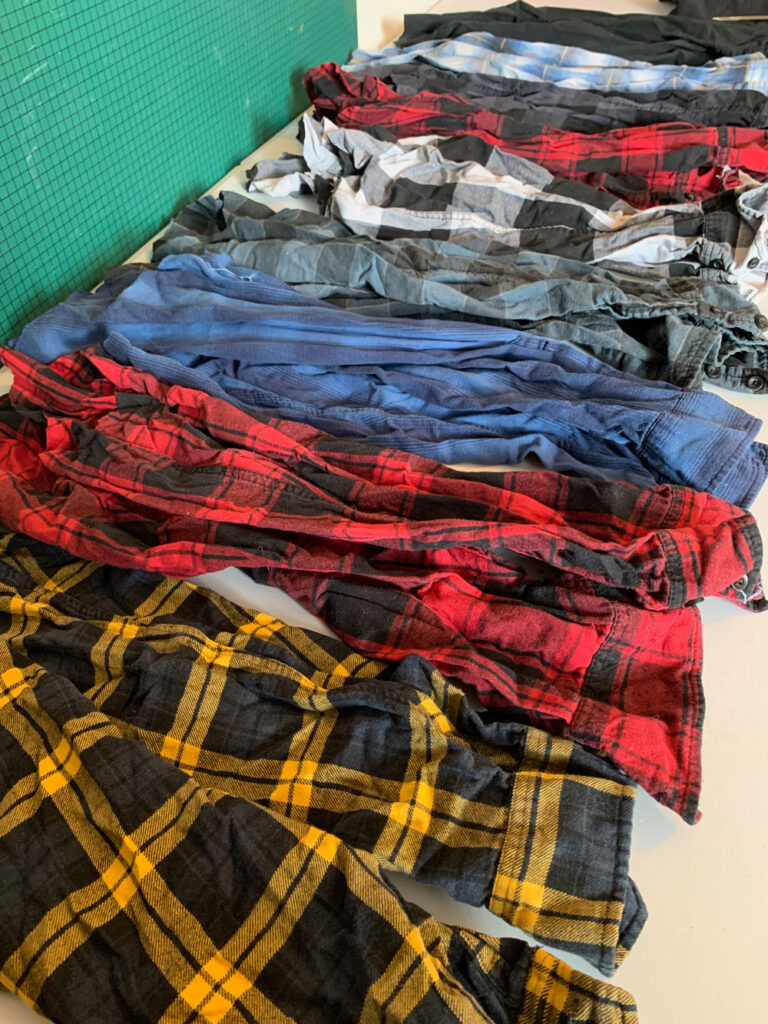
He laid the gauntlet, firmly before me – challenged me that unless I could cite good use, they should not be added to the peak of ‘stash mountain’ !

‘A dress!’ Was my comeback ‘A cool patchwork dress!’ It raised an eyebrow of disbelief but I grabbed that bag and literally ran to the studio with it and hid it under the cutting table. 
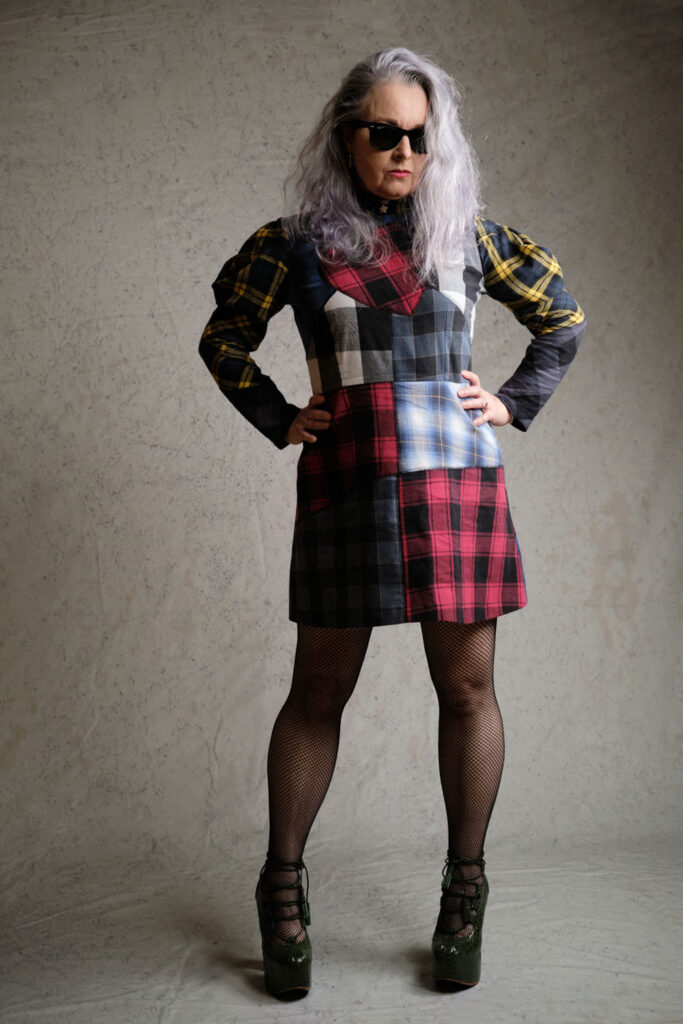
It remained there for quite a while, mostly because I had other projects going on, but in that safe space of time I was able to hatch a plan in my head. I didn’t want a crafty kind of patchwork dress. I mean they can look cool and boho but that isn’t me. And lumberjack plaid certainly doesn’t lend that vibe! I spent hours dividing up sketched outlines of dresses with small squares, big squares and randomly sized squares. None floated my boat. 

Then I tried random shapes to really over complicate a simple idea and then I realised it was the persistence of the vertical and the horizontal lines that were irritating me.
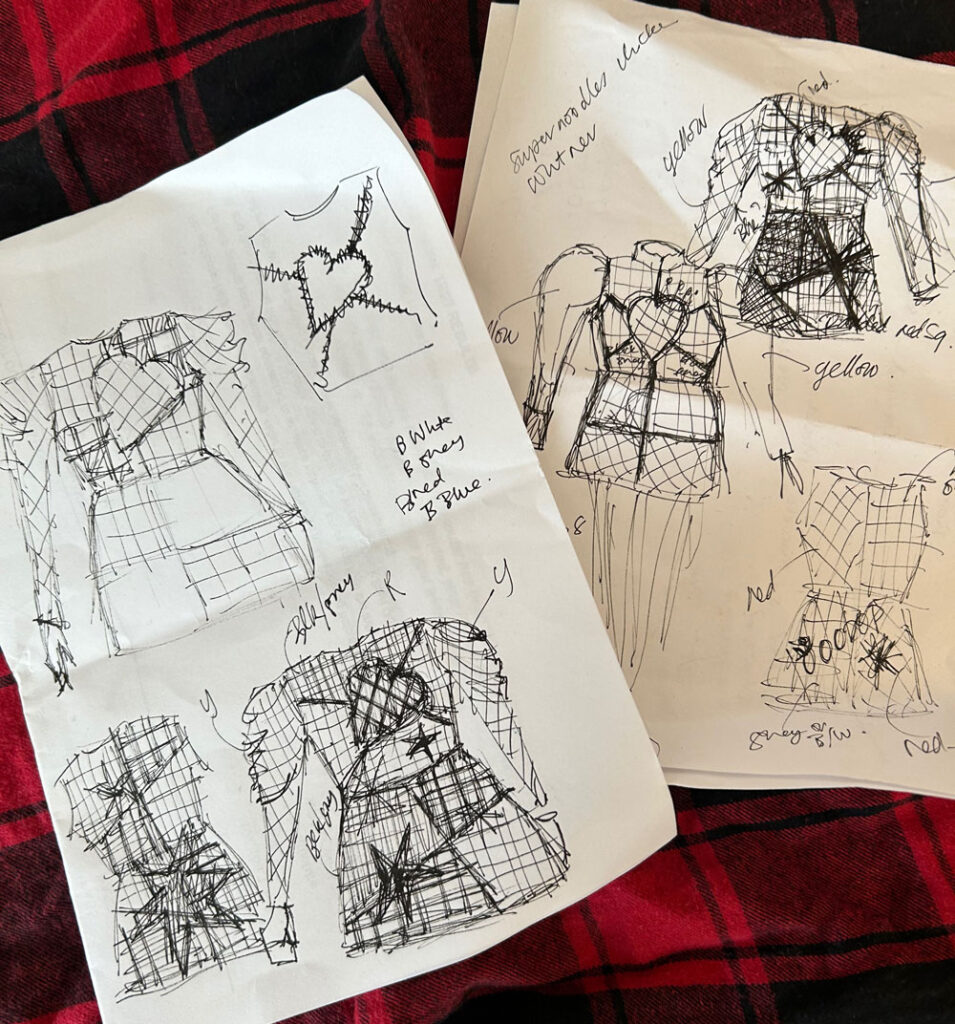
So I tried with some angular shapes and I was beginning to get somewhere. I already knew a heart was going to feature. It is after all a nod to Westwood. Someone who totally wore her heart on sleeve. And I’d be lying if I said I wasn’t inspired by her. She taught me it was ok to dress differently, not to care (so much) about what anyone else thinks and to do it boldly. To buy less and choose well and to take care of our planet. 

‘Fashion is very important. It is life-enhancing and, like everything that gives pleasure, it is worth doing well’ – Vivienne Westwood

I don’t always sew as sustainably as I could but I like to reuse and recycle and rewear whenever I can. Read to the end for some more of my sustainable projects.
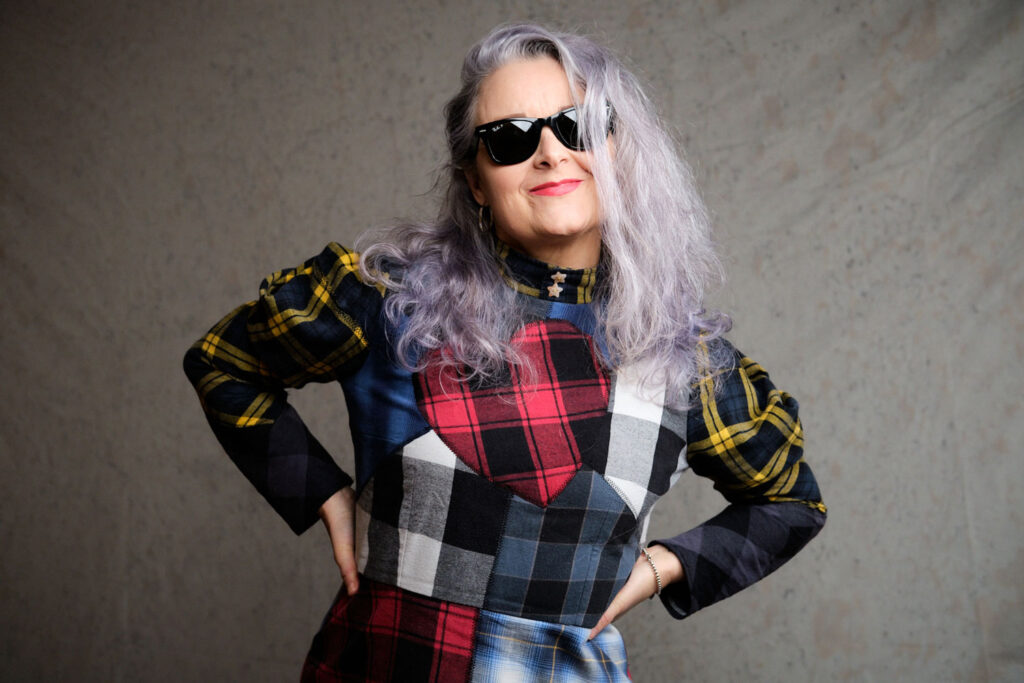
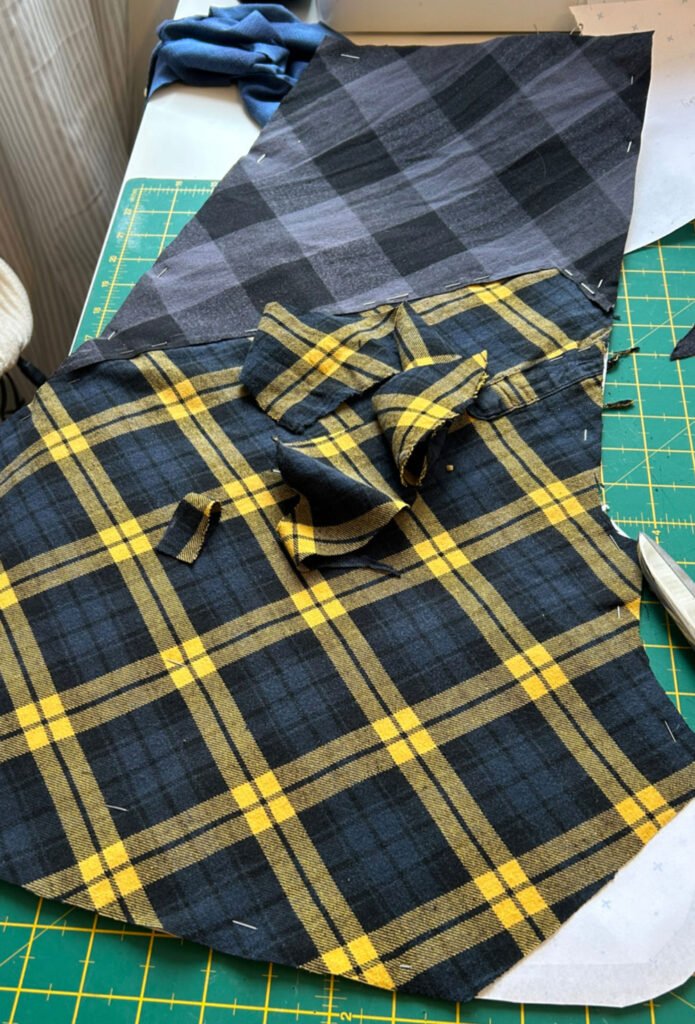
Once the sketch was finalised, I pondered how I was going to sew them together. These sleeves are made of cotton – a flannel I think – and they are soft and drapey. That was going to work wonderfully for the bias cowl sleeve I had in mind but not so well for the actual body of the dress. So it had to be stabilised somehow. I considered using a double sided fusible interfacing but I really didn’t want the extra weight so I simply sewed the pieces onto some black cotton I had in stash. I used a self-drafted pattern from my baby cord dress and cut the black cotton pieces first, before mounting the cutout shapes. I made sure to overlap them slightly and I zigzagged, first on the absolute edge and then again each side of each piece to make sure it was secured but also to make the black lines of stitching look intentional and a little like stained glass panels.
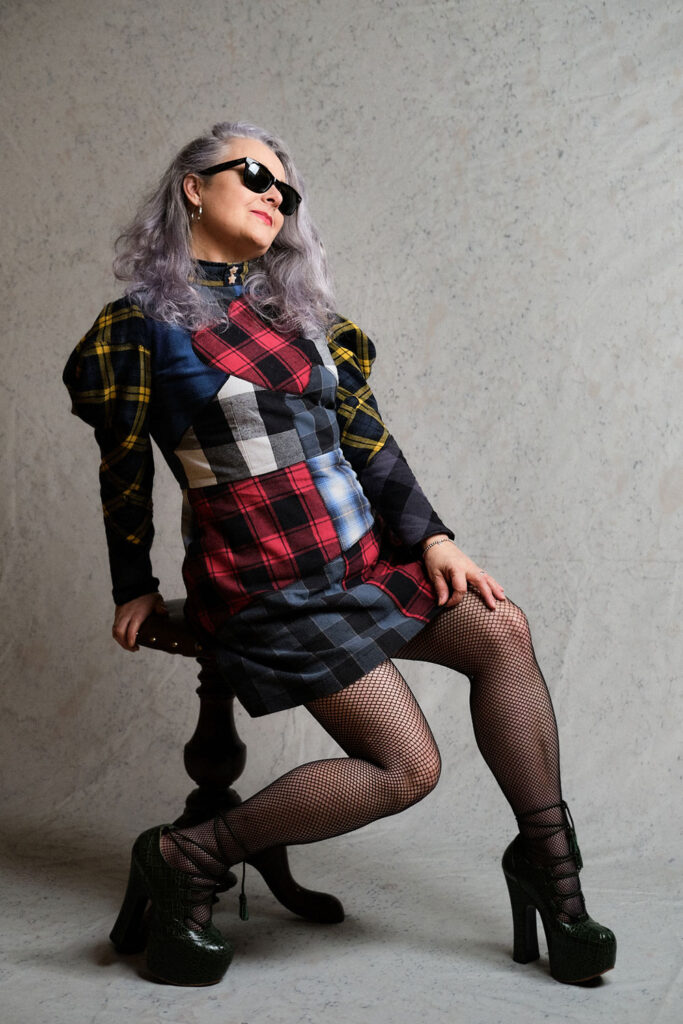
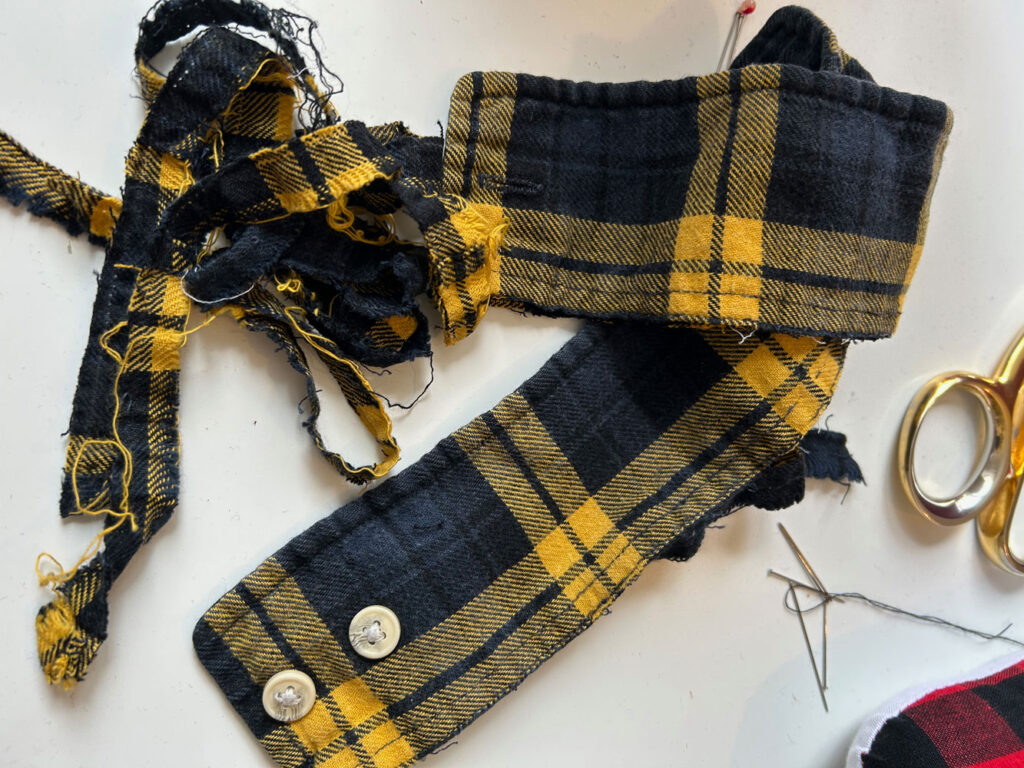
I managed to glean all the fabric I needed from 9 shirts worth of sleeves. I came a bit unstuck on the actual sleeves because I was so intent on featuring the yellow ones with as much coverage as possible. And that meant including the sleeve plackets! I’ve left the buttons on for context and again to make it intentional.

The collar is made from the cuffs of the yellow sleeves. Two of them, buttoned up, fitted perfectly around the necline. Again I was going to use the original buttons, but the Pigeon Wishes star buttons were cooing me. Loudly!
I considered making this dress sleeveless in the beginning. Oh the irony! But reconsidered at the prospect of not wasting any of those sleeves, to create one with statement sleeves instead. I took a draping class a while back with Mr O and he taught us how to draft a cowl sleeve, I’ve tried a few sleeve-drafting tutorials in the past but his was so much simpler and I’m slowly learning that long-winded old school methods aren’t always the best – controversial, I know!

I winced at the prospect of having to patch in some small pieces at the top of the sleeve but actually it adds to the punky charm and I love it. It feels like I’ve broken a whole heap of rules in the making of this dress, yet at the same time, none!
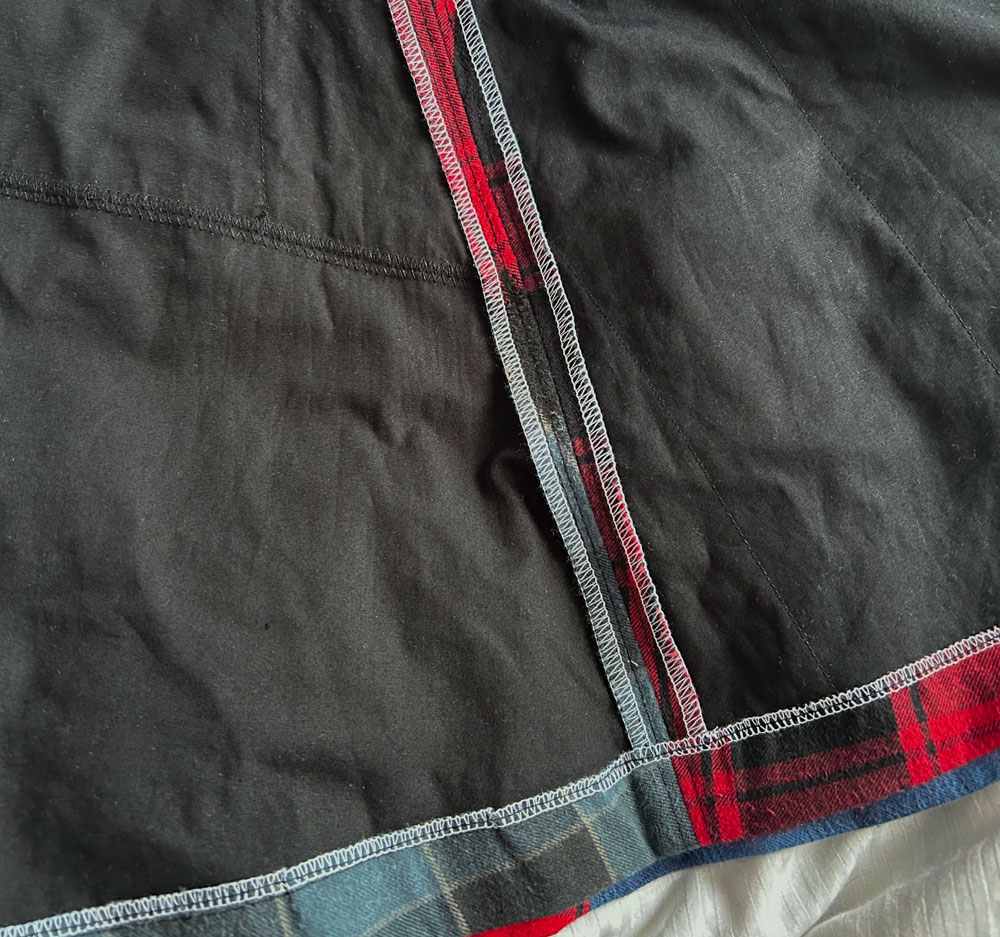
The good thing about having mounted all those pieces on black fabric is that the insides are clean (ish) and everything hangs as it should. Once I sewed up the side-seams, the shoulders, the skirt to the waist-seam and inserted the sleeves, I pressed open the overlocked seams on the inside so everything laid perfectly flat. (Couldn’t be arsed to change the thread from white to black but hey, who is going to see?!) I really must invest in some rainbow overlock thread. I think that would have looked even better to be fair. 
The collar went on next. I just had to cut off the seam bulk but of course the interfacing and the topstitching along the top and front edges was already in place – bonus!

And then I sewed in an invisible zipper. Also from stash. I made sure to align the waist seam before sewing up the second side of the zip because as punk as this is, I have standards you know, haha!
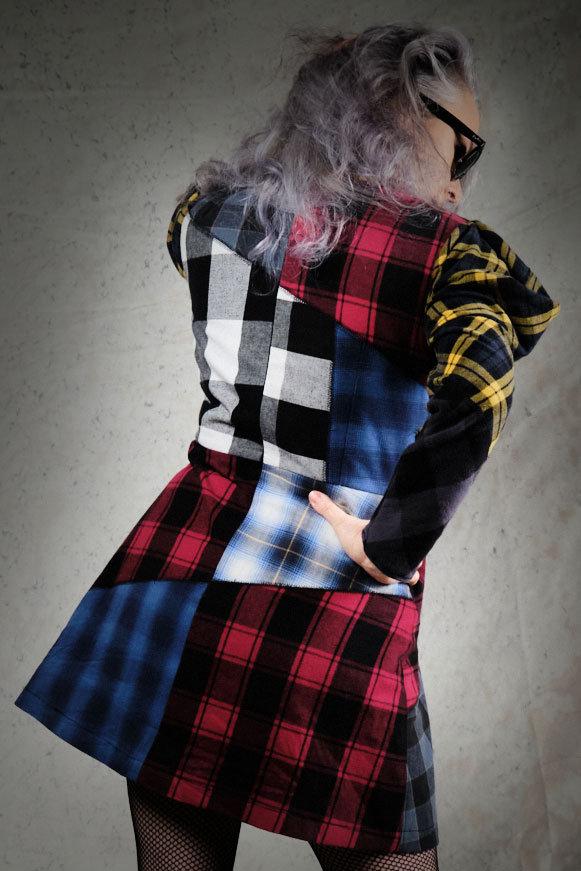
Having said that, standards went a bit out of the window with machined hemming. I toyed with hand-sewed ones, but… well… hours in the day and all that!

Dan was in the studio with me when it was all sewed up and finished. And suggested we shoot it that same night. So we went back home for tea grabbed some tights, shoes, shades and a skateboard (of course!) and just went for it. No time for a hair wash – just scruffed it up, just as I did in the 80s. And it couldn’t have gone better.
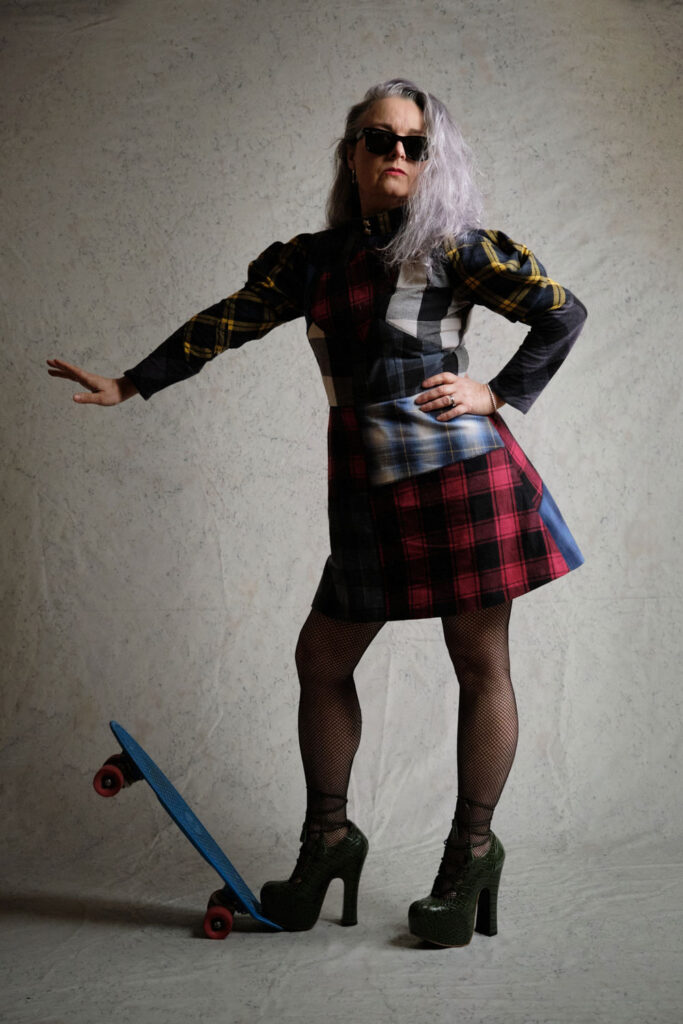
I am so over the moon with the shots that he took. He has forever championed my creations and has been so obliging with photographing them over the years – often more eagerly than me! But he totally knocked it out of the park this time. Do look him up if you are ever thinking of getting some professional shots done at danieljamesphotographic. I know I’m biased and all but he is bloody good!
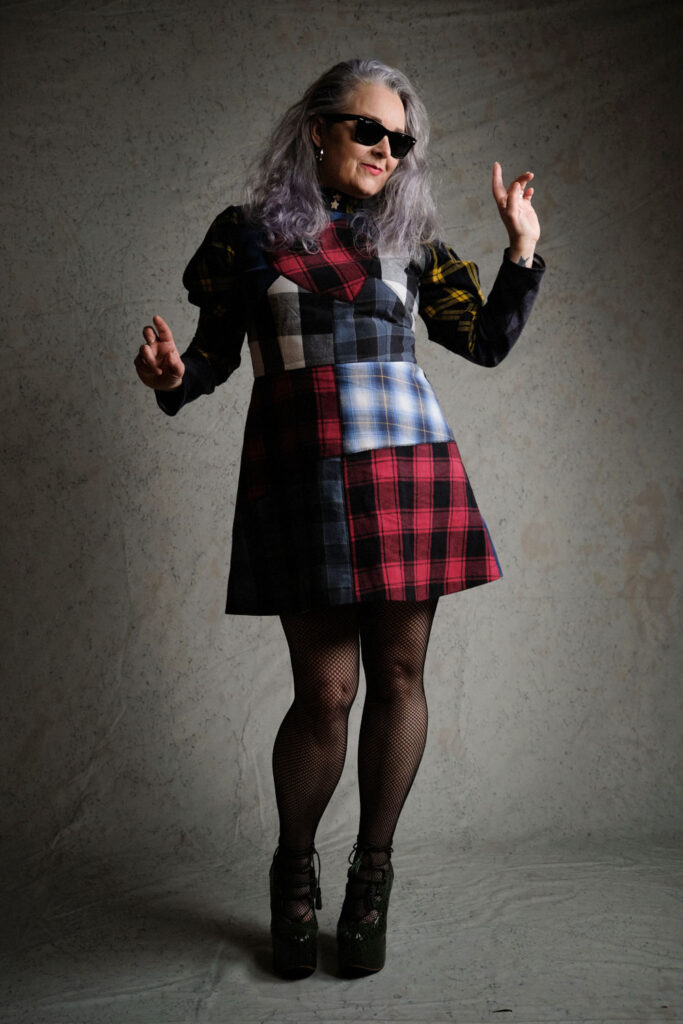
I posted some of them on Instagram a few days ago and the comments have been both humbling and mindblowing. It feels so good to have created something that is all me. Well, a bit of Dan and a bit of Viv too! And to have it appreciated by so many. I am so very very grateful and the whole process from bin-interception to reception of the photos has been incredible. And It’s just made me want to do more of the same. 
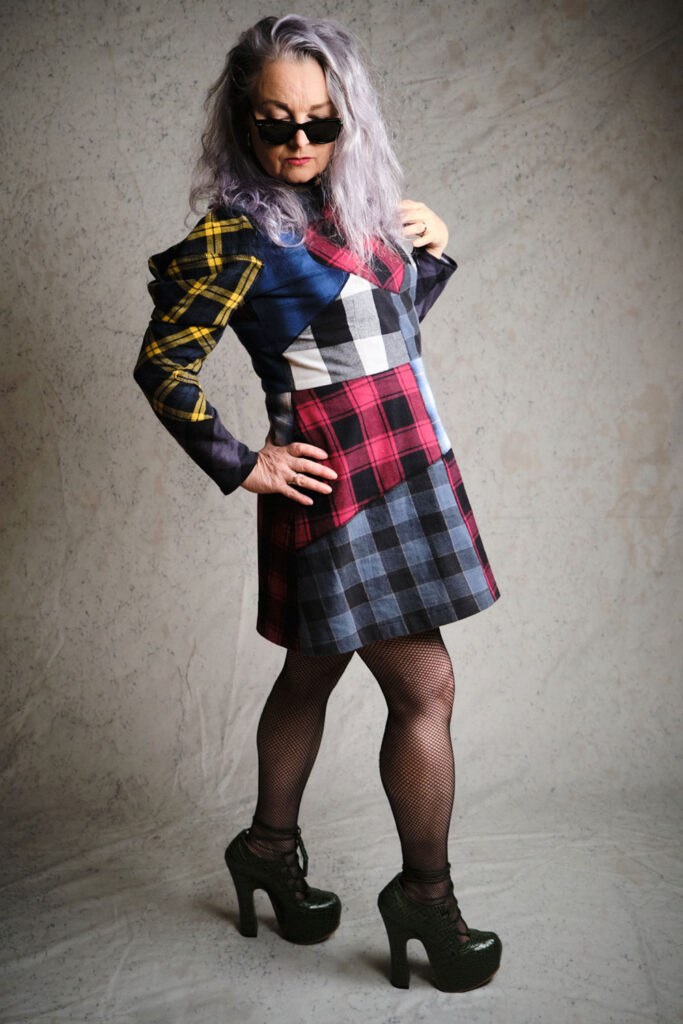
I have some really small scraps left over. I didn’t throw any cut-offs away. (Don’t tell Dan!) And I have another cool little project in mind so watch this space or follow along on Insta to find out more, soon.

Other favourite upcycled makes:
Dressmakers ball gown
Martini dress
Romper suit
Portrait tote bag
Lacroix Roman blinds
Ooobop Original jumper

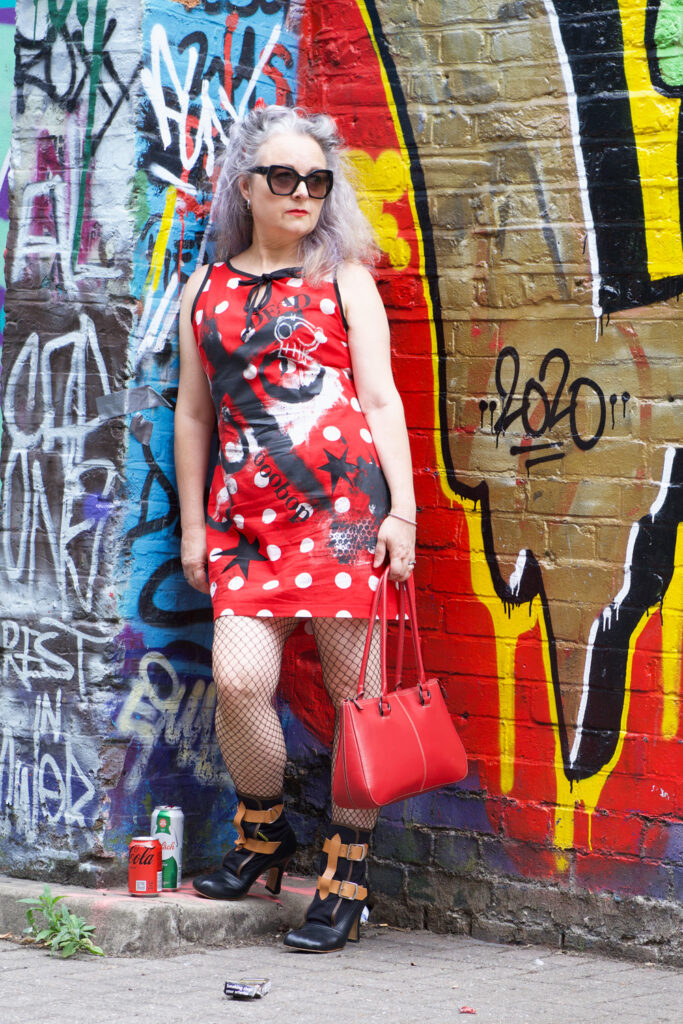
How to make a cute dress ‘dead cute’

I basically made a cute dress… and de-cuted it!

But why, Janene, why? Well since you asked, I’d grab a cuppa and pull up a comfy cushion if I were you, because there’s no short answer.

I’ve had the inclination to ‘mess things up’ for a while now. Not exclusively for moments of therapy when prompted by frustration, but because I’ve felt a bit caged. As if I’ve been blinkered and strapped down. Like I’ve had my wings clipped. I know this sounds a bit over dramatic. Especially since I lead a very nice life am surrounded by gorgeous friends and family and have a very desirable job. But I guess everything I do is, on the whole, well-behaved, expected, accurate and rule abiding. My work as a graphic designer permits a modicum of out-of-the-box thinking but largely there are rules, whatever industry I’m creating for. And the same goes for my ‘until now’ sewing: Cutting is precise, seams are consistent, fit is important and placement of design is key, etc etc. 

I documented my failed consideration of the neckline-keyhole placement on Instagram, how it  bugged the hell out of me that it wasn’t properly centred between spots. Most people agreed. Some shrugged it off and said it didn’t bother them. I was quite jealous of those people because caring so much about the finer detail is IMHO partly responsible for my lack of adventure! I’m not sure I can ever change that up though. I’ll just have to add the wilder stuff on top… or on the bottom!

In March this year, my wish to have a studio finally came true and I moved in with more than 60 other artists. My requirements were very basic – I had dreamed of having a cutting table as its quite tricky to get back up of the floor after a long cutting session nowadays – And faster wifi so that my graphic files would deliver as soon as I sent them. Little things, generally speaking, but actually, massive things to me, that would make a real difference to my productivity. 

Within days of settling in, I relished the added advantage of being able to leave a project out on the table overnight so that you can just come in and crack straight on with it the following morning, how awesome it was having a whole space to myself (apart from when Dan comes in) but yet there is often a friendly knock at the door, an invitation to lunch at the lovely cafe and advice and inspiration on tap.

I’ll admit to having big old imposter syndrome at first. Like ‘how can I possibly match up to the artistry that is resident here?’ I’m a graphic designer not a fine artist and I’m a dressmaker not a fashion designer. But therein lay the problem! I had labelled myself with titles of position, boxed myself in by definition and process. I design books and I make dresses for sure but that’s not all that I am or the end of the story by any stretch of the words, I can now feel all the other possibilities rising to the surface. Its sooo hard not to be inspired here! Next door to me is a wonderful poet, artist and mentor, the other side a painter and an interior designer, an amazing costumier upstairs with photographers, textile artists, musicians, set designers and an entomologist to boot!

The initial stage of the dress came about as I wandered around a charity shop in Shoreham. I found the red polka dot fabric there. Vintage most probably and slightly marked in place, approximately 5 metres of it and cheap. London prices are set as much as new fabric in some cases so it was straight in the bag without even considering what it would be used for. A regular habit and sometimes I think its a bad one until I think of a use and then I think its a good habit, hahaha!

I love the idea of rescuing fabric as much as I love purchasing brand new fabric that matches the exact Idea I have in my head so it helps to have a balance so I don’t feel too bad about buying new all the time. I think this must have been used as a table cloth or such like in its previous life but whatever it was I couldn’t really envisage me in a twee dress. So as I walked out of the shop with a bargain of a buy, I started to dream up the dress.

It didn’t take long. It needed black, that’s all. Just black. The ‘colour’ I always come running home to. My safety zone.  I used to only wear black when I was younger, not because I was goth or punk, I was very much on board with the New Romantics and if I bought anything black (sometimes white) I could guaranteee that the garments would layer and mix and match quite successfully – cheaper that way too. A black dress would render me invisible and cool at the same time. I could be part of the crowd yet not stand out at all, seeing as most of my peers were wearing black too! A kind of invisibility cloak, if you like.

When I returned to sewing (more seriously) about 20 years ago I wanted to sew all the colours, all the flowery fabric and all the frills. Because I could. Because I could affford to. And because I found a wonderful sewing community and I wanted to be just like them. But now I feel like I’ve come full circle armed with a fresh load of knowledge and Inspo, from the job that I do – I just love typography and graphic imagery – from my surrounding artist friends – I’m going large on the brush strokes – and a new found sense of brave. I just want to try new things. Not worry whether it fits in with anyone elses vibe and certainly not fashion as a whole. I don’t think I ever worried about that too much anyhoos but I just want to explore more possibilities 

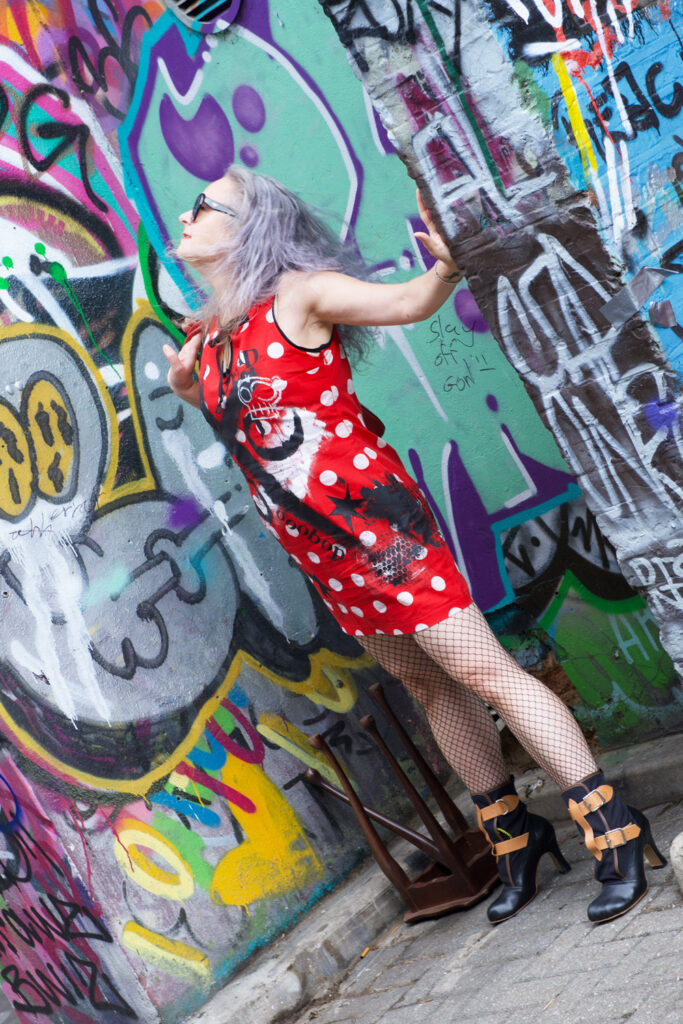
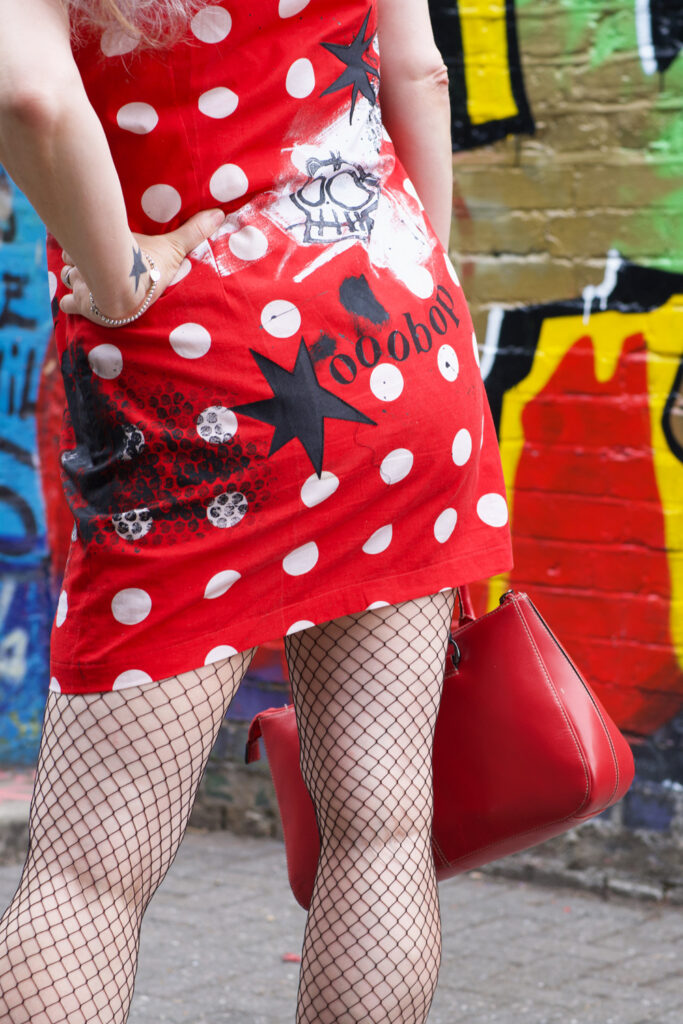
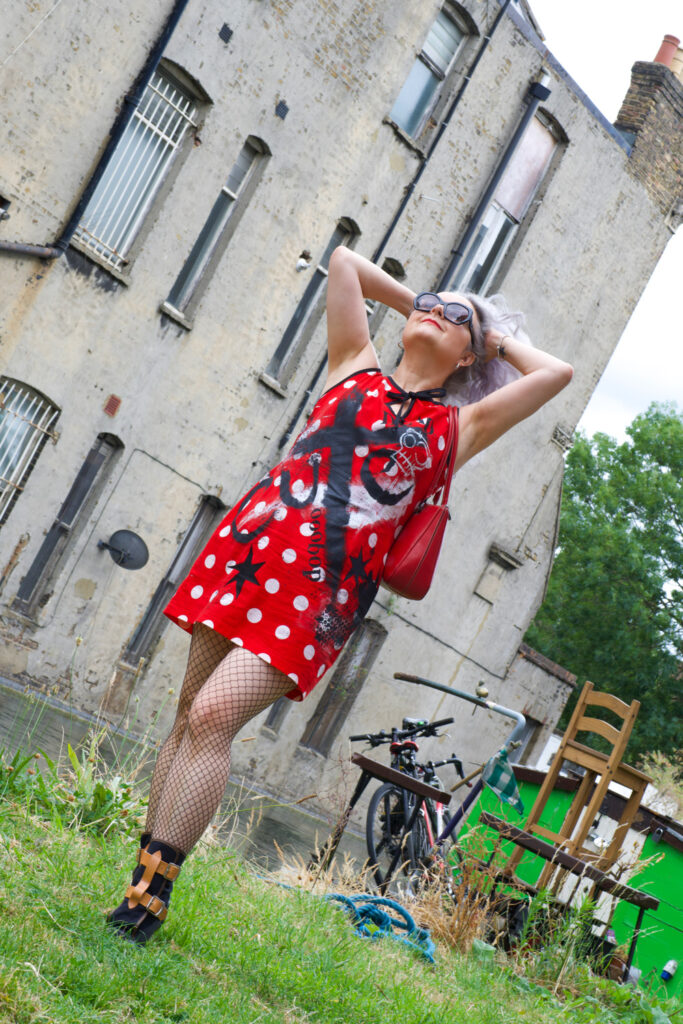
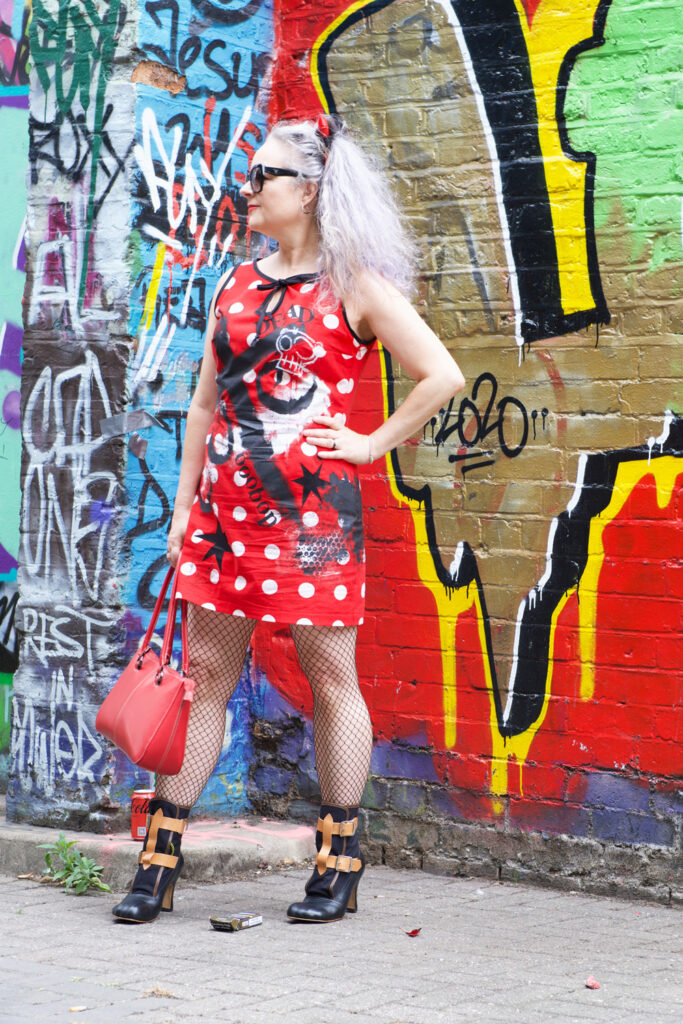
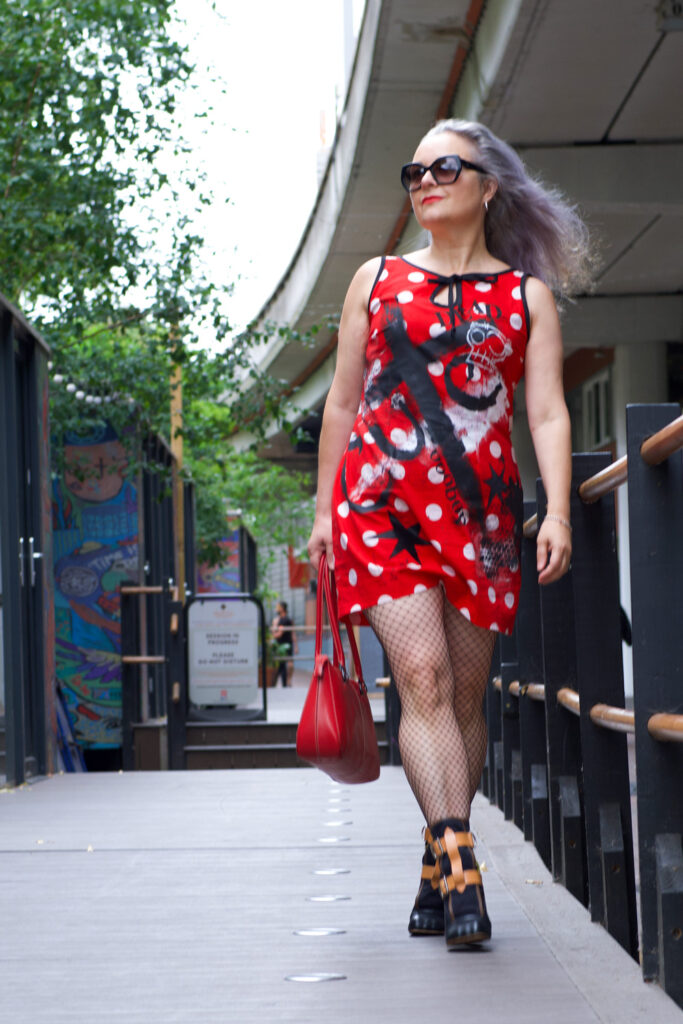
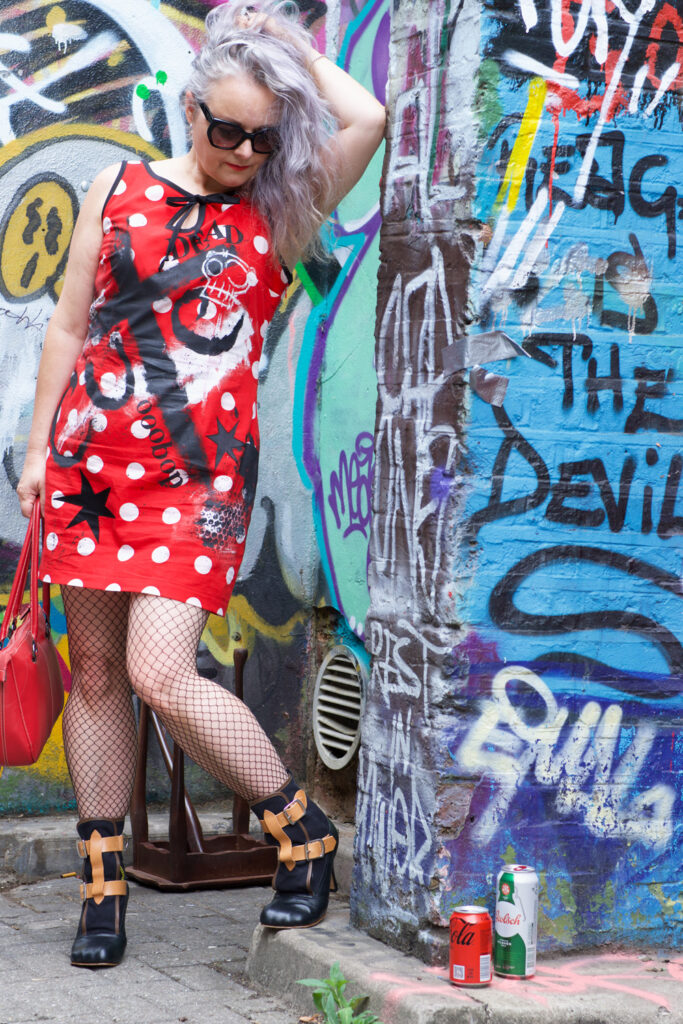
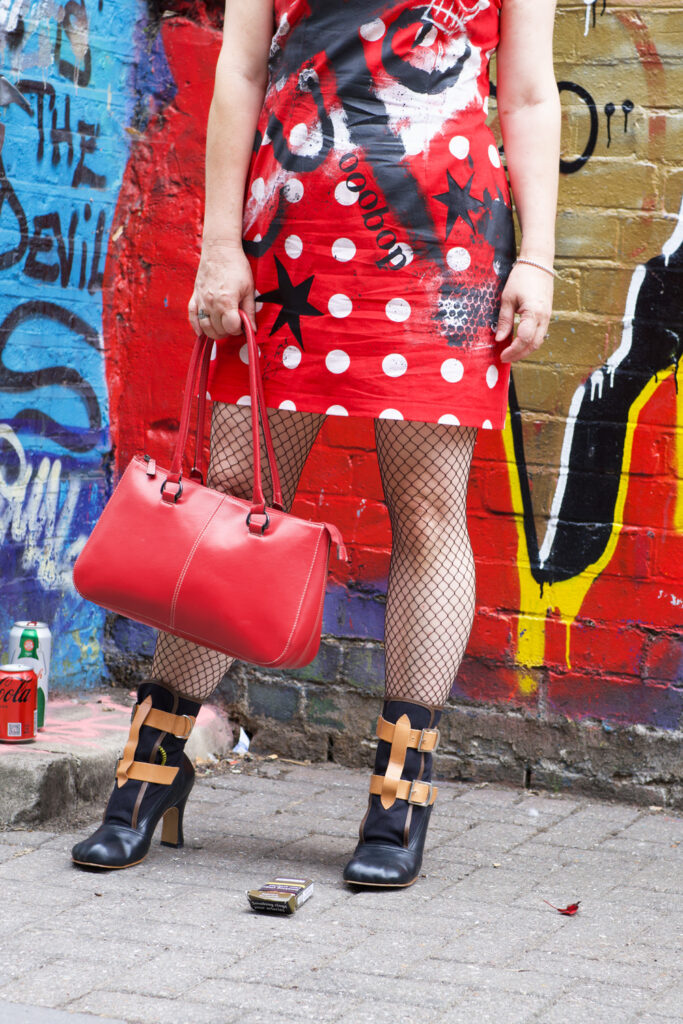
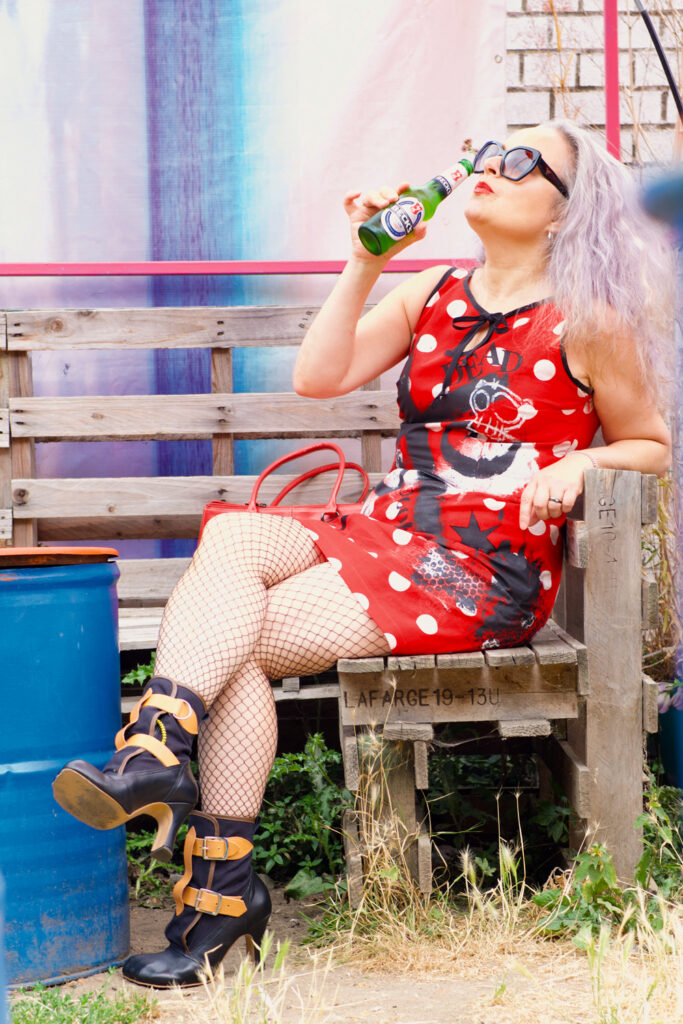
And so this dress was created from a pattern I designed from my own drafted pattern block. I used a vintage reclaimed fabric and painted on it with large black and white brush strokes, I carved a Lino piece to print the skulls, I used rubber letter stamps for some of the wording and I appliquéd the stars with scrap satin. Bubble wrap mono print and brush flicks were added for  texture. I used a fabric paint called Pebeo Setacolor which was fixed with heat, and I’ll report back with the results on how it laundered! Its not my best work yet, but I am proud and relieved to have finally released one of those crazy ideas from my head and put it into practice.

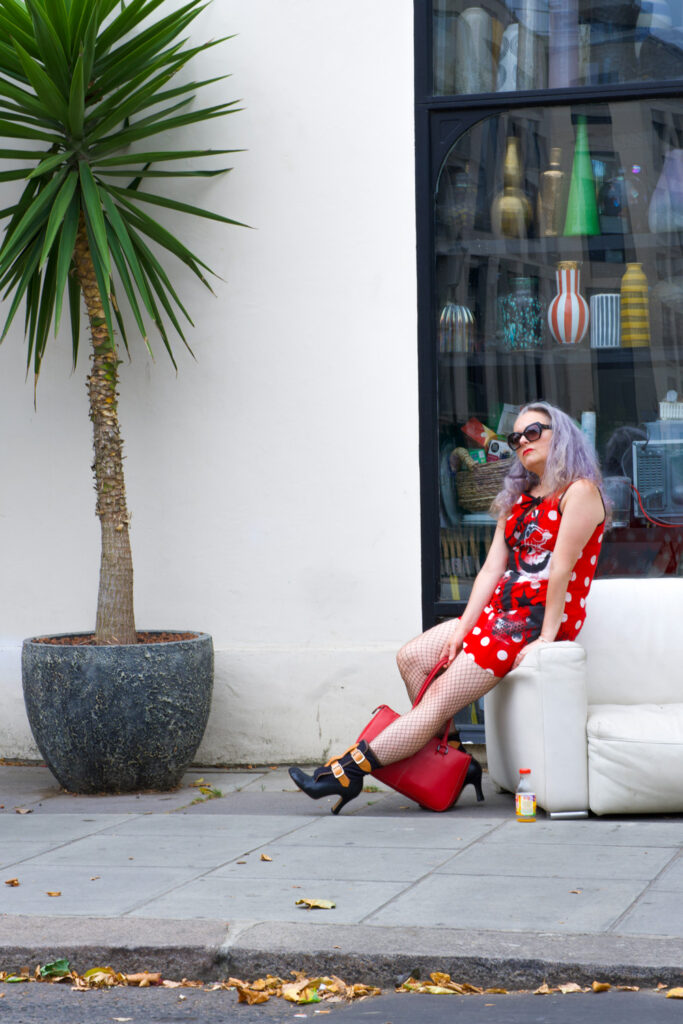
If I’d have made this dress as a youngster, my mum would definitely have walked ten paces behind me, worried about all the disapproving looks from people in the neighbourhood. It’s still kind of like that where she lives. Although she’s more used to me being ‘whacky’ now lol. But by stark comparison, Dan and I wandered around Portobello and the Grand Union Canal in West London, blending in perfectly with the surroundings and not a soul batting an eyelid. This is one of the main reason I love London. Another is that you come across free location set ups like this!

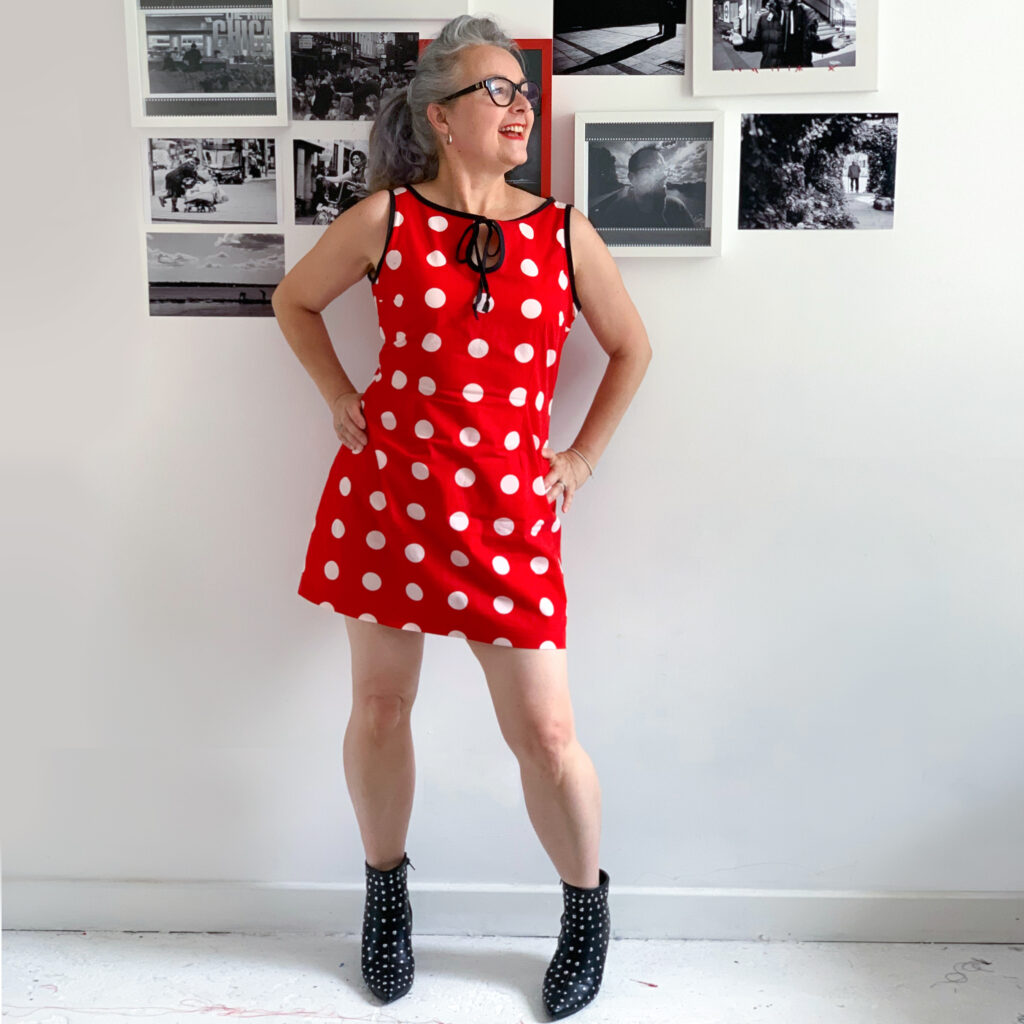
Oh, and this is how reasonably cute the dress was before:

I’ve got more ideas bubbling and more reclaimed fabric that will be perfect for purpose so I hope to share those once they are realised. There will also be a more demure wedding guest outfit to share soon too so do hit the subscribe pattern to be notified by Email of a new post.

Thanks to Dan for these amazing photos. Thanks to all the inspiring people in my life and many thanks too for you reading my waffle all the way to the end. Im forever grateful for your support and comments.

An ooobop original jumper for all reasons!
I like that there’s never a strict order of process. Often I pick a pattern and go looking for the right fabric. Sometimes the other way round. Driven by need or pure desire but in this case it got changed up a bit more.

Diane from @Dreamcutsew was kindly giving away some fabric on Instagram and I just couldn’t pass up her wonderful piece of cable knit jersey. I didn’t have a Scooby what I was going to do with it – I didn’t even know this kind of fabric existed till then!

I considered a cushion cover, a hat, some gloves – even some slippers! (I still have a small piece left so this could still be an option) But it sat for sometime, perched on the top of my own stash until I had a flash of inspiration. And then it came – in the shape of a hashtag challenge: #magamsewalong (Make a Garment a Month) hosted by @suestoney and @sewing_in_spain. This month the theme #naturalnovember was set by guest host @gigi_made_it, and that really got the ball rolling.

I loved how free-range the brief was;

☑️ Make something from a natural fibre
Now I’m pretty sure there wasn’t a speck of natural fibre in that cable knit but I did have a raggedy moth-eaten merino wool jumper which met its demise in an accidental hot wash. I’ve no idea why I kept it but I’m jolly glad I did because I decided to add some black detail. I generally stick to the safety of any colour palette that involves black!

☑️ Choose a make reflecting the weather and rhythms of the season where you live
The weather was definitely a factor in my need for a jumper. I don’t have nearly enough and I can never find any I like that I can actually afford!

☑️ Make something in a nature-inspired print
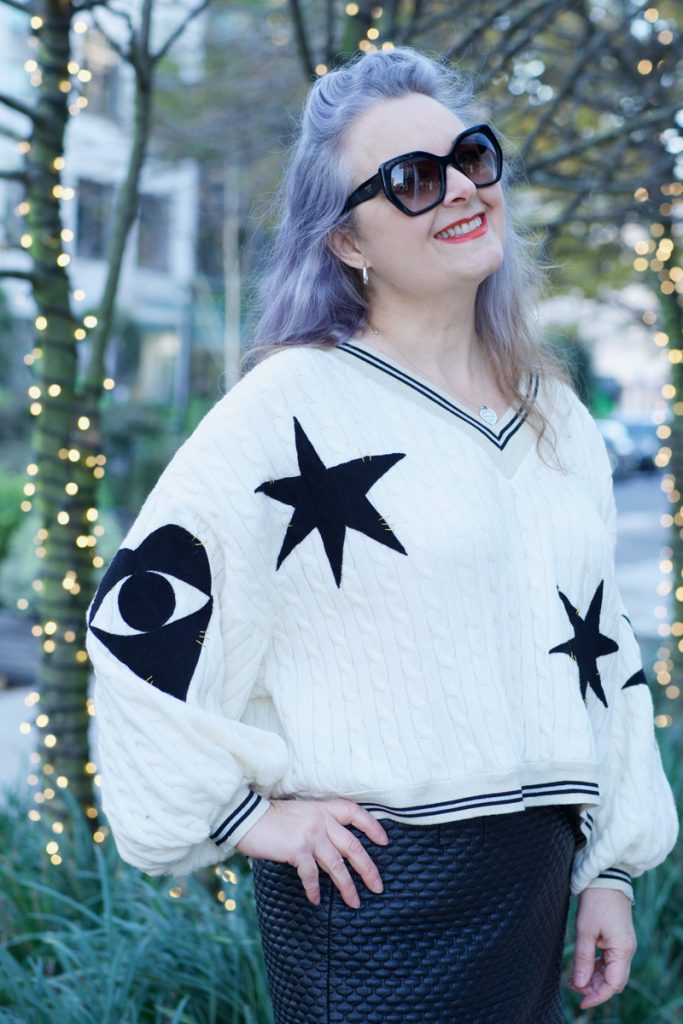
I figured stars are pretty nature-inspired, aren’t they? And an appliqué is an acceptable swap out for a print.

☑️ Use earth-friendly, sustainable materials in your make
So the main fabric was a leftover piece from another sewist, the appliquéd bits were upcycled from an old jumper. The gold thread was a few leftover strands from a previous project and the only additional notion was the cuffing/ribbing that I bought from Minerva.com

☑️ Make something that totally expresses your natural true self, unconstrained by cultural norms or trends
I’ve been so wanting to make something that does just that. It harks back to my 80s days where I was probably the most experimental with my clothing. Big batwings and balloon skirts the lot! I actually had puffball shorts too!

☑️ A make that occurs without (much) effort. As always, interpret creatively and be natural

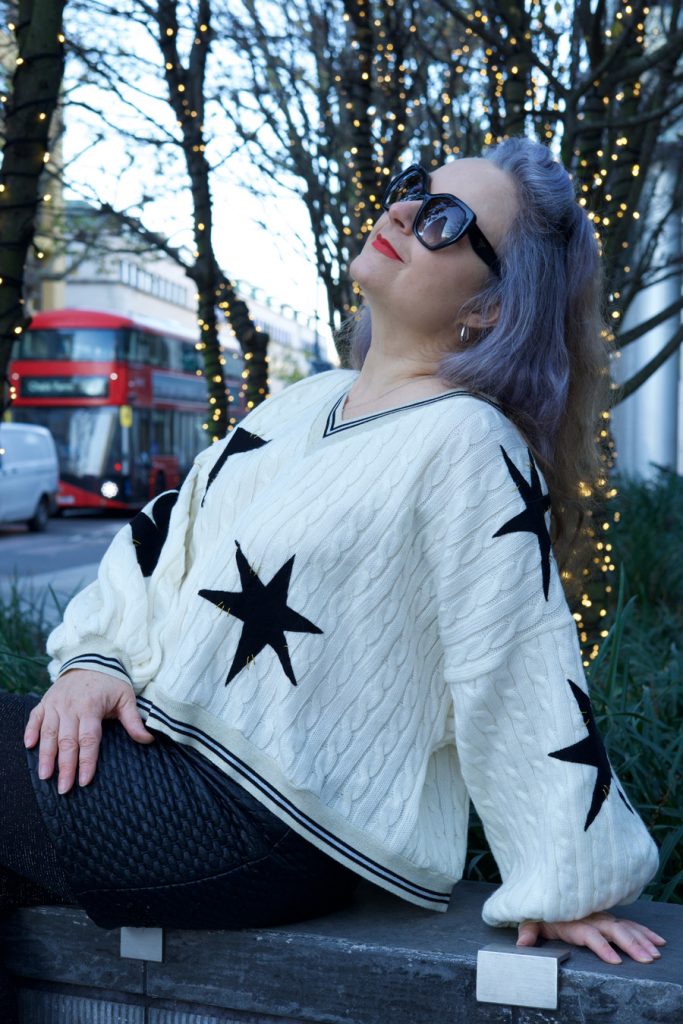
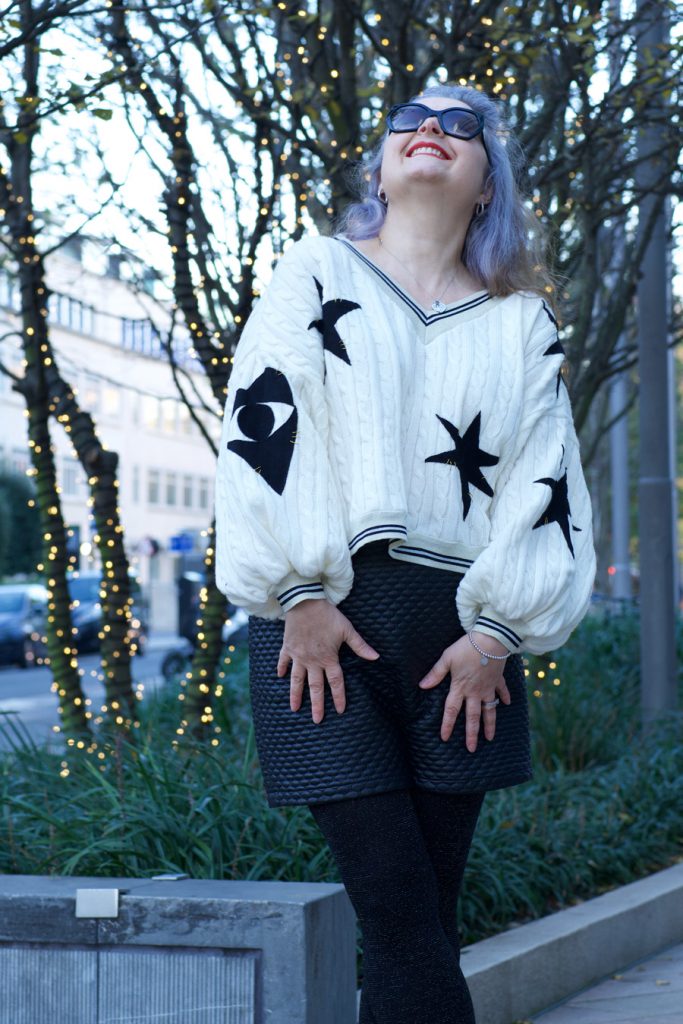
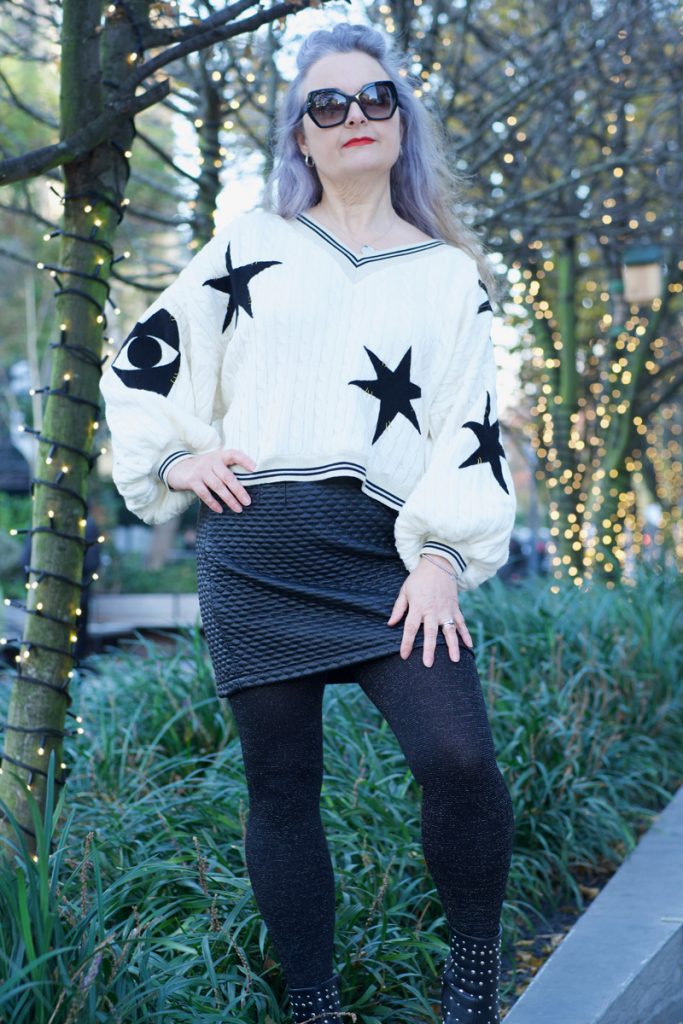
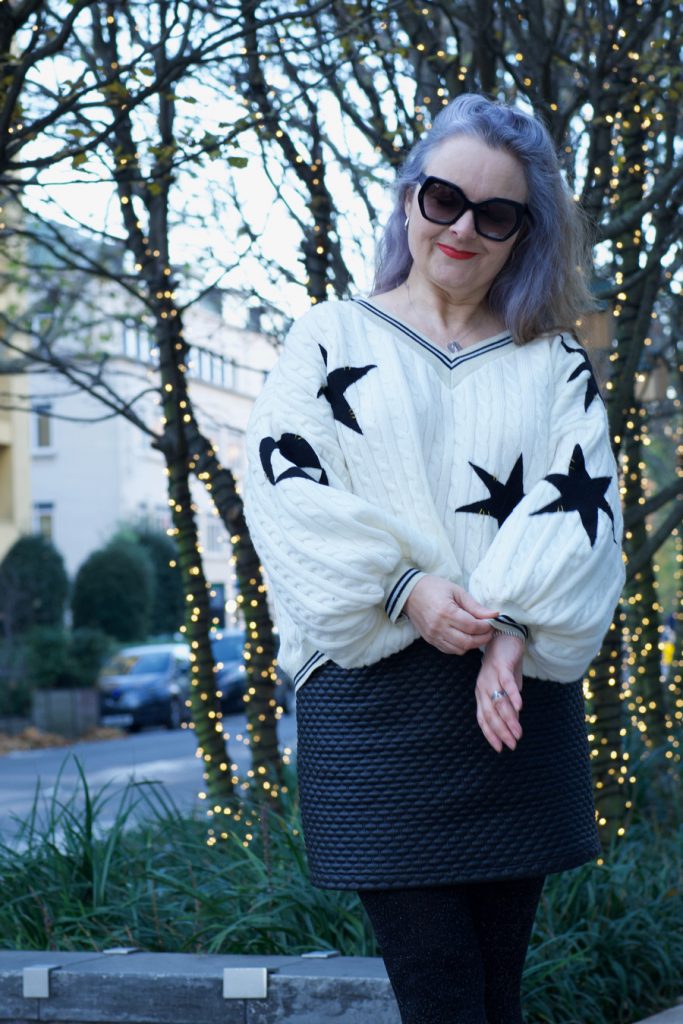
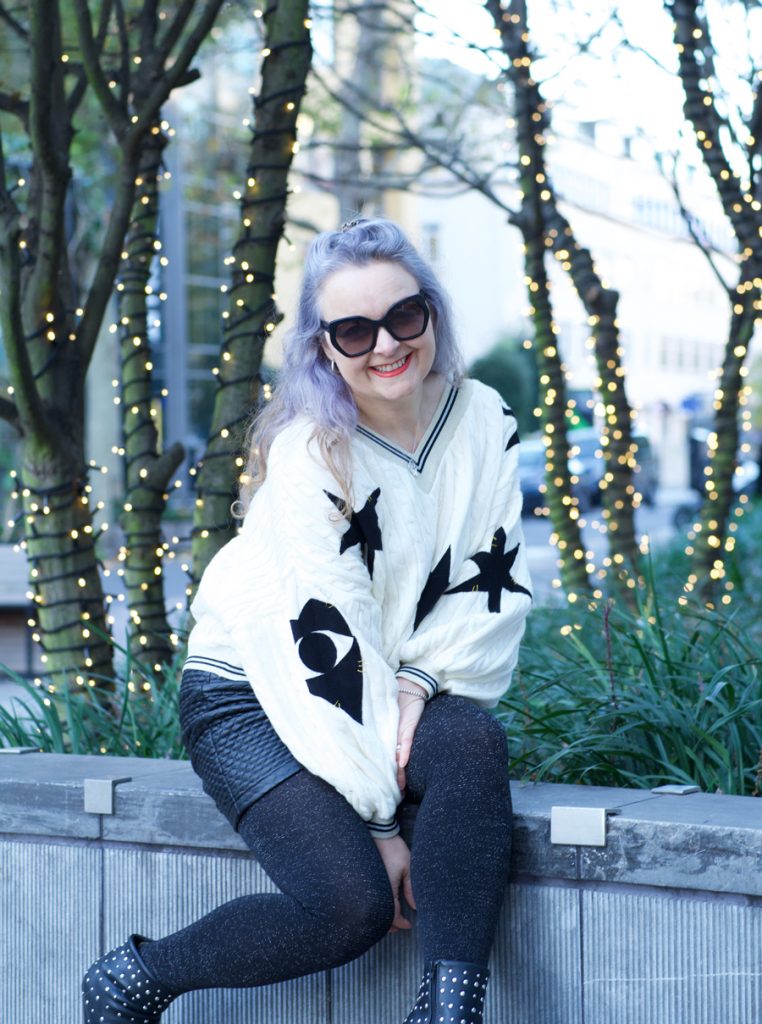
I freestyled the pattern. Based on a RTW jumper I already own and simplified further. No shaping for armholes and rectangles for sleeves gathered in at the cuff. That meant less waste too! I shaped the shoulders slightly and cut a V neck but the back piece is fundamentally a rectangle also.
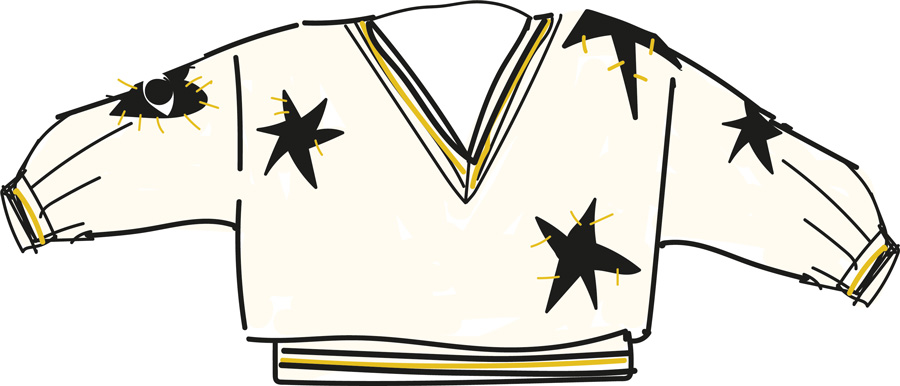
The project began with a very rough sketch! Please do not judge my Adobe Illustrator skills on this sketch alone – I might never work again!

Once the main pieces were cut out, I began by stabilising the shoulder seams. Even though it was going to have a relaxed drop shoulder I still didn’t want it to stretch out. After sewing the front to the back along the shoulders I added the cuffing along the neckline. Incidentally I used a wide shallow zigzag stitch on my regular machine throughout and then overlocked the edges for a smaller neater finished edge.

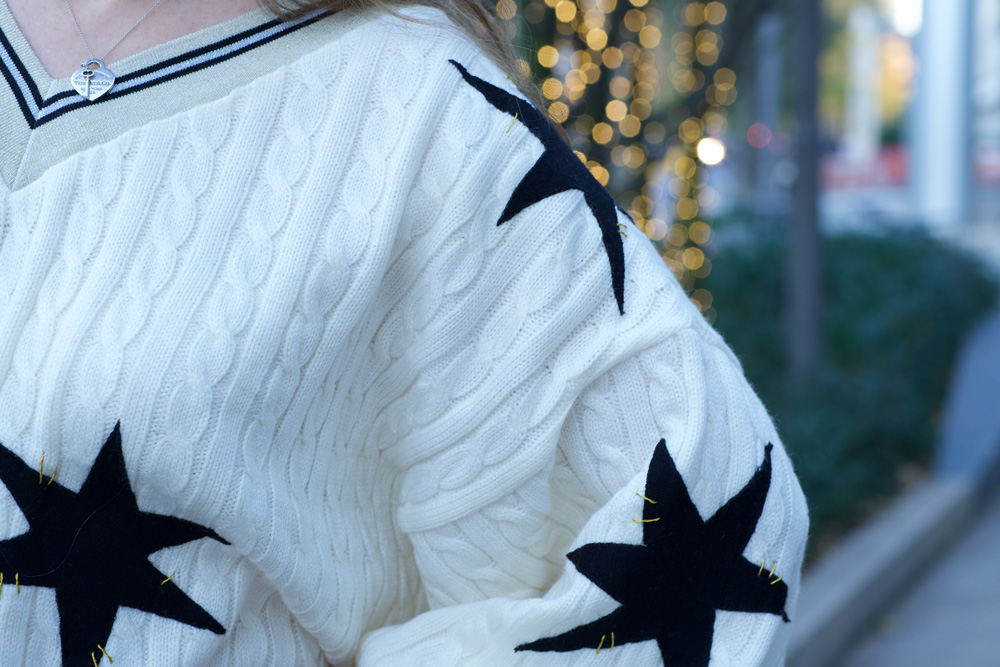
To make the appliqué shapes I first fused some doublesided fusible stabilizer to the black jumper pieces (sans moth holes) and then cut the shapes. I ironed the pieces to the front of the jumper and to the sleeves while they were flat. I then handstitched all round with a tiny blanket stitch. I’m still not entirely sure how the points of the stars will hold up over time but we’ll see. The big gold stitches are purely for decoration and to complement the glittery gold stripe of the ribbing.
When all the pieces were in place, I closed up the underarm and side seams. I gathered the wrists of the sleeves by hand with reasonably big stitches and then stretched the cuffing to fit, sewing right sides together. I did worry that it might be a bit bulky but it doesn’t feel uncomfortable at all. Just extra warm… and that’s totally fine with me. I can’t stand the cold!

The final step was to add the ribbing to the hem. I really like the contrast of the stripe and the added glitter just makes it pop!

I really loved the whole process from hatching the idea to wearing the finished jumper! It feels so great to be wearing something that is totally unique and totally me. And all thanks to my Insta fam.

I’d like to say this is my new way of working. I’d so love to get even more creative and original about all that I make and I will, in time, but I’ve already got an indie pattern in mind for my next dress. One I’ve never tried before. Watch this space to find out more!

Dan of course is behind the lens of these super shots… we took a 5 minute walk up the road where he’d already planned to factor in some twinkly lights. He is so very good at this and I’m so grateful but also aware that he’s getting more photography gigs of late, so I better keep that leash tight!!
Happy weekend everyone!

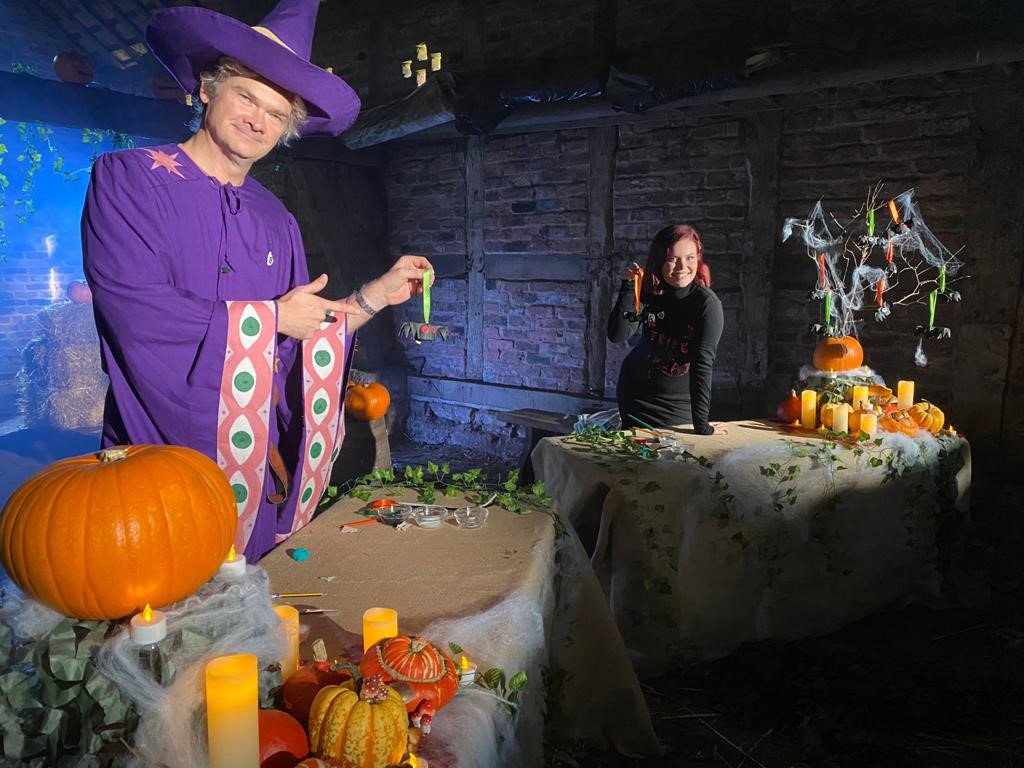
The Wizard in My Shed: Costume for Simon Farnaby
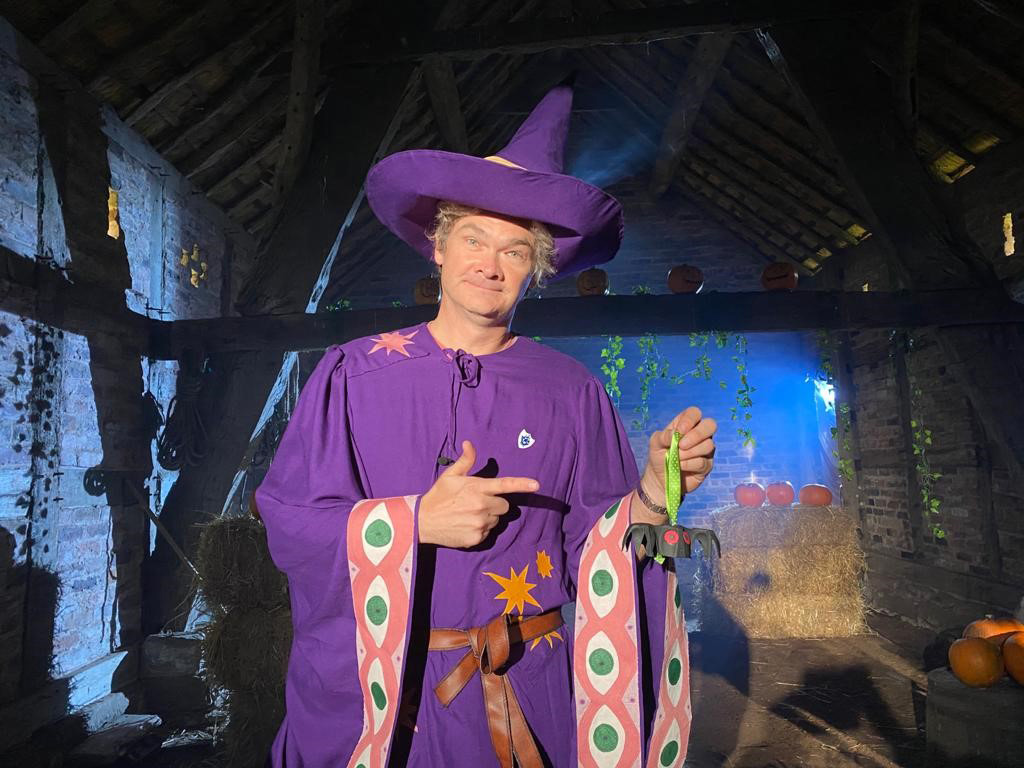
Simon Farnaby wearing bespoke Merdyn costume

And now for my next magic trick . . . !

I’ve worked as a graphic designer – advertising, marketing and publishing – for more than 30 years now and its fair to say that some of my most fun jobs have been sewing ones, such as this apron for Ellie Simmonds and Laura Ellen Anderson’s Amelia Fang outfit.

Last week was a busy one and typical that I should get an Emailed request for another costume with precious no time to spare.

Poised to turn it down, I looked to Dan in despair that I was about to say no to such a lovely job and he said, “Say yes. And we’ll make it happen!”

We? I thought. And how?!

But his face was doing that convincing thing. I’ve seen it before and he’s always been annoyingly right. So I replied to that Email with a yes and a gulp!

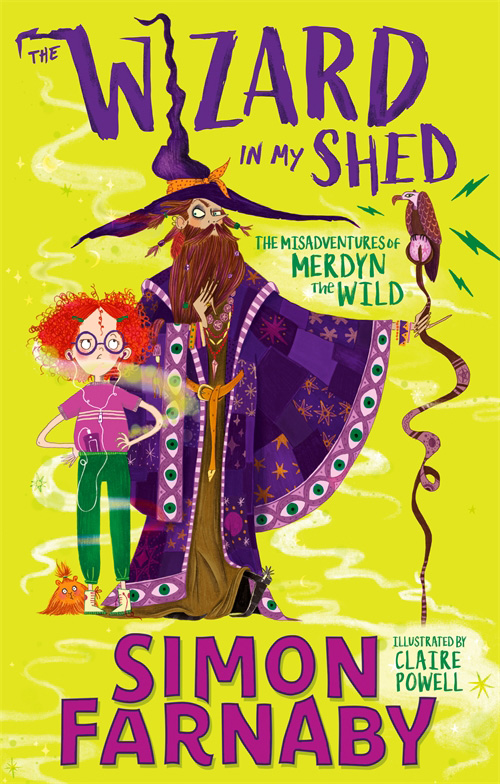
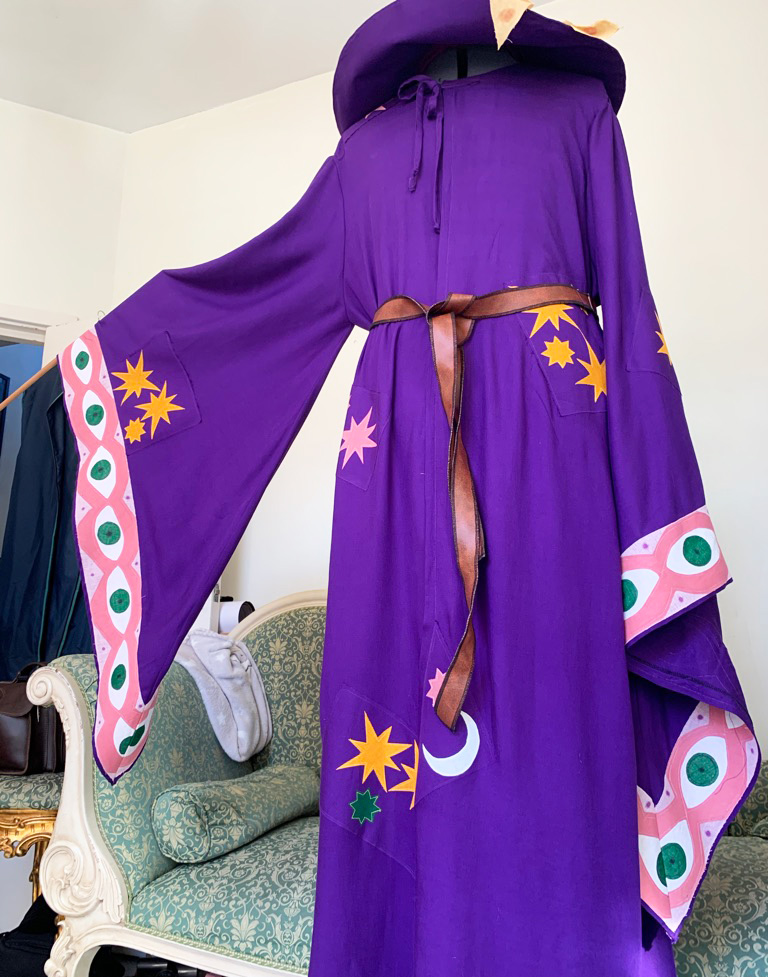
The original brief was for a hat and a cape of sorts fit for Merdyn, the main character from The Wizard in My Shed, the debut children’s book by Simon Farnaby. And it was needed tout de suite so that Simon could be filmed wearing it for a Blue Peter appearance the following week. Eek!

The Wizard in my Shed book cover

We don’t do things by half-measures at House of Ooobop – Simon was going to get a proper Wizards robe! So… no time to panic, I set about sourcing some purple fabric and Dan took charge of the details.

Have you ever wondered just how many purples there are in the world? I haven’t until now, that is. mostly because it’s my most unfavourite colour and generally only gets called upon reluctantly when I’ve run out of colour choices for a series of book cover designs!

But seriously, I walked the whole circle of Goldhawk Road fabric stores before I found not just the right shade of purple but also the right fabric itself – I needed 7.5metres of something drapey with a touch of structure. Something vaguely natural in fibre to account for studio lighting and prevent slow-roast simulation… oh and nothing too shiny or fancy-dress-like.

It took a while but patience persisted and I ticked all the boxes with a what I believe was a viscose twill and in the meantime, Dan came up trumps with some lovely muslin pieces in muted colours for the embellishments. All very carefully considered.

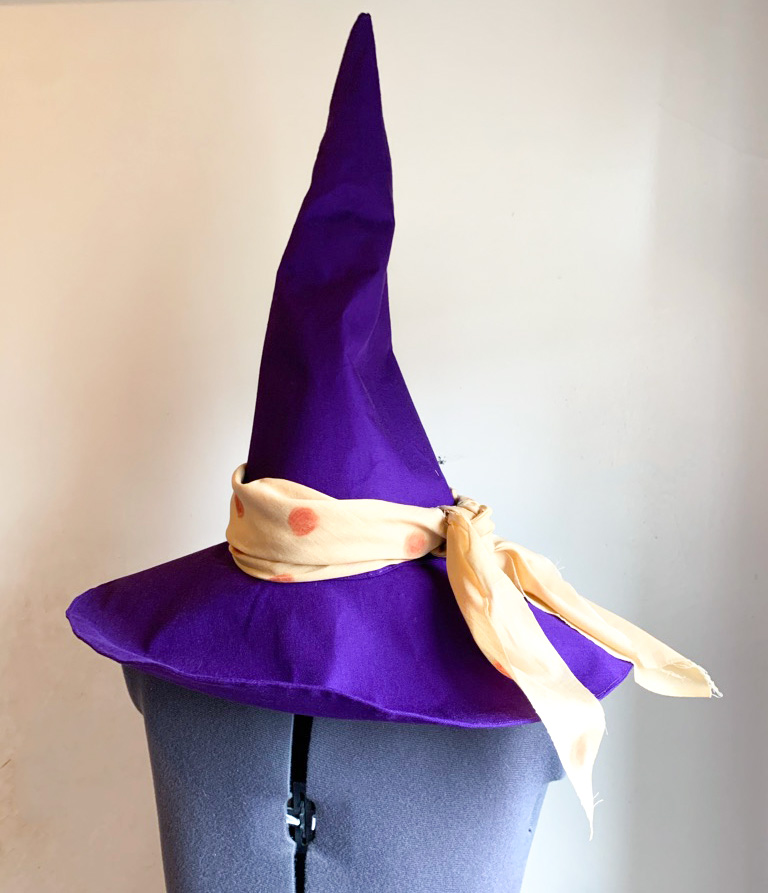
I started with the hat. Very simple pattern pieces but a very stiff fusible interfacing was key here. It created an authentic crumple in all the right places once I turned the main pointy section the right way out. It was quite tough sewing to the covered brim but once that seam was clipped and trimmed it sat beautifully. And I added a cotton muslin lining so it wouldn’t be so sweaty to wear under the lights.

Merdyns hat

Dan, meanwhile hand-coloured the spots on the scarf that was to be tied round the hat. Total dedication to the cause. He used the fabric sublimation crayons I bought from Wear Your Art at The Stitch Festival earlier this year and they worked a treat. Believe it or not, red dots on a yellow fabric is as hard to find as the right colour purple!

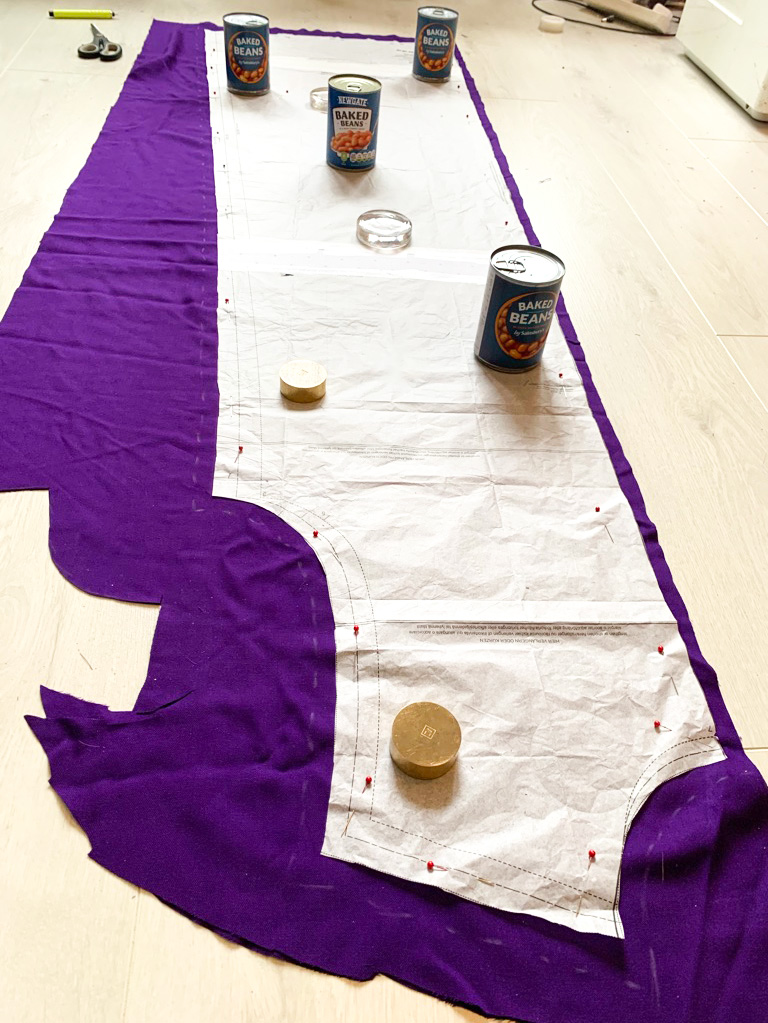
I can’t lie, I was dreading the next stage – cutting out the super long pieces of the robe – as I don’t have a table anywhere near long enough and it transpires my living room floor was only long enough to cut a single piece at a time. Boy was that a test of my knees! Also fingers crossed the whole time that the measurements had been taken and sent correctly. So much apprehension when you don’t get to take them yourself.

And do note the sophistication of pattern weights here.

robe pattern pieces pinned

Whilst I was finishing up on yards of seams, Dan was fusing the sleeve detail sections and the patches of stars. Two heads and two pairs of hands were definitely key to getting this done – just when I thought I couldn’t love him more!

The Wizard In My Shed Costume

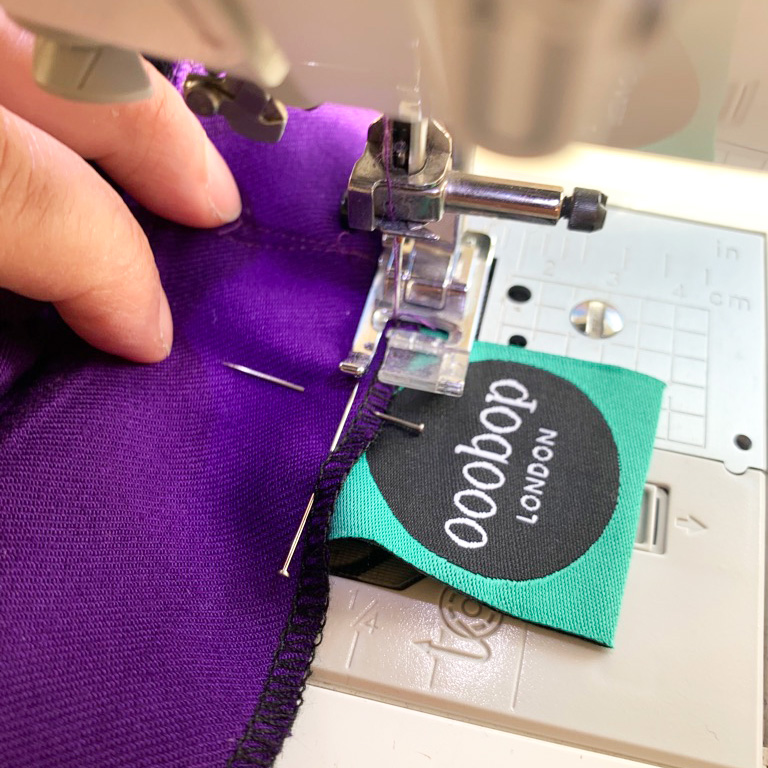
Wee hours of Wednesday morning came and we were trimming threads adding ties and sewing in the labels. I only ever add an ooobop label when I’m happy with my work.

ooobop label being sewn into the garment

Only thing left to do was to package our prized project ready for the courier. Something else that had to be considered. A regular dress cover was no where near long enough so Dan’s quick thinking brought some super long dust sheets to the table which I whipped up into a custom covering… of course!

I was a little bit sad, waving it goodbye especially after we cleared up the devastation. It was like nothing had happened.

We weren’t allowed to post pictures until after its appearance on Blue Peter. But boy was it worth the wait, Simon Farnaby in it and a Blue Peter badge on it. How cool is that?! So grateful for Dan’s faith in me and the trust of Lucy and Emily at Hachette Children’s Group for putting this amazing project our way.

Simon and Lindsey on set

I’m not being careful what I wish for any more. I totally want more of the same!

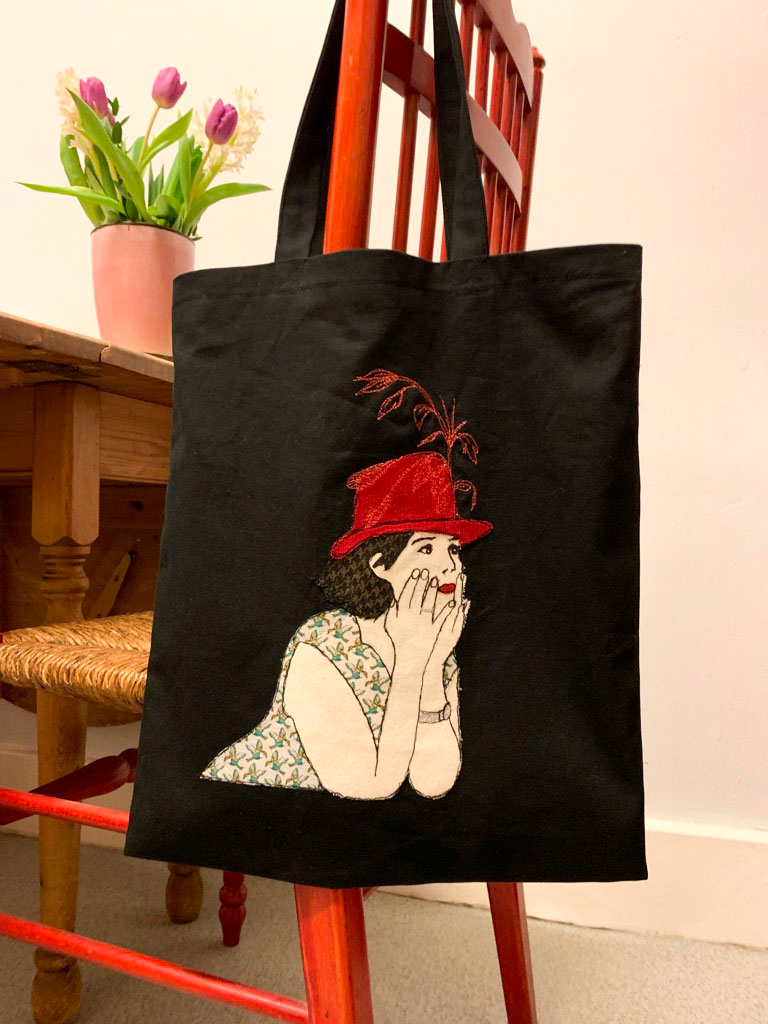
Portrait tote bag

personalised tote bag

What do you gift an incredibly lovely, clever, successful and well-travelled friend who doesn’t really care for ‘stuff’?

I didn’t know either but I figured something handmade and personalised would be the answer. So I set about creating a tote bag with an appliquéd portrait of the ‘birthday girl’ on the front.

To be fair I’m sure this bag still counts as ‘stuff’ but with a nod to usefulness at least!

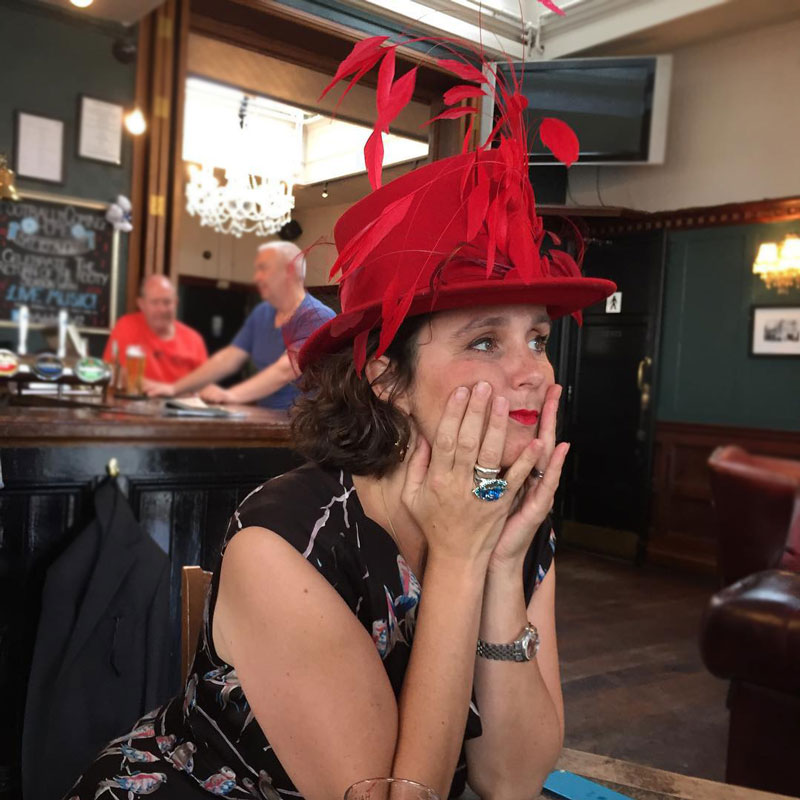
I took the photo of Katy at the pub where we met before we set off for the wedding of our mutual friends. She looked amazing in her gorgeous hat that was made by our amazing milliner friend, Jayne Hepsibah. And it seemed to me an all-round perfect pose for a stitched portrait.

portrait of Katy

This project has been on my reminder list for weeks. But (note to self) January is a ridiculously busy month in the world of children’s publishing and in my capacity as a freelancer this basically results in all work and absolutely no play. Read no sewing time at all!!

So, true to form, I started making it in the morning and had it ready for the party that evening!

It’s a pretty time-consuming but relatively simple process.

I enlarged the image to the correct size, on screen and then flipped it (so she was facing in the opposite direction) before printing out a copy on regular plain printer paper. I scribbled on the reverse with an HB pencil to create a carbon layer and then drew around the key areas of the image to leave a traced line onto the backing paper of some double-sided fusible webbing.

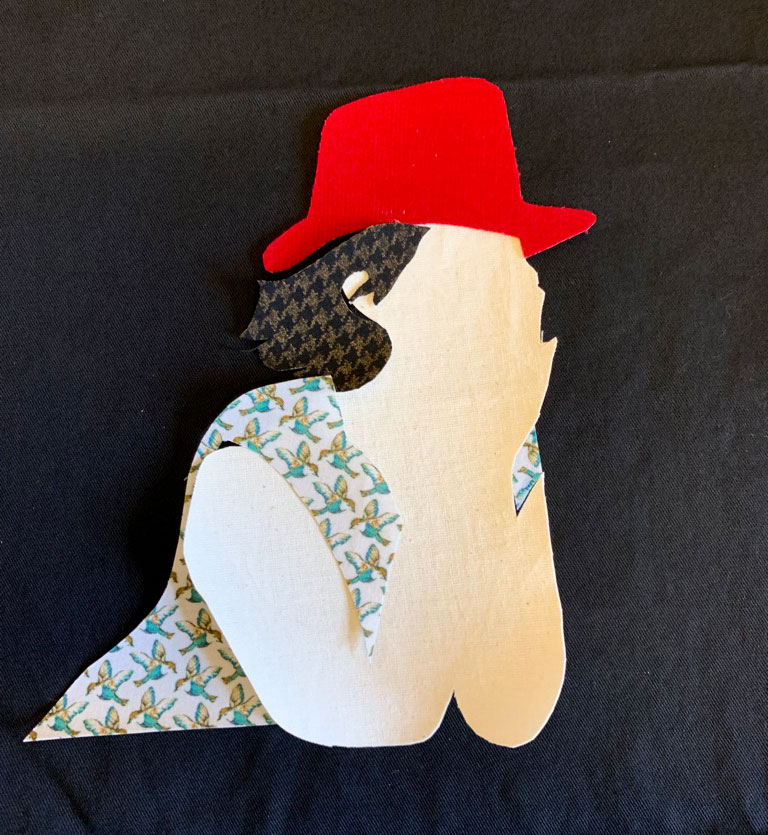
I cut around these pieces with extra allowance before ironing into the reverse of my selected fabric pieces. That way, when they were trimmed, each piece was as accurate as poss and the sticky bit reached to all the edges and points.

applique pieces arranged

Then I ironed them in position on the bag front piece  in order that there was a little overlap in places. It was so satisfying to see it come together at this point.

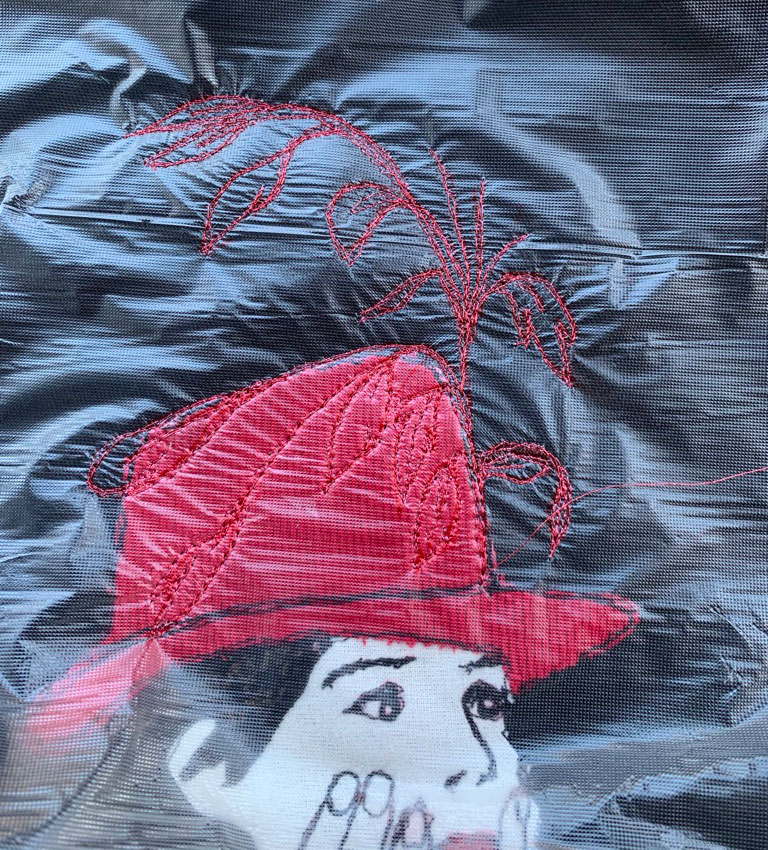
And then for the machine embroidery I used a regular black polyester thread. (Moon brand) with a white embroidery bobbin thread. I believe you can get it in black too but white seemed to work fine with no show-through. I also delighted in using some water-soluble stabiliser which is just amazing.

I used a Sharpie pen to draw the linework onto the stabiliser and then overlaid it onto the working area before sandwiching all into an embroidery hoop. Luckily my hoop just about fits under the presser foot so I could ‘draw’ all the finer detail using the freehand embroidery foot. Black thread  for the most part. And then silver metalic thread for the ring and watch, metallic red for the feathers. Worked a treat. No puckering. No skipped Stitches.

machine embroidery detail of feathers

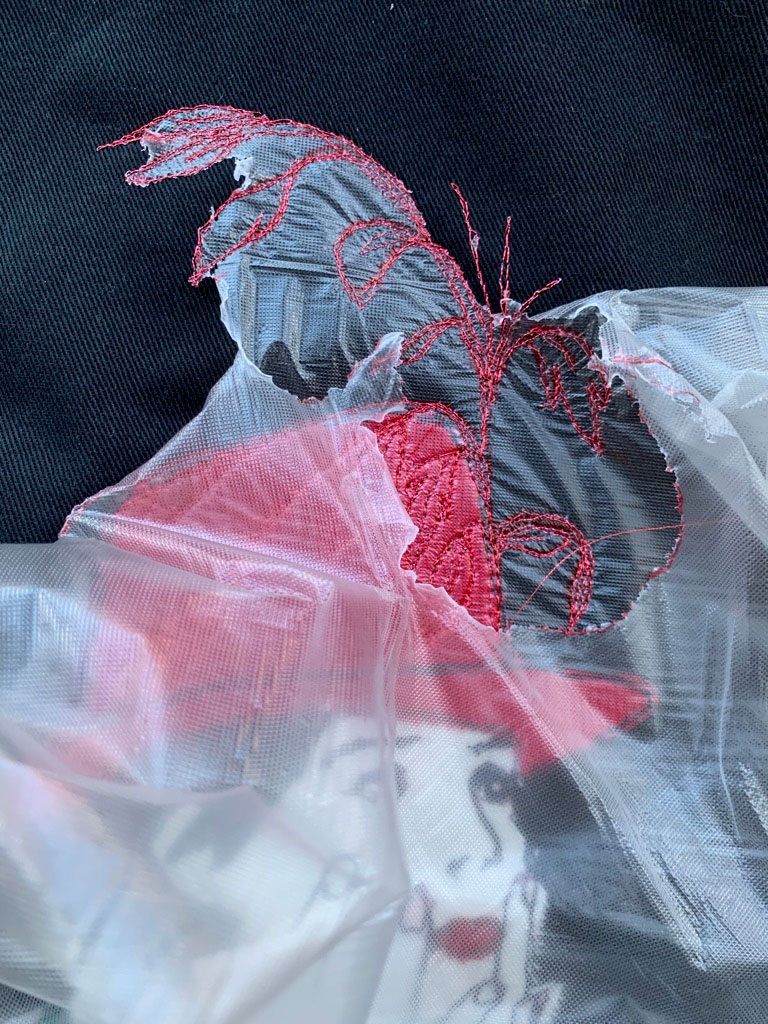
Even more satisfying was the action of peeling away the stabiliser. The little remaining fragments are washed away with cold water. Like magic!

stabilizer peeled away

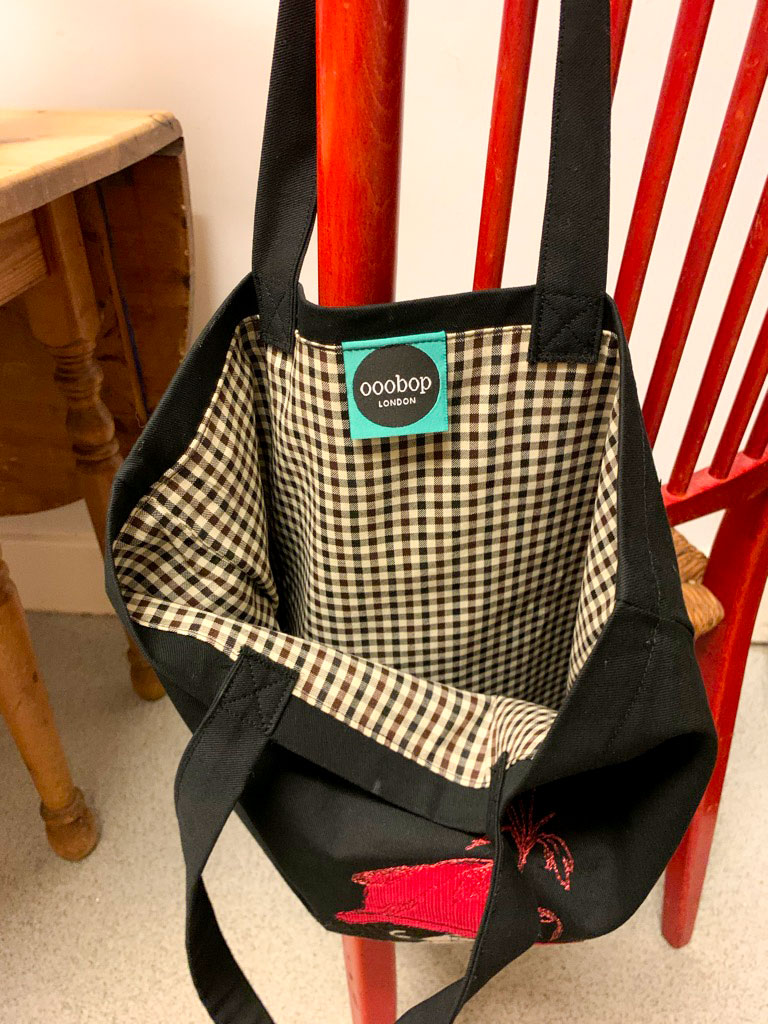
Once dried, I sewed up the bag using some black cotton twill from stash and included a gingham lining and an ooobop label of authenticity, of course!

inside of lined tote bag

I’m so pleased with the result. Not least of all because it documents  fond memory of a lovely day we spent together, but it includes some memories in the fabric, too:

The calico is from a toile of a favourite dress; the hat is leftover from the red corduroy dress I made for my granddaughter and the silk lips are from my memade 50th birthday dress. All small scraps I couldn’t bear to part with but that now have the best use!

I loved making this so so much. Guilt-ridden in fact, for the joy it’s given me in the process of creating and giving.  Add to that all the memories that bubbled to the surface along the way and you end up with a bag full of sentimentality.

Here’s to good friends, great parties and an eternal basket of spectacularly inspired sewing projects!

Other things I’ve created employing appliqué

Martini dress

Personalised bunting

More personalised bunting

Zipper pouch

Martini and Open the book

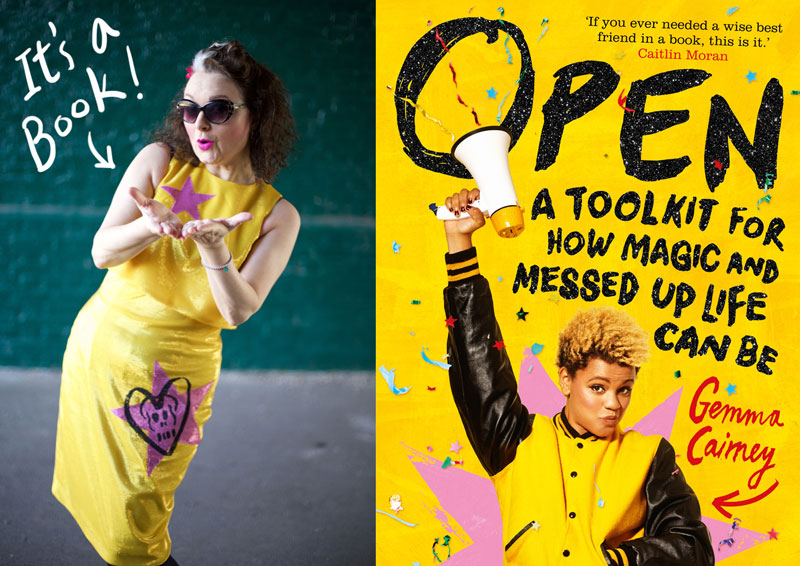
Martini dress for Open, the book launch

So I did it again… mixing business with pleasure. With no regrets – just pure delight in my two worlds working together again, so effortlessly, so cohesively this time.

Lets start from the top. By day, my hat-wearing is in the graphic design department of mostly publishing houses where I design covers and inside pages for children’s and young adult books.

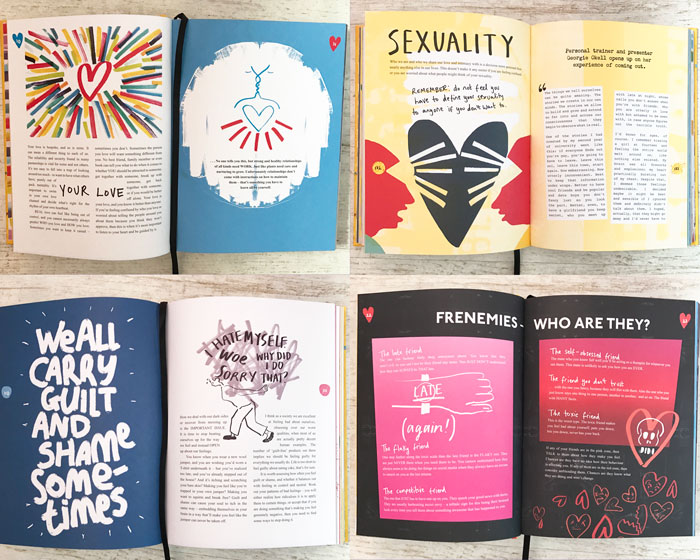
Late last year I was asked by Pan Macmillan if I would like to design the inside pages for a very cool book by radio and TV presenter, Gemma Cairney. This is the point when all my senses got seriously ignited and creative juices whisked up on hyperdrive. Errr… ok… like yes totally please… honour all mine and all that!

Open is exactly what it says on the tin: “A toolkit for how magic and messed up life can be”. All those taboo hard-to-deliver subjects laid bare, on the page, cool as.

I don’t often shout from the rooftops about my work unless I truly believe the hype but in this instance, with Gemma at the helm, loud-hailing her invaluable advice and support, awesome art direction from Rachel Vale who also designed the gorgeous cover, fellow designer, and wonderful person Tracey Ridgewell, and a plethora of edgy art from illustrator Aurelia Lange, I was in my element and couldn’t possibly keep shtum.

Here’s a little taster of what’s inside:

open spreads

This book involved a proper dream team, of that you can be sure. Just check out the thank you’s at the back. It’s all inclusive and that’s what made it such a pleasure and an honour to be working as part of #teamopen on this very important and unique book. Boy do I wish I had this book when I was a teen.

It was a lot of work in such a short space of time and yet when it was all over and the proof copies were in, it seemed like a distant blur. And then I got an invite.

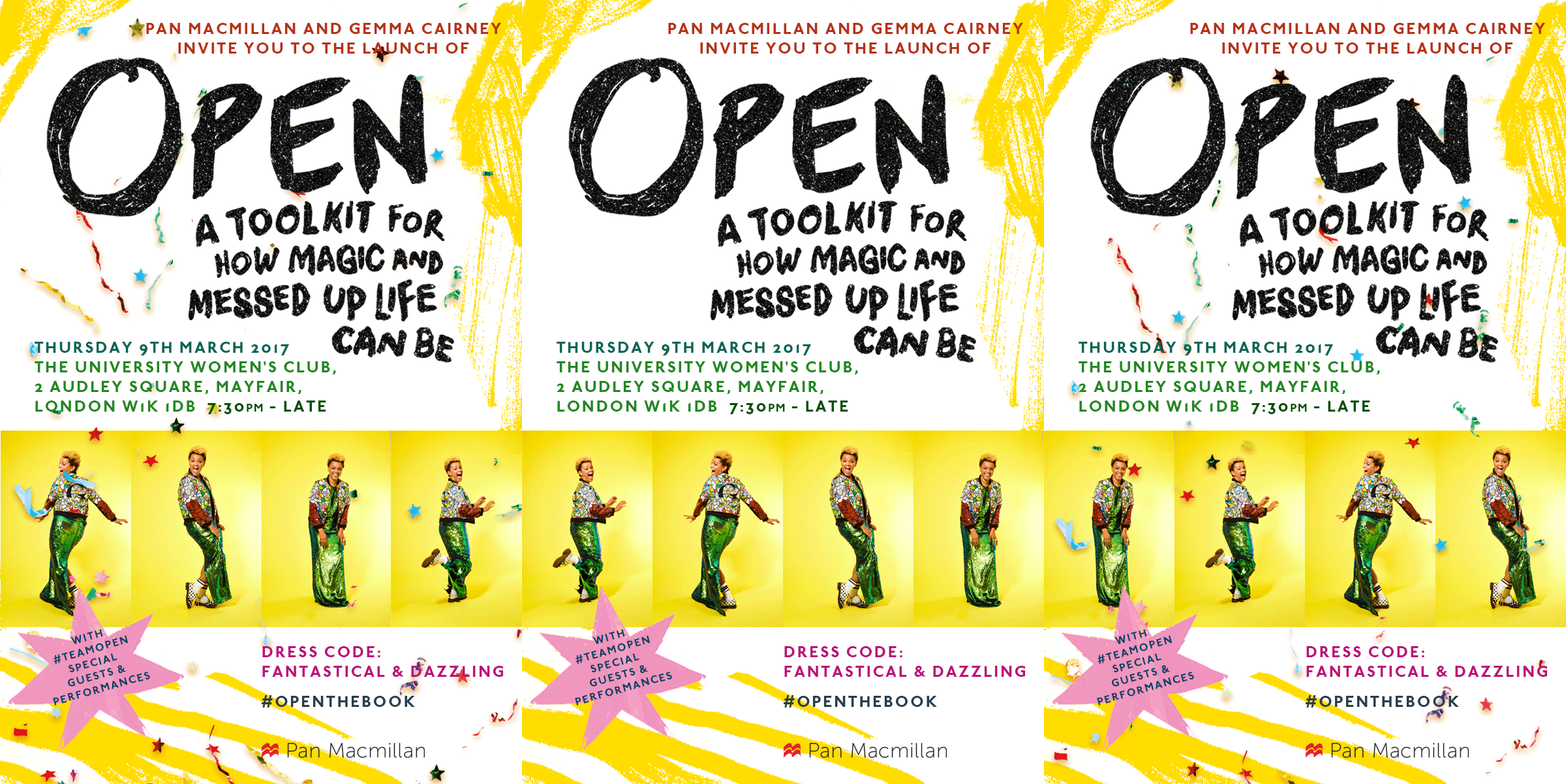
So when one gets an invitation to a very special book launch party, whereby the dress code is ‘fantastical and dazzling’… what is one to do? Make it, right?!

Open by Gemma Cairney

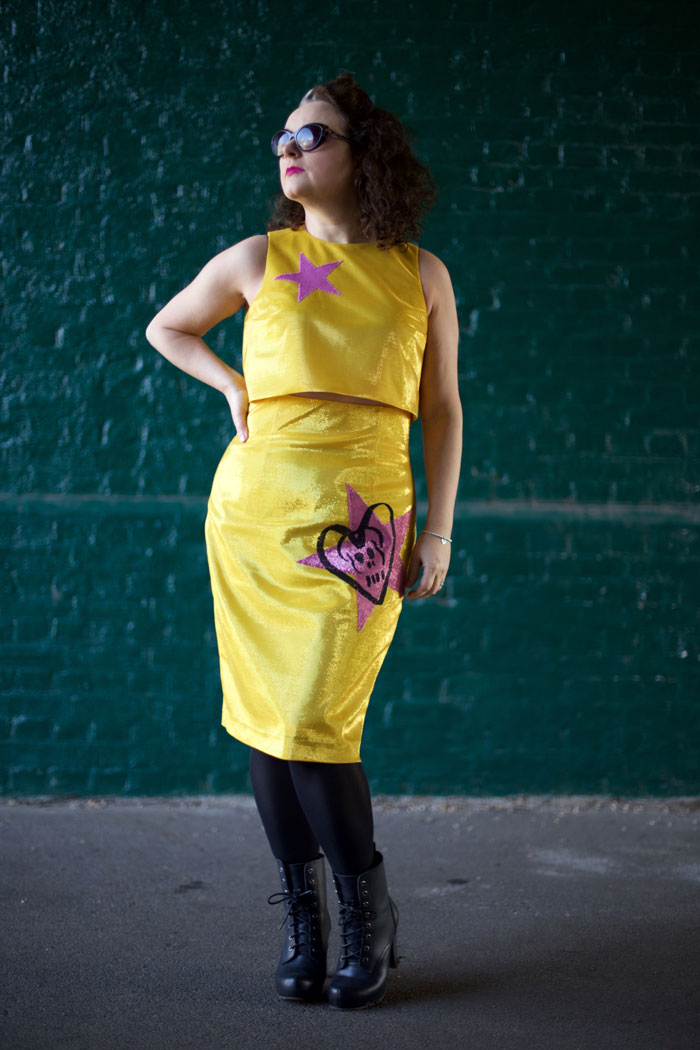
I didn’t have much time to plan. A couple of weeks in fact. So I needed a tried and tested pattern. All hail the Capital Chic Martini! I have only made this once before, in a vintage bark cloth (see here) but always knew there would be a need for more versions. Thank you so much Sally for such a brilliant design. I love it so much!

capital chic martini dress

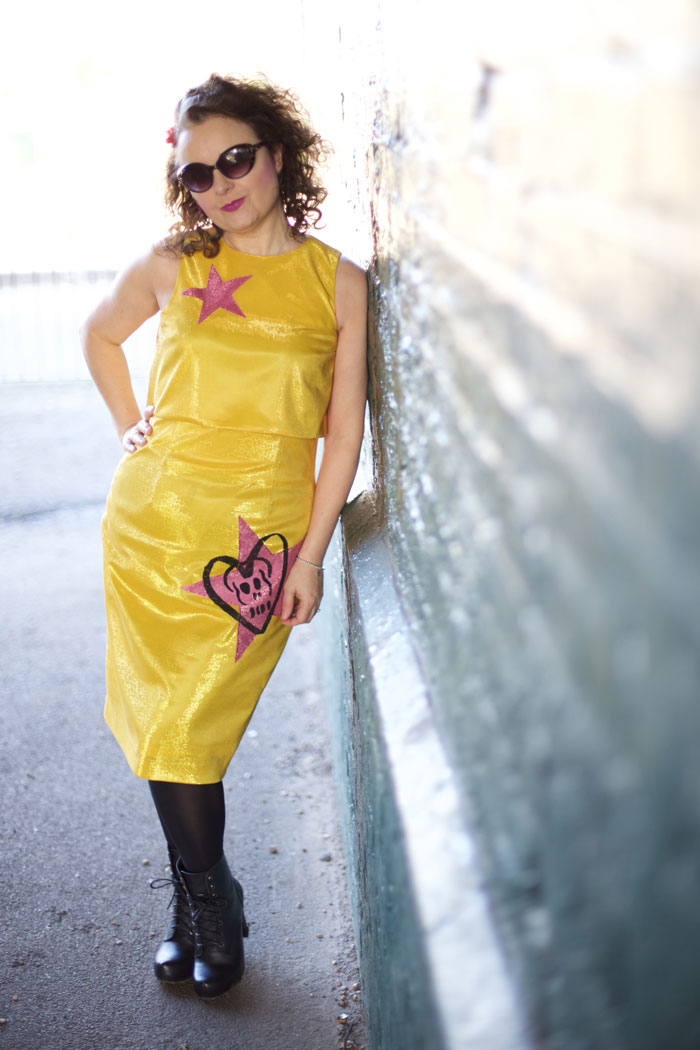
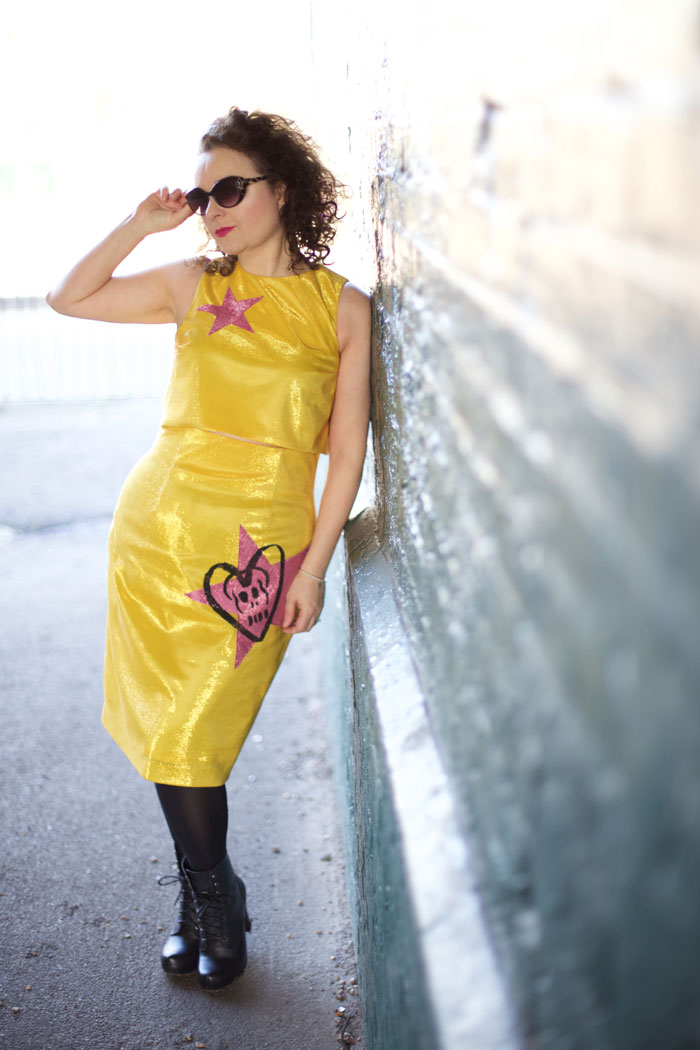
The fabric had to be shiny – no doubt about that. And preferably yellow. Though the thought made me squirm. It could all go horribly wrong and I might possibly end up looking like some gone-wrong banana.

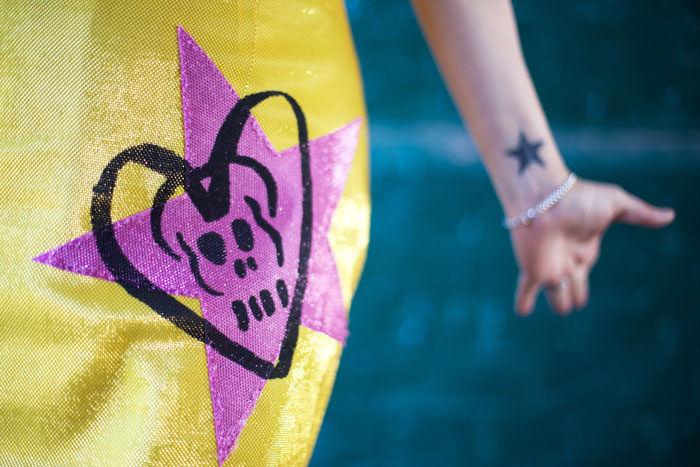
But I set to, with some weird synthetic shiny stuff from the Goldhawk Road, quite thankful that a no-smoking policy is ever present. All the time with a niggling urge to customize the dress somewhat. Then I chanced upon some pink fabric of the same kind in another shop. And appliqué stars just happened.

And then the night before, at quite literally the 11th hour,  I had a thought that I could paint one of the illustrations from inside the book, on the dress. Excitement overload!

I couldn’t possibly go ahead without first asking Aurelia’s permission – Open‘s incredibly talented illustrator – so when she got back to me with an absolute yes, it was all stations go, and I made a stencil from sticky-back laminate paper and used black fabric paint to daub one of her many cool iconic illustrations. I just love the end result.

martini dress aurelia illustraion

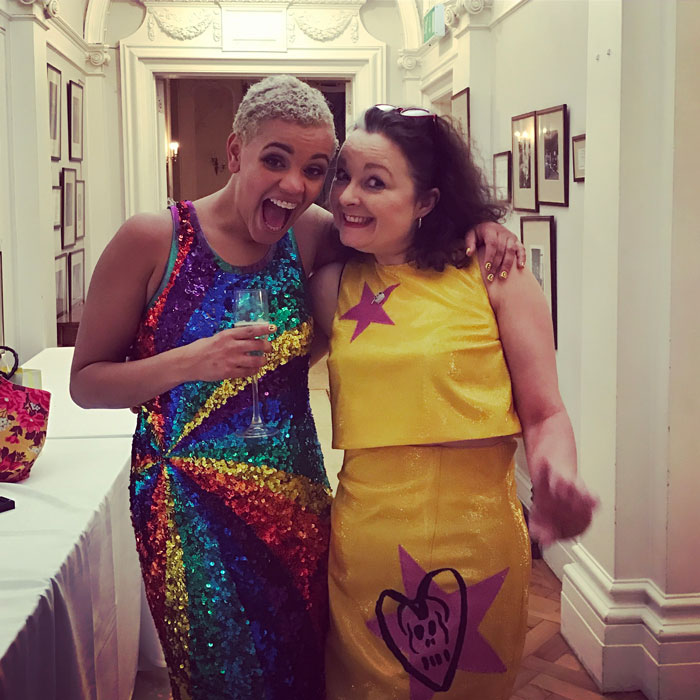
The party was immense. At the Women’s University in Mayfair, with period rooms bursting full of the most inspirational and creatively talented people. Jaw awe to say the least. I’m so proud of Gemma and I’m not even her mum! And just look how she rocks a sequin or two!

Gemma Cairney and ooobop

It’s insane that I managed to whip up this dress at a time when my workload has been so bonkers. But it just goes to prove that passion triumphs over ever everything. Even shut-eye! I will totally sleep when I’m dead.

I learned a lot from this project. Mostly that I respond well to a hefty deadline; I love that my job brings such creative people and projects to my table. But also that I relish a bespoke brief and a perfect opportunity to create an out-of-the-ordinary outfit for a party. I’ve just got to learn to deal with the attention it gets. Didn’t factor that in, lol!

capital chic martini dress

Daniel took these photos for me a couple of weeks ago. Just love the yellow against the green. He is so clever to have by-passed the daffs in in the local park to get to a scuzzy railway arch… who knew?!

capital chic martini dress

By stark contrast I’ve just finished three of the prettiest bridesmaid dresses in floral Liberty Lawn, that I hope to share with you after the actual wedding. So I must be due something more for me, hey?! Plus there are plans for a @Mccallpatternuk #thecocktailhour dress for the @eveappeal. More on that soon.

Are you more productive with a looming deadline or do you do just as well without? And would you be more inclined to make or buy a short-notice party dress? I’d love to know.

Till next time, my lovelies. Happy sewing! xxx

Your comments are always brighten my day and inspire me to write another post. Thank you.

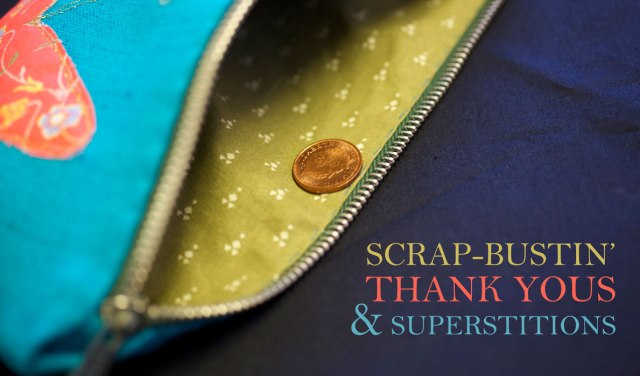
Scrap-bustin’ thank yous and superstitions

scrap busting thank yous and superstitions

Quality scrap-bustin’ that is! The word scrap doesn’t and shouldn’t be associated with a gorgeous piece of turquoise silk and some beautiful vintage cottons. But scrap-bustin’ it is until I think of something else!

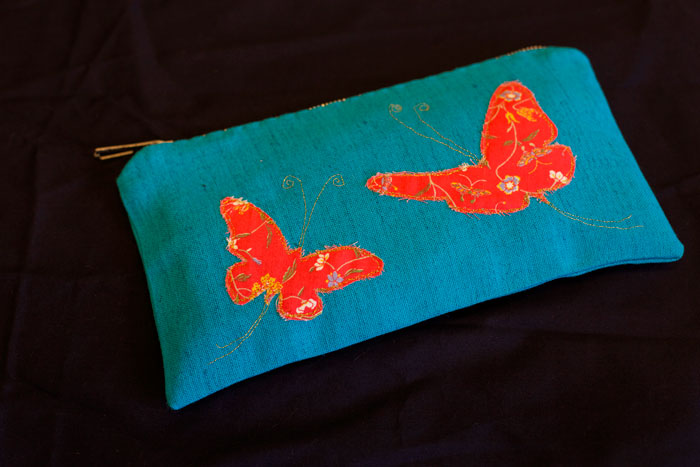
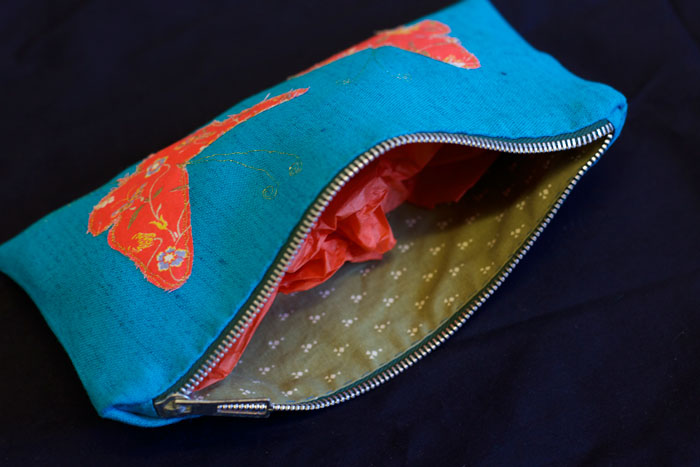
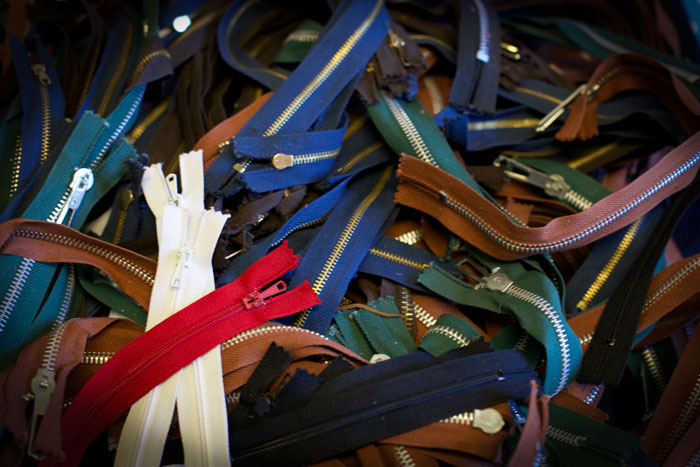
This little zipper pouch was inspired by a combination of prompts. I often frighten myself with all the intended ‘must-have-a-go-ofs’ that lurk in the back of my brain. The first to come to the fore, was a spot of free-motion embroidery. I spotted some lovely work by @thebobbinbird on twitter and that certainly set the ball in motion. I also needed a way of saying ‘thank you’ to my colleague’s mum who kindly donated a sack load of zips to me! (I’m not kidding about the sack. I’m still bringing them home a handful at a time because they weigh a tonne!) And I have been itching, for so long, to incorporate these tiny pieces of beautiful fabric, into a worthwhile project.

butterfly pouch

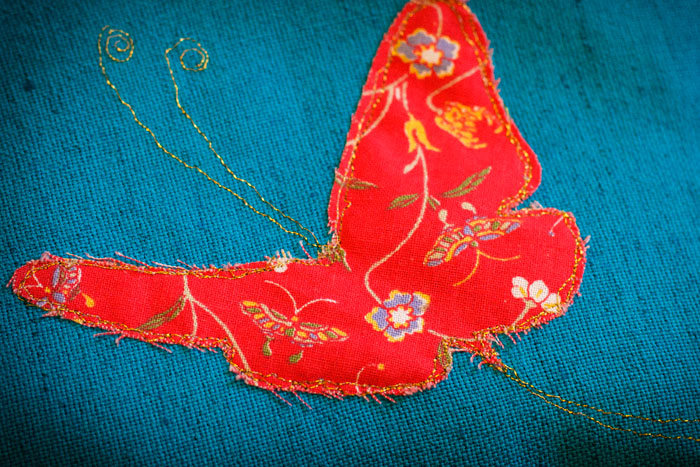
Now this is of course free-motion embroidery in the loosest sense! I pinned the tangerine-print butterfly pieces to the silk, lowered the feed-dog and using Sulky metallic thread and an embroidery foot, I ‘walked’ the stitches, free style, around the butterfly wings and to draw the curly antennae. I really loved the process, as I thought I would, and I’d love to be more adventurous next time. Perhaps even incorporate the technique on a garment or two!

butterfly applique detailI love the free nature of it all. The wonky lines and the fraying edges and the grain of the fabric. Quite a relief from some of the more precise methods usually employed in dressmaking. And oh how those colours pop!

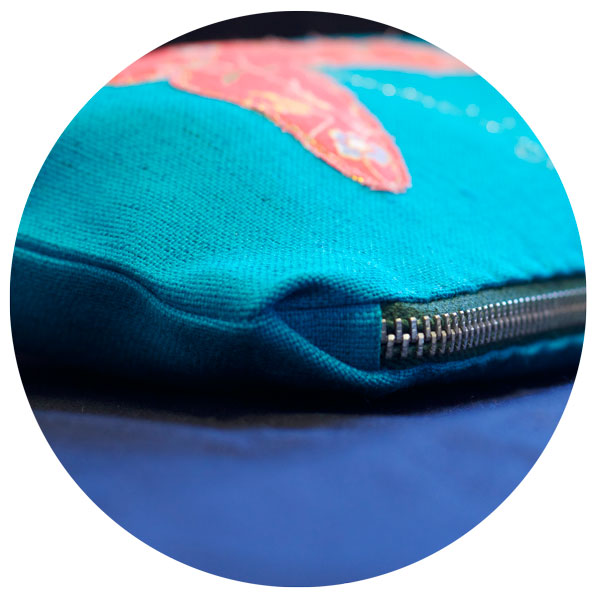
I had to use one of the millions of zips, of course! Would have been daft not to! And I covered the ends of the zip to act as stoppers and also because I had cut the length of the zip to fit.

covered ends of zip

The lining is a gorgeous vintage printed quilting cotton. Again part of another generous donation to me from a lovely friend and neighbour. I made small hand stitches around the opening edge to make sure it didn’t get caught in those rather hefty teeth!

pouch liningAnd the superstition bit? Well I’m not entirely sure how Mrs J will use this pouch. She may well use it as a purse so to be on the safe side I’m including a shiny penny to ensure good luck and prosperity. It is bad luck to give an empty one. Does anyone else do this or is it just me… and my mum who made me believe this?!

I think you may be seeing a lot of zippered projects to come. But if you have seen or employed any innovative uses recently I’d be very interested to hear about them!

zips