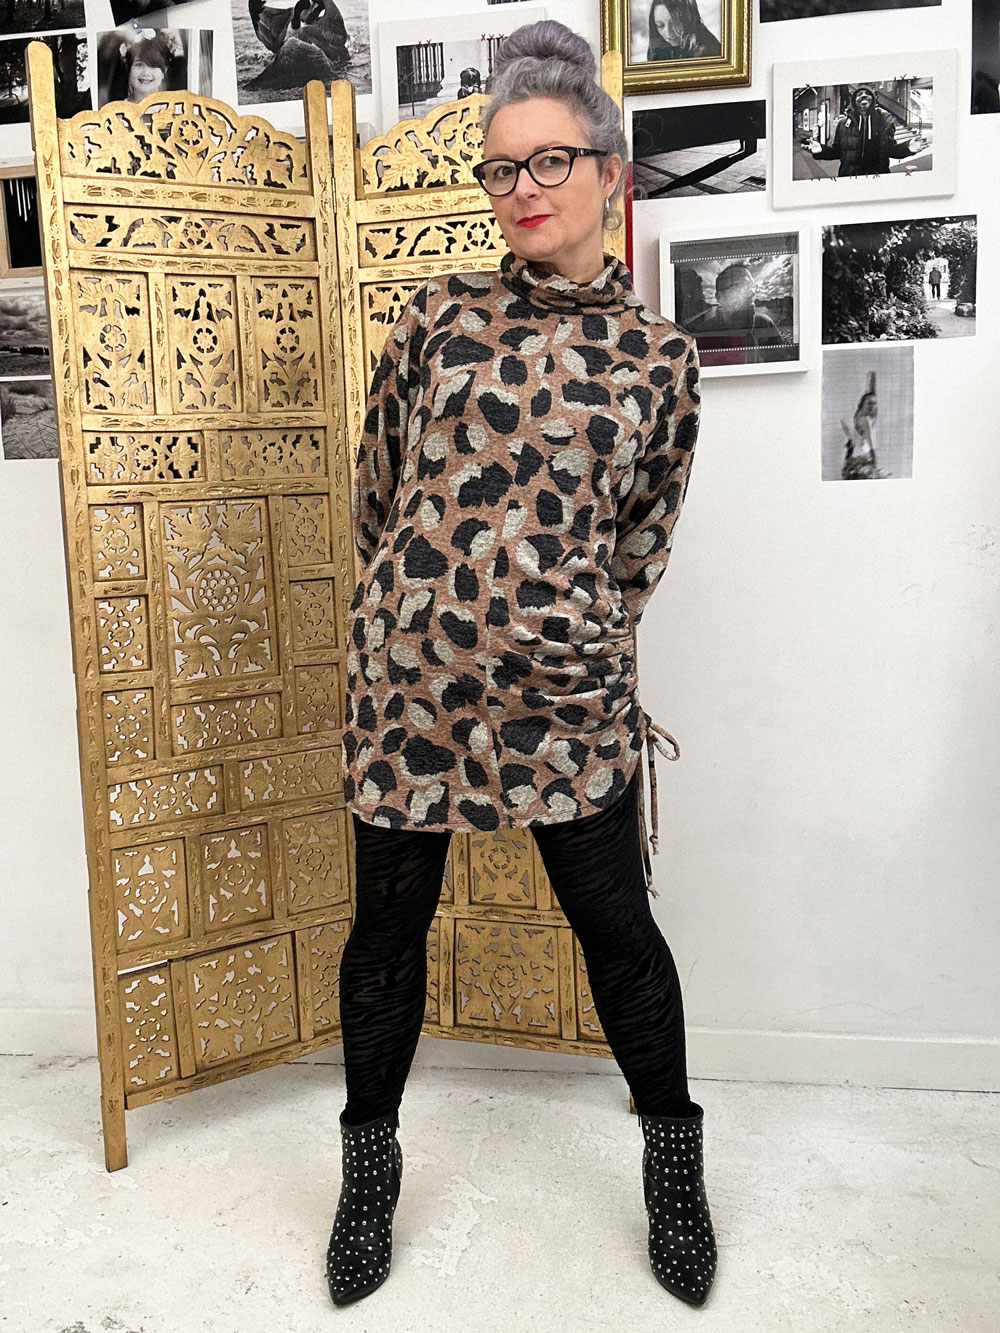
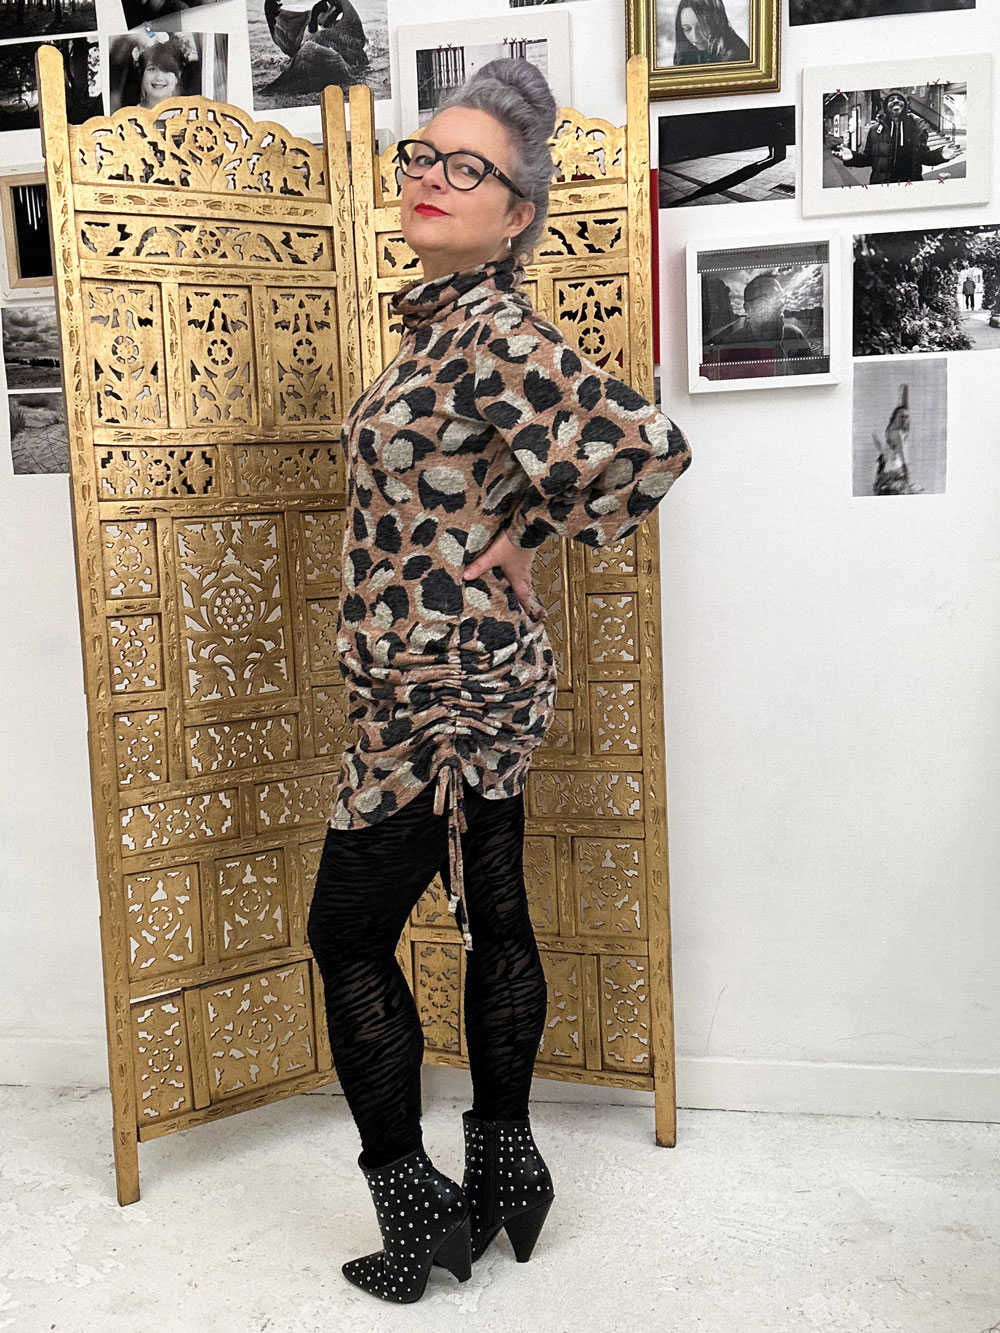
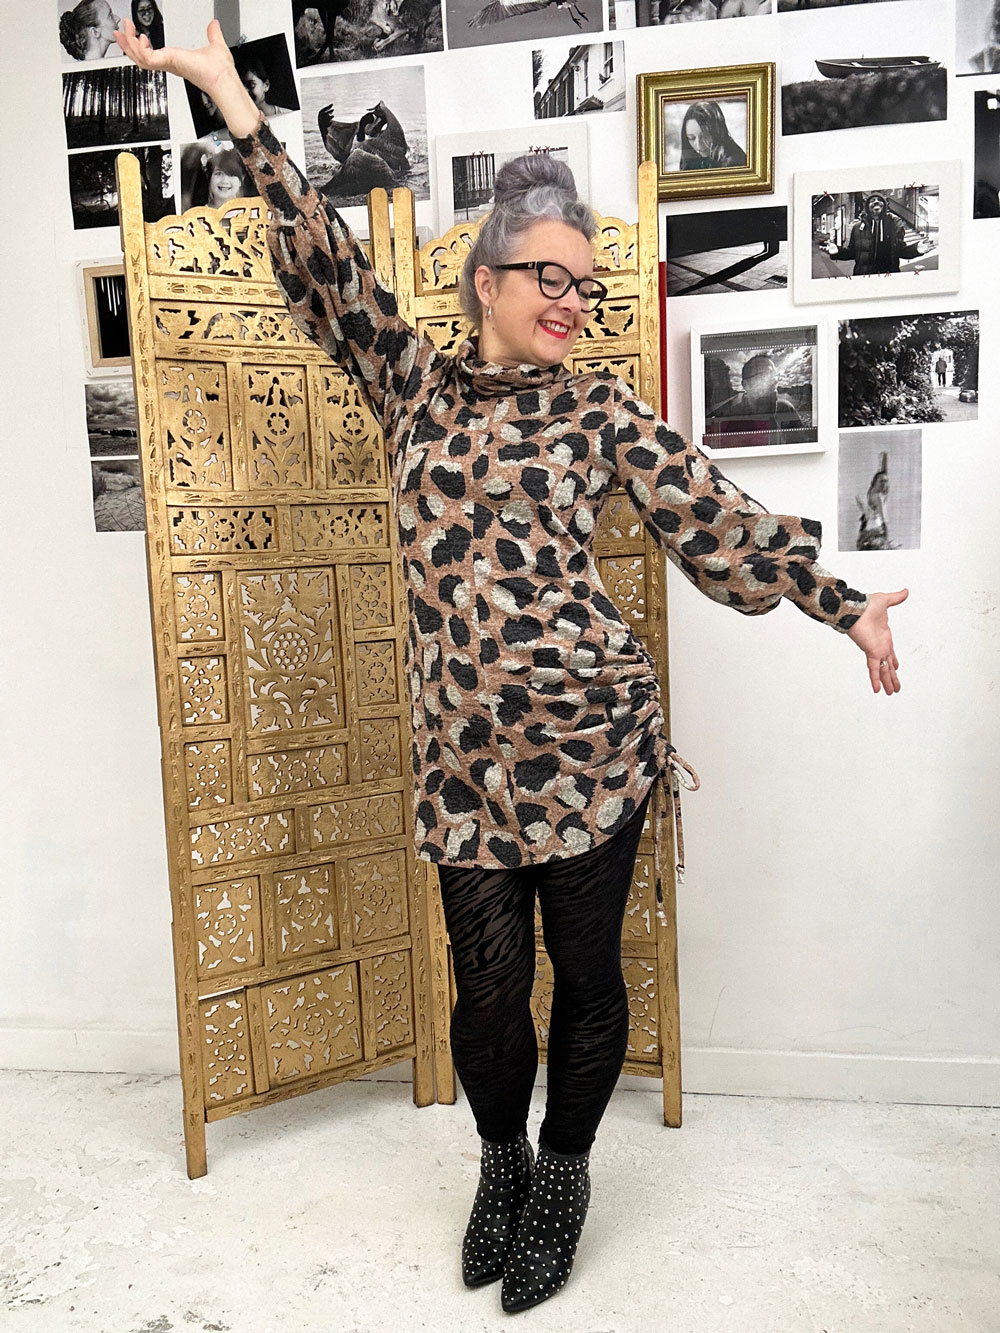
When Minerva presented their range of exclusive sweater knits to me I was very curious to know what they were like and when this piece of brushwork/giant animal print arrived I wasn’t disappointed. It’s a generous medium weight, very soft and super smooth to touch.
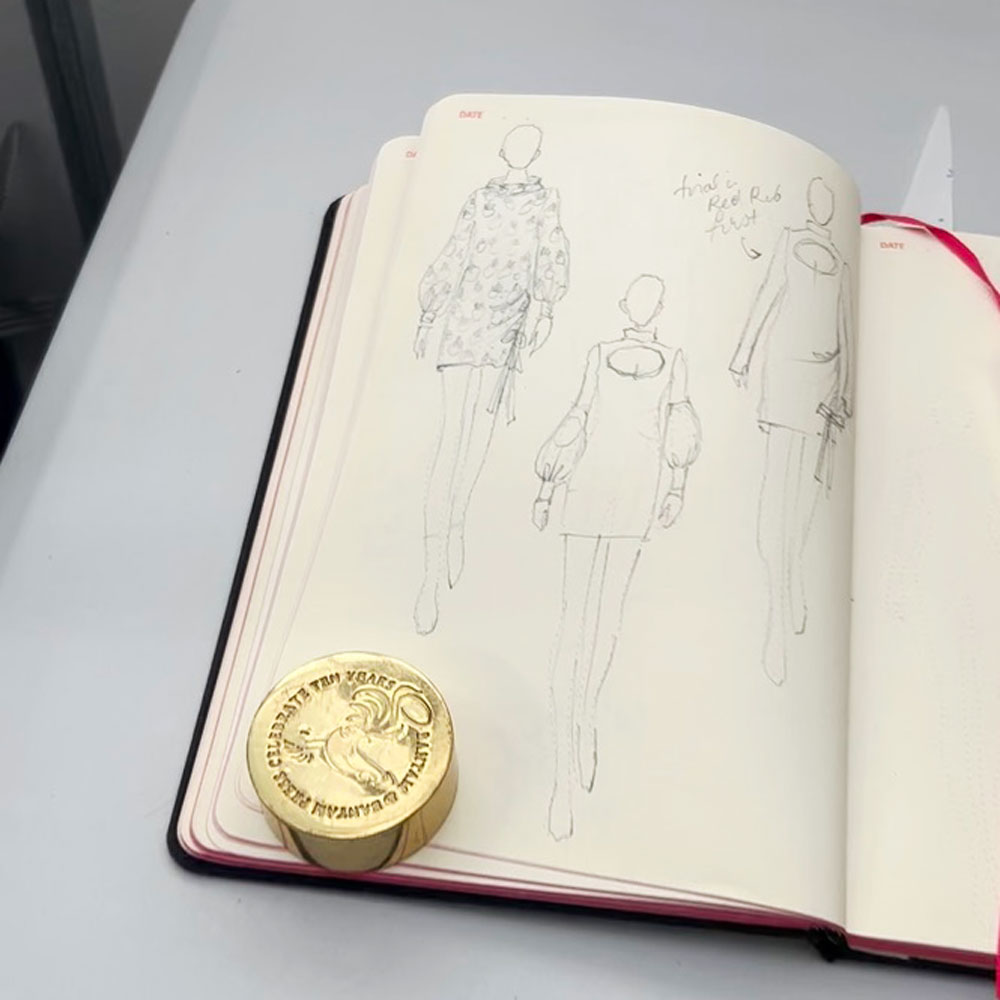
It was definitely worthy of a unique design so I got sketching in my Fashionary book. It’s fair to say that the natural drape of this fabric is what inspired the design. I wanted something cosy with long sleeves and and a high neck for chillier days. My skirts get shorter in the winter so I can embrace statement tights but I wanted a cheeky side detail to make it something other than just a fitted sweater dress.
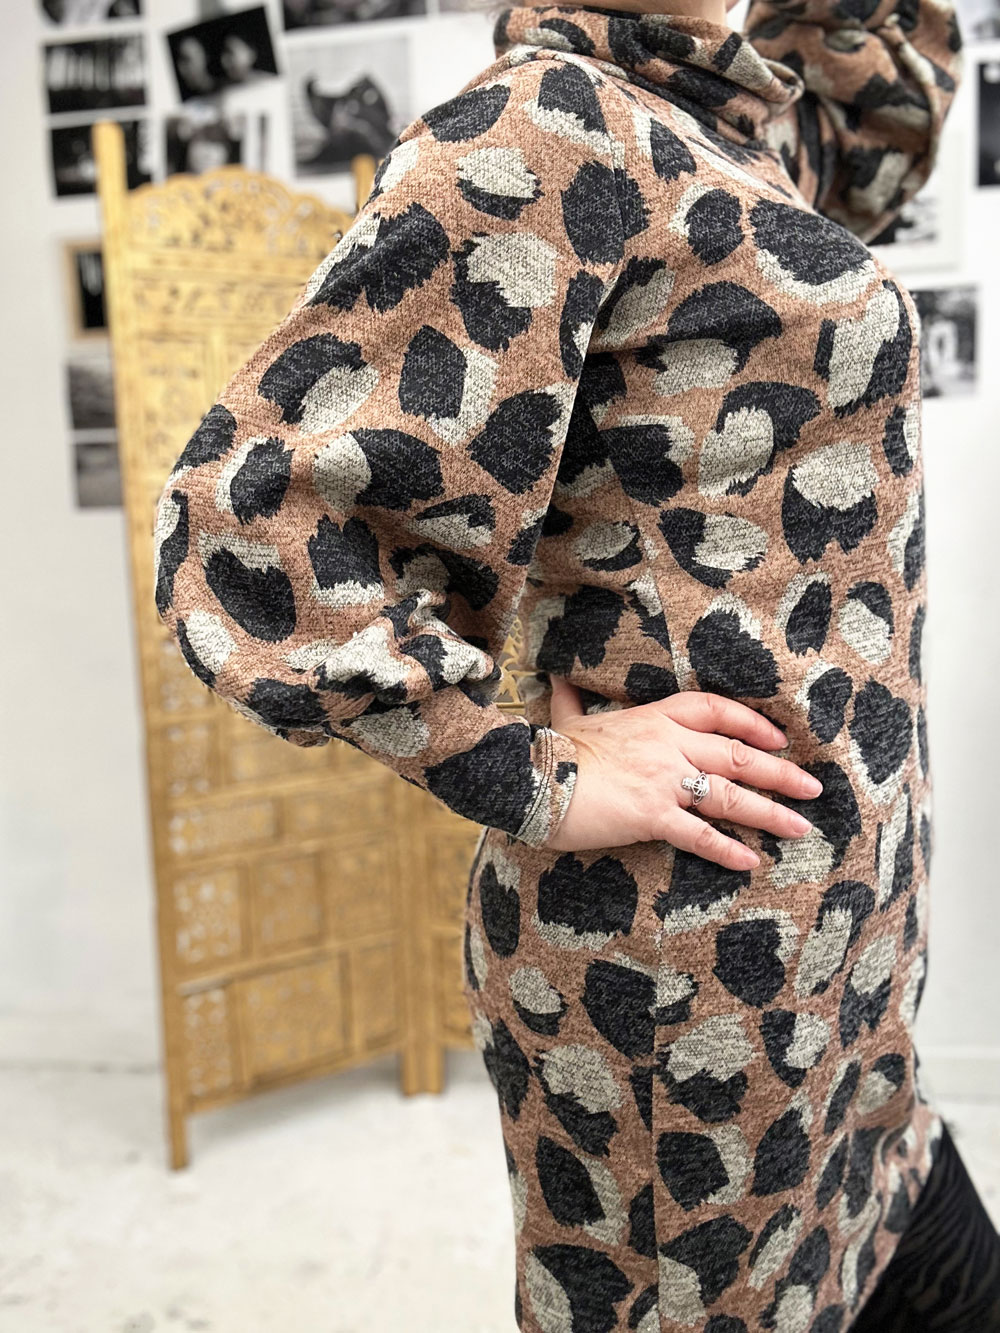
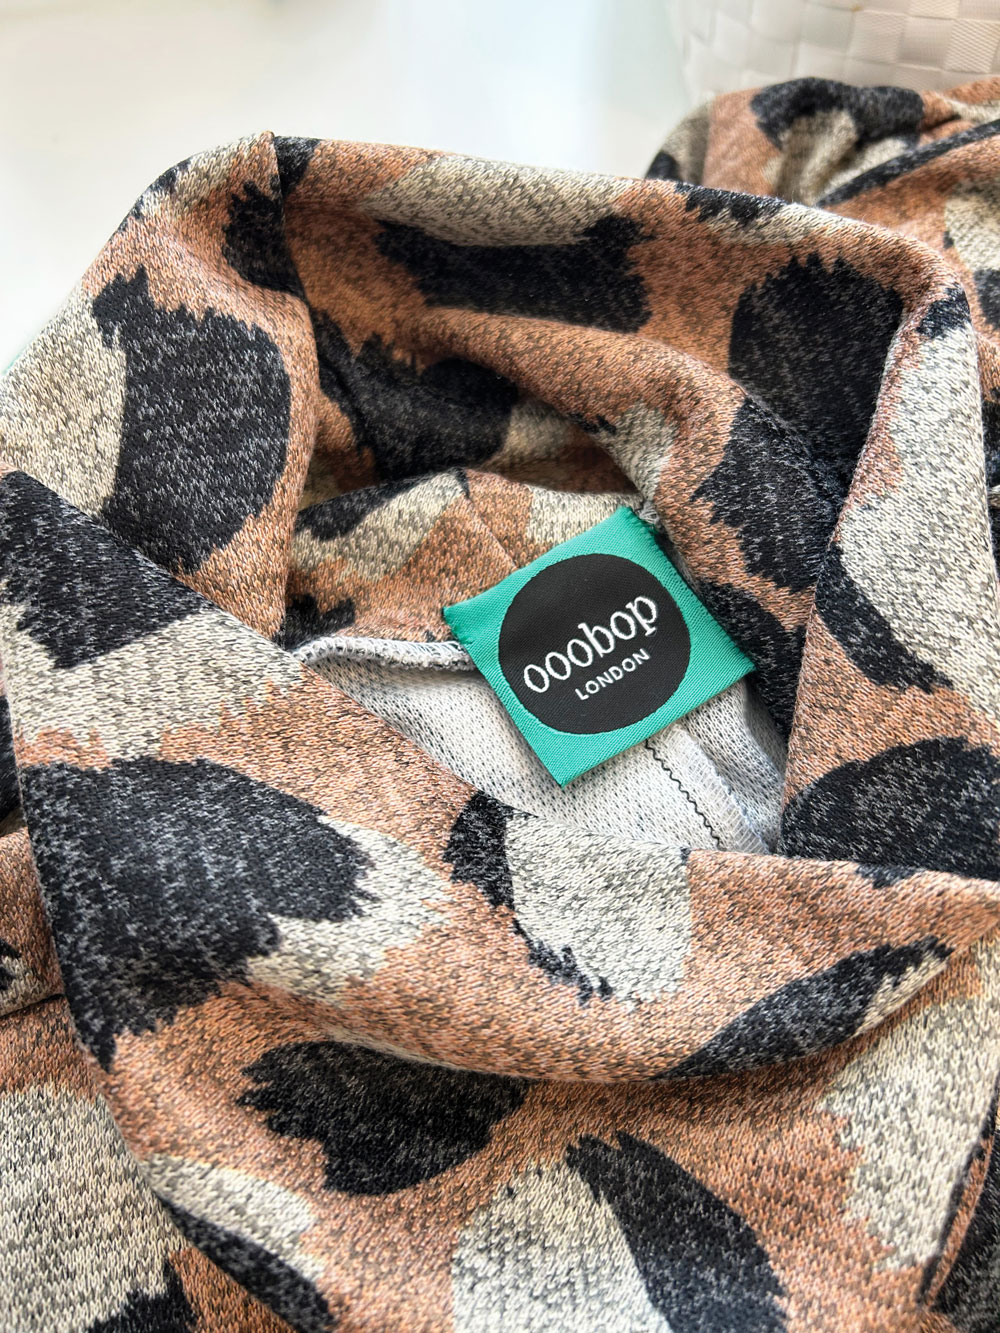
I made a test garment before cutting into the lovely new fabric and I usually make the tester in the same or similar material at least but I had to settle for a cotton jersey as I couldn’t find anything remotely similar in my usual local shops. And needless to say, it didn’t behave in quite the same way. Luckily the Minerva fabric was much more conforming to my design, especially when it came to the funnel neck. I wanted it to crumple down, to reflect the draping at the left hip and it worked sooo much better than on the test version!
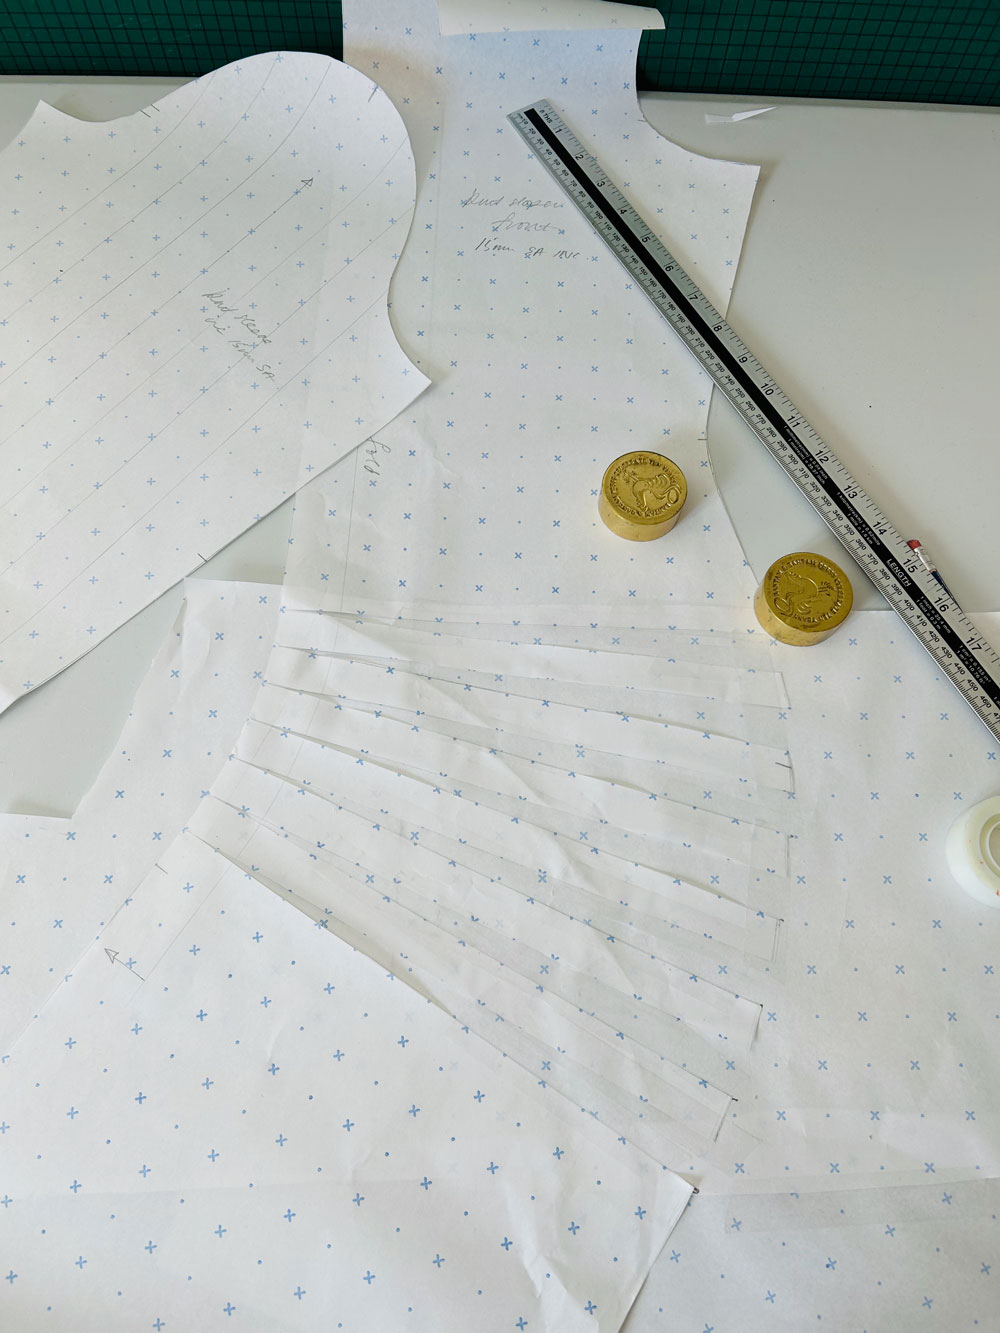
To achieve the side drapes, I created channels on the inside for two parallel ties which I secured at the tops. They are simply pulled and tied at the bottom which creates the draped look across the left front and across my left butt cheek! The ties were instrumental in creating an intentional detail rather than a look of ‘I simply haven’t pulled my dress down properly’!
I knew I wanted a statement sleeve of sorts but I didn’t want to go large on the shoulders so bishop sleeves were the best option and this fabric performed perfectly for the job. Incidentally I realised I hadn’t changed my sewing machine needle to a ball point one half way through and that a regular size 80 had done the job just as well. Having said that, the advice is to use a ball-point so best not do as I did, just in case!
I sewed the whole dress with a combo of a wide zigzag and the lightning bolt stitch. All seams were serged afterwards. I find it’s easier to make fit adjustments if needed this way. Although now I’ve nailed the fit, chances are I’ll sew it all up on the overlocker next time for an extra speedy sewing fix!
The hems including sleeves got special treatment with a twin stretch needle. Although, as always that didn’t come without grief! I’ve never managed to make a neat job of it first time. I’ve always ended up with a knotty bobbin thread or clunky stitches. But I was super determined not to end up with a lamo zigzag hem this time. So I addjusted the foot pressure, changed up the stitch length and basically threaded and unthreaded about sixteen times before it finally worked. And I’m so glad I persevered because it looks so much more finished.
I’m so happy with the result. And I’m warm and toasty and very proud of my exclusive self drafted dress. So much so that it bears not only my ooobop seal of approval label but the lovely Minerva Maker label too! Thanks Minerva. This fabric was such a treat to sew!
The Dressmaker’s Ball is an amazing annual event hosted by Crafty Sew and So in Leicester and presents a perfect opportunity to sew and wear whatever you damn like.
A free brief is pretty much unheard of in my work as a graphic designer. There are always rules – a style guide and house styles to abide by at the very least and so it is very refreshing indeed to be granted such freedom to create. Until of course, you start weighing up the possibilities which are endless!
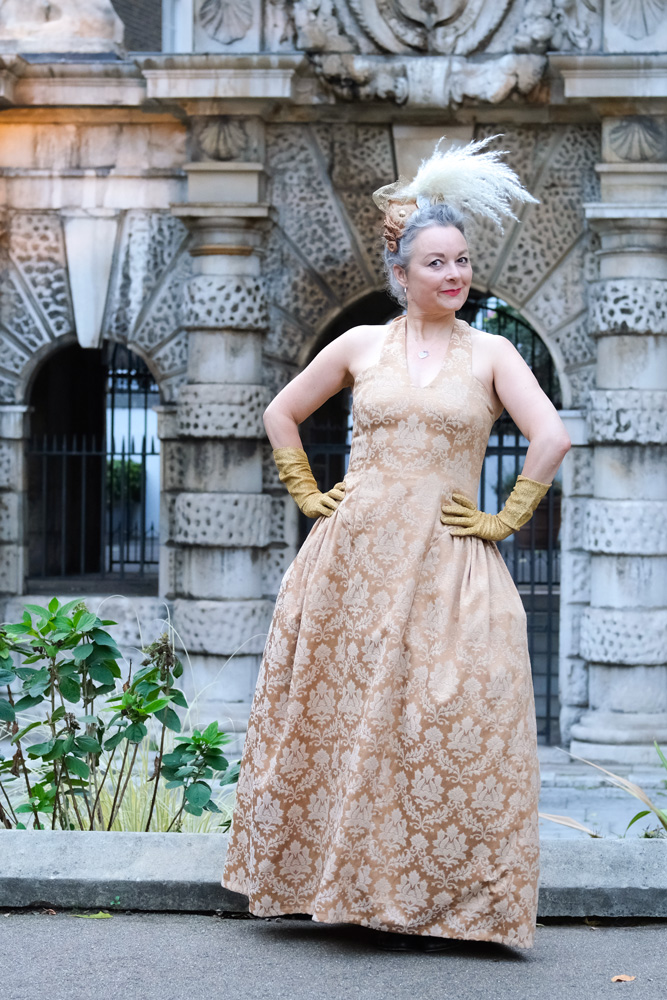
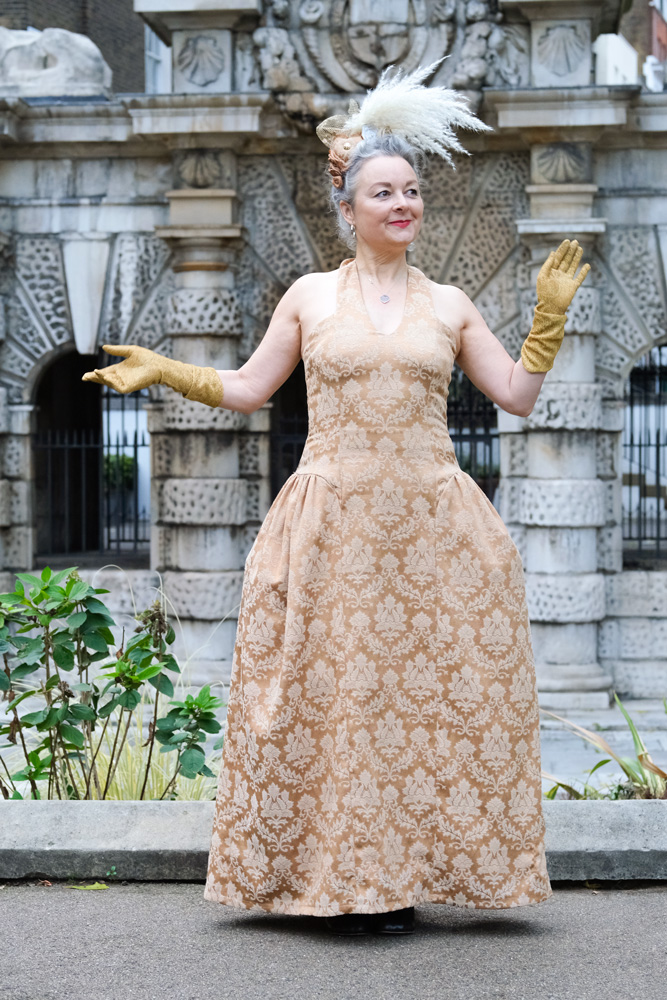
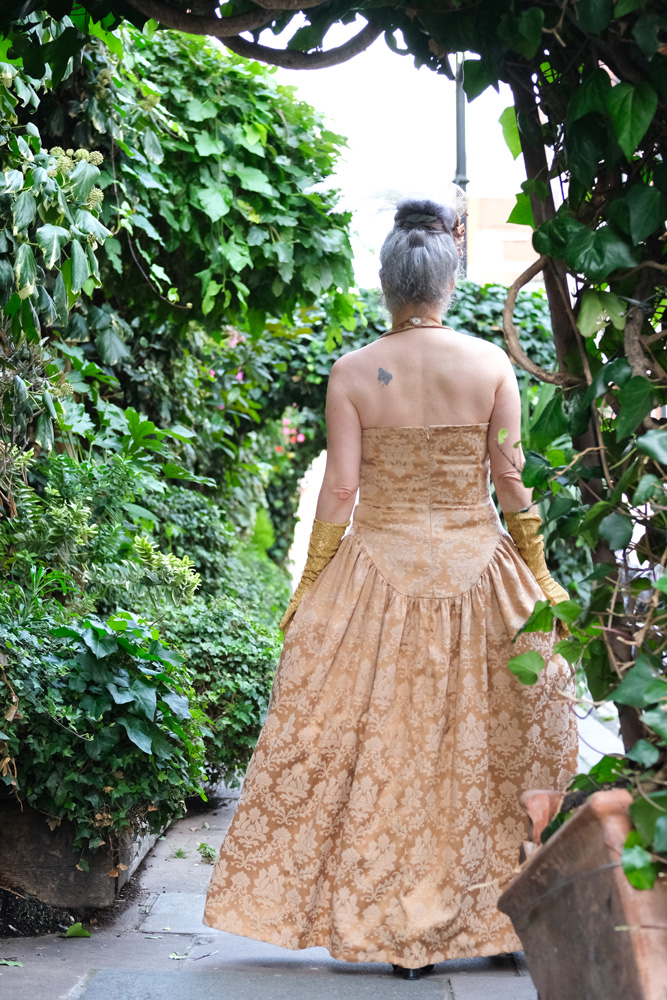
Gold damask ballgown front of York Watergate
One thing I was sure of was that mine was going to be self-drafted. I decided earlier this year that if I’m ever to get really good at designing and pattern-drafting, I would need to practise it a lot more – figures, right?! So that narrowed things down a bit (not)! Secondly, knowing the chances of me going to another ball quite so soon after, or even wanting to wear the same dress twice in any chase, were pretty slim, I wanted to make sure my fabric choice was a sustainable one.
Weirdly enough as I sketched out my design, I did imagine a damask curtaining of sorts. I just didn’t know I was literally going to strike gold in my local charity shop!
One pair of vintage gold damask curtains = £6 – Just enough fabric for a ball gown it transpires!
The design started out as a summer halter neck dress which I designed and made last year. I basically hacked the hip sections to create a silhouette similar to dresses of the 1700s. I can’t tell you why. I just did! Although if there was ever a wardrobe I could covet, it would most definitely belong to Marie Antoinette!
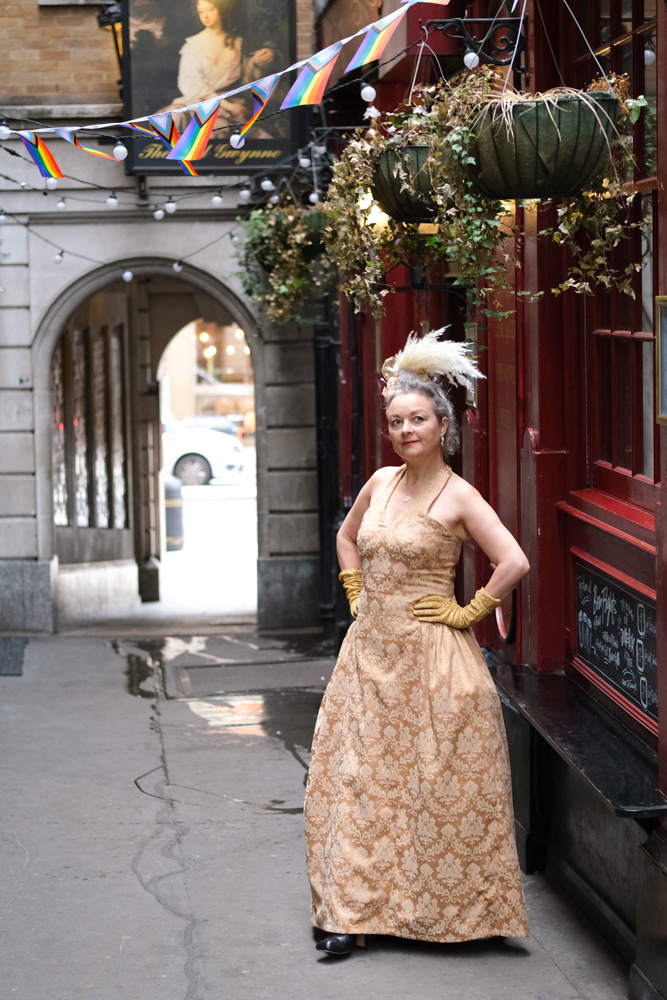
Gold damask ballgown outisde The Nell Gwynne Tavern
The styling of the dress was nailed quite soon and sewing it up was a relatively simple task, too but it was evident I needed some ‘scaffolding’ of sorts to make great shapes. There’s a lot of weight hinging on that halter neck and from past experience wearing my summer version, the back sags with its lack of support. So I created boning channels on the back and side seams to help it stay upright. I used plastic coated steel bones for no other reason other than I wanted to try something other than Rigilene. And I think I made totally the right choice. It felt very grown up to be cutting and filing them and sliding them in place. And I’m sure I’ll be finding more excuses to use them again soon.
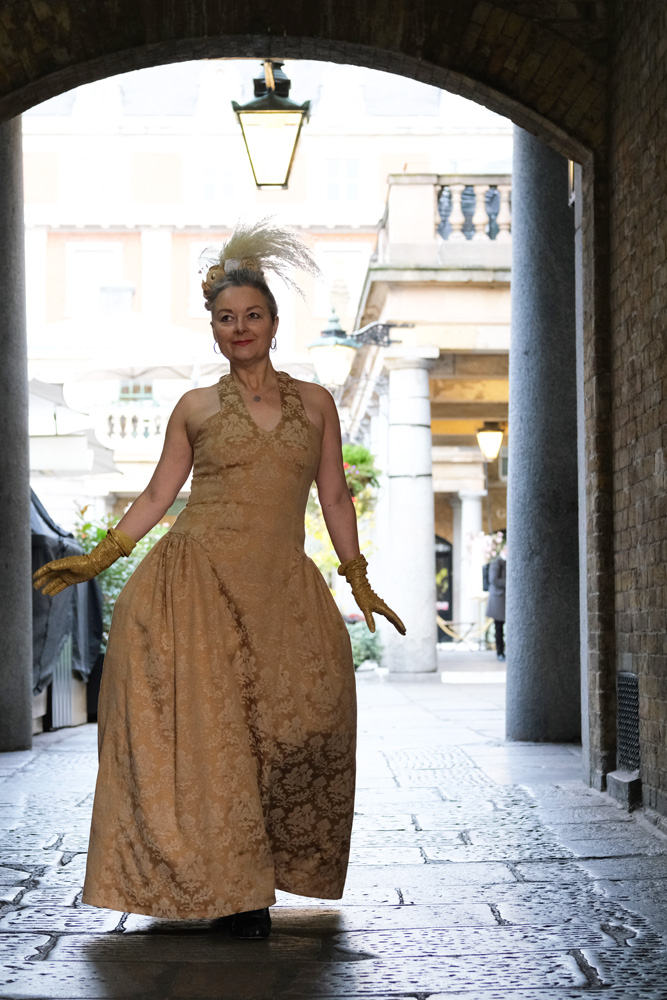
Gold damask ballgown in Covent Garden
And then of course I had to find a way to give some body to those hip sections!
I first tried to gather some doubled-over strips of double organza and sewed to the curved upper seam, in a similar way that I did with the puffed sleeves on my Alice in Wonderland dress. I didn’t get round to blogging that but here’s a link to my Insta reel which explains it a little. This method gave a little boost but ultimately, the weight of the curtain fabric just flattened it down.
The second experiment was very nearly the one I settled on, which was to use sections of crinoline. I found it in Classic Textiles in Goldhawk Road – I had no idea you could buy it by the metre. And I wasn’t entirely sure this was what it was for, but I tried to make gathered side panels again to sew along that top curved edge of the side sections. It was in need of boning too.
I mean it was ok but made the dress very difficult to fold without hard-creasing the crin. Plus, it was very scratchy and would need another layer of lining at least. I just knew I could do better. There had to be a way. And then the penny dropped that I just had to go trad with full on 18th century panniers!
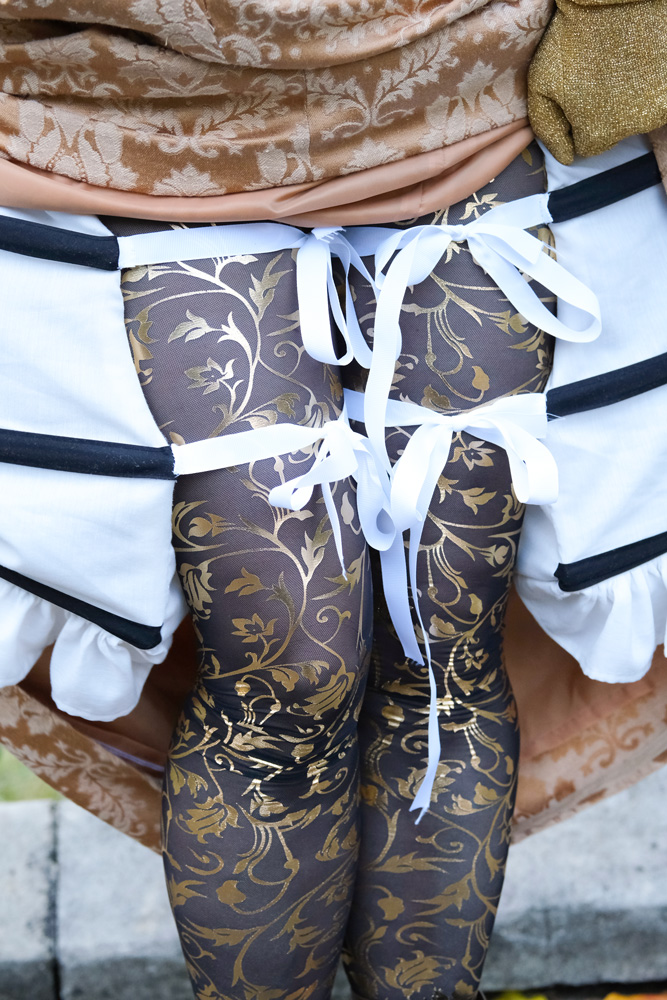
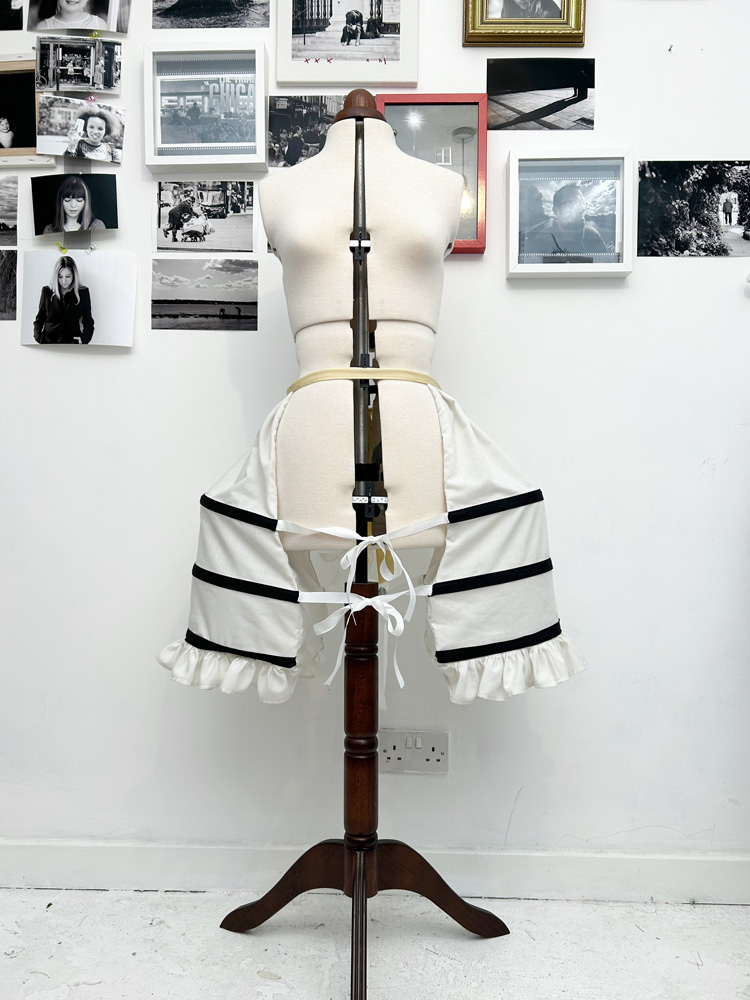
I Googled and YouTubed until I’d gleaned enough know-how to draft and sew a pair of pannier pockets from the leftover lining of the curtains. I already had some black bias binding, some white ribbon and some herringbone tape in stash so I thankfully didn’t have to fork out for any more materials. Not that I spent much on the curtains anyway!
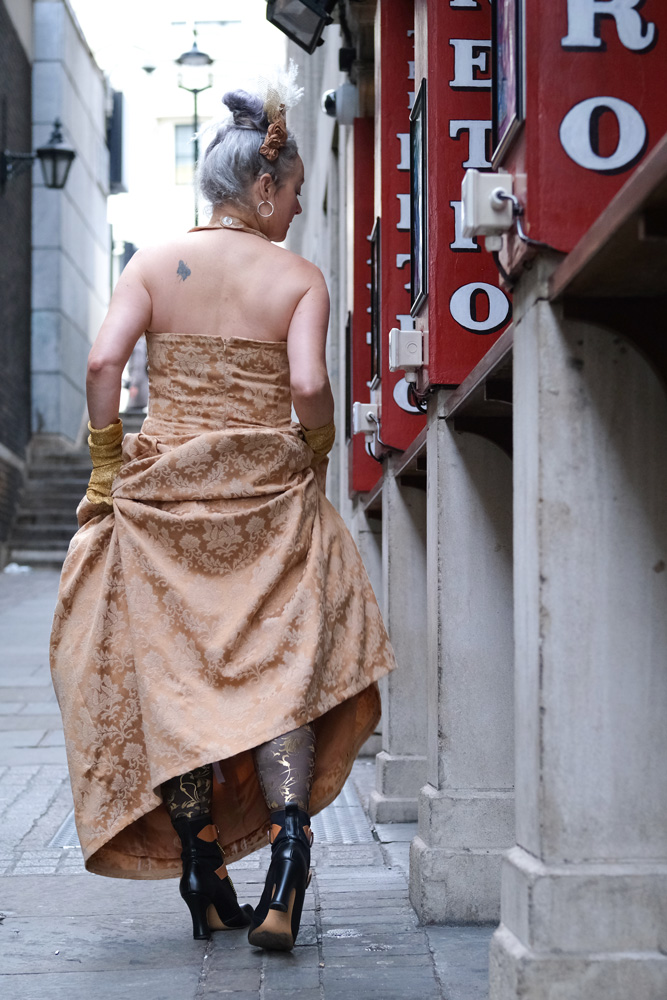
There are three horizontal boning channels formed by the black tape, the top one is slightly shorter to create a gradual slope up to the hip and the whole ‘device’ ties around my waist and around each leg. Well, to be fair, it was Dan who suggested I tie the ribbons round my legs because for the do itself, I tied the front ones in front and the back ones in the back and it worked fine but restricted movement a little, especially going up and down the stairs but toilet trips were infinitely easier with this method!
I did end up lining the skirt section. And Im glad I did because it created a little buffer between the understructure and the fabric, smoothing out some lines and also made it feel more special to swoosh about in. I attached the section seams of the lining to the main fabric with French tacks to keep it from twisting round. That was a fun thing to do in the hotel room earlier in the day!
Gold damask ballgown in Covent Garden
The panniers are collapsible by the way, and fold flat which made for easy transportation to the ball and the dress itself didn’t even need an iron when I took it out of the case
Gold damask ballgown outside the Sarastro
I’ve shown a few in situ photos on insta and I’m sure the official event shots will be ready soon but I so wanted `Dan to do a separate London Shoot and I’m so pleased I manage to grab him for a session before he went away for work again and we are so very lucky that London presents so many wonderful locations for us to choose from. It turned out to be quite the history lesson too!
Gold damask ballgown outside the Sarastro
The first location was in front of York Watergate, once the river entrance to the Duke of Buckingham’s London mansion, and now stranded some distance from the water in Victoria Embankment Gardens. The impressive watergate is just a short walk into the gardens from Embankment tube station and was built in 1626.
The second, outside the Nell Gwynne Tavern: Built on the site of the Old Bull Inn, It was named after the infamous mistress of Charles II. Nell, born and raised in the locality at St Martin in the Fields, sold fruit in the nearby Covent Garden market before gaining fame as an actress on the Drury Lane stage. Samuel Pepys describes seeing “the mighty pretty Nell” on his way to the Strand in 1667.
Next we went to Covent Garden which has been in existence since the early 1600s too!
Gold damask ballgown outside the Sarastro
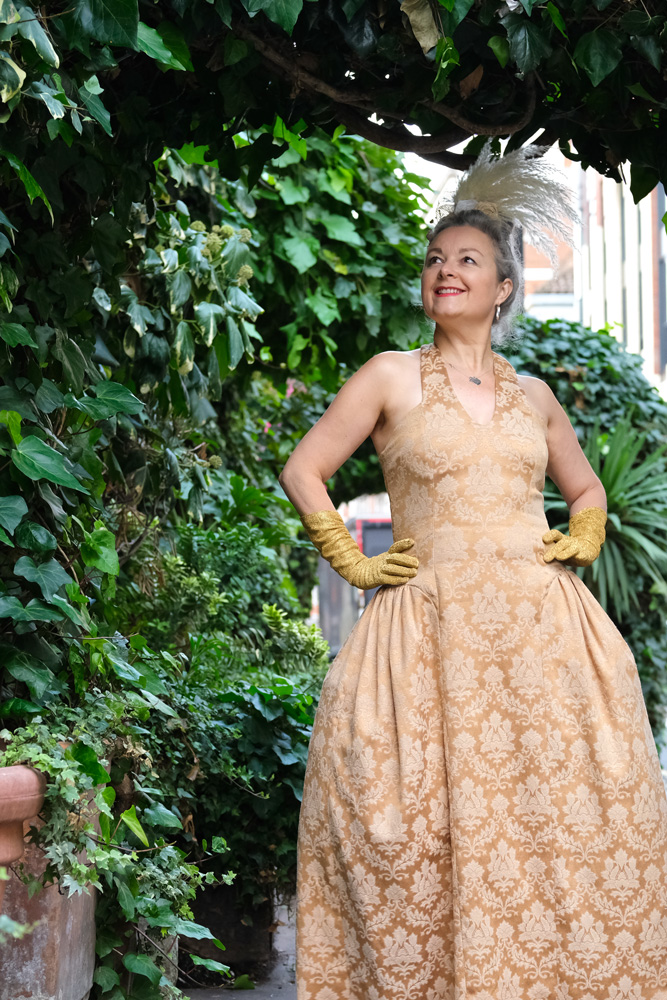
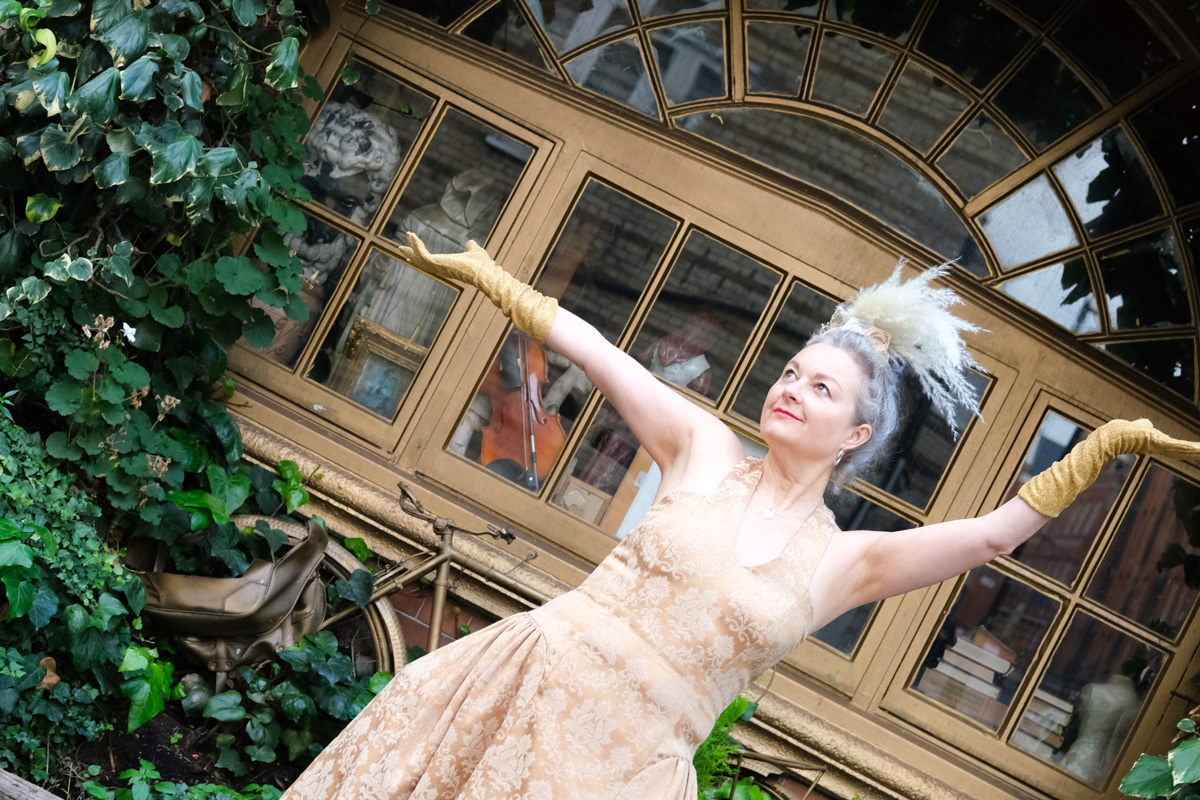
The leafy shots above were taken outside Sarastro restaurant in Drury Lane. I went there years ago and it was an amazing feast for the eyes! Outside presents curiosity shop styled windows, framed in gold. Inside is the stuff of theatre dreams!
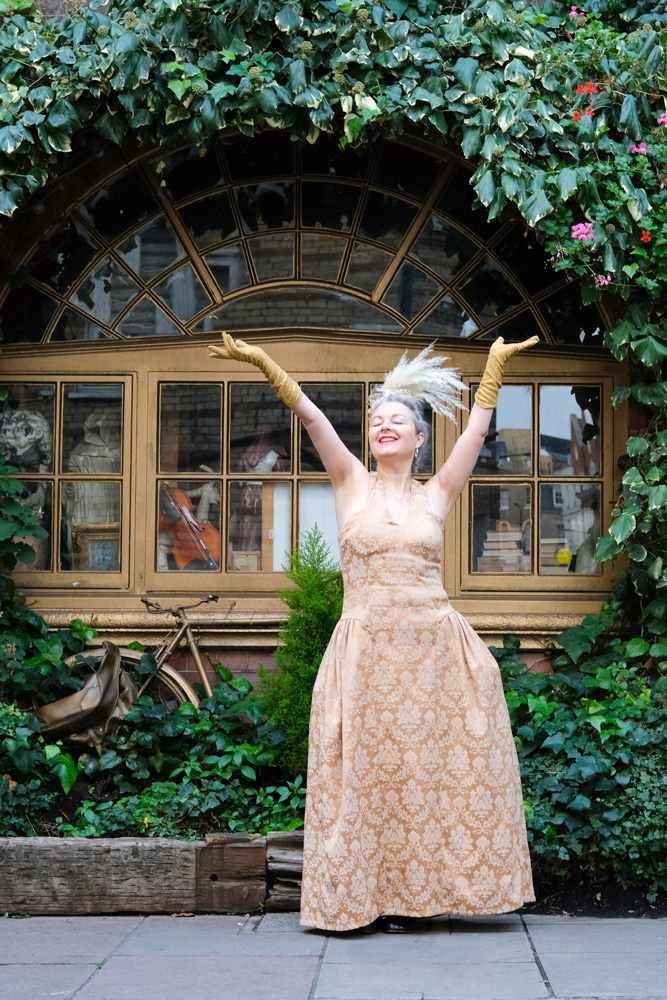
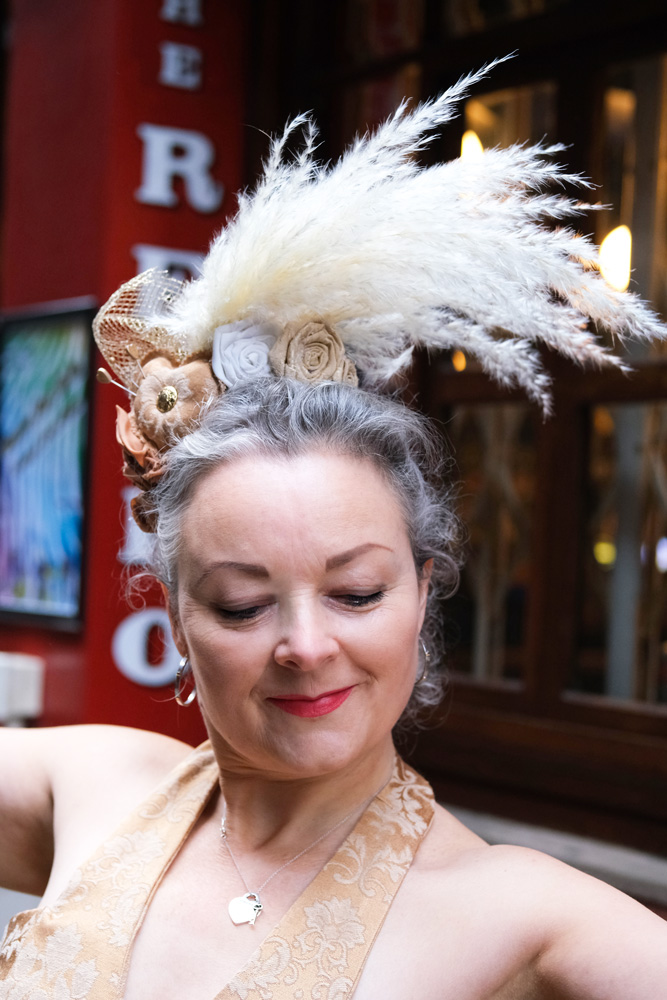
Before I sign off I must also mention my headpeice, hat, fascinator… I still don’t know the correct way to adddress it. But I made it. And I’m proud of it. And it was also formed from materials I already had to hand, ticking that sustainability box once more!
The plume is actually a piece of Pampass grass that I snaffled from the studio garden! The heart shaped pincushion is made from the leftover scraps of the dress, stuffed with overlocked offcuts and adorned with a gold lonesome vintage button from stash. I sprayed the pin heads gold, of course. The remaining flowers are made from scraps of the dress and lining fabric and the gold netting is also reclaimed.
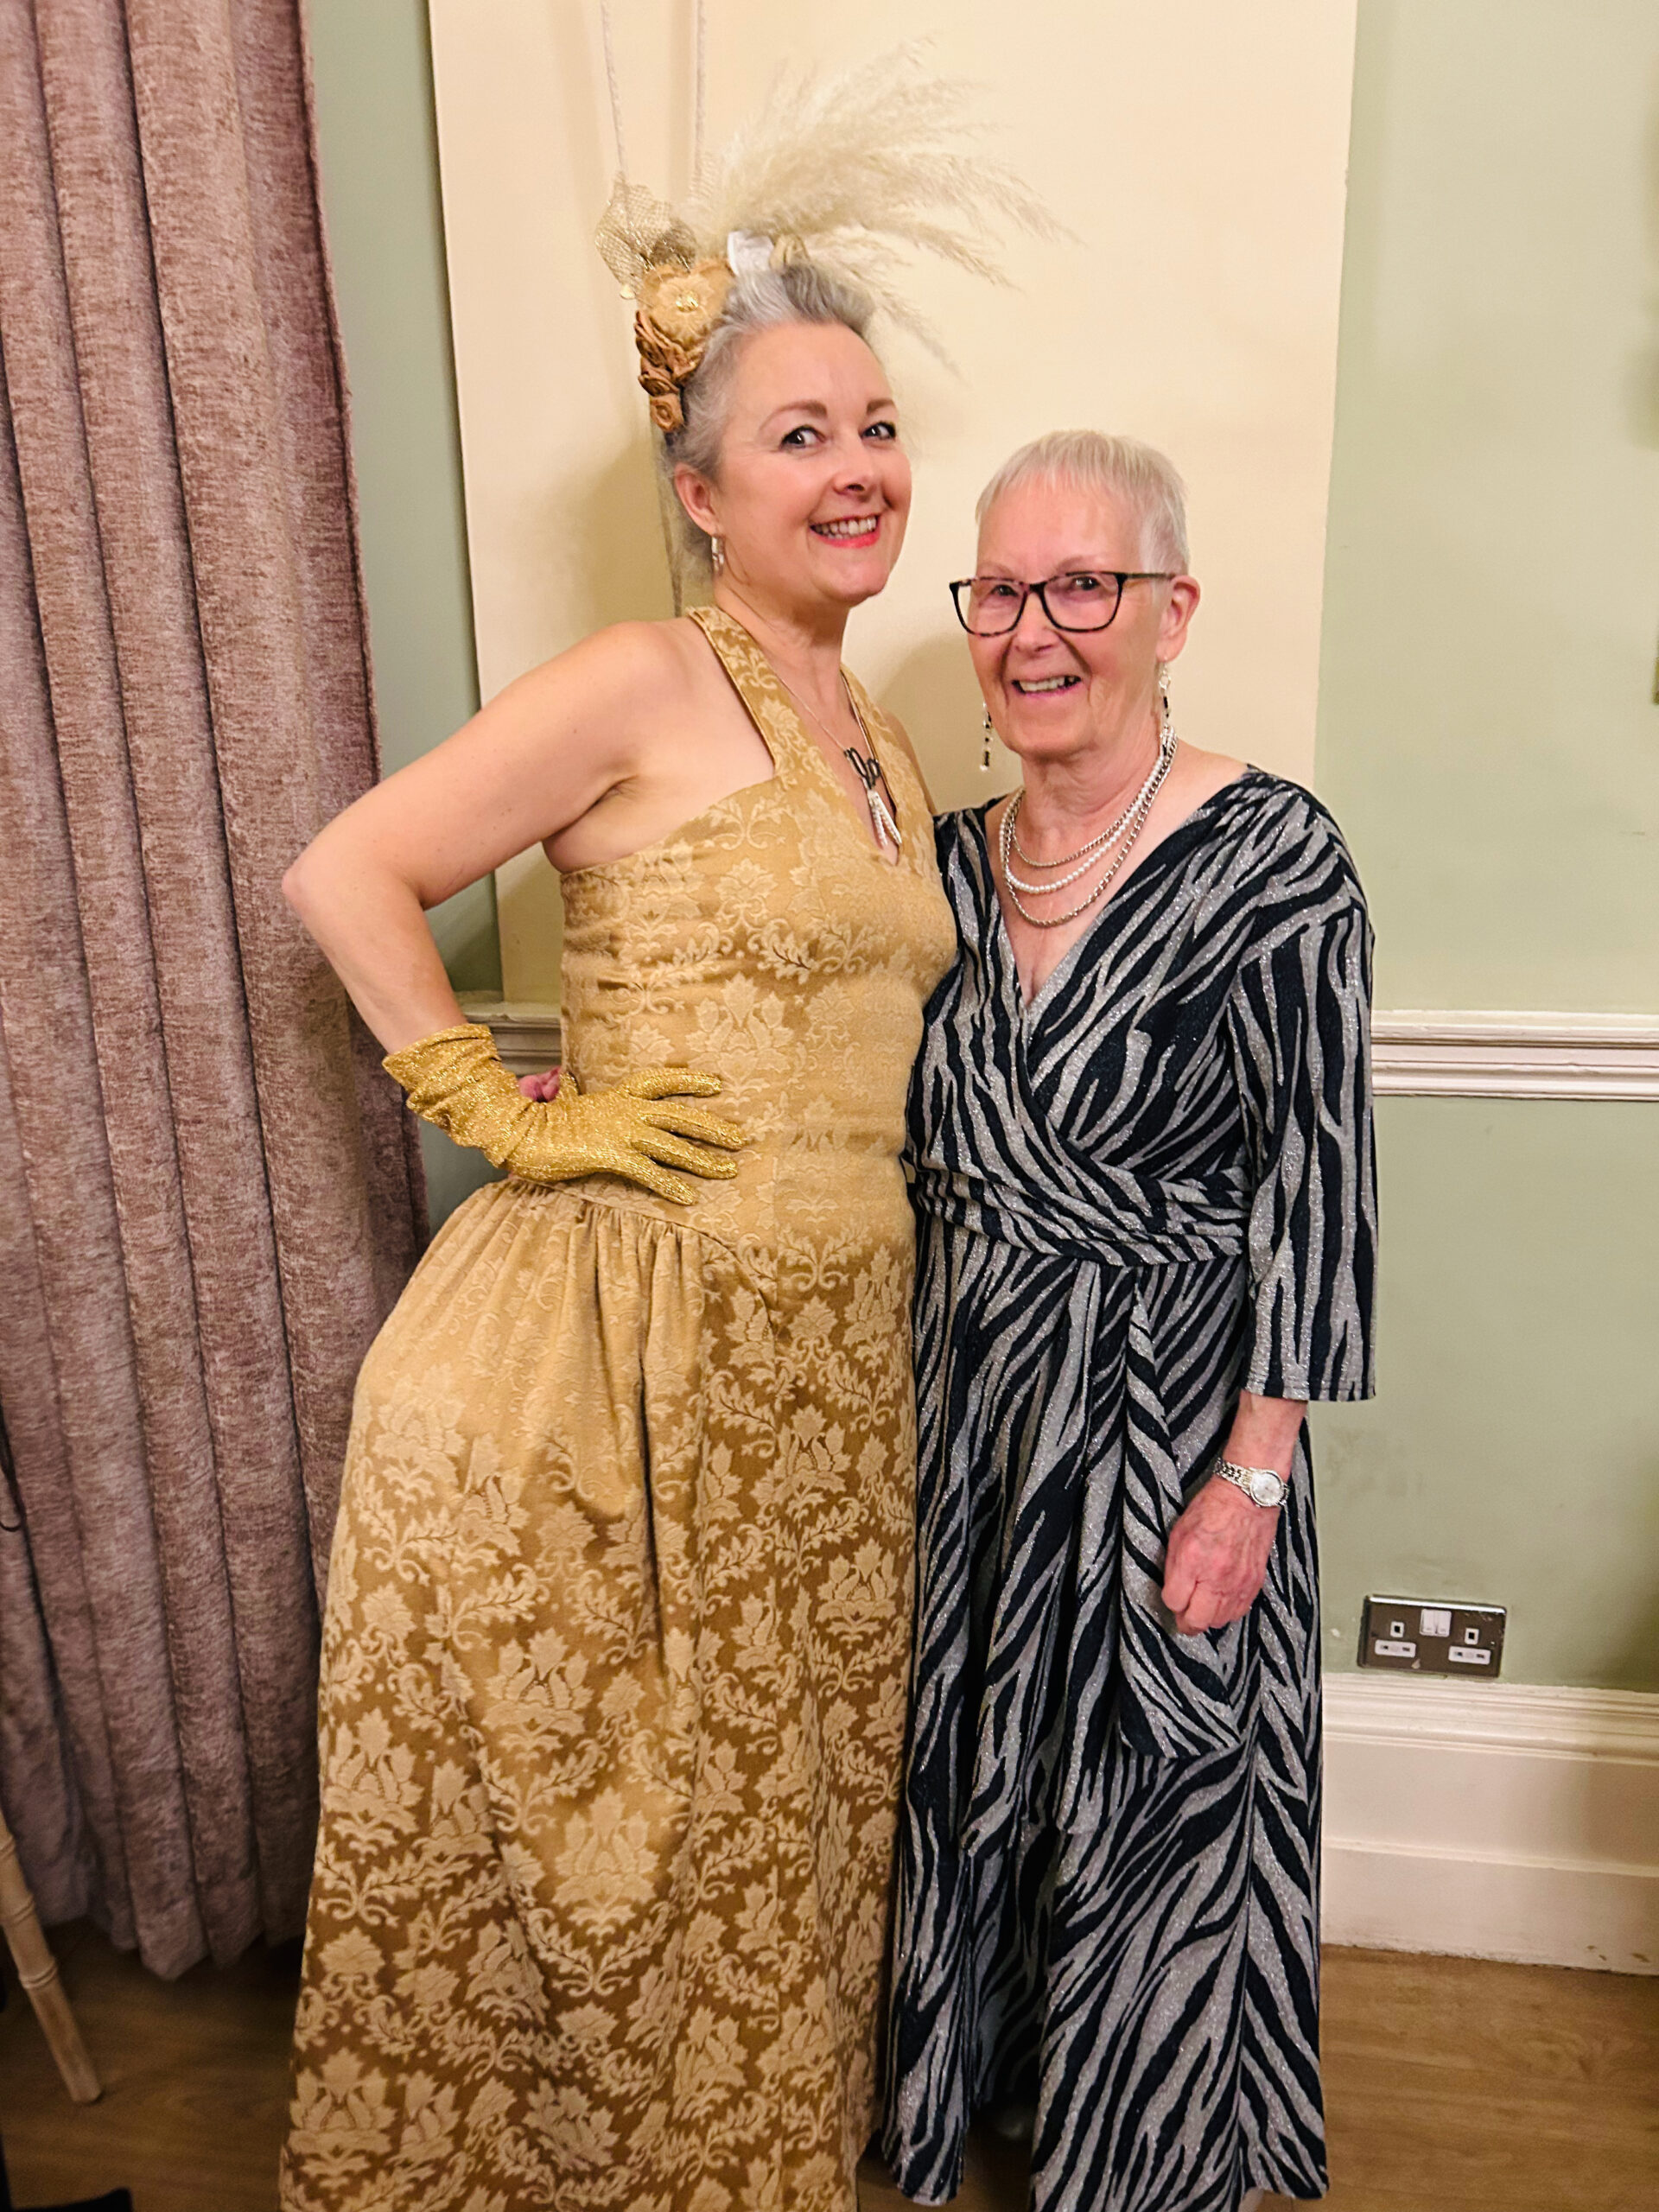
I must also include this photo of me and my mum, taken at the ball. She is the reason I sew. I’m so privileged to have inherited so many skills from her and I’m so proud that at 80 years young she is still sewing and finally took some time out of making for everyone else to make herself a gorgeous gown too.
And all that remains to be said is thank you. If indeed you reached the end of this marathon post. Or even if you didn’t, I totally appreciate your time and support. If you have any thoughts or questions please leave them in the comment box below and I will very happily get back to you. I can talk about this outfit till the cows come home. Just in case you didn’t gather that already!
I’ve wanted to make a classic dress suit for as long as I can remember. And I own very, many original vintage patterns that would have been perfect, believe me. But an overriding anticipated disappointment in the result always held me back.
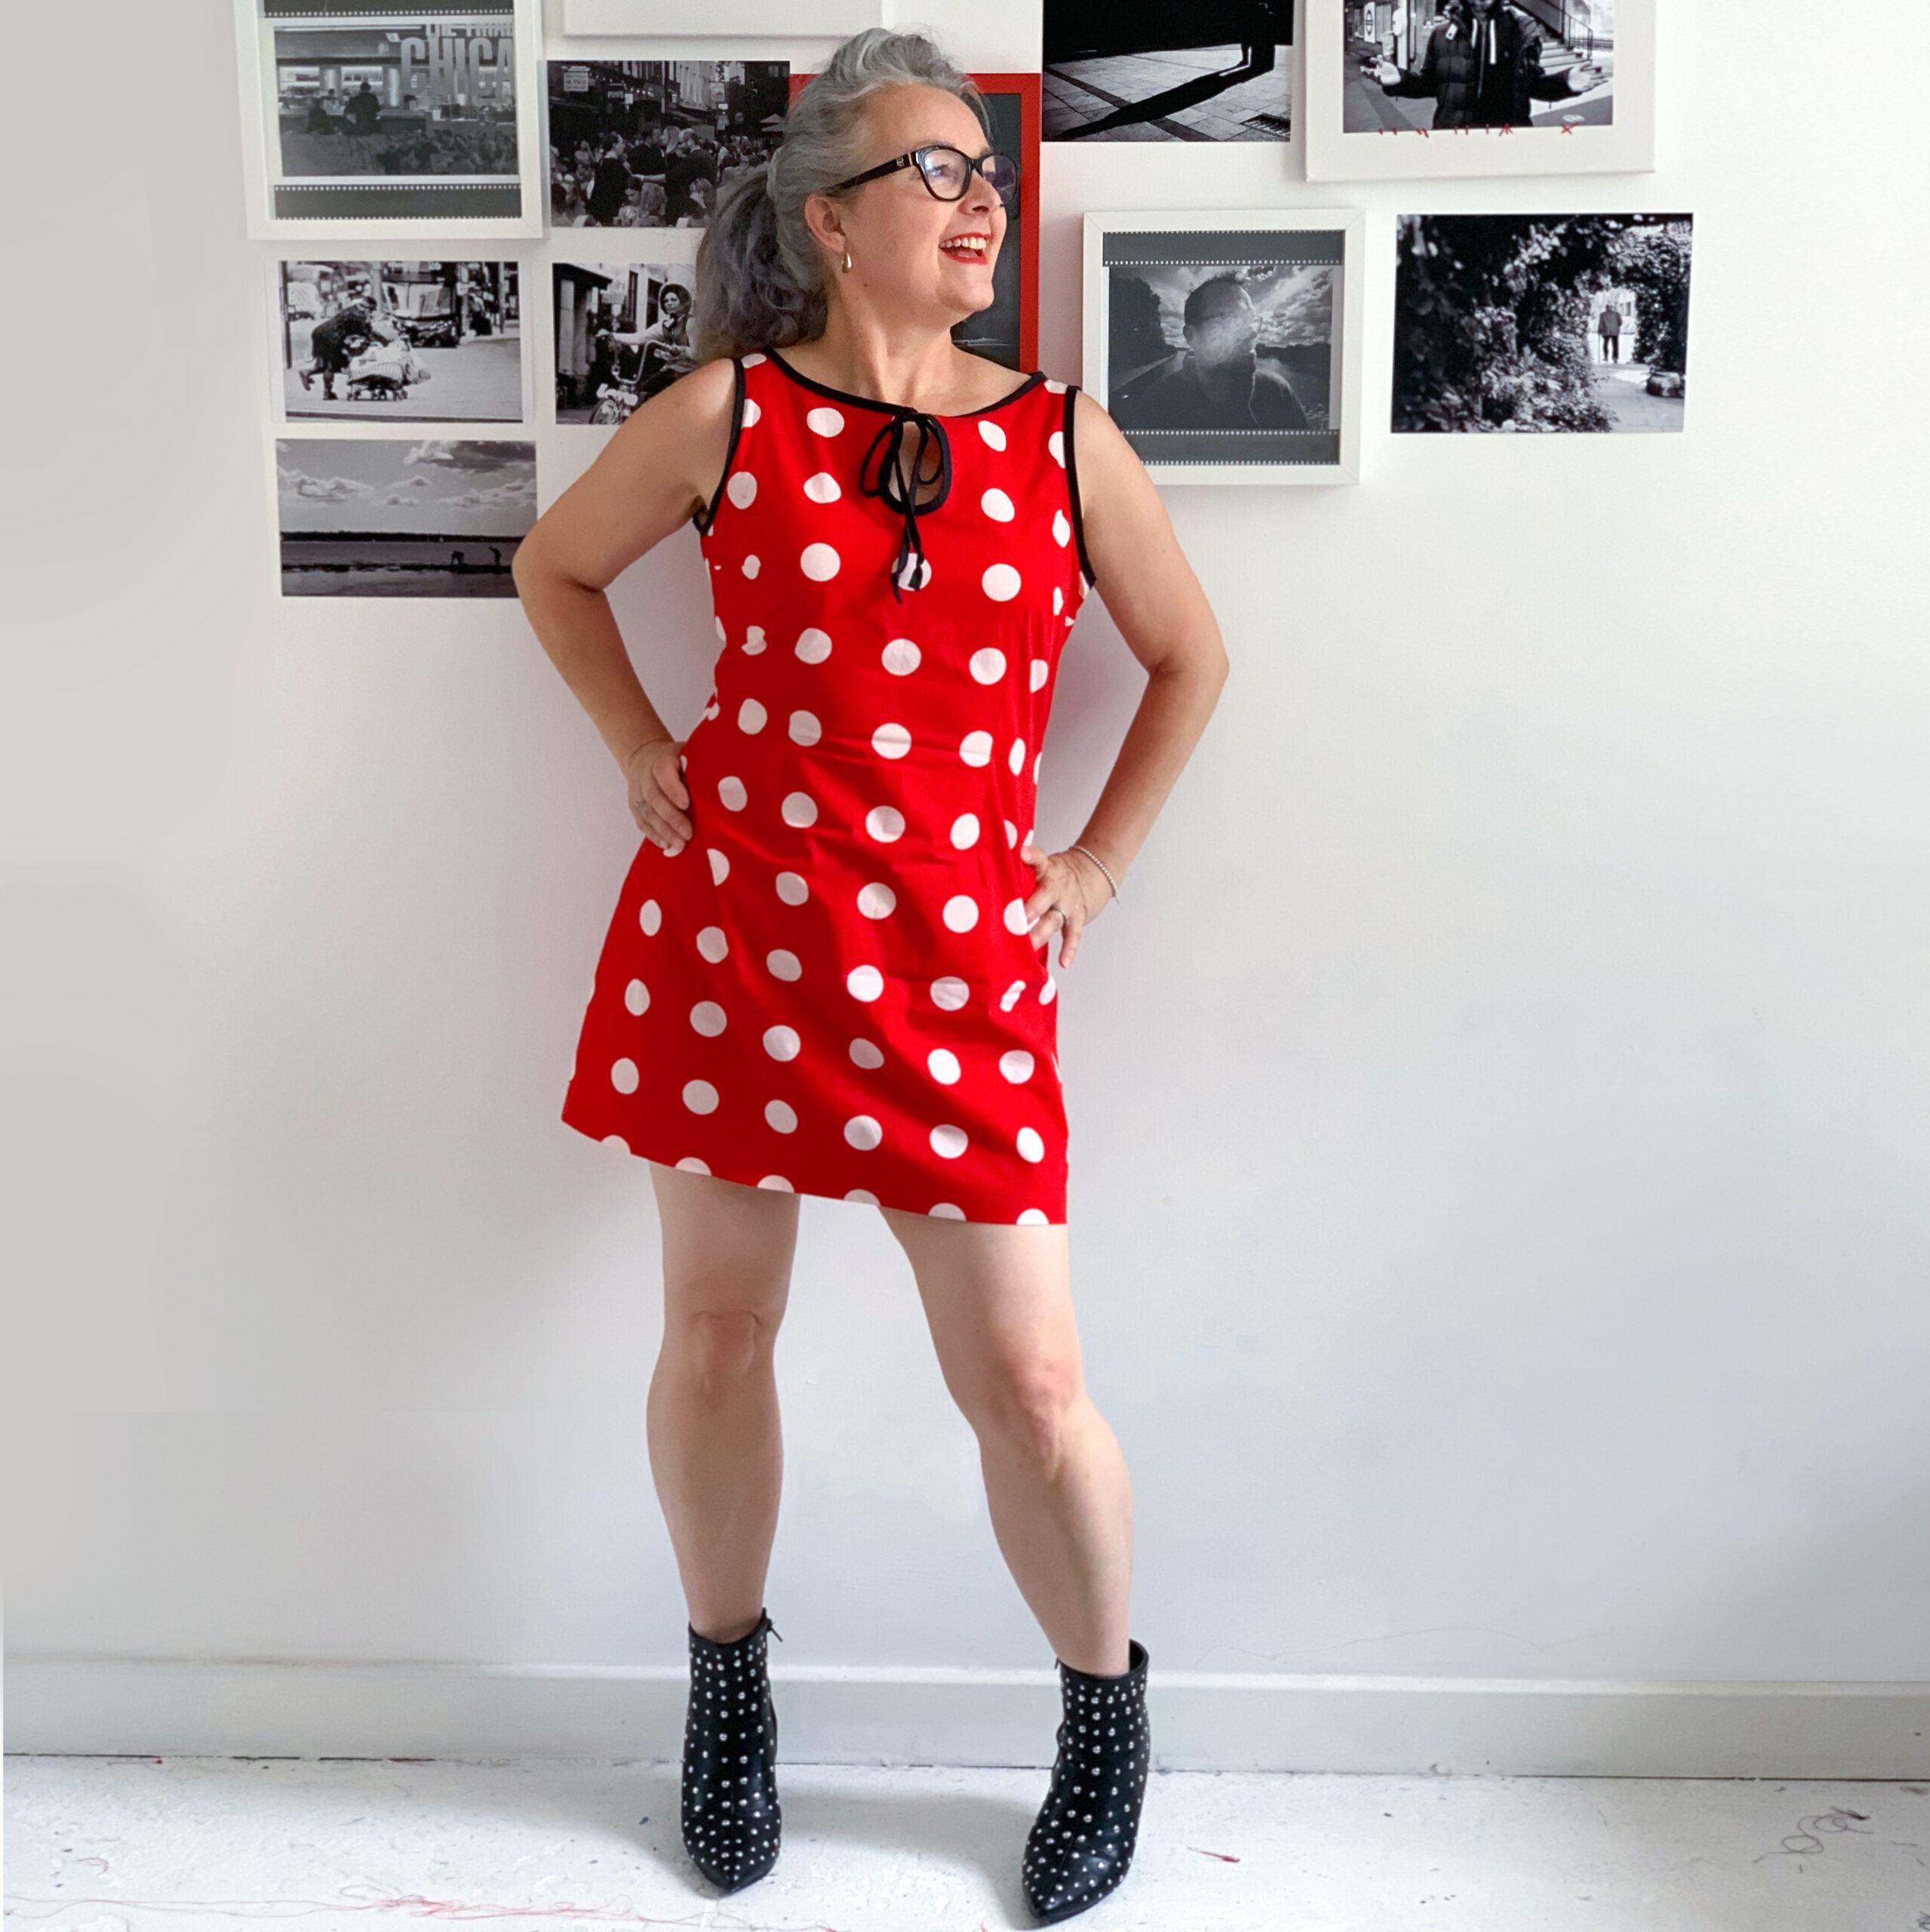
In fact its true to say I’ve altogether strayed away from vintage styles more recently, favouring an urge to be a bit more experimental instead. But I’ve never lost love for the classics. And when Lisa asked if I’d model for Sew Over It’s Vintage Dreaming collection I had to pinch myself. Every single garment of that Ebook is divine but the one look that took my breath away was Lisa in the pale blue polka dot Miriam set and Chantelle in the raspberry linen version. And I wanted it too!
There was something massively nostalgic about Sew Over It making a return to vintage. Because that’s where they were at when I discovered them, when indie pattern companies were brand new and it felt so refreshing to have exciting options outside of ‘the Big 4’ pattern companies, and is exactly the point at which I was keen on sewing all things 50s and 60s. The main benefits of modern vintage-style patterns are the more realistic and modern proportions of the body measurements and also the inclusion of multiple size options so you can grade very easily between 2 or more lines to get a perfect fit. Most of my 1950s patterns are generally an unprinted tissue template for a singular size only. And generally speaking don’t fit straight out of the packet!
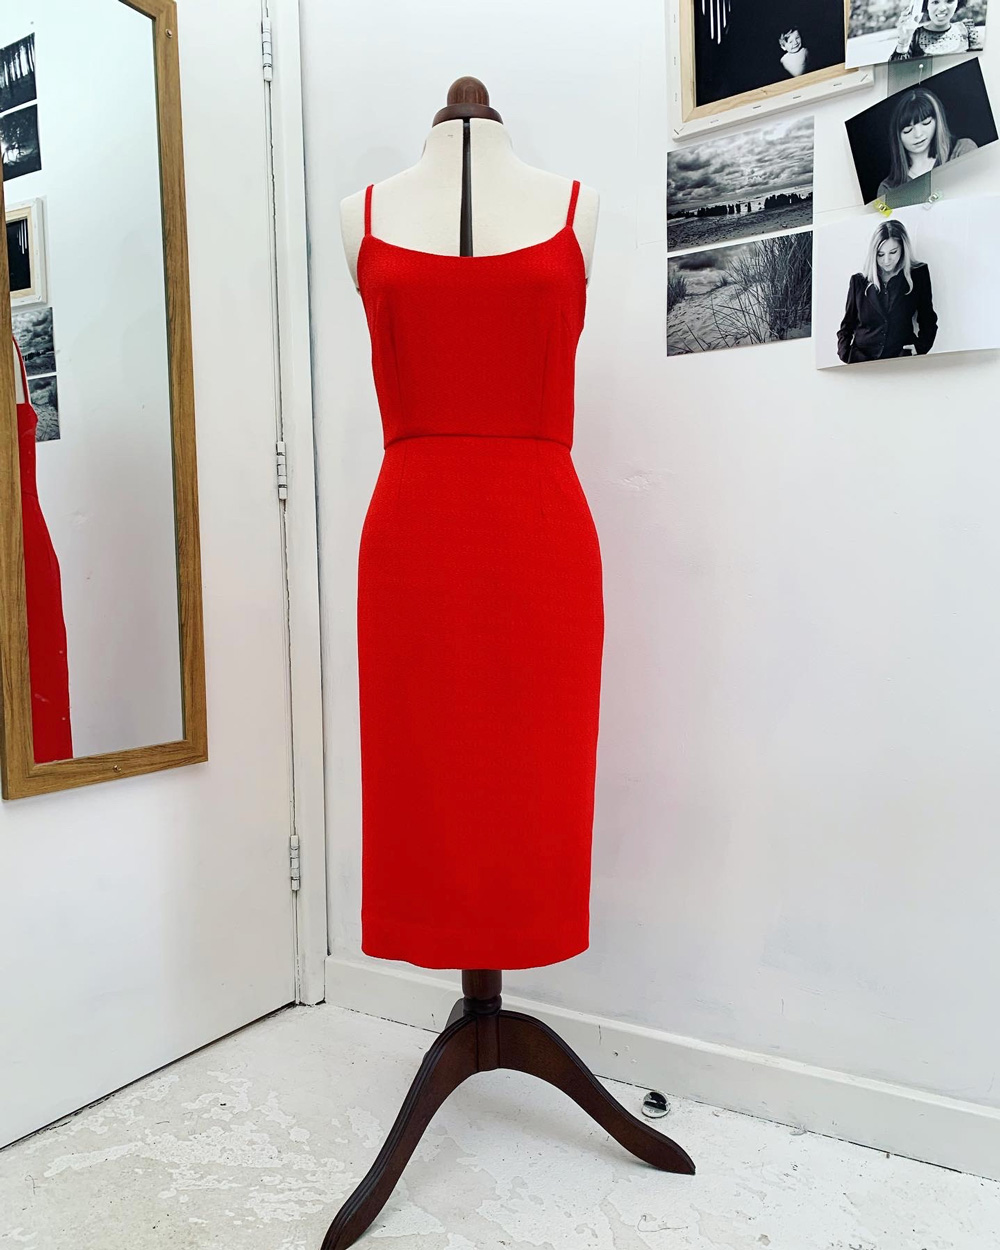
And so it was such a joy to cut a straight size 12 for the Miriam set with no fitting adjustments at all!
The dress came together so easily and relatively quickly. This is largely due to the simplicity of the design, but also the instructions are very clear and concise. The only step I skipped was for the adjustable straps. I just made sure the straps were exactly in the right place and the right length by pinning and trying on and adjusting … about 15 times before finally sewing in place!
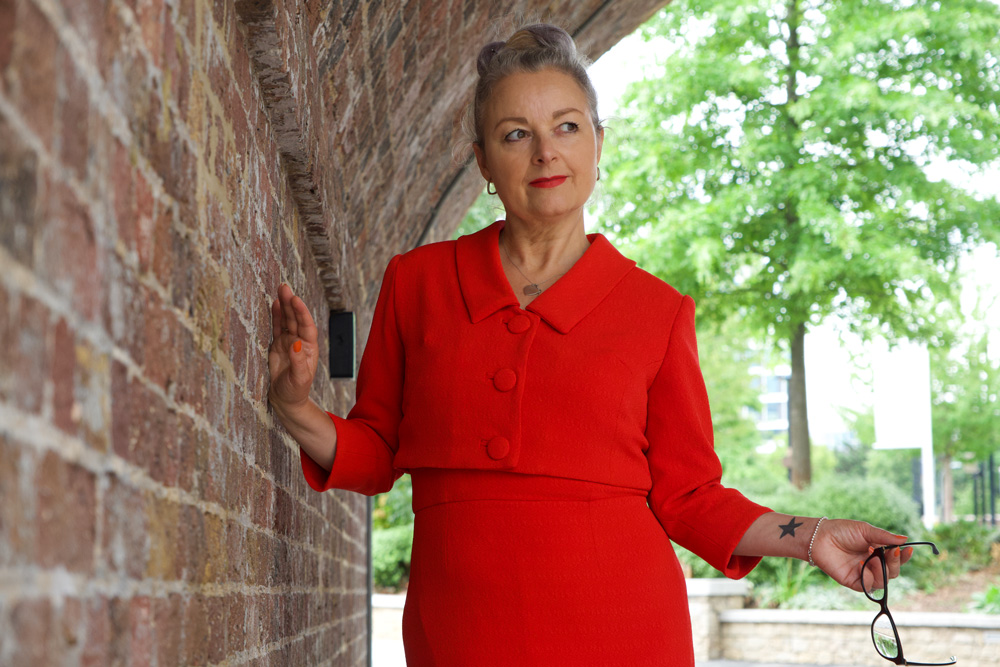
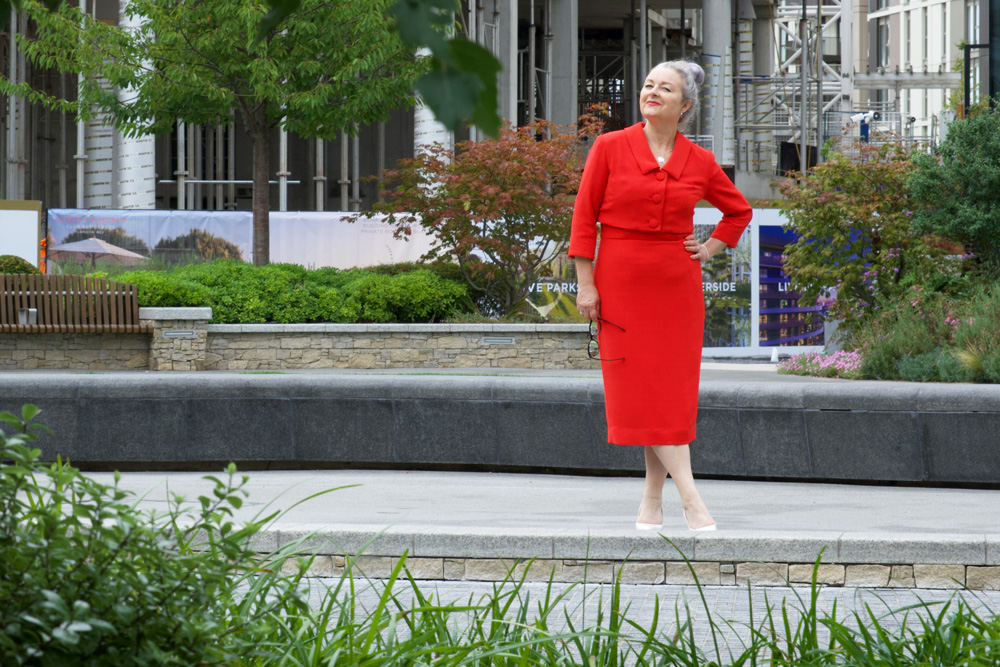
I used a medium weight, red textured crepe from New Crafthouse (always delighted to use deadstock) bought with a voucher I won back in April at the Spring Fling party. Also delighted that I’ve used it up relatively quickly and it’s not languished in stash! I’m trying so hard to create better habits recently regarding my fabric choices, sources and usage. More about that soon.
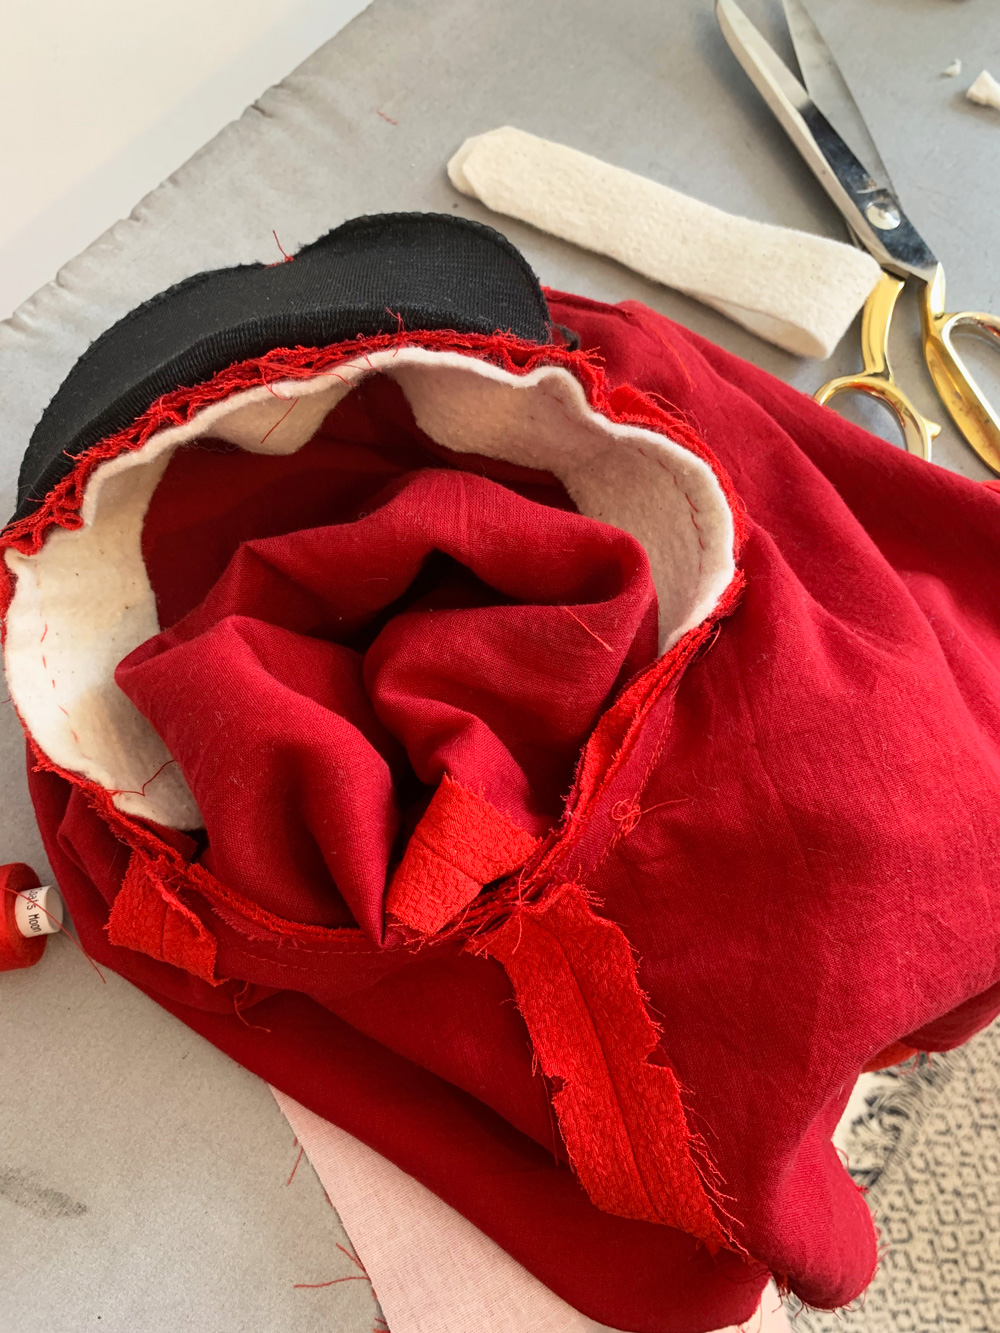
The jacket involved a bit more work. But that was mostly my fault! Although the fabric was great for the dress – it’s got great drape and is very huggy at the same time – I had a feeling it wasn’t going to have quite enough structure for a jacket so I needed to employ some extra techniques.
For starters, I underlined all the pieces with a red cotton voile – a great suggestion by SOI. I also padded the shoulders and added some strips of cotton fleece for the sleeve heads. I remembered to take a photo of the inner workings this time. Not quite so pretty though!
I had a horrible feeling that machine buttonholes were going to give me grief. I couldn’t bear to get to ‘almost finished’ stage only to ruin it all with raggedy buttonholes so I set about making old-school bound ones. And boy did I forget quite how faffy they are to do. I trialled some before I did the real ones. Worth it in the long run but I think I near fainted by holding my breath through the entire process.
Its worth noting the importance of having those welt sections on grain. They will fold better and press straighter and give a much better finish.
And once I’d finished the button holes it made total sense to make covered buttons too. Luckily I had inherited a bag of the button bases and the rubber pressing tool a while back. The size was a little larger than suggested but it worked just fine.
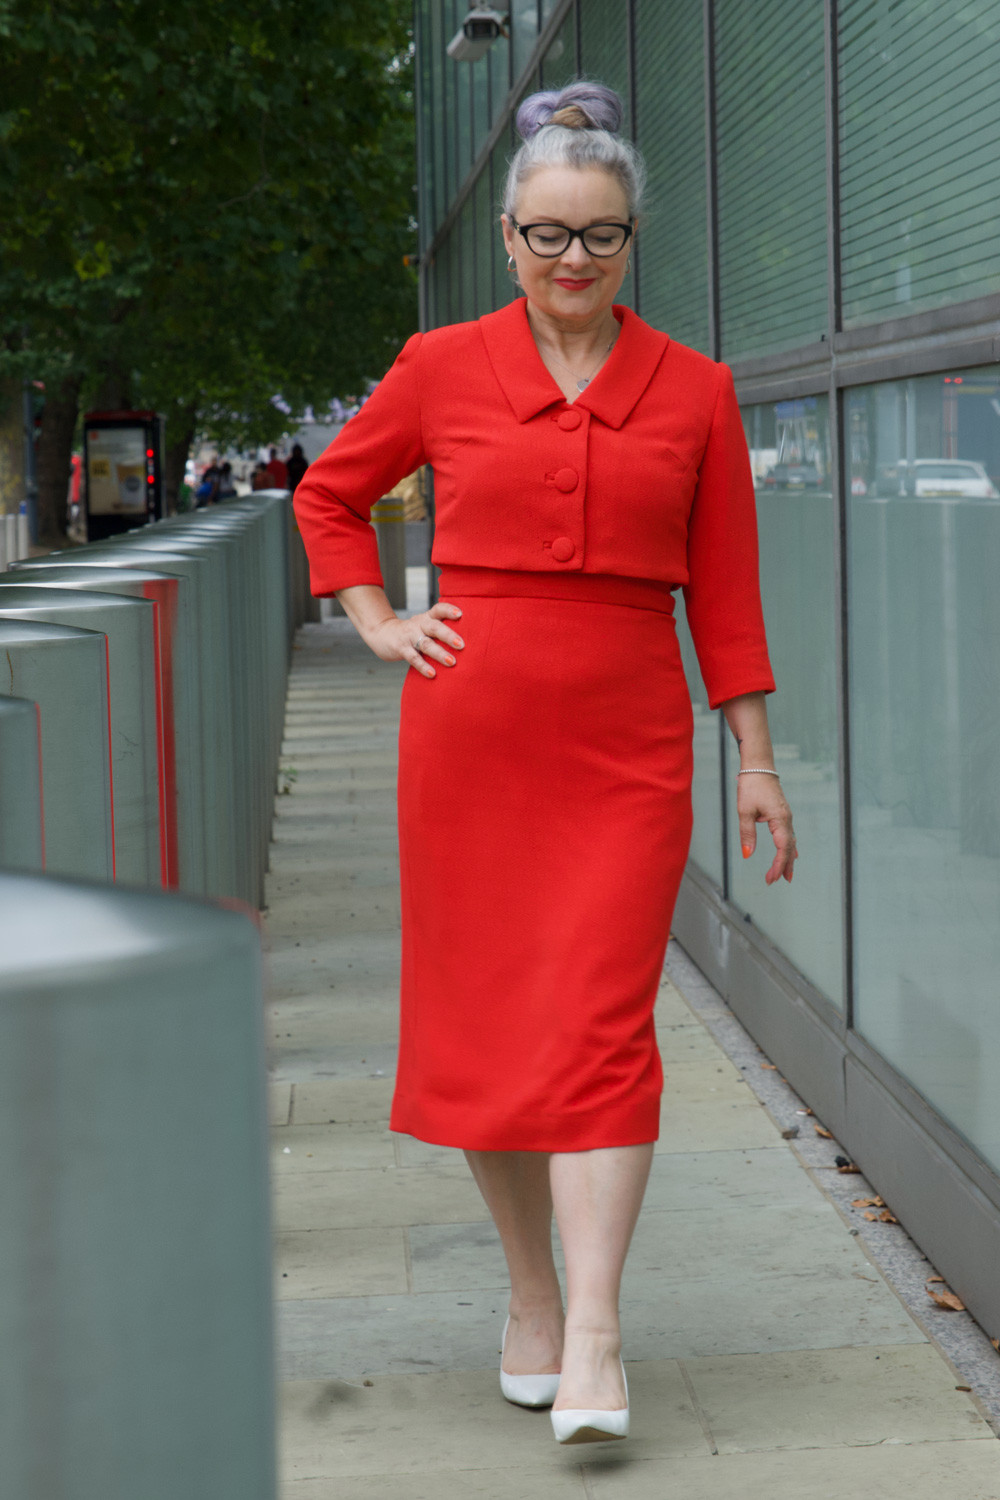
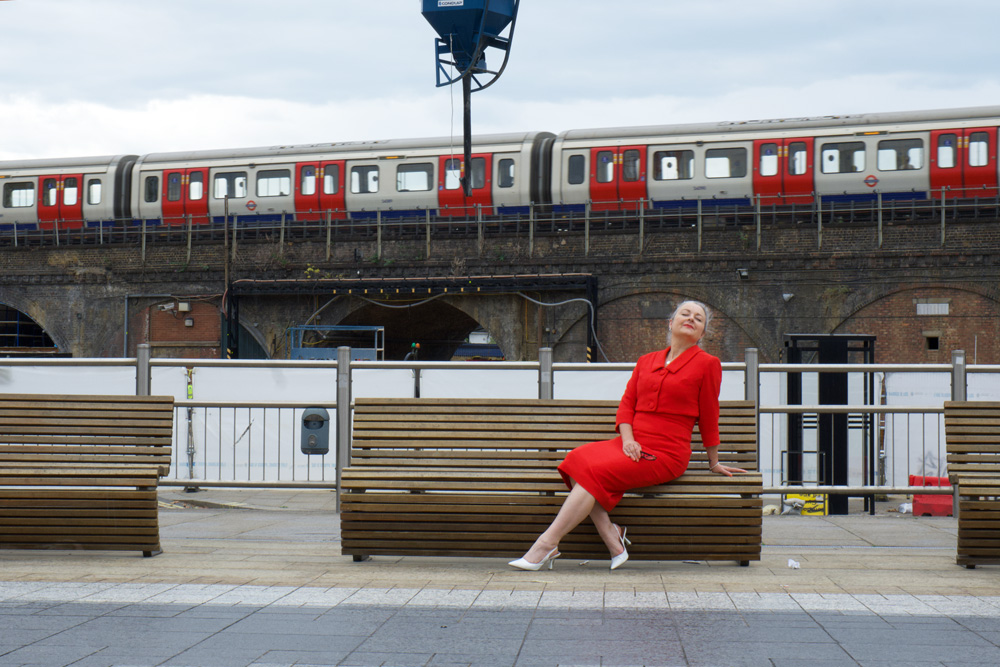
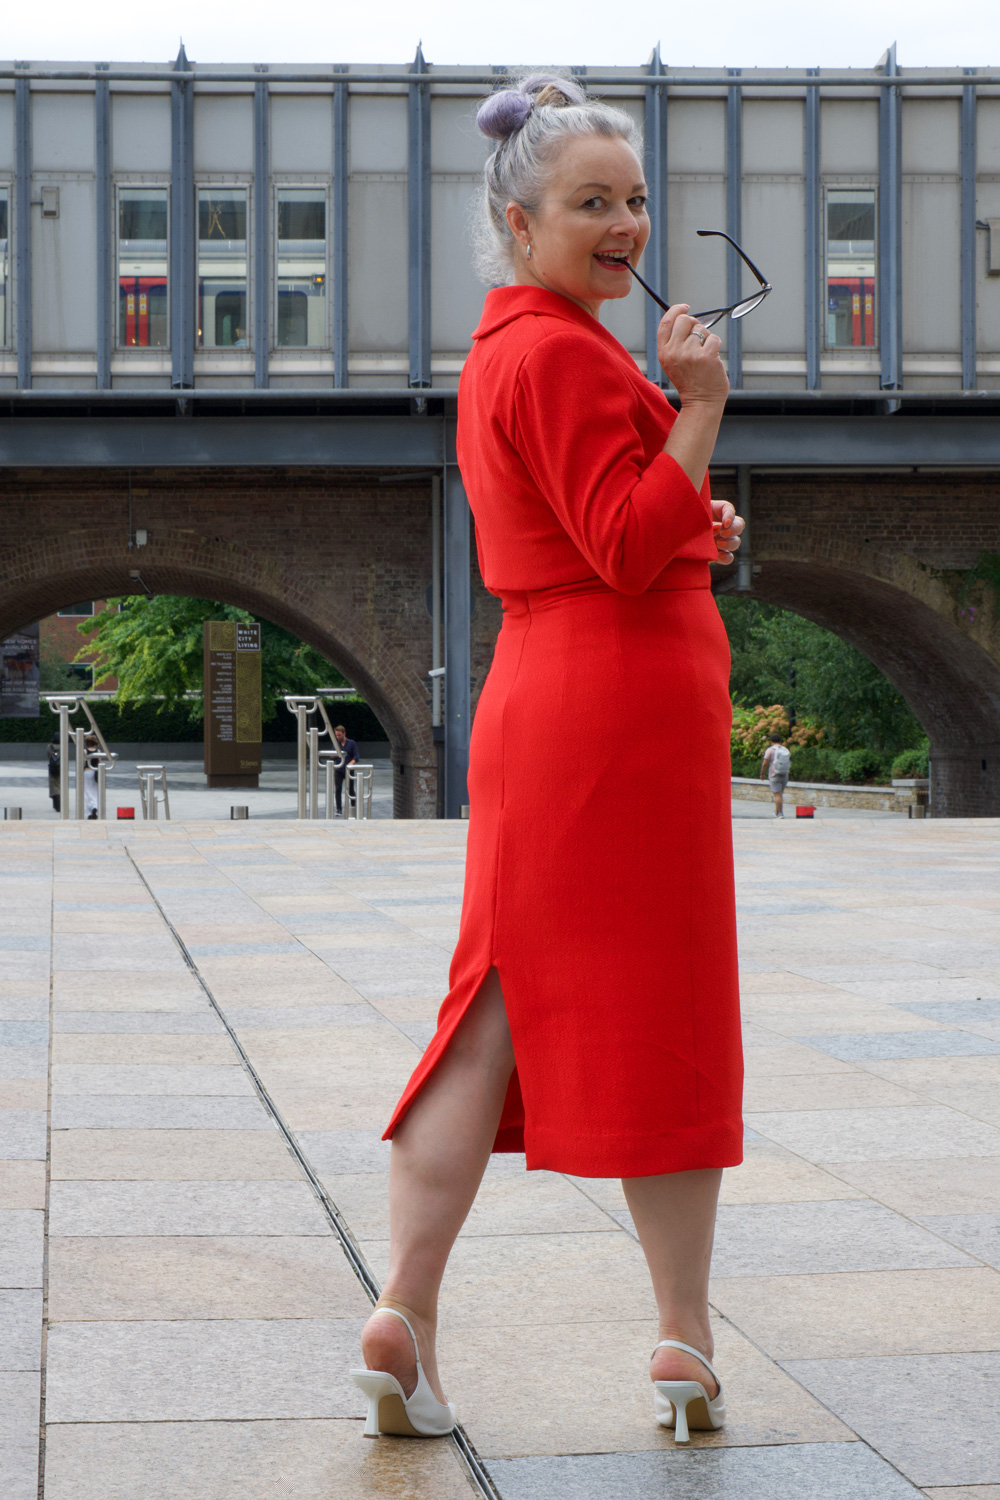
I completed the outfit in the nick of time to wear to my niece’s wedding and was so preoccupied I didn’t get any full length photos so all the thanks to Dan who took the time out to shoot these for me in and around where we work.
I just love how this suit makes me feel: mostly so grown up and properly dressed! It makes me walk tall and fills me with confidence. I got so many lovely comments from passing people, and that added to the feel good factor too! This is already a wardrobe bestie. And most probably will be for years to come.
But why, Janene, why? Well since you asked, I’d grab a cuppa and pull up a comfy cushion if I were you, because there’s no short answer.
I’ve had the inclination to ‘mess things up’ for a while now. Not exclusively for moments of therapy when prompted by frustration, but because I’ve felt a bit caged. As if I’ve been blinkered and strapped down. Like I’ve had my wings clipped. I know this sounds a bit over dramatic. Especially since I lead a very nice life am surrounded by gorgeous friends and family and have a very desirable job. But I guess everything I do is, on the whole, well-behaved, expected, accurate and rule abiding. My work as a graphic designer permits a modicum of out-of-the-box thinking but largely there are rules, whatever industry I’m creating for. And the same goes for my ‘until now’ sewing: Cutting is precise, seams are consistent, fit is important and placement of design is key, etc etc.
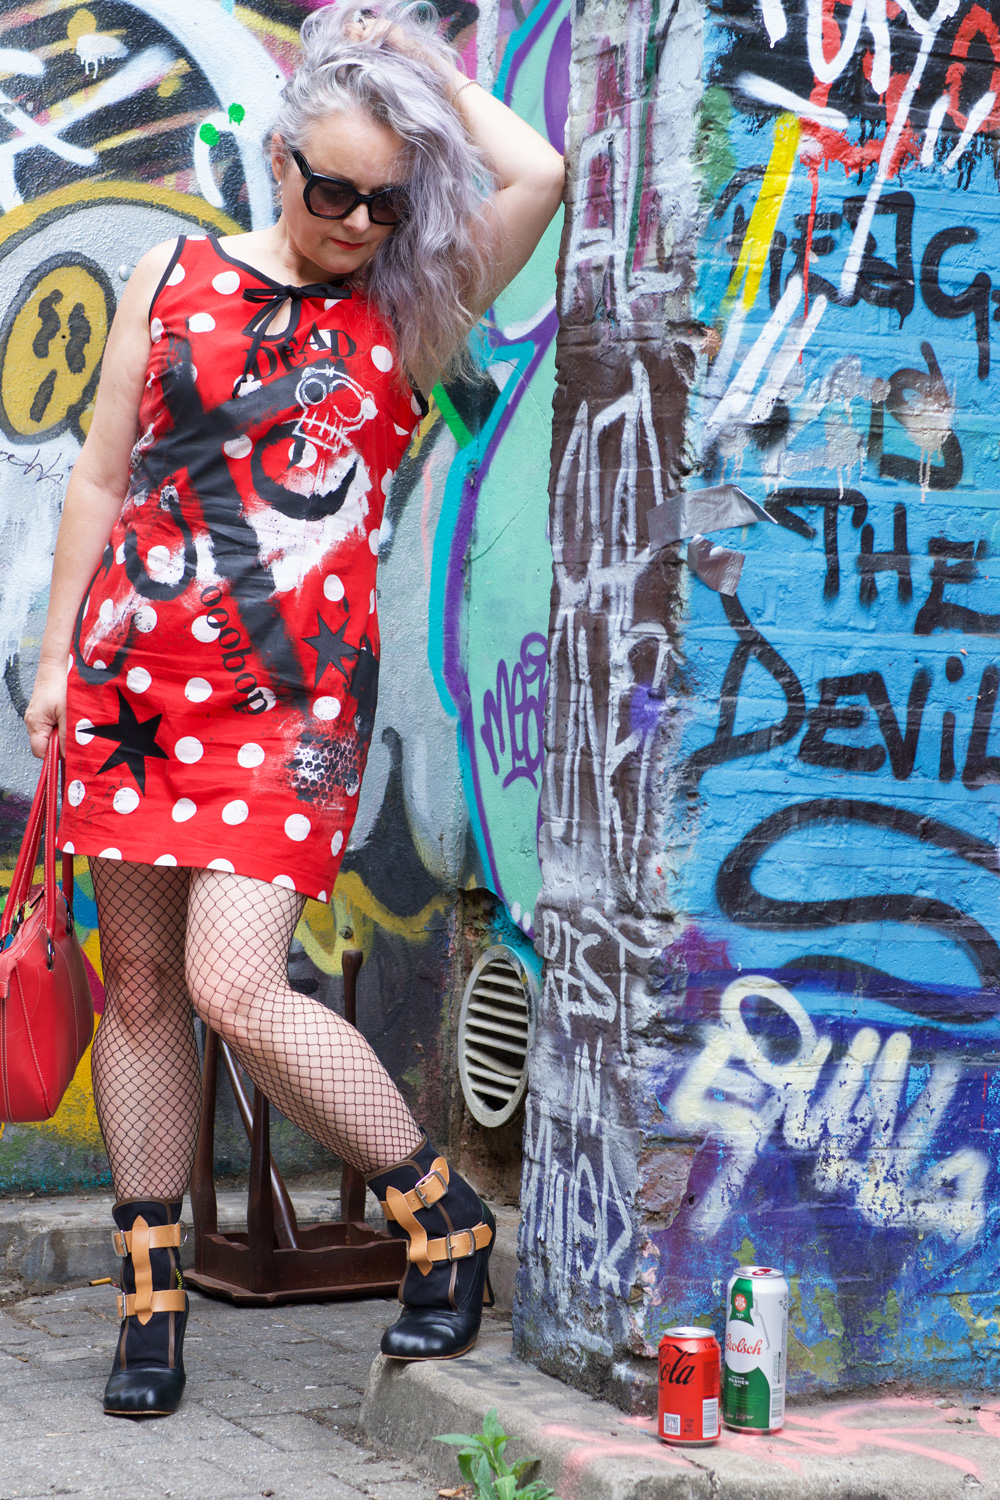
I documented my failed consideration of the neckline-keyhole placement on Instagram, how it bugged the hell out of me that it wasn’t properly centred between spots. Most people agreed. Some shrugged it off and said it didn’t bother them. I was quite jealous of those people because caring so much about the finer detail is IMHO partly responsible for my lack of adventure! I’m not sure I can ever change that up though. I’ll just have to add the wilder stuff on top… or on the bottom!
In March this year, my wish to have a studio finally came true and I moved in with more than 60 other artists. My requirements were very basic – I had dreamed of having a cutting table as its quite tricky to get back up of the floor after a long cutting session nowadays – And faster wifi so that my graphic files would deliver as soon as I sent them. Little things, generally speaking, but actually, massive things to me, that would make a real difference to my productivity.
Within days of settling in, I relished the added advantage of being able to leave a project out on the table overnight so that you can just come in and crack straight on with it the following morning, how awesome it was having a whole space to myself (apart from when Dan comes in) but yet there is often a friendly knock at the door, an invitation to lunch at the lovely cafe and advice and inspiration on tap.
I’ll admit to having big old imposter syndrome at first. Like ‘how can I possibly match up to the artistry that is resident here?’ I’m a graphic designer not a fine artist and I’m a dressmaker not a fashion designer. But therein lay the problem! I had labelled myself with titles of position, boxed myself in by definition and process. I design books and I make dresses for sure but that’s not all that I am or the end of the story by any stretch of the words, I can now feel all the other possibilities rising to the surface. Its sooo hard not to be inspired here! Next door to me is a wonderful poet, artist and mentor, the other side a painter and an interior designer, an amazing costumier upstairs with photographers, textile artists, musicians, set designers and an entomologist to boot!
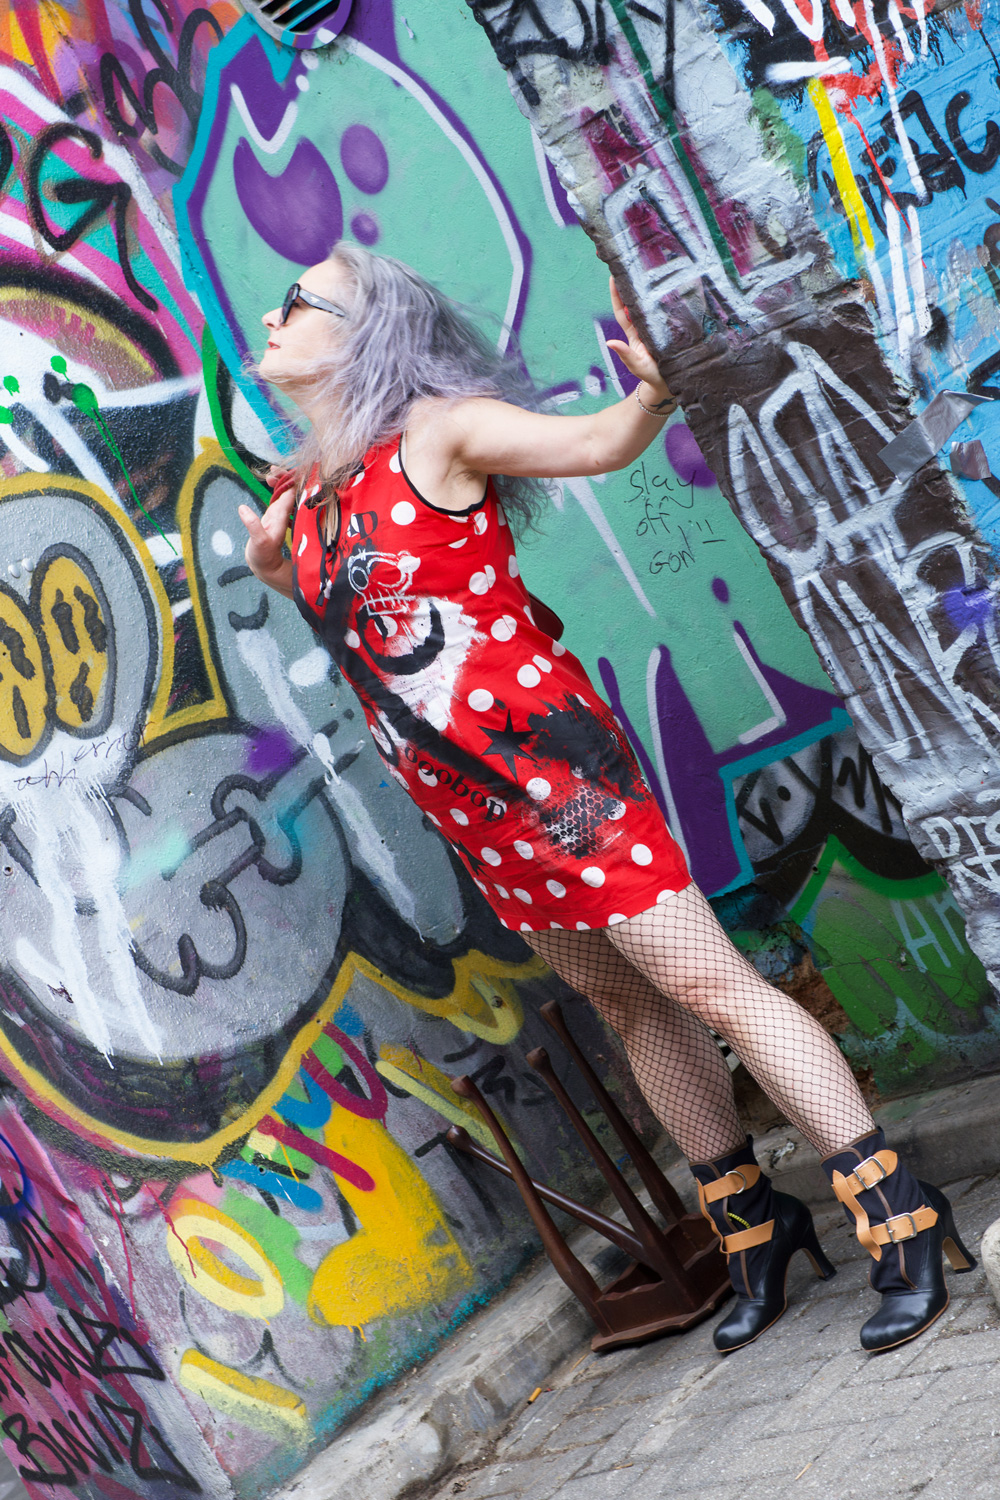
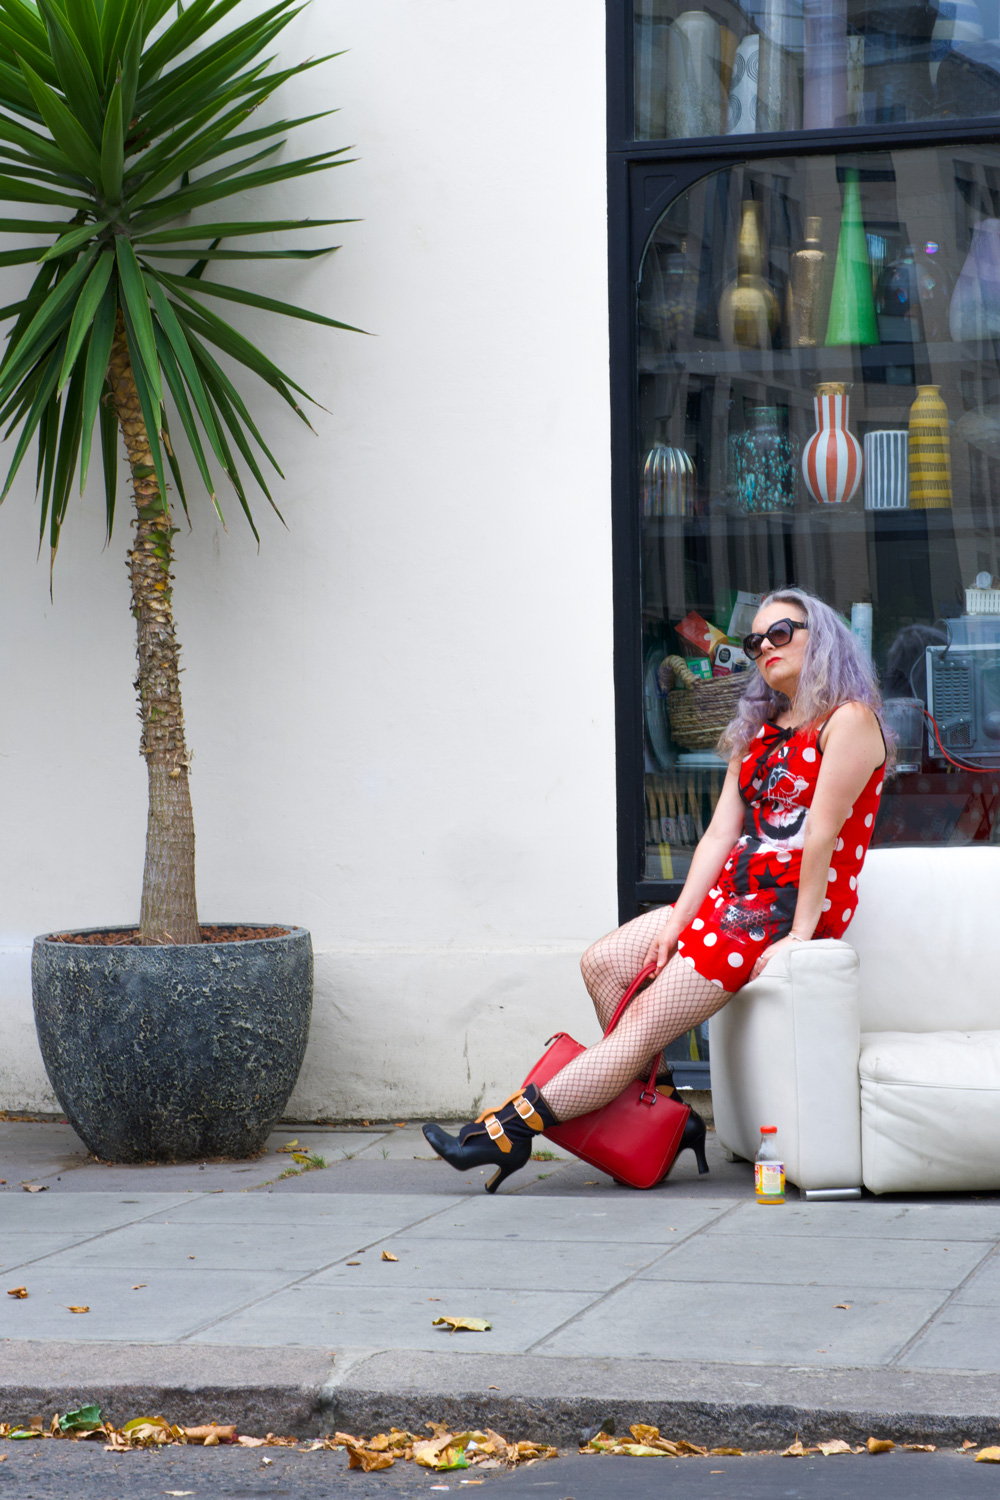
The initial stage of the dress came about as I wandered around a charity shop in Shoreham. I found the red polka dot fabric there. Vintage most probably and slightly marked in place, approximately 5 metres of it and cheap. London prices are set as much as new fabric in some cases so it was straight in the bag without even considering what it would be used for. A regular habit and sometimes I think its a bad one until I think of a use and then I think its a good habit, hahaha!
I love the idea of rescuing fabric as much as I love purchasing brand new fabric that matches the exact Idea I have in my head so it helps to have a balance so I don’t feel too bad about buying new all the time. I think this must have been used as a table cloth or such like in its previous life but whatever it was I couldn’t really envisage me in a twee dress. So as I walked out of the shop with a bargain of a buy, I started to dream up the dress.
It didn’t take long. It needed black, that’s all. Just black. The ‘colour’ I always come running home to. My safety zone. I used to only wear black when I was younger, not because I was goth or punk, I was very much on board with the New Romantics and if I bought anything black (sometimes white) I could guaranteee that the garments would layer and mix and match quite successfully – cheaper that way too. A black dress would render me invisible and cool at the same time. I could be part of the crowd yet not stand out at all, seeing as most of my peers were wearing black too! A kind of invisibility cloak, if you like.
When I returned to sewing (more seriously) about 20 years ago I wanted to sew all the colours, all the flowery fabric and all the frills. Because I could. Because I could affford to. And because I found a wonderful sewing community and I wanted to be just like them. But now I feel like I’ve come full circle armed with a fresh load of knowledge and Inspo, from the job that I do – I just love typography and graphic imagery – from my surrounding artist friends – I’m going large on the brush strokes – and a new found sense of brave. I just want to try new things. Not worry whether it fits in with anyone elses vibe and certainly not fashion as a whole. I don’t think I ever worried about that too much anyhoos but I just want to explore more possibilities
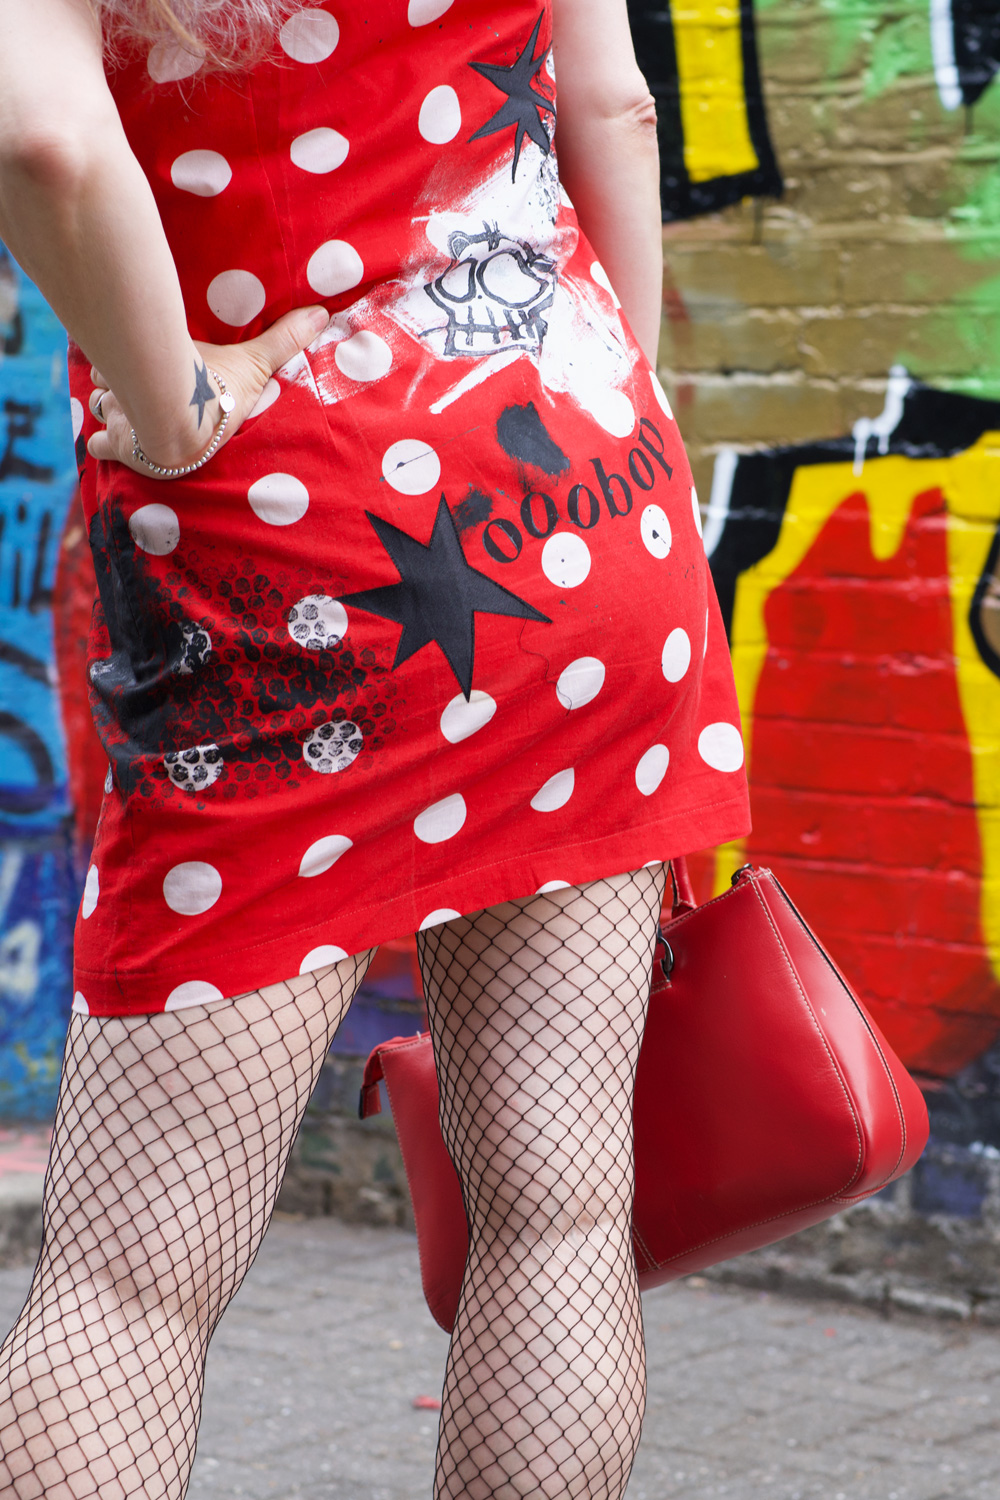
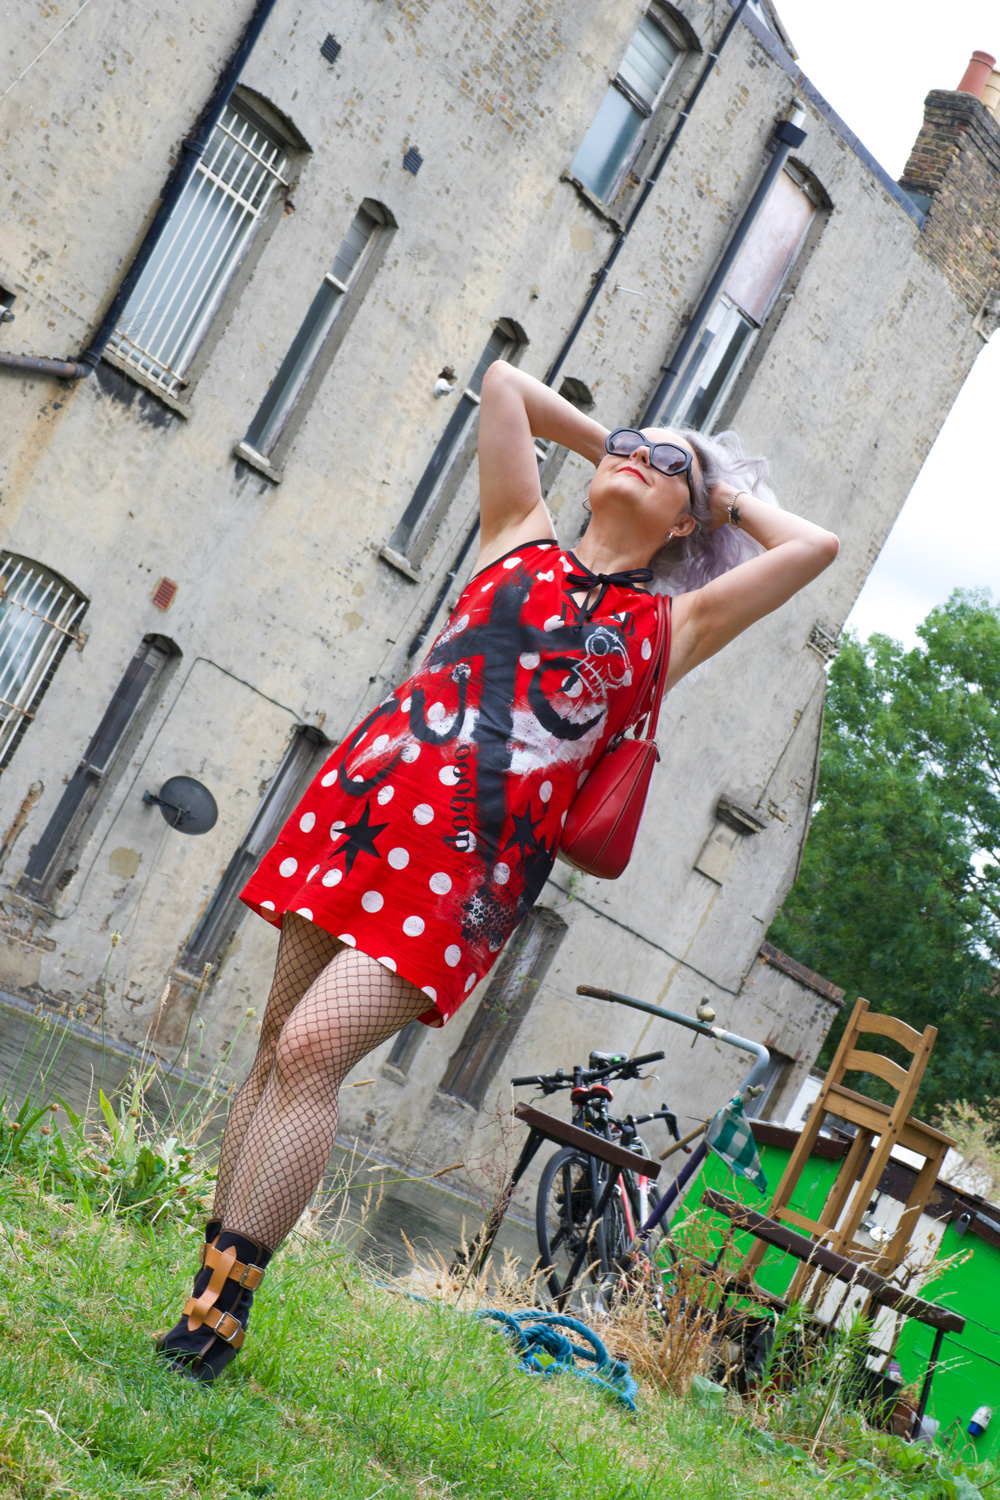
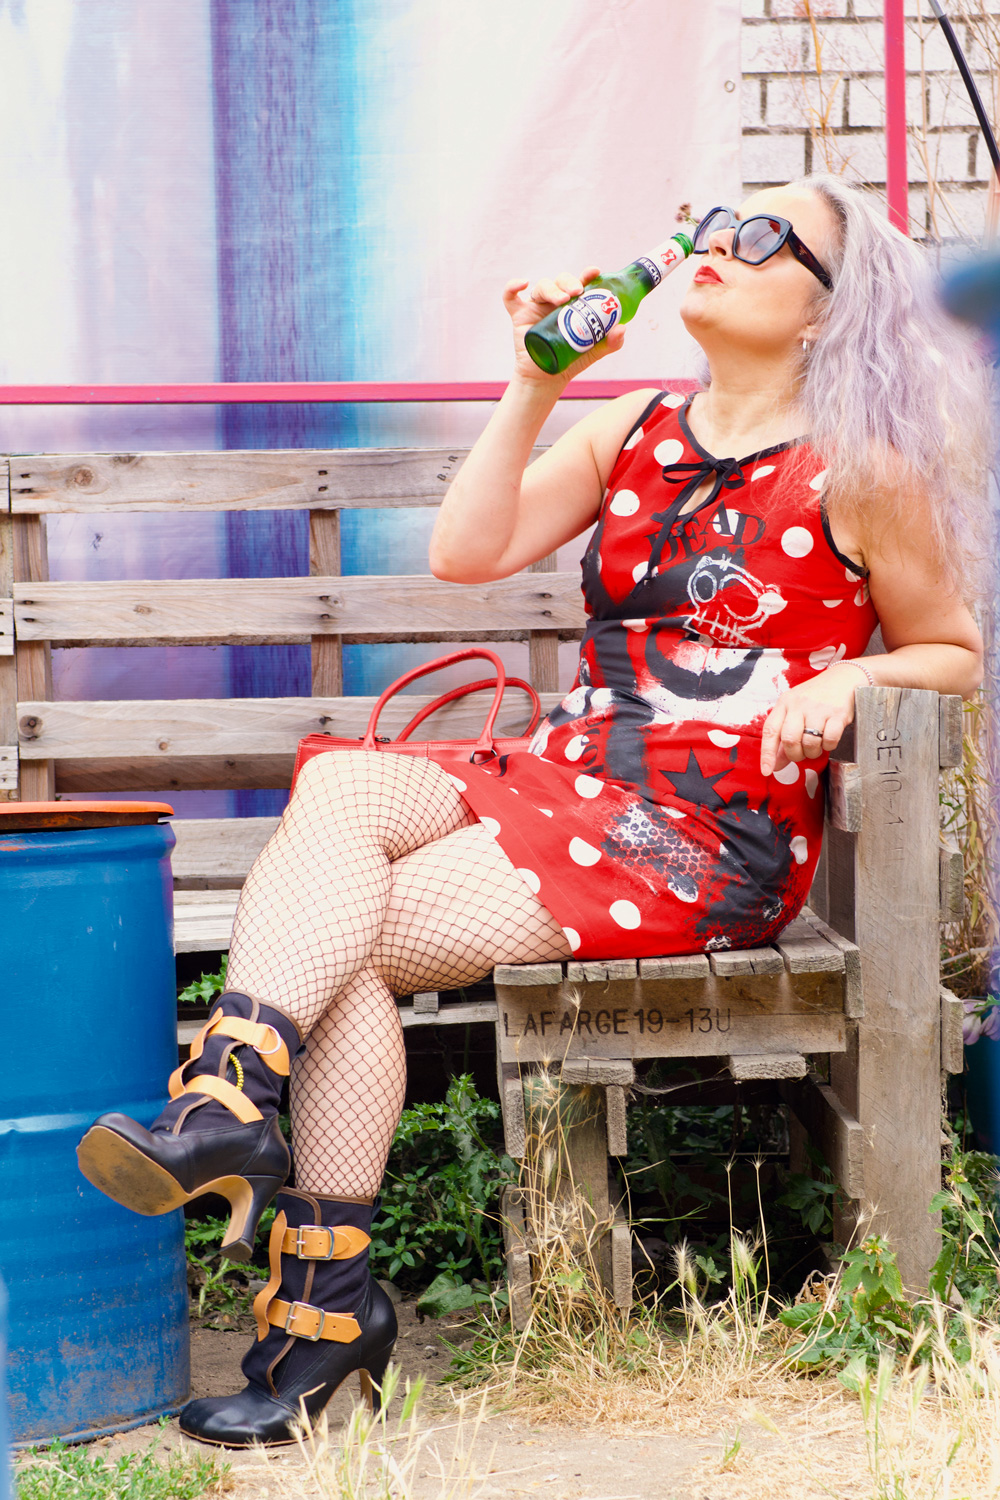
And so this dress was created from a pattern I designed from my own drafted pattern block. I used a vintage reclaimed fabric and painted on it with large black and white brush strokes, I carved a Lino piece to print the skulls, I used rubber letter stamps for some of the wording and I appliquéd the stars with scrap satin. Bubble wrap mono print and brush flicks were added for texture. I used a fabric paint called Pebeo Setacolor which was fixed with heat, and I’ll report back with the results on how it laundered! Its not my best work yet, but I am proud and relieved to have finally released one of those crazy ideas from my head and put it into practice.
If I’d have made this dress as a youngster, my mum would definitely have walked ten paces behind me, worried about all the disapproving looks from people in the neighbourhood. It’s still kind of like that where she lives. Although she’s more used to me being ‘whacky’ now lol. But by stark comparison, Dan and I wandered around Portobello and the Grand Union Canal in West London, blending in perfectly with the surroundings and not a soul batting an eyelid. This is one of the main reason I love London. Another is that you come across free location set ups like this!
Oh, and this is how reasonably cute the dress was before:
I’ve got more ideas bubbling and more reclaimed fabric that will be perfect for purpose so I hope to share those once they are realised. There will also be a more demure wedding guest outfit to share soon too so do hit the subscribe pattern to be notified by Email of a new post.
Thanks to Dan for these amazing photos. Thanks to all the inspiring people in my life and many thanks too for you reading my waffle all the way to the end. Im forever grateful for your support and comments.
Waaay back in April, I went to my very first New Crafthouse party. I’d heard of these legendary do’s but I was always too slow to the checkout page. This time round, howevs, I got a heads up and I snapped up a ticket the minute they went on sale.
The theme was Spring Fling… I do love a brief! Kind of narrows down the options of what to make, which is helpful because as you probably know its virtually impossible for a dressmaker not to make something new for a party!
Another good thing is, that because there’s usually a bank of ‘wanna makes’ swimming around in my head, I just have to pause the slideshow and pick a winner!
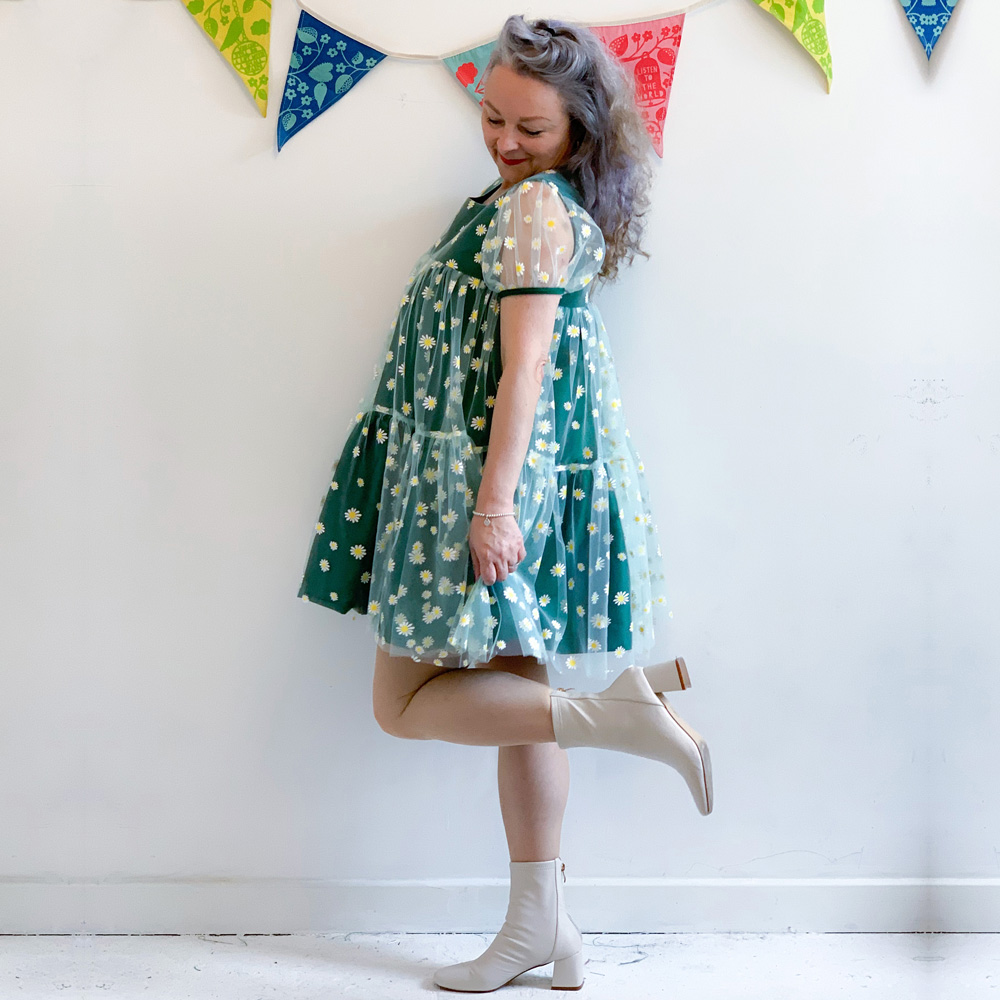
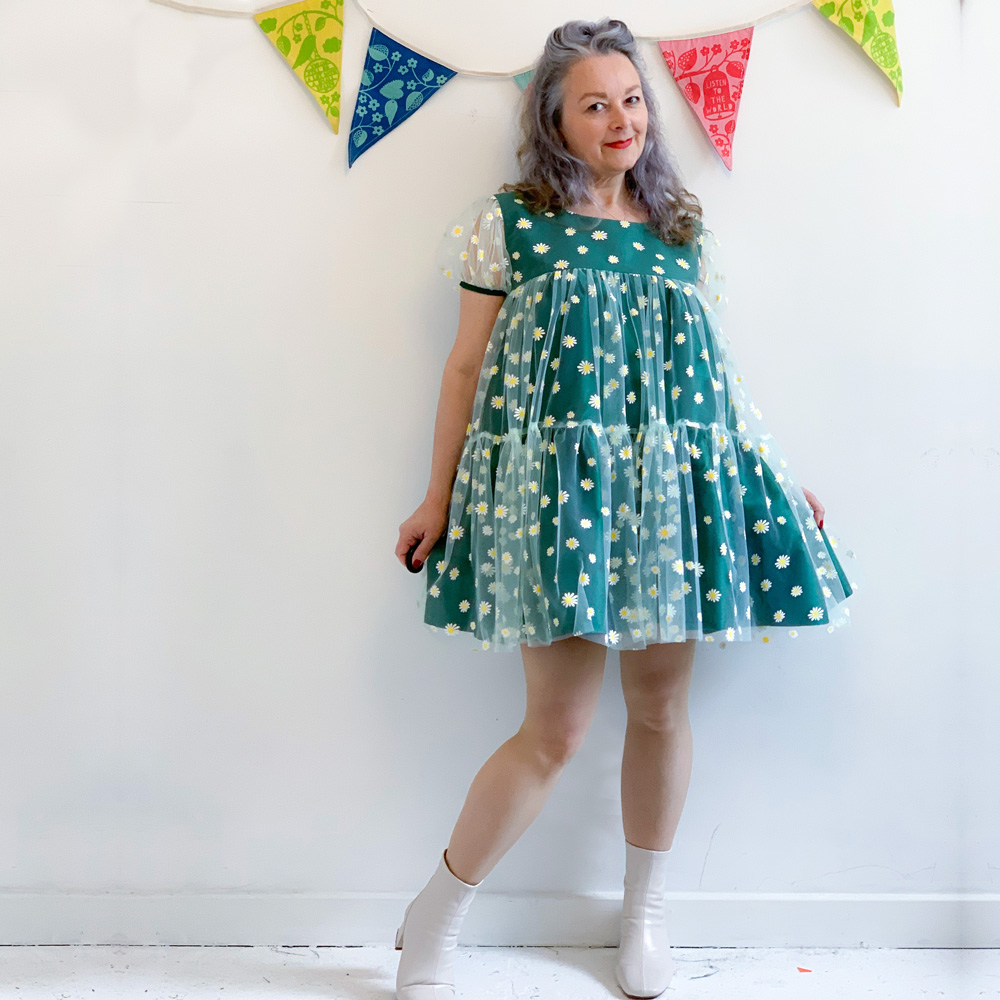
I’d been toying with a Molly Goddard style dress for a while. Not so over the top as that pink Killing Eve number – though, never say never! I guessed pink might be the popular choice for a spring theme and I wanted something a bit different, so I pictured what spring looked like in my local parks and daisies sprung to mind.
But boy did I set a task for myself. I wanted daisy tulle. It had to be daisies, on tulle and nothing else. And I searched high and low until I finally found it some on Etsy. Its actually a pale green tulle which was a bonus too though it doesn’t really come across as such.
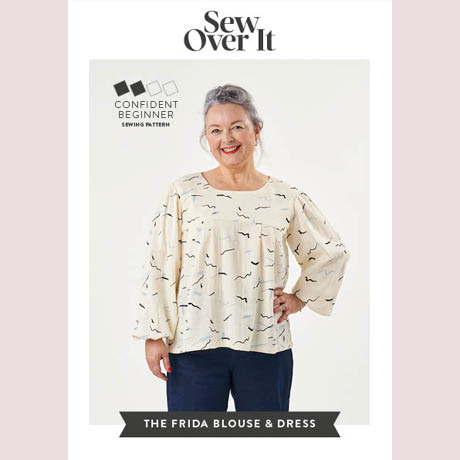
As for the pattern, I knew exactly what I was going to use. The SewOverIt Frida blouse and dress is such a great little pattern with no closures. Zippers and tulle aren’t generally friends so it was a perfect choice and a very simple hack would make my vision happen. And hey… see anyone familiar on the pattern cover?!
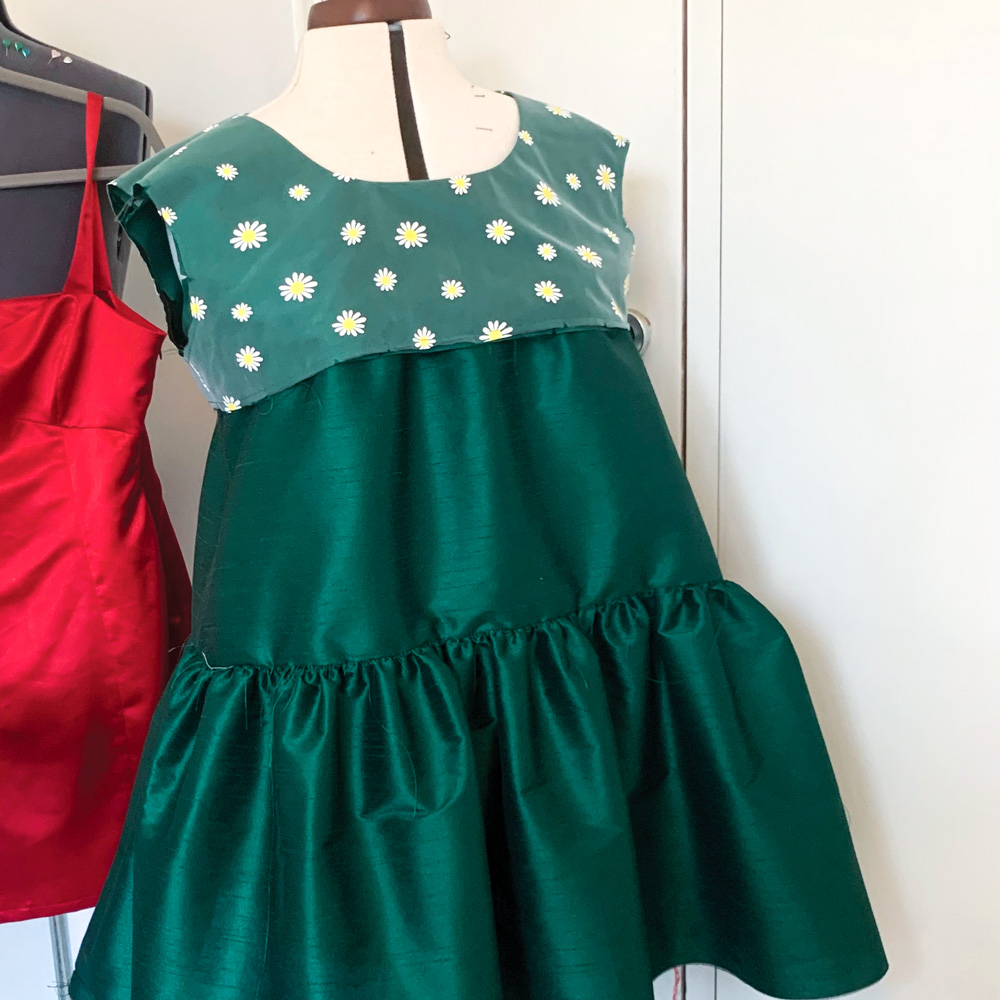
I kept the bodice section pretty much exactly as was, apart from shaving a little off the shoulder, because I wanted the sleeve puffs to sit on the end of my shoulder point for maximum pooof! I used a green poly taffeta for the underdress because it had great structure and also was a great grassy base for the daisies to sit on. I overlaid the tulle on to the bodice piece to sew as one and I love how the sheen of the taffeta shone through.
I used the longer skirt section of the Frida Dress pattern as the foundation of the under-dress. The top part where it meets the bodice is pleated and I kept that but I split it about half way down and spread that bottom half to end up with a gathered bottom tier. This created much more of a dramatic A-Line silhouette and already the cheeky fun of this little party dress was beginning to make an appearance.
The tulle overlay is simply two gathered rectangles, each to the same depth as their corresponding under layers. The bottom layer was cut twice as long as the upper one and gathered onto the top tier.
For the sleeves, I took the fuller sleeve pattern piece of the Frida, shortened it and then cut and slashed to spread it really wide. It was a bit trial and error but it worked just right with the first draft. I created some binding from the taffeta to edge the sleeves. I was so happy at this point as there were strong indications that it was evolving exactly as it had taken shape in my head!
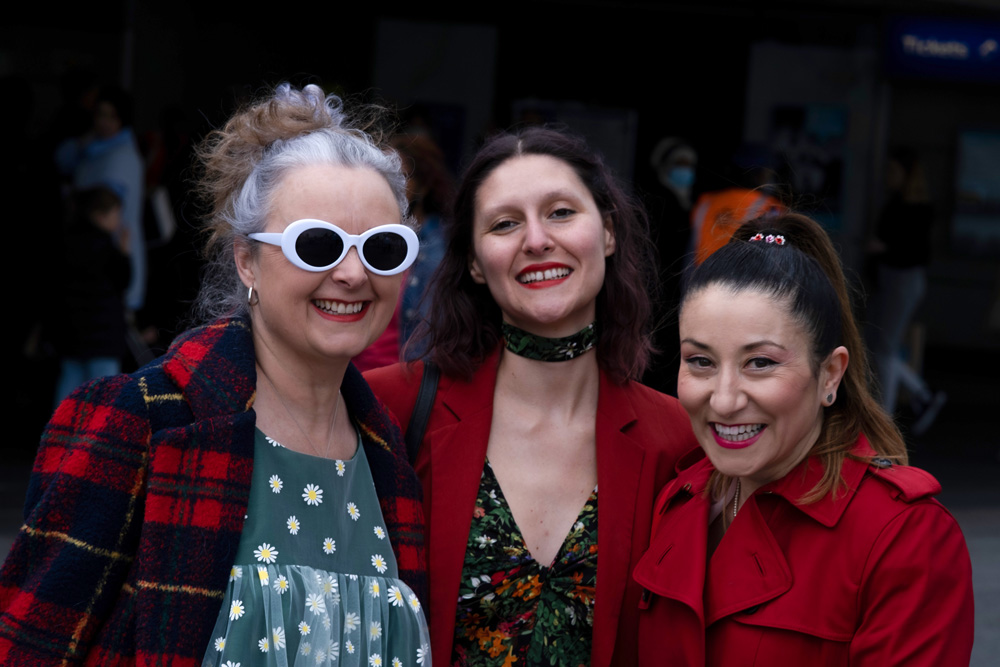
Apart from gathering the tulle (one of my least favourite things to do) The process was pretty simple. And I finished it just in time to meet up with Alma and Ilaria and set off for the do!
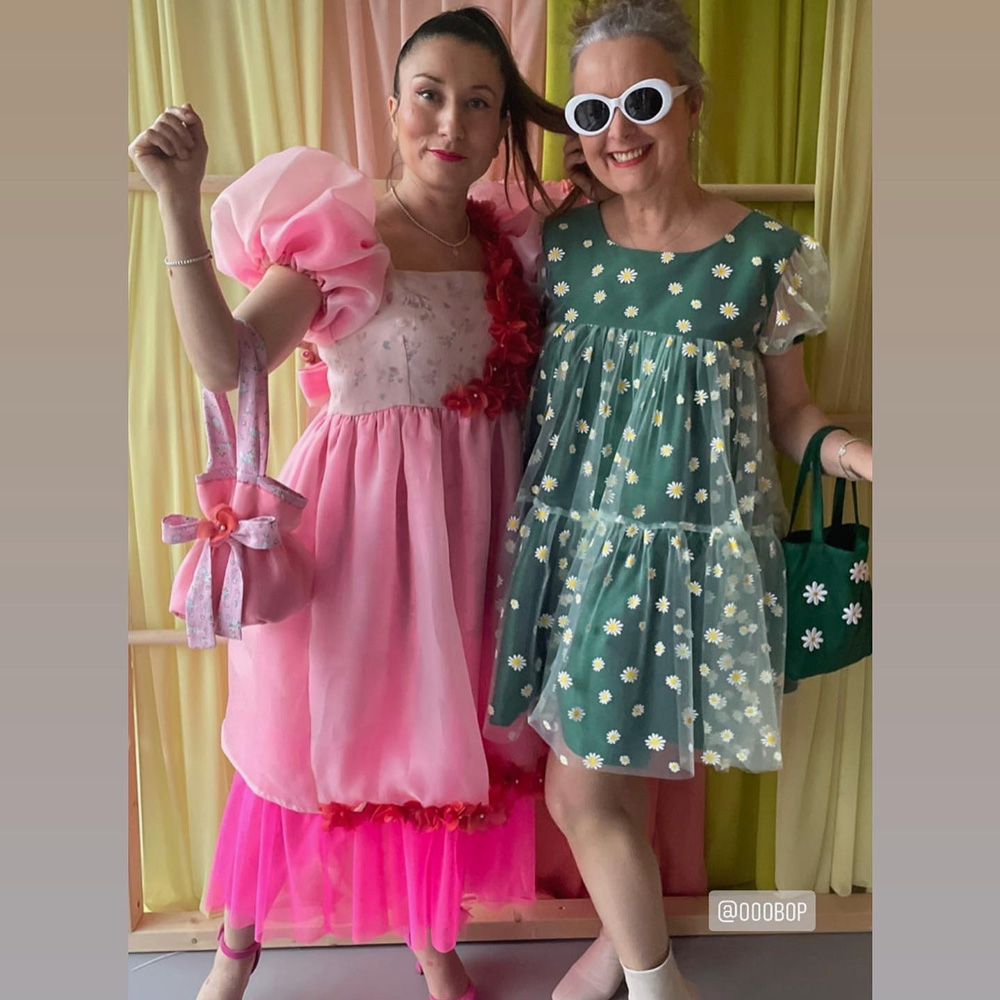
We had such an amazing time – New Crafthouse is such a lovely space in East London and Hannah and Rosie were awesome hosts. We were greeted at the door with a gin fizz and had immense fun catching up with sewing friends old and new, everyone of them looking incredible in their handmade creations. It blows my mind how much talent there is in our wonderful sewing community.
And guess what! Not only did Ilaria win first prize for her amazing Botticelli meets Molly Goddard dress (we clearly have great minds)… but I won a runners up prize too!
We seriously had no expectations of coming away with prizes. It was so exciting. And we were buzzing all the way home.
The first time I met the ladies of Crafty Sew and So was at their fabulous Dressmakers’ Ball in 2019. I’ve since been to their Crafty Sewing Camp and can verify that they throw a damn fine party! And so it seemed quite fitting that I chose to sew the Ready to Party Dress for my first experience with a My Handmade Wardrobe sewing pattern.
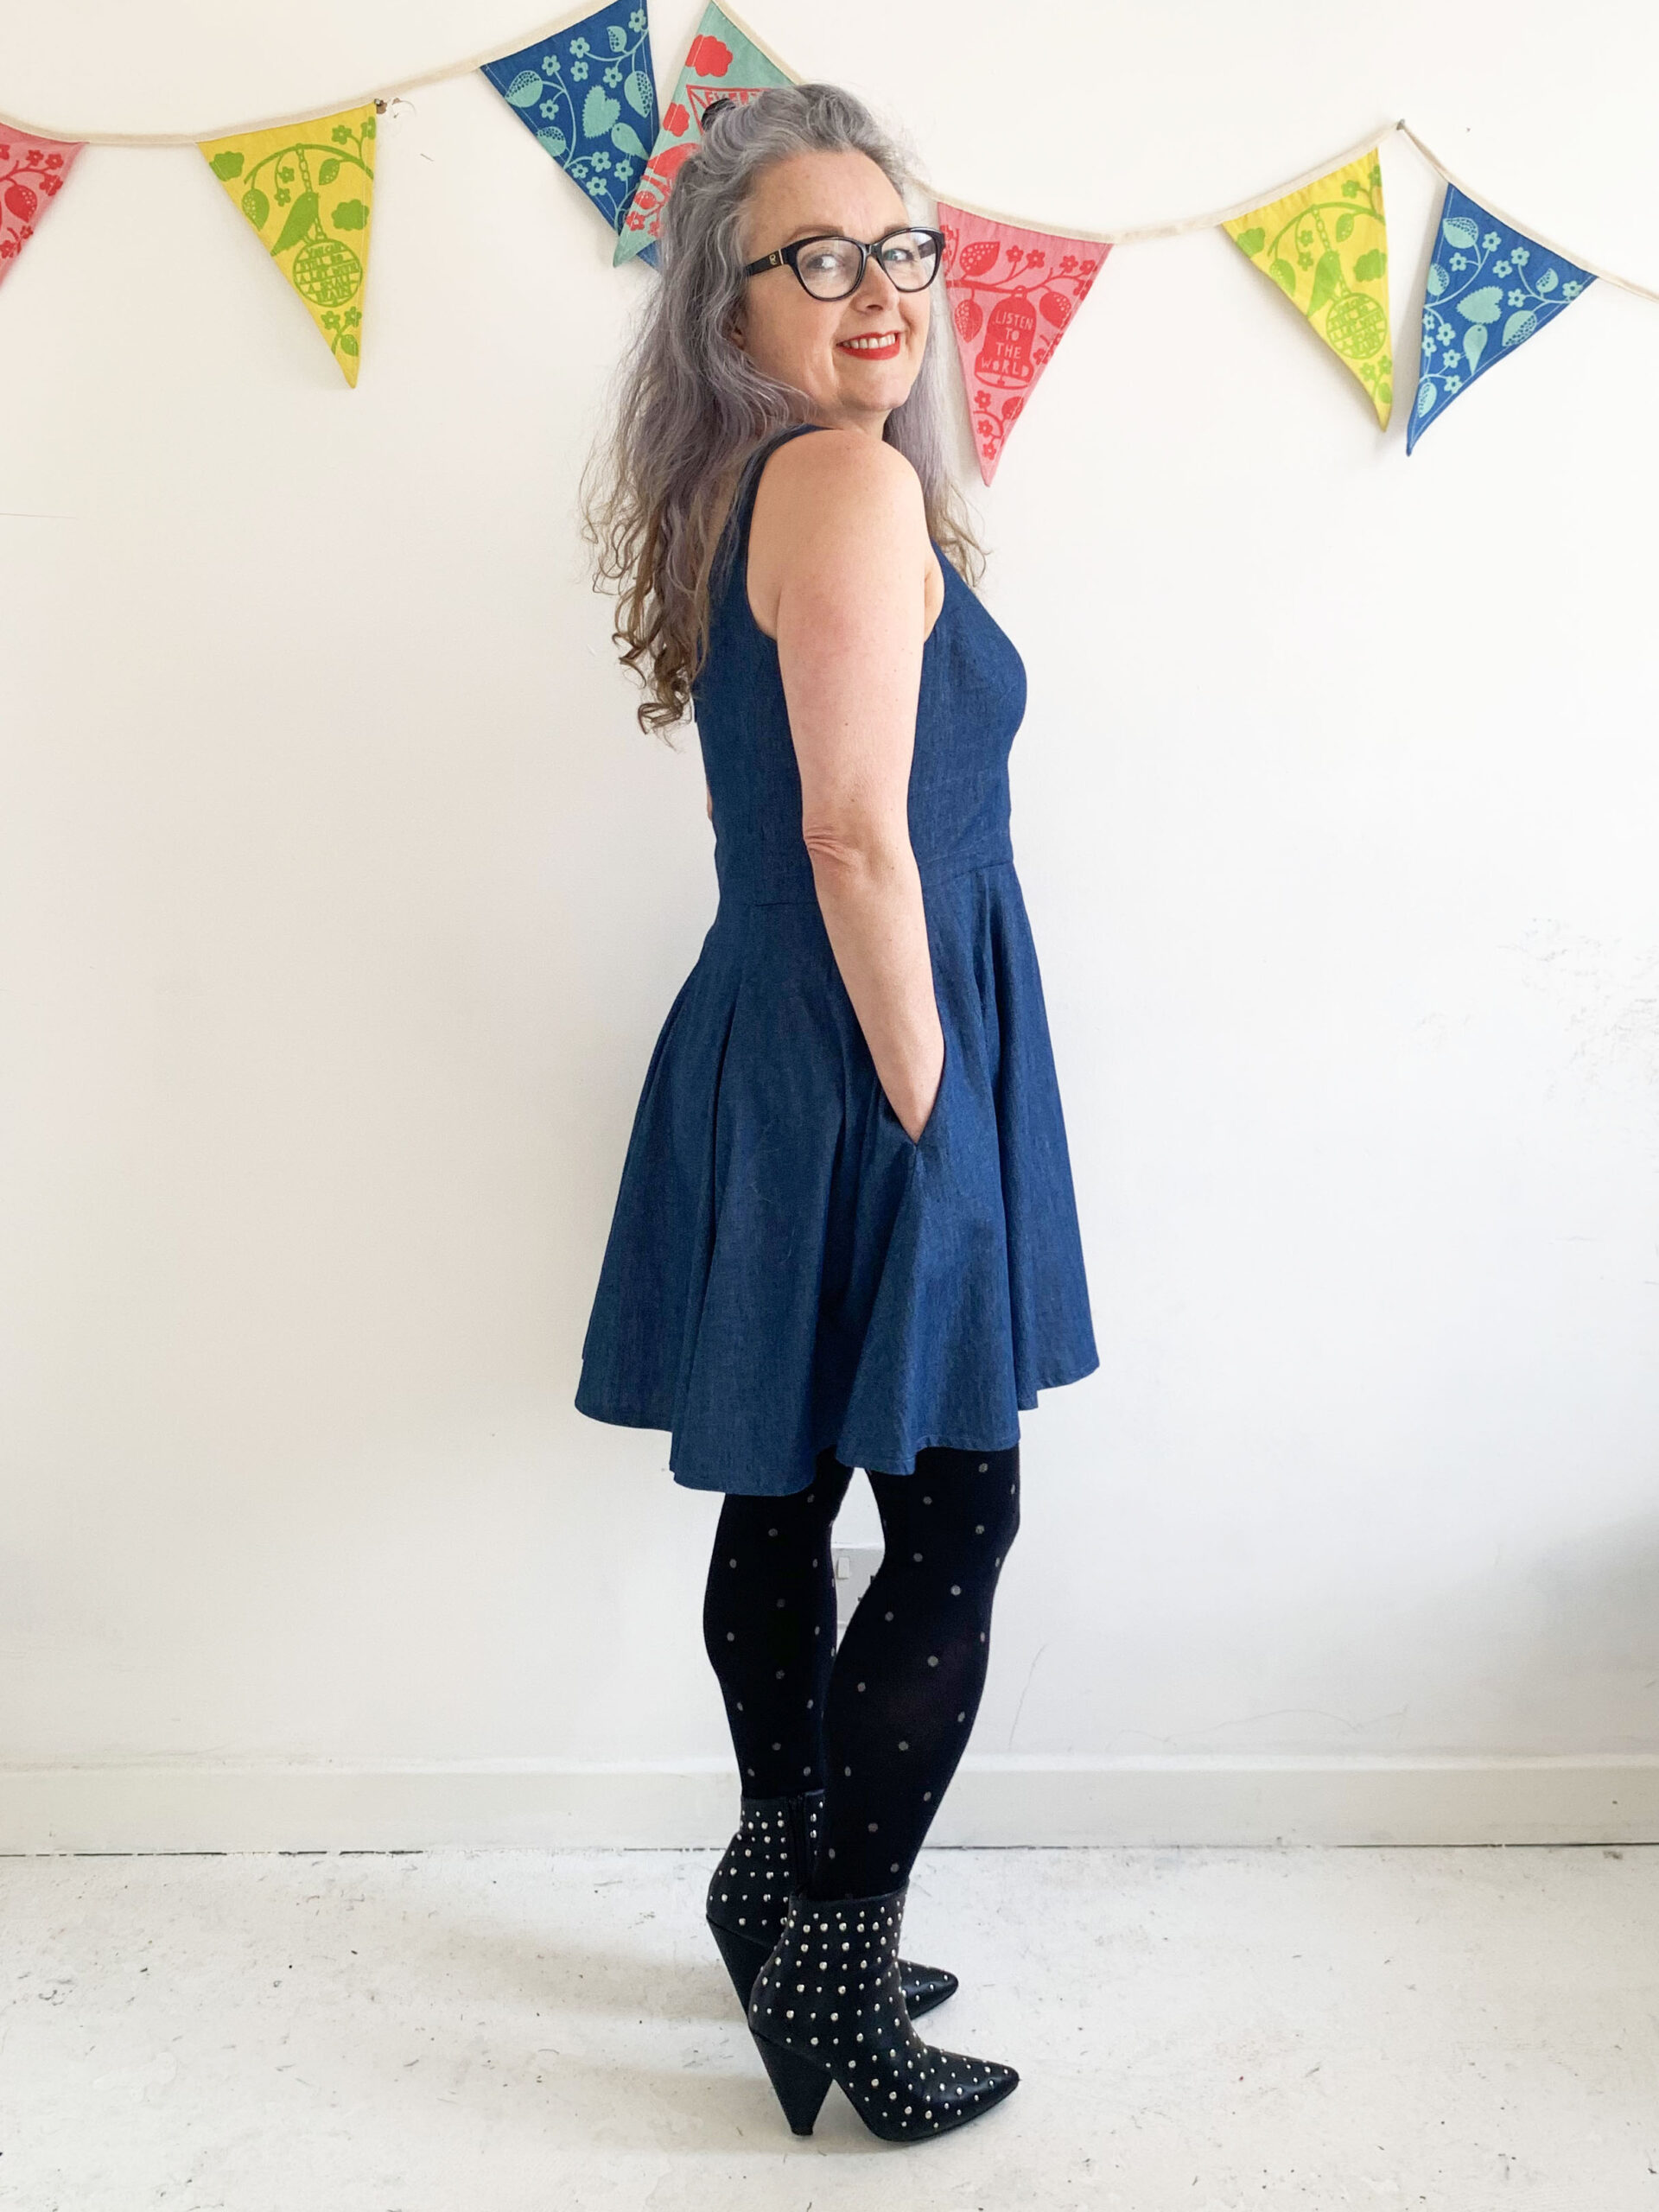
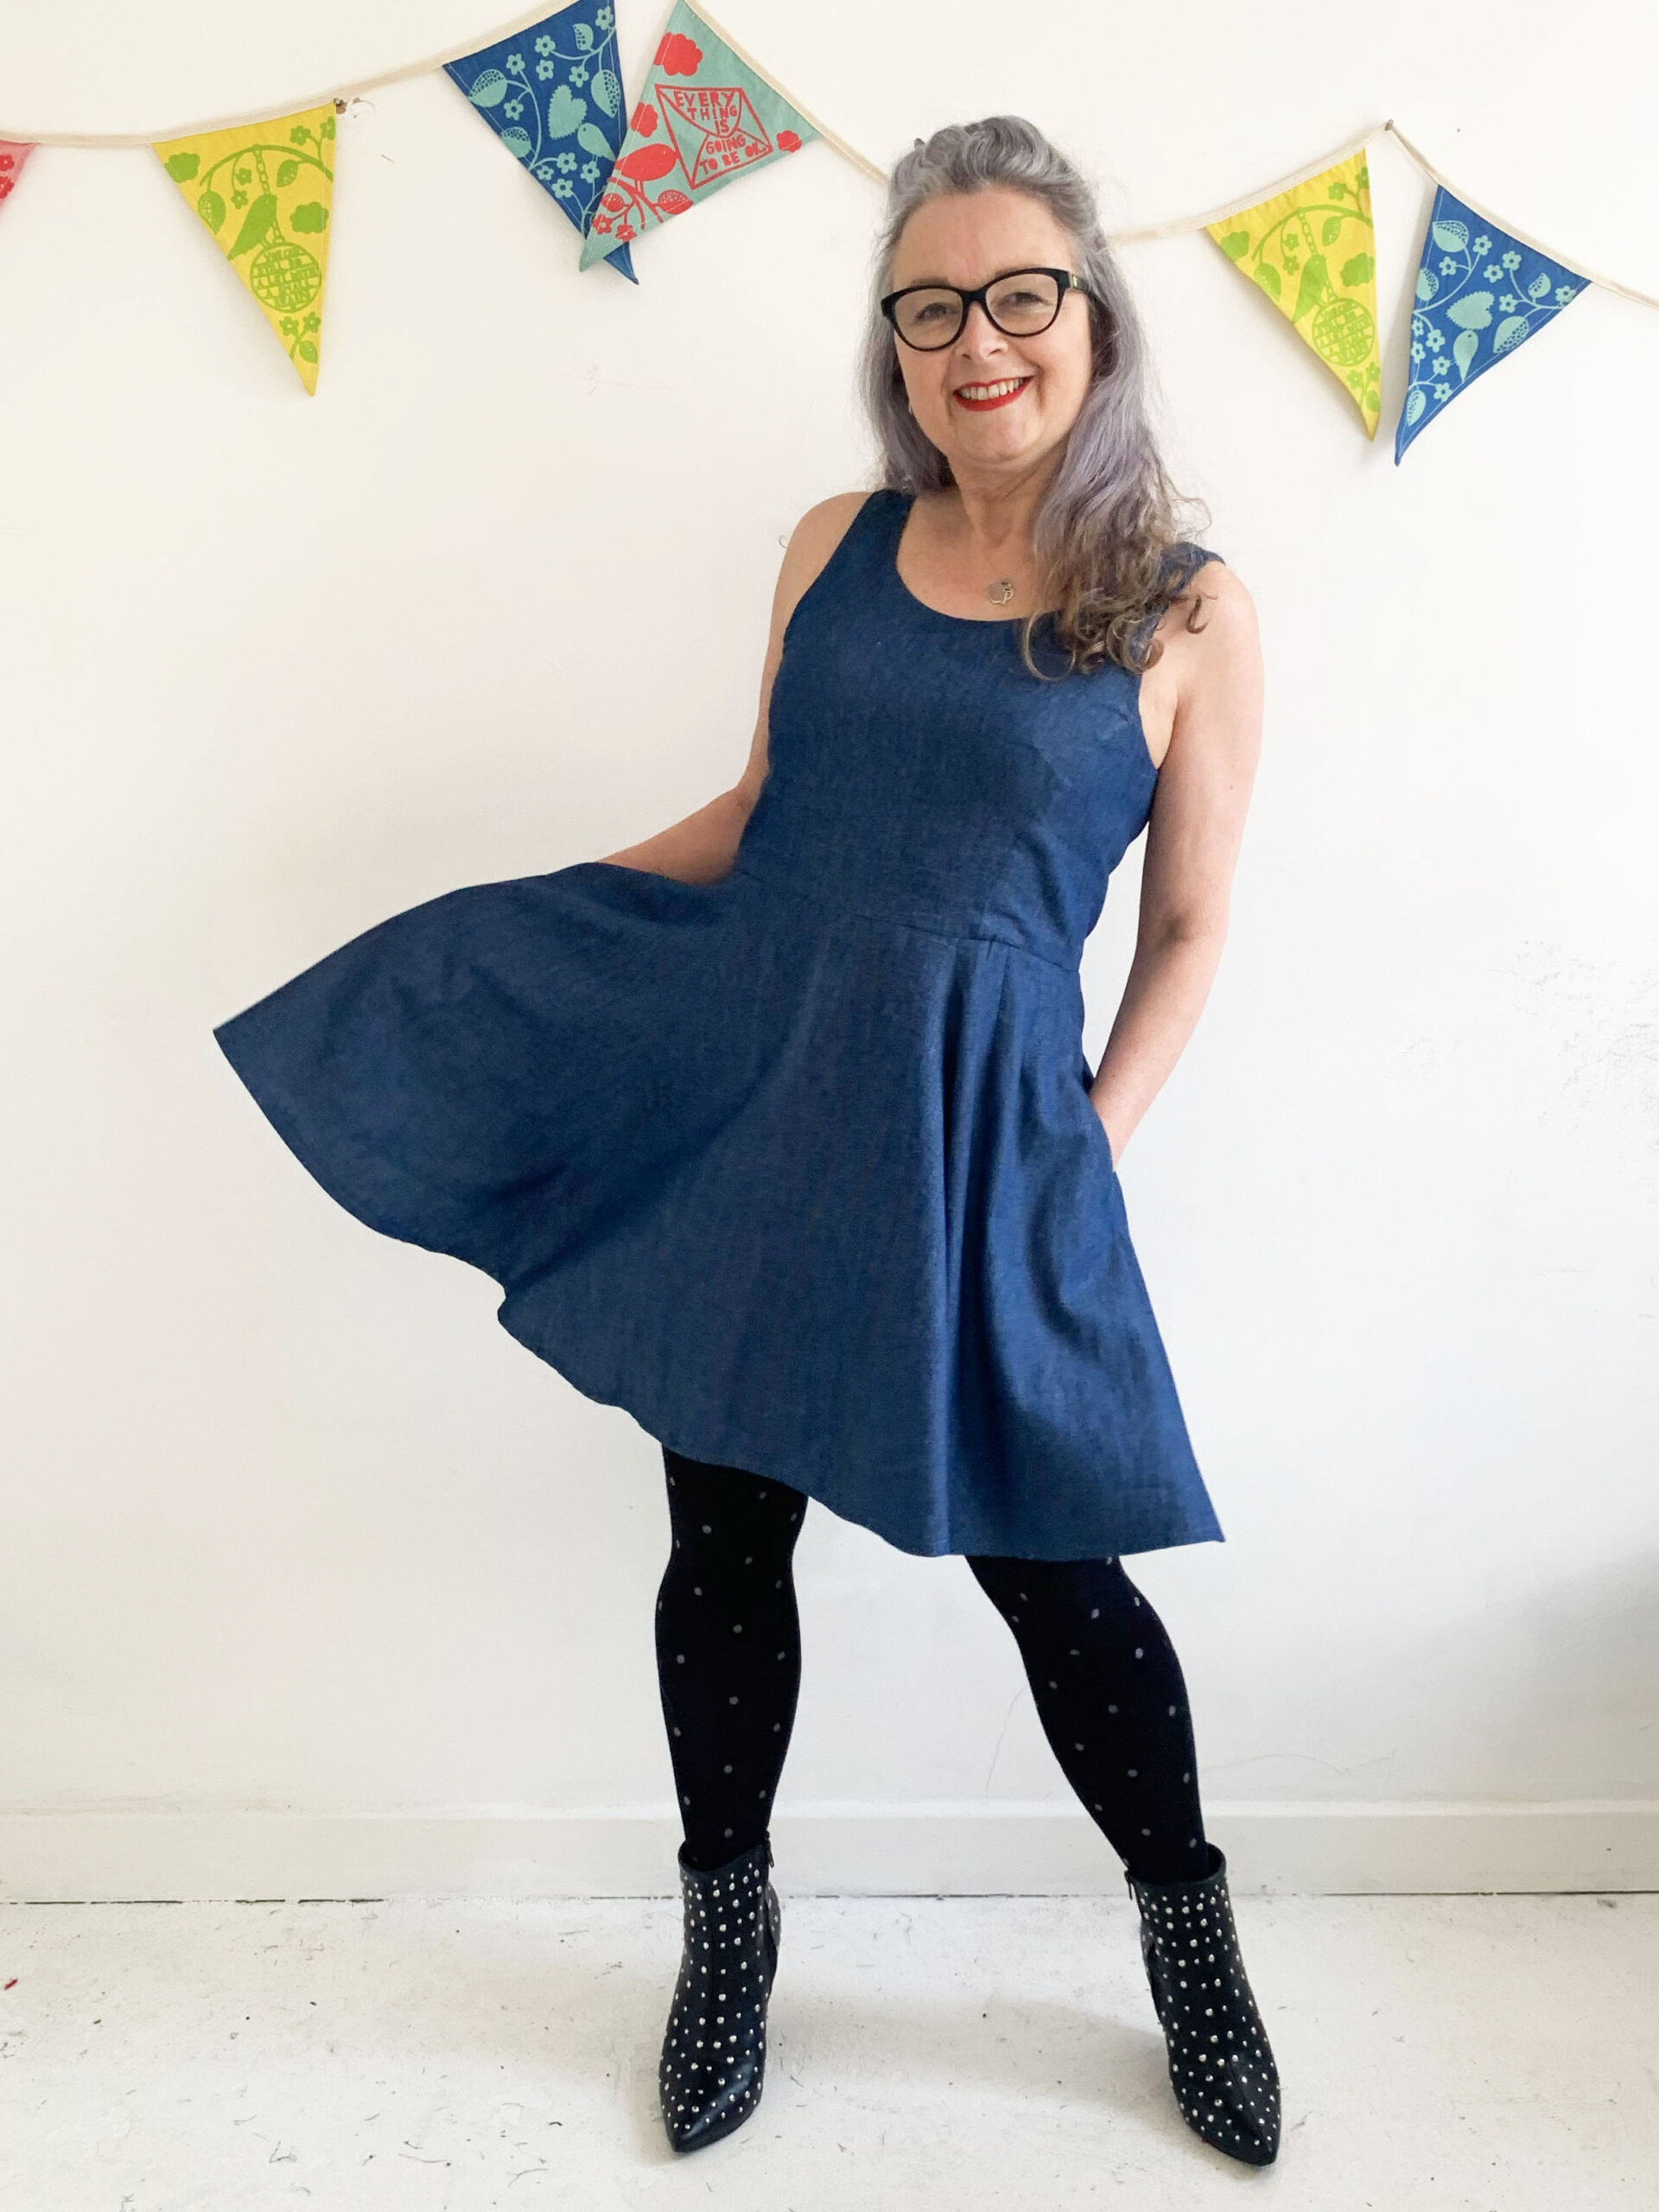
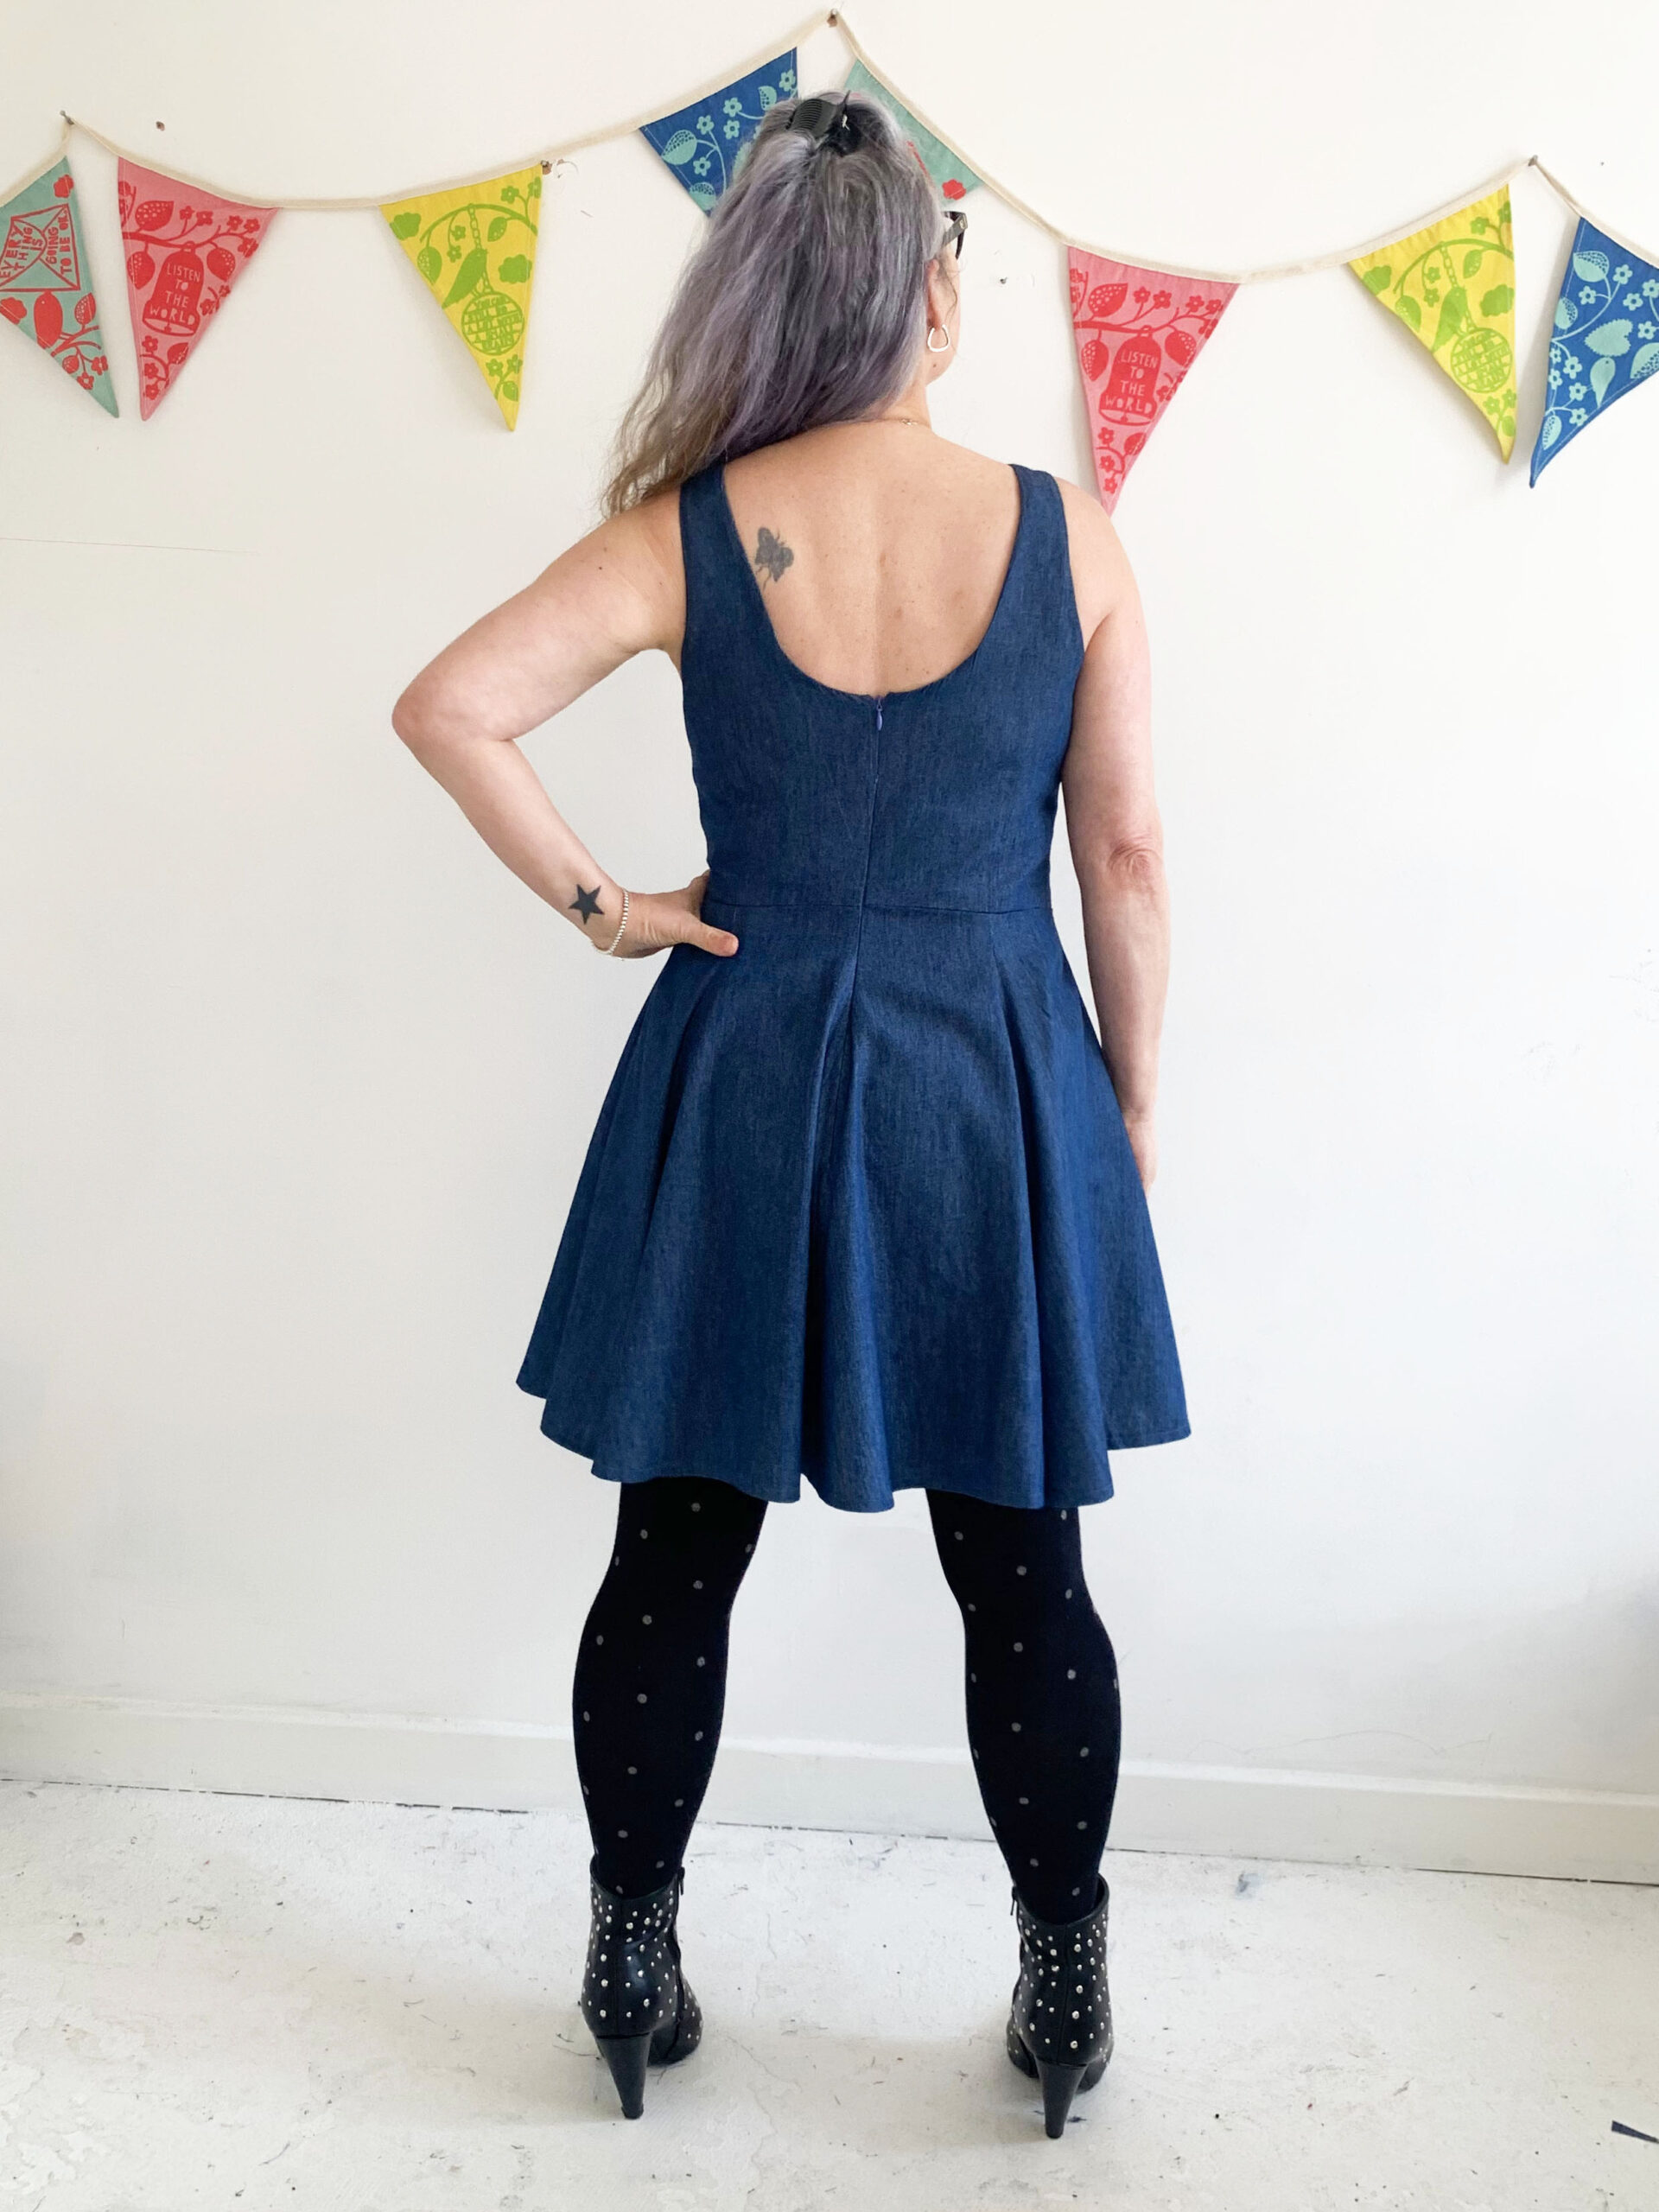
However, true to form and with no imminent fancy parties on the horizon I decided to make it up as an every day-dress instead.
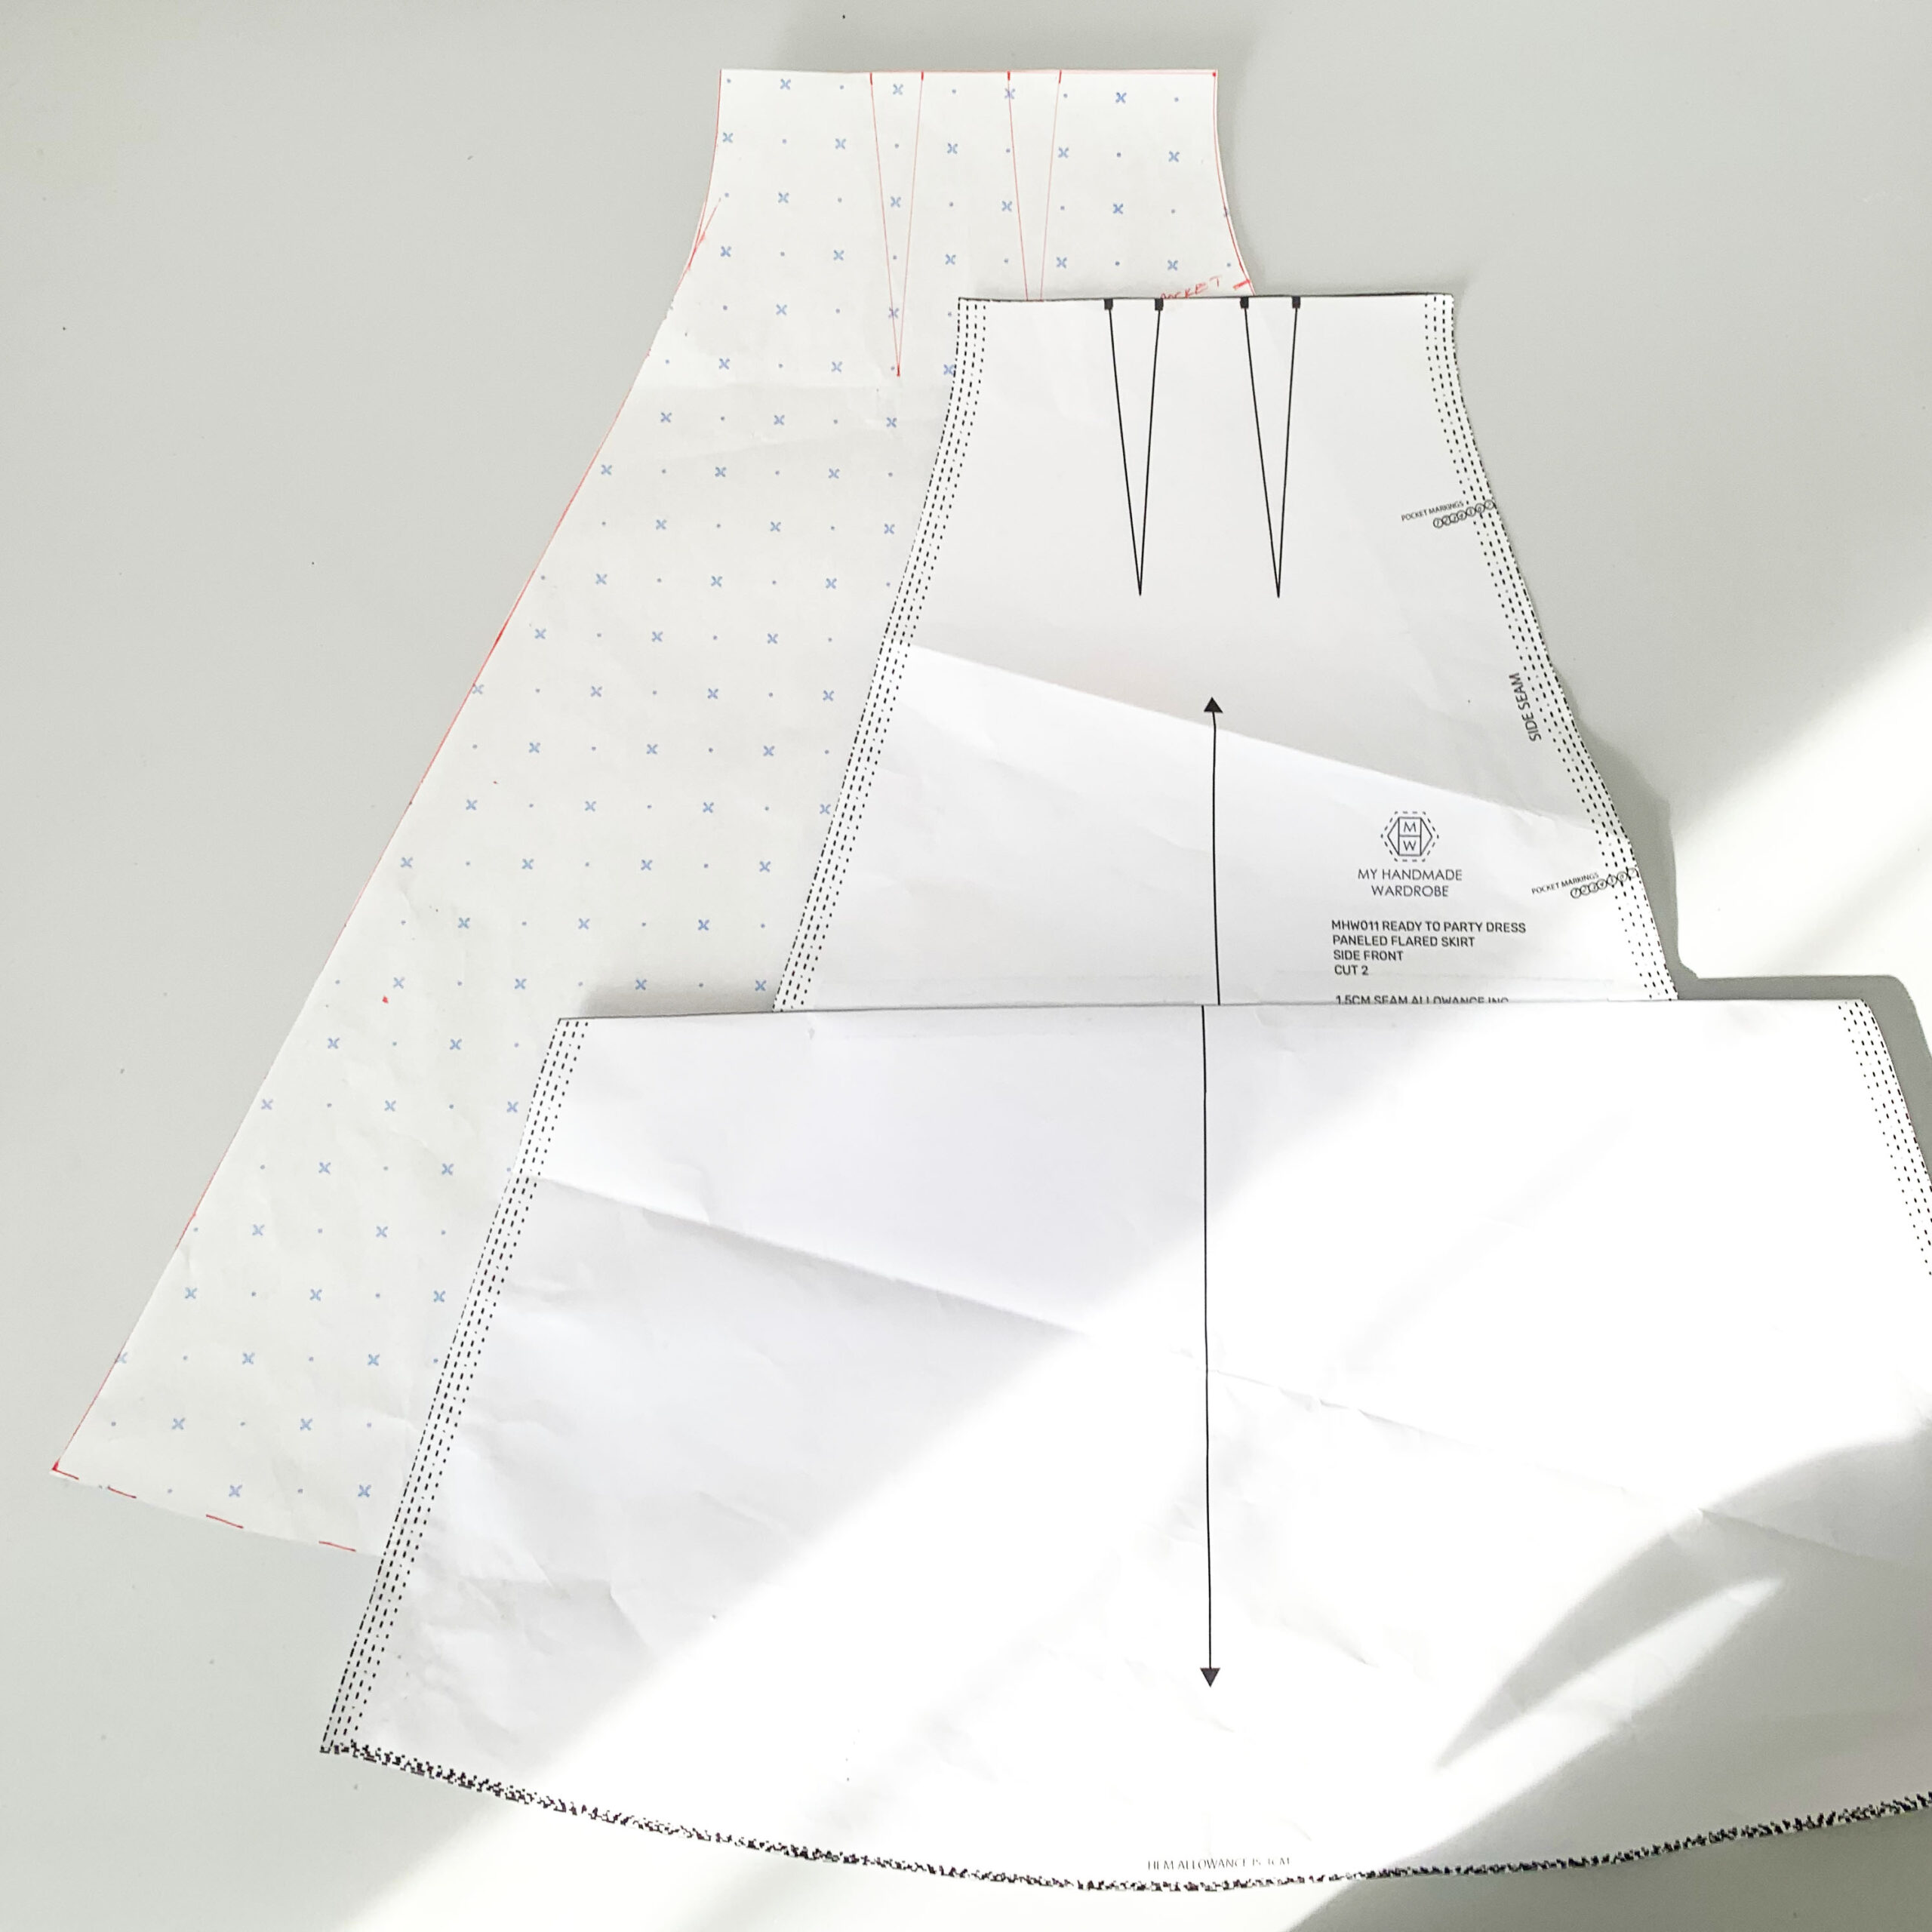
To make it more every-day, this dress was going to have to be substantially shortened for me. Before I go into more detail as to how I did this, I just want to add how interesting this skirt pattern is. It is made up of eight flared panels with a double set of darts on the side front and side back panels and the volume starts after the fitted section at the waist to create such a superb silhouette.
Each panel piece of the sewing pattern has a lengthen/shorten line which is super helpful as I really didn’t want to forego the amazing flare in the design. To be honest I wasn’t totally convinced I could remove a whole 9 inches without some sort of issue but hey, nothing ventured, nothing gained! As you can see there is quite a bit of a step when I folded up the excess. I sat and pondered a while and then convinced myself I just had to average out the difference to create the new pieces. So that’s exactly what I did. I traced the new piece and added the new side lines by drawing from the hem points to just below the waist shaping. And it worked!
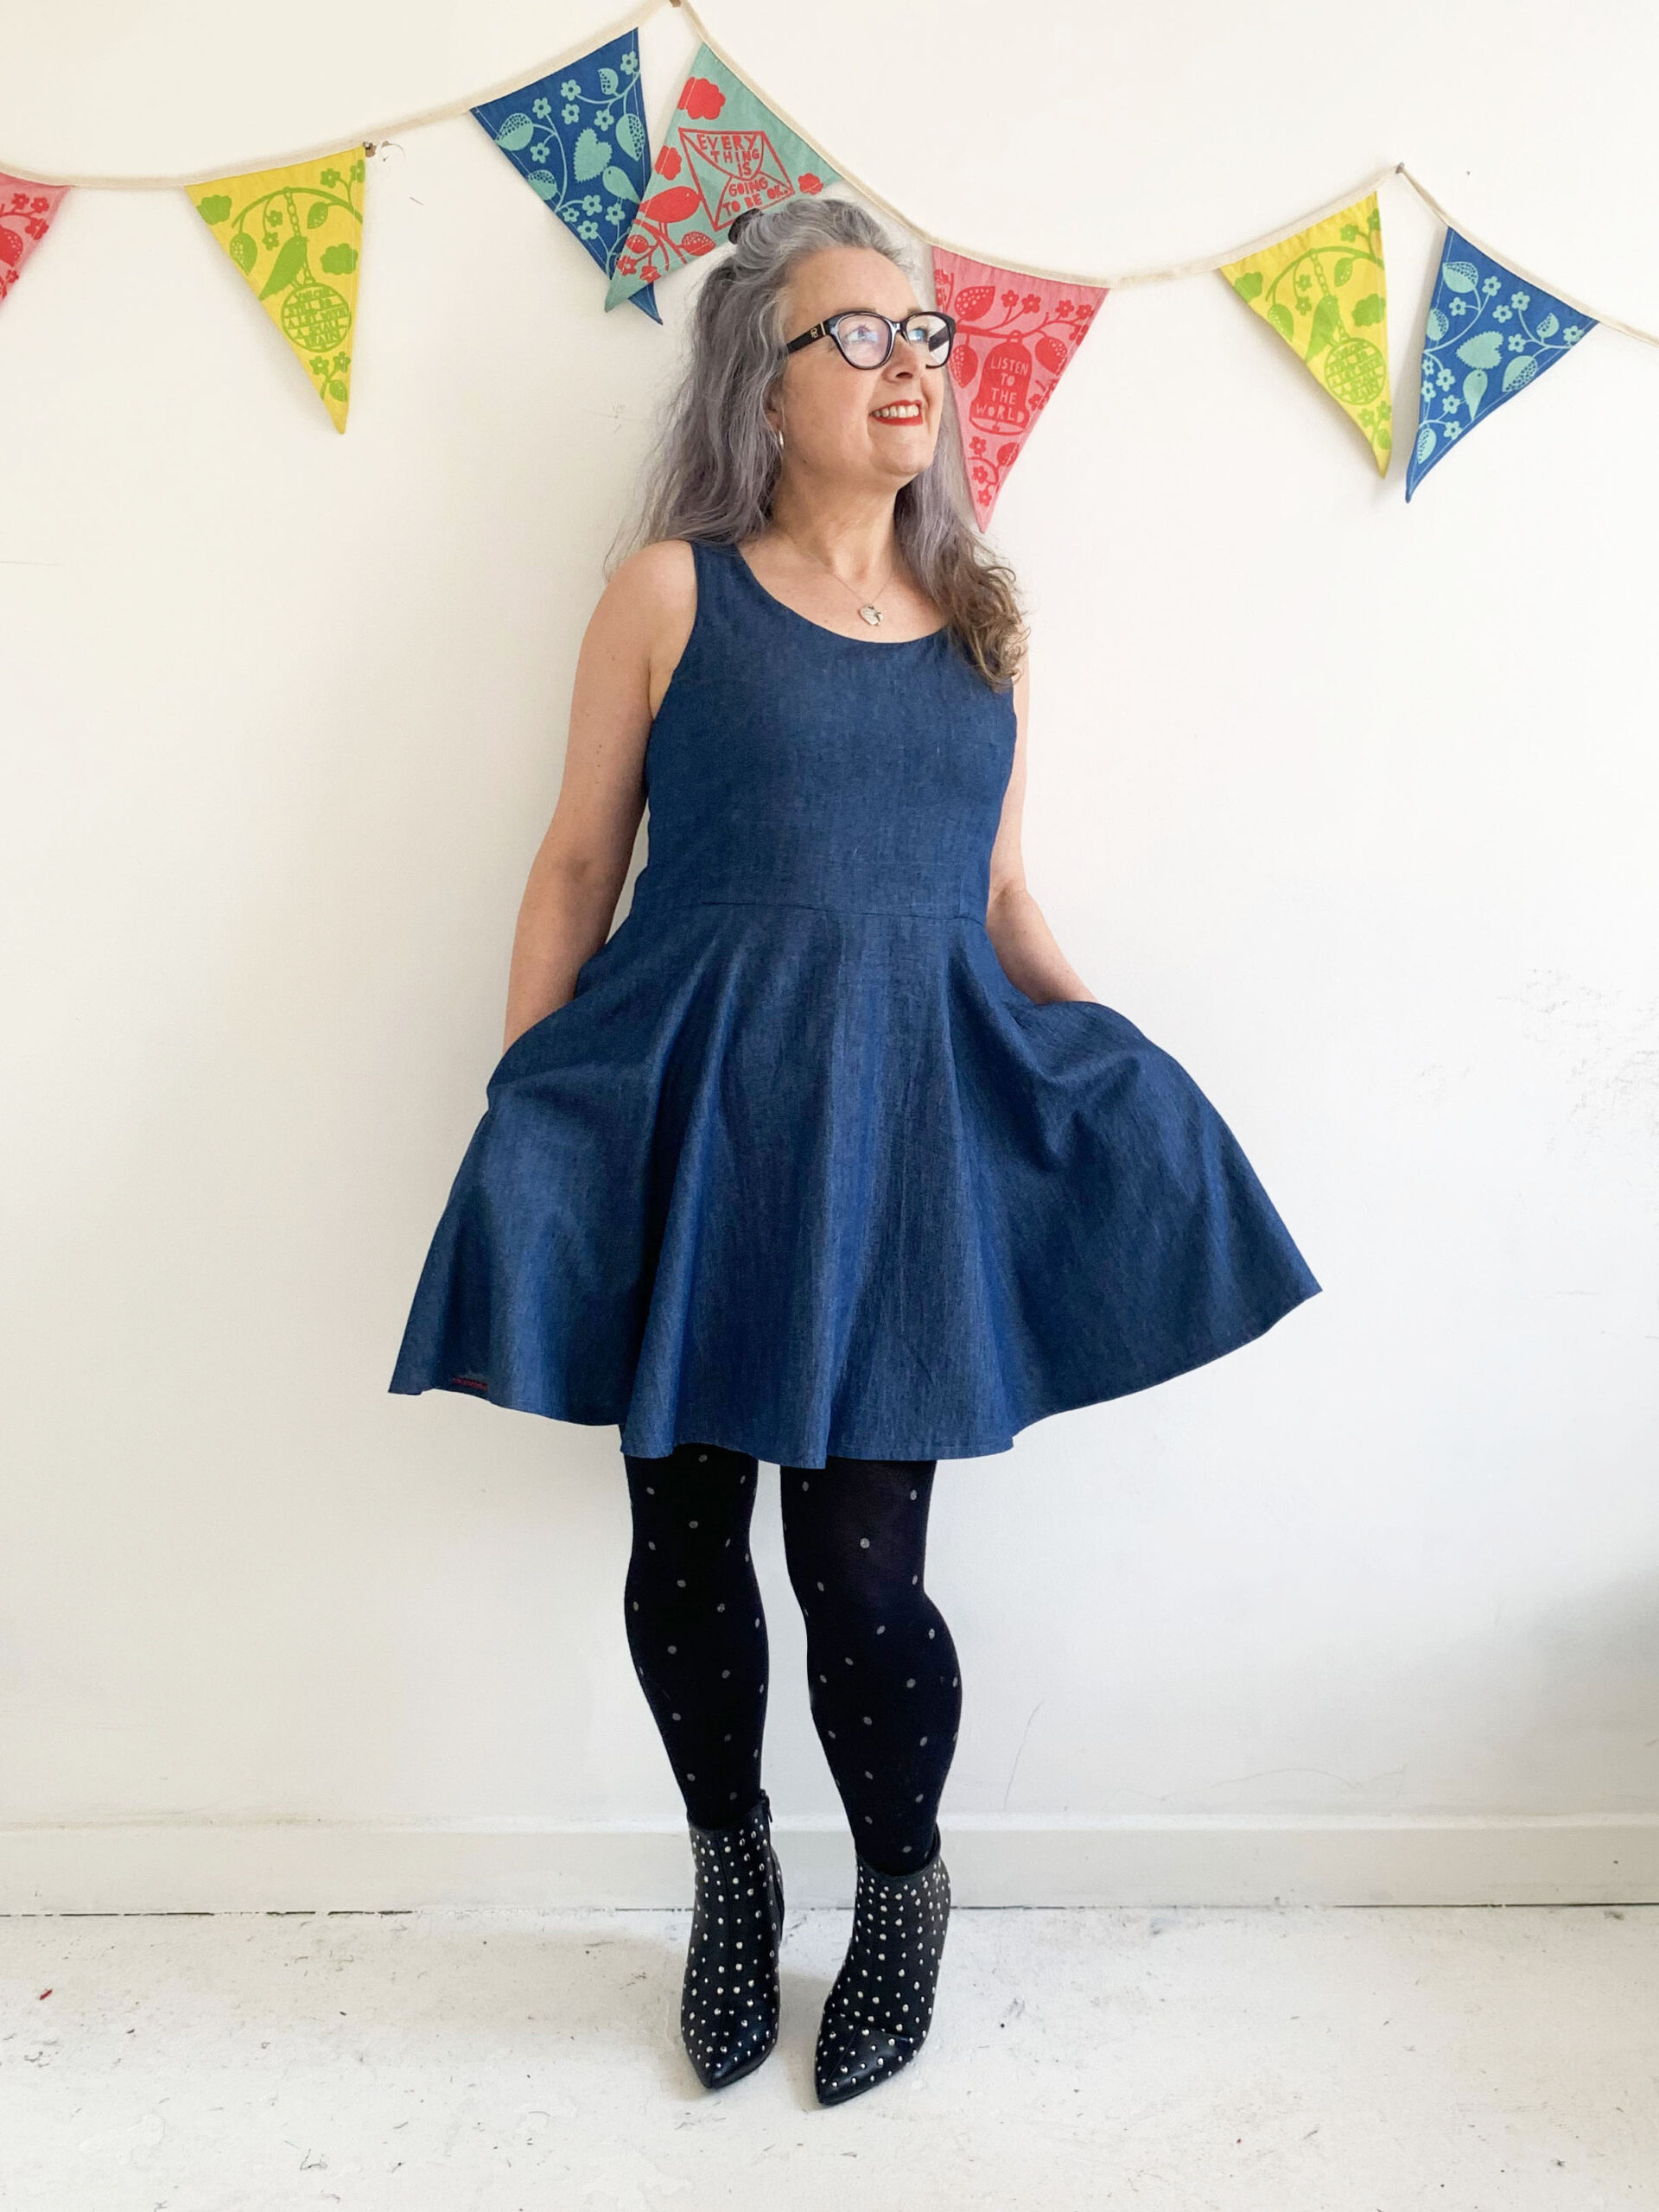
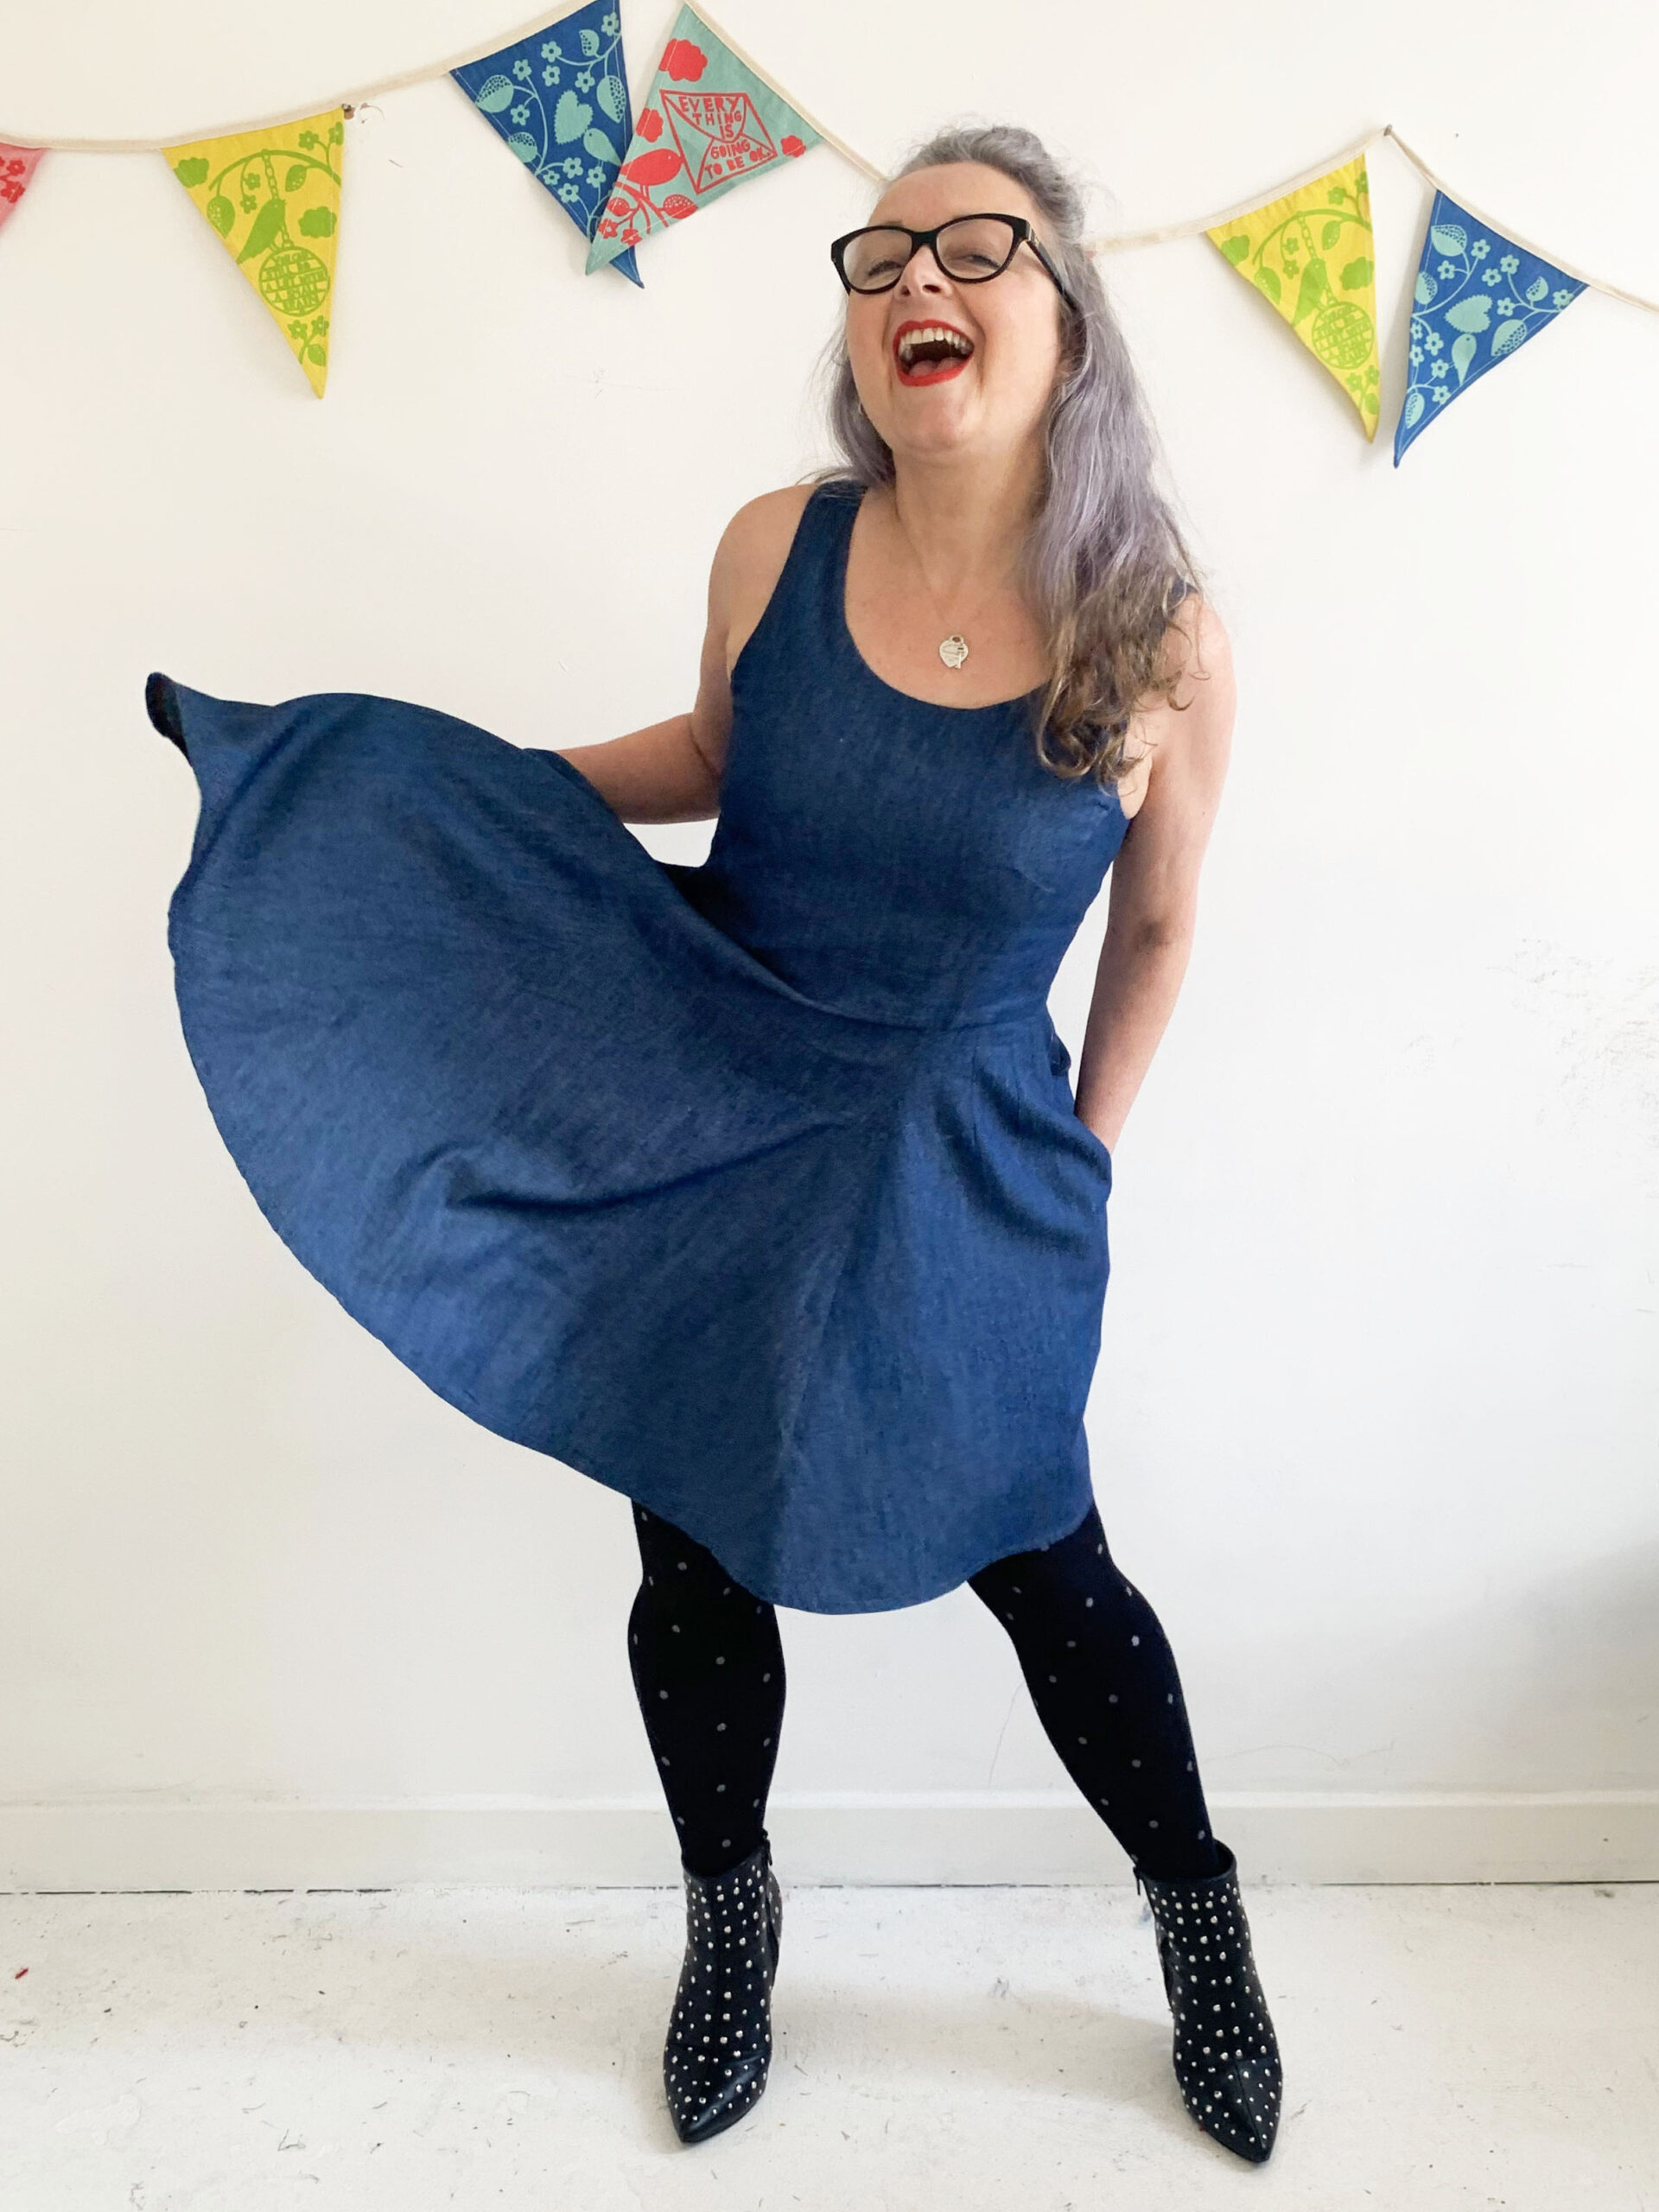
I took my time sewing the panels, being sure not to stretch out the bias seams of which there are many, and I’m sure the results were helped greatly by using this wonderfully soft and forgiving chambray fabric, also from Crafty Sew and So. It drapes so beautifully and seals the deal with my ‘every-day’ mission.
Because of potential bias behaviour, I did tack the sewn up skirt panels to my toile of the bodice while I sewed up the actual bodice. I felt it needed to hang a bit before hemming in case the hemline dropped unevenly and that proved to be a good idea.
I cut a size 4 for the skirt and graduated down to a 3.5 for the bodice but next time I might just slither a bit more off to go from 3.5 to 3 as it is a bit roomier in the waist than I anticipated. That’s the beauty of having all the size lines to trace off!
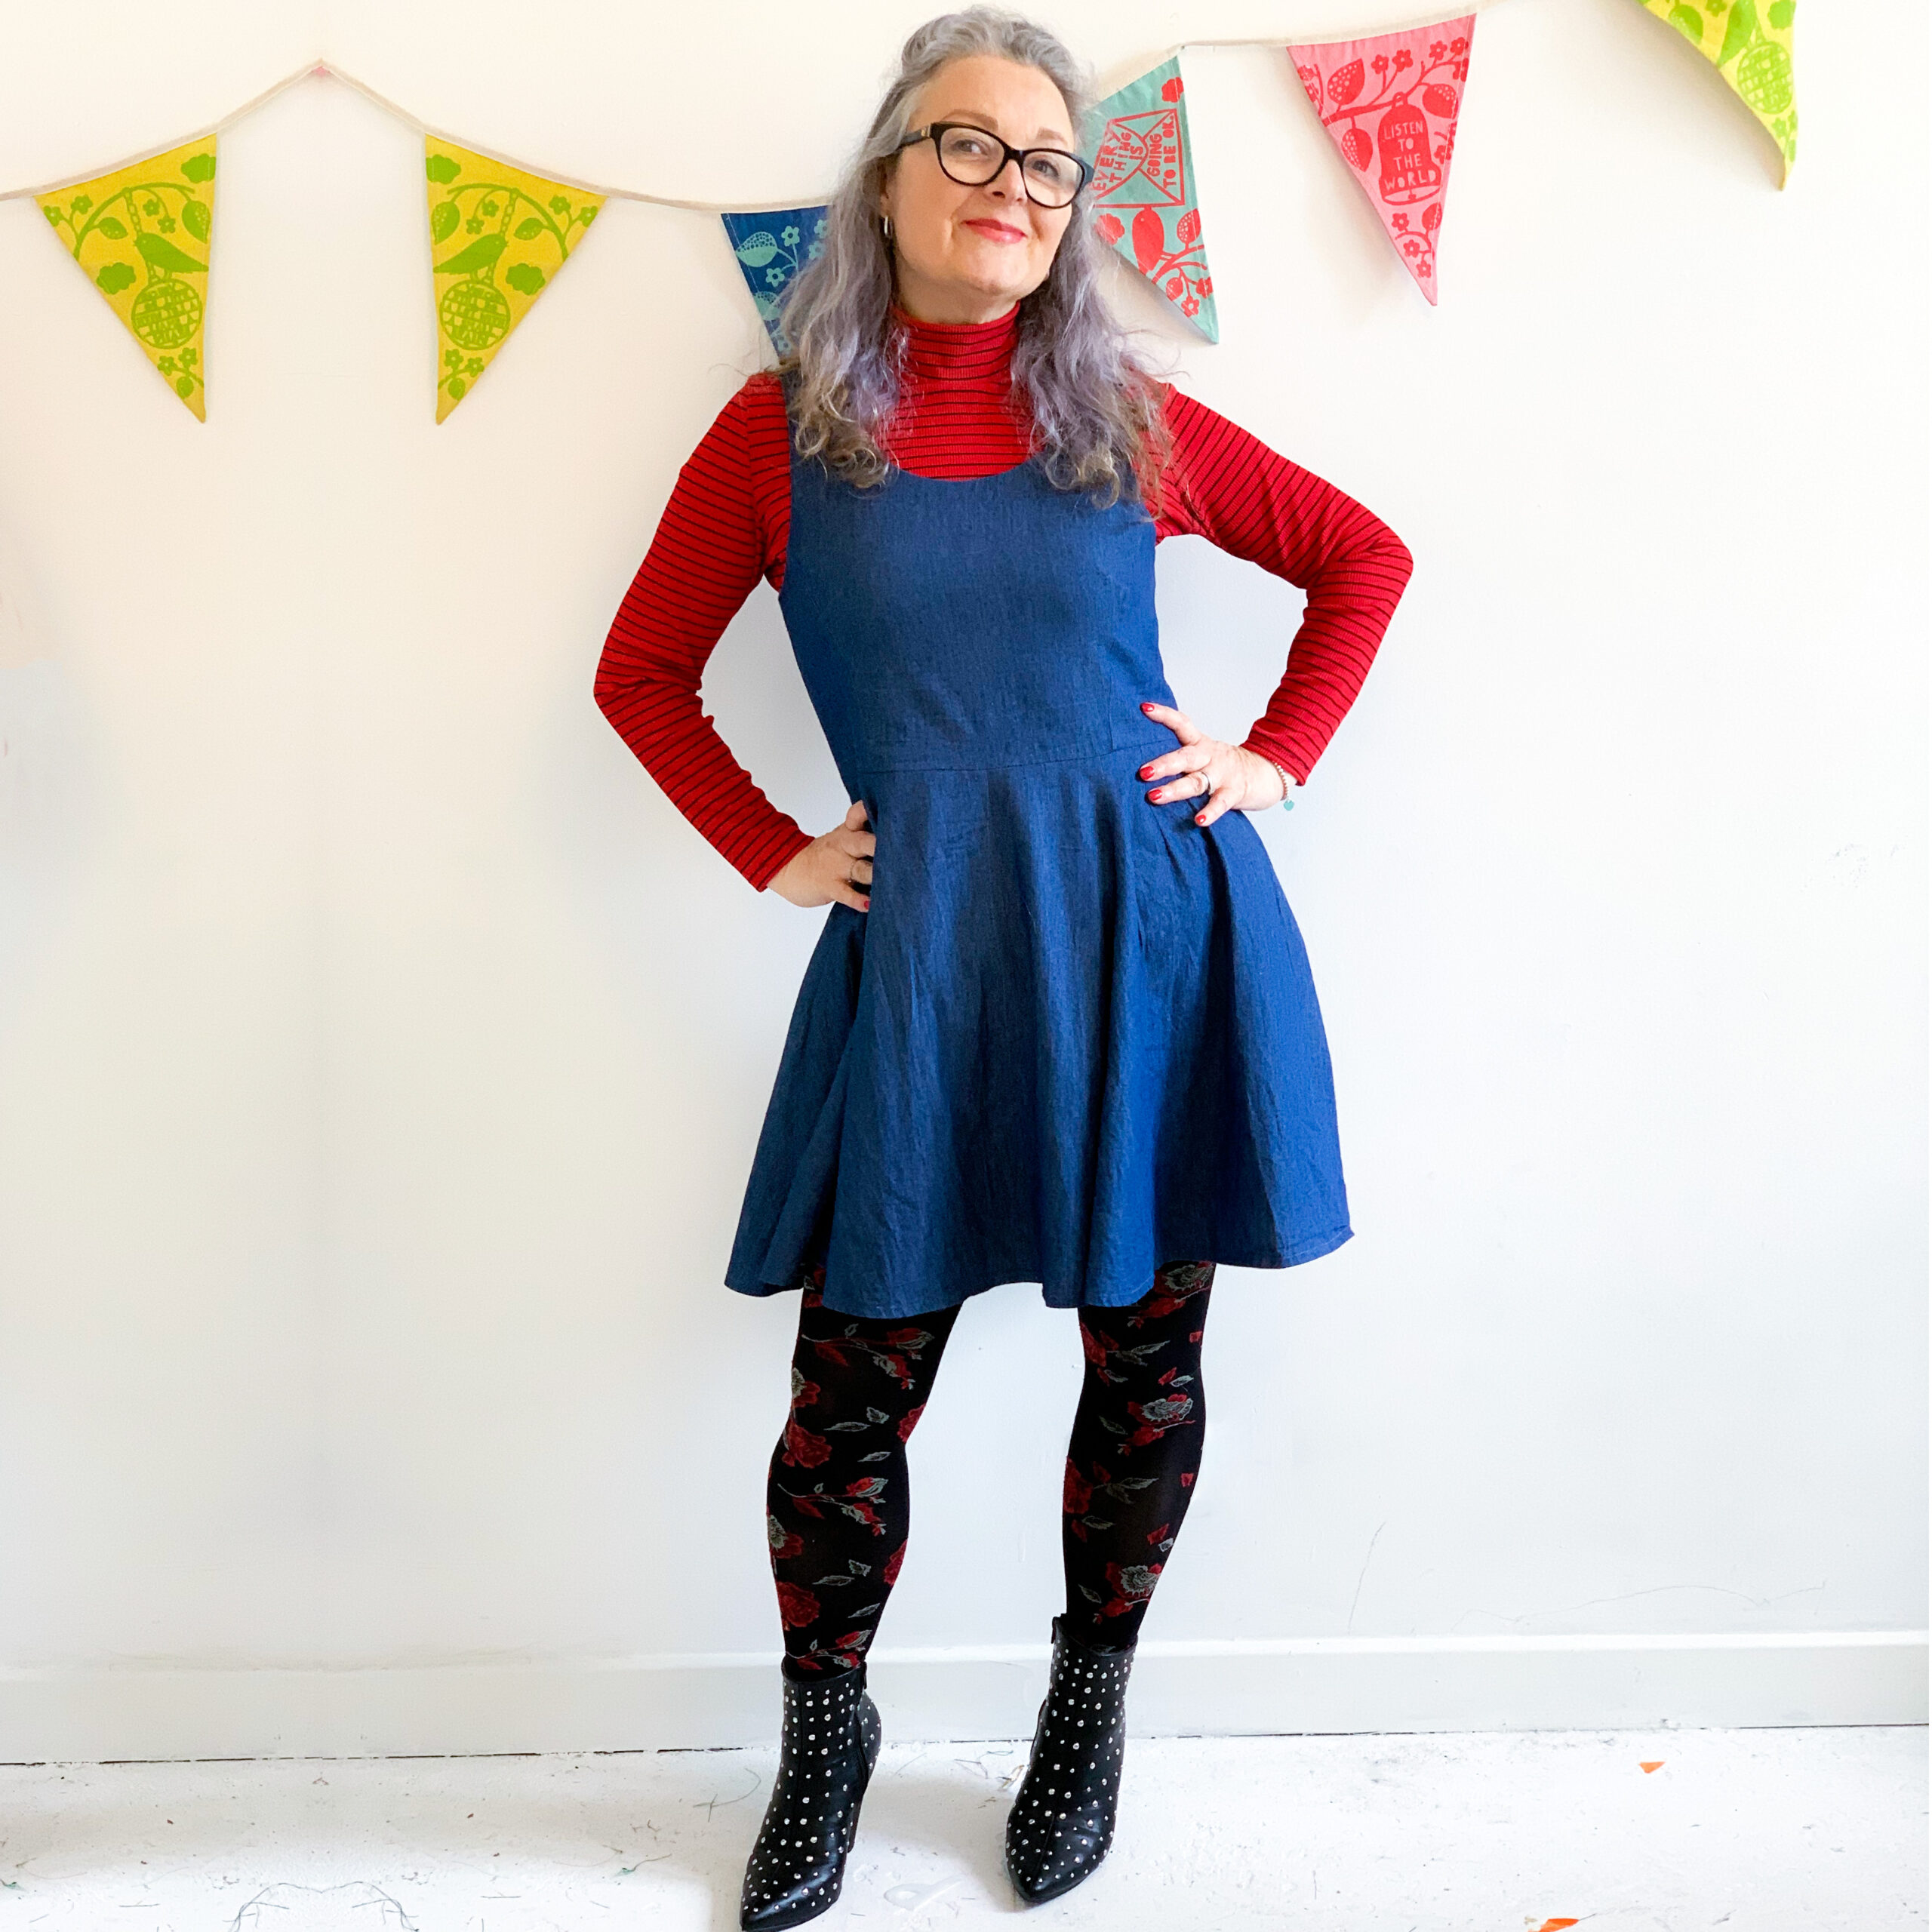
I was torn between choosing the sweetheart neckline and the round neckline of the bodice. And I was almost sold on sweetheart when I realized I could layer the round neckline version more readily with a t-shirt or turtleneck jumper underneath for a change of style and if it got chilly!
I love that its lined. In fact I love lining and the understitching process because it really does give a nice, neat finish.
Oh and I almost forgot to mention that it has pockets – lovely sized in-seam ones that get disguised in the drapes so you can stick anything you like in them with little chance of distorting the shape of the skirt!
I loved making this dress, it was a real pleasure to sew. And I love wearing it – its comfortable, versatile, flirty and feels good. And I can totally recommend this pattern and fabric combo. Because every day should be a party, right?!
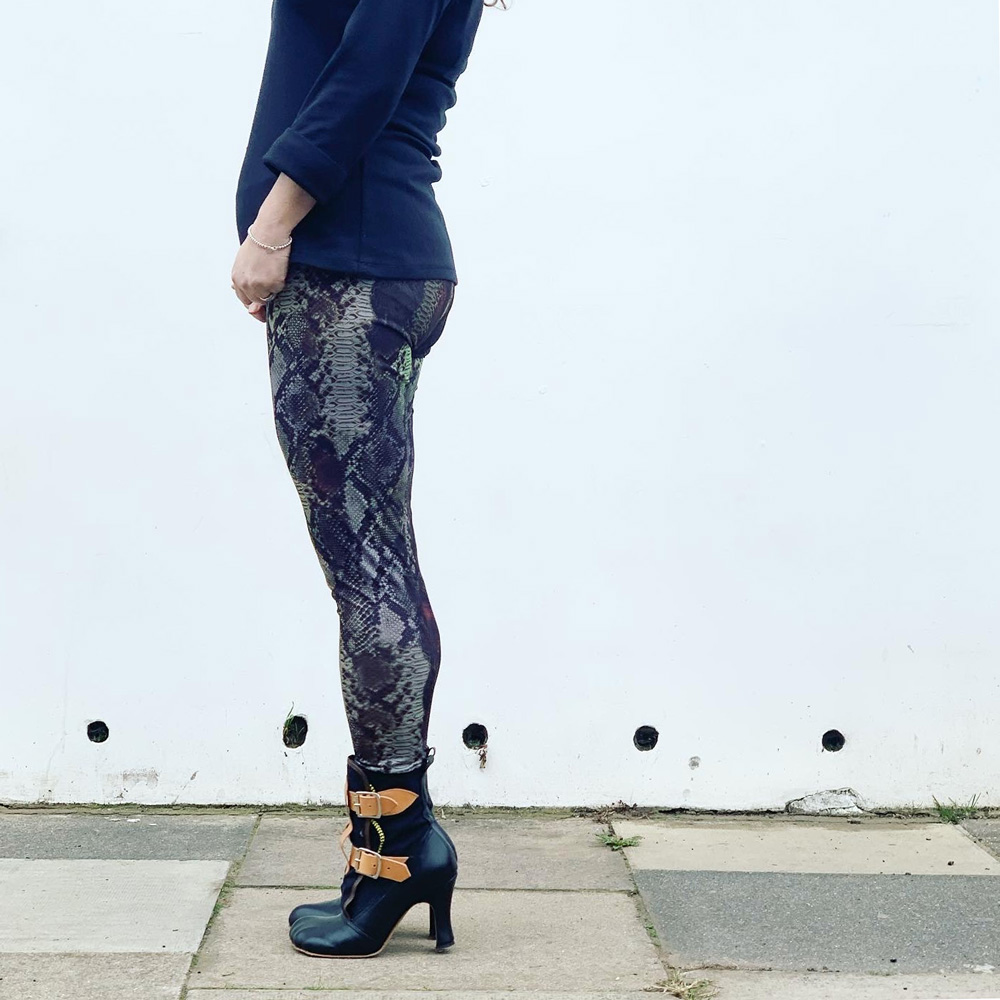
I remember quite plainly saying I did not see the point in making my own activewear. Where’s the fun? It’s just boring and functional. And let’s face it, there are plenty more interesting and fun things to be sewing up!
But never say never! I did a rain-check on the RTW pieces I already own – after one pair pretty much disolved, despite various fixing attempts – and realised not one single pair of bottoms actually fit me properly. Mostly the rise is the problem but also the waist elasticity.
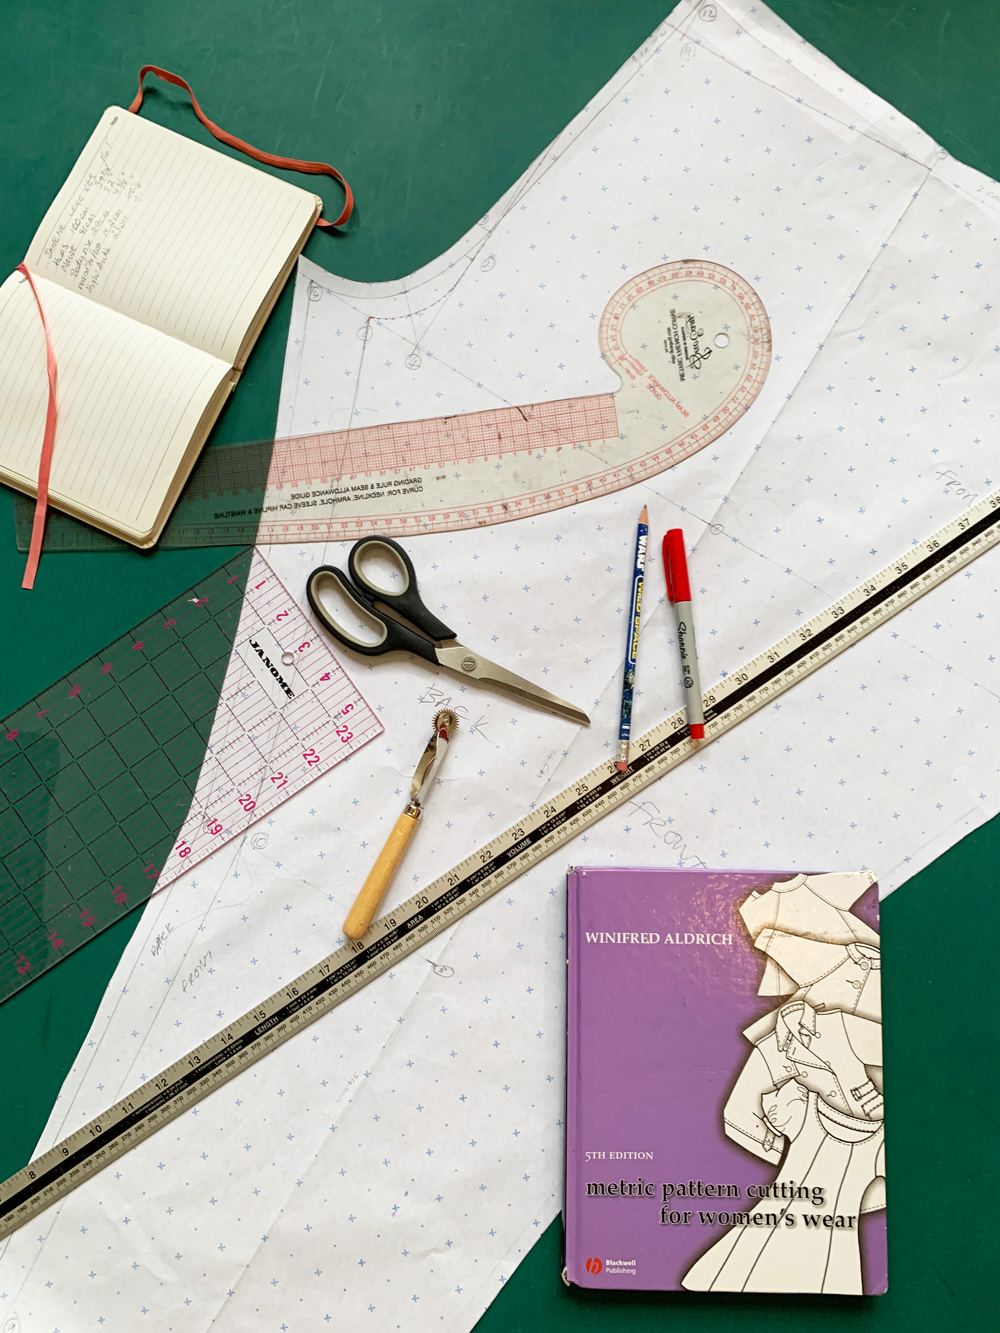
I spent the best part of an afternoon perusing patterns online. There are heaps! And I’m sure most of them would work a treat. But I would undoubtedly have had to make adjustments to said patterns and so I figured I may as well draft my own if it wasn’t going to work straight out the packet.
I followed instructions from Winifred Aldrich’s Metric Pattern Cutting for Women’s Wear – a firm fave in the sewing community. And it didn’t take long at all to draft the one single basic pattern piece.
In fact it took longer for me to decide how to finish the waistband!
I sewed up the leggings in a lightish weight very stretchy lycra. Took minutes on the overlocker with 4 threads. I didn’t even need to substitute stretch needles.
A quick try-on confirmed the fit was OK apart from quite a lot of ease at the waist – the back waist in particular. I didn’t really clock the excess at the thigh at this point. I was poised to take the waist in, before making a casing and threading elastic through – that totally would have been the quickest waistband solution – but then I visualised some gathering at the waist where the elastic waistband would have cinched it all in. I didn’t like how it looked (in my head!). So I set about another solution.
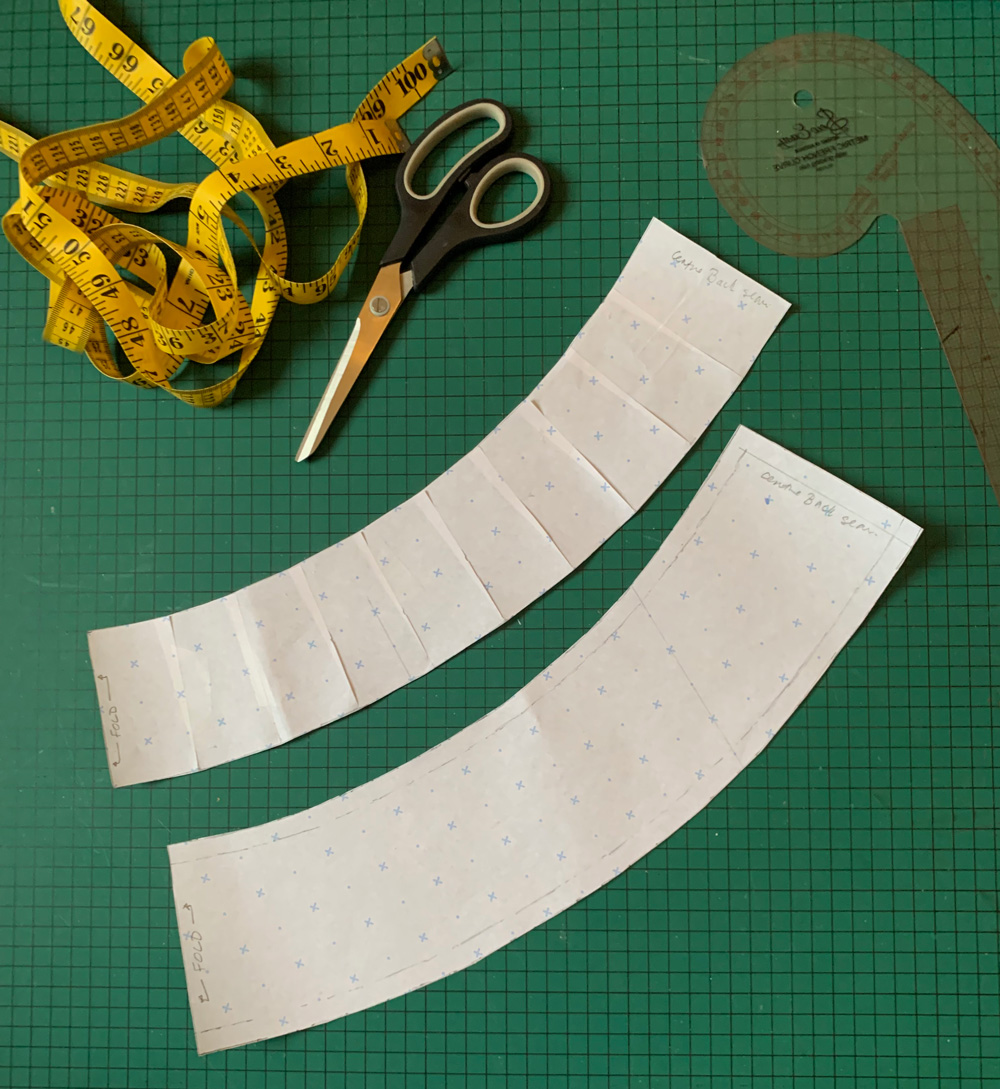
I measured the depth of the waistband from one of my existing pairs (10cm) and then measured the circumference of the leggings, 10cm down from the natural waistband. I halved that measurement to make a rectangular pattern piece that would ultimately be cut on the fold of the fabric.
I marked top edge, fold and side seam on the pattern piece.
To avoid all the gathering at the waistline I marked 10 equidistant slash lines from top to bottom and closed up the top edge until the top now-curved edge measured approximately 80% of the bottom curve.
I then traced the now-curved rectancle onto another piece of paper to add 1cm seam allowance all round apart from the fold edge.
I pinned the pattern to the folded fabric and cut 2 fabric pieces. With each piece right sides together, stitched the short edges to make 2 circular bands.
I placed one band inside the other, right sides facing, and stitched along the top (inwardly curved) edge.
I remeasured the top seamed edge of the waistband and cut some narrow (7mm) elastic to that same measurement with no overlap allowed so it would be a wee bit tighter still.
I then overlapped the elastic by 1cm and sewed the ends together to form a circle. I made quarter point markings along the finished top edge of the waistband. And with corresponding marks made on the elastic, I pinned and lightly stretched to fit as I zigzagged the elastic to the seam, making sure the edge of the elastic didn’t go past the actual seam line.
I trimmed 9cm down from the top of the natural waistline of the leggings (to leave 1cm seam allowance) ready to attach the waistband.
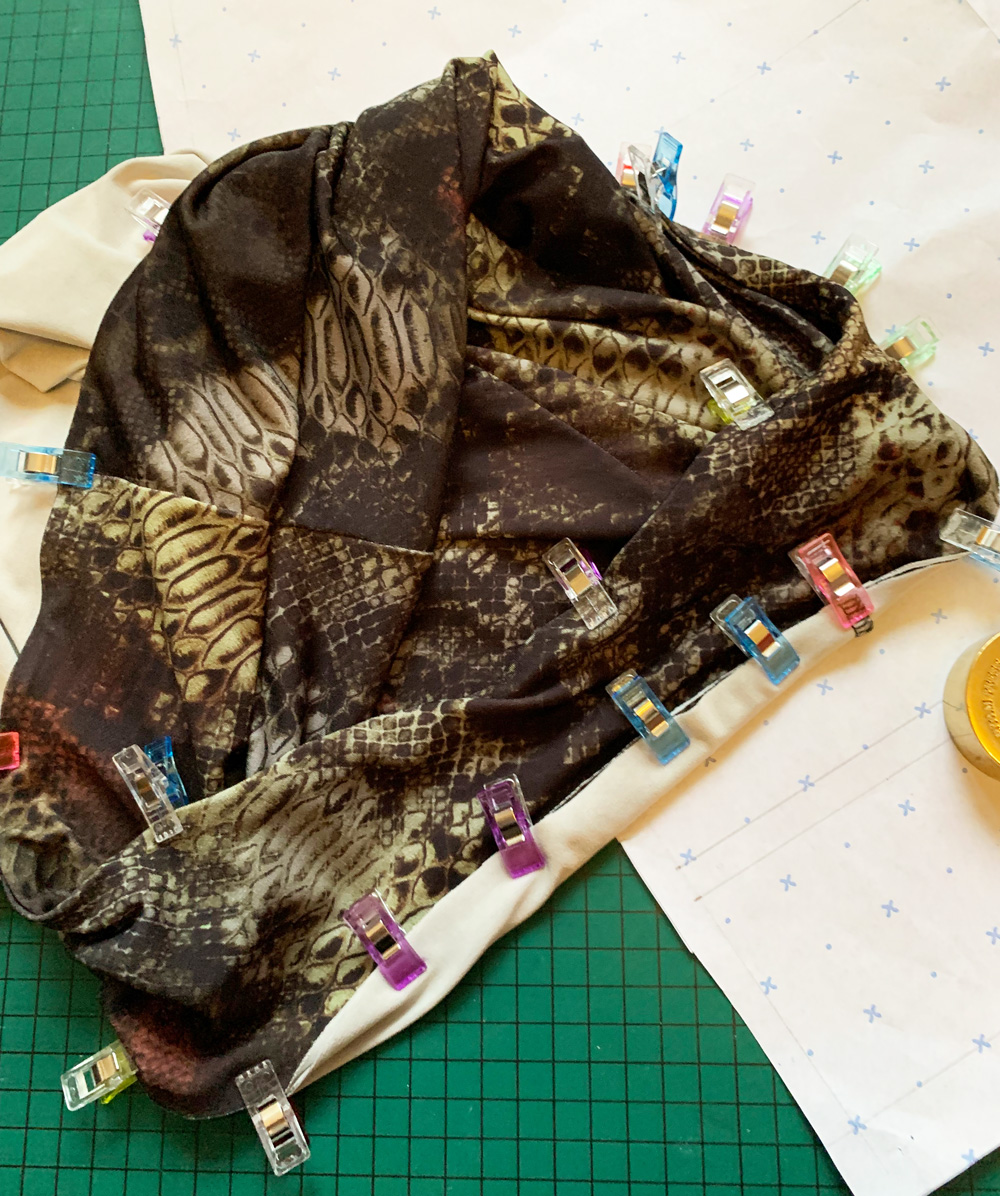
Before attaching I gave a quick press to the waistband, right sides out, to shrink the elastic a bit and make sure both pieces were aligned accurately. Then I attached the bottom two edges of the waistband to the top of the right side of the leggings (right sides together). I aligned the seam of the waistband with the centre back seam and clipped the band all round the top of the leggings. There was no need to stretch to fit this time because both measurements were the same. The clips worked a treat by the way, because the pins kept catching on the fabric.
A quick zoom round on the overlocker, and it was clear that all that care taken for accurate positioning paid off.
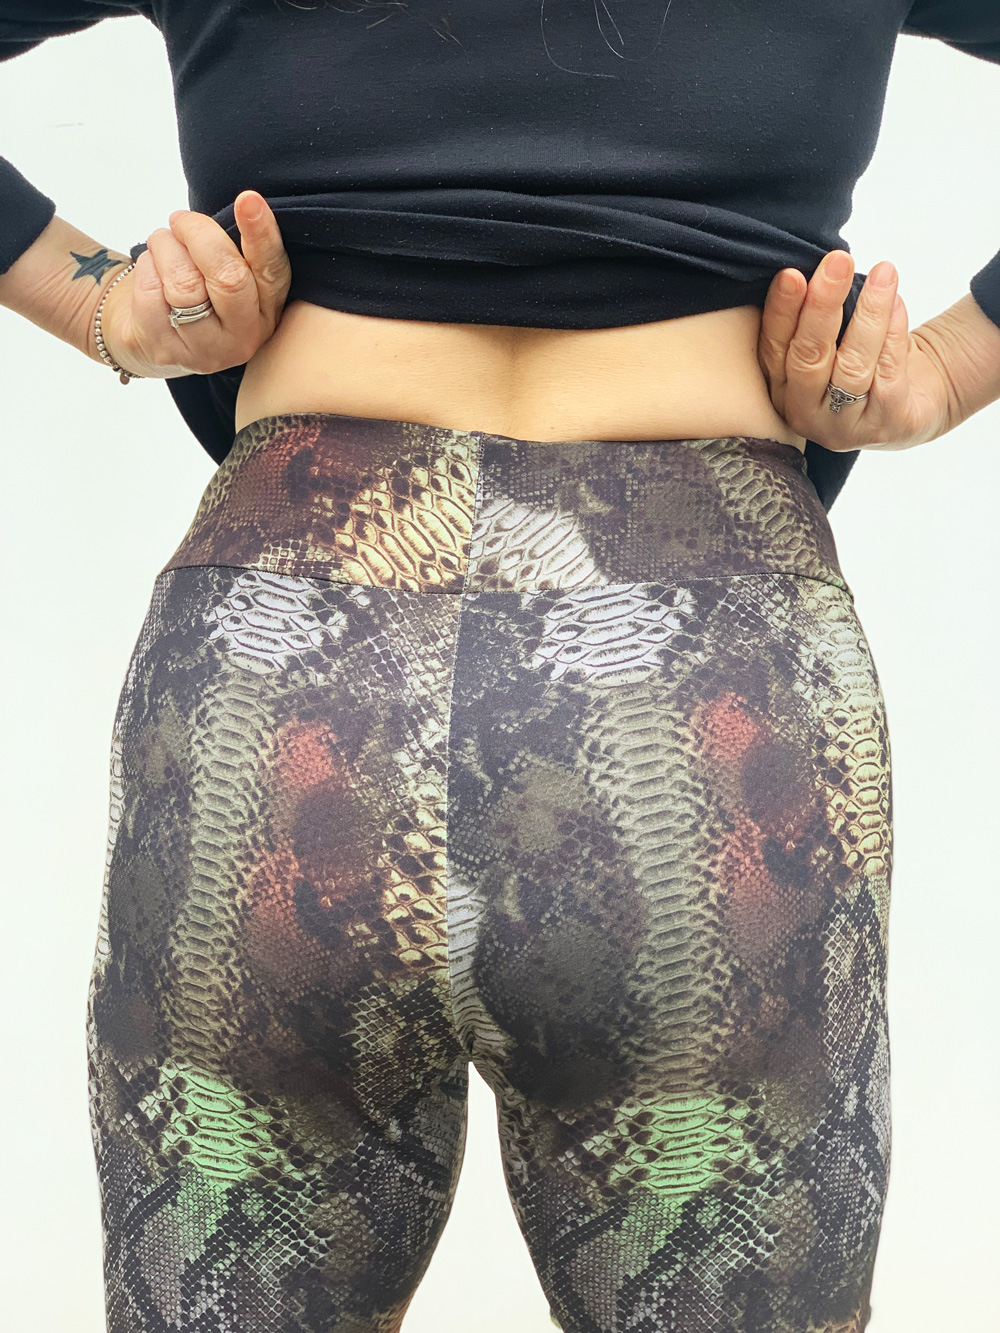
Now I wouldn’t normally volunteer a photo of my rear end, but I’m so chuffed how those two centre back seams lined up and how nicely that deep waistband hugs my hips and dips into the small of my back!
The last thing to do was hemming. Believe it or not I found this bit the most tricky! With everything else going to plan and so quickly, I decided to get the twin needle out and do it properly rather than employ my usual lazy zigzag treatment.
I dug out my barely used Millward stretch twin needle and rehearsed a twin stretch stitch on a scrap piece of the fabric. Took a while to perfect before I sewed for real. But then it messed up before I finished the first round. Sooo annoying! I dug out the manual to see if I’d set it up wrongly and the only thing I did was not to use the needle supplied with the machine, doh!
So I changed up the stretch twin for a regular Brother twin needle and tried again on some scraps. Again, seemed ok until I went to sew the real hem and the same thing happened again. It just got jammed and sucked into the feed dog with the bobbin threads all tangled under. I unpicked and managed to re-sew over the last bit but still, sooo annoying!! I’m totally sticking to zig-zagging next time!
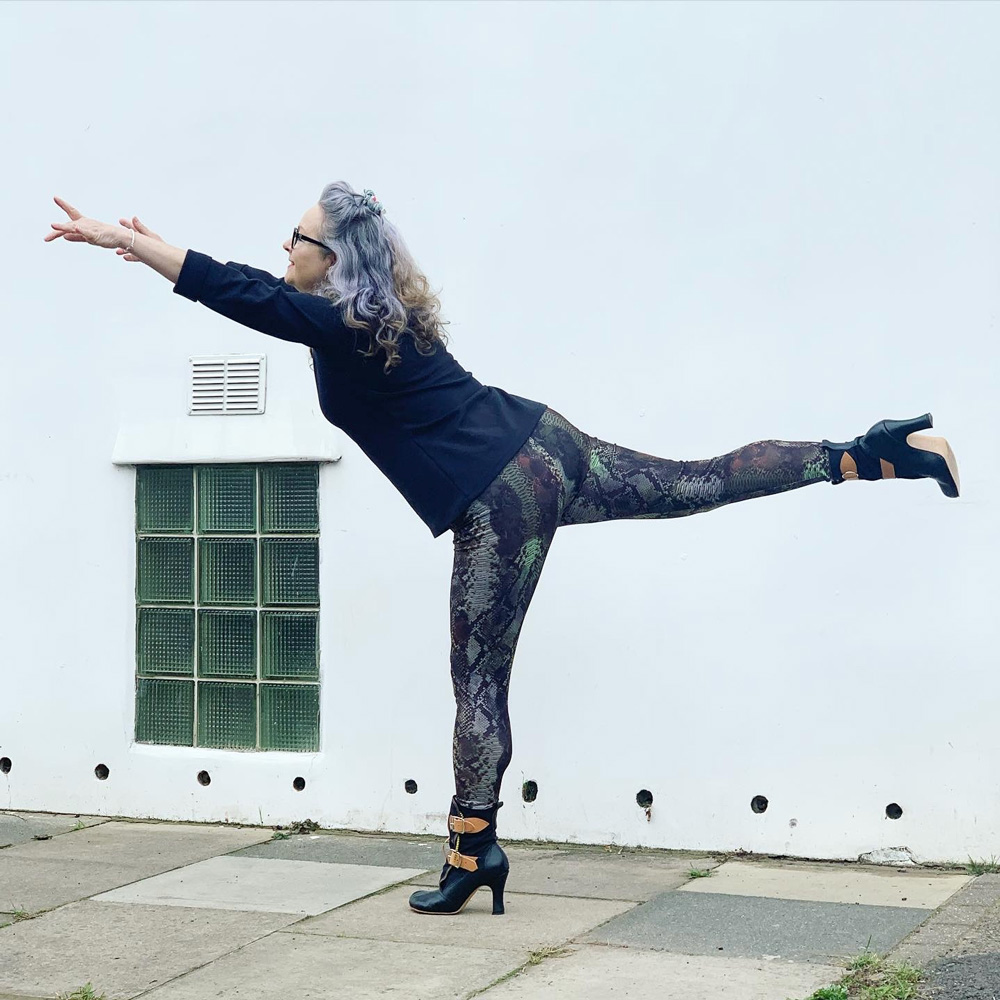
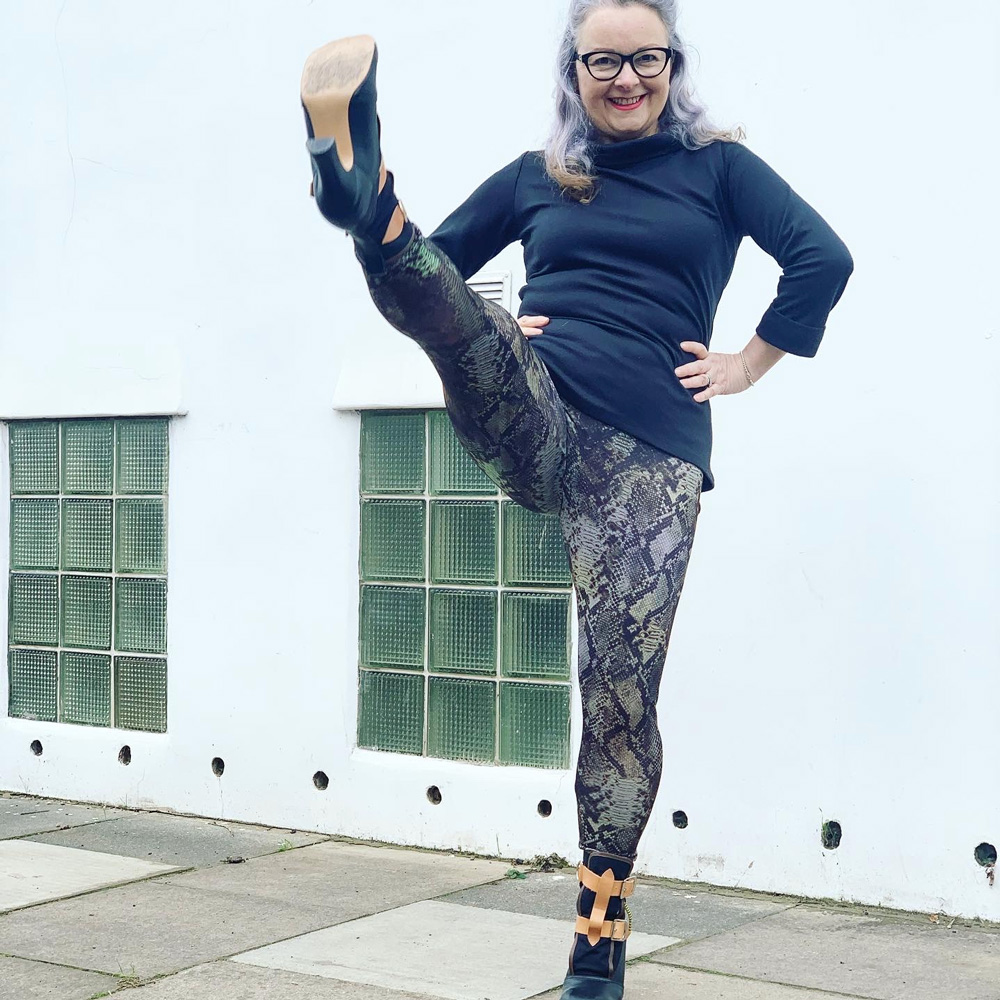
First test of the finished leggings was at my Zumba class. And I was so chuffed that they didn’t end up round my ankles. However I could feel how loose they were from the knee up the inner thigh and I really didn’t like the wobble factor as I was dancing! I’m so much more used to sturdier fabrics holding me in place!
I’m going to take them in but decided to shoot them as general day wear with heels as inspired by @paulalovestosew! They are entirely fine as… well, tights really!
And now I am on the hunt for some heavier stretch fabric. Thank you to everyone who have given some brilliant suggestions. I now appear to have too much choice!!
From not wanting to ‘waste time’ making my own, I can see how making these will quickly become addictive. So… absolutely… never say never!
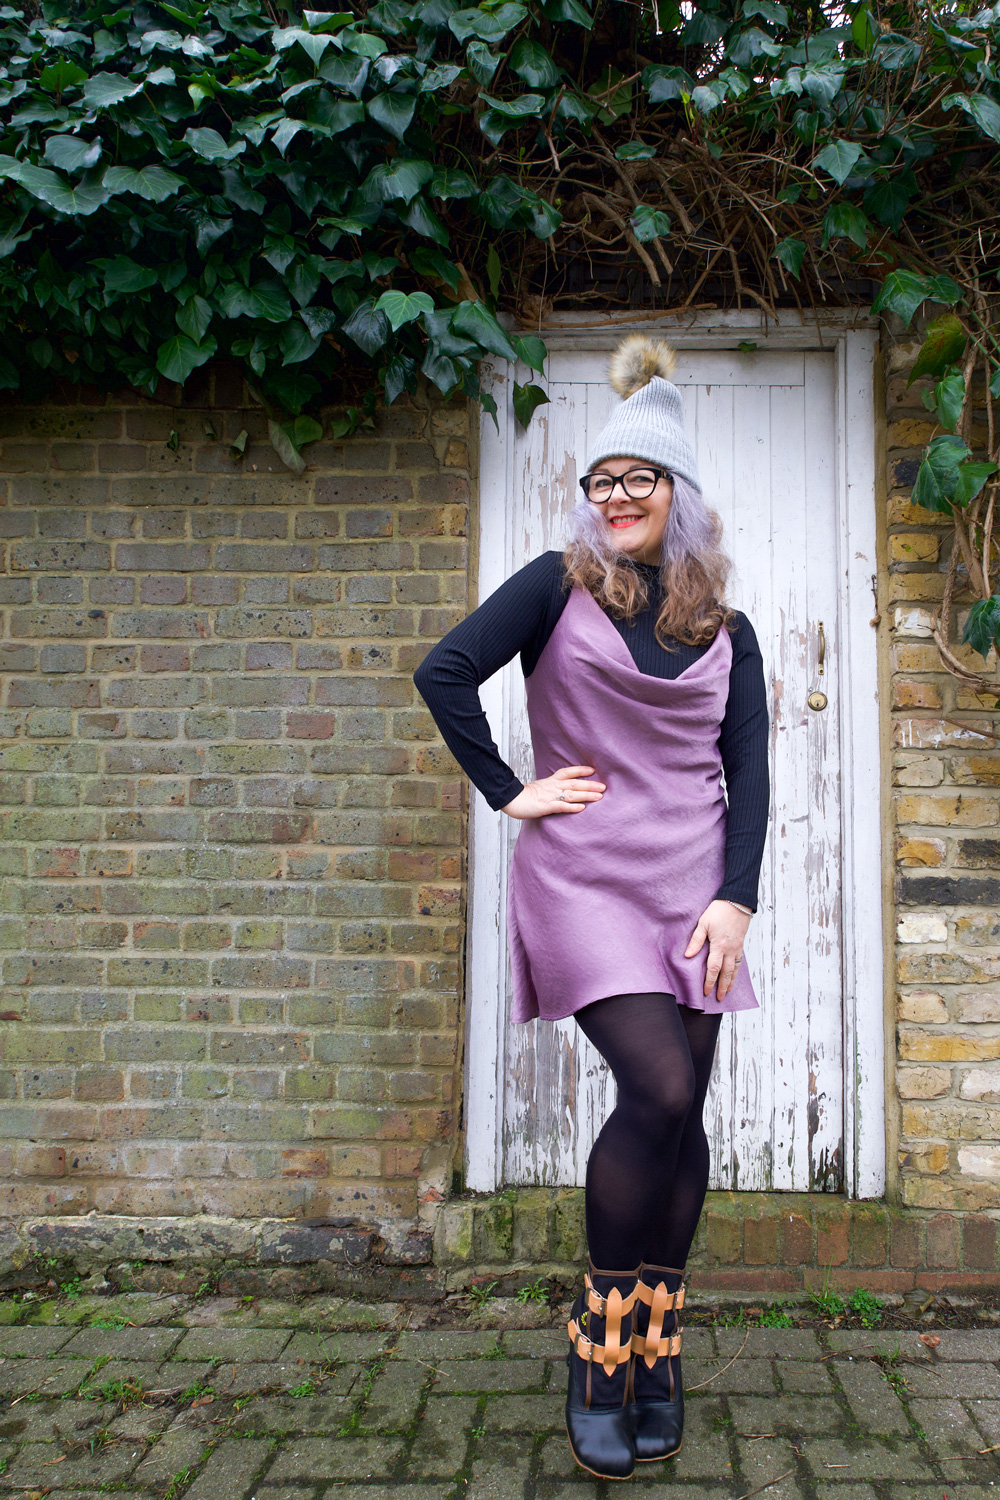
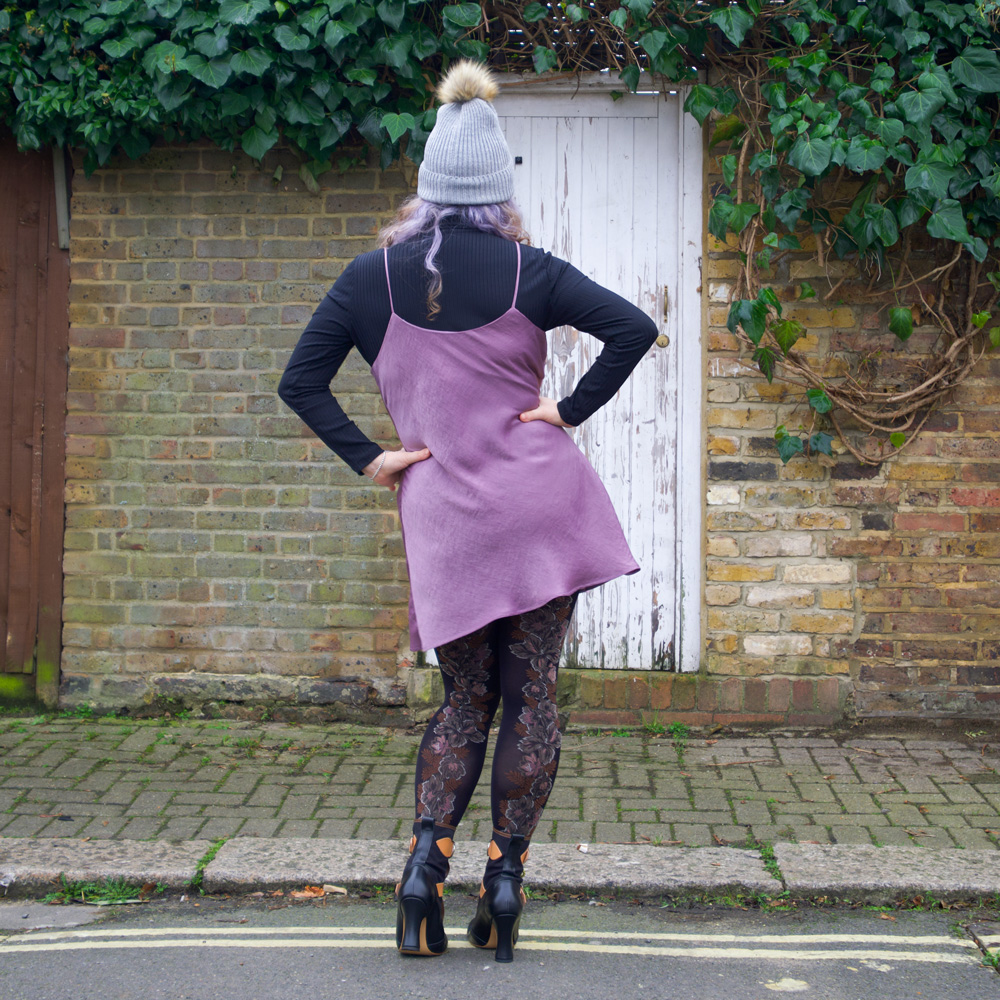
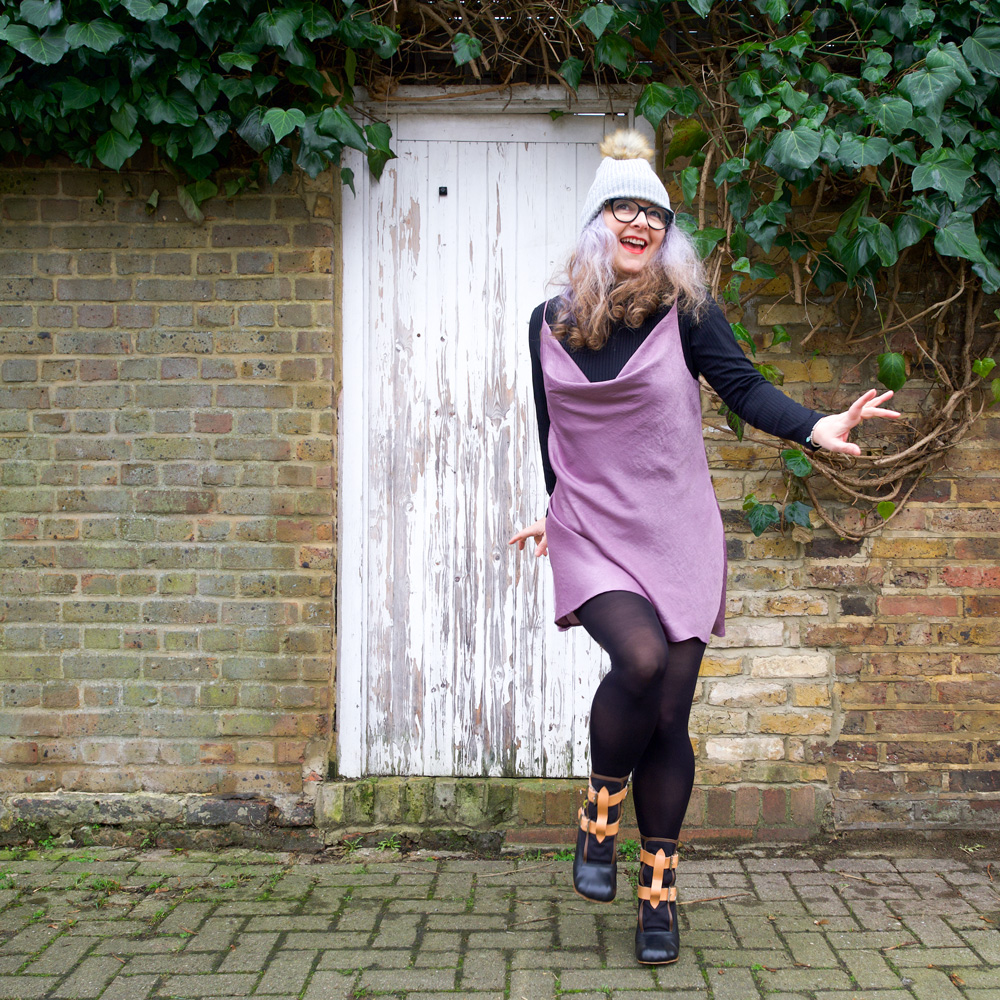
I’ve been admiring all the Masin Sicily slips since I saw the very first one, with the same thought in mind each time ~ could I pull it off?!
It’s a very clingy nowhere-to-hide kinda dress and I’ve never been ok with putting my belly out there but I figured I’d never know the level of exposure until I tried!
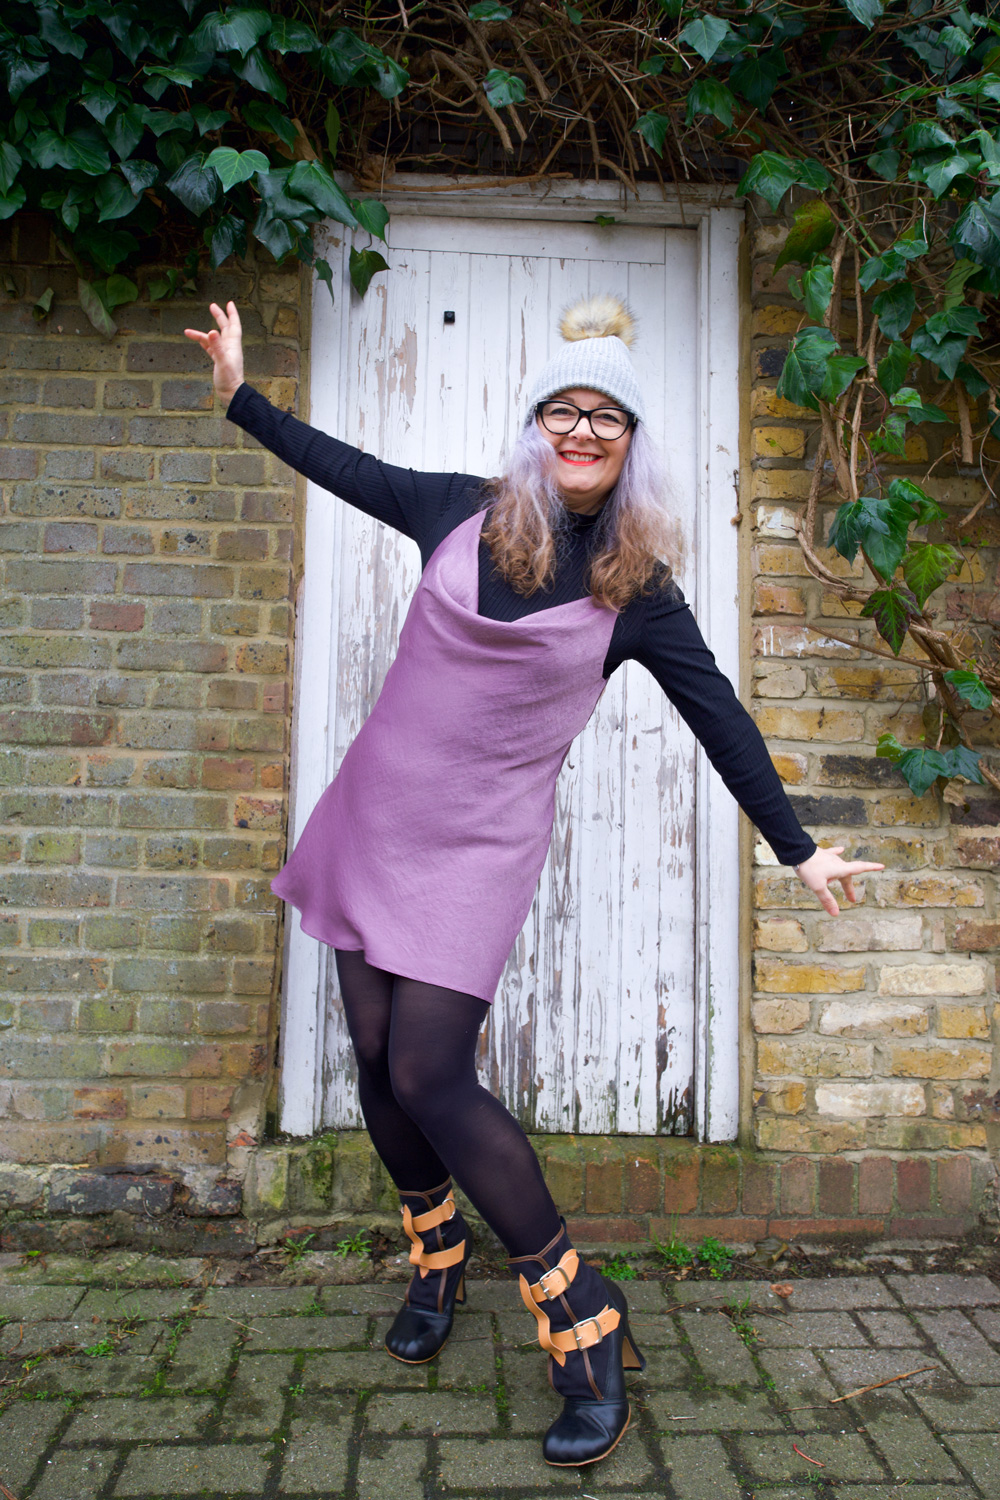
But why the lilac Janene? Haha, I thought I’d get in there before anyone else does! Because to be fair I don’t often break out of my red and black palette. (I’ll be running back to safety after this post, don’t you chicken curry about that!)
Truth be told there was a lilac lovers party going on and fomo got the better of me! Hosted by Cut One Pair and Pigeon Wishes and to celebrate the collaborative button collection this is the second time in the space of a few weeks that an Instagram challenge has given me a push out of my comfy zone. My first being my now favourite jumper!
I have never sewn a bias cut dress. Save a bias cut skirt section of the BHL Jenna dress which I just realized I never blogged (doh!). And I can’t actually remember the last time I sewed a cowl neckline so I was really looking forward to (read, super apprehensive about) making this dress!
Now for clarity (and first note to self) I have to say that putting together 50-odd sheets of A4 pattern pieces nearly drove me over the edge. And not for the first time. I don’t know why I put myself through this. Rewatching The Crown while I was doing it eased a bit of the pain but I so don’t want to do that again for a very long time!! Took me an age to get back up off the floor, if nothing else!
The next issue I had was cutting it out. I invested in an A0 cutting mat (Affiliate link) some time ago. It was quite pricey but equally worth every penny. I quickly learned that cutting slippery fabrics with scissors was not the best way forward the first time I tried! So I had both mat and rotary cutter lined up but still, working on the floor was a bit of a nightmare. I had to roll the rug back on the living room floor to pin the pattern to fabric and then roughly cut around each piece so they would fit on the mat to then be cut out more accurately.
It was better than I expected but the pinning and shifting of pieces was a little detrimental, I’m sure, and I’d have much rather have used pattern weights and cut on a large sturdy eye-level purpose built cutting table. Excuse me while I dream the sewing studio dream… again!
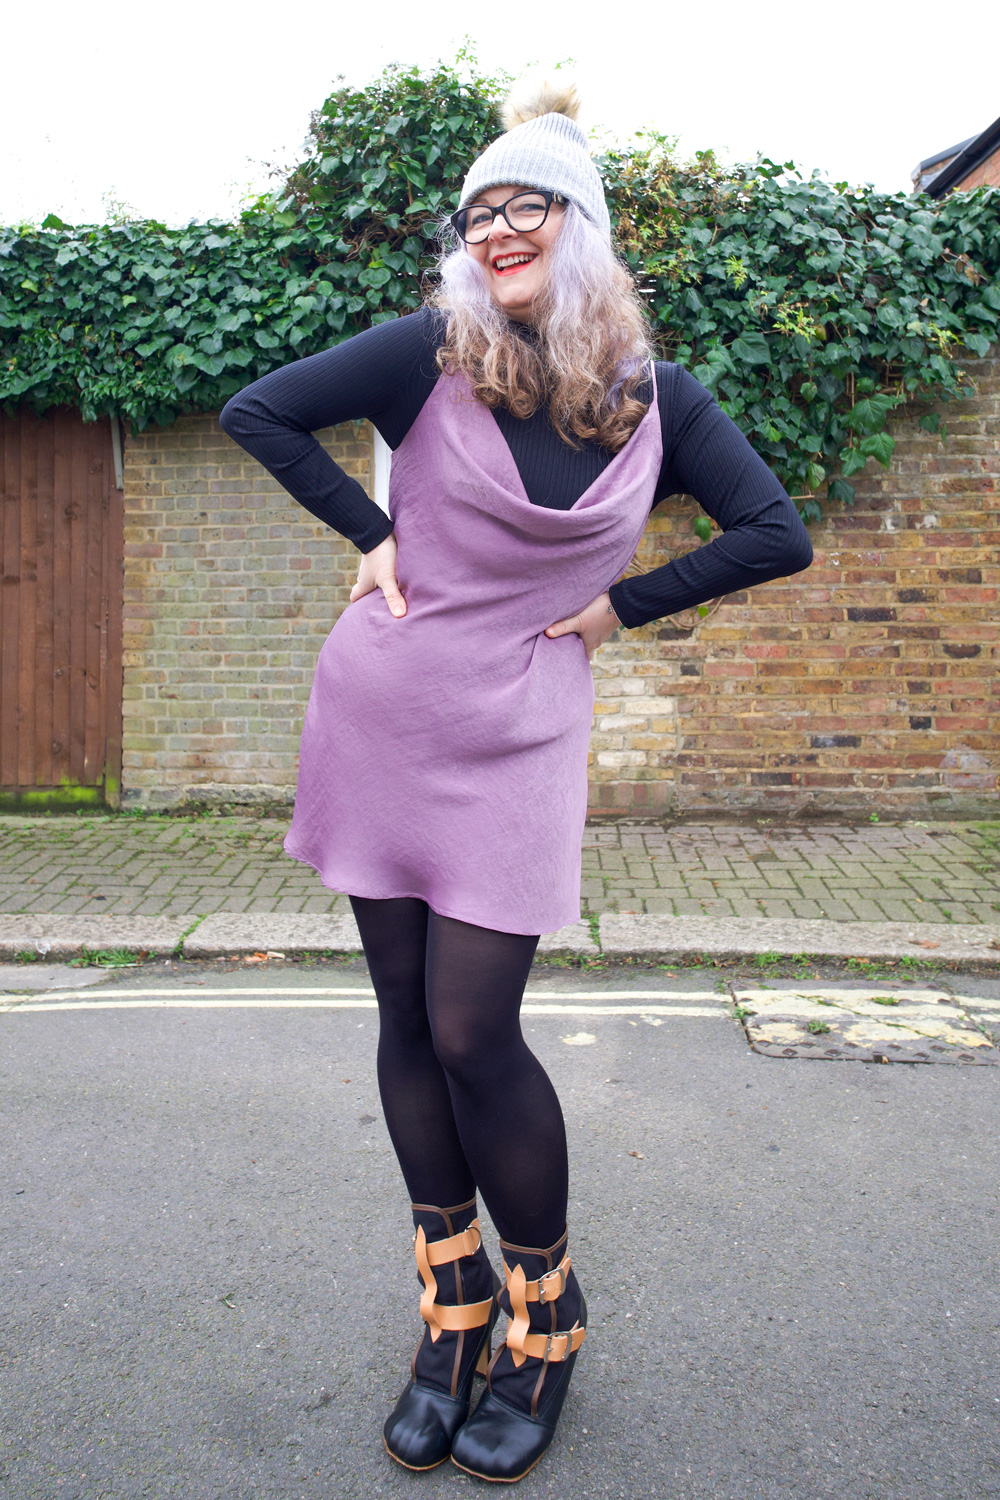
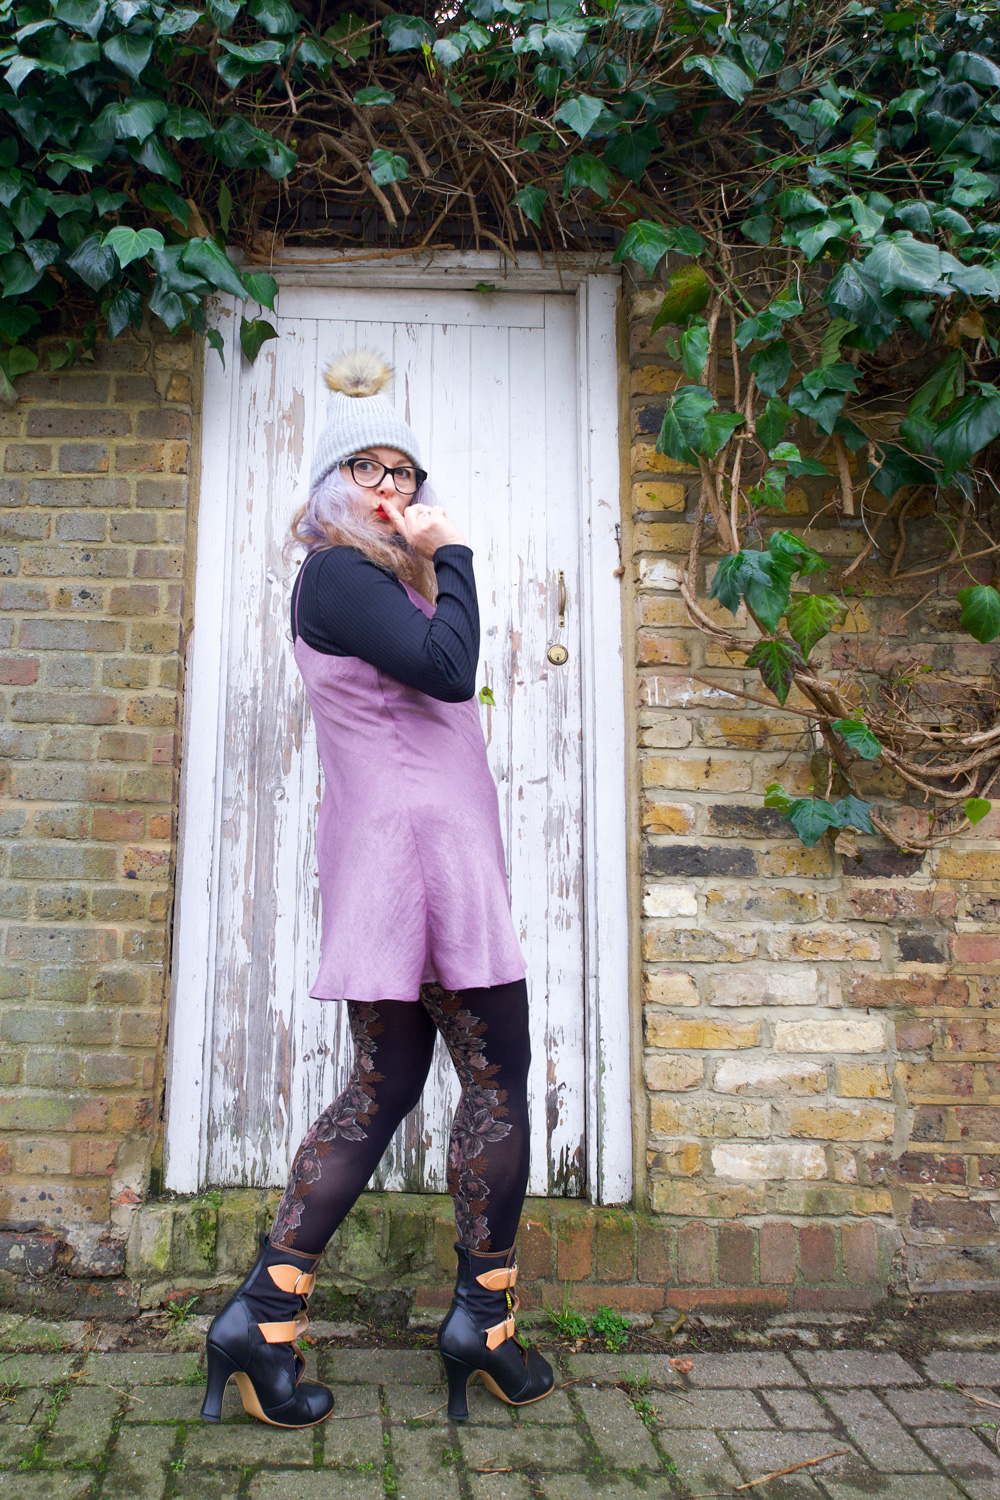
This is the first time I have used a sewing pattern by Masin and I have to say I found the instructions beautifully laid out, concise and super helpful. There’s a clear explanation of bias grain behaviour and how to pick the correct size. Having said that I still managed to pick a size too big because my hips are bigger proportionally than my bust (so I made the wrong choice instead of grading). And I think that is why my cowl neckline appears rather more dramatic than most. I’m still deciding if I’m comfortable with it. It’s perfectly fine layered with an undergarment but I’ve got a whole pack of tit tape at the ready for when I dare to wear it on its own!
I was surprised that this view A with the skinny straps was suggested as the easiest version to sew. It’s taken me years to master those spaghetti rouleaus! But I have to say now that I’ve grasped it, I actually quite enjoy making them. I recently posted a little tutorial here if you are interested: Rouleau Loops Made Simple
There are very few pattern pieces for view A – like front, front facing, back with facing, and strap – and no closures; so the rest of the instructions were super plain sailing BUT… and quite a big BUT…
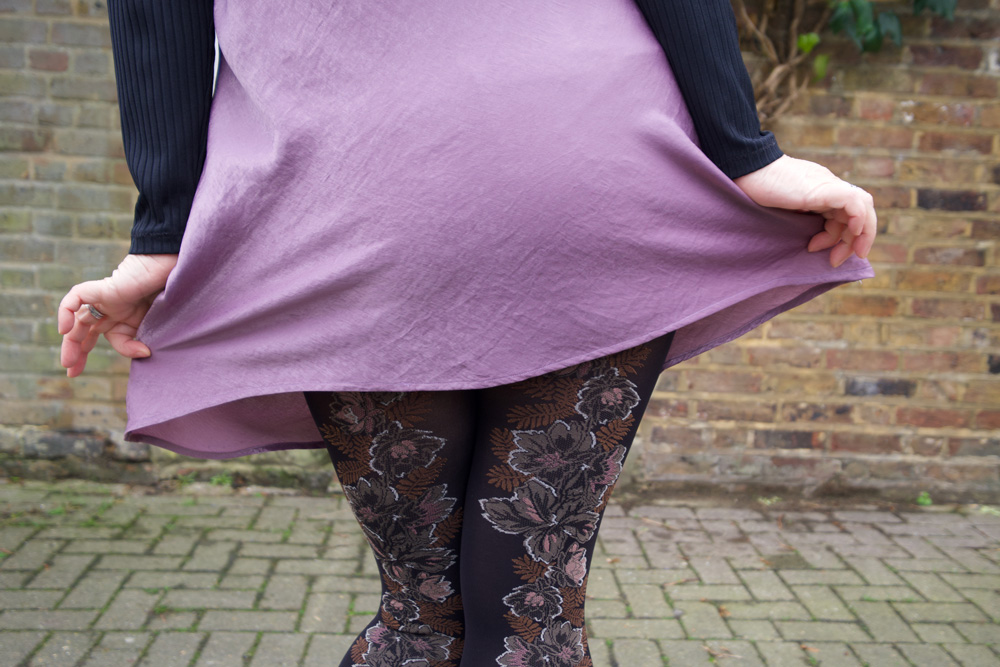
I think I made a boo boo by stay stitching the bias side edges with a straight stitch. I’m not entirely sure because I could have stretched out the seams when it hung over the edge of the table as I sewed, or perhaps as I was sewing the actual seams. I did use a small wide zigzag stitch to French seam the sides but of course that was like closing the stable door after the horse has bolted! While the dress is hanging, the bias cut fabric is going to stretch more but the stay-stitching is going to… well, STAY! (Second note to self: try zigzag stay-stitching too!)
All was not lost though. The worst of the puckering was near to the hemline and I had been mulling over a choice of midi and mini length at the start. So decision was made when I realised I could crop off the worst areas by going for a mini length!
I’m pretty pleased with my hemming too. I sewed a quarter inch away from the cut line and pressed as instructed and then sewed close to the second fold. Even though this velvet touch poly is totally synthetic I was amazed that it pressed so beautifully.
Once again I have learned new things. Testing things but valuable lessons all the same and nowhere near testing enough to put me off trying again – the absolute best thing about sewing adventures!
All in all I am delighted with the outcome and I will be revisiting this pattern again. Leopard print satin is already prewashed and sitting patiently atop the stash! So if anyone has any thoughts about stay-stitching bias dress side seams before I crack on, please let me know in the comments below. And I will love you forever!
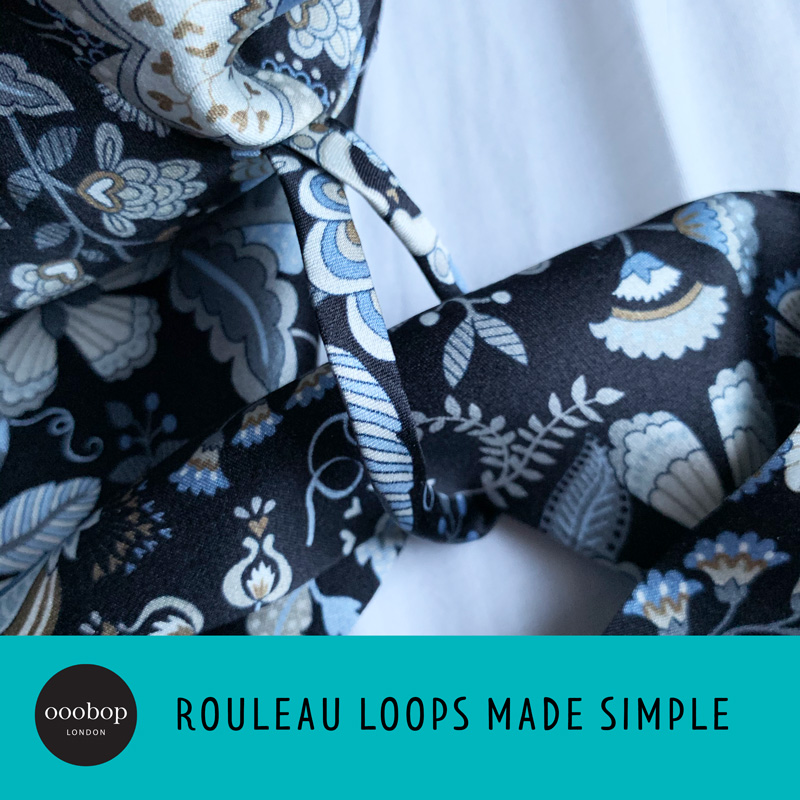
I struggled to make a satisfactory rouleau loop for years and dodged any sewing patterns that involved spaghetti straps, button loops, ties and such decoration. Determined to get the technique nailed for my Vogue Liberty silk dressing gown, I rehearsed the following method with great results. I hope this works for you too!
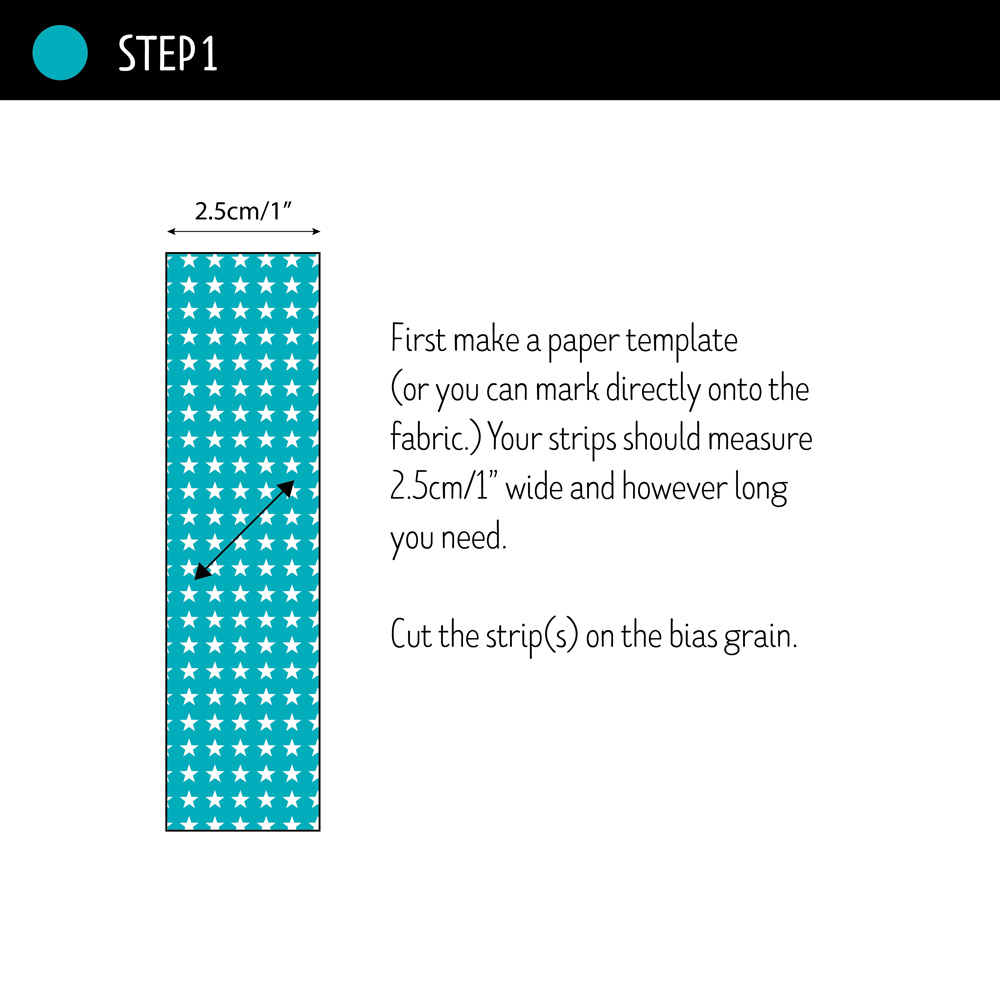
STEP 1: First make a paper template (or you can mark directly onto the fabric.) Your strips should measure 2.5cm/1” wide and however long you need.
Cut the strip(s) on the bias grain.
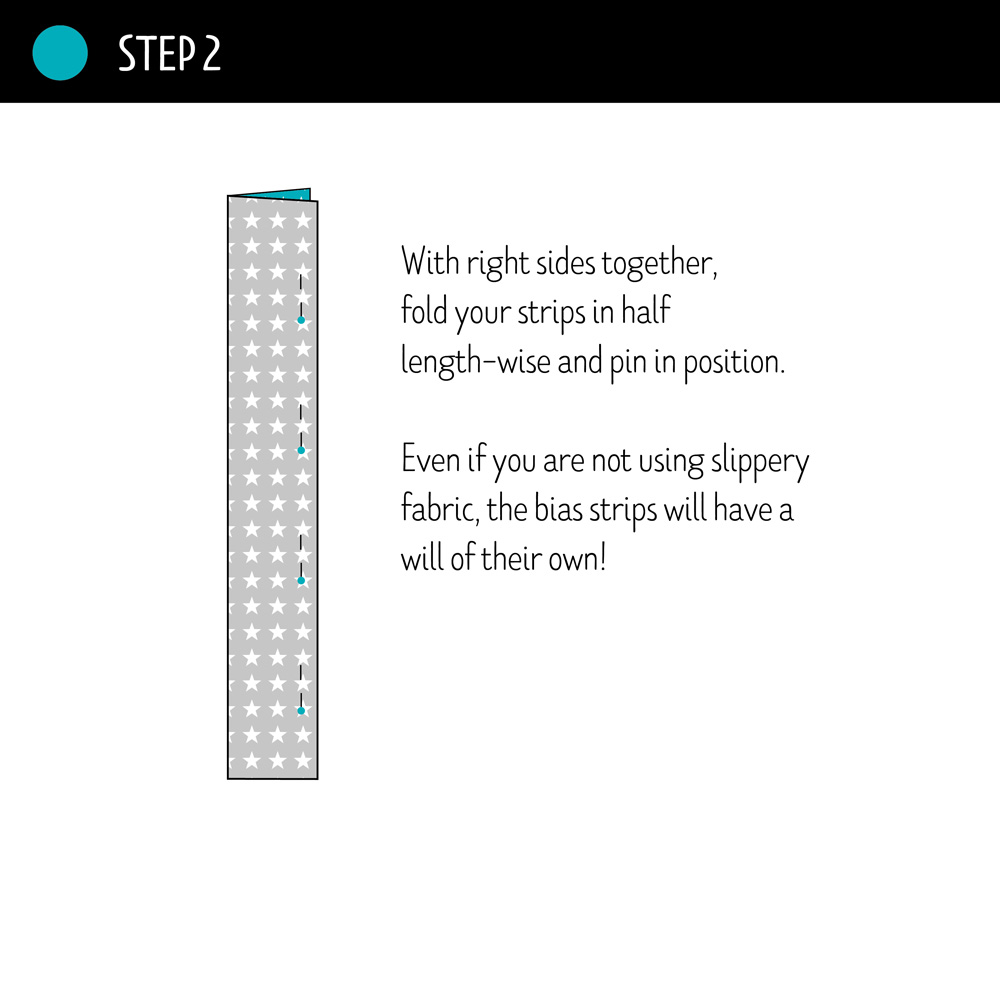
STEP 2: With right sides together, fold your strips in half length-wise and pin in position. Even if you are not using slippery fabric, the bias strips will have a will of their own!
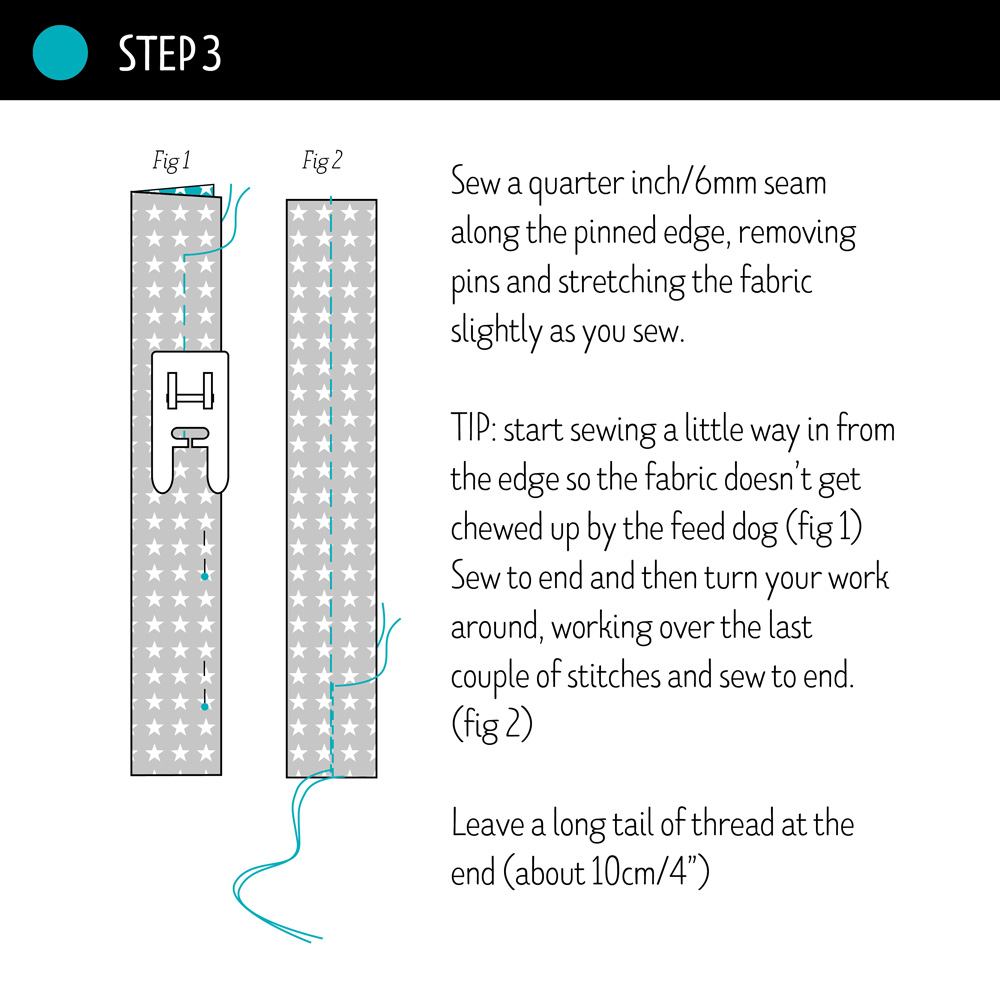
STEP 3: Sew a quarter inch/6mm seam along the pinned edge, removing pins and stretching the fabric slightly as you sew.
TIP: start sewing a little way in from the edge so the fabric doesn’t get chewed up by the feed dog (fig 1) Sew to end and then turn your work around, working over the last couple of stitches and sew to end. (fig 2)
Leave a long tail of thread at the end (about 10cm/4”)
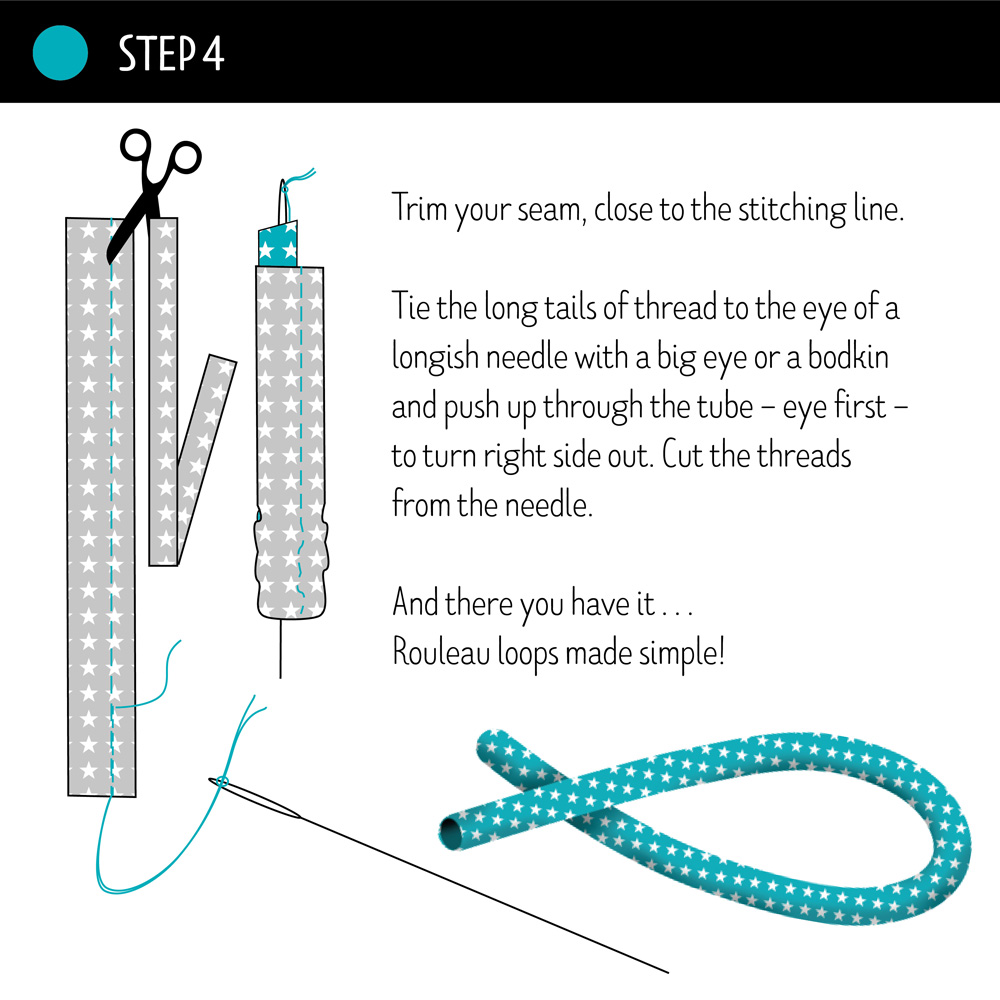
STEP 4: Trim your seam, close to the stitching line.
Tie the long tails of thread to the eye of a longish needle with a big eye or a bodkin and push up through the tube – eye first – to turn right side out. Cut the threads from the needle.
And there you have it . . . Rouleau loops made simple!
Do let me know if you found the layout of these instructions helpful. I sometimes struggle with photographed instructions and I find illustrated steps are easier to follow but that might just be me!
I like that there’s never a strict order of process. Often I pick a pattern and go looking for the right fabric. Sometimes the other way round. Driven by need or pure desire but in this case it got changed up a bit more.
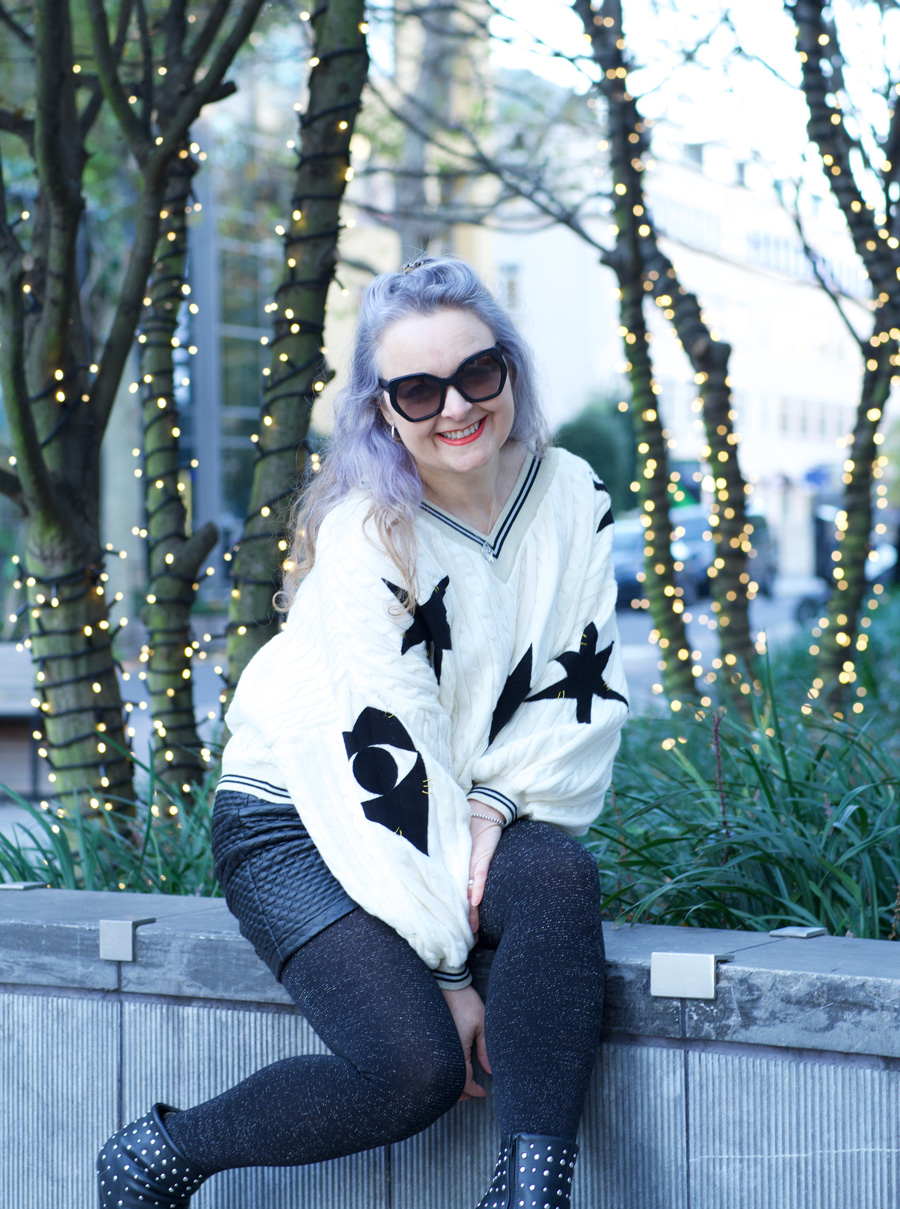
Diane from @Dreamcutsew was kindly giving away some fabric on Instagram and I just couldn’t pass up her wonderful piece of cable knit jersey. I didn’t have a Scooby what I was going to do with it – I didn’t even know this kind of fabric existed till then!
I considered a cushion cover, a hat, some gloves – even some slippers! (I still have a small piece left so this could still be an option) But it sat for sometime, perched on the top of my own stash until I had a flash of inspiration. And then it came – in the shape of a hashtag challenge: #magamsewalong (Make a Garment a Month) hosted by @suestoney and @sewing_in_spain. This month the theme #naturalnovember was set by guest host @gigi_made_it, and that really got the ball rolling.
I loved how free-range the brief was;
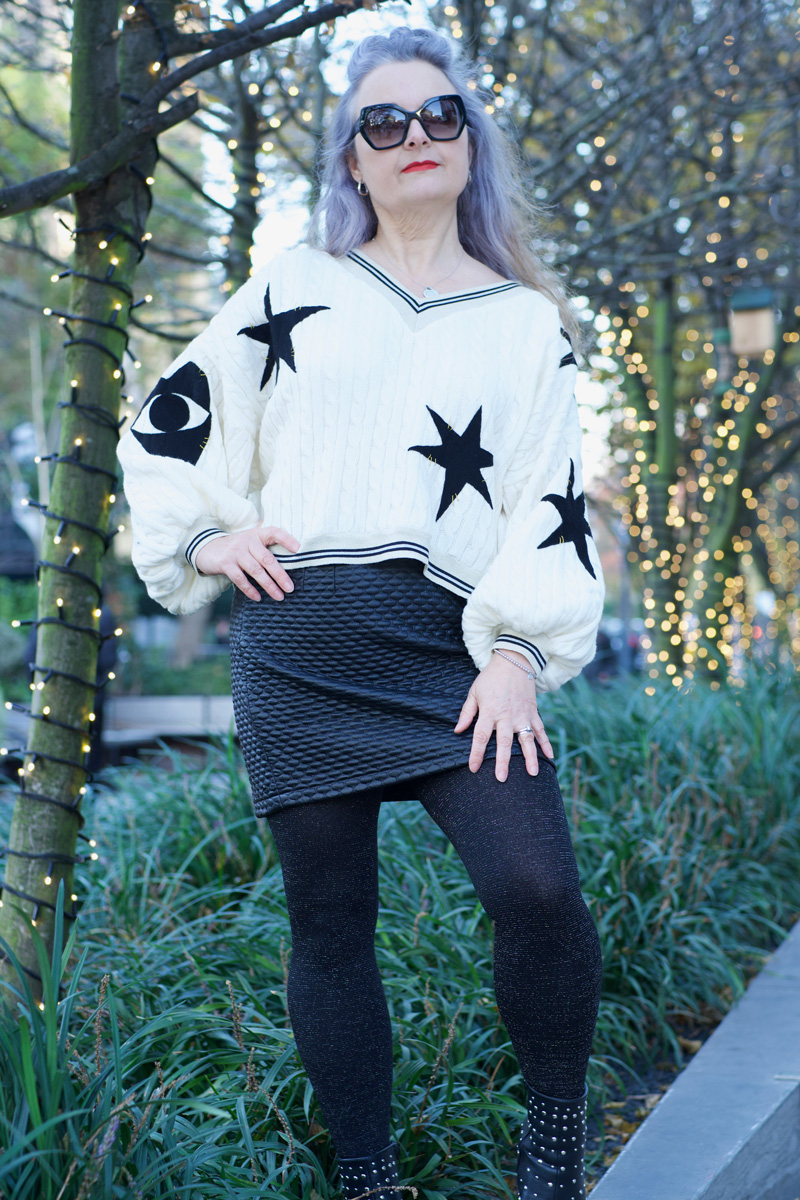
☑️ Make something from a natural fibre Now I’m pretty sure there wasn’t a speck of natural fibre in that cable knit but I did have a raggedy moth-eaten merino wool jumper which met its demise in an accidental hot wash. I’ve no idea why I kept it but I’m jolly glad I did because I decided to add some black detail. I generally stick to the safety of any colour palette that involves black!
☑️ Choose a make reflecting the weather and rhythms of the season where you live The weather was definitely a factor in my need for a jumper. I don’t have nearly enough and I can never find any I like that I can actually afford!
☑️ Make something in a nature-inspired print I figured stars are pretty nature-inspired, aren’t they? And an appliqué is an acceptable swap out for a print.
☑️ Use earth-friendly, sustainable materials in your make So the main fabric was a leftover piece from another sewist, the appliquéd bits were upcycled from an old jumper. The gold thread was a few leftover strands from a previous project and the only additional notion was the cuffing/ribbing that I bought from Minerva.com
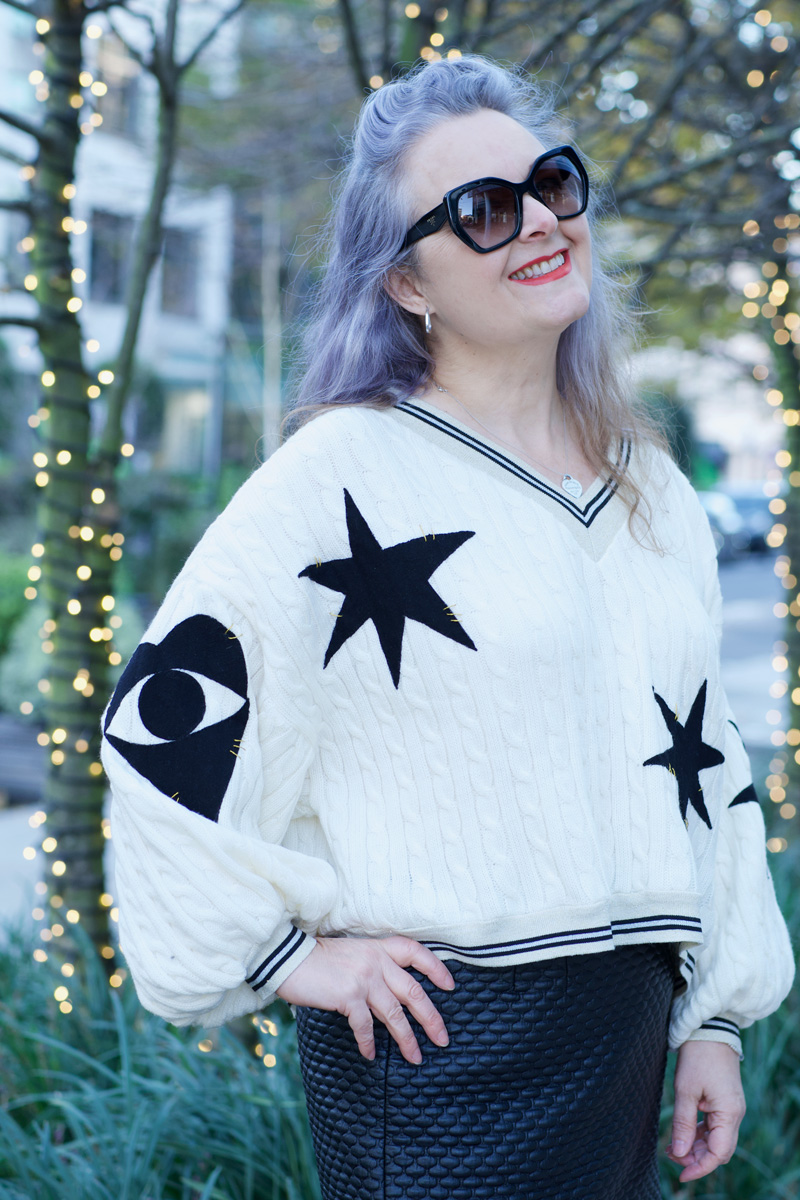
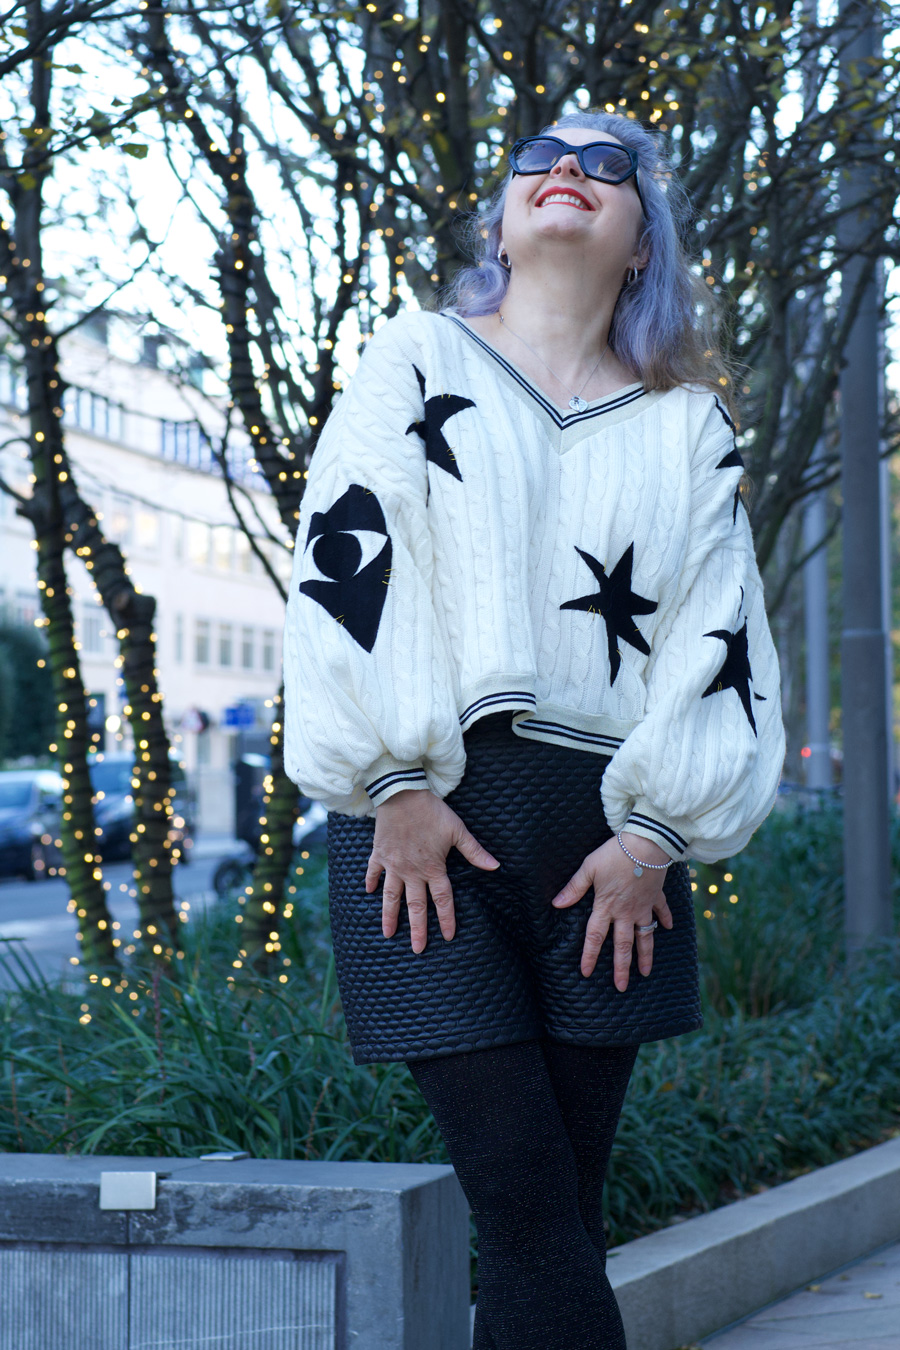
☑️ Make something that totally expresses your natural true self, unconstrained by cultural norms or trends I’ve been so wanting to make something that does just that. It harks back to my 80s days where I was probably the most experimental with my clothing. Big batwings and balloon skirts the lot! I actually had puffball shorts too! ☑️ A make that occurs without (much) effort. As always, interpret creatively and be natural I freestyled the pattern. Based on a RTW jumper I already own and simplified further. No shaping for armholes and rectangles for sleeves gathered in at the cuff. That meant less waste too! I shaped the shoulders slightly and cut a V neck but the back piece is fundamentally a rectangle also.
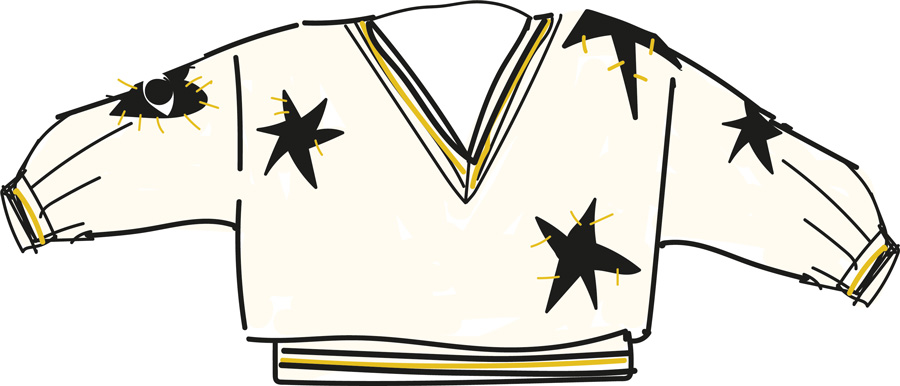
The project began with a very rough sketch! Please do not judge my Adobe Illustrator skills on this sketch alone – I might never work again!
Once the main pieces were cut out, I began by stabilising the shoulder seams. Even though it was going to have a relaxed drop shoulder I still didn’t want it to stretch out. After sewing the front to the back along the shoulders I added the cuffing along the neckline. Incidentally I used a wide shallow zigzag stitch on my regular machine throughout and then overlocked the edges for a smaller neater finished edge.
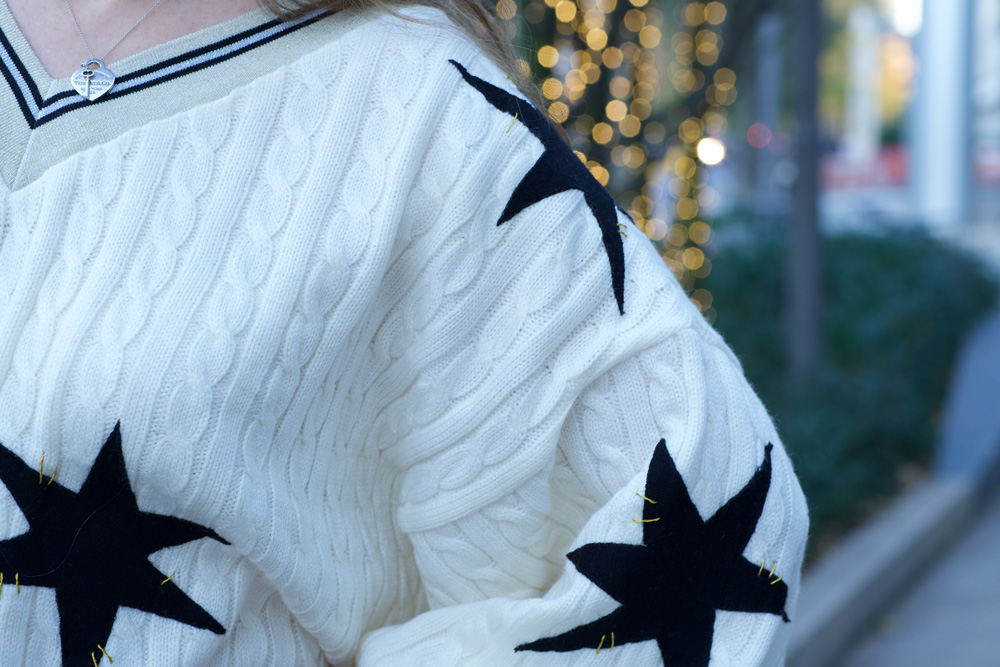
To make the appliqué shapes I first fused some doublesided fusible stabilizer to the black jumper pieces (sans moth holes) and then cut the shapes. I ironed the pieces to the front of the jumper and to the sleeves while they were flat. I then handstitched all round with a tiny blanket stitch. I’m still not entirely sure how the points of the stars will hold up over time but we’ll see. The big gold stitches are purely for decoration and to complement the glittery gold stripe of the ribbing.
When all the pieces were in place, I closed up the underarm and side seams. I gathered the wrists of the sleeves by hand with reasonably big stitches and then stretched the cuffing to fit, sewing right sides together. I did worry that it might be a bit bulky but it doesn’t feel uncomfortable at all. Just extra warm… and that’s totally fine with me. I can’t stand the cold!
The final step was to add the ribbing to the hem. I really like the contrast of the stripe and the added glitter just makes it pop!
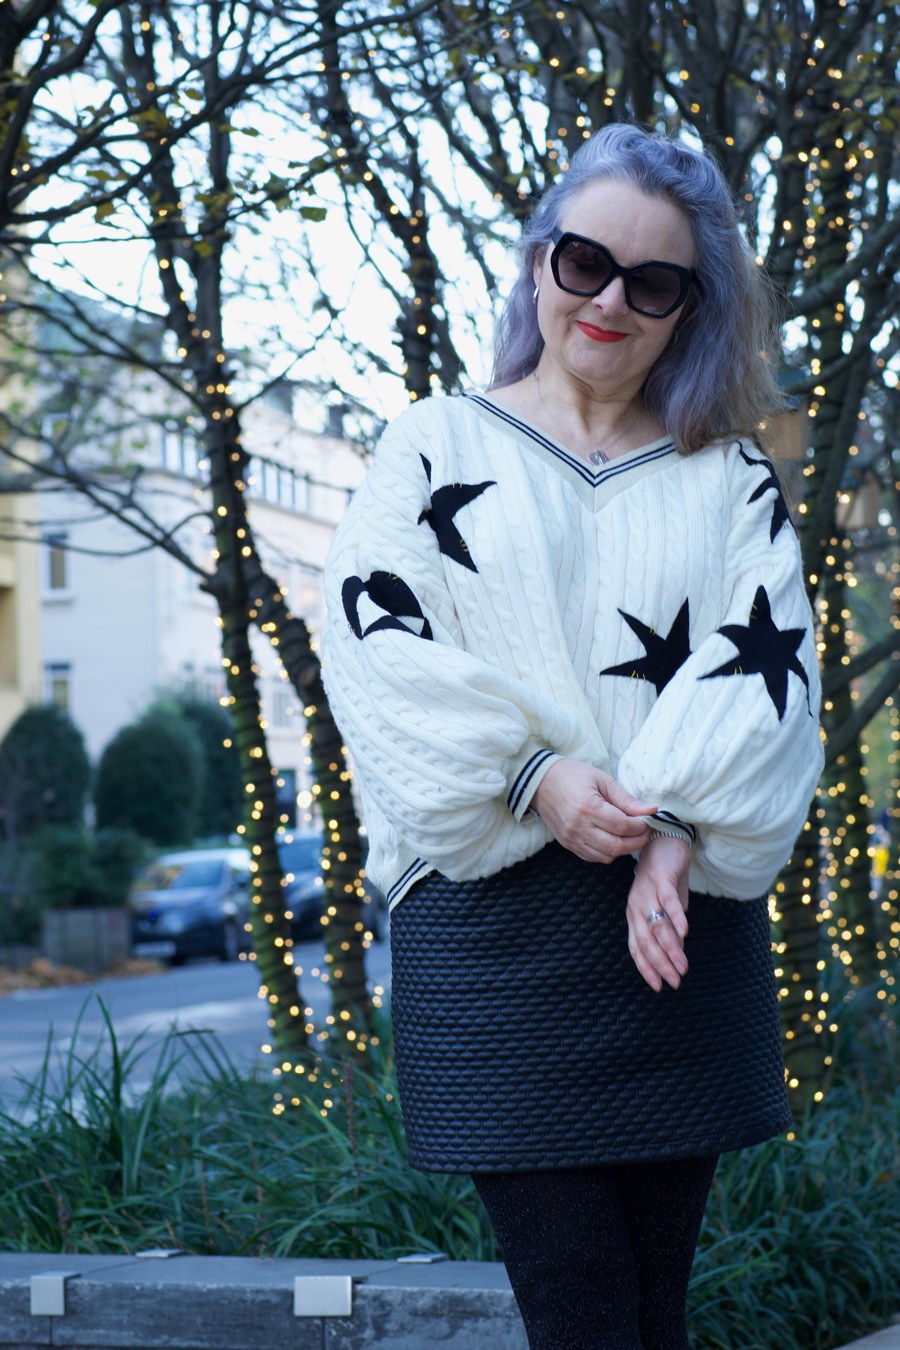
I really loved the whole process from hatching the idea to wearing the finished jumper! It feels so great to be wearing something that is totally unique and totally me. And all thanks to my Insta fam.
I’d like to say this is my new way of working. I’d so love to get even more creative and original about all that I make and I will, in time, but I’ve already got an indie pattern in mind for my next dress. One I’ve never tried before. Watch this space to find out more!
Dan of course is behind the lens of these super shots… we took a 5 minute walk up the road where he’d already planned to factor in some twinkly lights. He is so very good at this and I’m so grateful but also aware that he’s getting more photography gigs of late, so I better keep that leash tight!!