Flora – my new bestie!

Flora dress By Hand London

I can’t tell you how delighted I was to be asked by the By Hand London girls, to pattern-test for them, back in January. All honoured and everything I was!

The package arrived with goodies galore and a link to my fabric of choice from Ray Stitch. How could I resist this gorgeous Liberty Tana Lawn?!
Liberty Tana Lawn

But hang on a minute. The dress in the pictures doesn’t look at all like this fabric!

Well, you see, I kinda messed up a bit. I was clever enough to make a muslin before I cut into this buttery lawn, but I stupidly pre-empted adjustments that so didn’t need to be made. Three more muslins later with differing versions of the same adjustment, I was fast running out of time. What was I thinking? I rushed through the final version before I’d properly corrected MY mistakes. And I emphasise MY mistakes because By Hand London’s Flora pattern is spot on and when I came to make the one you see in the pictures, I made no adjustments whatsoever save a bit of an increase to the waist. Doh! Me and my meddling!!

Thankfully I still have just enough of the lawn to replace the front bodice and I certainly will do that and post it as soon as I can. I just love this dress soooo much!

Flora dress by hand london

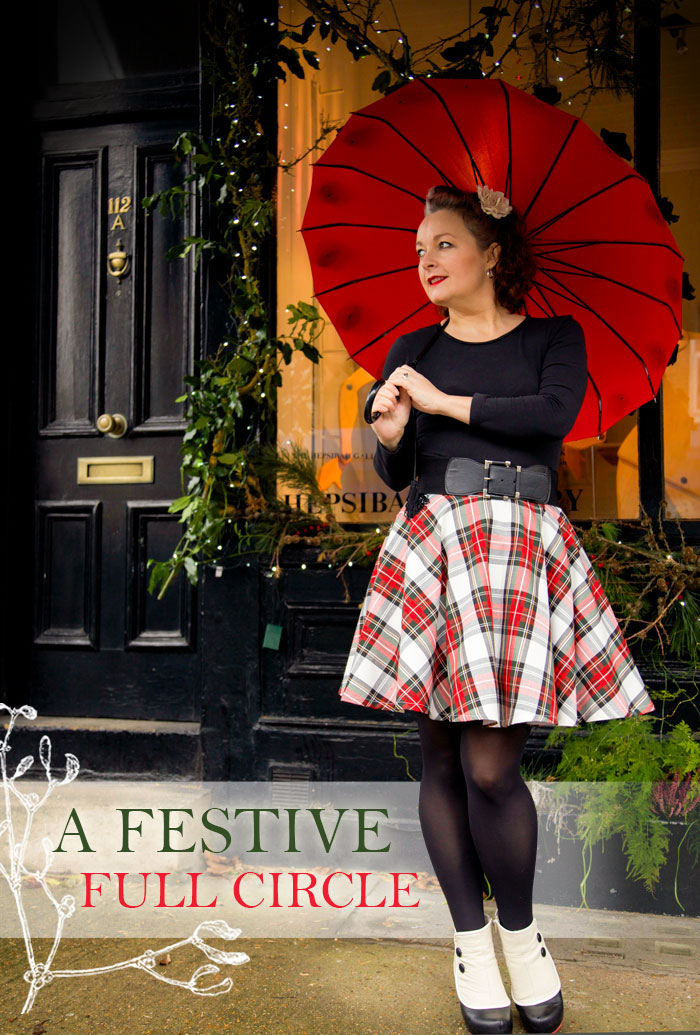
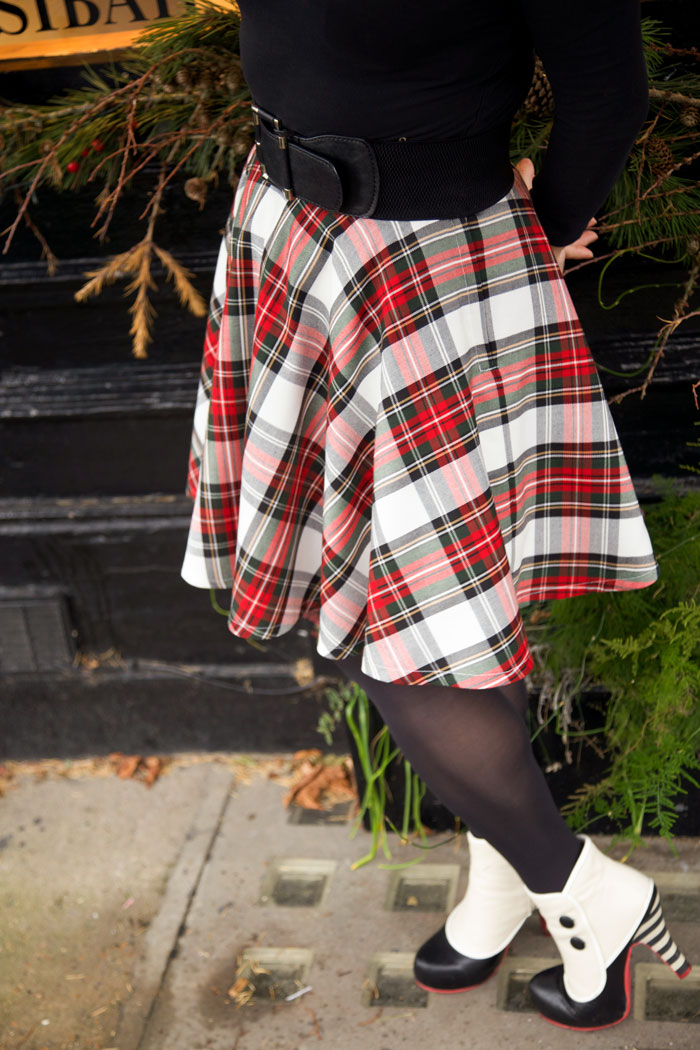
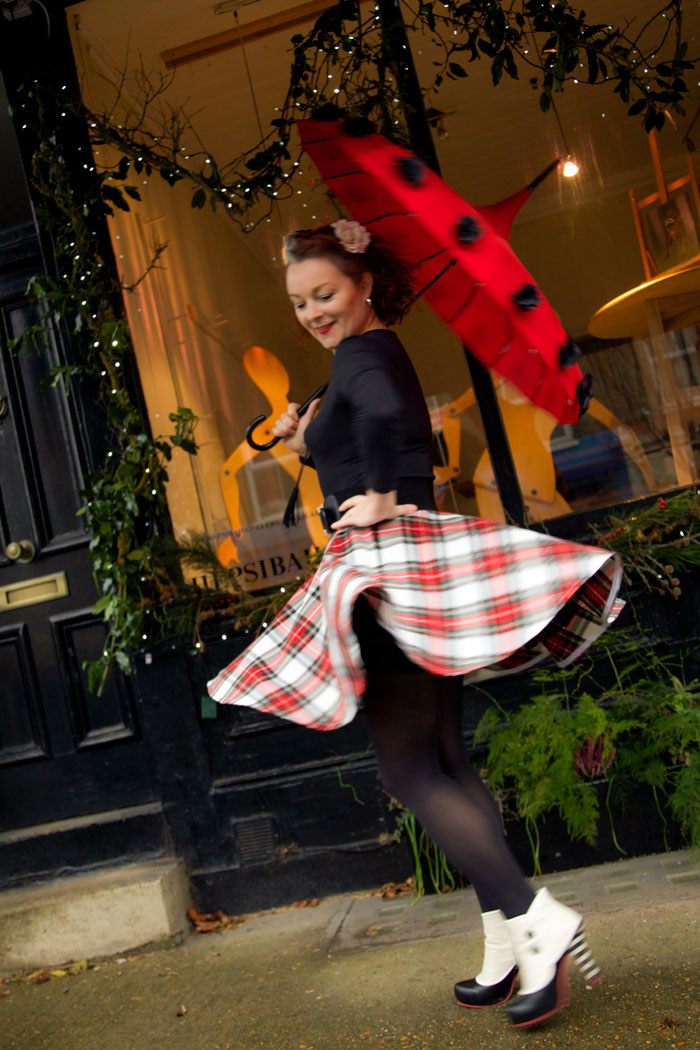
So what is this fabric that isn’t Tana Lawn, then? Well my friends, I should have called this dress the Four Quid Flora because that’s exactly what it is! £1.99/m special dress fabric from Dave the Drapers in Shepherds Bush Market! I had a spare zip and some leftover lining so literally this dress cost me just £4. I can’t vouch for any natural threads going on but do you know what? I really don’t care. It has a sheeeeen! So shiny. It shimmers in the sunshine! And it has body. Enough to hold that beautiful structured shape yet just enough drape to create soft pleats and barely any creases.

flora by hand london dress

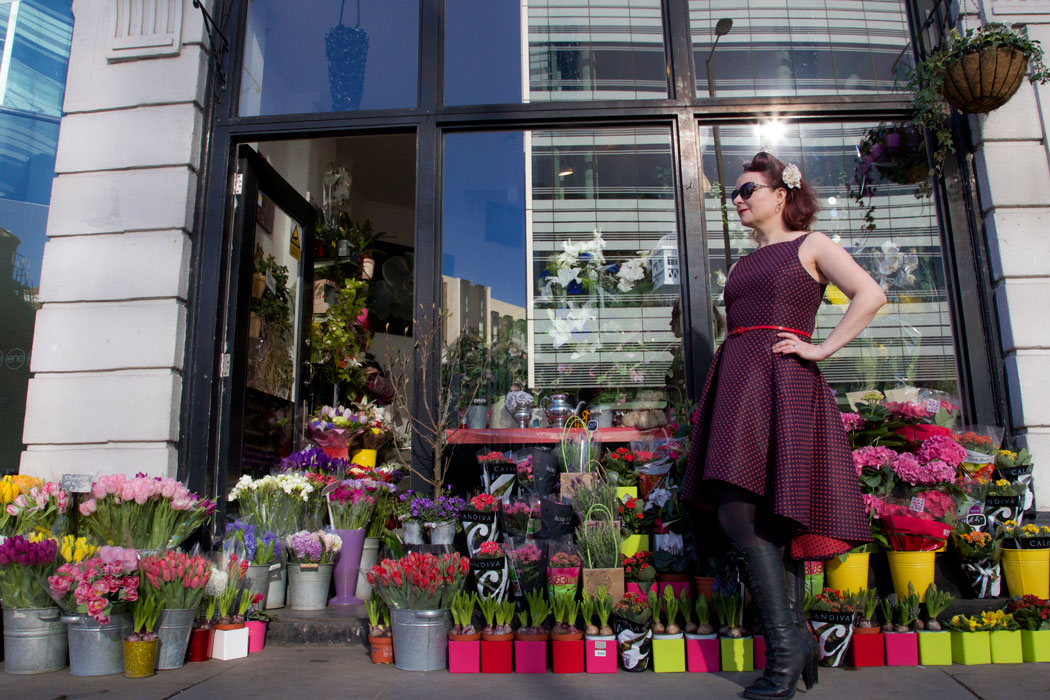
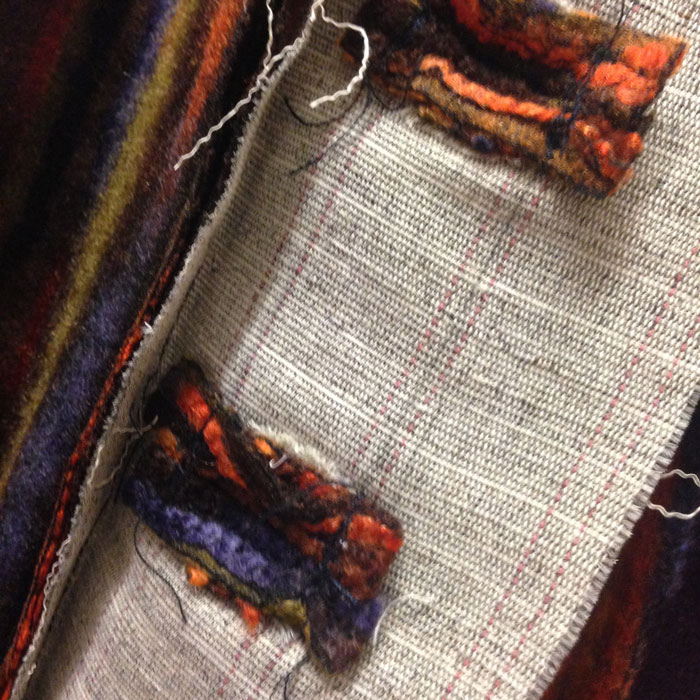
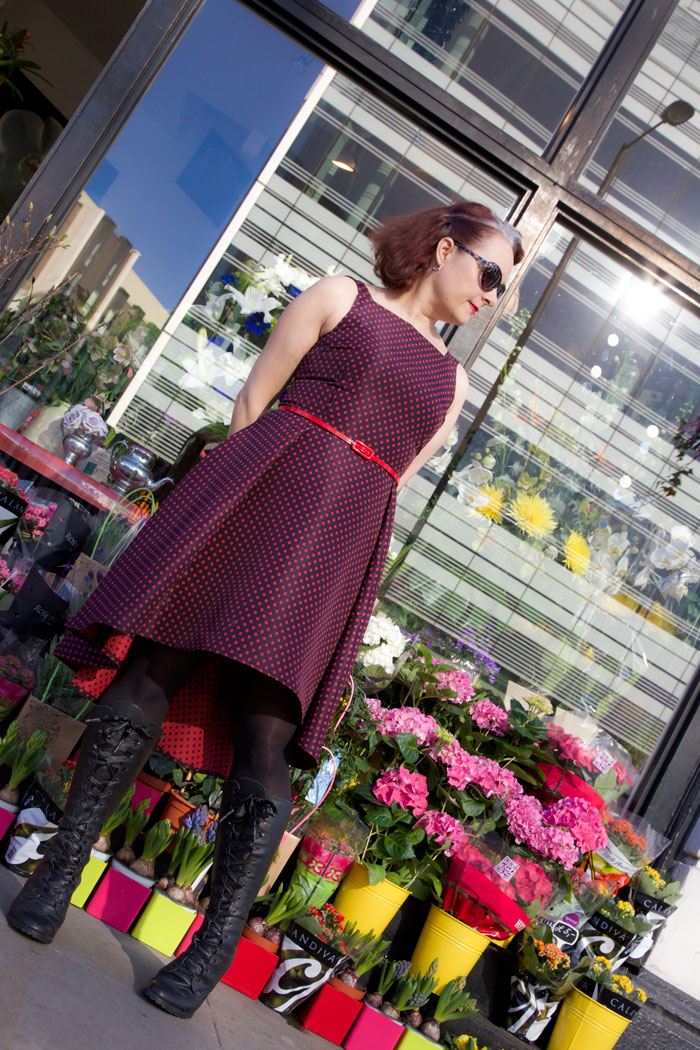
The dropped hem is clearly the most striking feature about the skirt section. And so I had to take care to finish it all good and proper. It’s not often your insides are on display to the general public! And hey, another Brucey bonus about this fabric is that the polka dots reproduce beautifully in reverse on the wrong side. Or perhaps it was the right side. Who knows? Dave certainly didn’t!

flora dress by hand london

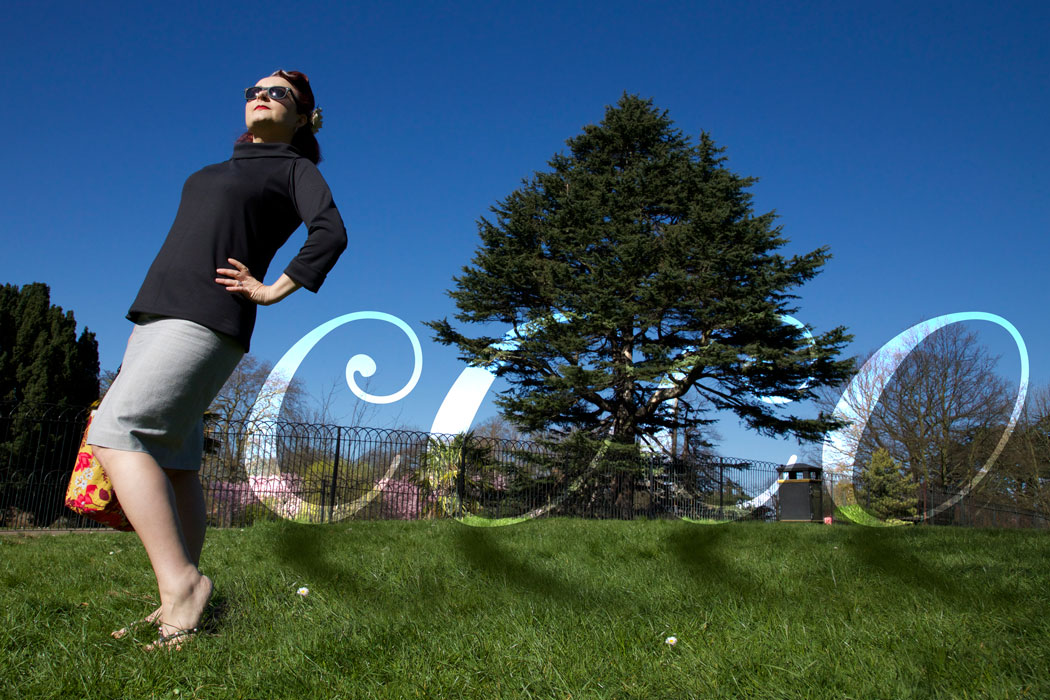
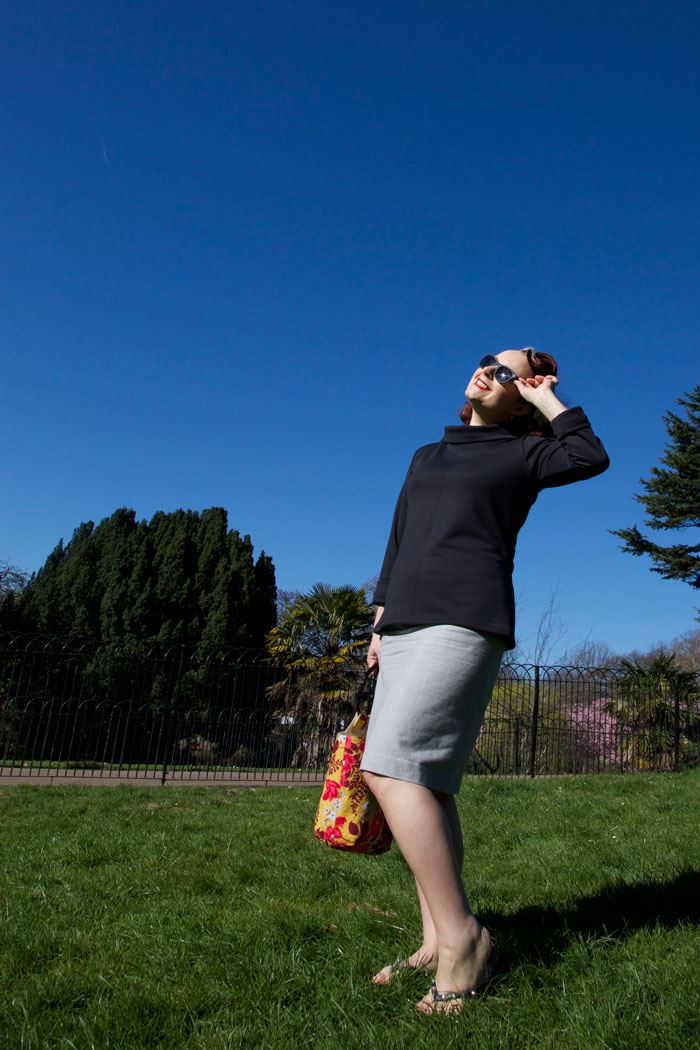
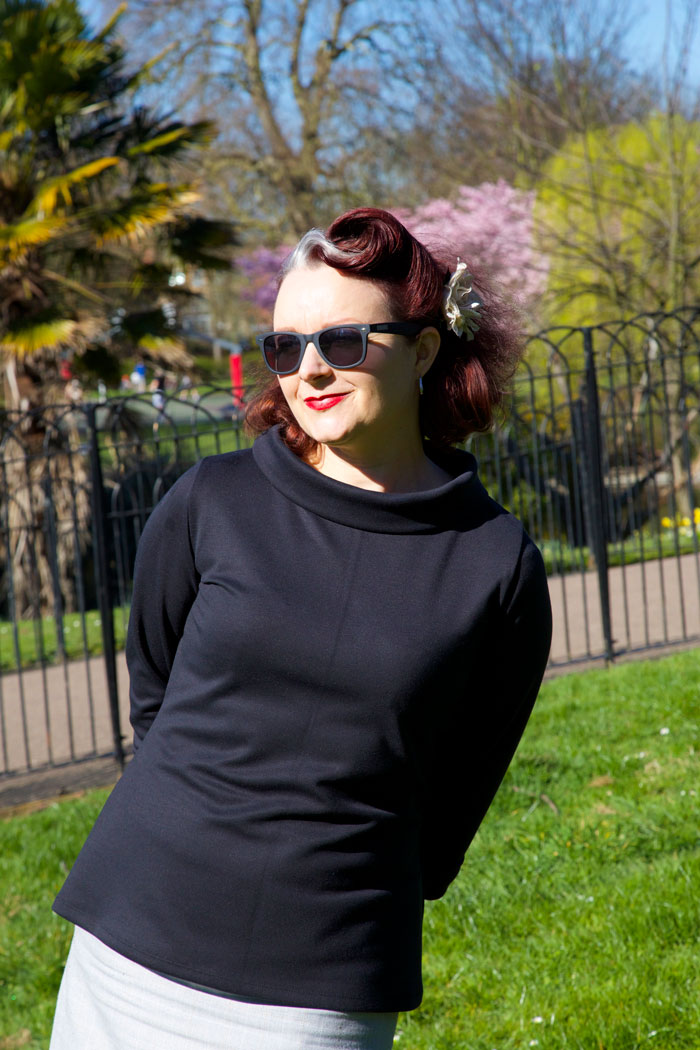
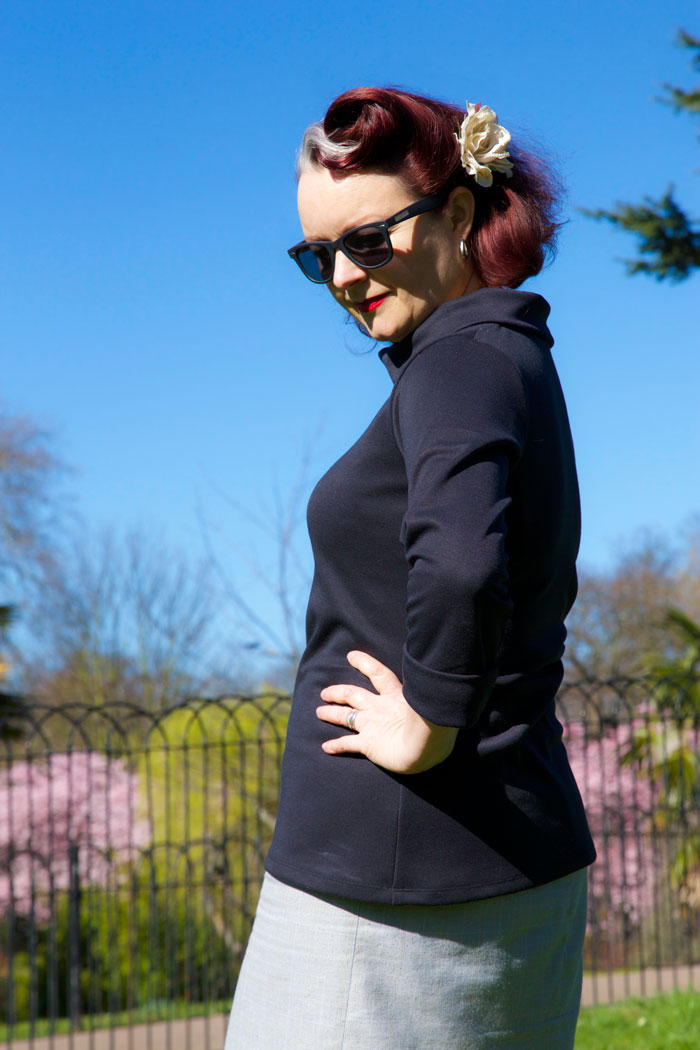
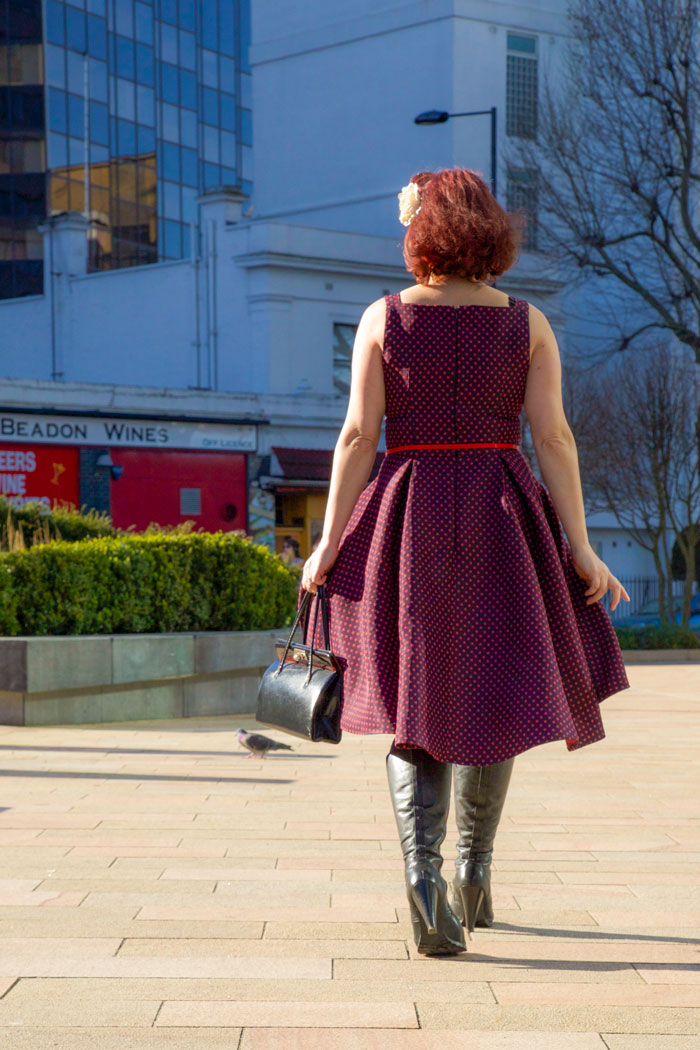
I must just give a quick shout out to Turners flower shop on Hammersmith Broadway, for kindly letting us shoot outside their pretty shop.

And also add that Mr O was risking life and limb to take these photos. I might have been on the pavement but he was practically lying in the middle of the road. Not ordinarily quiet round this neck of the woods! His dedication knows no bounds!

flora dress

I wholly recommend the Flora dress to anyone. Beginner or advanced. Such little input for such incredible output! And so quick to make… so long as you don’t pre-empt unnecessary adjustments like I did! And boy is it flattering. A lovely vintage style neckline and a full structured skirt. Who could ask for anything more? The first place we stopped at, two ladies commented on how they loved my dress. Ego trip or what?!

flora dress on Hammersmith Bridge

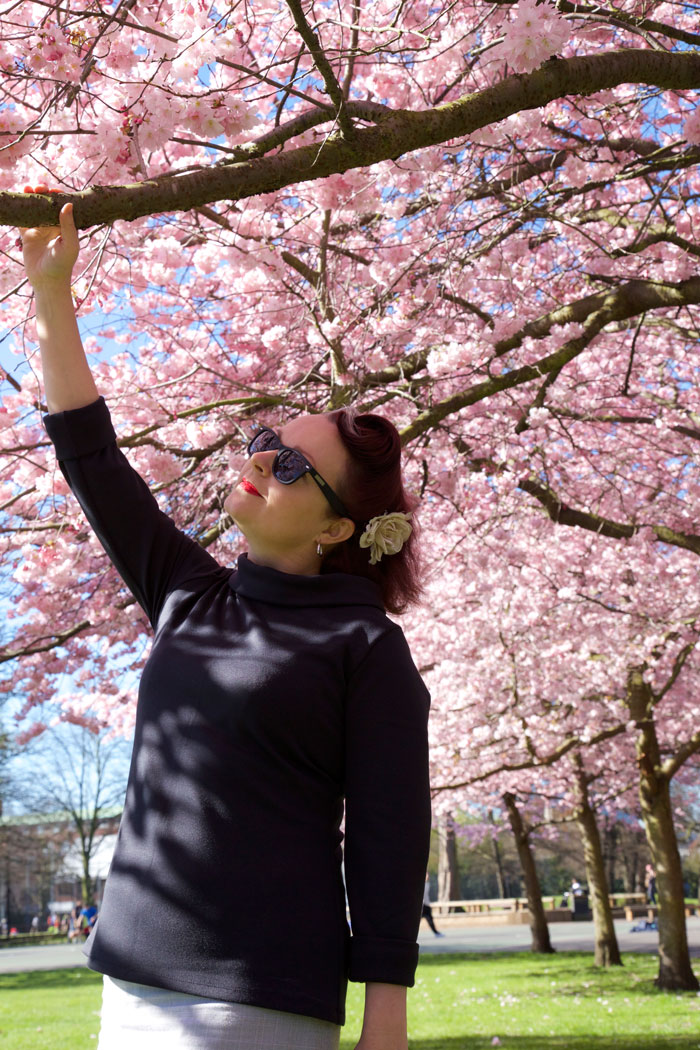
It has been such gorgeous weather in old London Town this week. I’m so loving the brighter mornings and I even got to come home from work in daylight this evening. I feel more energised and ever more ready to get on with some more sewing. I feel a few more Floras coming on for sure.

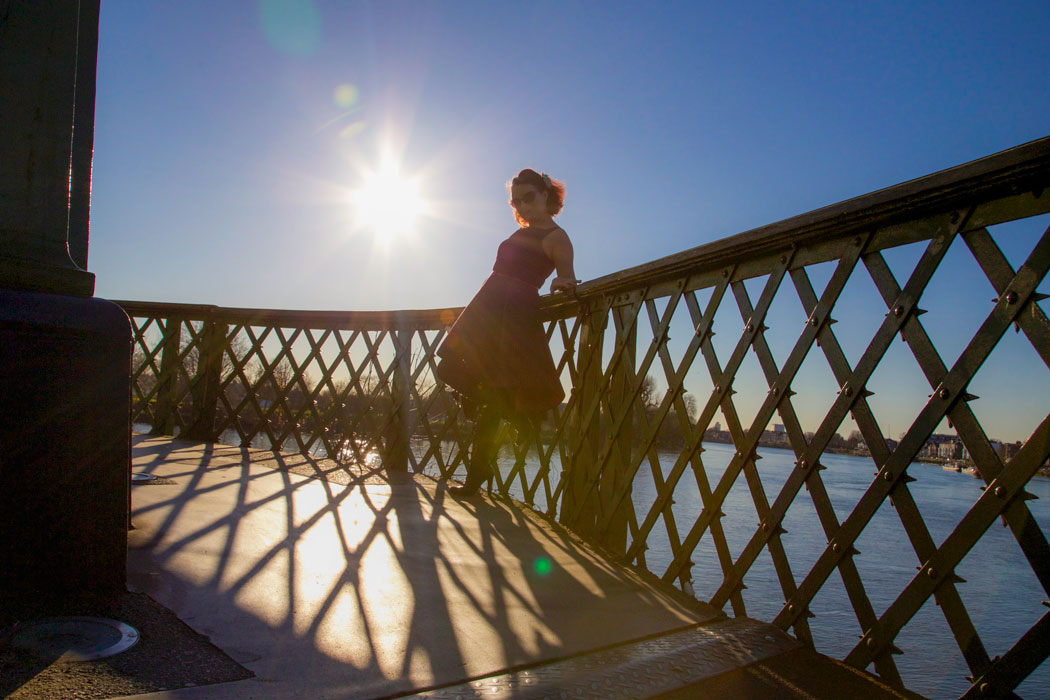
These last couple of pics were taken on Hammersmith Bridge. My favourite bridge of all the bridges in London. And just so perfect to stroll across at sunset.

flora dress on hammersmith Bridge

Now who remembers the Flora ads? I certainly do! Definitely worth a giggle!

[youtube https://www.youtube.com/watch?v=JmS3t5R3O6M]
[youtube https://www.youtube.com/watch?v=_piSsGckJw8]

Coco

coco top

Now you won’t find many stretchy casuals on my blog as a rule but the beauty of rule of thumbs is that they can be changed in a click of the fingers. Move over wovens, and make way for the Coco that is stretch jersey (of sorts!)

coco top

I thank Tilly for this genius newbie. Not only for it’s ease of make…. 2 hours I tell ya! And that included pattern tracing and childminding! But a casual top with a retro vibe is completely up my street and something that was seriously lacking in my wardrobe.

Over the last few years… 3 years to be precise… I am so proud to say that I have not shopped the high street for anything but undies and cardies. My wardrobe is almost completely handmade by me. But there still resides a few too many black Primani T’s for my liking and this is where Coco could change all!

coco top

I just love the funnel neck and although this fabric doesn’t appear to have more than one single natural fibre, it is a perfect weight to hold the shape. And the cuffs are a wonderful addition to compliment the neckline.

coco funnel neck top

I think I could have gone up a size but I quite like how snug and fitted it is. This top could be serious friends with jeans or capris, with a mini or maxi, and I’m thinking a pair of plaid shorts would partner perfectly. Worn today with an old faithful pencil and a pair of flip flops to do the hockey run!

And it must be mentioned that Mr Ooobop deserves a medal for these photos today. He was in one serious hangover and suffered plenty a head rush when he got up from down low for those creative sky shots!

coco top blossom

Today is just beautiful which is why I’m keeping this short and sweet. Gotta dash to catch those last few rays and Mr O needs a ‘hairy dog’, poor deserved love!

So if you haven’t done already, do pop over to Tilly and the Buttons shop and grab yourself a copy of this pattern. It doubles as a dress pattern,  includes a plain neckline version plus you get to see Tilly herself model the cutest versions of all!

My Vintage Dreamcoat!

My vintage Dreamcoat

And so I present the focus of all my dreams since first bidding all my hard-earned pennies pounds on vintage Butterick 547. It’s taken nearly seven months to realise the nagging vision that was persistent even throughout my busiest months.

At least 2 of the 7 months, were taken up with searching for the ideal fabric. Quite incredible seeing as I’m a stone’s throw from the Goldhawk Road. I watched London folk on a daily basis, as they paraded their neutral tones around town, and that was inspiration enough to fuel a rebellious approach and lead me to an online supplier of ‘quality coating fabric’ – Fabric Dreams. Of all the samples I requested (which were incidentally free of charge and free of postage!) this non-wool, fabric was my favourite. I confused myself with this choice at first believing a quality coat must be in wool. But I went with gut and gut came good!

vintage Butterick 547

The hardest bit about the construction was having enough space to lay out the pieces. They were huge. I knew I was going to have to lob off the usual 4 inches from the bottom but I wanted to construct the original length in case I had a later moment of maxi-madness!

vintage coat butterick 547

This coat was seriously made in hourly bursts. If I had no hours left at the end of the day, sleep was stolen. I could not have done it any other way. Full time freelanceness which often runs into the evenings, with school runs and domestic chores to boot, means little or no time to sew. But UK weather waits for no seamstress and I was seriously going to freeze my butt off unless I got a wriggle on. Good enough motivation wouldn’t you say?!

vintage coat B547

The only issue with working in hundreds of little shifts is that I probably spend as much time getting stuff out and putting it away as I do on actual sewing time. But hey ho. Got there in the end. I really must stop dreaming about one of the children’s bedrooms being a sewing room. Terrible mother!

vintage dreamcoat

I interrupt this post to big up my amazing and wonderful bestest friend and boyf in the whole world, Daniel. I swear this coat wouldn’t look half as good if it wasn’t for his amazing photography skillz! I owe him so many waistcoats, it’s untrue!!

The other great thing about him being chief Ooobop photographer, is that we get to mooch around London together finding lovely locations. Today was mostly the British Museum. Feel like a bit of a fraud for not actually looking at one single exhibit. But we did have a cultural day at the V&A yesterday, honest guv!

vintage dreamcoat back

The coat is made of eight panels which create such a lovely shape. There was stacks of ease and I think I could have pinched out a bit more but I like how it feels and I wouldn’t want to feel restricted in it at all. Interestingly enough, even though the ‘skirt’ is not a circle, letting it hang overnight, the hemline dropped in the same way. A lengthy process to level up the hem, and check it at least 5 times before cutting, was quite painful but worth it.

vintage coat at the British MuseumLining this coat was quite a chore. Even though I chose a real quality, strong, gold lining, it frayed like Billy-O. So I serged every open seam. Because I can. Because I now have an overlocker BTW!! But because I am a newbie overlockerist I got all smug and complacent with the speed and completely hacked through the side-back panel. I swore a bit. But didn’t have time for a proper sulk. I’d come far too far enough down the line to be crying over torn lining. Luckily for my sanity, I had over-bought said gold lining by a metre and a half and so I cut another piece, dutifully unpicked the ruined one and half an hour or so later it was as if nothing had happened!

An entire evening and a morning was spent entirely hand-sewing in the lining with tiny stitches. Around the armholes, down the side seams, all around the facings and neckline and of course the hems. What joy!

But what warmth!

warm vintage coat

I’ve stubbonly been walking around in my draughty Vogue jacket, lovely as it is, refusing to buy a coat, lest it meant I would never finish this one. But now I have. And boy, it feels good to be warm. Bring on the snow!

Of course the warmth may not have been totally down to the coat. Mr O insisted this was a great photo of me having a cheeky snifter! He’s such a bad influence.

cheeky_snifter

A little wander into Covent Garden was lovely on such a bright winter’s day. This coat is great for twirling in too!

twirling vintage coatAnd a little venture into Neal’s Yard to soak up some more colour, if that was at all possible!

vintage Coat Neals YardThank you all for your support and patience throughout my first coat-making venture. It feels amazing to be wearing something so functional, yet so strikingly original and properly fitted. I won’t divulge cost of this project as it has scared the living pants off me but I can honestly say it was worth every single penny pound!

Vintage coat in progress

And so, six months after my gruelling battle to win this beauty of a pattern, work has begun, in earnest. When I was bidding the for pattern, I had the finished coat, clearly in mind and so to be faced with 19 pattern pieces and the usual vague set of instructions, the fear set in.

Butterick_547

I’ve made a jacket or two, I’ve even tackled the wicked welts. So what was I afraid of? Doing it justice, I think. If I was going to go to the bother of making a coat – not just any old coat, but the coat of my nightly dreams since battle was won – I needed the right fit, the right fabric, the finest construction, let alone the neatest bound buttonholes. (Something I hadn’t yet conquered !)

I live near fabric heaven, The Goldhawk Road. And so finding the right fabric should have been easy, right? Easy enough when your expectations aren’t stationed on the moon! I searched high and low and eventually found this amazingly eccentric fabric, online at ‘Fabric Dreams‘. Quite apt, really! I initially had tangerine wool in mind so I ordered a few different free samples and then sat under the letterbox for all of 4 days!

When they did arrive, it was a no-brainer. Even though the fabulous, firey fabric was 100% not wool (and not just tangerine, but an entire fruitbowl of colours) and the others were, it screamed at me to be given a chance and so I agreed to put it centre stage. After all, if I was ever going to go to the bother of making a coat, there’s no way I wanted it to go unnoticed, oh no!

I even made a toile. Just the body section. And this confirmed my need to loose some circumference. I had my suspicions that the coat would be a little big, and it was, but was worried I’d loose the nipped in shape if I took it in at the top and let it out at the waist (the usual Ooobop sausage-shape adjustment!). So with some careful measuring, re-measuring, a little panicking and some more measuring, I took out half an inch, vertically, all the way down, from each of the front and back pieces. So as not to affect the silhouette of the design. Incidentally, like a good girl, I had pre-traced all the pieces!

And then to cut the real fabric. Ooooo the suspense, the fear, the excitement! The pieces are massive. I know I will eventually chop off about 6 inches but I wanted to start long so I could make that decision later. But that did mean I had to cut out on the floor. My kitchen table just ain’t big enough! And that, in turn, meant I had to wash the floor… doh! Always something to hamper a plan! Still took three roll outs of the fabric and continual shooing of cats.

cutout_on_floor

Honestly, why do they insist on laying where I’m cutting? It’s not like there’s no other piles of fabric in the house!

Cat on fabric

An hour and a pair of stiff legs later, I had a wonderful pile of cut pieces. It’s quite tricky to cut though the ‘corded’ texture but it doesn’t fray.

Yesterday I sewed the main body sections and oooed and arrred as I steamed those seams open. For all it’s 100% not woolness, it presses beautifully. And I haven’t had to clip any curves either.

pressed seams

It was getting late last night and I did hesitate to start on the bound buttonholes but knew my dreams would be sweeter if I at least had a go. So I tried a few tester ones on some scrap fabric using the instructions on the pattern sheet. They were rubbish! So I went to YouTube to find someone who’d show me how. They were rubbish too! And then I remembered Karen’s fabulous Ebook download which proved to be the perfect method and I’d even go as far as saying I loved doing them!

bound buttonholesbound buttonholes reverse

Practising those stood me in good stead for making the welt pockets too!

welt pocketsPretty camouflaged huh?! Thats without the invisible stitching which is yet to be done. I’ll be fishing around for ages trying to find a way in, when it’s finished properly!

I pondered for ages, wondering what kind of collar I should have. Should it be the big dramatic scalloped one? One of the self same fabric to keep it simple or a little furry shawl collar? I opted for the latter, after going round in circles. Mostly in the shower!

Faux fur is fast running out in the Goldhawk Road. The good stuff anyway. I’m told by reliable sources that no more will be ordered as summer stock will soon be on it’s way! So I was well chuffed to find this short pile, soft-as-you-like, faux fur. Works a treat.

faux fur collarThough I’ve made fantastic headway this weekend, there is still a lot of work to be done. The sleeves, the length, the hem, the lining and the facing behind the buttonholes. But it will be worth it I’m sure. I can feel those sub zeros honing in over the next few weeks but hey, bring ’em on. I’m going to be snug as some bugs!

Basket of Flowers quilt block revisited

basket of flowers quilt block

It’s been a very long time since I sewed a quilt block! Almost a year to be precise! But hey, I’m not going to beat myself up about it!

This is the 24th block I’ve created to date and it’s another version of the Basket of Flowers design, which I make first time round here.

I much prefer the pretty fabrics in this block but I wasn’t so hot on those points!

It doesn’t pay to have a long break from quilting. I am so out of practice and I could easily have made another pair of pj’s in the time it took me to put this little fella together.

I’ve acquired some extra tools in the meantime… a quilting ruler, a new rotary cutter and a larger self-healing cutting mat. Can’t imagine how much longer still, it would have taken without those!

Incidentally, do not ever place your cutting mat on your ironing board, lest you forget that rubber and hot irons aren’t the best of friends! I came to my senses at the crucial moment!

Block Facts:

Name: ‘Basket of Flowers’ or ‘Lily Basket’ or ‘Flower Basket’
History: This design was ideally suited to the dress and feedsack prints of 1930s America, where it was a particular favourite
Level: Set in seams require experience.
No. of pieces: 13

Progress report:

Block 1: The Double Four Patch
Block 2: The Whirlwind
Block 3: The Sailboat
Block 4: The Shoo-fly
Block 5: The Trafalgar
Block 6: The Windmill
Block 7: The Chequer Square
Block 8: The Diamond Square
Block 9: The Cactus Pot
Block 10: The Sawtooth Star
Block 11: To come!
Block 12: The Windmill Sails block
Block 13: The Basket of Flowers block
Block 14: Susannah
Block 15: Road to Oklhahoma
Block 16: Chequer Star
Block 17: Nelson’s Victory
Block 18: Fair and Square
Block 19: Diamond Pinwheel
Block 20: Whirligig
Block 21: Old Maid’s Puzzle
Block 22: Whirlwind Square
Block 23: Windblown Square
Block 24: Basket of Flowers block revisited

Mini Stanley Pyjamas

Mini stanley pyjamas

Little Miss Ooobop has been hassling me for a pair of PJs for so long, bless her. So yesterday, we set off for the Goldhawk Road to track down the very specific ‘cats and dogs’ fabric that she wanted. But of course, the shops were shut. It was New Years Day, after all! In order to relieve the disappointment (me more than her), we drove off, instead, to get a burger and watch a movie!

Now as luck would have it, for all that was closed in Chiswick High Road, Cath Kidston was open! Like some shining apparition amidst the rainy gloom! And there was a sale on. So we duly picked out some Mini Stanley fabric. No cats but very cute dogs!

Cath Kidston mini stanley pjs by the window

I used this vintage Maudella pattern. It’s not dated but could be 1950s if not 1960s. What would you say?

maudella_3162

I’m still working on convincing LMO to have the matching top to the bottoms but I don’t think a 9 year old can see past the ‘fogey’ images on the pattern sleeve!

I dutifully traced the one pattern piece. This is something I make a habit of nowadays. Just purely out of the respect for a tissue pattern piece that has happily existed for between 50-70 years. I don’t want to be the one who destroys that amount of history!

So including the careful ironing of the pieces, the tracing, the cutting, the making and the finishing touches, it took all of 2 hours. This is largely down to the magic of my new, though very old, overlocker, which was so generously bestowed upon me just before Christmas. I didn’t realise what the implications of having one were, until all the seams were serged and the hem edges neatly finished in a jiffy!

detail of overlocked seams

I am still going to have to work on the fine tunings of the tensions but it will so totally do me for now!

reading a book in mini stanley pjs

LMO has spent the rest of the afternoon in her new PJs and I’m delighted to have completed my first project on just day 2 of the New Year. Here’s hoping its the first of many more projects to come.

jumping in mini stanley pjs

Happy New Year lovely people x

Photography by DJ Photographic

My lovely secret Santa

It takes a special ornament, outside of the colour scheme of ‘no colour at all’ to earn a place on my tree. Yes I hands up to being a total control freak. Especially where my tree is concerned! They know the rules: No toilet roll decorations, no horrid coloured ornaments, and abolutely no tinsel! They respond by ceremoniously gaffa-taping Teddy Crap-Crap to the top of the tree. Teddy Crap-Crap is a rubbish, moth-eaten, hand-knitted teddy in all the rubbish colours of a wrong rainbow. He is as far removed from a fashionista fairy that you can get. They put him at the top where I can’t reach and for all my neighbours to see and point and laugh. I am mostly not amused!

But. Despite my rules of white and glass and glitter and feathers only, this year my Secret Santa gifted me the most thoughtful decoration ever.

secret santa pompom

On first inspection a lovingly hand made red pompom. On a closer second look, a lovely red pompom adorned with buttons and on asking all the right questions I get to find out that all the buttons have been lovingly hand-picked from Taylors, a 100 year old button shop in the heart of the West End of London. They are mostly vintage, 1940’s and 50s glass buttons with a couple of gilt filagree ones thrown in for good measure.

Secret Santa was amazed that I’d never heard of Taylors. I have to say, I actually, really don’t get out much. But now I know about them, They will be hearing from me, I can tell you!

If you can’t make it to the shop, you can order online, but if you just want some virtual shop therapy check out this slide show of photos from the shop. I don’t know how but it takes me there in a real floaty wannabe way!

Now I’d like to ask Secret Santa if she perhaps wove some catnip into this pompom, because Pants the cat is seriously in love with it too!

Pants the cat with pompomHe even did that funny face that boy cats (big cats included) do when they pick up on scent! What’s all that about?!

pants the cat picking up scent

Well, I have to say, its hugely unlikely that I will get a mo to post between now and the big day, so I would like to take this opportunity to wish you all the most wonderful of Christmas wishes and of course the biggest thanks for being part of my ever growing family of fellow sewers and supporters. I love you all xxxxx

A festive full circle

Tartan full circle skirt

Here’s a little something that wasn’t on my mahoosive Christmas to do list! So it’s a small miracle that it’s being blogged here and now. Each and every year at around about this time, I say out loud, over and over that next year I will start earlier with Christmas prep: do my accounts in September, the Christmas presents in October, get the cards sent in November and not take on quite so much work so I can ease in gently and revel in the lead up! Perhaps next year I might take note.

So with all this month’s stressy stuff going on, how on earth did I get it together to make anything new? I stole sleep. Robbed it, right from under my own nose. Three whole precious hours. Doesn’t sound like much in the grand scheme of things but when you are only averaging about five to six as it is, the motive would have to have been significantly necessary. Well I did need an outfit for the office lunch!

tartan circle skirt

I’d like to say it was an impulse make but to be honest I spend a lot of time dreaming about what I want to make so when I eventually get round to making it, it feels like I’ve made it before, at least 4 or 5 times in my head!

I love the Westwood/punk/vintage/rockabilly vibe of tartan. I know that it has deeper, traditional roots and I even have some distant Scottish blood so it feels highly appropriate and very festive!

tartan circle skirt

The skirt is self-drafted full circle with a waistband and lapped zipper. I didn’t line it and chose, instead to finish the insides with Hong Kong seams and a bias finished hem. I feel slightly guilty for machining the hem but I think that’s a small price to exchange for some shut-eye! I’m wearing a tiered organza petticoat underneath. Just one layer. Just to give it a bit of poof!

twirling in tartan circle skirtAnd I went for a shorter length this time. I’ve recently been hooked on below the knee pencil skirts so this 17 incher feels much more party like. Just had to be ready for any embarrassing fashion blunders in this blustery weather.

Tartan was most definitely the right fabric for the job.
The drape is perfect.
It doesn’t need lining.
Its a dream to sew.
Bit fraying but with quick work and seam binding , that’s not really an issue.
It doesn’t crease
Its totally machine washable.
It only took a metre . . .
. . . and only cost a fiver!

tartan circle skirtI didn’t have too much trouble lining up the horizontal patterns but if I allowed a bit more time I could have evened up the design at the sides a bit more. I did however leave it to hang for the statutory 24 hours before trimming and hemming. I know how worth it that bit is now!

I can’t see me getting anything else sewn this side of Christmas, unfortunately. I simply have no idea how I thought I might have chance to finish my coat. The muslin is made and I know what adjustments I need to make but the fabric is going to be looking longingly at me for a few weeks more, I think.

So in the meantime I will just have to resign to the wardrobe what is and twirl in my new tartan . . . while I’m running around like a headless chicken!

tartan circle skirtThanks as always to the fabulous Daniel Selway for his tireless photography favours.
And also to the wonderful Jayne Hepsibah-Sullivan whose Hepsibah Gallery window makes a perfect backdrop!

Vintage 50s blouse with monogram

simplicity 2195 blouseThis is vintage Simplicity 2195 . . . or a great substitute for a bowling shirt fit for a game with the Spoolettes! Who are the Spoolettes you may well ask? Well hop over to Sew Dixie Lou to get a little insight.

vintage 50s blouse with monogram

I’m gutted I didn’t get any photos of our fabulous sporting event. But if you want a bit of inside info, Charity Shop Chic has posted some great ones here plus you get to see her amazing bowling shirt refashion too!. We sure did rock Bloomsbury Lanes with all sorts of complimentary comments coming from the staff.

I struggled to find an actual bowling shirt pattern but I’m quite glad I found this one as it works very well as an every day shirt. I wore it to lunch today at Carluccios with Mr O. Teamed with self-drafted half circle skirt and my favourite ankle boots from Office.

simplicity_2195_1

simplicity_2195_4I knew the hand embroidery was going to be a challenge for me. The last time I entertained such a thing was at the age of nine. But I thought this would make a lovely project to take on holiday back in August. (An efficient bit of planning on behalf of those Spoolettes meant that this sewing challenge fitted in superbly with my holiday!)

So first in the suitcase was the needle and thread and a hoop and a half made shirt with a piece of freezer paper ironed in position. As with most things I didn’t spend too much time reading up on the best way to go about this and the only transfer pencil I had was red, so I traced my initials from the original transfer, supplied with the pattern, on to the freezer paper. I couldn’t bear to cut up and ruin the original!

I had, however, read somewhere at some point, that ‘padding stitches’ were a good idea to raise the ‘satin stitches’. And so I set about tracing the edge of the monogram with some small running stitches.

monogram

A long process but not too much hardship when you are sat outside a beautiful Maltese villa, watching your children have so much fun in the pool, whilst all 40 degrees of sunshine warms your toes!

All was going swimmingly until I came to pick off the darned freezer paper. Gah! Never again. It took sooooo long!!

padding stitchesBut once it was off It was a pleasure to sew. A bit wonky here and there but it worked, kinda! Just wish I had used some stabiliser on the reverse to stop the stretching that happened too.

monogram_embroidery

I’ve got plans on making a gingham one, just as the pattern cover pic. Yes I’m still harping on about gingham but I happened across some gorgeous egyptian cotton gingham. Well at least that’s what the lady sold it to me as! But to be perfectly honest, it may be a way down the list as this sub-zero-like weather does not inspire me to make anything other than slankets right now!

simplicity_2195 pattern

Postscript:

I completely forgot that I’d asked the waitress to take the following photo. Feast your eyes on a table full of splendidly hand-made bowling shirts sported by an amazing team of beautiful and talented Spoolettes…

Spoolettes

Scrap-bustin’ thank yous and superstitions

scrap busting thank yous and superstitions

Quality scrap-bustin’ that is! The word scrap doesn’t and shouldn’t be associated with a gorgeous piece of turquoise silk and some beautiful vintage cottons. But scrap-bustin’ it is until I think of something else!

This little zipper pouch was inspired by a combination of prompts. I often frighten myself with all the intended ‘must-have-a-go-ofs’ that lurk in the back of my brain. The first to come to the fore, was a spot of free-motion embroidery. I spotted some lovely work by @thebobbinbird on twitter and that certainly set the ball in motion. I also needed a way of saying ‘thank you’ to my colleague’s mum who kindly donated a sack load of zips to me! (I’m not kidding about the sack. I’m still bringing them home a handful at a time because they weigh a tonne!) And I have been itching, for so long, to incorporate these tiny pieces of beautiful fabric, into a worthwhile project.

butterfly pouch

Now this is of course free-motion embroidery in the loosest sense! I pinned the tangerine-print butterfly pieces to the silk, lowered the feed-dog and using Sulky metallic thread and an embroidery foot, I ‘walked’ the stitches, free style, around the butterfly wings and to draw the curly antennae. I really loved the process, as I thought I would, and I’d love to be more adventurous next time. Perhaps even incorporate the technique on a garment or two!

butterfly applique detailI love the free nature of it all. The wonky lines and the fraying edges and the grain of the fabric. Quite a relief from some of the more precise methods usually employed in dressmaking. And oh how those colours pop!

I had to use one of the millions of zips, of course! Would have been daft not to! And I covered the ends of the zip to act as stoppers and also because I had cut the length of the zip to fit.

covered ends of zip

The lining is a gorgeous vintage printed quilting cotton. Again part of another generous donation to me from a lovely friend and neighbour. I made small hand stitches around the opening edge to make sure it didn’t get caught in those rather hefty teeth!

pouch liningAnd the superstition bit? Well I’m not entirely sure how Mrs J will use this pouch. She may well use it as a purse so to be on the safe side I’m including a shiny penny to ensure good luck and prosperity. It is bad luck to give an empty one. Does anyone else do this or is it just me… and my mum who made me believe this?!

I think you may be seeing a lot of zippered projects to come. But if you have seen or employed any innovative uses recently I’d be very interested to hear about them!

zips