Curtain couture and some unexpected love for a pink suit!

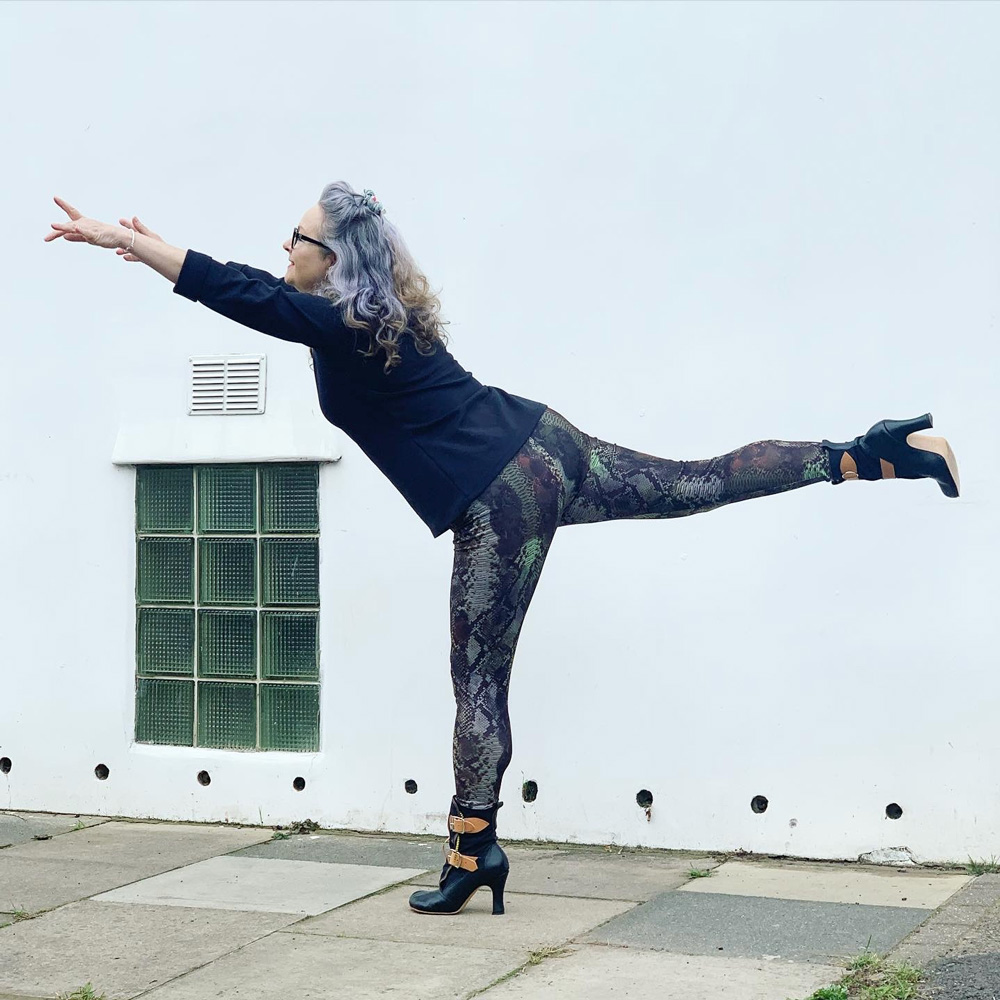
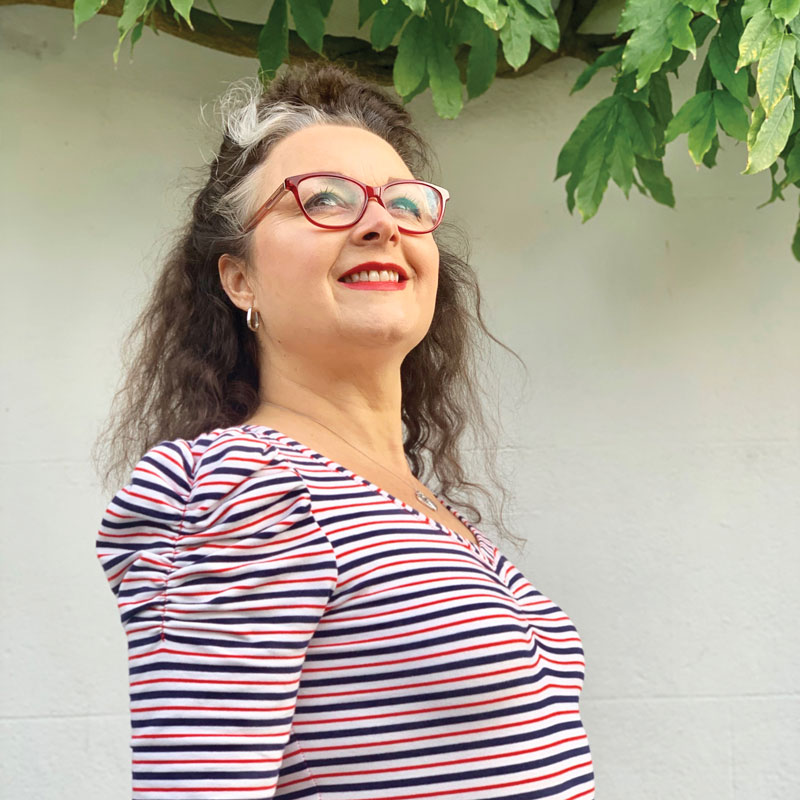
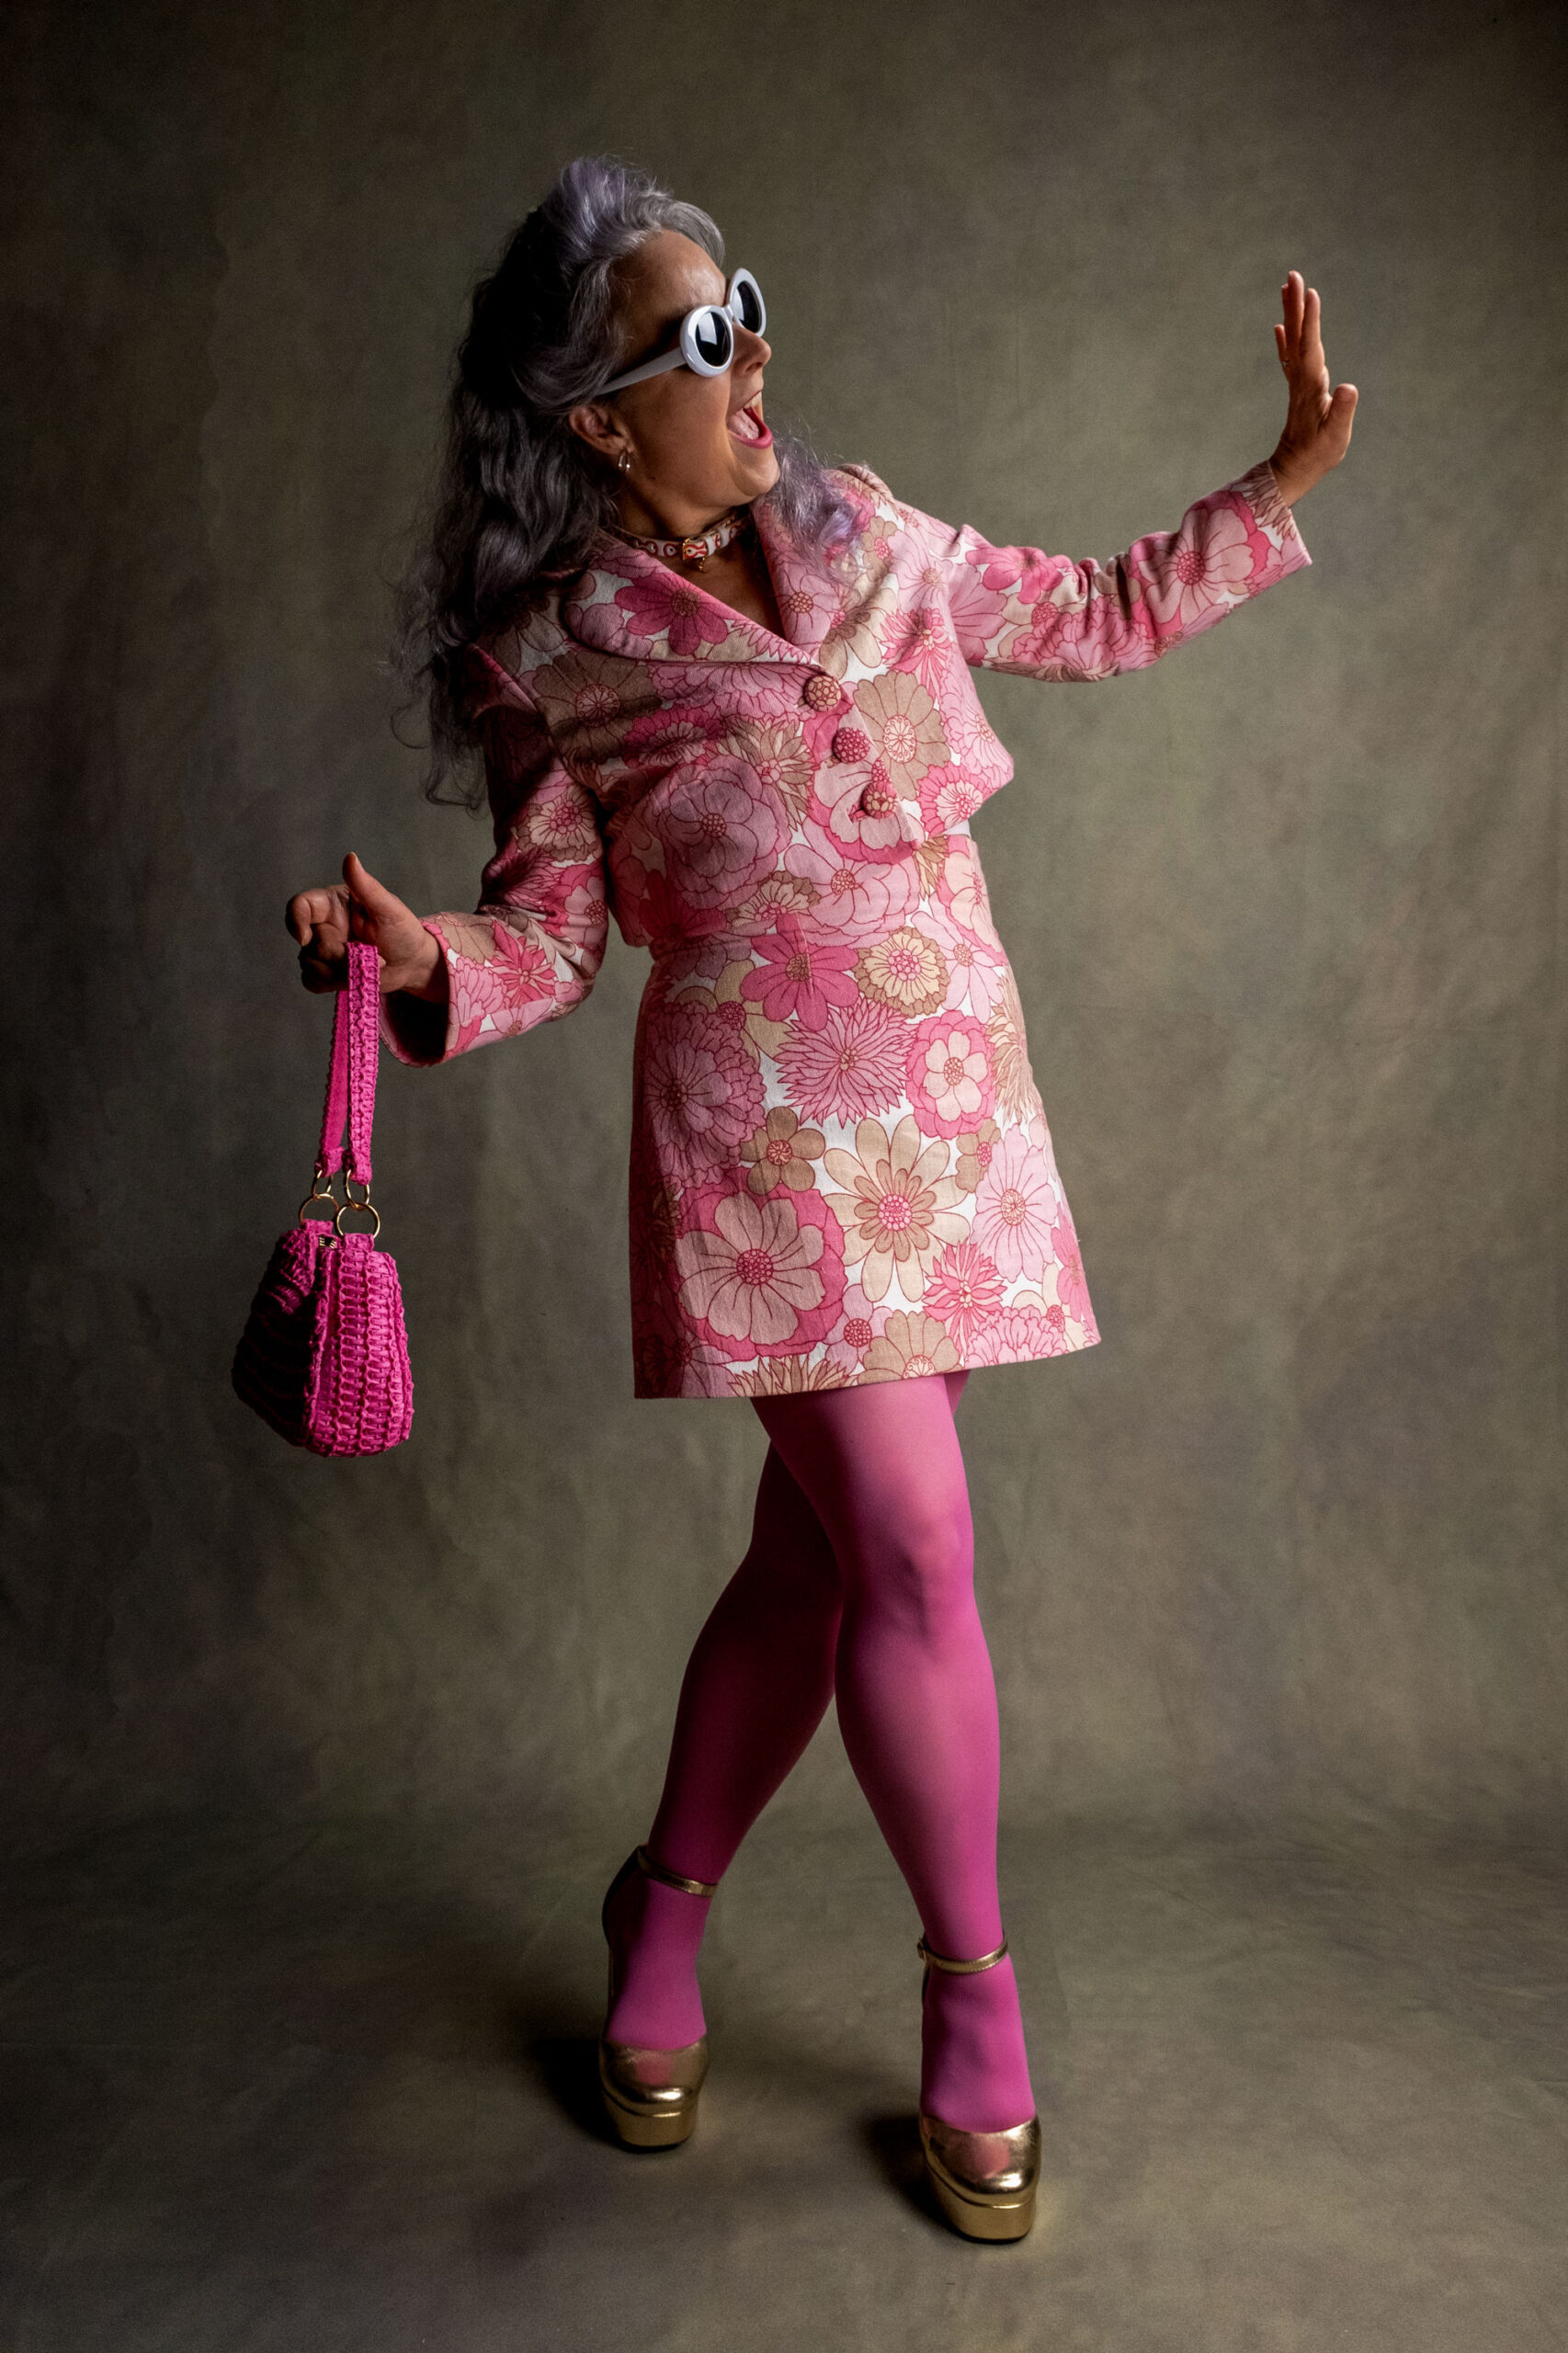
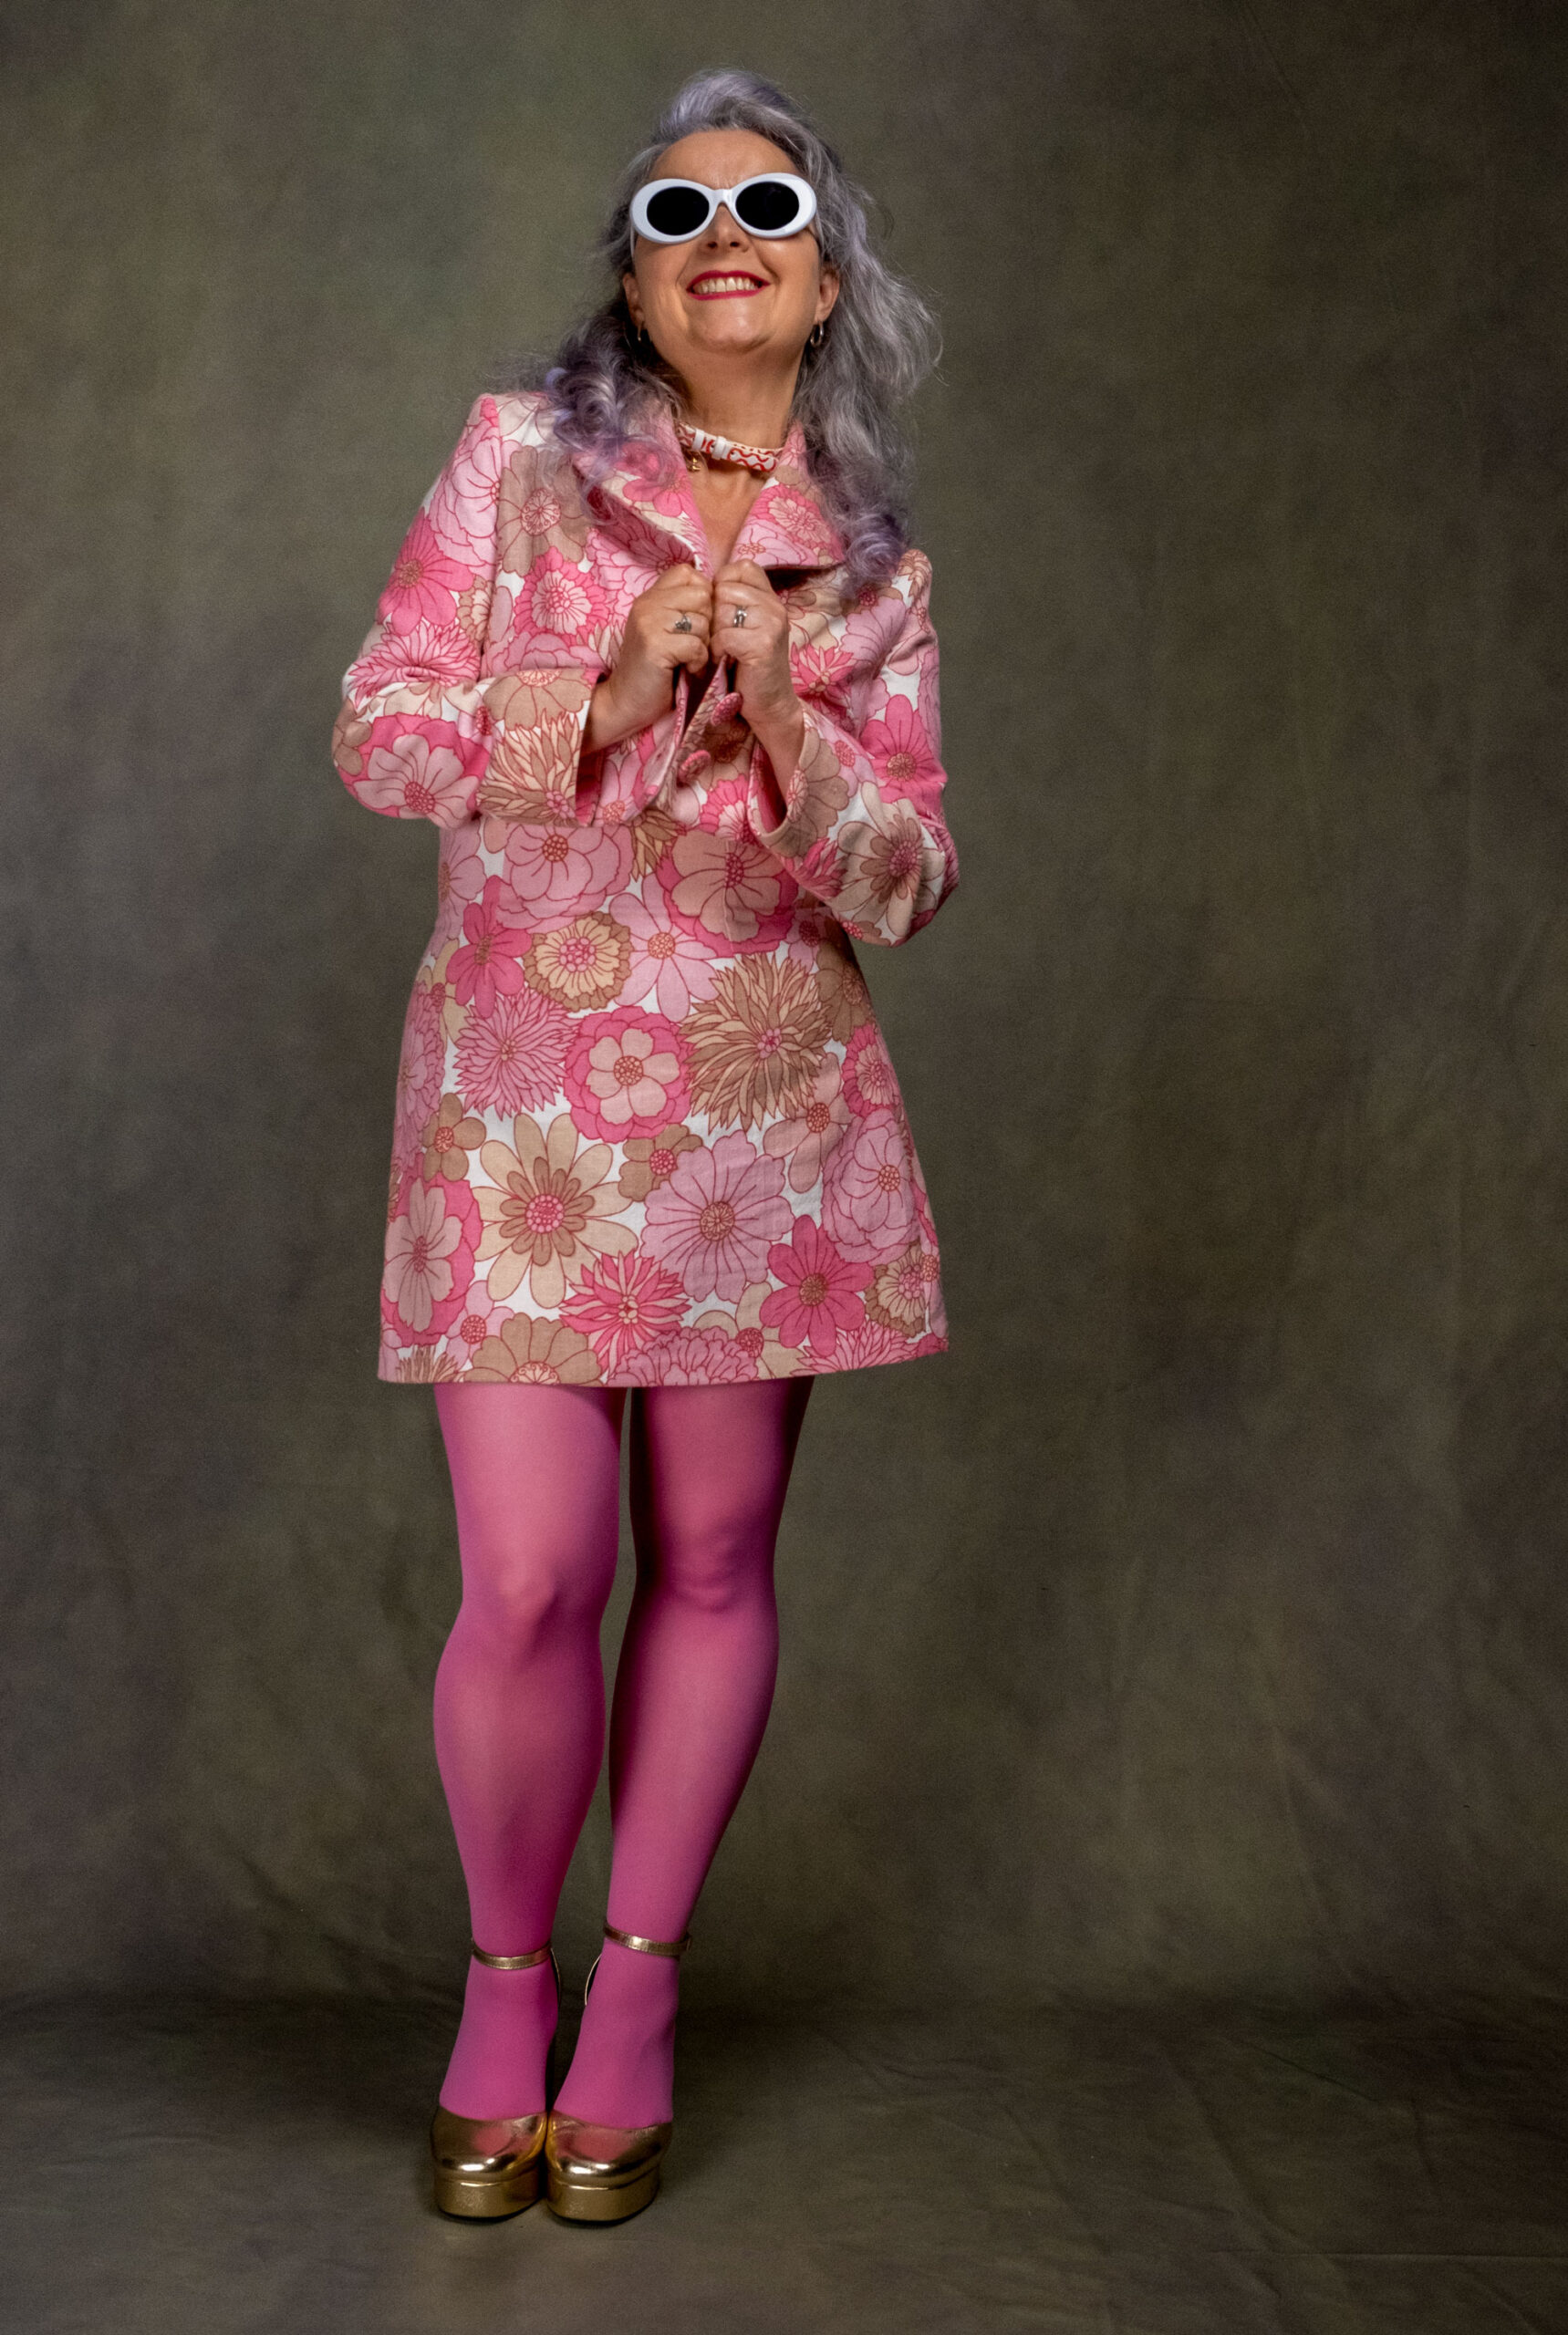
I don’t think I ever imagined myself wearing or making a pink suit. Yet here I am. Pink tights, scarf, handbag and all. And it totally wasn’t in the name of Barbie, I can assure you!

The back story begins with a gifted pair of freshly laundered and neatly folded vintage M&S curtains from my very good friend Kiki. The jury is still out as to whether they are late 60s or 70s but either way they are something special!

Initially I wasn’t sure as to why she’d ‘thought I could do something with them’. They were so far from my every day vibe. But I did feel a pull to retain the faith she had in me, to create something interesting from them. I had no idea what at the time. So they sat in their neat folded pile on top of my existing tower of interesting fabrics for quite some time before the eureka moment struck!

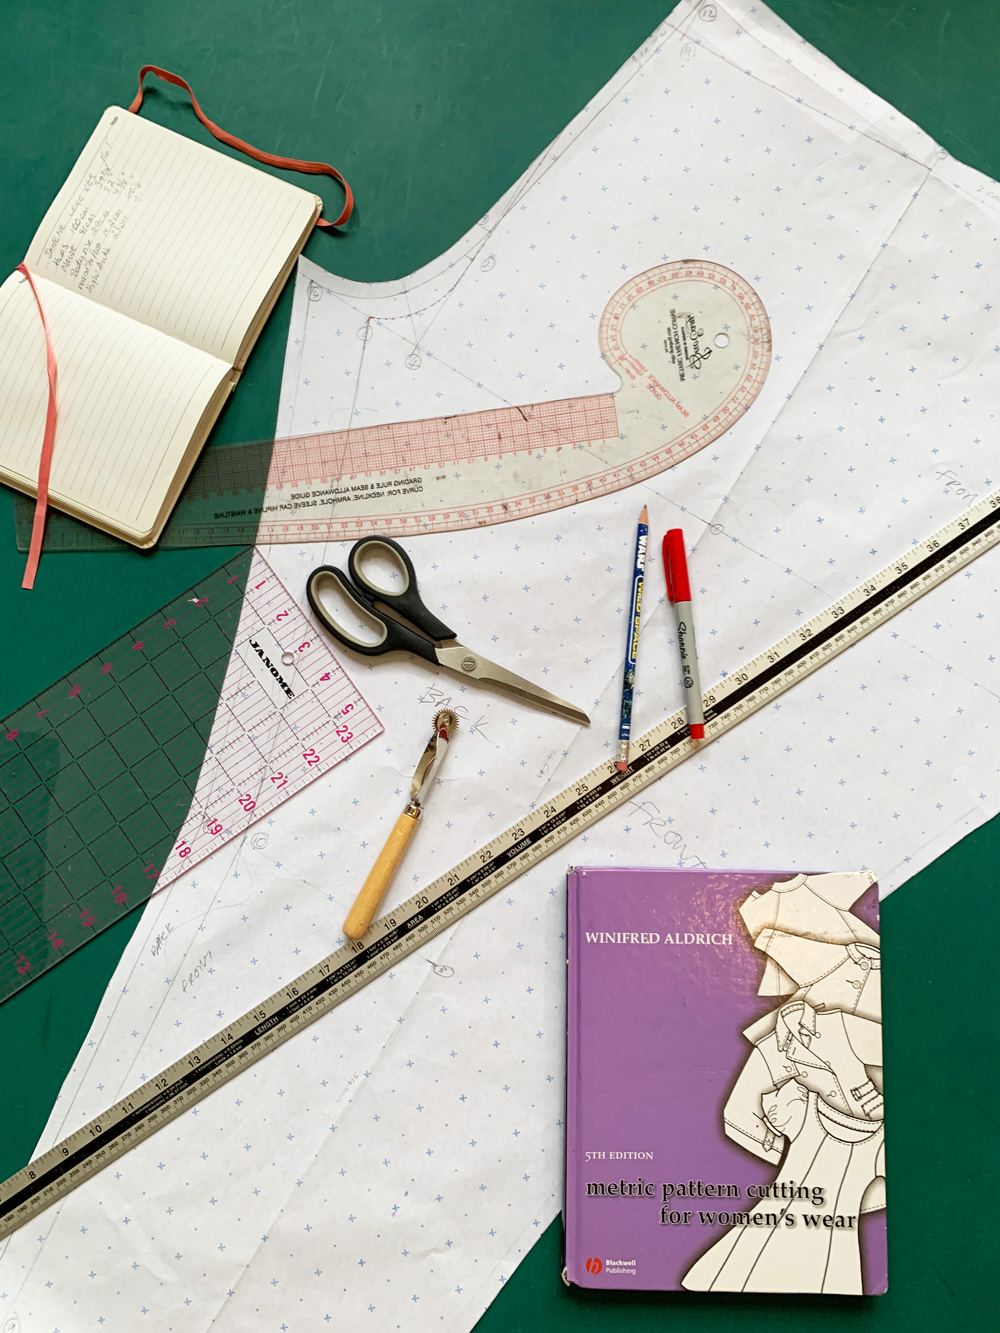
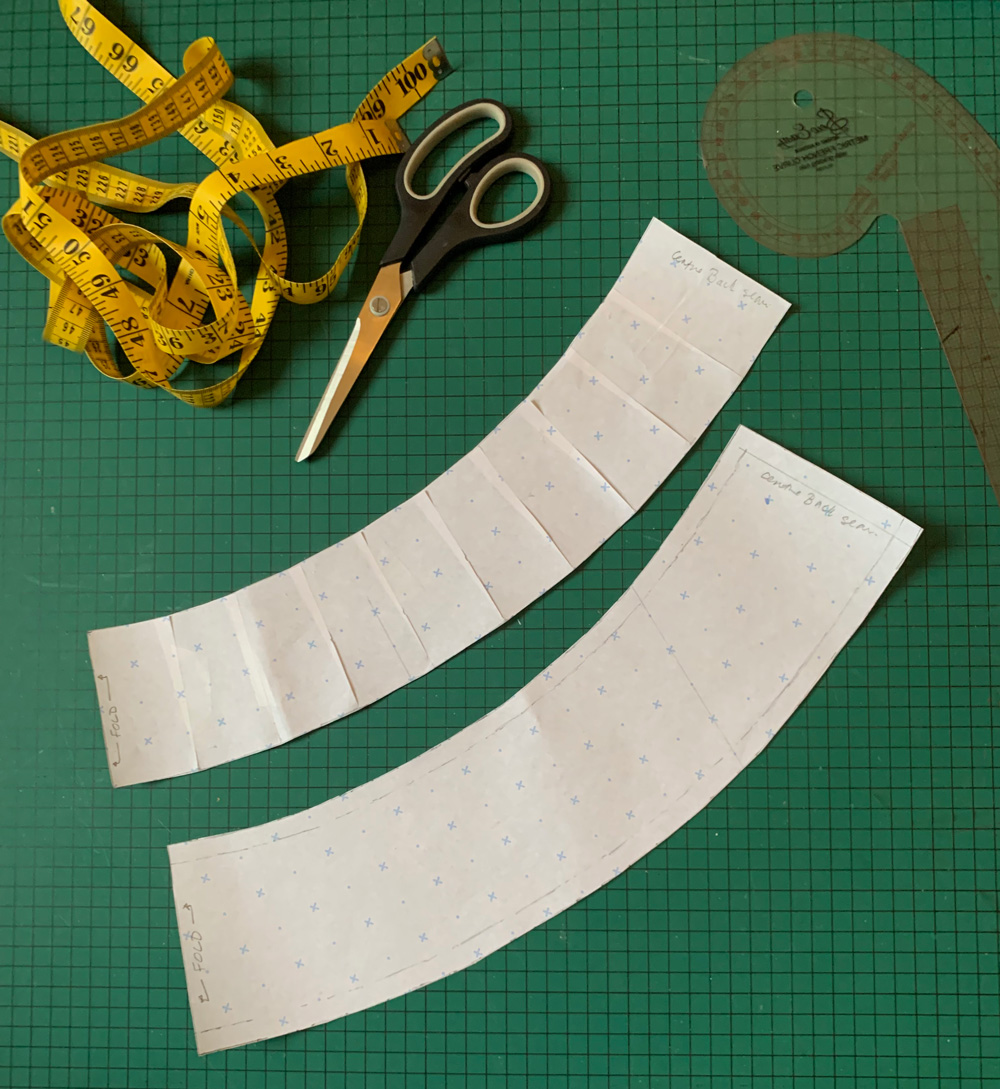
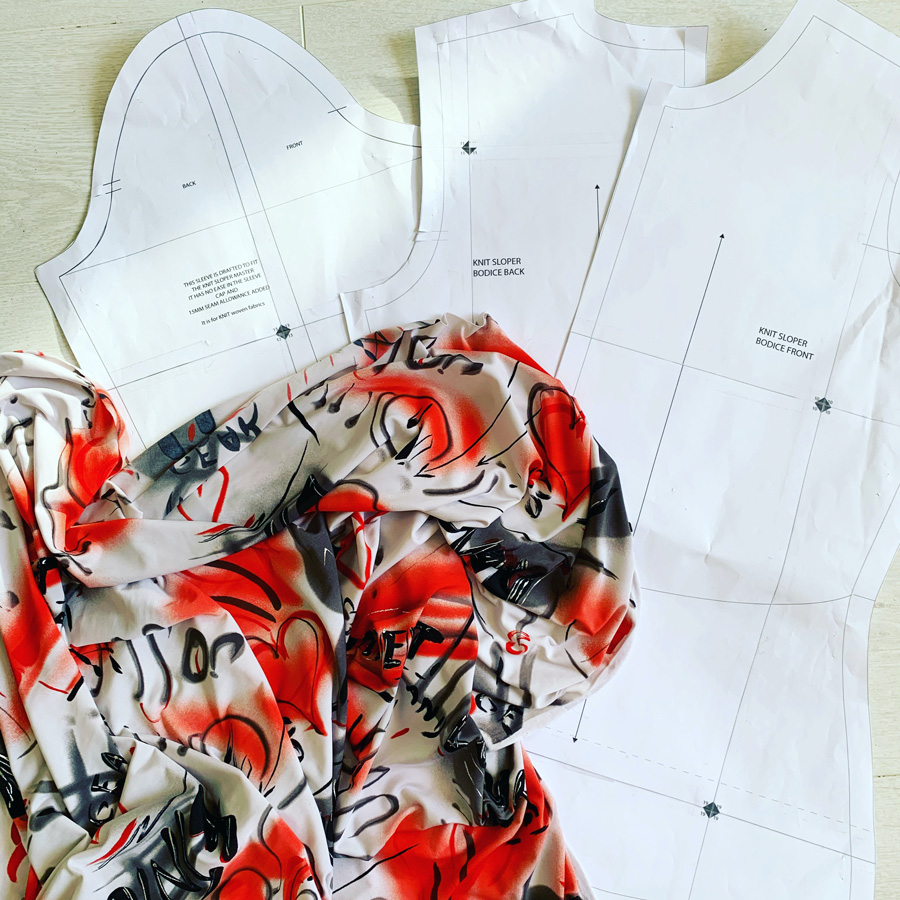
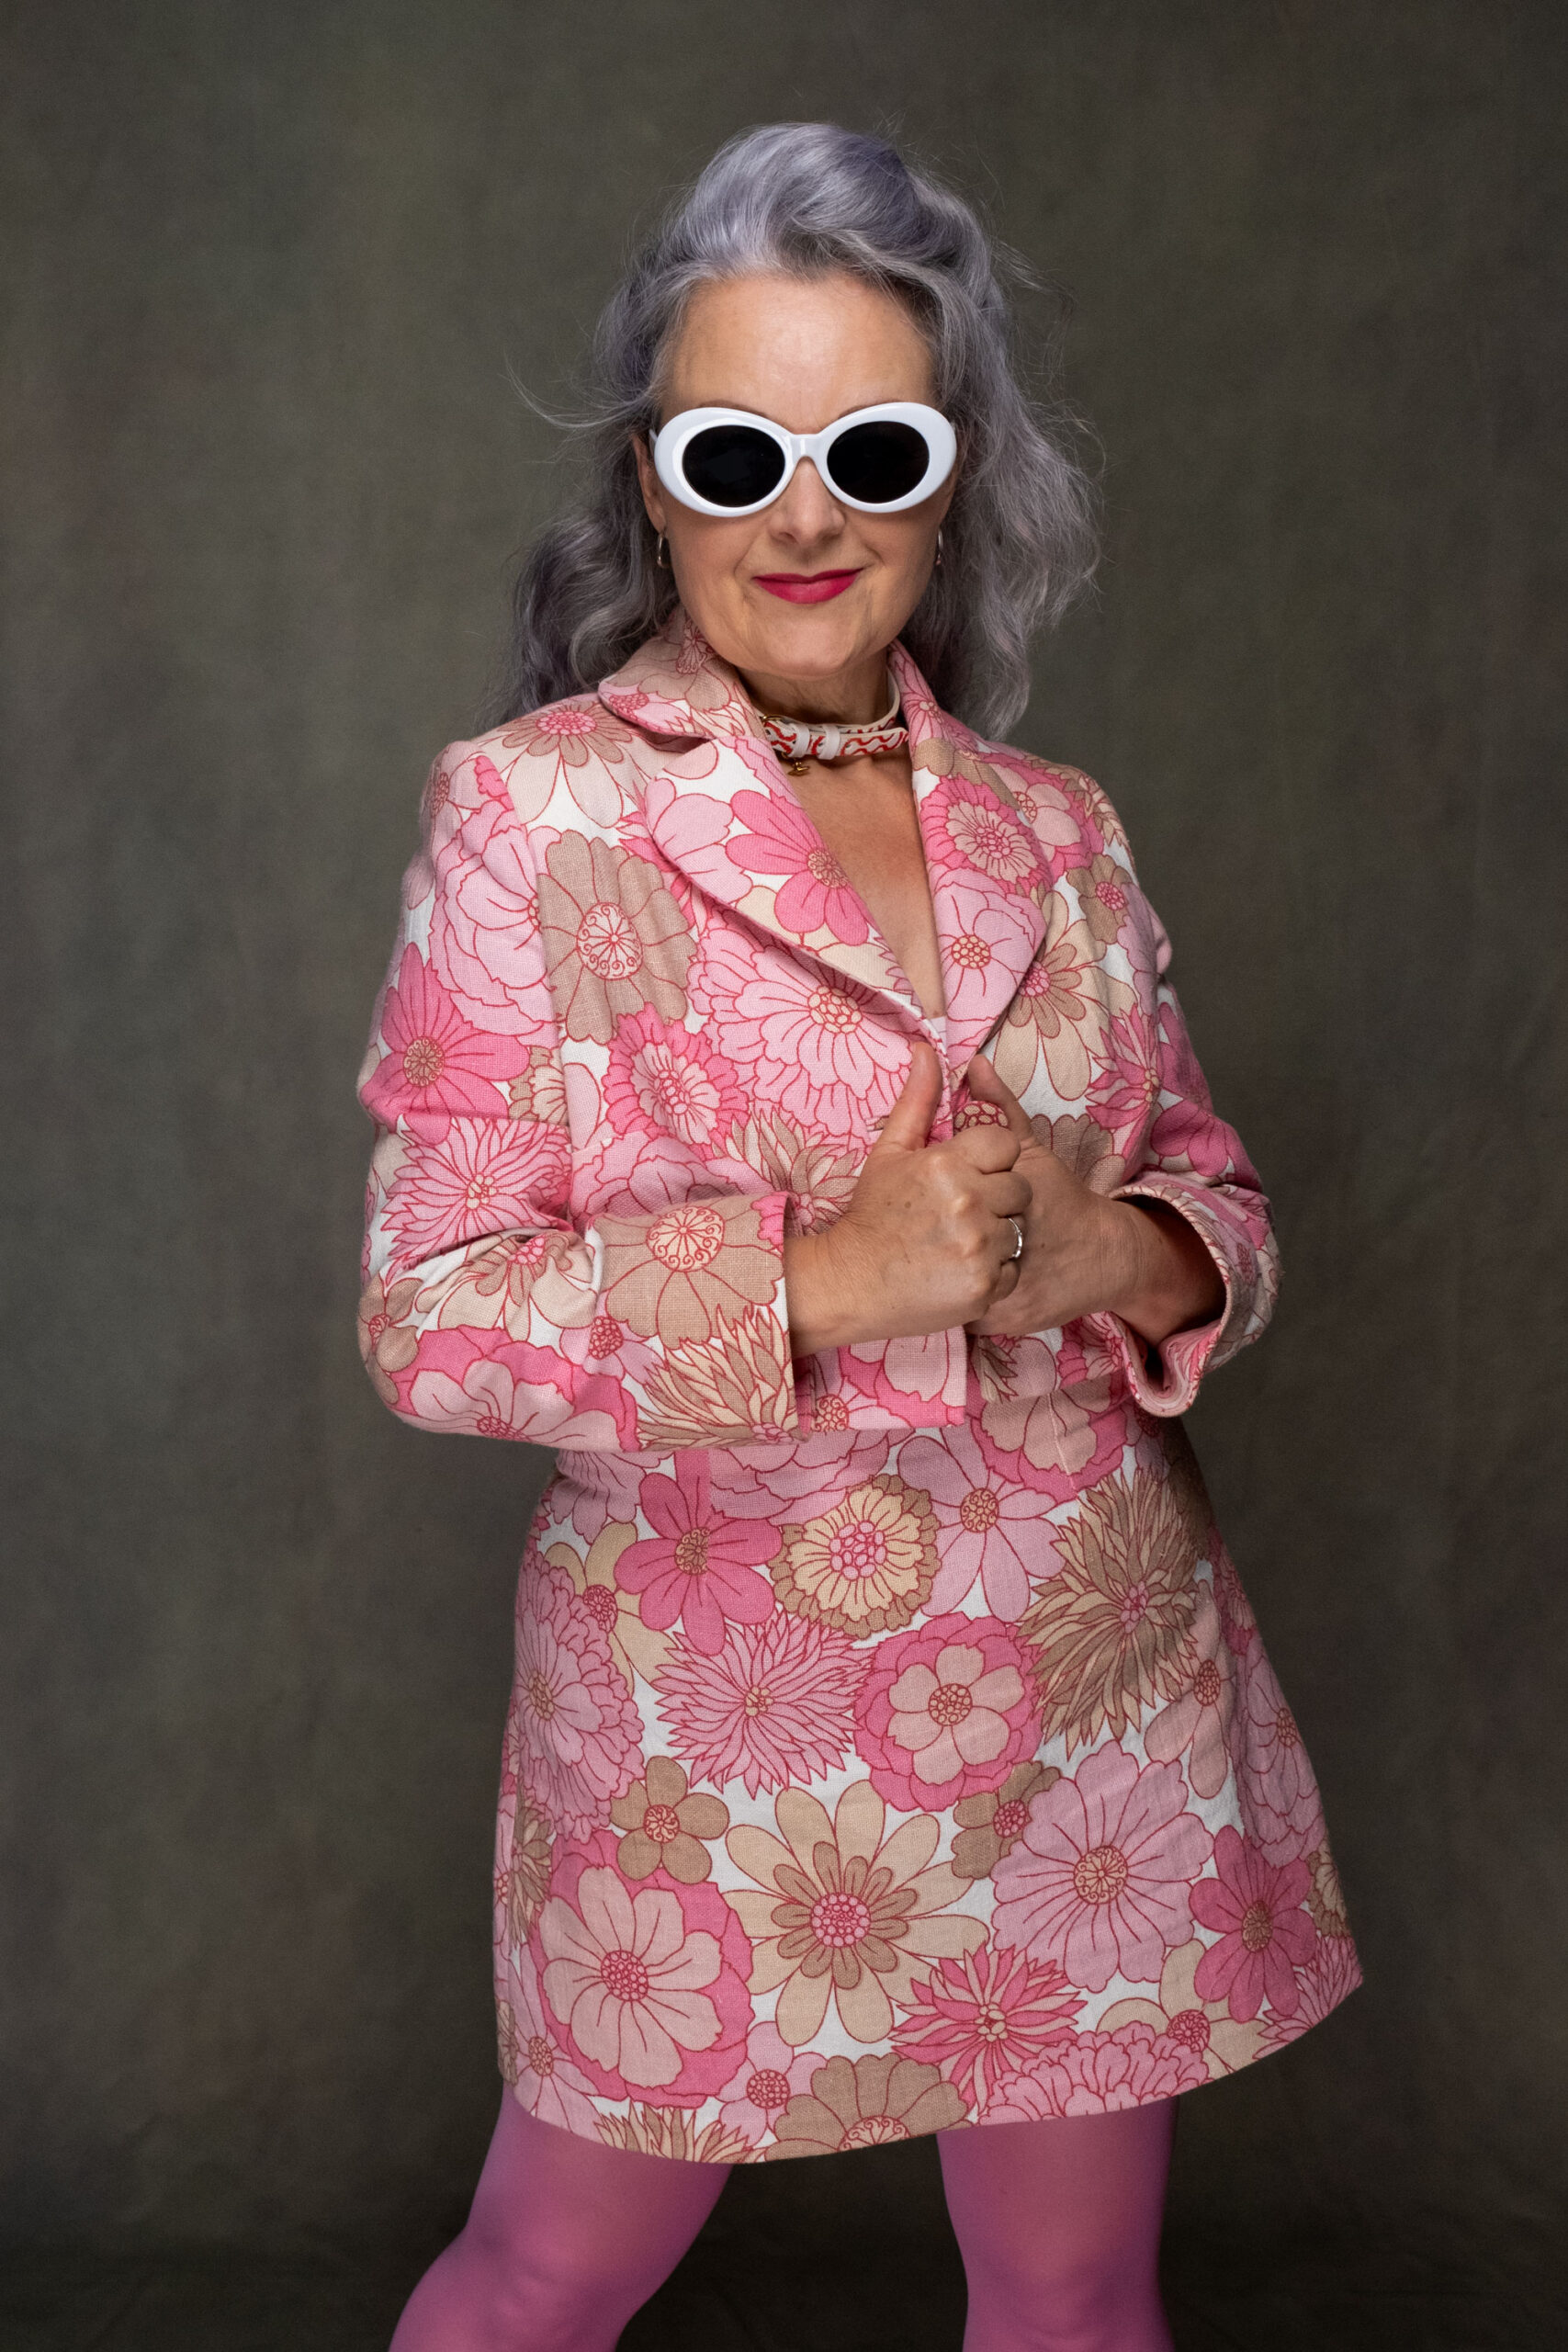
I’ve been practicing pattern making for a while – starting with basic blocks and having fun with adaptations but up to this point I had never drafted a jacket, for fear of that notched collar. It transpires, like anything else it just required a bit of learning and rehearsing to understand the process. And I’m so glad I did. I really wanted to draft a coat this year so this was my first toe dipped before that happens.

Once I’d drafted the pattern and visualised the final thing I couldn’t get the curtain fabric out of my head and I sketched those big flowers in my Fashionary to see if it would work. And I was pretty sold that it would. 

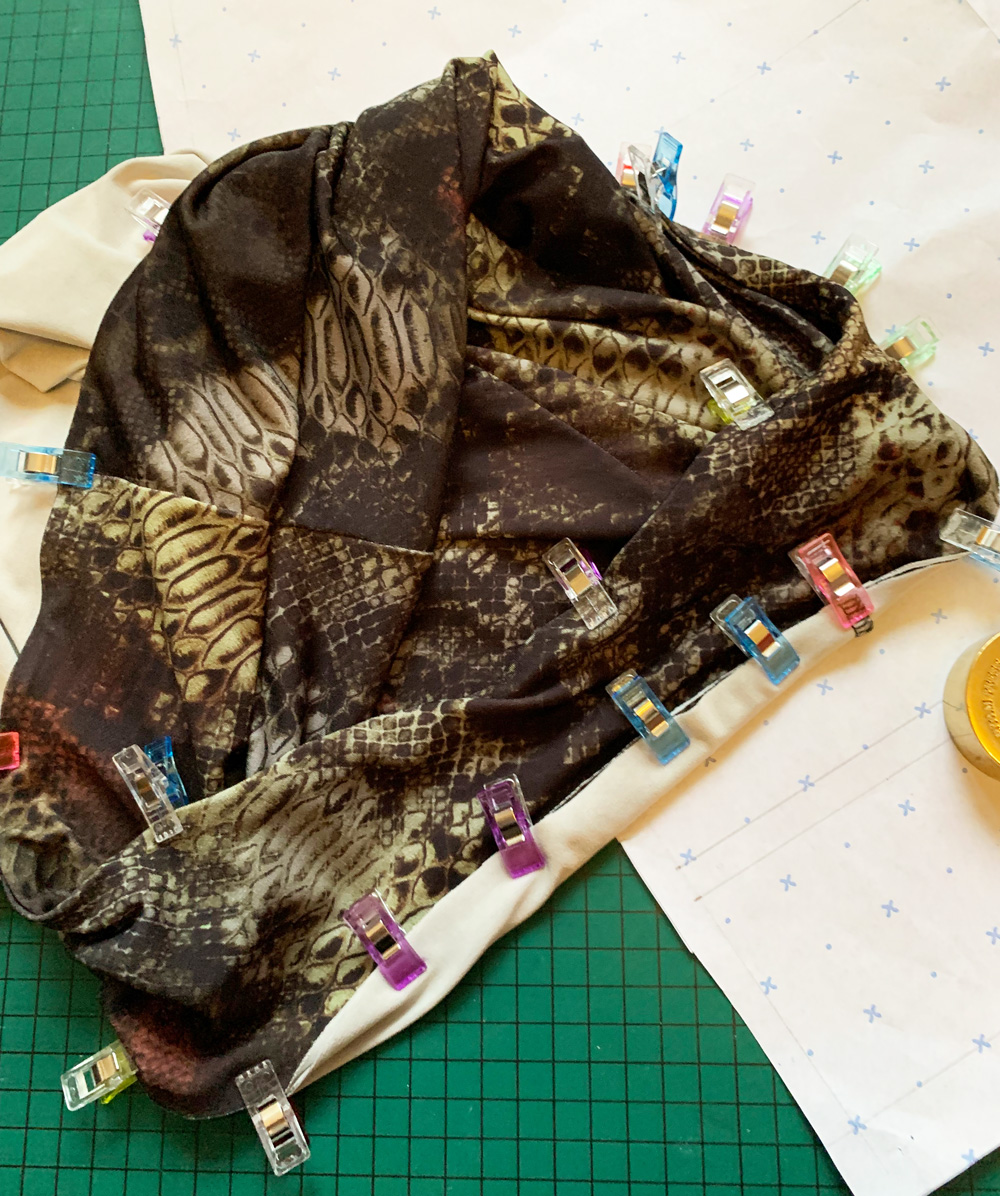
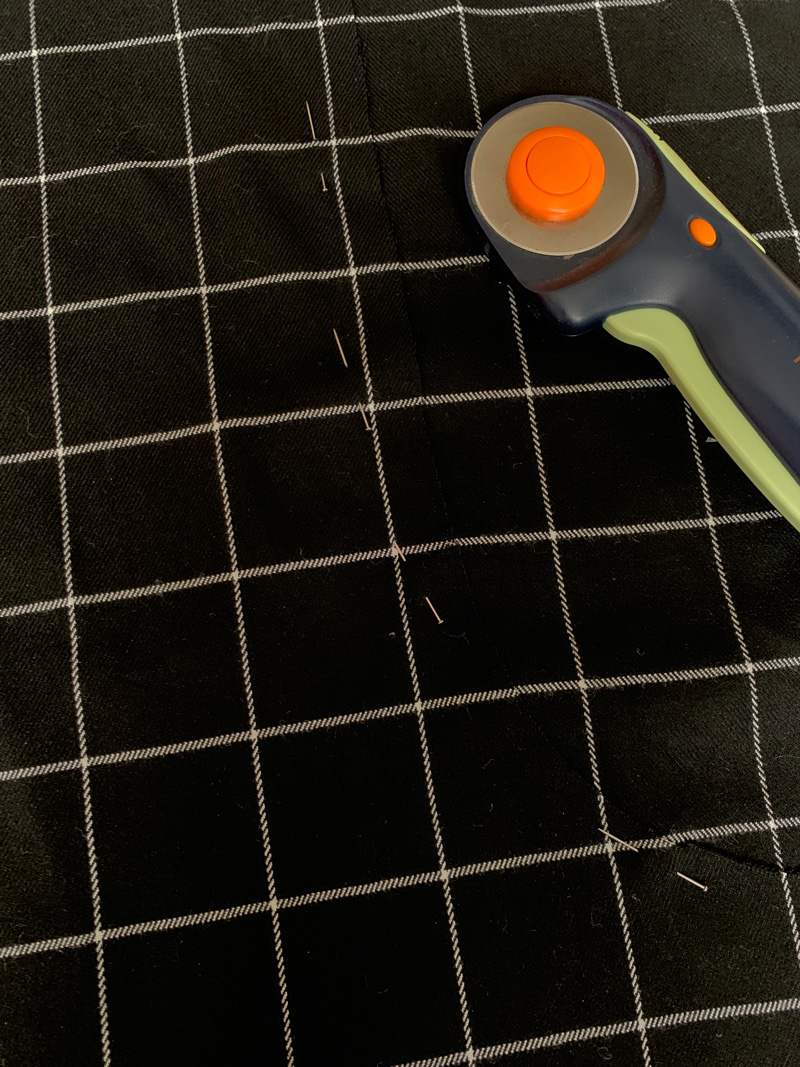
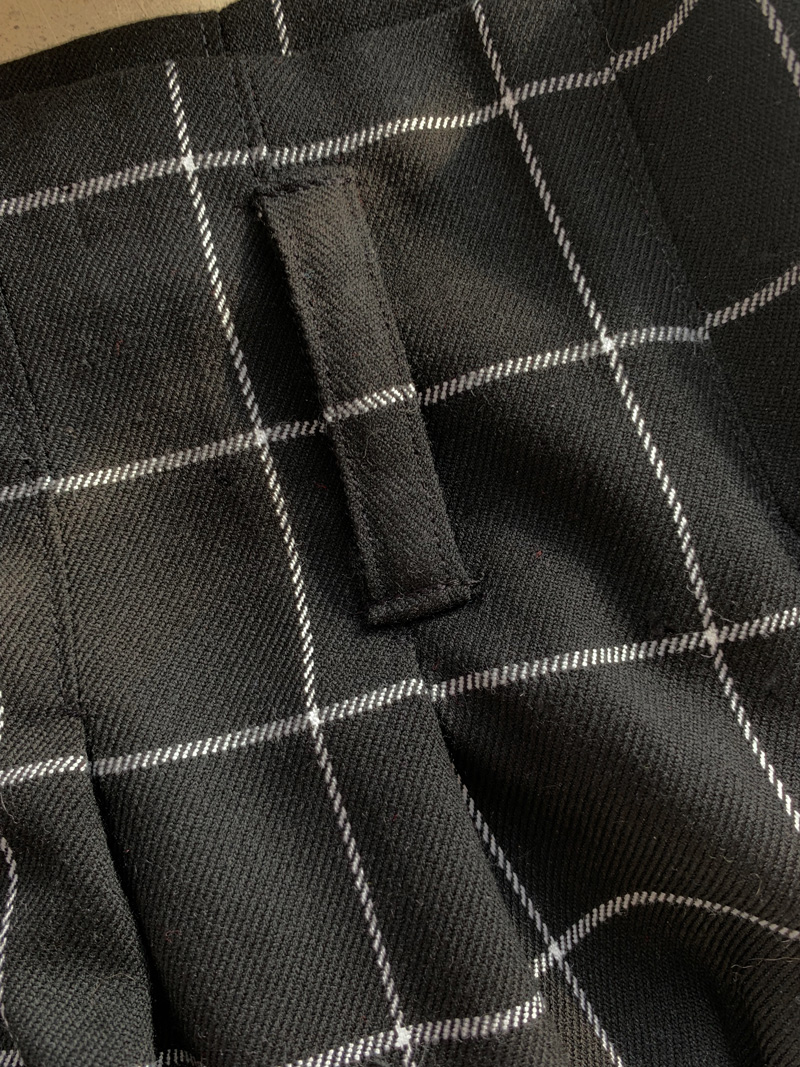
The fabric was great to work with – great texture and relatively stable. Perhaps a wee bit on the heavy side but I really didn’t mind that because it gave some great structure.

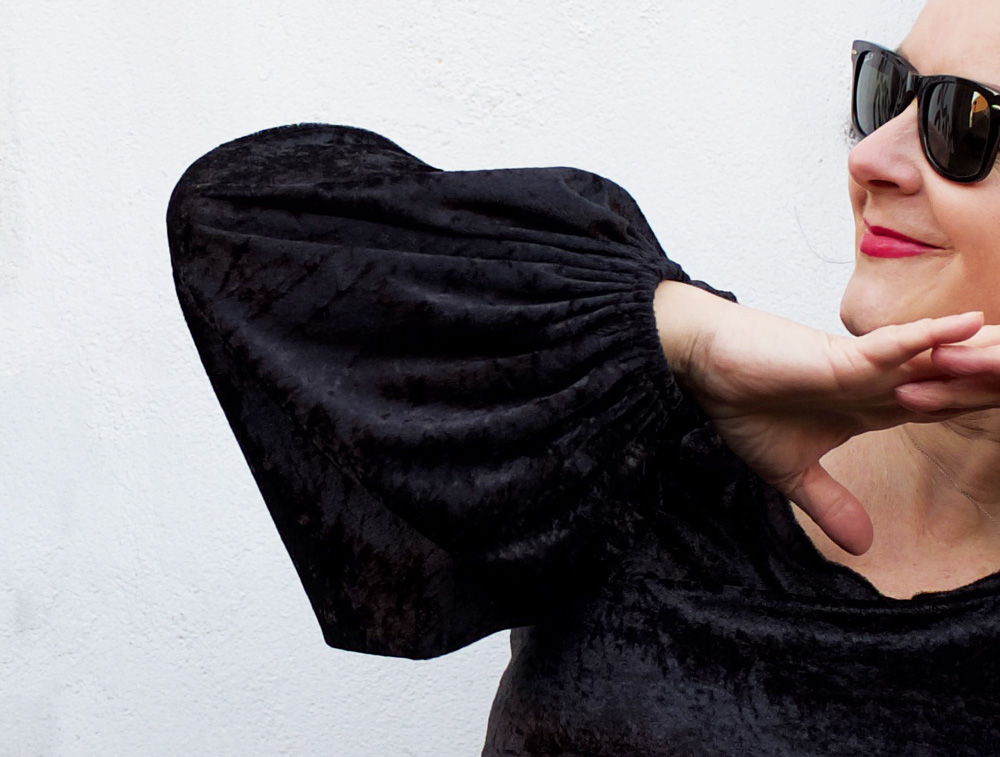
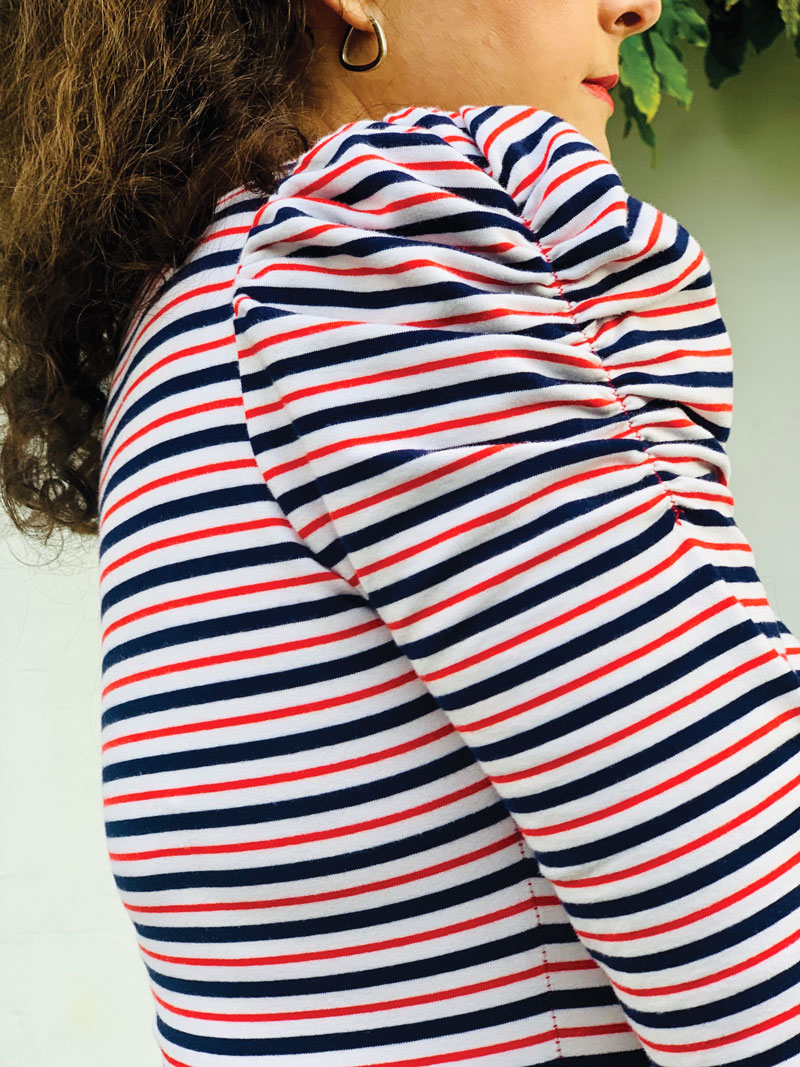
I padded the shoulders and added a sleeve head before lining it. I can’t not do this now I know what a difference it makes. And I spent a lot of time cooing over the rounded shoulder cap before I moved on to the next stage!

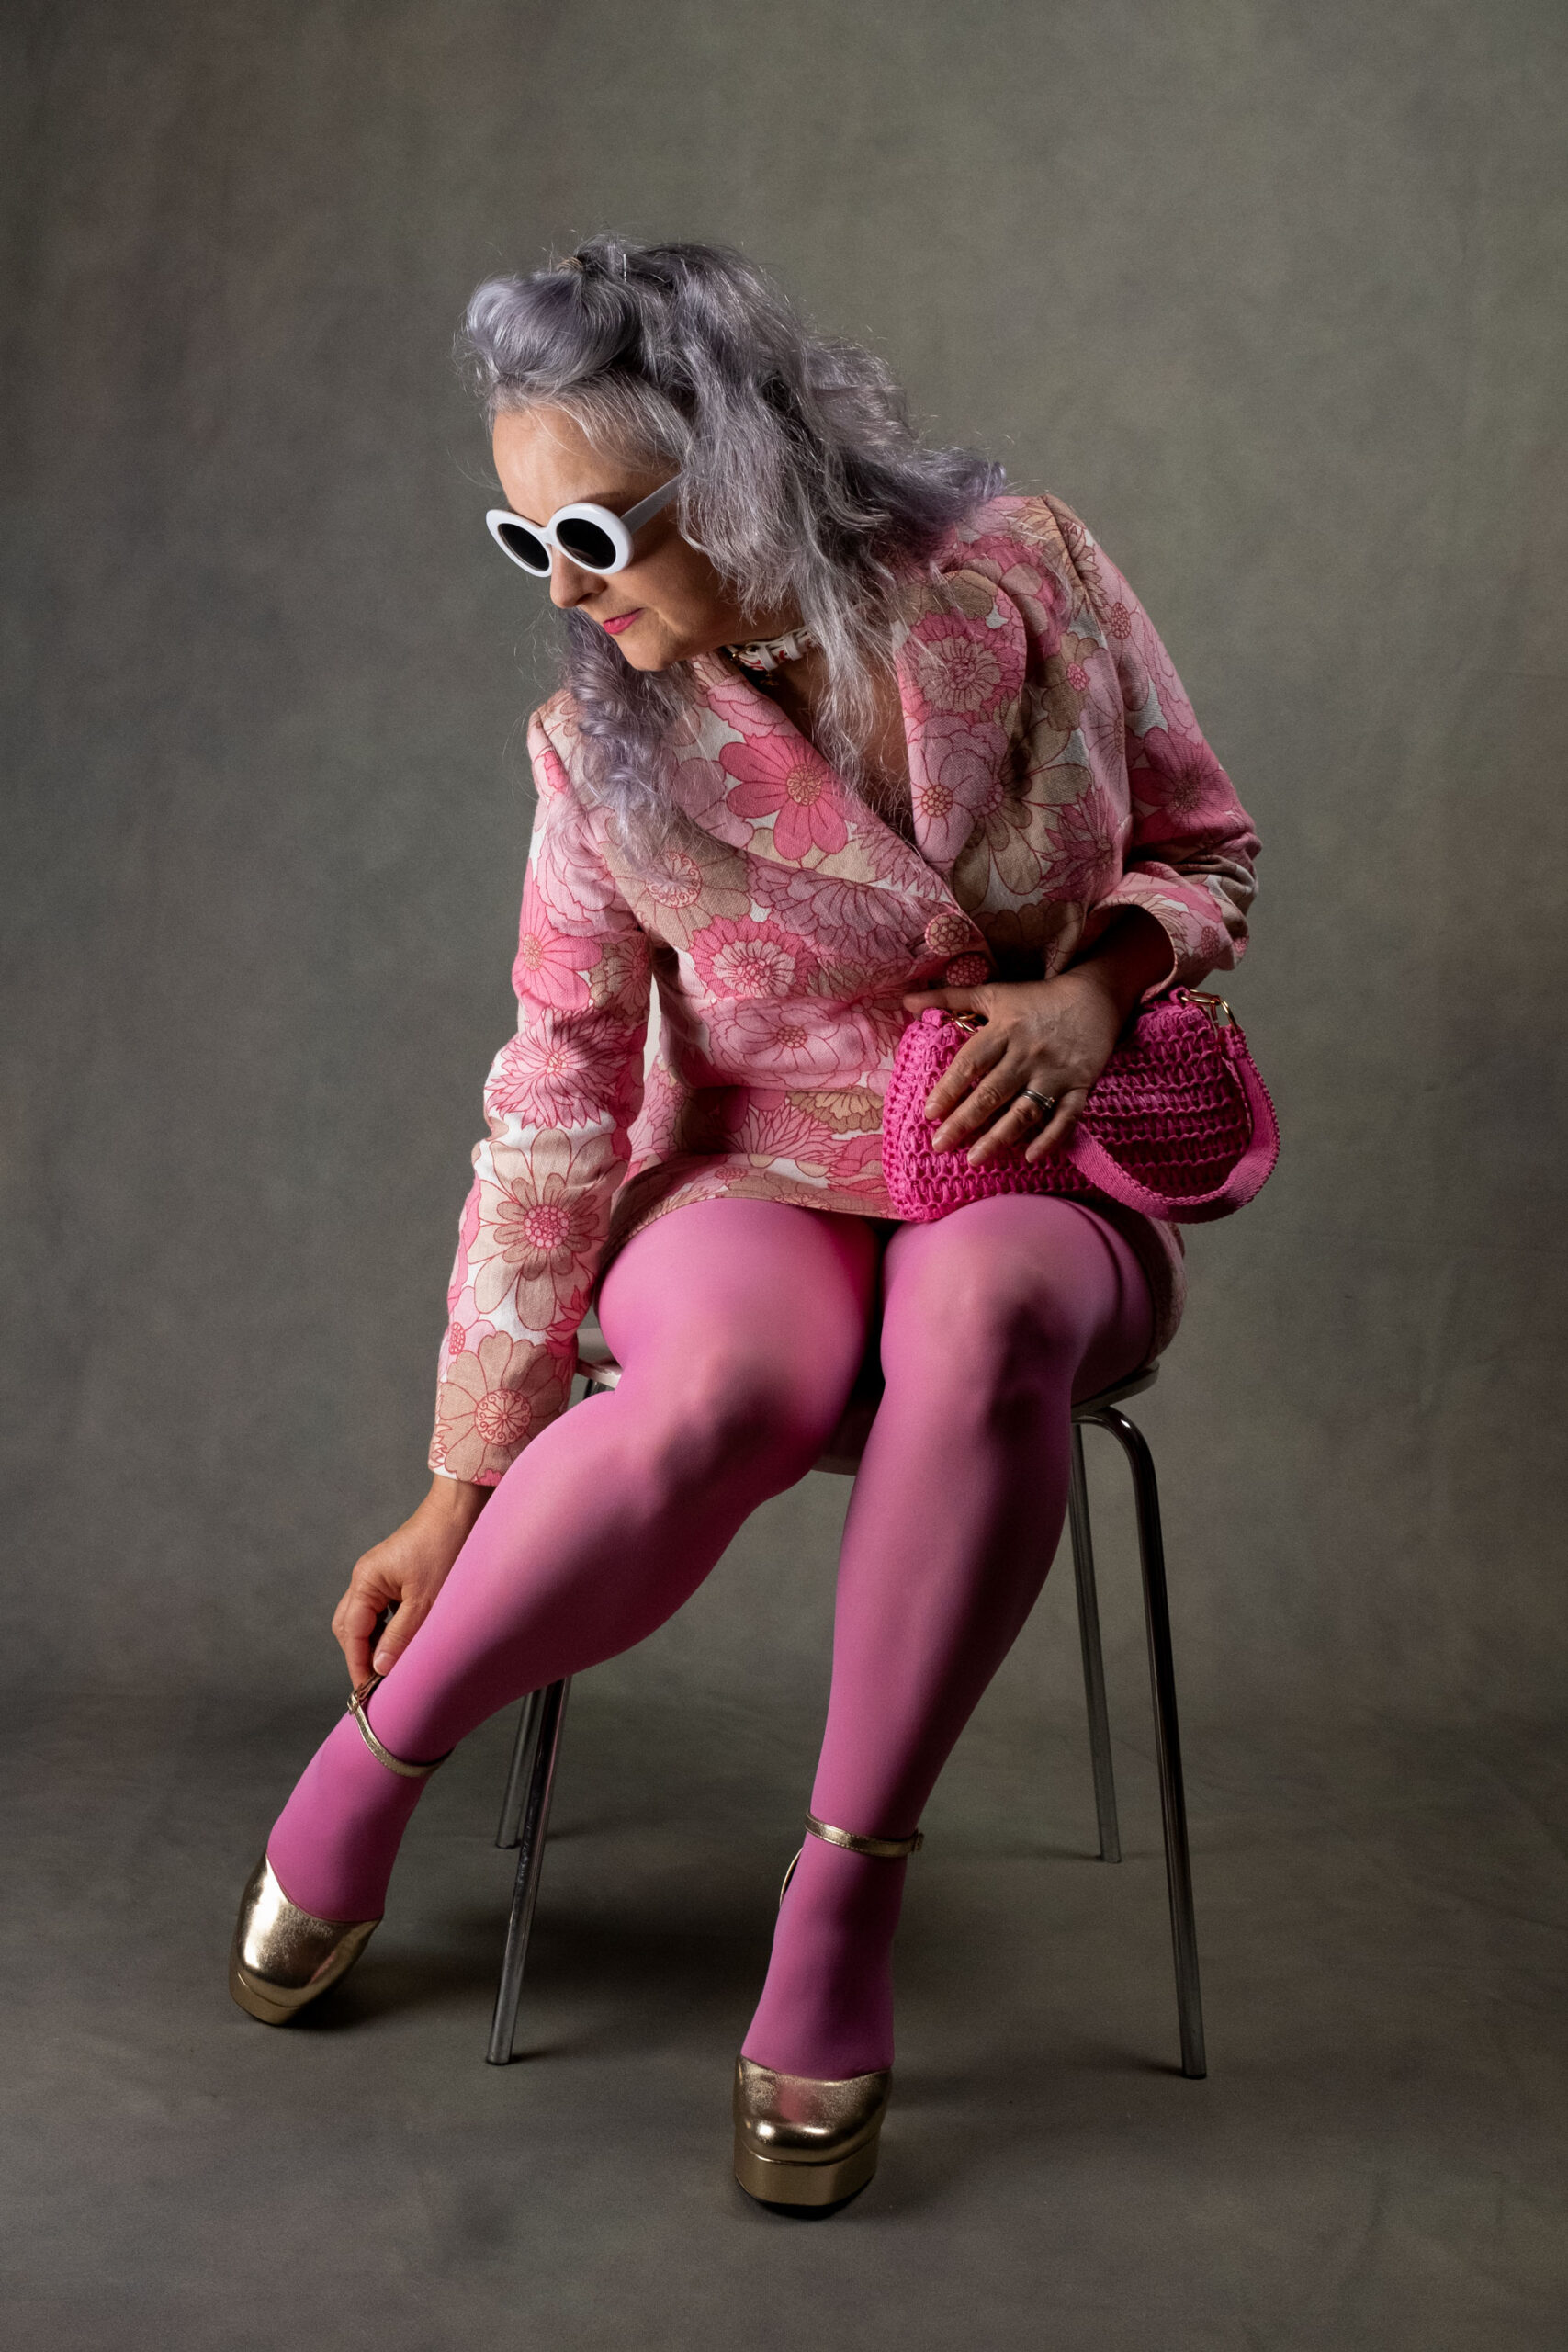
The rounded lapels were a conscious decision to reflect the rounded retro flower design, and also because I fell in love with the heart shaped lapels on a Vivienne Westwood jacket years ago, hoping one day I would replicate it. Not yet. But I’m one step closer!

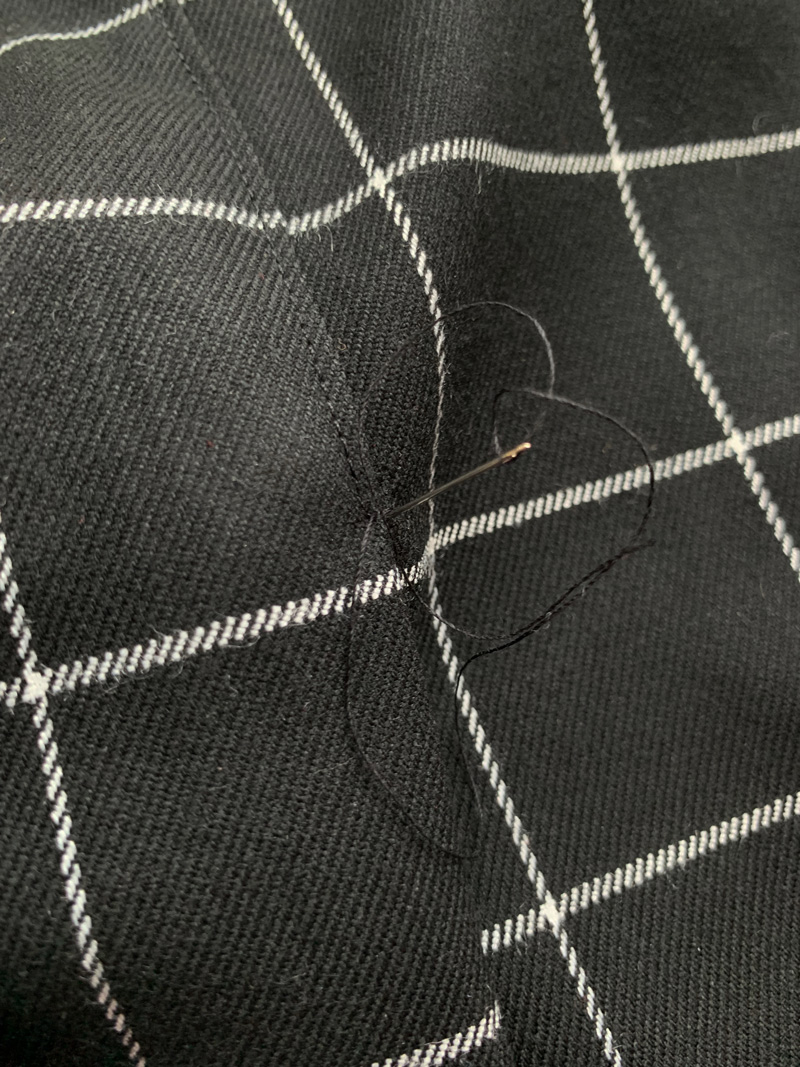
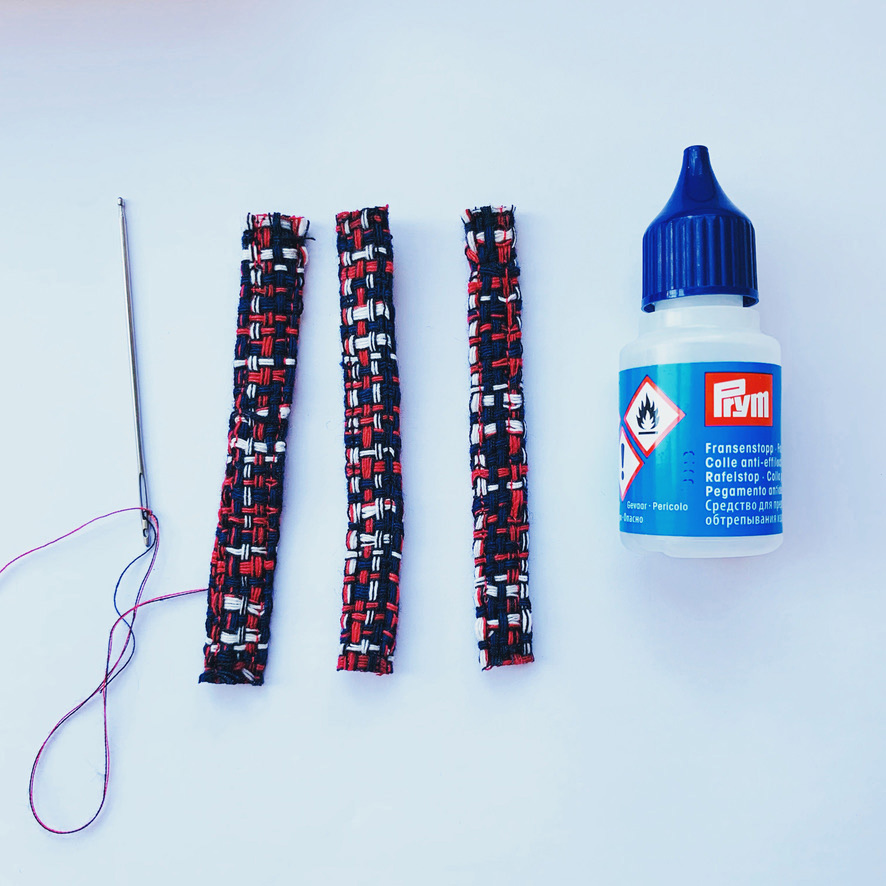
Bound buttonholes were a must. Sometimes a machined button hole just doesn’t cut it. My jacket was a labour of love and was going to get the best kind of button holes. Covered buttons too. No other buttons I looked at came close to being able to use up the fun flower centres from the leftover scraps.

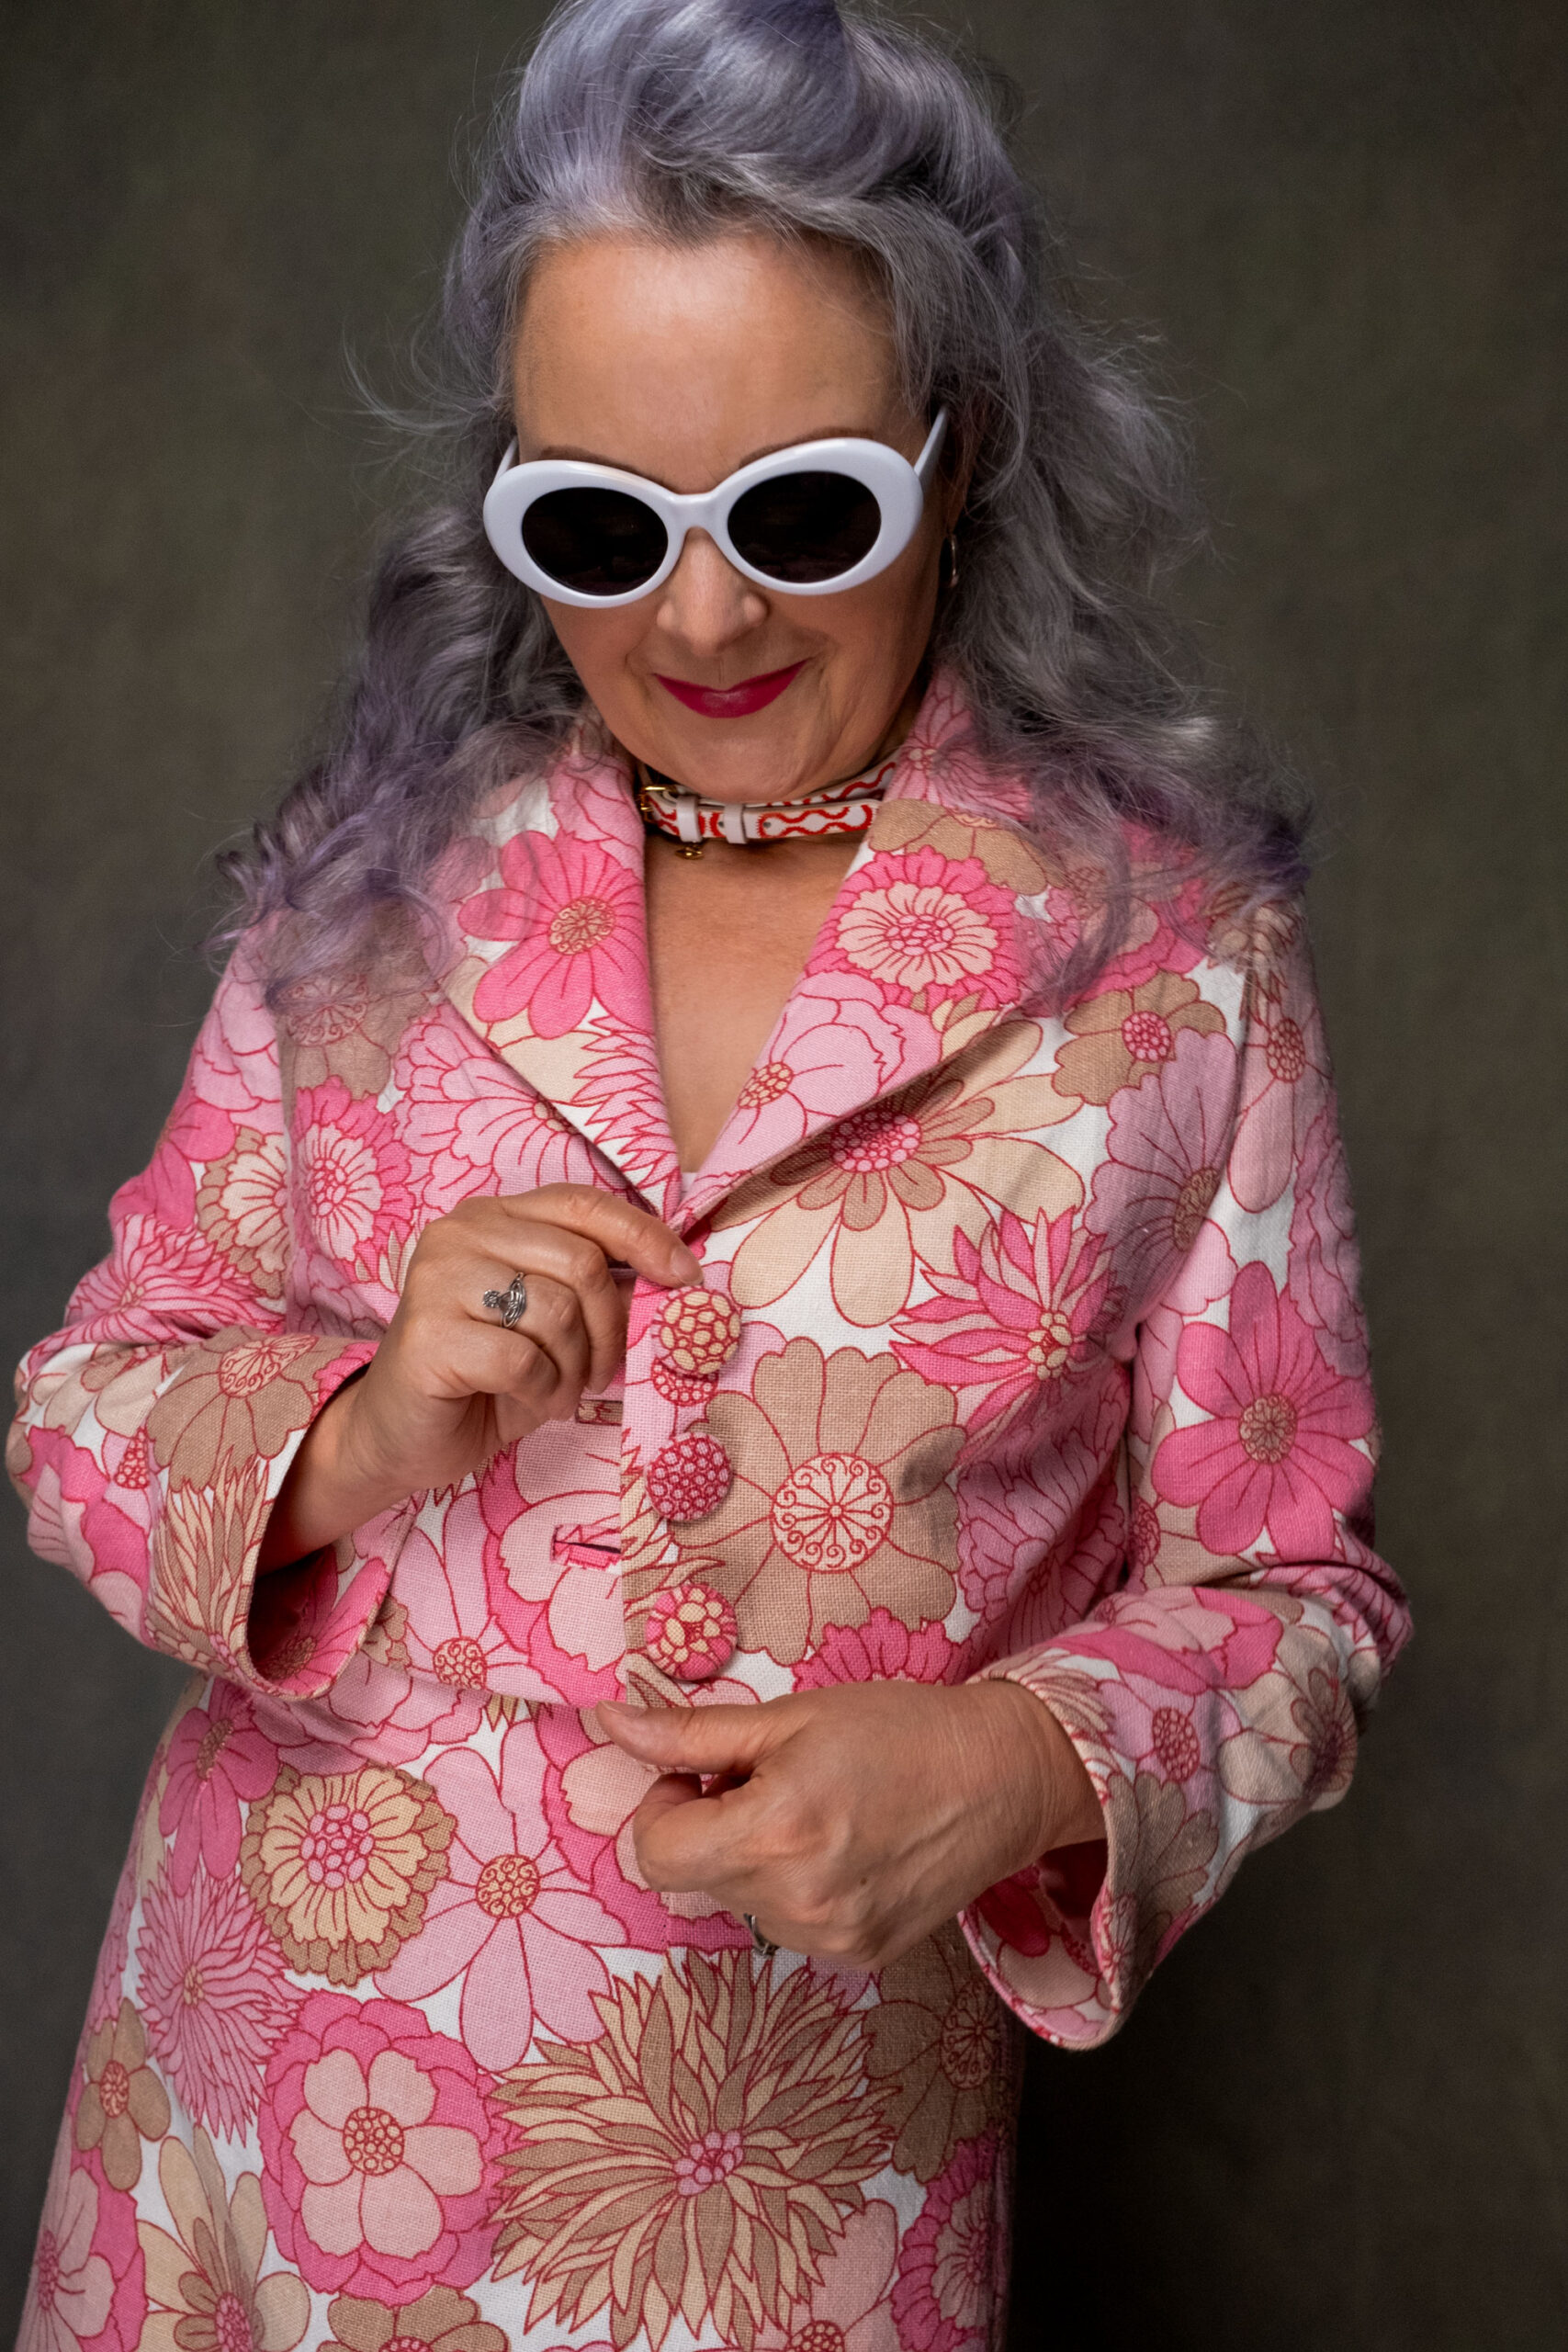
I used facings to finish the hems of the jacket bodice and the sleeves which I love to do and it makes it look all fancy inside too!

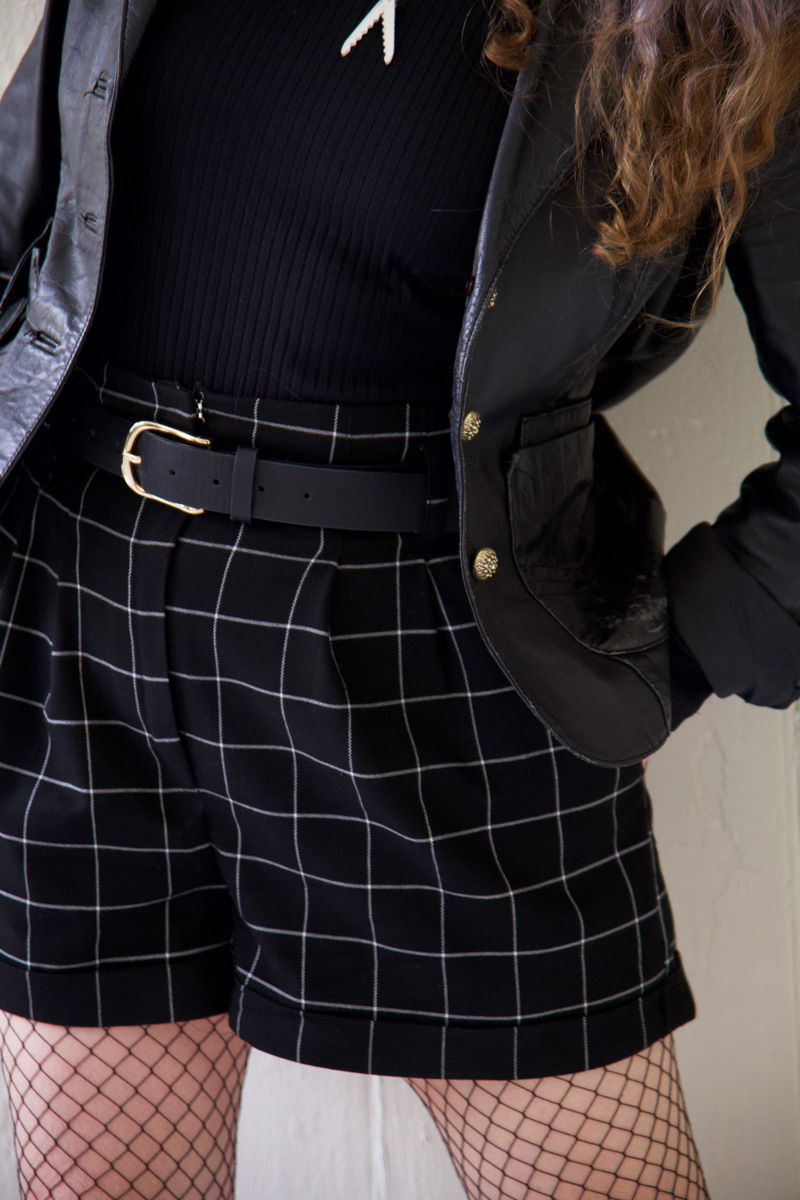
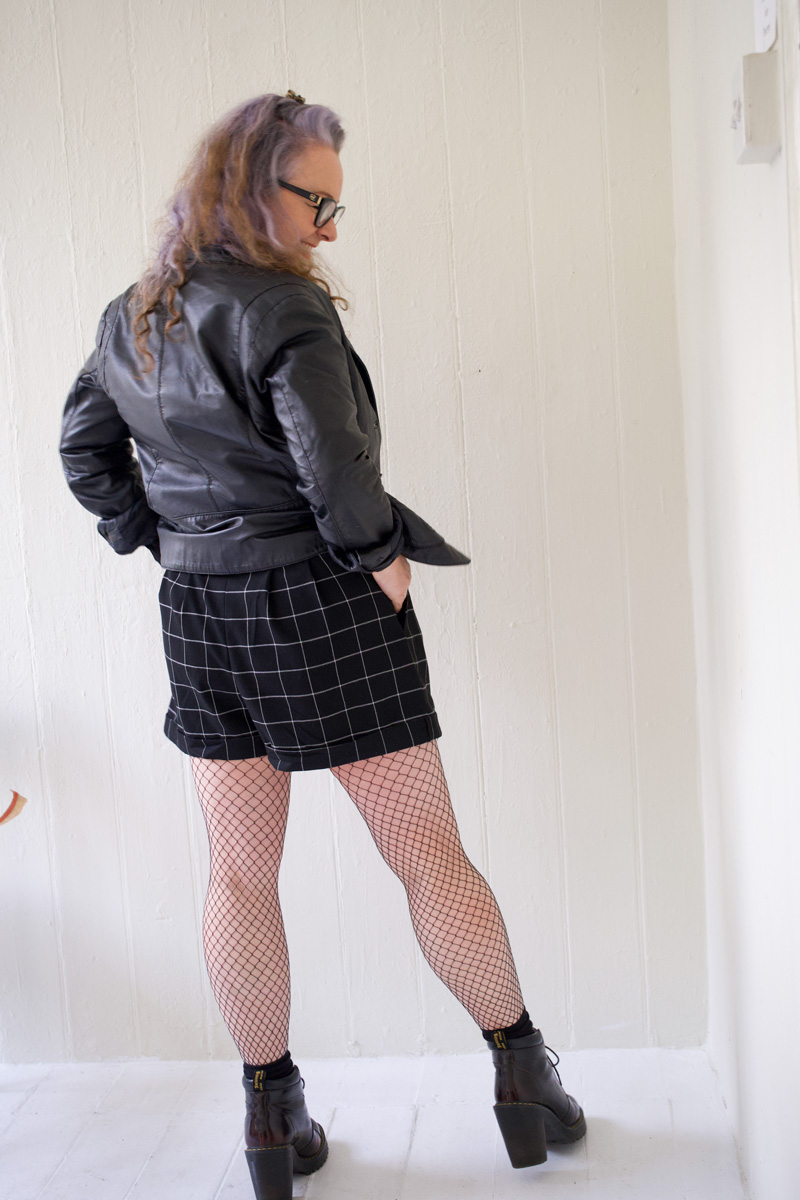
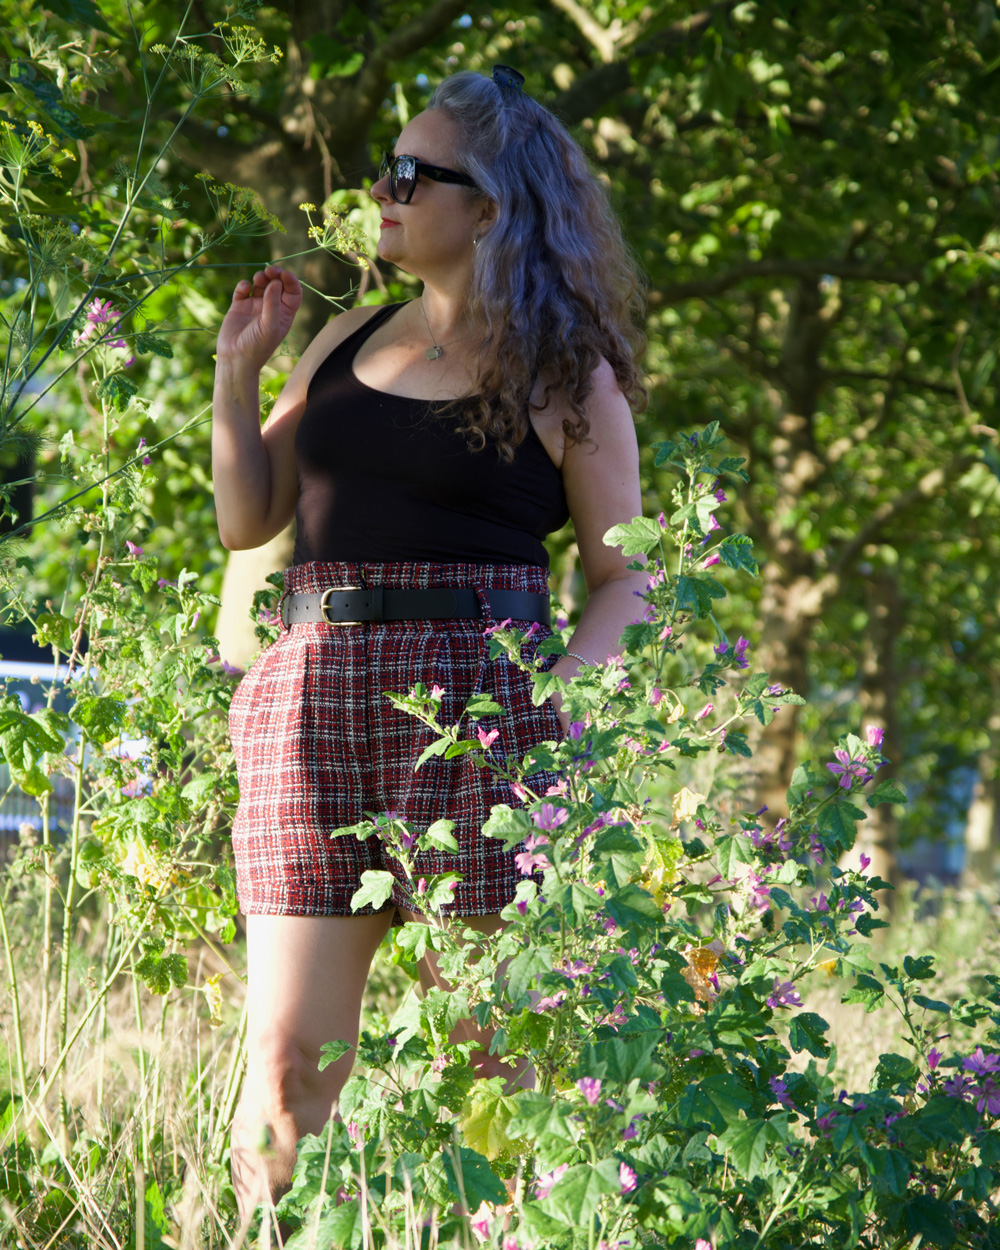
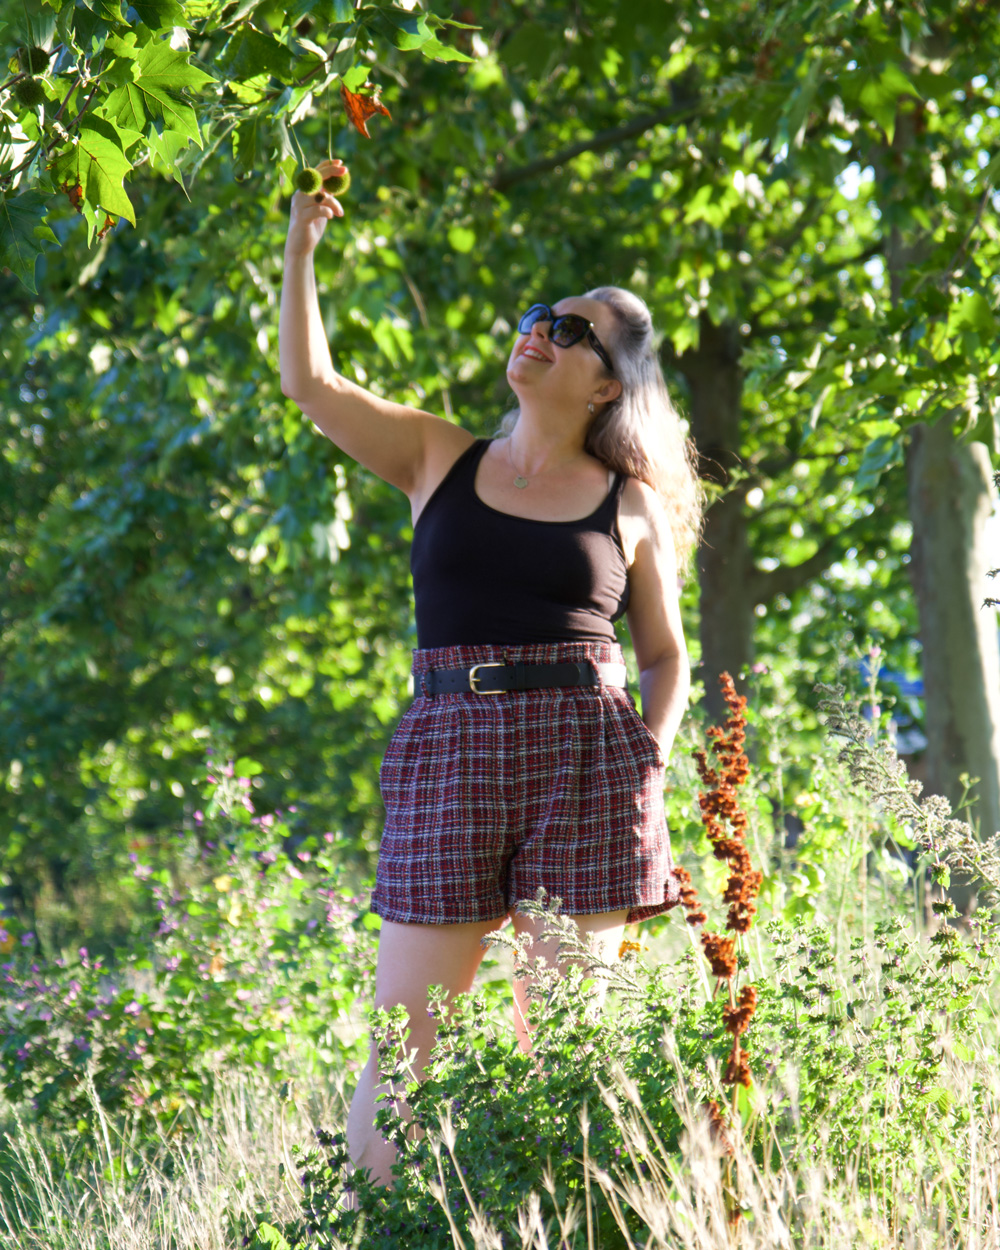
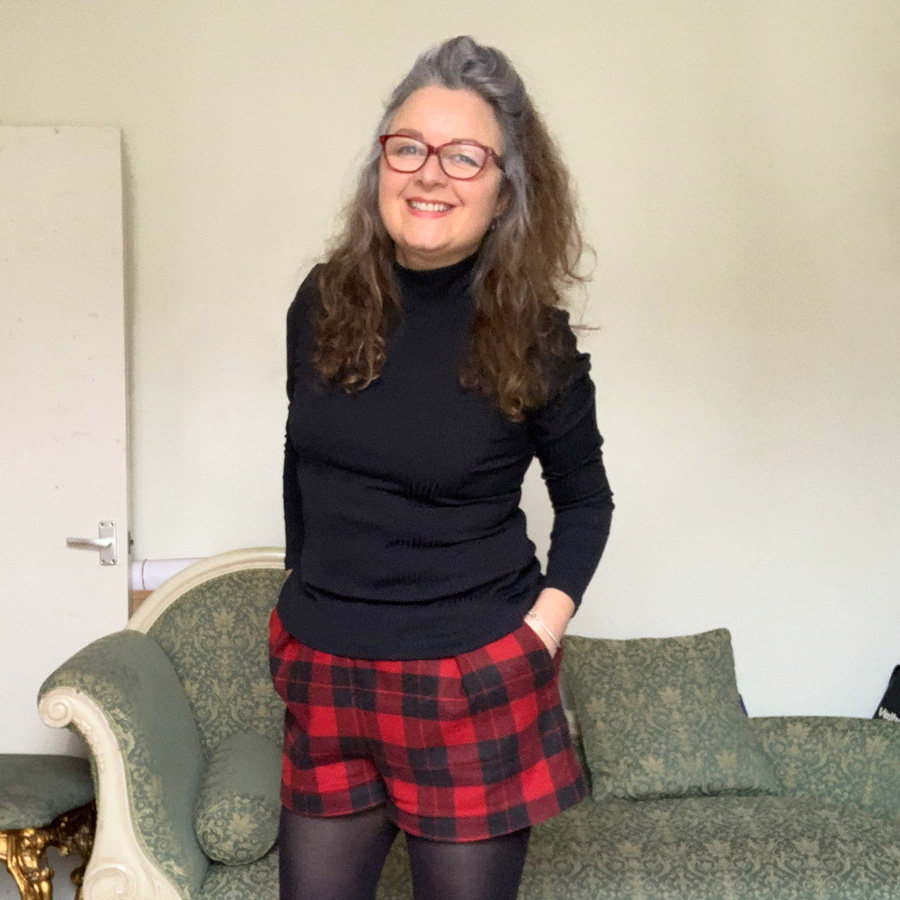
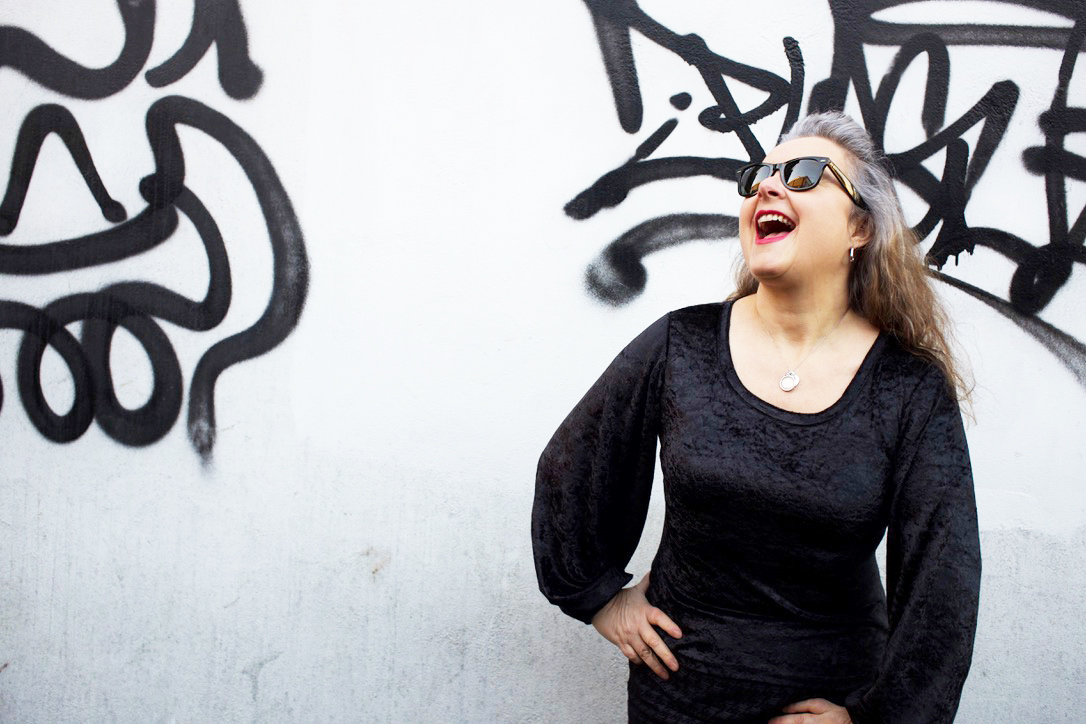
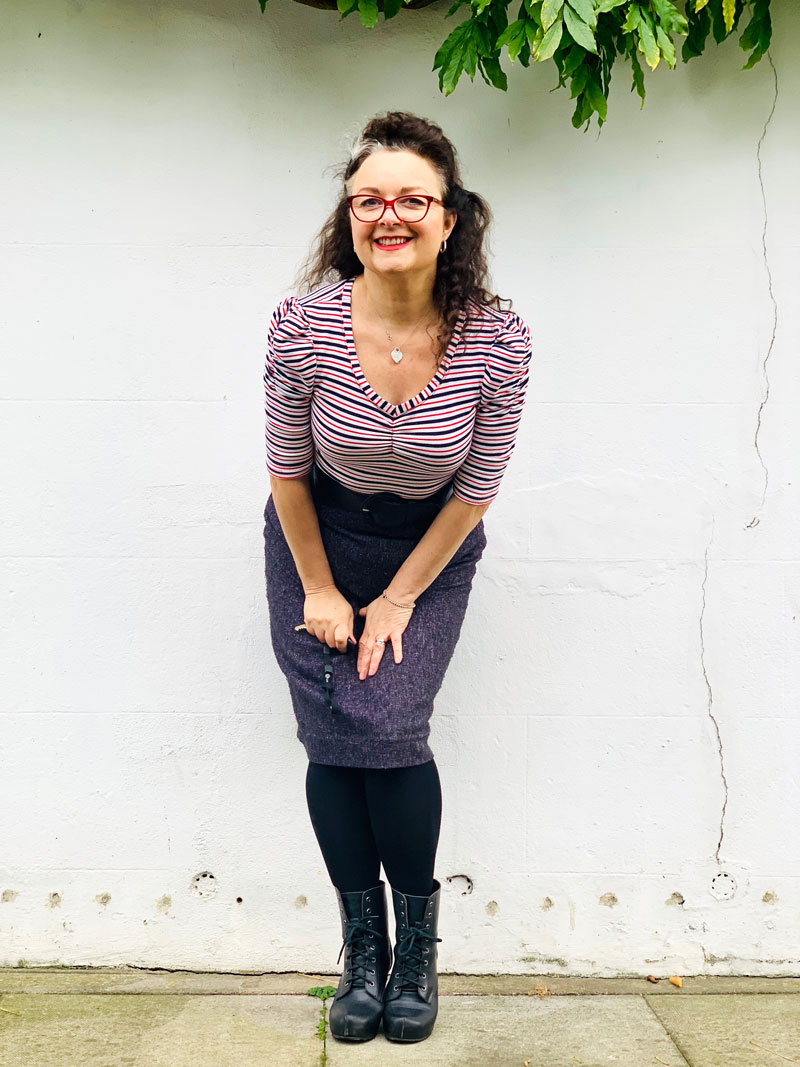
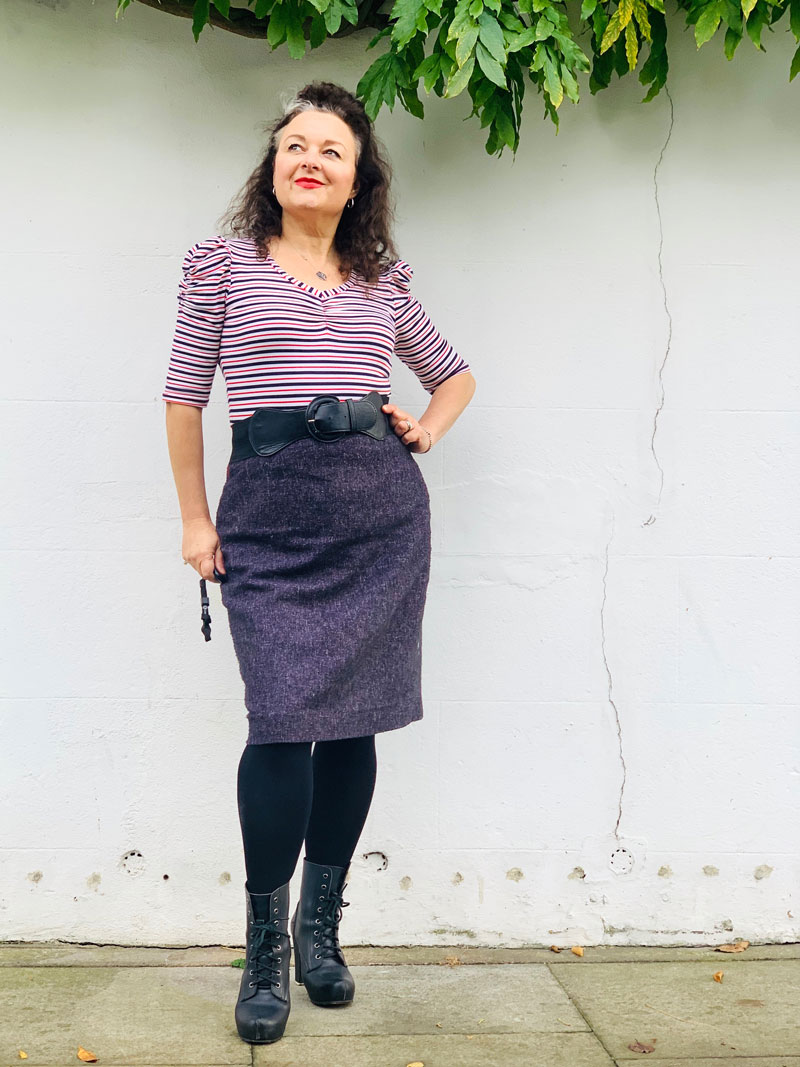
The only problem I had was that I didn’t really have anything to wear with it once it was finished! I mean it will totally go with a black dress and all but I weirdly don’t have many of those any more. So I whipped up a high waisted mini skirt on deciding that the fabric was too heavy for a shift dress which was an initial thought.

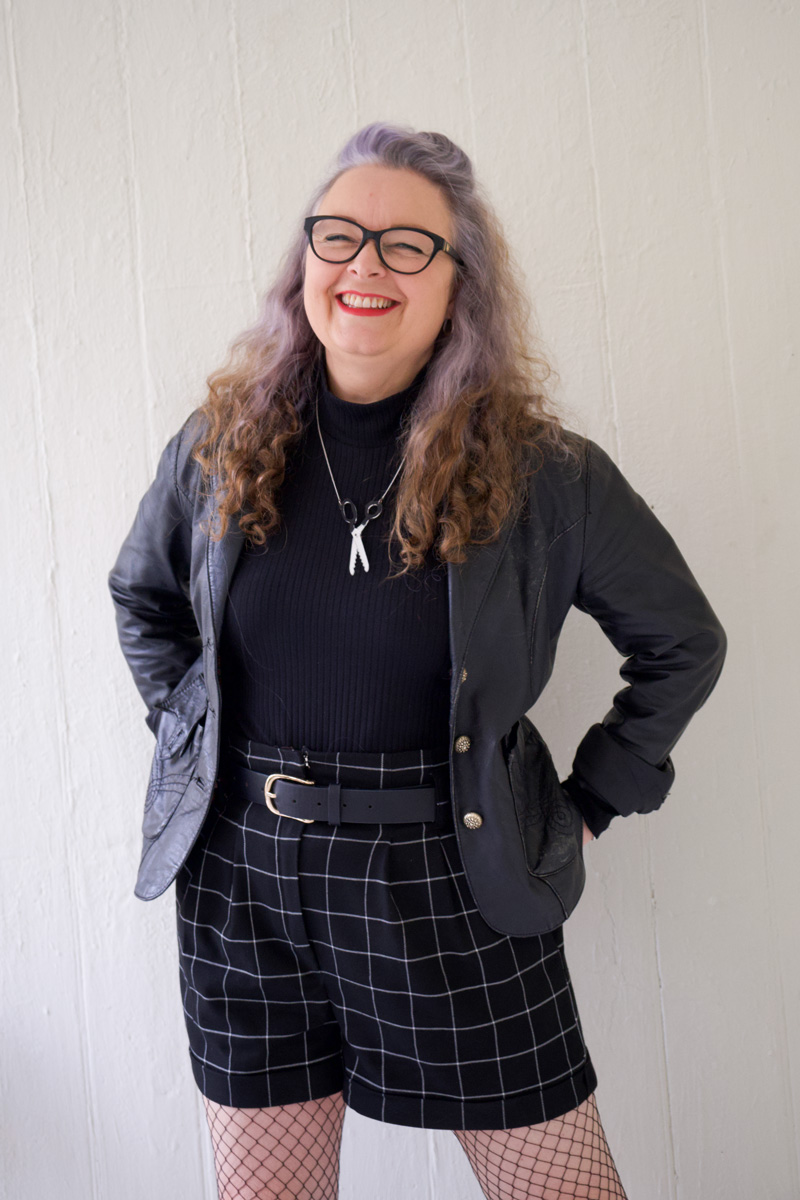
Now I have the option of wearing this as a suit or as separates. And I’m so happy about it.

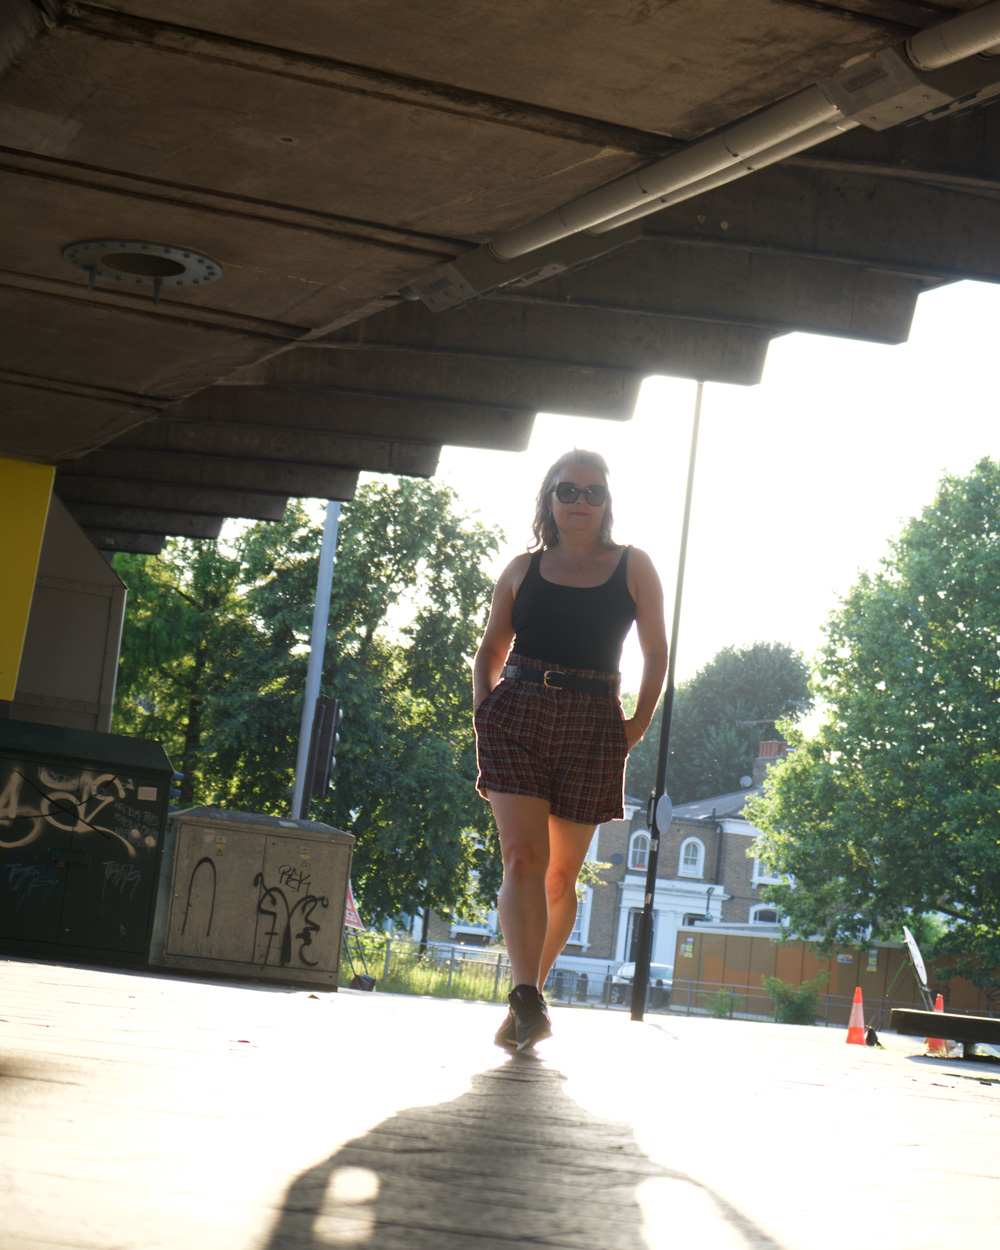
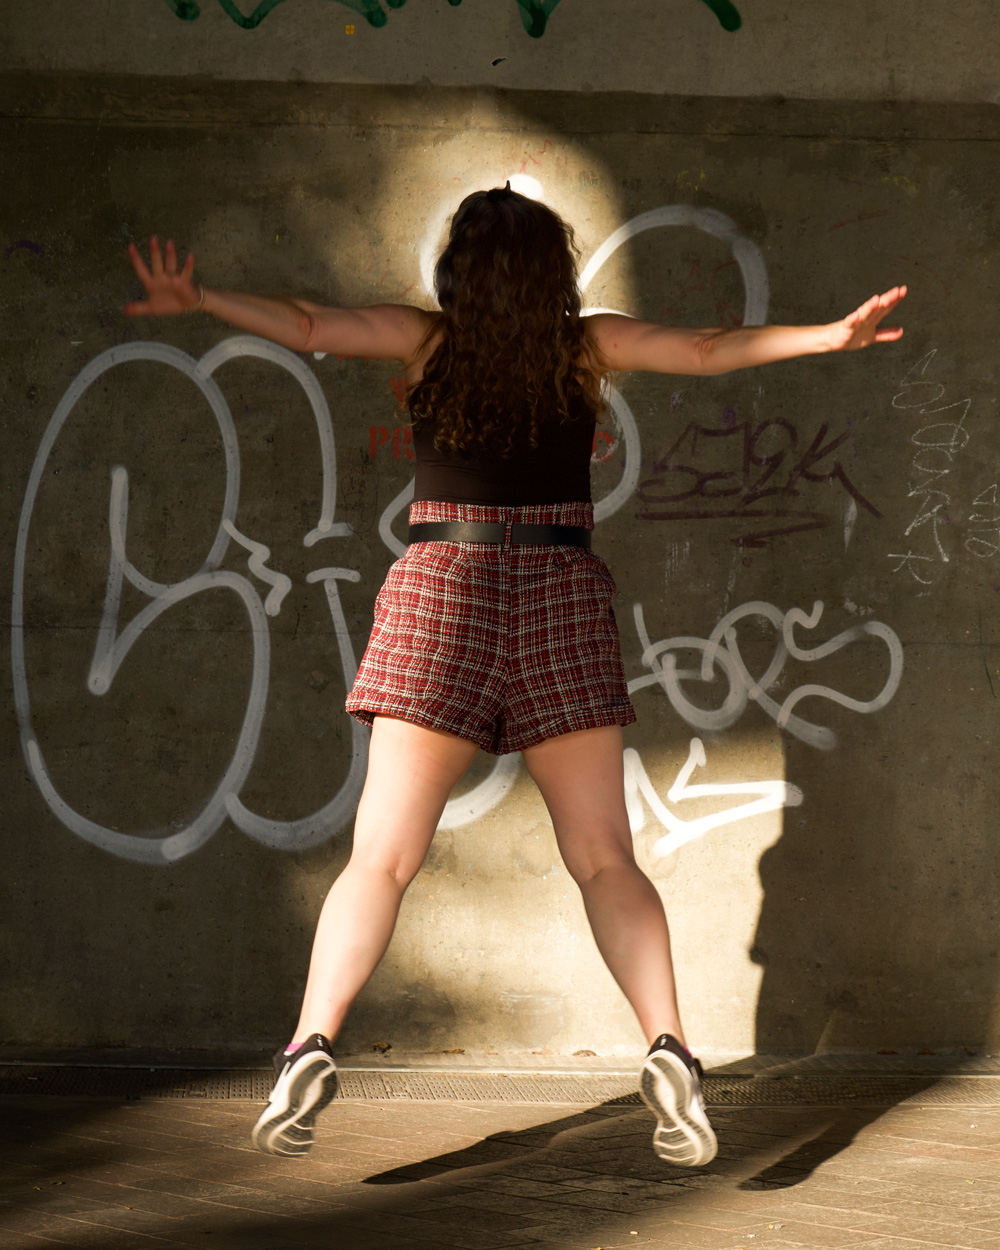
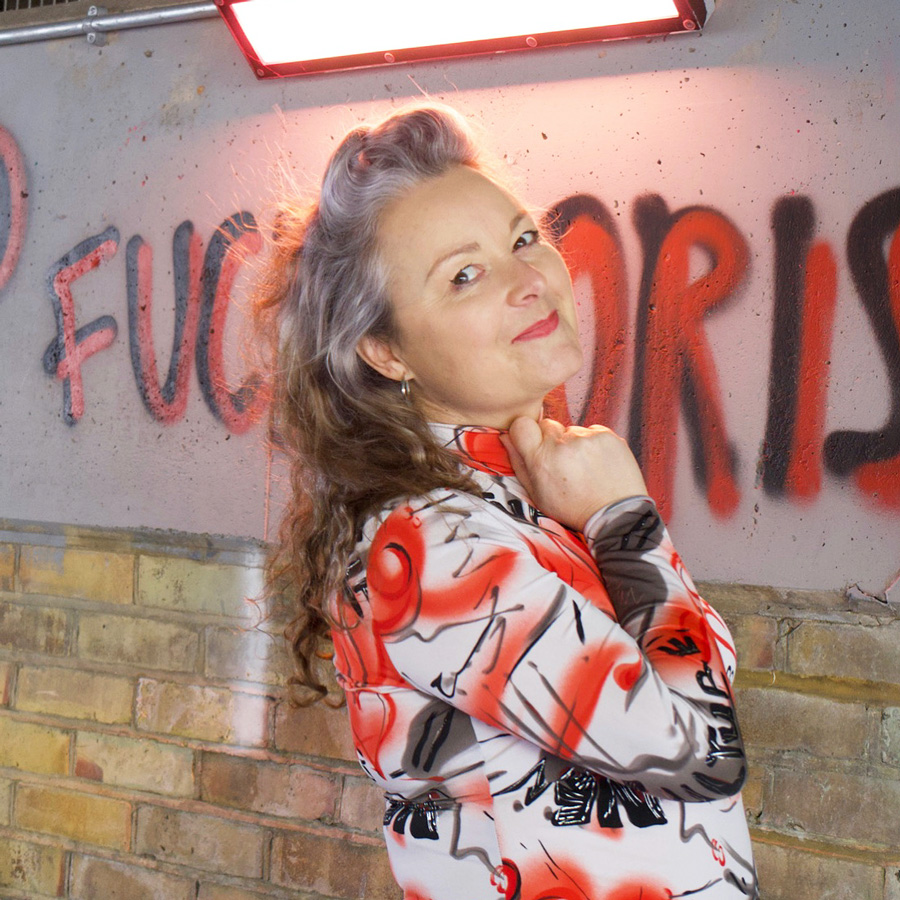
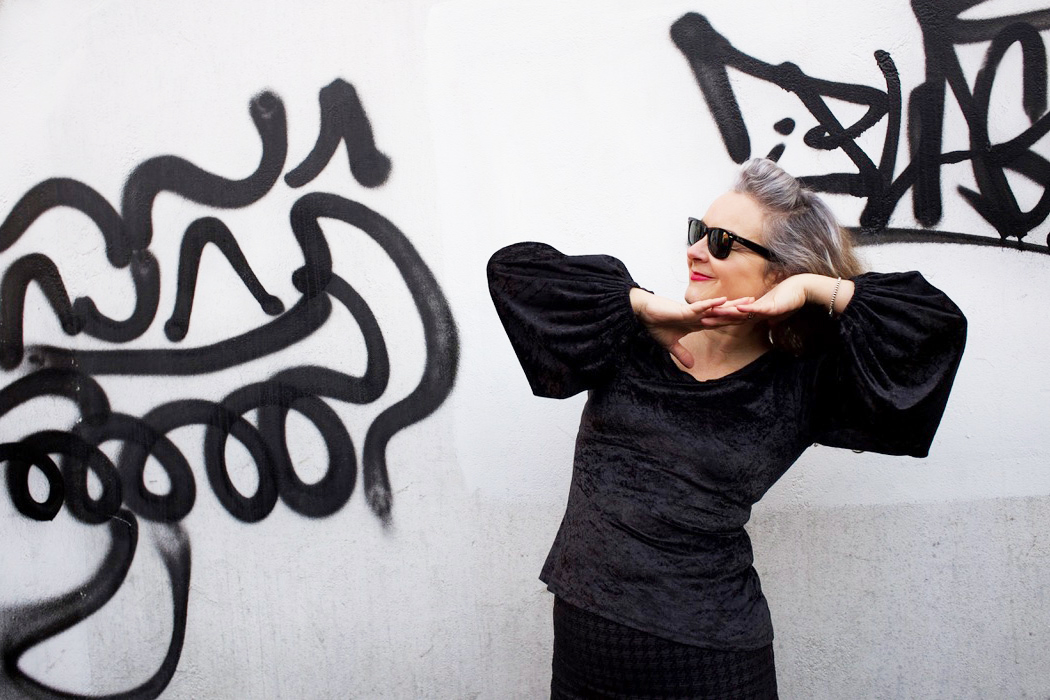
The shoot was a great excuse to style it up. Dan was very encouraging of going full on retro although I had all of a couple of hours to pull something together. He’s becoming more and more in demand lately so I just have to make the most of when he’s around!

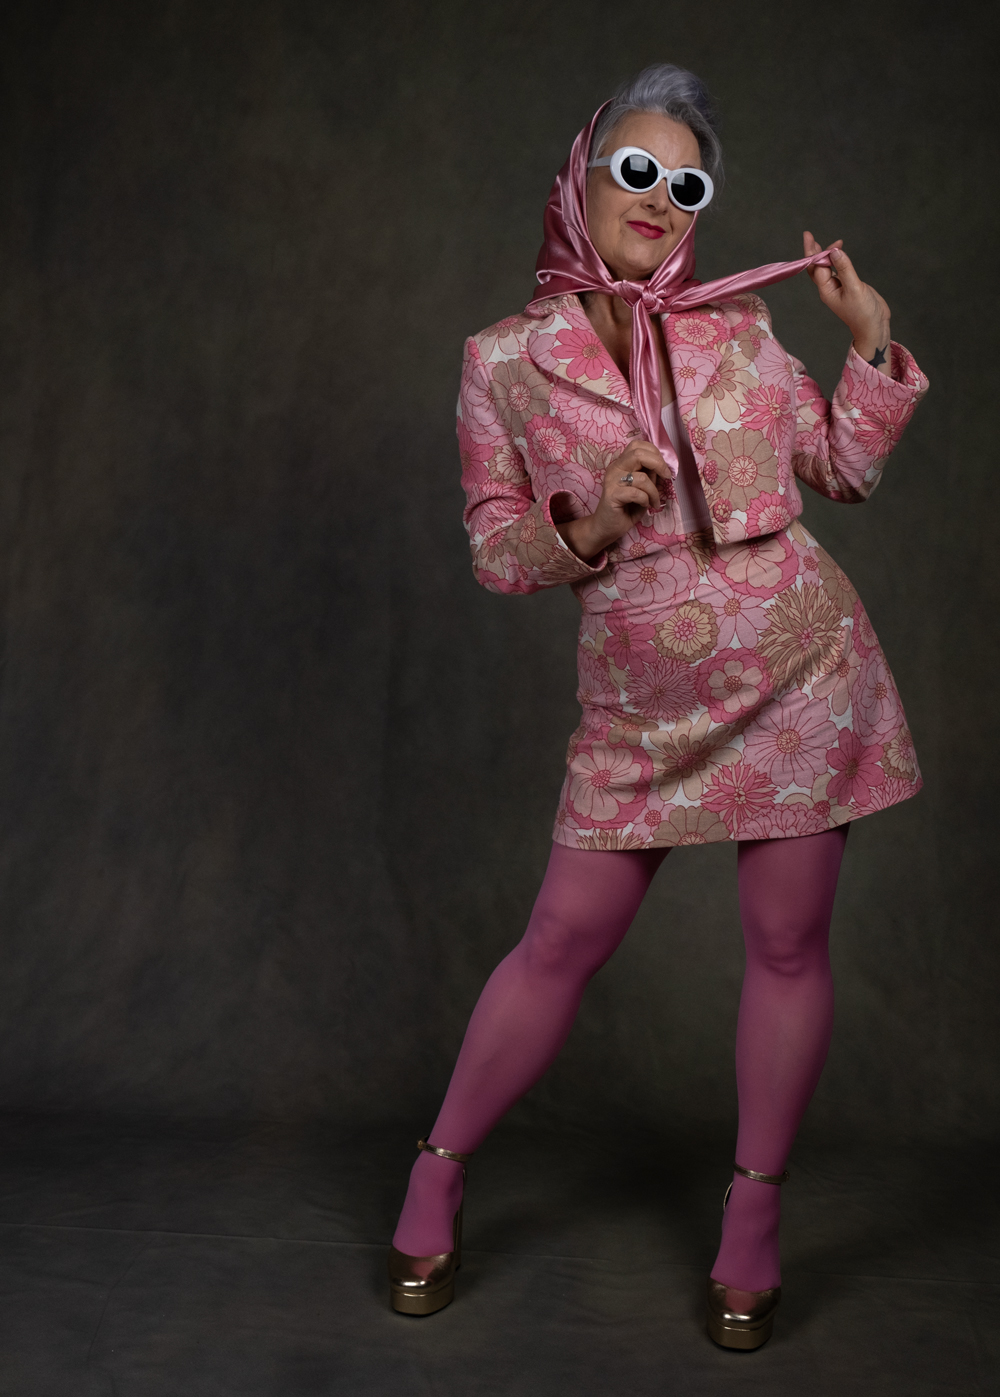
Photos credit: danieljames.photographic

The making of a Serpentine shirt for Mr O

On waving this wonderful Serpentine fabric in front of Mr O, and declaring that I wasn’t sure what I should make with it, my foot suffered an instant shot. “A shirt for me” he said, with no hesitation. Doh! I had no quick comeback! It was a perfect suggestion, of course. 

Fabric Godmother were so kind in forwarding on my goody bag, when I was unable to attend one of their events last year and this fabric was one of the treats inside. I thought on first feel that it was a cotton lawn but it turns out it’s a viscose sateen – a new one on me – and it is gorgeous to the touch and super to sew with. Presses beautifully too. 

I reused vintage Butterick 5007, (western shirt pattern) for the 4th time – definitely less daunting this time round. The only things I still fear about it are the buttonholes because I know for a fact that at least one will mess up and I’ll have to deal with the nasty task of unpicking it. And that is exactly what happened. Is there actually anything more annoying?

It takes time to put this shirt together, mostly due to all the neat details: curved yokes, rounded hemline; pleats and darts on the cuffs; diamond darts for slim fitting and every single piece has 2 parallel rows of topstitching. But weirdly, I really like the process. The main section comes together pretty quickly and its a great one for sewing in stages if time is short. Which it is the story of my actual life!

It also has some serious statement collar action going on which Mr O loves. I personally couldn’t carry them off but I think he rocks these aeroplane wings, styled up with his 70s jacket and hat. 

I didn’t make any attempt to pattern match as you can see. I only had 2m to work with – the exact amount required – and there would have been so much waste if I had even tried. That is my excuse and one I am firmly sticking to!

Even though I enjoyed the process, I properly ran out of steam when it came to sewing on the buttons. So I successfully managed to delegate the sourcing and sewing of, to Dan. And he did a fabulous job – giving way more attention to detail than I’d have given – he sewed with alternate orange and yellow threads throughout to complement the colours in the design and it looks simply awesome.

This is definitely not the last time I will use this pattern. I just noticed that Fabric Godmother has a Navy version of the same fabric on sale on their site, and made the mistake of showing Dan!

But he’s going to have to wait a wee while – I’ve got a lovely little commission I need to crack on with and also I want a new coat!

Photos are by me this time. But I think you probably guessed that already, haha! I think I’ll stick to my day job!

Previous versions I made are here and here

Putting my self-drafted leggings to the test

Janene is posing sideways, standing on one leg with the other leg straight out and arms forward. She is wearing her snakeskin print leggings with high heel boots and a black rollneck top

I remember quite plainly saying I did not see the point in making my own activewear. Where’s the fun? It’s just boring and functional. And let’s face it, there are plenty more interesting and fun things to be sewing up!

But never say never! I did a rain-check on the RTW pieces I already own – after one pair pretty much disolved, despite various fixing attempts – and realised not one single pair of bottoms actually fit me properly. Mostly the rise is the problem but also the waist elasticity.

I spent the best part of an afternoon perusing patterns online. There are heaps! And I’m sure most of them would work a treat. But I would undoubtedly have had to make adjustments to said patterns and so I figured I may as well draft my own if it wasn’t going to work straight out the packet. 

I followed instructions from Winifred Aldrich’s Metric Pattern Cutting for Women’s Wear – a firm fave in the sewing community. And it didn’t take long at all to draft the one single basic pattern piece.

Flatlay of drafted leggings pattern piece, drafting tools, note book and pattern drafting book

In fact it took longer for me to decide how to finish the waistband!

I sewed up the leggings in a lightish weight very stretchy lycra. Took minutes on the overlocker with 4 threads. I didn’t even need to substitute stretch needles.

flatlay of partially finished leggings. Just awaiting the waistband.

A quick try-on confirmed the fit was OK apart from quite a lot of ease at the waist – the back waist in particular. I didn’t really clock the excess at the thigh at this point. I was poised to take the waist in, before making a casing and threading elastic through – that totally would have been the quickest waistband solution – but then I visualised some gathering at the waist where the elastic waistband would have cinched it all in. I didn’t like how it looked (in my head!). So I set about another solution.

I measured the depth of the waistband from one of my existing pairs (10cm) and then measured the circumference of the leggings, 10cm down from the natural waistband. I halved that measurement to make a rectangular pattern piece that would ultimately be cut on the fold of the fabric.

I marked top edge, fold and side seam on the pattern piece.

To avoid all the gathering at the waistline I marked 10 equidistant slash lines from top to bottom and closed up the top edge until the top now-curved edge measured approximately 80% of the bottom curve.

I then traced the now-curved rectancle onto another piece of paper to add 1cm seam allowance all round apart from the fold edge.

Flatlay of the drafted pattern pieces, one with and one without seam allowance, for the waistband. a tape measure and a pair of scissors are positioned next to the pattern pieces.

I pinned the pattern to the folded fabric and cut 2 fabric pieces. With each piece right sides together, stitched the short edges to make 2 circular bands.

I placed one band inside the other, right sides facing, and stitched along the top (inwardly curved) edge.

I remeasured the top seamed edge of the waistband and cut some narrow (7mm) elastic to that same measurement with no overlap allowed so it would be a wee bit tighter still.

I then overlapped the elastic by 1cm and sewed the ends together to form a circle. I made quarter point markings along the finished top edge of the waistband. And with corresponding marks made on the elastic, I pinned and lightly stretched to fit as I zigzagged the elastic to the seam, making sure the edge of the elastic didn’t go past the actual seam line.

I trimmed 9cm down from the top of the natural waistline of the leggings (to leave 1cm seam allowance) ready to attach the waistband.

Before attaching I gave a quick press to the waistband, right sides out, to shrink the elastic a bit and make sure both pieces were aligned accurately. Then I attached the bottom two edges of the waistband to the top of the right side of the leggings (right sides together). I aligned the seam of the waistband with the centre back seam and clipped the band all round the top of the leggings. There was no need to stretch to fit this time because both measurements were the same. The clips worked a treat by the way, because the pins kept catching on the fabric.

The waistband of the leggings is clipped in position with some colourful plastic clips.

A quick zoom round on the overlocker, and it was clear that all that care taken for accurate positioning paid off.

Now I wouldn’t normally volunteer a photo of my rear end, but I’m so chuffed how those two centre back seams lined up and how nicely that deep waistband hugs my hips and dips into the small of my back!

View of Janene's bottom! She is holding up her top a few inches to reveal the back of the waistband and show how it fits very snugly.

The last thing to do was hemming. Believe it or not I found this bit the most tricky! With everything else going to plan and so quickly, I decided to get the twin needle out and do it properly rather than employ my usual lazy zigzag treatment.

I dug out my barely used Millward stretch twin needle and rehearsed a twin stretch stitch on a scrap piece of the fabric. Took a while to perfect before I sewed for real. But then it messed up before I finished the first round. Sooo annoying! I dug out the manual to see if I’d set it up wrongly and the only thing I did was not to use the needle supplied with the machine, doh!

So I changed up the stretch twin for a regular Brother twin needle and tried again on some scraps. Again, seemed ok until I went to sew the real hem and the same thing happened again. It just got jammed and sucked into the feed dog with the bobbin threads all tangled under. I unpicked and managed to re-sew over the last bit but still, sooo annoying!! I’m totally sticking to zig-zagging next time!

Side view of Janene wearing her handmade snakeskin print leggings and high heel boots. Her head is cropped out of the image.

First test of the finished leggings was at my Zumba class. And I was so chuffed that they didn’t end up round my ankles. However I could feel how loose they were from the knee up the inner thigh and I really didn’t like the wobble factor as I was dancing! I’m so much more used to sturdier fabrics holding me in place!

I’m going to take them in but decided to shoot them as general day wear with heels as inspired by @paulalovestosew! They are entirely fine as… well, tights really!

Front view of Janene wearing her handmade snakeskin leggings. Her feet are slightly apart. There are some small wrinkles on the knees.

And now I am on the hunt for some heavier stretch fabric. Thank you to everyone who have given some brilliant suggestions. I now appear to have too much choice!!

From not wanting to ‘waste time’ making my own, I can see how making these will quickly become addictive. So… absolutely… never say never!

Image of Janene doing a high kick in her handmade snakeskin leggings. She is also wearing high heel boots, a black rollneck top and a pair of black rimmed glasses.

Posed photos by Daniel James

Seven useful tips for a rocking pair of M7726/M8168 shorts

M7726 shorts handmade and modelled by Janene @ooobop

I was inspired to make a second pair of these McCall shorts (see here for first pair) by the lovely checked suiting fabric I saw and snapped up in the Crafty Sew and So sale and was then spurred on by the #magamsewalong #rocktober instagram challenge hosted by @suestoney and @sewing_in_spain, themed by @salixsews.

close up of M7726 shorts handmade by Janene @ooobop

I’m still a bit scarred from that loose weave fabric I used last time, but oh the rewarding joy in using a more stable fabric. I did however underestimate the time and patience in cutting and matching those checks though.

TIP 1: Cutting out

I laid out the fabric in a single layer and cut all the pieces individually, using a rotary cutter for more accuracy. I find the fabric moves less and you can get consistently close to the edge of the curved sections.

I flipped the first set of cutout pieces onto the remaining fabric and pinned it in position to cut the corresponding pieces so the checks would line up. And most importantly I marked ‘WS’ (wrong side) on each piece!

detail of front section of shorts overlaid and pinned onto fabric to match checks

TIP 2: Marking the pieces

I know we are constantly reminded to do this. I’m lazy and often don’t – just marking as I get to the correlating instruction, if I feel I need to. But in the case of these shorts it’s crucial to get those marks on, and visible.

I used a combination of tailor’s chalk and tailor tacks and made sure to distinguish the small circles versus large circles, not forgetting the squares and the centre front line versus the fold lines! It seems like such a faff but you’ll thank me later!

TIP 3: Finishing the seams

I overlocked all the edges of all the pieces, after I sewed the seams but I finished the fly section before I added the zip.

I never paid any attention to finishing when I first started out sewing but learned quickly when my favourite memade shirt literally fell apart at the seams!

Also advisable to finish your seams in a matching thread. This doesn’t always matter but read on to tip 7 to find out why.

TIP 4: Tacking is important

When you have such a large and noticeable check pattern, or any pattern tbh, any slight stretch or movement of the fabric can lead to a mis-align of the design. So hand tacks, in a contrasting colour, are a really great way of keeping things in place while you sew.

Believe me, I always try to dodge this bullet thinking I can go quicker without and even this time I tried simply pinning the pleats in position before I sewed and twice had to unpick because the line of the checks formed a ‘step effect’.

TIP 5: Tying up loose ends

To finish off the topstitching neatly, leave a longer thread than your automatic machine cutter might allow for. Take a hand sewing needle and thread it with the loose thread on the right side. Push the needle and the thread through to the wrong side and tie together a few times with the bobbin thread. Trim a few mm’s away from the knot.

detail of how to tie up loose ends with threaded needle sticking out of the front side of the fabric

TIP 6: The roll-up

I used a strip of fusible interfacing to sandwich in the middle of the rolled up hem. The suiting fabric I used was a little sturdier than the last fabric I used but still very soft and I didn’t want the cuff to flop down. It was a good way to use up those little scraps of interfacing too – I hate throwing them away! I also did a blind catch-stitch about a cm inside the top edge of the roll up to keep that cuff in position. Just for good measure!

I wanted a slightly bigger roll up than I did last time but the positioning of those checks played a big part in how much and where I pressed that last fold. As a result the pocket bags have a tendency to show when I’m seated. Slightly annoying and not a biggie, except that’s where I first used non matching (white) overlocking thread. I thankfully changed it up when I remembered that the side seams were going to be visible on the roll-up!

Janene standing with hands

I wore these shorts 5 days straight after I made them – I love them so much. And I think that’s largely due to the time and patience I invested in making sure those details were on point. I even matched the belt loops for goodness sakes!

They are so comfortable to wear, lovely and warm with tights and I love styling them with boots. Its given me a great opportunity to test them out with all my different tops (breaking all the ‘rules’ for pattern mixing) so I’ll be sure to share that with you soon, too.

I do hope these tips come in useful, for this project or any others you’ve got on the go. And please share any additional ones you might have in the comment section. One of my favourite things about sewing is the prospect of it always being a work in progress. There’s more than a lifetimes worth of tips and techniques to keep us busy and sharing them is half the fun!

In the meantime I’m pondering my next project. Could be an actual jumper, a work-out piece or a self-drafted dress. Decisions, decisions…!

Postscript! I’ve since found out that this McCalls pattern has been rereleased under M8168, Taylor McCalls

Other shorts I’ve made:

The making of McCalls M7726 shorts – an unexpected triumph!

M7726 shorts made by ooobop

One of the many reasons I wanted to sew my own clothes was so that I didn’t wind up wearing the same as anyone else. Not to stand out from the crowd necessarily but just so I could be me. 

But every so often the sewing community manages to turn that ideal on its head and makes me want to sew the things other people have made, haha… oh the irony!

M7726 shorts made by ooobop

In particular McCalls M7726 shorts. As spied on Giorgia’s Insta feed over at @1stitchforward. I mean, come on…. super classy matching fitted jacket and all! 

In between then and now, I have been careful not to overbuy fabric. It’s crazy to think that I’ve never got the right kind to use, despite a toppling stash. But when I saw a little Chanel suit on the YouTube FF Channel – a fitted jacket and shorts in their signatory bouclé, I think – I remembered some fabric I was saving for a ‘particular something’!

M7726 shorts made by ooobop

Now I’m not trying to pass this awful fabric as bouclé. But I did envision it as giving a similar vibe. Ten out of ten for naivety…!

I’ve no idea what this fabric is. But I’m sure you can see from the flat lay below, just how vulnerable to pulling it is. It didn’t take long before I realised it didn’t have a straight grain either! I sulked for a bit. And sweated over countless placements of the pattern pieces. Didn’t matter how I manipulated those bunched criss-crossed threads, they just did as they pleased. So I followed the selvedge for the ‘straight’ and ignored the ‘grain’ because there wasn’t one… seriously frustrating!

M7726 shorts made by ooobop

Once the pieces were cut. I had another sulk because I was convinced they were going to look so wonky. And the fraying! More like unravelling! It is such a loose weave. I abandoned it at this point knowing no amount of overlocking would hold those edges.

And then a brainwave. A roll of Prym seam tape to the rescue. Literally a whole roll! Every edge of every piece I taped down. And then overlocked for good measure. I’m still yet to wash them so I don’t know how well it will hold.

M7726 stabilised pieces

After I did this it was more enjoyable to sew. The impending feeling of failure was much reduced and I serged on. But I definitely ruled out the prospect of a matching jacket!

M7726 shorts made by ooobop

Tailor tacks were many and necessary to align all pieces. Though not fun to pick out at the end! I had to be super careful of not pulling out threads of the actual fabric!

But as the shorts started to take shape, I began to love the project. And I felt pride in not giving up.

I love how neat those pockets are. Probably due to the stabiliser tape. But the edge stitching gives a sharpness too.

No such word as ‘cant’ !

All was going well and then I had a wobble over the belt loops. How on earth was that going to work in this fabric? With lashings of Prym Fray check. Thats how!

The instructions were to make a long tube and then cut to size. ie: sew along the long edge, trim, turn, edge stitch and cut into 3 separate pieces. In fall-apart fabric? That was going to be a joke. I considered other options and with some great suggestions from IG followers as a safety net, I went ahead to try – just in case it did work. Thanks to that stinky stabiliser, it actually did.

M7726 belt loops for shorts

Though the bodkin wanted to poke out between every thread of that fabric tube along the way. Boy I’ve become a determined soul in my old age!

And finally the leg hems. My initial thoughts were not to roll them them up as suggested as I think its a bit of a scruffy finish with the side seams showing and all. I sewed another pair of shorts here – sadly outgrown – whereby bias cuffs were sewn as turn ups. It’s a much neater technique that hides all the raw edges and side seams. But then I had a little think and noticed that the open seams are kind of camouflaged so I opted for the more casual look to the turn up as per instructions.

M7726 shorts made by ooobop

For such a little project there were plenty of painful and lengthy processes but lots of new lessons learned too: Believe it or not, this was the first time I’d sewn a fly zipper, and belt loops! And I’m pretty damned chuffed with the result. I genuinely thought they were heading for the recycling bin so soon into the project and yet now I have a great pair of shorts for all seasons!

M7726 shorts made by ooobop

We took a little wander at sundown with Dan to shoot under the flyover at Hammersmith. In truth we didn’t have the energy to go further afield – it was very hot!

I can’t wait to sew these again, in a more stable fabric of course. It will be a breeze. Breeze! Oh how I want actual real life breeze right now. Bring on the storms!

Self drafted Turtleneck knit top

black rib knit top worn with plaid shorts

The last thing I made was this turtleneck rib knit top. Most probably up there with some of the most boring things I’ve made, but actually a top that ticks a lot of boxes.

I self drafted it for one and learned something new in the process. I’ve self drafted a fair few patterns for woven fabric to date, like this Liberty Lawn summer dress, a few shift dresses like this batik one, and more recently my handkerchief hem dress  to name a few. But I’ve never thought to self draft a knit pattern. Why would I? Its akin to reinventing the wheel as there’s so many great basic knit patterns out there. But I do love a challenge. And also have another agenda in the shape of some very special stretch fabric that is still waiting to be made into a well fitting dress so if I master a moulage in knit then I’ll be one step closer to designing a knit dress, right?

Black ribbed knit top flatlay

The process was actually very simple. In a nutshell removing the darts and any ease to create a close fitting shell that stretches around the curves of the body. I used my self-drafted woven moulage as a starting point and made the adjustments from there. I found a great lesson on Craftsy, by Suzy Furer and also referred to my favourite sewing book: Patternmaking for Fashion Design by Joseph Armstrong.

knit sloper pattern pieces

I tested it first on some nasty nylon fabric. To be fair I don’t know what the fibre content is but I’m certain there’s not an ounce of natural anything in it! Looks kinda cool with its graffiti design though. But I messed up royally on the turtle neck itself. Such a stoopid mistake. I made it 10% smaller than the neck opening which was fine. Sewed it in a circle to check it would go over my head which was fine too. Then stretched it as I sewed in place, much as I would sew a binding on a scooped neckline. Realising I had excess (as a result of over stretching) I cut off about an inch and a half, maybe even 2 inches more to make it fit. And that was where I went so wrong. I can just about get it over my head but its akin to being slowly strangled if I’m wearing it for more than half an hour!

toile of knit top in a synthetic graffiti print fabric

Everything else was just fine, though. Just made a massive note to self to not mess with the collar piece!

I especially loved that it was all sewn on the overlocker save for the hemming, so was super quick to whip up. One very important thing gleaned from sewing knit tops before is to stabilise the shoulder seam to stop it stretching out. I used some Prym iron on stay tape (aff. link) for the first time and it was so easy to apply in a straight line. Its been subject to a few 40 degree washes since and it’s still totally intact. Definitely no going back to sew-in tape now.

So then I made the black one with ribbed knit I bought in the Minerva sale for a snip! And I love it. Its so versatile – goes with all my skirts and shorts and also is a great under-layer for some of my self-drafted dresses, on a chillier days. Topped with a cardi for an extra layer its a definite win win win!

It’s just so classic, with a nod to retro too and has already had soooo much wear that it will probably wind up being the most sustainable item of clothing in my wardrobe for that reason alone.

I’d love a couple more of these. A leopard print one for sure and perhaps a red one … predictable much! But first I have to make something a bit more exciting. And I’ll tell you all about that real soon.

In the meantime, here’s to boring practical clothes that go with absolutely everything and for a quick sew fix too!

Are you sewing much over lock down? I’m struggling to get as much sew time due to work pressures – everything is taking so much longer so I feel like I’ve lost so many hours in my day. But all things considered, it could certainly be much worse!

Wishing you all well in any case.

Janene x

Tilly Agnes top with hacked sleeves

Tilly and the Buttons Agnes sleeve hack

I feel like I haven’t posted anything in yonks though I did publish a write up about my By Hand London Rumana Coat over at Minerva. That’s the deal, see. They send me choice fabric, I whip something up and give them an exclusive write-up in exchange. If you haven’t seen it on my instagram grid @ooobop, do hop over to here at my Minerva profile to have a looksee!

The coat was such a lovely project to work on but if you’ve worked on one before, and if you don’t get much time to sew, you’ll know just how long it takes in short bursts. As soon as I finished it I promised myself that my next project would be a quicker one. A Tilly and the Buttons Agnes top – Just the ticket for a swift sew on a spare Saturday morning.

Tilly Agnes top in crushed black velvet

For clarity I cut it out the night before, but seriously, this top was ready to wear by lunchtime.

It helped that I’ve made three others before: One in a navy/ivory striped cotton jersey, a plain black cotton jersey one and a navy/red/ivory striped one in a gorgeous French Terry. Each time I opted for the ruched neckline and those gorgeous puffy sleeves but this time I thought I’d change things up a bit with a bishop sleeve.

To do this, I took the regular full length template and slashed from the hem of the sleeve to the arc of the sleeve cap. I spread the pieces, traced the result and repeated the process again with the new piece to create the flare.

I was tempted to go larger still but was worried the fabric would be too bulky gathered in at the wrist.

Tilly Agnes sleeve hack detail

The fabric is a gorgeous stretch crushed velvet from Fabrics Galore. I bought it eons ago when we were allowed to go actual fabric shopping. It was definitely earmarked for an Agnes and I’m so pleased to have stuck to plan for a change! My only concern was the extent of stretch compared to the jerseys I’d used before.

I measured the bodice pattern pieces and physically stretched the fabric to guesstimate the result and I’m glad to report that it fits. Albeit very snuggly! There would be no hope if there were any remaining mince pies to be had!

Though it has to be said,  I do like the contrast of the close fitting body against the draping sleeves. Luckily!

To sew this top you begin by stabilising the shoulder seams with some tape or ribbon or suchlike. I skipped this stage with one that I made with disastrous results – the shoulder stretched out like Billy-O! So I made sure to obey that instruction this time.

And then on to that neckband. Oh boy was I in for a ‘treat’ this time.  The object is to stretch the doubled over loop of fabric as you stitch it around the neckline. Well, the crushed velvet, as soft and lovely as it is, definitely wasn’t designed for such treatment. And it curled up like a goodun on the raw edge I wanted to sew. It became a nail-biting 8-stage process of pressing, pinning, unpinning, pressing, basting, pressing, sewing and eventually overlocking which thankfully sliced off the curl and the bulk thus making the topstitching way easier. I decided against the ruching at the neckline to avoid tempting fate!

Tilly Agnes top detail of neckline

From this point on it was seriously plain sailing. The sleeves are set in flat. No ease necessary on the cap. The side seams and underarm seams are sewn in one go. I used the overlocker for this – so satisfying! I hemmed the bottom up with a Zigzag stitch, mostly because I’m too lazy to set up another spool and swap out the needle for a twin one! In. Any case the stitches were going to sink in to the velvet so it didn’t really matter.

And finally I cut some Prym 7mm standard elastic (Aff link) just a bit wider than my wrist and wide enough to go over my knuckles plus bit extra for the overlap. (Its all very calculated round here!) I threaded the elastic through a gap in the sleeve hem that I sewed up and zig zagged the overlapped ends before sewing up the gap.

And then my hacked-sleeve Tilly Agnes was ready to go!

Tilly Agnes sleeve hack

I love that she’ll be a staple in place of any boring long sleeve Tee and can be dressed up or down owing to the slightly more luxurious fabric. Just got to remember to pull those sleeves up if I’ve got soup for tea!

And I’m so glad this was as successful as was envisaged because I have just taken delivery of a new length of equally gorgeous stretch velvet from Minerva in leopard print which I can’t wait to make!

Thanks to Daniel for my impromptu photoshoot. We went for a walk trying to avoid people and ended up down the back of the bus garage… such glamour!

Tilly Agnes top with sleeve hack

And thanks to you my lovely reader,  for taking the time to read my ramblings and for your continuing and valued support. Hope you are also managing to find joy in the small things to keep you happy in these weird times.

More soon
Janene x

Tilly Agnes in French Terry

Tilly and the Buttons Agnes top

Despite my latest drafting adventures, I’m not about to give up on the tried and tested patterns I know and love. And the Agnes top by Tilly and the Buttons is one such gem.

I made it first in 2016, using a black and ivory stripe cotton jersey and it’s been one of my favourite go-to tops ever since. So much so that I didn’t want to change a single thing about it.

Detail of rouching on the sleeves
Rouching with stripes for max effect!

I just love the silhouette. The statement sleeves take full responsibility for this, of course – such clever drafting and  a simple rouching achieved  by stretching and sewing a short length of 5mm elastic along a guideline inside the upper part of the sleeve. Add to that some gathering on the sleeve cap for extra poof… et voila!

There’s a cheeky bit of rouching down the centre front, too – using the same technique – which is super flattering.

I used a French Terry for this one. A cosy navy, red and white stripe – making it extra French! I scored it at Crafty So and So’s lovely shop in Leicester, which I was so excited to visit the day after I attended their awesome Dressmakers Ball in March this year.

French Terry: One of its sides is flat, while the other side is with cross loops. It can be 100% cotton or be made from a variety of fibres, sometimes with spandex (also known as elastane or lycra). It is often warp knitted, and the term French Terry is colloquially used for all warp knitted Terry – source: Wikipedia

The fabric is a bit weightier than the first one I made, giving those sleeves a bit more structure. However the neckline didn’t work out as well as before. But I think that’s largely due to the neckband being slightly too long and having not stretched quite enough. But it wasn’t a biggie. I nipped in a little dart inside at the centre front and it was sorted in a jiffy. In fact it sharpened the v-line a bit more.

V neck accentuated with a wee dart inside the binding

I confess I was too lazy to bring out the twin needle and not brave enough to sew completely on the overlocker, despite having the option of 4 threads now. I just stuck to the devil I knew and sewed with a regular zig-zag stitch. And amazingly enough, a regular needle. Very surprised I didn’t need to dig out the ball-point!

I just love how Agnes brings a bit more style to the table than a regular T. And I love to wear it with a pencil or circle skirt. What other kind of skirts are there?

Worn with a classic pencil skirt

I’m seriously so happy with it. And so in love with French Terry and will definitely seek out more of the same when I come to make another. Which I will.

So much fun in a Tilly Agnes
When you look up and a passer by is mimicking your serious selfie poses!

DIY Dior-inspired tulle skirt

tulle skirt front

I’ve been inspired to make a tulle skirt for a very long time. I’ve made a few for others – my favourite was an orange one for ‘Amelia Fang’ – but still I wondered long and hard about what kind of tulle skirt would I make for me. And where on earth would I wear it tbh! A lot of what I make might be considered a #sewfrosting entry but I often wear party clothes as office attire so it would never go underworn. So long as I didn’t go for ‘sugar-plumb fairy’ all would be good.

tulle skirt back view

And then one day, whilst browsing the ‘glossies’ in my local hairdressers, I spotted that Dior tulle skirt. I gasped once at the skirt and twice at the price – a whopping great £3,100!

Now I don’t doubt the craftsmanship and experience deployed at House of Dior and I am totally au fait with the arduous task of gathering grief and the time it takes, but still that price point means I’ll just have to make my own. Lifelong story of life!

dior style tulle skirt

It would be unfair to say that Dior was the original designer inspiration. It was more Molly Goddard that initially sold me, with her transparent chiffon baby doll dresses worn over jeans with clompy boots. But still that image prompted the action.

dior style tulle skirt

I love the cheeky transparency of the tulle and the sideways looks it attracts from passing strangers. I do have modesty shorts underneath by the way –  I’m not brave enough to show the world my actual pants! But should the occasion arise for less cheek, I can always rustle up a simple petticoat of black lining.

It’s so much fun to wear. Currently loving it styled as shown with fitted jacket and high-heel Doc Martens but can also see it with a T-shirt and trainers, versus a corset and some sparkly shoes. In your face, repeat-wear shame… I’m even wearing this skirt to Sainsbos!

And it’s perfect for twirling in. Doesn’t take much to release my inner gypsy spirit. I could dance all day!

twirling in tulle skirt

ooobop tulle flamenco pose

I’ve been reining in my fabric buying for a wee while now but with a firm idea of what I was going to immediately make, I could justify a few metres of tulle. I just had to endure a few eye-rolls!

The construction at House of Ooobop was very basic: there are fundamentally two layers of two gathered tiers of tulle. The top layer is a soft pin-dot tulle. It has a bit of stretch cross-wise so I made sure to keep the ‘straight grain’ long! The under layer is a mid-weight tulle – not too stiff, not too soft – so it gives the necessary structure to the floppy tulle on top.

dancing in a tulle skirt

Once gathered, the top edges are attached to a satin waistband with button closure. And the beauty of tulle is that there is no need to hem – thank goodness. I was clean out of black thread at the end of this! But should anyone want a more detailed tutorial, please leave me a comment below and I’ll gladly do a follow up post.

ooobop tulle skirt with London bus

Mr O (aka Daniel James Photographic) took these amazing photos of course. His patience and dedication to the cause unruffled by my whinging about the cold (and the smell of horse poo!) … and that my feet hurt from all the walking we did.

wearing tulle skirt in Trafalgar Square

But the latter is largely due to wearing my new Christmas Docs from my lovely hubby, fresh out the box without wearing-in first. No pain no gain though!

Doctor Martens with tulle skirt

So I’m totally New Year’s Eve ready, and of course I am also appropriately ready for  the much awaited Christian Dior: Designer of Dreams exhibition at the V&A museum in February… which is really soon. And I’m so excited! Who’s coming?

ooobop tulle skirt front view

Thank you so much for reading this post, and for all your lovely words of encouragement over the years. I have been a little lapse in the writing dept of late but I’m not stopping blogging any time soon. I’ve got some lovely projects coming up in 2019 already and some I didn’t even get round to posting from this year. So keep tuned and all will be revealed!

Wishing you all an amazing New Year, fuelled with happiness and good health and all things sewing of course! xxx

No more repeat-wear shame

selfdrafted quilted skirt

I made a skirt in 2016. A self-drafted mini skirt, in a black quilted fabric. And I wore it for the umpteenth time to my local today.

I wore it with pride. Because I made it. Because I feel comfortable in it and because I’ve created something that is so versatile, it gets to be office wear as much as an invitation to party.

The same skirt worn with handmade M7542 lace top

And it occurred to me that I’ve overcome one of the most ridiculous anxiety inducing things without really much effort at all…

The shame of being seen to wear the same thing more than once!

Social media hawks will ditch you for a lack of frock variation in your feed but that aside, and certainly before the world went online I grew up with a wince every time I had to show up wearing something I wore ‘the last time’.

And yes, people have commented. But not always bad though:

‘Oh I love that skirt/dress’.

If only they’d have stopped right there…

‘Isn’t that the one you wore to Sally’s, last week?’

And that would get me thinking about what they were thinking. How I was being judged. And then I’d get all stressed out. So unnecessary!

The same skirt worn with handmade Vogue 2934 jacket

Like many families of the time, money was quite short when I was growing up and I simply didn’t have many clothes. And those that I did were almost always mum-made.

That in itself was an issue with my school friends who wanted to know where I got my skirt from. And I used to mumble “my mum made it” hoping it would go unheard. But it never was. It was amplified by an expression of sympathy. And I couldn’t ‘sit with them’ – home made clothes were simply not cool! And the comments came thick and fast. Thank goodness for school uniform – the only clothes you can not be shamed for wearing on a daily basis!

quilted mini skirt

As an art college student, the freedom to wear whatever I wanted – even if it was from a charity shop – was so exciting. But still the look of ‘didn’t you wear that, yesterday?’, from students… and ‘friends’!

And as a studio junior with a plimsoll on the first rung of the career ladder at an advertising agency. The self same thing. Only different words now:

Someone didn’t go home last night!”

Oh the horror! One thing to be shamed for poverty and assumed lack of laundry skills, but another to be tarred with the dirty stop-out brush!

The same skirt worn with handmade BHL Sarah blouse

And it didn’t stop at day wear. People actually remembered that you wore ‘that same skirt’ to last year’s party. Damn you long-term-memory-people!

So why now am I simply not bothered by those judgy eyes and cutting comments?

Well I kind of feel like I’ve got the upper hand now.

  • I’ve addressed some confidence issues.  Read: got older and wiser and care less about what other people think
  • I have the back up of a new society who thankfully champions sustainability – reminding me to reduce waste by only making what I need – I simply can’t ignore those giant mountains of textile waste – and  laundering only when necessary to sustain the life of the fabric and also the reduce water waste.
  • My clothes are made by me now. I’m proud of the collection I’ve amassed, of the time I’ve dedicated to make them and have absolutely no intention of ditching any garms until they are deemed irreparable or unwearable. So until that day you definitely will see many more days of this skirt. I’m shouting loud and proud at the number of times I’ve worn it (if only I could remember!)

Same skirt worn with handmade vintage wing-collar shirt: Butterick 556

Do you have a favourite item that makes repeat appearances or do you do battle with repeat-wear shame?

Disclaimer: The right to repeat wears does not get upheld at the expense of cleanliness! I draw the line at being remotely stinky and appreciate fully when there is a real need for laundering!