The SOI Miriam dress and jacket I always knew I wanted

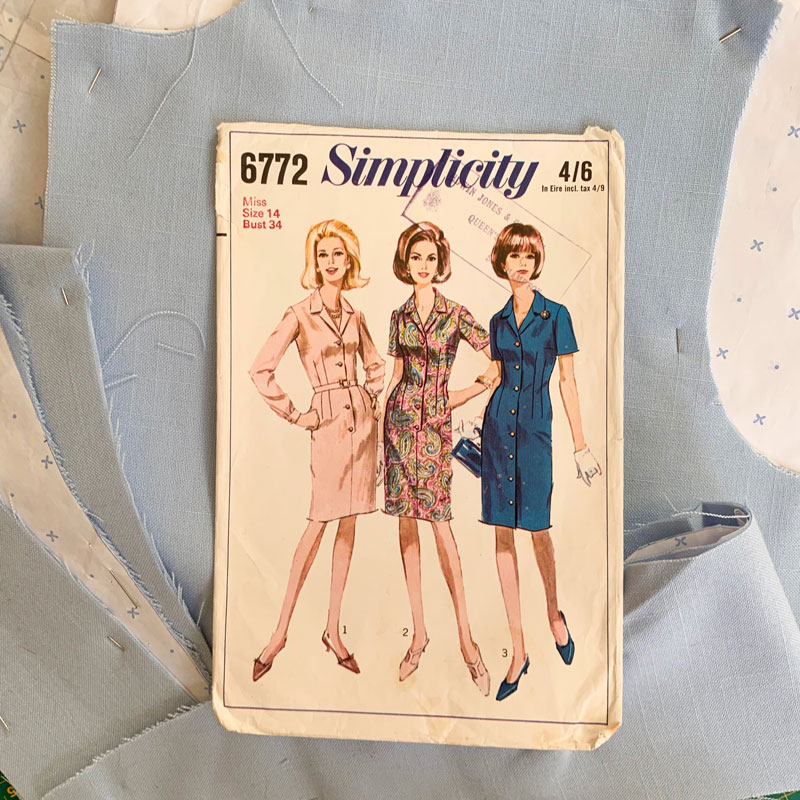
I’ve wanted to make a classic dress suit for as long as I can remember. And I own very, many original vintage patterns that would have been perfect, believe me. But an overriding anticipated disappointment in the result always held me back.

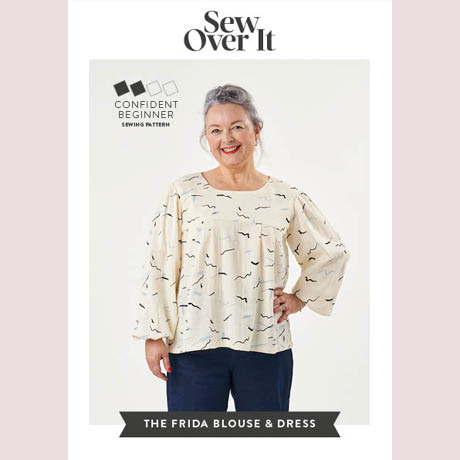
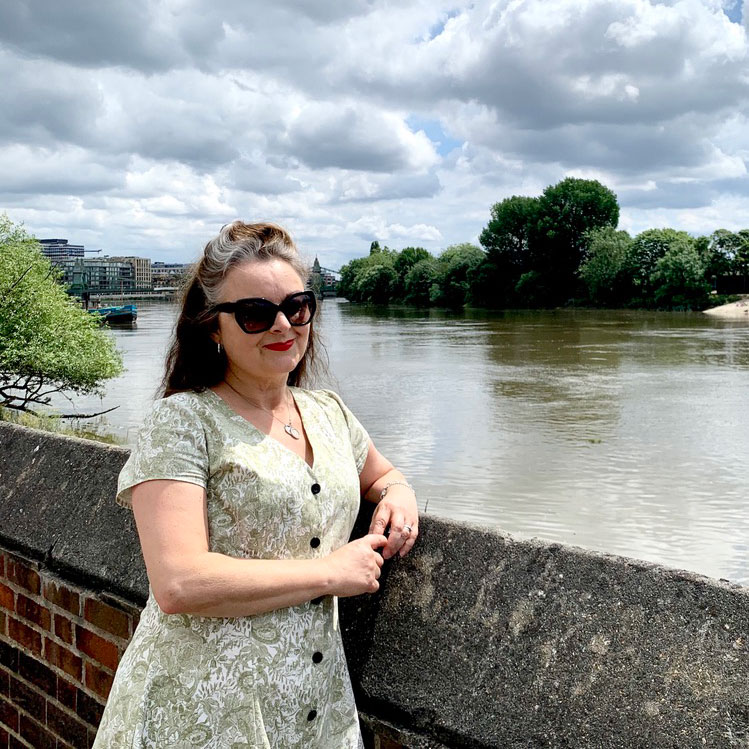
In fact its true to say I’ve altogether strayed away from vintage styles more recently, favouring an urge to be a bit more experimental instead. But I’ve never lost love for the classics. And when Lisa asked if I’d model for Sew Over It’s Vintage Dreaming collection I had to pinch myself. Every single garment of that Ebook is divine but the one look that took my breath away was Lisa in the pale blue polka dot Miriam set and Chantelle in the raspberry linen version. And I wanted it too!

There was something massively nostalgic about Sew Over It making a return to vintage. Because that’s where they were at when I discovered them, when indie pattern companies were brand new and it felt so refreshing to have exciting options outside of ‘the Big 4’ pattern companies, and is exactly the point at which I was keen on sewing all things 50s and 60s. The main benefits of modern vintage-style patterns are the more realistic and modern proportions of the body measurements and also the inclusion of multiple size options so you can grade very easily between 2 or more lines to get a perfect fit. Most of my 1950s patterns are generally an unprinted tissue template for a singular size only. And generally speaking don’t fit straight out of the packet!

And so it was such a joy to cut a straight size 12 for the Miriam set with no fitting adjustments at all! 

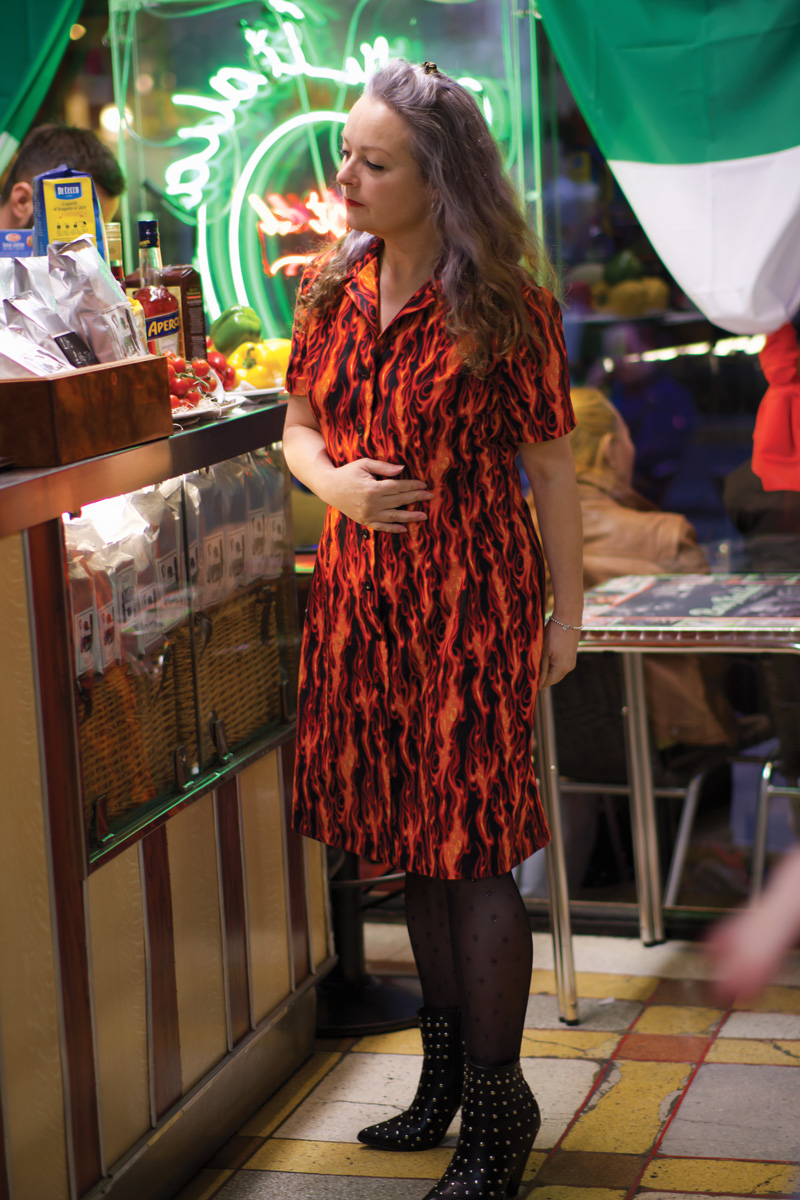
The dress came together so easily and relatively quickly. This is largely due to the simplicity of the design, but also the instructions are very clear and concise. The only step I skipped was for the adjustable straps. I just made sure the straps were exactly in the right place and the right length by pinning and trying on and adjusting … about 15 times before finally sewing in place!

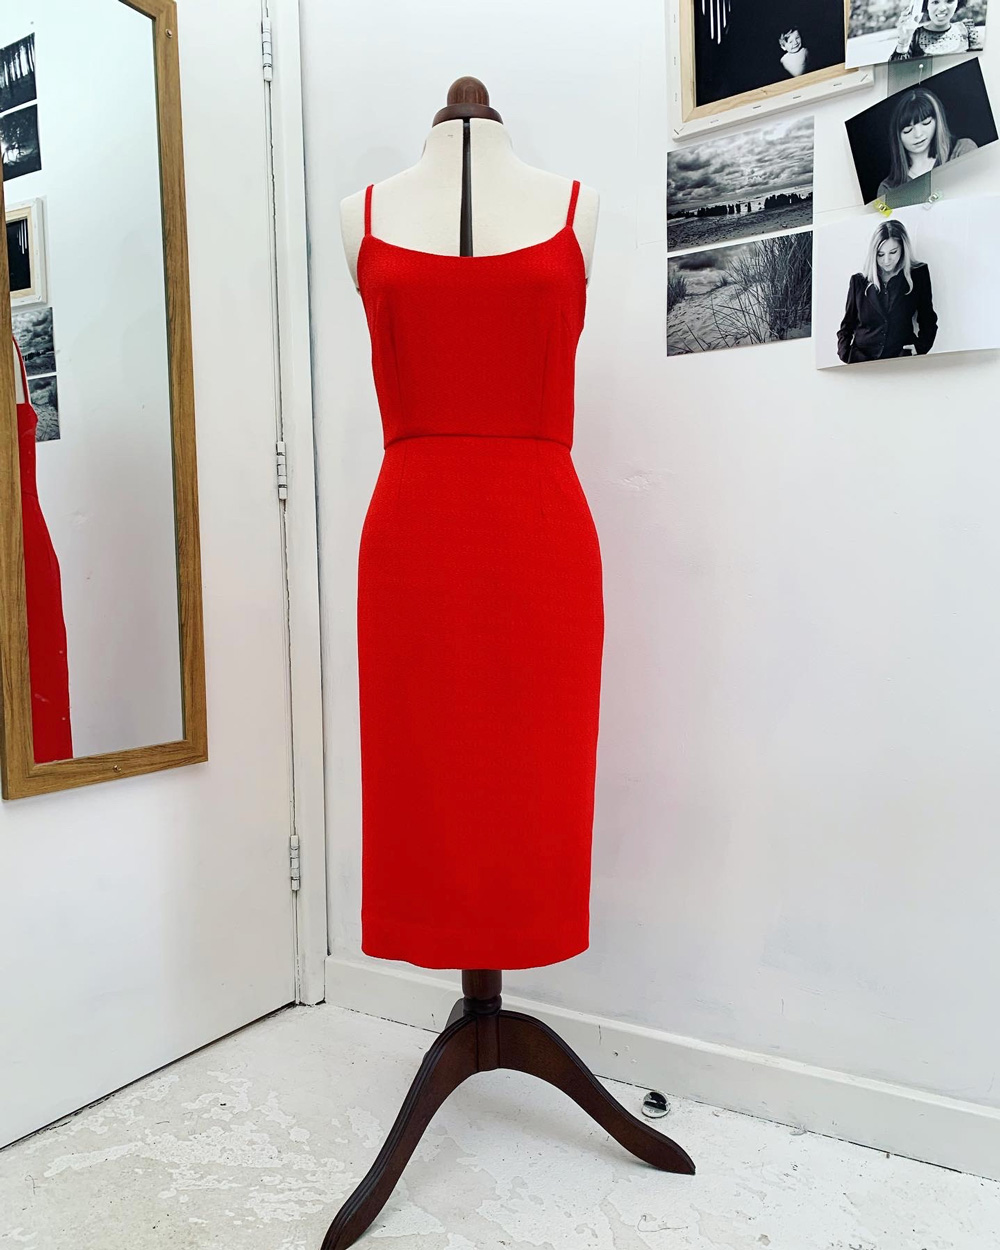
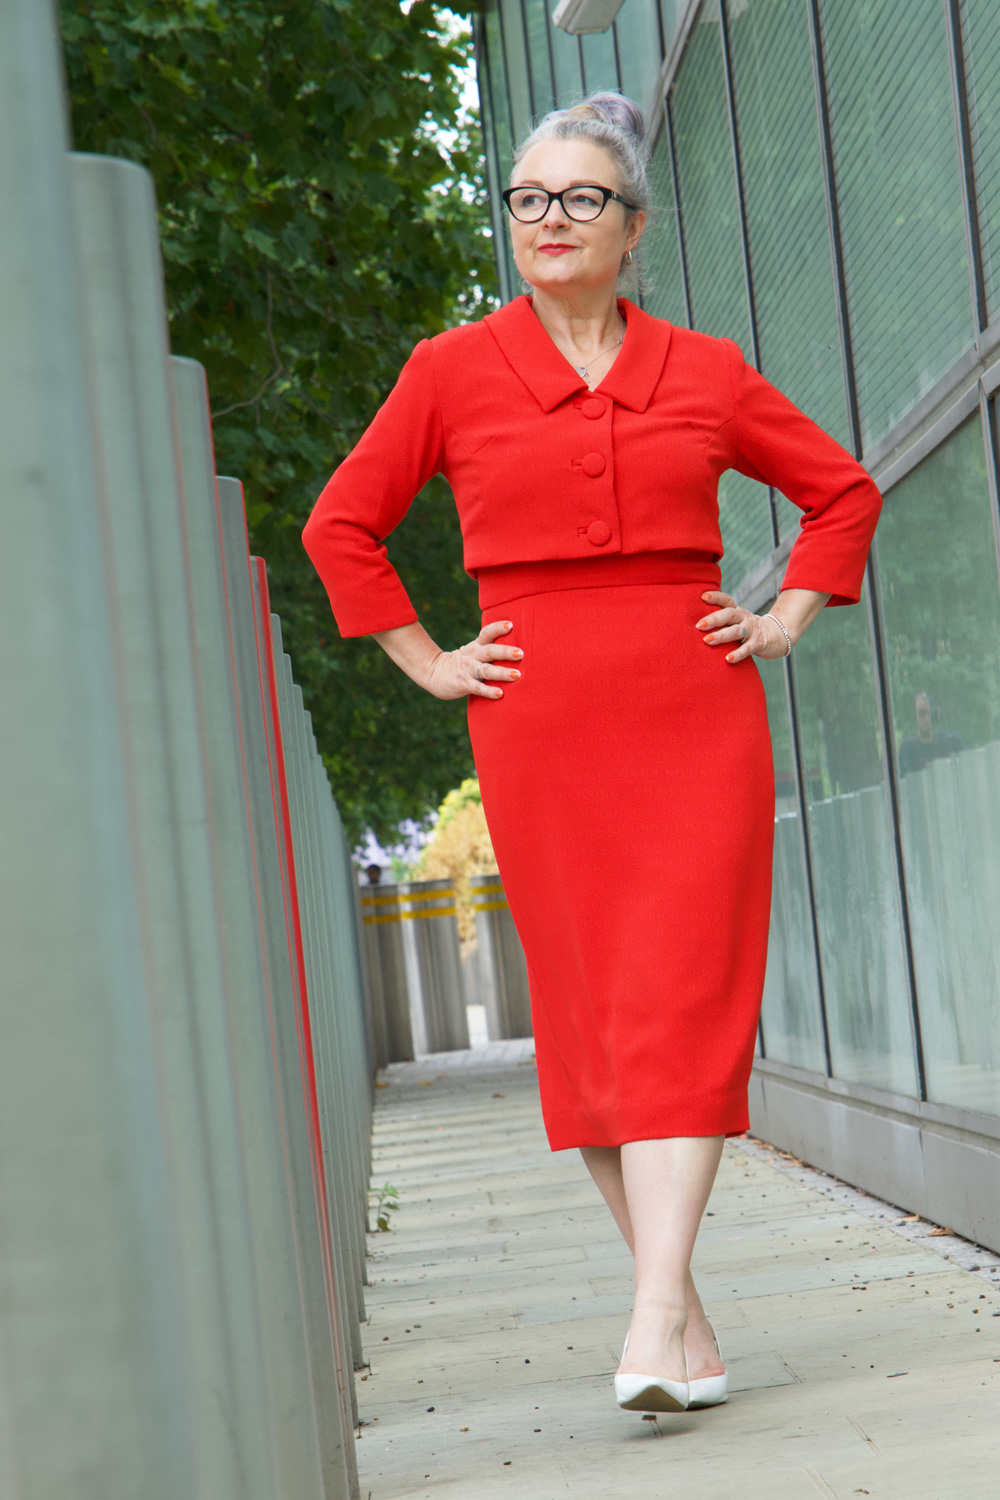
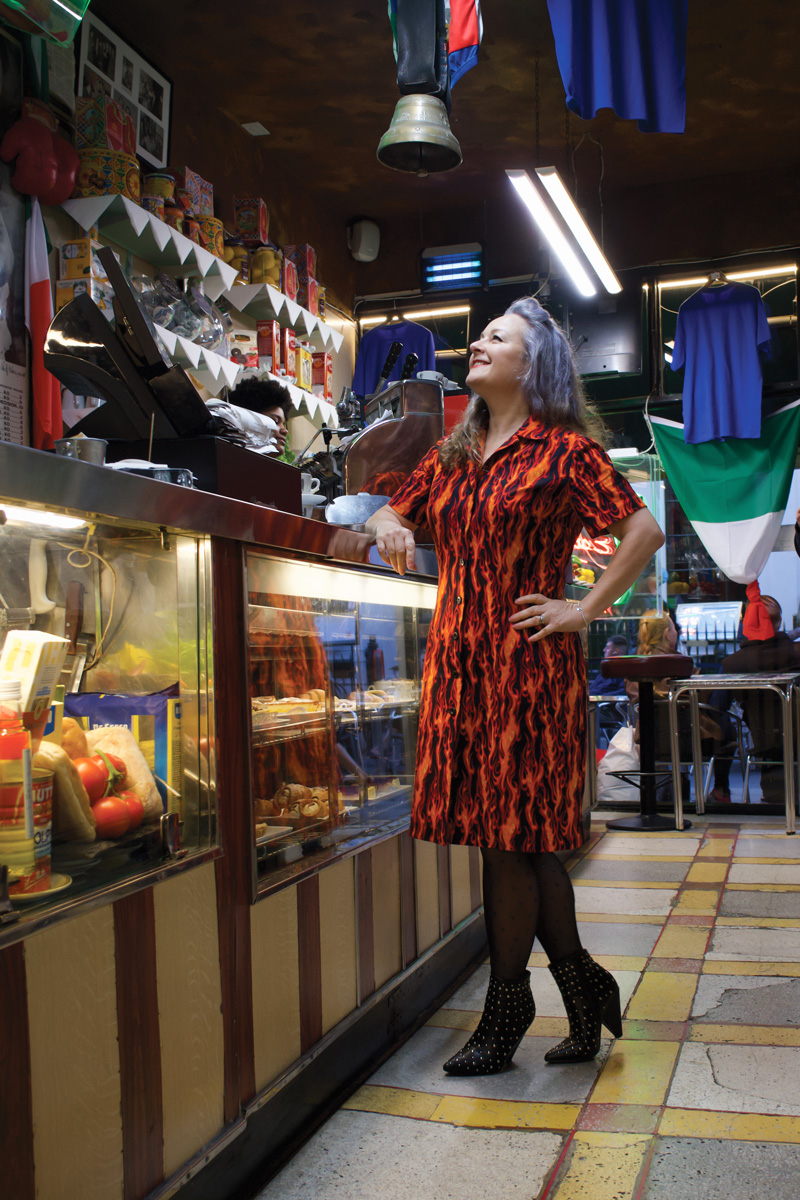
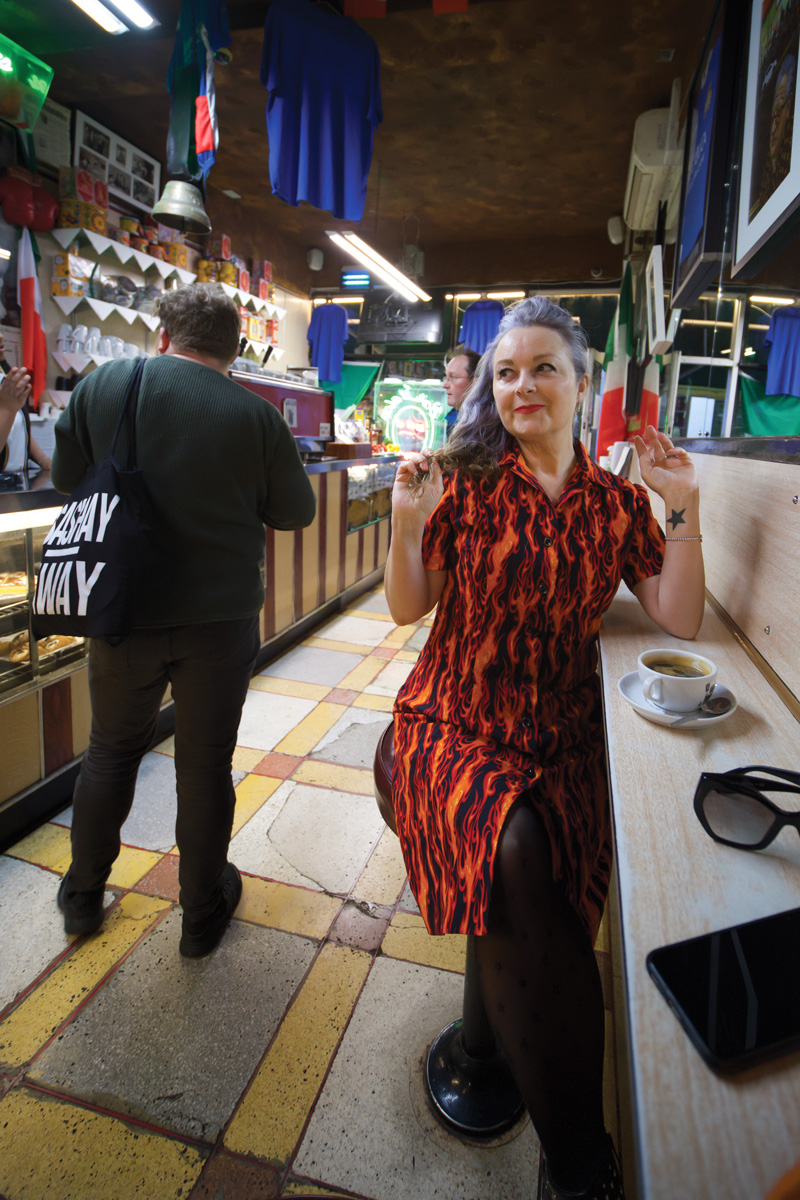
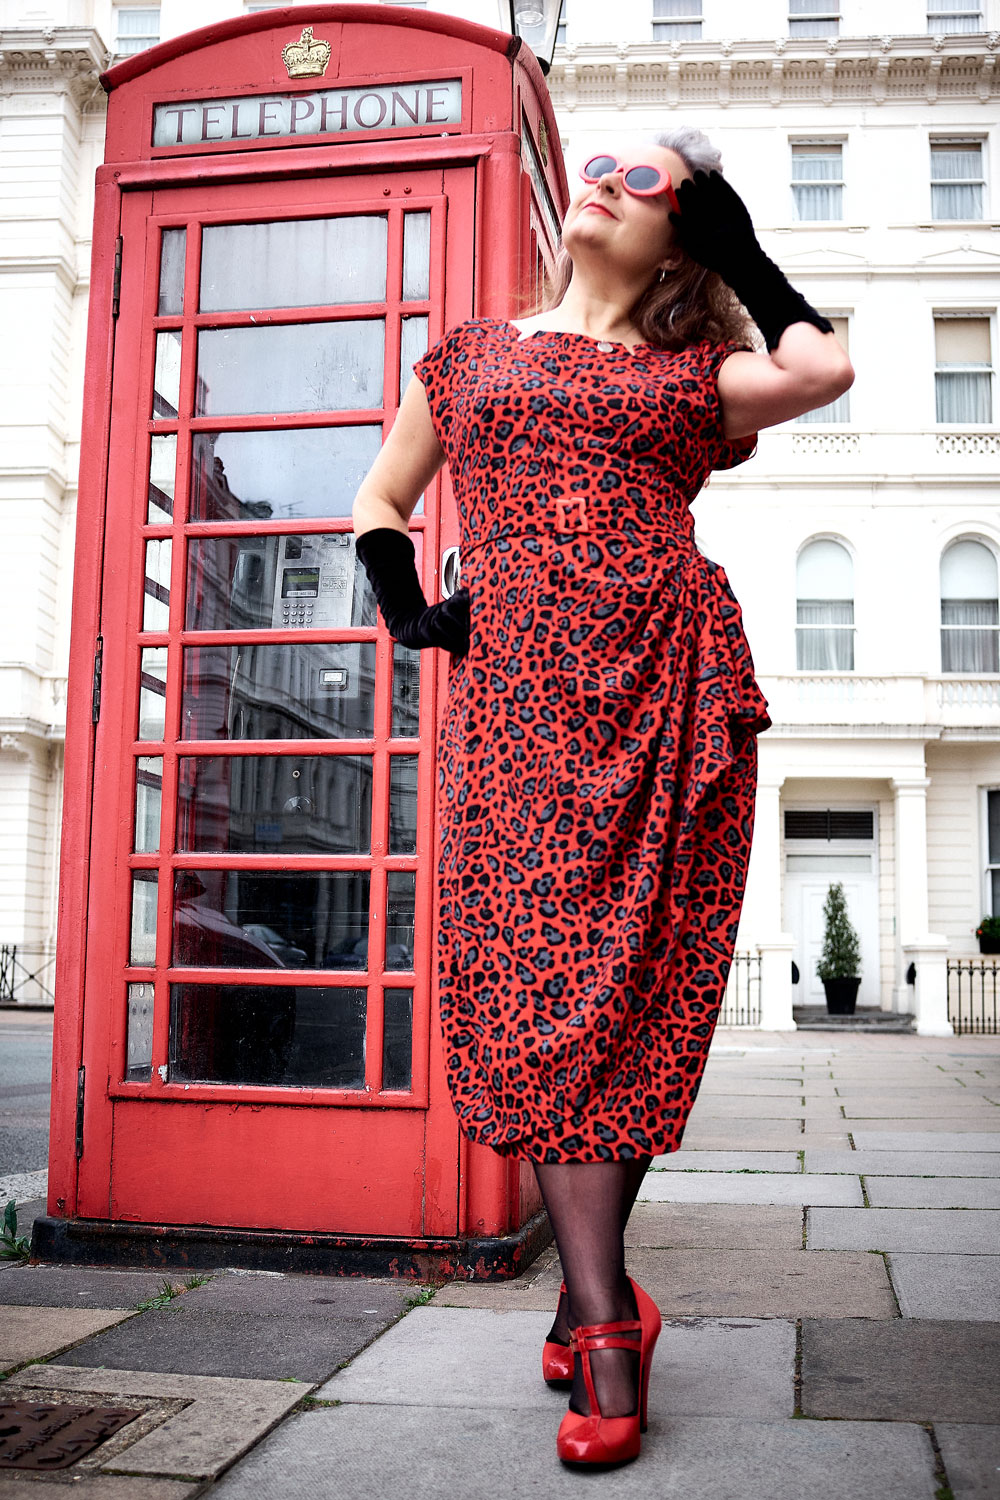
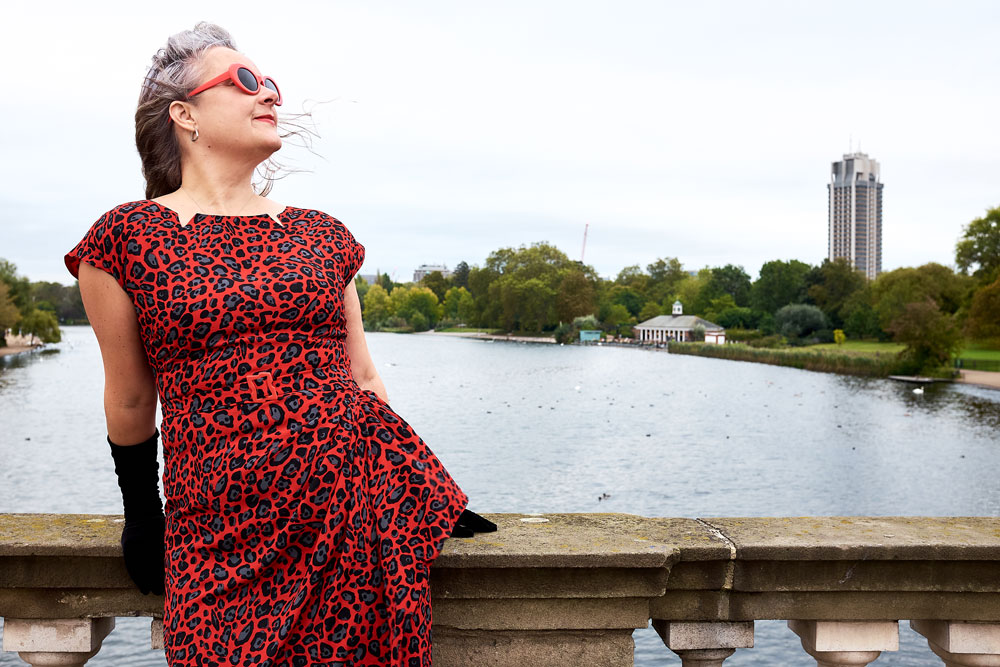
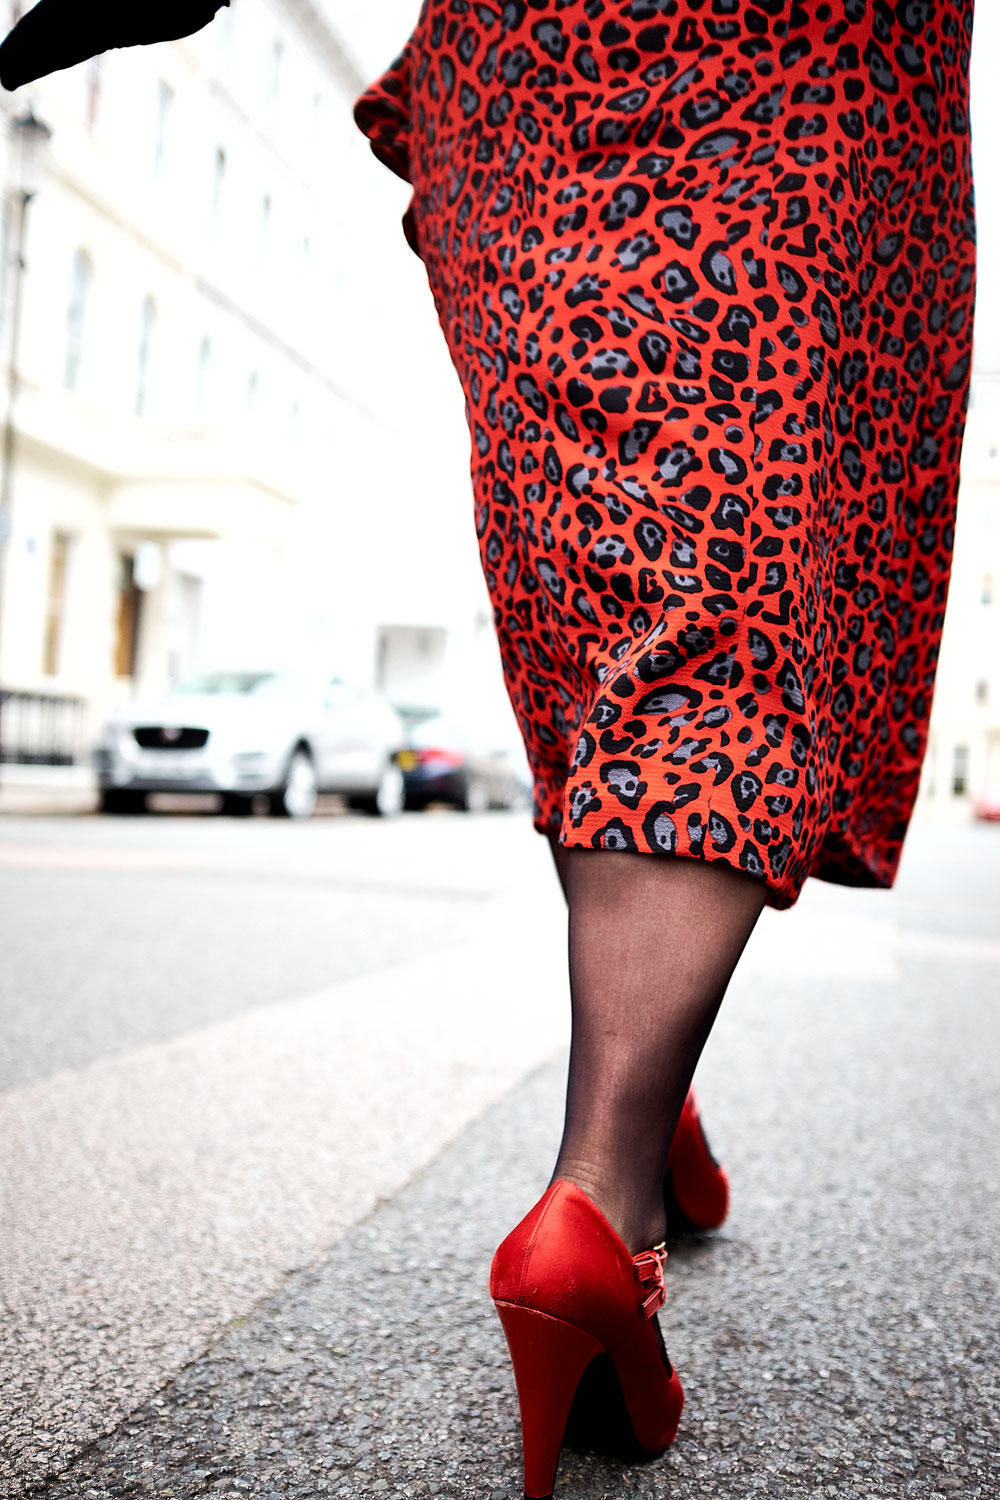
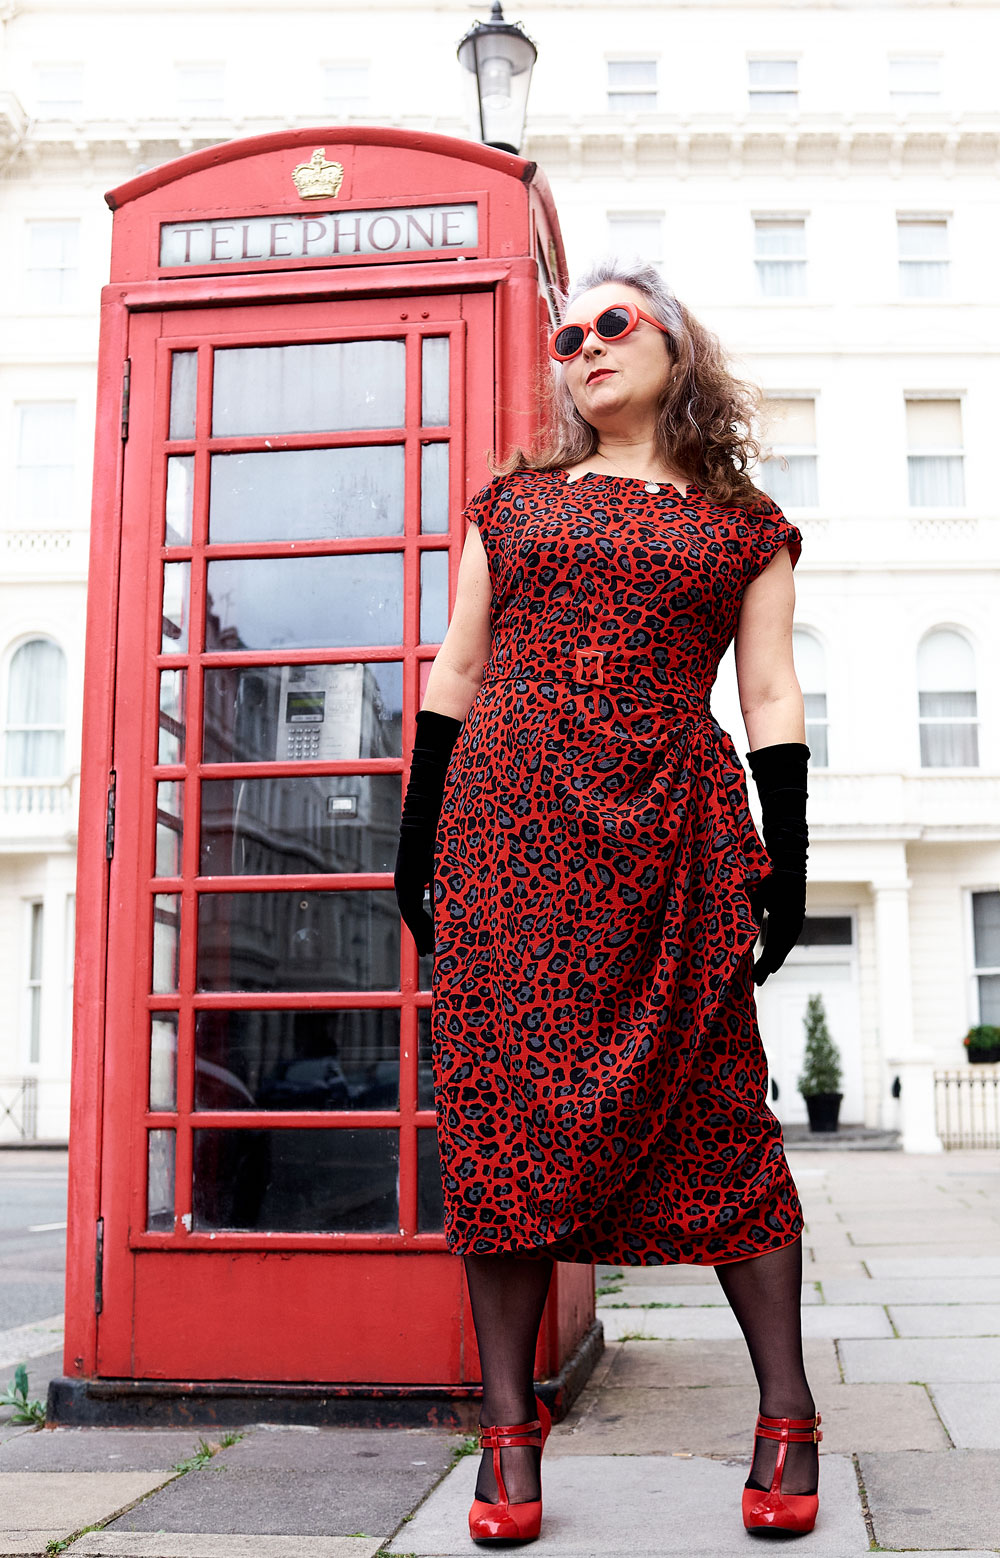
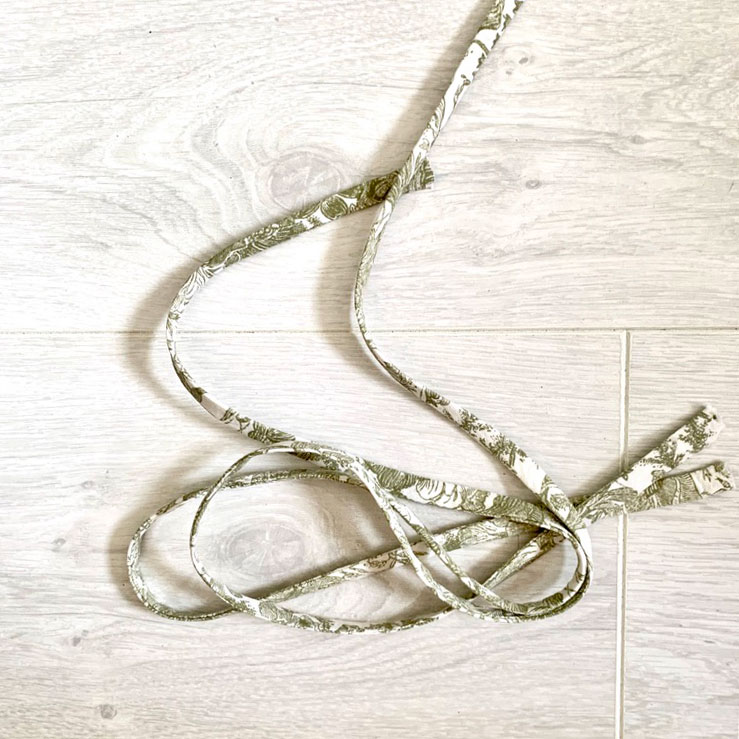
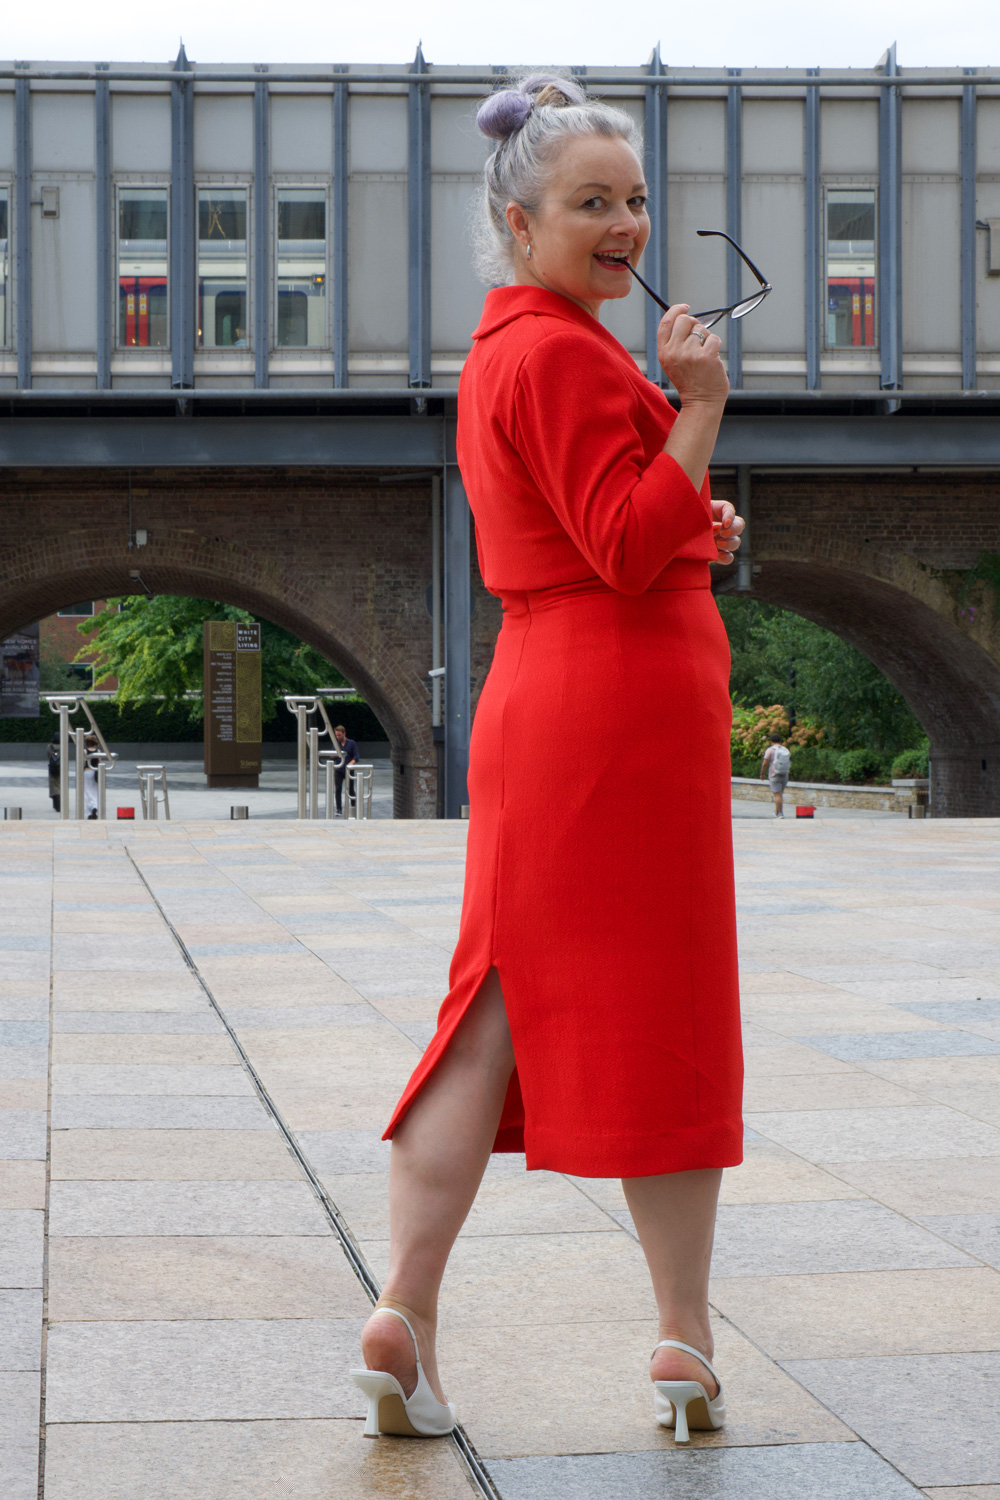
I used a medium weight, red textured crepe from New Crafthouse (always delighted to use deadstock) bought with a voucher I won back in April at the Spring Fling party. Also delighted that I’ve used it up relatively quickly and it’s not languished in stash! I’m trying so hard to create better habits recently regarding my fabric choices, sources and usage. More about that soon.

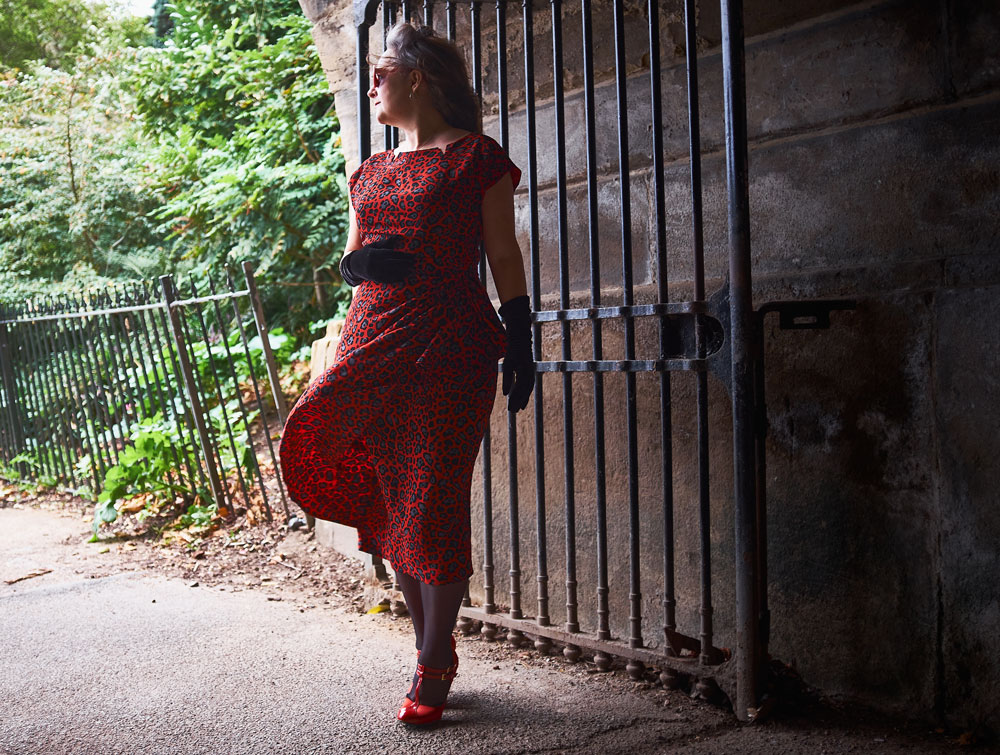
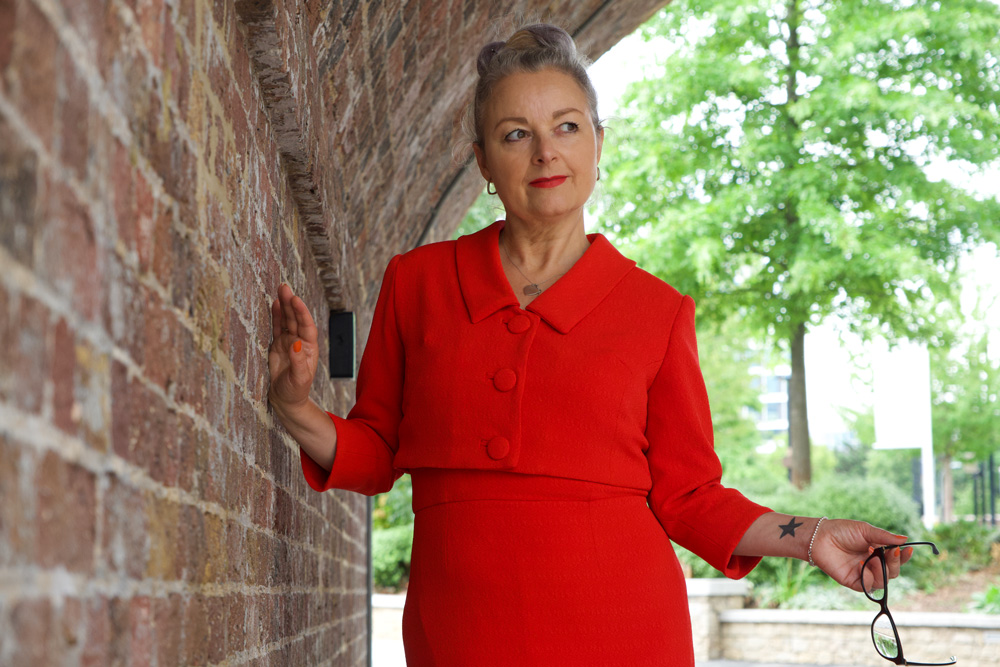
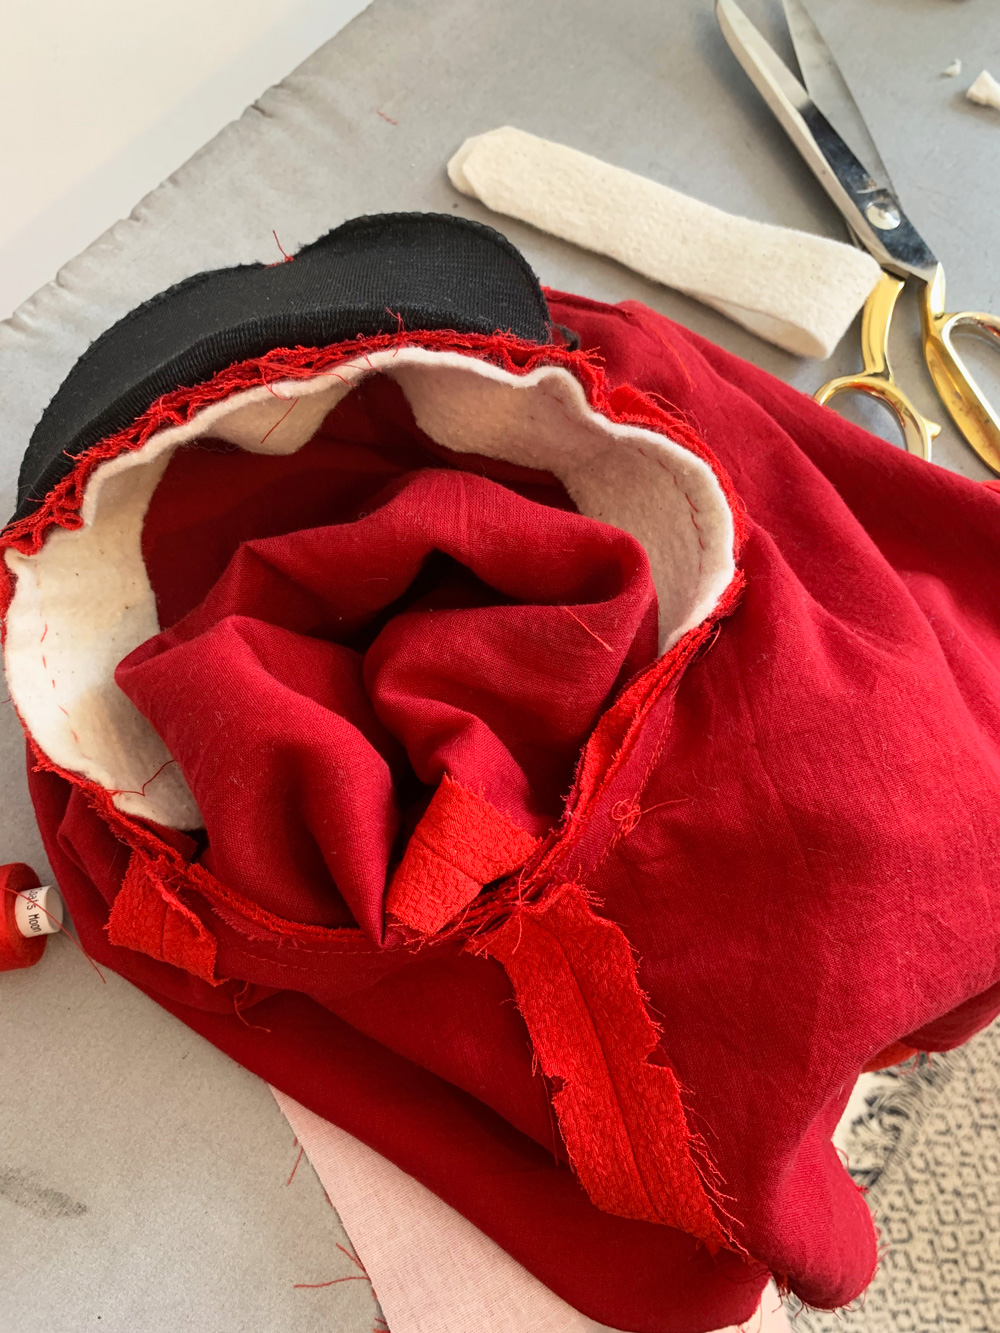
The jacket involved a bit more work. But that was mostly my fault! Although the fabric was great for the dress – it’s got great drape and is very huggy at the same time – I had  a feeling it wasn’t going to have quite enough structure for a jacket so I needed to employ some extra techniques. 

For starters, I underlined all the pieces with a red cotton voile – a great suggestion by SOI. I also padded the shoulders and added some strips of cotton fleece for the sleeve heads. I remembered to take a photo of the inner workings this time. Not quite so pretty though!

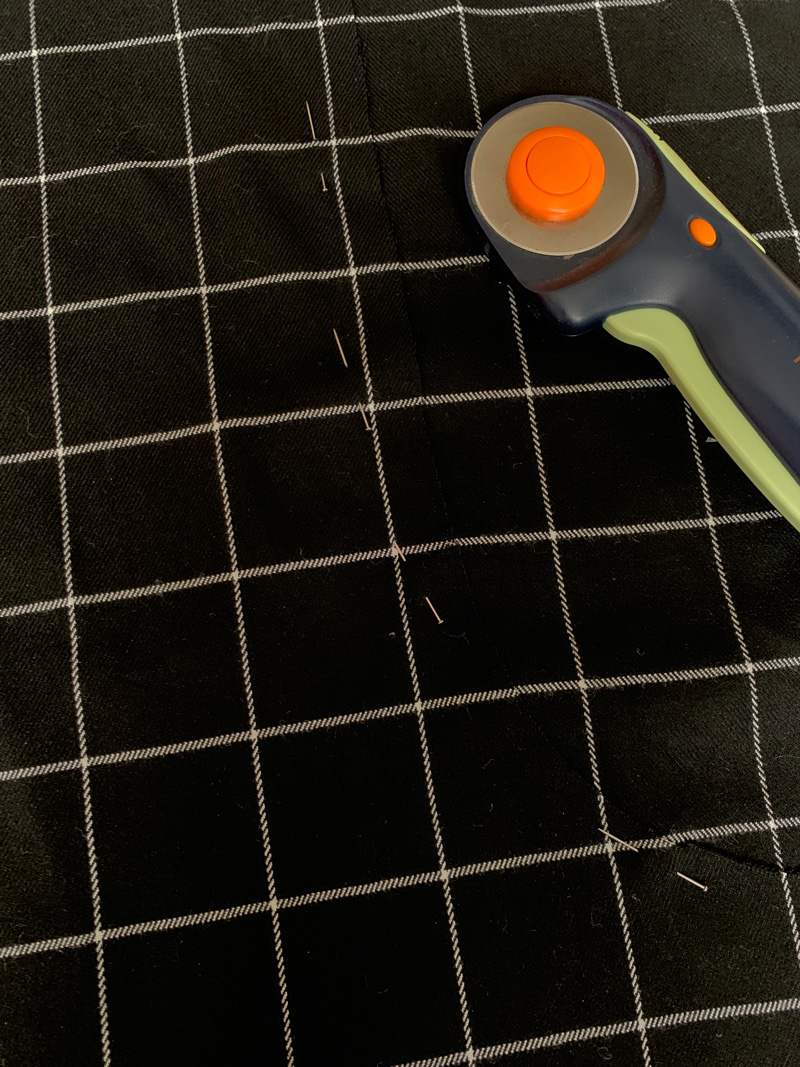
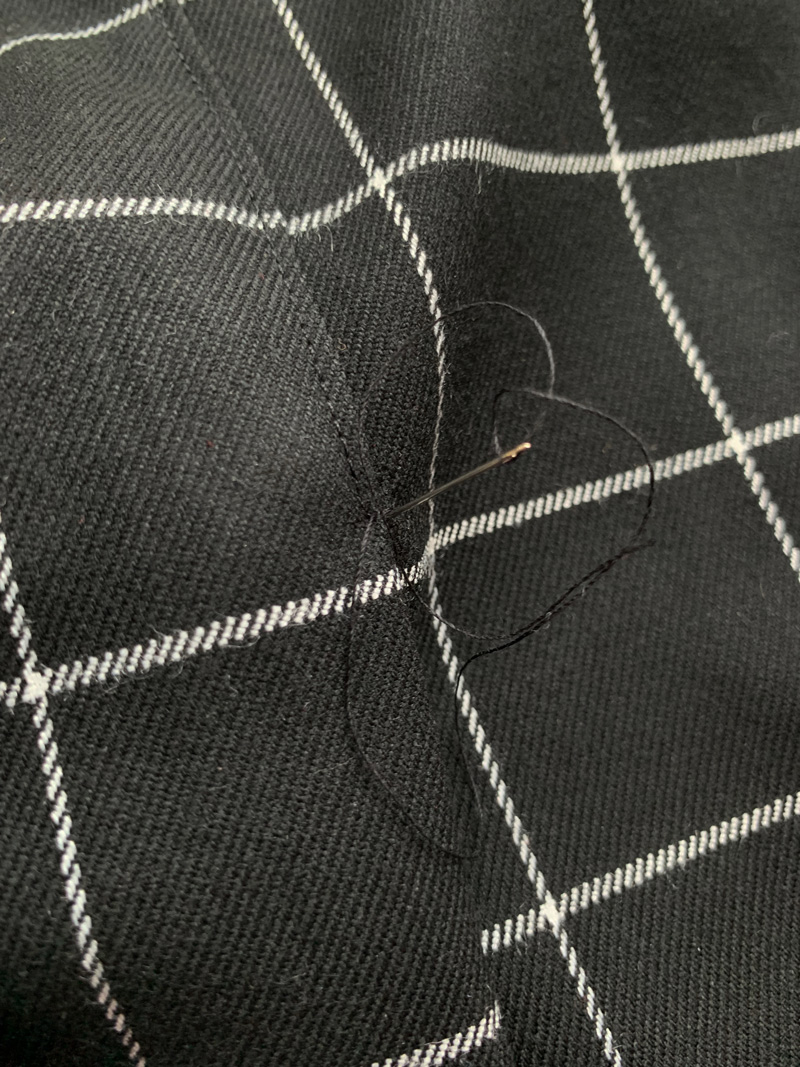
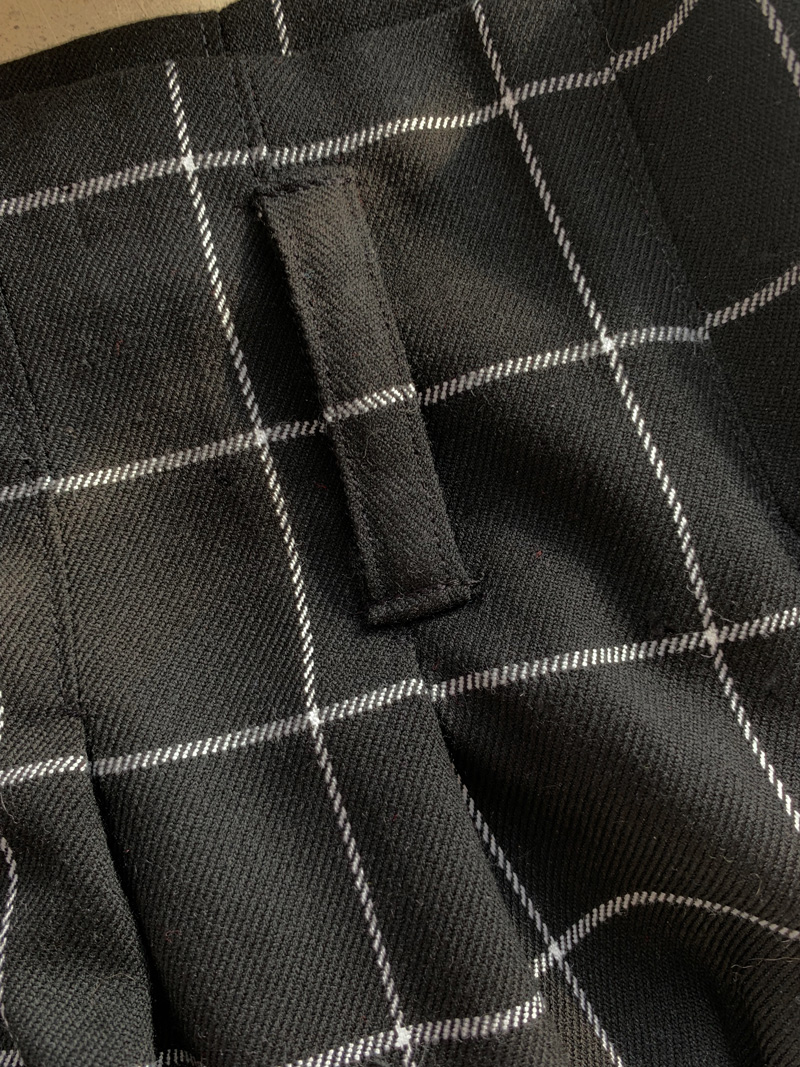
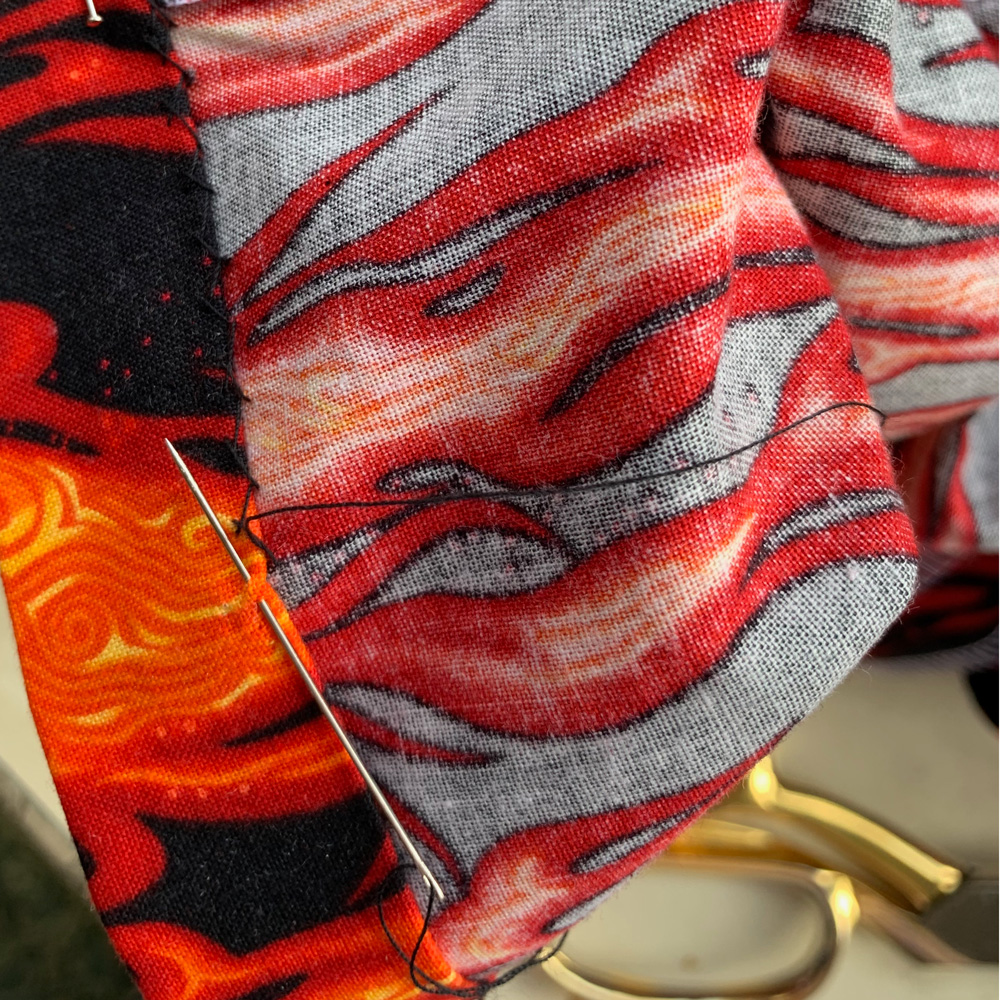
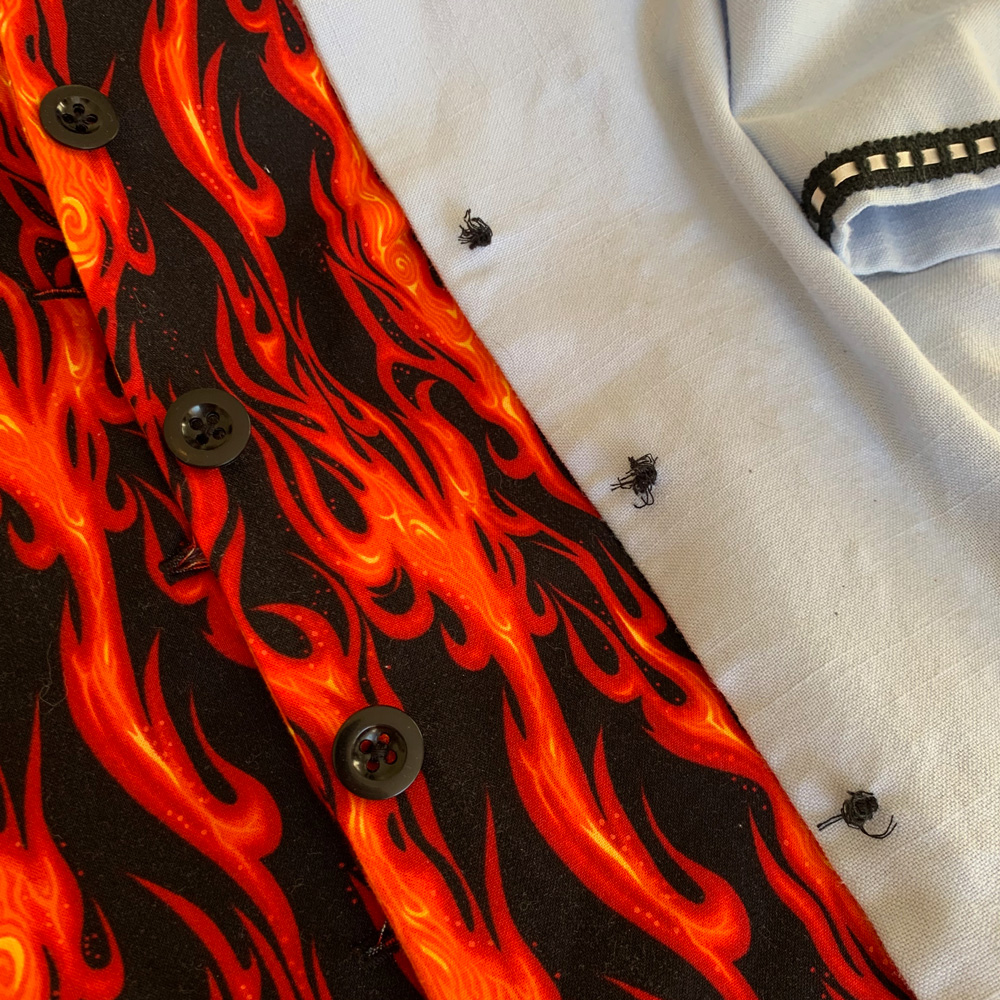
I had a horrible feeling that machine buttonholes were going to give me grief. I couldn’t bear to get to ‘almost finished’ stage only to ruin it all with raggedy buttonholes so I set about making old-school bound ones. And boy did I forget quite how faffy they are to do. I trialled some before I did the real ones. Worth it in the long run but I think I near fainted by holding my breath through the entire process. 

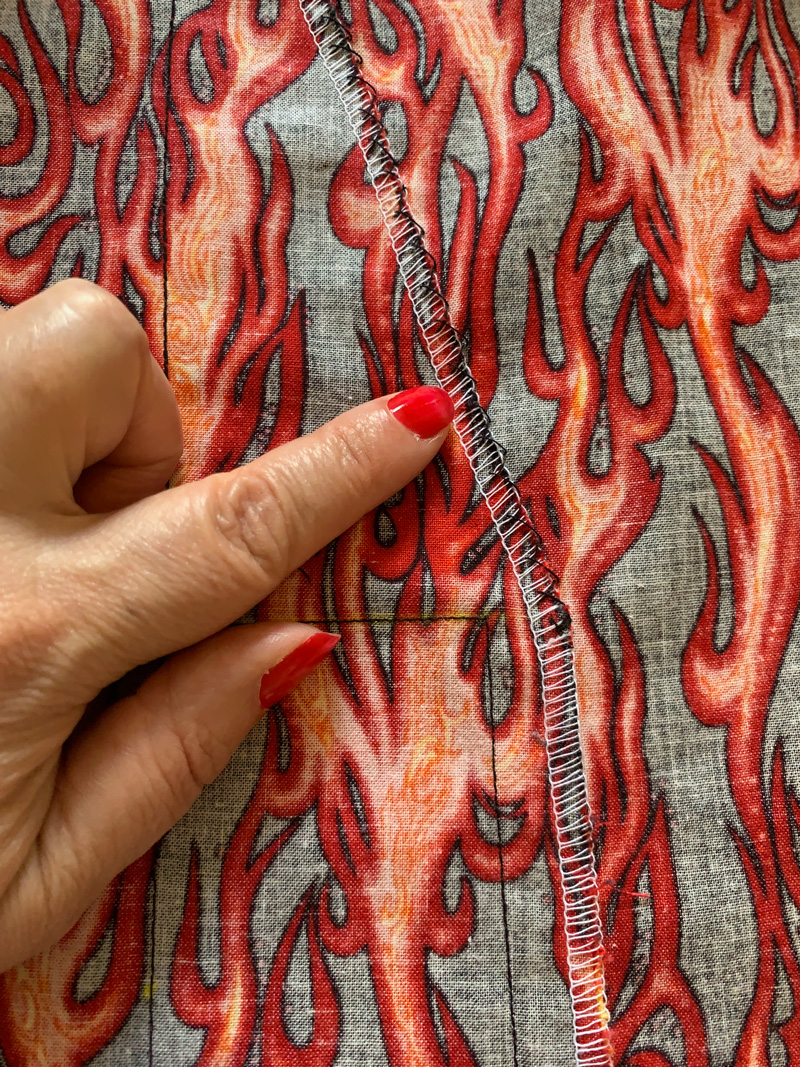
Its worth noting the importance of having those welt sections on grain. They will fold better and press straighter and give a much better finish.

And once I’d finished the button holes it made total sense to make covered buttons too. Luckily I had inherited a bag of the button bases and the rubber pressing tool a while back. The size was a little larger than suggested but it worked just fine.

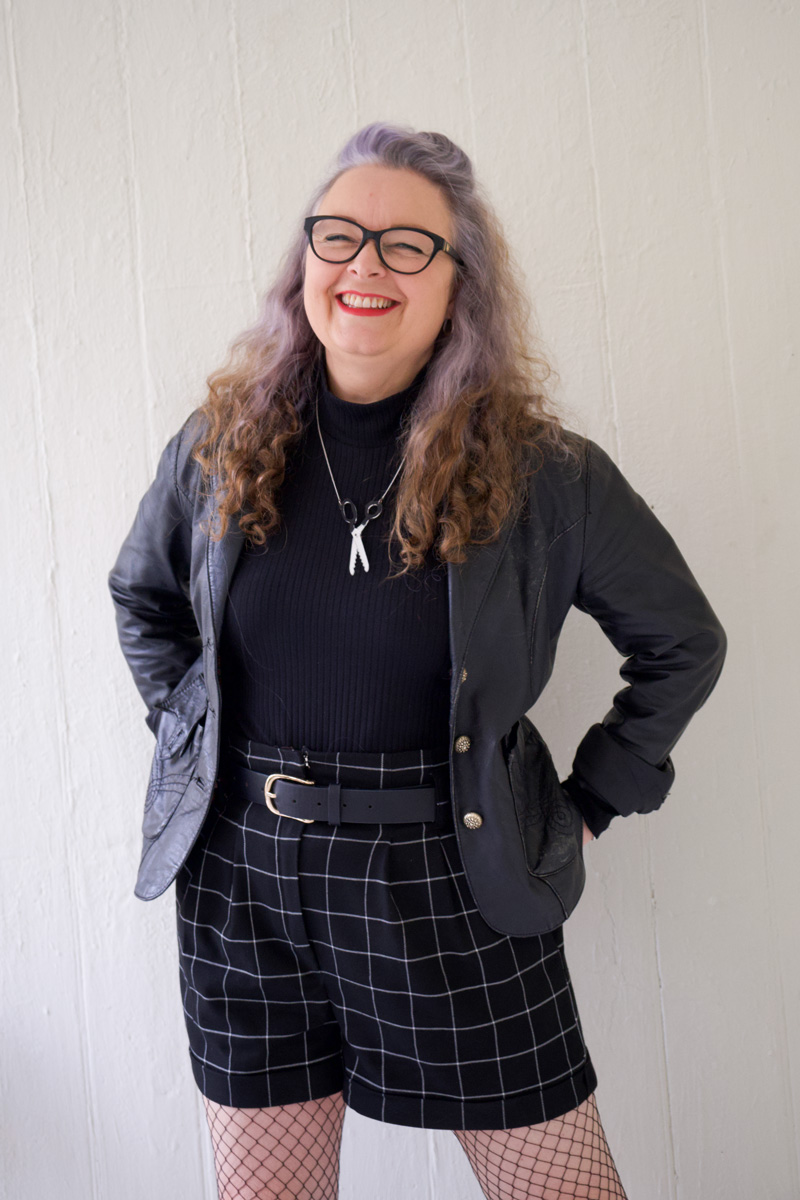
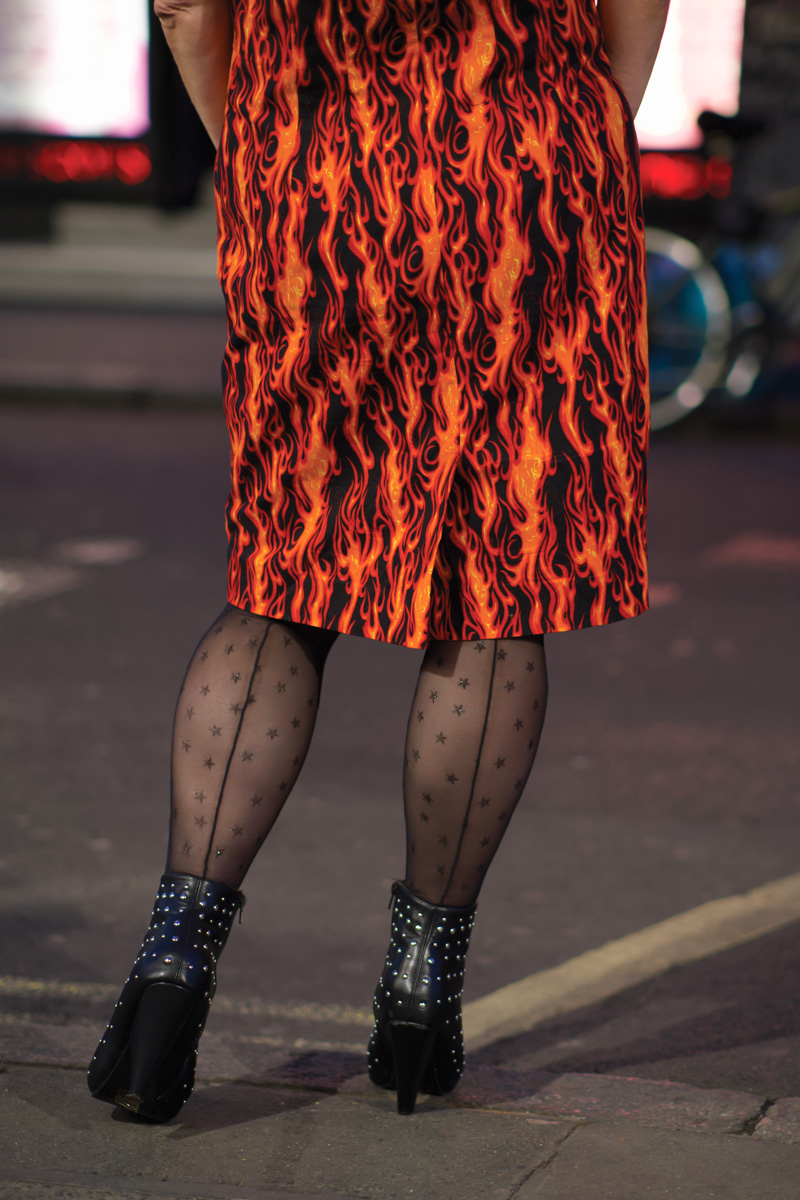
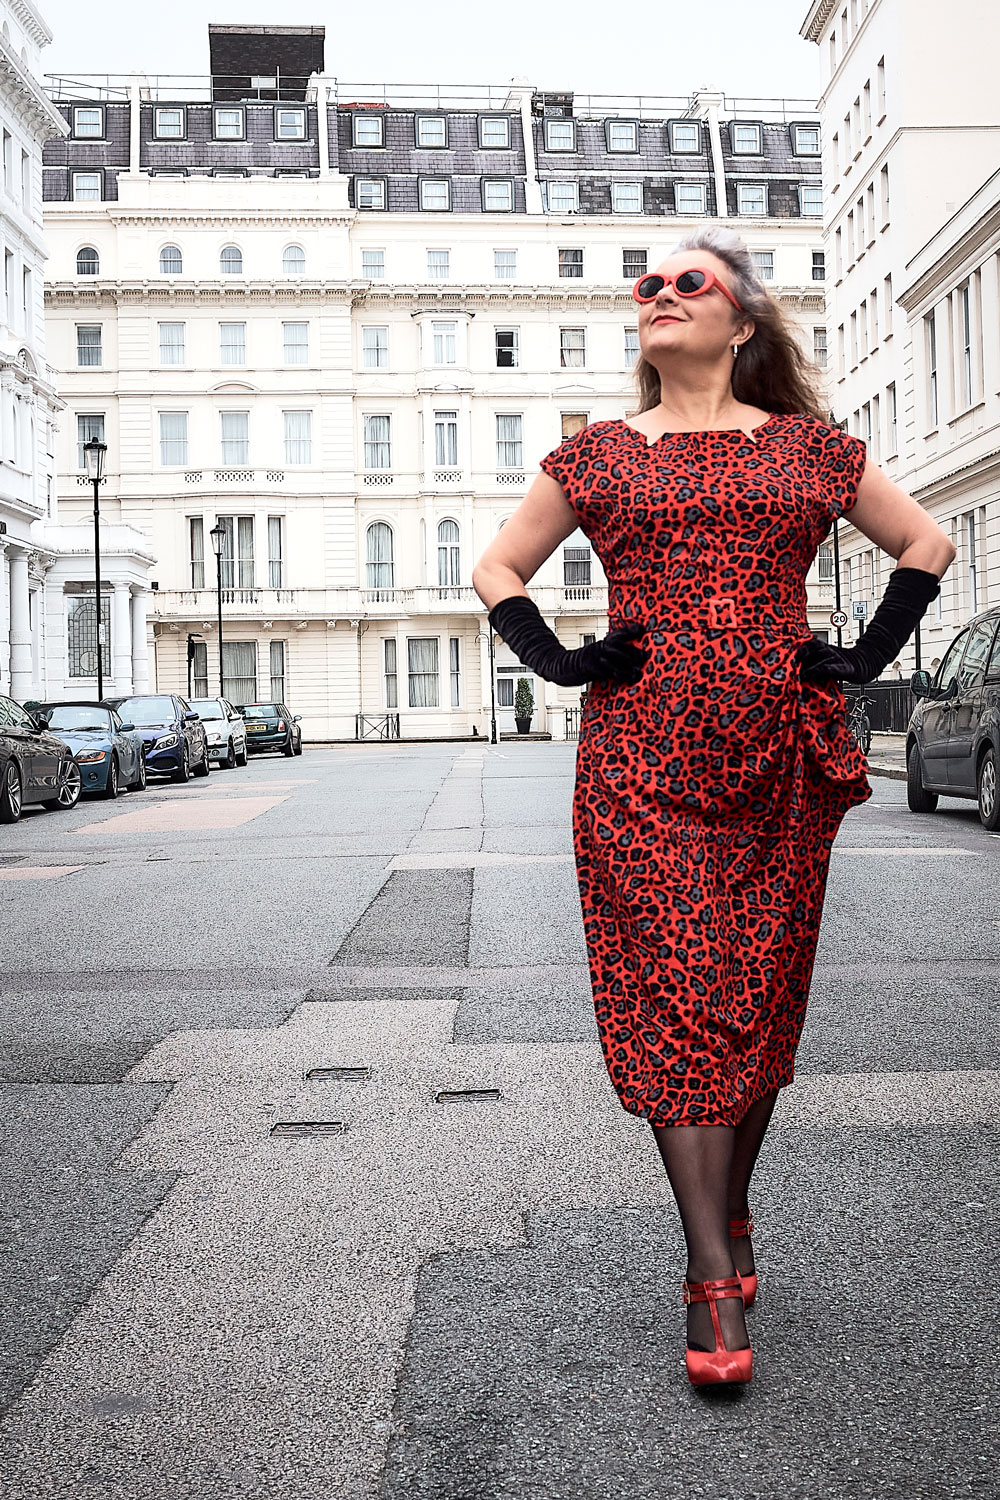
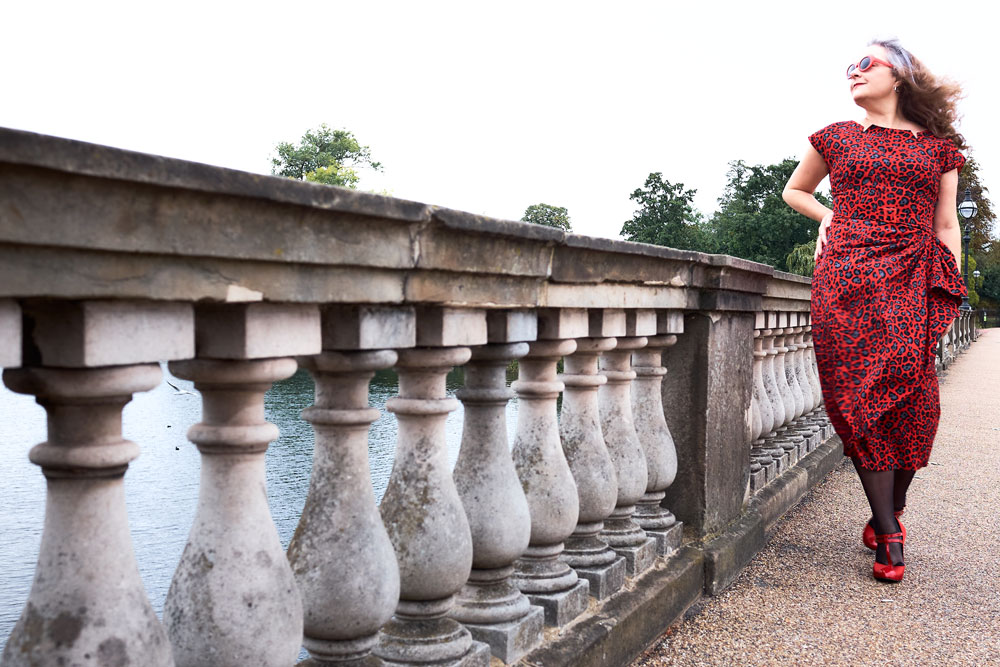
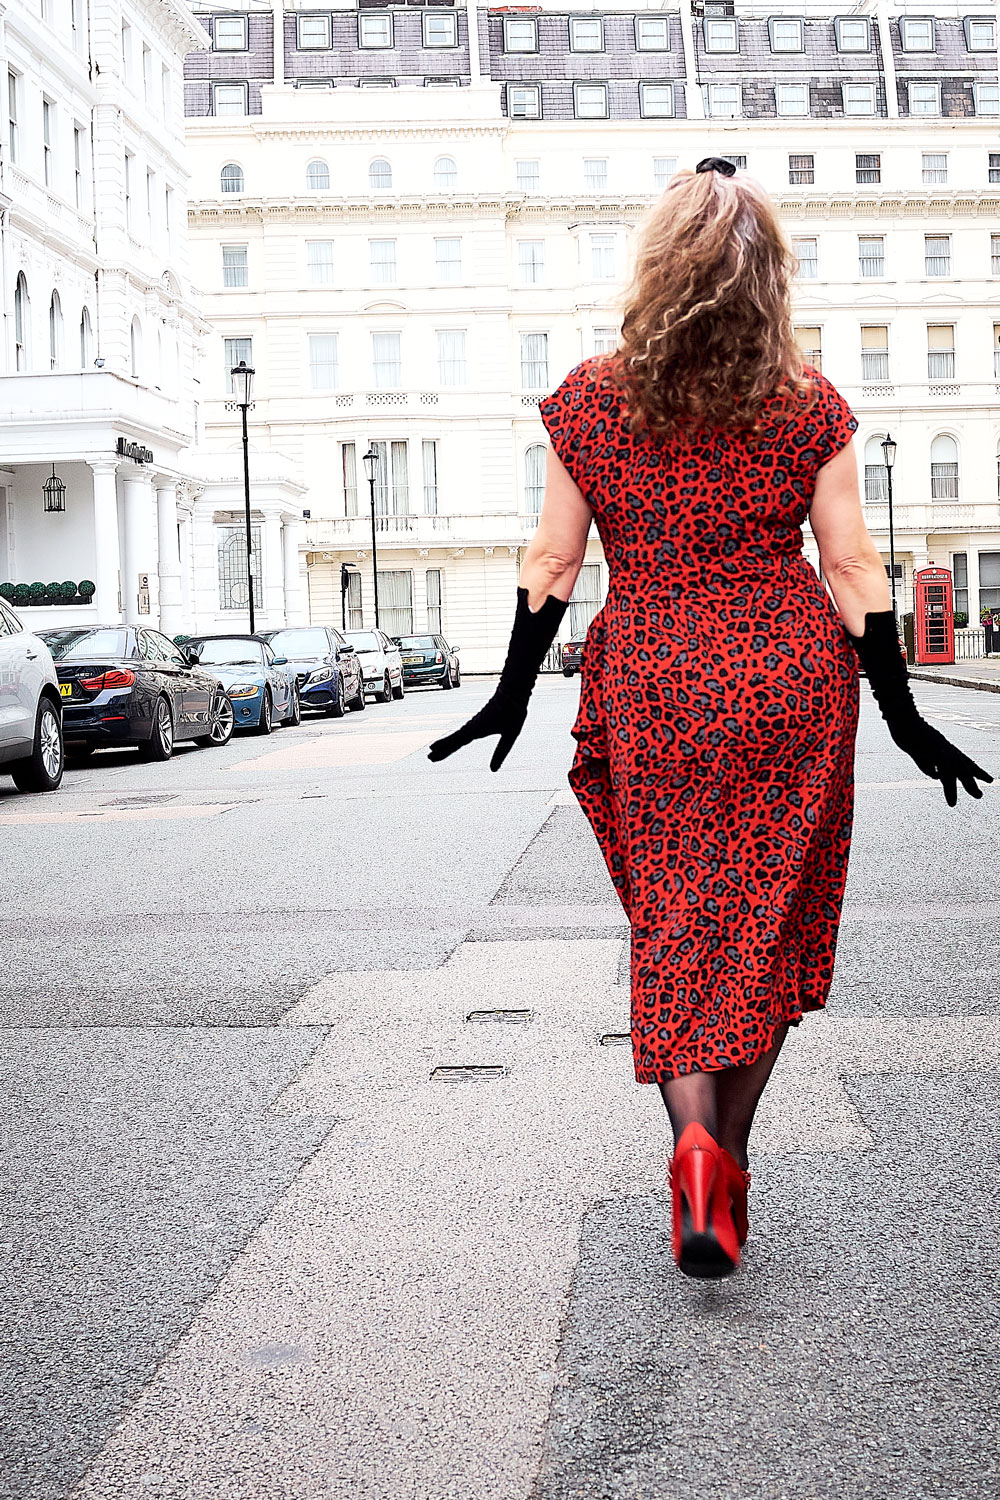
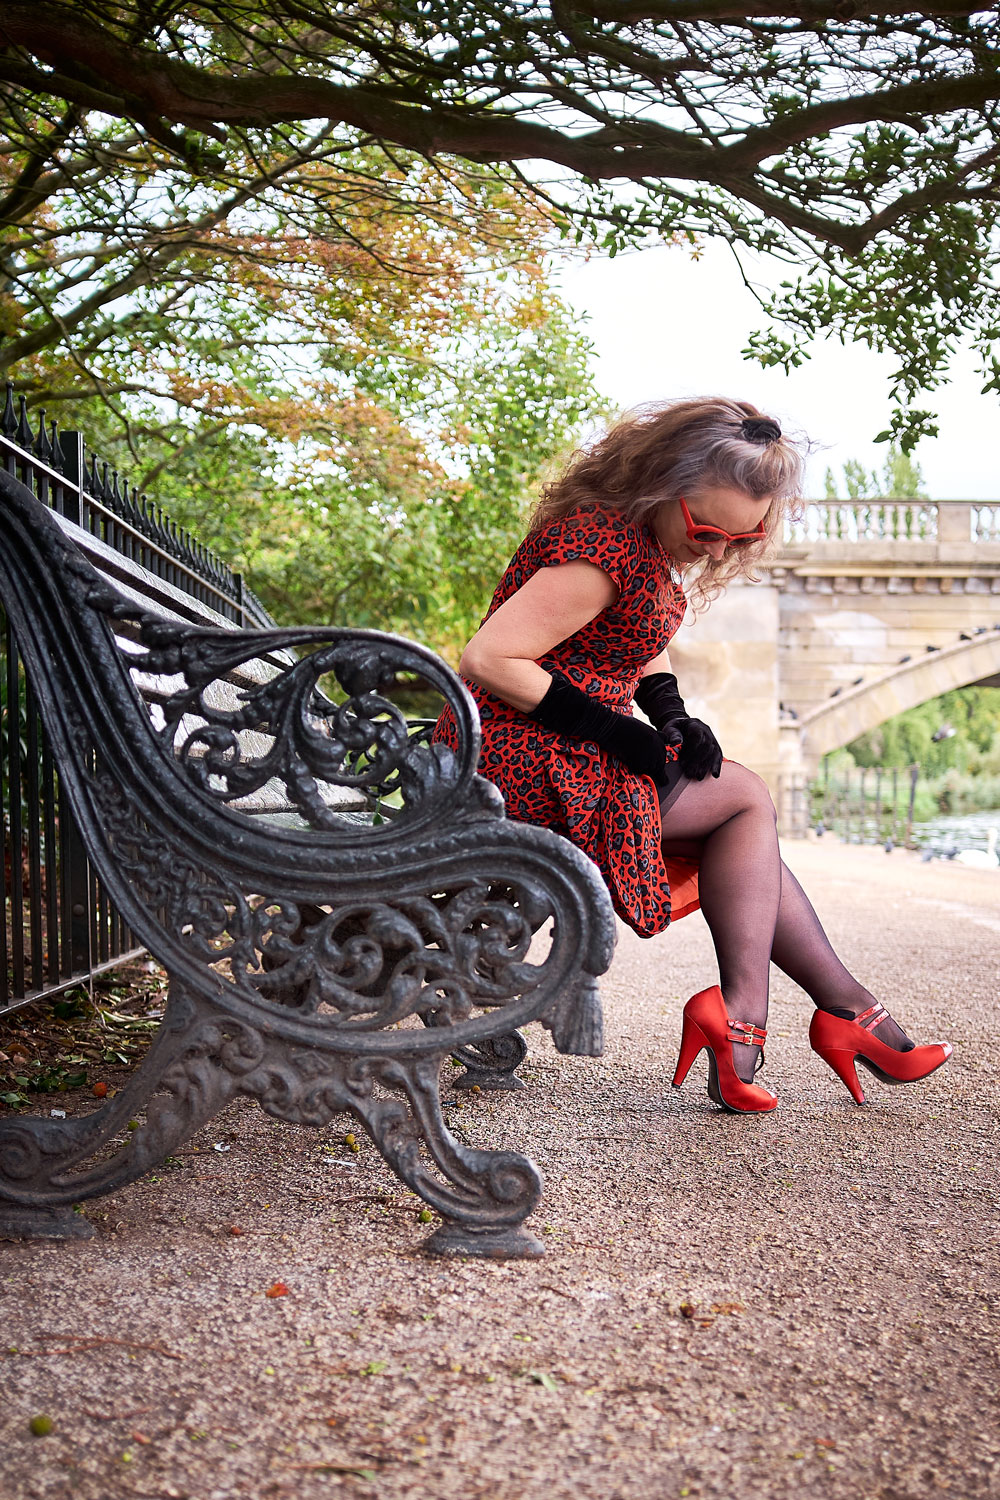
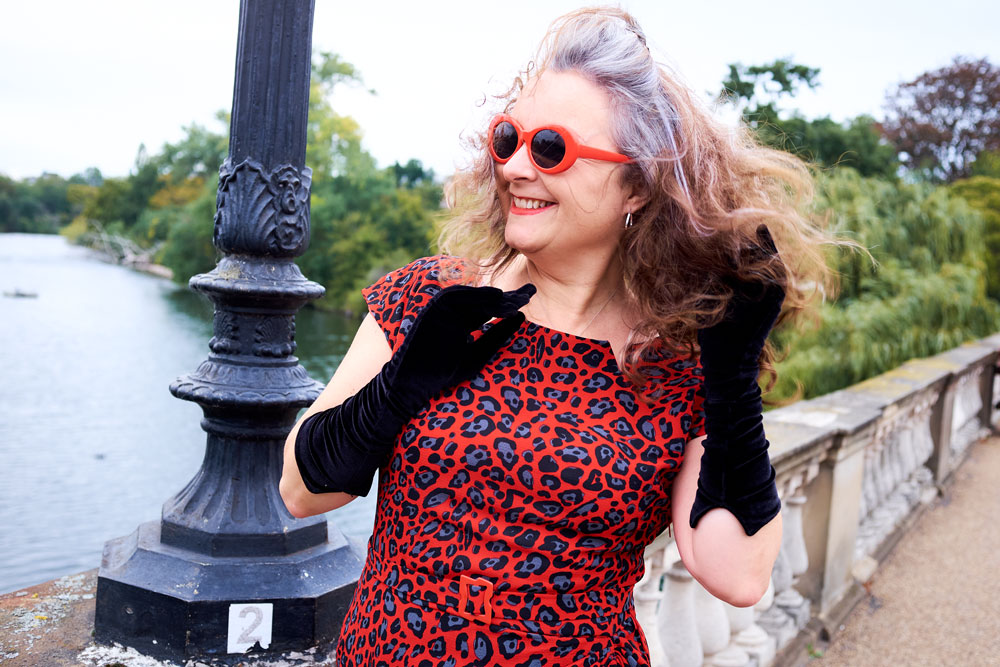
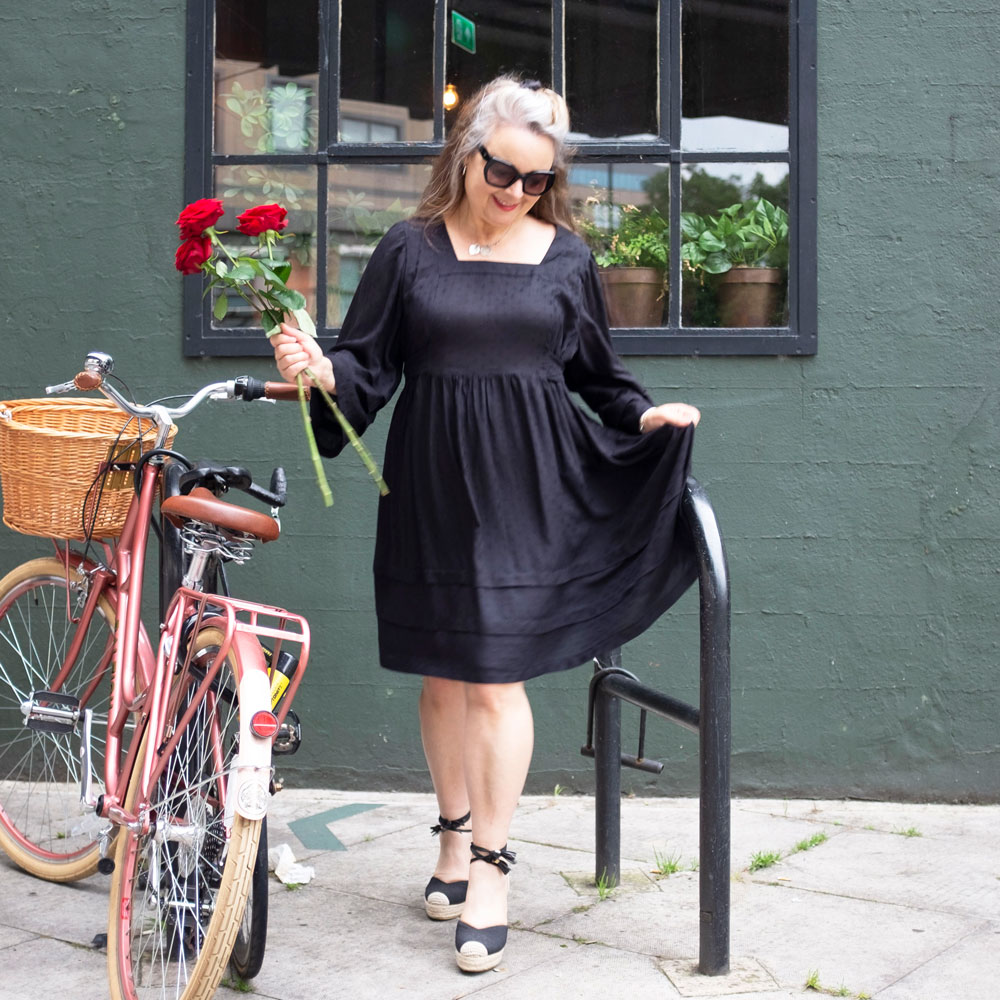
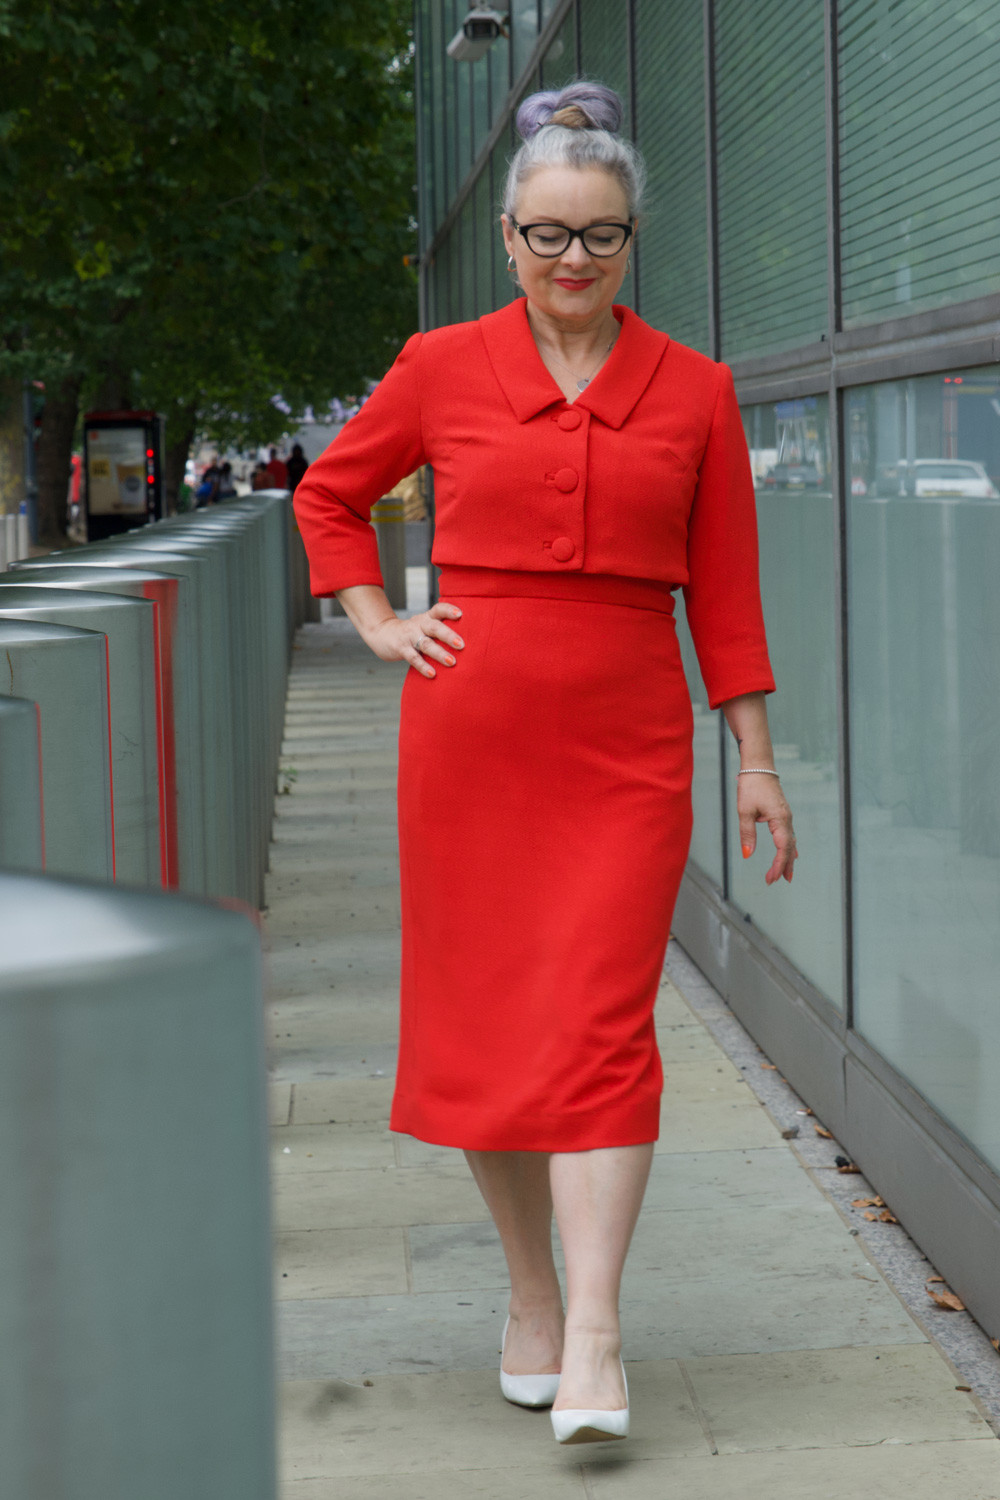
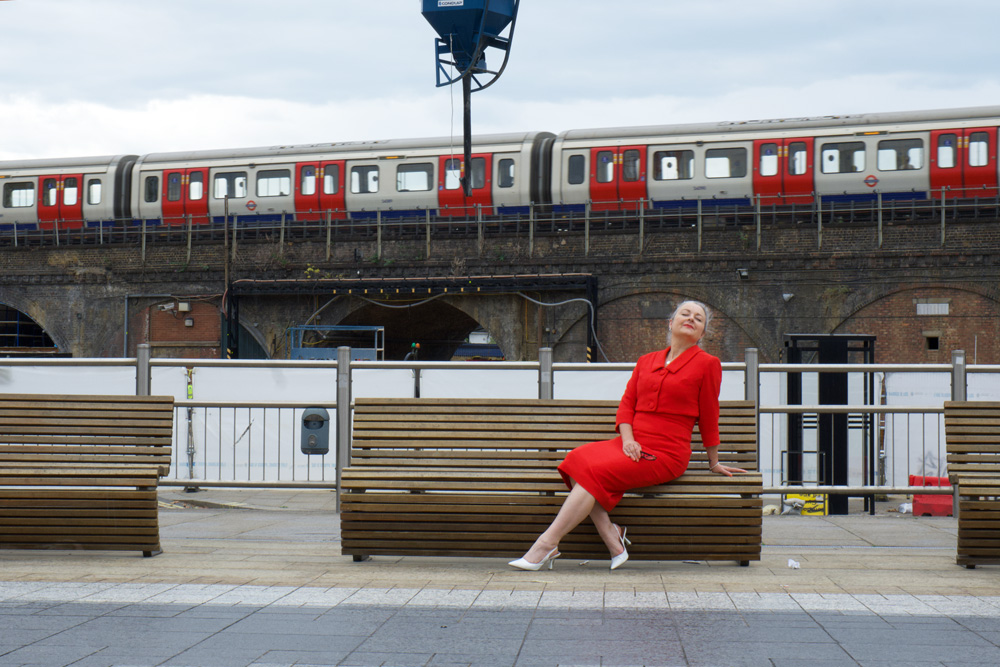
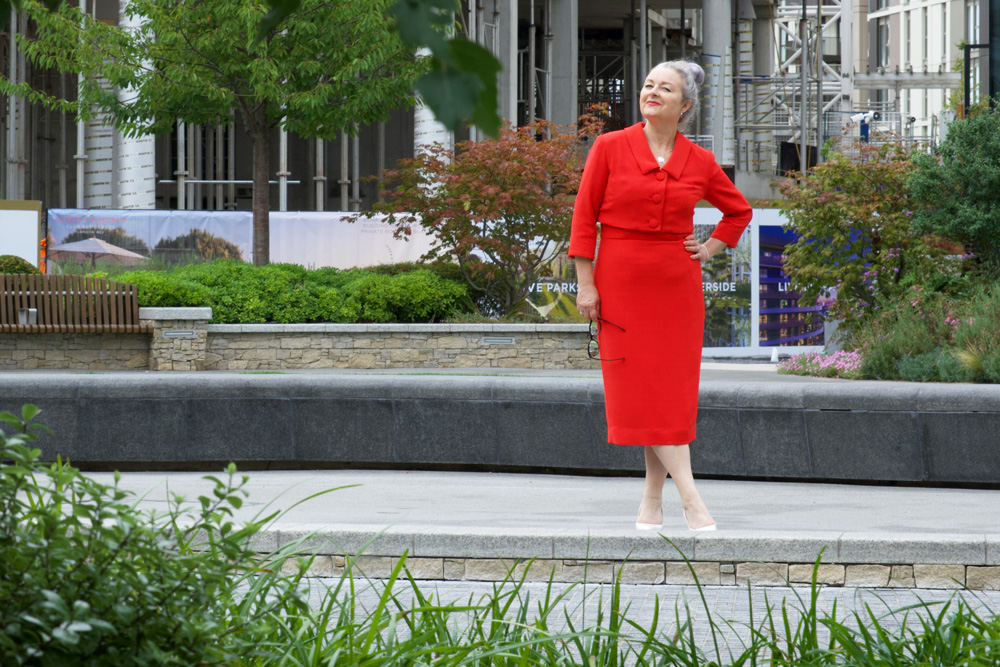
I completed the outfit in the nick of time to wear to my niece’s wedding and was so preoccupied I didn’t get any full length photos so all the thanks to Dan who took the time out to shoot these for me in and around where we work.

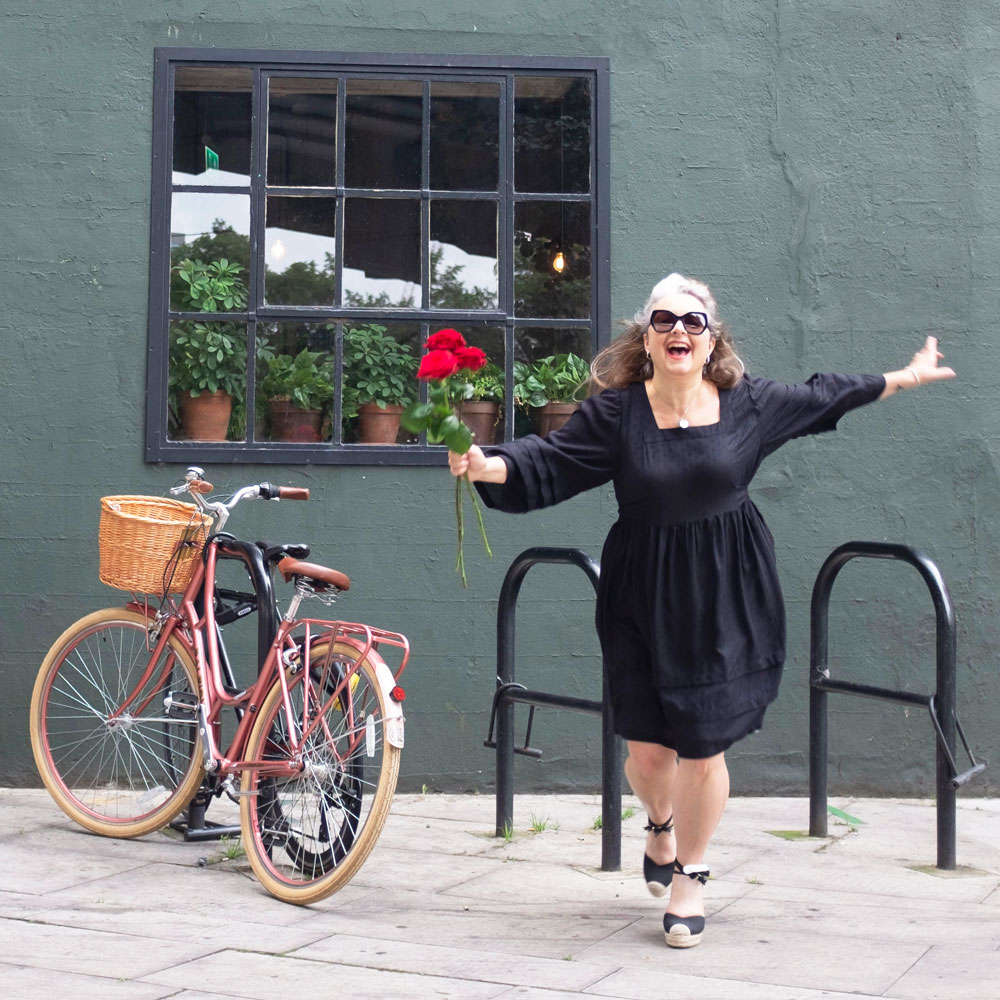
I just love how this suit makes me feel: mostly so grown up and properly dressed! It makes me walk tall and fills me with confidence. I got so many lovely comments from passing people, and that added to the feel good factor too! This is already a wardrobe bestie. And most probably will be for years to come.

How I hacked a Frida to make my daisy dress

Waaay back in April, I went to my very first New Crafthouse party. I’d heard of these legendary do’s but I was always too slow to the checkout page. This time round, howevs, I got a heads up and I snapped up a ticket the minute they went on sale.

The theme was Spring Fling… I do love a brief! Kind of narrows down the options of what to make, which is helpful because as you probably know its virtually impossible for a dressmaker not to make something new for a party!

Another good thing is, that because there’s usually a bank of ‘wanna makes’ swimming around in my head, I just have to pause the slideshow and pick a winner!

I’d been toying with a Molly Goddard style dress for a while. Not so over the top as that pink Killing Eve number – though, never say never! I guessed pink might be the popular choice for a spring theme and I wanted something a bit different, so I pictured what spring looked like in my local parks and daisies sprung to mind. 

But boy did I set a task for myself. I wanted daisy tulle. It had to be daisies, on tulle and nothing else. And I searched high and low until I finally found it some on Etsy. Its actually a pale green tulle which was a bonus too though it doesn’t really come across as such.

As for the pattern, I knew exactly what I was going to use. The SewOverIt Frida blouse and dress is such a great little pattern with no closures. Zippers and tulle aren’t generally friends so it was a perfect choice and a very simple hack would make my vision happen. And hey… see anyone familiar on the pattern cover?!

I kept the bodice section pretty much exactly as was, apart from shaving a little off the shoulder, because I  wanted the sleeve puffs to sit on the end of my shoulder point for maximum pooof! I used a green poly taffeta for the underdress because it had great structure and also was a great grassy base for the daisies to sit on. I overlaid the tulle on to the bodice piece to sew as one and I love how the sheen of the taffeta shone through.

I used the longer skirt section of the Frida Dress pattern as the foundation of the under-dress. The top part where it meets the bodice is pleated and I kept that but I split it about half way down and spread that bottom half to end up with a gathered bottom tier. This created much more of a dramatic A-Line silhouette and already the cheeky fun of this little party dress was beginning to make an appearance.

The tulle overlay is simply two gathered rectangles, each to the same depth as their corresponding under layers. The bottom layer was cut twice as long as the upper one and gathered onto the top tier.

For the sleeves,  I took the fuller sleeve pattern piece of the Frida, shortened it and then cut and slashed to spread it really wide. It was a bit trial and error but it worked just right with the first draft. I created some binding from the taffeta to edge the sleeves. I was so happy at this point as there were strong indications that it was evolving exactly as it had taken shape in my head!

Apart from gathering the tulle (one of my least favourite things to do) The process was pretty simple. And I finished it just in time to meet up with Alma and Ilaria and set off for the do!

We had such an amazing time – New Crafthouse is such a lovely space in East London and Hannah and Rosie were awesome hosts. We were greeted at the door with a gin fizz and had immense fun catching up with sewing friends old and new, everyone of them looking incredible in their handmade creations. It blows my mind how much talent there is in our wonderful sewing community.

And guess what! Not only did Ilaria win first prize for her amazing Botticelli meets Molly Goddard dress (we clearly have great minds)… but I won a runners up prize too!

We seriously had no expectations of coming away with prizes. It was so exciting. And we were buzzing all the way home.

Useful Links
Sew Over It Frida Blouse and Dress pattern
The New Crafthouse
Mod Retro Vintage Sunglasses (aff link)

Working on the bias: My first Sicily slip dress

Janene is wearing her handmade Sicily slip dress and is posing with one hand on hip in front on a white door surrounded by brickwork and ivy overhead. She is wearing a self-drafted black turtleneck top, grey bobble hat, black rimmed glasses and Vivienne Westwood Bondage Boots.

I’ve been admiring all the Masin Sicily slips since I saw the very first one, with the same thought in mind each time ~ could I pull it off?!

It’s a very clingy nowhere-to-hide kinda dress and I’ve never been ok with putting my belly out there but I figured I’d never know the level of exposure until I tried!

But why the lilac Janene? Haha, I thought I’d get in there before anyone else does! Because to be fair I don’t often break out of my red and black palette. (I’ll be running back to safety after this post, don’t you chicken curry about that!)

Janene is wearing her handmade Sicily slip dress and is posing with both hands on hips in front on a white door surrounded by brickwork and ivy overhead. She is wearing a self-drafted black turtleneck top, grey bobble hat, black rimmed glasses and Vivienne Westwood Bondage Boots.

Truth be told there was a lilac lovers party going on and fomo got the better of me! Hosted by Cut One Pair and Pigeon Wishes and to celebrate the collaborative button collection this is the second time in the space of a few weeks that an Instagram challenge has given me a push out of my comfy zone. My first being my now favourite jumper!

I have never sewn a bias cut dress. Save a bias cut skirt section of the BHL Jenna dress which I just realized I never blogged (doh!). And I can’t actually remember the last time I sewed a cowl neckline so I was really looking forward to (read, super apprehensive about) making this dress!

Back vew of Janene wearing her handmade Sicily slip dress. She is posing with both hands on hips in front on a white door surrounded by brickwork and ivy overhead. She is wearing a self-drafted black turtleneck top, grey bobble hat and Vivienne Westwood Bondage Boots.

Now for clarity (and first note to self) I have to say that putting together 50-odd sheets of A4 pattern pieces nearly drove me over the edge. And not for the first time. I don’t know why I put myself through this. Rewatching The Crown while I was doing it eased a bit of the pain but I so don’t want to do that again for a very long time!! Took me an age to get back up off the floor, if nothing else!

The next issue I had was cutting it out. I invested in an A0 cutting mat (Affiliate link) some time ago. It was quite pricey but equally worth every penny. I quickly learned that cutting slippery fabrics with scissors was not the best way forward the first time I tried! So I had both mat and rotary cutter lined up but still, working on the floor was a bit of a nightmare. I had to roll the rug back on the living room floor to pin the pattern to fabric and then roughly cut around each piece so they would fit on the mat to then be cut out more accurately.

Janene is wearing her handmade Sicily slip dress and is posing with arms outstretched in front of a white door surrounded by brickwork and ivy overhead. She is wearing a self-drafted black turtleneck top, grey bobble hat, black rimmed glasses and Vivienne Westwood Bondage Boots.

It was better than I expected but the pinning and shifting of pieces was a little detrimental, I’m sure, and I’d have much rather have used pattern weights and cut on a large sturdy eye-level purpose built cutting table. Excuse me while I dream the sewing studio dream… again!

This is the first time I have used a sewing pattern by Masin and I have to say I found the instructions beautifully laid out, concise and super helpful. There’s a clear explanation of bias grain behaviour and how to pick the correct size. Having said that I still managed to pick a size too big because my hips are bigger proportionally than my bust (so I made the wrong choice instead of grading). And I think that is why my cowl neckline appears rather more dramatic than most. I’m still deciding if I’m comfortable with it. It’s perfectly fine layered with an undergarment but I’ve got a whole pack of tit tape at the ready for when I dare to wear it on its own!

waist up image of Janene, wearing Masin Sicily slip dress. She is holding 3 lilac colour carnations with both hands to the bottom of the frame. She is wearing black rimmed glasses and her head is back, laughing.

I was surprised that this view A with the skinny straps was suggested as the easiest version to sew. It’s taken me years to master those spaghetti rouleaus! But I have to say now that I’ve grasped it, I actually quite enjoy making them. I recently posted a little tutorial here if you are interested:  Rouleau Loops Made Simple

There are very few pattern pieces for view A – like front, front facing, back with facing, and strap – and no closures; so the rest of the instructions were super plain sailing BUT… and quite a big BUT…

I think I made a boo boo by stay stitching the bias side edges with a straight stitch. I’m not entirely sure because I could have stretched out the seams when it hung over the edge of the table as I sewed, or perhaps as I was sewing the actual seams. I did use a small wide zigzag stitch to French seam the sides but of course that was like closing the stable door after the horse has bolted! While the dress is hanging, the bias cut fabric is going to stretch more but the stay-stitching is going to… well, STAY! (Second note to self: try zigzag stay-stitching too!)

Side view of Janene wearing her handmade Sicily slip dress and is posing with right index finger on lip in front on a white door surrounded by brickwork and ivy overhead. She is wearing a self-drafted black turtleneck top, grey bobble hat, black rimmed glasses and Vivienne Westwood Bondage Boots.

All was not lost though. The worst of the puckering was near to the hemline and I had been mulling over a choice of midi and mini length at the start. So decision was made when I realised I could crop off the worst areas by going for a mini length!

I’m pretty pleased with my hemming too. I sewed a quarter inch away from the cut line and pressed as instructed and then sewed close to the second fold. Even though this velvet touch poly is totally synthetic I was amazed that it pressed so beautifully.

Detail of small hem on dress. Cropped image of hands holding out skirt to sides

Once again I have learned new things. Testing things but valuable lessons all the same and nowhere near testing enough to put me off trying again – the absolute best thing about sewing adventures!

All in all I am delighted with the outcome and I will be revisiting this pattern again. Leopard print satin is already prewashed and sitting patiently atop the stash! So if anyone has any thoughts about stay-stitching bias dress side seams before I crack on, please let me know in the comments below. And I will love you forever!

Janene is wearing her handmade Sicily slip dress and is skipping towards the lens in front on a white door surrounded by brickwork and ivy overhead. She is wearing a self-drafted black turtleneck top, grey bobble hat, black rimmed glasses and Vivienne Westwood Bondage Boots.

Lovely photos by Daniel James Photographic

Seven useful tips for a rocking pair of M7726/M8168 shorts

M7726 shorts handmade and modelled by Janene @ooobop

I was inspired to make a second pair of these McCall shorts (see here for first pair) by the lovely checked suiting fabric I saw and snapped up in the Crafty Sew and So sale and was then spurred on by the #magamsewalong #rocktober instagram challenge hosted by @suestoney and @sewing_in_spain, themed by @salixsews.

close up of M7726 shorts handmade by Janene @ooobop

I’m still a bit scarred from that loose weave fabric I used last time, but oh the rewarding joy in using a more stable fabric. I did however underestimate the time and patience in cutting and matching those checks though.

TIP 1: Cutting out

I laid out the fabric in a single layer and cut all the pieces individually, using a rotary cutter for more accuracy. I find the fabric moves less and you can get consistently close to the edge of the curved sections.

I flipped the first set of cutout pieces onto the remaining fabric and pinned it in position to cut the corresponding pieces so the checks would line up. And most importantly I marked ‘WS’ (wrong side) on each piece!

detail of front section of shorts overlaid and pinned onto fabric to match checks

TIP 2: Marking the pieces

I know we are constantly reminded to do this. I’m lazy and often don’t – just marking as I get to the correlating instruction, if I feel I need to. But in the case of these shorts it’s crucial to get those marks on, and visible.

I used a combination of tailor’s chalk and tailor tacks and made sure to distinguish the small circles versus large circles, not forgetting the squares and the centre front line versus the fold lines! It seems like such a faff but you’ll thank me later!

TIP 3: Finishing the seams

I overlocked all the edges of all the pieces, after I sewed the seams but I finished the fly section before I added the zip.

I never paid any attention to finishing when I first started out sewing but learned quickly when my favourite memade shirt literally fell apart at the seams!

Also advisable to finish your seams in a matching thread. This doesn’t always matter but read on to tip 7 to find out why.

TIP 4: Tacking is important

When you have such a large and noticeable check pattern, or any pattern tbh, any slight stretch or movement of the fabric can lead to a mis-align of the design. So hand tacks, in a contrasting colour, are a really great way of keeping things in place while you sew.

Believe me, I always try to dodge this bullet thinking I can go quicker without and even this time I tried simply pinning the pleats in position before I sewed and twice had to unpick because the line of the checks formed a ‘step effect’.

TIP 5: Tying up loose ends

To finish off the topstitching neatly, leave a longer thread than your automatic machine cutter might allow for. Take a hand sewing needle and thread it with the loose thread on the right side. Push the needle and the thread through to the wrong side and tie together a few times with the bobbin thread. Trim a few mm’s away from the knot.

detail of how to tie up loose ends with threaded needle sticking out of the front side of the fabric

TIP 6: The roll-up

I used a strip of fusible interfacing to sandwich in the middle of the rolled up hem. The suiting fabric I used was a little sturdier than the last fabric I used but still very soft and I didn’t want the cuff to flop down. It was a good way to use up those little scraps of interfacing too – I hate throwing them away! I also did a blind catch-stitch about a cm inside the top edge of the roll up to keep that cuff in position. Just for good measure!

I wanted a slightly bigger roll up than I did last time but the positioning of those checks played a big part in how much and where I pressed that last fold. As a result the pocket bags have a tendency to show when I’m seated. Slightly annoying and not a biggie, except that’s where I first used non matching (white) overlocking thread. I thankfully changed it up when I remembered that the side seams were going to be visible on the roll-up!

Janene standing with hands

I wore these shorts 5 days straight after I made them – I love them so much. And I think that’s largely due to the time and patience I invested in making sure those details were on point. I even matched the belt loops for goodness sakes!

They are so comfortable to wear, lovely and warm with tights and I love styling them with boots. Its given me a great opportunity to test them out with all my different tops (breaking all the ‘rules’ for pattern mixing) so I’ll be sure to share that with you soon, too.

I do hope these tips come in useful, for this project or any others you’ve got on the go. And please share any additional ones you might have in the comment section. One of my favourite things about sewing is the prospect of it always being a work in progress. There’s more than a lifetimes worth of tips and techniques to keep us busy and sharing them is half the fun!

In the meantime I’m pondering my next project. Could be an actual jumper, a work-out piece or a self-drafted dress. Decisions, decisions…!

Postscript! I’ve since found out that this McCalls pattern has been rereleased under M8168, Taylor McCalls

Other shorts I’ve made:

Simplicity 6772 shirtdress on fire for the #sewvintageseptember challenge

I love it when sewing stars align. Like when Minerva sends a call out to promote their new fabric ranges, and the ideal fabric screams to be made up from my go-to 60s shirtdress pattern during a month when one of my favourite annual Instagram challenges inspires me to dust off those vintage pattern boxes.

Well those flames spelled out the obvious, to me. A retro Rockabilly shirtdress.

The pattern is vintage Simplicity 6772 from 1966. And a perfect project for sewing up in between busy work shifts. I’ve sewn it up twice before – in dogtooth and in blue – and that gave me confidence to forego any toiling though I did make a few fitting adjustments, namely extending the bodice length by quarter of an inch and lowering the bust and top points of the waist darts. There are 12 darts to this dress: 4 diamond waist darts on the front, 4 on the back, 2 bust darts and 2 shoulder darts which seems very excessive but actually this is very commonplace to vintage patterns and all the better for shaping.

The fabric is a Robert Kaufman cotton poplin which I received as part of the Minerva Ambassador programme. I’ve used poplin only once before, for my self-drafted sundress but cannot fault the quality. It is such a lovely genuine medium weight, imho – not too light and not too heavy. The weave is such that it’s an absolute joy to hand finish the hems – so easy to pick up a single thread for a catch-stitch and it presses so effortlessly too.

Another advantage is that it doesn’t crease as easily as regular shirting cotton. Prior to taking these shots I’d been walking around in this dress and sitting down for a couple of hours and it still looked pretty neat.

My dresses usually get shorter as the months get colder but this time I opted for a to-the-knee rather than an above-the-knee hemline for a change. The actual pattern suggestion is quite a bit longer but I think I’ve hit the sweet spot. And the little kick pleat at the back looks more sensible when it’s longer in any case.

In order to keep that kick pleat nice and flat and in position, I stitched it down with with a few catch-stitches inside. I think you can tell how much I enjoyed hand stitching this fabric!

It’s amazing how a quality fabric can make so much difference to the whole sewing experience. For instance, pressing as I’ve mentioned before but also for turning nice sharp points on the collar sections and the corners of the front facings. Setting in the sleeves was a breeze, too.

I decided the buttons had to be plain. I’ve exhausted my stash of black buttons and so I robbed some off a previous dress that won’t get any wear over the next six months at least, on account of it being too summery. So I have plenty of time to replace them!

It was fun to take this dress out for it’s maiden stroll around Soho and stop for a coffee in Bar Italia. I used to hang out here a lot in my clubbing days. A pit stop after dancing the night away when you weren’t quite ready to go home – a quality hit of caffeine and always someone interesting to yabber away to. Some things never change!

Fab photos by Daniel James Photographic

Roll over taggy blankets, there’s a new taggy T- in town!

Let’s face it. There’s not much gratification to get from making children’s clothes – So much effort for such a few amount of wears, if any. And I’ve recently refrained, until a request for my grandson came in: My son cannot find plain unbranded quality cotton toddler T-shirts that don’t have stupid slogans, or images on them and wondered if I’d care to oblige.

At first I was reluctant, especially after recently refusing a similar request for a grown up. But then I realised I could add a very tiny but genius design feature here which would tick two boxes, and make this project more worthwhile.

Anyone else know a toddler with a silky label obsession? I mean, that’s kind of what the taggy blanket (afflink) was invented for (for anyone who doesn’t know, a taggy blanket has lots of silky ribbon loops sewn around the edge of a small piece of fleece fabric and serves as a comforter. ) Or perhaps this is what is responsible for the silky label obsession to start with. Who knows?!

Blake is no exception and loves a label. He’ll find them every where – blankets, cushions, stuffed toys and especially on his own clothes. Trouble is they are always on the inside and he insists on pulling up his top to get at them.

I had a flash of inspiration when I was at the Crafty Sewing Camp, as I sewed my sweary label to the outside of my Ankara dress – far too good to hide inside – that I should sew a label to the outside of his T-shirts! Its kind of like a toddler taggy T- with less chance of a draught, especially with colder months coming up.

For the T-shirt , a quick Google led me to Diby Club and a great free pattern with lots of style variations with very detailed instructions. Such a lot of work invested to give for free. It made me a bit suspicious tbh but I knew proof would be in the making of it and there was zero chance of me wasting any amount of time, drafting a pattern in any case.

I didn’t need to refer to the instructions as I’ve sewn various tops and T’s but I did take heed of the measurements for the neckband as clearly it had been tried and tested on a fabric with the same suggested amount of stretch.

I sewed most of it on the overlocker and was quite excited about doing a blind hem on the body and sleeve section with the overlocker too, until I tested it on a scrap. It was a bit of a heavy finish for such a small garment, especially in this amazing premium cotton jersey. So I just overlocked the edges and hemmed with a zigzag on my regular machine. Again, too lazy to set up the twin needle but its just as cute and I’ve had no complaints! Incidentally I bought this fabric from Minerva. It washes beautifully, presses and recovers well. Lots of different colour options, too.

Blake wasn’t very impressed when I asked him to try it on but when I pointed out the label, there was no hesitation and within seconds of his arms pulling through, went into his little silky stroking trance mode which is generally an indication of nap time! One happy customer and one very happy Nanna who ultimately enjoyed making such a boring project and also seeing it appreciated in real life. You know what? I might even make another!

It was a fantastic little no-brainer of a project to palette cleanse and gear me up for something a little more involved and with #SewVintageSeptember here already, best I get cracking with my next project.

Do you ever sew for little ones or sew something really boring before starting a more complicated project?

Vogue robe in a luxurious Liberty silk – my wfh wardrobe is looking better already!

I generally don’t have a go-to order for dressmaking. My thought processes vary according to mood, need and weather. Sometimes choosing pattern first and then pairing an appropriate fabric, sometimes the other way round, especially if I’m fabric shopping in real shops and then an idea will spring to mind while I’m stroking and bouncing and draping and holding all the materials aloft. The latter is a dangerous game though, and hasn’t helped stash mountain at all!

But when Minerva approached me with some Liberty silk offerings I was quick to choose which fabric but wasn’t so quick to pair a pattern. What a gift! But wow… what a blooming responsibility! What pattern would best showcase this heavenly fabric?

I needed a project with damage limitations. It had already arrived at a super work-busy point in time and there was only room for assignment within small allocated time-slots throughout the weeks.

Mood and need and weather came to the fore. I was so tired of shuffling round the house in my tatty old dressing gown. Sometimes I don’t even bother getting out of it to work – there’s actually no need when I’m working from home and nobody is going to see me. But a silk robe would have me sitting more upright, feeling so much better about myself, plus it’s getting warmer so I really don’t need to be enveloped in velour anymore. I had a need to swan around in silk! And a robe would be simple, right?!

In an ideal world I’d have drafted the pattern myself. I’m getting quite fond of the maths. But with time not on my side that wasn’t going to be a great option because it would need toiling, too. So a quick scout on the web presented me with V8888. A delightful selection of nightwear to accompany a very stylish robe. I ordered it from Minerva.

I also ordered a very large cutting mat and a new blade for my Fiskars rotary cutter. I’ve worked with silk satin only once before and it was a slippery beast. My scissors slid around the dining room table and I was cursing at every snip. But weighted down and cut slowly and carefully with said cutter, this time I had no problems at all. I was amazed at how little it frayed, especially with all the extra handling involved. Most of the seams except for the armholes are sewn with a French seam. And because I only had one shot of this, I checked and double-checked and triple-checked each side and pairing of seams before sewing. It was totally worth it of course because the inside is so neat and the robe so much stronger as a result.

I chose the longer sleeves for the shorter version of the robe. Because I like that look and it’s way more classy. The shorter sleeves involved a band of lace at the hem and that would have been far too fussy for the design of this fabric. I wanted to keep it as simple as possible.

But I had not anticipated all the rouleau loops. Haha. There was me, thinking simple robe tied at the waist with a belt. The belt was actually such a joy to make and press. So satisfying. But the loops I left for another day. And another day. Until I didn’t really have many days left to submit the finished article!

So I cracked on. And fell at the first hurdle. My smallest loop turner was too fat. The smallest drinking straw I had in the kitchen drawer (for the drinking straw/kebab stick trick) was too fat as well. So I remembered a trick my mum taught me, by tying the long threads left at the end of the seam to the end of a bodkin, or large-eye needle, and pulling through, eye of needle first. So satisfying that I was weirdly excited to do the rest and even made a little graphic tutorial for my sister in law!

There are two inside ties – one front left and the other inside right side seam. There are two belt loops inset on each side seam and there is a thread loop at the right front opening. I’m thinking of doing a tutorial for that too as it was quite fun to do.

I am so grateful to Minerva for the opportunity to sew with this fabric because it has definitely delivered some more valuable experience as well as a super luxurious wfh outfit! I must admit I was terrified of cutting into it at first but once I got going, any fear was allayed, largely due to the quality of those threads. It’s so stable, on grain and not at all like the silk I previously sewed that was fragile enough to catch on the rough skin of my hands! Liberty silk is most definitely worth its price point.

And just to note, it does make me sit straighter, it feels amazing to wear and it has got me out of doing the washing up!

Daniel is of course the man behind the lens and this was such a fun shoot. The look on my daughter’s face was priceless when she poked her head around the bedroom door to see what we were up to. Even more so when Dan said ‘Its not what it looks like’!! Haha. We are so doing our best at being embarrassing parents!

Please note: I am an Ambassador for Minerva and the fabric was given to me free of charge in exchange for a review. I purchased the pattern and all notions required. To see the original article and more of my Minerva Makes. Please visit my Minerva profile.

Retro Butterick 5880 in red leopard print

B5880 dress

Big thanks to Marie @stitchoddyssey and Kerry @kestrelmakes for their great insta challenge, #sewvintageseptember, without which this dress would still be in tissue form, in its little envelope, nestled with the other hopefuls! The challenge encouraged us to sew up our neglected vintage patterns, something I’ve been meaning to do for such a long time. Plus it presented so many inspiring posts as everyone uploaded their gorgeous creations. I’m late to the finishing post but I’m so jolly glad I got there!

B5880 on the Serpentine bridge

I used to sew so many more vintage dresses than I do of late. When I first began sewing I inherited (read stole) a few from my mum’s collection – just basic skirts and tops. And then my love for them grew so much that years later I found myself bidding silly money for 40s and 50s patterns online. I loved the cover art, the pre-cut pieces, the prompts to hand finish and the unfailing elegance of the times.  I learned how to style the finished garment without conforming to an entire vintage look (totally ignoring the wails of the purists!) and made them my own. I’ve included links to some of my faves at the end of this post.

B5880 retro Butterick dress

So what happened? Why don’t I sew vintage so much any more? Well basically, I discovered indie patterns. And later learned to draft patterns myself. And those vintage pattern boxes have since remained closed owing to the rip-off number of hours in a day! That said, I have left a couple of patterns, loose on the top of the pattern box tower, just in case I get a miracle few hours spare to schedule them in!

The pattern I used for this dress is Butterick 5880. A retro reproduction from 1951. I love the sarong-style side drape and the neckline with its little fang-like indents!

Retro Butterick 5880 pattern envelope

It screamed leopard-print at me from the off. But I can never find the perfect scale print in a perfect colour way, let alone the actual perfect fabric weight.

I asked in pretty much all the stores along the Goldhawk Road with not an ounce of success. A block colour probs would have worked fine and that was my next plan and was just deciding on red or black (of course) until I spotted this red, black and grey print in Classic Textiles. It was definitely an Hallellujah moment!

B5880 dress modelled on the Serpentine bridge

So my vision of Rockabilly chic was restored and off I skipped with some cheaper poly for the toile – I always try to mock up in as close a fabric as poss to get best fit – and some anti-static fabric from the little shop next to A-One (never can remember it’s name but the owner is always so friendly and kind). I paid £6.50 a metre for the lining. Pretty much the same as the main fabric because I didn’t want cling or spiky static stuff going on. It ironed like a dream and feels so silky to the touch – red of course!

I only mocked up the bodice. Knowing exactly what the issue was going to be – pooling at the back! The back piece is cut on the fold so to get round this I traced and cut the piece in two, adding seam allowance and taking 2 inches of ease out but cutting and slashing on a line drawn from a third of the way up from the bottom of the armhole, across to the centre back.

B5880 back view

I sewed out a dart on the mock up to check it worked before cutting out my main pieces.

And here is where the fun started. That wrap piece is huge and because I wanted to keep the entire length of the skirt (I know right… where has Janene gone!) I had no chance of cutting out on my tiny kitchen table. I remember thinking laminate flooring would be a great idea in the living room so I could cut larger pieces. And it is mostly. But wiggling crepe and shiny scissors meant I was crawling around on the floor for aeons! Getting up and straightening up afterwards was an insight into being a hundred years old!

Back view of skirt and heels

And just as I’d finished I had to cut the lining, too. All the moaning and groaning that day – you’d never have guessed it was my favourite thing to do!

The bodice came together pretty swiftly. I’m always a bit scared to clip so close to the point of a ‘V’. And you can see a smidge of the lining as a result. But I’d rather that, knowing its stronger as there will be some stress on those points at times. But kudos to the Vilene G710 Light Woven Iron On Fusible Interfacing I got from Minerva Crafts. It was such good quality and it was definitely key for providing just enough structure so that neckline doesn’t roll out.

B5880 retro butterick dress neckline

I pinked the seam edges and the lining edges. Mostly so there would be no additional bulk on pressing. But also because it’s fun!

The main skirt pieces are dead simple to assemble too though I did overlock those seams. The bodice seams are enclosed and it felt safe to pink but when this dress ultimately gets tossed around with a wash load of other stuff, I worried the skirt seams would be more vulnerable and susceptible to fraying. And I didn’t want that after all the effort invested.

Now let’s talk wrap! All I can say is that I’m jolly grateful for that QR code bottom left of the pattern cover, that links to a very good tutorial by Professor Pincushion. I read the instructions included with the pattern about 50 times over and still couldn’t work it out. But the video was instrumental in working out those pleats.

B5880 retro butterick dress shot in a tunnel

I had assumed the wrap was a singular piece. And it would probably work just as well assuming ones fabric is double sided. But I like how much neater it’s finished by being faced. It adds a fair bit of weight though, and there’s quite a bit of stress where that pleated section joins the waist seam so will have to keep an eye on that. The full lining adds even more weight to this dress but its not a bad thing. It slides on with ease, helps the dress to hang better, prevents any show through and feels so special to wear.

B5880 dress and London telephone box

Following the marathon hand finishing session (shoulder seams of lining, joining bodice lining at waist, hemming, French tacks) I almost forgot about the belt! That was pretty simple to whip up though. It’s basically an interfaced tube, sewn, trimmed and turned. Though the turning was not fun at all! Once pressed, the flat end is folded over the central bar of the buckle and hand stitched down. Luckily I had a small collection of vintage buckles to choose from – the asymmetric red one was a clear winner.

Although this is clearly a 50s dress design, it could so easily pass as 80s and be dressed down with Doc Martens and a denim jacket but for the purposes of our shoot on Sunday, I felt the need for glam – heels, care of Shelter Charity shop, Long velvet gloves from British Heart Foundation charity shop and Sunglasses, a lucky find in Cancer Research charity shop. Stockings bought from What Katie Did.

Adjusting stockings on a bench by the Serpentine, London

And yes, actual stockings! I’m so out of practice and really nervous of them pinging loose and ending up round my ankles. But they felt so good to wear with a dress of an ‘appropriate’ length and added to the feel good factor.

The weather wasn’t the least bit inspiring at the weekend but Dan was so keen to shoot with his new camera insisting that there’s no such thing as bad weather as far as photography is concerned. He’s mostly right of course, especially looking back at these photos, and I’m so pleased his eagerness helped me to meet the challenge deadline, but I might argue that wind is the exception to his rule!

 Windy day and wild hair

Some of my other favourite vintage makes:

Photography by Daniel Selway

Testing the Tamzin dress

BHL tamzin dress by ooobop

It’s been a while since I’ve taken on any pattern testing. I’ve been trying to claw back time so I can focus on a whole host of things that I want to work on and develop and I managed to resist the urge until By Hand London contacted me to test the tremendous Tamzin dress. How could I possibly refuse?

It’s so floaty, so folksy yet so cool and classy all at the same time.

And if you hadn’t noticed already there’s some beautiful bonus details which bring the added charm.

A square neckline is always a favourite of mine. I love the clean lines and that it shows just enough skin to keep it classy. The external front and back neckline facing is such a neat finish. I’m sure it helped that I used quite a lightweight fabric to get that topstitching nice and consistent but the proof will be in the pudding when I get my hands on some lovely linen for the next version. I just can’t resist the urge to embellish that facing much like Elisalex did.

BHL Tamzin dress made by ooobop

Incidentally the fabric I used for this was won over a year ago, in the #brightsewing challenge hosted by @thepinkcoatclub and @theunfinishedseamstress. (I had entered my Yellow shiny appliquéd number!) Part of my prize was a voucher which went towards this amazing Atelier Brunette diamond viscose fabric from SisterMintaka. It is such a beautifully soft and draping fabric that I was almost too scared to use it. I wanted it to be for something special and, well now you see it!

I didn’t quite have enough for the full length of skirt – its quite hungry on the yardage due to those pin tucks and the sleeves pieces are huuuge! – but to be fair, I had already decided on a shorter version so there wasn’t any heartache involved. Except I sewed the pin tucks too small!

And let’s just take a moment to ogle at the pin tucks on the sleeves. Aren’t they simply divine?!

By Hand London Tamzin Dress sleeve detail

Before I read the instructions I had anticipated a right royal pain in the arse time of getting them even, especially with drifting draping fabric but there is a nifty technique included to make life so much easier and perfectly sized and spaced pint tucks to boot!

Now you may think I’m being lazy here but another selling point of this pattern is that there are no closures on this dress other than the delightful back ties. I don’t hate sewing zips as much as I used to but the joy in not having to sew one at all is immense!

BHL Tamzin dress handmade my ooobop

I chose the variation with the ties that start from the side front and wrap around the back. There is another version of the tie that starts from the back. But I wanted all that ribbon detail and for it to cinch me in at the waist.

I think you can probably tell already how happy I am with the result.

BHL Tamzin dress made by ooobop

The instructions were super clear, and it was a joy to sew. Not complicated at all but I must add that it’s not the quickest dress to whip up – those added details come at a price of a couple of hours more but it’s totally worth it.

Are you sold? Or have you made one already? I’d love to know what you think either way.

Vintage Laura Ashley Romper

Shelby Romper Suit by ooobop against a white wall

Last weekend was a Godsend. Seriously. As a sewist, who wouldn’t relish permission to sew your undivided heart out for two full days whilst tuned in to all manor of inspirational videos and chat from the best kind of community ever. I’m talking the #SewingWeekender hosted by The Foldline and English Girl at Home, obviously. The event that sparked so much joy and raised so much money for such great causes.

And hey, I made a new outfit in the process, too!

ooobop shelby romper against white wall

I’m not sure if I can ever stop making True Bias Shelby Rompers now. This is my third and still I’m not done!

This wasn’t the intended fabric though. I had factored in some crinkle cotton linen gauze, but following a prewash, it crinkled to half the size and became all elastic and everything. I set about ironing but got bored after the first 20cms and swapped it up for a really old pair of curtains instead. As you would!

Ordinarily I have a reputation for exaggeration, but in this case I’m not joshing. I bought these Laura Ashley curtains in a charity shop many moons ago. Quite excited by the vintage factor. Had to look up those roman numerals though . . .

MCMLXXVIII

MCMLXXVIII = 1978 for the less Roman among us!

I bought them when I was dead broke. And still argued the West London inflated charity shop price! They served my previous two addresses as actual curtains and have sat wantingly in stash mountain for the last 10 years. So I think you might relate to my happiness at using them to make my third True Bias Shelby Romper suit.

ooobop shelby romper walking

I get it now. Using the same pattern over and over. If it ain’t broke and all that. Such an easy gig when it works straight out of the packet. I made my first ‘trial’ one in a very lightweight (quite see through) star-print viscose. And I love it still. The second, more improved version realised in a tropical print viscose and it’s so interesting to see the difference when it sews up in a fabric with a bit more structure. The silhouette is accentuated even more and feels good against the skin being 100% cotton and all. Feels even better knowing how many lives it’s lived and yet 42 years on its still many more years away from a landfill!

That said, there was a little issue with the tiny back straps. They didn’t turn as easily in curtain fabric. It’s a bit of a toughie compared to viscose. So following a wee tantrum, I re-cut the pieces on the bias – remembering a video tutorial I’d watched about cutting rouleau loops on the bias – and it bloody worked a treat. Thank goodness I had enough fabric left!

ooobop bias straps for shelby romper suit

This isn’t the end of this particular project. I’ve got plans. Mostly to mess things up! You know what I’m like with my colour palette – there’s not a scrap of black going on, save for the buttons. So I’m going to add some paint. Just a bit. And not quite sure where and what. But watch this space!

Thank you Daniel once again, for my lovely photos. Especially when the clouds dictated we should never have strayed further than the garden gate, let alone to the riverside. But I’m jolly glad we did.

ooobop shelby romper hammersmith riverside