Tropical Shelby

ooobop shelby romper in tropical print
What bliss, when you have precious little time to play with, but you have a sewing pattern that you know fits straight out of the packet! I’m back again with another True Bias Shelby Romper suit. And I love it just as much as the star version… don’t make me choose!

The fabric is a beautiful quality viscose from SewSewSew. Once again the sewing community came to my aid when I asked if anyone knew where I could get my hands on some tropical print. And Amy from Almond Rock so kindly pointed me in exactly the right direction

Tropical print version of True Bias Shelby Romper

I feel all ‘holiday’ in this one, ditching the Docs for a pair of espadrilles. Believe it or not, I’ve never owned a pair owing to my fat feet and inability to squeeze my toots into them. But Asos have a wide-fitting shoe section and I thought I’d give them a shot. Mostly very happy, especially with the fit. I just have to learn to walk in them and keep my heels from lifting out. Any tips?

Ooobop Shelby Romper

Despite having a mahoosive collection of salvaged and inherited buttons, I still couldn’t muster up five that were just right, so I bought from a seller on Ebay Number-Sixty – who have a huge selection of buttons at very reasonable prices. You can’t really see from the photo but they are olive green with subtle swirls and following the last episode of The Great British Sewing Bee, I was totally inspired by one of the contestants, Nicole,  to sew them on with a pop of contrasting orange thread.

close up of buttons sewn on with orange thread

There was one little tip I forgot to share last time which is so helpful. The instructions advise to stitch in the ditch on top of the shoulder seams and centre back seam to secure the facing piece down. I can’t believe up until now I have been painstakingly handstitching the facing to the seams. This advice will be carried through to all my projects where applicable. It’s so much more effective. And quicker!

I really do love this pattern – the ease at which it sews up right through to finished romper suit. It truly is so much fun to wear. So much so that I can’t wait for my next order of fabric to arrive so I can make my next one. Haha… I make no apologies. It really is that good!

ooobop Shelby Romper

Lovely photos of course by Daniel Selway


True Bias Shelby Romper with stars

ooobop True Bias Shelby Romper suit

All the kisses for the sewing community today. But mostly for The Foldline and their generous Instagram campaign: Random Acts of Kindness and to Amy aka AlmondRock, for tagging me! That in itself presented a fuzzy, warm virtual hug but the prospect of getting to choose a pdf pattern of choice was such an awesome treat!

I was literally that kid in the sweetshop. I don’t know if you’ve visited The Foldline’s pattern store recently but it is mind-blowing. So many super stylish patterns – Indie and Big 4. Put some serious quality browsing time aside before you head on in!

After a delightfully long peruse fuelled with umms and ahhhhhs a-plenty, I decided on the True Bias Shelby pattern. Especially after I spied Patsypoomakes‘ version – which was definitely the deciding factor.

The Shelby is a very versatile design that delivers a v-neck, princess-seamed dress and romper suit in both maxi and mini lengths, with 2 sleeve options.

True Bias shelby pattern line drawing

So reminiscent of my 90s youth – styled with DM’s, lockdown hair and a pair of shades to hide the baggy eyes. Much the same as I would have done thirty-odd years ago except hair probably would have been  loaded with half a can of Elnett, crimped and backcombed for added bigness!

I have never used a True Bias pattern before and I really didn’t know what to expect with regards sizing, clarity of instructions, general fit and ease of sewing etc, so I opted for some super drapey stash fabric to toile it. After all what were the chances of a romper fitting in all the right places, first time round and without a ‘hungrybum’ feature?

I didn’t think for one minute that this was going to fit without some inevitable adjusting but I was going to enjoy the process all the same. I clipped and overlocked and pressed all the seams and it brought so much joy to see it taking shape. I diligently followed every step of what is probably the clearest most concise set of instructions I have ever encountered all the while believing this was destined to be a test garment only.

ooobop True Bias Romper set back view

The more I progressed with the sewing the more it became apparent that I wasn’t going to look like a giant baby (I did have some initial doubts) and it was going to be a perfect fit and I was beginning to feel a bit sad that I might not have used the best fabric for it to be actually wearable. It looks pretty decent in the pics because it was a relatively cloudy day today. But it’s really sheer. Like hold-it-up-to-the-light and-see-absolutely-everything sheer!

I am determined not to let these go to waste and so my lightbulb moment came with the discovery of my ever-so-nineties Pineapple Dance Studio cycling shorts! No one would really know in any case, and everyone is saved from seeing my actual butt!

ooobop True Bias Romper set back view

Princess seams always produce the smoothest and flattering lines IMHO but the waist ties at the back cinch in a waist I never knew was there! Creating them was a breeze with my Clover Easy Loop Turner and they are the perfect length and width to effortlessly tie into a cute bow.

You can totally tell how much thought and consideration has been put into drafting this pattern. I had no choice but to work on it in small, often hour-long stints and yet it was so easy to pick back up on where I left off each time. Even at my most tired after a very long working day, the instructions were so clear, the illustrations were brilliantly presented and it sewed up so effortlessly. I couldn’t recommend this pattern more if I tried!

ooobop True Bias Shelby


Vintage Simplicity 6772 shirtdress revisited

simplicity 6772 vintage shirt dress

There is joy to be had when you revisit a pattern that you know only needs a couple of tweaks. Even more joyous when the pieces have been sat in a basket, all cut out and are ready for a simple sew-together.

I’d almost forgotten about it. Though to be honest, the main reason for it sitting pretty was that I was unsure about the colour. I liked the pale blue, linen-like fabric when I scored it cheap all that time back from a closing-dowm sale in Ealing, but I just didn’t have a plan and so it took up residency in stash mountain for a very long time before it’s destiny was decided.

A little burst of consciousness about the wastefulness of my impulse buying spurred me into action to finish any WIPs before buying any more fabric and so I paired it with vintage Simplicity 6772 – one of my favourite vintage shirt dress patterns.

simplicity 6772 sewing pattern

I used this pattern first in 2015 from suiting fabric – my worky shirtdress – which is perfect for an Autumnal wardrobe and it gets a lot of work-wear. This next version was going to be great for those warmer months.

It sewed up beautifully. I took a smidge out of the ease of the sleeve head; shortened the hemline a little and I just loved the way it shaped up with all those darts. I used to hate sewing them but it really doesn’t bother me now especially when on realising how important they are for a great fit. It comes together pretty quickly, with no lining, and precious little hand sewing except for the hem and attaching the under-collar to the neckline.

simplicity 6772 handmade shirtdress

The only thing that bothered me with this pattern and fabric combo was that it looked a little ‘nursey’! I’m so not used to wearing light colours – my usual palette very much centres around red and black – and it was going to take a bit of getting used to, so I added some black buttons to subtract some of the ‘clinical’!

And I’ve been very happy wearing it until a ‘friend’ jokingly asked why I was dressed like a nurse. The cheek of it! Really struck a nerve and I was not best amused!

So, not to be defeated, I had a little rummage in the trim box and found some lovely ribbon-insert braid – just enough to edge the collar and sleeves.

I’ve just spent a lovely long weekend away in Devon with Mr O (hence the random poses in fields of cows) and this was a great little hand-sewing project to complete in the hotel room when those ominous black clouds did their thing outside.

ribbon-insert trim on collar

And I’m really happy with the results. I think it’s a little less ‘care-worker’ and much more ’50’s diner waitress’ now. But that’s ok. I can live with that!

simplicity 6772 trimmed collar and sleeves

I’ve got more love for it now. Which is a good thing because this dress is so easy to wear and so flattering, IMHO! All thanks to some great pattern drafting and lots of perfectly placed darts.

back view of simplicity 6772

The journey of this dress definitely provoked some thinking about my buying habits. My bad, bad buying habits where I’m swayed by a bargain and the belief that a cheap length of fabric will have an ideal use at some point. Unless it’s of fairly good quality and at the very least within my preferred range of colours, it’s not going to be put to use without compromise. And I don’t want compromise. It won’t feel right and that in itself will not be a fair exchange for all the hours of work invested. And also, I’m so over that ugly box tower of fabrics looming over my bed. Lesson learned… I hope!

Photos by Daniel James Photographic

What I wore to the Dressmaker’s Ball 2019

ooobop wearing V8814 dress

‘Get me to the Ball!
‘There is a Disco at the Palace!
‘The rest have gone and I am jealous!’

Just like Roald Dahl’s Revolting Rhyme about Cinderella when she was stropping out about a lack of invite, this is exactly how I was feeling when I learned too late about the first dressmakers ball in 2017.

Needless to say I subscribed to all the hashtags and signed up to get news of the next one and snapped up that ticket as soon as it was live.

The event is organised by team Crafty Sew and So and this year’s was at The City Rooms in Leicester.

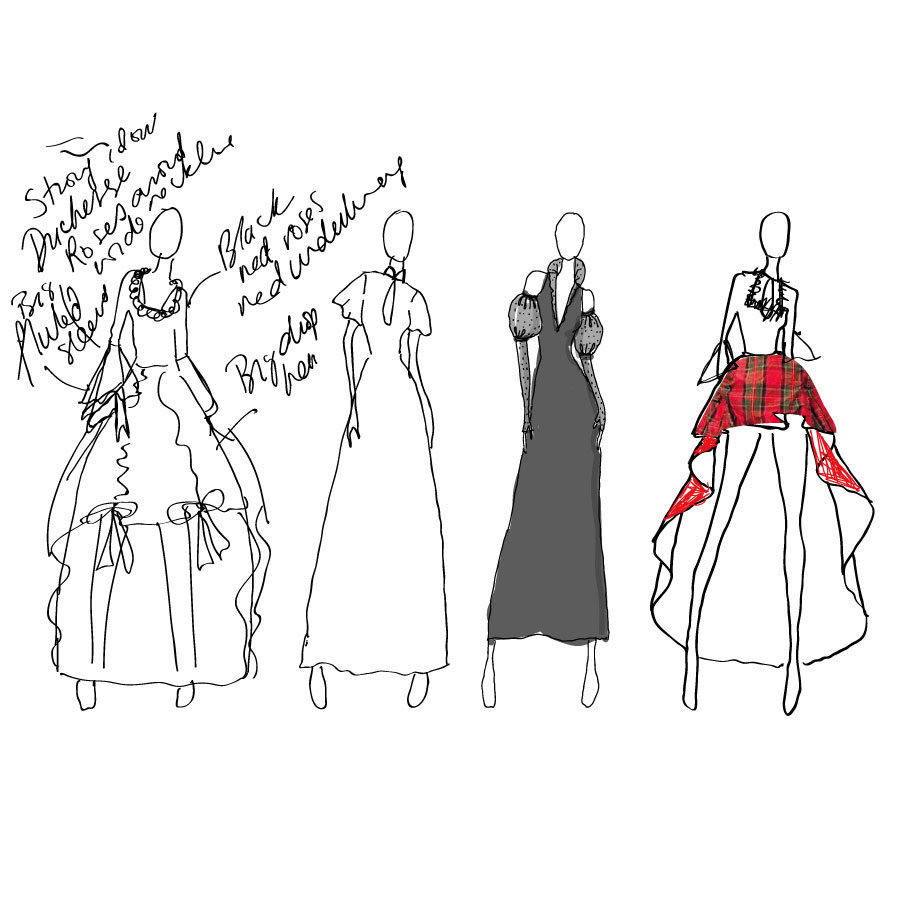
The minute I had that ticket secured, my head flooded with all the possibilities for a free range, self drafted no holds barred gown of dreams, all for me. Elizabethan ruffs, balloon organza sleeves. Crinoline skirt. Bustle perhaps? I had a year after all.

designs for ooobop ballgownTruth be told and no surprises here, I decided on the dress with just over 10 days to go. You know how it goes ~ work, family, work and more work. And I’m a little bit sad to say that my all time avant-garde number ended up straight out of a packet.

Vogue pattern V8814

A lovely pattern for sure but the proof was in the making: No toile time. No anything time. Time? Definitely a thing of the past. Enjoy it while you can kiddos. It passes you by on the blink of an eye with every added birthday.

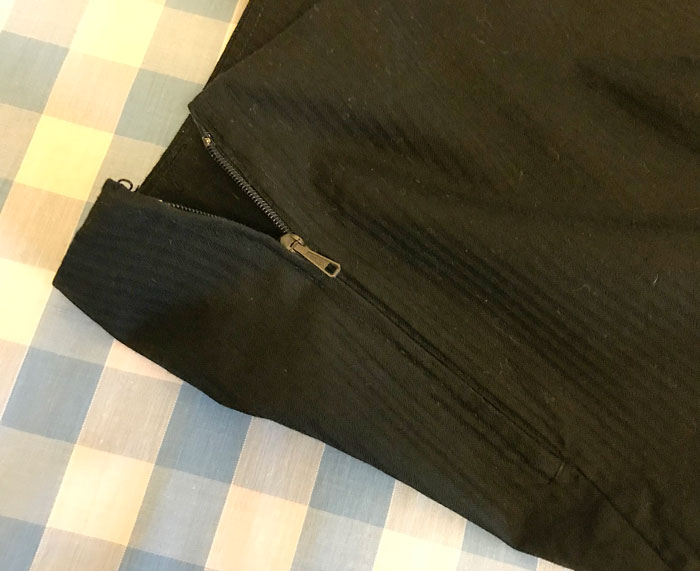
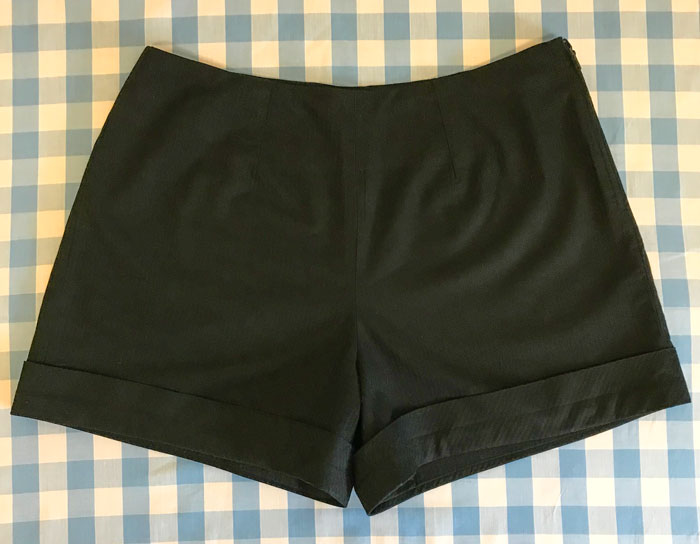
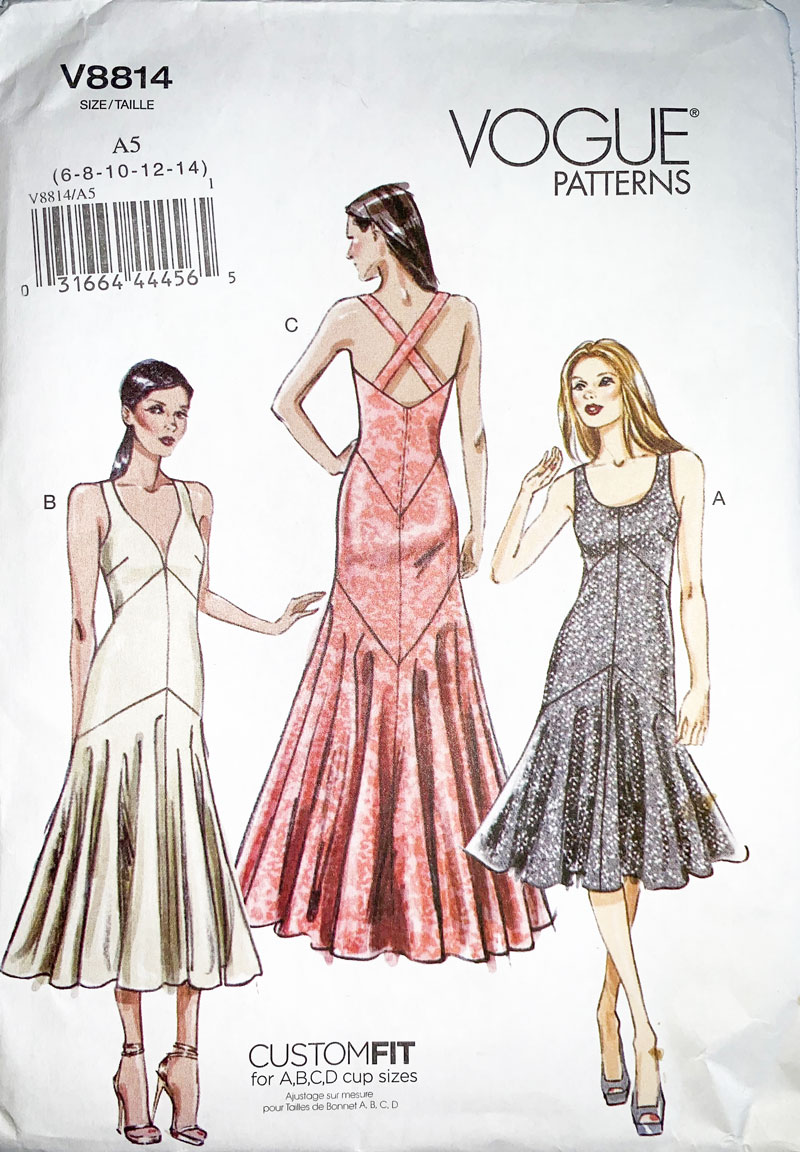
Now let’s discuss this slinky Vogue number V8814. I chose floor length, version C. I was going to a ball after all and visions of slow-mo sweeping skirt-motions danced in my head. I opted for the one with plunging neckline and crossover straps at the back. The bodice is snug to the hips and then all the volley is in the circular skirt.

I am so grateful to those pattern companies who display the finished sizes on the pattern pieces. Lord only knows why quite so much ease has to be added. I’d have swum in the suggested size according to actual stats!

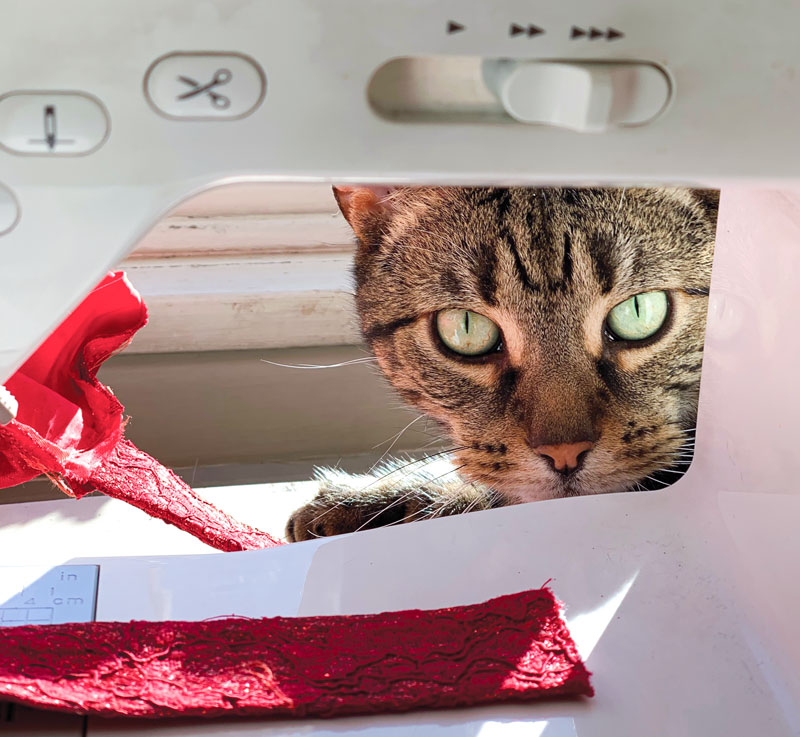
And I am so delighted to have chanced upon a pattern that for all it’s sophistication was a total breeze to put together! The only area that needed fixing was the neckline which gaped a little so I hand-sewed some 5mm wide elastic along the inside of the neckline, stretching slightly to pull it in more to the chest. And the only tricky bit was convincing Pants I didn’t need his help!

Pants the cat helping me sew

I’d bought a singular ticket to the ball just because I worry about making plans with people and then have to cancel due to work commitments. Plus I knew that I would meet people there. The sewing community is such a welcoming and fun place, of that I was certain.

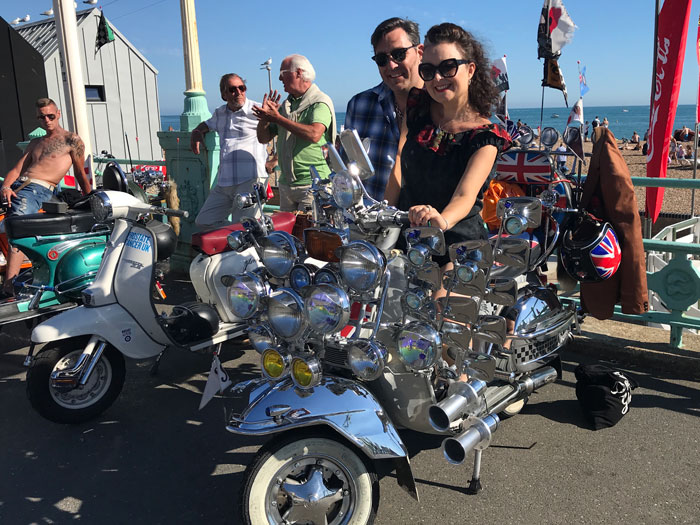
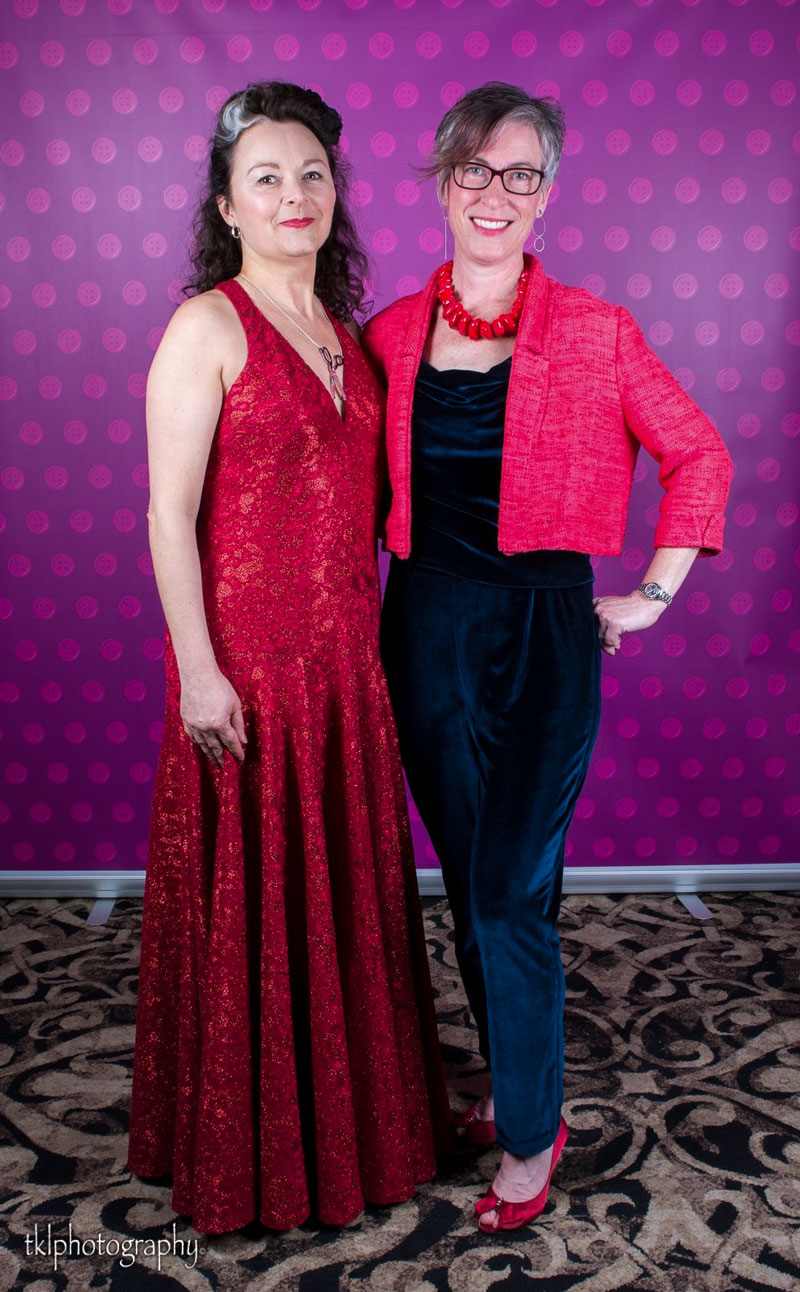
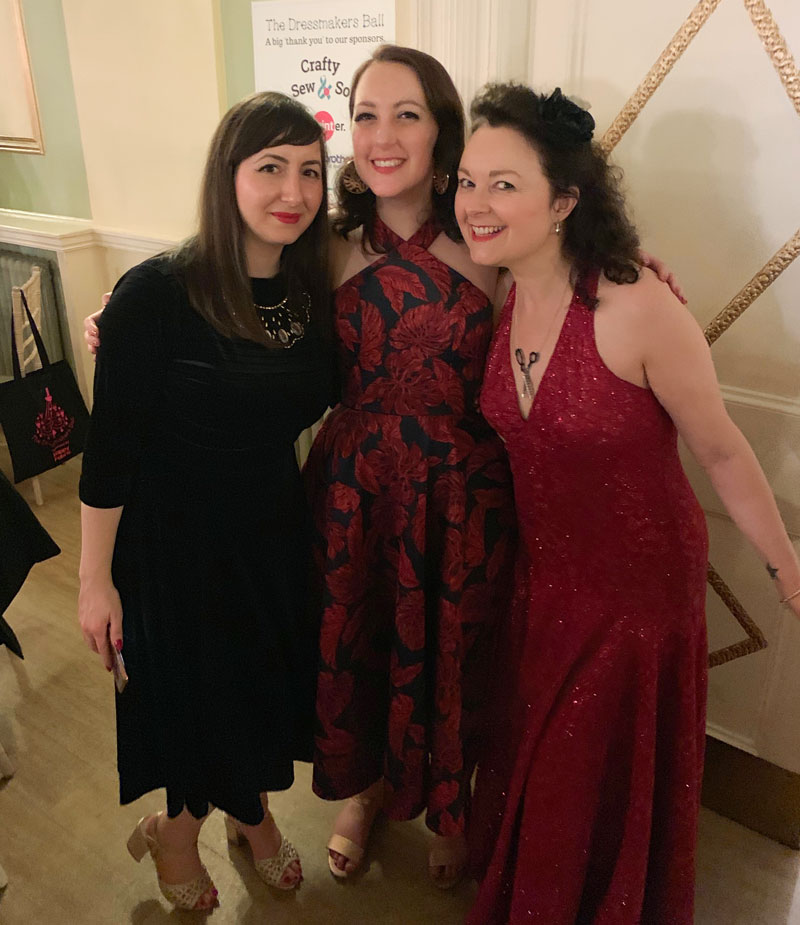
But that didn’t stop me from being self-conscious in front of the photographer. I’m so spoilt by Mr O’s awesome willingness to oblige my blog shots that I forget what it’s like to stand and pose in front of someone you don’t know! Thank you TKL Photography for bearing with me and thank you Tamsin, for posing with me and making me feel a little less awkward!

ooobop with Tamsin from Pimp my Curtains

We decided upon fishbowls of gin to relax us even more!

Tamsin and ooobop drinking gin

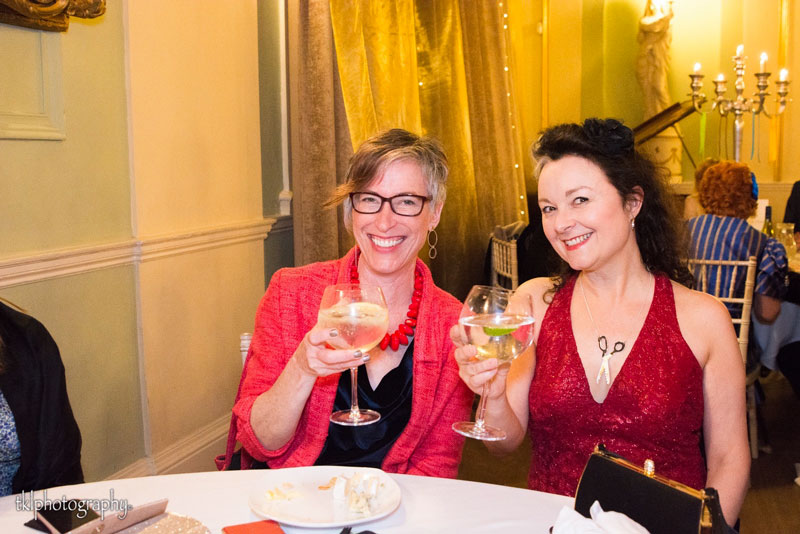
It was such an amazing evening. A ballroom brimming with stunning guests all adorned in bespoke, handmade attire, dancing to some really cool covers by a brilliant live jazz band. I spent most of the evening gawping at stunning outfits and discussing them, clinking and raising a glass at every opportunity to the brilliant hosts and the awesome sewing community.

And look who else I found: Marie from A Stitching Odyssey and Amy, blogger at Almond Rock and editor of Love Sewing Magazine.

judges at the dressmakers ball 2019

Not at all trying to fraternise with the judges before the catwalk competition – honest, guv!

So why have I taken so long to blog about this dress?

In short.

The fabric.

I’m ashamed by my panic purchase of glittery fabric.

‘I want a dress! I want a coach!
‘And earrings and a diamond brooch!
‘And silver slippers, two of those!
‘And lovely nylon panty hose!

Perfectly weighty and with great drape for the skirt, I chanced upon it in the Goldhawk Road. It appears to be a red lace bonded over a synthetic satin with glitter glued in the gaps of the lace.  I joked about the fire-hazzard potential should I stand too close to a candle, given the probability of not a single natural fibre involved. But it was met with a straight face. The seller was already was unhappy that my need for five yards meant discarding the first couple of metres on the roll as the lace was clearly bonded in sections. Lucky I noticed the join because he sure as hell wasn’t going to point it out!

But I did not question the glitter. 

Recently, my day job has involved lots of work relating to the harmful effects of plastic on the environment, and though I haven’t come across any reference to glitter in the books as yet, this quote by Alice Horton, a research associate at the UK’s Centre for Ecology and Hydrology, jumped out at me and touched a nerve:

“While there is currently no evidence specifically on glitter being bad for the environment, it is likely that studies on glitter would show similar results to those on other microplastics”.

And now I feel bad. For not thinking it through. For the trail of glitter I literally left behind. I don’t exaggerate when I say that I left a red glittery bum shape on my seat when I stood up after dinner. And I’m sorry for anyone who sat in my place afterwards and took a little piece of me home with them.

To this day I’m finding that damned stuff on my shoes, in the carpet, on the cat… It’s never going to go away. And then it’ll end up in the sea and all the poor fishes will be lunching on it.

And I know I can’t un-do it. But I can not-do it again. No more more glitter for me. I need to think before I buy. I just can’t cope with the guilt! Or do you think I’m over-reacting?

Vintage Butterick coat with added sparkle!

butterick 547 coat by ooobop

Returning to a sewing pattern you’ve worked with before is like turning to an old friend for advice and reassurance – you’re assured of the fit, the skills needed and prepped for pitfalls along the way. Mostly!

And if like me, you paid a pretty penny for the pattern, you’ll get immense satisfaction from apportioning the cost. I won Butterick 547 fair and square by charging straight  in to this crazy bid war! So now the pattern only cost £25 for each coat which sits marginally better, lol!

Butterick 547 coat full length

I made the first version in 2014, truly believing it would be my forever coat – my dreamcoat – but sadly there was an issue with the fabric that I didn’t foresee. So I had to make another in something more stable.

I found the ideal fabric at The Great British Sewing Bee Live show a couple of years back. Pretty sure the seller was M Rosenburg and Son . It’s a fabulous giant dogtooth with teal metallic highlights. It’s got a great weight and a great drape, and it’s stable weave means no stretching or kinking at the hemline.

vintage Butterick coat by ooobop

I just adore the fit – snug to the waist and lapping round my legs – the silhouette is truly 50s. Four buttons to the waist allows for the lower ‘skirt’ to separate as I walk along and a flash of the blue lining does everything to attract attention and some lovely comments.

ooobop vintage coat sunrise and swan

butterick 547 vintage coat

Sewing the shell pieces was a breeze but I stalled when it came to the welt pockets and the button holes. They call for a little more concentration and I had to psyche myself up before cracking on with that stage. But I practised on scrap pieces to remind myself of the process. The main thing that worried me was the fraying of the fabric and those tiny welts for such thick fabric. But I remembered seeing how some bloggers employ the help of Prym Fray Check and it definitely helped. In fact ended up using it on all the inside seams too. I know the seams are all ultimately hidden by the lining but sealing those edges just reassured me that it will hold together over time. Nothing to do with an unthreadded overlocker and a dose of lazyitis, I assure you! I also invested in a Clover buttonhole cutter to cut the reverse of the bound buttonholes. I can’t tell you how satisfying that little crunch feels when it bites through the coating to create a perfectly straight line. No faffy snipping with pointy scissors any more!

vintage handmade coat bound buttonholes

I don’t usually go to that much effort for many of the garments I make but I have to say, it’s always worth it. Buttoning up this coat becomes quite the ceremony. Especially with those heavy vintage buttons … feels so good!

butterick 547 button detail

So actually, all the tricky bits were a breeze. But I shouldn’t have been so smug so soon as I had a minor meltdown about the sleeves. (Fat lot of good my old friend is!) I’d shortened them at least an inch too much the first time round and forgot to unfold that pleat in the pattern pieces for this time round. But I was inspired to use the leftover fur for some cuffs. I sewed them on with half the hem allowance and folded them back with an inch of the fluff to the inside (if that makes sense) and voila – the perfect length and actually a stylish feature to compliment the furry lapel. I can also fold them down to extend beyond my fingertips if I forget my gloves!

Vintage coat cuff detail

Butterick 547 collar

Most of all I loved all the hand-stitching on this coat. Sewing on the buttons. Sewing down the welt edges, sewing in the lining and catch-stitching the hem. I found it really satisfying and very relaxing. I just took my time and relished each stitch, very aware at how far I’ve come with finer stitches over the years. A marked difference from the whinges about it being such a chore the first time round.

I love that most people have no idea that this is sewn from a vintage pattern. Which verifies it’s classic style.  It really is timeless and classy and at some point I will make it simply in black for a more formal occasion. And then I can apportion that pattern cost further!

butterick 547 salute

I’m so glad I made it in time for the cold snap. I really hate the cold so much and yet I’ve never got enough of the right clothes. Mainly because I am now completely allergic to buying RTW and I’d sooner sew than knit. But hey, the only numb part of me on the day we shot this coat was my toes!

Lola Ramona boots

And I have to address the photos of course, taken by my wonderful hubby  – mostly known for his rock and roll bass playing but also a superstar behind the lens. You can see more of his photos at Daniel James Photographic. He was keen as mustard to get up and out before 6 in the morning, taking the bus to Kensington Gardens  and walking to Hyde park before the sun rose. And it was glorious. So pretty and quite breathtaking as the mist rolled in from the Serpentine as  the swans and the Mandarin ducks preened themselves in the golden rays. So magical.

butterick 547 vintage coat

I’ve had a Google to see if anyone else has made this coat up but so far have drawn a blank. Surely I can’t be the only one? Maybe that’s why I ended up paying the earth!

ooobop sitting on a bench

Thanks as always for popping by. Hope you’ve got some lovely plans lined up for the weekend. And I’ll look forward to bumping into some of you at the Spring Knitting and Stitching Show next week… eeek!

School reports (or shorts to the layperson!)

I have created some fabulous projects recently (blows own trumpet): A mother-of-the-bride dress for me, an original and self-drafted dress design for a new customer and a tiered dress that I helped a friend to realise from some fabulous sketches she’d made. But before you get too excited, those posts are very much waiting on the back burner of the publishing pile until I can get hands on the photographic evidence.

In the meantime I have a small and rather underwhelming pair of shorts to report. Or ‘school reports’ as the cheeky cockney mister would have them called!

wearing handmade in Quadrophenia Alley
Classy shot in Quadrophenia Alley, Brighton!

This is third time out the packet for Simplicity 2659. Such a great little pattern that came free with Sew Magazine a good few years ago. I made my first ever pair (see here) in May 2012 where I declared it a small baby step towards the making of actual long pants / trousers. And I followed up with a second more wintry pair here. Simplicity 2659 easy chic Six years on I still haven’t made any ‘longs’ for me but I did make a couple of pairs of satin brocade jogging pants for my youngest so I guess that counts… in a toddler step kinda way. I’m itching to try drafting a proper pair for myself as I’m convinced its the only way to get a proper fitting pair. Just got to find some time… and the courage!

handmade shorts simplicity
Even classier shot, in Brighton, day after Pride!

The only thing different I did in the making of the shorts this time was to invest in a facing rather than use this twill tape to finish the waistline. Twill tape worked great for the last two versions. It certainly is a quick and unfussy operation but I didn’t have any left and couldn’t even wait the single day for a Prime delivery! So I measured 7cm down from the waist of both the front and back sections and traced off the top portion of the pattern. I then closed up the darts to form facing pieces, cut the pieces and sewed the right hand side seam and pressed open. The zipper is on the left and so the left hand side of the facing was going to be slip-stitched to the zipper tape. With right sides together I sewed the facing to the waist seam of the shorts. I understitched that seam allowance to the facing, close to the line of stitching to prevent it rolling out and also tacked the facing to the front and side seams.

Talking zipper – I hand sewed it in this time. Just because I had a spare mo and also because I had the inclination. I like the little visible little prick stitches and it feels like I have more control over the insertion. I always seem to miss catching in the underlap of the overlap when I sew by machine. If you know what I mean?! I finished off with a hook and eye at the top. lapped zipper I just love the turn ups. In fact I get a little moment of joy from sewing the bias strips onto the hemline. It’s like they bring the party to an otherwise ridiculously small and simple garment. And of course because they are cut on the bias there is a contrast in the direction of the fabric pattern. In this case the diagonals meet the vertical lines in the fabric. I can’t explain why this makes me so happy. It just does! You might have to imagine what they actually look like as it appears that it’s harder to shoot a pair of black shorts than actually make them! simplicity 2659 shorts And I finished them up just in time for a little day trip to Brighton. This weather is still  up until Sunday was sweltering in the UK and I’ve decided that minimal coverage of body is the only way forward! Ordinarily I’m a little bit shy about too much naked leg on display but in Brighty, anything goes and nobody bats an eyelid so I was happy as Larry paddling in the sea…. simplicity 2659 shorts … and sitting astride a scooter, care of Mod Roy! But boy did I feel like a traitor. My dad was a rocker after all! (Spot the guy who seriously wanted to feature on ooobop!) With Mr O on Modroys scooter Incidentally. The top I am wearing is handmade too. The pattern I used is Butterick B4685 . I made it from some fake linen border print fabric along with a matching skirt and blogged it here.

French Gypsy Dress

1952 French Gypsy dress

And finally, after two years of waiting in the wings, and following a match-made fabric and pattern eureka moment, my French Gypsy Dress is finished and worn already.

The pattern is by Sew La Di Da Vintage, and I knew I would love it but I could never quite decide on the fabric. The samples shown on the site and exhibited at the shows I’ve visited are so gorgeous I could never hope to get close. I love the packaging and the styling of all the patterns.

Gypsey Dress sewing pattern

I found the fabric online at Minerva Crafts, which is unusual for me. I much prefer shopping in real life! I have to touch and feel and think about it and walk from shop to shop and talk about it with the assistants before I make a call. But when I found this beaut on a random scroll, I didn’t give a second thought to what it would feel like or indeed what it was for – I just loved the colours and the black background of course. It’s a stretch cotton sateen. Quite sturdy, moderate stretch and a great lack of creasibility!


Thing is, I didn’t connect to two to begin with. And when sometime after I considered pairing them I thought it would be too weighty for the gathered upper bodice and sleeves. Though I knew the skirt would totally benefit from a bit of weight and the silhouette would be awesome.

French Gypsy Dress back

Then I got busy and all sewing plans were out the window until I got a free weekend. Woohoo! A whole undisturbed Saturday and after a pep talk with my mum it was full steam ahead. She basically said, “What are you so scared of? If it all goes pear shaped you can just get some more fabric.” Which is true of course, if not a little bit wasteful. And I could have tested on something else first but I had a window of opportunity and I wanted a new dress right there and then!

And I couldn’t be more pleased. It fits in all the right places, is flattering and comfortable too.

Construction-wise its really quite simple. The most complicated thing is taking time to make those bodice and sleeve gathers even. I know now after heaps of lazy and rushed gathering attempts in the past, that the key is to sew 2 rows of gathering stitches, either side of the intended seamline and there’s every chance your gathers will keep evenly distributed and pucker free.

1952 French Gypsy Dress

I made the binding for the neck and sleeve edges from some leftover black duchesse satin. I was prepared to rip it off if it didn’t work because I wasn’t entirely sure if it was the right kind of fabric for the job. But it was. Just perfectly right, actually!

There is a length of elastic inside the bias casing that starts and ends on the back sleeve seams. This is such a great idea because it allows for the dress to be worn on or off the shoulders and keeps the back bodice pieces completely flat. Incidentally there are no darts in the back pieces of this dress. Instead, the instructions call for a brilliant fitting stage whereby the back seam is pinned to fit and marked with chalk or an erasable pen (you will need a partner for this). Then the seam is machine tacked and pressed open so the creased edges give the perfect guide for zip insertion. It’s such a cool stage of instruction and one that I am definitely going to consider using on future makes. Is this a typical vintage construction method, I wonder?

French Gypsy dress reflection

I’m so happy with the outcome. It brightened a very drizzly day and feels so great to wear. And better still, it’s another strike off my #makenine2018 – wahooo!

I might try poomfing the skirt more with a layered petticoat and styling it up with flowers in my hair. Definitely a contender for what to wear when the Frida Kahlo exhibition hits the V&A this year.

Well it’s back to work tomorrow. But I’ll be returning with a head full of plans. That’s the trouble with a bit of time off!


Vogue Cocktail Hour dress V9241

V9241 cocktail dress

cocktail hour eve appeal

The first time I’d heard of the Eve Appeal was when I took part in last year’s Vintage Sewalong campaign. They are the ONLY UK  national charity that raises awareness and funding research into the five gynaecological cancers so it wasn’t too much of an ask for me to join in the Cocktail Hour once again, and help McCalls promote a range of Vogue patterns that raise good money for such a great cause.

Last year I made Retro Butterick 5813 for the Big Vintage Sewalong 2016. This year I chose Vogue 9241, a fabulous design by Kathryn Brenne.

V9241_PATTERN_COVER

A little bit Helena Bonham Carter, A little bit Anne Robinson, perhaps… but totally full of character and no doubt a talking point at a cocktail party. Sadly the only cocktail party I’ve ever been invited to was the one at The Knitting and Stitching Show at Ally Pally and I was typically too busy with work to attend. Though I prefer to think that I have been to loads and they were so good, I’ve clean forgotten all about them!

But if I do ever get another invite (nudge, nudge) I would be proud to wear this dress. It would rock a room of standard LBDs and not leave without comment.

I chose this design because of that awesome collar, of course, and because it reminded me of my birthday dress – the skirt section at least – and I considered using silk dupion, the same. But not only do I not like doing things twice, I find the suction of creativity too much to bear if I copy what’s on the packet. ie a red silk dress. I felt like black would have hidden too  much of the detail so I went a bit off piste and used a pinstripe suiting fabric instead, lol!

V9241_cocktail_dress_4

I wanted those pinstripes to emphasise the godets and that collar. Actual stripes would have been a bit too cray-cray (mmmm…. maybe next time though?!) I really wasn’t 100% sure it would turn out as special in what is effectively a boring cheap suiting fabric!

But it did. And I am so happy. Which is lucky really because I hadn’t left any time to change it up!
This dress really isn’t as complicated as it looks. I wouldn’t go as far as to say it’s a doddle but really just more time-consuming than anything. It needs a fair bit of yardage too so watch out if you’ve got any big ideas on fancy pants fabric. It could end up costing an arm and both legs!
V9241_cocktail_dress_5
One thing which I must point out is that there is an error on the layout and pattern pieces. The instructions say to cut 2 of front which threw me a bit because there was no reference to use it anywhere. The layout plan indicated the same. I wondered if it could be a facing/lining of sorts but a quick Tweet message to McCalls confirmed it was an error and that they had contacted the US office to amend.
This pattern has a massive amount of ease. It’s so helpful to have body measurements and corresponding size table on the packet but better still to clock the ease on the pattern pieces themselves. Not all pattern companies do this so kudos to Vogue. With that info at hand, I realised I could afford to drop a whole dress size. I’d suspected I might have to do this because the pattern image itself looks a little bit roomy. I like things more snug, like a hug!
V9241_cocktail_dress_6
The collar is sewn front to facing, then the wire is sewn to the seam allowance of the outer curved edge before turning out. The wire is sewn in using a wide-ish zigzag stitch making sure to keep the needle either side of the wire. Requires a fair bit of concentration. Frightened the bloody life out of me when I took my eye off the ball and the needle clonked on the wire!
V9241_wired_collar
This is the second time in a month that I’ve had the need for animation wire, the first being for the wings of Amelia Fangs outfit. I ordered some more off Amazon. Affiliate link here:

I ordered all three weights as I really wasn’t sure what constituted ‘medium weight’. Initially I tried the lightest one but it was a bit flimsy so I opted for the 2mm diameter.
I’ve been having a lot of fun positioning the collar in all sorts of ways. But there would be more fun I’m sure if my fabric was sturdier or interfaced to give it a bit more structure. I could go totally could go totally Maleficent! This pinstripe stuff is very soft with quite a bit of drape which still works well, mind.
V9241_cocktail_dress collar
The skirt is all about the godets. How do you even say that? Godettes or godays? A little care is needed to insert the points accurately into the open seams of the bodice but if you’ve ever made quilt blocks with inset seams you will be walking it!
I noted the length was kinda granny for me. So I lobbed 4 inches off before I cut it out. And it reaches just shy of knee length now. But by nature of how the godets are tied up inside, I can just as easily lower the hem a couple of inches or so if I must be more demure!
I pretty much followed the instructions to the T but I could have done with taking some of the excess out of the back bodice length – that’s always an issue for me. But skirt seciton moves around and drapes so unusually, I don’t think it’s a biggie! And I hand stitched the bias facings of the armholes, rather than topstitch as instructed. Call me old fashioned!
V9241_cocktail_dress_3
So I am the last entry on the Vogue Patterns Bloggers Calendar 2017. I initially thought that was the best position to be in but the mash-up of anxiety and inspiration was building with each gorgeous post that popped up, every month.  In case you didn’t catch them all, click here to the amazing contributions from all the fabulous sewing bloggers. I just love how everyone has put an individual spin on their own cocktail dresses.
I do hope that some or one of these at least will inspire you to buy a pattern from the Cocktail Hour selection and rustle one up for yourself. Or maybe even buy one for a gift for a sewing friend. All helps towards the amazing work done by the Eve Appeal.
Thanks to The Foldline for including me in the line up, to Dan for the fabulous photos and also to Aska and Tom at the Thatched House in Hammersmith for allowing us to shoot them in their lovely pub.
 

Almost naked in a McCall’s M7542 Lace top!

M7542 lace top

It won’t surprise you to know that this wasn’t an intended ‘next one on the list’. In fact, to be fair there is no ooobop project list that remains unedited for more than a minute. I even announced a break from self-sewing in my previous post. I am indeed an experienced saboteur of my own plans.

But in this instance I am totally blaming Sam, editor at Sew Now magazine for the delightful interruption of production. She kindly sent me a copy of issue 11, thinking the free pattern, McCall’s M7542 would be ‘very me’. She was very spot on. And I was instantly drawn to view B


The pattern itself is very simple, non-fitted – save a couple of side bust darts, and even though those view B sleeves look dramatically difficult, they are nothing less than a kind of dropped hem circle skirt that falls from the elbow instead of the waist!

So a quick scan of the instructions reaffirmed my plans for not toiling! I just picked the closest size to me and cut the tissue pieces straight out. I didn’t even trace them first. That felt a bit rebellious to be honest. I always trace things off. ‘Just in case’. You know. Or maybe you don’t!

M7542 handmade lace top

All the same, I wasn’t going to go all guns out on some fancy expensive fabric, mind… just in case. So a little trip to Dave the Drapers in Shepherds Bush Market, found me some cheap lace in case it didn’t quite go to plan. And yes that lace is cheap. £1.25m cheap! And. Plus. A gazzillion volts of static electricity told me so!

M7542 handmade lace top

But… hand cream saved the day! I kid you not, just rubbed some in my hands – which are always dry as some bones – and ran the fabric through newly moisturised hands. Just to see. And guess what? Not one single, tiny crackle!

M7542 lace top detail

Now as you can see, the fabric has a fair bit of show-through so my main concern was keeping those seams neat – not so much that my bra would show. Priorities, right?! French-seaming was the way forward and with narrow zigzag stitch to account for a bit of stretch in the lace. I had to concentrate and take time over this as the prospect of unpicking was terrifying and probably impossible tbh. All the little stitches properly embedded and camou’d in the lace. But worth the effort. I just love how the joins are visible.

M7542 lace top and short skirt

The only thing I changed up was substituting the neck facing for a satin bias edging. The binding also edges the opening at the back and I sewed a single large popper at the back for the closure. I had originally considered a rouleau button loop but that seemed like a lot of effort for such little exposure – I wear my hair down most of the time so it’s covered up anyway.

The lace trim just finishes it off nicely. I had no fraying issues, but I didn’t like the harsh edge once cut. The mad thing was that the trim cost nearly twice as much as the fabric, ha!

M7542 lace top

When I first showed Dan this top, on the hanger, his response was Cool! Very Stevie Nicks! But when I put it on, he said Mmmm… too much skin! I agreed and bought a black cami top the next day to up the modesty factor. But then there was a disappointingly lack of detail. So back to the bra and off to Horseguards parade at 6am on Friday morning to shoot it.

M7542 lace top side view

I wore a jacket for the tube journey but still felt, full pelt, the commuter looks of: someone didn’t go home last night! 60 derniers and my handmade quilted skirt ensured decent coverage to my lower half at least.

The walk from Westminster station to St. James’ Park and Horseguards Parade at that time of the morning was just lovely. The morning light was so glorious and the buildings were lit beautifully all around us. So worth getting up at the crack of sparrows!

M7542 lace top and sunglasses

It’s quite incredible that the on same spot where I was being photographed, jousting was once a thing for Henry VIIIs entertainment! There was a fancy guard at the entrance of the arch – one of the Queen’s Lifeguards – but we spared him of early morning hassle, sure that he would need a little break before onslaught of tourist attention.

There were hardly any people around, save the guard, a few (heavily armed) policemen and a few boldly striding city workers. So thankfully no gawpers as I stood, near-naked in the morning light. We took some more alongside the pillared Mall Galleries and a wolf-whistling cyclist signalled it was time to put the jacket back on!

M7542 lace top in Mall

I’ll happily wear it like this to dimly lit gigs and parties but I will have to rethink an undergarment for any day time wear. Maybe it’s a red cami or a boob tube or suchlike. Suggestions very welcome!

I’ve also just managed to enter this in time for #Sleevefest2017, hosted on Instagram by Valentine and Stitch and dream.cut.sew .The challenge runs from now until August 31st 2017 so you’ve still got time to submit your creative sleeve designs. And here’s a link (affiliate) in case you get the same calling for McCalls Ladies Easy Sewing Pattern 7542 Tops with Sleeve Variations.

Happy sewing, everyone! x

M7542 lace top back view


Big Vintage Sewalong: Retro Butterick 5813

Big Vintage Sewalong dress

Back in March I announced I was taking part in the McCalls Big Vintage Sewalong. My scheduled date to blog seemed an awful long way off then, but all of a sudden today came shooting along like an express train and of course I’d left everything till the last minute!

My pattern of choice was the 1950s Retro Butterick 5813 – Nail on the head, Alana from Flying Purple Hippos.com! – but it wasn’t without a dither. I loved each of the three 1940s patterns on offer too!

retro butterick 5813

As soon as that pattern was in hand and I’d decided on version A, I headed straight down to Goldhawk Road and to the relatively new store, Goldbrick Fabrics, to snap up some gorgeous Italian brocade. I’ve been quite literally ‘stitched up’ (or rather unstitched) by brocade, once before (yes looking at you BHL Georgia!) and I knew as a rule, it has massive ‘give’ issues but this particular brocade is beautifully soft and luxurious with just the right amount of body at the same time and subsequently a little more forgiving.

retro butterick 5813

big vintage sewalong dress

And because the fabric was so special I wasn’t about to employ any gung ho scissor action. So I made a toile like the good girl I am. Fortunately I only had to make a few minor adjustments. Firstly I needed to remove some excess bagginess from the back bodice. I often come up against this issue but this style commanded some serious ease for practical reasons of movement I guess.

Big Vintage Sewalong Butterick 5813

Secondly, I needed to gain a little more girth. My go to adjustment for this is always to add a bit at the side seams but that often results in a loss of shape and a sausagey silhouette, so I thought I’d try a different way by sewing narrower darts and I do believe the result was way better, though, looking at the back view shot I should also have shortened the bodice a tad.

retro butterick 5813

Thirdly, I lobbed a fair bit off the length. I ummed and arred between below the knee or to the knee but I think after seeing these photos, an inch longer may have added a bit more drama. What do you think? I sewed a substantial hem so I could take it down a little I guess.

I wouldn’t recommend this dress to an absolute beginner. There are potentially, lots of hissy-fit inducing features like darts – lots of them, some underbust gathering (which admittedly would probably have been easier in a more manageable fabric) oh and inset panels! Luckily I’ve had some former training with insetting sections of my quilt panels – for example the Whirligig block –which made the instructions and the construction a near enough breeze!

Another thing to be mindful of is the precision of facing the front opening – sewing perfectly symmetrical seams to meet at a single point before turning through. I think the collar is such a lovely feature of this dress. There were no complications in adding it and it has a real neat finish that encloses the lining around the neck edge.

Big Vintage Sewalong dress

It’s fully lined too which means sleeves an’ all! I’ve only ever done this twice to my ever failing knowledge: My vintage plaid dress (which annoyingly seems to have disappeared from my blog) and more recently my Sew Over It Joan Dress. And I must say it feels like a bit of a rip off to have to basically construct the dress all over again in lining, no cutting of corners, darts, gatherings, inset panels the lot! And that means even more seams to overlock too!

retro butterick 5813

But of course it was all worth the effort and it’s so lovely and weighty. Proper quality, like!

I’m not sure whether I cut or sewed the wrist end of the sleeve incorrectly but in any case I opened the seam a little to avoid the puckering that was about to happen. And yes those are 3 little darts for shaping the sleeve. On the fashion fabric and the lining. That’s proper vintage detail!

retro butterick 5813

I chose an invisible zip over a more-authentic lapped one, only because I had one to hand but I’m really pleased with the outcome. It just looks like another side seam. I achieved such invisibility by taking my time for once, pinning and then tacking in position before using a regular zipper foot and then sewing a second time with the invisible zipper foot.

retro butterick 5813

One thing that surprised me was the vent. It’s just a slit with facings either side and the lining is stitched to the facings like a little bridge around the outside. Much simpler than the usual lined vents or kick pleats of most vintage dresses I’ve sewn but it does feel like a bit of a cop out after all the attention to detail elsewhere.

Overall I totally love this dress. It was such a pleasure to indulge in some vintage sewing again. Very long overdue and I’d love an excuse (and some more hours in the day) to make another. But I’d make a few more adjustments next time, namely taking a bit off the shoulders, shortening the bodice a fraction and adding a little more to the waist.

retro butterick 5813

It got some lovely comments as we strutted around Portobello Road and around Notting Hill. Not least of all from the lady who managed to sell me 2 new pairs of sunglasses. Flattery gets you everywhere, see!

retro butterick 5813

retro butterick 5813

retro butterick 5813

Many thanks to The Foldline for the encouragement, for McCalls Pattern Company UK for providing the pattern and fabric. I sincerely hope that lots of people get inspired to buy these gorgeous vintage patterns and that lots of wonga is raised for The Eve Appeal in the meantime.

retro butterick 5813

Special thanks also to Dan for dutifully shooting these amazing photos. We always have such fun. London is so full of amazing places and we’re lucky that most of them are just a short tube ride away. It’s always a hoot when we’re oot and aboot!

Marie from A Stitching Odyssey is next up. Can’t wait to see what she makes.