The making of a Serpentine shirt for Mr O

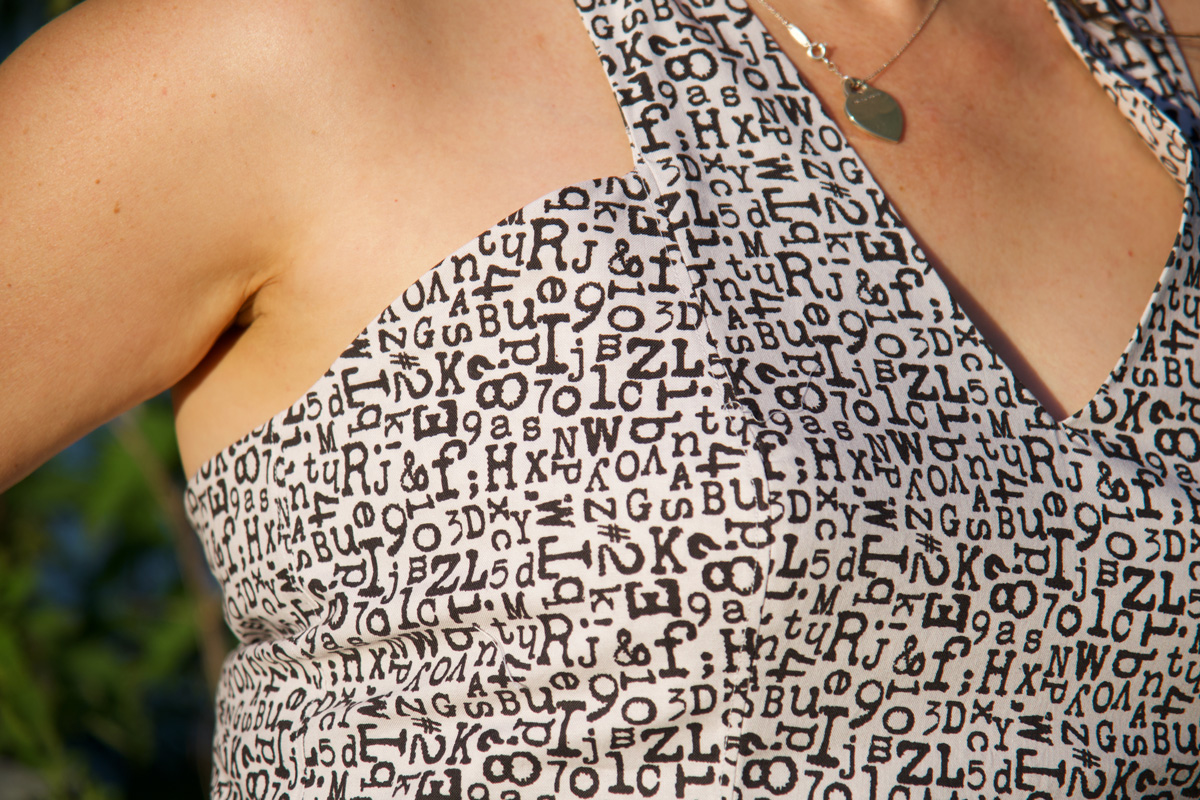
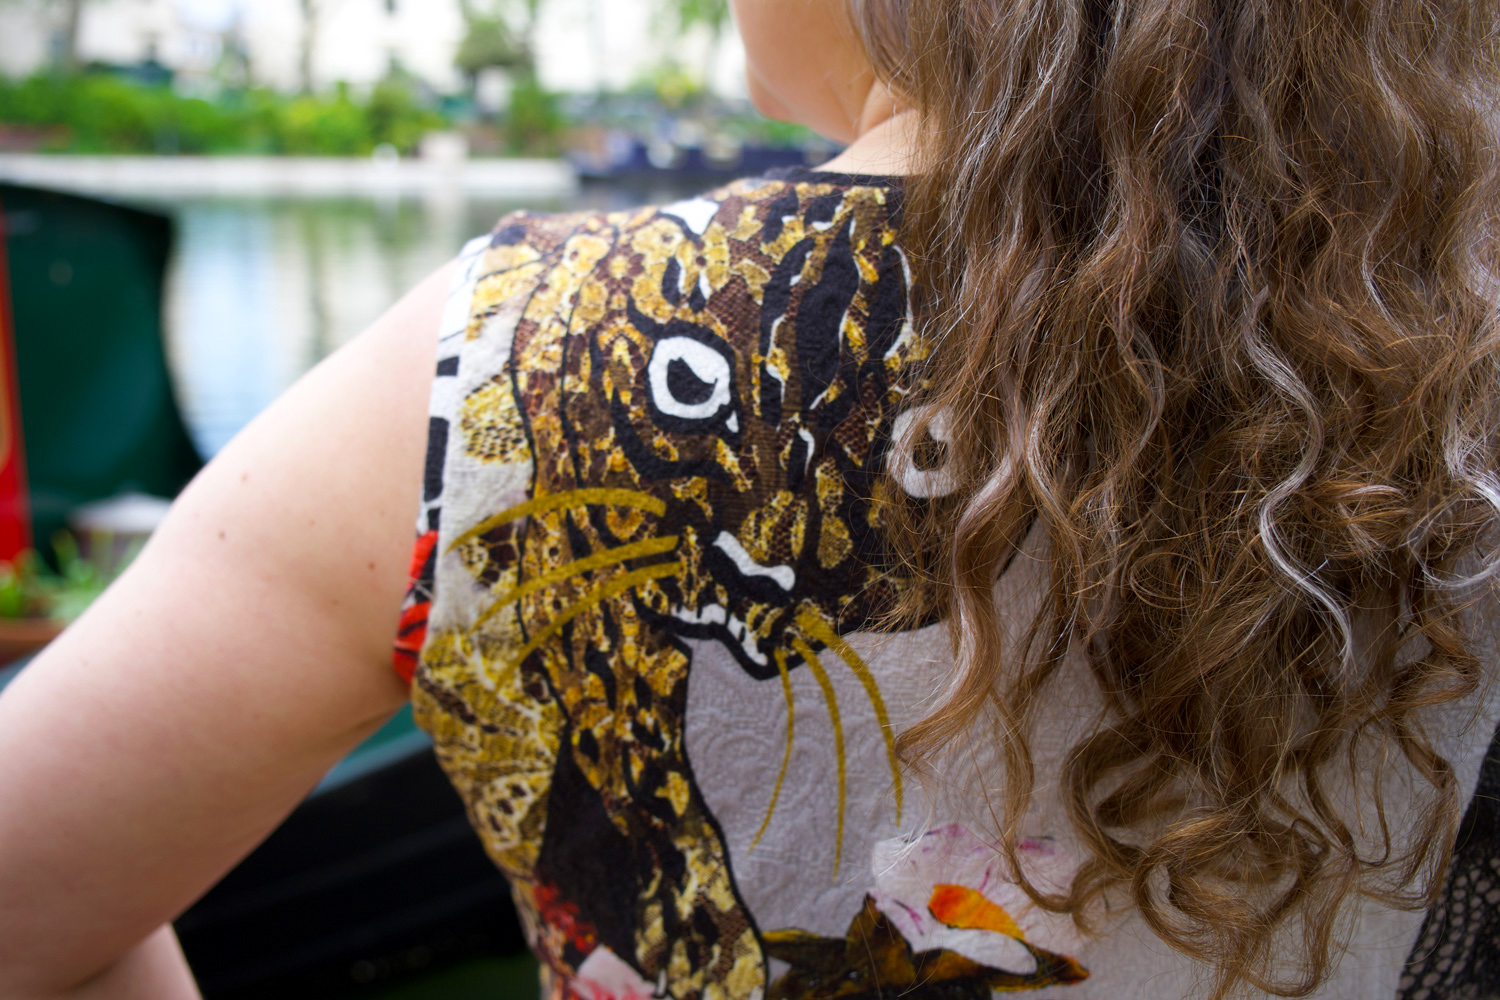
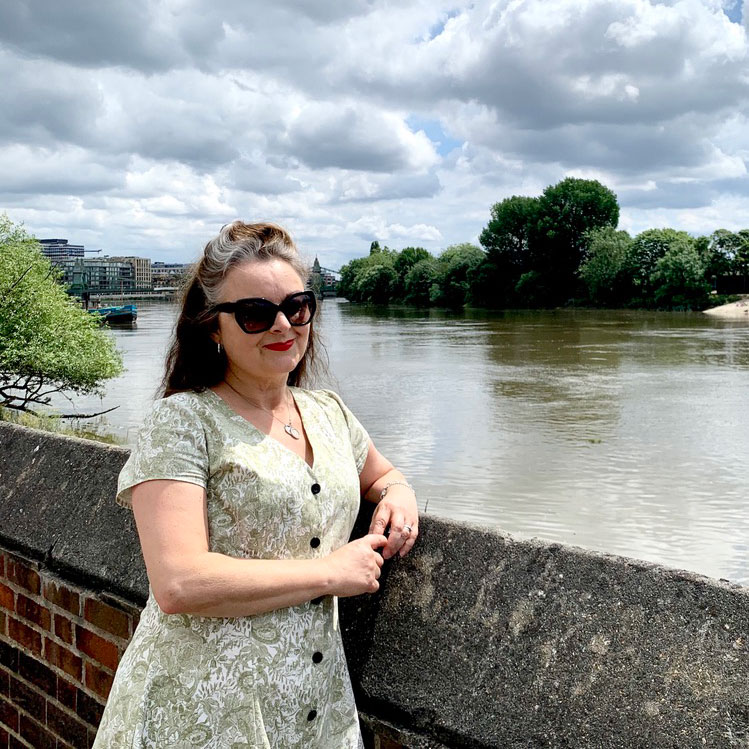
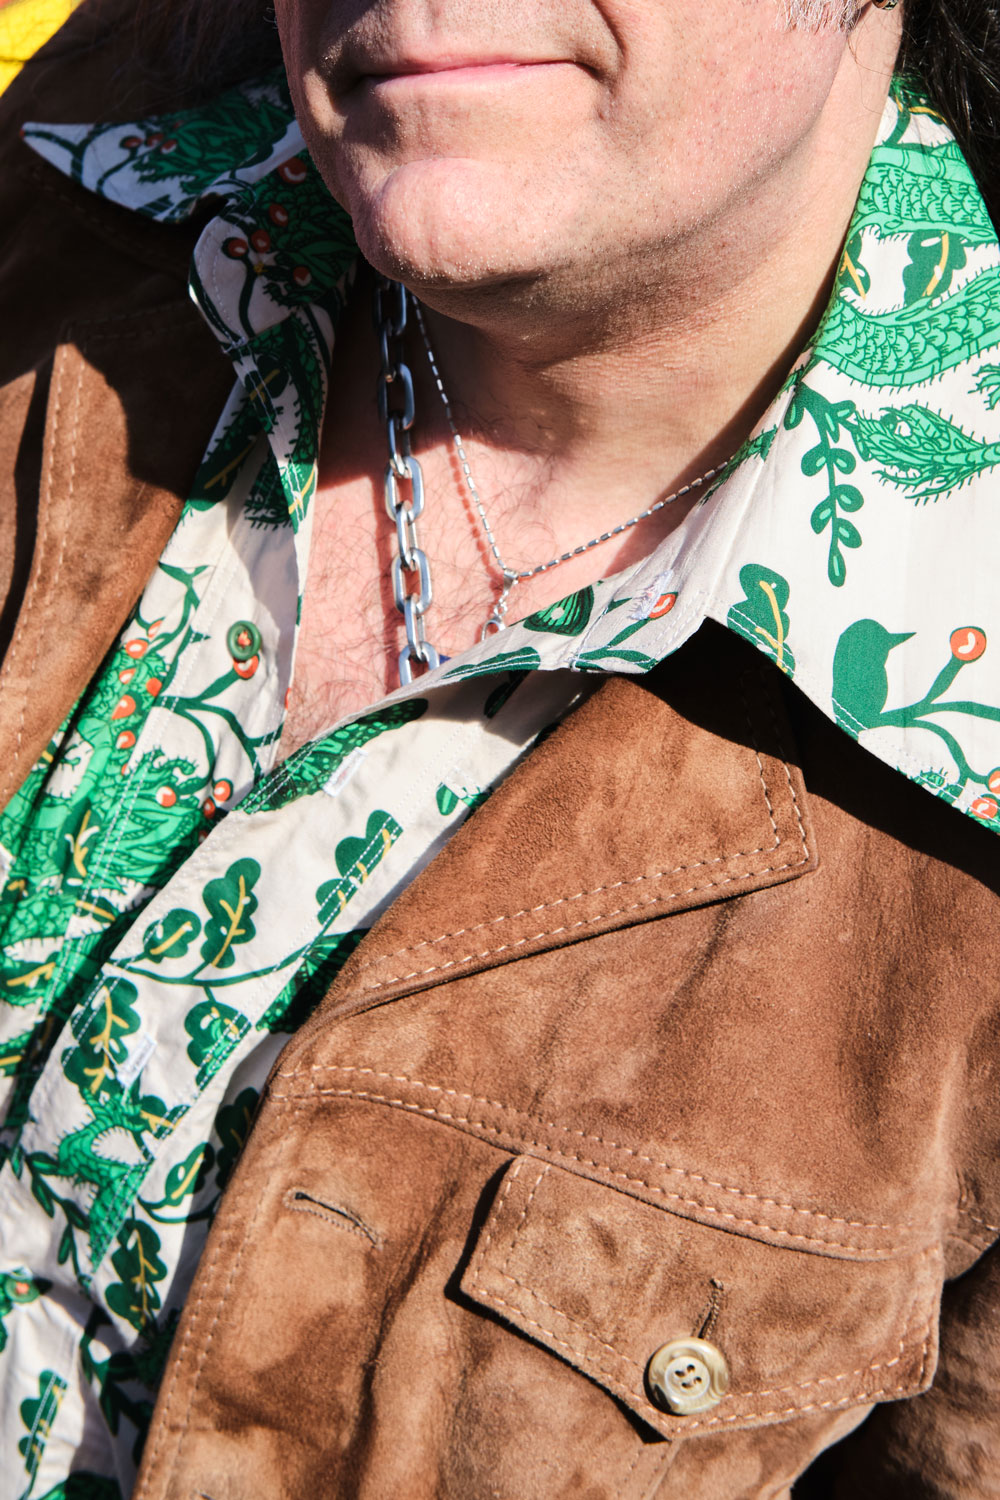
On waving this wonderful Serpentine fabric in front of Mr O, and declaring that I wasn’t sure what I should make with it, my foot suffered an instant shot. “A shirt for me” he said, with no hesitation. Doh! I had no quick comeback! It was a perfect suggestion, of course. 

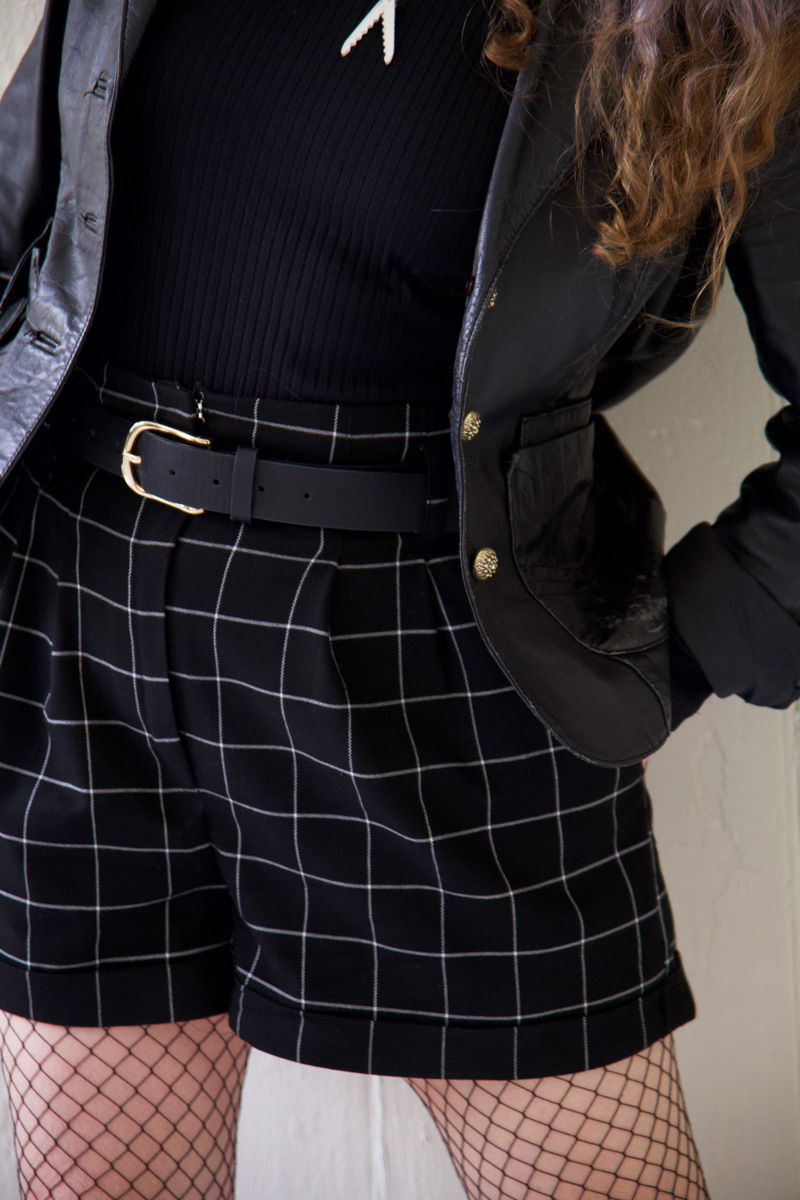
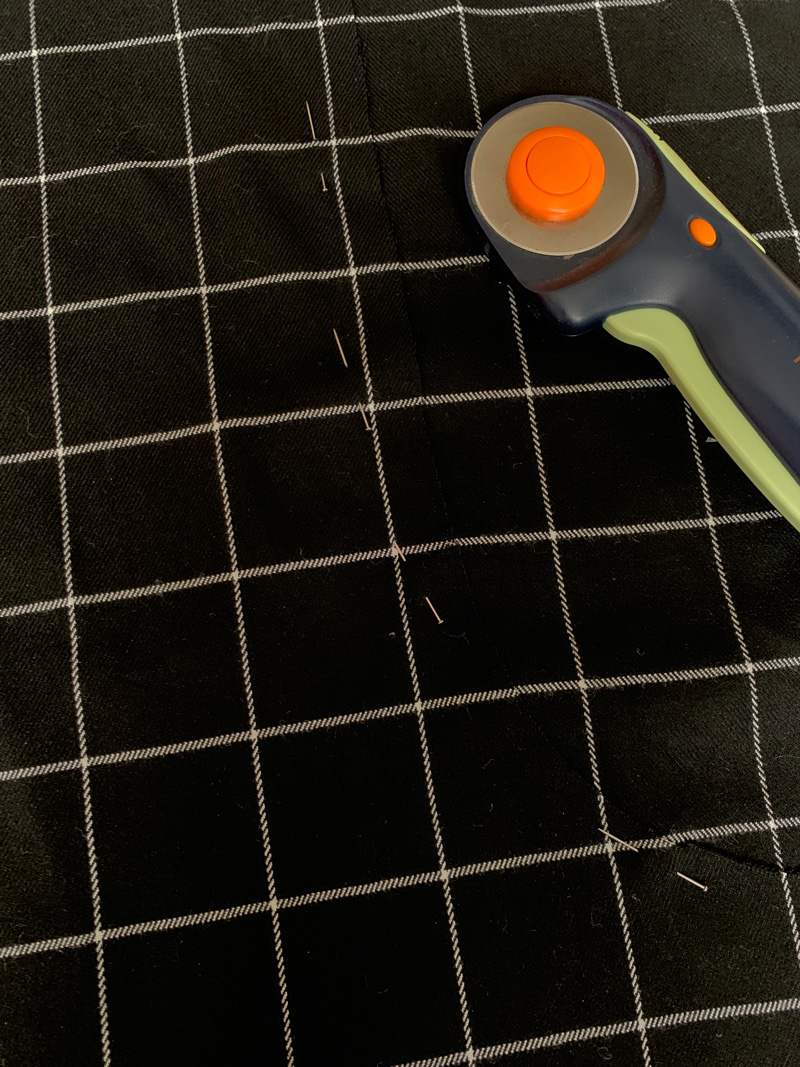
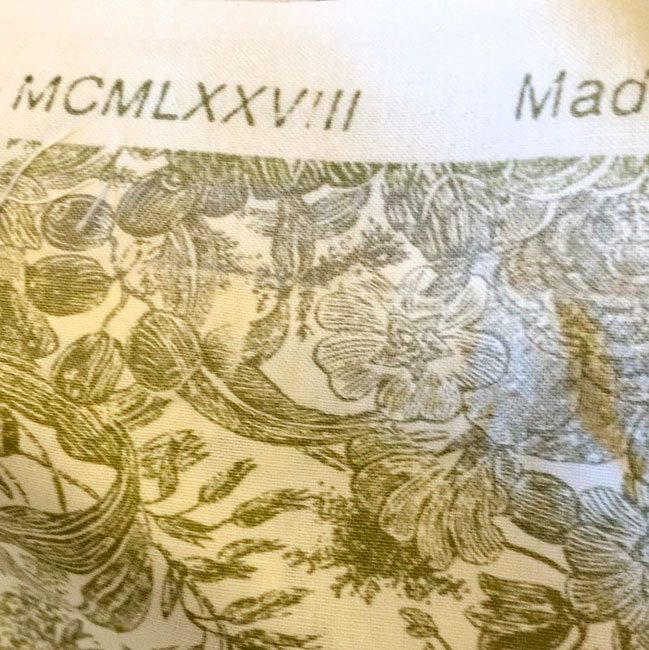
Fabric Godmother were so kind in forwarding on my goody bag, when I was unable to attend one of their events last year and this fabric was one of the treats inside. I thought on first feel that it was a cotton lawn but it turns out it’s a viscose sateen – a new one on me – and it is gorgeous to the touch and super to sew with. Presses beautifully too. 

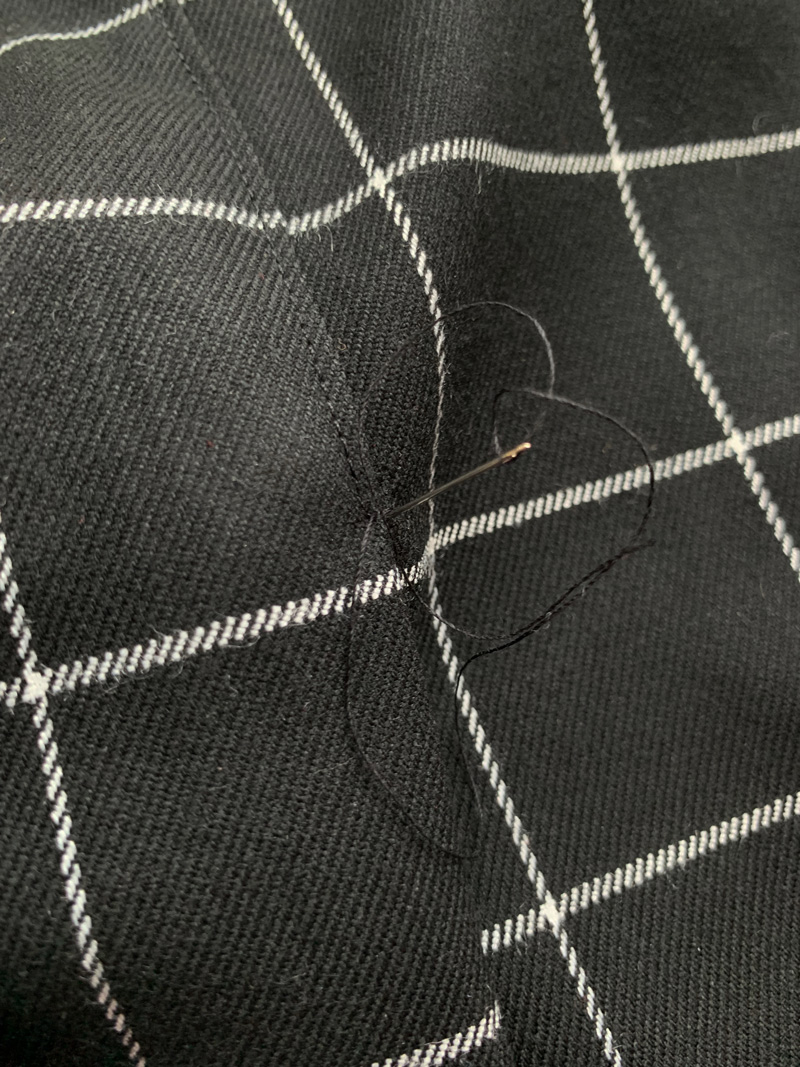
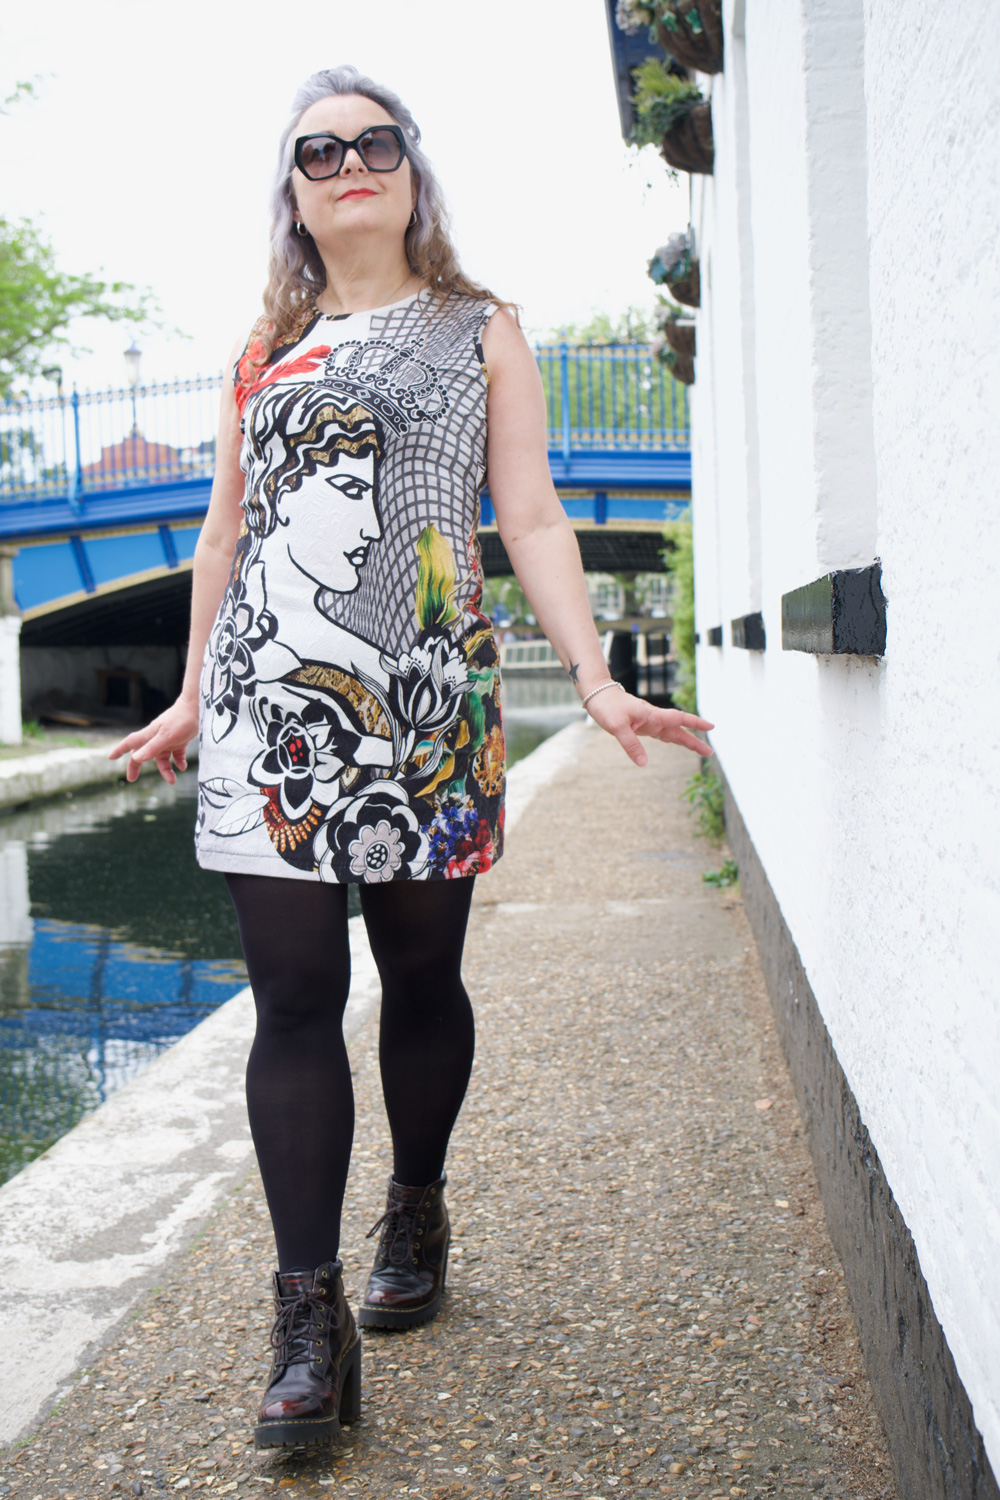
I reused vintage Butterick 5007, (western shirt pattern) for the 4th time – definitely less daunting this time round. The only things I still fear about it are the buttonholes because I know for a fact that at least one will mess up and I’ll have to deal with the nasty task of unpicking it. And that is exactly what happened. Is there actually anything more annoying?

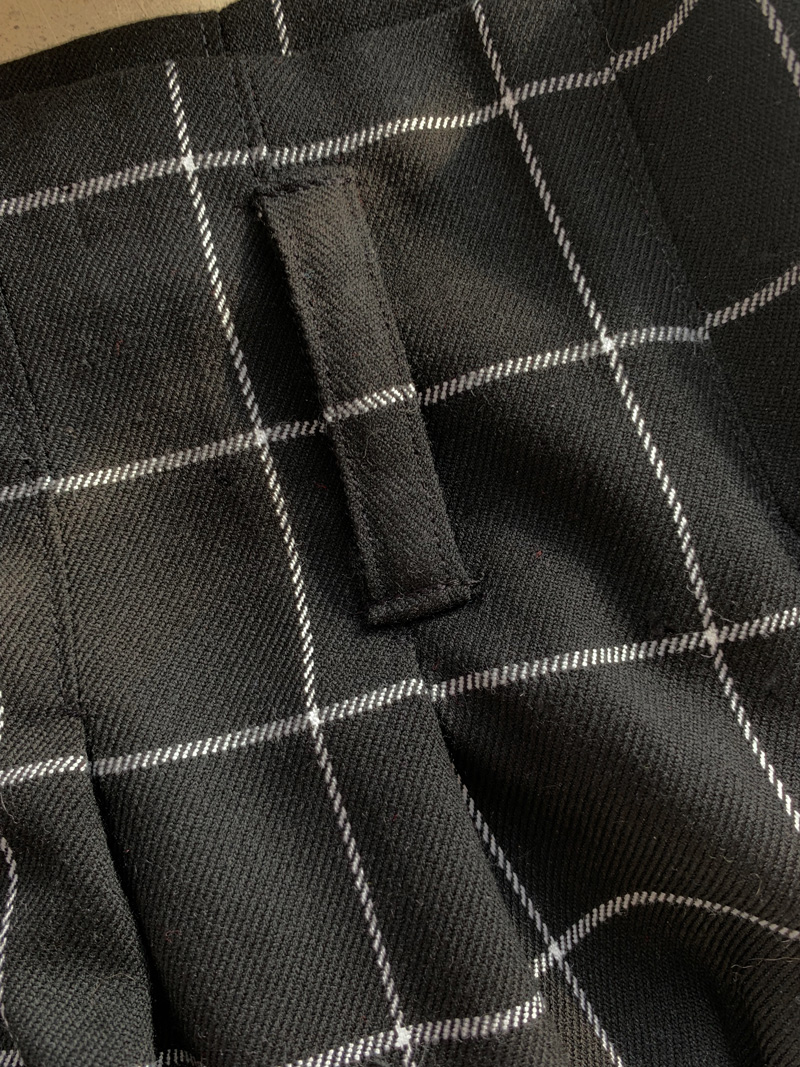
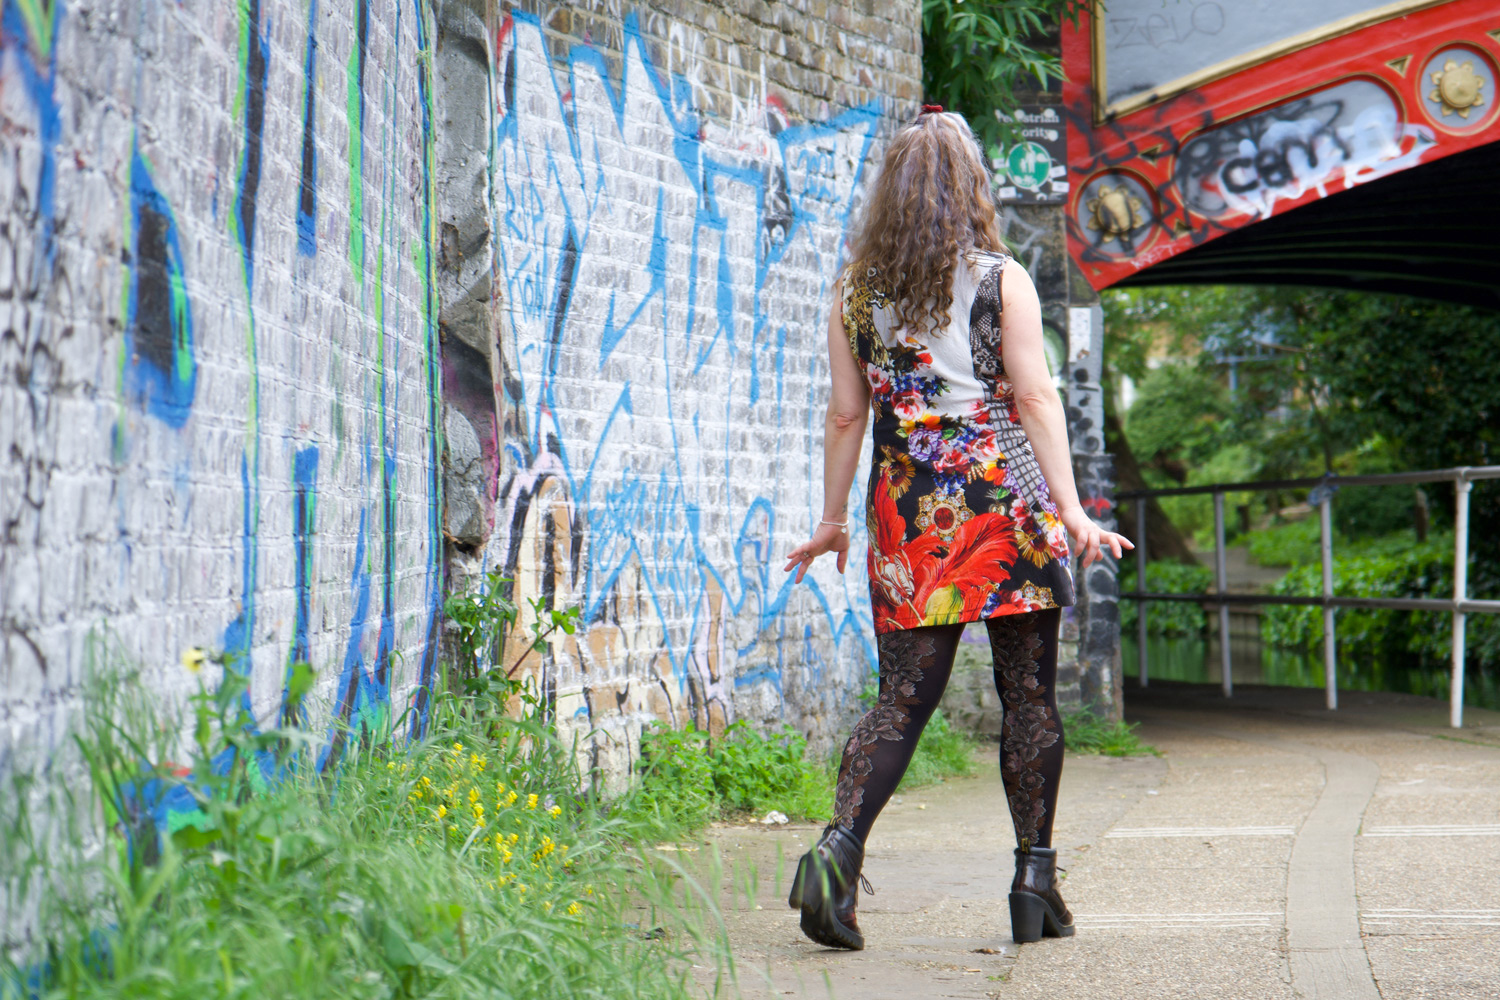
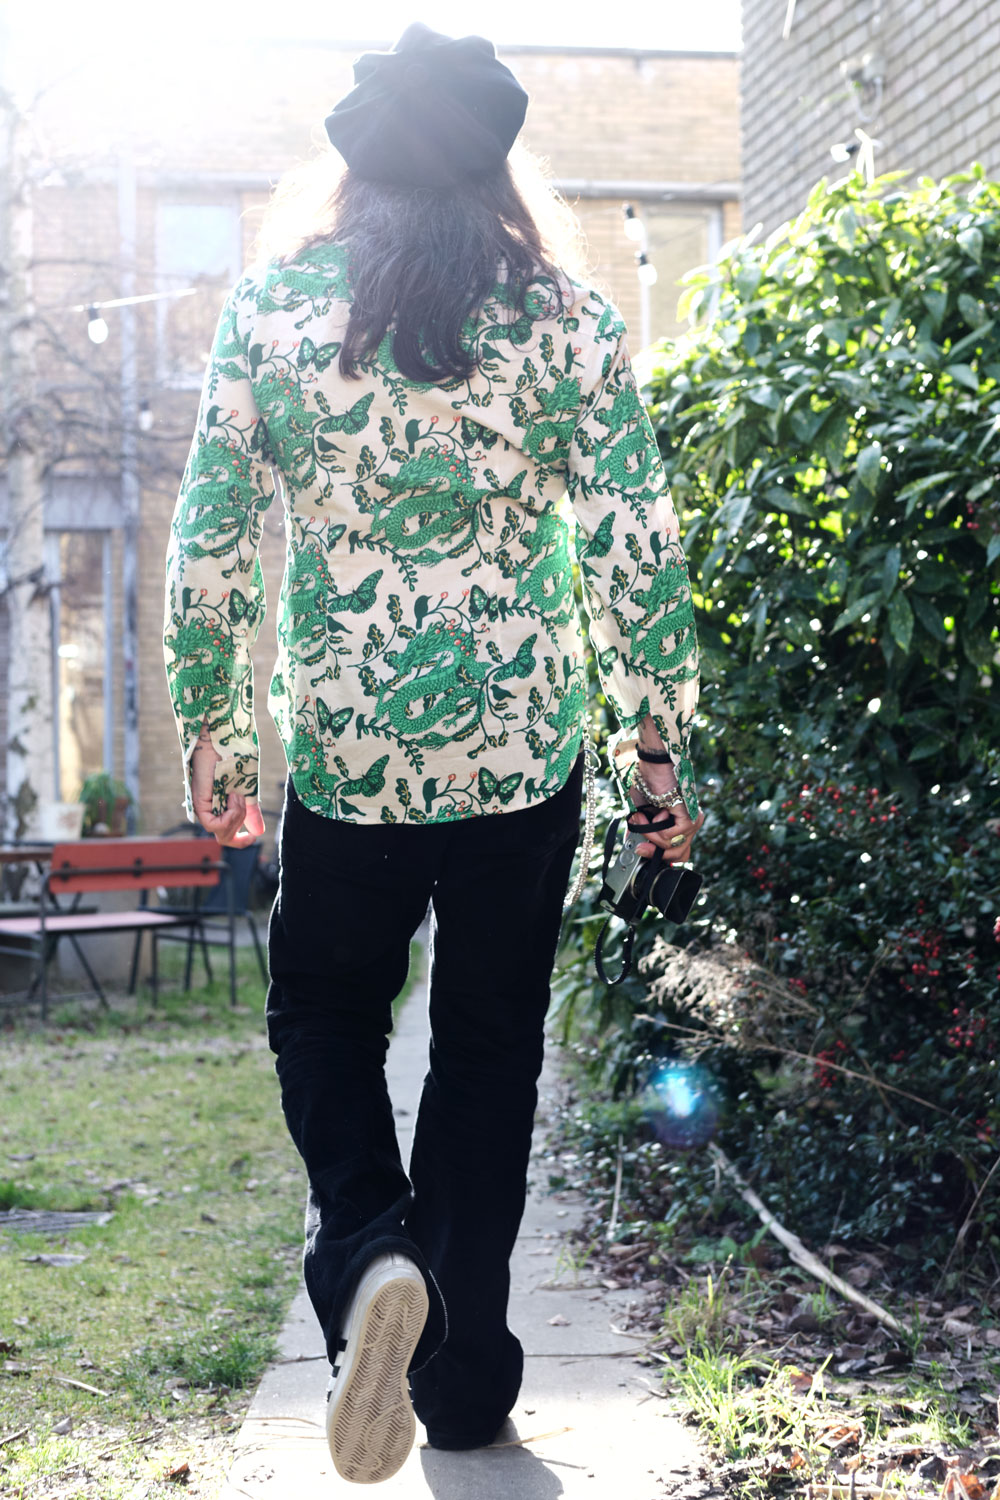
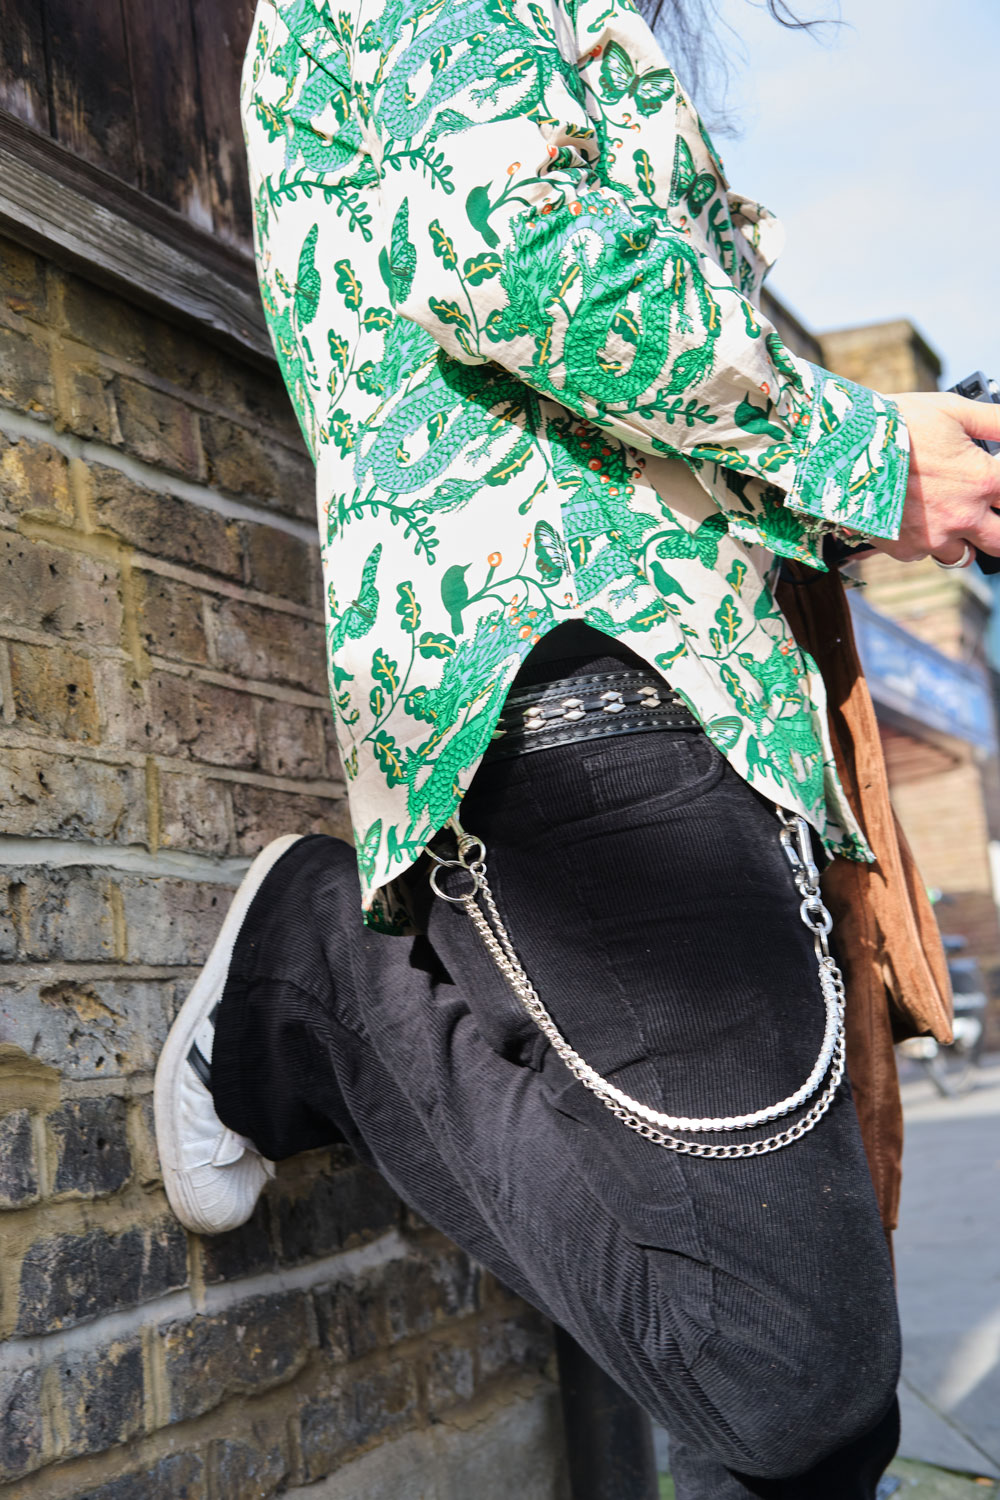
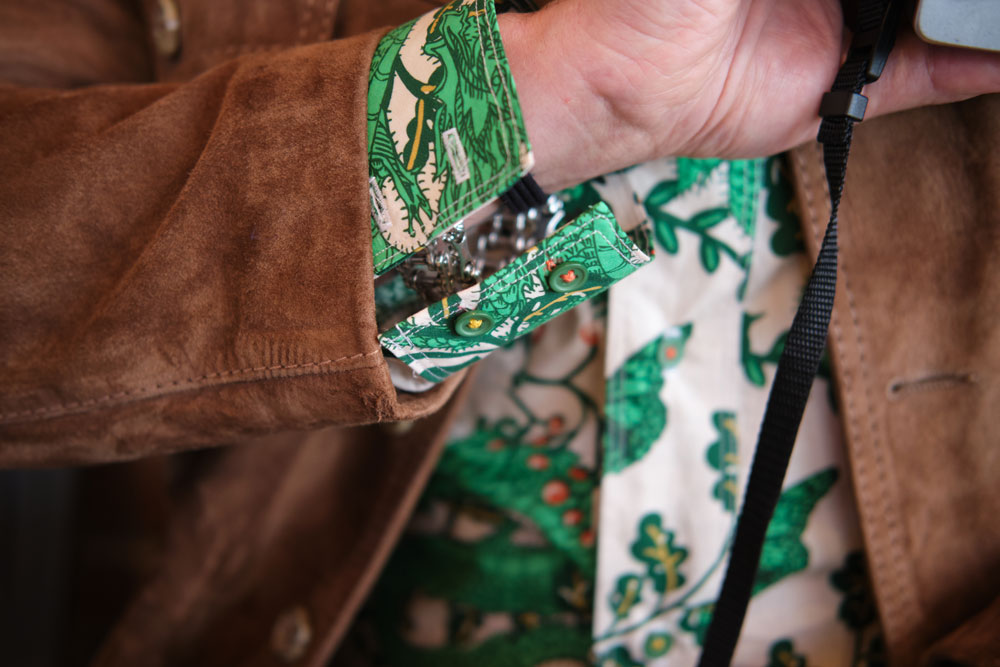
It takes time to put this shirt together, mostly due to all the neat details: curved yokes, rounded hemline; pleats and darts on the cuffs; diamond darts for slim fitting and every single piece has 2 parallel rows of topstitching. But weirdly, I really like the process. The main section comes together pretty quickly and its a great one for sewing in stages if time is short. Which it is the story of my actual life!

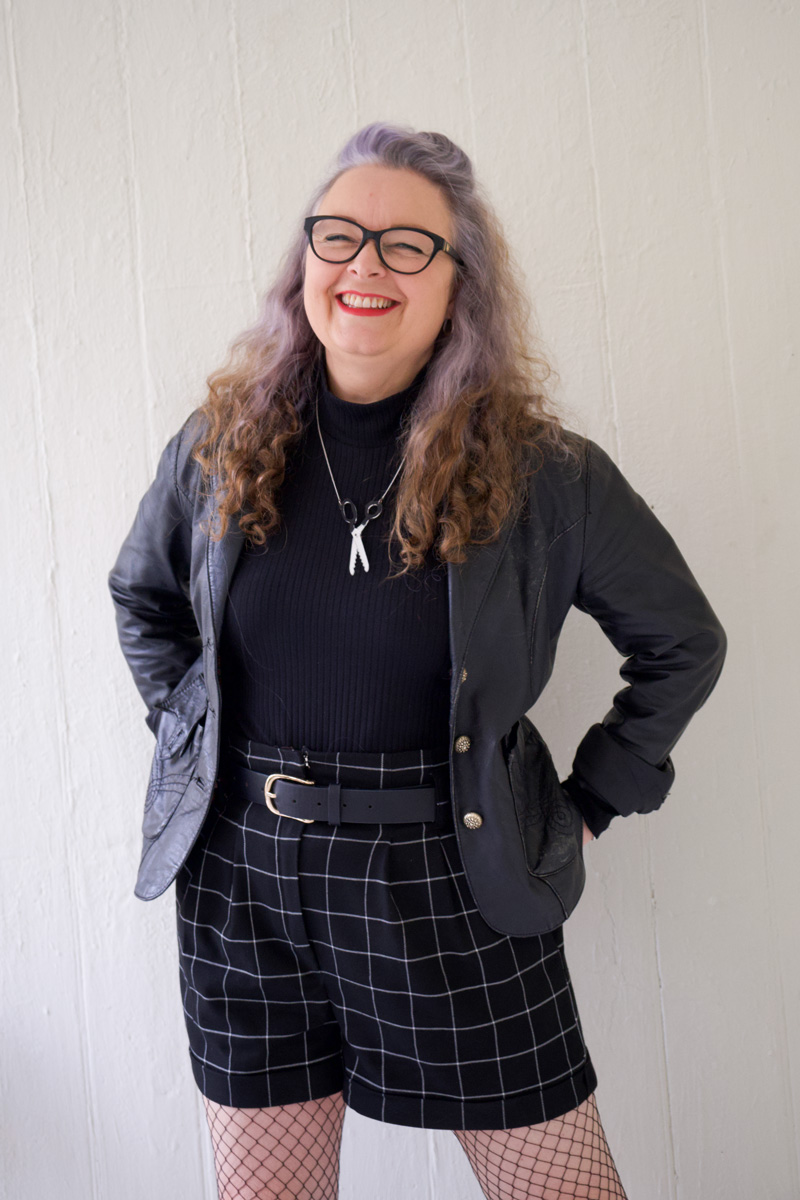
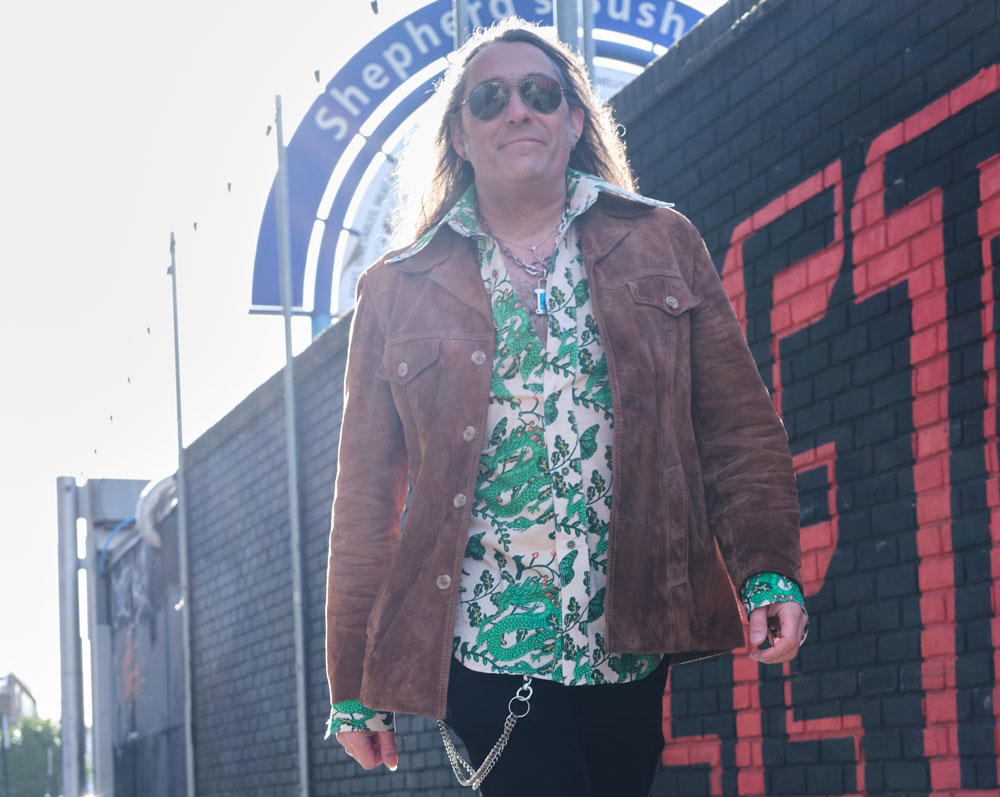
It also has some serious statement collar action going on which Mr O loves. I personally couldn’t carry them off but I think he rocks these aeroplane wings, styled up with his 70s jacket and hat. 

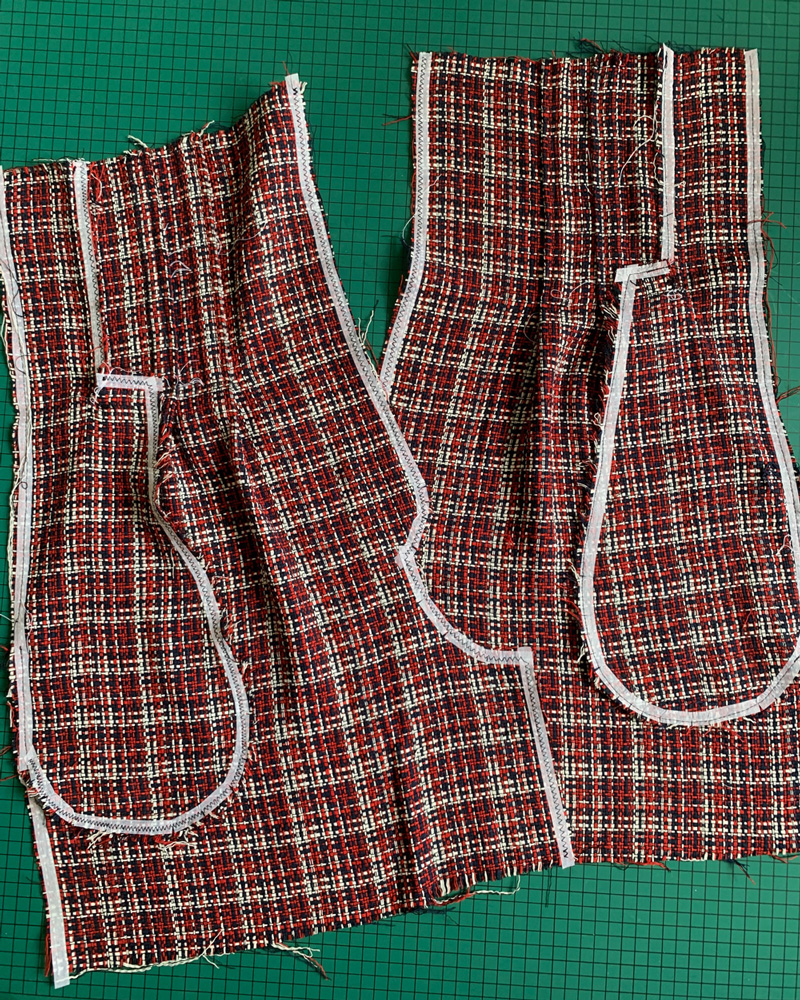
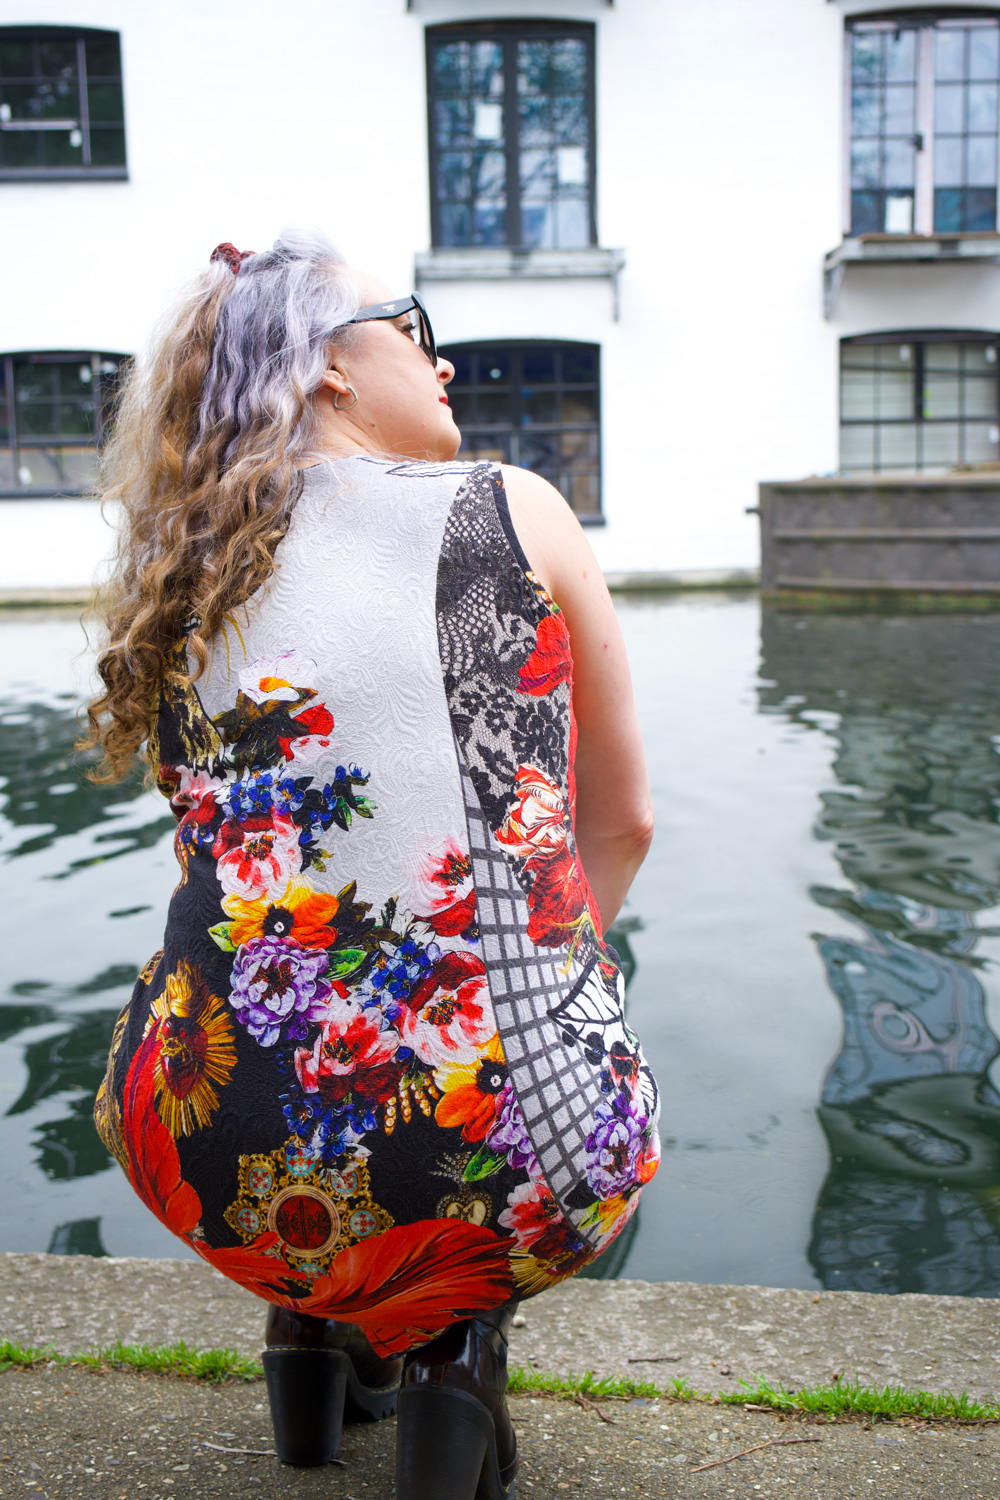
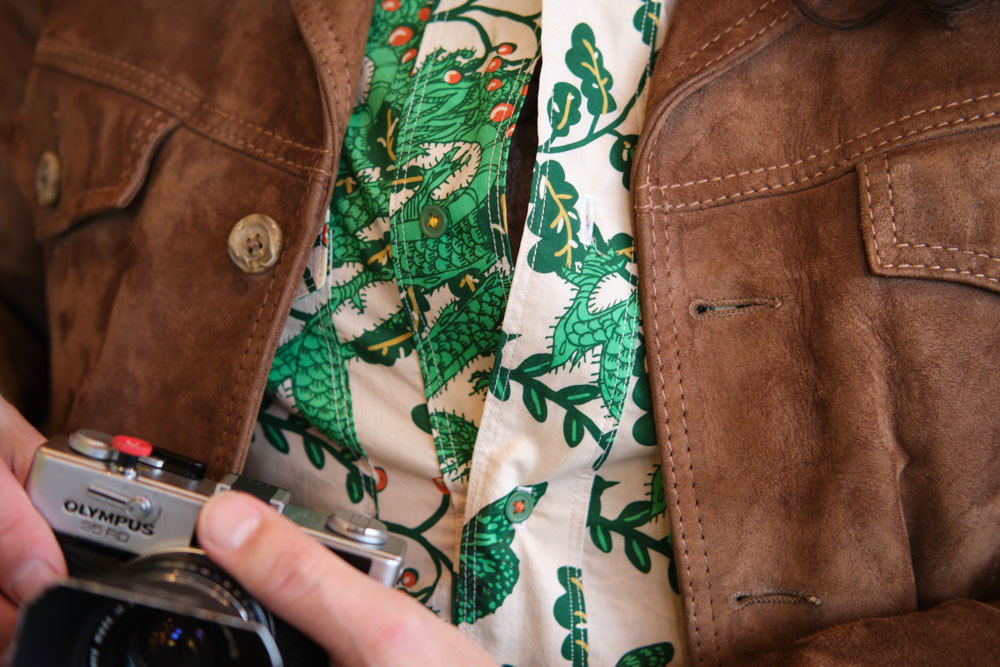
I didn’t make any attempt to pattern match as you can see. I only had 2m to work with – the exact amount required – and there would have been so much waste if I had even tried. That is my excuse and one I am firmly sticking to!

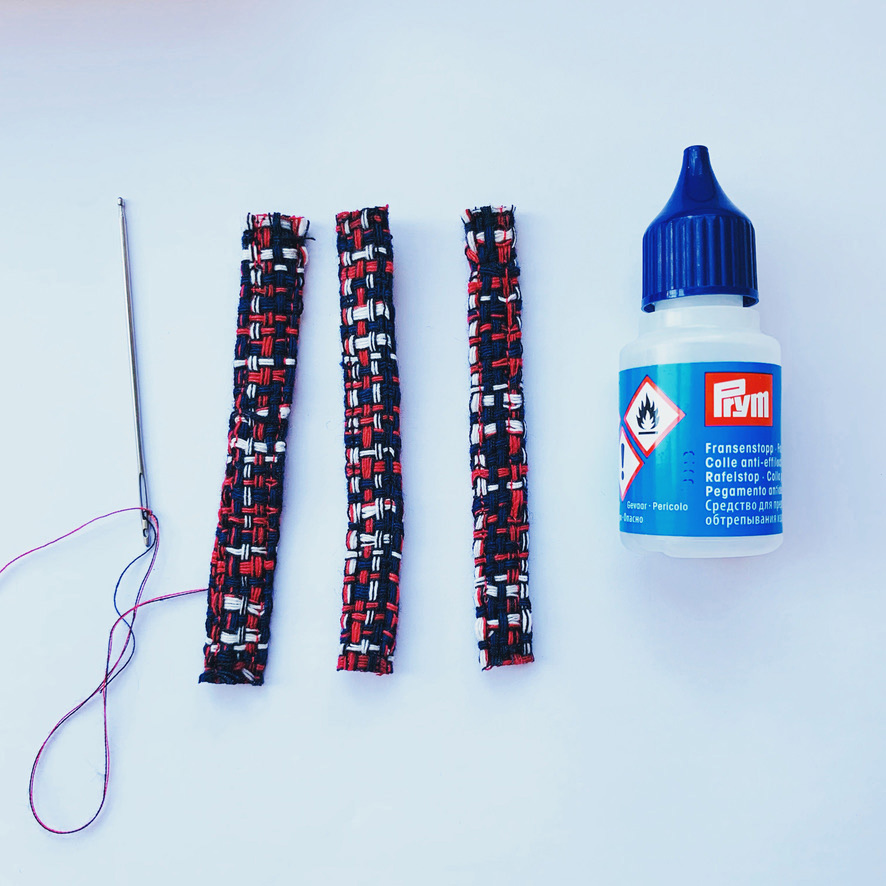
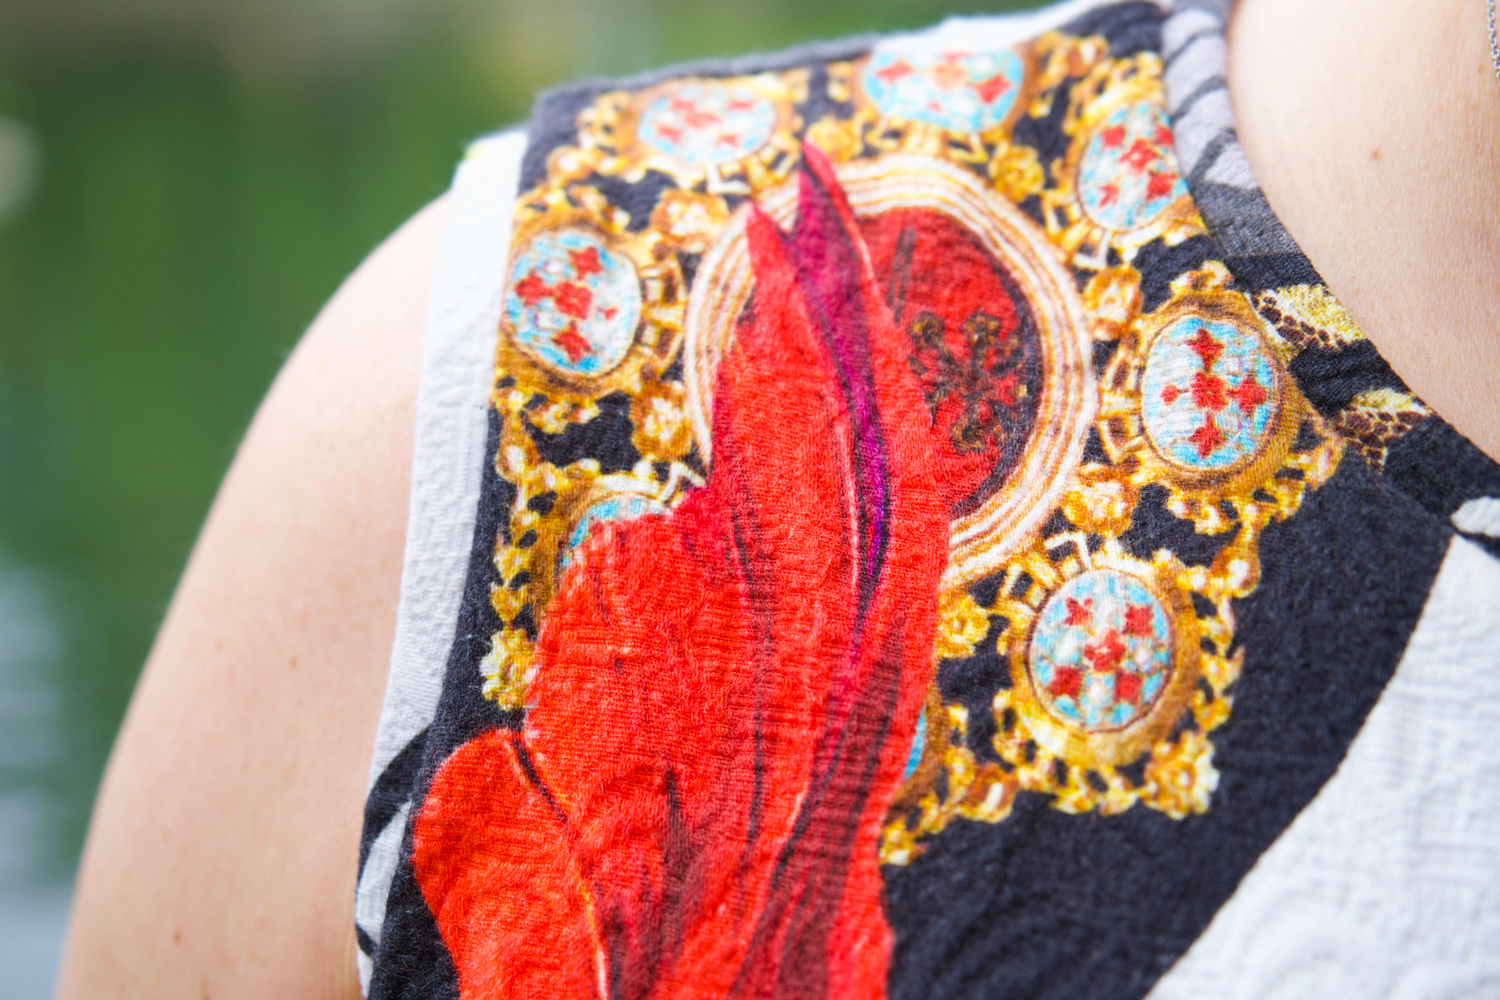
Even though I enjoyed the process, I properly ran out of steam when it came to sewing on the buttons. So I successfully managed to delegate the sourcing and sewing of, to Dan. And he did a fabulous job – giving way more attention to detail than I’d have given – he sewed with alternate orange and yellow threads throughout to complement the colours in the design and it looks simply awesome.

This is definitely not the last time I will use this pattern. I just noticed that Fabric Godmother has a Navy version of the same fabric on sale on their site, and made the mistake of showing Dan!

But he’s going to have to wait a wee while – I’ve got a lovely little commission I need to crack on with and also I want a new coat!

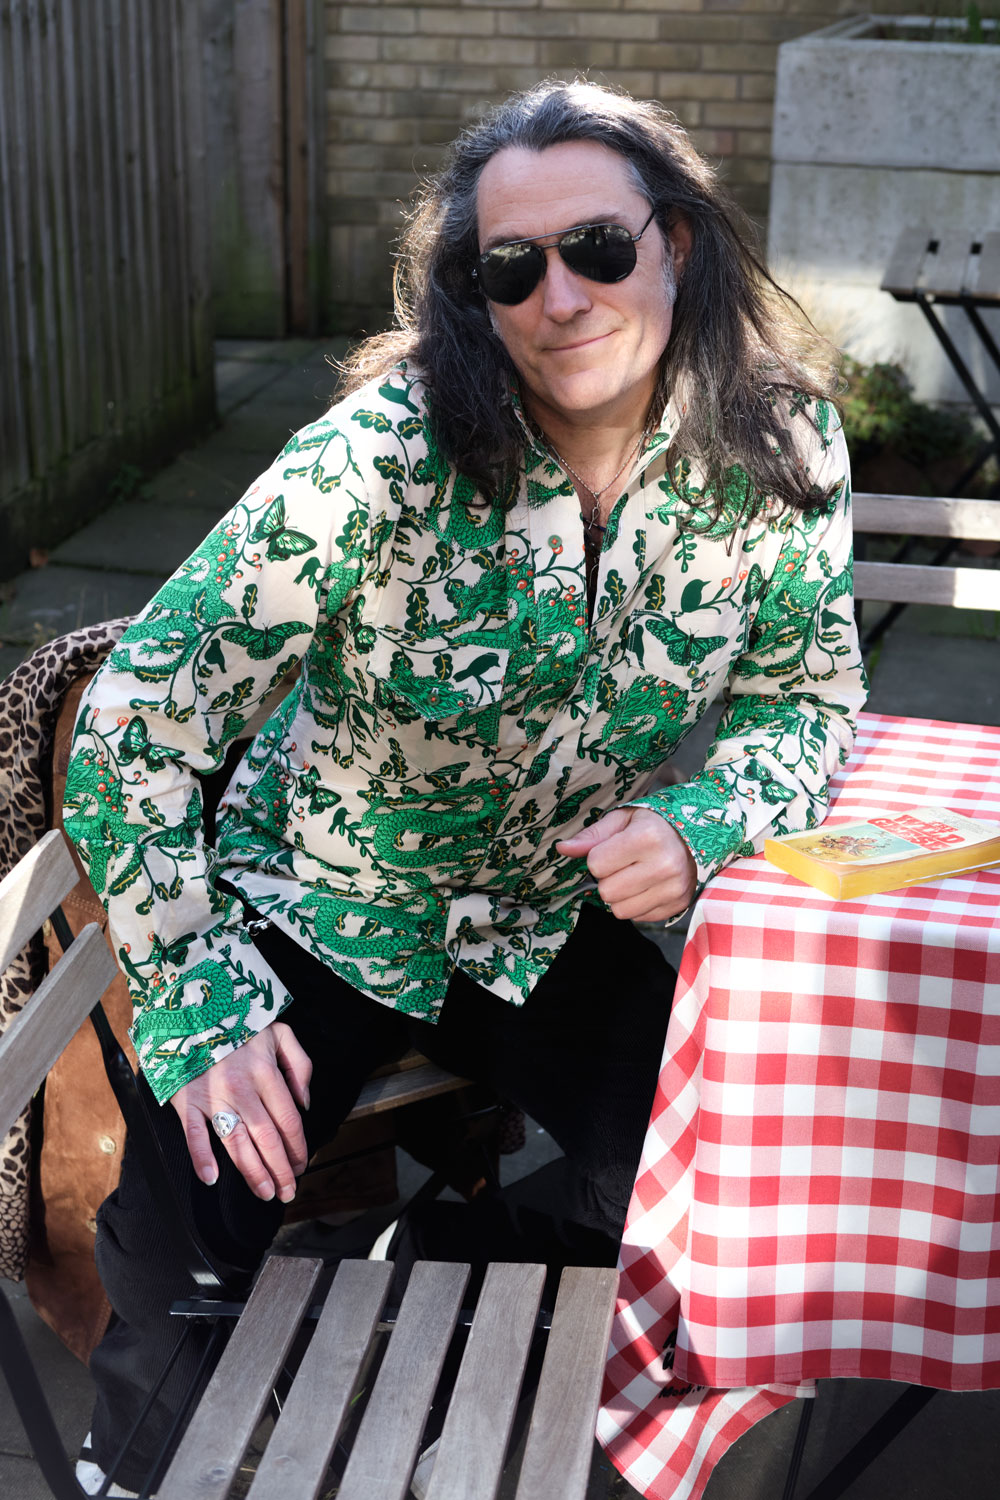
Photos are by me this time. But I think you probably guessed that already, haha! I think I’ll stick to my day job!

Previous versions I made are here and here

Ready to Party Dress

Original post written for the Crafty Bloggers Club

The first time I met the ladies of Crafty Sew and So was at their fabulous Dressmakers’ Ball in 2019. I’ve since been to their Crafty Sewing Camp and can verify that they throw a damn fine party! And so it seemed quite fitting that I chose to sew the Ready to Party Dress for my first experience with a My Handmade Wardrobe sewing pattern.

However, true to form and with no imminent fancy parties on the horizon I decided to make it up as an every day-dress instead. 

To make it more every-day, this dress was going to have to be substantially shortened for me. Before I go into more detail as to how I did this, I just want to add how interesting this skirt pattern is. It is made up of eight flared panels with a double set of darts on the side front and side back panels and the volume starts after the fitted section at the waist to create such a superb silhouette.

Each panel piece of the sewing pattern has a lengthen/shorten line which is super helpful as I really didn’t want to forego the amazing flare in the design. To be honest I wasn’t totally convinced I could remove a whole 9 inches without some sort of issue but hey, nothing ventured, nothing gained! As you can see there is quite a bit of a step when I folded up the excess. I sat and pondered a while and then convinced myself I just had to average out the difference to create the new pieces. So that’s exactly what I did. I traced the new piece and added the new side lines by drawing from the hem points to just below the waist shaping. And it worked!

I took my time sewing the panels, being sure not to stretch out the bias seams of which there are many, and I’m sure the results were helped greatly by using this wonderfully soft and forgiving chambray fabric, also from Crafty Sew and So. It drapes so beautifully and seals the deal with my ‘every-day’ mission. 

Because of potential bias behaviour, I did tack the sewn up skirt panels to my toile of the bodice while I sewed up the actual bodice. I felt it needed to hang a bit before hemming in case the hemline dropped unevenly and that proved to be a good idea. 

I cut a size 4 for the skirt and graduated down to a 3.5 for the bodice but next time I might just slither a bit more off to go from 3.5 to 3 as it is a bit roomier in the waist than I anticipated. That’s the beauty of having all the size lines to trace off!

I was torn between choosing the sweetheart neckline and the round neckline of the bodice. And I was almost sold on sweetheart when I realized I could layer the round neckline version more readily with a t-shirt or turtleneck jumper underneath for a change of style and if it got chilly!

I love that its lined. In fact I love lining and the understitching process because it really does give a nice, neat finish.

Oh and I almost forgot to mention that it has pockets – lovely sized in-seam ones that get disguised in the drapes so you can stick anything you like in them with little chance of distorting the shape of the skirt!

I loved making this dress, it was a real pleasure to sew. And I love wearing it – its comfortable, versatile, flirty and feels good. And I can totally recommend this pattern and fabric combo. Because every day should be a party, right?! 

An ooobop original jumper for all reasons!

I like that there’s never a strict order of process. Often I pick a pattern and go looking for the right fabric. Sometimes the other way round. Driven by need or pure desire but in this case it got changed up a bit more.

Diane from @Dreamcutsew was kindly giving away some fabric on Instagram and I just couldn’t pass up her wonderful piece of cable knit jersey. I didn’t have a Scooby what I was going to do with it – I didn’t even know this kind of fabric existed till then!

I considered a cushion cover, a hat, some gloves – even some slippers! (I still have a small piece left so this could still be an option) But it sat for sometime, perched on the top of my own stash until I had a flash of inspiration. And then it came – in the shape of a hashtag challenge: #magamsewalong (Make a Garment a Month) hosted by @suestoney and @sewing_in_spain. This month the theme #naturalnovember was set by guest host @gigi_made_it, and that really got the ball rolling.

I loved how free-range the brief was;

☑️ Make something from a natural fibre
Now I’m pretty sure there wasn’t a speck of natural fibre in that cable knit but I did have a raggedy moth-eaten merino wool jumper which met its demise in an accidental hot wash. I’ve no idea why I kept it but I’m jolly glad I did because I decided to add some black detail. I generally stick to the safety of any colour palette that involves black!

☑️ Choose a make reflecting the weather and rhythms of the season where you live
The weather was definitely a factor in my need for a jumper. I don’t have nearly enough and I can never find any I like that I can actually afford!

☑️ Make something in a nature-inspired print
I figured stars are pretty nature-inspired, aren’t they? And an appliqué is an acceptable swap out for a print.

☑️ Use earth-friendly, sustainable materials in your make
So the main fabric was a leftover piece from another sewist, the appliquéd bits were upcycled from an old jumper. The gold thread was a few leftover strands from a previous project and the only additional notion was the cuffing/ribbing that I bought from Minerva.com

☑️ Make something that totally expresses your natural true self, unconstrained by cultural norms or trends
I’ve been so wanting to make something that does just that. It harks back to my 80s days where I was probably the most experimental with my clothing. Big batwings and balloon skirts the lot! I actually had puffball shorts too!

☑️ A make that occurs without (much) effort. As always, interpret creatively and be natural

I freestyled the pattern. Based on a RTW jumper I already own and simplified further. No shaping for armholes and rectangles for sleeves gathered in at the cuff. That meant less waste too! I shaped the shoulders slightly and cut a V neck but the back piece is fundamentally a rectangle also.

The project began with a very rough sketch! Please do not judge my Adobe Illustrator skills on this sketch alone – I might never work again!

Once the main pieces were cut out, I began by stabilising the shoulder seams. Even though it was going to have a relaxed drop shoulder I still didn’t want it to stretch out. After sewing the front to the back along the shoulders I added the cuffing along the neckline. Incidentally I used a wide shallow zigzag stitch on my regular machine throughout and then overlocked the edges for a smaller neater finished edge.

To make the appliqué shapes I first fused some doublesided fusible stabilizer to the black jumper pieces (sans moth holes) and then cut the shapes. I ironed the pieces to the front of the jumper and to the sleeves while they were flat. I then handstitched all round with a tiny blanket stitch. I’m still not entirely sure how the points of the stars will hold up over time but we’ll see. The big gold stitches are purely for decoration and to complement the glittery gold stripe of the ribbing.

When all the pieces were in place, I closed up the underarm and side seams. I gathered the wrists of the sleeves by hand with reasonably big stitches and then stretched the cuffing to fit, sewing right sides together. I did worry that it might be a bit bulky but it doesn’t feel uncomfortable at all. Just extra warm… and that’s totally fine with me. I can’t stand the cold!

The final step was to add the ribbing to the hem. I really like the contrast of the stripe and the added glitter just makes it pop!

I really loved the whole process from hatching the idea to wearing the finished jumper! It feels so great to be wearing something that is totally unique and totally me. And all thanks to my Insta fam.

I’d like to say this is my new way of working. I’d so love to get even more creative and original about all that I make and I will, in time, but I’ve already got an indie pattern in mind for my next dress. One I’ve never tried before. Watch this space to find out more!

Dan of course is behind the lens of these super shots… we took a 5 minute walk up the road where he’d already planned to factor in some twinkly lights. He is so very good at this and I’m so grateful but also aware that he’s getting more photography gigs of late, so I better keep that leash tight!!

Happy weekend everyone!

Seven useful tips for a rocking pair of M7726/M8168 shorts

M7726 shorts handmade and modelled by Janene @ooobop

I was inspired to make a second pair of these McCall shorts (see here for first pair) by the lovely checked suiting fabric I saw and snapped up in the Crafty Sew and So sale and was then spurred on by the #magamsewalong #rocktober instagram challenge hosted by @suestoney and @sewing_in_spain, themed by @salixsews.

close up of M7726 shorts handmade by Janene @ooobop

I’m still a bit scarred from that loose weave fabric I used last time, but oh the rewarding joy in using a more stable fabric. I did however underestimate the time and patience in cutting and matching those checks though.

TIP 1: Cutting out

I laid out the fabric in a single layer and cut all the pieces individually, using a rotary cutter for more accuracy. I find the fabric moves less and you can get consistently close to the edge of the curved sections.

I flipped the first set of cutout pieces onto the remaining fabric and pinned it in position to cut the corresponding pieces so the checks would line up. And most importantly I marked ‘WS’ (wrong side) on each piece!

detail of front section of shorts overlaid and pinned onto fabric to match checks

TIP 2: Marking the pieces

I know we are constantly reminded to do this. I’m lazy and often don’t – just marking as I get to the correlating instruction, if I feel I need to. But in the case of these shorts it’s crucial to get those marks on, and visible.

I used a combination of tailor’s chalk and tailor tacks and made sure to distinguish the small circles versus large circles, not forgetting the squares and the centre front line versus the fold lines! It seems like such a faff but you’ll thank me later!

TIP 3: Finishing the seams

I overlocked all the edges of all the pieces, after I sewed the seams but I finished the fly section before I added the zip.

I never paid any attention to finishing when I first started out sewing but learned quickly when my favourite memade shirt literally fell apart at the seams!

Also advisable to finish your seams in a matching thread. This doesn’t always matter but read on to tip 7 to find out why.

TIP 4: Tacking is important

When you have such a large and noticeable check pattern, or any pattern tbh, any slight stretch or movement of the fabric can lead to a mis-align of the design. So hand tacks, in a contrasting colour, are a really great way of keeping things in place while you sew.

Believe me, I always try to dodge this bullet thinking I can go quicker without and even this time I tried simply pinning the pleats in position before I sewed and twice had to unpick because the line of the checks formed a ‘step effect’.

TIP 5: Tying up loose ends

To finish off the topstitching neatly, leave a longer thread than your automatic machine cutter might allow for. Take a hand sewing needle and thread it with the loose thread on the right side. Push the needle and the thread through to the wrong side and tie together a few times with the bobbin thread. Trim a few mm’s away from the knot.

detail of how to tie up loose ends with threaded needle sticking out of the front side of the fabric

TIP 6: The roll-up

I used a strip of fusible interfacing to sandwich in the middle of the rolled up hem. The suiting fabric I used was a little sturdier than the last fabric I used but still very soft and I didn’t want the cuff to flop down. It was a good way to use up those little scraps of interfacing too – I hate throwing them away! I also did a blind catch-stitch about a cm inside the top edge of the roll up to keep that cuff in position. Just for good measure!

I wanted a slightly bigger roll up than I did last time but the positioning of those checks played a big part in how much and where I pressed that last fold. As a result the pocket bags have a tendency to show when I’m seated. Slightly annoying and not a biggie, except that’s where I first used non matching (white) overlocking thread. I thankfully changed it up when I remembered that the side seams were going to be visible on the roll-up!

Janene standing with hands

I wore these shorts 5 days straight after I made them – I love them so much. And I think that’s largely due to the time and patience I invested in making sure those details were on point. I even matched the belt loops for goodness sakes!

They are so comfortable to wear, lovely and warm with tights and I love styling them with boots. Its given me a great opportunity to test them out with all my different tops (breaking all the ‘rules’ for pattern mixing) so I’ll be sure to share that with you soon, too.

I do hope these tips come in useful, for this project or any others you’ve got on the go. And please share any additional ones you might have in the comment section. One of my favourite things about sewing is the prospect of it always being a work in progress. There’s more than a lifetimes worth of tips and techniques to keep us busy and sharing them is half the fun!

In the meantime I’m pondering my next project. Could be an actual jumper, a work-out piece or a self-drafted dress. Decisions, decisions…!

Postscript! I’ve since found out that this McCalls pattern has been rereleased under M8168, Taylor McCalls

Other shorts I’ve made:

The making of McCalls M7726 shorts – an unexpected triumph!

M7726 shorts made by ooobop

One of the many reasons I wanted to sew my own clothes was so that I didn’t wind up wearing the same as anyone else. Not to stand out from the crowd necessarily but just so I could be me. 

But every so often the sewing community manages to turn that ideal on its head and makes me want to sew the things other people have made, haha… oh the irony!

M7726 shorts made by ooobop

In particular McCalls M7726 shorts. As spied on Giorgia’s Insta feed over at @1stitchforward. I mean, come on…. super classy matching fitted jacket and all! 

In between then and now, I have been careful not to overbuy fabric. It’s crazy to think that I’ve never got the right kind to use, despite a toppling stash. But when I saw a little Chanel suit on the YouTube FF Channel – a fitted jacket and shorts in their signatory bouclé, I think – I remembered some fabric I was saving for a ‘particular something’!

M7726 shorts made by ooobop

Now I’m not trying to pass this awful fabric as bouclé. But I did envision it as giving a similar vibe. Ten out of ten for naivety…!

I’ve no idea what this fabric is. But I’m sure you can see from the flat lay below, just how vulnerable to pulling it is. It didn’t take long before I realised it didn’t have a straight grain either! I sulked for a bit. And sweated over countless placements of the pattern pieces. Didn’t matter how I manipulated those bunched criss-crossed threads, they just did as they pleased. So I followed the selvedge for the ‘straight’ and ignored the ‘grain’ because there wasn’t one… seriously frustrating!

M7726 shorts made by ooobop

Once the pieces were cut. I had another sulk because I was convinced they were going to look so wonky. And the fraying! More like unravelling! It is such a loose weave. I abandoned it at this point knowing no amount of overlocking would hold those edges.

And then a brainwave. A roll of Prym seam tape to the rescue. Literally a whole roll! Every edge of every piece I taped down. And then overlocked for good measure. I’m still yet to wash them so I don’t know how well it will hold.

M7726 stabilised pieces

After I did this it was more enjoyable to sew. The impending feeling of failure was much reduced and I serged on. But I definitely ruled out the prospect of a matching jacket!

M7726 shorts made by ooobop

Tailor tacks were many and necessary to align all pieces. Though not fun to pick out at the end! I had to be super careful of not pulling out threads of the actual fabric!

But as the shorts started to take shape, I began to love the project. And I felt pride in not giving up.

I love how neat those pockets are. Probably due to the stabiliser tape. But the edge stitching gives a sharpness too.

No such word as ‘cant’ !

All was going well and then I had a wobble over the belt loops. How on earth was that going to work in this fabric? With lashings of Prym Fray check. Thats how!

The instructions were to make a long tube and then cut to size. ie: sew along the long edge, trim, turn, edge stitch and cut into 3 separate pieces. In fall-apart fabric? That was going to be a joke. I considered other options and with some great suggestions from IG followers as a safety net, I went ahead to try – just in case it did work. Thanks to that stinky stabiliser, it actually did.

M7726 belt loops for shorts

Though the bodkin wanted to poke out between every thread of that fabric tube along the way. Boy I’ve become a determined soul in my old age!

And finally the leg hems. My initial thoughts were not to roll them them up as suggested as I think its a bit of a scruffy finish with the side seams showing and all. I sewed another pair of shorts here – sadly outgrown – whereby bias cuffs were sewn as turn ups. It’s a much neater technique that hides all the raw edges and side seams. But then I had a little think and noticed that the open seams are kind of camouflaged so I opted for the more casual look to the turn up as per instructions.

M7726 shorts made by ooobop

For such a little project there were plenty of painful and lengthy processes but lots of new lessons learned too: Believe it or not, this was the first time I’d sewn a fly zipper, and belt loops! And I’m pretty damned chuffed with the result. I genuinely thought they were heading for the recycling bin so soon into the project and yet now I have a great pair of shorts for all seasons!

M7726 shorts made by ooobop

We took a little wander at sundown with Dan to shoot under the flyover at Hammersmith. In truth we didn’t have the energy to go further afield – it was very hot!

I can’t wait to sew these again, in a more stable fabric of course. It will be a breeze. Breeze! Oh how I want actual real life breeze right now. Bring on the storms!

Bring on the summer, I’m sundress ready!

Janene is posing with her right hand on a low white wall with trees and bushes in the background. She is wearing her handmade sundress and sunglasses and smiling with head back

I had absolutely no plans whatsoever when I placed my order for this delightful Robert Kaufman cotton poplin fabric, which is usually a very bad mistake. Rash decisions with no end goal ultimately end up with more material languishing in stash mountain for a considerable amount of time. But I had to have it! I don’t generally like novelty prints but I think this can be classified more as graphic print or typographic print – very appropriate for a graphic designer anyways! And I absolutely love it!

Janene is leaning against a tree holding a piece of grass, wearing her handmade sundress

When it arrived I was in awe of its texture. I don’t think I’ve ever worked with cotton poplin before – the cottons I’ve worked with have been much smoother and crease a whole heap more. You can see the weave of the threads on closer inspection of this one and it’s got a marvellous matt quality to it.

Janene is posing straight on with both hands on hips wearing her handmade sundress and sunglasses

It feels very similar to some vintage batik fabric I used last year for a sheath/shift dress and I love how that one feels against my skin. So after much deliberation, I decided upon something much the same – fitted for sure but with all this roasty toasty weather we’ve been blessed with, I also liked the idea of baring my back and cutting away the shoulders to air a bit more skin!

Janene is posing with her back to a low level wall alongside the river with trees and bushes in the background, wearing handmade dress and sunglasses and smiling

But I had to get my skates on. Not only did I have a Minerva review deadline, there was an Insta hashtag challenge I was determined to join in with, too.

So typically, I decided to make things just a tad more difficult for myself by designing, self-drafting and sewing my own fitted sundress!

Janene is posing in her handmade dress and sunglasses with one hand on hip and the other in a mock salute

I traced my existing sloper template to include princess seams and a V-neckline, increasing the underarm curve slightly above the bust across the side front where it meets the centre front piece seam and the ‘strap’ that is graduated to the shoulder and meets a back extension to form a buttoned halter-neck.

I created a facing for the whole of the top half to the waist. I did consider making it shorter but I may add a lining to the skirt section at some point.

To finish the seams, I trimmed and pressed the seam allowance to the side and topstitched alongside the joins to create a kind of faux flat felled seam finish.

Close up detail of the bodice section to show the faux flat felled seams

It’s not a bad fit for a first trial. I did do a mock up of a shortened version and its seemed to fit just right but its amazing what issues a little real life walk-around brings to the fore.

It transpires the back section collapses a little and could probably do with a bit more support. Maybe some interfacing would have given more structure or perhaps I need to add bones in the side and centre back seams? Or maybe I just live with it. What do you think? That said, I love how effortless it is to wear right now and I don’t particularly want to have to sit so upright in it all the time!

Back view of the dress that Janene is wearing to show that it is collapsing a little.

Needless to say, I’m not deterred. It’s so perfect to pair with espadrilles and I’m sure I’ll be donning trainers with it at some point, even flapping around in flip flops – DM’s too, probably. They’ll all go well with it, which proves its very much my kinda dress!

Janene is sitting on a log in the shade wearing her handmade dress, sunglasses and espadrilles. She is looking into the distance with her left hand on her shoulder and the other on her lap.

By the way, the fabric is called ‘Out of Print’ and if you like it as much as I do, here’s a link, but you’ll have to be quick. I don’t think theres many metres in stock.

Thank you so much to Minerva of course for gifting this lovely material as part of the Brand Ambassador programme. And also to the lovely ladies of Instagram (@sewing_in_spain, @Rocco.Sienna and @SewSarahSmith) who are hosting the #sewtogetherforsummer challenge which involves sewing a summer dress before 21st June. There are so many great entries already which have totally inspired and spurred my project along – do have a looksee! Sometimes deadlines are a good thing… Yay! I did it!!

Janene is walking towards the camera but looking to the side, holding a blade of grass. She is wearing her handmade sundress and sunglasses and espadrilles.

One more thank you to my Daniel for finding this ideal little suntrap along the river and for taking these fabulous photos.

http://vg9.14e.mywebsitetransfer.com/retro-butterick-57-halter-dress/
http://vg9.14e.mywebsitetransfer.com/speed-sewing-for-summer/

So much love for the self-drafted Dolce dress of dreams

Remember that divine Dolce fabric I was compelled to buy, back at The Stitch Festival 2020? Well it just got stitched up. And boy oh boy it didn’t disappoint. 

I had absolutely no idea what I was going to do with it at the time. But I knew it was going to be fabulous, even if I simply draped and cinched with a belt! It’s an Italian cotton metalassé according to the selvedge – a cotton and lycra Jacquard according to M. Rosenberg’s web listing. But all the same a quality weighty, textured stretch fabric of dreams. BTW, I pre-washed at 40 degrees and those colours still popped! And heads up, there are 3 singular metres left remaining on their site if you’re a sucker for a crazy-ass in-yer-face designer print as much as me!

Despite the try-hard distraction of the print, the texture of the metalassé holds it’s own

Ultimately, I decided to let the design speak for itself. Any clever design lines were going to get lost and I wasn’t going to jeopardise one bit of that amazing artwork if I could help it. That meant no darts, no pleats, no tucks, no waist seam. Mmmmm. A full length maxi dress for ultimate impact. That is the end goal. But first to trial a short sheath to test the fit. I bought enough to have a long and a short version, psychically of course!

I’ve drafted a few woven dresses in the past, for me and others, but I’ve only recently worked a knit sloper. So earlier this year I practised on some turtle neck rib-knit tops to test the fit – see black one here, and red one there. All I had to do was extend the bodice pieces to a dress length and omit the sleeves. I didn’t want a turtleneck but I did want a jewel neckline so I didn’t alter that much either.

Though I was happy with the results I knew that the template might not translate in this weightier stretch. Comparatively, the rib-knit was light weight and had way more stretch. I should really have trialled a sleeveless version too but impatient me couldn’t wait any more and I just went for it.

The pattern pieces simply consist of a back a front and some self binding for the neckline and the armholes. And cutting it out was a joy. Not only because is was dead quick with a rotary cutter and all, but it was so satisfying – no slippage, no stretching… just a lovely little satisfying crunch as that blade sliced through!

I first sewed the shoulder seams, after applying my favourite iron-on stabilising tape [aff-link] to limit any stretching, then I sewed the side seams using my overlocker. The first try-on highlighted a bit too much ease in the armholes so I nipped 1cm (so 2cm in total) off the end of the shoulder and graduated to zero at the neckline. 

Happy with the rest of the fit I pondered the effect of facings over bindings. I have a love-hate relationship with separate facings – they always flap around and need ironing flat. The only ironing I don’t begrudge is pre-cutting out, and not post assembly! I much prefer an all in one neck and armhole facing that curves over or under bust. But this fabric is quite heavy and I feared the result would be too chunky.

So I decided on bindings which would mean trimming the seam allowances back a bit to allow for the additional 1cm wide strips to sit comfortably.

Looking at the back I can see that  I would need to lower the armscyce next time. It’s comfortable and all but the knock on effect of taking out the ease on the shoulder has raised the underarm. Not a biggie though. That leopard over my shoulder is a dammed fine distraction!

As you might imagine, the thing that took the longest with this dress was consideration of placement. Both back and front are good. Like stupendously good! There was no pattern matching necessary. It was just plain choice. Well, and the want to not decapitate the chap on the front! I decided I didn’t like the idea of someone on my back but I did like the possibility of the back side being prettier than the front. So that’s the way the cookie crumbled.

We had such fun taking these shots yesterday. Dan had recently been on a walk shooting birds along the Grand Union canal and suggested it might throw up some lovely backgrounds for the shoot. He wasn’t wrong and I was very humbled by all the wonderful comments from passing strangers, about my dress. It’s so effortless to wear. Though not quite the weather to wear without tights yet. No-one needs to be blinded by the intensity of my pale pins so soon into the year! In any case. It’s very short. I’m sure the world isn’t ready for my pants either!

More is more, when it comes to tights!

We walked to Westbourne Park, with a cheeky peek at some market stalls in Portobello along the way. Couldn’t resist this odd fabric from a vintage stall. Anyone want to hazard a guess as to what this is?!

If you can bear to watch this space for another year or so, who knows what kind of crazy dress this will turn into!

And there we started our walk, all the way to Paddington basin where we sat for a lovely lunch and a cheeky beer or two in a beautiful Victorian pub. 

A bus ride back through the remnants of a demonstration in Hyde Park was quite exciting. A few more beers and a takeaway to round off a fabulous day of doing what we both love. Bring on the sunshine – we want more London days like this!

So a gazillion thanks to Daniel James Photographic and not forgetting Dibs who blogs at Dibs and the Machine , sells incredible designer fabric at Selvedge and Bolts and who was instrumental in making me buy this fabric in the first place!

Testing the Tamzin dress

BHL tamzin dress by ooobop

It’s been a while since I’ve taken on any pattern testing. I’ve been trying to claw back time so I can focus on a whole host of things that I want to work on and develop and I managed to resist the urge until By Hand London contacted me to test the tremendous Tamzin dress. How could I possibly refuse?

It’s so floaty, so folksy yet so cool and classy all at the same time.

And if you hadn’t noticed already there’s some beautiful bonus details which bring the added charm.

A square neckline is always a favourite of mine. I love the clean lines and that it shows just enough skin to keep it classy. The external front and back neckline facing is such a neat finish. I’m sure it helped that I used quite a lightweight fabric to get that topstitching nice and consistent but the proof will be in the pudding when I get my hands on some lovely linen for the next version. I just can’t resist the urge to embellish that facing much like Elisalex did.

BHL Tamzin dress made by ooobop

Incidentally the fabric I used for this was won over a year ago, in the #brightsewing challenge hosted by @thepinkcoatclub and @theunfinishedseamstress. (I had entered my Yellow shiny appliquéd number!) Part of my prize was a voucher which went towards this amazing Atelier Brunette diamond viscose fabric from SisterMintaka. It is such a beautifully soft and draping fabric that I was almost too scared to use it. I wanted it to be for something special and, well now you see it!

I didn’t quite have enough for the full length of skirt – its quite hungry on the yardage due to those pin tucks and the sleeves pieces are huuuge! – but to be fair, I had already decided on a shorter version so there wasn’t any heartache involved. Except I sewed the pin tucks too small!

And let’s just take a moment to ogle at the pin tucks on the sleeves. Aren’t they simply divine?!

By Hand London Tamzin Dress sleeve detail

Before I read the instructions I had anticipated a right royal pain in the arse time of getting them even, especially with drifting draping fabric but there is a nifty technique included to make life so much easier and perfectly sized and spaced pint tucks to boot!

Now you may think I’m being lazy here but another selling point of this pattern is that there are no closures on this dress other than the delightful back ties. I don’t hate sewing zips as much as I used to but the joy in not having to sew one at all is immense!

BHL Tamzin dress handmade my ooobop

I chose the variation with the ties that start from the side front and wrap around the back. There is another version of the tie that starts from the back. But I wanted all that ribbon detail and for it to cinch me in at the waist.

I think you can probably tell already how happy I am with the result.

BHL Tamzin dress made by ooobop

The instructions were super clear, and it was a joy to sew. Not complicated at all but I must add that it’s not the quickest dress to whip up – those added details come at a price of a couple of hours more but it’s totally worth it.

Are you sold? Or have you made one already? I’d love to know what you think either way.

Handkerchief hem dress

ooobop design hankerchief hem dress

Lockdown forced me to buy fabric online. Not my favourite thing to do but needs must when Covid pulls the rug!

I headed straight to Minerva – amazing selection; easy to navigate website and very competitive prices. I’m also a fan of the accompanying videos that showcase the fabric in action so you can get a fair impression of the weight and drape.

I was on a roll with the Shelby rompers, having made a starry one, a tropical one and an upcycled one in relatively quick succession, and my plan was to make a plain one that was a bit more casual and downplayed for those days when you want to be slightly less visible. Read: any excuse to go back to black!

I’m a sucker for black. But even moreso for a black fabric with a texture. And linen is a firm favourite. So I figured this crinkle cotton striped linen gauze would tick all the boxes. Black was sold out unsurprisingly, so I went for charcoal which actually champions those slubs with way more contrast.

But when it arrived I was a bit miffed. It wasn’t at all as I’d imagined. It was a bit scratchy, a bit wonky with it’s loose weave and worst of all, following a prewash it contracted to half the width! That lovely slubby texture totally worked against me, didn’t behave at all like regular linen and was almost elastic! – I was dead scared to make it into a romper. What if one leg ended up longer than the other, lol!

ooobop hankerchief hem dress
Channeling Blondie and Parallel Lines!

Despite the disappointment I rejoiced in the realisation that I’ve come far enough into my dressmaking journey to know when a fabric isn’t going to cut it. And the tantrums are few and far between now, because I’m quicker at finding solutions. Also the fabric completely softened after a prewash and I was more determined than ever to let this fabric do the talking.

So I went off piste. Not accidentally I’m sure because I’ve always got a catalogue of crazy designs in my head and sometimes they make it to a page in my Fashionary book so they’ve got a better chance of being realised. A summer linen dress incorporating a fitted sleeveless bodice, with a v-necklline and a handkerchief skirt would be it’s destiny.

ooobop hankerchief hem dress

I reached for my bodice sloper, added a v-neckline and narrowed the shoulders. I also swung the darts to fashion a double French dart for no good reason other than I’ve never done it before. And I really like the result!

The vertical stripes of this linen lend themselves perfectly to the bodice but I decided to switch the stripes horizontally for the skirt section because I much prefer how horizontal lines fall at the sides. There was precious little worry how it would all hang for cutting it on the cross because I was playing to it’s wonky nature in any case. And it turned out good. In fact more than good. I love it!!

ooobop design hankerchief hem skirt detail

I have to cite a few influences here: Liz from this year’s GBSB for sticking to her alternative fashion style. I realised I was drifting away from mine and she’s unknowingly reeled me right back in! My bestie Laura Bird who loves an All Saints asymmetric number, always sporting an ‘interesting’ dress and Burda Style for first introducing me to a hanky hem!  I made my first maxi dress here and a second silver one here  and they are still my favourites though this is my first short dress with a handkerchief hem.

So how did I cut the skirt?

I decided on the length of the skirt (the depth) and factored in seam allowance and hem.

I made the width of the skirt to the following calculation:

Front piece (cut 1) = half waist measurement + (2x length of skirt) + 8inches for 2 box pleats + (2x hem allowance)

Back piece (cut 2) = quarter waist measurement + (1x length of skirt) + 4inches for 1 box pleat + seam allowance + hem allowance

I marked the centre of the front piece and 4 inches either side to tack the box pleats. I overlocked the bottom of the bodice piece and the top of the skirt pieces before pinning and sewing in place. I sewed up to the side seam on each piece and then sewed the seam allowance of the extra fabric along the top edge. After the centre back edges were overlocked, I inserted an invisible zip and enclosed the top part of the zip with the facing.

Finally I hemmed all four edges of the skirt and mitred the corners. And oh what a neat little finish that is!

ooobop hankerchief hem dress

I know it’s not the most groundbreaking dress. But I made it to my own order and an image in my head and it really feels good. The fabric feels good against my skin in this heat and I love how carefree it is.

I finished up sewing it yesterday morning in good time for Dan to have a practice with his new camera. (Clever, hey?!) And I’m delighted with the results. Thank you oh clever talented husband of mine!

ooobop hankerchief hem dress

Also…new shoes!!  Buffalo hologram numbers that literally turn rainbow in the sunshine. And yes I know I’m probably channelling 90s Spice Girl. And no… I’m not about to grow up anytime fast!

Vintage Laura Ashley Romper

Shelby Romper Suit by ooobop against a white wall

Last weekend was a Godsend. Seriously. As a sewist, who wouldn’t relish permission to sew your undivided heart out for two full days whilst tuned in to all manor of inspirational videos and chat from the best kind of community ever. I’m talking the #SewingWeekender hosted by The Foldline and English Girl at Home, obviously. The event that sparked so much joy and raised so much money for such great causes.

And hey, I made a new outfit in the process, too!

ooobop shelby romper against white wall

I’m not sure if I can ever stop making True Bias Shelby Rompers now. This is my third and still I’m not done!

This wasn’t the intended fabric though. I had factored in some crinkle cotton linen gauze, but following a prewash, it crinkled to half the size and became all elastic and everything. I set about ironing but got bored after the first 20cms and swapped it up for a really old pair of curtains instead. As you would!

Ordinarily I have a reputation for exaggeration, but in this case I’m not joshing. I bought these Laura Ashley curtains in a charity shop many moons ago. Quite excited by the vintage factor. Had to look up those roman numerals though . . .

MCMLXXVIII

MCMLXXVIII = 1978 for the less Roman among us!

I bought them when I was dead broke. And still argued the West London inflated charity shop price! They served my previous two addresses as actual curtains and have sat wantingly in stash mountain for the last 10 years. So I think you might relate to my happiness at using them to make my third True Bias Shelby Romper suit.

ooobop shelby romper walking

I get it now. Using the same pattern over and over. If it ain’t broke and all that. Such an easy gig when it works straight out of the packet. I made my first ‘trial’ one in a very lightweight (quite see through) star-print viscose. And I love it still. The second, more improved version realised in a tropical print viscose and it’s so interesting to see the difference when it sews up in a fabric with a bit more structure. The silhouette is accentuated even more and feels good against the skin being 100% cotton and all. Feels even better knowing how many lives it’s lived and yet 42 years on its still many more years away from a landfill!

That said, there was a little issue with the tiny back straps. They didn’t turn as easily in curtain fabric. It’s a bit of a toughie compared to viscose. So following a wee tantrum, I re-cut the pieces on the bias – remembering a video tutorial I’d watched about cutting rouleau loops on the bias – and it bloody worked a treat. Thank goodness I had enough fabric left!

ooobop bias straps for shelby romper suit

This isn’t the end of this particular project. I’ve got plans. Mostly to mess things up! You know what I’m like with my colour palette – there’s not a scrap of black going on, save for the buttons. So I’m going to add some paint. Just a bit. And not quite sure where and what. But watch this space!

Thank you Daniel once again, for my lovely photos. Especially when the clouds dictated we should never have strayed further than the garden gate, let alone to the riverside. But I’m jolly glad we did.

ooobop shelby romper hammersmith riverside