On waving this wonderful Serpentine fabric in front of Mr O, and declaring that I wasn’t sure what I should make with it, my foot suffered an instant shot. “A shirt for me” he said, with no hesitation. Doh! I had no quick comeback! It was a perfect suggestion, of course.
Fabric Godmother were so kind in forwarding on my goody bag, when I was unable to attend one of their events last year and this fabric was one of the treats inside. I thought on first feel that it was a cotton lawn but it turns out it’s a viscose sateen – a new one on me – and it is gorgeous to the touch and super to sew with. Presses beautifully too.
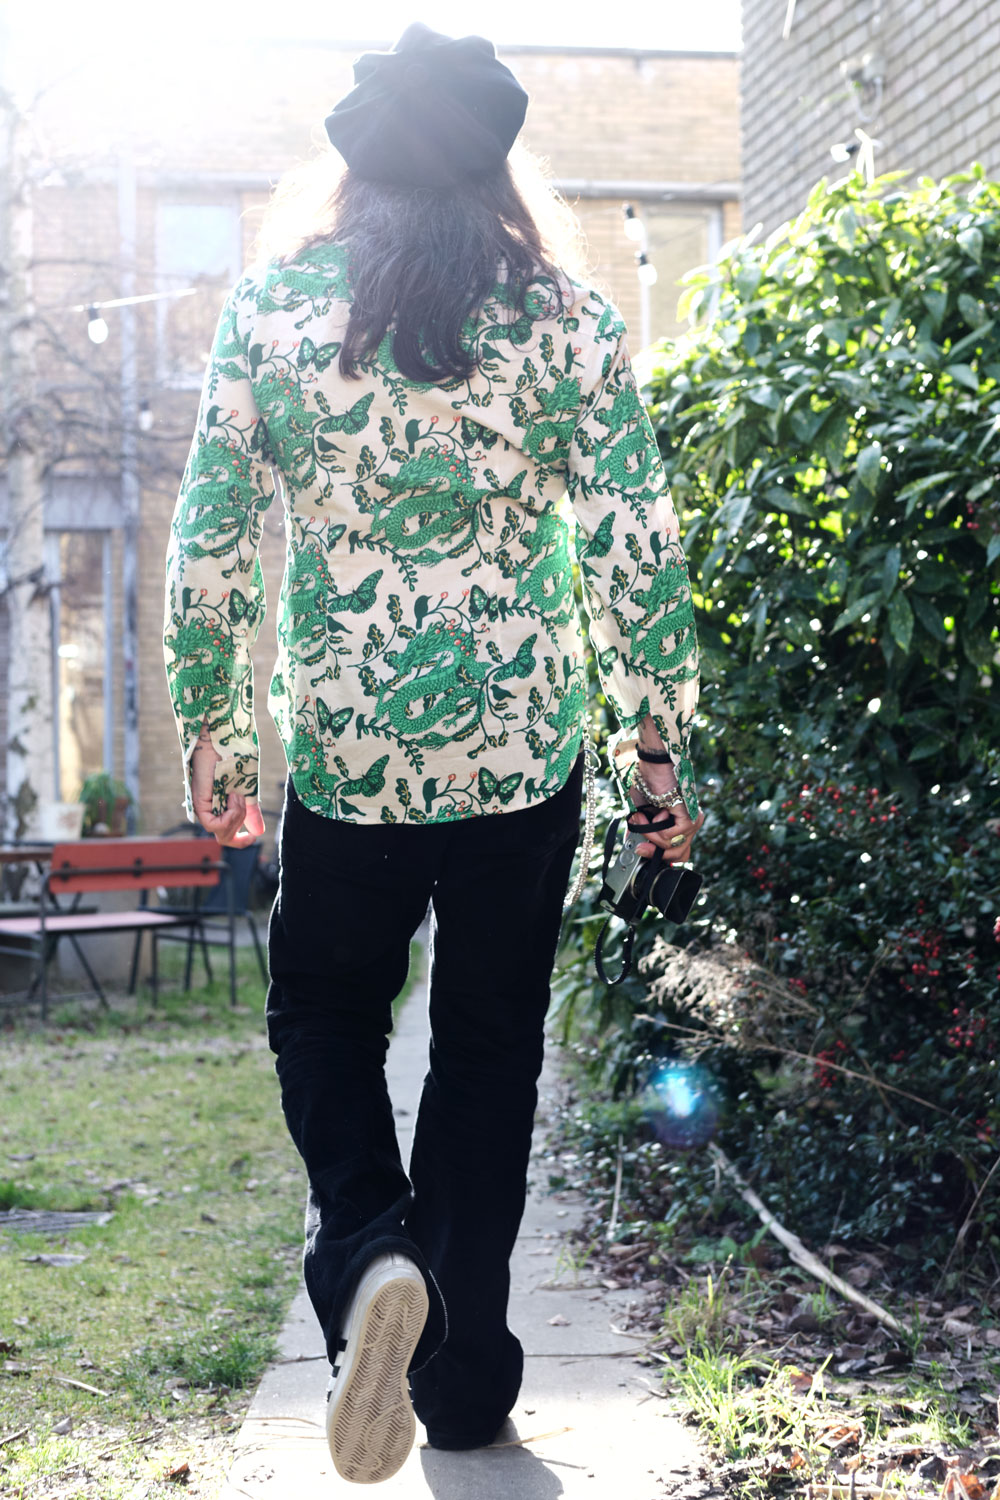
I reused vintage Butterick 5007, (western shirt pattern) for the 4th time – definitely less daunting this time round. The only things I still fear about it are the buttonholes because I know for a fact that at least one will mess up and I’ll have to deal with the nasty task of unpicking it. And that is exactly what happened. Is there actually anything more annoying?
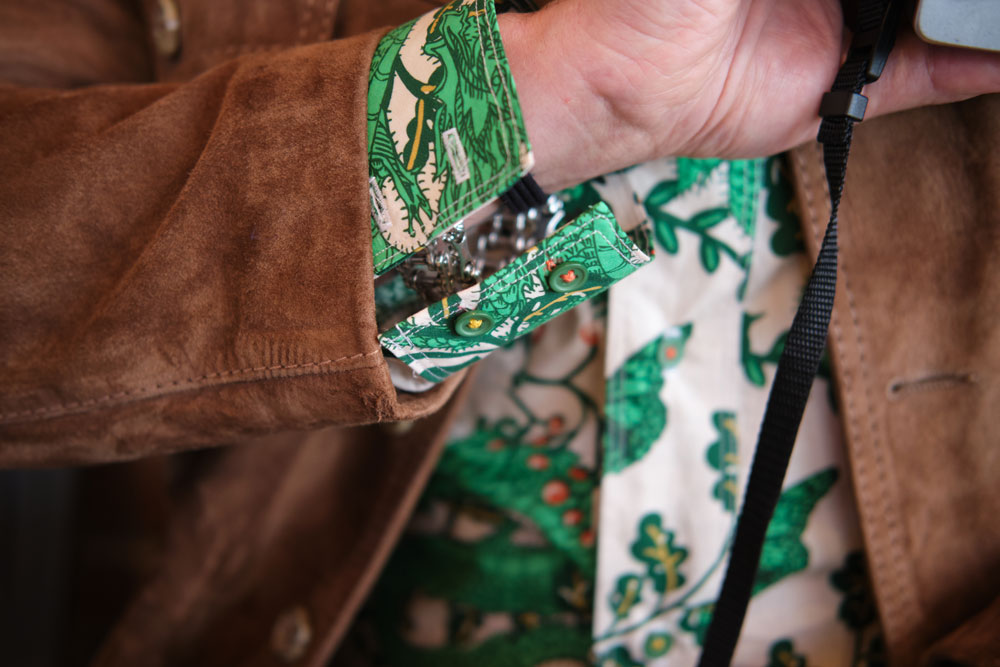
It takes time to put this shirt together, mostly due to all the neat details: curved yokes, rounded hemline; pleats and darts on the cuffs; diamond darts for slim fitting and every single piece has 2 parallel rows of topstitching. But weirdly, I really like the process. The main section comes together pretty quickly and its a great one for sewing in stages if time is short. Which it is the story of my actual life!
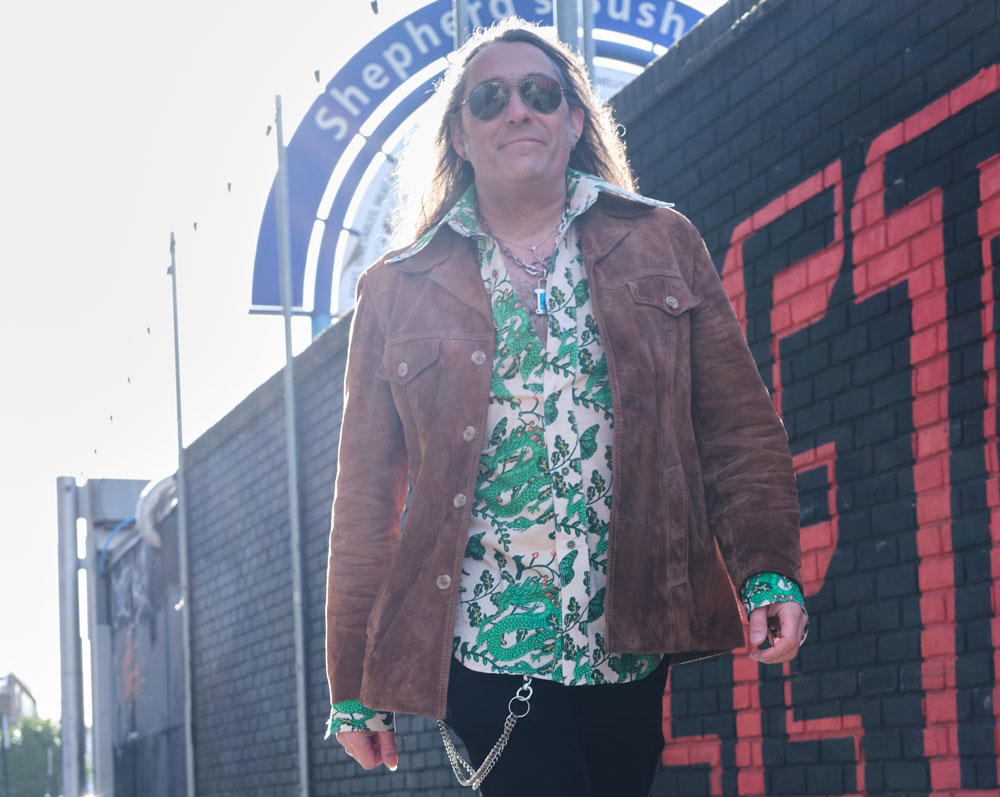
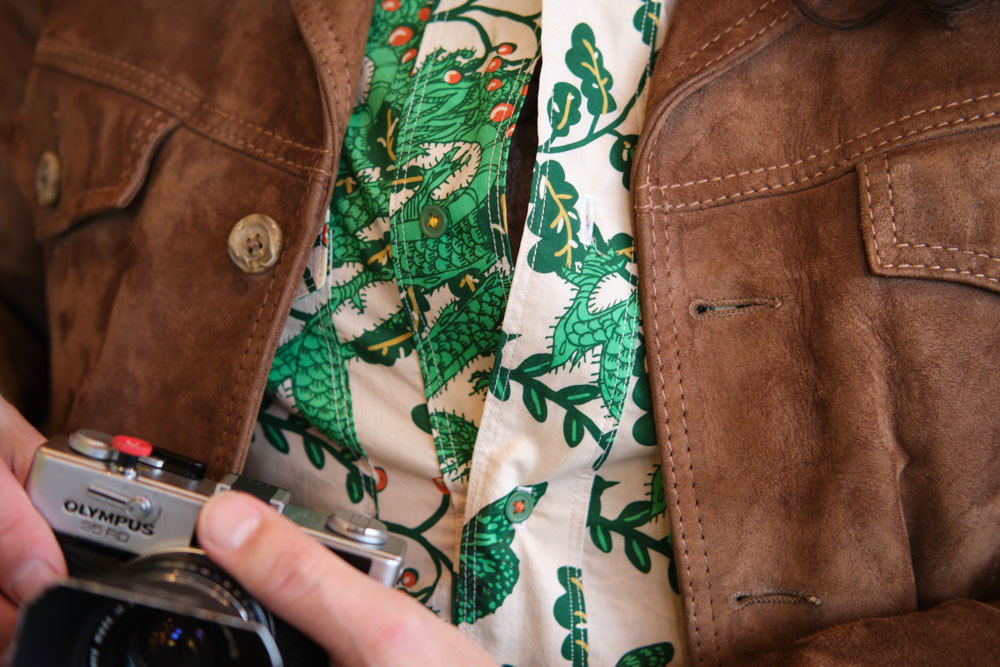
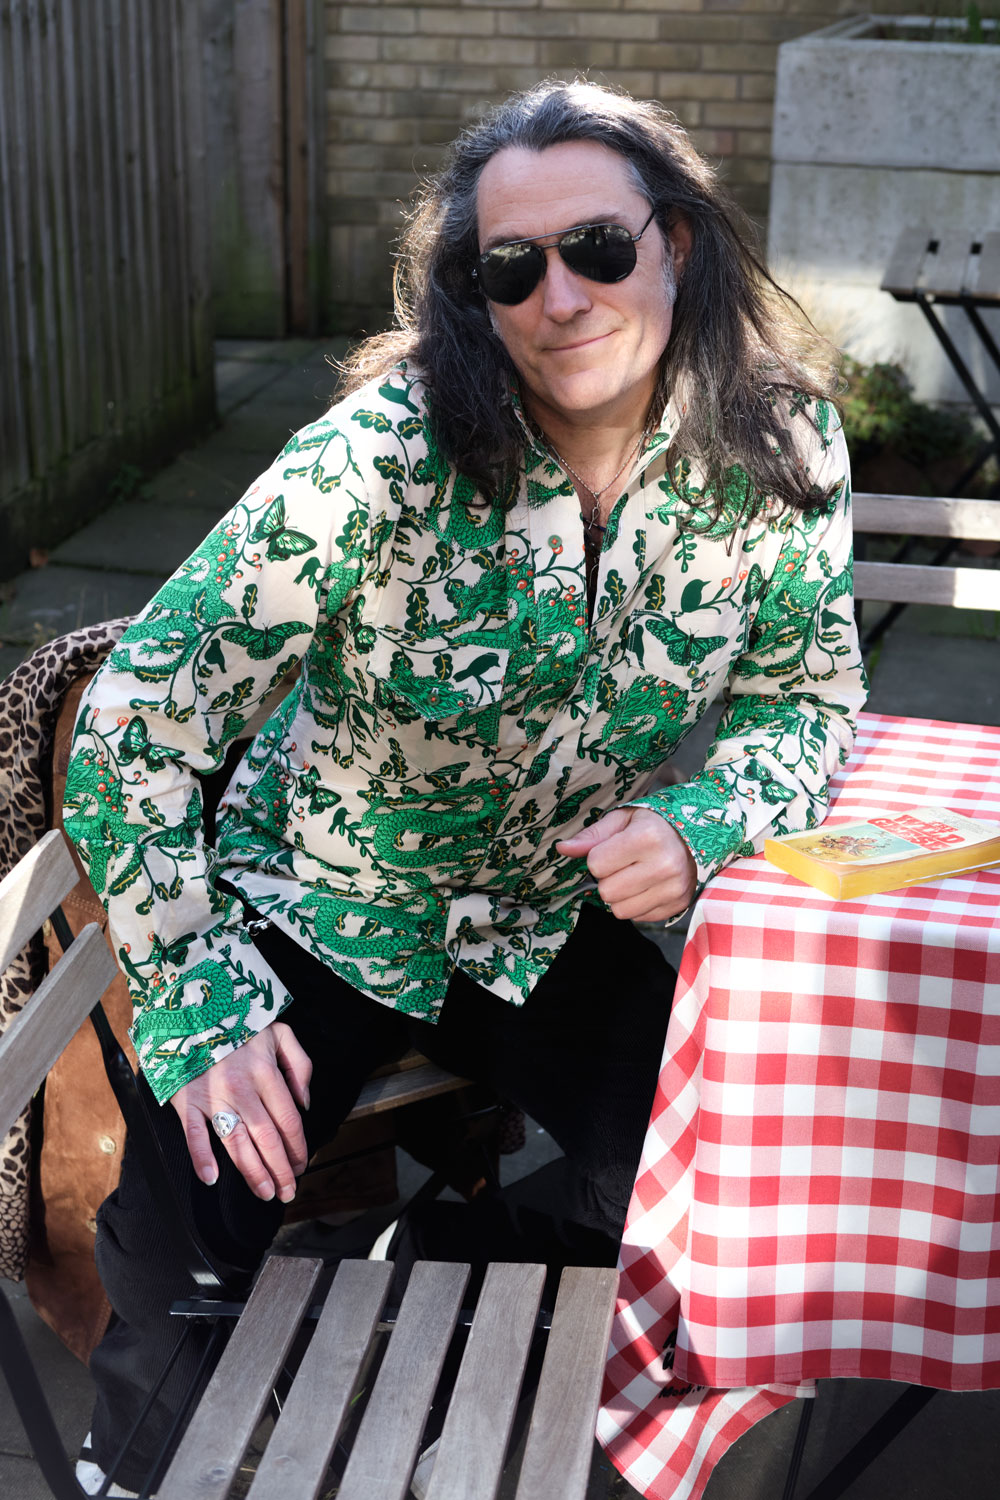
It also has some serious statement collar action going on which Mr O loves. I personally couldn’t carry them off but I think he rocks these aeroplane wings, styled up with his 70s jacket and hat.
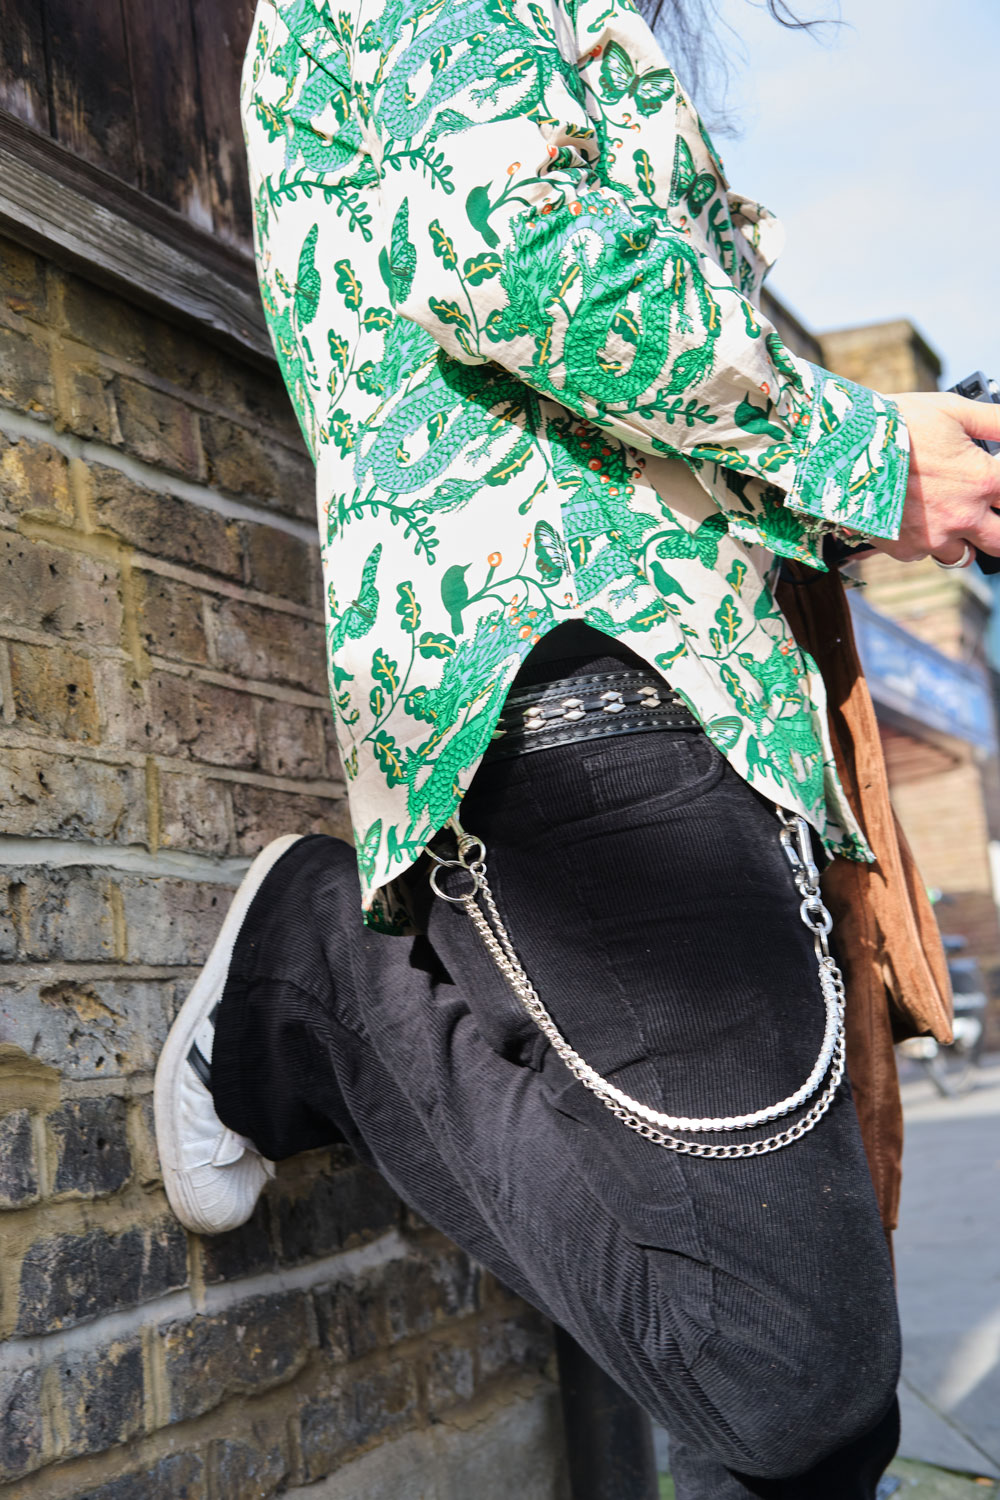
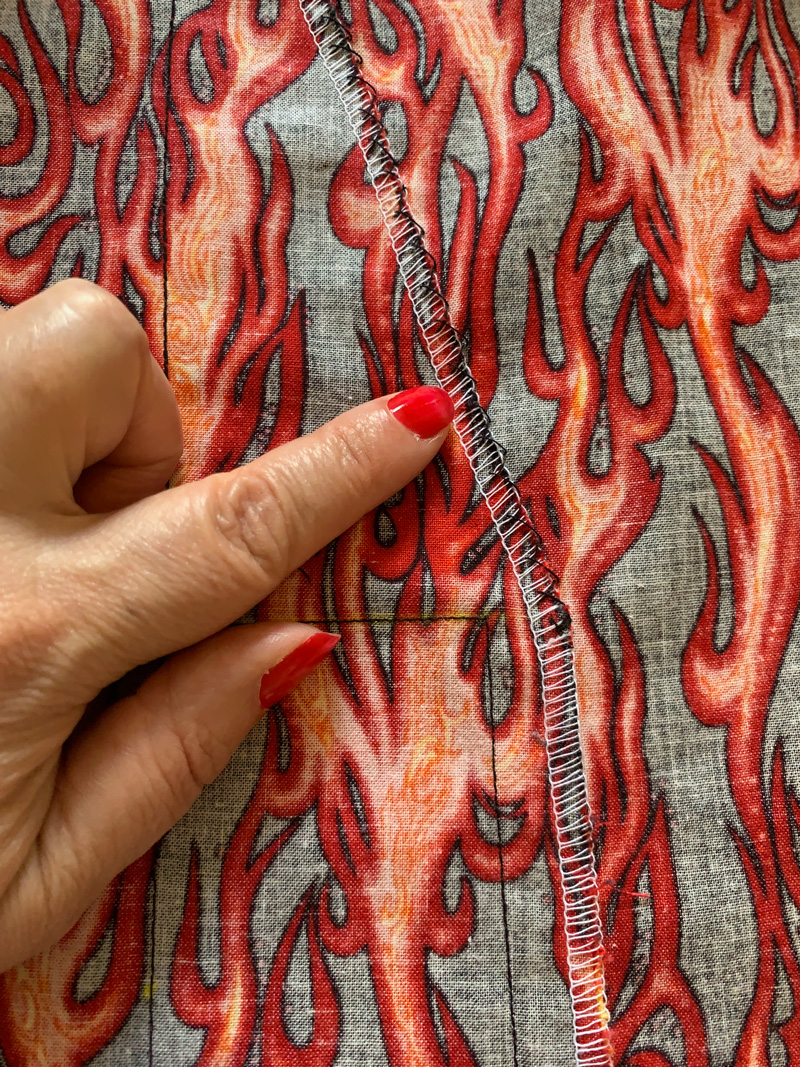
I didn’t make any attempt to pattern match as you can see. I only had 2m to work with – the exact amount required – and there would have been so much waste if I had even tried. That is my excuse and one I am firmly sticking to!
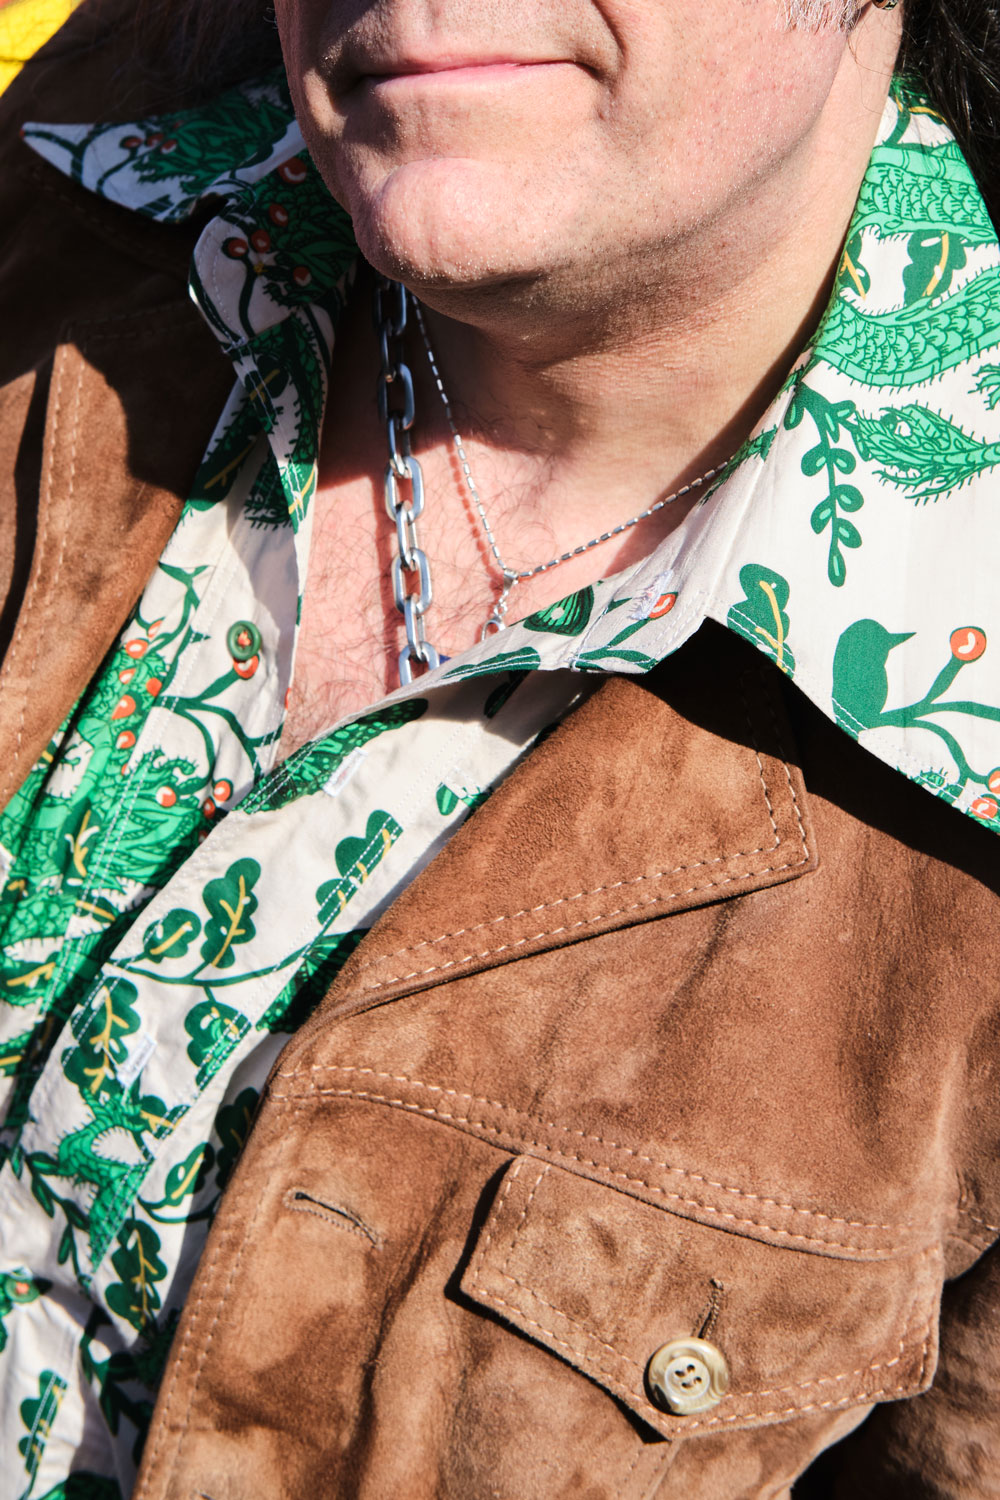
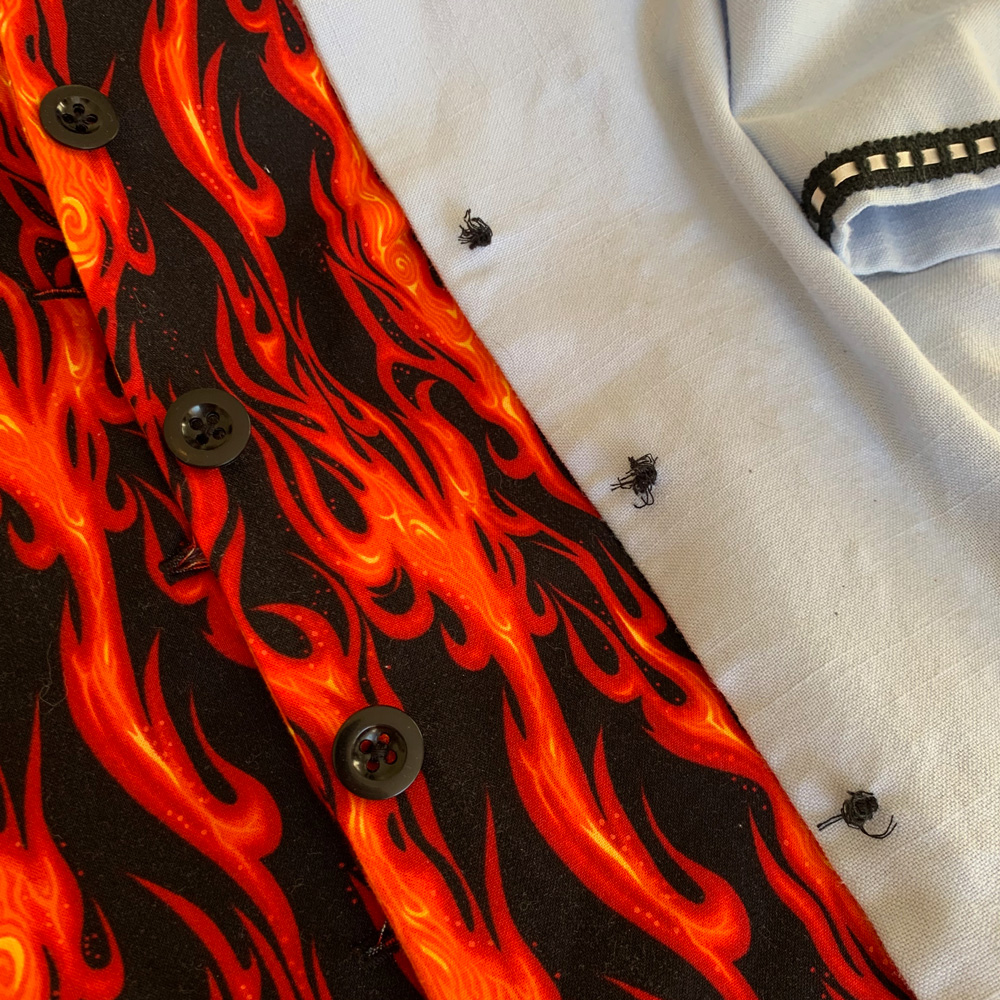
Even though I enjoyed the process, I properly ran out of steam when it came to sewing on the buttons. So I successfully managed to delegate the sourcing and sewing of, to Dan. And he did a fabulous job – giving way more attention to detail than I’d have given – he sewed with alternate orange and yellow threads throughout to complement the colours in the design and it looks simply awesome.
This is definitely not the last time I will use this pattern. I just noticed that Fabric Godmother has a Navy version of the same fabric on sale on their site, and made the mistake of showing Dan!
But he’s going to have to wait a wee while – I’ve got a lovely little commission I need to crack on with and also I want a new coat!
Photos are by me this time. But I think you probably guessed that already, haha! I think I’ll stick to my day job!
I love it when sewing stars align. Like when Minerva sends a call out to promote their new fabric ranges, and the ideal fabric screams to be made up from my go-to 60s shirtdress pattern during a month when one of my favourite annual Instagram challenges inspires me to dust off those vintage pattern boxes.
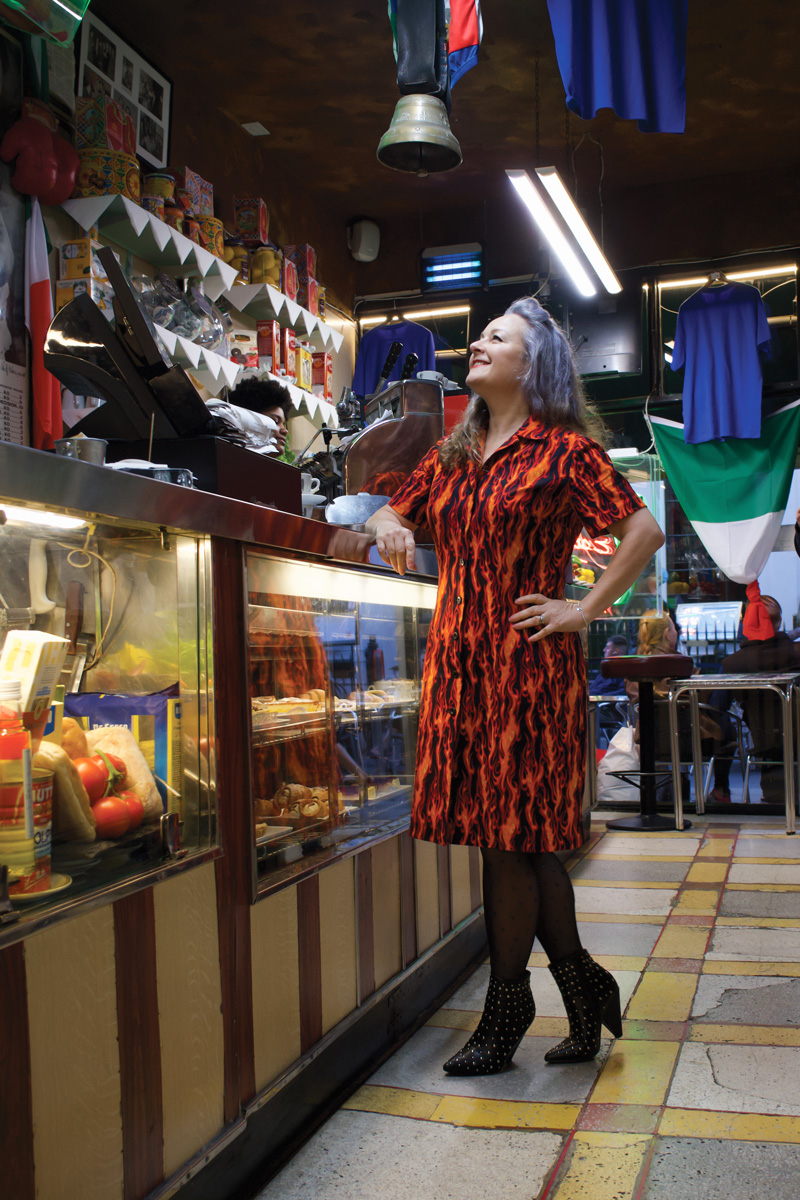
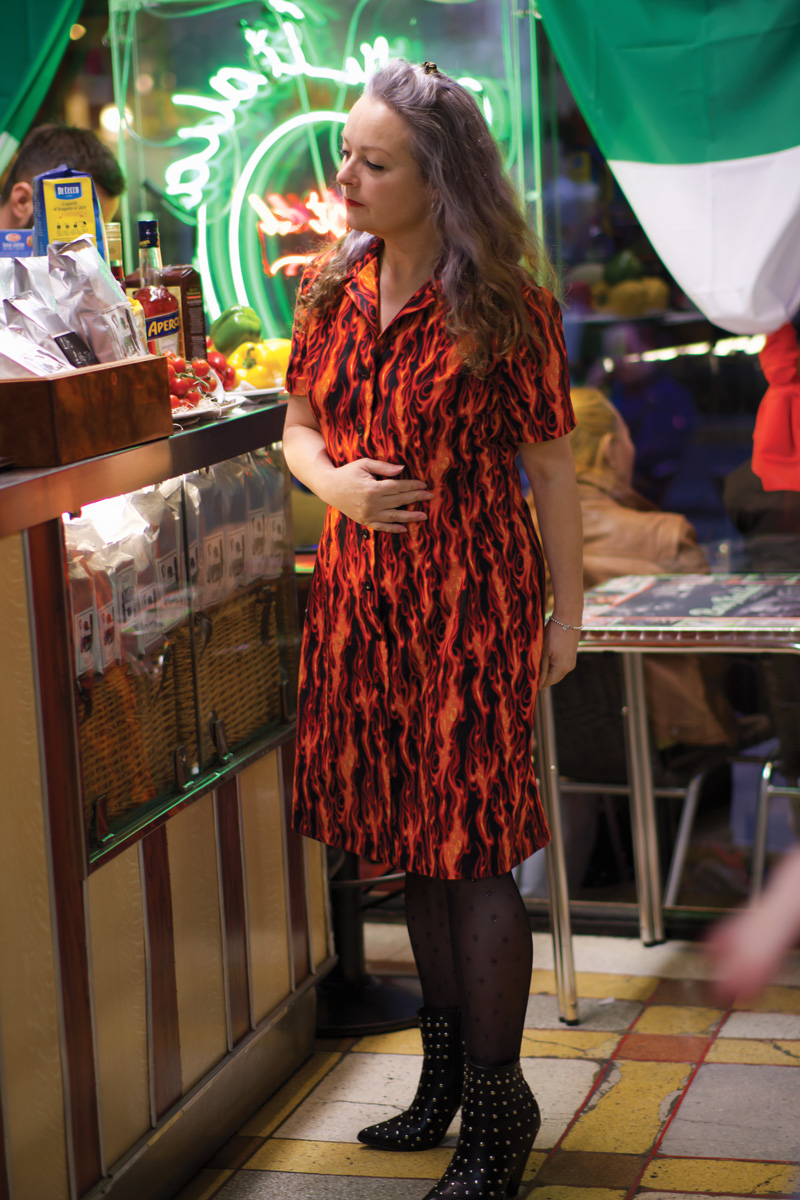
Well those flames spelled out the obvious, to me. A retro Rockabilly shirtdress.
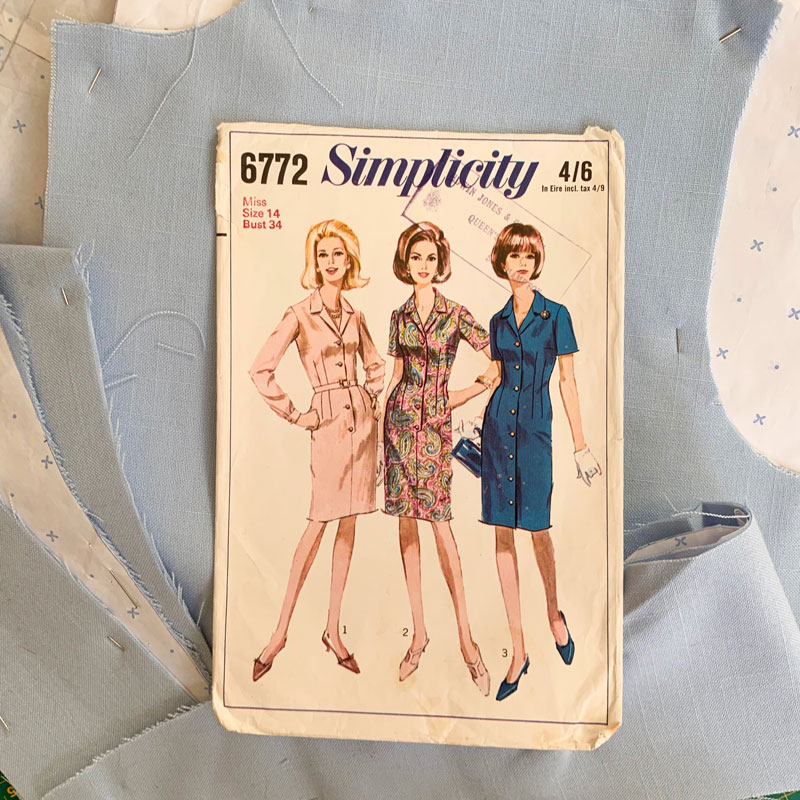
The pattern is vintage Simplicity 6772 from 1966. And a perfect project for sewing up in between busy work shifts. I’ve sewn it up twice before – in dogtooth and in blue – and that gave me confidence to forego any toiling though I did make a few fitting adjustments, namely extending the bodice length by quarter of an inch and lowering the bust and top points of the waist darts. There are 12 darts to this dress: 4 diamond waist darts on the front, 4 on the back, 2 bust darts and 2 shoulder darts which seems very excessive but actually this is very commonplace to vintage patterns and all the better for shaping.
The fabric is a Robert Kaufman cotton poplin which I received as part of the Minerva Ambassador programme. I’ve used poplin only once before, for my self-drafted sundress but cannot fault the quality. It is such a lovely genuine medium weight, imho – not too light and not too heavy. The weave is such that it’s an absolute joy to hand finish the hems – so easy to pick up a single thread for a catch-stitch and it presses so effortlessly too.
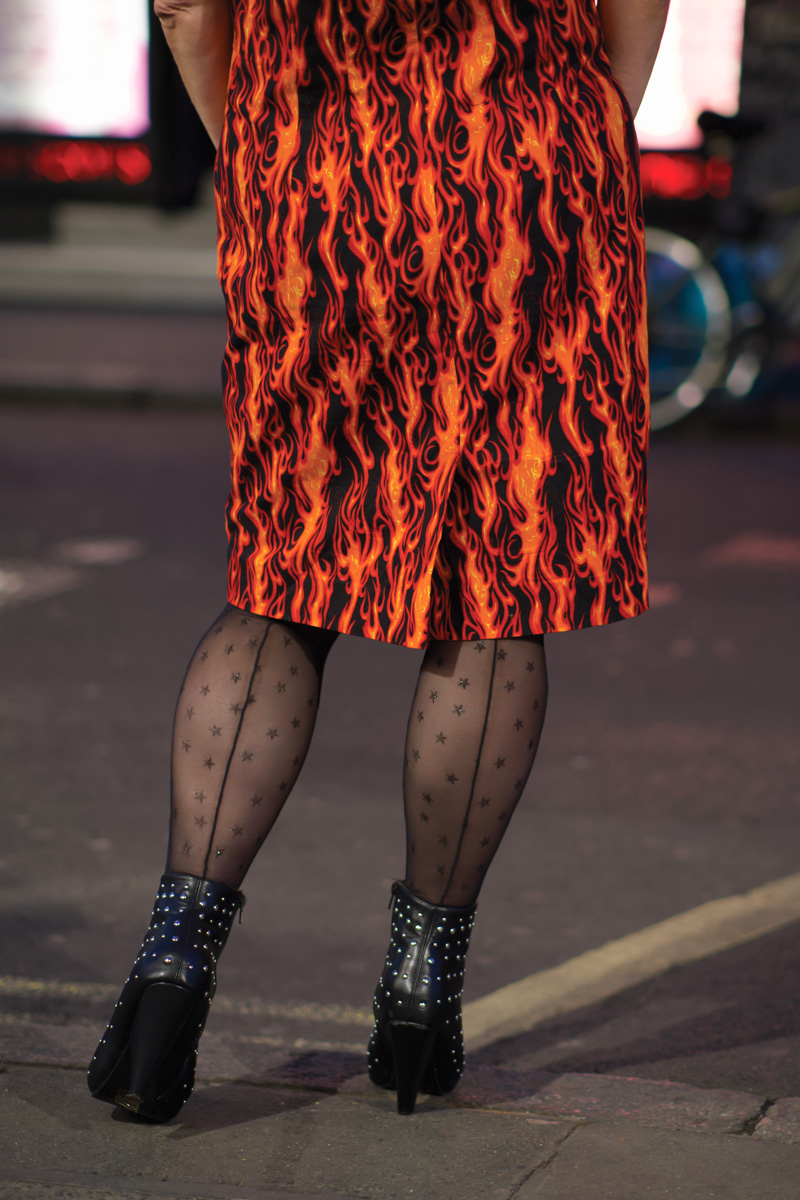
Another advantage is that it doesn’t crease as easily as regular shirting cotton. Prior to taking these shots I’d been walking around in this dress and sitting down for a couple of hours and it still looked pretty neat.
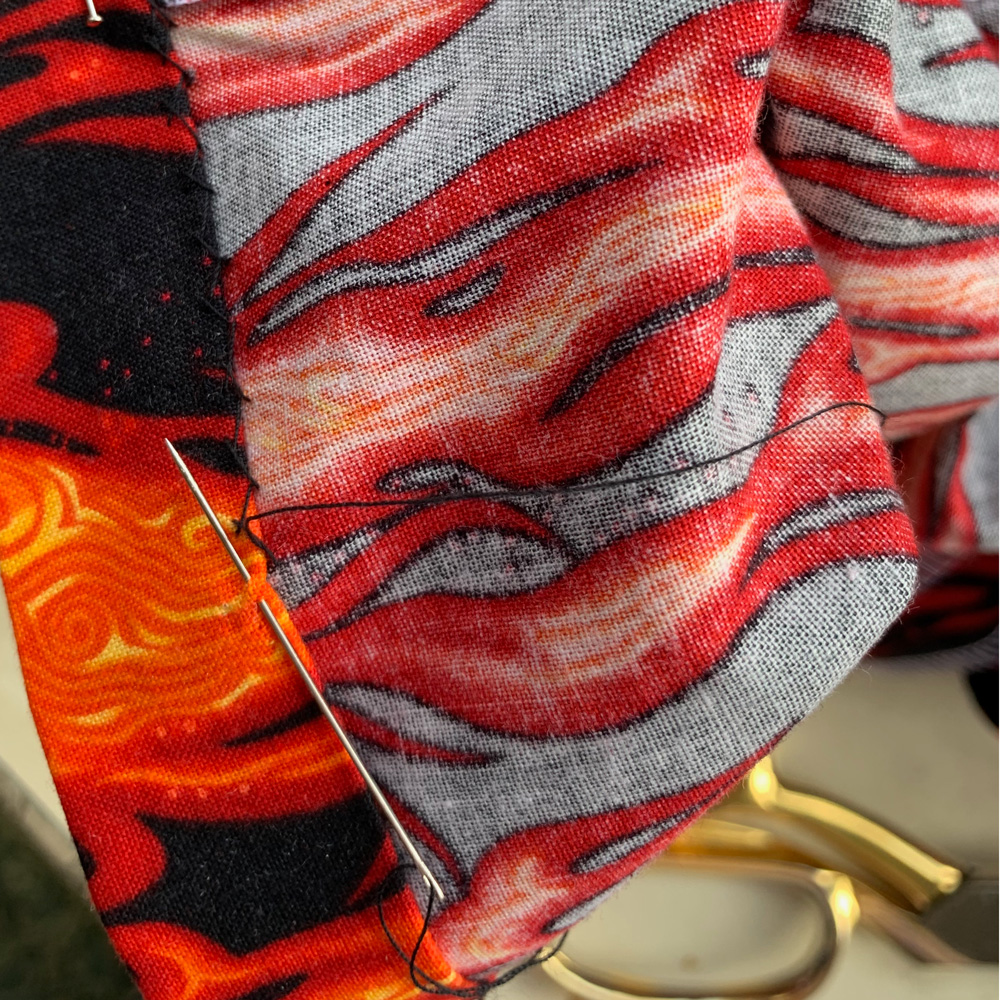
My dresses usually get shorter as the months get colder but this time I opted for a to-the-knee rather than an above-the-knee hemline for a change. The actual pattern suggestion is quite a bit longer but I think I’ve hit the sweet spot. And the little kick pleat at the back looks more sensible when it’s longer in any case.
In order to keep that kick pleat nice and flat and in position, I stitched it down with with a few catch-stitches inside. I think you can tell how much I enjoyed hand stitching this fabric!
It’s amazing how a quality fabric can make so much difference to the whole sewing experience. For instance, pressing as I’ve mentioned before but also for turning nice sharp points on the collar sections and the corners of the front facings. Setting in the sleeves was a breeze, too.
I decided the buttons had to be plain. I’ve exhausted my stash of black buttons and so I robbed some off a previous dress that won’t get any wear over the next six months at least, on account of it being too summery. So I have plenty of time to replace them!
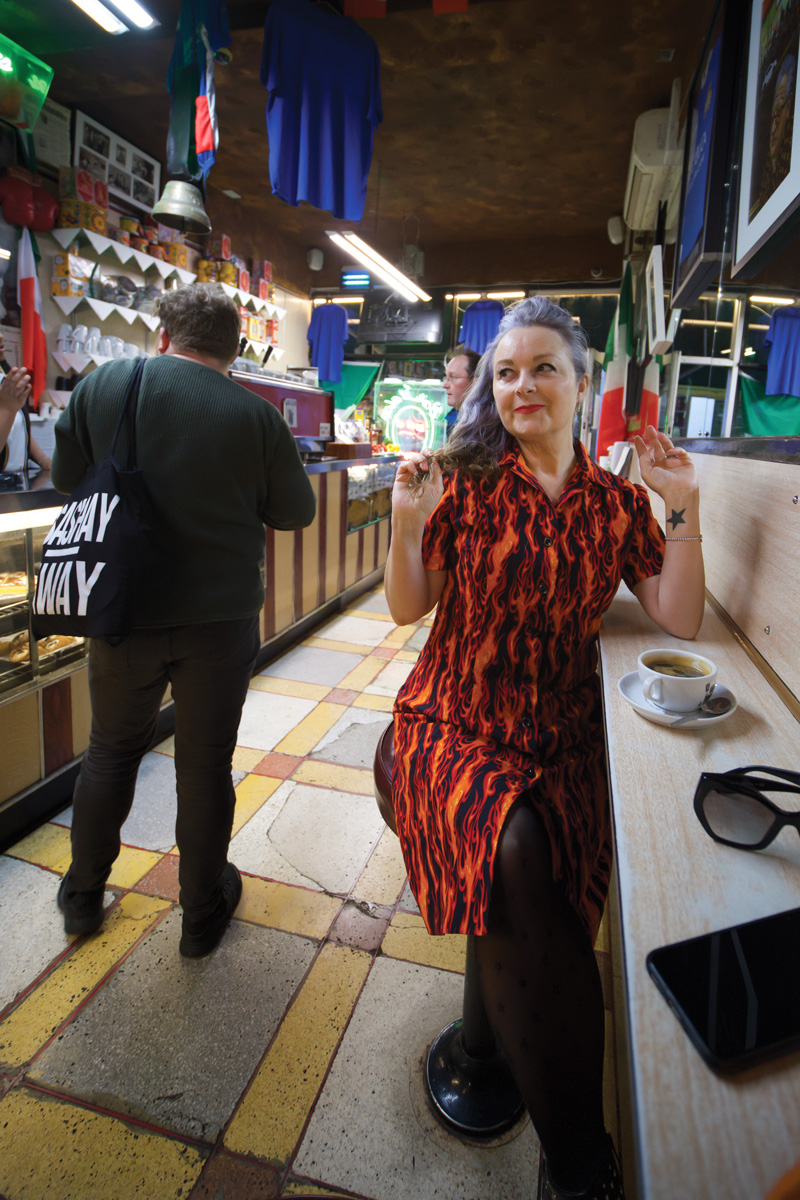
It was fun to take this dress out for it’s maiden stroll around Soho and stop for a coffee in Bar Italia. I used to hang out here a lot in my clubbing days. A pit stop after dancing the night away when you weren’t quite ready to go home – a quality hit of caffeine and always someone interesting to yabber away to. Some things never change!
Last weekend was a Godsend. Seriously. As a sewist, who wouldn’t relish permission to sew your undivided heart out for two full days whilst tuned in to all manor of inspirational videos and chat from the best kind of community ever. I’m talking the #SewingWeekender hosted by The Foldline and English Girl at Home, obviously. The event that sparked so much joy and raised so much money for such great causes.
And hey, I made a new outfit in the process, too!
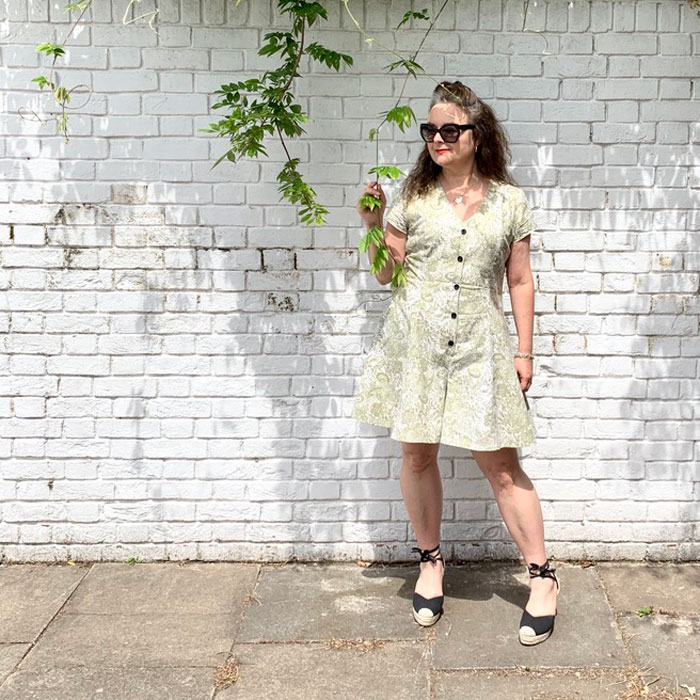
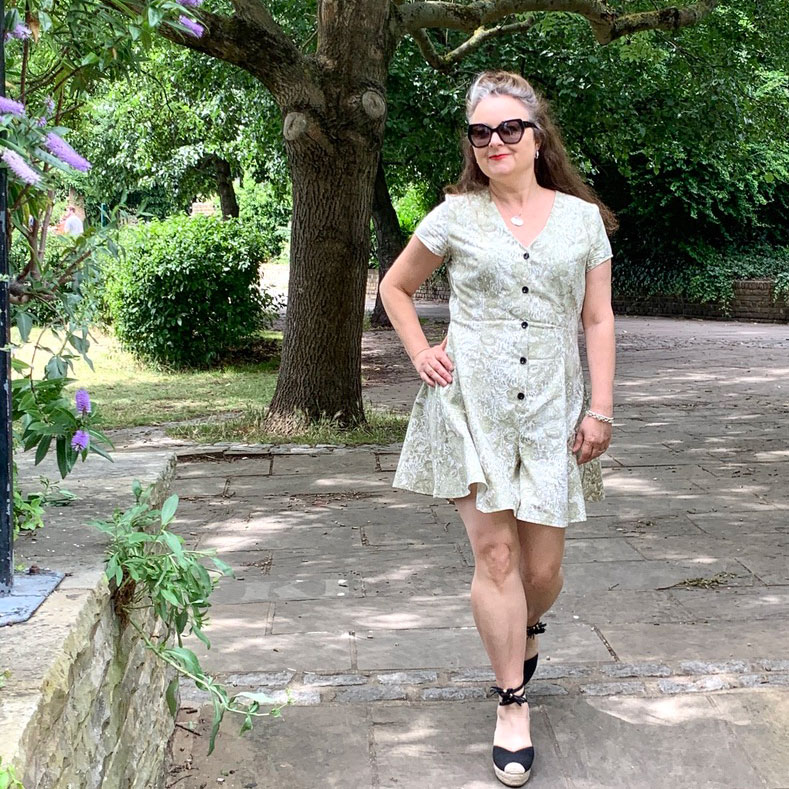
I’m not sure if I can ever stop making True Bias Shelby Rompers now. This is my third and still I’m not done!
This wasn’t the intended fabric though. I had factored in some crinkle cotton linen gauze, but following a prewash, it crinkled to half the size and became all elastic and everything. I set about ironing but got bored after the first 20cms and swapped it up for a really old pair of curtains instead. As you would!
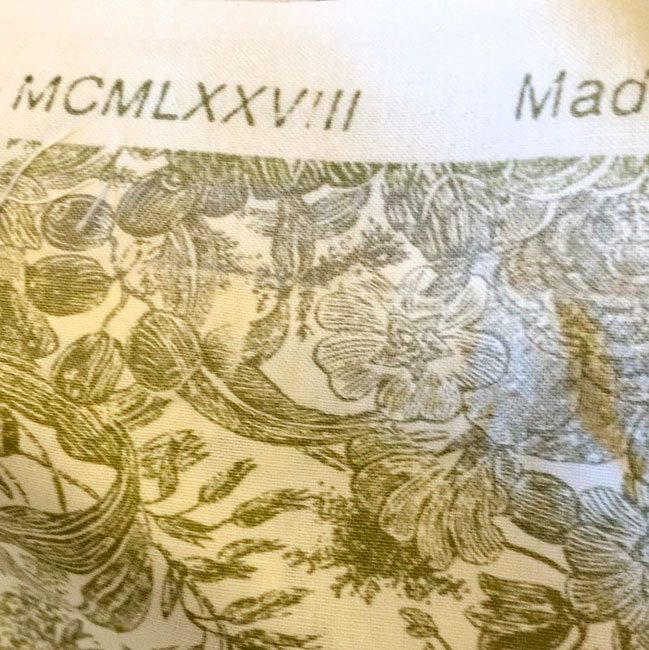
Ordinarily I have a reputation for exaggeration, but in this case I’m not joshing. I bought these Laura Ashley curtains in a charity shop many moons ago. Quite excited by the vintage factor. Had to look up those roman numerals though . . .
MCMLXXVIII = 1978 for the less Roman among us!
I bought them when I was dead broke. And still argued the West London inflated charity shop price! They served my previous two addresses as actual curtains and have sat wantingly in stash mountain for the last 10 years. So I think you might relate to my happiness at using them to make my third True Bias Shelby Romper suit.
I get it now. Using the same pattern over and over. If it ain’t broke and all that. Such an easy gig when it works straight out of the packet. I made my first ‘trial’ one in a very lightweight (quite see through) star-print viscose. And I love it still. The second, more improved version realised in a tropical print viscose and it’s so interesting to see the difference when it sews up in a fabric with a bit more structure. The silhouette is accentuated even more and feels good against the skin being 100% cotton and all. Feels even better knowing how many lives it’s lived and yet 42 years on its still many more years away from a landfill!
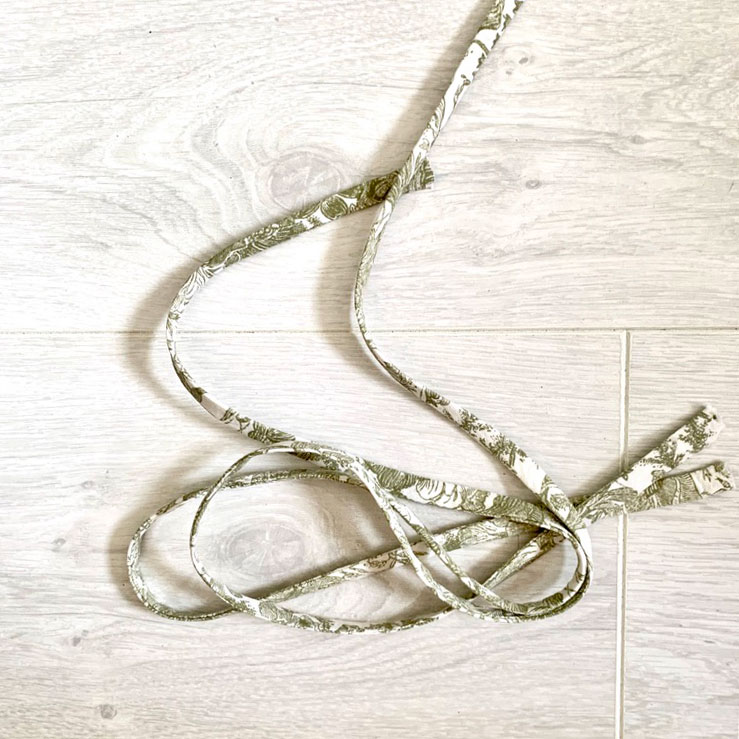
That said, there was a little issue with the tiny back straps. They didn’t turn as easily in curtain fabric. It’s a bit of a toughie compared to viscose. So following a wee tantrum, I re-cut the pieces on the bias – remembering a video tutorial I’d watched about cutting rouleau loops on the bias – and it bloody worked a treat. Thank goodness I had enough fabric left!
This isn’t the end of this particular project. I’ve got plans. Mostly to mess things up! You know what I’m like with my colour palette – there’s not a scrap of black going on, save for the buttons. So I’m going to add some paint. Just a bit. And not quite sure where and what. But watch this space!
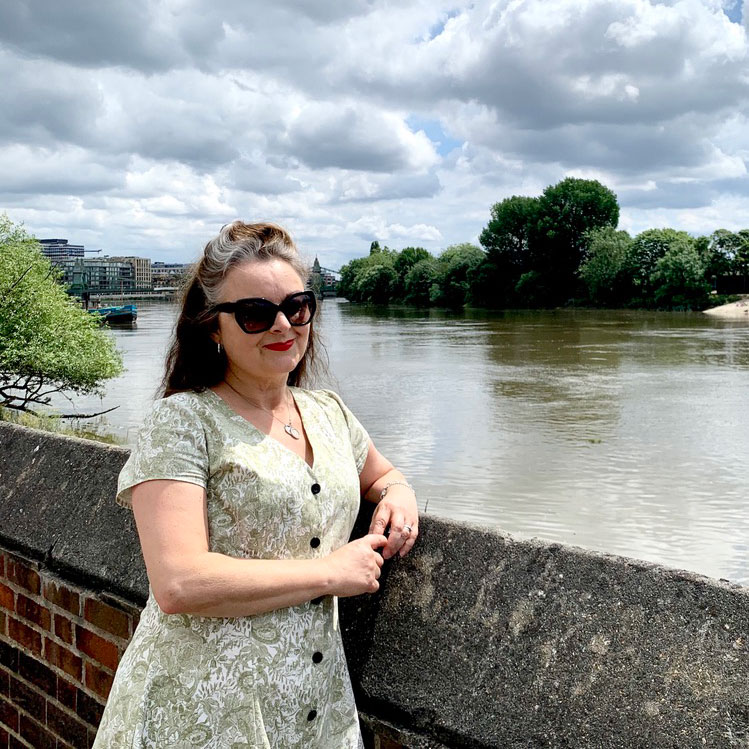
Thank you Daniel once again, for my lovely photos. Especially when the clouds dictated we should never have strayed further than the garden gate, let alone to the riverside. But I’m jolly glad we did.
Special occasions call for special dresses and I don’t think I’ve had call to make anything more special than a mother-of-the-bride dress for my daughter’s wedding.
But what would it be? I had a whole years notice but in true ooobop to-the-wire styleee, I left myself a couple of weeks before the big day.
That’s not to say I spent days and weeks and months googling and mulling, dreaming and virtually making in my head, the hundreds of possiblilites.
I really didn’t know what I wanted. But I did know I didn’t want to look like a run-of-the-mill MOTB.
Have you ever googled to see the expected format? Pastel shades, sensible knee-length skirt, coordinating jacket with statutory three-quarters of a sleeve, satin and lace, obligatory big hat, and nude tights… Would I conform? Not a chance!
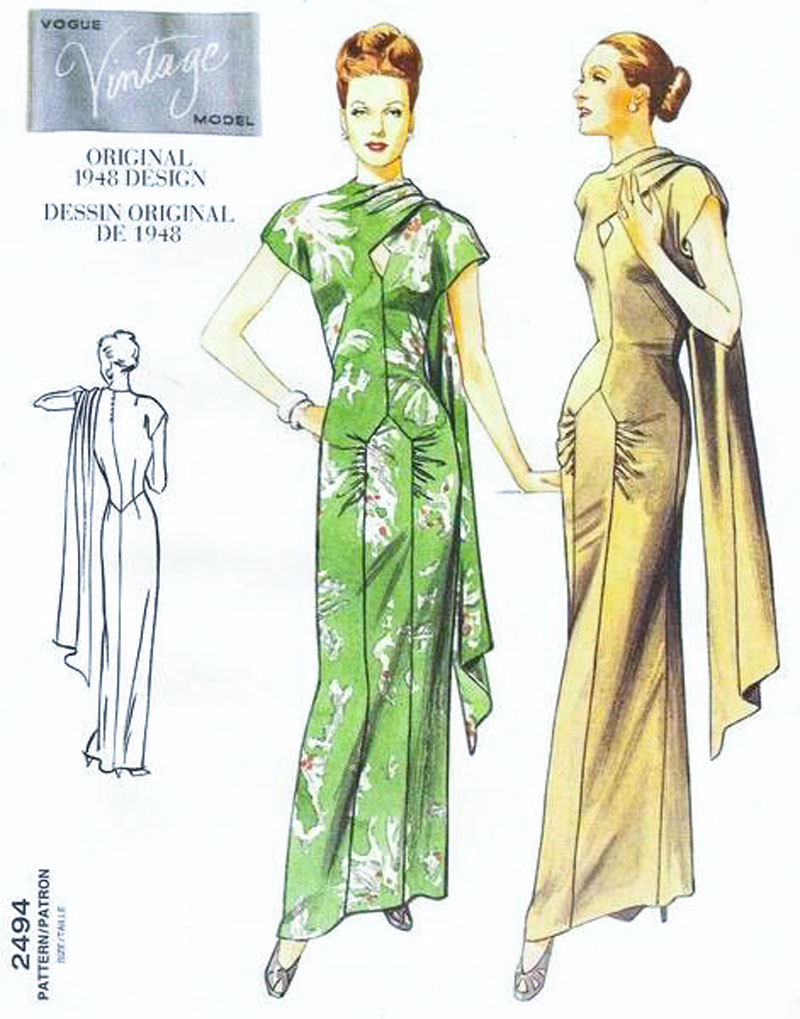
And then I remembered this gorgeous vintage Vogue pattern that I’d bought before I even knew what kind of special occasion it was going to be for!
Vintage Vogue V2494 sewing pattern
It’s an original 1948 design. Full of elegance and style. Wasn’t too sure that a five foot four sausage shape could work it as well as the cover girls but the vision was strong and I was so delighted to have made a decision at last. Just had to root through a million other patterns to find it!
The only experience I’ve had sewing vintage Vogue patterns before was the V2934 jacket which I made twice, first here and again (after I lost the first one) here, and more recently the Vogue Designer Original 1486. Interestingly all have the cut-on sleeve element and each of them reasonably uncomplicated to sew.
I anticipated a rocky ride with with the construction and fit of this dress though, especially as I’d left no time at all to properly test it but the beauty of this pattern is that it has ACTUAL body measurements printed on the pieces. And I can’t tell you how grateful I am for this small mercy.
I had full intention of toiling, especially as the plan was to go full on lavish silk satin. Not every day your daughter gets married. I knew the price was going to be hefty. This dress only calls for 3m so I knew at the very least I was looking to spend around £100. But I did the sensible thing of looking around before I committed to the first fabric I found.
V2494 full length dress
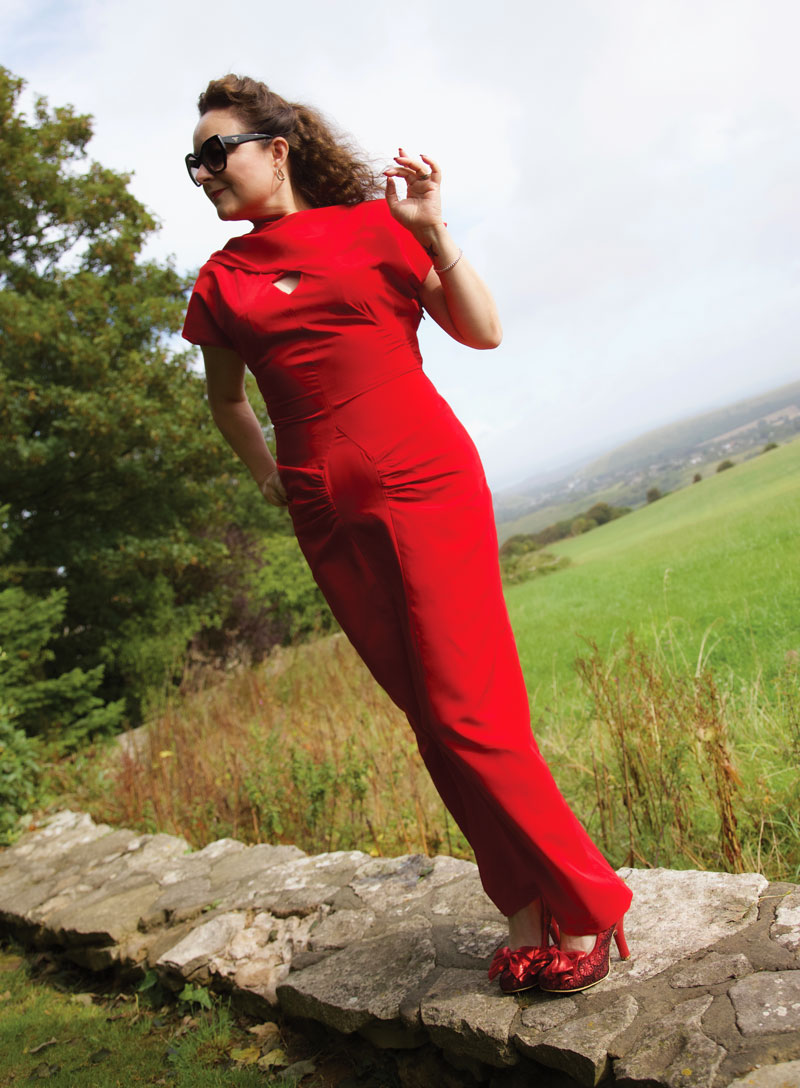
John Lewis’ haberdashery department at Westfield, White City had not long opened and so I headed to check out their stock. Got chatting to a lovely sales assistant who was mesmerised by my pattern choice and eager to show me some ‘just-in’ peachskin fabric. I’d heard of it but never had the pleasure of a feel. It draped beautifully and suddenly the option of a more forgiving matt appearance became instantly more appealing, moreover the price of just £8 per metre! It was only available in red. But hey. That was ok. Kind of a no-brainer, really!
The making up of this dress was deceivingly simple. It was down to my haste that markings were confused and I’m so glad I rehearsed that little diamond opening on a different fabric. As you can imagine, there are a fair few positional points on that front piece and my first attempt saw me reposition it some distance lower than it was meant!
V2494 detail of peephole
Despite the tricky diamond peephole and that lovely inset panel the front, the rest of the construction was a breeze: There is no lining. So the peachskin was a perfect weight to not warrant an underlayer.
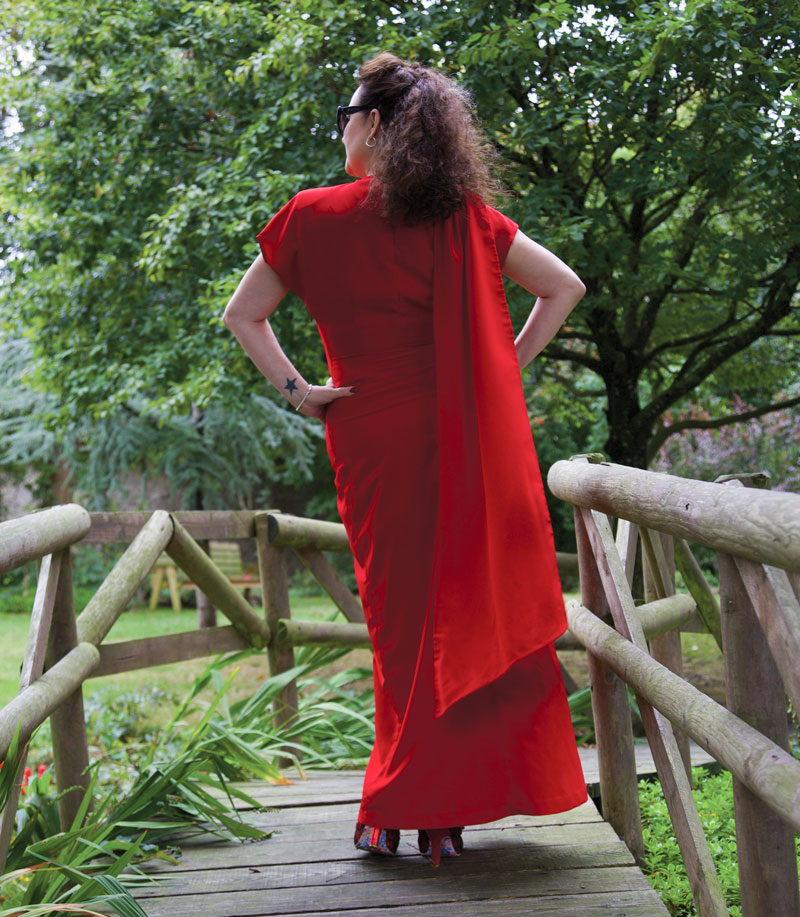
The sleeves are cut on, negating any need for tricky easing or setting in of sleeve caps. And that beautiful drape at the back is connected to the shoulder seam and simply hand tacked to the shoulder once the pleats have been arranged.
There was hand finishing of course: The hem at the hemline, as standard, and the hem of the drapey bit. I knew this would have to be neat as it clearly states on the pattern: “single-layered drape, (wrong side shows)”. So I just took little slip stitches in matching thread all the way round. This is where the fabric let me down a little bit as it syntheticicity wouldn’t allow a decent press and it resembled more of a rolled, rolled hem. But it was ok. Just a little bit annoying. Silk in this instance would have behaved a whole lot better I’m sure.
V2494 back view of dress and over the shoulder drape
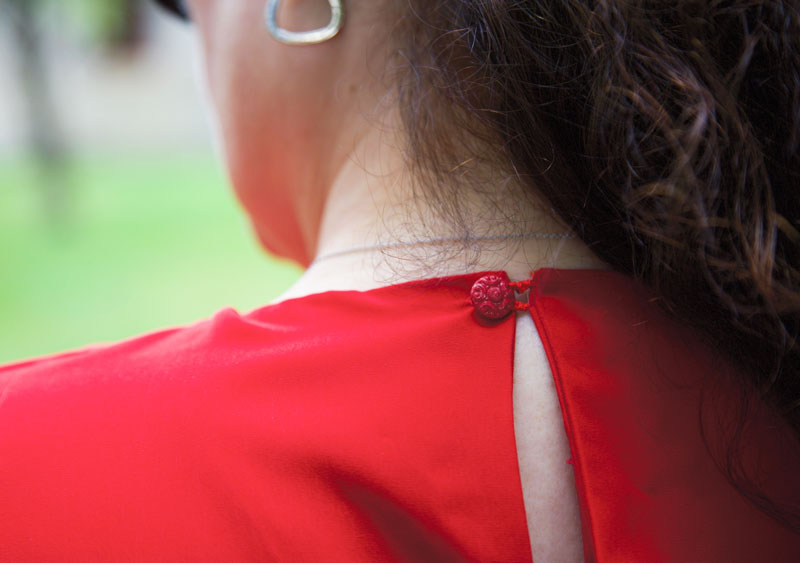
I confess I didn’t fully finish this dress until the morning of the day. Early hours of the morning I was still finishing the hemming and sewing a button loop (rather badly) on the back. I always intended to have just the one little button as opposed to a whole line of them as suggested but still managed to make it wonky! I do love that little vintage button though. It was just waiting for this dress.
V2494 detail of button and button-loop
I didn’t manage to get any suitable full length shots of it on the day hence a reshoot by Daniel almost a year later! It’s a bit tighter on me now than it was on the big day but that’s no surprise as my nerves ensured a low cal intake on the lead up! And to be fair I’m not entirely sure when I’d wear this again. So it’s on with a dress cover and resigned to the back of the ‘drobe until a suitable situation arises.
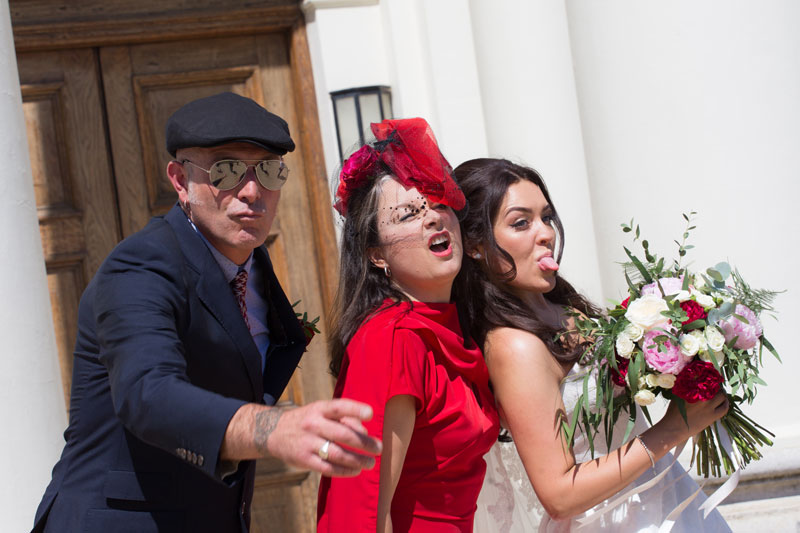
However there was one shot in particular that just about sums up how stylishly and elegantly I carried off that dress – and pretty much sums up the non conformity of our fam! Brilliantly captured by Daniel of course.
Note that I did succumb to wearing a hat. Not just any old hat, mind – an exquisite and original ‘piece of art’ that was beautifully handmade by my wonderful milliner friend Jayne at Hepsibah Gallery in Hammersmith. Again, I’m not sure I did it as much justice as it deserved but it certainly felt wonderful to wear and made me feel so very important!
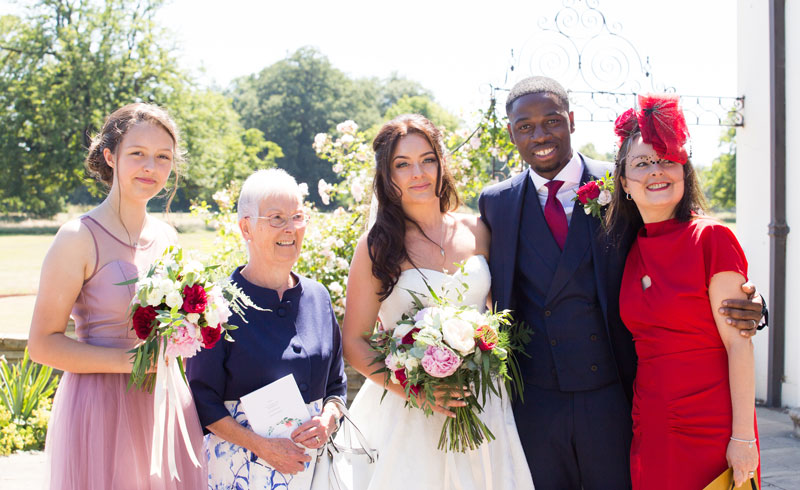
From left: Youngest dort, Samaria, my mum (also wearing handmade) my daughter Stephanie, her husband Daniel and me!
There is joy to be had when you revisit a pattern that you know only needs a couple of tweaks. Even more joyous when the pieces have been sat in a basket, all cut out and are ready for a simple sew-together.
I’d almost forgotten about it. Though to be honest, the main reason for it sitting pretty was that I was unsure about the colour. I liked the pale blue, linen-like fabric when I scored it cheap all that time back from a closing-dowm sale in Ealing, but I just didn’t have a plan and so it took up residency in stash mountain for a very long time before it’s destiny was decided.
A little burst of consciousness about the wastefulness of my impulse buying spurred me into action to finish any WIPs before buying any more fabric and so I paired it with vintage Simplicity 6772 – one of my favourite vintage shirt dress patterns.
I used this pattern first in 2015 from suiting fabric – my worky shirtdress – which is perfect for an Autumnal wardrobe and it gets a lot of work-wear. This next version was going to be great for those warmer months.
It sewed up beautifully. I took a smidge out of the ease of the sleeve head; shortened the hemline a little and I just loved the way it shaped up with all those darts. I used to hate sewing them but it really doesn’t bother me now especially when on realising how important they are for a great fit. It comes together pretty quickly, with no lining, and precious little hand sewing except for the hem and attaching the under-collar to the neckline.
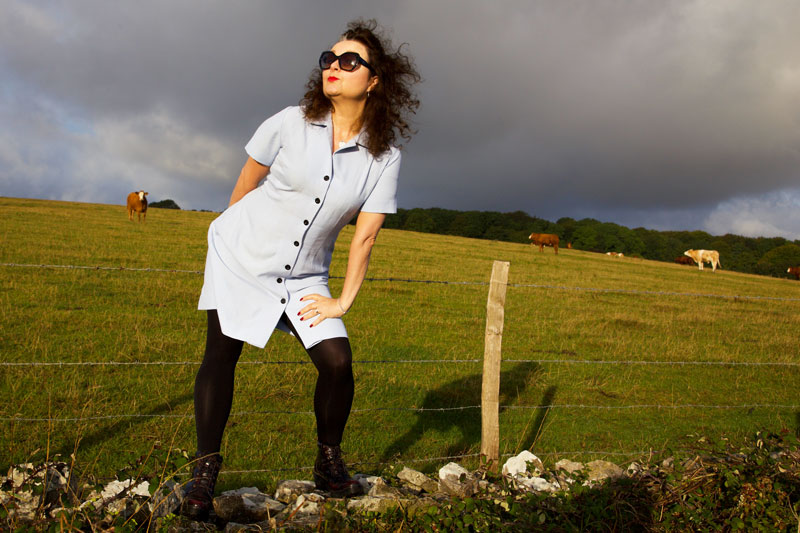
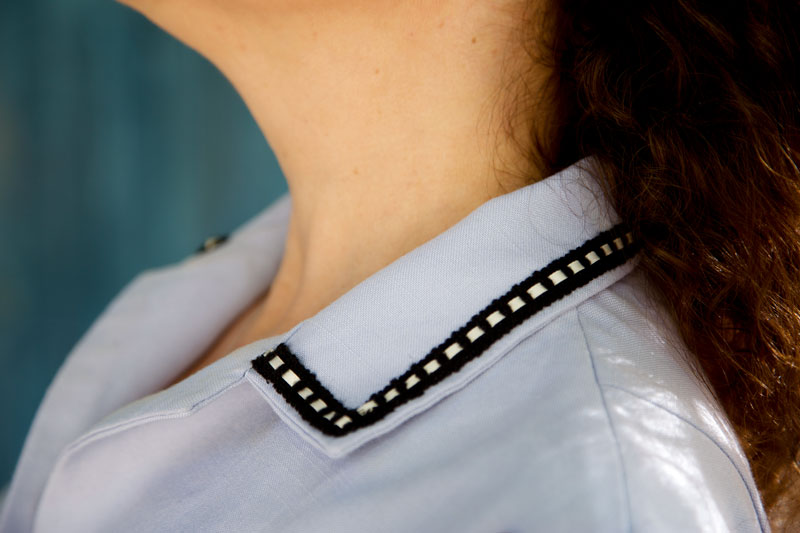
The only thing that bothered me with this pattern and fabric combo was that it looked a little ‘nursey’! I’m so not used to wearing light colours – my usual palette very much centres around red and black – and it was going to take a bit of getting used to, so I added some black buttons to subtract some of the ‘clinical’!
And I’ve been very happy wearing it until a ‘friend’ jokingly asked why I was dressed like a nurse. The cheek of it! Really struck a nerve and I was not best amused!
So, not to be defeated, I had a little rummage in the trim box and found some lovely ribbon-insert braid – just enough to edge the collar and sleeves.
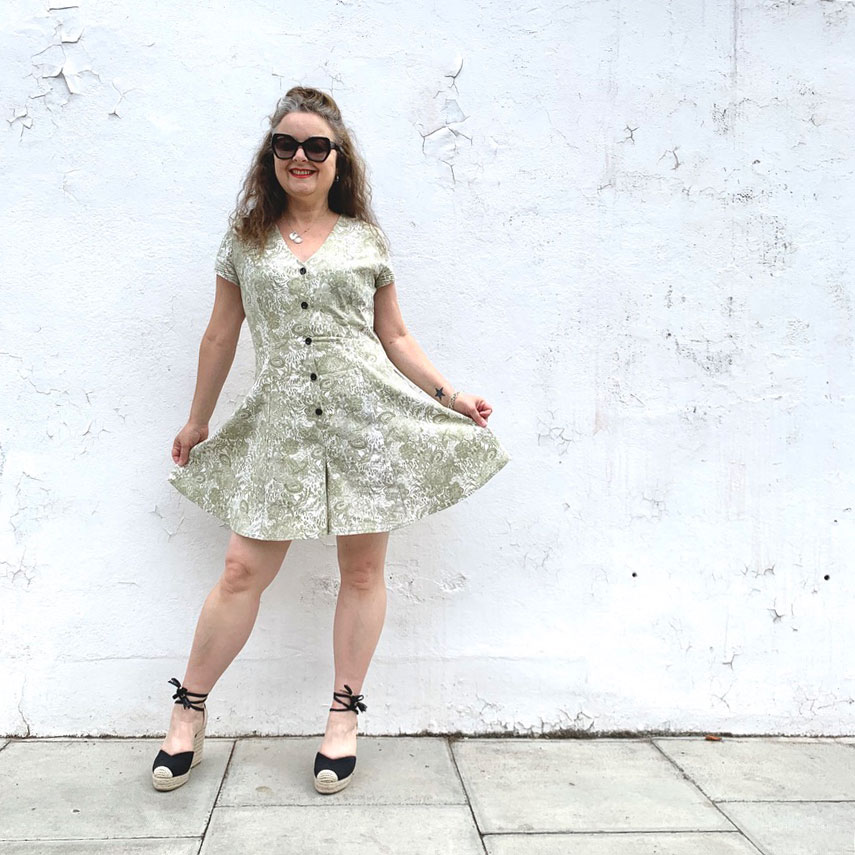
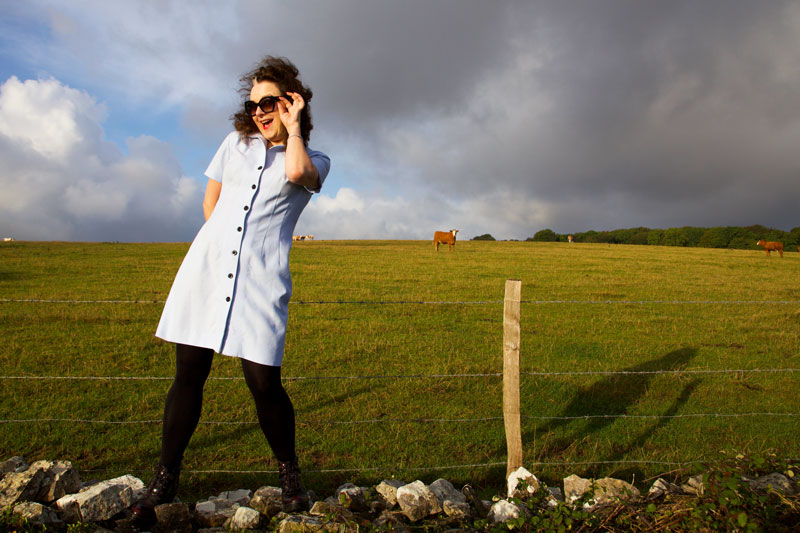
I’ve just spent a lovely long weekend away in Devon with Mr O (hence the random poses in fields of cows) and this was a great little hand-sewing project to complete in the hotel room when those ominous black clouds did their thing outside.
And I’m really happy with the results. I think it’s a little less ‘care-worker’ and much more ’50’s diner waitress’ now. But that’s ok. I can live with that!
I’ve got more love for it now. Which is a good thing because this dress is so easy to wear and so flattering, IMHO! All thanks to some great pattern drafting and lots of perfectly placed darts.
The journey of this dress definitely provoked some thinking about my buying habits. My bad, bad buying habits where I’m swayed by a bargain and the belief that a cheap length of fabric will have an ideal use at some point. Unless it’s of fairly good quality and at the very least within my preferred range of colours, it’s not going to be put to use without compromise. And I don’t want compromise. It won’t feel right and that in itself will not be a fair exchange for all the hours of work invested. And also, I’m so over that ugly box tower of fabrics looming over my bed. Lesson learned… I hope!
I first made this Vintage Vogue jacket and blogged it back in 2013 (see here) but somehow, sometime soon after, I managed to loose it! It’s still a total mystery. Quite possibly a drunken misplacement and if that was the case I’m so annoyed at myself. I hope sincerely that someone found it and loved it as much as I did.
But hey, the advantage of being a crazy sewing lady is that one can whip up another at will, right?
The pattern is a reprint of Vintage Vogue 1950s cape-like jacket.
It’s a great pattern and comes together really swiftly. Two backs (for a centre back seam) and two fronts with cut-on dolman sleeves and clever neckline darts that create a superbly structured stand up ‘collar’. There’s quite a lot of hand stitching inside but I actually enjoyed that bit. Not just because I took it to the park one sunny afternoon to finish off!
It helped of course that the fabric I chose – a remarkably cheap flocked, brocade-type of furnishing weight fabric from Dave the Drapers in Shepherds Bush Market – had the right amount of structure to hold that shape, but I was a bit worried throughout the process that there wasn’t quite enough drape for the swing back.
And there wasn’t really. It stuck out like a comedy shark fin! I should have taken a side view photo to prove that I wasn’t being a drama queen but I was so fixated on solving the problem and not throwing in the towel and instead of grabbing the camera, I grabbed my purse and dashed to the nearest charity shop in search of a weighty chain.
After all, that’s what Chanel did, right?
To be fair I’m sure House of Chanel has a special kind of chain and rules on how to sew it in – anybody know? I just stitched every other link with a couple of stitches for security and hey presto, it worked a treat!
Incidentally that picture above also shows the detail of the lining I bought from Oxfam. It was totally biding its stay in my stash for this immensely appropriate pairing!
As with anything you make twice, it’s always good to change things up a little. I felt the black frog fastenings I chose last time sunk shamefully into the fabric so I went for a contrasting gold set and matching metallic braid to edge the cuffs, second time round.
It was the best choice! This jacket is so much fun. I love the textures, the overall shape and the slightly bonkers nod to a Christmas drummer boy! I’m not saving it for best and I’m definitely not letting it out of my sight!
I’ve been neglecting my vintage patterns of late. But that did allow for some exciting rummaging and little squeals of delight when I found some treasures I’d completely forgotten about. And I just love that ‘aha moment’ when found pattern meets perfect stash fabric. Proper romance that is!
This is Blackmore So-Easy 9266. Not sure if it’s 50s or 60s as it’s not dated. The instructions were a little more explained compared to the last 40s Blackmore pattern I used but I enjoyed making both just the same.
I knew this dress wasn’t going to fit straight out of the packet. It was already too small and any dodgy fitting on this was going to shout from the rooftops. So it needed time and patience to grade it up properly and work through 3 toiles before I was ready to cut into the real stuff.
Once all the adjustments were transferred to the pattern pieces – grading up, shortening the back bodice substantially, taking out some excess from the overbust and increasing the waist – it was fundamentally a very easy to sew dress.
There’s no lining. The bodice is simply faced at the top edge. I must remember to tack this down in a couple of places on the inside, as the photos totally reveal how it peaks out at the back if it’s not poked in to start with.
I do so love recreating an original vintage dress but I should know by now how the drawings on the cover cheat so much! The skirt on the cover looks tapered and very fitted but in actual fact, not only is cut straight, it has a wide kick pleat allowance which gives the visual appearance of being even wider at the hemline.
I took it in quite substantially to arrive at this shape – like 4 inches each side seam! – and I sewed the kick pleat down too. I hated the granny hemline. Not flattering on my vertically challenged frame for sure. This does, however, mean that I have to walk very lady-like and in heels and therefore one helluva lot slower than normal. Not such a bad thing when for most of the time I’m rushing around like a lunatic with giant strides in Docs or trainers.
The fabric is bark cloth. Found in a little basement fabric shop in Waterloo ages ago. I love the texture so much, the colours are fabulous and it sews up beautifully. I made a Martini dress from bark cloth of the vintage kind but I have to say, this modern weave was definitely more grain-stable and less prone to stretch. It’s not usual to find this stuff in any old fabric store. Certainly a void of it in the Goldhawk Road. So if anyone has a link to a favourite UK store, please let me know. By the time shipping is added to the original Hawaiian brands, the price is rocketed!
Now, I would just like to touch upon the issue of straps. Fally down straps!! I felt sure that I had sussed the right width, length, the right position and before sewing them down, I walked around the house for a few hours with them pinned to make sure of their position. Ulitmately the ends of the straps would be sandwiched between the facing and the top bodice so better to get them in the right position first. I thought I’d cracked it. Made sure to sew exactly as pinned. But the buggers still fall down!! It really is the bane of my strappy-dress life.
To be fair, It doesn’t help that I’ve got sloping shoulders. But I do think also that I made the bodice a touch too wide for my over-bust and so the straps sit too close to the edge of my shoulders. Another little adjustment to bear in mind for next time.
Clever lady Clare, from River Elliot Bridal also had a great solution which was to sew a narrow elastic inside the strap to generate a little more grip. Must give that a go too.
I’m hoping the stormy skies keep at bay and glorious sunshine keeps coming over the next few months so my current favourite newbie gets more outings. But all the same, the fickle in me is furiously flicking through the collection to find the next new fave to make… because I can!
Mostly I sew from patterns. Vintage ones, Burda ones, any of the big-four, independent ones, any that take my fancy, really. But when it came to finding a pattern befit of a significant birthday party dress, I was stumped. I searched through the hundreds I owned, I trawled through plenty more online and still I didn’t come up trumps until a visit to the hairdressers presented this beauty in one of their glossy mags.
Who was I kidding?! But a girl can dream right?!
With a couple of months to go and so many people asking what I was going to wear, the pressure was on and almost too much to bear. I even considered RTW as a get out clause! But following more procrastination and now only 6 weeks to go, cool words of advice from Sally of Charity Shop Chic, put me back on track and sold it to me as a simple circle puffball attached to a bodice of choice.
I just needed a prompt, a bit of pressure and some added faith, obviously!
With all that poompf in the skirt section going on, the quest was for a simple bodice. One I could toile and fit with not much time on my hands. It also had to fit in with a busy work load leading up to Christmas, and be sewn in the the evenings so black was totally out of the question too!
I remember ear-marking this vintage Weldons pattern as a potential party dress some time back and when I rifled through my patterns for the umpteenth time, it shouted out all the reasons it should be chosen. Simple to fit, no sleeves to insert, flattering neckline, small amount of fabric required and a perfect yoke for a string of cockerel feathers!
The small amount of fabric issue was quite an issue at this point as I’d already decided that silk was the only way forward. The only way I was going to get a classy, crumpled look and not just wind up looking like a discarded crisp packet!
The skirt section is a greedy full circle with an added 16 inches around the waist to accommodate 4 box pleats: Two at the front and two at the back. The full hem is then gathered onto an a-line, mini underskirt which I self-drafted by closing the waist darts on a self-drafted skirt block, and adding a little flare. Both are attached to the waist seam.
The wonderful Sew Busy Lizzy gifted me the polka-dot taffeta some time back. I love that it found a special use. Not so shiny that it caused static, strong enough to support all that silk whilst adding a cheeky secret air of Moulin Rouge!
Having toiled the whole thing in calico beforehand, it transpired I needed 5 metres of dupion silk. Pricey at £25 a metre if one shops in Broadwick Street, London. But £12 if you’re lucky, in Goldhawk Road. I say lucky because I pretty much went in all the shops to get the right colour – a two-tone black & red. And the last one I tried had not only the best colour but offered the best price too.
For all my fretting, Sally was absolutely right of course. It really didn’t take long to sew. The indecision and worrying took way longer! And fears about working with silk were laughed off when I made the first cut. Literally like cutting into butter. And it behaved and sewed up brilliantly.
And so the finished article partied hard to the band and the DJ with a hall full of amazing family and friends. It went way too quickly though, and I so wish I could press replay so I could get round to spending more time with everyone who came. But I guess thats the downside of hosting ones own!
Mr O aka Daniel Selway took these amazing shots for me this morning. Nothing wrong with a party shot but lets just say there’s a definite improvement of photographic quality in the sober light of day!
Happy new year to you all. Wishing you a peaceful, healthy, and joyous 2017 xxx
I needed a dress for a wedding. Not just any old wedding but a beautiful Indian wedding where I couldn’t hope to compete with the finery of silks and saris. No pressure, then! I rifled through every kind of fabric and bored all the Goldhawk Road shop owners senseless with my dilemma, during the weeks leading up to the big day.
I diligently visited a roll of paisley brocade in A-One Fabrics, three days on the trot, properly umming and arrring out loud. But it wasn’t quite right. I ordered some gorgeous cotton satin roseprint from Minerva thinking … actually who knows what I was thinking. It was all wrong until I spied a roll of drapey green fabric at the back of the shop. 100% polyester it transpires. My inner snob rose to the fore but I bashed it back down when I handled the weight and the smooth silky texture and noted the lack of crease when I screwed it into a ball. And oh the colour! Not to mention the price tag of £4.00 a metre. I wasn’t arguing at all!
I was sold on the waist and hip detail, the softly gathered side fronts that fall from the hip and that cheeky little key hole detail with the bow tie feature.
Incidentally the bow tie itself is some vintage liberty homemade bias binding that I inherited.
I made a quick bodice toile in the original size, half knowing it was too small, but wanting to test the pattern without sleeves. Inevitably I changed my mind and graded the pattern up a size. Redrawing the pattern allowed me to add the seam allowance on too. Something this pattern didn’t allow for which also shows it’s age a bit, I think.
I’m quite used to vintage patterns without markings or seam allowances but one thing that struck me as a bit odd with this one, was an instruction to “Make darts in the back bodice where shown by dotted lines in diagram”. Quite literally the diagram which is the tiny pattern layout illustration on the back of the packet. So it’s anyone’s guess, really!
Inserting the gathered panels into that front skirt panel was a bit tricky but quilting skills have taught me how to clip and pivot at a point, so it wasn’t too terrifying. Again, the instructions are loose: “Gather upper edge of side fronts to fit hip yoke of front as in sketch and stitch together matching VV to VV.” Simples, lol!
I’m pretty pleased with the outcome. And it worked well for a wedding where colour was the order of the day. But there are niggles: I forgot to add seam allowance to the sleeves which actually doesn’t appear to make much difference but I did sew them on back to front! How much difference that makes will show in the next version which I’d like to make soon while it’s all fresh in my head; The waistline could do with a bit of ease. I like how it’s nipped in but it’s not that comfortable! And although the fabric is nice and drapey, I’d like to try it in a lawn or a lightweight cotton so that the neckline and the darts press sharper. I also neglected to do my usual adjustment to take out the excess fabric from the back bodice. I cheated instead by removing the zip and trimming the centre back seam… not very well!
Considering I pretty much sewed this up the day before and was hemming on the morning of the wedding, I think it turned out pretty well. The niggles can so easily be sorted next time round. And to get change from a tenner is such the ‘Brucey bonus’ that I feel it prudent to reward myself with some lovely lawn!
I don’t have any of the official pictures from the day to share as yet but I’m sure you can imagine how stunning all the ladies looked, as did the men in their exquisite flocked and braided coats. I can’t begin to tell you how gorgeous my friend the bride looked. But I did shed actual tears – in a good way – when she walked into the room. Such an honour to have been invited to such a special day. And I’m so glad I went to the bother of making a dress, especially.
Photos by the wonderful Daniel Selway. Location: St Pauls, London Shoes: Lola Ramona Handbag: vintage from local Fara Charity Shop