Treasures for my Treasures

Amelias first tree decoration

In a few days time I’ll be wondering why on earth I didn’t make all my Christmas presents. All that joy that could have been had by hand-crafting beautifully personalised gifts for all my friends and family yet instead I chose to race around stinking hot, over perfumed shopping malls for expensive and ‘box-ticking’ presents. But as I sit, still with a work to-do list up to my ears, I’m currently fully aware why I didn’t quite get round to it!

I did at least manage to rustle up two little decorations for two of my favourite little people – my grandchildren!

Blakes first christmas tree decoration

This is their first Christmas on planet earth and my first Christmas as a Nanna! And boy am I loving it!

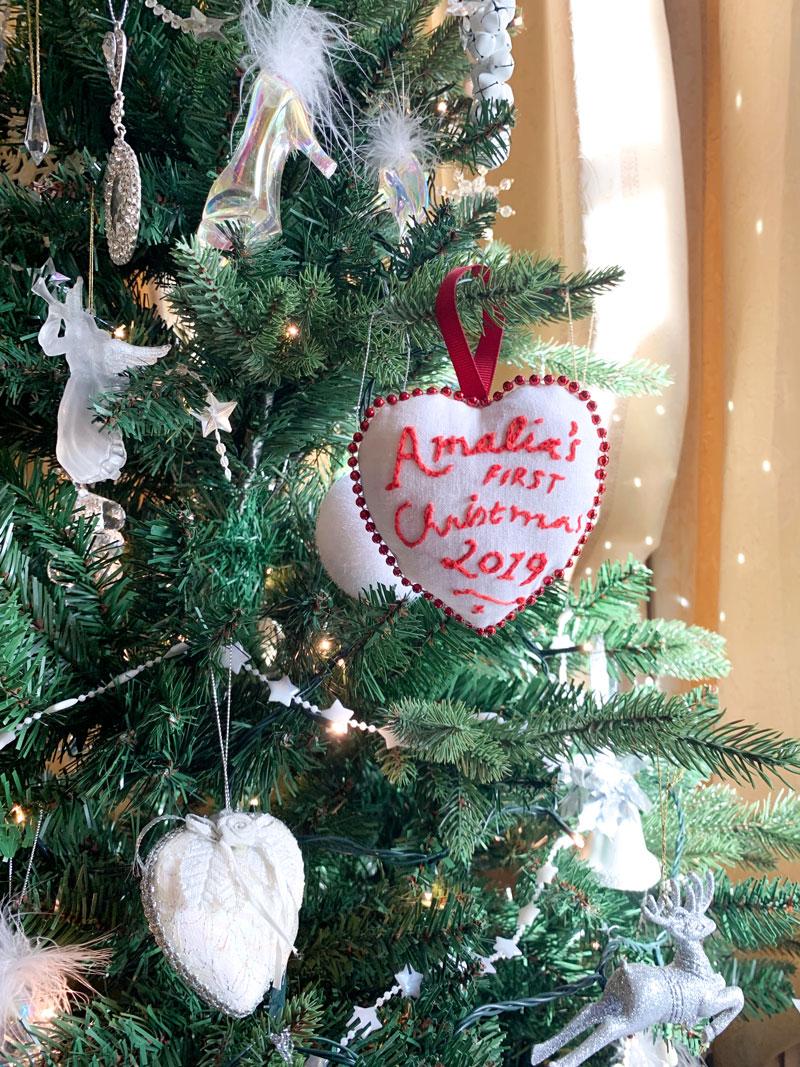
My Christmas tree is filled with decorations either gifted by others or that have been bought at Christmas Fayres in good company. And every year I dec the tree the memories all come flooding back. And I loved the thought that a personalised tree decoration might be a ritual of sorts or a cute keepsake at the very least for Amalia and Blake.

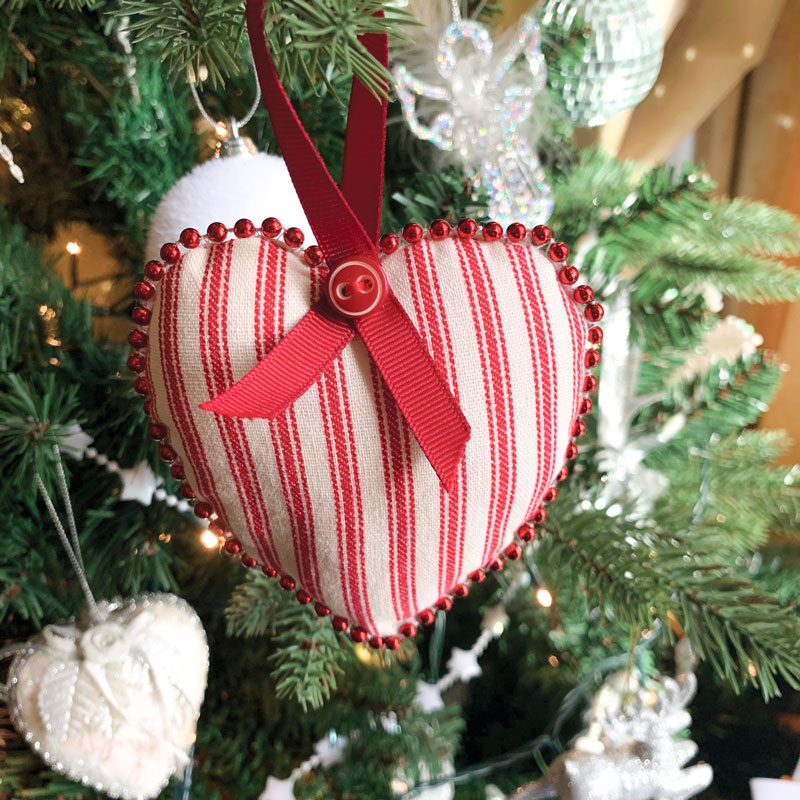
I’d love to report that I stuck to my sustainability guns for not buying new fabric and used leftovers instead. But that would be a complete lie. I couldn’t fight the the vision of lovely linen and festive …. ticking!  It just works, right?! I did reclaim some ribbon and rooted around the button tin for the perfect vintage buttons, though.

Amalia first Christmas memento reverse

And if you are interested in the process for these little decs …

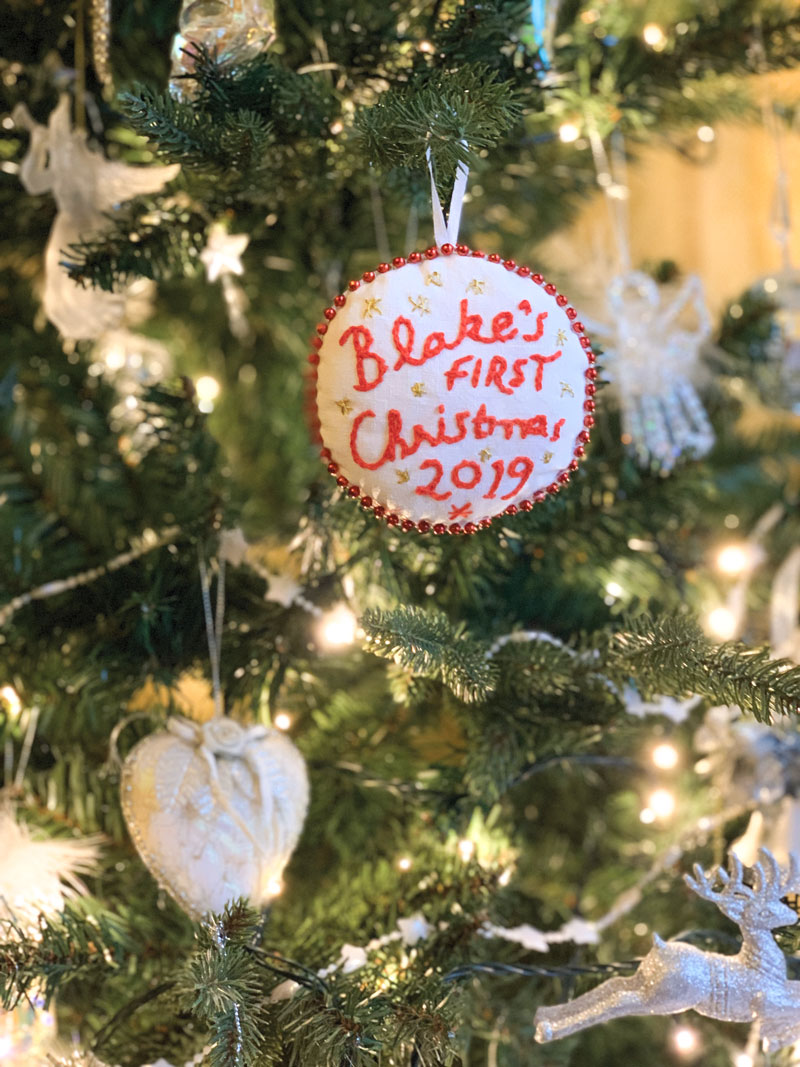
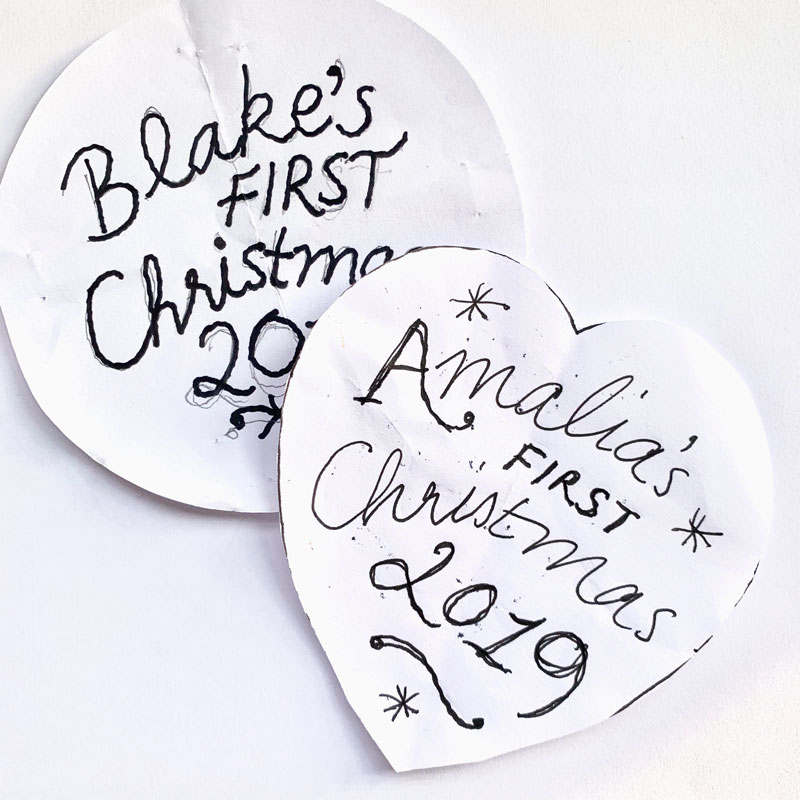
The lettering is my handwriting. I perfected it at first on paper within the confines of a heartshape for Amelia and a circle for Blake before tracing onto Solvy water soluble stabiliser. I love this stuff. It’s so much fun! There’s a link to buy this below but you could also use a transfer pencil if you had one to hand. That will wash away too. Anything that doesn’t leave a mark on the finished article.

template for lettering

I then placed the Solvy with the wording on top of the plain linen and then sandwiched them between the embroidery hoops, tightening enough so there is no movement but not too much to stretch the fabric. It just helps to achieve more even stitches and less puckers.

Mostly I used a chainstitch and stem stitches in places using 3 strands of red embroidery thread. Gold metalic embroidery thread for the stars on Blake’s one.

Front of Amalias tree decoration

Once the design was finished I washed away the stabiliser with cold water, patted dry with a tea-towel and finished the drying process by ironing.

My paper template then served as a pattern piece to centralise the design and cut the shape around the lettering allowing an extra quarter of an inch for seam allowance. I cut a matching piece for the reverse.

With right sides together I seamed all round, leaving a small gap for turning and clipped the seams for smoother curves.

Polyester toy filling was pushed into the seams before I steamed them for extra smoothness! One they were filled I slip-stitched the opening closed.

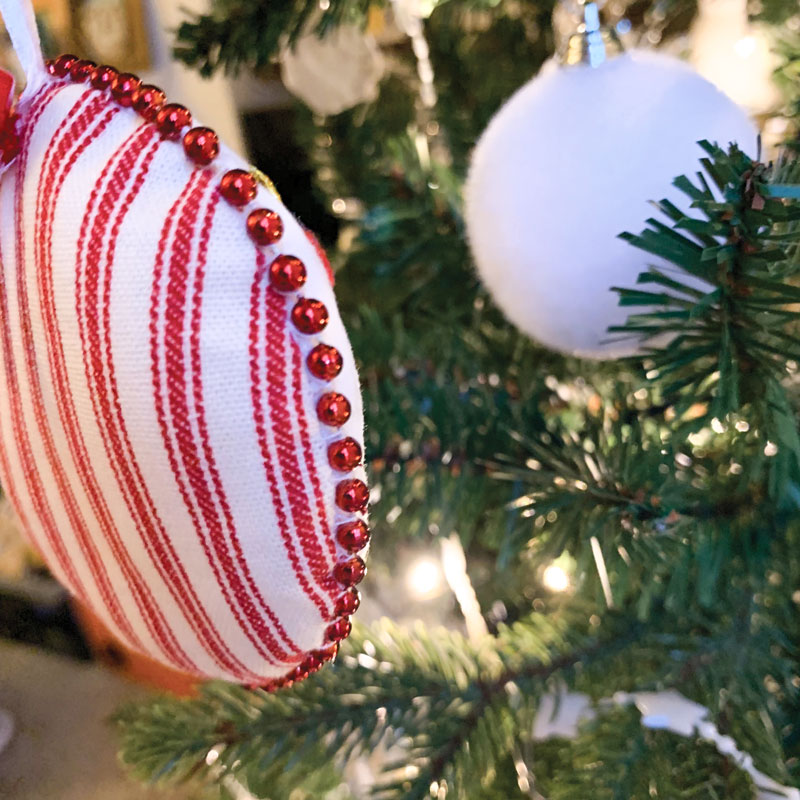
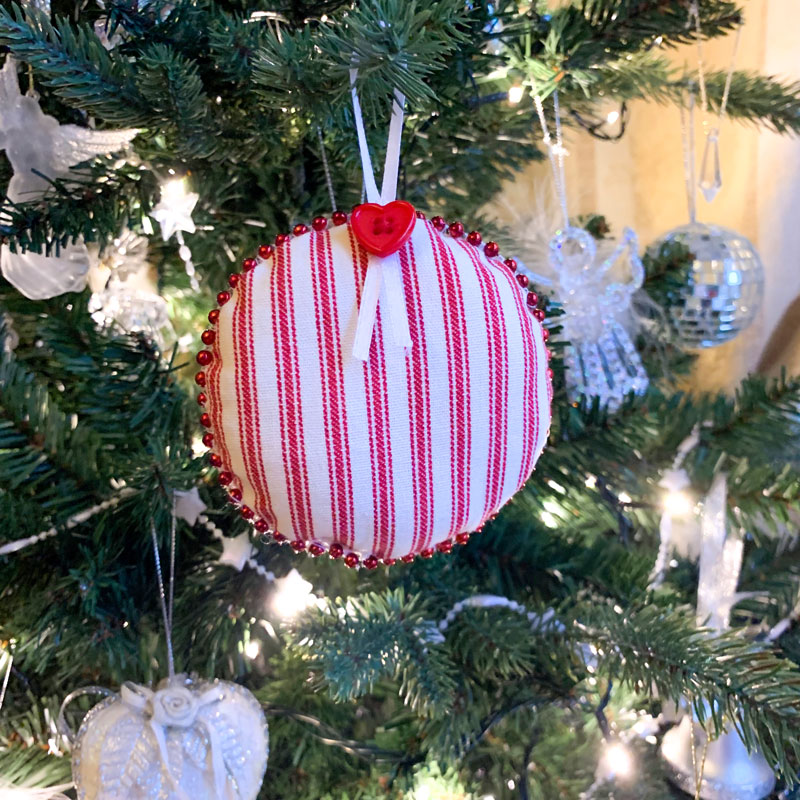
I found the red metallic beaded trim at Sarah’s Haberdashery stall in Shepherds Bush Market and I oversewed it along the seam line.

detail of the red metallic beading

Finally I used a length of ribbon for the loop and sewed it in position on the reverse, adding a little vintage button in both instances to cover the stitches.

I savoured every little wonky stitch of this project, as I reminisced at how much has happened this year. I’m so very proud of my children, and what they have become. And my heart is literally bursting with love for my ever increasing family (bffs included) and what they mean to me. I do hope my little treasures will cherish these as they grow older nearly as much as I’ve loved making them!

Reverse of circular decoration

So how did you all fare with making gifts this year? Or did you get caught up in the rat race like me? Let me know how you wrestle with your conscience and please give me tips how I can be more productive next year.

In the meantime I would like to thank each and every one of you for sticking with my sporadic posts. It means a lot to still have you reading them and I’m forever grateful for all your lovely comments and continuing support.

Wishing you all the very loveliest of Christmases and the bestest of New Years ever. See you on the other side!

Love Janene xxx

Materials mentioned (affiliate links):

Tools mentioned (affiliate links):

A 60s worky shirt-dress

simplicity 6772 shirtdress frontGood afternoon lovely readers. I trust you are having a lovely weekend. I love the peace and quiet of a Sunday afternoon. It’s especially quiet today since Mr O and both children are all out. Best blogging time I thought, but eeek, no photographer! So please excuse the awkward poses to the remote snaps! It’s hard to summon up the enthusiasm when there’s no one bossing you around.

This is the first draft of Simplicity 6772. A lovely fitted sheath dress with front button closing and notched collar. Or a shirt-dress to the layperson!

simplicity 6772 packet

I made version 3, with short sleeves, which buttons all the way down. And I used a £2.50/metre suiting fabric from Dave/Danielle the Drapers in Shepherds Bush Market. I did stop to ponder who might make such a crazy suit in gingham but images of capri trousers and cropped jackets a la Doris Day quickly sprung to mind, very nearly usurping the plans for this dress.

I love Dave the Draper fabric for test garments. I don’t think you can actually buy cheaper and even though the content and quality is an unknown, its always good enough. And generally speaking I end up with something wearable, in this case…. for a fiver!

simplicity 6772 sideThat said, I will be making some adjustments to the next one, which incidentally is already cut out! Namely: taking some of the ease out of the sleeves. They are practically puffed sleeves and it certainly didn’t warn me of that on the packet front. They are also a weird length. I made twice the suggested hem allowance, and turned them up! I’ll also be shaving a centimetre off each shoulder before I sew them in.

I did some proper grading on this pattern using the cut and spread method. A little added to the bodice, moreso added to the waist and hip with the side seams blended together. I remembered to add the extra to the collar and the sleeves, though I probably should have left the sleeves alone to avoid the puff!

Given that it’s suiting fabric it didn’t need a lining. I just overlocked the seams. Suiting is a joy to hem, especially on this kind of check. It’s so easy to pick a couple of threads and the stitches just disappear. It’s presses so easily too. It’s a wool blend of sorts. And I have totally gotten over my snobbery of synthetic/blended fabric, since it doesn’t need much ironing and doesn’t tend to crease when you’ve been sat down at an office desk all day.

I love a shirt-dress but have only made two before. The 1940s Shoe Dress and The Shirt Dress Revisited. Both from the same pattern, both with full skirts. I like how this one is more understated though. Would be completely utilitarian in a khaki! It certainly feels more worky than the other two. To be honest, I’m lucky enough to work in a creative environment where almost anything goes (as is often apparent!).

I was a little disappointed that I didn’t have a suitable set of red buttons but it was quite refreshing to be persuaded with blue ones. I toyed with green and checked ones but the winners were some gorgeous vintage buttons kindly inherited from my friend Nigel’s, aunt.

vintage blue buttons

There are a whopping twelve darts going on in this dress! Four long diamond ones in the front, four of the same in the back; two shoulder darts and two bust darts. And its all these ‘lovely’ darts that create the great shape to this dress. The back especially. And I love that little kick pleat. So glad I didn’t exchange it for a slit.

simplicity 6772 shirtdress back view

It would be crazy at this point not to mention the shoes. A more than happy find on my way back from work in the sale at Office. They are of course my favourite Lola Ramona shoes. These ones having pale green polka dots, a cream bow and purple heels. The thing I love most about these shoes is that they don’t go with anything but yet they look good with everything!!

lola ramona spotty bow shoes

I’ll be off now. The plan is to return shortly with a revised version of this shirt-dress. But you know what happens when you make plans. Well, when I make them, anyway!

TTFN x

It’s all about Mimi, and me!

Mimi blouse from Love at First StitchI’m sure you are all very familiar with Tilly and the ButtonsLove at First Stitch book. It comes very recommended if you haven’t got it already. Well this is the Mimi blouse from said gorgeous book.

Mimi was indeed love at first sight and I (shamefully) started working on it way back in September last year before it landed on the to-do pile!  But it’s finished now and it’s fab, and I love it so that’s all that matters, right?!

The fabric is viscose, I’m sure, and was a great charity shop find a couple of years ago. Don’t you just love it when you already ‘just happen to have’ that perfect fabric for the job. Better still when it only cost a couple of quid. And better more still when that couple of quid goes to a good cause.

It gathered well, presses beautifully, yet doesn’t crease. Magic, that is!

mimi blouse and love at first stitch book

It was lovely working from the book instead of a giant fold out set of instructions. The steps are crystal clear and the photography is so so beautiful. Inspiration counts for a lot these days, when I’m run ragged at the end of the day. It completely takes you by the hand and leads you into a dreamworld of having more hours than you actually have and makes sewing possible! And that really is magic!

The buttons are properly vintage and are the same that I used for my vintage wrap blouse. I’ve used all but one now. Best save that for an emergency button loss!

mimi blouse buttons

I wondered if they were a bit big but I do like the way they contrast and don’t go MIA among the spots.

The collar is definitely my favourite part. Much like the one on my By Hand London Sophia dress. And I love the little tucks on the sleeves. Which incidentally are finished perfectly with a facing.

Despite all the pretty pictures and faultless instructions I did manage to make a booboo though. Totally my fault. Instead of just going with my usual body measurements, I first checked out the finished garment measurements which seem huge if you don’t take into consideration the gathering, which I didn’t. And so I went down a size. It isn’t blatantly obvious. Only when I put my arms up or shoulders back do the gathers on the yoke poof out a bit. I don’t practise the best posture tbh so I think I’ll get away with it!

Tilly and the Buttons Mimi Blouse

I’m all for tucking a shirt in usually but I like that this one can be a little more casual. It has a great shape and is everso comfy whilst retaining a bit of retro chic methinks!

mimi blouse back view

All the above photos were taken by my lovely Daniel who never ever complains. Even when he has things to do himself. He took these with minutes to spare before he rushed off to his soundcheck. And all I had to do in exchange was sew a button on his coat. Best I finish his waistcoat soon, hey?! You can see more of his pics here. They’re not all about me!

But today was totally all about me. This morning I went for an actual run. I say ‘actual’ because it usually amounts to a fast walk! I ran the fastest and the furthest in 3 weeks of practising and it felt amazing.

I then got to shoot my Mimi with Daniel and had lunch with my little family before everyone left the house for the day on separate missions. I found myself unexpectedly home alone.

So I uploaded my lovely Mimi photos and considered going to see Alexander McQueen’s Savage Beauty exhibition at the Victoria and Albert museum. Twitter warned of long queues but I went anyway. Because I could! And on my own, which was blissful and meant I could read and absorb every word and gaze longingly for a long time and hang around as long as I liked. And I did! With only 2 minutes max of queueing time. Oh the power of a V&A membership card and the joy of living in London.

I will definitely be going again, and again and probably again. So I will spare you the breathtaking detail as I’m sure that many of you will want to experience that yourselves.

I am home now with tea and I have blogged too. And that makes me happier still.


Vintage wrap-blouse

vintage wrap blouse

In the olden days I used to worry that I wouldn’t have enough to blog about but now it seems I’m capable of even forgetting that I’ve made stuff to blog about!

This lovely pattern was generously gifted to me by Anne of Mercury Handmade. Not only did she post me a much-wanted, missing copy of Burda Style magazine back in August but she also enclosed two surprise gorgeous vintage patterns. This being one of them. If you’ve not caught up with Anne yet, I seriously advise you to pop over to her blog for all the inspiring and perfectly made clothes she makes for herself and her two lucky daughters

Bestway D.3,109 blouse pattern

The pattern is Bestway D.3,109. One of those mail order sorts, by the looks of it. And I’m thinking early 1950s.

I love the flattering neckline and the extended sleeves. The back is just one piece which incorporates the sleeves and there are interesting yoke pieces which incorporate them on the front. The ‘collar’ lays flat, sitting on the collar bone to create that lovely opening. And its beautifully shaped to nip in at the waist.

It’s held closed with just two vintage buttons. The third is for decorational purposes but at some point I would add an internal button or snap to keep the under-wrap in position. For the time being I generally tuck it into my pants!

lighthouse blouse buttons

I used a nice crisp cotton from the goldhawk road. It’s printed with lighthouses which seemed a perfect choice for this blouse.

vintage lighthouse blouse

I love wearing vintage style blouses. There’s always something a little bit quirky about them. And they are so easily paired up with a circle or pencil skirt. I’m slowly getting away from the easy-to-wear jersey tops that I used to wear all the time. Just need to make a couple more so I can ditch the rest of my tatty go-tos!

vintage lighthouse blouseAnd in case any of you are wondering. I wouldn’t ordinarily be out in December without a coat. It is winter as I post this and it is very, very nippy out! We just ran across the road while the sun was out to take these shots and ran back in before the goosebumps set in!!

I’m now about to add about 10 more layers and head out into the wild and crazy world of Christmas shoppers! I’ve not even scratched the surface yet. Please don’t tell me you’ve all done yours!


Speed sewing for summer!

vintage rose dress

I am so loving this heat. You won’t ever hear a moan from me, however hot it gets. I’ve had my fair share of cold to last me a lifetime. My pace has slowed, my skin is glowing, my nails… I’ve actually got some. Bring on that Vit D, baby!!

My only gripe – well it’s not even a gripe, really – is that I don’t have nearly enough summer dresses. It’s only ever been necessary to make 1 or 2 with such poor rubbish excuses for summers that we have.

I had a lovely Email from a very dear friend last week, asking if I’d like to take care of his aunt’s sewing patterns and best of all his aunt’s beautiful sewing box. A no-brainer of course. The patterns, the box and it’s surprise contents are so deserved of their own post but what I do have to show you for now is the dress I ran up in haste this weekend for our lunch date with Nigel.

I cut it out on the Thursday night, sewed it together on the Friday night (legged it down to the market on Saturday morning to get a zip) inserted said zip and hemmed it up before our lunchtime jaunt to a lovely converted cricket pavillion pub for lunch.

vintage rose dress

In order for that kind of magic to happen I had to use a tried and tested bodice. And that of course is all credit to the lovely Elisalex pattern, brilliantly crafted by ByHand London. I replaced the skirt with a gathered rectangle using the full width of the 45″ fabric, and making good use of the selvedges to minimise neatening of so many raw edges!

I’ve had the fabric in Stash Mountain for so long, it felt like the dress was for free too, which is always a bargain!

Of course there were corners to be cut, namely a machined hem and I dodged hand stitching the bodice lining to the skirt seam. Don’t judge, just yet! This will most definitely be rectified as the complete sewing snob inside of me cannot stand to see that stitching. It’s just not right!

vintage rose dress detail

I’ve got another in the pipeline too, using some lighter weight cotton in a red rose print. Only this time I’m going to take the sound advice of BHL’s FBA instructions and give the girls an extra inch!

Is anybody else speed sewing for summer?

When I got back home I had a good old rummage in that lovely old sewing box. It was hours before I came up for air!

sorting vintage buttons