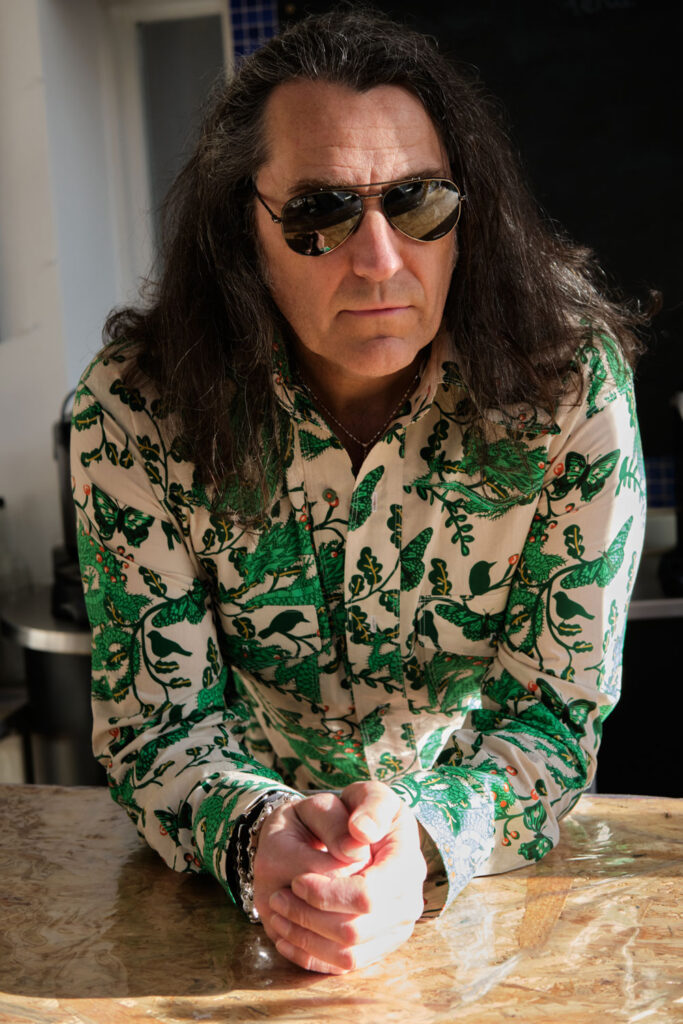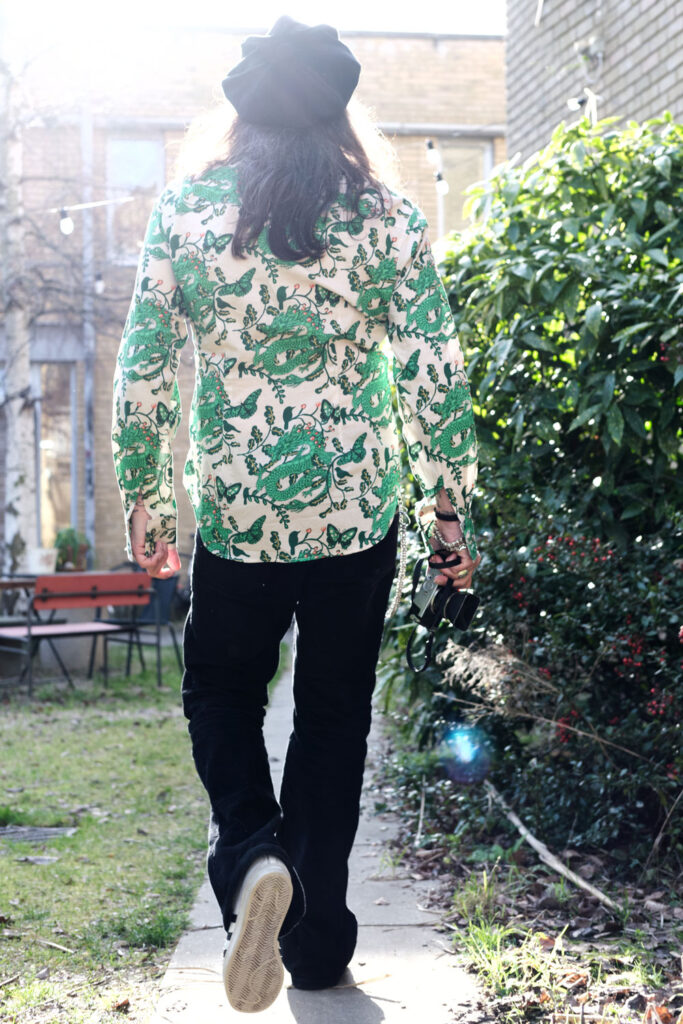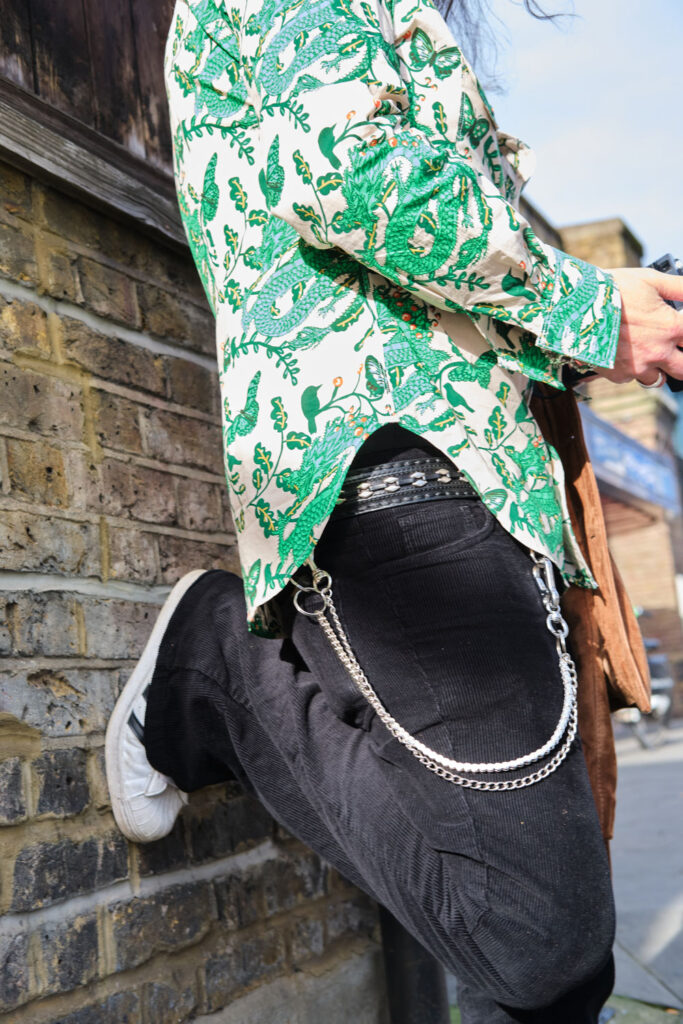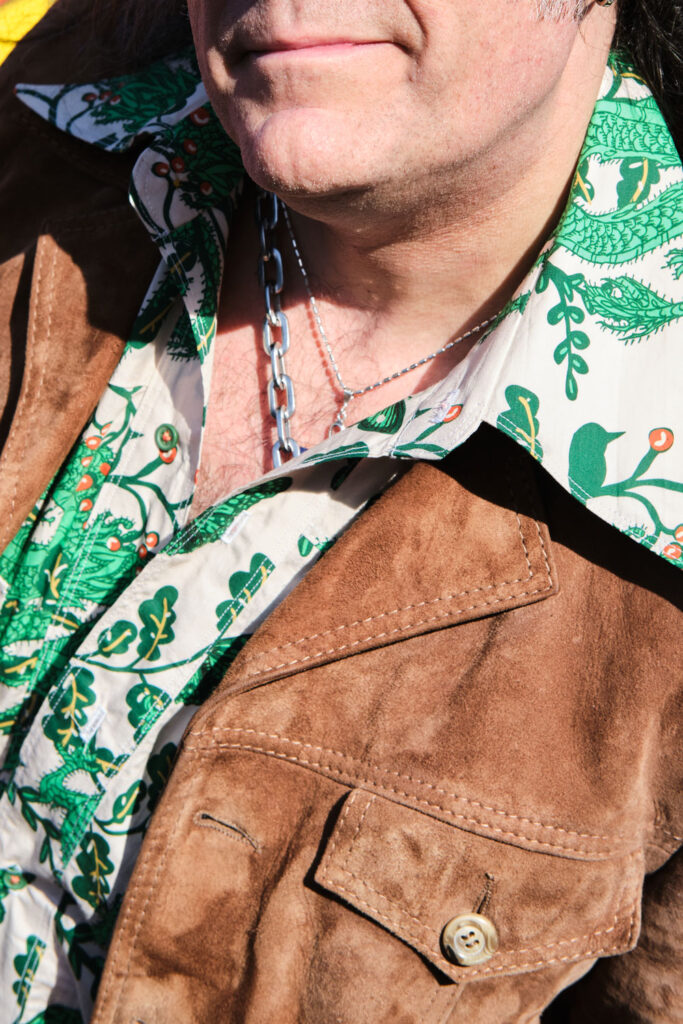
The making of a Serpentine shirt for Mr O

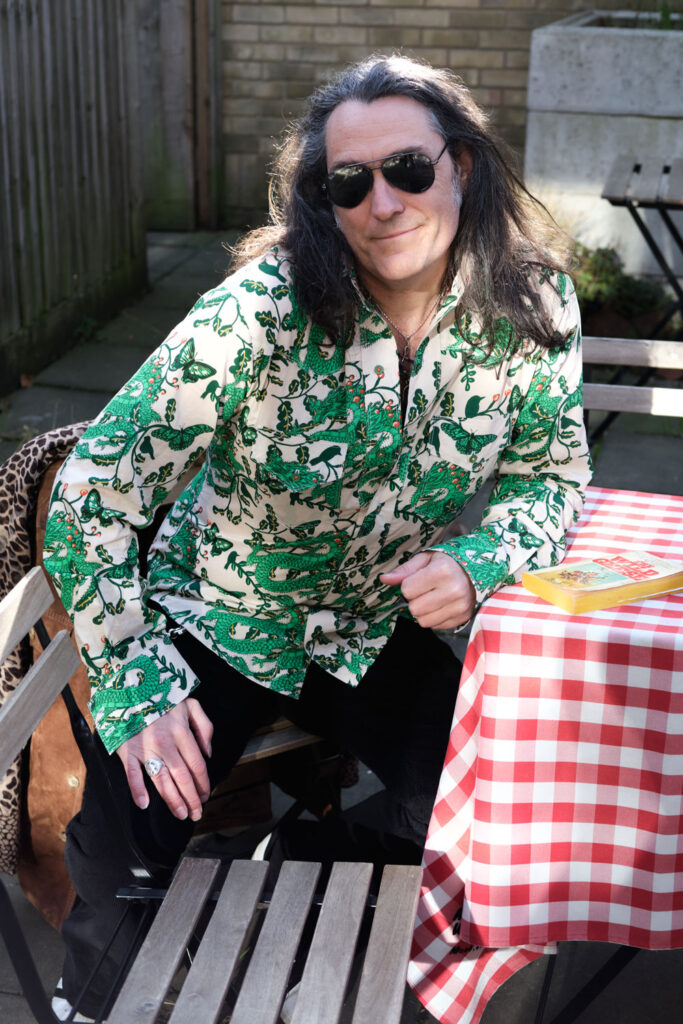
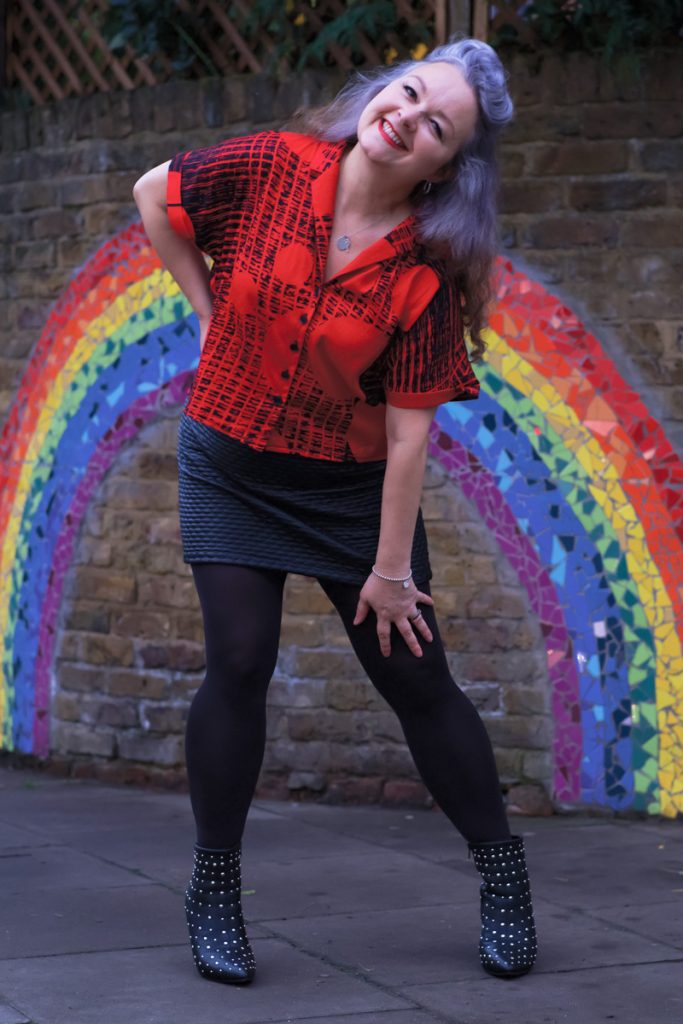
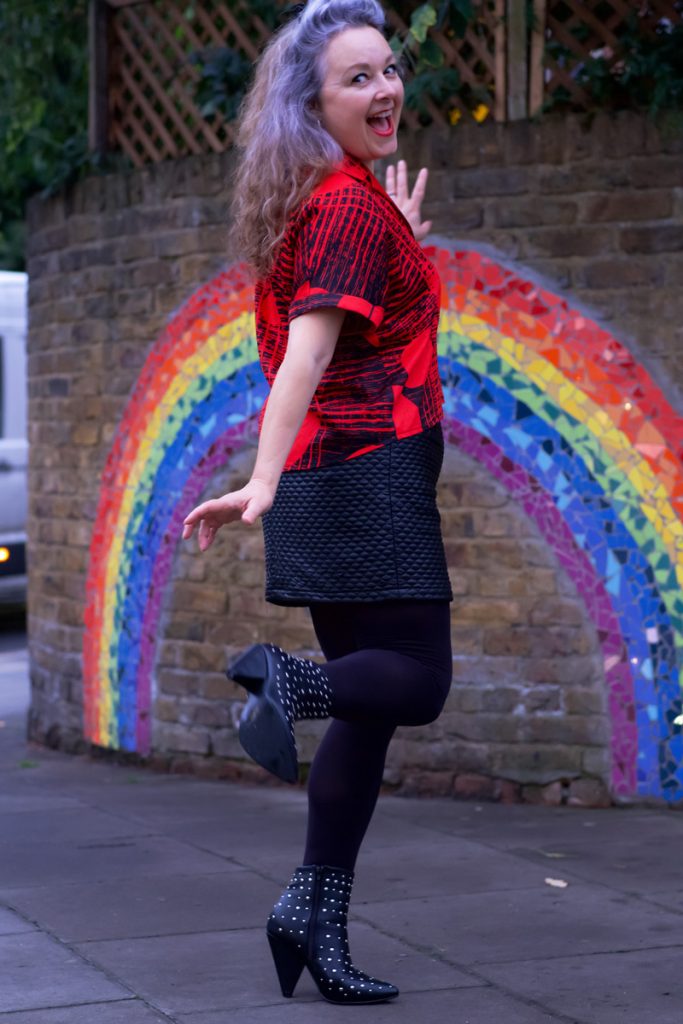
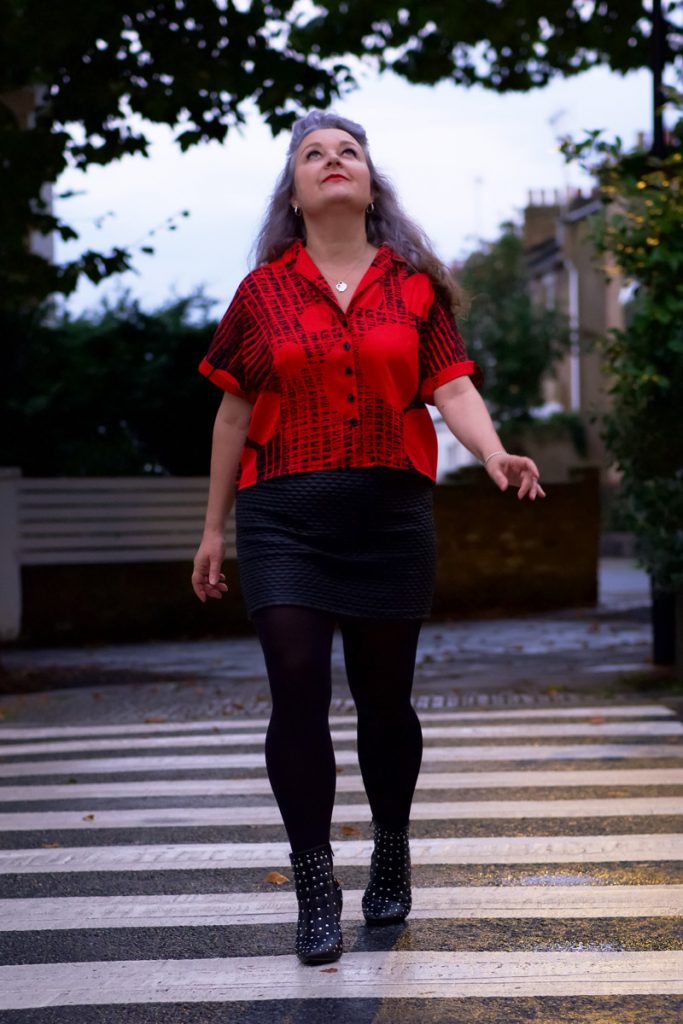
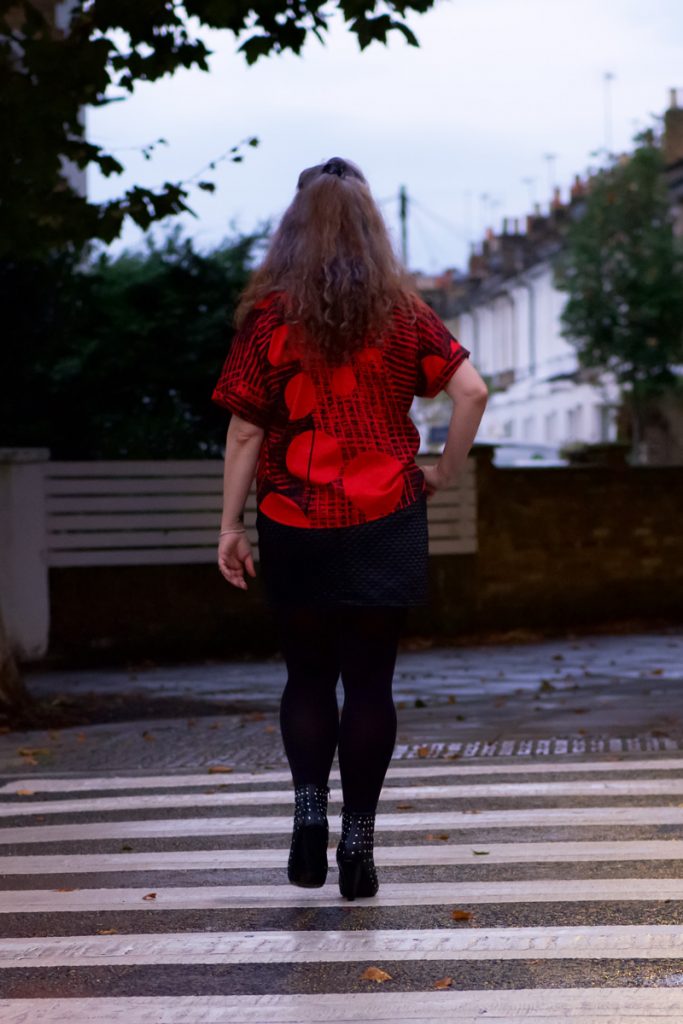
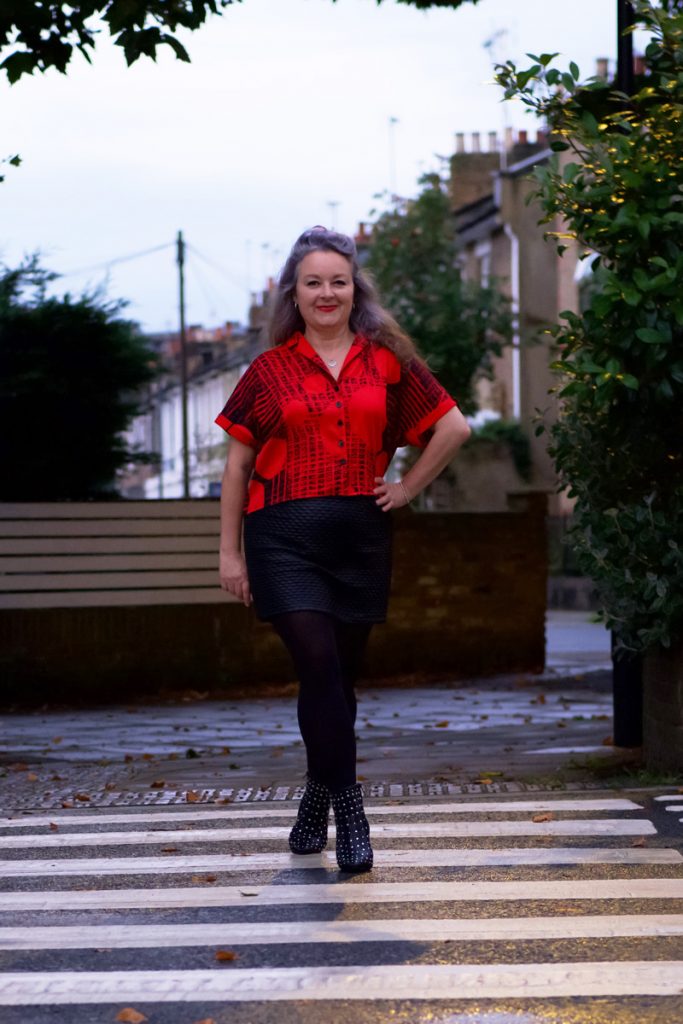
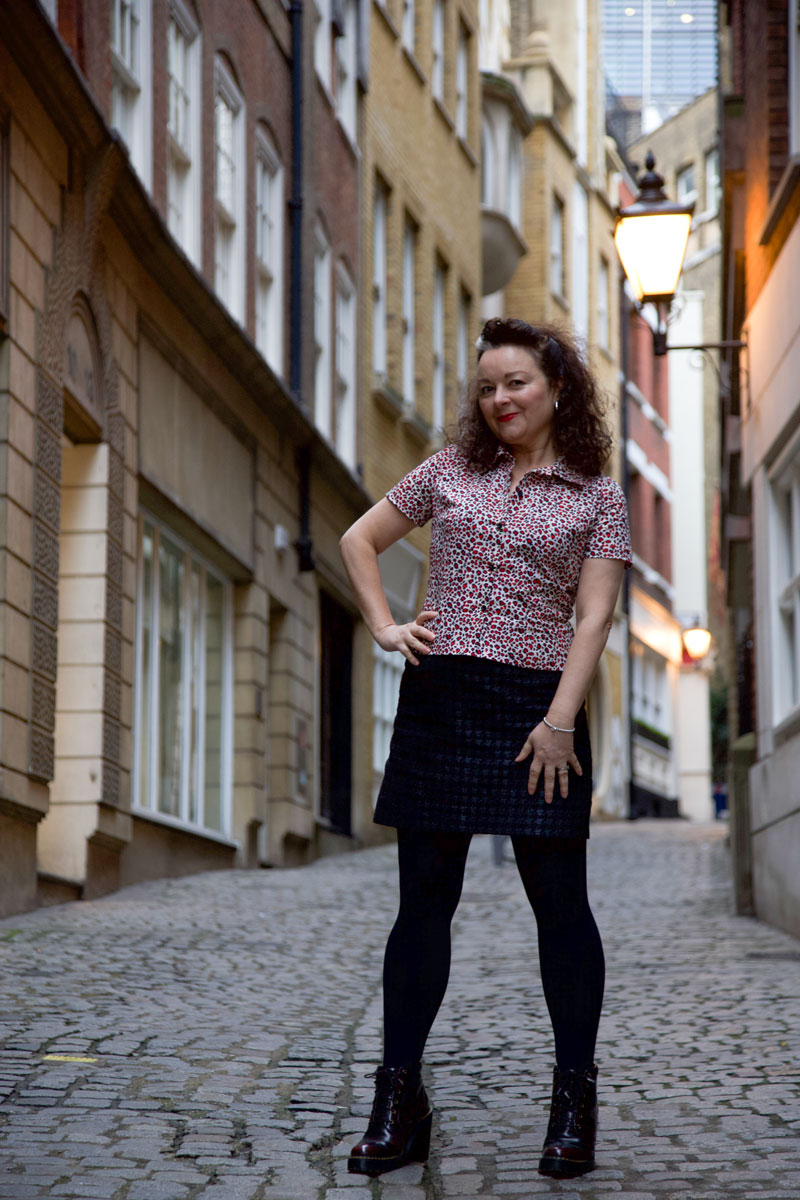
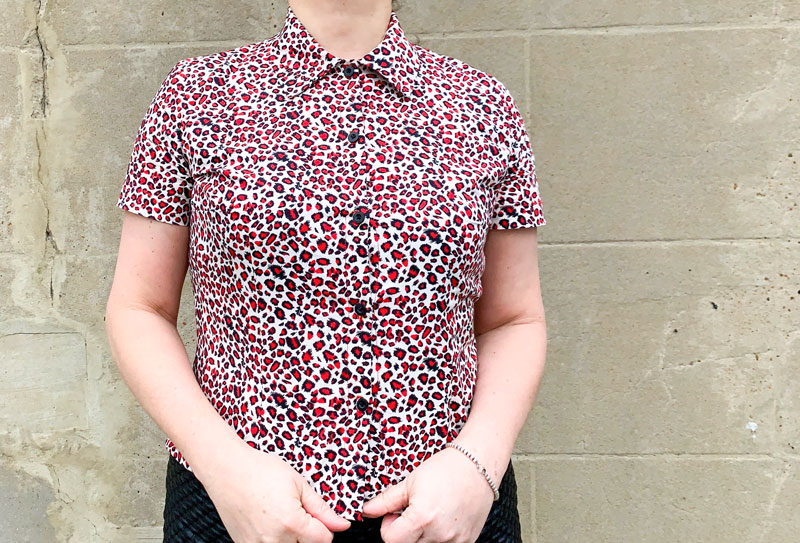
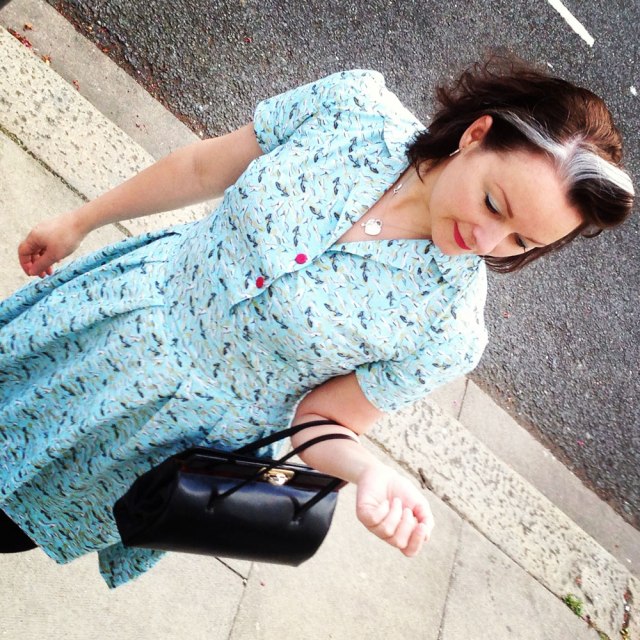
On waving this wonderful Serpentine fabric in front of Mr O, and declaring that I wasn’t sure what I should make with it, my foot suffered an instant shot. “A shirt for me” he said, with no hesitation. Doh! I had no quick comeback! It was a perfect suggestion, of course. 

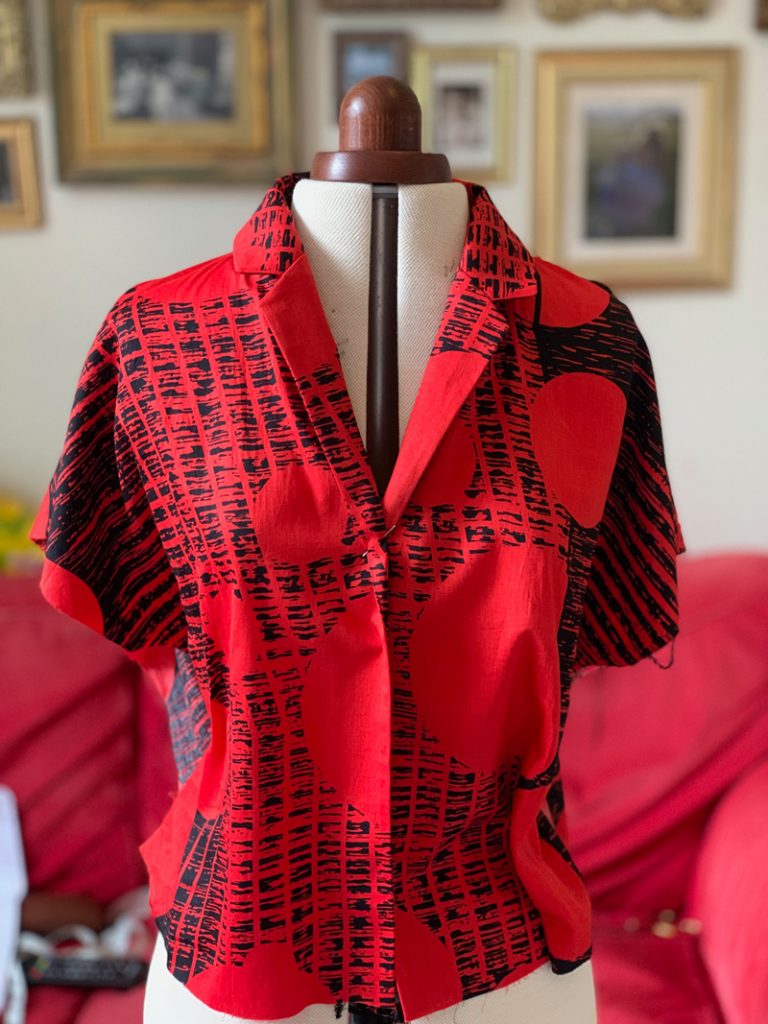
Fabric Godmother were so kind in forwarding on my goody bag, when I was unable to attend one of their events last year and this fabric was one of the treats inside. I thought on first feel that it was a cotton lawn but it turns out it’s a viscose sateen – a new one on me – and it is gorgeous to the touch and super to sew with. Presses beautifully too. 

I reused vintage Butterick 5007, (western shirt pattern) for the 4th time – definitely less daunting this time round. The only things I still fear about it are the buttonholes because I know for a fact that at least one will mess up and I’ll have to deal with the nasty task of unpicking it. And that is exactly what happened. Is there actually anything more annoying?

It takes time to put this shirt together, mostly due to all the neat details: curved yokes, rounded hemline; pleats and darts on the cuffs; diamond darts for slim fitting and every single piece has 2 parallel rows of topstitching. But weirdly, I really like the process. The main section comes together pretty quickly and its a great one for sewing in stages if time is short. Which it is the story of my actual life!

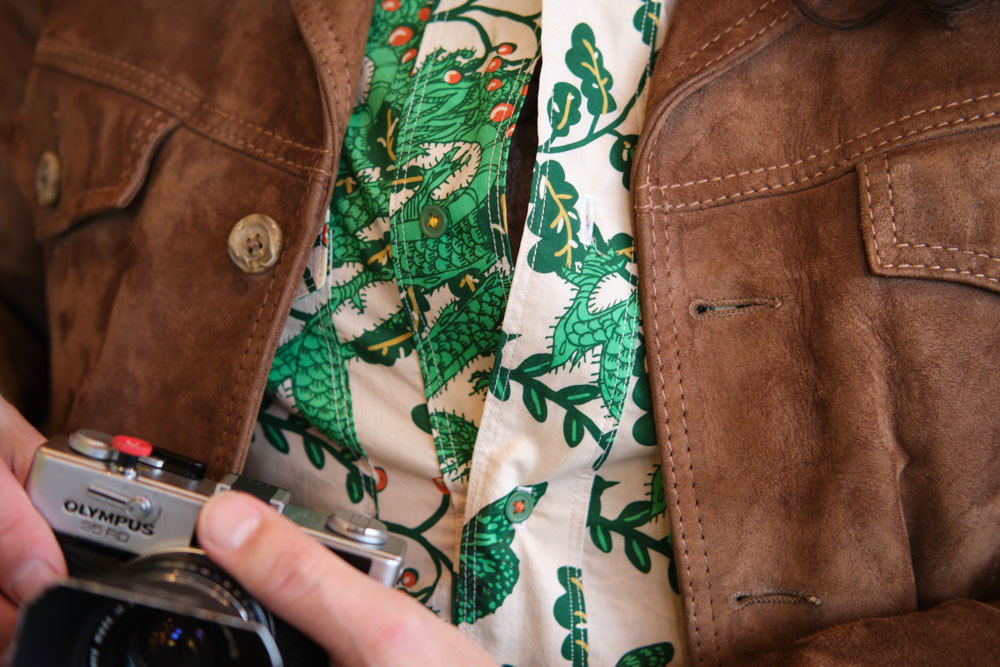
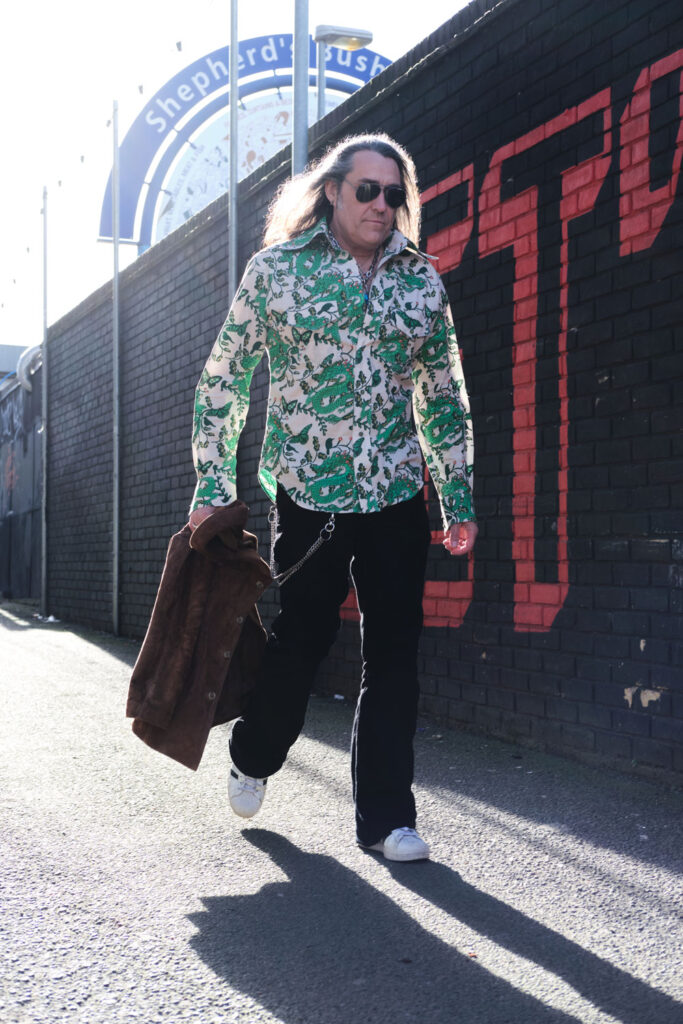
It also has some serious statement collar action going on which Mr O loves. I personally couldn’t carry them off but I think he rocks these aeroplane wings, styled up with his 70s jacket and hat. 

I didn’t make any attempt to pattern match as you can see. I only had 2m to work with – the exact amount required – and there would have been so much waste if I had even tried. That is my excuse and one I am firmly sticking to!

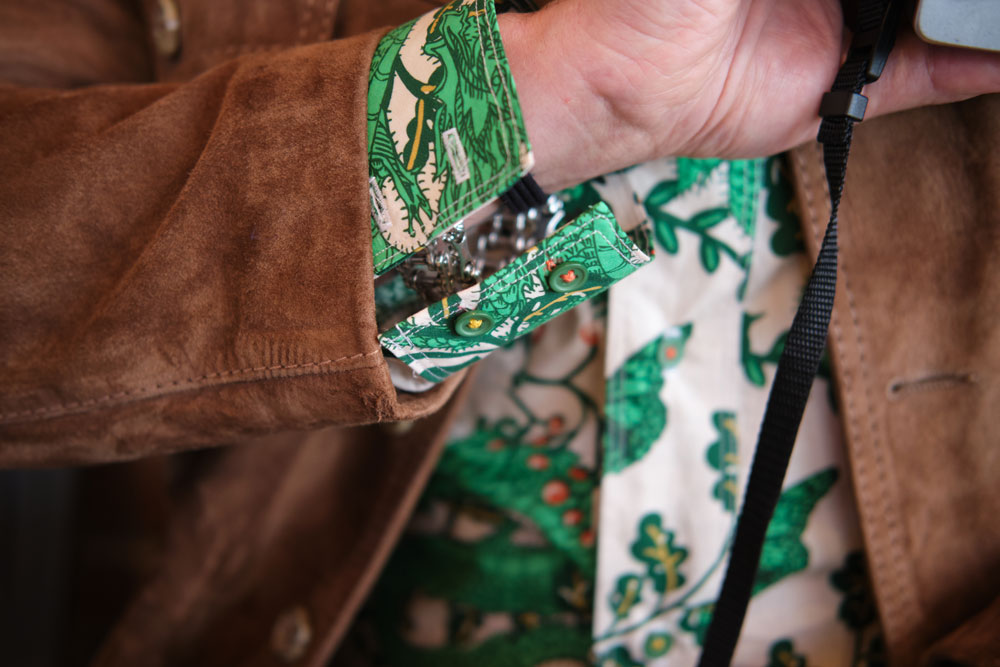
Even though I enjoyed the process, I properly ran out of steam when it came to sewing on the buttons. So I successfully managed to delegate the sourcing and sewing of, to Dan. And he did a fabulous job – giving way more attention to detail than I’d have given – he sewed with alternate orange and yellow threads throughout to complement the colours in the design and it looks simply awesome.

This is definitely not the last time I will use this pattern. I just noticed that Fabric Godmother has a Navy version of the same fabric on sale on their site, and made the mistake of showing Dan!

But he’s going to have to wait a wee while – I’ve got a lovely little commission I need to crack on with and also I want a new coat!

Photos are by me this time. But I think you probably guessed that already, haha! I think I’ll stick to my day job!

Previous versions I made are here and here

Theres a lot to love about a Libby Shirt

I’ve already had people ask if the fabric I used for this shirt was leftover from my latest sheath dress. I’m clearly set in my colour palette ways!

It isn’t, but its a close contender I found it on a pile of Ankara bundles when I was looking for pyjama fabric. And was pleasantly surprised by the light-weightness of it and of the lovely sheen. The shop owner told me it was cotton satin – I didn’t realise that Ankara prints came in any other weight other than the usual medium/heavy structured cotton. Definitely keeping eyes peeled now for different kinds.

And I did have a plan for a lovely lightweight pair of pjs until I saw all the lovely Libby shirts on Insta and that instantly changed things up. I bought, downloaded the pdf pattern, printed and cracked on with tiling the pages together that same evening.

I’ve only ever made one Sew Over It pattern before – the Joan dress – which Im still in love with. If only I could squeeze myself back into it… It was a tough enough wiggle from the outset!

And because of that, I made sure I was being totally realistic about my choice of size this time. Yes I have been known to cheat myself! But to be fair, it does state on the instruction booklet that “Sew Over It patterns tend to have less ease than other patterns as most of the designs are intended to have a closer fit.”

This time ironically it appears I’ve erred on the bigger size! But it really doesn’t matter as it’s so lovely and cool to wear on a humid day. No touching underarm seams and a slight blouson back which really keeps it all nice and airy.

There was nothing complicated about the construction. Though I took time to make sure all the little circles and notches were clearly marked on my fabric pieces. Especially as far as the collar pieces were concerned. And they fitted together a real treat. The fabric pressed nice and sharp too as you’d expect from a quality cotton and a bit of hot steam. And I marvelled at the results. for some time before carrying on with the rest!

I had just about enough fabric to make this shirt and not an iota of thought was given to pattern matching. It would have been very difficult in any case with the design being so random and all. It was looking to be a nasty mismatch at the centre front with the half circle meeting the full circle but I think I’ve got round that by disturbing the design with some black button holes and buttons. I’ll just keep telling myself that!

This image has an empty alt attribute

I cut the longer length version so that I could make up my mind if the cropped length was going to suit me or not. Before I hemmed, I tried it on and cropped was definitely the way forward so I just overlaid the front pattern piece onto the shirt and trimmed to the line. I did however go back to check If there was one back piece for both versions as I wasn’t sure if it was quite right for the back to stay longer. There isn’t and it doesn’t matter. I’d just assumed the back would be cropped too.

I love how the finishes are considered in the instructions for each seam. It comes together so neatly that you are prompted to stand back and admire your progress at each stage. The cuffs in particular are a great way to bind the sleeve hems. And the facings do a great job of housing the overlocked hemline at the centre fronts too.

I would definitely make this shirt again, perhaps in a slightly more draping fabric next time. Maybe a viscose or liquid-like silk satin for a posher version!

I love the style of this shirt, the cropped length option and the cut-on sleeves. Such a timeless vintage vibe. And a very easy fit.

All I’ve got to do is make some bottoms to wear with them, haha. I’m forever in need of simple black skirts or shorts but I just can’t bear to make something that boring. Needs must though!

Photography by Daniel James Photographic

Thanks to Dan for taking these shots under really difficult circumstances. Nagging wife and failing light is never a winning combination. But I love them!

Camp collar shirt

selfdrafted camp collar shirt

Did I imagine that Christmas and New Year break? Feels like it happened a lifetime ago… can I scroll back a few weeks pleeeease – it’s all a bit too much already! Any one else feeling the same?

I know I mustn’t complain. Too much work is the least of concerns for a freelancer. I’m just craving a sewing project soooo much! There’s so many in my head I’m literally going to burst if I don’t get to make at least one of them soon.

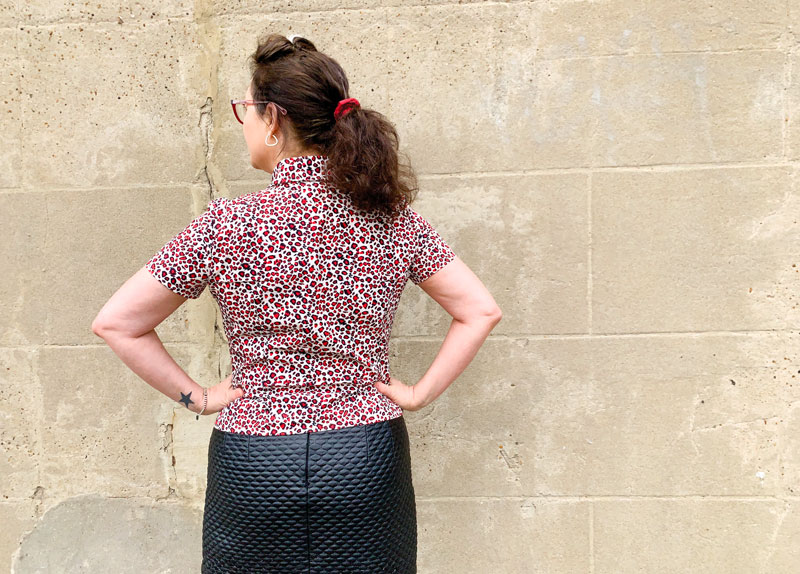
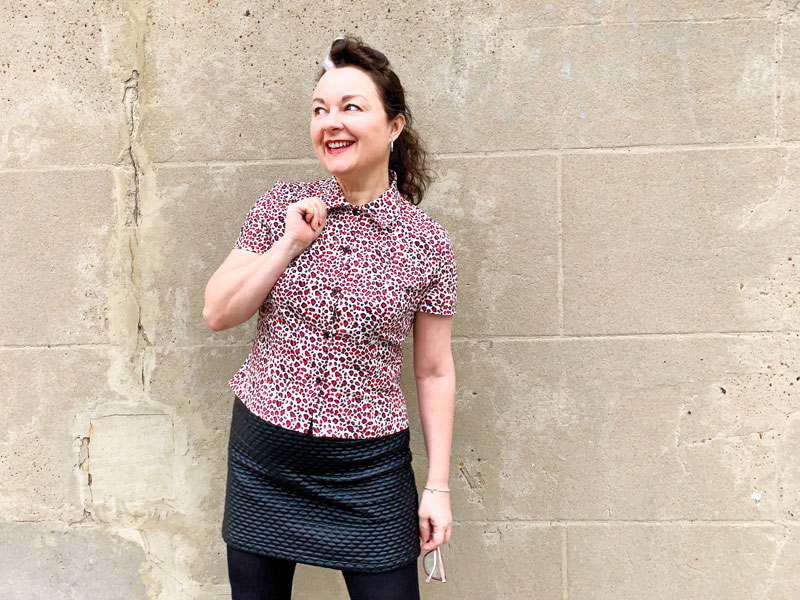
front view of shirt

But it’s dark now… and I’m exhausted – story of my life. So I’ll just settle for a little fix from blogging a recently-made shirt for now.

I already had this animal print cotton fabric in stash and it was just enough to rehearse a new self-drafted design. One of the upsides of designing my patterns digitally is that I can test a pattern layout on computer screen to see how much fabric I’ll be needing. And also plan the positioning of pieces for minimum waste without having to crawl around the living room floor ‘playing giant Tetris’ while the fam barks at me to get out of the way of the telly – I don’t have a proper cutting table, see.

Side view of camp collar shirt

My recent self-drafted adventures have included a 70s style dress with flared sleeves and a Christmas Dress with bishop sleeves. Both of which use the same bodice block and knowing it worked both times meant I just had to add a bit of extra ease, add a button extension and lengthen to the hipline for a great fitting shirt. The sleeves would be simpler than both trialled before, and I found a great video tutorial on Bluprint to draft a one-piece collar. So what could go wrong?

Well this is where I classically mess up because I try and run before I can walk. I’ve never actually made up a straightforward self-drafted sleeve for myself yet. Just flared ones in both cases. So there was never any trouble with fit. But as my block stands, it’s too tight. Luckily I had my suspicions and made one sleeve up in calico to check first. Lord knows where I went wrong. But I seriously must have got lucky previously! To rectify (badly) I have slashed and spread to the sleeve cap. And it works, kind of. But it is still a bit snug. In fact it’s a bit too tight under the pits too so I need a revisit to this pattern before I make another.

Back view of shirt

I’m going to lower the underarm point and redraft that sleeve with less haste (read less excitement) and less speed! Because I’ve got more plans going forward and I’m going to need those pattern pieces spot on!

The collar worked out perfectly. It’s a camp or Hawaiian collar, so Suzy Furer told me on the Bluprint video tutorial. Basically a collar and stand, all in one. I did check out another tutorial on YouTube for the construction. It was kind of obvious but I just needed some reassurance.

hawaiian collar

Suzy advised to ditch the waist darts front and back but I really quite like the fitted aspect of it and I’m convinced that if I lower the armscye by half an inch or so more and sort the sleeves out it will be a much more comfortable fit.

So the consensus is that it’s not the greatest self-drafted shirt in the world but it’s a great starting point and I’m looking forward to a new and improved one. Might have to buy some new fabric though… I’m feeling stripes!

Have you kicked off the New Year with a new project yet? Pray tell. I’ll do my best not to get too jealous!

BHL Sarah Shirt in cotton silk

BHL Sarah Shirt

This is By Hand London‘s latest lady, Sarah. Released just last week. A classy swingy shirt to interpret any way you fancy. She’s a dress up or down kinda girl with gorgeous sleeves so I snatched that offer of pattern-testing and got straight on it.

The sleeves are what I love most about this shirt. Nicely full but not so much that they’d trail in your soup. And with a subtle puff on the shoulder, it makes for a great shape. But there’s an alternative short sleeve design with a cuffed hem, if you’d prefer.

BHL Sarah Shirt sleeves

The Peter Pan collar has a roundy and a pointy option too. I went for sharp corners because, well, that’s just the way I was rolling that day. But the roundy collar looks just as good on all the others I’ve seen.

Sarah Shirt collar

Sarah calls for a light to medium weight fabric and I do believe I hit the nail on the head with this black cotton silk. I’ll never get away with not ironing it but it doesn’t crease to madly, even when I’ve left it on ‘one of the piles’. Of course that meant French seams all the way, but that’s ok because it looks dead neat inside and out. the only seams I had to trim and serge were the armholes. The yoke is designed in such a way that it encloses all seams too and with some tiny hand-stitchery to the undercollar, it’s beautifully neat all round. Note that I chickened out of any top-stitching, though!

BHL Sarah Shirt

I used poppers/press-studs for the cuffs though I was very tempted to extend the cuff beyond the sleeve end to make for faux cufflinks or maybe even real ones. There’s always a next time!

BHL Sarah Shirt cuffs

Theres a lot of button holes to sew down the front placket. Instructions call for 10-15 and mine has 12. But they are necessary to get that neat flat finish. My buttonhole action decided to wreak havoc and I ended up having to redo 2 of them. One for bad positioning and one that was just an oversewn mess. Out came a brand new scalpel blade. I wasn’t going to loose a fight over a final detail. Took a lot of patience to unpick but successfully managed to create new ones and dead chuffed I was about that too!

BHL Sarah Shirt

I love the pleats on the front yokes and at the centre back but I was quite surprised at how much swing was involved. It’s not normally a silhouette that I’d go for. I’m usually a ‘tucker-in’ of blouses, but once I saw how it looked, when I wore it loose for the photos I really liked it. Nothing ventured, nothing gained and all that!

Sarah Shirt back view

This isn’t a quick one to run up. But it’s none too taxing either. I’d say the only difficulty with this pattern lies with however challenging your fabric is. Mine required a bit of careful handling and I imagine chiffon or the likes would need a bit of a talking to but a more stable cotton would have been much easier and quicker to work with, I think.

If, like me, you’re sold on Sarah, she’s up for grabs over at By Hand London.


Photography: Daniel Selway
Shirt: BHL Sarah
Skirt: handmade (yet to be blogged)
Tights: M&S (I think!)
Boots: Irregular Choice
Handbag: Fara charity shop, Ealing
Sunglasses: Retro Peepers

Vintage western shirt #3… of the linen kind


70s shirt Butterick 5007

It’s been a while since I made Mr Ooobop something. Quite shameful really for all the lovely photos he takes for me. So I’m delighted to have finally finished his latest shirt. And he loves it, thankfully!

The hardest bit for me was being back behind the camera again. Well out of practice I was. But luckily Dan has more patience than me and was very obliging as I got him to mill around on Barnes common!

This is the third version I’ve made from the same pattern – Butterick 5007 – A 70s men’s western shirt.  The kind of shirt you have to imagine beyond the pattern pic:

butterick 5007 pattern cover

Mr O is quite good at that. Non-conformist to a T for Taurus he is, and believes very firmly that if it ain’t broke, don’t fix it. So all that needed to be altered this time was the choice of fabric. The flowery fabric used in the last shirt I made him was gorgeous but faded so quickly in the wash. Such a shame. So he chose this gorgeous black linen with embroidered details.

butterick 5007 shirt

When we came to buy the fabric. I didn’t think I would have a problem with pattern matching because the little embroidered motifs were quite sparse but that’s where I massively slipped up. Didn’t really consider placement, did I…doh!

Placement isn’t really that difficult if you take time and consider each piece and where it’s going to sit with the adjoining pieces, of course, but when you’ve purchased only just enough fabric for the job and it was end of roll, it creates a problem or ten.

You can move the pieces around to work as much as you like but sometimes that ain’t very economical and you end up short of material for all the pieces. Luckily enough I had some spare plain black linen floating around because what was left didn’t leave suitable areas for the cuffs, collar stands and one of the pockets. I also used some of the plain stuff for the underside of the pocket flaps.

butterick 5007 mens shirt

It’s a close-fitting shirt, which required a bit of fitting but that was done on the first version, which incidentally has disappeared from my blog but here’s a pic of it. I just love the vintage Laura Ashley curtain fabric I rescued here. The beard, not so much!

B5007 with double bass

In all cases, the pointed collar is large. He likes it that way. But I did include a stiffer facing this time so it is even more exaggerated!

The back and front yokes are cut on the bias. Fine for the back but I did some serious head-scratching on the placement decisions for the front yokes. In my head I wanted the design flipped and symmetrical. Why my brain couldn’t let it lie I have no idea!

70s shirt back yoke

70s shirt front yokes

I love how the above picture shows the texture of the linen. It is one of my favourite fabrics to work with. And I’m told it feels great and is dead comfy to wear too! Also shows up some of the painstaking topstitching. I had clearly forgotten just how long this takes. It can’t be rushed. And I couldn’t do it at night-time. Sewing black on black with stupid crap low energy ethical lightbulbs is not good for anyone’s health. So I’m glad I waited for weekend daylight hours to get a neat job.

You can’t see from these photos, and you probably wouldn’t have noticed in real-life and close up either, but I interfaced the cuffs and button band in a white fusible woven interfacing. French stuff. Great quality in fact. But when I cut the button holes it was a little irritating to see the white edges. So I got my Sharpie out and coloured them in… shhhh!

The buttons aren’t an exact match for the blue in the embroidery which bugs a bit but I’m keeping eyes peeled for a closer colour. They can always be replaced at a later date. But I so wish I’d put the buttons on the other side of the cuff. Mr O doesn’t often do his cuffs up so you don’t get to see them side on!

70s shirt shaped hemline

He also doesn’t like to tuck a shirt in much. And so it’s great that the shaped hemline gets a showcase. I used a bias tape to finish the edge because I forgot to lengthen it again I much prefer how it looks.

B5007 in black linen

It was really lovely to catch an hour or so of the sunshine in Barnes, today and especially lovely to spend a little time with this fella. We’ve been like passing ships lately. And he’s off again now to do a gig in Kent! So what’s a girl to do? Crack open a bottle and crank up the sewing machine I guess! Tough life on a Sunday afternoon, hey!

70s western shirt for men

Happy sewing, everyone!


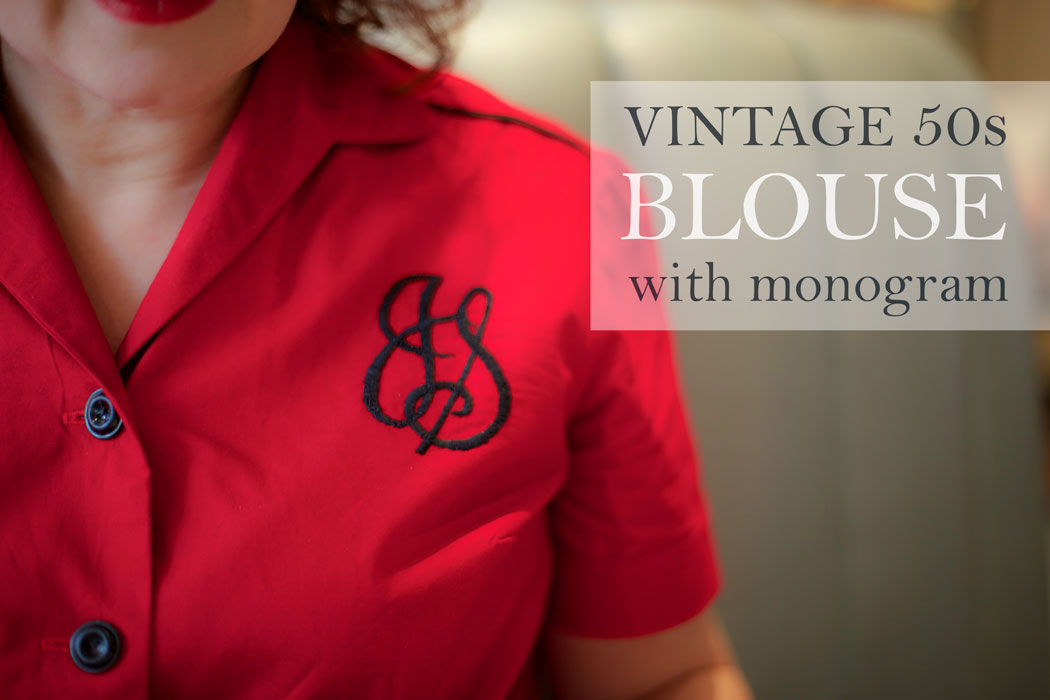
Vintage 50s blouse with monogram

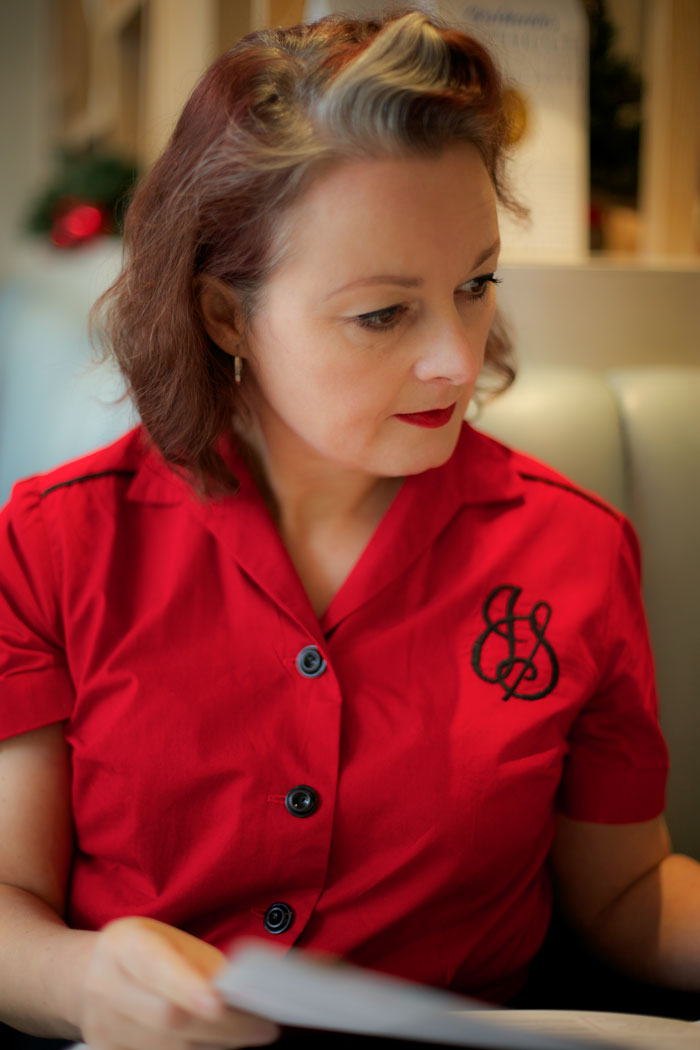
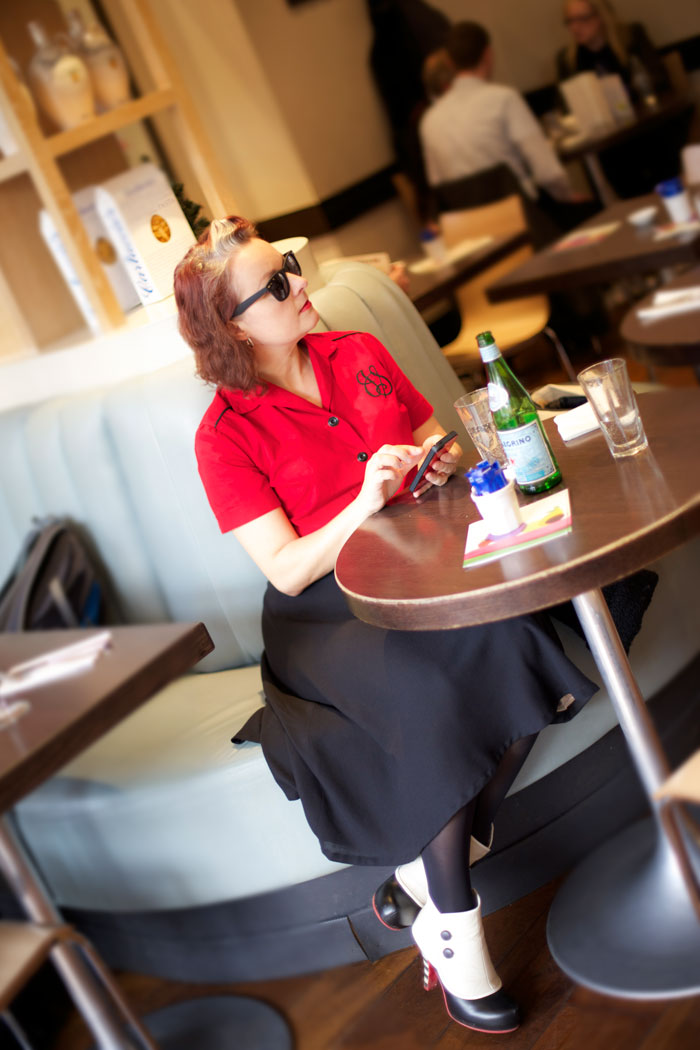
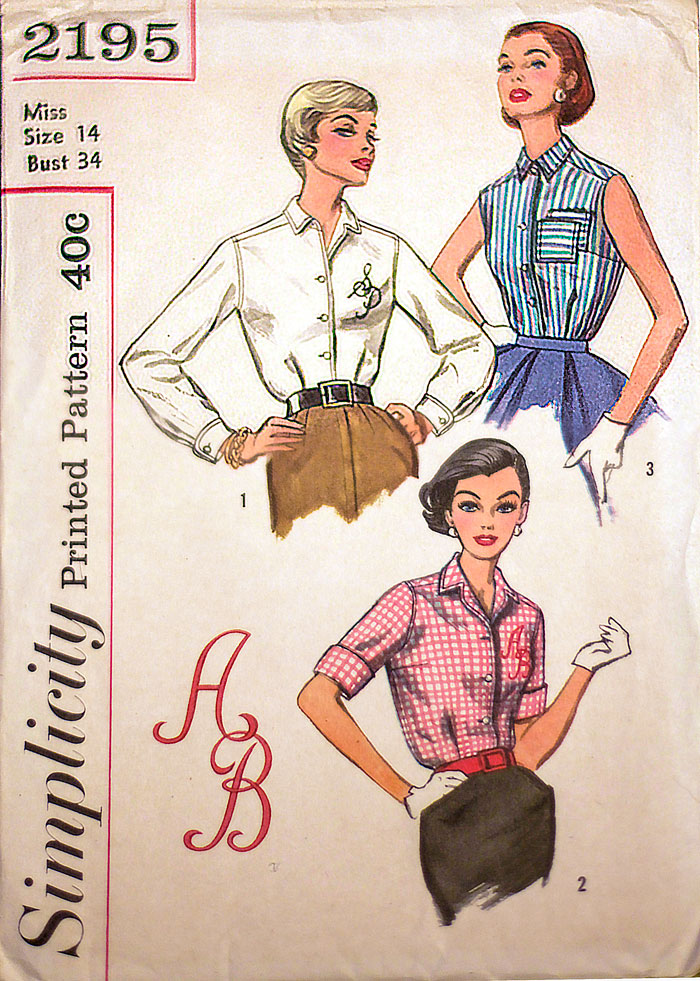
simplicity 2195 blouseThis is vintage Simplicity 2195 . . . or a great substitute for a bowling shirt fit for a game with the Spoolettes! Who are the Spoolettes you may well ask? Well hop over to Sew Dixie Lou to get a little insight.

vintage 50s blouse with monogram

I’m gutted I didn’t get any photos of our fabulous sporting event. But if you want a bit of inside info, Charity Shop Chic has posted some great ones here plus you get to see her amazing bowling shirt refashion too!. We sure did rock Bloomsbury Lanes with all sorts of complimentary comments coming from the staff.

I struggled to find an actual bowling shirt pattern but I’m quite glad I found this one as it works very well as an every day shirt. I wore it to lunch today at Carluccios with Mr O. Teamed with self-drafted half circle skirt and my favourite ankle boots from Office.

simplicity_2195_1

simplicity_2195_4I knew the hand embroidery was going to be a challenge for me. The last time I entertained such a thing was at the age of nine. But I thought this would make a lovely project to take on holiday back in August. (An efficient bit of planning on behalf of those Spoolettes meant that this sewing challenge fitted in superbly with my holiday!)

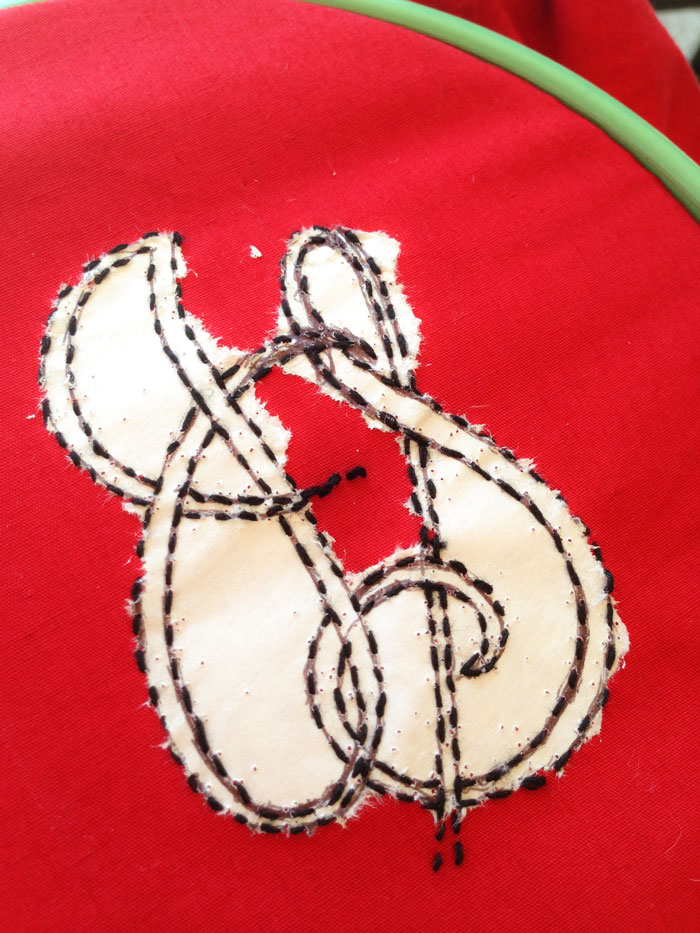
So first in the suitcase was the needle and thread and a hoop and a half made shirt with a piece of freezer paper ironed in position. As with most things I didn’t spend too much time reading up on the best way to go about this and the only transfer pencil I had was red, so I traced my initials from the original transfer, supplied with the pattern, on to the freezer paper. I couldn’t bear to cut up and ruin the original!

I had, however, read somewhere at some point, that ‘padding stitches’ were a good idea to raise the ‘satin stitches’. And so I set about tracing the edge of the monogram with some small running stitches.

monogram

A long process but not too much hardship when you are sat outside a beautiful Maltese villa, watching your children have so much fun in the pool, whilst all 40 degrees of sunshine warms your toes!

All was going swimmingly until I came to pick off the darned freezer paper. Gah! Never again. It took sooooo long!!

padding stitchesBut once it was off It was a pleasure to sew. A bit wonky here and there but it worked, kinda! Just wish I had used some stabiliser on the reverse to stop the stretching that happened too.

monogram_embroidery

I’ve got plans on making a gingham one, just as the pattern cover pic. Yes I’m still harping on about gingham but I happened across some gorgeous egyptian cotton gingham. Well at least that’s what the lady sold it to me as! But to be perfectly honest, it may be a way down the list as this sub-zero-like weather does not inspire me to make anything other than slankets right now!

simplicity_2195 pattern

Postscript:

I completely forgot that I’d asked the waitress to take the following photo. Feast your eyes on a table full of splendidly hand-made bowling shirts sported by an amazing team of beautiful and talented Spoolettes…

Spoolettes

Me Made May 13: My final days

So here we are. The final days of Me Made May ’13! I feel quite sad in a way. But relieved. And accomplished. And enlightened. So thank you SoZo for setting this brilliant challenge. I didn’t realize quite what a knock on effect it would have. Or how it would make me feel. I wholly recommend this challenge to anyone who has yet to take the plunge. 

I really didn’t think I would make it to the end of the month. For sure there were repeats and some days no photo evidence at all. In reality, taking a photo of yourself every day is really difficult. Easy at first with all the initial enthusiasm for the challenge but then harder each day as the sun disappears, the hubby sets of earlier for work and the outfits get more tight-fitting the older they are!

But the journey was worth it. It was fantastic to focus each day on each hand made garment and realise where I’ve come from and what I’ve arrived at. Confirmation on what I’ve learned and achieved was invaluable. I don’t have time to stop and think properly about most things these days, especially what I’m going to wear on any particular day. So this was a fantastic excuse for self-indulged focussing, on past experience as well as some future plans. Oh yes, of course the flip side of the coin has meant my project list has increased ten-fold. But hey that list always makes for sweet dreams, if nothing else!

So to wrap up… the final days of  Me Made May ’13.

Jersey cowl neck top

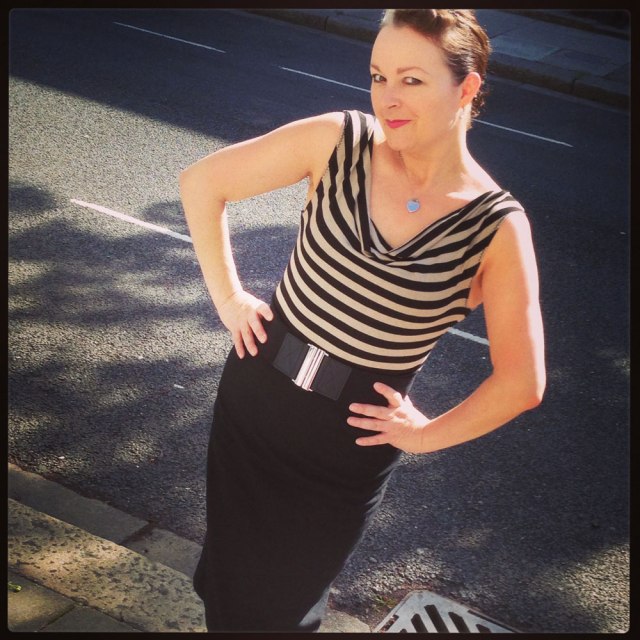
DAY 22: Silk touch jersey cowl top and wool pencil skirt
Neither of these are blogged, I made them so long ago. But the cowl top is made from a free pattern on Burdastyle by Ichigogirl. Its the same as the stripy one I made. The skirt is a Simplicity pattern that my mum gave me to kick start my sewing antics. It has a little vent on the front knee. I didn’t line it, unfortunately and this is something I would never do with wool now. I should really go back and line it. It would hang much better and not stick to my tights!

Day 23 black self-drafted pencil skirt

DAY 23: Black self-drafted pencil skirt
This is possibly the most worn and practical of garments in my wardrobe. It fits like a glove, because I drafted it to my exact measurements. It’s properly lined and the lining is even properly attached to the vent. The waistband incorporates a woven interfacing so it doesn’t roll and is fastened by a hook and bar instead of a rubbish ‘eye’! It was a fantastic learning curve making this skirt. So absolutely worth all the effort that it feels fantastic to wear. I always imagined a whole weeks worth of these to choose from and I still think that is highly necessary. They are perfect work skirts and glam up nicely for a spontaneous evening out too!

DAY 24: Stripy wool mini A-line skirt
A miserable day. No sunshine at all, so the woolly skirt came back out. No photographer today I’m afraid. I’ve come to realise how much I wear this skirt. Mostly when I can’t think of anything else to wear. It fits; it’s comfortable; it goes with DMs… and it keeps my butt warm!

Day 25 mmm13 Elisalex shortened

DAY 25: The shortened Elisalex
Today was the 20th anniversary of the day my dad died. Always a sad day. But always a good excuse to don a pretty dress and catch up with my wonderful brothers and sisters, nieces and nephews. The cemetery is a bit of a trek from the bus stop so I needed to sport something easy to walk in. Small heels means small skirt in my world so there was only one thing to do. And that was to chop the bottom off my test Elisalex dress! So glad I did. The duvet cover did good! Although I love my longer rosy version, it’s kind of ‘for best’ but this cheeky little version is now a great little throw-on when-the-sun-shines-and-go dress!

DAY 26: Grey pencil skirt
No photographic evidence today. I wore the first pencil skirt I ever drafted which still fits pretty well. Its lined but has no vent. I was taking things one step at a time back then and to learn to create a vent was information overload! I have to take pigeon steps but it still works. It’s a good staple, though a little boring. It’s days are numbered as soon as the others are on the cutting table!

Day 27 goat eating dress

DAY 27: First summer dress of the year
Today we went to the Surrey County Show. An ideal place to sport a full on flowery frock. Not such a great idea to wear in the goat tent though! Note that Mr O sought his photo opportunity before letting me know what was occurring! I still love this dress but I need to take some volume out of the back. I didn’t notice before but it gapes at the zip. I’m pretty sure its a simple fix. And hopefully it will fit better.

Day 28 Danielle dress

DAY 28: Danielle dress
Now here’s a blast from the past. Almost 2 years ago to the day. It was a bit of a squeeze, I can tell you. So much wrong with this dress but I still like the vibe of it. The fabric was a charity shop find, unsure of the content but it’s soooo itchy and scratchy. I thought I was being out there by using red lining but that turned out to be a no-no with the pale open weave fabric on the skirt! I can’t really breathe in this dress and you can tell by the pull across my chest but this dress is a lovely reminder that I should make another that fits in a much lovelier fabric.

Day 29 button back top

DAY 29: Button back retro top
I was fast running out on day 29 so it was a great propmt to rectify some issues with some garments I don’t tend to wear any more. This one in particular was really annoying to wear because I made the neckhole too small. I really liked the jewel neckline but in reality it kind of chokes you to death. Only problem was that the first buttonhole started right at the top, so to lob a centimetre off the neckline would halve my first buttonhole. My need to wear a me-made top spurred on a quick fix and I replaced the buttonhole with a press-stud and sewed the button on top so nobody will ever know!

Day 30 vintage pencil skirt with pockets

DAY 30: Vintage pencil skirt with pockets
Not yet blogged but again, a hurried make out of desperation but boy I’m glad. I’ve been meaning to make this for yonks! It still needs some fine tuning and this is really just a test garment but I will fill in the details when I blog it. But what’s more to say? Its a pencil skirt with pleats and front pockets… hooray!

Day 31 1940s shoe dress

DAY 31: 1940s shoe dress again!
A shameless repeat but one I’m prepared to wear again and again. This is by far one of my favourite dresses. It gets comments from total strangers as I stroll down to Sainsbo’s. It’s cool and comfy and is covered in shoes! This is the item of clothing that I need at least 5 more of. Along with 7 pencils skirts, my wardrobe should have at least 7 of these too!

And so we leave the month of May and venture on to pastures new. A prom dress for my friend’s daughter is on the go, FBA’s and all, a bespoke pencil skirt for my daughter’s birthday present and another that was bid on by my friend at the school auction. (Far too nervous to ask what she bid!)

Thank you as always for your wonderful comments and support x

Me-made May’13: My first week
Me-made May’13: My second week/
Me-made May’13: My third week/

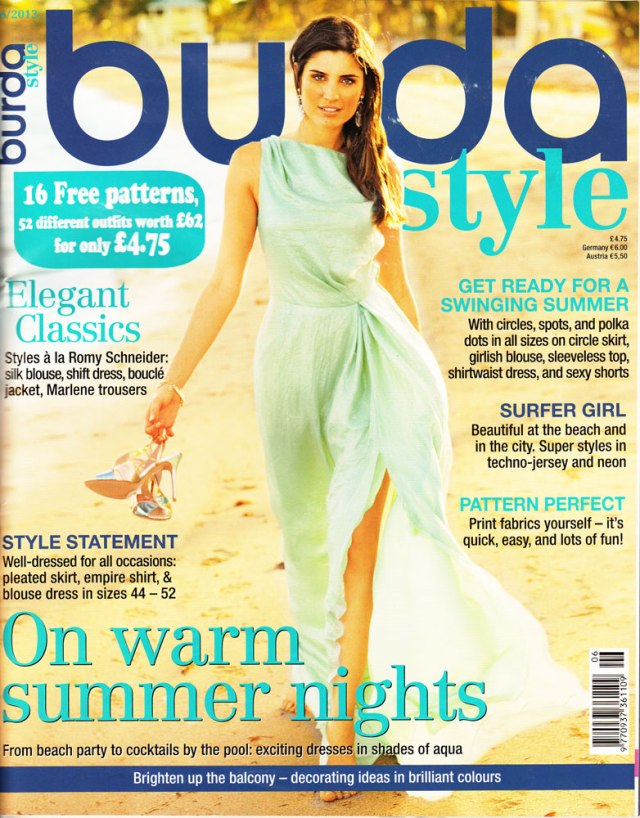
ooobop! review: Burda Style June 2013

Burda magazine June 2013

Can you believe this is the summer edition of June 2013? I can’t. I’m wrapped in my fleecy blanky, fingerless gloves no less, shivering my butt off as I point blank refuse to turn the heating on. My toes are curled for no other reason other than I can’t uncurl them because they are frozen solid. Is this weather for real?

I really want to get excited about summer clothes, really I do. But I’m struggling. So if you hear a slightly less enthusiastic tone this month, please bear with!

First section up is… Summer Fashion… ha! “Keep looking stylish, even in the heat…” is the opening line of the first intro copy.  Ha bloody ha! Rub it in why don’t ya!

Summer fashion Burda June 2013Ok. I’m going to try. I actually do really like the hand finishing on the brown shift dress, bottom left (above). Its a great couture technique that I’m thinking of employing on a future wool crepe dress I have planned.

The shorts, centre, bottom row, are not dissimilar to the plaid shorts I made. These ones are made with stretch pique which sounds more comfy. I will defo give these a go as one of my gripes was the lack of facing with with Simplicity ones. I know I could probably draft one but hey, I don’t need to now! A bit difficult to see in the photo (top row, centre pic) but that t-shirt looks to be a good fit with side panels and neat little sleeves. Don’t have an overlocker as yet and I’m wincing at the thought of messy insides so I’ll just hang on a bit for that one until I win the lottery. Boy I can’t believe how much those overlockers are!

My dislikes are the pink pants, bottom right. I love this look on the right kind of body. I don’t have that kind of body, unfortunately so they won’t be appearing on my list anytime soon. As won’t that dress top left corner, funnily enough. I say funnily enough because at first glance it looks like a classy dress. Save the pompoms! But it’s not even the pompoms that are putting me off. I quite like them. Its more the “artfully laid little pleats” that appear on the right shoulder aligned with the left hip. Even from the photo I can see some annoying crosswise folds that would annoy the heck outa me!

So who doesn’t like lots of dots? That’s the theme for the next section:

Lots of dots Burda June 2013I think I can safely say I like everything in this section save the long shorts, first column middle row. Just a bit unflattering and boyish for me. I love the shirt-dress top right, most of all. If Me-Made-May’13 has taught me anything it’s that I need more shirt dresses. I love how comfortable and stylish and edgy they can be. It’s not to do with cutting edge design. More clever choice of fabric that makes a great shirt dress. And I’d love to have one for every day of the week. This is quite a slim-fit one and it sure fits the bill as far as I’m concerned.

The shift dress, bottom right corner, has some great side panels that are piped. I still haven’t attempted piping but this would be a great opportunity to practice. It would also be a great chance to practise some colour blocking too. Employing some block colour in those panels would create a great slimming effect.

The cowl top with gathered sides (top left corner) is a firm fave too. Much more stylish to wear than a plain old T! And I love the yellow swinging full skirt. Perhaps not in yellow though. It’s got plenty inset godets on top of all the gathering. And a big bow at the waistband. Dead funky!

The next section is all about beach wedding/party dresses. I truly have goosebumps right now thinking about how the chiffons and georgettes might feel next to my skin, but there are some pretties…

beach beauty section burda June 2013The cowl neck dress, bottom left corner, is my favourite here. With its side gathers and simple shape I think it could be really flattering and perfect for a few evening cocktails on the beach. The dress, top right, is quite stunning and doesn’t look that difficult to construct but there is some yardage of crèpe satin going on here, so it’s not really for the ‘thrifties’ among us!

I don’t dislike the others. They all have their place. Apart from the strange diagonal pleated bodice dress, top left corner – same issues as that purple dress in the first section. Oh, and that one sleeve wonder dress bottom right corner. Not sure I could handle that!

So, swiftly we move on to ‘Surfer Girl’. Not me. Not any part of it. I have noted there are a lot of runners that sew. Or sewists that run! I wish I could say I was one of those. But I’m not so I will leave judgement in the hands of the “Sporty Spices” of the sewing blogger nation…

surfer girl section June 2013That said, the little jersey skirt in the centre, bottom row, could be a quick and easy casual make for holidays and weekends. The jacket is a bit 80s for me, mind!

The Mother & Daughter section is at the very least tweeee!

Mother and Daughter section June 2013Would anyone ever consider dressing to match their daughter?

I quite like the dress, top centre. Though it looks a bit starchy in the batiste. I might be inclined to use something slightly drapier. I do really like the idea of printing on the fabric though. That would totally seal the uniqueness of the garments. You could really create some signature pieces with a clever use of design. I just made a skirt, similar to the star-print one, top right corner, but from an old vintage curtain. I love the deep waistband. I need to finish mine but I hope it looks as good as it does on this mummy!

The Plus Section gets as much attention, if not more this month:
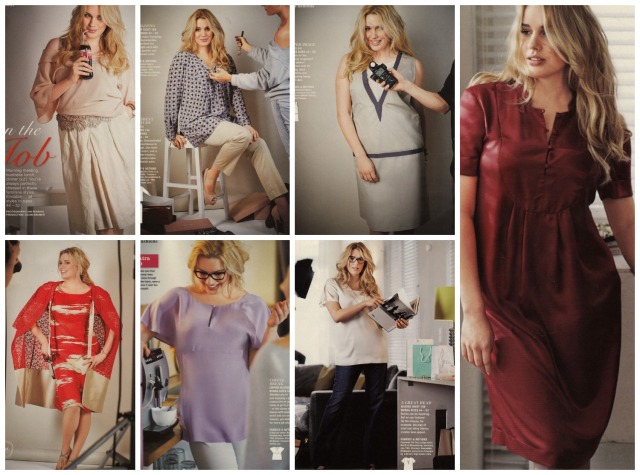
Plus fashions June 2013I love how each of these designs incorporate clever structured detail to flatter the curviest of bods. Simple lines and crepe satin exude the elegance and the loose cut sleeves and empire waistline of that red dress, bottom left is simple yet stunning. But the one I like most is the red dress on the right. Cute standy up collar and dinky button loops on a fabulous yoke bodice add perfect detail to really versatile dress.

So what do you all think? Any faves? Any absolute disses?

I’m off up the wooden hill to Bedforshire right now. I’ve given up trying to keep warm. But I’m still thinking shirt dress. Perhaps in some rockabilly print that I have in a box somewhere. I’ll dream about it and see how it looks!

Night all. And thanks so much for keeping up with my ramblings x

Me Made May 13: My third week

I did it. I actually made 3 weeks of Me Made May ’13! It wasn’t as desperate as I thought it would be and I’ve really enjoyed it! The only thing that has been a bit tricky is getting a photo when the mister has left earlier for work.

Most of the garments I have worn this week have issues. Mostly fitting issues. Things drafted either too big or too small and things that no longer fit because of some unwelcome poundage that crept up over the last year or so! I must learn to create things that fit in the now and not for when the pounds are shed. Because it doesn’t work like that!

Another revelation, which comes as no surprise to me, is that I need more skirts and tops for work. I’ve no shortage of ideas. Just got to pull my finger out!

So here we go. Week 3 of  Me Made May ’13.

pin dot jersey top

DAY 15: Pin dot jersey top
New Look 6753. This is one of the few jersey tops I’ve made. I like how it’s an easy-to-wear casual top but it’s not my favourite top to wear. Perhaps because I made it too big and its defied all my attempts of shrinkage too! I have since been advised to make a size smaller when using stretch fabric. I’m sure I’d love it more if it fit more snuggly. Still better than a Primani top though!

stripy cowl top

DAY 16: Stripy cowl top
This was a great free pattern from the Burdastyle website. Really simple to put together and really easy to wear. I’m not convinced I graded it up properly, or enough for that matter so the cowl isn’t as dramatic as it could have been. But I still like it.

pinstripe wool jacket

DAY 17: Wool pinstripe jacket
This is a pattern from Burdastyle magazine, issue 11/2010. It was my first venture into tailoring and is anything but perfect but it prompted me to delve more into the art of old school tailoring techniques which are now ready to employ when I embark on another. Once again I overestimated the size but that means it’s great to wear with a few layers underneath and boy I needed them today! The pinky mauve pinstripe means it doesn’t really go with much apart from a flooky pinstripe skirt that I owned already!

floral mini skirt

DAY 18: Floral mini skirt
I made this in march last year and it still feels good teamed with Docs and a cardi. Keep meaning to make more of these. They are so simple and so cute and so easy to wear. So long as its none too windy!

tartan shorts

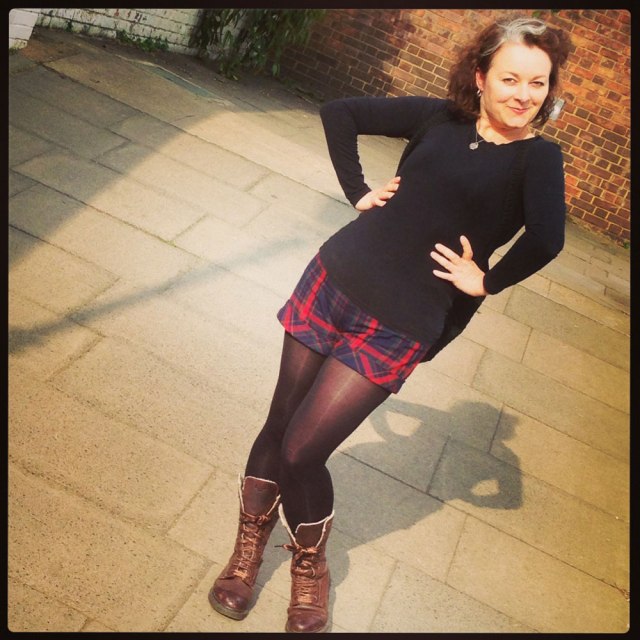
DAY 19: Plaid shorts
I do enjoy wearing these. Despite the fabric going all bobbly on me. Only on the weekend, mind. Won’t catch me in the office with that much leg out! I wore them down to the river pub to meet some friends. The pattern I used was Simplicity 2659. A simple and satisfying overnight make. There will be more of these. It’s just a matter of time. However I will not be using the twill tape facing method. I will draft a properfacing this time. They do need a bit more structure at the waist and front. And I must make them a wee bit bigger next time!

black rose party dress

DAY 20: Black rose party dress
This is me and my lovely fella, the last of the party people, at the end of his spectacular 40th birthday party. It was taken in the wee hours of the morning and so I’m very glad the photo is such poor quality! The dress, which I just about fit into, was whipped up overnight for a party March last year. I have since found some very similar fabric which will be another one of these one day!

DAY 21: Wool check skirt
I didn’t manage to get a photo of today but rest assured it was a me-made kinda day. I wore the same wool check skirt I sported on the second week, day 10. Crazy that May has turned out cold enough to sport a woolly skirt more than once in the space of a couple of weeks.

Can’t believe there’s only one more week left. I think I’m going to have to dig real deep now!

Laters! x

Me-made May’13: My first week
Me-made May’13: My second week/

Me Made May 13: My second week

If I’m honest, I thought that So Zo’s Me Made May ’13 would be an easy 4-poster for the month of May. I really thought it would help to bridge the massive gap between my sporadic makes and make me look more efficient than I actually am. Well, it has been a good gap-bridger for sure, but it hasn’t been a doddle!

I’m sure many of you can relate to the pre-work madness of getting kids off to school, while catching up on the jobs you were meant to do the night before, shouting threats of x-box confiscation if the son doesn’t arise anytime soon, feeding the cats with one hand and signing homework books with the other before getting one’s own butt out the door to work. So throw a rummage through the drawers for a me-made outfit and fluttering of the eyelashes at the general direction of ones hubster for a quick photoshoot into the equation and, well you can imagine what the neighbours must think!

But all that aside. It has been a total eye opener. I have worn things I had completely forgotten about and there has been a realisation of how much I’ve advanced. I may even go back to some of these projects and fix some niggling issues. But I equally might not!

So here we go. Week 2 of  Me Made May ’13.

Vintage wing collar blouse

DAY 8: 1950s wing-collar blouse
Butterick 556. Im still very happy with this blouse even though the shoulder pads have gone all lumpy and weird in the wash! The sleeve heads leave a lot to be desired. I remember thinking at the time that the sleeve looked more gathered than eased into the armscye. I really need to make another but better. So good to wear to work.

Day 9 1940s shoe dress

DAY 9: 1940s Shoe Dress
Butterick 2638. This is the same pattern I used for the red version and with the same issues, ie button placement. I think I prefer the shorter length sleeve. The shoe-print fabric was such a great find from a charity shop. It’s 100% cotton with such a smooth finish. I need more of these dresses.

Day 10 wool check skirt mmm13

DAY 10: Wool check skirt
I wasn’t expecting to include this skirt in May. It’s a blanket-weight wool, an ex-throw in fact, turned pencil skirt! But we all know how the weather in Blighty is a constant surprise! I self-drafted the pattern. I didn’t stay stitch the waistline before adding the waistband, hence why it probably came up a bit bigger and just noticed that the lining peeps at the hem otherwise, quite happy with this one.

Day 11 mmm13

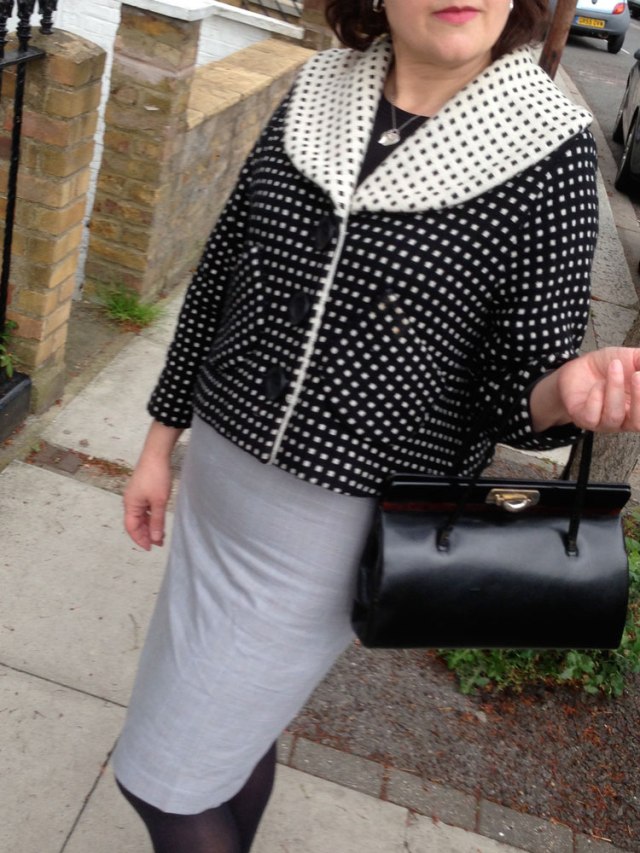
DAY 11: Dotty shawl collar swing jacket
I made this a good couple of years back from a free pattern in Sew magazine. It is a great spring jacket with three-quarter sleeves and I love the fabric. I had to create the buttonholes by hand but apart from that it was very easy to put together as far as I remember. I do enjoy wearing it. Something about the collar makes it feel vintage and glamourous.

DAY 12: Grey pencil skirt
Hubby off to work early + non obliging offspring = no photo! But see photo above. I wore it yesterday too. Don’t judge!

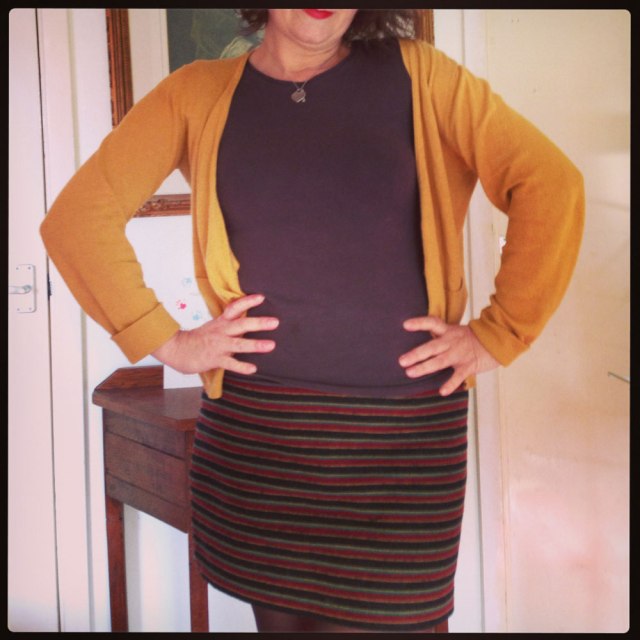
day 13 stripe wool skirt

DAY 13: Stripy wool skirt
You really can tell how chilly it was this week. All the wool came out to play! This is a very simple A-line mini skirt from Burdastyle magazine. The fabric is a twill-backed Italian wool from Ditto Fabrics in Brighton. Very lovely to wear.

Day 14 lace peasant top

DAY 14: Lace-trimmed peasant top
I didn’t think I had much love for this top. Mostly because it’s white and partly because of the lace. But seeing it here with a black skirt and after wallowing in all the lovely comments I got at work, I think I do now. One of the quickest tops to rustle up and tuck into a skirt. I need a red one! 

Feels so good to round up week two. Only a couple of days for week three… eek! See you soon! x