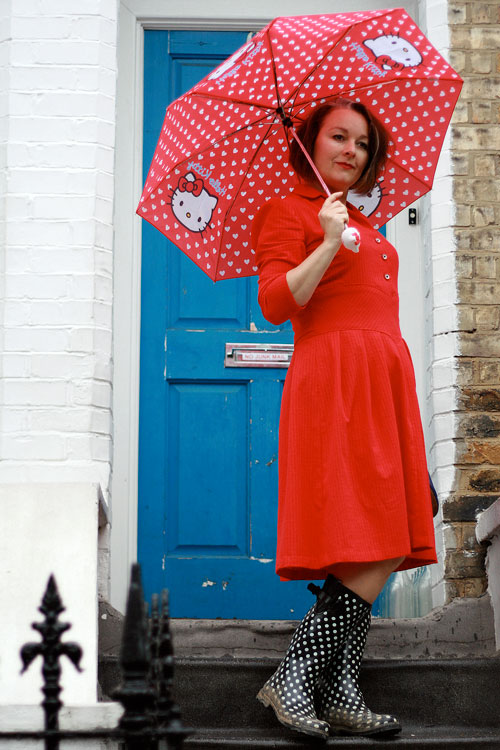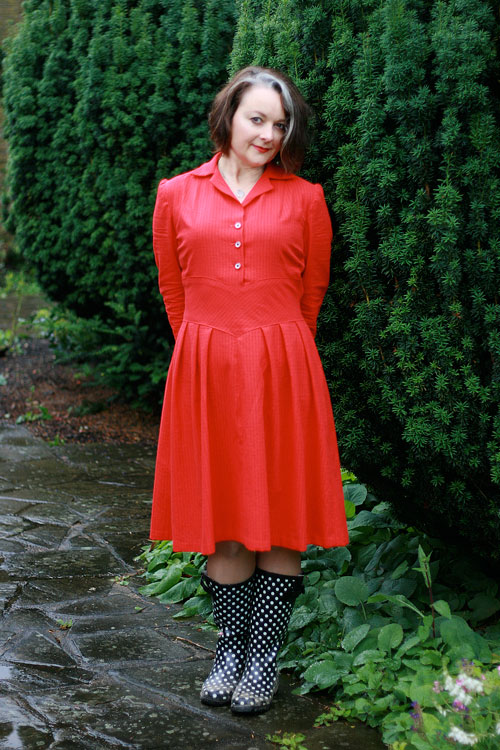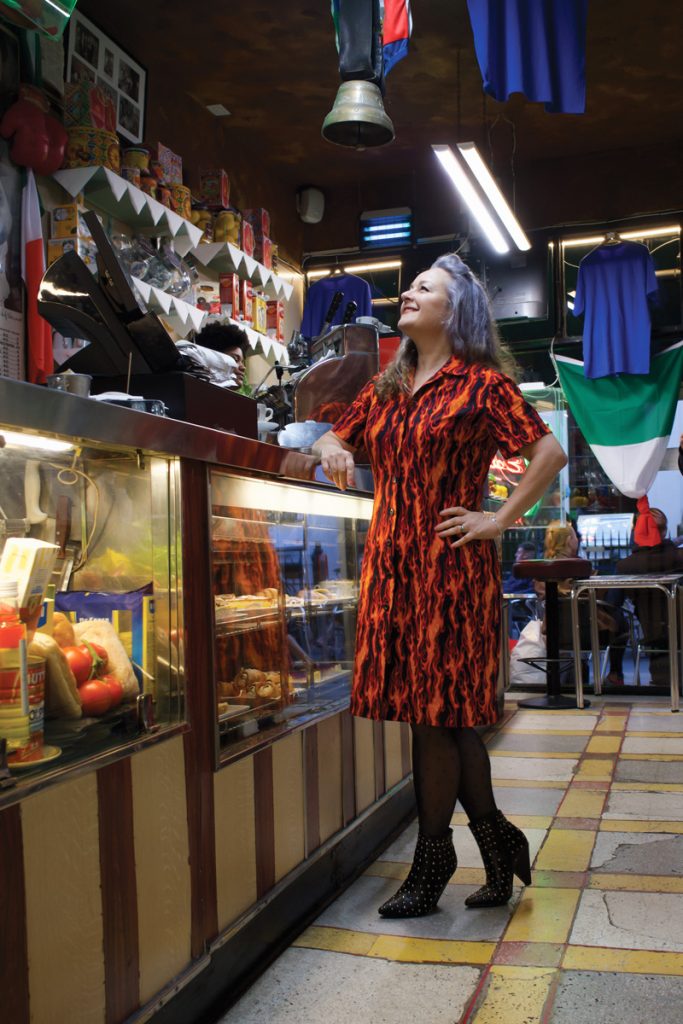
Simplicity 6772 shirtdress on fire for the #sewvintageseptember challenge

I love it when sewing stars align. Like when Minerva sends a call out to promote their new fabric ranges, and the ideal fabric screams to be made up from my go-to 60s shirtdress pattern during a month when one of my favourite annual Instagram challenges inspires me to dust off those vintage pattern boxes.
Well those flames spelled out the obvious, to me. A retro Rockabilly shirtdress.

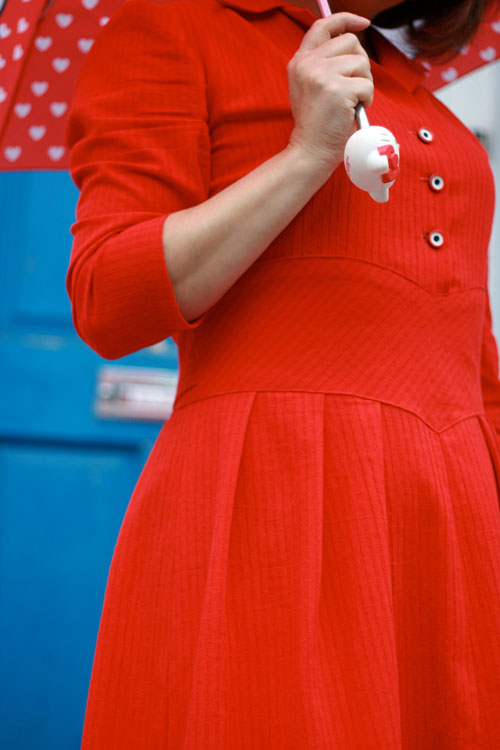
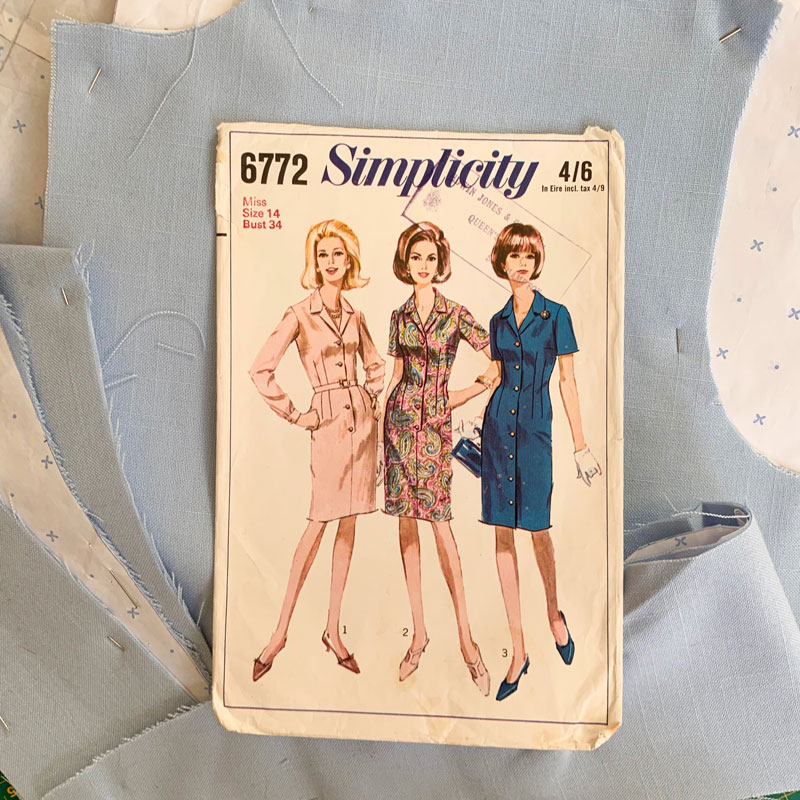
The pattern is vintage Simplicity 6772 from 1966. And a perfect project for sewing up in between busy work shifts. I’ve sewn it up twice before – in dogtooth and in blue – and that gave me confidence to forego any toiling though I did make a few fitting adjustments, namely extending the bodice length by quarter of an inch and lowering the bust and top points of the waist darts. There are 12 darts to this dress: 4 diamond waist darts on the front, 4 on the back, 2 bust darts and 2 shoulder darts which seems very excessive but actually this is very commonplace to vintage patterns and all the better for shaping.
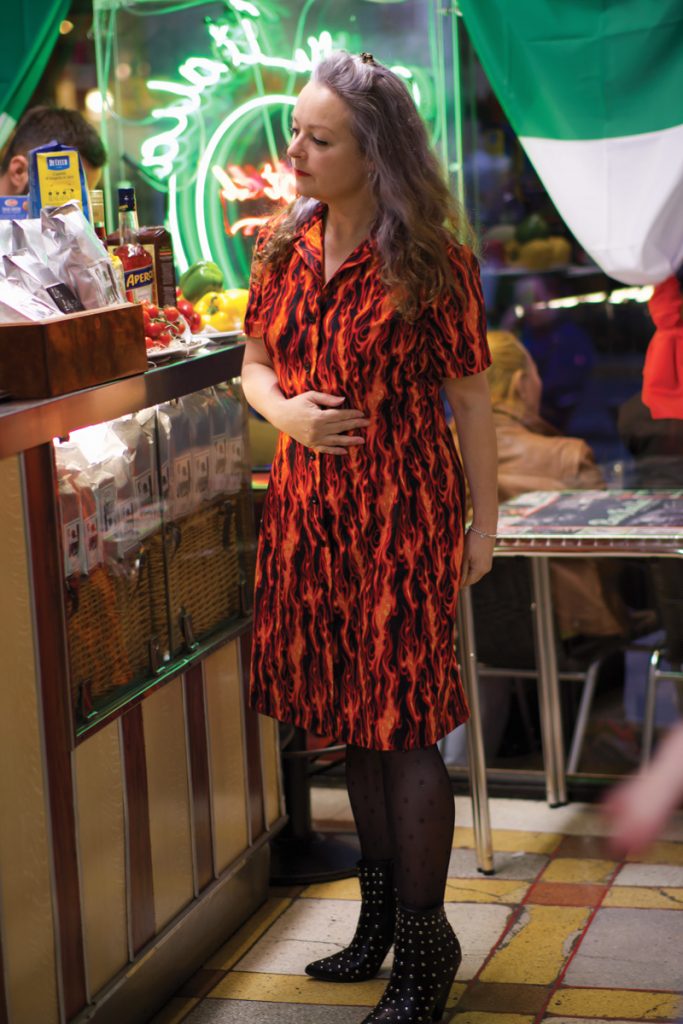
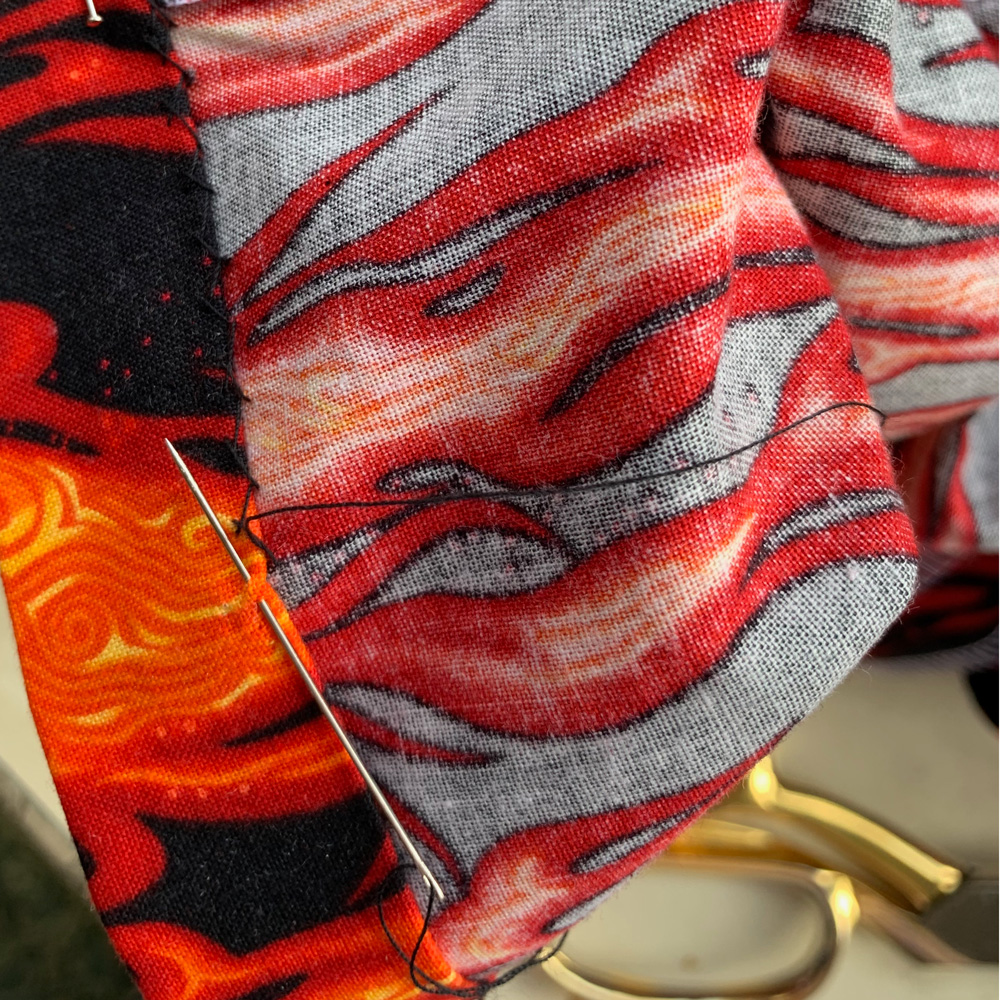
The fabric is a Robert Kaufman cotton poplin which I received as part of the Minerva Ambassador programme. I’ve used poplin only once before, for my self-drafted sundress but cannot fault the quality. It is such a lovely genuine medium weight, imho – not too light and not too heavy. The weave is such that it’s an absolute joy to hand finish the hems – so easy to pick up a single thread for a catch-stitch and it presses so effortlessly too.
Another advantage is that it doesn’t crease as easily as regular shirting cotton. Prior to taking these shots I’d been walking around in this dress and sitting down for a couple of hours and it still looked pretty neat.

My dresses usually get shorter as the months get colder but this time I opted for a to-the-knee rather than an above-the-knee hemline for a change. The actual pattern suggestion is quite a bit longer but I think I’ve hit the sweet spot. And the little kick pleat at the back looks more sensible when it’s longer in any case.
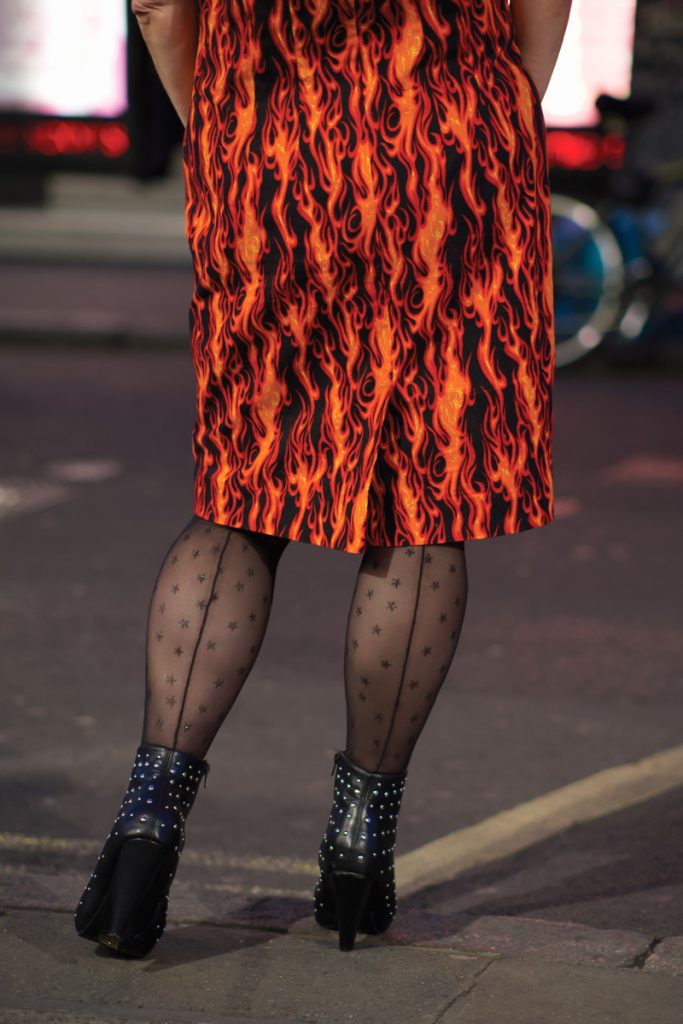
In order to keep that kick pleat nice and flat and in position, I stitched it down with with a few catch-stitches inside. I think you can tell how much I enjoyed hand stitching this fabric!
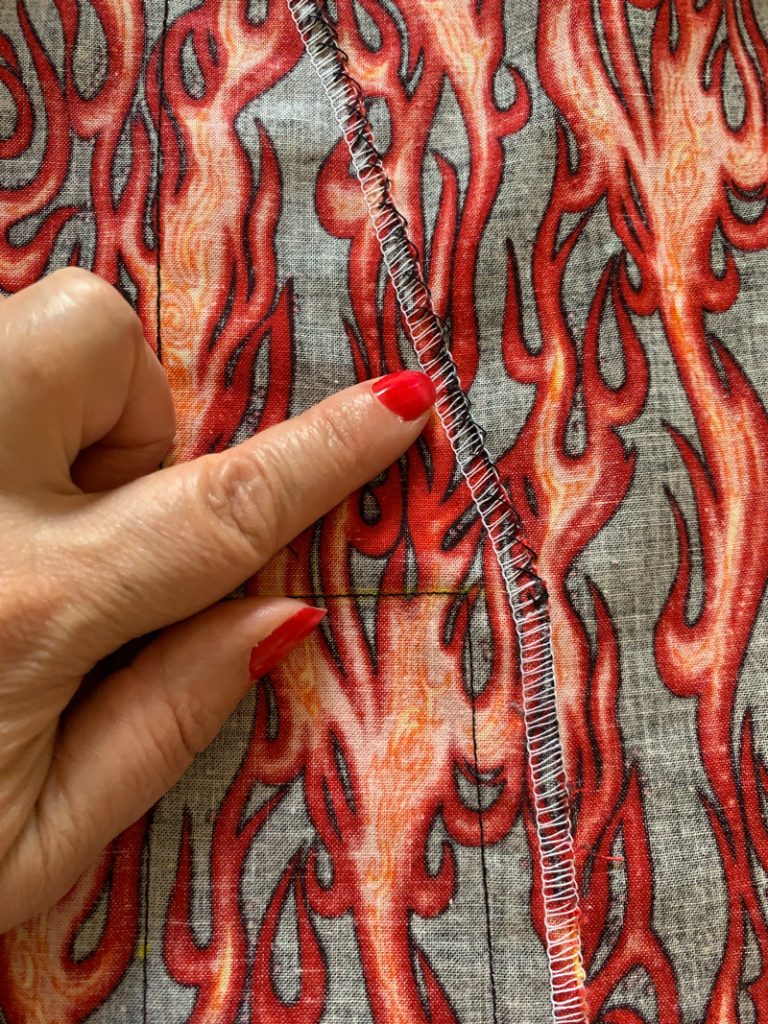
It’s amazing how a quality fabric can make so much difference to the whole sewing experience. For instance, pressing as I’ve mentioned before but also for turning nice sharp points on the collar sections and the corners of the front facings. Setting in the sleeves was a breeze, too.

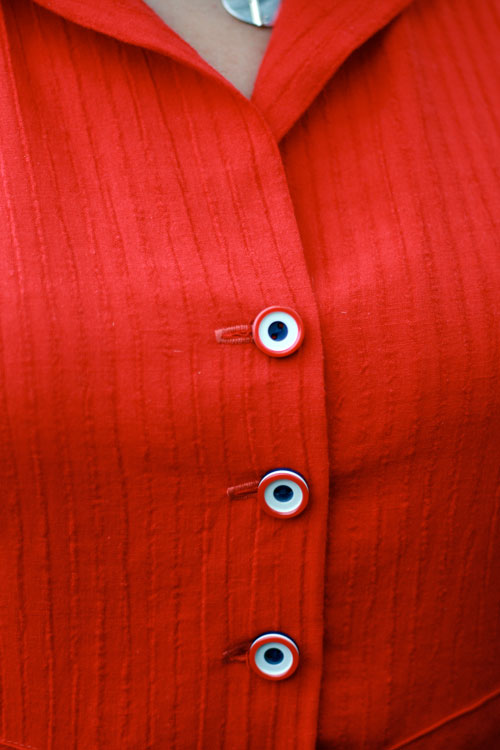
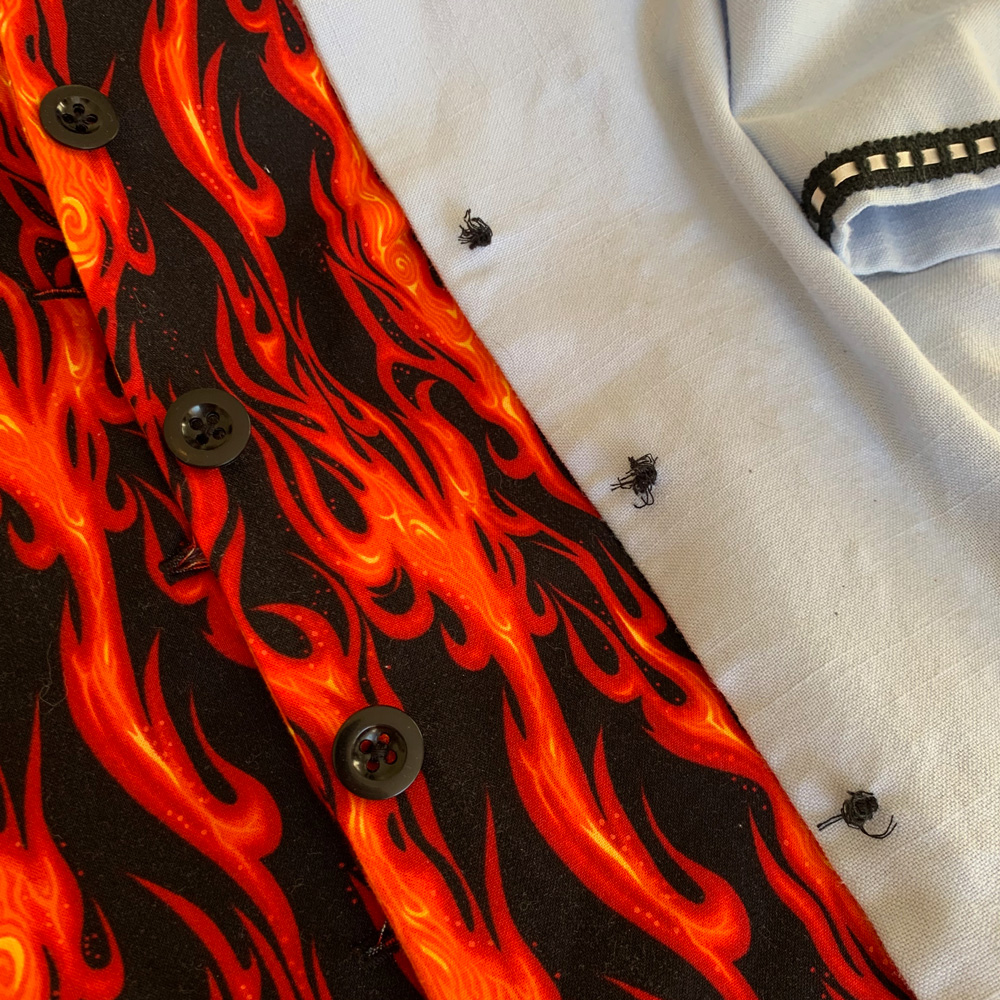
I decided the buttons had to be plain. I’ve exhausted my stash of black buttons and so I robbed some off a previous dress that won’t get any wear over the next six months at least, on account of it being too summery. So I have plenty of time to replace them!
It was fun to take this dress out for it’s maiden stroll around Soho and stop for a coffee in Bar Italia. I used to hang out here a lot in my clubbing days. A pit stop after dancing the night away when you weren’t quite ready to go home – a quality hit of caffeine and always someone interesting to yabber away to. Some things never change!
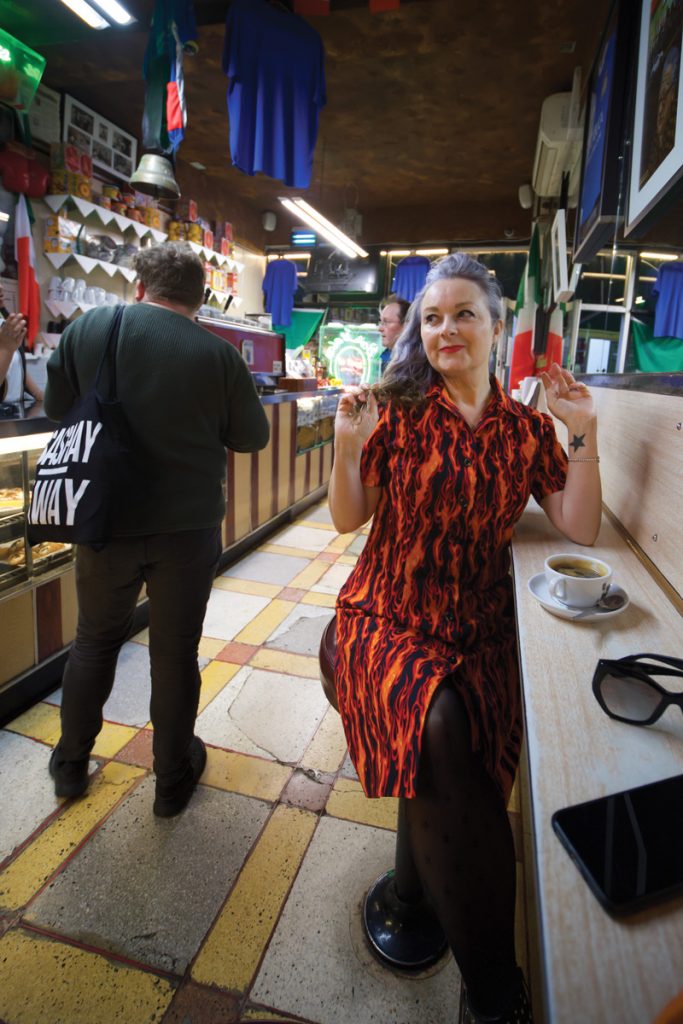
Fab photos by Daniel James Photographic

Tilly and the Buttons Rosa Dress

Tilly and the Buttons Rosa Dress

Introducing my new Tilly and the Buttons Rosa dress.

I was delighted when Tilly asked me if I’d like to test this pattern. I was excited by just the line drawing alone. All I could see was piping and matching buttons and I didn’t falter when the pattern arrived.

I won’t go into construction details, mostly because so many weeks have passed, I’ve quite forgotten them, but also I think it only fair to do that with a tried and tested one.

That said, I love it and its had so many outings already. The legs are still bare, making the most of this warm September, but I have another styled vision of red tights and black patent DMs for the colder months ahead!

I love the 3/4 rolled up sleeves with the tab. It adds such a lovely detail. I’m always doing stuff and sometimes a full length sleeve just irritates me and feels so restrictive. Rolled sleeves makes me feel like I mean business even if I actually don’t!

tilly_rosa_dress_4

I’m pretty sure I jumped at this pattern after making Mr O a few vintage western shirts (See two of them here and here). And I’m pretty sure the only shirt I’ve ever made myself – with a proper collar – is my 50s bowling shirt.

So I was due one. Even if it’s actually a dress! It still has that lovely vintage front and back yoke that I adore.

Tilly and the Buttons Rosa dress back yoke

I used a cheap washed out denim from A-One fabrics in the Goldhawk Road. Was a bit worried about the thickness, with piping sandwiched in the seams, but it worked just fine. Incidentally, the only piping I managed to get my hands on is upholstery piping for sure. It’s not dainty in the least. But hey I wanted statement red piping and I got it!

I apologise to anyone with a phobia of wrinkled clothing. I do have an iron – honest, guvs! But denim is just one of those tricksy fabrics I guess and in any case there is no official term for such phobia so I might just get away with it!

Tilly and the Buttons Rosa dress pockets

I actually sewed down the pockets, whilst sewing on the buttons (intentionally of course ;-)) to save me putting anything in them. Which I obviously would if they were functional. This will ultimately limit unnecessary boob distortion and minimize wrinkle action.

Another thing I really like about this pattern is the in-outness of the waist to hip. Such a lovely shape. And really helpful when one’s waistline is increasingly difficult to define!

Tilly and the buttons rosa dress

I should really declare that I took these shots myself. Not the usual quality delivered by Mr O, because he is away, gigging with his new band. It isn’t my favourite thing to do at all but needs must when your children declare they have better things to do, like walking someone else’s dog or doing Latin homework. Yeah, right!

Happy weekend everyone. Hope you get some sewing in! xxx


A 60s worky shirt-dress

simplicity 6772 shirtdress frontGood afternoon lovely readers. I trust you are having a lovely weekend. I love the peace and quiet of a Sunday afternoon. It’s especially quiet today since Mr O and both children are all out. Best blogging time I thought, but eeek, no photographer! So please excuse the awkward poses to the remote snaps! It’s hard to summon up the enthusiasm when there’s no one bossing you around.

This is the first draft of Simplicity 6772. A lovely fitted sheath dress with front button closing and notched collar. Or a shirt-dress to the layperson!

simplicity 6772 packet

I made version 3, with short sleeves, which buttons all the way down. And I used a £2.50/metre suiting fabric from Dave/Danielle the Drapers in Shepherds Bush Market. I did stop to ponder who might make such a crazy suit in gingham but images of capri trousers and cropped jackets a la Doris Day quickly sprung to mind, very nearly usurping the plans for this dress.

I love Dave the Draper fabric for test garments. I don’t think you can actually buy cheaper and even though the content and quality is an unknown, its always good enough. And generally speaking I end up with something wearable, in this case…. for a fiver!

simplicity 6772 sideThat said, I will be making some adjustments to the next one, which incidentally is already cut out! Namely: taking some of the ease out of the sleeves. They are practically puffed sleeves and it certainly didn’t warn me of that on the packet front. They are also a weird length. I made twice the suggested hem allowance, and turned them up! I’ll also be shaving a centimetre off each shoulder before I sew them in.

I did some proper grading on this pattern using the cut and spread method. A little added to the bodice, moreso added to the waist and hip with the side seams blended together. I remembered to add the extra to the collar and the sleeves, though I probably should have left the sleeves alone to avoid the puff!

Given that it’s suiting fabric it didn’t need a lining. I just overlocked the seams. Suiting is a joy to hem, especially on this kind of check. It’s so easy to pick a couple of threads and the stitches just disappear. It’s presses so easily too. It’s a wool blend of sorts. And I have totally gotten over my snobbery of synthetic/blended fabric, since it doesn’t need much ironing and doesn’t tend to crease when you’ve been sat down at an office desk all day.

I love a shirt-dress but have only made two before. The 1940s Shoe Dress and The Shirt Dress Revisited. Both from the same pattern, both with full skirts. I like how this one is more understated though. Would be completely utilitarian in a khaki! It certainly feels more worky than the other two. To be honest, I’m lucky enough to work in a creative environment where almost anything goes (as is often apparent!).

I was a little disappointed that I didn’t have a suitable set of red buttons but it was quite refreshing to be persuaded with blue ones. I toyed with green and checked ones but the winners were some gorgeous vintage buttons kindly inherited from my friend Nigel’s, aunt.

vintage blue buttons

There are a whopping twelve darts going on in this dress! Four long diamond ones in the front, four of the same in the back; two shoulder darts and two bust darts. And its all these ‘lovely’ darts that create the great shape to this dress. The back especially. And I love that little kick pleat. So glad I didn’t exchange it for a slit.

simplicity 6772 shirtdress back view

It would be crazy at this point not to mention the shoes. A more than happy find on my way back from work in the sale at Office. They are of course my favourite Lola Ramona shoes. These ones having pale green polka dots, a cream bow and purple heels. The thing I love most about these shoes is that they don’t go with anything but yet they look good with everything!!

lola ramona spotty bow shoes

I’ll be off now. The plan is to return shortly with a revised version of this shirt-dress. But you know what happens when you make plans. Well, when I make them, anyway!

TTFN x

ooobop review: Burda Style March 2015

Burda Style March 2015 cover

Can you feel that spring sunshine, desperately trying to squeeze though your bedroom window in the morning? Well if that isn’t happening, the March 2015 issue of Burda Style magazine will do it’s best to brighten your days.

There’s some lively goings-on this month, with all sorts of asymmetric, geometrical, hankerchief-hemmed and draped goodness!

Beach Pearls sets some scenes for a summer wardrobe: I just love that maxi dress (A). It’s not dissimilar to the viscose jersey one I made here, but the bust detail is right on the money! A lot more support I would think and what a flattering silhouette!.

beach pearls burda march 2015

It also translates into a lovely strappy top (B).

Now I like where the asymmetrical skirt (C) is coming from but not quite where it landed up! Way too much like a sack tied round the middle for me. Further on it is redeemed with some better styling, I can assure you.

Nice Jumpsuit (C), btw. If jumpsuits are your thing. You might want to add some ‘fashion tape’ to the list of required notions, though. Click here: Hollywood Fashion Tape if you’re interested in buying any from Amazon!

Flared trouser suits (E)? mmm…and bat wing empire-lines (F)? double mmm… Lets move on to the shirtwaist dress with ‘maxitail in the right seam’ (G). I do like that. And I love the biker-meets-Mao jacket too (H)!

Uh oh. There’s that batwing-empire-line again (I). Swiftly moving on to the Flowers and Stripes section!

Flowers and stripes burda style march 2015

I’ve never made or owned a pair of culottes (A). But I bet they’re a far safer than a full skirt on a windy day. And looks lovely in a largish print. If you like that sort of thing.

And there’s that shirt-waist dress (B) again with ‘cut-on-dipped hem’ like last time! It would be better to use a fabric that has a reverse as good as the good side, I would have thought.

Look how that lovely maxi translates to a cute beach dress too (C).

This month features a chic wrap dress (D). There is some assurance of a button at the side and concealed snap fasteners to keep the wrap in place. Potential for a Bucks Fizz moment there!

The peasant top addict in me (see two of them here and here) is quite drawn to this ‘relaxed tunic’ (E)! Would need a fine drapey jersey to pull off with any sophistication I would have thought.

And there’s some more geometric delight in the shape of a simple v-neck dress with symmetrical ‘cut-on tails’ (F)!
Any weddings occurring this year? Loving both these bridal party dresses (A) in The Big Day section.

The Big Day Burda March 2015

The bride’s dress (B) is the same as (A) with a flowy underskirt of crêpe chiffon. That’s if you haven’t been put off by the chiffon adventures in The Great British Sewing Bee recent episode.

Can’t help thinking this dress (C) is a bit cake-like with all the tiers an’ all.

And although I usually embrace a bit of invention, I still wouldn’t want to look like I’d been dragged behind the wedding car, en-route in this dress (D)!

This fairytale dress (E) is far simpler and much more sophisticated though. Just get rid of the batwing-empire-maid who’s ruining the photo!

Oh this is much better (F). Lovely wide-dipped hem again. Bust darts for shape. Cotton lace overlay, crepe satin underlay. I’d wear it with cowboy boots. Or even DM’s. Or is that just the hippy in me?!

Now there’s that asymmetric skirt again (centre, G), styled much more favourably with a gorgeous jacket: standing collar and 50s style winged lapels. See, it does have potential to work. Nice suit on the right too!

I’ve picked out the following three from the Reader Favourites section:

reader favourites burda march 2015

Jumpsuit (A) made short for all you lovely long-legged people!

Lovely floor-length dress (B) in striped jersey with side slits and a ‘hankerchief hem’. I can definitely feel some more maxi’s coming on this year.

And a cute little dress (C) based on the short lace wedding party dress design. Not my cuppa tea fabric-wise, but I’m always sold on a midriff piece!

Not overly inspired by the plus section this month I’m afraid, though the trench coat is rather amazing, I must say.

plus size trench coat burda march 2015

But, there is cuteness for small people at the back.

Childrens section burda style march 2015

The best design and the garment most fitting to the Colour Splash section by far, is the paint-spattered dress (A) with tying bands that resemble the sleeves of another garment. Hands up who wants an adult version? Genius!

1940s shirt dress revisited

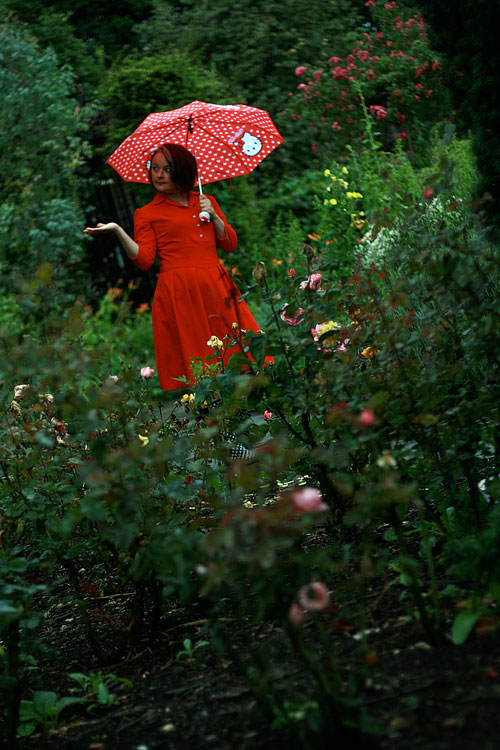
1940s red shirt dress

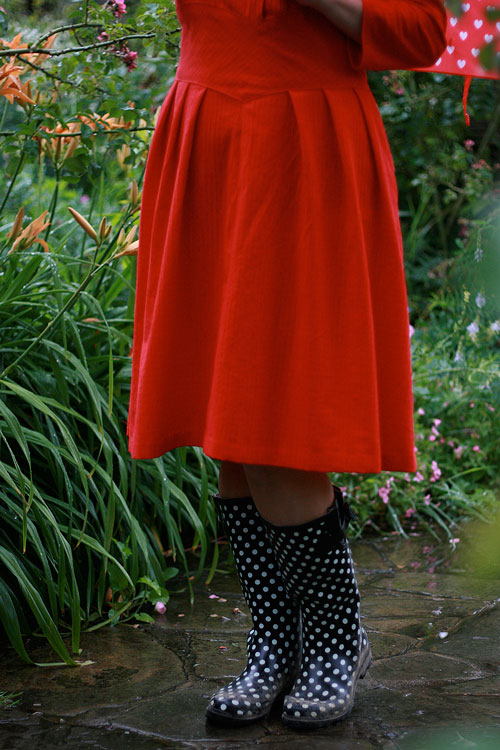
I always wondered why, with all the patterns in the world, would I ever make one twice? In the case of my peasant tops, here and here, I can only say it was because they were dead easy and required little brainpower, perfect for a late night sew. But in the case of this dress, the rationale was purely because I’ve never had a dress I feel so at home in! I had in my head, that I was a simple shift dress girl but actually I think I’m more of a shirt-dress girl!

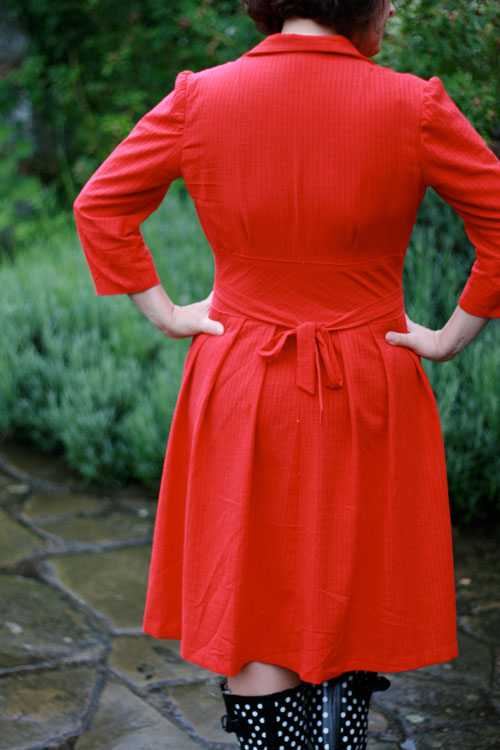
1940s red shirt dress

Without the association of the pattern, I wonder if anyone would guess it dated back to the 1940s? Do you think it’s obvious? Or have I been looking at vintage patterns for so long now, I think they are the norm?! Perhaps if I were to style it with appropriate accessories: hat, bag and gloves, it might give the game away, but – dressed traditionally sporting wellies and a brolly – I think it also crosses over as a modern shirt dress too.

I’d like to tell you what this fabric is but I have no idea! It’s red and it’s 100% cotton for sure. Kind of like a cheesecloth seersucker but not, and vaguely reminiscent of my candlewick beadspread I had as a child… without the little soft threads that pulled out oh-so satisfyingly easily! I thought it might be ribbed cotton. I’ve heard that mentioned before but I really haven’t a clue. It was kindly donated to me by a friend who desperately needed to get rid of a big bag of fabric… I could never be like that! And I knew what ‘the red’ was destined for immediately.

1940s shirt dress detail

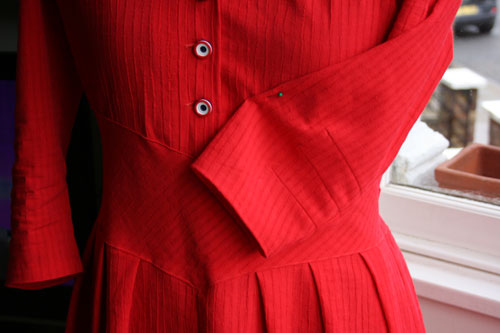
It came together sweetly as before with the addition of a few minor changes. I added a third button just because I love the little ‘targets’ and two didn’t showcase them enough. They cost £2.45 for six, bought at the London Vintage Fashion, Textiles and Accessories Fair, September 2011 and I think they are vey happy on this dress!

target button detail

I made it an extra inch longer, but really could have gone for 2 inches… oooh, I am getting brave in my old age!

length of skirt

I also added an extra inch around the midriff, knowing the struggle I have to get the dress on, over my head and judging by the photos of the last dress, it does look a bit snug. But it was highly unnecessary on this version. The mystery fabric, unlike the shoe fabric, has a lot more give and resulted in little poofy bits at the sides. I put it on the mannequin and looked at it for a few days, wondering if I could get away with it. I probably could have done, but it would have annoyed the hell out of me!

dress before alteration

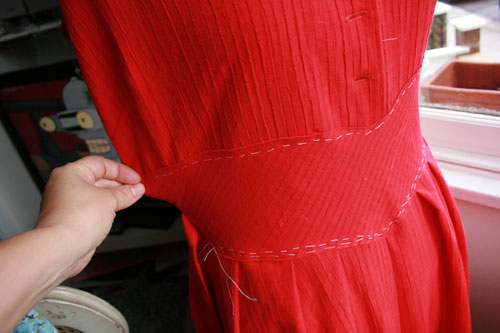
And so… I sensibly turned the dress inside out and chalked and basted where I wanted the new line of stitching to be. Namely half an inch in from the original seam, starting from just above the waist, in a straight line up to the armscye. I tried it on again and was much happier with the silhouette.

Dutifully, I removed the basting and unpicked the topstitching where the midriff meets the bodice. I sewed the new side seams on the bodice over the chalkines. Sewed the new side seam on the right side of the midriff section and trimmed the left side opening to match (where the zipper goes).

I must be getting better at this. I would never have had the patience to do that a few years ago! But it was of course, worth it and now I am a happier bunny!

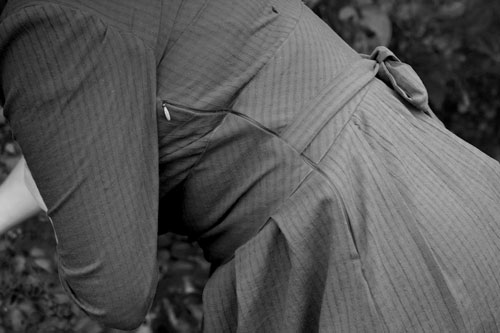
Here is a picture of the zip in the side seam. Once I’d sewn one size of the zipper in place, I made sure to make chalk marks where the midriff needed to line up. I pinned the second side of the zip to those marks first and then pinned the rest. Worked like a treat!

zipper detail

I opted for longer sleeves this time. Not full length, just three quarters. Mr Ooobop! thinks they will annoy me being so fitted and I have a little tendency to agree but I wanted to see how it affected the overall look.

I’m intrigied by the construction of the sleeve with darts to shape the lower arm. I guess this is a vintage thing because, to date, I have not come across these in a modern pattern.

vintage sleeve darts

Allowing for adjustments, this dress did seem to take longer than the first. About 5 evenings after work, spread over a couple of weeks. I have been really keen to see it finished but not so keen that I wanted to rush it and ruin it! And in any case I had to wait for Mr Ooobop! to be around to do his usual photo magic . . . and for the sun to come out! Well, we gave up waiting for the sunshine!

1940s red dress in the rain

I’m sure that this little revisitation wont be the last but I do have an incredibly long list of other ‘wannamakes’ to tend to first, so its back into the envelope and into the box ’til next time!

Do you like to revisit a favourite pattern or do you prefer to try something new every time?

back of dress

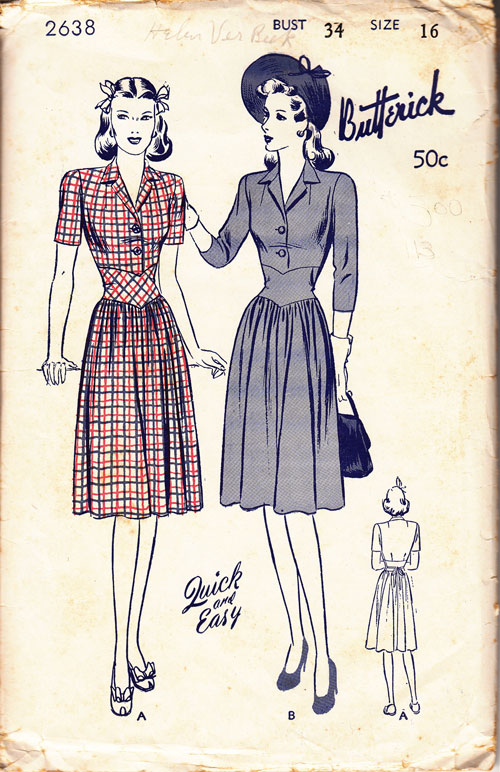
butterick 2638

Horizontal or vertical buttonholes?

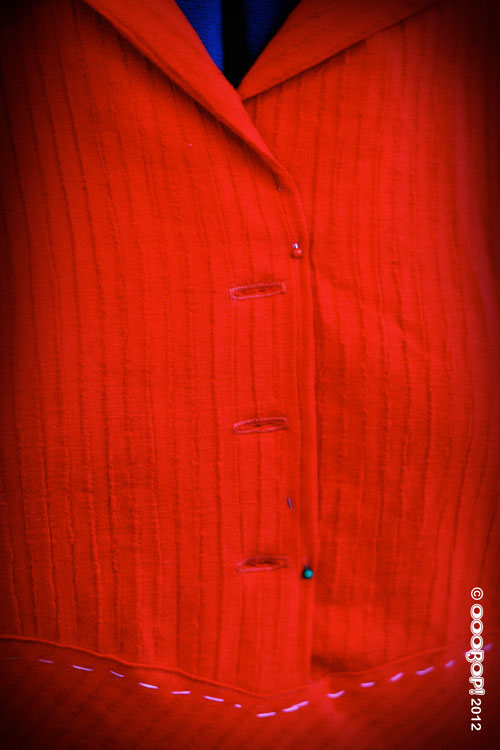
horizontal buttonholes

I’m in the process of making a second version of the 1940s shirt dress I made in May, and I’ve been prompted into wondering (ie arguing with Mr Ooobop!) whether it is usual to make horizontal or vertical buttonholes on a garment. I couldn’t bear the quandary any longer!

So I did a little research and came up with the following…

  • Horizontal ones allow for a little more expansion. The button can slide along the opening without distorting the buttonhole as much as a vertical one.
  • It’s easier to sew buttons in position, following a column of vertical buttonholes as there is a little  more room for manoeuvre, but you have to sew them on more accurately to meet the positions of the end points of horizontal buttonholes.
  • Horizontal buttonholes generally can’t be placed on a shirt placket band as there is not enough room for them to sit comfortably and so vertical ones are used.
  • Exceptions include the collar and cuffs where there is more stress, then you will find a horizontal one. And in the case of more expensive shirts, the bottommost button too!
  • Horizontal buttonholes take a bit longer to create as the foot needs to be repositioned and position measured each time, whereas its easier to shift the position down each time for vertical ones. I’m thinking this is a reason for mass produced garments having vertical ones.
  • Horizontal buttonholes stay buttoned more securely. Any stress across the garment opening, pulls the button into the the end of the buttonhole, where the button stops.
  • It is a little less-fiddly to button up with vertical buttonholes.
  • Most vintage patterns are marked for the buttonholes to be created horizontally.

So there you have it… fascinating, hey?! It doesn’t prove much except that you can seemingly create them however you like… so long as it works for you and your choice of garment!

I’m going with horizontal ones and now feel much happier about doing so. Apart from the fact that it makes me feel a bit rebellious, (and that I won the argument) I like that it’s a little bit of authenticity for this little 40s number.

Which way round do you sew your buttonholes? Any reason different from the above?

I’m hoping to have said dress all finished and blogged by the weekend so bring on the sunshine so Mr Ooobop! can take some sunny shots!

The 1940s Shoe Dress

1940s shoe dress

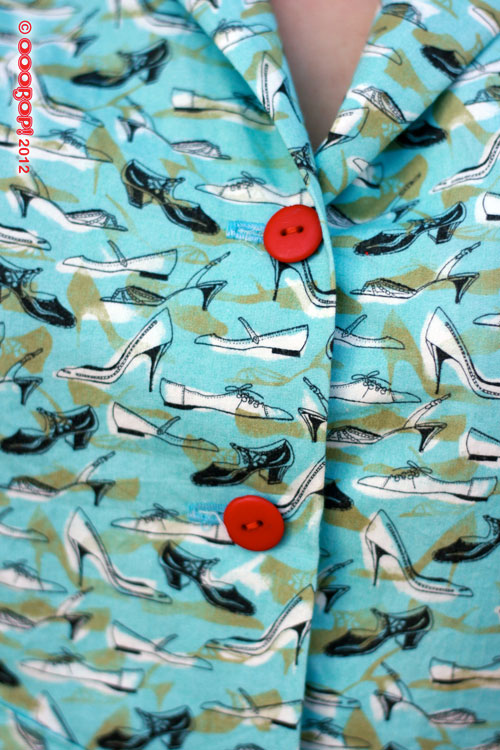
I do believe I have just made my most fitting and appropriate dress for this lovely hot summer we have just entered into. And it’s covered in shoes! And it fits in with this weeks Sew Weekly challenge, ‘Inspired by the 1940s’. And I just realised it matches my Ooobop header too! I am just a little bit happy!

1940s shoe dress

Last July, I posted about the ‘shoe fabric’, quite sure it was destined to be a 1950s shirt buttoned dress. The pattern had to be just right. I wasn’t going to waste that fabric, even if it did only cost a fiver! That was until I found this amazing pattern for a 1940s shirt buttoned dress which was spot on.

butterick 2638

I was sold on the midriff! I knew it would be flattering, it was just a question of how the shirt top would fit. Well it all went together like a dream. I took 5 inches off the length, worried as usual about the granny factor but actually I might be inclined to leave it a bit longer next time. And yes, there will so totally be a next time! The other alterations I made included adding 2 inches to the waist, being careful to add it to the shirt top and the midriff and the top of the skirt.

1940s shoe dress pleats

I was a bit worried about the gathering ‘poofing’ out the skirt section so I replaced the gathers with soft pleats. I know it kind of takes away a bit of the authenticity but I think its a lot more flattering. I also included a little turn up on the sleeves, as I did with my wing collar shirt. Just a little detail but I think it finishes a short sleeve much better and gives a little more interest.

1940s shoe dress front

I so enjoy a good old rummage in the button tin. I quite often had my whole head in my mum’s button tin when I was little and so the whole searching for the right button thing generates such a nostalgic feeling which escalates to pure joy when you find the perfect ones! These two little red beauties were 2 of a little set so kindly gifted to me by Rachel at House of Pinheiro as a thank you for doing a little guest spot over at her place! Gotta love this whole blogging thing!

1940s shirt dress buttons

The back of the dress is finished off nicely with side-ties that tie in a little bow at the back which also serve as a great device to hide the near invisible side zip.

1940s shirt dress back

Of course, there are no prizes for guessing who took the lovely photos! Mr Ooobop! is so clever and so willing and so lovely. My blog would be truly rubbish without his wonderful photos.

1940s dress yellow backgroundWe had such fun taking these today, en route to lunch in a local pub garden…. and then onto dinner at our local Italian restaurant, Casa Mia. Totally indulgent day today but it wasn’t our fault. It was all sunny and everything and we were seriously confused into thinking we were on holiday!

1940s dress sunshine

Sewing, Sunshine, park life, Prosecco and pizza….and more sunshine! I am so easily pleased!