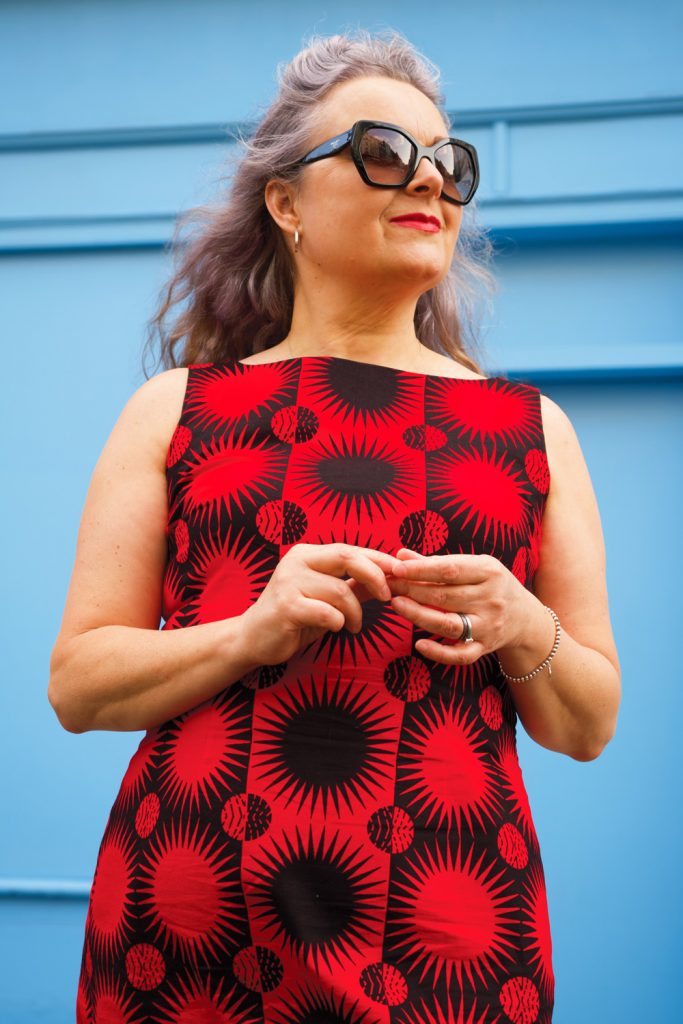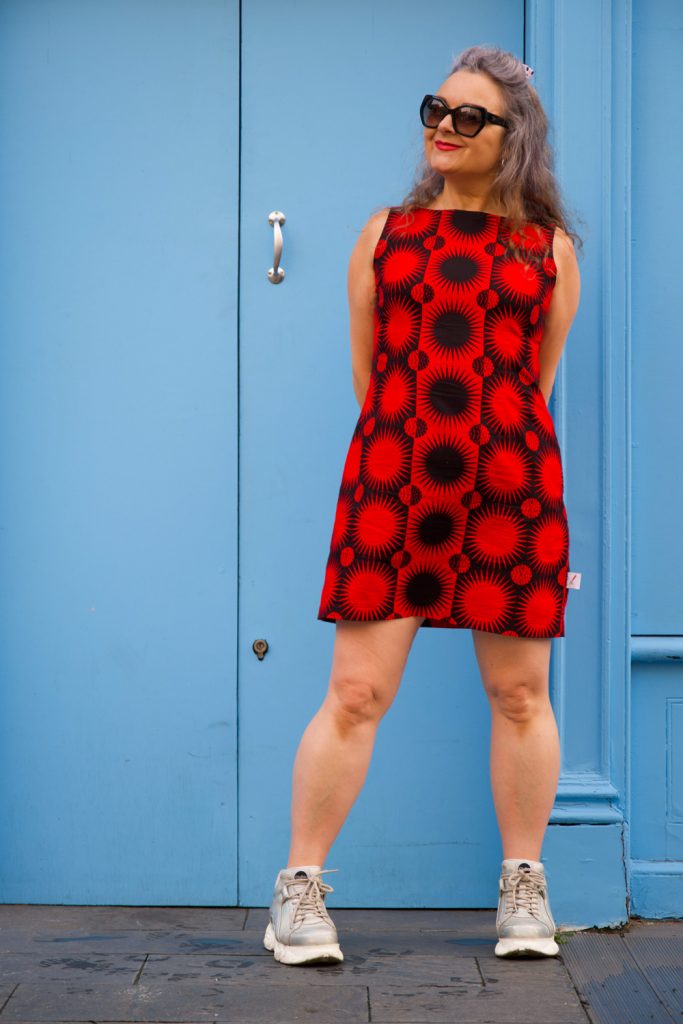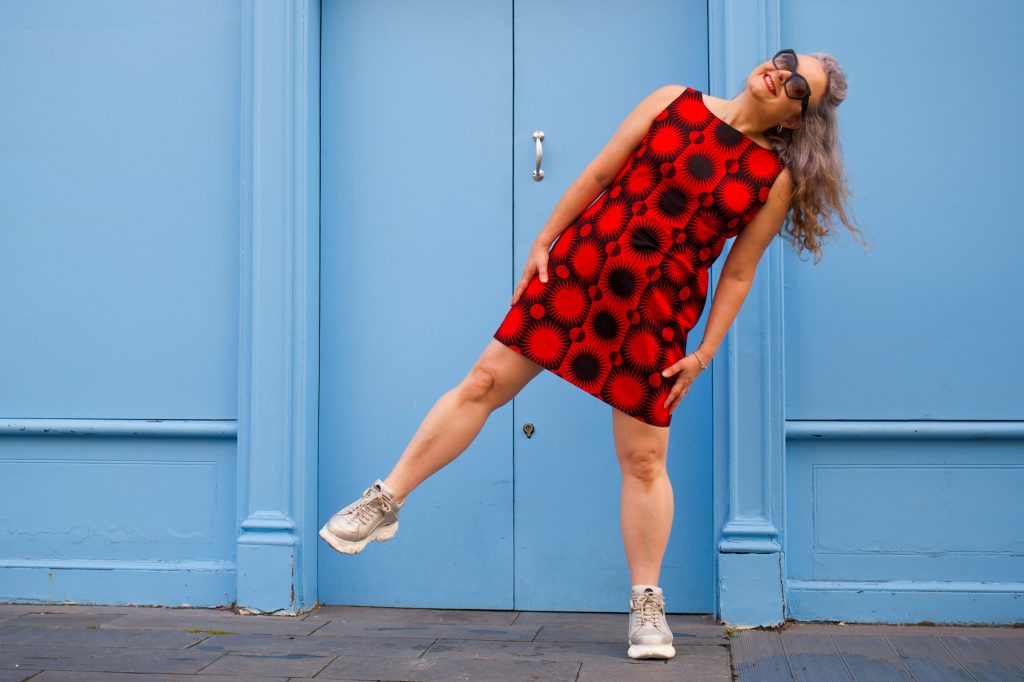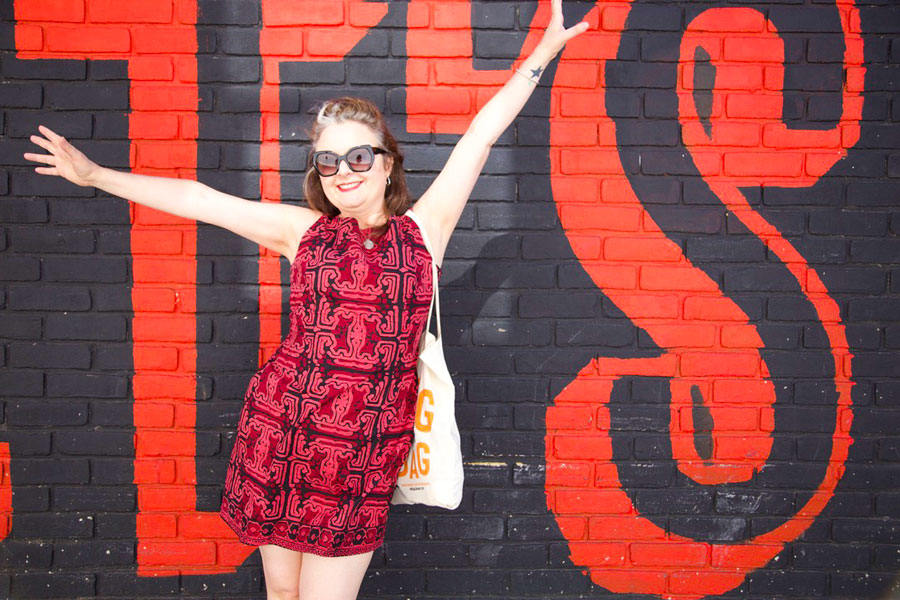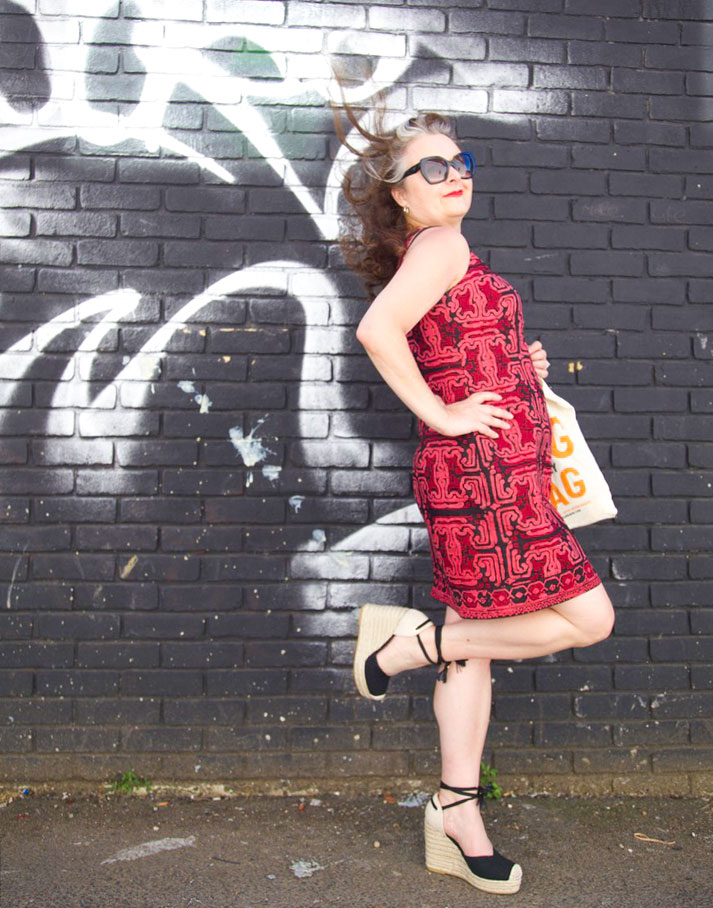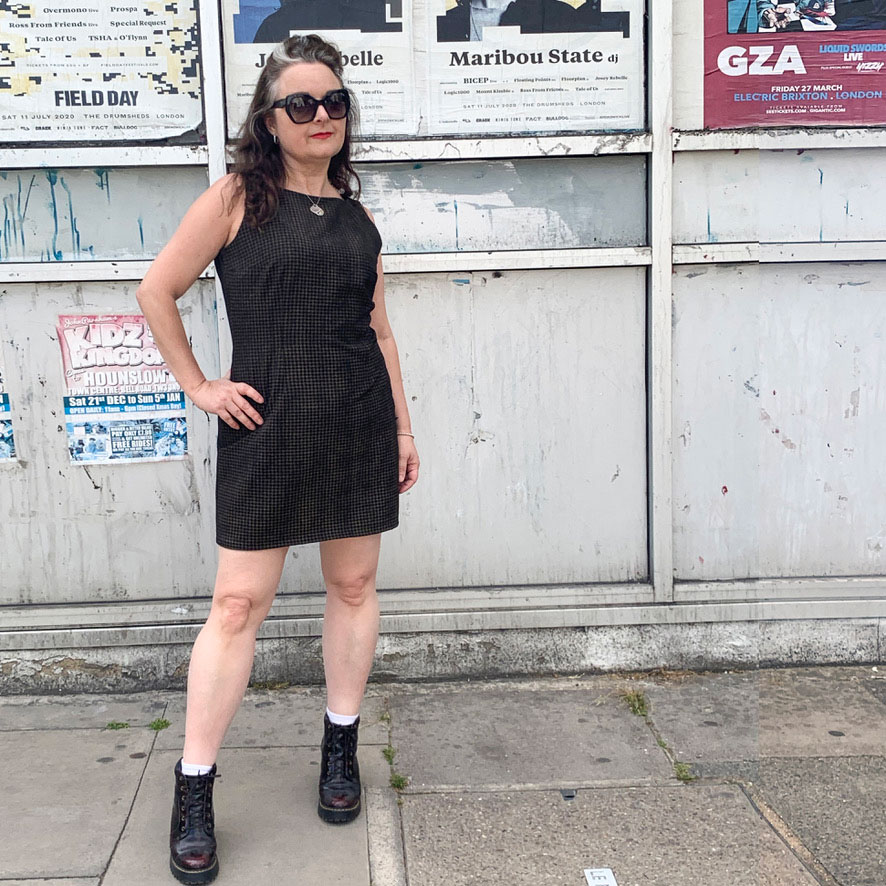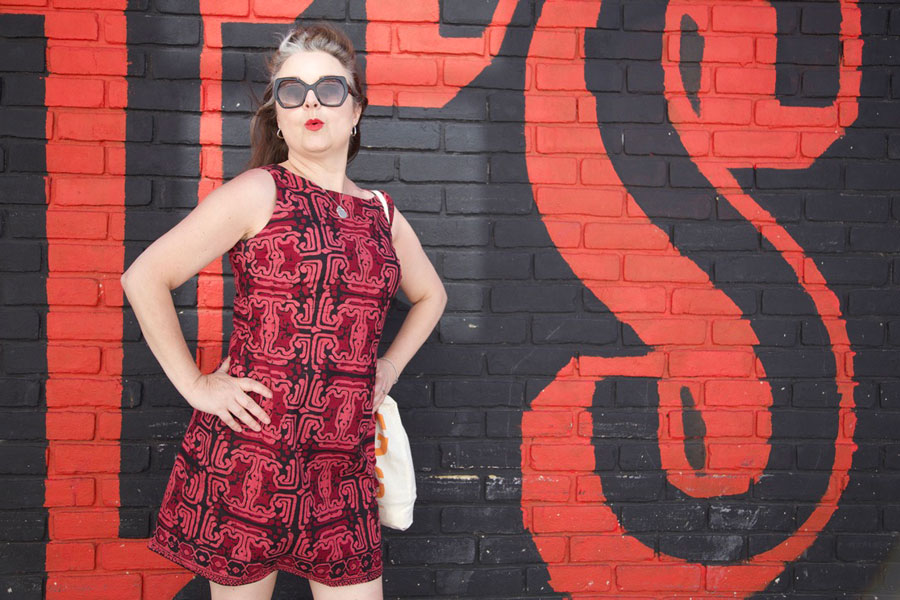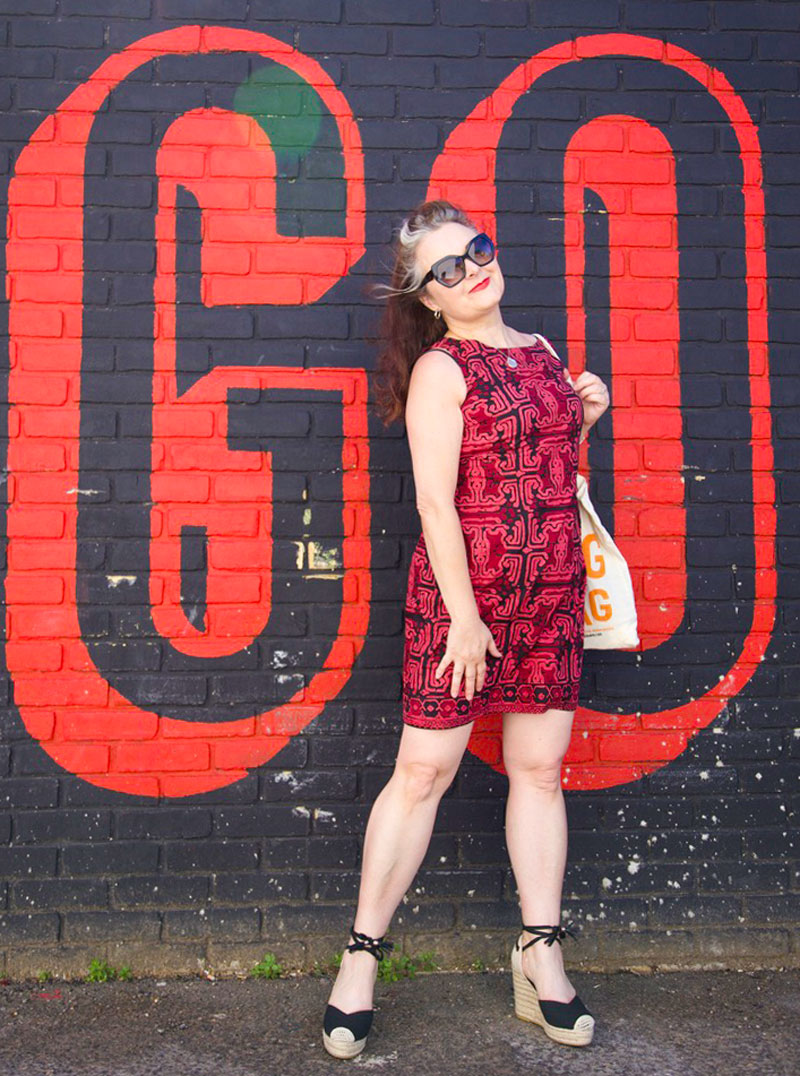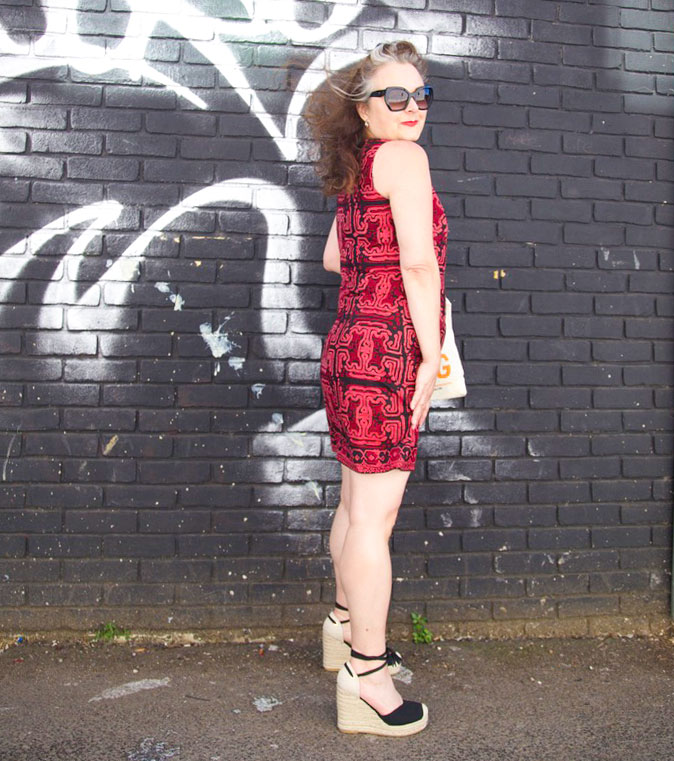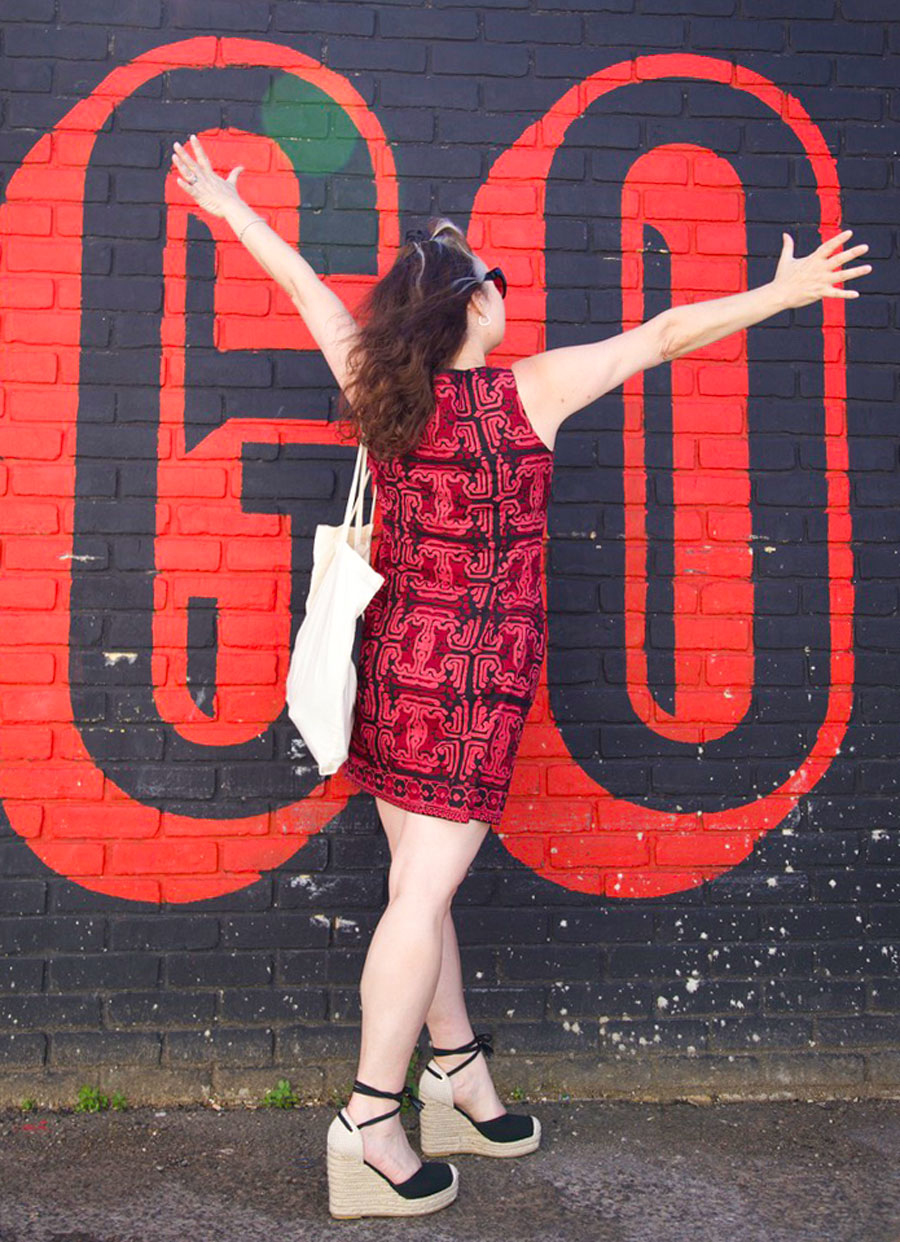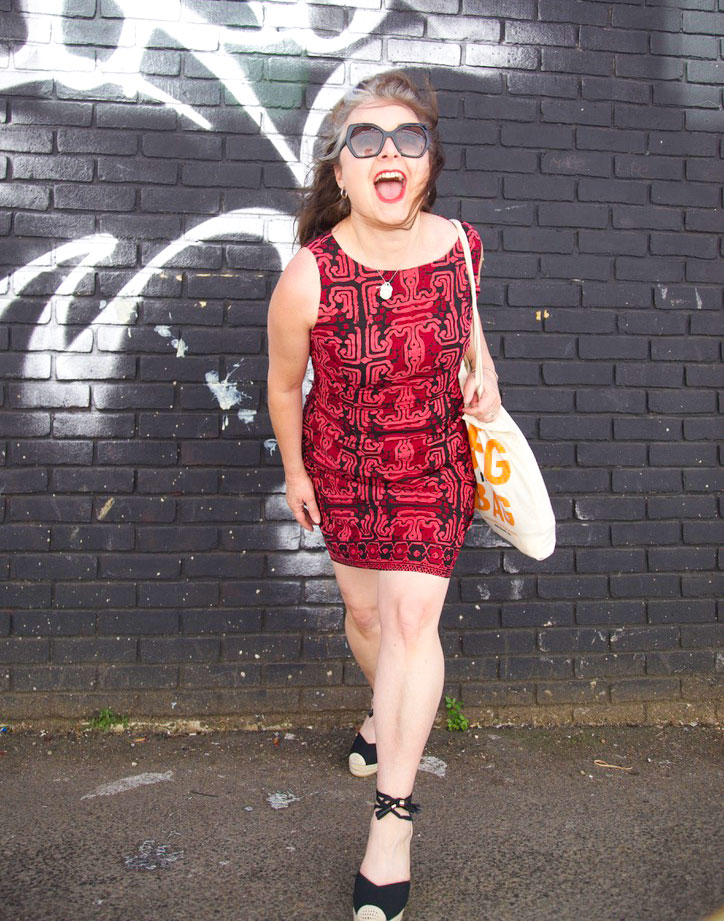
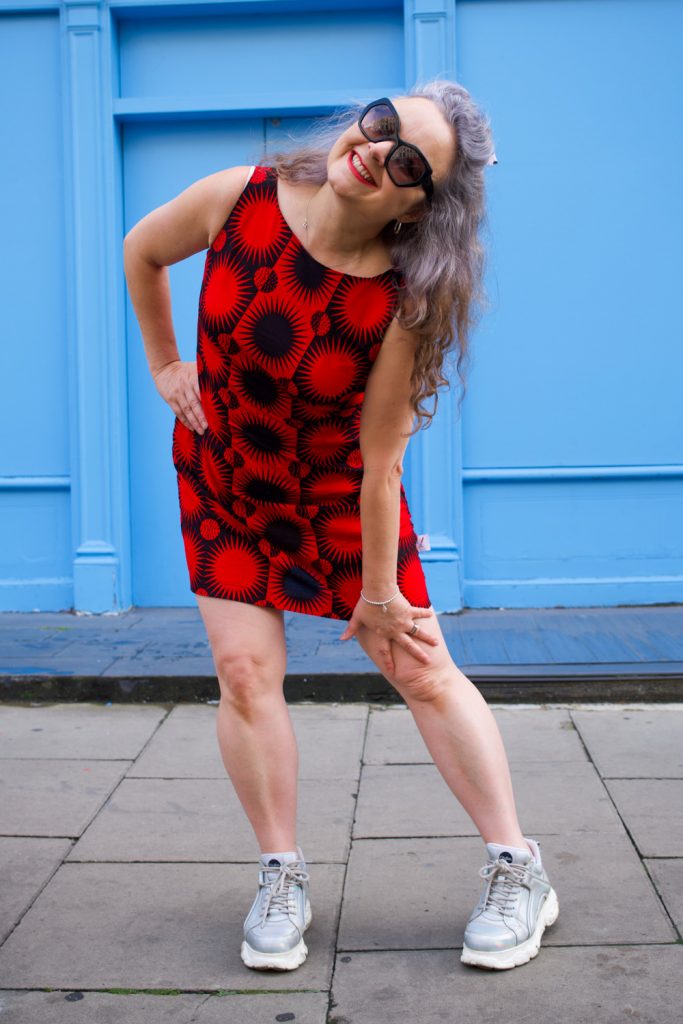
Fitted sheath dress in a graphic Ankara fabric

This is the dress I completed at the Crafty Sew and So camp, weekend before last which feels like a dreamy distant memory already, since I’ve been buried deep in work projects ever since. Thank goodness I realised the importance of taking a simple no-brainer project with me as I had anticipated a lot of chat and I didn’t want to be getting stressed out by fiddly details… or miss out on all the goss!

Sewing a sheath dress is a good test of fine tuning a fit as woven fabric has no forgiveness whatsoever! And I’m pretty sure I’ve nailed it now. It feels like it fits in all the right places and its amazing how that feeling transmits a confidence when I wear it. Well I can hardly blend into the background with this graphic print in any case!

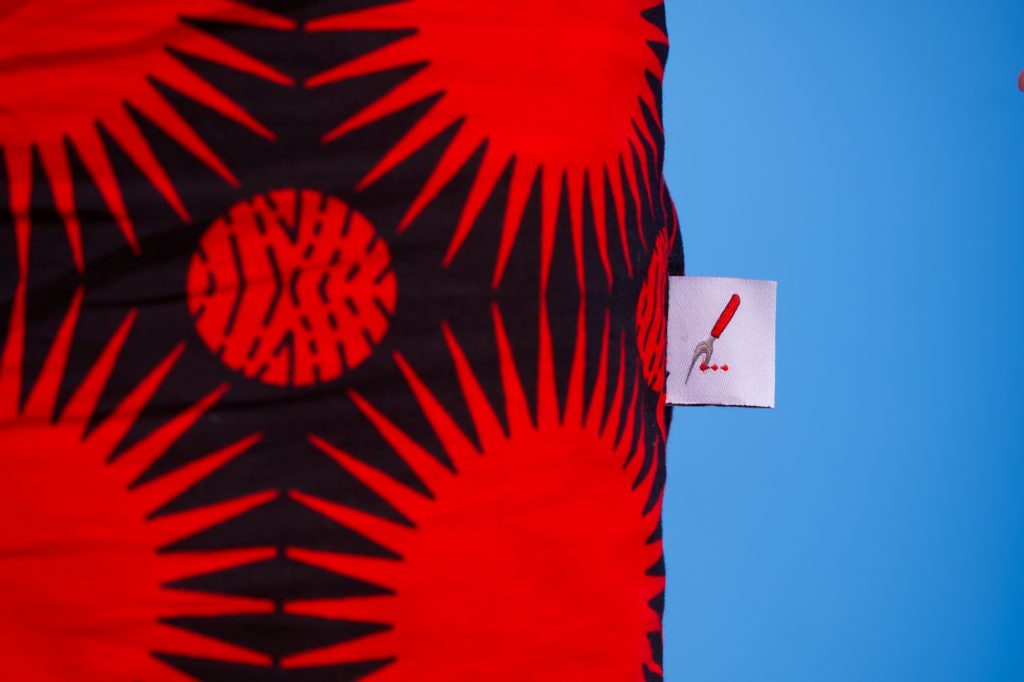
I was hoping the Ankara fabric, with its strength and weight, would give good structure and I wasn’t disappointed. If you’ve sewn with it before, you’ll appreciate how your shears slice so accurately through the threads and the joy of ironing those sharp seams – especially helpful when pressing those understitched facings. They are so never going to pop out!

The dress pattern is simply a front and a back piece and an all in one facing to finish the armholes and the neckline. The zip is at the left side – something I learned from sewing a lot of vintage dresses and a method that means the back piece stays as one so there is no need to pattern match across a zip.

I would normally have tried harder to match across the side seams but I was working with a remnant here, left over from this crazy cowl skirt project, so I was limited with my placement options. Very happy that I used stash fabric though!

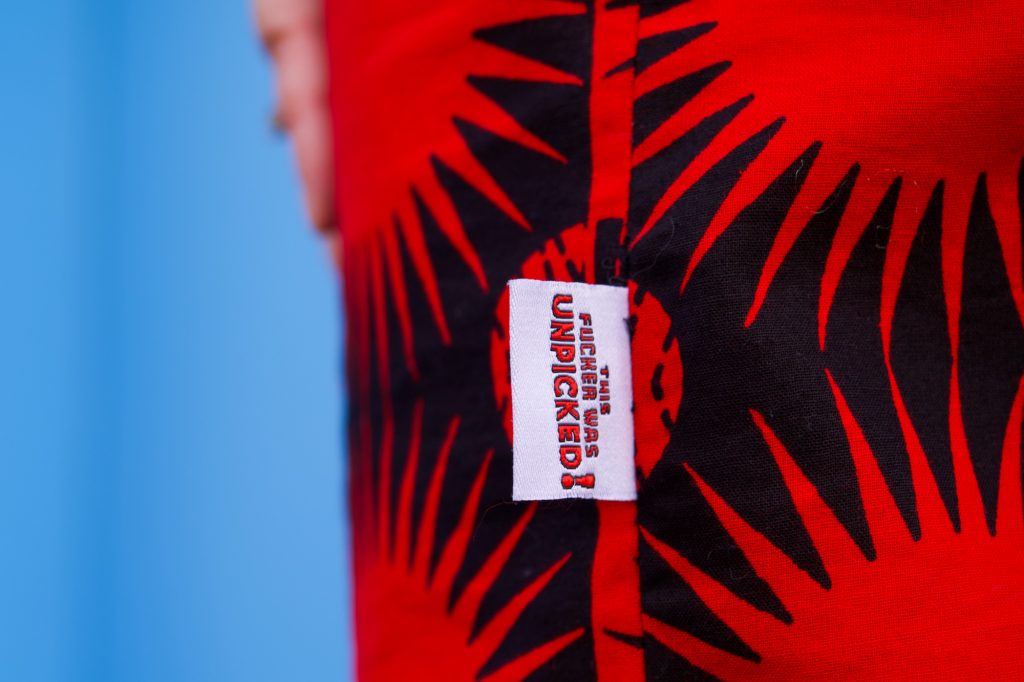
And whilst we are on the subject of side seams, I’d like to draw attention to the sweary label that Manisha from Manisha’s Fancy Fabrics kindly and appropriately gifted me from Sew Me In (explicit) Labels. Because, despite the simplicity of this dress, I had to unpick 3 seams at least due to distraction of talking and mostly laughing my head off. In case you need any confirmation, sewing alongside likeminded makers who share as much passion about dressmaking, is incredibly good for the soul but a little bit detrimental to productivity!

This won’t be my last sheath dress for a number of reasons:

  • Its a lovely no-brainer of a sew, once the fit is mastered
  • It uses precious little fabric
  • Its can be office-appropriate in a suiting fabric, casual in a cotton, dressy in a satin
  • It can be customised so easily

Thanks to Dan for these lovely photos. We were in Charlotte Street, and very much drawn in by the blue of the shopfront. We haven’t been up town for a long while and it was good to see the buzz is still there, with lots more pedestrianised areas for al-fresco drinking and dining.

Keep tuned for some more of my pattern drafting adventures. I’ve got a few plans up my sleeve!

Shift in the right direction!

ooobop self-drafted shift dress

I’m so happy right now. Doesn’t take much – just a shed load of sunshine, some quality time with the fam and success at last with the fit of my shift dress.

In case you’ve missed any part of me whittling on about this process, my mission has been to achieve the best fit I can using my own dress pattern with minimal seam lines – ie a darted dress with both front and back pieces cut on the fold – so as not to disturb the print of a very boldly designed fabric that I have in mind to sew next!

self-drafted shift dress in a vintage batik fabric

The fabric I used here was the best test so far because it too required careful pattern placement. You can see the first version I made here and I just realised I didn’t even get round to blogging the second so here is an actual shot, instead!

Self-drafted dogtooth shift dress

I was gifted the gorgeous batik fabric a few years back, by a lovely friend who had inherited it from her parents. When she saw it featured in my instagram post she was so happy to see it again and so pleased that it was being put to good use. I kinda felt duty bound as I remember her telling me that her parents used to travel for to Thailand and Indonesia  quite a lot in the 60s and 70s for work and that they always returned with gorgeous authentic fabrics. Proper sentimental value and vintage, too!

ooobop self-drafted batik shift dress

This piece in particular is undoubtedly a hand-blocked batik. Though this is based purely on my own research and I could be wrong so please correct me if you think different.

It wasn’t very wide but I knew it would be perfect for the third trial of my shift dress, knowing I was very nearly there with the fit. I wouldn’t have risked it otherwise!

It’s such a fine quality cotton. Actually feels so natural against my skin, which is an odd thing to say but I have worn cotton before that doesn’t feel nearly as good. And it completely stood up to a stroll in 24° of Shepherds Bush sunshine today.

ooobop self-drafted batik shift dress

I was intrigued by the selvedge of this fabric. Why would it have just one edge of border decoration? I put out to the wonderful, ever obliging sewing community on Instagram and the very clever Meg from @cookinandcraftin suggested it was very likely to be used for a hemline and a centre front detail for a sarong when wrapped. I loved knowing this and was determined not to waste this detail so I set about cutting my pieces on the cross grain in order to make the best use of the design.

ooobop_self-drafted shift dress in batik

But I hit a snag and realised just in time that the cross grain had absolutely no give at all, and considering the style and fit, it could have been a disastrous move. So I cut on the long grain, as I have trialled twice before (if it ain’t broke and all that) and cut the border separately to seam along the hemline with a generous seam allowance which is overlocked and pressed down on the wrong side. It actually helps to add a bit of weight to the bottom of the dress too.

ooobop shift dress and shades

I made a few other tweaks to the pattern since version 2:

  1. I widened the shoulder straps by 1cm having struggled to pull the dress through the facing during construction, as per the ‘burrito-method’! The fabric I am going to use for the next one is much thicker and I don’t want to risk damaging it or pulling out any stitches in the process.
  2. There was still an element of pooling at the back (swayback issues as usual). And even though I added a quarter of an inch more at the hips since last time – with some improvement – it didn’t seem to solve the issue as much as I’d like.
  3. Then, just this morning, I saw that Cortney from @s.is.for.sew on Insta detailed how she lengthened her back darts to resolve a similar issue. So I moved the bottom point of the diamond dart down 2.25″ and continued the widest part down longer before tapering off. It worked a bloody treat!

ooobop self-drafted batik shift dress

ooobop batik shift dress

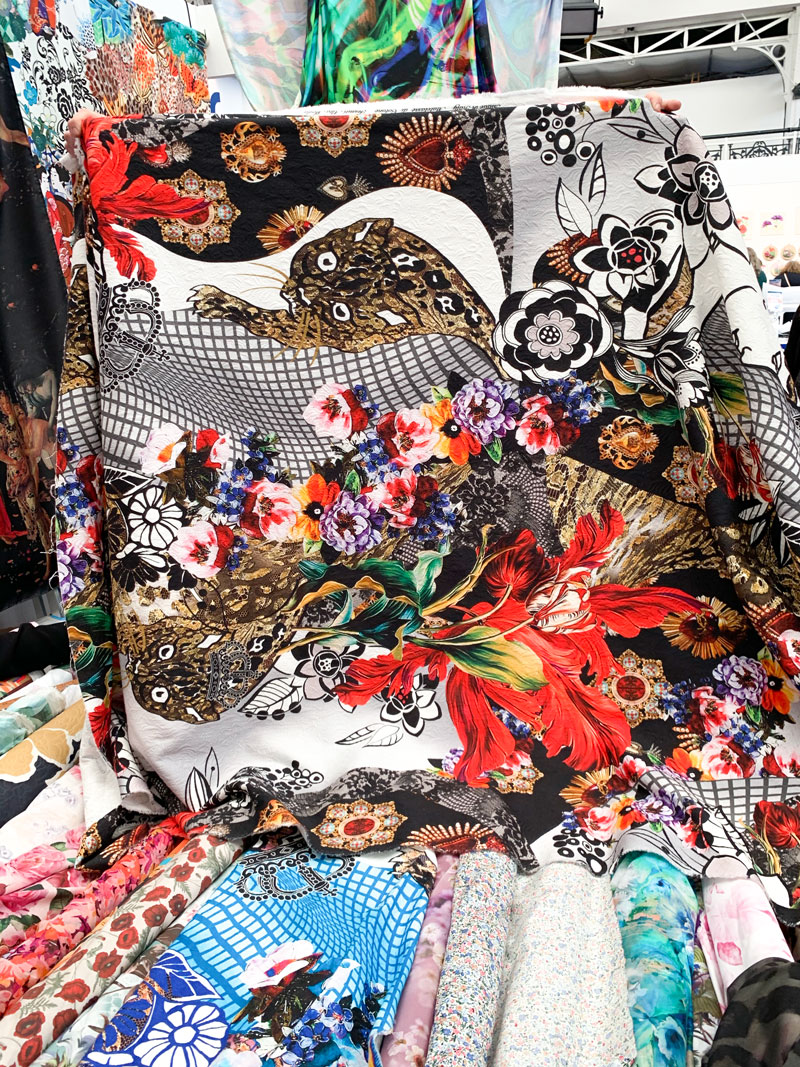
And so I do believe I’m ready to cut into that prize D&G fabric that I got from The Stitch Festival 2020 – only dilemma now being, how the hell do I choose my favourite placement of the design? I anticipate this being the longest part of the process!

Dolce and Gabbana fabric at M Rosenberg's stall
Dolce and Gabbana fabric at M Rosenberg’s stall

Thank you as always to Daniel for these amazing shots down the alley of the Laundry Yard in Shepherds Bush, London. For anyone who knows, you’ll know what a brave move this was!

Self-drafted Batik shift dress by ooobop

Vintage Simplicity 4687 to the rescue!

simplicity 4687 vintage dress

The look on Mr O’s face was a picture following my little I’ve-got-absolutely-nothing-to-wear tantrum on Friday evening. The undulating range of handmade dresses strewn across the floor and the bed said otherwise. It was Rachel’s hen night on Saturday. To be attended by various gorgeous sewing bloggers who would all be adorned with their own spectacular creations.

“So make one, then” was the ridiculous response.
“Er… It’s Friday. The hen do is tomorrow?” I replied, teenage-style, deepened yet rising in intonation.

A roll of the eyes. No sympathy. A simple shift dress appears in my head. Some crazy tropical fabric follows in the next mind scene. Mission Ooobop-new-dress are go!

I run upstairs dig out Simplicity 4687 from the neatly labelled ‘vintage 1950s’ box of sewing patterns (believe that and you’ll believe anything!) and following an exhausting rummage, retrieve said fabric from stash. I pinned and cut it out right there and then. Winging it. No adjustments. No time.

simplicity sewing pattern 4687

Saturday morning and I’m all over it like a nettle rash. One front, two backs, 3 facings 10 darts(!) and Bob was my uncle! Walkaway dress, eat your heart out!

"simplicityLack of lining, overlocker on form and an invisible zipper foot all helped to speed up the process. And thanks to the ample ease that Simplicity ensures, the only alteration I had to make was to loose a few inches on the bust. I took them out at the side seams just under the armhole. Next time I’ll be sure to grade it properly.

simplicity 4687 vintage dress

Incidentally this is the first time I’ve used my invisible zipper foot and I won’t be looking back as unanimously claimed by many a Twitter follower when I put the question of ‘was it worth it’ out for debate! I mostly referred to the price tag of £13 which seemed a bit hefty for a little foot. But boy does it make zip insertion a breeze. So quick and so neat. You’d never see any evidence at all if it wasn’t for lack of pattern matching! Certainly no time for that!

invisible zip

The hen do was a roaring success, thanks to the brilliant and selfless organising skills of the amazing Miss Demeanour. And Rachel looked amazing as evs as she boogied the night away, totally unfazed by us all wearing our Rachel masks and assuming the ‘Rachel signature pose’ at every given opportunity. I can assure you it was terrifying!

rachel hen night

As you can imagine, any photos taken last night of me in my new dress, would at best have been blurry but mostly ungainly so Mr O has come to my rescue by rustling up these photos today. I can tell you that the sunglasses are a necessary accessory!
simplicity 4687 vintage dressSo thank you to Daniel, not only for the photos but for raising that red rag to this bull and ensuring I had something to wear after all! 😉

Mono dress & faux film noir!

self drafted dress film noir
10.30pm.
The air is heavy.
Rain spatters relentlessly against the rattling windows.
Daniel and Janene each propped horizontally on opposite sofas. Mood is low. The bank holiday weekend is nearing it’s end…

Daniel: Got anything you need to shoot?

Me: Actually yes. But nothing fancy. Just need some pics of that trial dress I self-drafted.

Daniel: Ok. Go to it. Heavy on the make up. Big on the heels. And find a hat.

Me: But . . .


And that’s how these crazy shots came about! Quite literally out of not wanting to end our soggy bank holiday with the grumps!

So this is the dress:

mono dress full length

It’s my next leap on from my first ‘proper’ foray into pattern drafting. I’d tweaked the bodice and I’ve drafted a few pencil skirts to know the drill, and so I thought I’d pair the two together and make me a dress!

There were a few toiles along the way I can tell you! And this one still isn’t perfect. Goodness knows how but I think I need to take at least 2 inches out of the back bodice. My thoughts on this were confirmed at the time of drafting the back skirt section when I noticed there was precious little difference from the hip line to the waist line! I measured the bodice and double checked all measurements and just assumed it was meant to be.

However. I did have to do some trimming just under the waist line after I’d tacked it all together. And I thought I could live with it until I realised the side seams were a little bit too forward.

This really is no big shakes. In fact this is such a giant leap forward for me, the knowledge I’m gaining all the way is so totally rewarding. And luckily I have a heap load more of this fabric that was so kindly given to me by my fabulously talented milliner friend, Jayne Hepsibah. She wasn’t sure what it was but I’ve given it a burn test and it burns to a very fine pale dust. I wasn’t expecting that at all as it’s quite a weighty, almost upholstery style fabric with a bit of stretch! So I’ll make another soon to confirm my findings and rectify the problems.

The other niggling thing is that the armholes on the front could do with widening a bit. I wore this dress to a party a couple of weeks ago and all that dancing and waving of arms resulted in a little chafing round the sleeve edges.

I have some very similar fabric, but in crazy tropical colour, waiting in the wings once I’ve sorted out the issues. Can’t be neglecting the crazy inside when it’s raining outside!

self-drafted dress film noir style

There’s a fair few influences going on with this dress. The neckline I poached from a 40s pattern in my stash. The bold crazy fabric has echos of Kazz the Spazz who still continues to be one of my heroes despite her blog being no more *sniff*, though I’m sure she’d do it more justice with colour! And the overall design came about whilst doodling in my Fashionary book and watching Madmen!

Even though it’s far from perfect and hardly a ground-breaking design, there’s a huge amount of satisfaction that it didn’t come out of a commercial pattern envelope and that I had to make it up to my own instruction!

I self-lined the bodice. And considering the weight of the fabric, it behaved beautifully. With a bit of understitching round the armholes and neckline of course. A good test for the next run when I intend to make that neckline a little bit deeper, but still keep those nice angles.

self-drafted monochrome dress

And the hat! Let me tell you about the hat. Well I don’t happen to have any vintage hats just lying around. I’m sure Mr. Ooobop is convinced I have an actual ‘wardrobe department’ upstairs. I don’t sadly. But what I did have was this cheapie fascinator that I got from the pound shop, onto which I gathered some glittery tulle. Genius, non?! I’m sure some Russian veiling would have been classier but I’ll happily settle for this one… for a quid!

customised fascinatorWe had such a hoot doing these photos. Mr O was able to practice with his new birthday flash attachment and I couldn’t resist the addition little faux film noir-ness with my magic Photoshop wand!

This dress totally called for black and white pics and I wasn’t about to protest. I find black and white photography considerably kinder, compared to full on colour, especially at the end of a knackering weekend!

I’m so glad I’ve got such a pushy boyf, really! I’d never have got the get up and go let alone the camera skills to do this by myself! We really did have a lot of fun with this.

Shame neither of us smoke anymore, otherwise we could have got some proper authenticity going. However we did manage to fashion some obligatory venetian blind shadows!

head shot blind shadows

And it’s a fine way to capture the drama after the last glass of Prosecco got spilled!

vintage scream film noir

I do hope you all had a restful weekend with some making going on, of course!

ooobop! review: Burda Style June 2013

Burda magazine June 2013

Can you believe this is the summer edition of June 2013? I can’t. I’m wrapped in my fleecy blanky, fingerless gloves no less, shivering my butt off as I point blank refuse to turn the heating on. My toes are curled for no other reason other than I can’t uncurl them because they are frozen solid. Is this weather for real?

I really want to get excited about summer clothes, really I do. But I’m struggling. So if you hear a slightly less enthusiastic tone this month, please bear with!

First section up is… Summer Fashion… ha! “Keep looking stylish, even in the heat…” is the opening line of the first intro copy.  Ha bloody ha! Rub it in why don’t ya!

Summer fashion Burda June 2013Ok. I’m going to try. I actually do really like the hand finishing on the brown shift dress, bottom left (above). Its a great couture technique that I’m thinking of employing on a future wool crepe dress I have planned.

The shorts, centre, bottom row, are not dissimilar to the plaid shorts I made. These ones are made with stretch pique which sounds more comfy. I will defo give these a go as one of my gripes was the lack of facing with with Simplicity ones. I know I could probably draft one but hey, I don’t need to now! A bit difficult to see in the photo (top row, centre pic) but that t-shirt looks to be a good fit with side panels and neat little sleeves. Don’t have an overlocker as yet and I’m wincing at the thought of messy insides so I’ll just hang on a bit for that one until I win the lottery. Boy I can’t believe how much those overlockers are!

My dislikes are the pink pants, bottom right. I love this look on the right kind of body. I don’t have that kind of body, unfortunately so they won’t be appearing on my list anytime soon. As won’t that dress top left corner, funnily enough. I say funnily enough because at first glance it looks like a classy dress. Save the pompoms! But it’s not even the pompoms that are putting me off. I quite like them. Its more the “artfully laid little pleats” that appear on the right shoulder aligned with the left hip. Even from the photo I can see some annoying crosswise folds that would annoy the heck outa me!

So who doesn’t like lots of dots? That’s the theme for the next section:

Lots of dots Burda June 2013I think I can safely say I like everything in this section save the long shorts, first column middle row. Just a bit unflattering and boyish for me. I love the shirt-dress top right, most of all. If Me-Made-May’13 has taught me anything it’s that I need more shirt dresses. I love how comfortable and stylish and edgy they can be. It’s not to do with cutting edge design. More clever choice of fabric that makes a great shirt dress. And I’d love to have one for every day of the week. This is quite a slim-fit one and it sure fits the bill as far as I’m concerned.

The shift dress, bottom right corner, has some great side panels that are piped. I still haven’t attempted piping but this would be a great opportunity to practice. It would also be a great chance to practise some colour blocking too. Employing some block colour in those panels would create a great slimming effect.

The cowl top with gathered sides (top left corner) is a firm fave too. Much more stylish to wear than a plain old T! And I love the yellow swinging full skirt. Perhaps not in yellow though. It’s got plenty inset godets on top of all the gathering. And a big bow at the waistband. Dead funky!

The next section is all about beach wedding/party dresses. I truly have goosebumps right now thinking about how the chiffons and georgettes might feel next to my skin, but there are some pretties…

beach beauty section burda June 2013The cowl neck dress, bottom left corner, is my favourite here. With its side gathers and simple shape I think it could be really flattering and perfect for a few evening cocktails on the beach. The dress, top right, is quite stunning and doesn’t look that difficult to construct but there is some yardage of crèpe satin going on here, so it’s not really for the ‘thrifties’ among us!

I don’t dislike the others. They all have their place. Apart from the strange diagonal pleated bodice dress, top left corner – same issues as that purple dress in the first section. Oh, and that one sleeve wonder dress bottom right corner. Not sure I could handle that!

So, swiftly we move on to ‘Surfer Girl’. Not me. Not any part of it. I have noted there are a lot of runners that sew. Or sewists that run! I wish I could say I was one of those. But I’m not so I will leave judgement in the hands of the “Sporty Spices” of the sewing blogger nation…

surfer girl section June 2013That said, the little jersey skirt in the centre, bottom row, could be a quick and easy casual make for holidays and weekends. The jacket is a bit 80s for me, mind!

The Mother & Daughter section is at the very least tweeee!

Mother and Daughter section June 2013Would anyone ever consider dressing to match their daughter?

I quite like the dress, top centre. Though it looks a bit starchy in the batiste. I might be inclined to use something slightly drapier. I do really like the idea of printing on the fabric though. That would totally seal the uniqueness of the garments. You could really create some signature pieces with a clever use of design. I just made a skirt, similar to the star-print one, top right corner, but from an old vintage curtain. I love the deep waistband. I need to finish mine but I hope it looks as good as it does on this mummy!

The Plus Section gets as much attention, if not more this month:
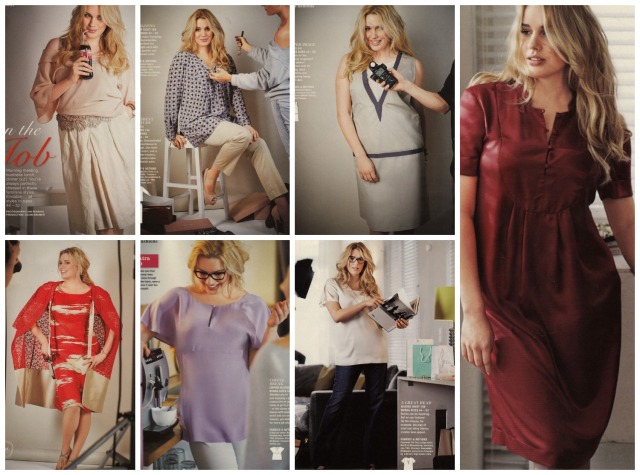
Plus fashions June 2013I love how each of these designs incorporate clever structured detail to flatter the curviest of bods. Simple lines and crepe satin exude the elegance and the loose cut sleeves and empire waistline of that red dress, bottom left is simple yet stunning. But the one I like most is the red dress on the right. Cute standy up collar and dinky button loops on a fabulous yoke bodice add perfect detail to really versatile dress.

So what do you all think? Any faves? Any absolute disses?

I’m off up the wooden hill to Bedforshire right now. I’ve given up trying to keep warm. But I’m still thinking shirt dress. Perhaps in some rockabilly print that I have in a box somewhere. I’ll dream about it and see how it looks!

Night all. And thanks so much for keeping up with my ramblings x
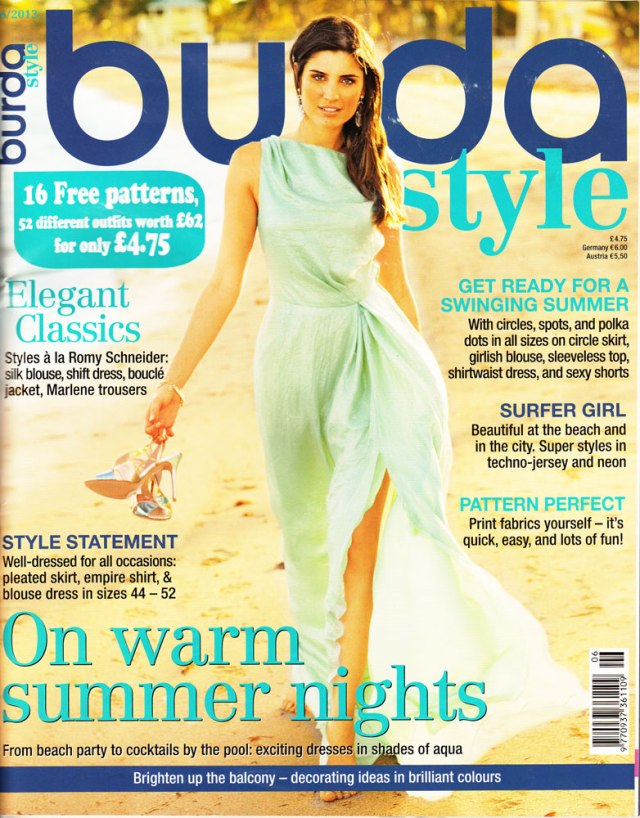
ooobop! review: Burda Style April 2013

Burda April 2013 cover

And so, as I sit, still in the depths of winter, double wrapped for good measure, It’s small wonder that I am less inspired by this month’s Burda than usual.

This is April’s edition for goodness sakes. I should be so eager to set about some fluttery spring makes, but its all too much even for my vivid imagination!

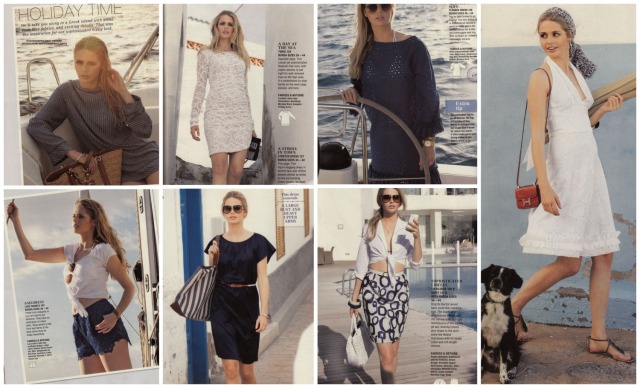
The Holiday section tempts me with a batiste maxi a cute bouclé shift dress and a smart pair of cigarette pants but though the rest are very holidayish they do nothing to float my boat I’m afraid.

favourite holiday fashions

Having said that, I do keep coming back to that little white dress (below right) but would have to invest in some ‘fashion tape’ for modesty reasons!

holiday fashions

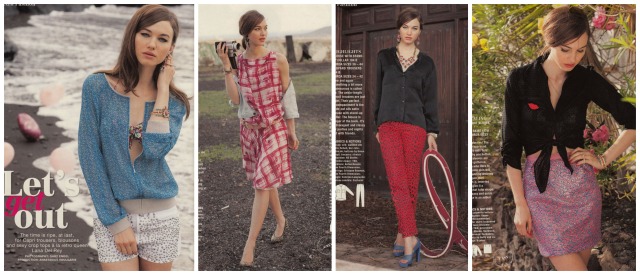
The retro section is always a sure fire bet for me and didn’t let me down with this adorable blouse, cute bustier top and equally cutesy dress. I wouldn’t change a thing about the blouse. It was undoubtedly designed with gingham in mind and the dress is a great showcase style for some statement fabric. Always sold on a sweet heart neckline. So flattering.

favourite retro fashions

I don’t dislike the others. I just feel retro is a bit of a loose term for the other garments in this section…

retro fashions

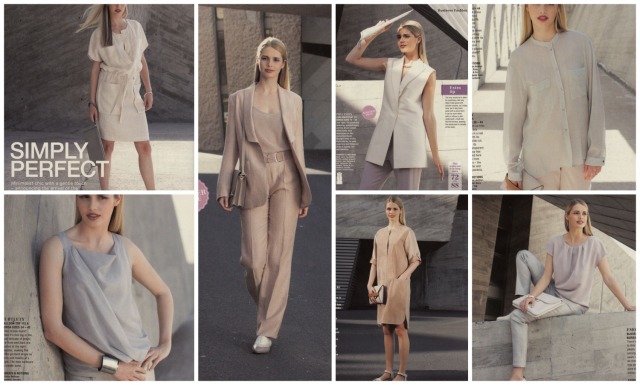
I’m a little bored by the business section. But hey it’s all very ‘fitting’! Some very interesting cuts even if they’re not my thang.

business fashions

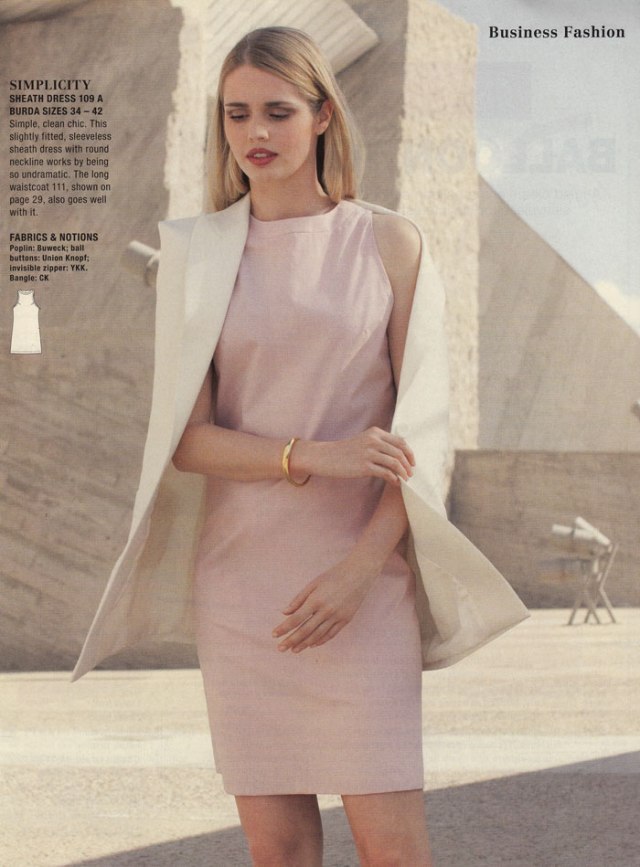
That said, the little pink shift dress works well in a lightweight fabric too. Very simple to put together even though its been marked with 3 difficulty circles. Not sure why.

business pink shift dress

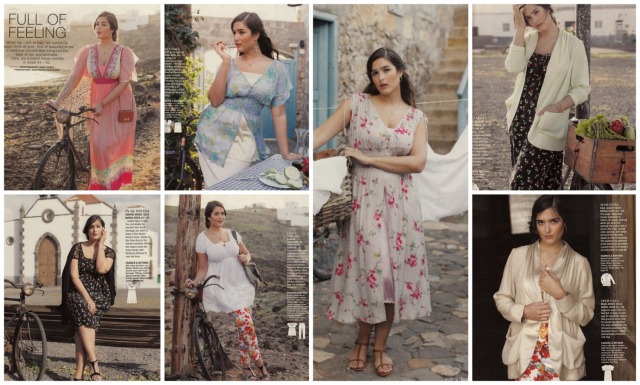
There’s a lot of pretty going on with the Plus Fashions. And a bit of an education for me too! I thought it was the lesser endowed that benefitted from an empire line. But no. Check out these delightful visions of ‘womanliness’!

plus fashions

And this one is my favourite. I particularly love the neckline and the slashed sleeves.

favourite plus size dress

An interestingly unusual suggestion for ‘Fathers and Sons’. Said parties in my house just gave me a ‘don’t even go there’ look before I even uttered a word! Shame really, because I think its all very charming!

father son vintage fashion

No further children’s section this month but for all of you crochet fans, there are some really gorgeous projects. I’m so seriously considering digging out those crochet hooks for some of this darling bunting!

crocheted bunting

crochet projectsOr perhaps I ought to consider a crocheted blanky to cover my knees while I work!

I do hope you continue to find these reviews helpful. I must say, in reviewing a lot of the styles grow on me from my first glances. There are always some surprising elements in a Burda pattern. Make no mistake!

Till next time, my lovelies. Happy sewing x