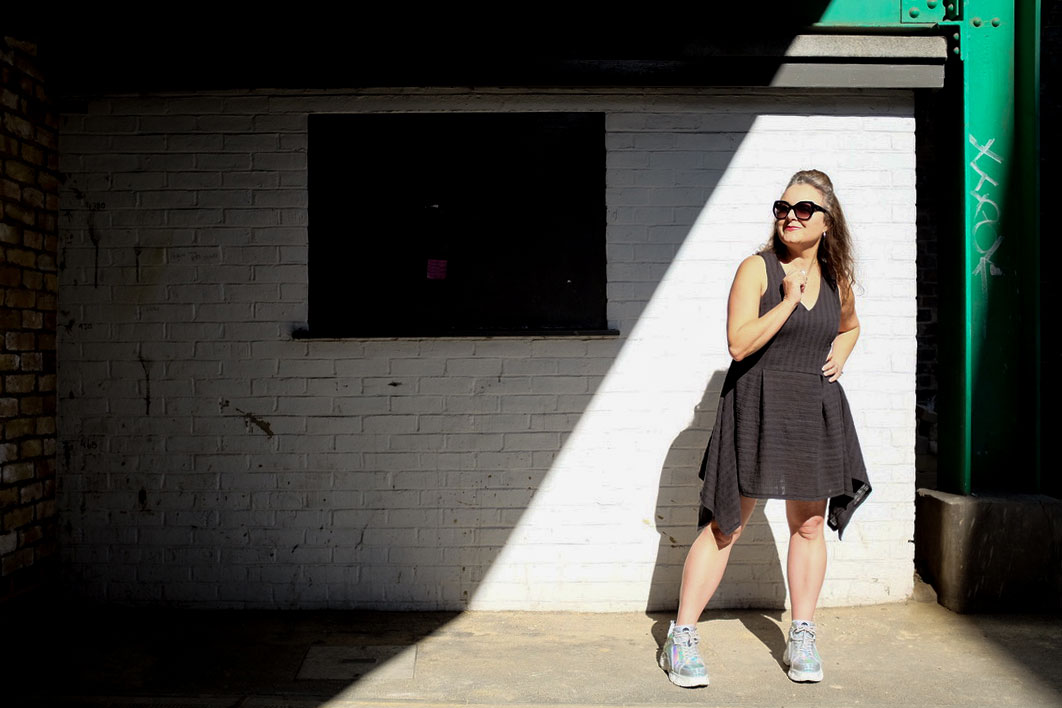
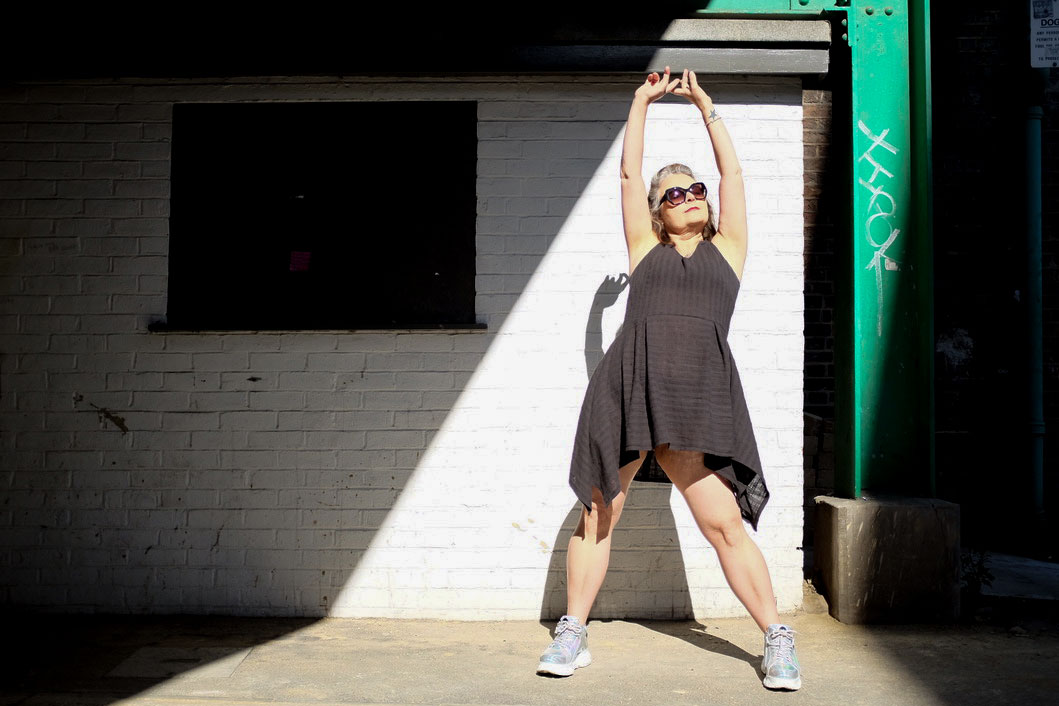
Handkerchief hem dress

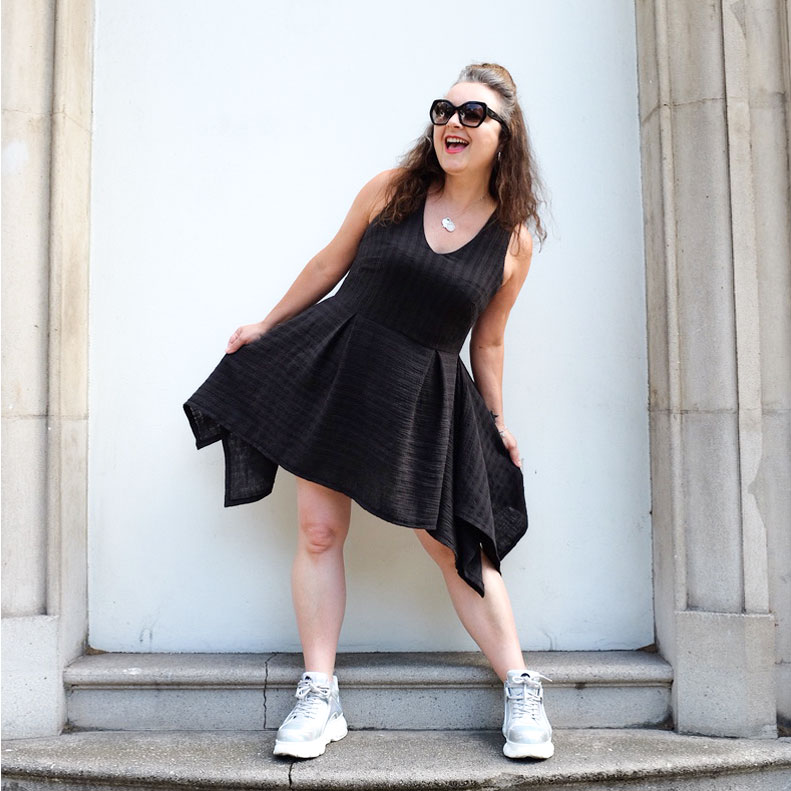
ooobop design hankerchief hem dress

Lockdown forced me to buy fabric online. Not my favourite thing to do but needs must when Covid pulls the rug!

I headed straight to Minerva – amazing selection; easy to navigate website and very competitive prices. I’m also a fan of the accompanying videos that showcase the fabric in action so you can get a fair impression of the weight and drape.

I was on a roll with the Shelby rompers, having made a starry one, a tropical one and an upcycled one in relatively quick succession, and my plan was to make a plain one that was a bit more casual and downplayed for those days when you want to be slightly less visible. Read: any excuse to go back to black!

I’m a sucker for black. But even moreso for a black fabric with a texture. And linen is a firm favourite. So I figured this crinkle cotton striped linen gauze would tick all the boxes. Black was sold out unsurprisingly, so I went for charcoal which actually champions those slubs with way more contrast.

But when it arrived I was a bit miffed. It wasn’t at all as I’d imagined. It was a bit scratchy, a bit wonky with it’s loose weave and worst of all, following a prewash it contracted to half the width! That lovely slubby texture totally worked against me, didn’t behave at all like regular linen and was almost elastic! – I was dead scared to make it into a romper. What if one leg ended up longer than the other, lol!
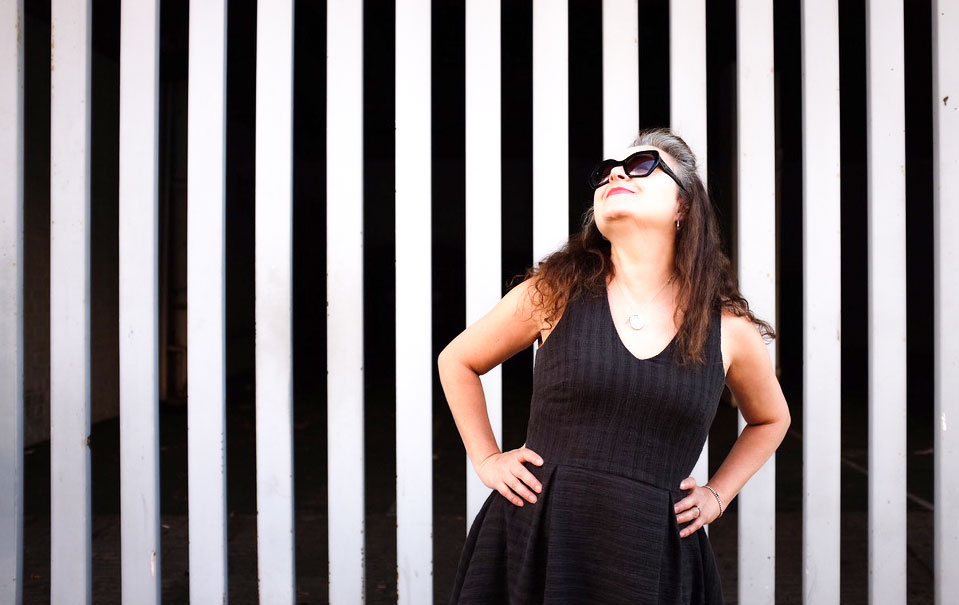
ooobop hankerchief hem dress
Channeling Blondie and Parallel Lines!

Despite the disappointment I rejoiced in the realisation that I’ve come far enough into my dressmaking journey to know when a fabric isn’t going to cut it. And the tantrums are few and far between now, because I’m quicker at finding solutions. Also the fabric completely softened after a prewash and I was more determined than ever to let this fabric do the talking.

So I went off piste. Not accidentally I’m sure because I’ve always got a catalogue of crazy designs in my head and sometimes they make it to a page in my Fashionary book so they’ve got a better chance of being realised. A summer linen dress incorporating a fitted sleeveless bodice, with a v-necklline and a handkerchief skirt would be it’s destiny.

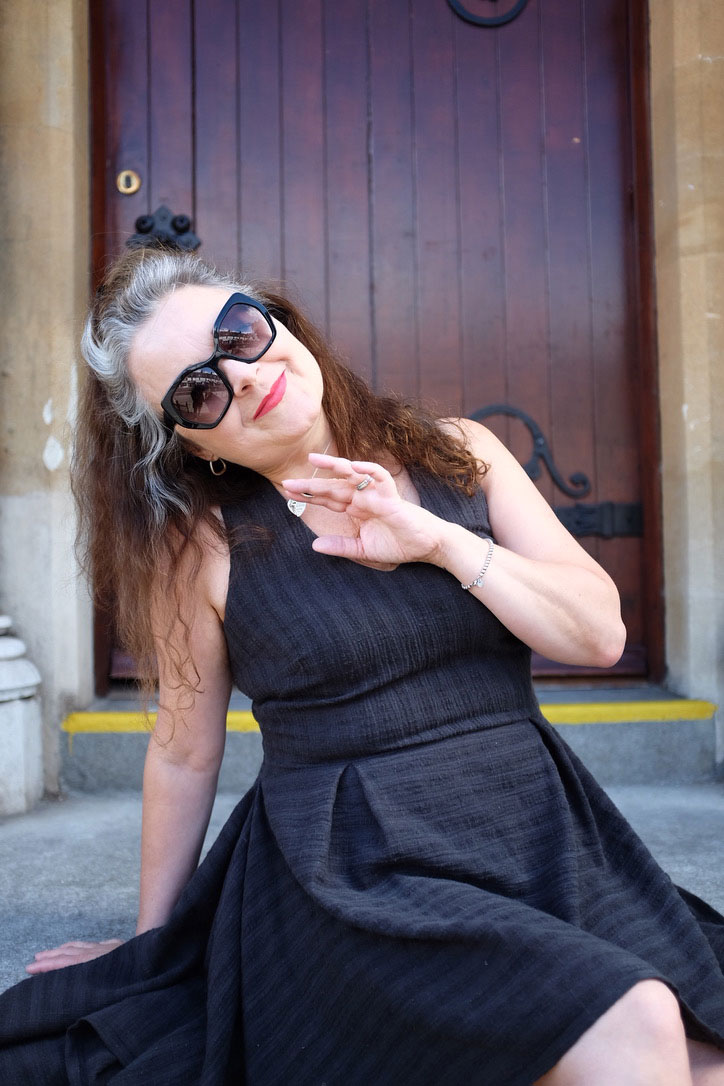
ooobop hankerchief hem dress

I reached for my bodice sloper, added a v-neckline and narrowed the shoulders. I also swung the darts to fashion a double French dart for no good reason other than I’ve never done it before. And I really like the result!

The vertical stripes of this linen lend themselves perfectly to the bodice but I decided to switch the stripes horizontally for the skirt section because I much prefer how horizontal lines fall at the sides. There was precious little worry how it would all hang for cutting it on the cross because I was playing to it’s wonky nature in any case. And it turned out good. In fact more than good. I love it!!

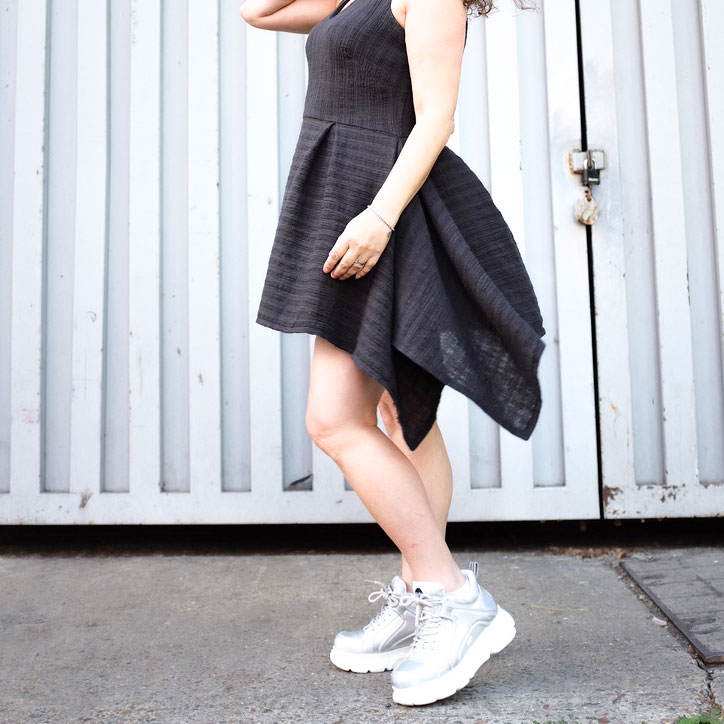
ooobop design hankerchief hem skirt detail

I have to cite a few influences here: Liz from this year’s GBSB for sticking to her alternative fashion style. I realised I was drifting away from mine and she’s unknowingly reeled me right back in! My bestie Laura Bird who loves an All Saints asymmetric number, always sporting an ‘interesting’ dress and Burda Style for first introducing me to a hanky hem!  I made my first maxi dress here and a second silver one here  and they are still my favourites though this is my first short dress with a handkerchief hem.

So how did I cut the skirt?

I decided on the length of the skirt (the depth) and factored in seam allowance and hem.

I made the width of the skirt to the following calculation:

Front piece (cut 1) = half waist measurement + (2x length of skirt) + 8inches for 2 box pleats + (2x hem allowance)

Back piece (cut 2) = quarter waist measurement + (1x length of skirt) + 4inches for 1 box pleat + seam allowance + hem allowance

I marked the centre of the front piece and 4 inches either side to tack the box pleats. I overlocked the bottom of the bodice piece and the top of the skirt pieces before pinning and sewing in place. I sewed up to the side seam on each piece and then sewed the seam allowance of the extra fabric along the top edge. After the centre back edges were overlocked, I inserted an invisible zip and enclosed the top part of the zip with the facing.

Finally I hemmed all four edges of the skirt and mitred the corners. And oh what a neat little finish that is!

ooobop hankerchief hem dress

I know it’s not the most groundbreaking dress. But I made it to my own order and an image in my head and it really feels good. The fabric feels good against my skin in this heat and I love how carefree it is.

I finished up sewing it yesterday morning in good time for Dan to have a practice with his new camera. (Clever, hey?!) And I’m delighted with the results. Thank you oh clever talented husband of mine!

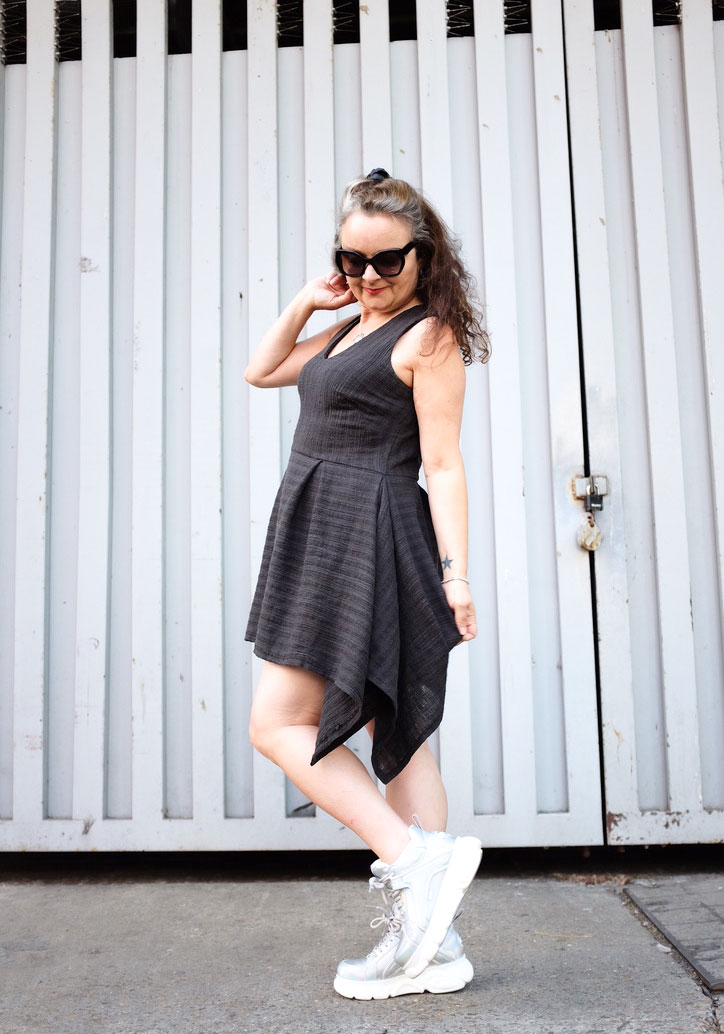
ooobop hankerchief hem dress

Also…new shoes!!  Buffalo hologram numbers that literally turn rainbow in the sunshine. And yes I know I’m probably channelling 90s Spice Girl. And no… I’m not about to grow up anytime fast!

Treasures for my Treasures

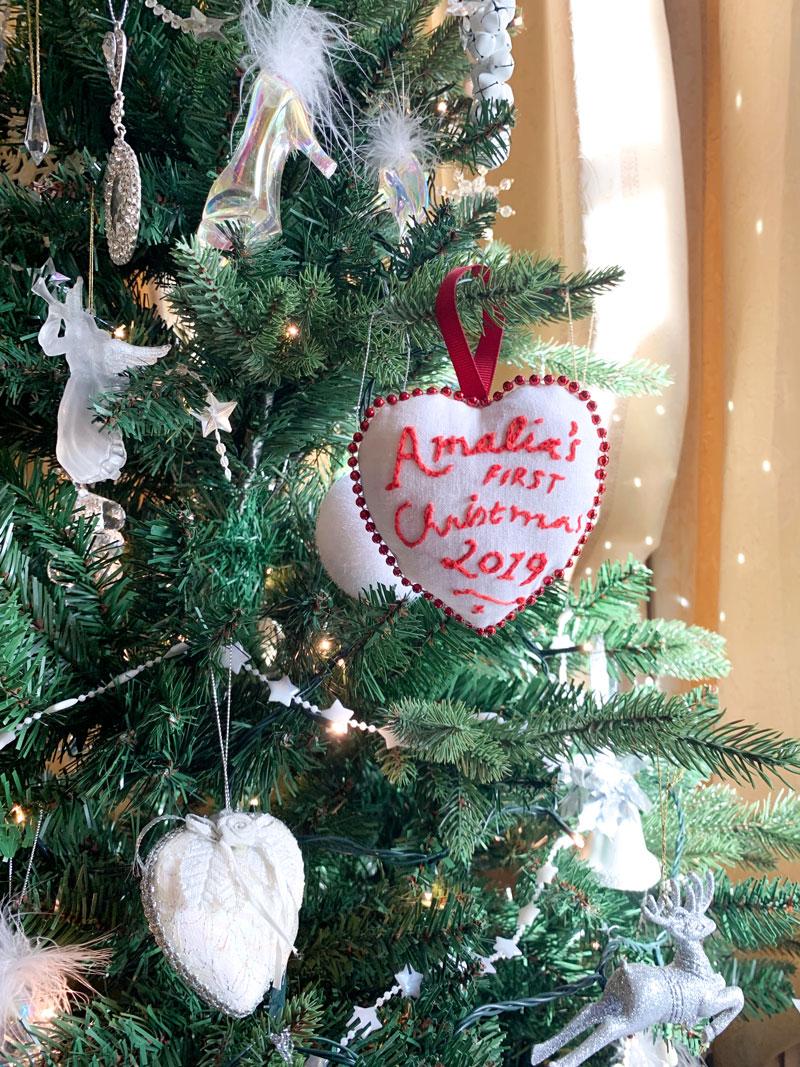
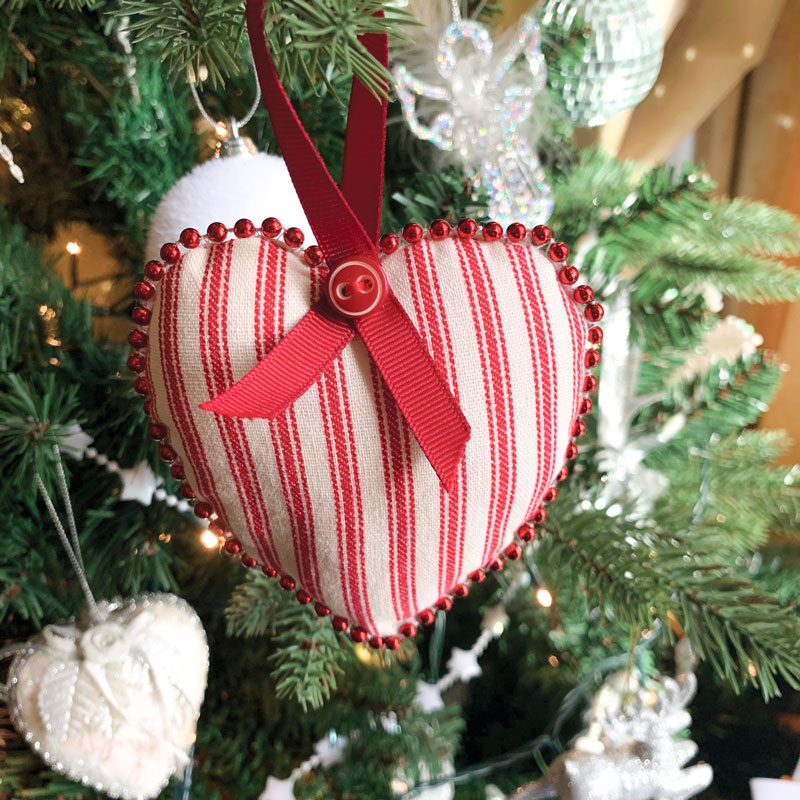
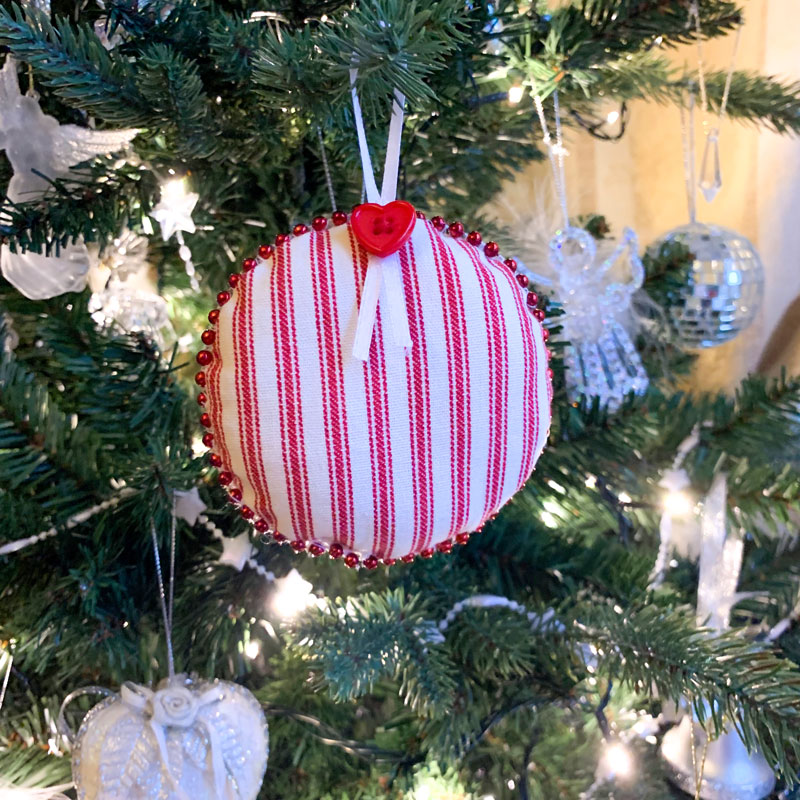
Amelias first tree decoration

In a few days time I’ll be wondering why on earth I didn’t make all my Christmas presents. All that joy that could have been had by hand-crafting beautifully personalised gifts for all my friends and family yet instead I chose to race around stinking hot, over perfumed shopping malls for expensive and ‘box-ticking’ presents. But as I sit, still with a work to-do list up to my ears, I’m currently fully aware why I didn’t quite get round to it!
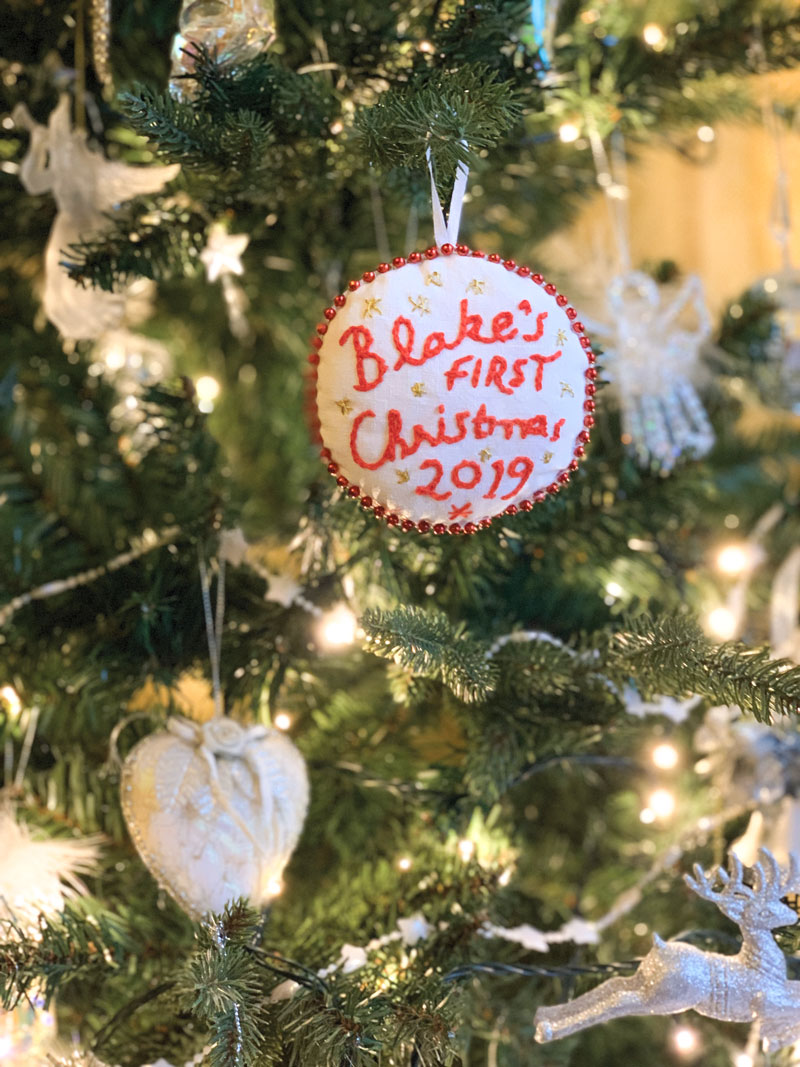
I did at least manage to rustle up two little decorations for two of my favourite little people – my grandchildren!
Blakes first christmas tree decoration

This is their first Christmas on planet earth and my first Christmas as a Nanna! And boy am I loving it!

My Christmas tree is filled with decorations either gifted by others or that have been bought at Christmas Fayres in good company. And every year I dec the tree the memories all come flooding back. And I loved the thought that a personalised tree decoration might be a ritual of sorts or a cute keepsake at the very least for Amalia and Blake.

I’d love to report that I stuck to my sustainability guns for not buying new fabric and used leftovers instead. But that would be a complete lie. I couldn’t fight the the vision of lovely linen and festive …. ticking!  It just works, right?! I did reclaim some ribbon and rooted around the button tin for the perfect vintage buttons, though.

Amalia first Christmas memento reverse

And if you are interested in the process for these little decs …

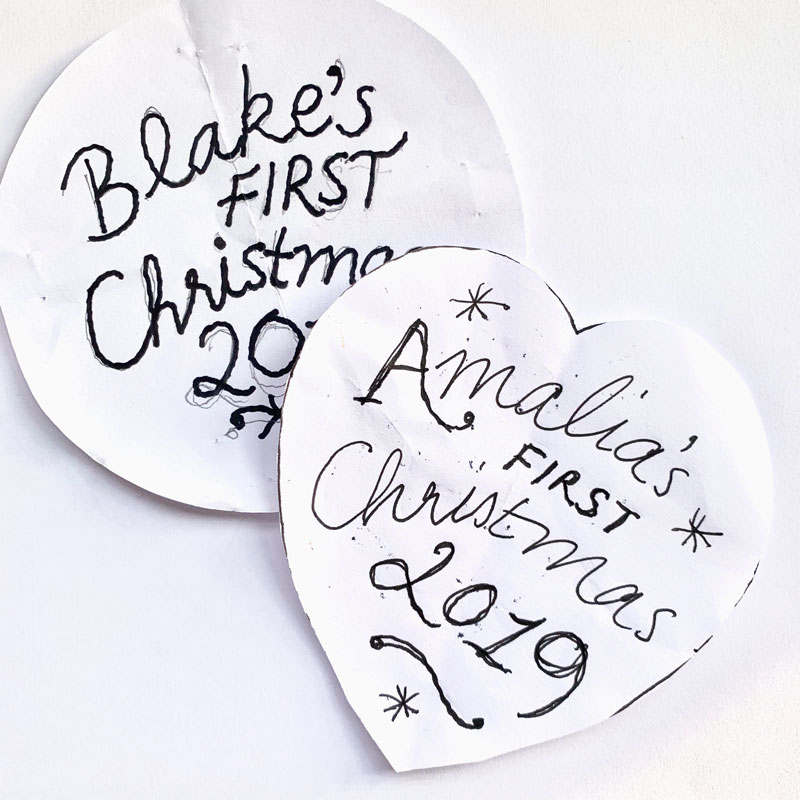
The lettering is my handwriting. I perfected it at first on paper within the confines of a heartshape for Amelia and a circle for Blake before tracing onto Solvy water soluble stabiliser. I love this stuff. It’s so much fun! There’s a link to buy this below but you could also use a transfer pencil if you had one to hand. That will wash away too. Anything that doesn’t leave a mark on the finished article.

template for lettering

I then placed the Solvy with the wording on top of the plain linen and then sandwiched them between the embroidery hoops, tightening enough so there is no movement but not too much to stretch the fabric. It just helps to achieve more even stitches and less puckers.

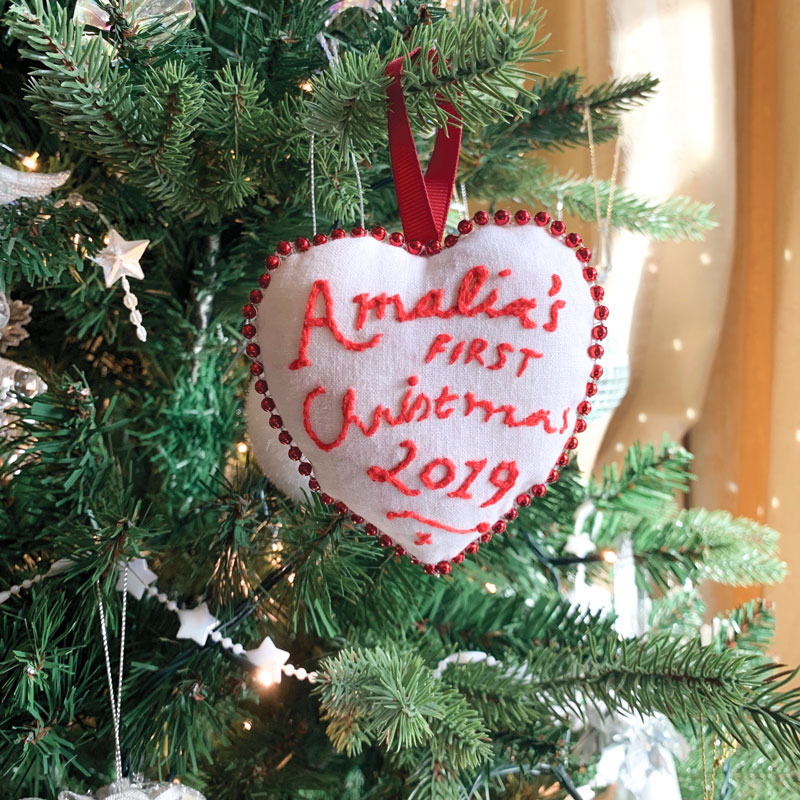
Mostly I used a chainstitch and stem stitches in places using 3 strands of red embroidery thread. Gold metalic embroidery thread for the stars on Blake’s one.

Front of Amalias tree decoration

Once the design was finished I washed away the stabiliser with cold water, patted dry with a tea-towel and finished the drying process by ironing.

My paper template then served as a pattern piece to centralise the design and cut the shape around the lettering allowing an extra quarter of an inch for seam allowance. I cut a matching piece for the reverse.

With right sides together I seamed all round, leaving a small gap for turning and clipped the seams for smoother curves.

Polyester toy filling was pushed into the seams before I steamed them for extra smoothness! One they were filled I slip-stitched the opening closed.

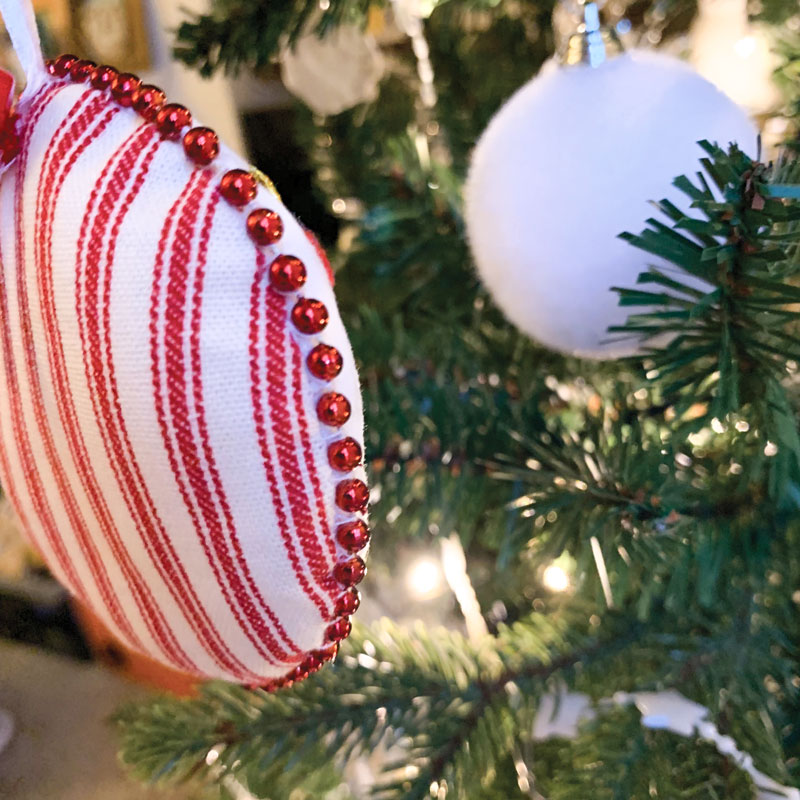
I found the red metallic beaded trim at Sarah’s Haberdashery stall in Shepherds Bush Market and I oversewed it along the seam line.

detail of the red metallic beading

Finally I used a length of ribbon for the loop and sewed it in position on the reverse, adding a little vintage button in both instances to cover the stitches.

I savoured every little wonky stitch of this project, as I reminisced at how much has happened this year. I’m so very proud of my children, and what they have become. And my heart is literally bursting with love for my ever increasing family (bffs included) and what they mean to me. I do hope my little treasures will cherish these as they grow older nearly as much as I’ve loved making them!

Reverse of circular decoration

So how did you all fare with making gifts this year? Or did you get caught up in the rat race like me? Let me know how you wrestle with your conscience and please give me tips how I can be more productive next year.

In the meantime I would like to thank each and every one of you for sticking with my sporadic posts. It means a lot to still have you reading them and I’m forever grateful for all your lovely comments and continuing support.

Wishing you all the very loveliest of Christmases and the bestest of New Years ever. See you on the other side!

Love Janene xxx

Materials mentioned (affiliate links):

Tools mentioned (affiliate links):

Vintage western shirt #3… of the linen kind


70s shirt Butterick 5007

It’s been a while since I made Mr Ooobop something. Quite shameful really for all the lovely photos he takes for me. So I’m delighted to have finally finished his latest shirt. And he loves it, thankfully!

The hardest bit for me was being back behind the camera again. Well out of practice I was. But luckily Dan has more patience than me and was very obliging as I got him to mill around on Barnes common!

This is the third version I’ve made from the same pattern – Butterick 5007 – A 70s men’s western shirt.  The kind of shirt you have to imagine beyond the pattern pic:

butterick 5007 pattern cover

Mr O is quite good at that. Non-conformist to a T for Taurus he is, and believes very firmly that if it ain’t broke, don’t fix it. So all that needed to be altered this time was the choice of fabric. The flowery fabric used in the last shirt I made him was gorgeous but faded so quickly in the wash. Such a shame. So he chose this gorgeous black linen with embroidered details.

butterick 5007 shirt

When we came to buy the fabric. I didn’t think I would have a problem with pattern matching because the little embroidered motifs were quite sparse but that’s where I massively slipped up. Didn’t really consider placement, did I…doh!

Placement isn’t really that difficult if you take time and consider each piece and where it’s going to sit with the adjoining pieces, of course, but when you’ve purchased only just enough fabric for the job and it was end of roll, it creates a problem or ten.

You can move the pieces around to work as much as you like but sometimes that ain’t very economical and you end up short of material for all the pieces. Luckily enough I had some spare plain black linen floating around because what was left didn’t leave suitable areas for the cuffs, collar stands and one of the pockets. I also used some of the plain stuff for the underside of the pocket flaps.

butterick 5007 mens shirt

It’s a close-fitting shirt, which required a bit of fitting but that was done on the first version, which incidentally has disappeared from my blog but here’s a pic of it. I just love the vintage Laura Ashley curtain fabric I rescued here. The beard, not so much!

B5007 with double bass

In all cases, the pointed collar is large. He likes it that way. But I did include a stiffer facing this time so it is even more exaggerated!

The back and front yokes are cut on the bias. Fine for the back but I did some serious head-scratching on the placement decisions for the front yokes. In my head I wanted the design flipped and symmetrical. Why my brain couldn’t let it lie I have no idea!

70s shirt back yoke

70s shirt front yokes

I love how the above picture shows the texture of the linen. It is one of my favourite fabrics to work with. And I’m told it feels great and is dead comfy to wear too! Also shows up some of the painstaking topstitching. I had clearly forgotten just how long this takes. It can’t be rushed. And I couldn’t do it at night-time. Sewing black on black with stupid crap low energy ethical lightbulbs is not good for anyone’s health. So I’m glad I waited for weekend daylight hours to get a neat job.

You can’t see from these photos, and you probably wouldn’t have noticed in real-life and close up either, but I interfaced the cuffs and button band in a white fusible woven interfacing. French stuff. Great quality in fact. But when I cut the button holes it was a little irritating to see the white edges. So I got my Sharpie out and coloured them in… shhhh!

The buttons aren’t an exact match for the blue in the embroidery which bugs a bit but I’m keeping eyes peeled for a closer colour. They can always be replaced at a later date. But I so wish I’d put the buttons on the other side of the cuff. Mr O doesn’t often do his cuffs up so you don’t get to see them side on!

70s shirt shaped hemline

He also doesn’t like to tuck a shirt in much. And so it’s great that the shaped hemline gets a showcase. I used a bias tape to finish the edge because I forgot to lengthen it again I much prefer how it looks.

B5007 in black linen

It was really lovely to catch an hour or so of the sunshine in Barnes, today and especially lovely to spend a little time with this fella. We’ve been like passing ships lately. And he’s off again now to do a gig in Kent! So what’s a girl to do? Crack open a bottle and crank up the sewing machine I guess! Tough life on a Sunday afternoon, hey!

70s western shirt for men

Happy sewing, everyone!


ooobop review: Burda Style June 2015

burdastyle june 2015 cover

The skies may be grey and the sun may not be out but the June 2015 issue of Burda Style magazine most certainly is. And that’s enough to brighten my day!

There’s all sorts of summer fun going on this month. Opening with a cool, light and breezy dress (A). I’m not so sure I can pull off as much elegance as the model wearing it, but with a careful fabric choice, perhaps. I’m intrigued by the wide collar top (E). Moreso that it’s linen. I love linen.

Burda june 2015 section 1

Dress (G) looks like a comfy number. I don’t do comfy as a rule but if I can get over that fabric choice I think a plain colour jersey would make more of that gathered front detail.

The floral dress (B) is for teens and definitely not for my pear-shaped bod but I’d quite like a lace dress like (B). Burda suggests adhesive bra pads to avoid a bra strap. No big pants allowed here either!

Once again I’m having to get past the crazy print on top (C) to envisage a slightly translucent white or black lightweight cotton fabric. The skirt looks fun and easy though.

Great to see some teen designs in this issue. Almost always the kid stuff is for the little ‘uns. Just how cool is that Sergeant Pepper jacket (H)? I so wish my daughter would let me make that for her. She’s more likely to go for the parka though.

I’m so tempted by the jumpsuit (D), even though I haven’t worn a pair of trousers in years. Sold by the midriff. I do like a midriff! I might have to do something about the halter pieces though. Looks like a lot of fabric going on there.

I do like the seamlines on dress (F). Bit difficult to see here but they are panelled seams in corset-style. But I like dress (J), more. The front rouching and the neckline has a certain Asian chic about it. It’s made of jersey, would you belive it? So no zipper going on here!

The Happy Hour section takes us on a night out with lots of black and gold going on.

Burdastyle June 2015 section 2

I love the contradiction of a lace bomber jacket (K)! The interesting front seams are highlighted with satin binding and it has pockets, of course.

Top (Q) looks very elegant tucked in here but the contrast definition with the skirt doesn’t work for me. Especially with all that front drapey pocket business. Too much volly where I really don’t need it!

Ah see… I much prefer this dress (L) in one colour. Though I don’t think the shot does it as much justice. Looks a bit lop-sided here with one shoulder shorter than the other. It is an ‘easy’ make so it might be worth a try.

Cute little tube dress (P) here for all you daring ladies. And this certainly would be an easy one to put together for an emergency going out dress… just two side seams needed in that metallic jersey print.

I love how Burda fills the void in my lack of fabric knowledge. This dress (O) is made of metallic twill! Never have I come across such stuff.

And I love the corsetted detail on dress (N). One would totally have to pay attention to perfect fit and stitching on this one though. That satin highlights every glitch.

Lace is a great choice for this elegant top (R) A shortened version of dress (L). The armholes and neckline are beautifully bound with organza. Not sure why the hem would stay raw though.

And I maintain my love for the jumpsuit (M). Especially if I could get my hands on some gold metallic, viscose linen weave! Super stylish!

Next up is the Sunshine section, kicked off with this pretty shirt dress (S). A Peter Pan collar is enough of a change to give it a cute edge but I think I’d ditch the lower flounce. Not sure why that section appears to be cut on the bias too. Bit jarring with those stripes.

Burdastyle June 2015 section 3

Love the paper bag shorts (T)! Not sure if I could carry them off with a detailed top section though. It would have to be a plain T or similar.

Really like the yellow ensemble (Y). Especially now I can see more detail on that skirt. The buttons could contrast and be a lovely feature. The collar feature adds a little vintage-style twist. Gorgeously cool for picnic days in the park.

Love the shirt dress (W) cropped to a shirt too.

However I’m not too impressed with the colour section. Mostly because I don’t like the chosen colour palette. All too much for little old me, I’m afraid. And I’m finding it hard to see past the colours to focus on the designs. Short of my latest make, I tend to have black or red as a base colour and work up from that. My pick would be the Kaleidoscope tube dress (6). In black, probably. Call me unadventurous!

burdastyle june 2015 section 4

Plus Fashion goes all out adventurous on us though . . . on safari…with some mad sleeves!

Burda style june 2015 plus section

You can’t really see the detail in dress (9). The volume of fabric is concealed by the detail of the print but you can hopefully pick out the rouched seams all the way down to the wrist in dress (12). My favourite piece in this section of the mag is the ankle length lace coat. Or ‘chasuble’ as Burda calls it. Learn something new every day!

So whaddyafink? Have you got yours yet? Have you already whipped something up? Do tell x


Another hand made gift for Christmas

tilda rabbit in christmas tree

I’ve been toying with the idea of making everyone a hand made Christmas present, like forever! And I never get it together in time. But this year I made two!: The secret santa gold pleather bag for Emmie, and now this Linen Tilda rabbit for a special baby boy who’s name I can’t declare lest I give the surprise away!

I forgot how much fun these are to make. I made the last two so far back, the post has sadly gone missing. But here’s a picture of them at least:

Tilda rabbits

And here’s a link to the chicken I made from the same book which is called Crafting Springtime Gifts.

Crafting Springtime Gifts

I’d dutifully traced the patterns on to some cereal box card so I simply had to draw round the pieces on the linen, sew along the lines and then cut out with a small seam allowance.

I got a nice plump bag of polyester toy stuffing from the market. It’s amazing how much you need for just one wee bunnie!

The eyes are drawn on with a laundry marker which is always a scary thing to do as it’s the last thing you do once its all sewn up. I was pre-planning a bunnie with shades just in case my hand shook to much and screwed up the eyes!

The nose is embroidered. I didn’t have any pink embroidery thread so I sewed with 4 regular pink threads and achieved the same. Little bit on the wonk but all part of the handmade charm!

tilda rabbit head shot

This time round I used pink satin for the inner ears. What child doesn’t like to feel a bit of ‘silky’ when they are nodding off to sleep?!

I also left the buttons off and replaced with some embroidered crosses on the straps instead. Don’t want to be the cause of a terrible choking incident!

tilda rabbit profile

I have visions of this little fella being dragged around by one arm or leg in true old fashioned childlike stylee. And ending up pale and threadbare in his later years. That’s if baby approves and doesn’t banish him to the toy box forever!

I love sewing with linen and I love having the chance to employ a decorative stitch! Goodness knows why I only reserve it for toys though!

tilda rabbit decorative stitch

In other news. I’m thinking of making a new hat. Not sure I’ll get that done before Christmas though. That would be one massive miracle!

And that just leaves me to say, thank you so much for your continuing support and wonderful comments. Have a fabulous Christmas one and all, wishing you lots of love and good health for the coming year. xxx


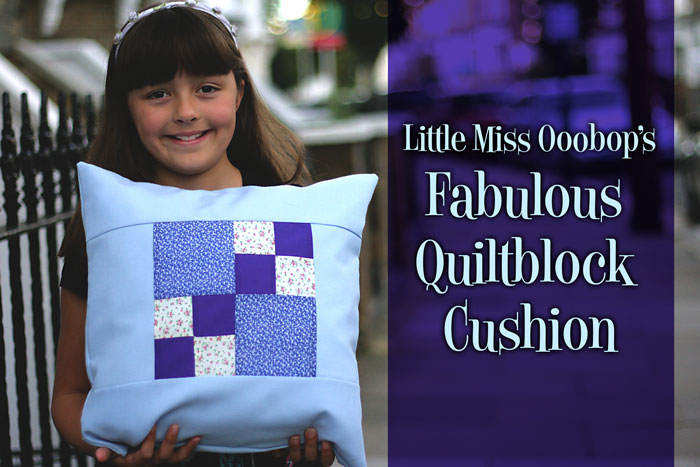
Little Miss Ooobop’s Fabulous Quiltblock Cushion

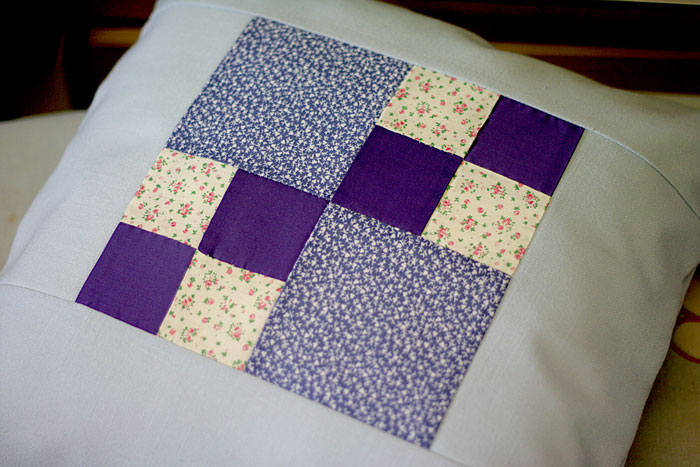
quiltblock cushion cover

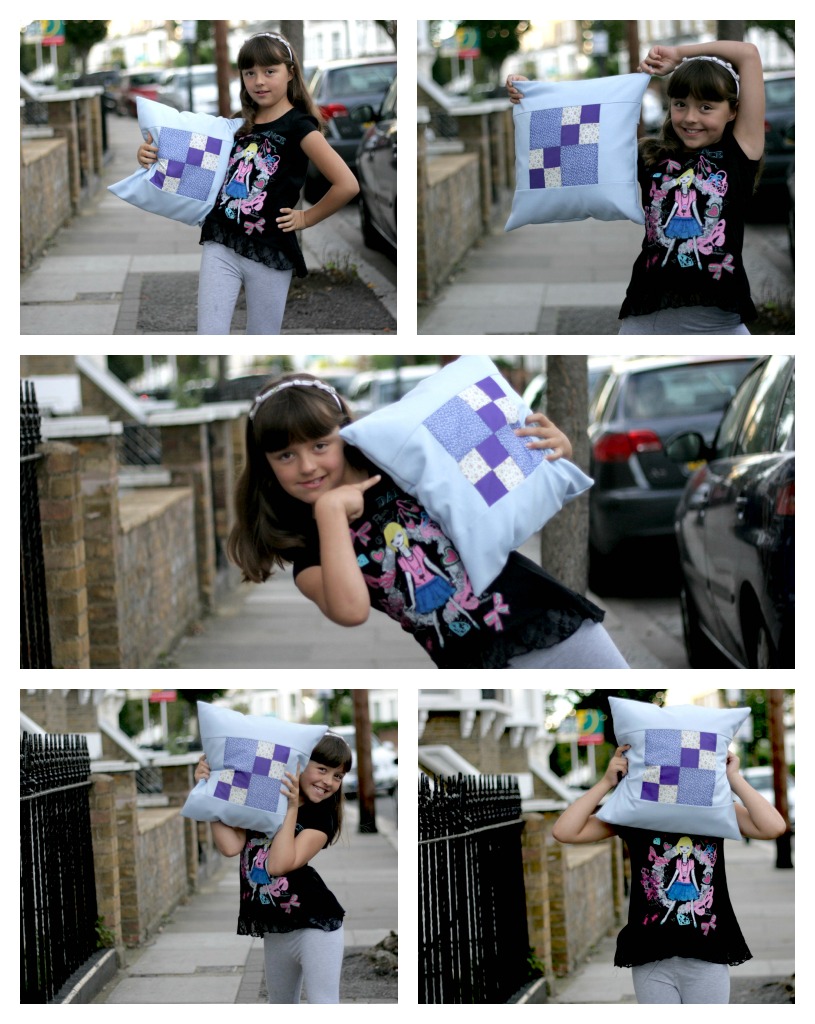
Let it not be said that my littlest daughter doesn’t finish anything! I am so proud of her and I think you can tell by the photos that she is pretty damned pleased with herself too! And most amazingly, all the photos were bribe-free! No hard cash, no ice creams…. nuffink!

quiltblock cushion coverShe made the central quilt block – a double four patch – back in January. She sewed each little square by hand and made such a neat job of it. I can honestly say I wouldn’t have done any better myself!

So this weekend, when she asked if she could turn the block into a cushion cover I dutifully abandoned any sewing plans of my own, made a dash to the market for a cushion pad, and did some maths to work out the remaining blocks needed for the front panel and two for the envelope back pieces. Actually, the maths, was probably the most time consuming part of this project!

quiltblock cushion cover

I had the powder blue linen in stash so this counts as a minor stash bust too…yay!

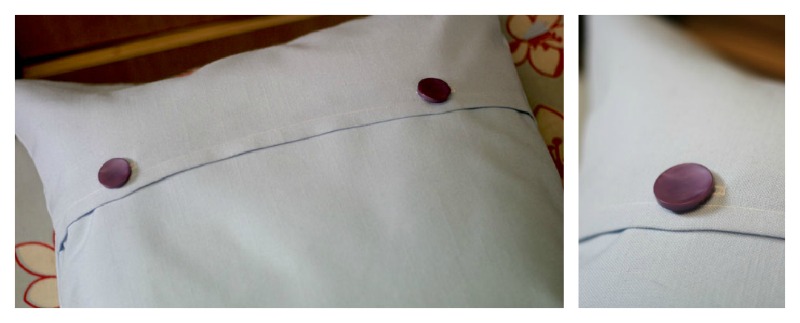
And Little Miss Ooobop! cleverly rooted through the button box to seek out these lovely purple buttons for the back.

cushion cover envelope backShe loved being the ‘master of the machine’! And as soon as she’d finished the cover she was practicing the different stitches for her next project!

It is so lovely to share a child’s enthusiasm. Especially when it is focussed on something so basic and traditional. I know I can’t push it too far. I so don’t want to put her off. She has to come to me with her own desire for crafting but I might just happen to plant a little creative seed of thought every now and then!

Is it a bird . . . ?

Yup!

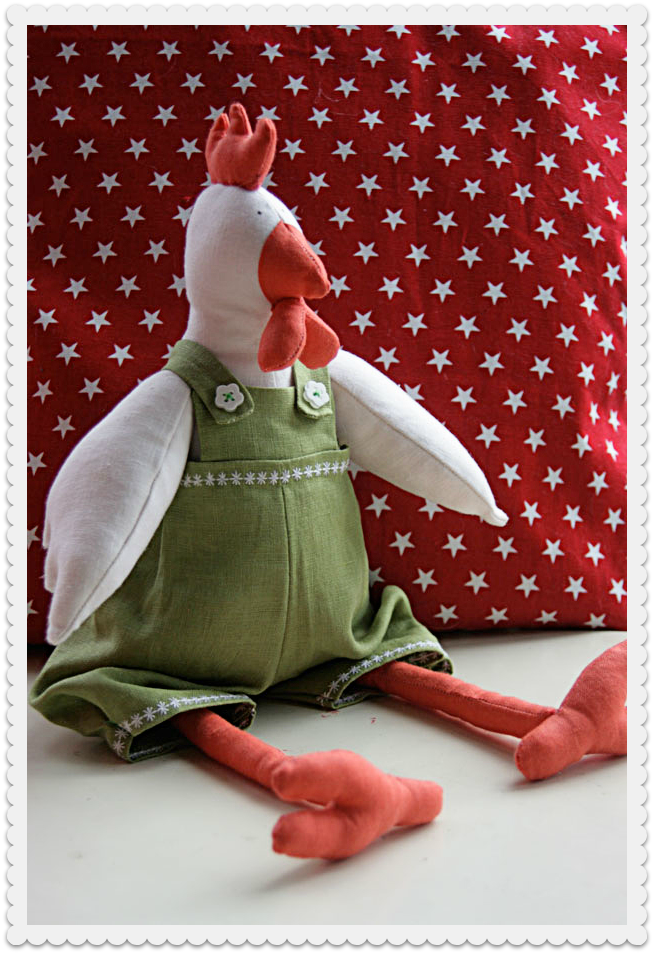
tilda hen toy in linen

Meet Elsie the chicken,  or ‘chook’ as my friend might say! Elsie – well, not Elise in particular – but a chicken toy of sorts was going to be a gift for my friend Elina way back in June when we were invited to her summer garden party.

We were so looking forward to going and spending a lovely afternoon in Oxford at a quintessential English garden party. I even had plans on a rose-print tea dress, but the date was usurped by my daughter’s own birthday celebrations and so, in the end, we missed out on what looked to be such a gorgeous event.

Whilst flicking through the photos of the party on Facebook, I clocked a great picture of Elsie the (real) chicken in Elina’s garden. Fabulous reference! Just because we didn’t go, didn’t mean I couldn’t still send her a chicken!

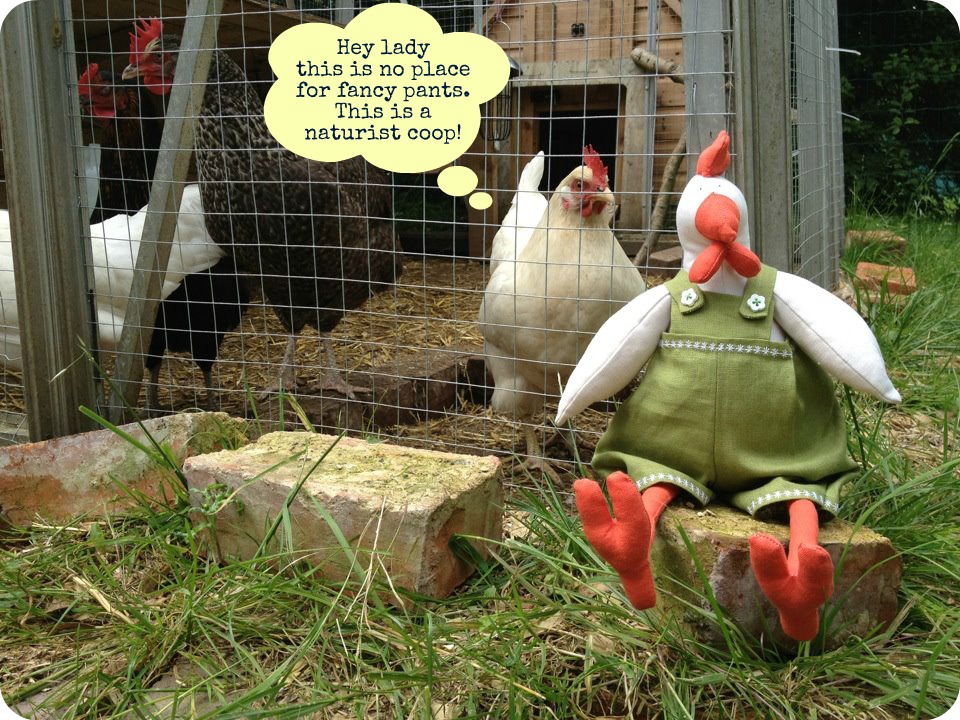
tilda linen hen

And so armed with my copy of Tilda’s Crafting Springtime Gifts, (The self same book that inspired my Tilda bunnies!) a small pile of linen and a big bag of stuffing, I set to work.

A fiddly little thing to put together but nonetheless hugely rewarding. I love that you sew around the shapes before cutting them out, with a small seam allowance. Makes for much more accuracy. There was still lots of hand sewing, however, which, once I’d relaxed about it and told myself I had all the time in the world,  was actually enjoyable. And in case I haven’t mentioned it in a while…. I love linen! I love the way it moulds and feels and creates something that feels instantly nostalgic!

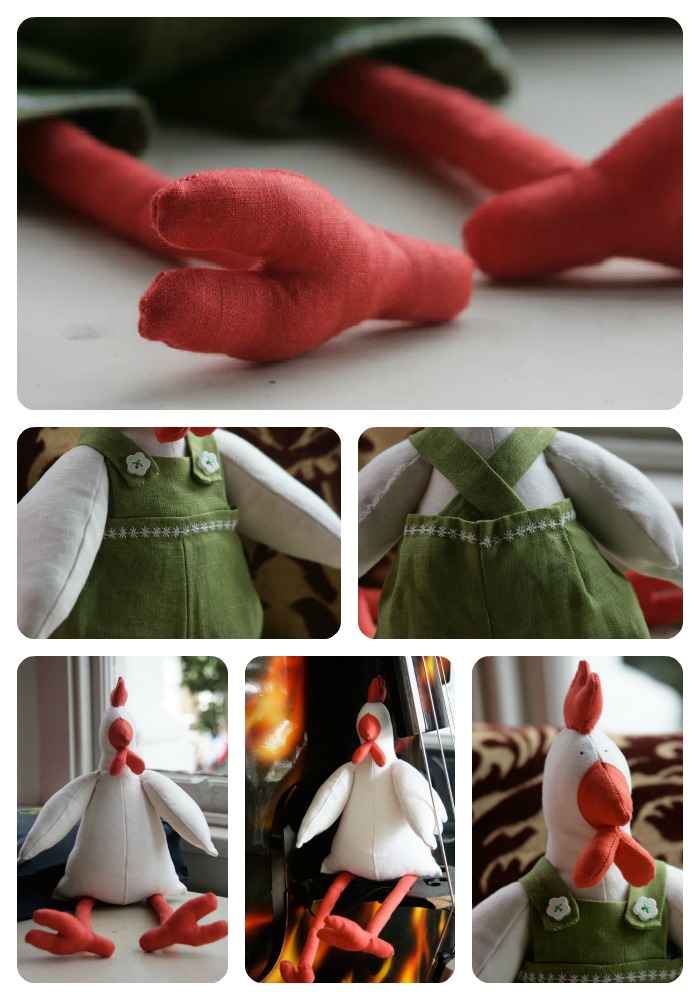
Collage of tilda hen

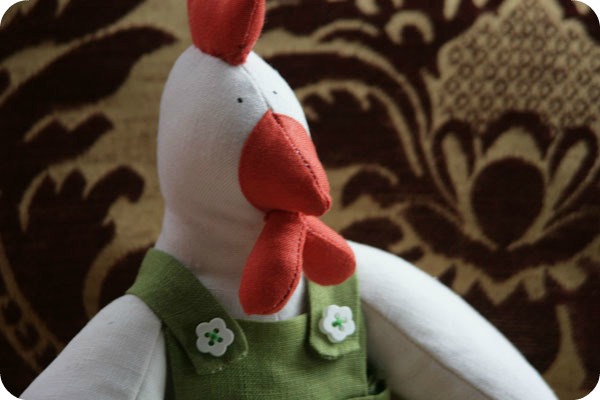
I’m so glad that real Elsie is white because it’s so difficult finding a light brown linen! She started to look like a duck at one point but of course, her ‘tiara’ and ‘wobbly bits’ under the chin are all she needs to confirm her identity, hey?! I should have used red really, for her contrasting details but the orange linen looked far too good to ignore… artistic license and all that!

I do hope that Elina will like her. I hope too that Elsie arrives before she notices this post too! I’m just far too impatient these days!