Why on earth would I want to go to the bother of drafting a skirt block when I already posess a pattern collection of monster proportions? Good question.
Well apart from the fact that I am the world’s greatest procrastinator, it’s mostly because I plainly just don’t like not knowing about stuff! Well, that plus the fact that I wanted to create a perfectly fitted skirt! I have managed it once or twice before, by adjusting patterns, but only by the power of ‘flook’ and not by any knowledgable means.
Making a fitted skirt pattern is something I have been wanting to do for such a long time. I looked into taking a course but was really shocked by the prices. I guess I set my hopes high starting with the London College of Fashion! Getting a course to fit in nicely with work and children is a bit tricky too. So I set out on a mission to self-teach! It has taken me a long time to get my head round it (the old grey matter aint what it used to be!)… and get round to actually doing it.
The truth is, I am quite impatient and the idea of some mountainous mathematical process leading up to the joyful part of sewing wasn’t very enticing to say the least. But if I am ever to realise some of these far fetched designs I carry round in my head then I have to start learning to draft a properly fitted skirt block at the very least!
To be honest. Now that I have sussed it, it seems remarkably easy!
The hardest part of this process was being totally honest about my own body measurements! I’m forever thinking I’m smaller than I am or believing that if I make anything at least a half a size smaller I will loose some pounds to fit into it properly! But I had to be true to myself this time if I was going to go to the effort of making something to properly fit.
The following instructions have been compiled from various sources and put together here in a fashion that is clearer to me. I can’t claim this as the best way forward for everyone. So if you are going to use these instructions and make a skirt from the pattern, please make a toile first! I needed, in any case to document the instructions as a note to self because even after my first attempt, I forgot some of the process! This method really did work for me and it would make me such a happy bunny if they work for you too, so be sure to let me know!
All measurements are in inches (sorry). I use millimetres in all that I do at work but I can’t break away from imperial measurements for sewing and cooking!
Drafting the basic skirt block
First make a note of your measurements.
It is easier if someone does it for you. Less chance of cheating!
Make sure the tape measure is comfortable and not tight.
You will need 3 measurements:
and the following materials:
- A large piece of paper, that is just over half of your hip measurement by just over how long you want your skirt to be. (Tape pieces together if necessary)
- A long ruler
- A pencil
- A right angled triangle/set square.
NB: this pattern allows for 1 inch of ease which can be altered to suit.
(Click on the images to enlarge)
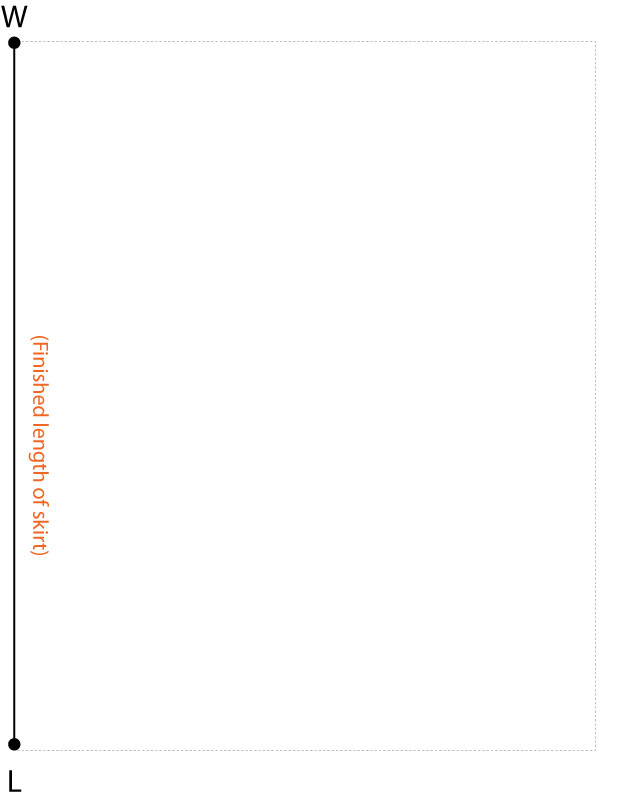
STEP 1:
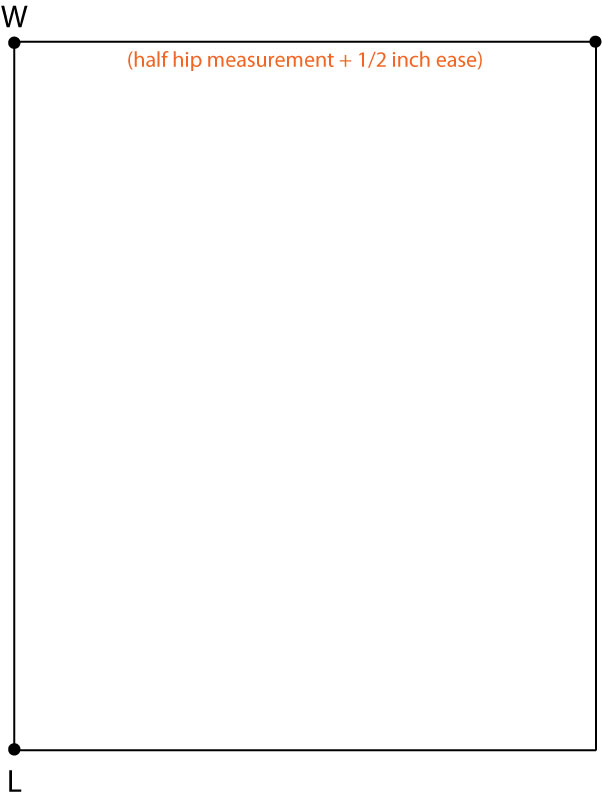
On the left hand side, draw a vertical line the length you would like your skirt to be.
Mark the top point as W. (W to L = length of skirt)
STEP 2:
Draw a line at right angles to point W, to the length of half your hip measurement + 1/2 inch ease.
Complete the rectangle.
STEP 3:
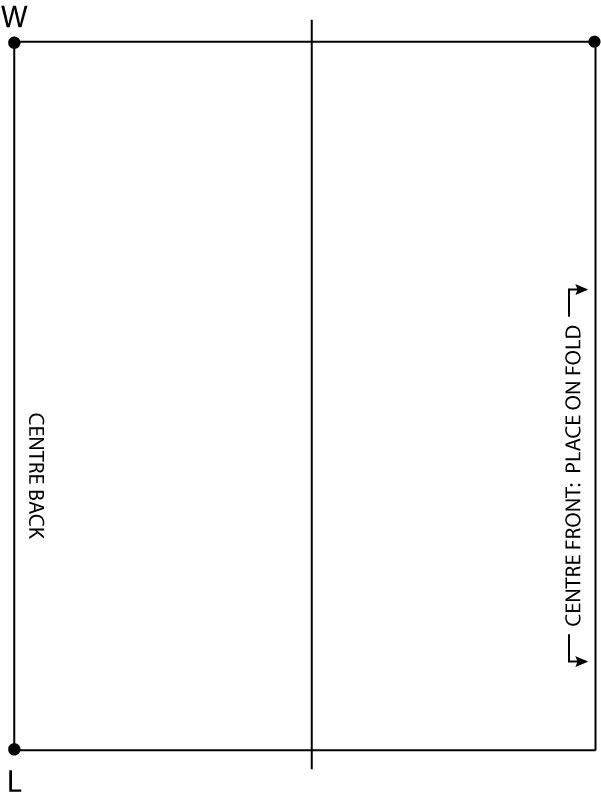
Draw a vertical line between the two outside edges, at a distance that measures 1/4 hip measurement plus 1/2 inch ease, from the centre back seam. This will separate the front from the back pieces.
Mark the left vertical line as centre back and the right vertical line as centre front. Draw arrows on centre front to remind you to position centre front on fold.
STEP 4:
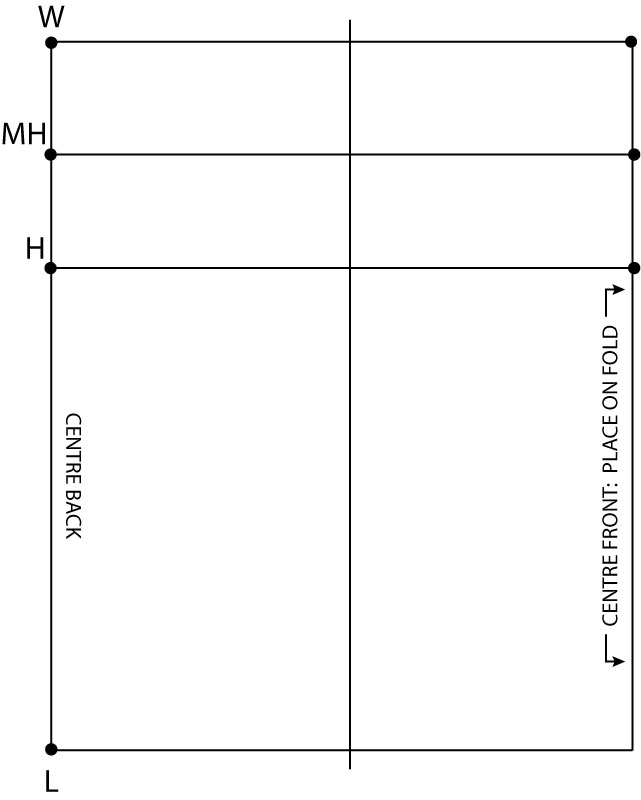
Measure 8 inches down from the W point. Mark this new point with H. Draw in the horizontal Hip Line.
Measure half way between the Waist Line and the Hip Line and draw a line across. This is the Middle Hip Line. Mark it MH.
STEP 5:
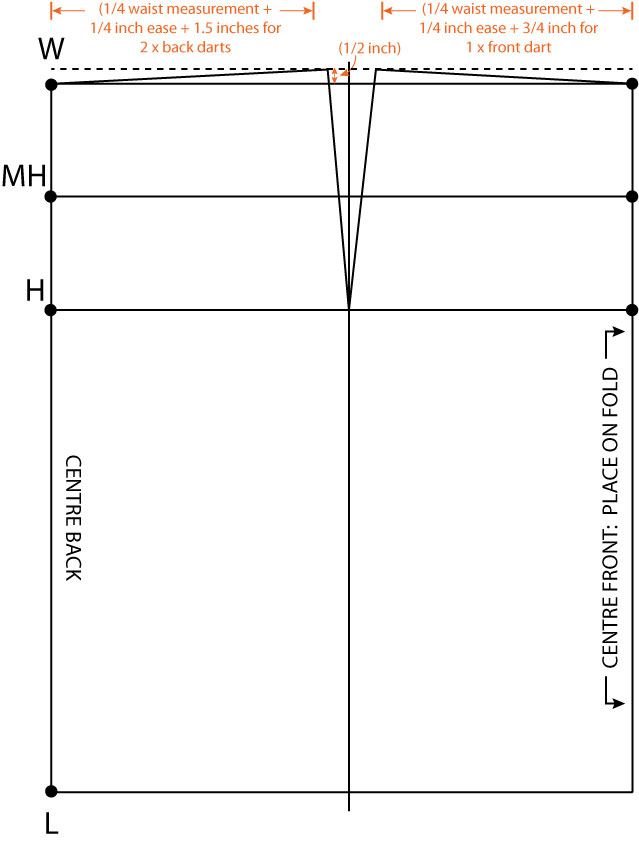
Draw a line from point W that rises to half an inch above the Waist Line.
Measure across from point W, diagonally up to the new guide line, the distance of 1/4 waist measurement + 1/4 inch ease + 1.5 inches for 2 back darts. From that end point, draw a line down to the point where the Hip Line meets the centreline. This creates the hip curve and a shape to the waist.
Repeat the process for the front pattern piece to create the hip curve for the front side. The diagonal waist line for the front piece will be 1/4 waist measurement + 1/4 inch ease + 3/4 inch for 1 front dart.
You can use a french curve or freehand to give a smoother curve at the end.
STEP 6:
To create the front dart: find the centre point of the wast line on the front piece and draw a vertical line, from the Waist Line to just before the Middle Hip Line. This is the central fold of your 3/4 inch wide dart. Draw in the dart as shown below.
To create the back darts: draw 2 vertical lines equidistant across the Waist Line. The dart nearest the centre back line extends to an inch and a quarter down past the Middle Hip Line. The other back dart, nearest the side seam, extends just to the Middle Hip Line. Draw in the two darts, each 3/4 inch wide at the top, as shown in the diagram below.
NB: please note that although these darts appear to be standard measurements, you may very well have to alter them to suit your own body shape. Making a toile will highlight if this is necessary for you or not.
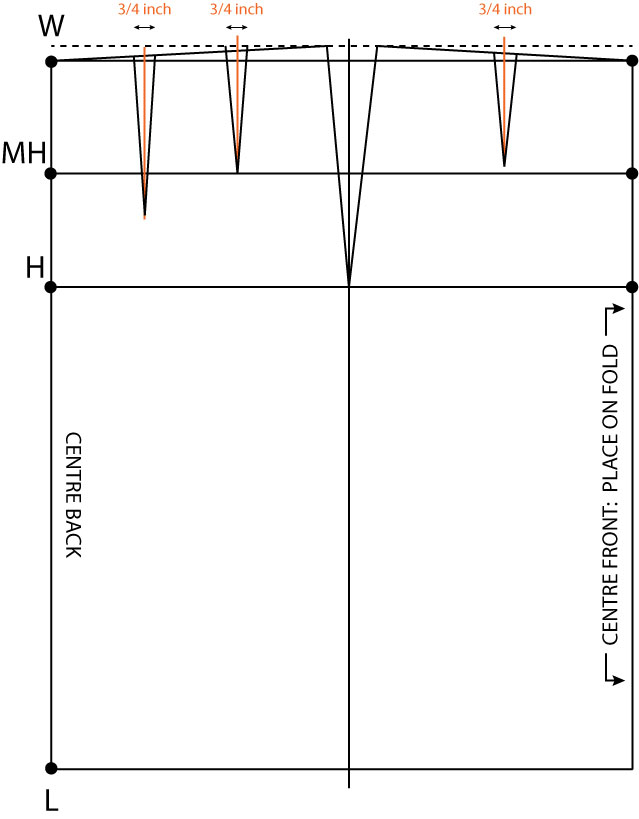
Et voila! The tricksy bit is done!
All that remains is to smooth those curves, cut the front and back pieces apart and add seam allowance. You should be familiar with this process if you regularly use Burda Style patterns from the magazine! 5/8 inch is usual. A good hem allowance is between 1.5 and 2 inches.
Remember not to add seam allowance to the centre front, but do add it to the centre back.
To create the facing, I traced from the Middle Hip Line up to the Waist Line on both pieces, cut out and folded the paper on the dart lines to create the curve at the waist. But you could alternatively make a waist band, whereby a facing piece is not necessary.
I do hope this is of help and that I didn’t make it too confusing. Do shout if I’ve missed anything or if there is anything you don’t understand.
First skirt from the self-drafted pattern

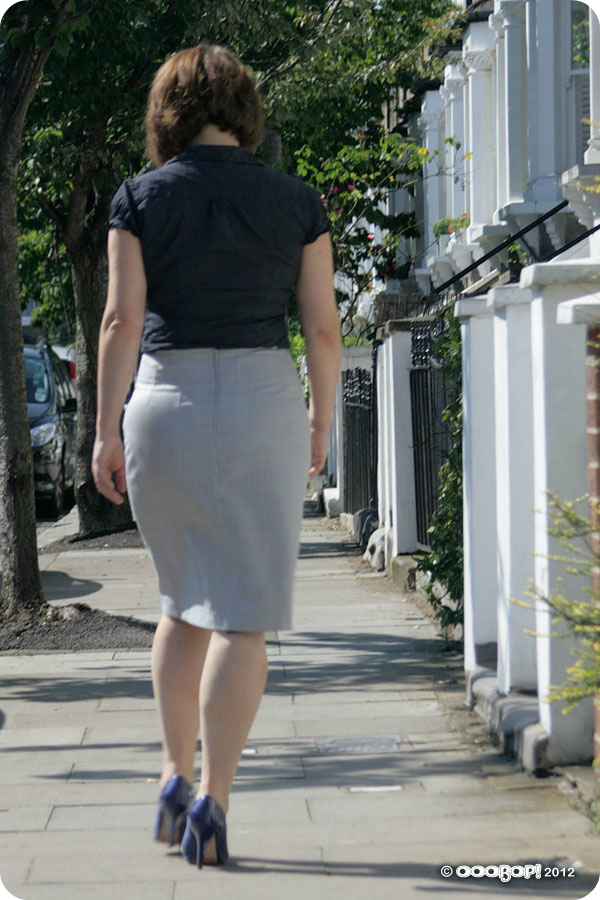
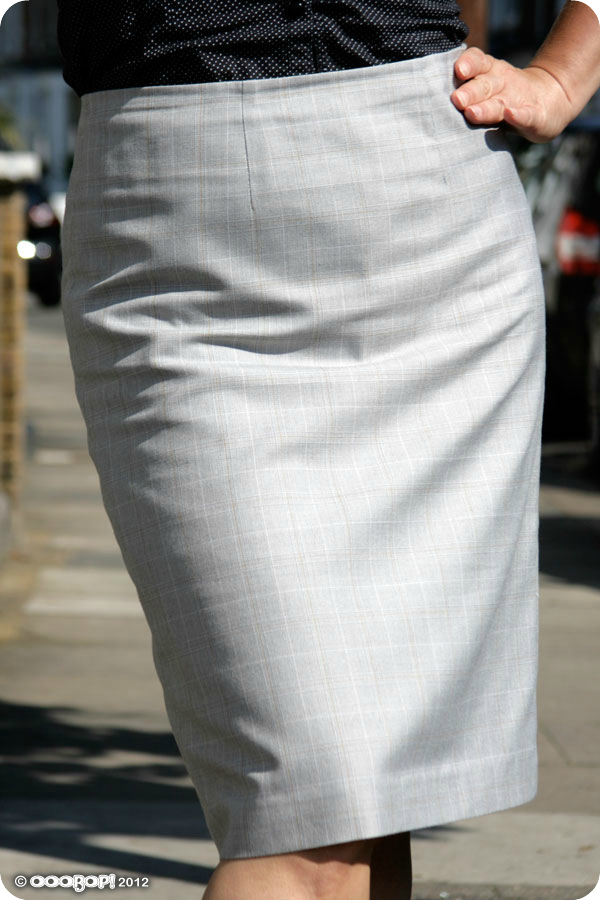
Probably the most boring skirt I have ever made, re. choice of fabric, lack of features… not even a walking slit, standard length etc. BUT, by the same token, probably the biggest learning curve so far!
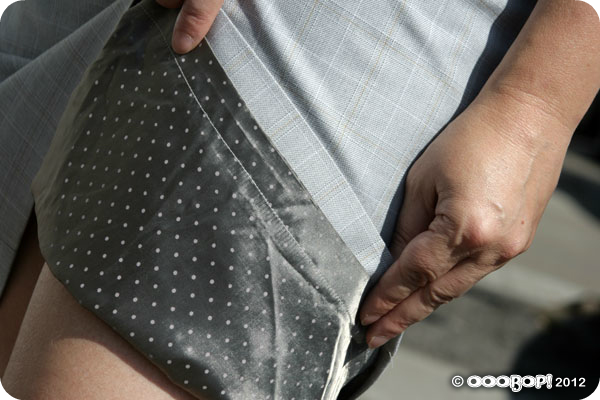
This is a very wearable toile. I’m so glad I did this. Pencil skirts are a great go-to for work. Especially in neutral colours. This is a very lightweight, cheap suiting fabric and I never thought it would be wearable but with the addition of a lining it gained a bit more structure. To create the lining pieces, I cut the same skirt pieces from below the line of the facing and added a couple of inches across the width of front and back for ease, which was incorporated as a pleat along the top seam line. Incidentally the two-tone polka dot lining is far more interesting than the self fabric! I found 3 metres of it in a Charity shop recently for £1!
I inserted a lapped zipper but I still need a little practice in that department! One great tip I picked up along the way, however was to take the loose thread from the baseline stitching of the zip, thread a needle and take the thread to the inside of the garment. You can then either knot the ends together with the bobbin thread or, in the case where the bobbin thread is too short ( I have an automatic cutter and this often happens) you can just do a couple of reinforcement stitches and snip. It all helps to create a flawless finish on the outside.
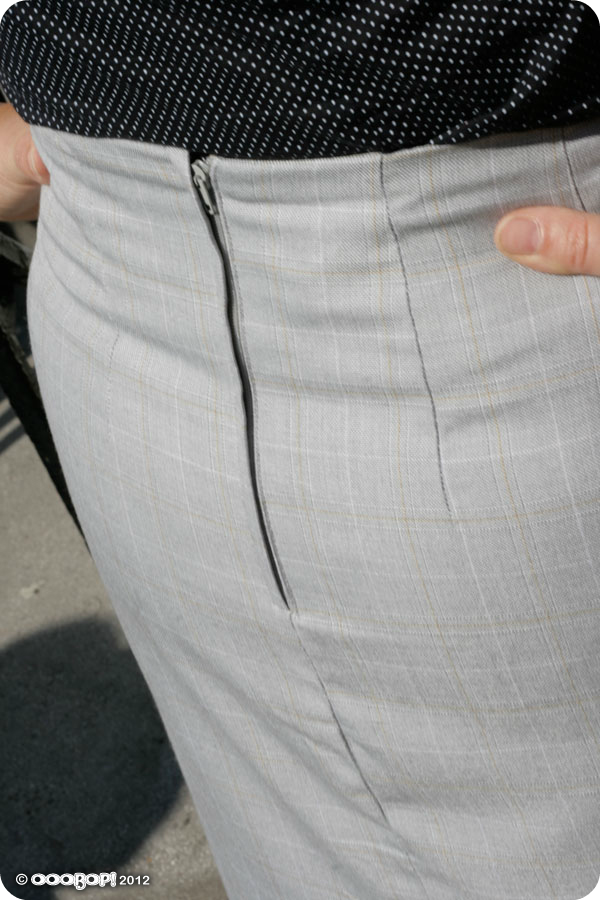
I love the idea that I am on my way to making custom fitted garments. Im sure it will be a very rewarding journey.
I am going to experiment a bit more with variations on this block before I steam into the creation of a bodice block. I like the idea of changing the darts to princess seams, perhaps with piped seams, making it more of a wiggle skirt with a vent, and making a high-waisted version too. Oh hours in the day… where art thou?!
