Vintage Laura Ashley Romper

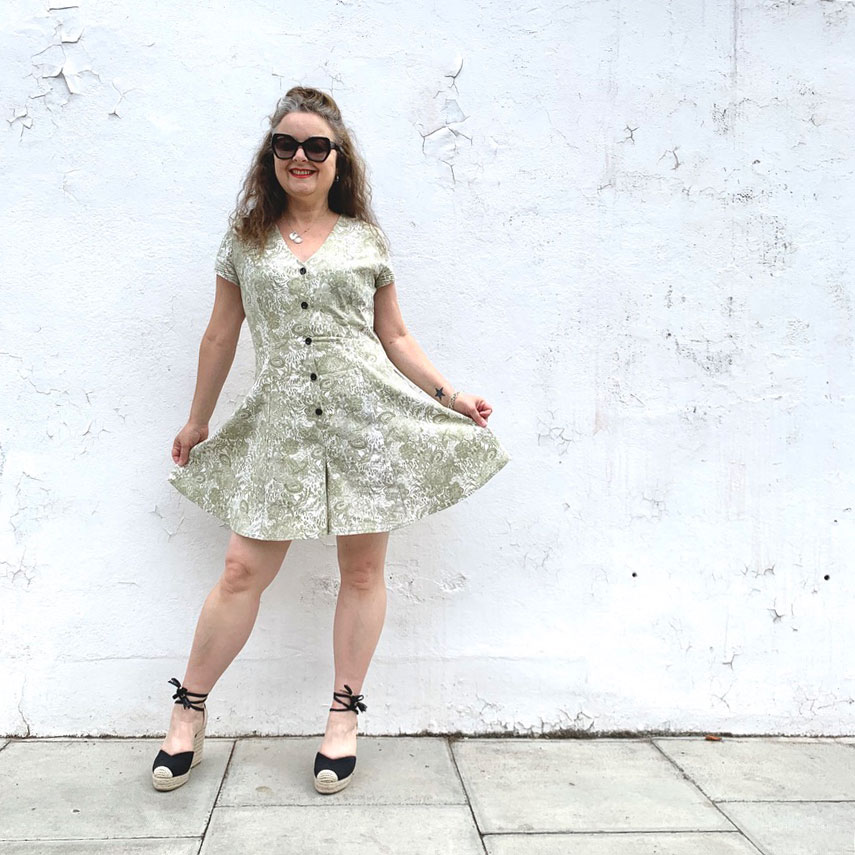
Shelby Romper Suit by ooobop against a white wall

Last weekend was a Godsend. Seriously. As a sewist, who wouldn’t relish permission to sew your undivided heart out for two full days whilst tuned in to all manor of inspirational videos and chat from the best kind of community ever. I’m talking the #SewingWeekender hosted by The Foldline and English Girl at Home, obviously. The event that sparked so much joy and raised so much money for such great causes.

And hey, I made a new outfit in the process, too!

ooobop shelby romper against white wall

I’m not sure if I can ever stop making True Bias Shelby Rompers now. This is my third and still I’m not done!

This wasn’t the intended fabric though. I had factored in some crinkle cotton linen gauze, but following a prewash, it crinkled to half the size and became all elastic and everything. I set about ironing but got bored after the first 20cms and swapped it up for a really old pair of curtains instead. As you would!

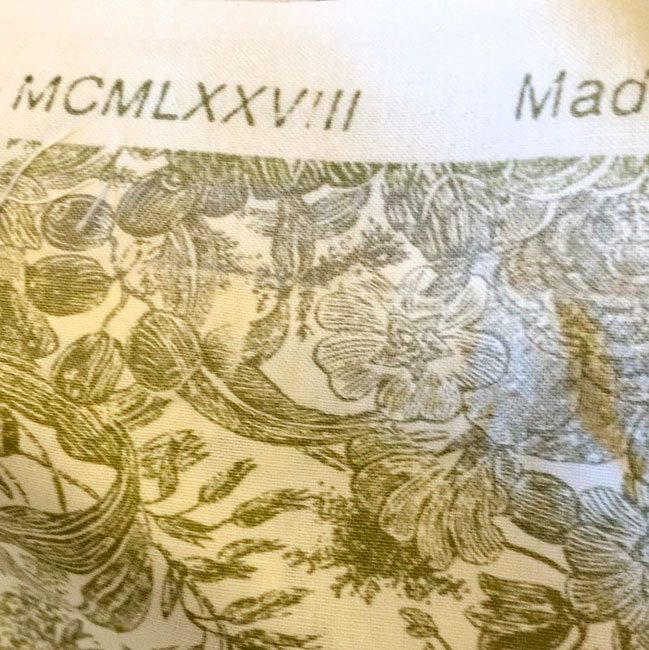
Ordinarily I have a reputation for exaggeration, but in this case I’m not joshing. I bought these Laura Ashley curtains in a charity shop many moons ago. Quite excited by the vintage factor. Had to look up those roman numerals though . . .

MCMLXXVIII

MCMLXXVIII = 1978 for the less Roman among us!

I bought them when I was dead broke. And still argued the West London inflated charity shop price! They served my previous two addresses as actual curtains and have sat wantingly in stash mountain for the last 10 years. So I think you might relate to my happiness at using them to make my third True Bias Shelby Romper suit.

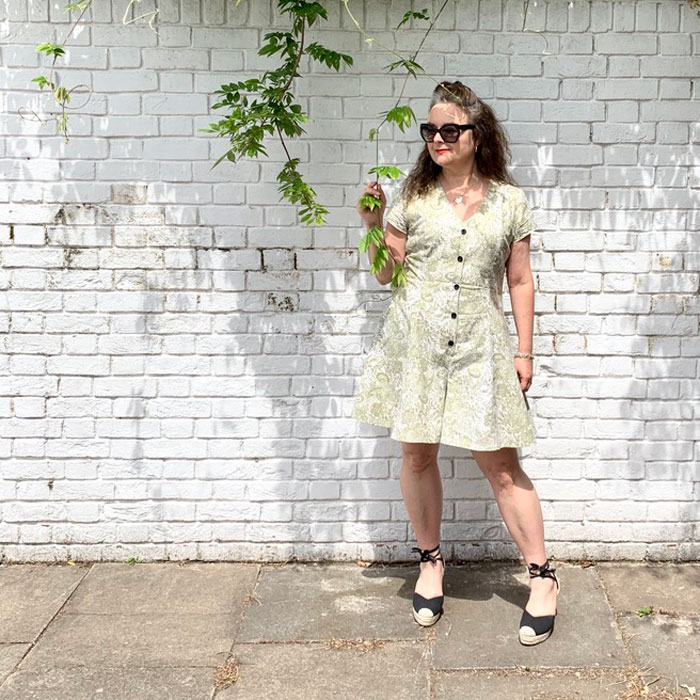
ooobop shelby romper walking

I get it now. Using the same pattern over and over. If it ain’t broke and all that. Such an easy gig when it works straight out of the packet. I made my first ‘trial’ one in a very lightweight (quite see through) star-print viscose. And I love it still. The second, more improved version realised in a tropical print viscose and it’s so interesting to see the difference when it sews up in a fabric with a bit more structure. The silhouette is accentuated even more and feels good against the skin being 100% cotton and all. Feels even better knowing how many lives it’s lived and yet 42 years on its still many more years away from a landfill!

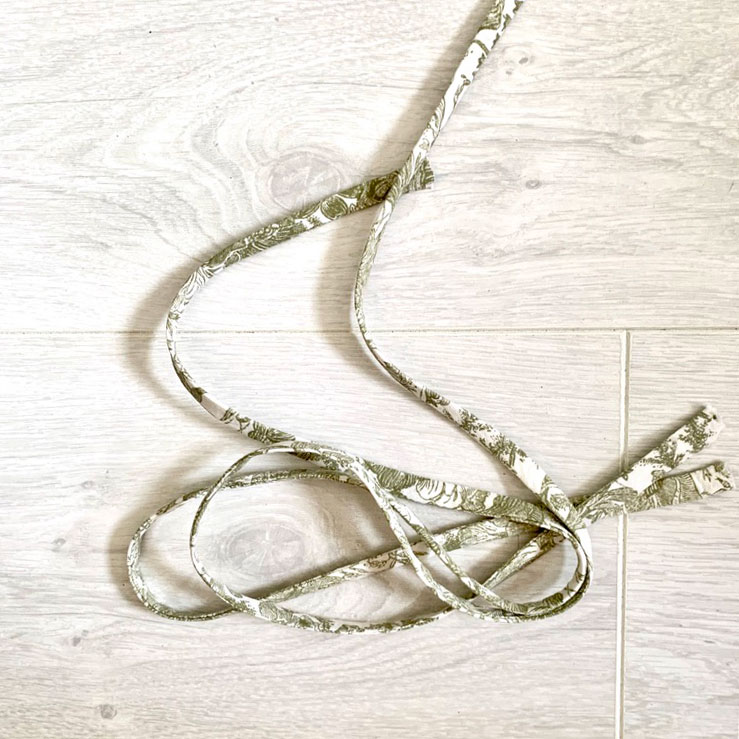
That said, there was a little issue with the tiny back straps. They didn’t turn as easily in curtain fabric. It’s a bit of a toughie compared to viscose. So following a wee tantrum, I re-cut the pieces on the bias – remembering a video tutorial I’d watched about cutting rouleau loops on the bias – and it bloody worked a treat. Thank goodness I had enough fabric left!

ooobop bias straps for shelby romper suit

This isn’t the end of this particular project. I’ve got plans. Mostly to mess things up! You know what I’m like with my colour palette – there’s not a scrap of black going on, save for the buttons. So I’m going to add some paint. Just a bit. And not quite sure where and what. But watch this space!

Thank you Daniel once again, for my lovely photos. Especially when the clouds dictated we should never have strayed further than the garden gate, let alone to the riverside. But I’m jolly glad we did.

ooobop shelby romper hammersmith riverside


Personalised baby bunting banner

Lucas bunting banner

Welcome to the world, baby Lucas – our new gorgeous nephew!

I got a sneak preview of the nursery before he was born so I already knew the colour scheme. And he has cool rock ‘n’ roll parents so skull and crossbones were totally acceptable!

I attached the letters with double-sided bondaweb as I did before on Maddie and Charlie’s bunting but this time, instead of using the appliqué stitch, I used a regular straight stitch, quite close to the edge, to secure the letters in black. Appliqué stitch on my machine is slow and unless its visible – in a slightly or fully contrasting colour – there’s not much need to waste time or thread!

bunting banner stitching

There was a slight contrast issue with the letters against the background fabrics. So I sewed another line of white stitching around the letters to make them stand out more.

Lucas with his mum and dad, live across the waters in the sunnier climes of Florida (not jealous, much!) and so I was delighted to receive this picture of the bunting in situ, not long after posting the parcel.

lucas banner bunting in the nursery

Fancy that. My handiwork travelling all that way to hang in an American nursery! And incidentally, no longer bearing the name ‘bunting’. It’s now called a banner! Bunting in the US is more akin to a baby’s snowsuit. Interesting to compare the search results for ‘bunting’ on Amazon.com v Amazon.co.uk! Learn something new everyday!

Windmill Square quilt block


windmill square quilt block

That bit of holiday between Christmas and New Years day and up until I go back to work, is such a lovely time for me. I don’t like to make too many plans so I can have optimum time for sewing and baking and general pottering – all the things I wish I could be doing when I’m working! This time round I managed to complete two tops. One yet to be photographed and blogged (after the heavens have closed) and one sadly not-up-to-scratch Burda top. That wasn’t an Ablogogie btw! I’ve also just managed to get in a bit of quilt blocking. I’ve been tricked into thinking I have all the time on my hands now, much the same as I did this time last year when I last made this Churn Dash quilt block! My great-great-grandchildren are so going to love this quilt!

This one is block 26, a Windmill Square – a modern take on the Windmill block. The design also features within the Diamond Pinwheel and the Windmill Sails Block. Historically, the pinwheel is believed to be a good luck symbol, it’s movement suggesting the ebb and flow of fortune.

It is assembled from four identical corners (square blocks) with no tricky inset seams involved. And even with a year out of practice, I have to say I pretty much nailed that centre point! *blows trumpet with great gusto*

I sometimes think I’m cheating by having the fabrics pre-chosen but I’m not sure I’d chose a better selection. All the designs have been perfect to date. The only real snag is that the fabric pieces supplied are just enough to cut your templates from and that doesn’t allow for any personal preference with placement. It always seems to work ok though. I loved getting my tiny iron back out of the basket and being able to focus on the small neat seams.

tiny iron for quilting

And I love that this block is seemingly loaded with luck too! Luck that I will willingly and gladly share with you all. Because we could all use it from time to time!

Block Facts:

Name: Windmill Square
History: A modern take on the traditional Windmill or Double Pinwheel block.
Level: Some experience needed to achieve a neat finish
No. of pieces: 16

Progress report:

Block 1: The Double Four Patch
Block 2: The Whirlwind
Block 3: The Sailboat
Block 4: The Shoo-fly
Block 5: The Trafalgar
Block 6: The Windmill
Block 7: The Chequer Square
Block 8: The Diamond Square
Block 9: The Cactus Pot
Block 10: The Sawtooth Star
Block 11: To come!
Block 12: The Windmill Sails block
Block 13: The Basket of Flowers block
Block 14: Susannah
Block 15: Road to Oklhahoma
Block 16: Chequer Star
Block 17: Nelson’s Victory
Block 18: Fair and Square
Block 19: Diamond Pinwheel
Block 20: Whirligig
Block 21: Old Maid’s Puzzle
Block 22: Whirlwind Square
Block 23: Windblown Square
Block 24: Basket of Flowers block revisited
Block 25: Churn Dash
Block 26: Windmill Square

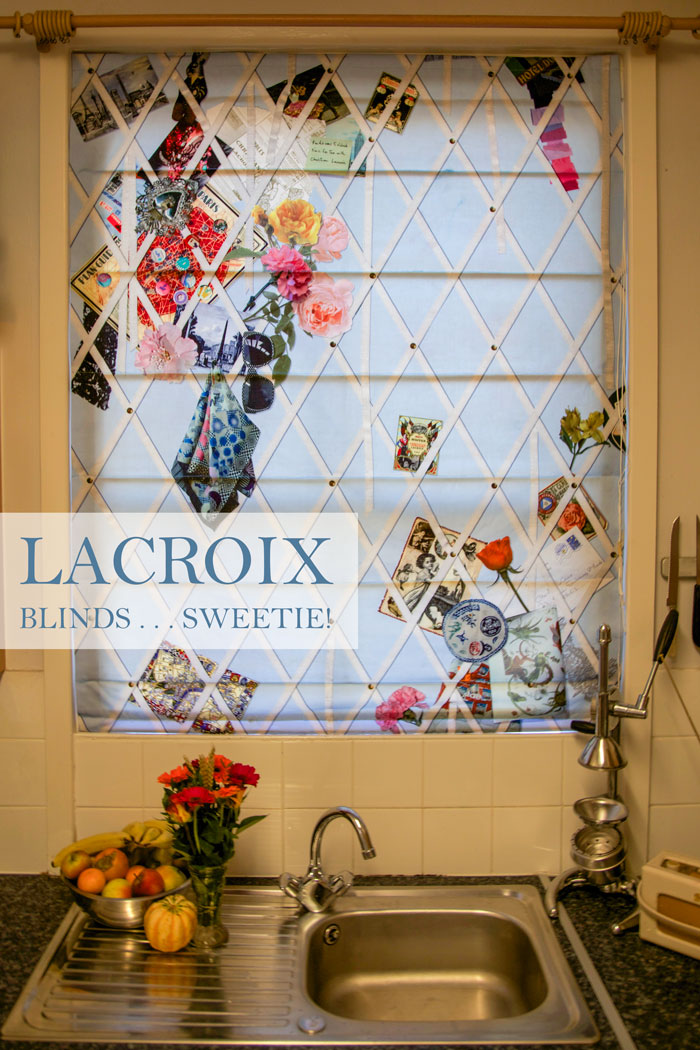
Lacroix blinds… sweetie!

christian_lacroix_blinds

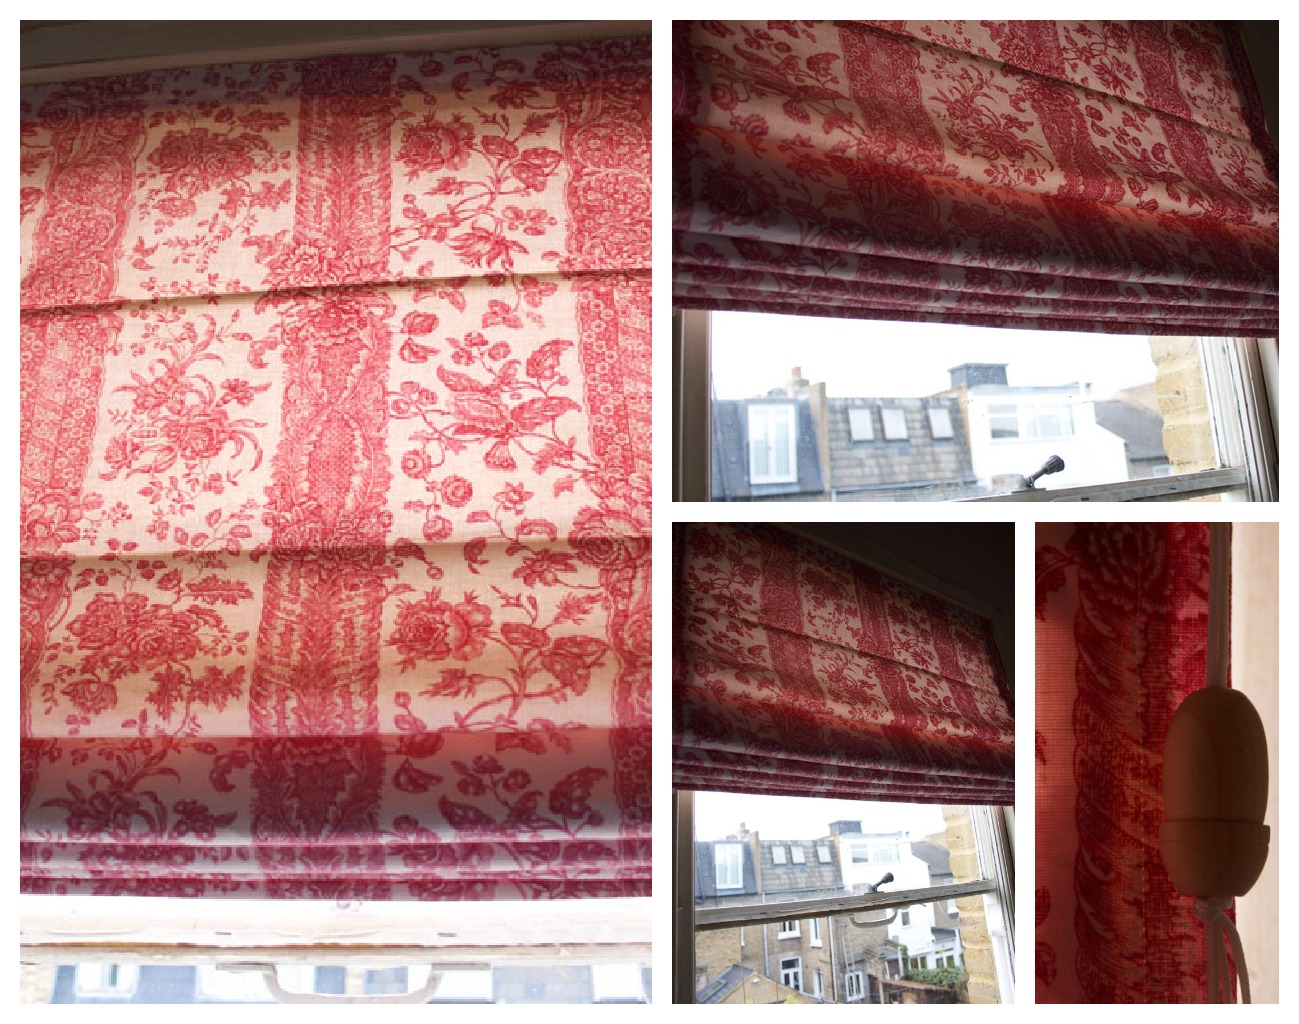
This has to have been my best charity shop find ever. 2 x 3m pieces of Christian Lacroix Souvenir fabric. A little Googling confirmed I had sealed a very special deal at £6 a piece!

Interestingly enough. My first thoughts were not Roman blinds at all. Moreso a tea dress, Dolly Clackett stylee of course. Though, don’t hold your breath. I still have three metres of the stuff left!

The detail on the fabric is amazing. I especially love the Spanish postcard, the button badges and the random Lacroix labels.

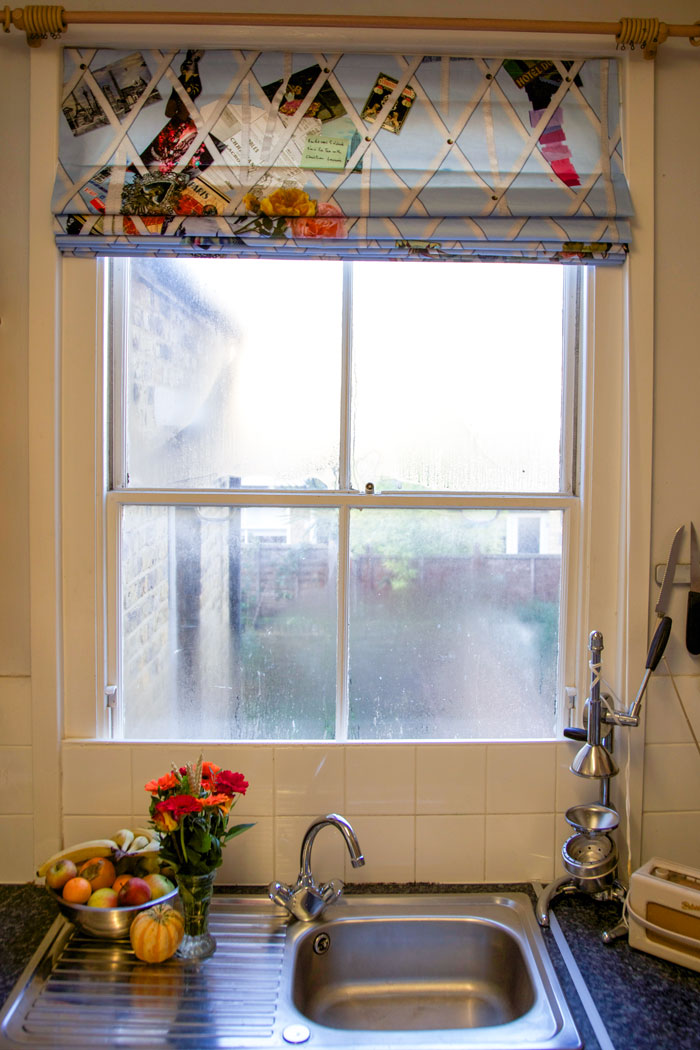
For anyone who has has squeezed in my quirky kitchen for a gin coffee, they will know it rates far from the well-appointed kitchens of West London. It is after all about 5 foot square and doubles up as a kitchen-diner come sewing room! But that is no reason to forgo an opportunity to dress up a window. A window so deserved, I might add. It has worn the same shabby polka dot curtain for far too long.

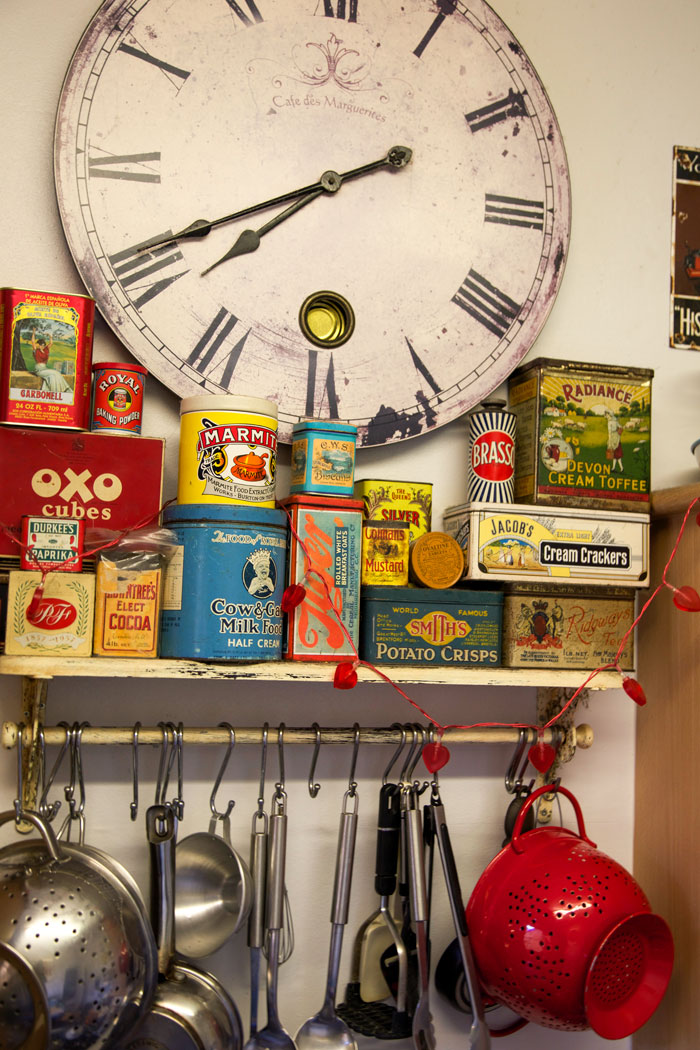
kitchen shelf

And so when I bought the yards of loveliness home and put it on the kitchen table, it screamed Roman blinds. I’ve made a few before. The first ones were a bit daunting but they have got easier each time. If you fancy making yourself some, I posted a tute here.

I’ve yet to add a cleat and an acorn and take down the old curtain rail (and clean the window), but just had to post while I had daylight to shoot!

christian Lacroix blinds open

I’m so not a ‘designer’ girl, though little things sure do please little minds. And in the inimitable words of Jennifer Saunders: “It is Lacroix, sweetie!”

[youtube=http://www.youtube.com/watch?v=fFqHlliWmVY&w=420&h=315]

Kiki’s vintage cushion cover

When my good friend Kiki asked me to make a cushion cover from her late mother’s Biba skirt, I kind of refused. Big time! I love my friend Kiki so much and would do anything for her but cut up a Biba skirt?! She was going to have to drug me first!!!

She texted to say she was on her way with said skirt. It didn’t look like I had a choice. In fact she was at mine before I got back myself! Mr O had a cuppa on the go. I went straight for the wine. This was going to be painful.

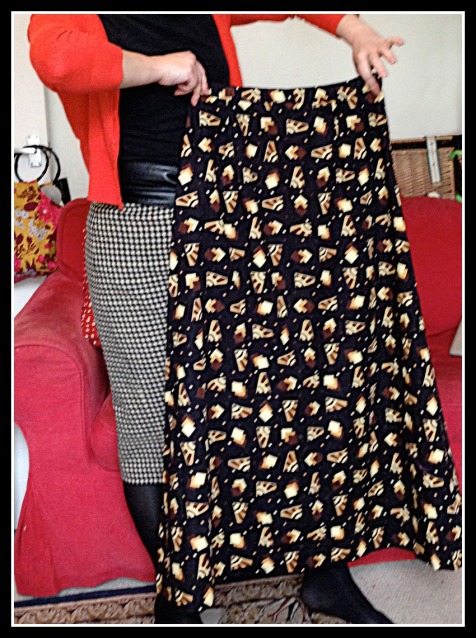
Luckily for me, Kiki gets things muddled all the time. (I really should write a dictionary of exclusive Kiki words and terms. I’m sure it would be a best-seller!) What she meant was that the skirt was a Biba-esque-style maxi skirt that her mum had hand-made in the 70s. She couldn’t see herself in it and to be honest, neither of us could get it over our thighs!

Jean's original skirt

Well. That was a relief but still didn’t make for easy cutting up. But I warmed to the idea that Kiki would get daily pleasure from it being on her sofa instead of folding it away in the attic forever.

There’s quite a lot of fabric going on in a maxi A-line skirt. Plenty enough for a 50cm cushion pad!

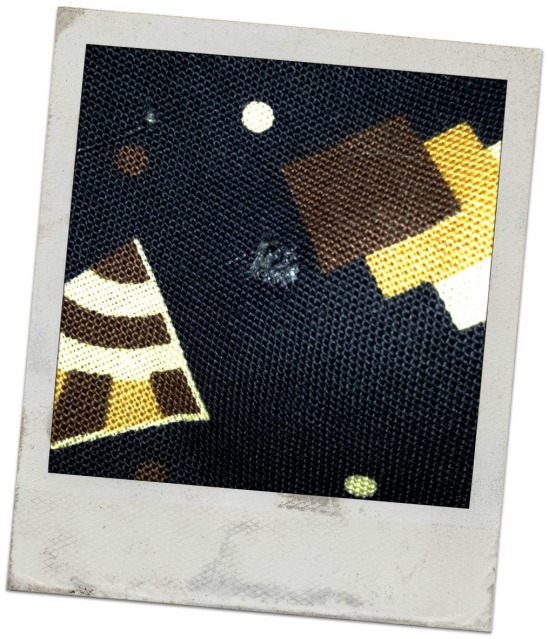
But there was a moth-hole. Typically right in the middle of where I needed to cut.

moth hole

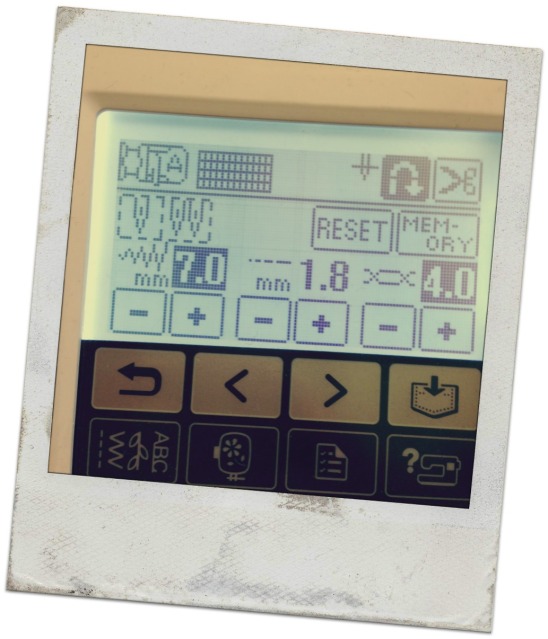
I’ve not used the darning stitch on my machine before now.

darning stitch

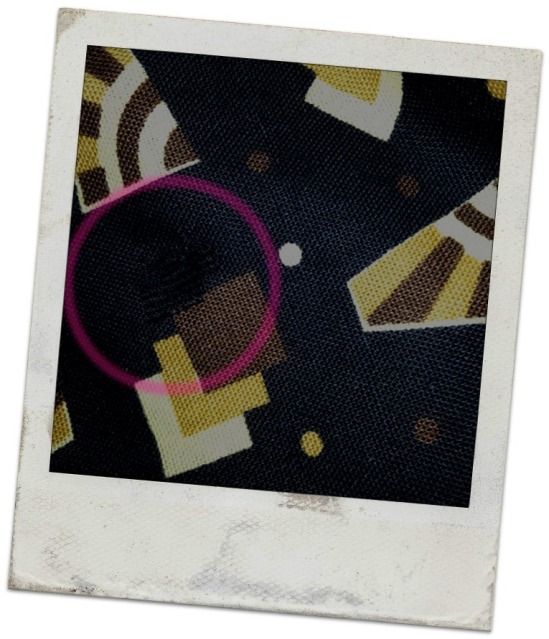
It doesn’t mend totally invisibly but far better than a poke in the eye and a fraying hole!

darned hole

Nothing complicated about the cushion cover itself. Just two squares. Zipper sewn to top edges first. Seamed all round. And Bob’s yer uncle!

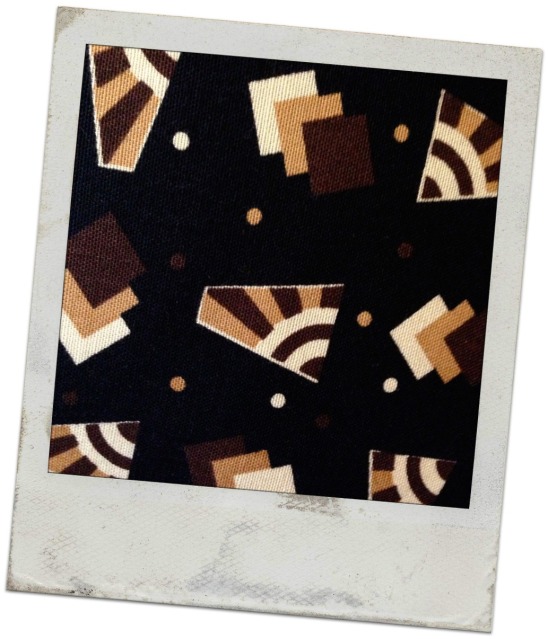
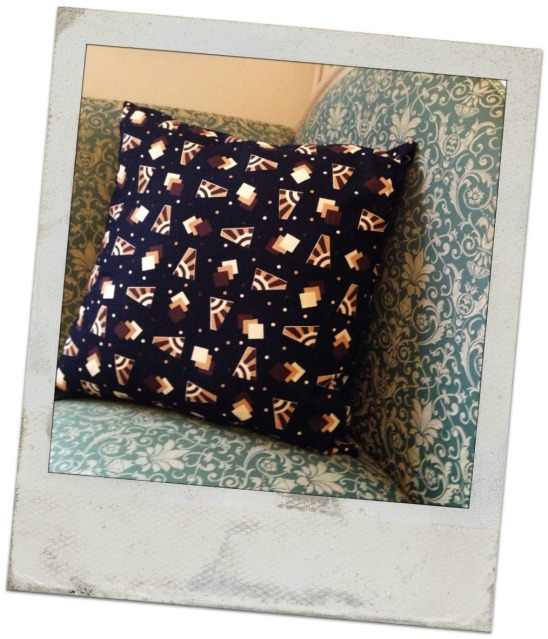
Such a great geometric design on this fabric. It’s great quality cotton furnishing fabric of some kind.

geometric fabric detail

And I have to say – I think it looks great on my sofa! Kiki can take as long as she likes coming to collect it!

finished cushion

How to make a Roman blind / shade

And here is the long awaited tutorial. Sorry I took so long. I completely underestimated how long it would take to put together! Despite the lengthy post, this really is a simple sewing project, involving jus a few lines of straight line sewing. Please do a mock up first to check I haven’t given you a bum-steer! And please do point out anything that is unclear or needs adding.

It does, however require some very careful measuring and a few calculations.

No corners must be cut. The accuracy in the measurements will ensure perfectly fitting and super smooth operating blinds.
Remember: Measure twice (at least!) and cut once!

roman shades during day

You will need:
Furnishing weight fabric for the outer
Curtain lining for the backing.
Nylon cord. As a guide I used 9m but yours may be more or less.
Small plastic rings
4 screw eyes
Cleat
Acorn / cord pull.
Strong self adhesive velcro. The width of your window frame or baton.
Wooden doweling or synthetic rods cut to size.


1. Calculate the size and cut your main fabric roman shade step 1
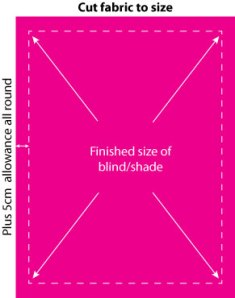
Measure the size that you want your finished blind to be.

Add 5cm side turnings and hem allowances on all sides, to this measurement, and cut your fabric.
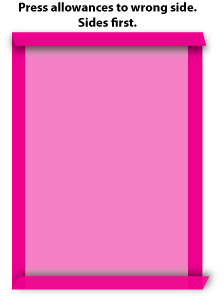

roman shade tutorial step 22. Press Allowances
Press the allowances all round. You could even mitre the corners if you wanted to be really clever… er…I didn’t!
No need to stitch in place at this point. All will become clear!


roman shade tutorial step 33. Now to prepare your lining… and some serious sums!
Start with the measurement of the finished size of your blind. This will include allowances of 2.5cm all round.

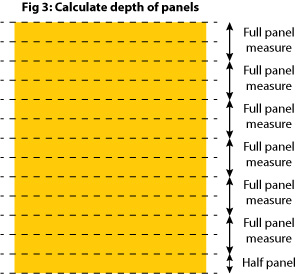
First work out how many sections/folds you want to incorporate into your blind.
I chose to have 7.
The bottom panel must be half the depth of the others which are equidistant.
To calculate this I doubled 7 (panels) to make 14 and deducted 1 to make 13 and divided this into the finished depth of the blind (150cm in my case)
so:
7 x 2 – 1 = 13
150cm / 13 = 11.5

11.5 is the half size panel at the bottom
The remaining 6 full size panels will be double that at 23cm (see fig 3)

You will also need to accommodate the dowels so extra fabric will be needed to allow for the casings.
Measure the circumference of your dowels and allow a couple of milimeters extra, otherwise you will struggle to get the dowels in the casings.

My casings were 12mm.

12mm x 7 panels = 84mm (8.4cm to be added to the final depth of the lining fabric)

So the finished measurement of the lining fabric to be cut is 80cm (width) x 158.4 (150+8.4)

Always measure twice and cut once!
You can now cut your lining to size.


4. Mark the positions of the panels then hem all round

Mark the positions of the panels, starting with the bottom one, in my case, 11.5cm from the bottom. I chose to mark on the right side with chalk to make the lines easier to follow.

Mark up from this point, the depth of the casing, in my case 12mm. From that point, mark the next full size panel up, in my case, 23cm
Mark the depth of the casing and from that point the next full size panel. Repeat the markings for the rest of the panel.

The side turnings and hem allowance is 2.5cm all round. Fold and press in position.
Sew all round close to the edges of the lining fabric so the rods wont get caught in the seams.


roman shade tutorial step 55. Create casings for rods

With wrong sides together and guide lines matching, fold in between the casing lines and press.

Sew accurately on the marked lines from edge to edge.
Repeat this for the remaining casings.
Your lining is now complete and ready to attach to the main fabric.
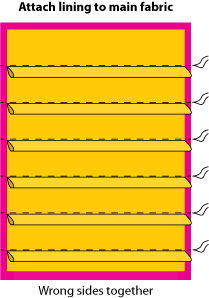

roman shade tutorial step 66. Attach prepared lining to main fabric

Lay the main fabric, as prepared in step 2, wrong side up on a flat surface.

Lay the prepared lining, wrong sides down, on top of the main fabric, making sure it sits 2.5cm in from each edge.

Making sure both layers are perfectly flat, pin together along the casings, so the casings are facing down towards the bottom hem.
Use as many pins as it takes to secure your two pieces together with no bubbles or creases!

Sew neatly and carefully from one side to the other, directly above the casings, sewing both lining and main fabric together.

Hand sew the top edge of the lining to the main fabric. Or machine stitch if you prefer.


7. Attaching the velcro

Stick the loop side (the fluffy side) of the velcro to the top edge of your blind.

Stick the hook side (the spiky side) of the velcro to the top edge of your baton or window.

NB. I used the strongest adhesive velcro I could find, which worked beautifully but to ensure it didn’t separate from the fabric I also hand stitched it.
This is very difficult but worth the effort to strengthen the bond. Do not under any circumstances try to sew it on the machine. The adhesive will totally ruin the needle and get stuck!
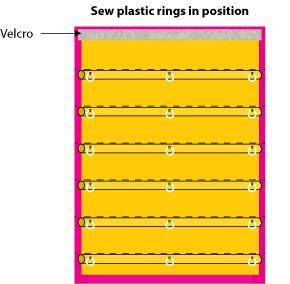

roman shade tutorial step 88. Insert the rods and sew on the rings

Inset a rod into the hem of the main fabric and hand sew the hem of the main fabric to encase it.
This helps to give the base of the blind a bit of weight and keeps it hanging nice and straight.

Hand sew the lining hem over the main fabric hem.

Insert the other rods into the casings and hand stitch the ends closed to stop the dowels falling out.

Hand sew 3 plastic rings to the centre of each dowel casing, one at each end and one in the middle.
It is important that the rings are perfectly aligned with each other.
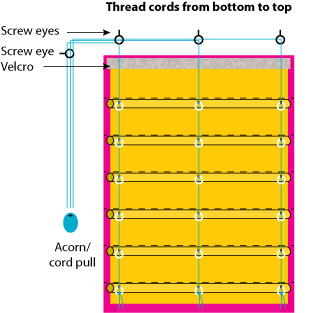

roman shade tutorial step 99. Attaching the cords

Screw 3 screw-eyes into the the underside of your baton or window frame.
They must be aligned with the rings you have attached to your dowel casings.

Attach the 4th screw eye to the side of the window frame, in line with the others.

Attach 3 lengths of nylon cord to the bottom 3 rings. Ensure the knots are tied securely.

Assuming your pull cord is going to be on the right hand side of the window,
run the first length of nylon cord up through the right hand set of rings. It will need to be long enough to do this and then run along the top 3 screw eyes and the side screw eye, down to the cleat, plus a little bit more!
Then run the middle cord up through the rings and allow enough to run through the centre and right hand screw eye, and the side screw eye, down to the cleat, plus a little bit more!
The final cord runs up the rings in the same way, through the top right hand screw eye, through the side screw eye and down to the cleat plus a little bit more!

NB: The screw eyes will sit below the velcro in real life!


10. Attach the blind to the window

You can now attach your blind to the window by pressing the velcro edges together firmly.
Thread the cords as detailed above.
With the blind at the lowered position, carefully make sure that the cords are neatly and precisely lined up. Gently pull on them individually and secure all three cords together at the ends with an ‘acorn’ or cord-pull.
Attach your cleat, proudly raise your blind, marvel at the magical way it folds up and wrap the cord around your cleat. Or lower it and raise it a few more times just for the joyfulness of it all!

Secret Santa Success!

50s_shirt_peg_bag_x

I know, I know… this still isn’t anything like a tutorial for Roman Blinds.

I’m on it, honestly I am and it will happen, once I’ve get round to drawing some diagrams to accompany the words.

But for now I can reveal the only Christmassy sewing project that I managed to squeeze into my crazy real-life workload. It was a secret Santa gift for my friend at work.

The theme last year was ‘home made’ or ‘charity shop bought’. I made a selection of jams for my boss and she loved them! So when this years theme was decided as ‘red white and gold’ I was determined to make something once again.

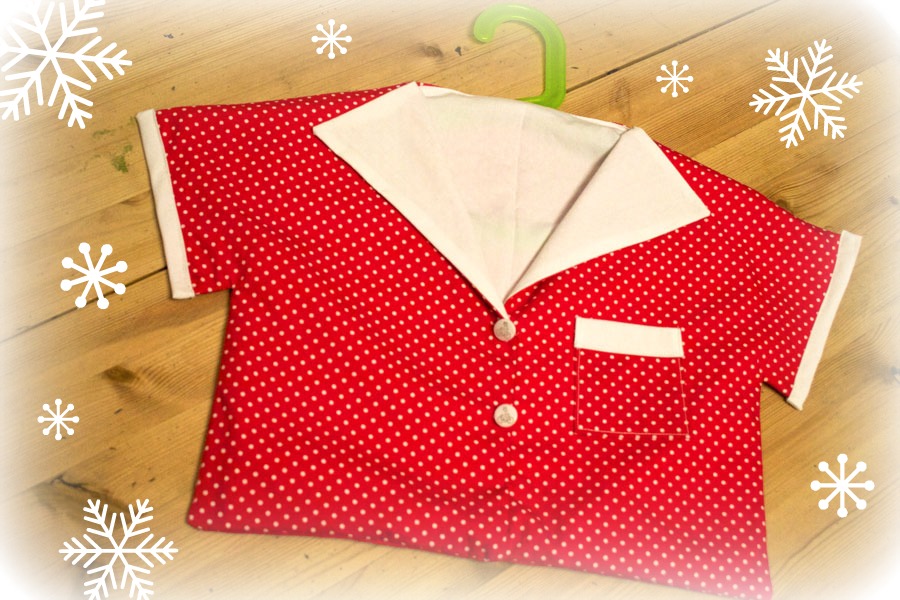
As soon as I plucked Ness out of the hat, I knew what I was going to make for her. She recently moved house this year, and was really excited to have a garden for the first time. ‘I will be needing a peg bag and everything’, she said! I had been meaning to make one ever since she came out with that so this was the perfect prompt. She also likes all things 50s, including my blouse so the Norman Hartnell approach to the peg bag was the only way forward!

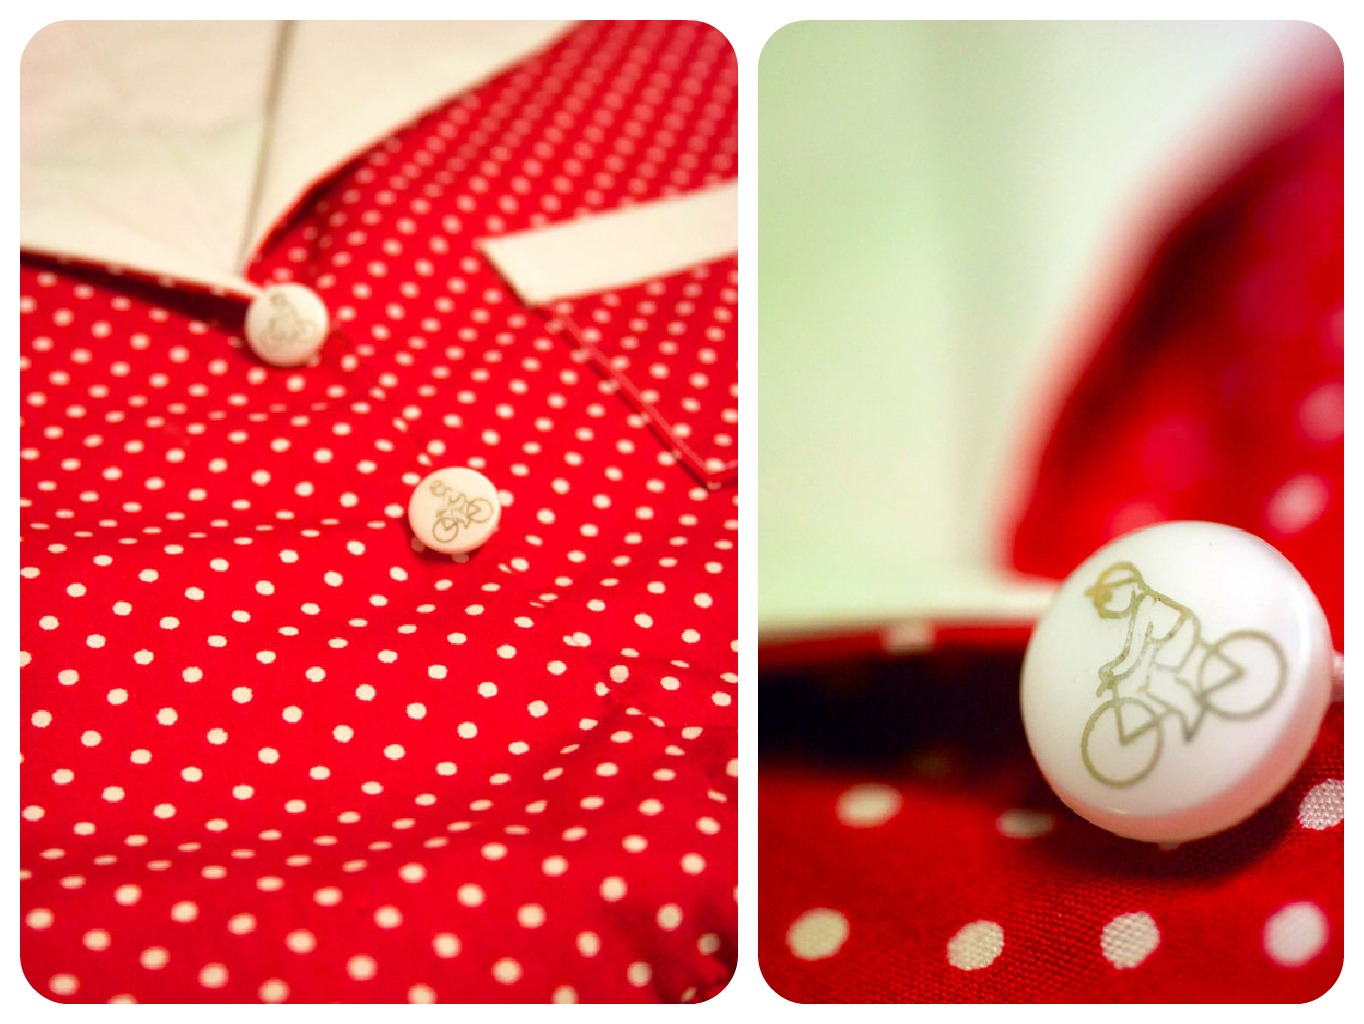
The two little white buttons with gold bicycles were sourced by Little Miss Ooobop! at a vintage fair last year and have seemingly been waiting patiently for this project!

peg bag buttons

To make the pattern, I drew a template for the back, overall shape and cut 2, one in pin dot and one lining. The front pieces are literally half of the back but allowing a couple of centimeters at the front for overlap.

I used one of my daughter’s child sized Ikea hangers. If I made this again, I would source a lovely wooden hanger so the shoulders are more horizontal and not sloping down.

She was delighted! Though the other partygoers at the opposite end of the table were a little confused. Not sure those young pups even know what a peg bag is! They just thought I’d miscalculated some measurements!

secret santa success

It was hardly a secret though. I was one of two seamstresses at the table and my poker face was rubbish!

I’m winding down from work as from tomorrow – *squeal* – and I’m really hoping to get some sewing action in before I return. Hoping it will curb my usual Christmassy eating frenzy.  Of course, that’s if 21.12.12 doesn’t prove to be the end of the world in which case we will all be eating hats!

Roman blinds/shades for the landing

Well I’ve certainly got that winter nesty feeling. Never thought I’d say it but the rain can tip down as much as it likes. The wind can howl till it’s heart content and who cares if it’s cold as a polar bear’s nose. I am happily inside, toasty and warm, making bread, watching old movies, sewing and putting up my freshly made Roman blinds, or Roman shades if you are anywhere but the UK!

roman shades during day

I’m assuming the fabric is vintage. It had that musty attic smell about it when I landed 5 metres of it, for £10 at a charity shop. But nothing a spruce in the washing machine couldn’t sort.

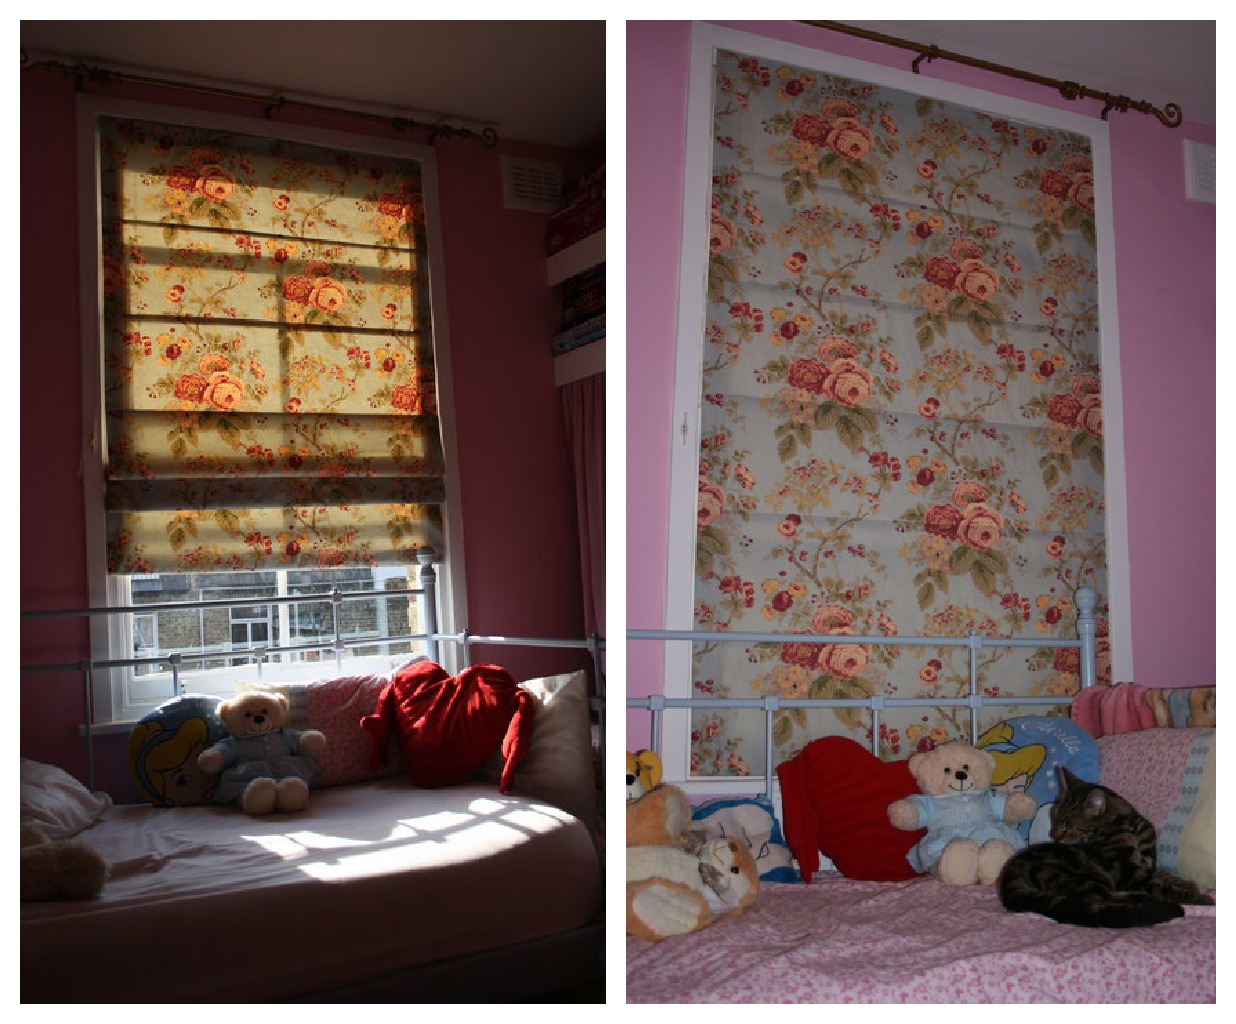
The hardest thing about these darn blinds (or shades) is photographing them! Too light outside and you get too much show through. Too dark and you see nothing!

roman shades in the dark

Too long trying to be arty farty with it all and you get cat-hassle!

roman shade with cat interference

I’ve made these on a couple of occasions before but only posted on Burda. This set I made for Little Miss Ooobop’s room using an remnant of fabric I picked up in a discount fabric store for a fiver:

Roman blinds in rose fabric

And these black ones I made for my eldest daughter… for considerably more pounds:

black roman blinds

This is a great sewing project for a beginner because it only involves sewing in straight lines. But as many times as you make them you still have to measure twice and cut once. Or in my case, five or six times. It’s all in the maths.

For anyone who’s interested I will compile a tutorial. I didn’t take in-progress shots, mainly because I worked in such a horrendous way, spread all out on the living room floor with cats jeopardising the project every step of the way! But I will create some diagrams which should be a lot easier to follow. Just not tonight, ’cause I’m pooped!