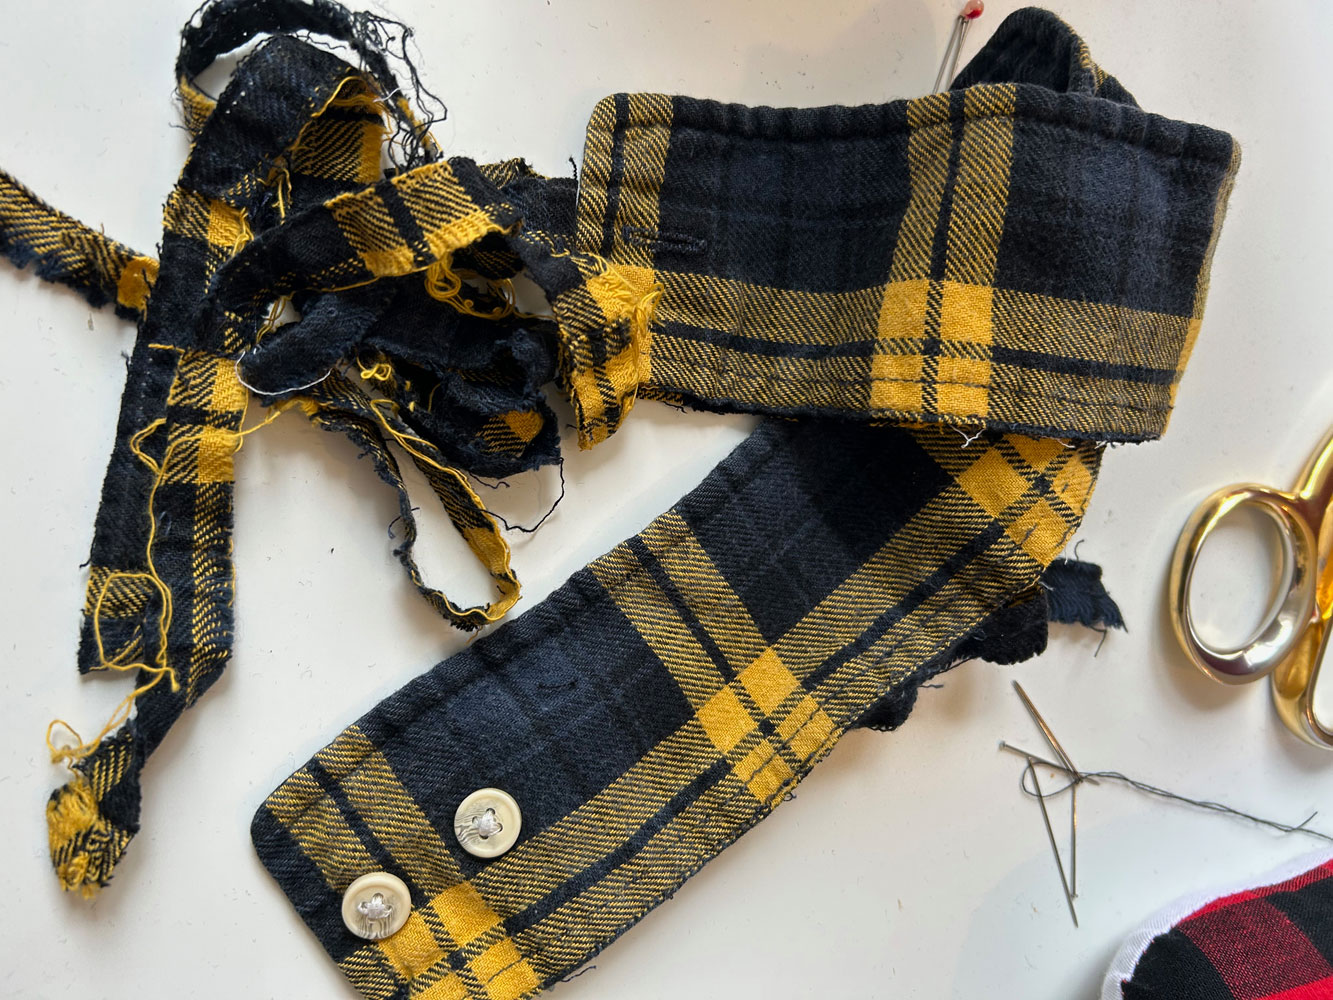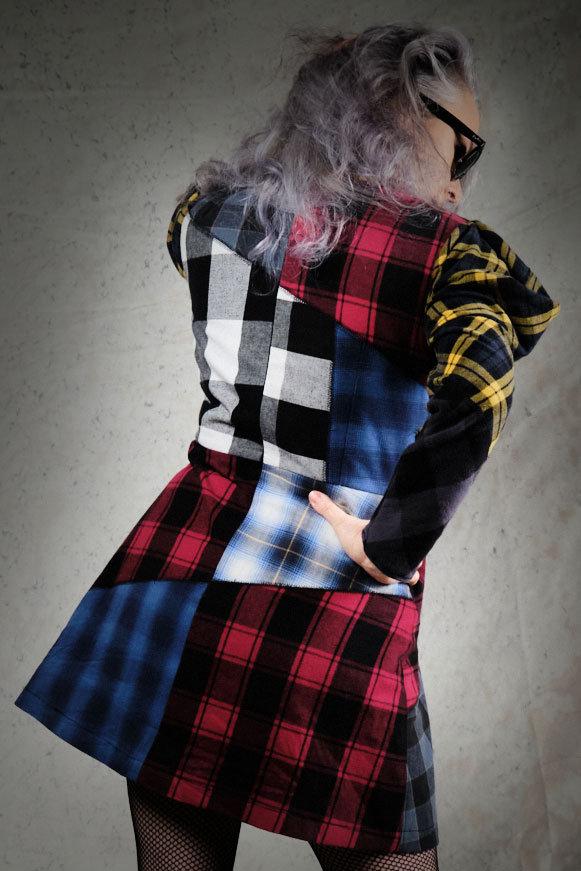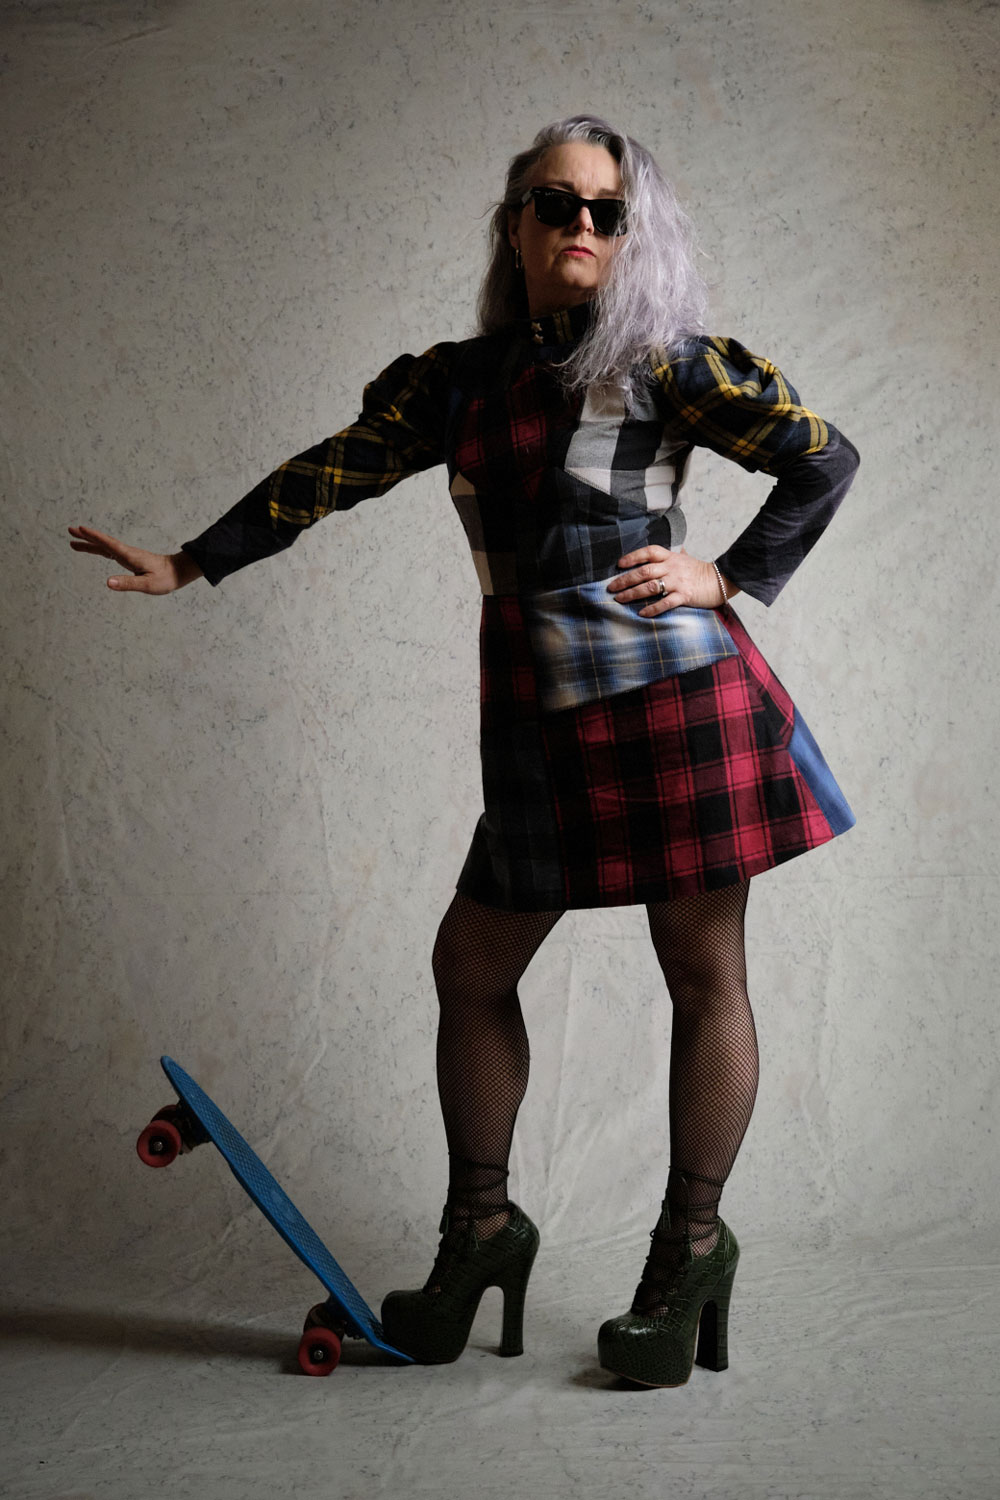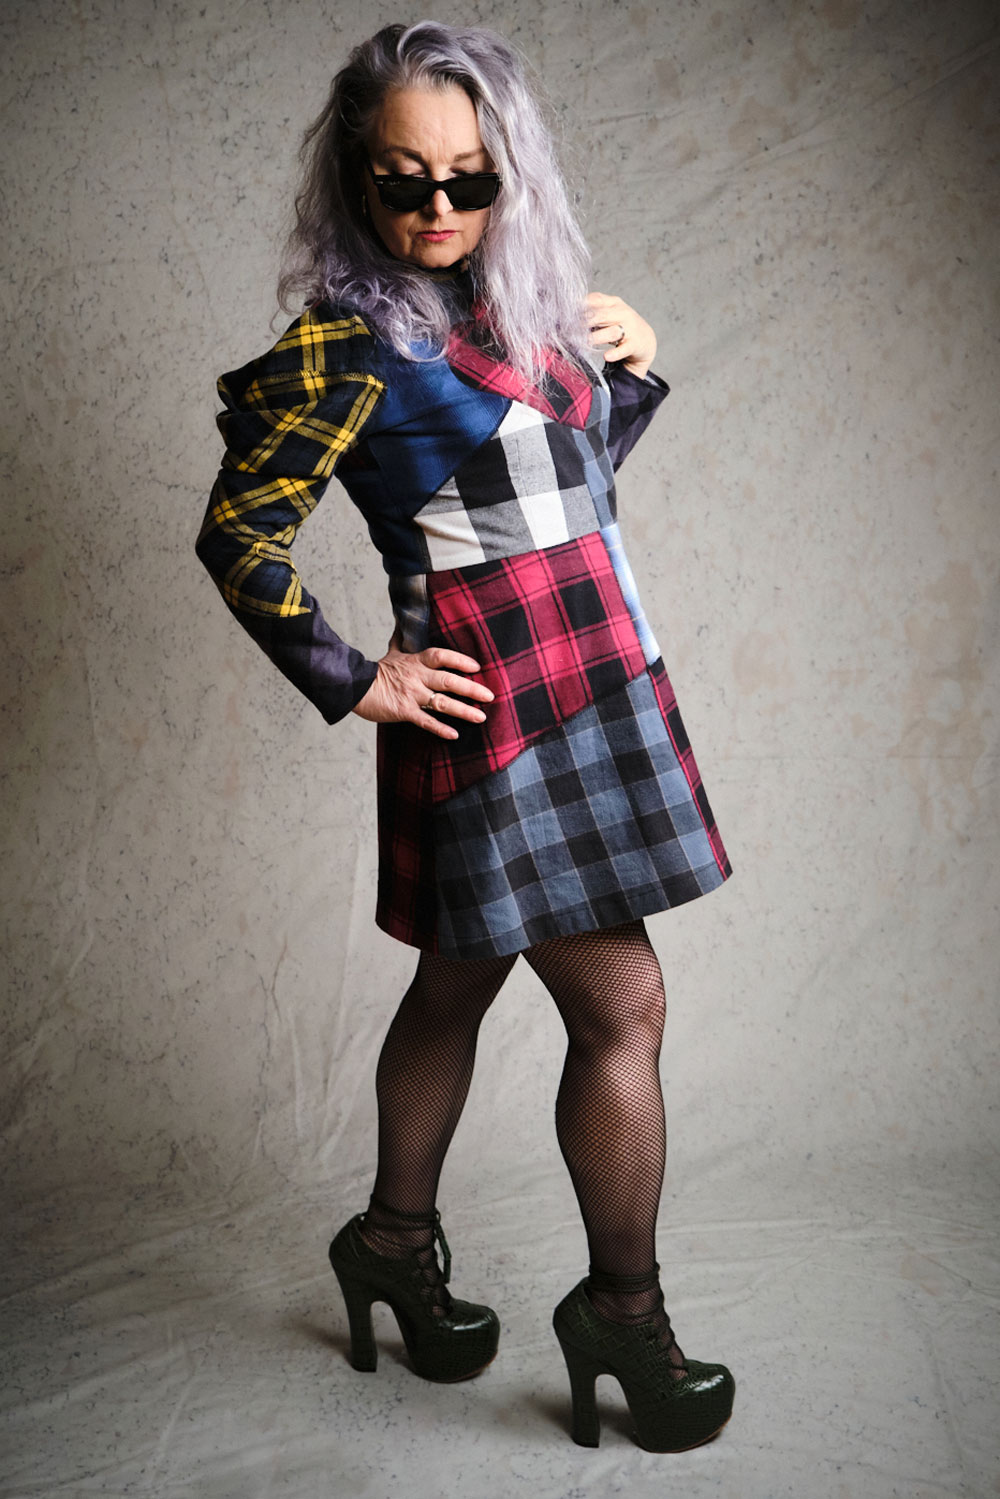
This dress began the way many of my pieces do – quietly and without great expectation with a pile of discarded, damaged, pre-loved clothing rescued from the 50p rail outside my local charity shop. I’ve always had a soft spot for the reject items. The ones nobody else wants. The frayed hems, the tired seams, the faded fabrics that have already lived a life before landing in my hands. They scream potential!
At one point, I even flirted with the idea of offering my services to mend them up a little so they could command a higher price for the charity. A noble thought, but wildly unsustainable. I’d never financially survive donating that much of my time. So instead, I channelled that urge elsewhere by teaching mending skills so people can fix their own clothes, and rescuing these forgotten garments in a different kind of way. I like to think of it as a quiet collaboration between past and present.
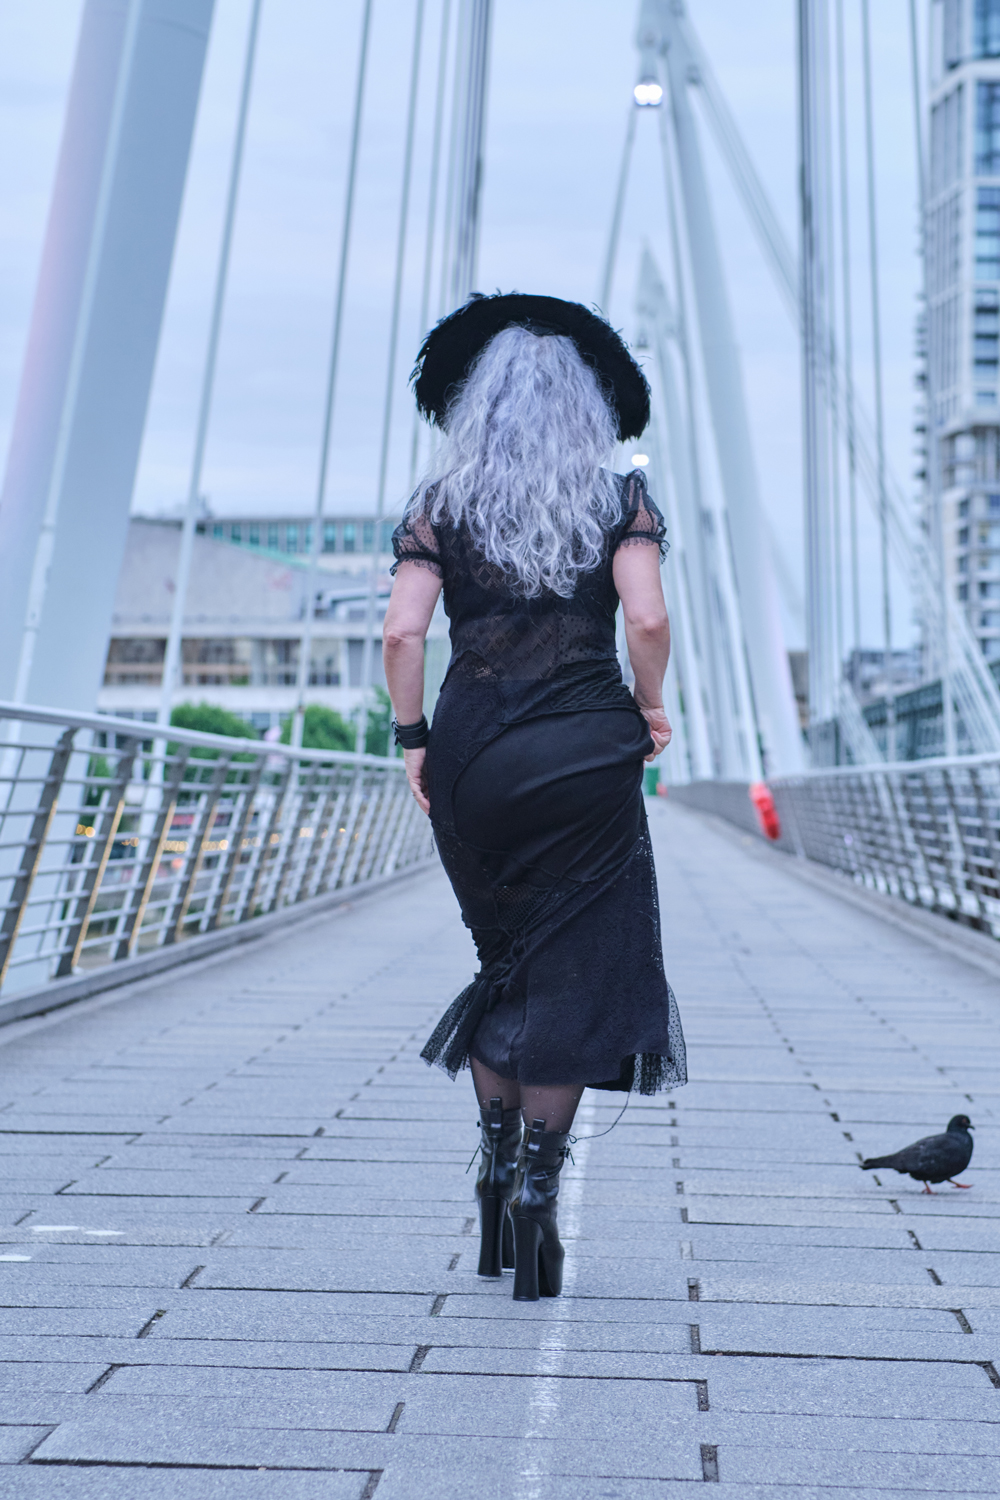
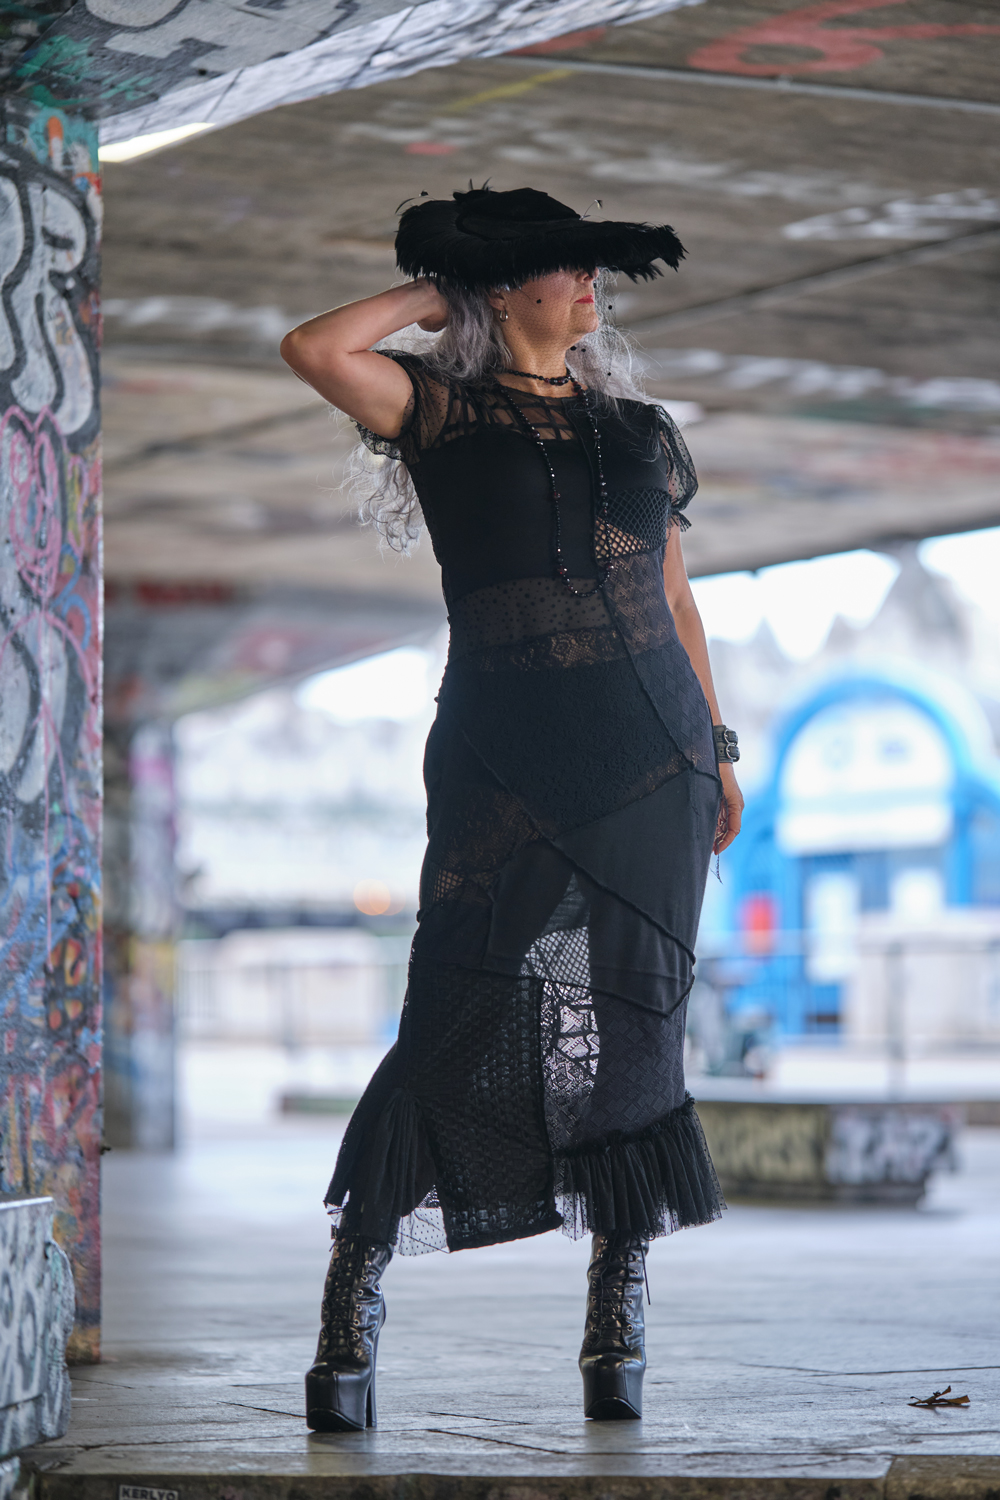
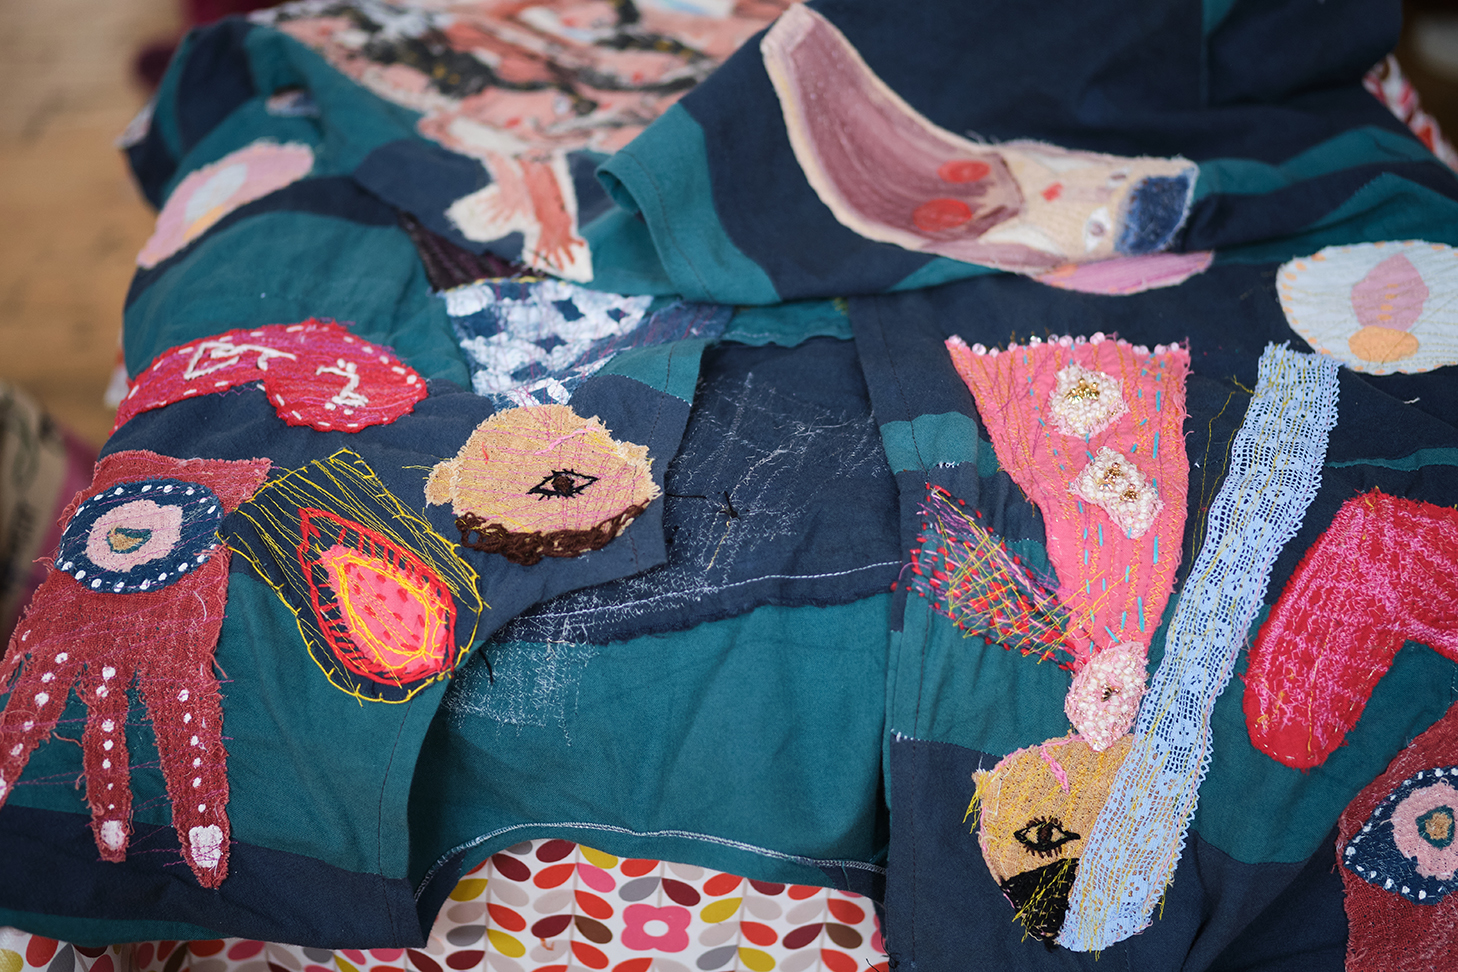
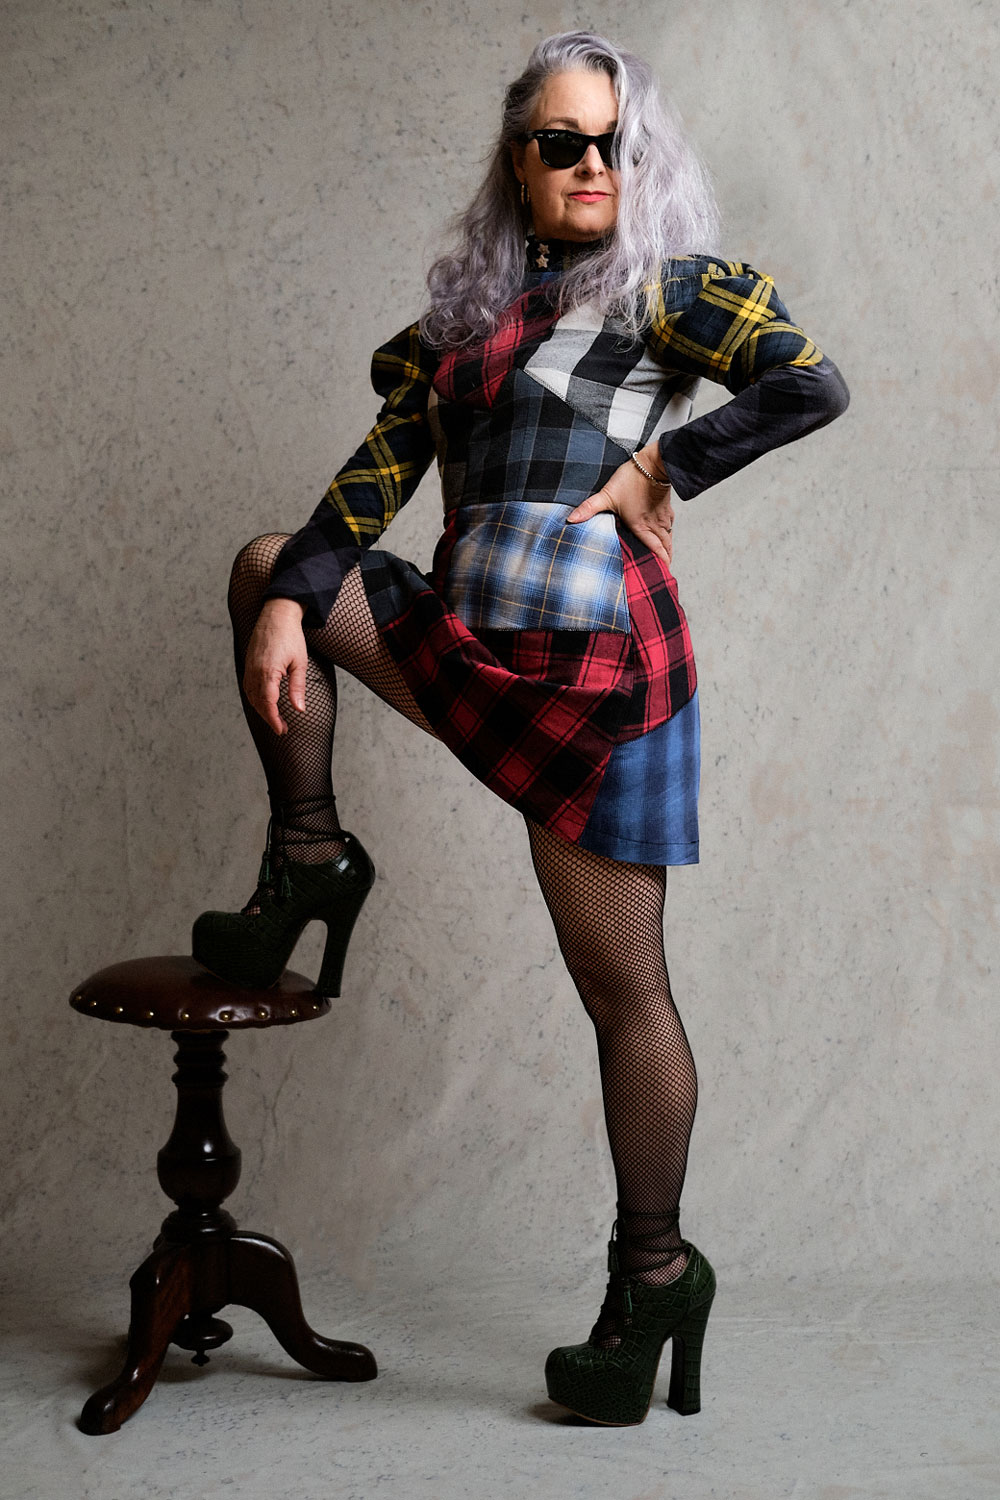
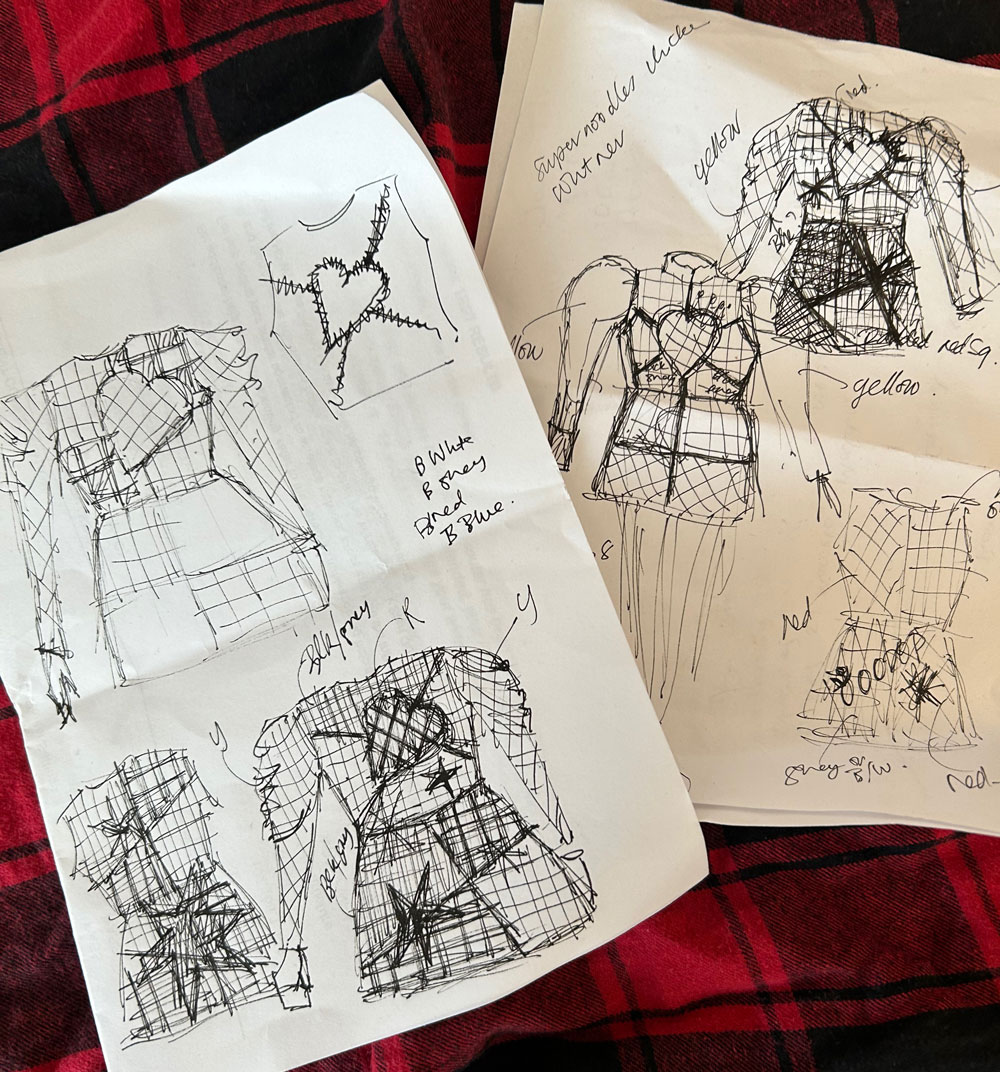
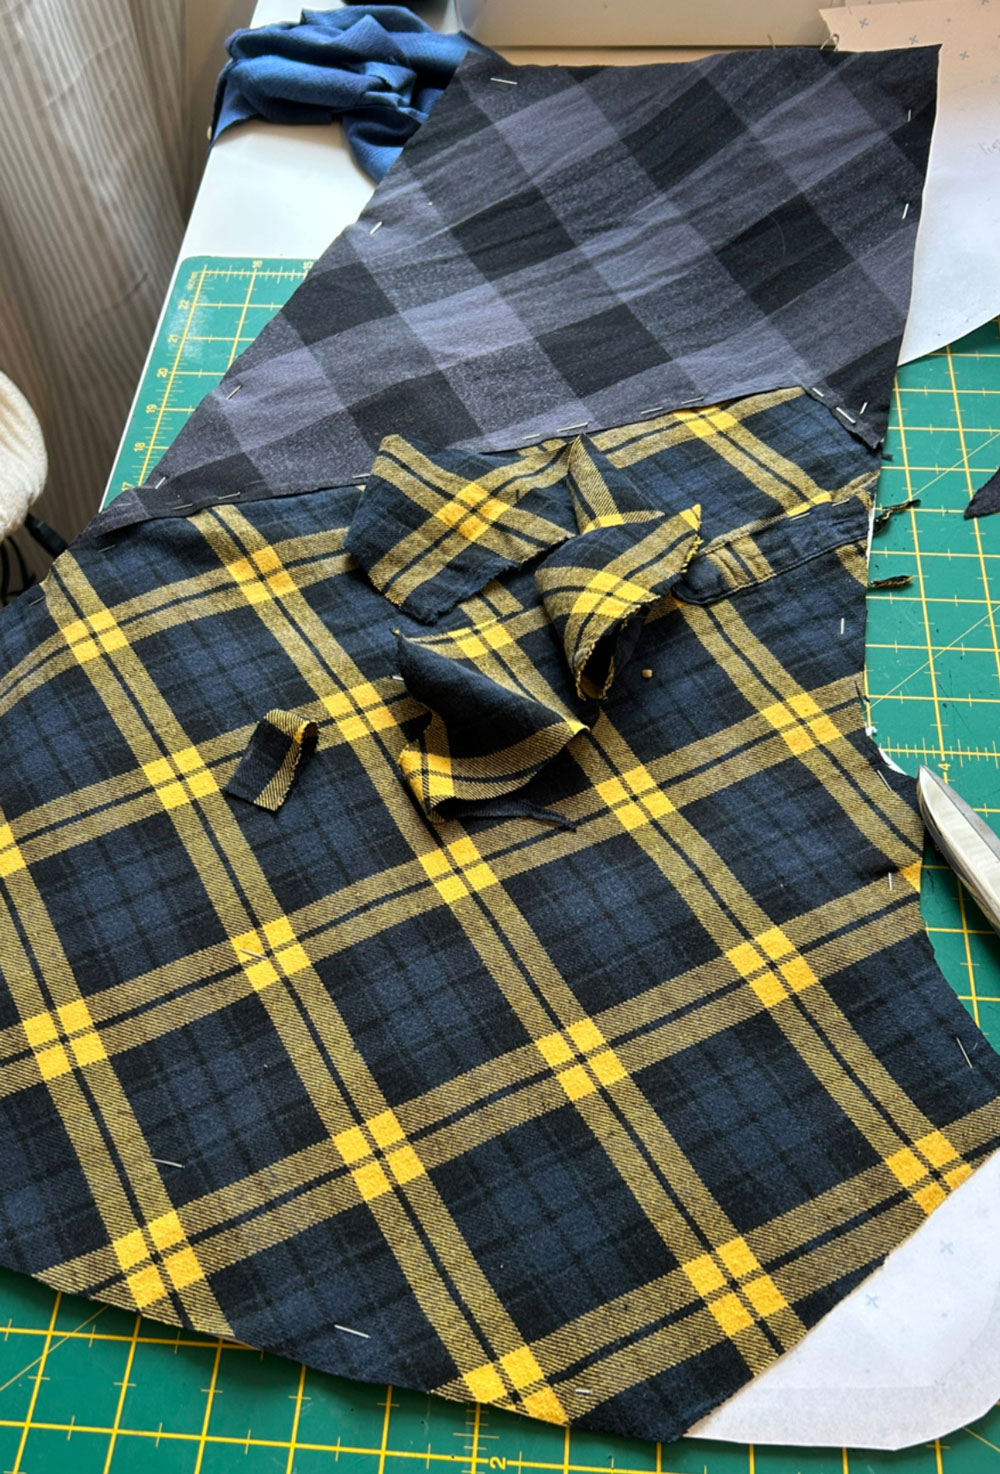
As with my Perfectly Imperfect dress, I could see the potential immediately in the textures, the tears, the subtle stains and faded fabrics. I began cutting and piecing everything together without a fixed plan, guided almost entirely by instinct and curiosity. That’s always been my preferred way of working, especially when I’m creating wearable art rather than a conventional garment.
It’s impossible not to wonder who wore these clothes before me. What their lives looked like. What ordinary and extraordinary moments were absorbed into the fibres. Clothing carries stories whether we acknowledge them or not, and when you work with reclaimed fabrics, you’re never starting from a blank slate.
But somewhere along the way, the mood shifted. It darkened.

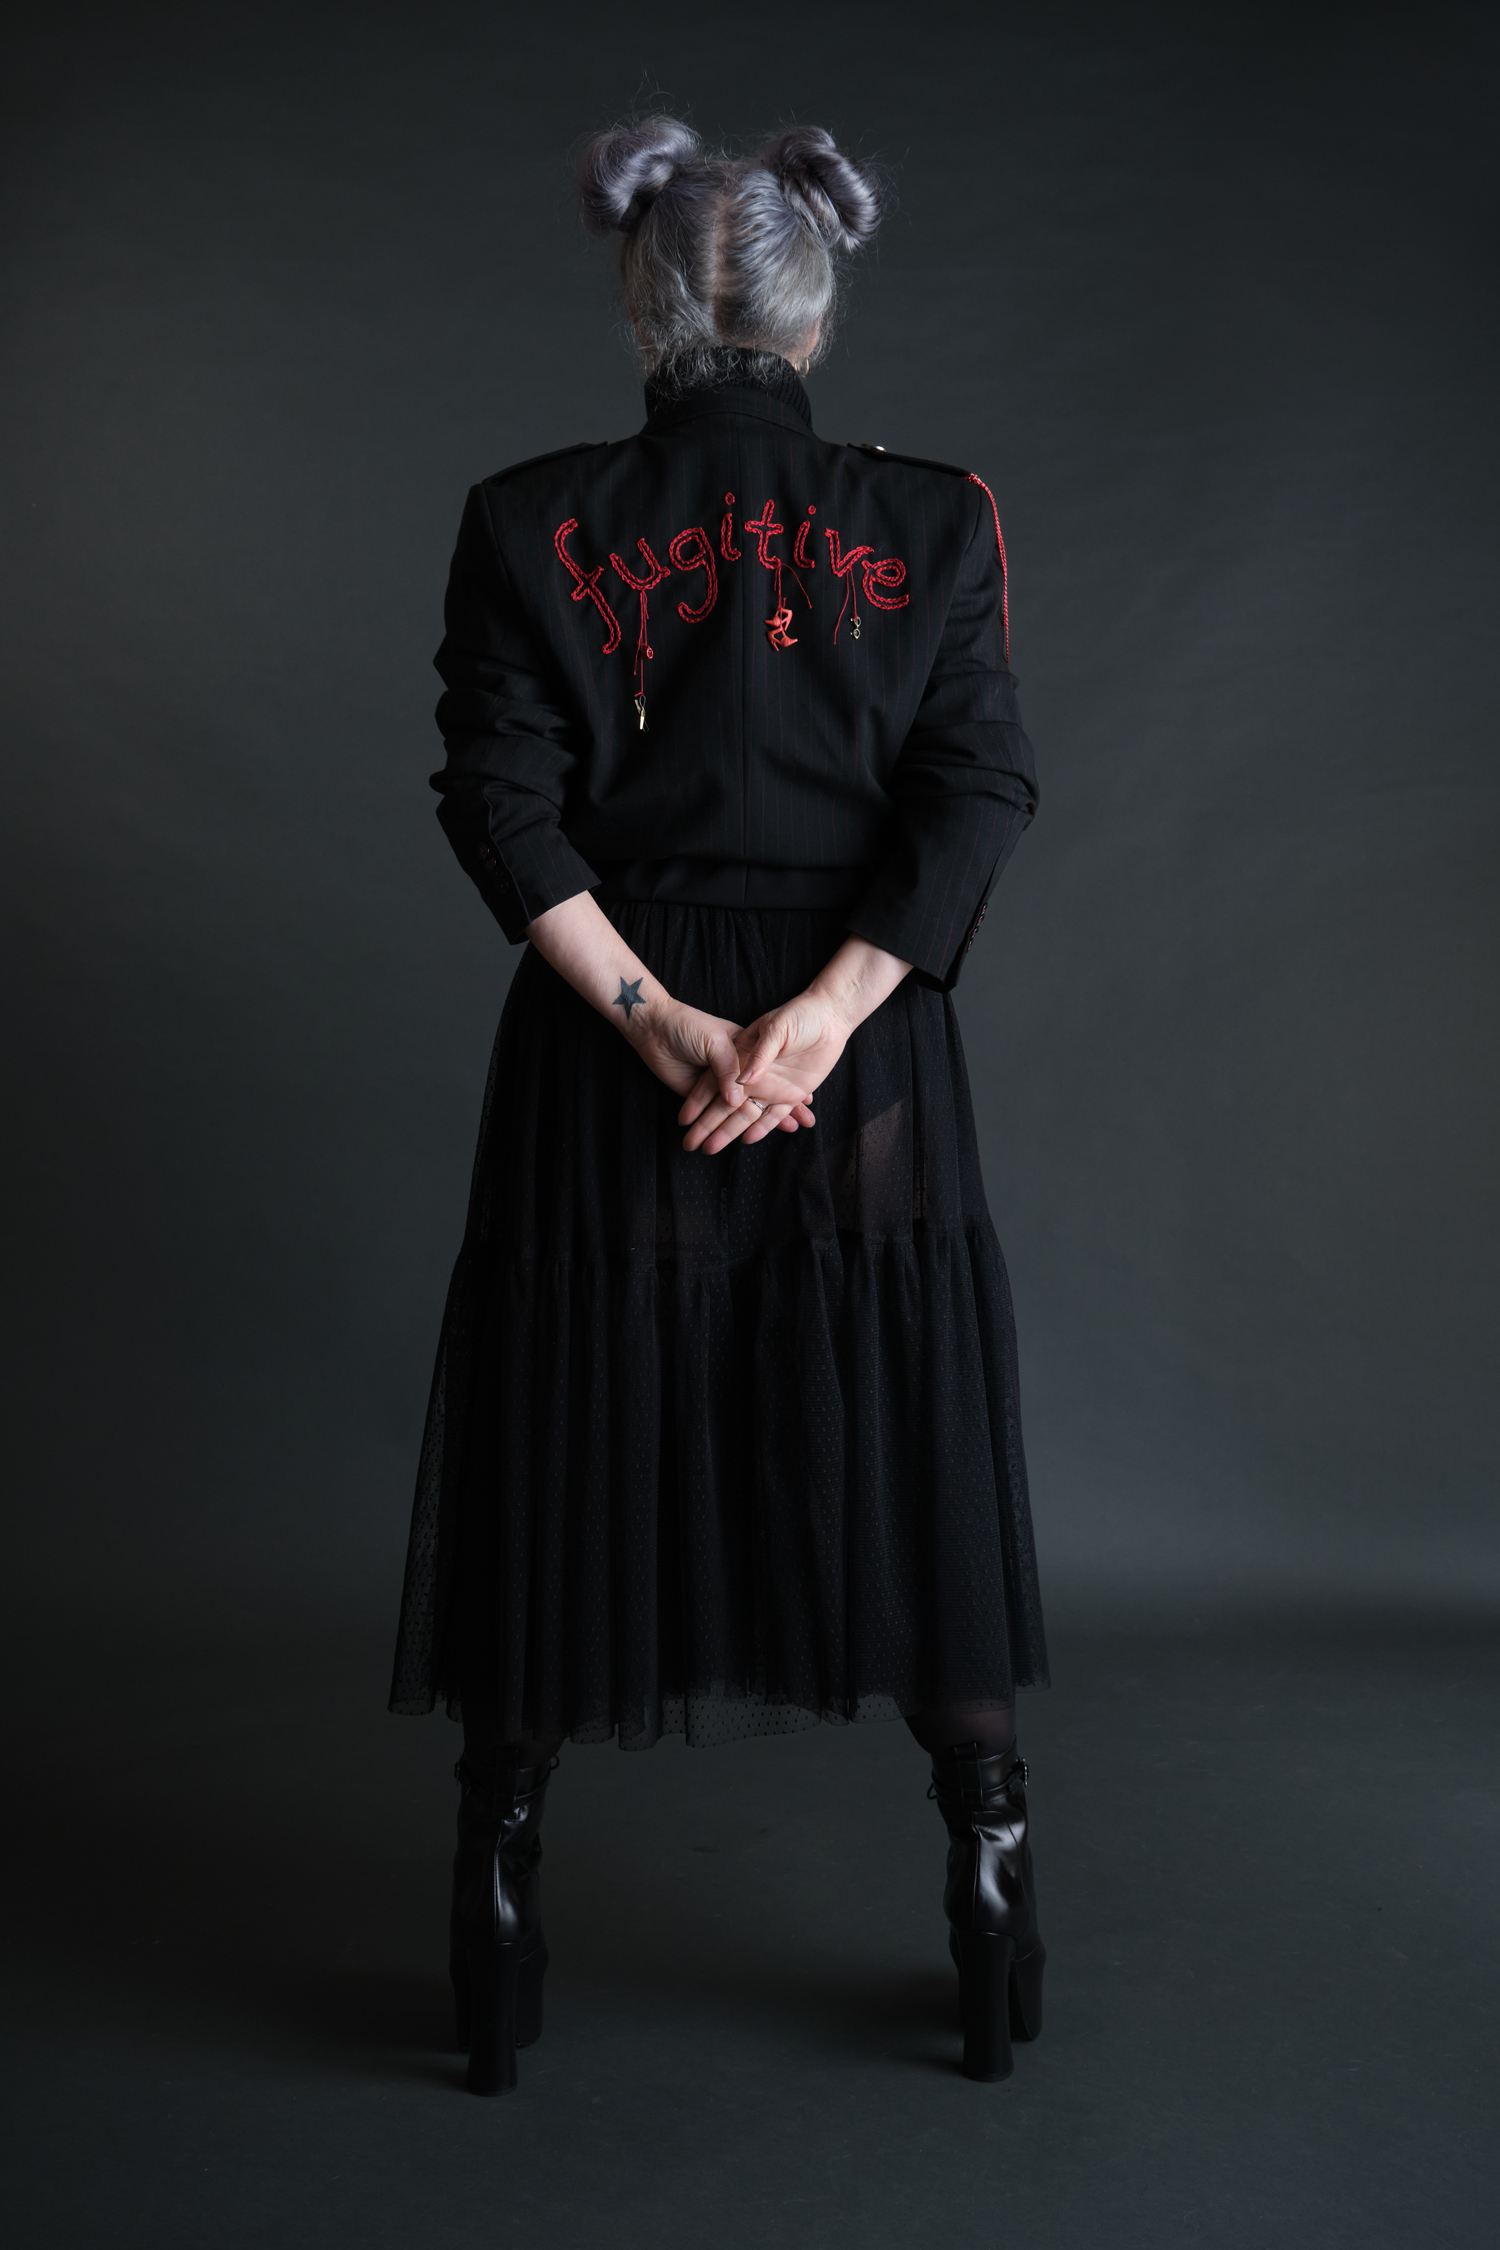
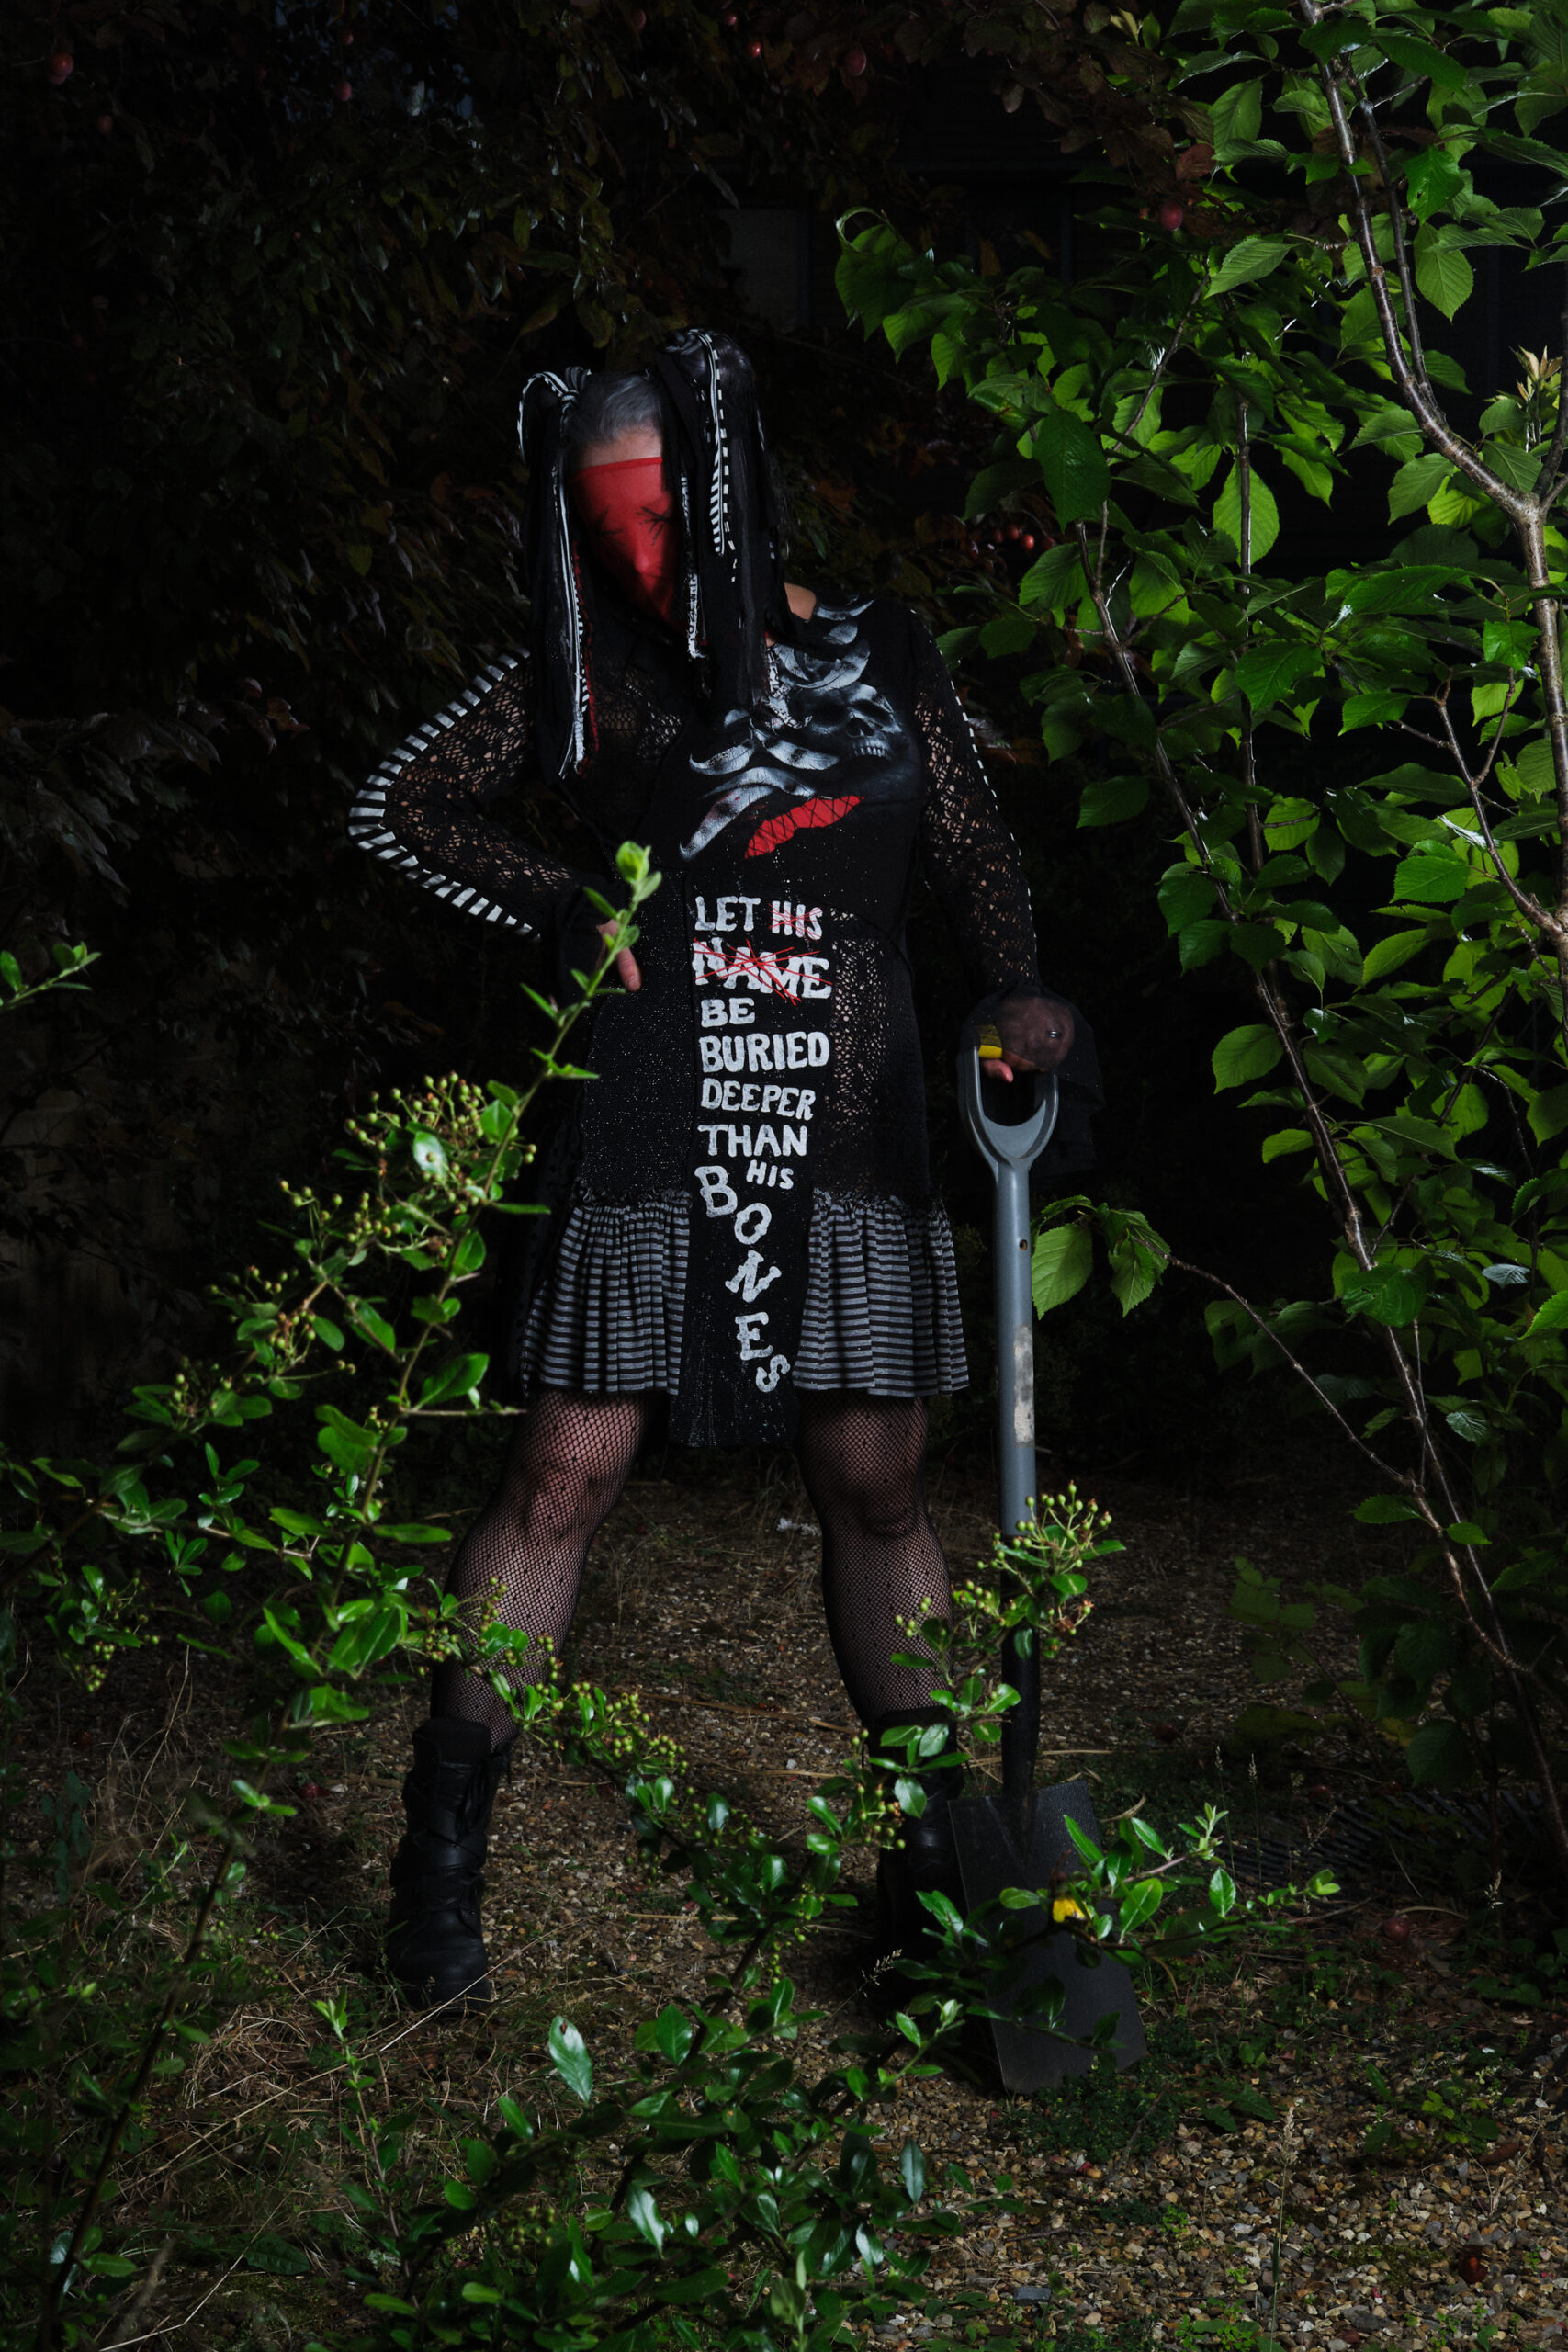
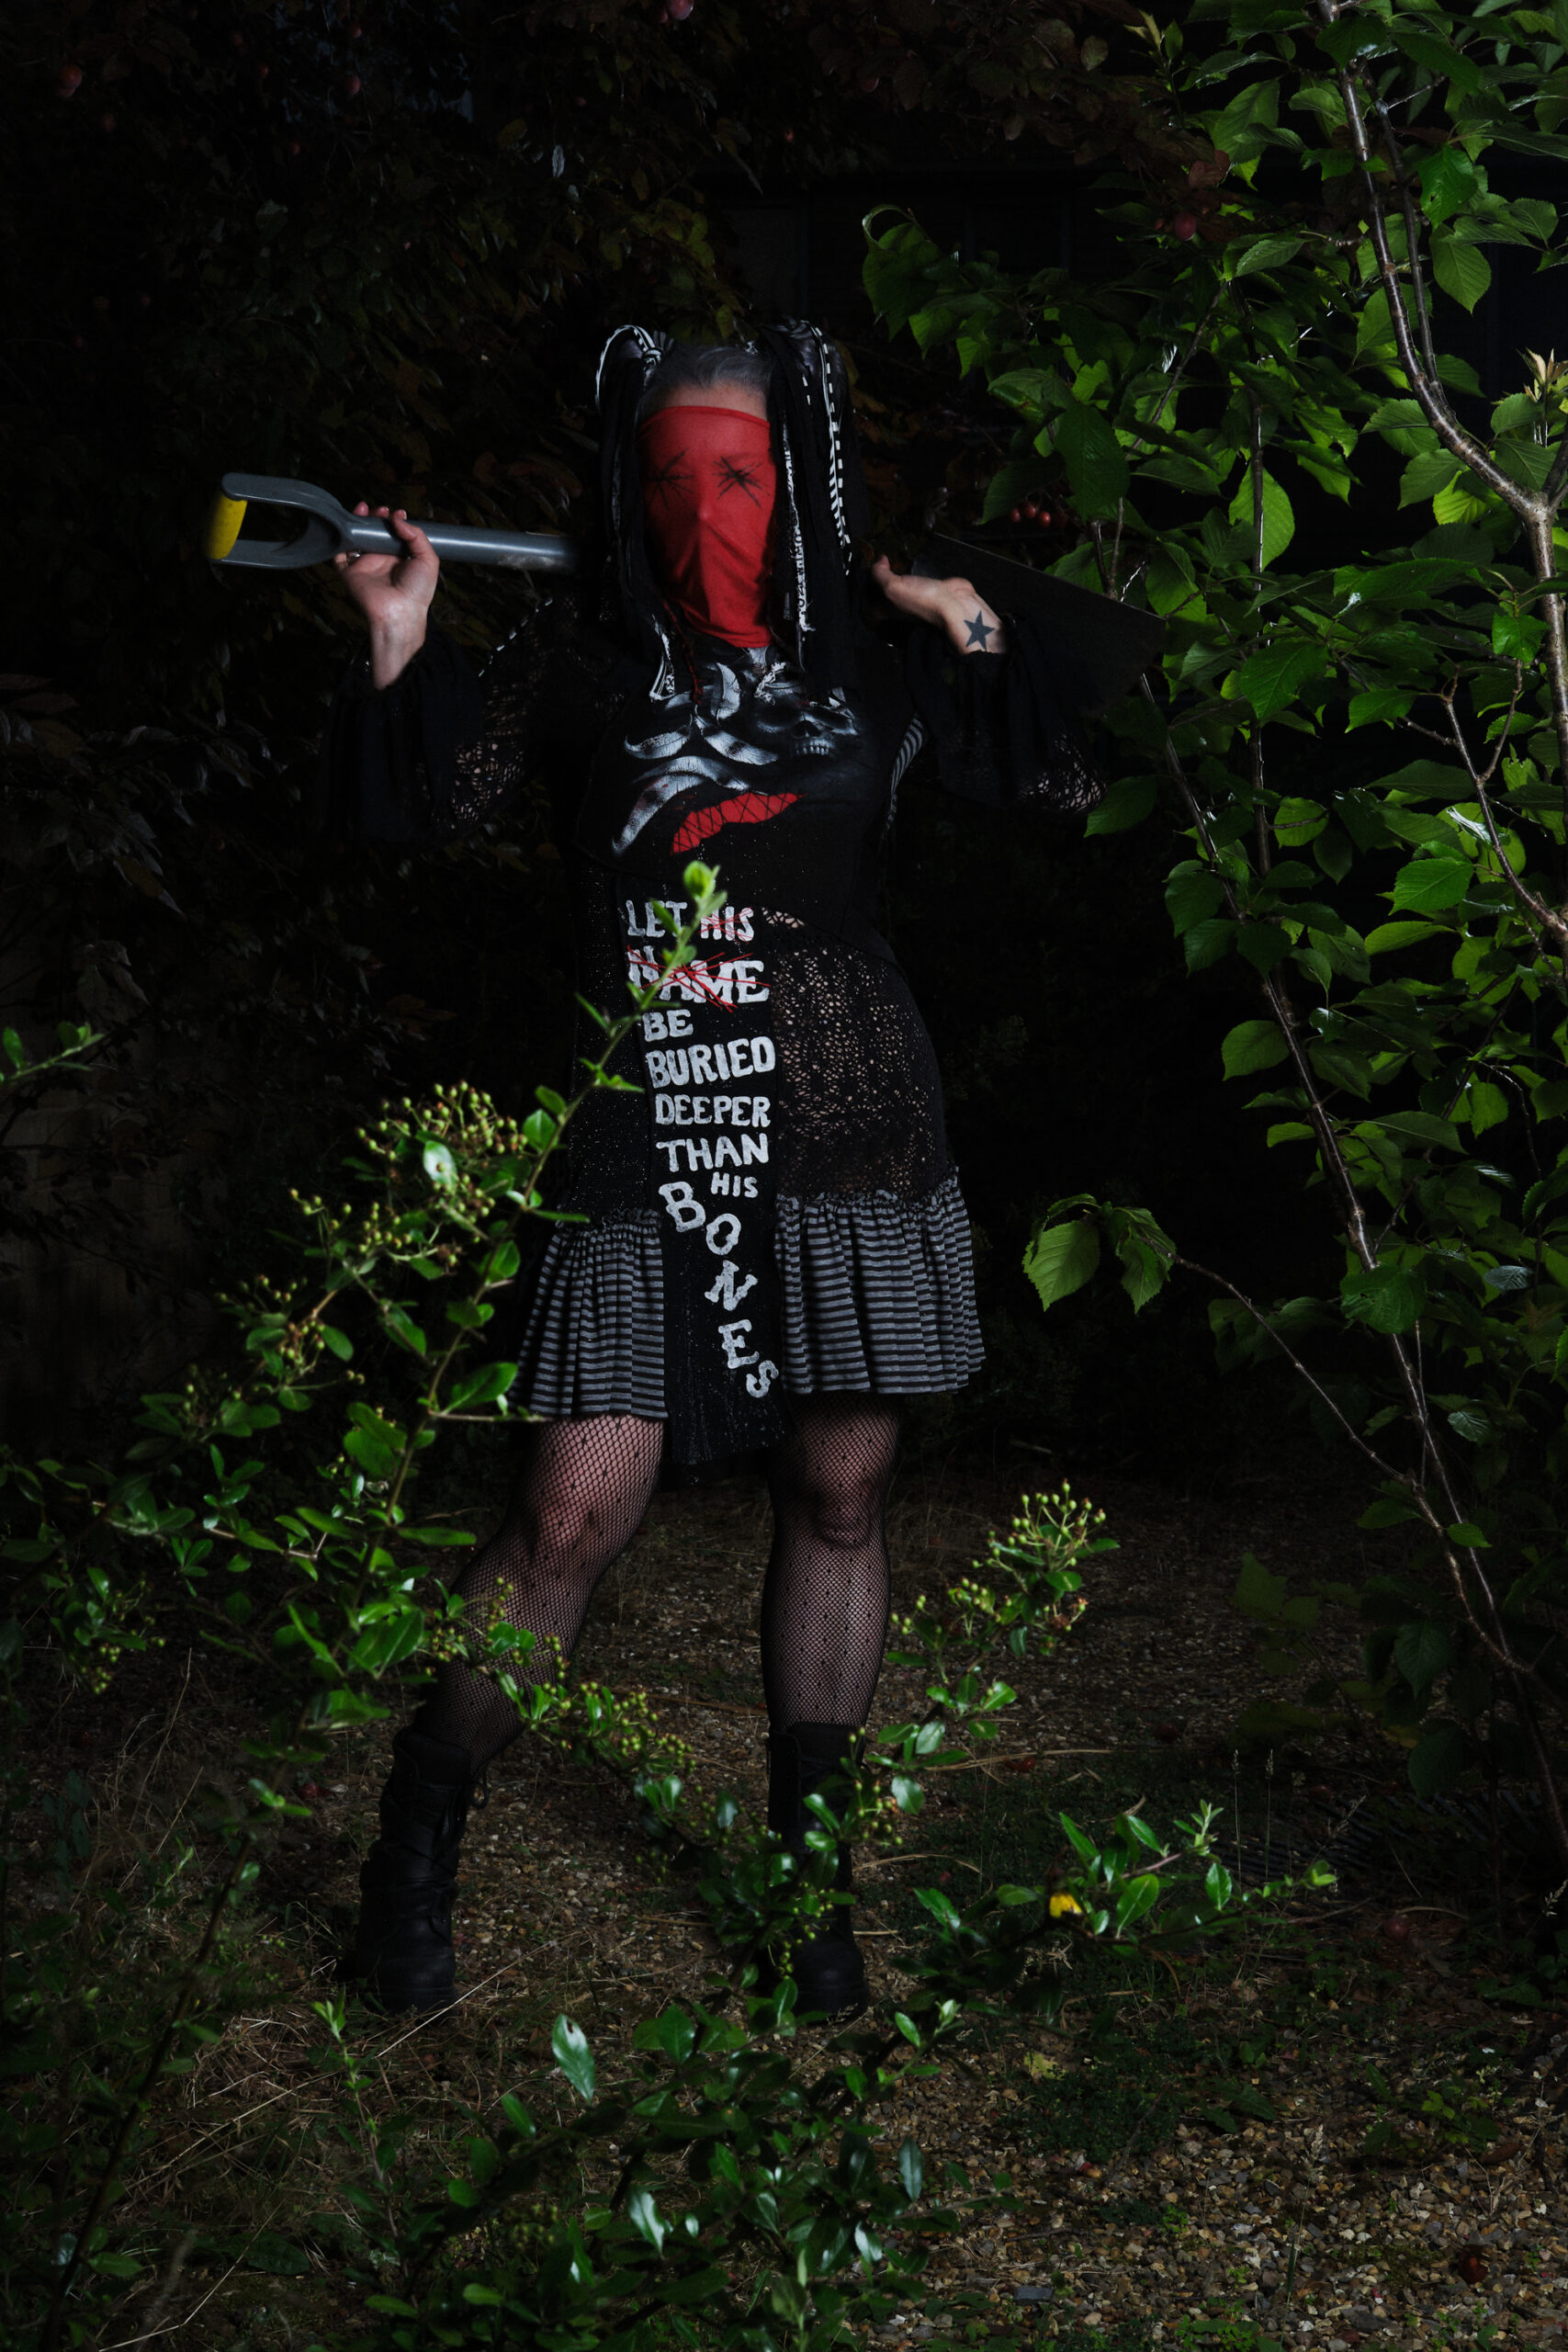
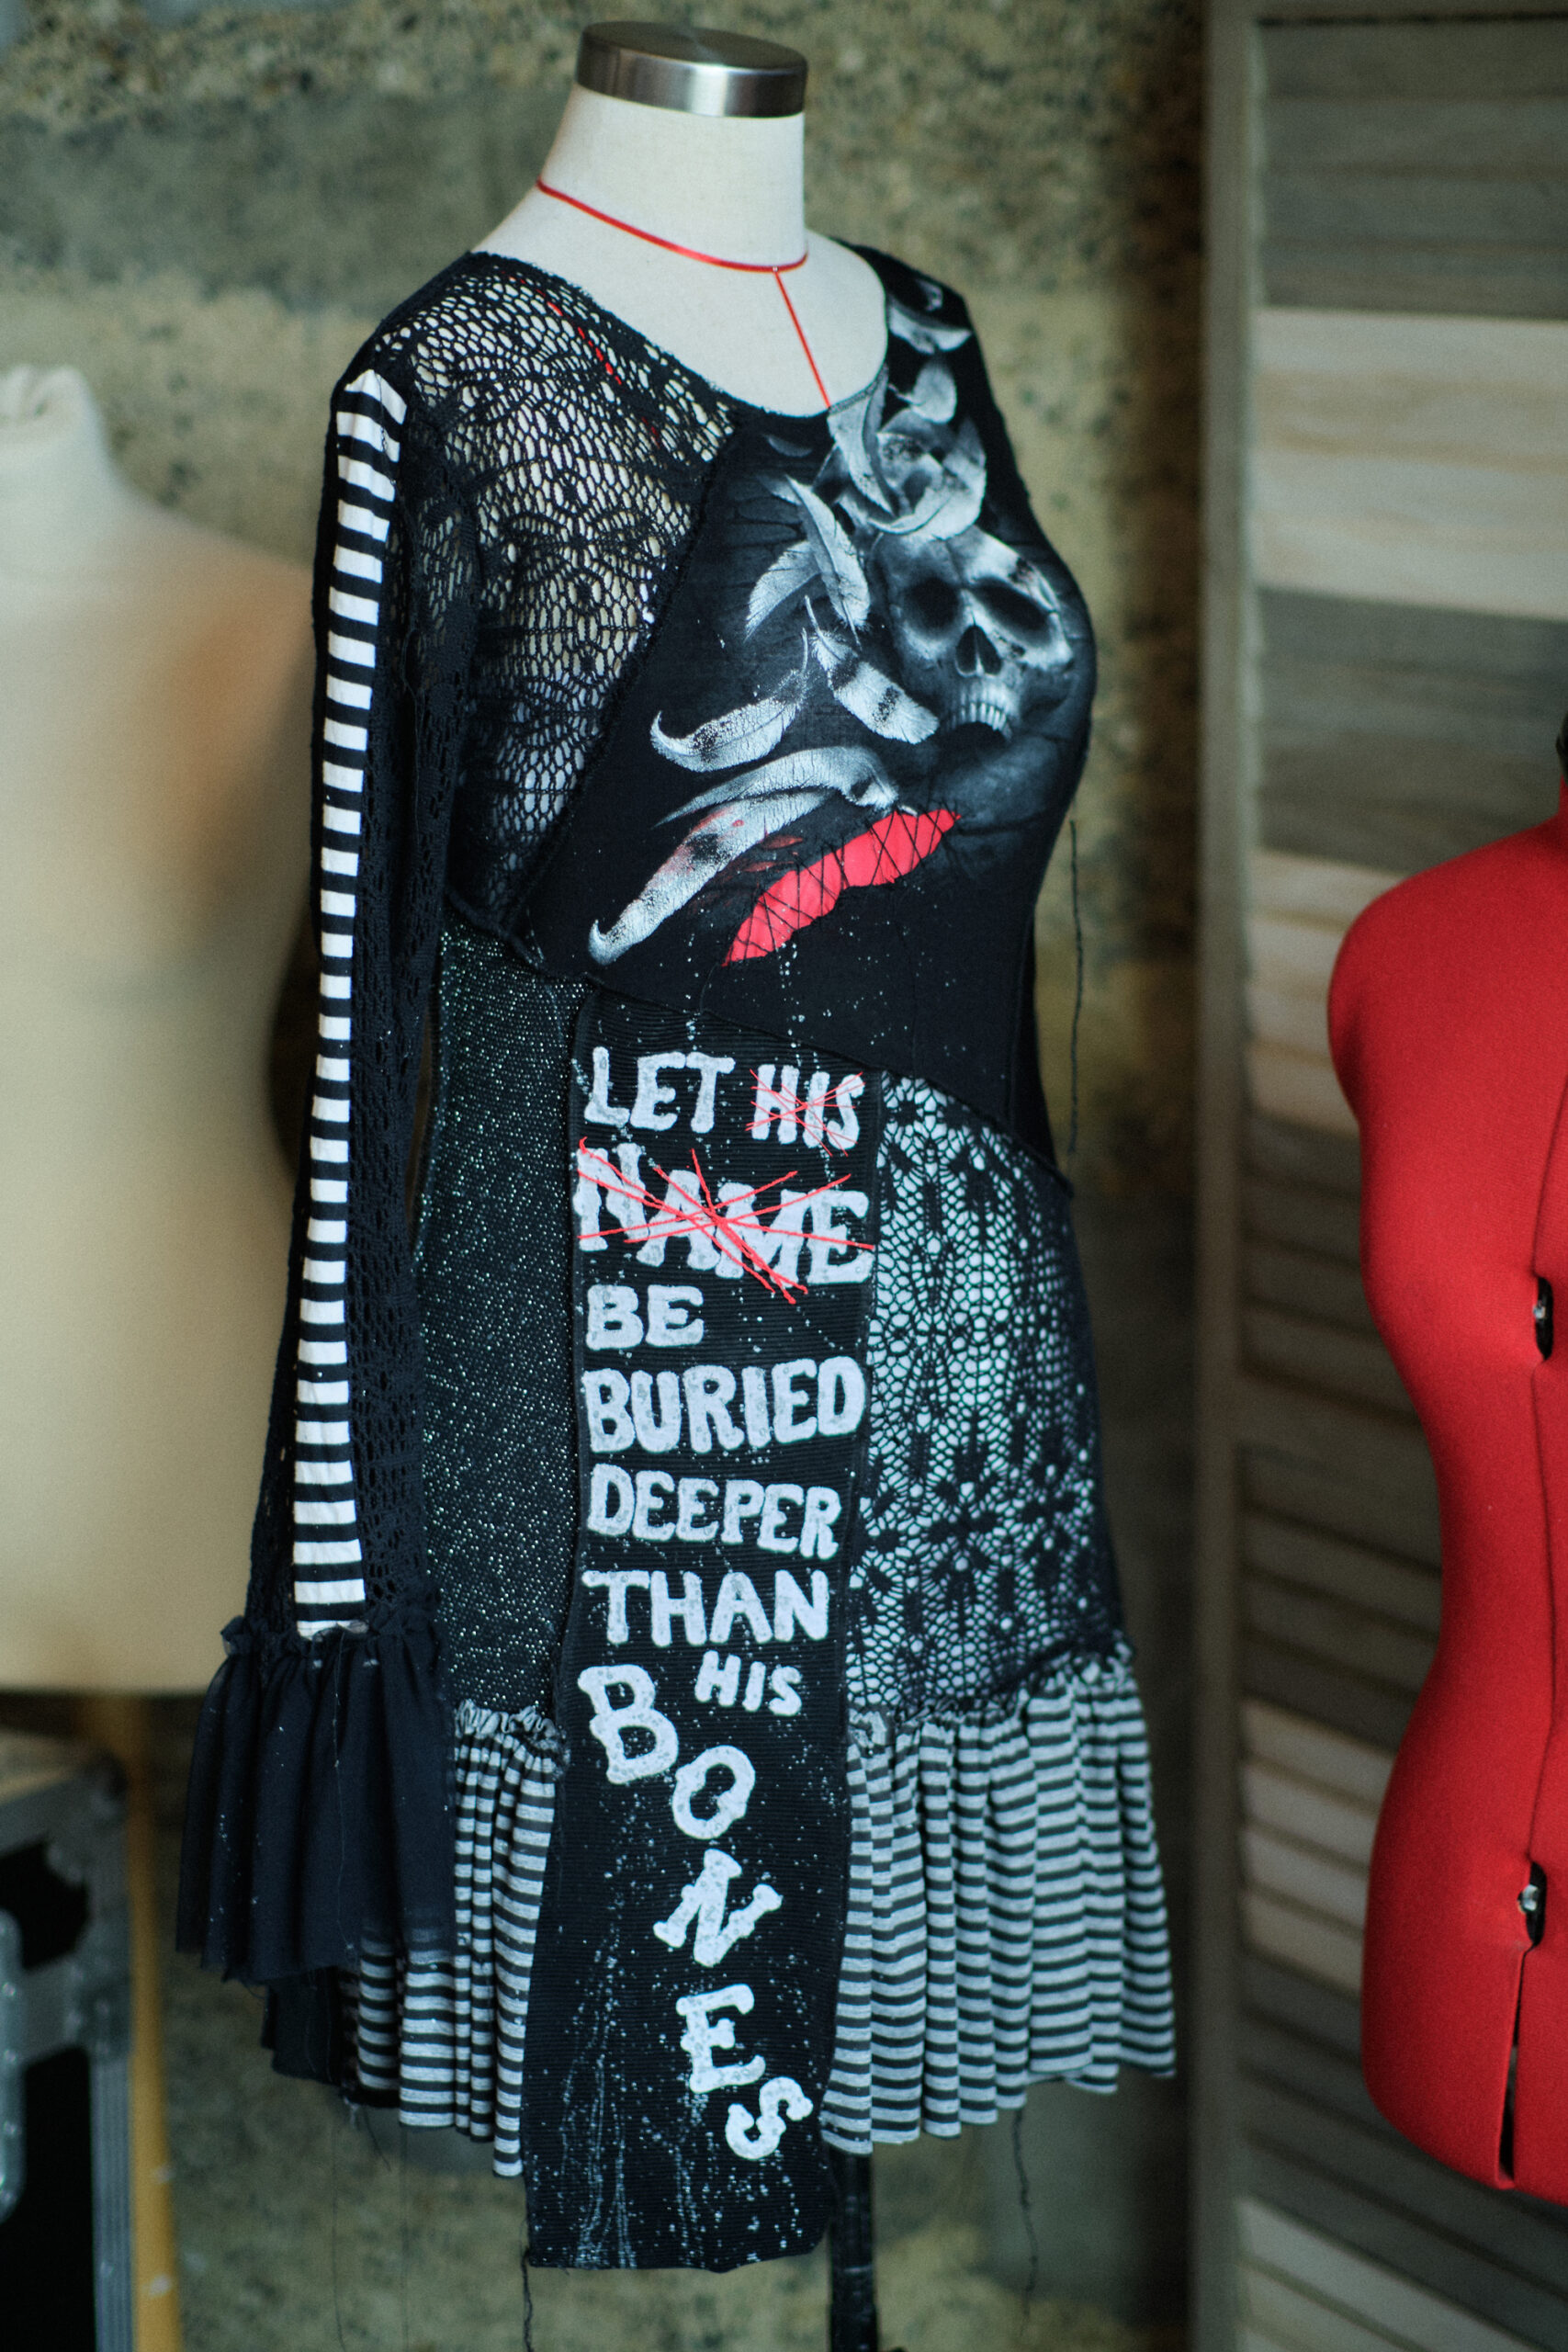
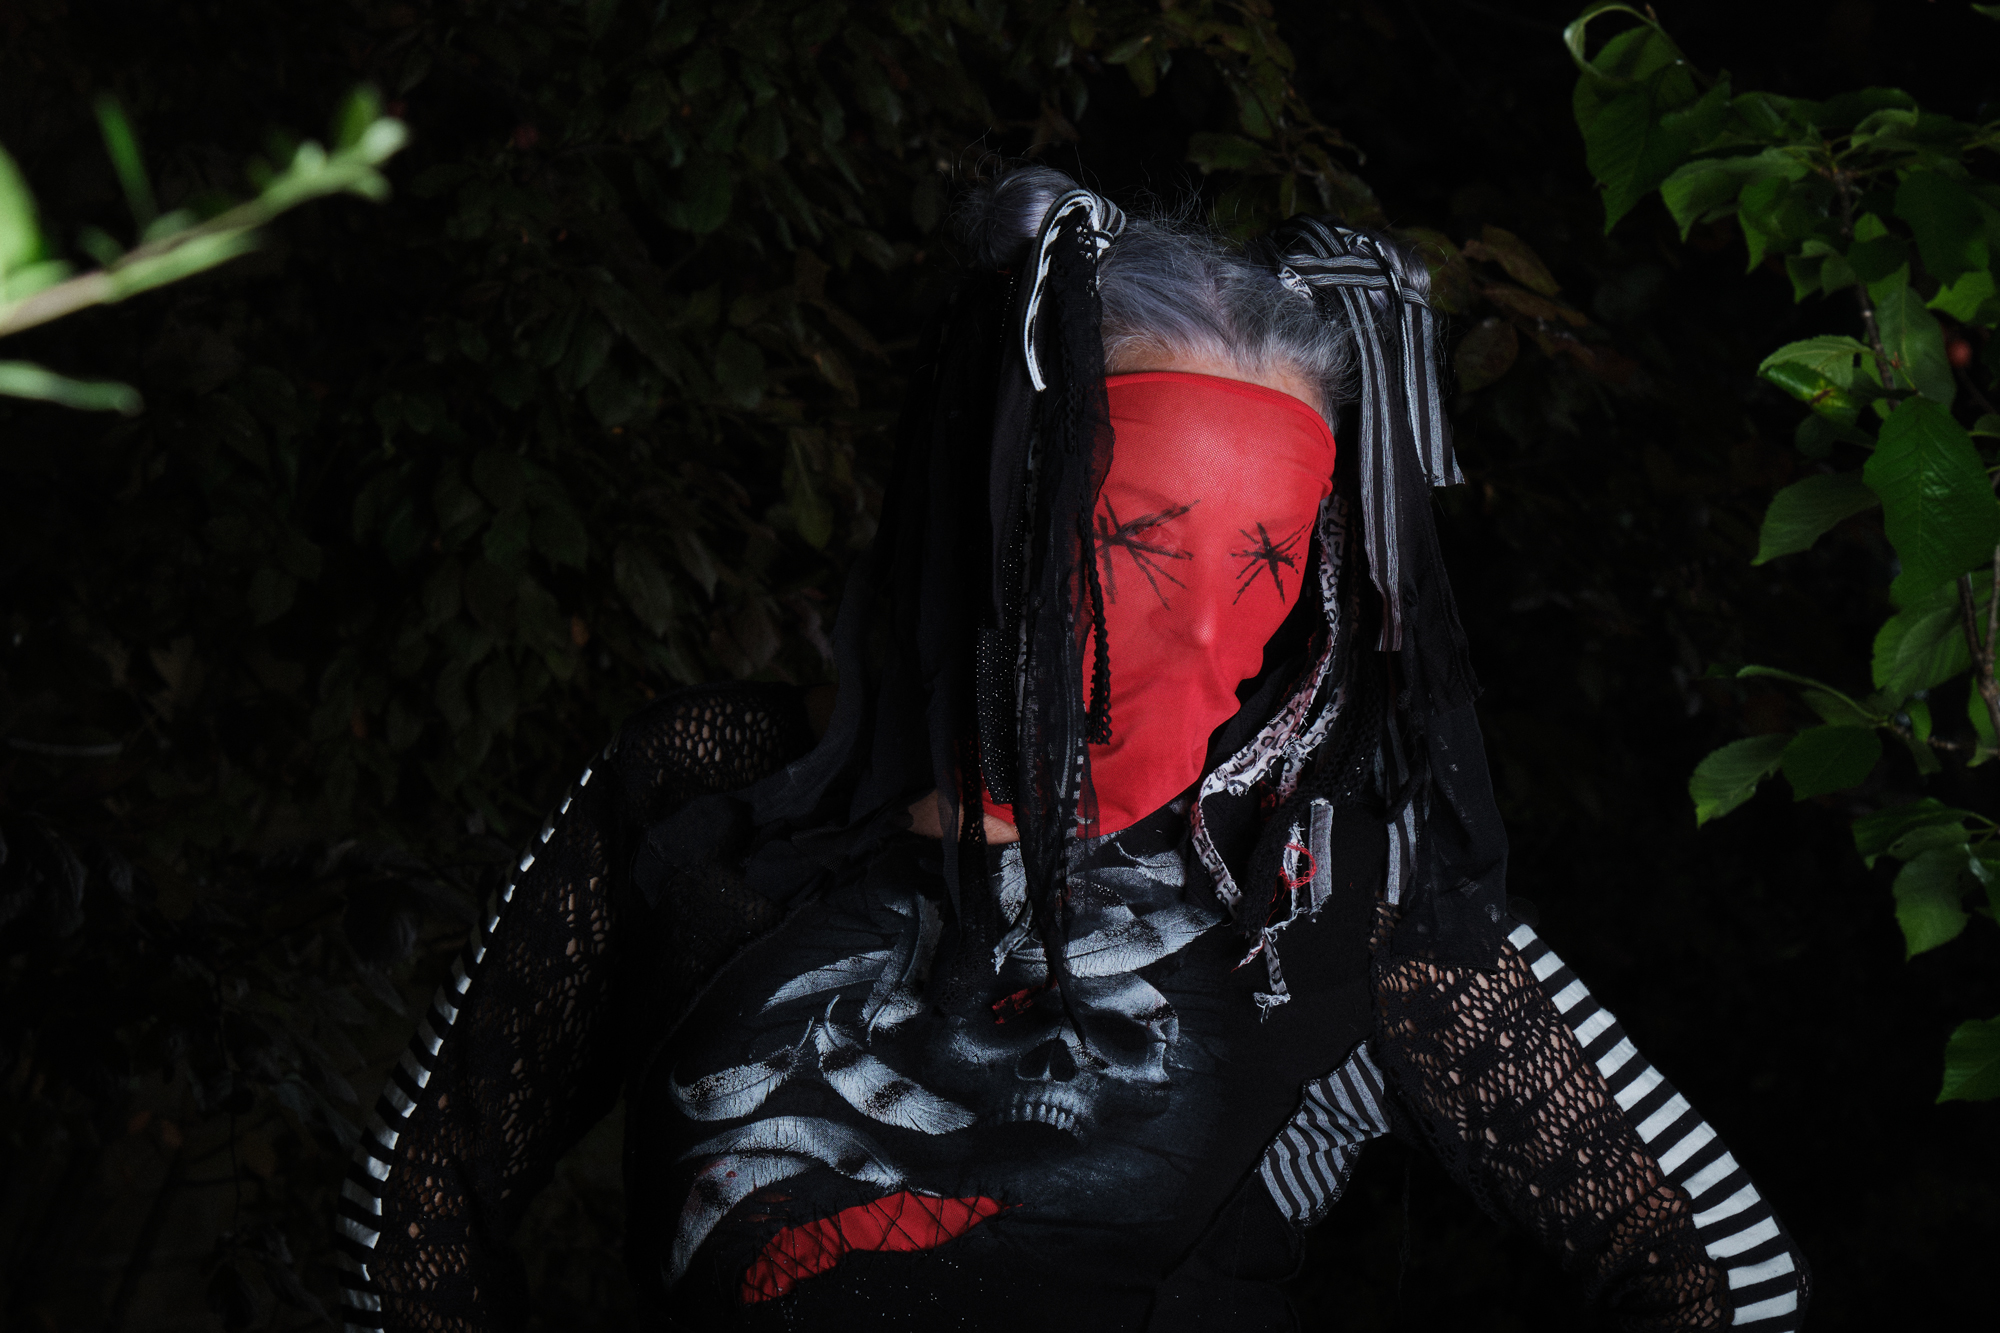
At first, I didn’t consciously understand why. I just noticed that scars were beginning to appear in the composition. Shapes that felt wounded. Interruptions rather than embellishments. And then the words arrived, uninvited but undeniable: “Let his name be buried deeper than his bones.”
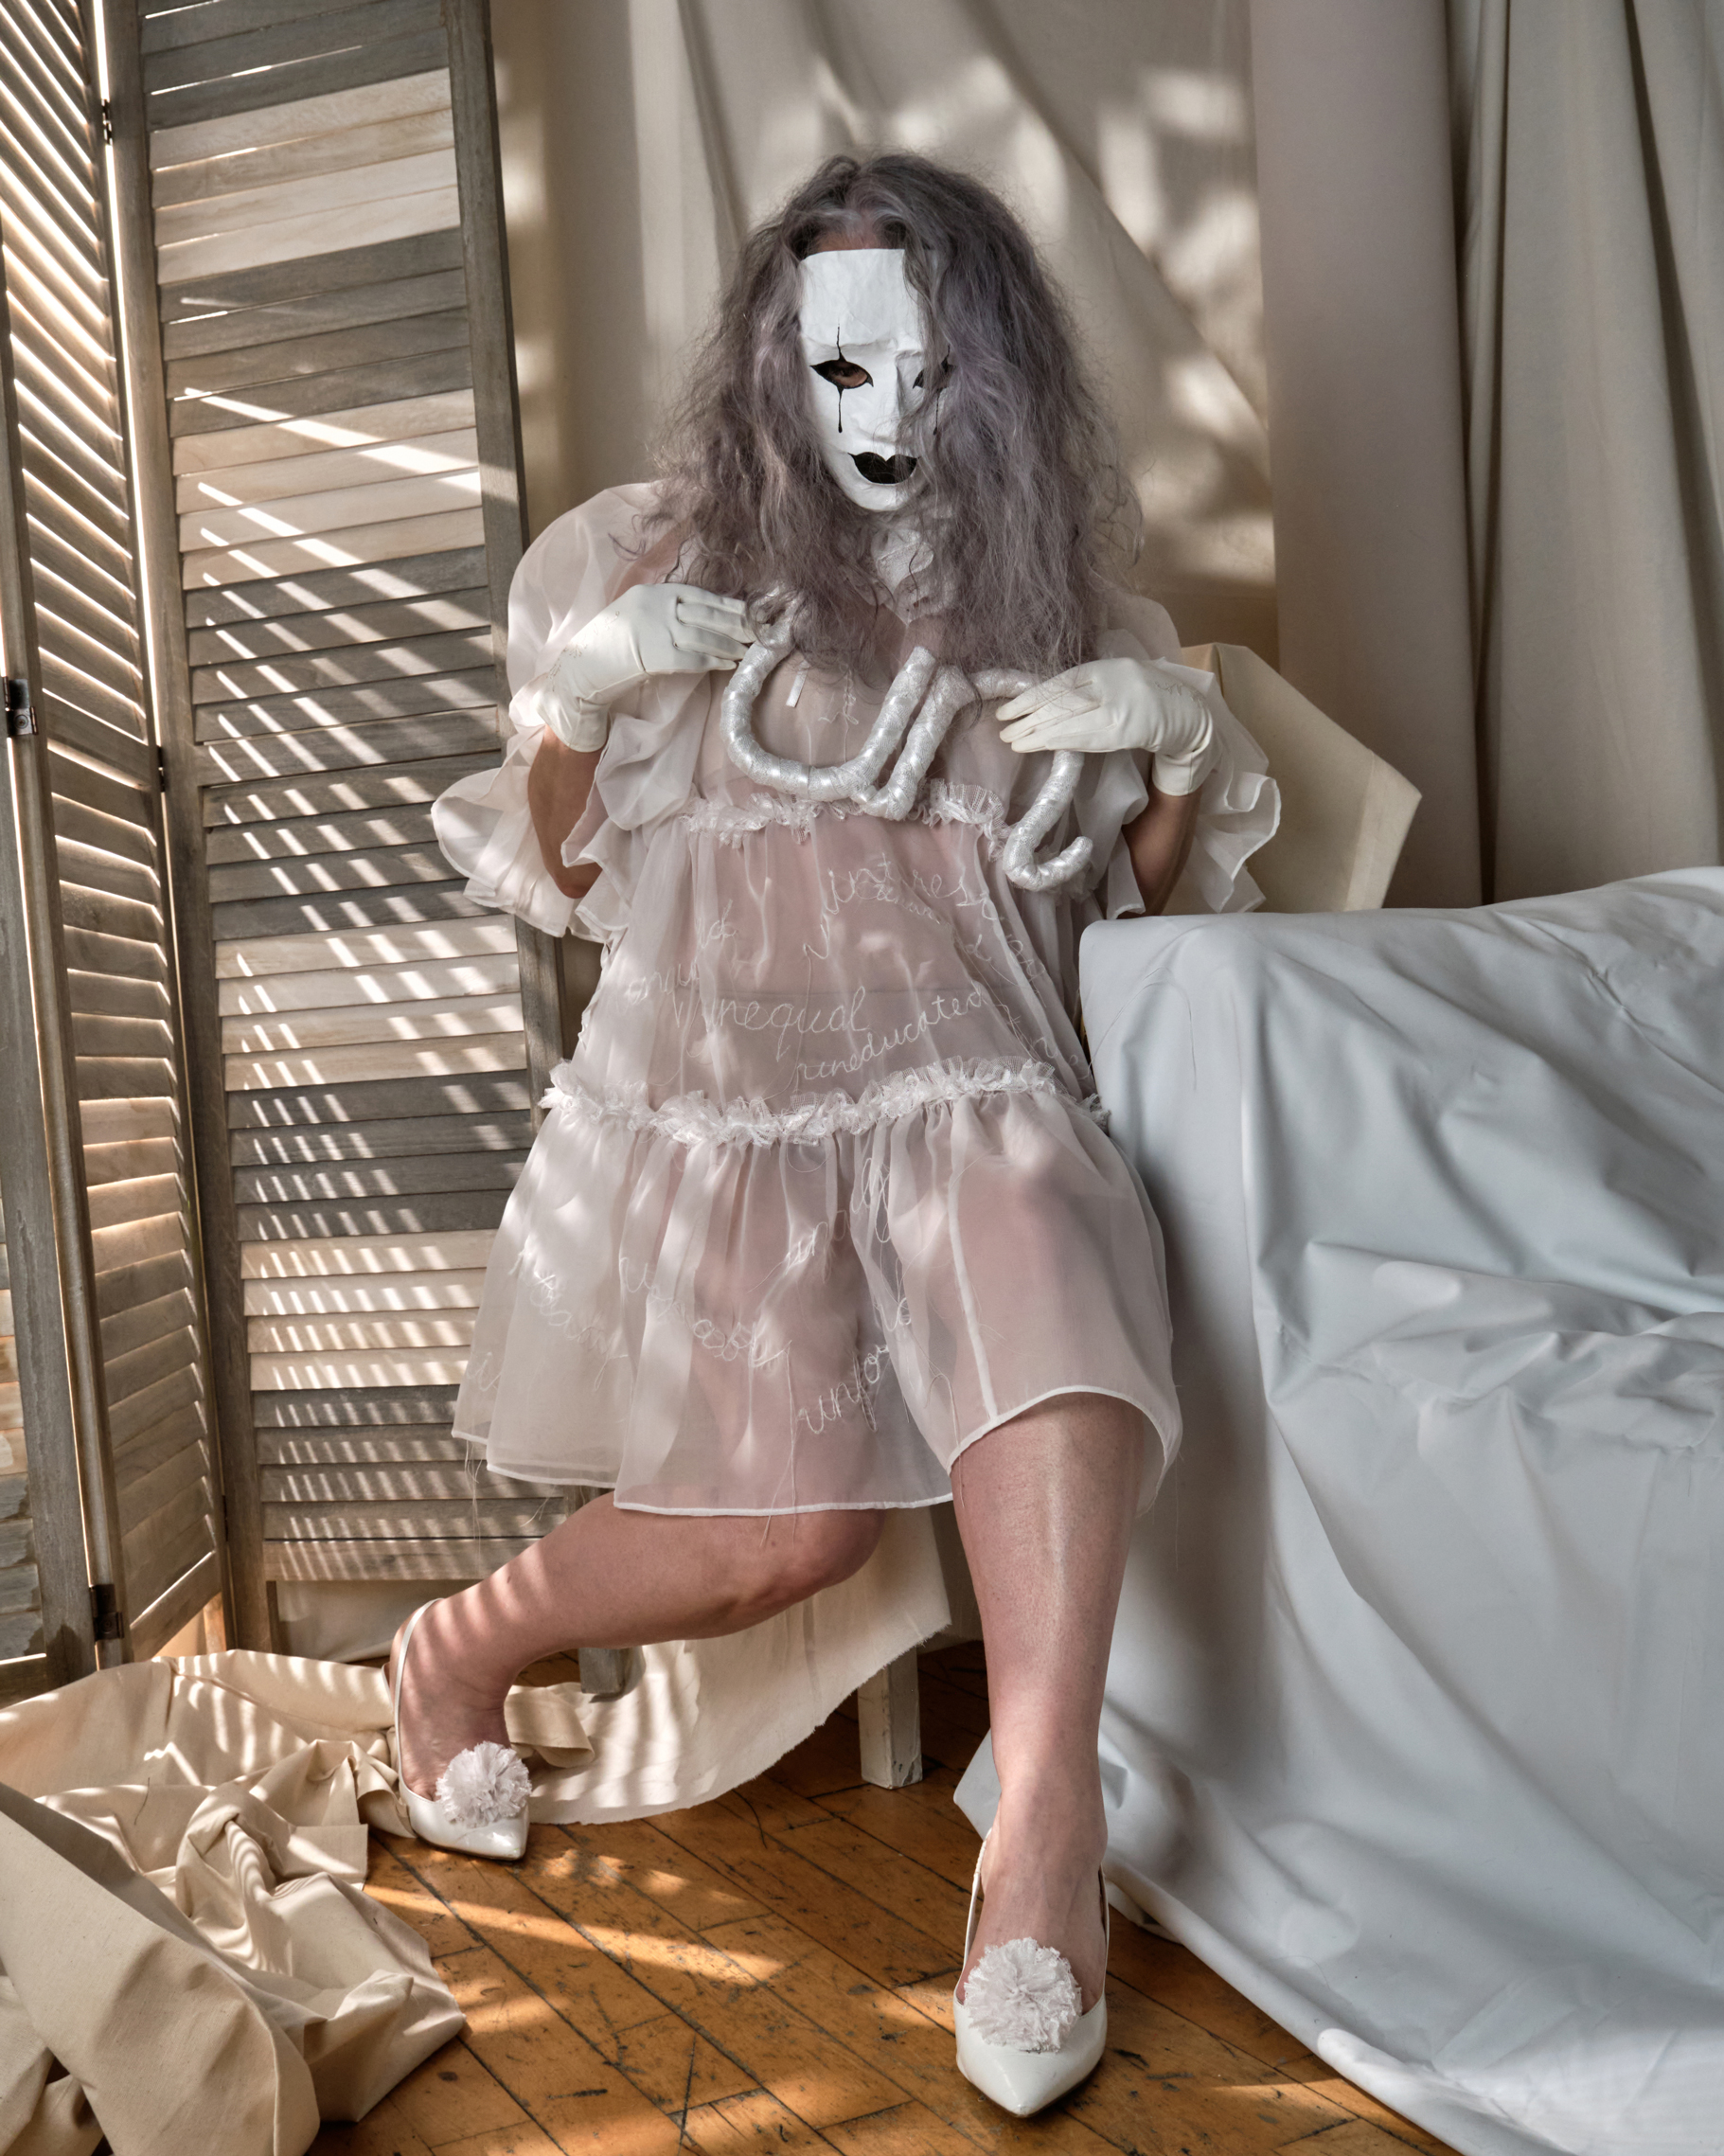
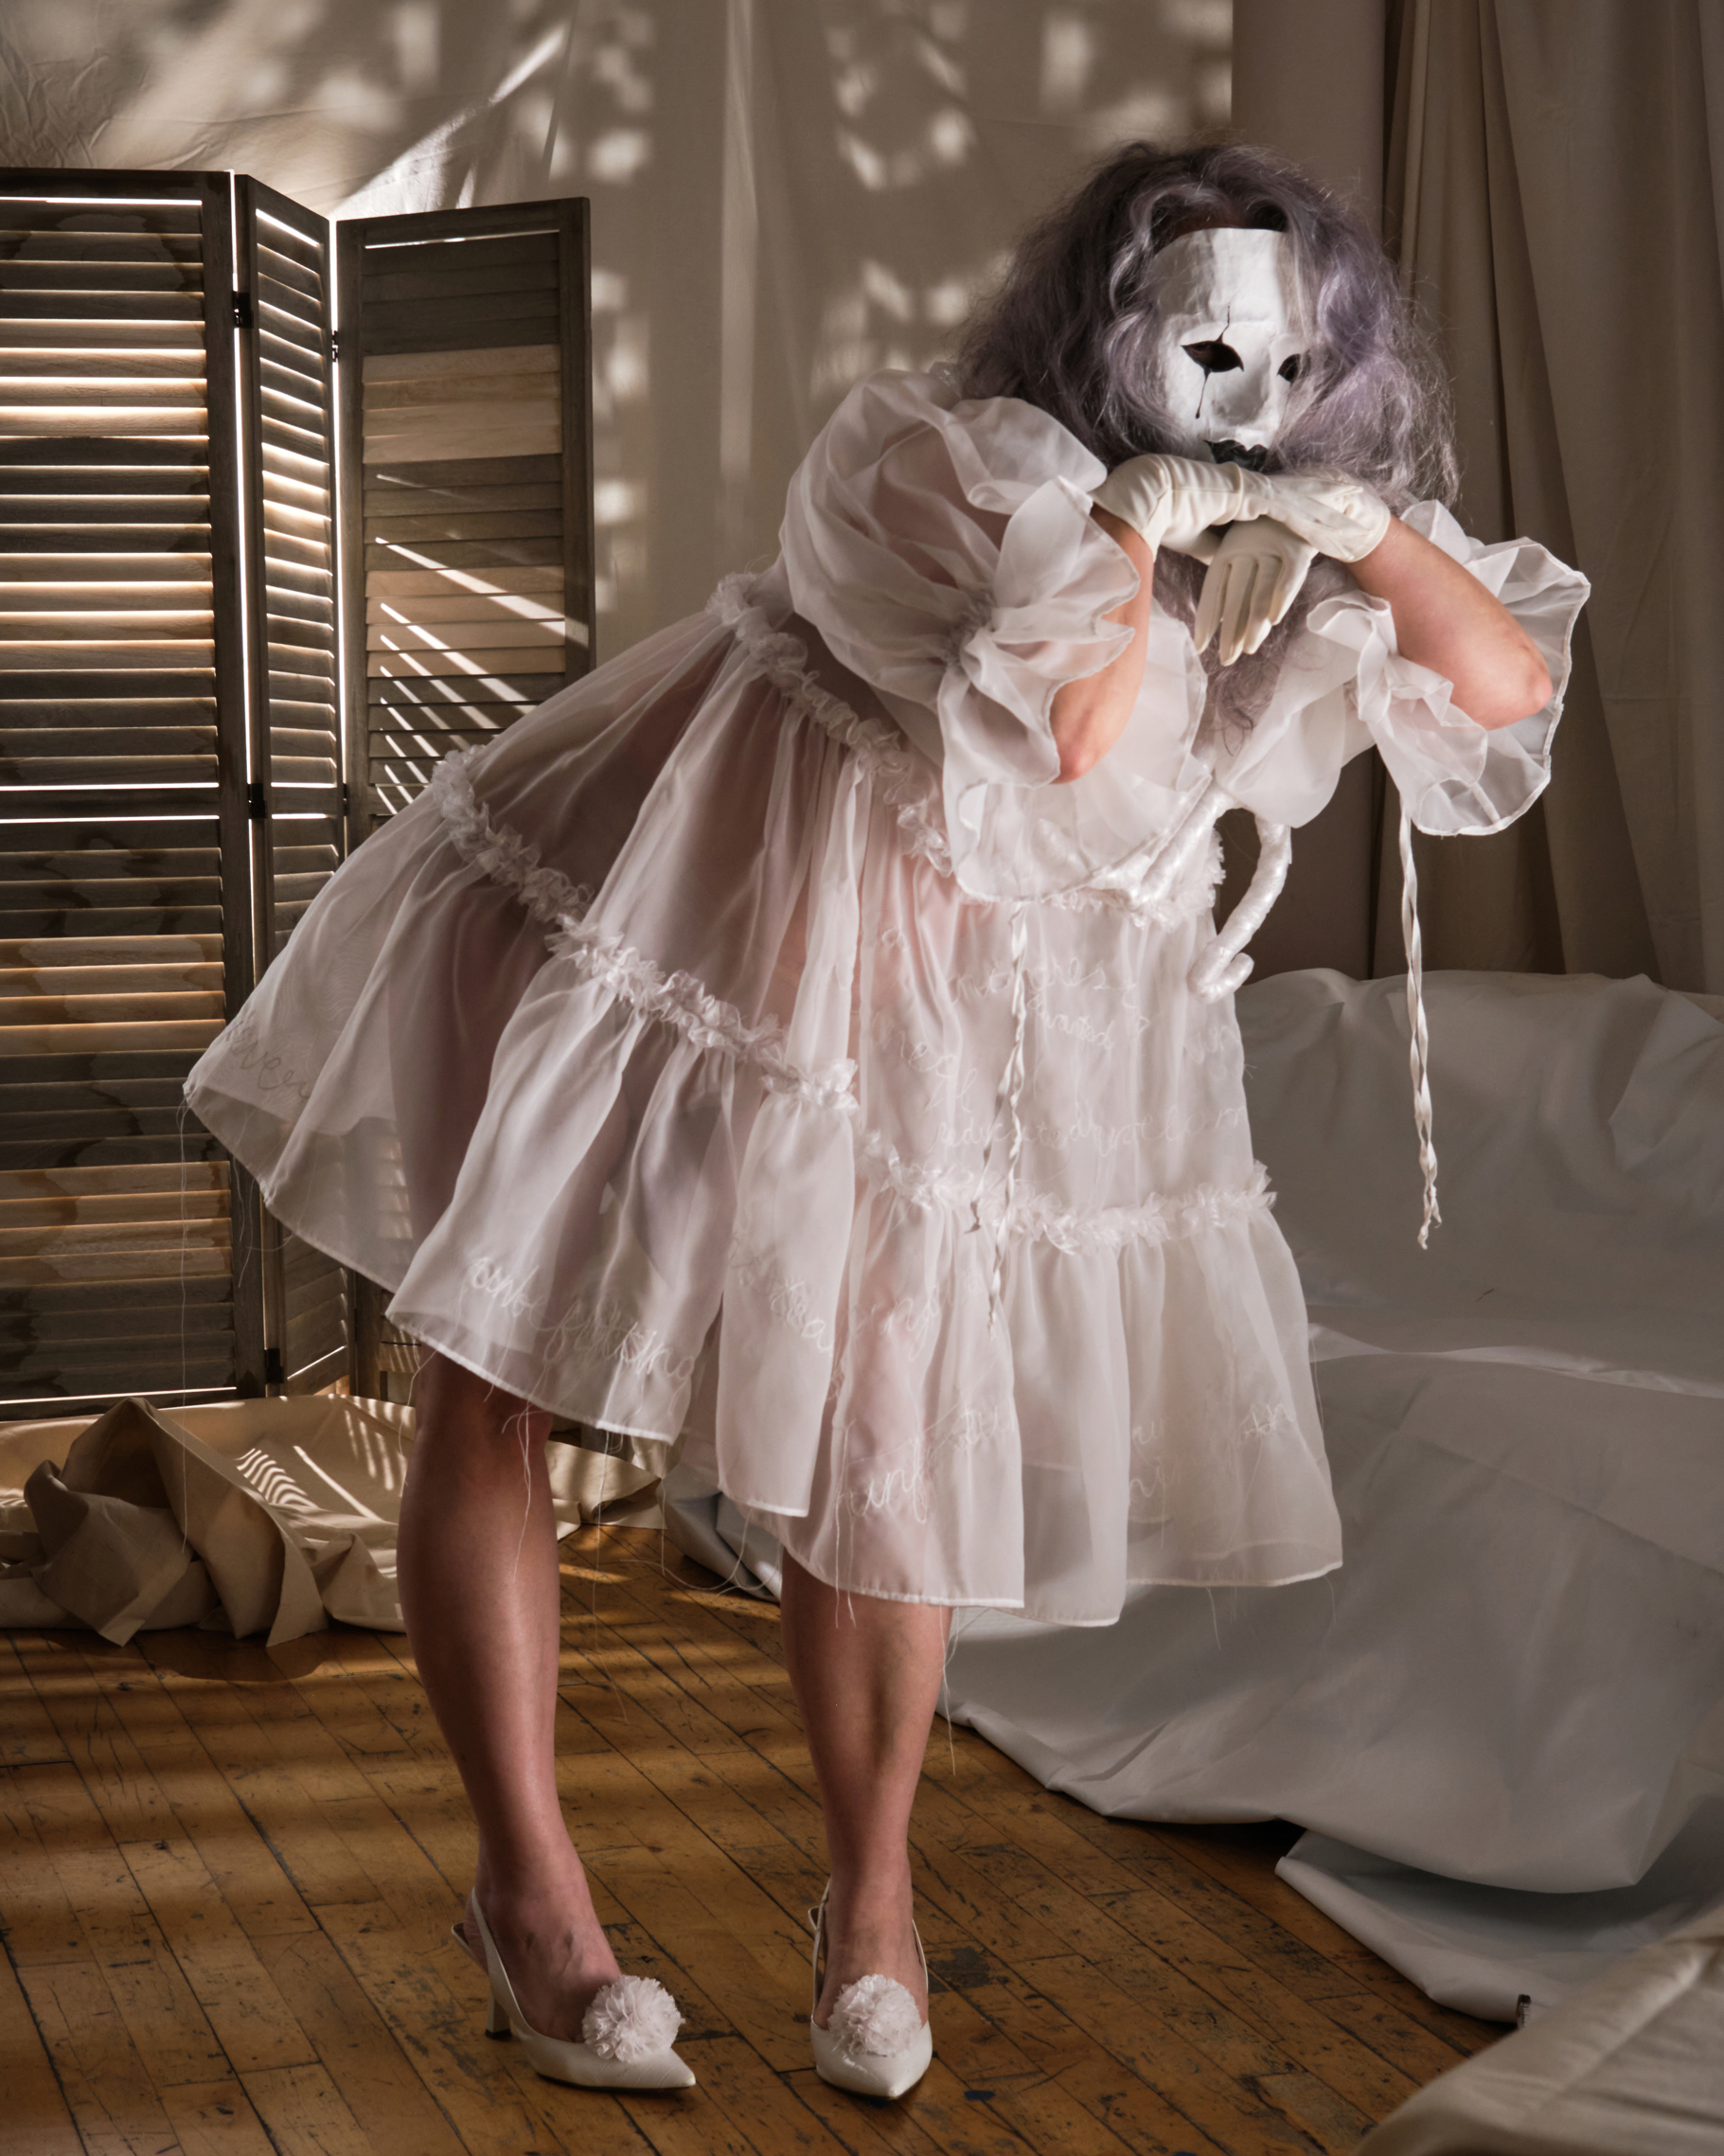
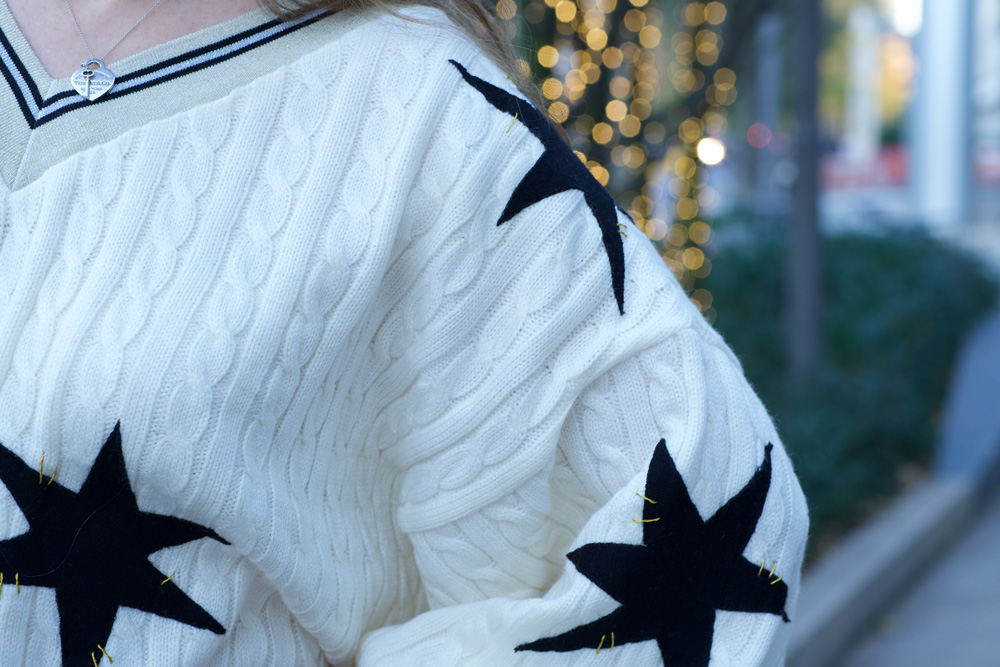
Once those words surfaced, everything snapped into focus. The entire piece changed direction in an instant. The skull motif and the feathers I had added almost absentmindedly suddenly felt as though they had been waiting for this moment all along. They stopped being decorative elements and became symbols. Heavy ones. Necessary ones.
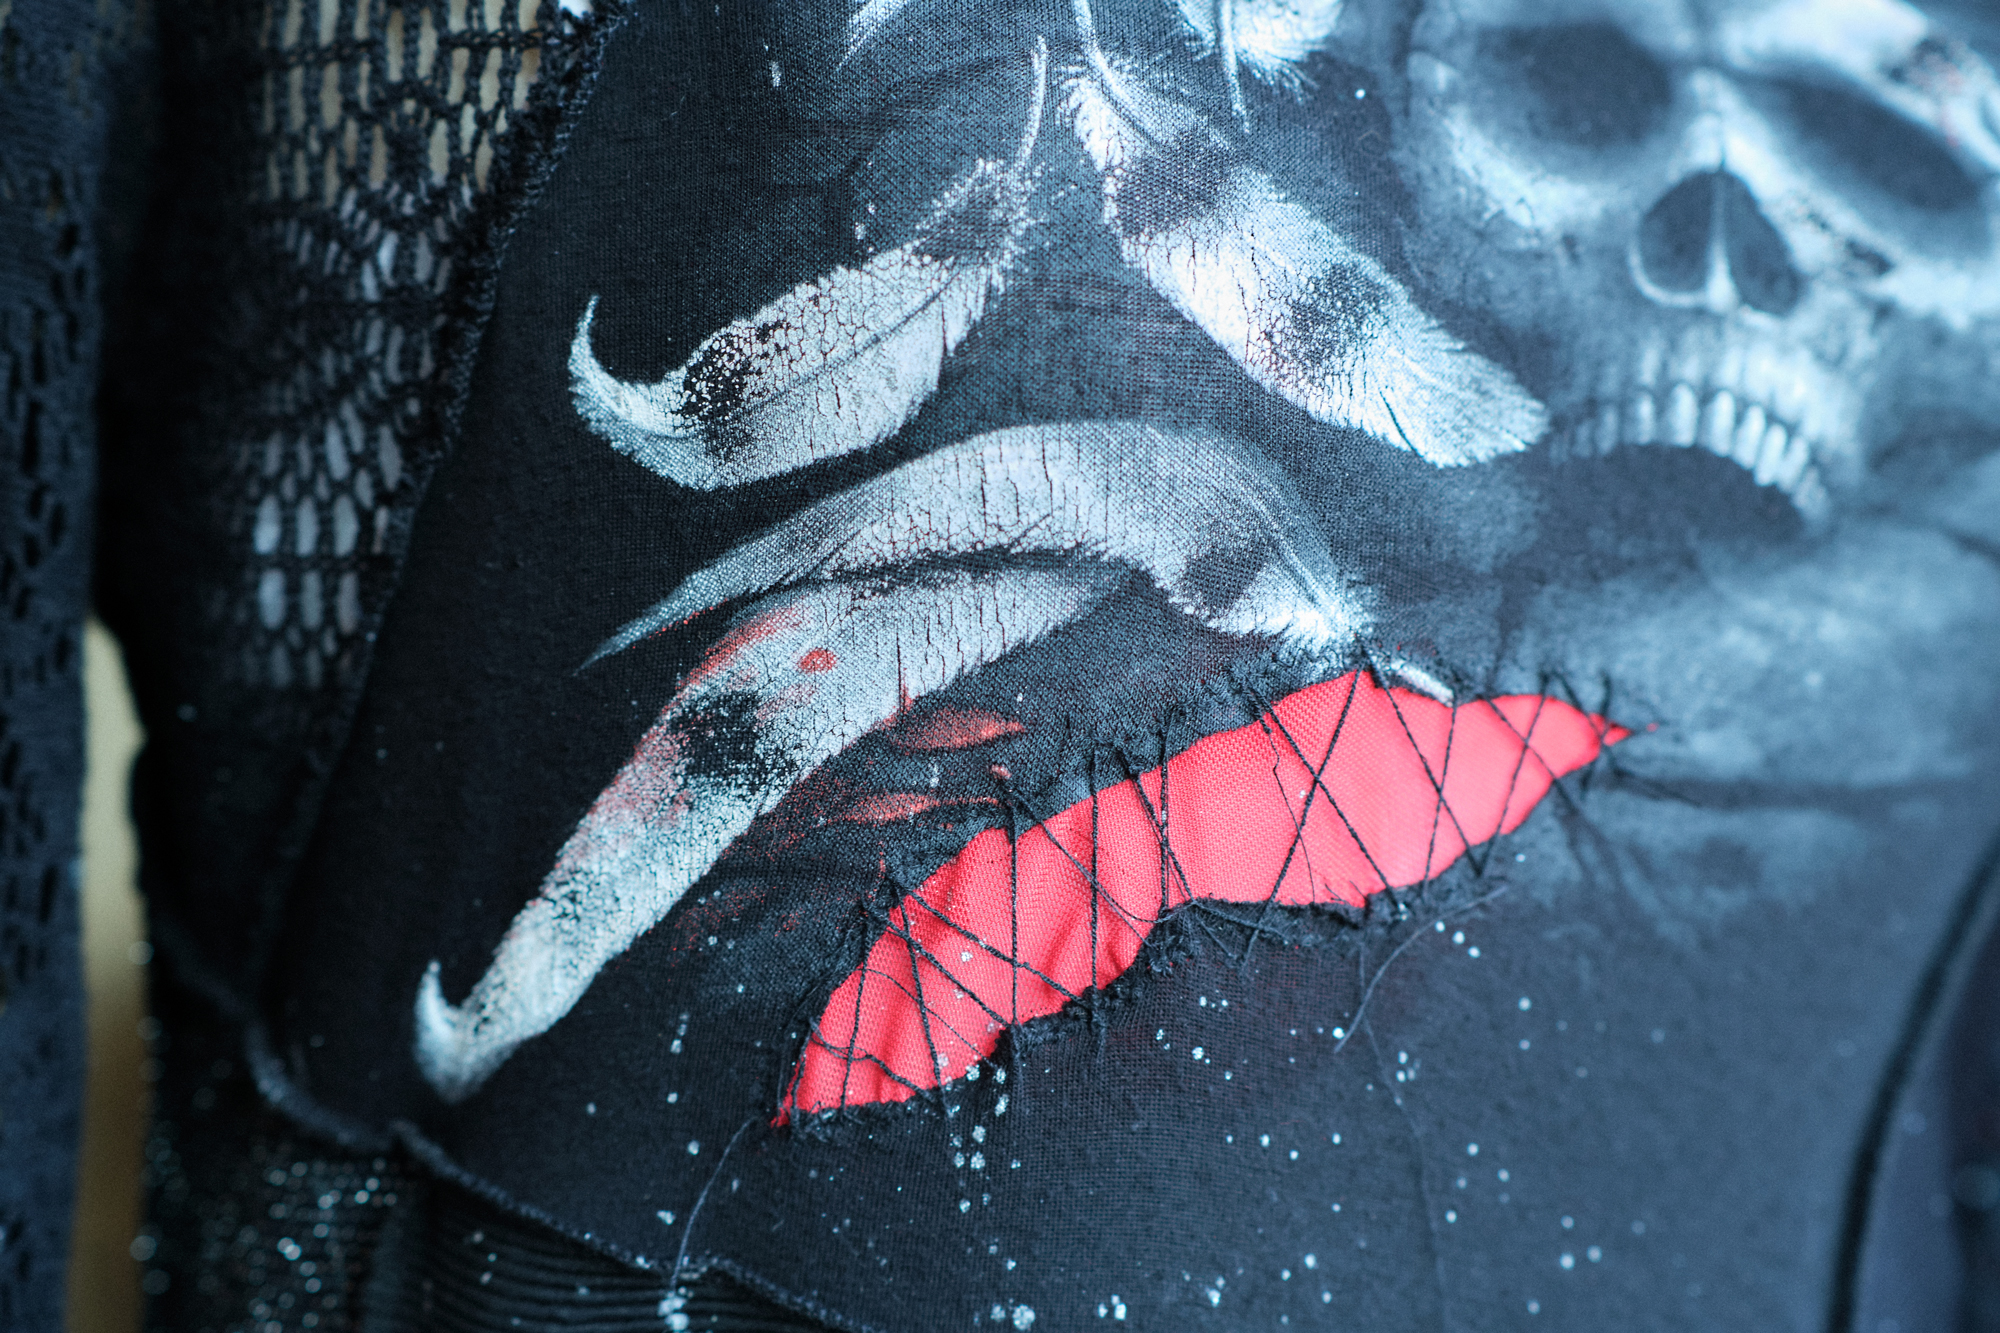
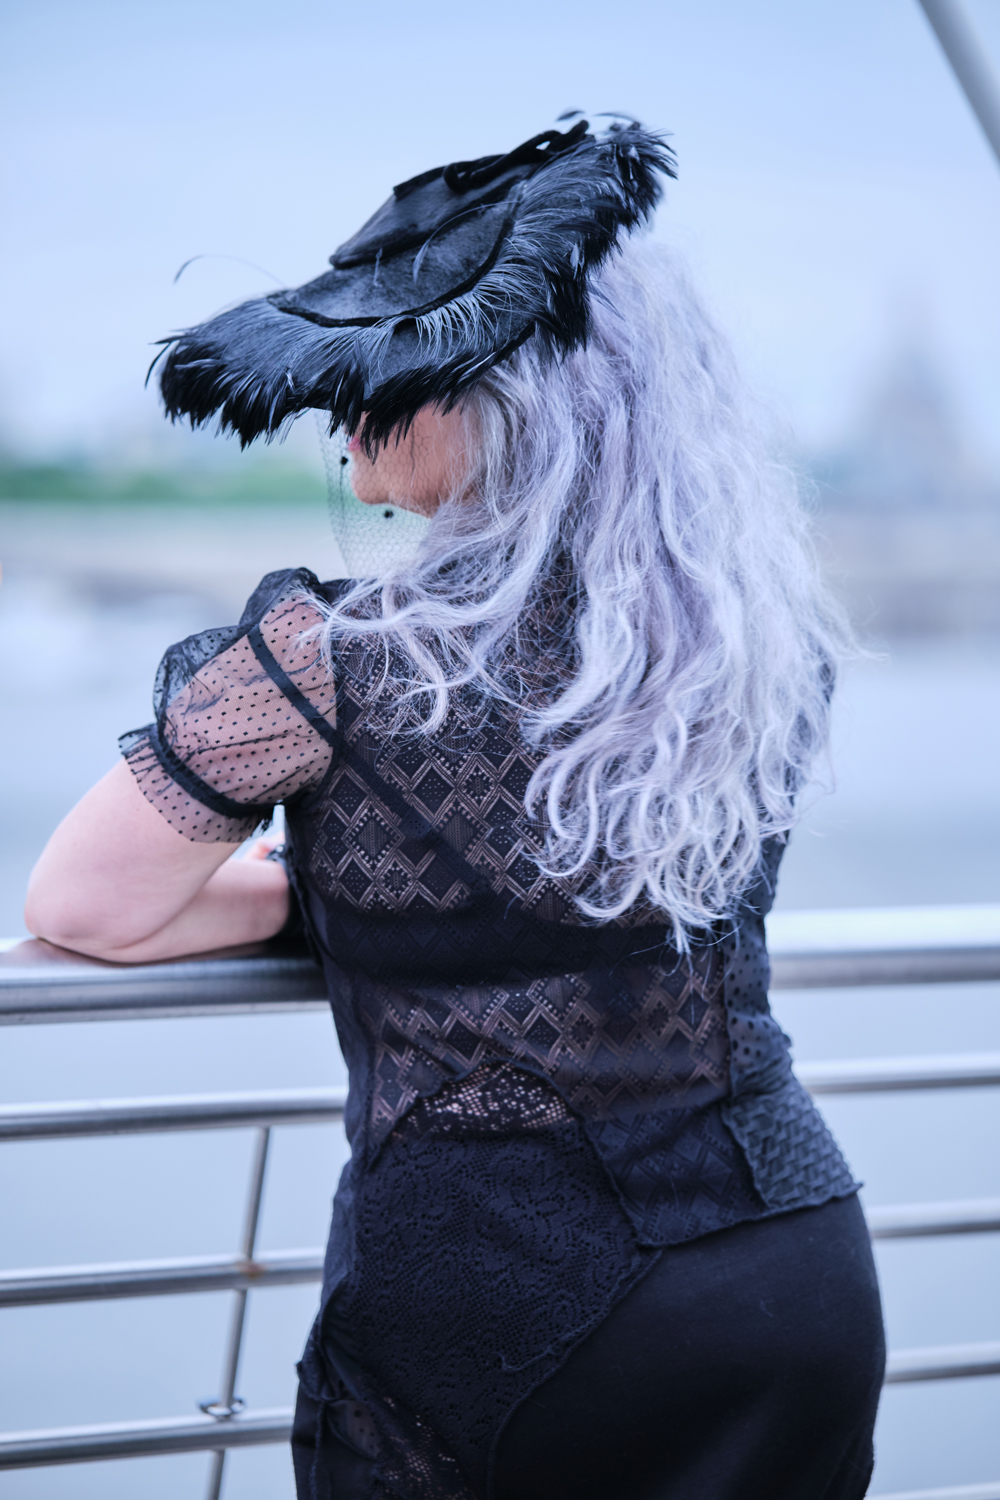
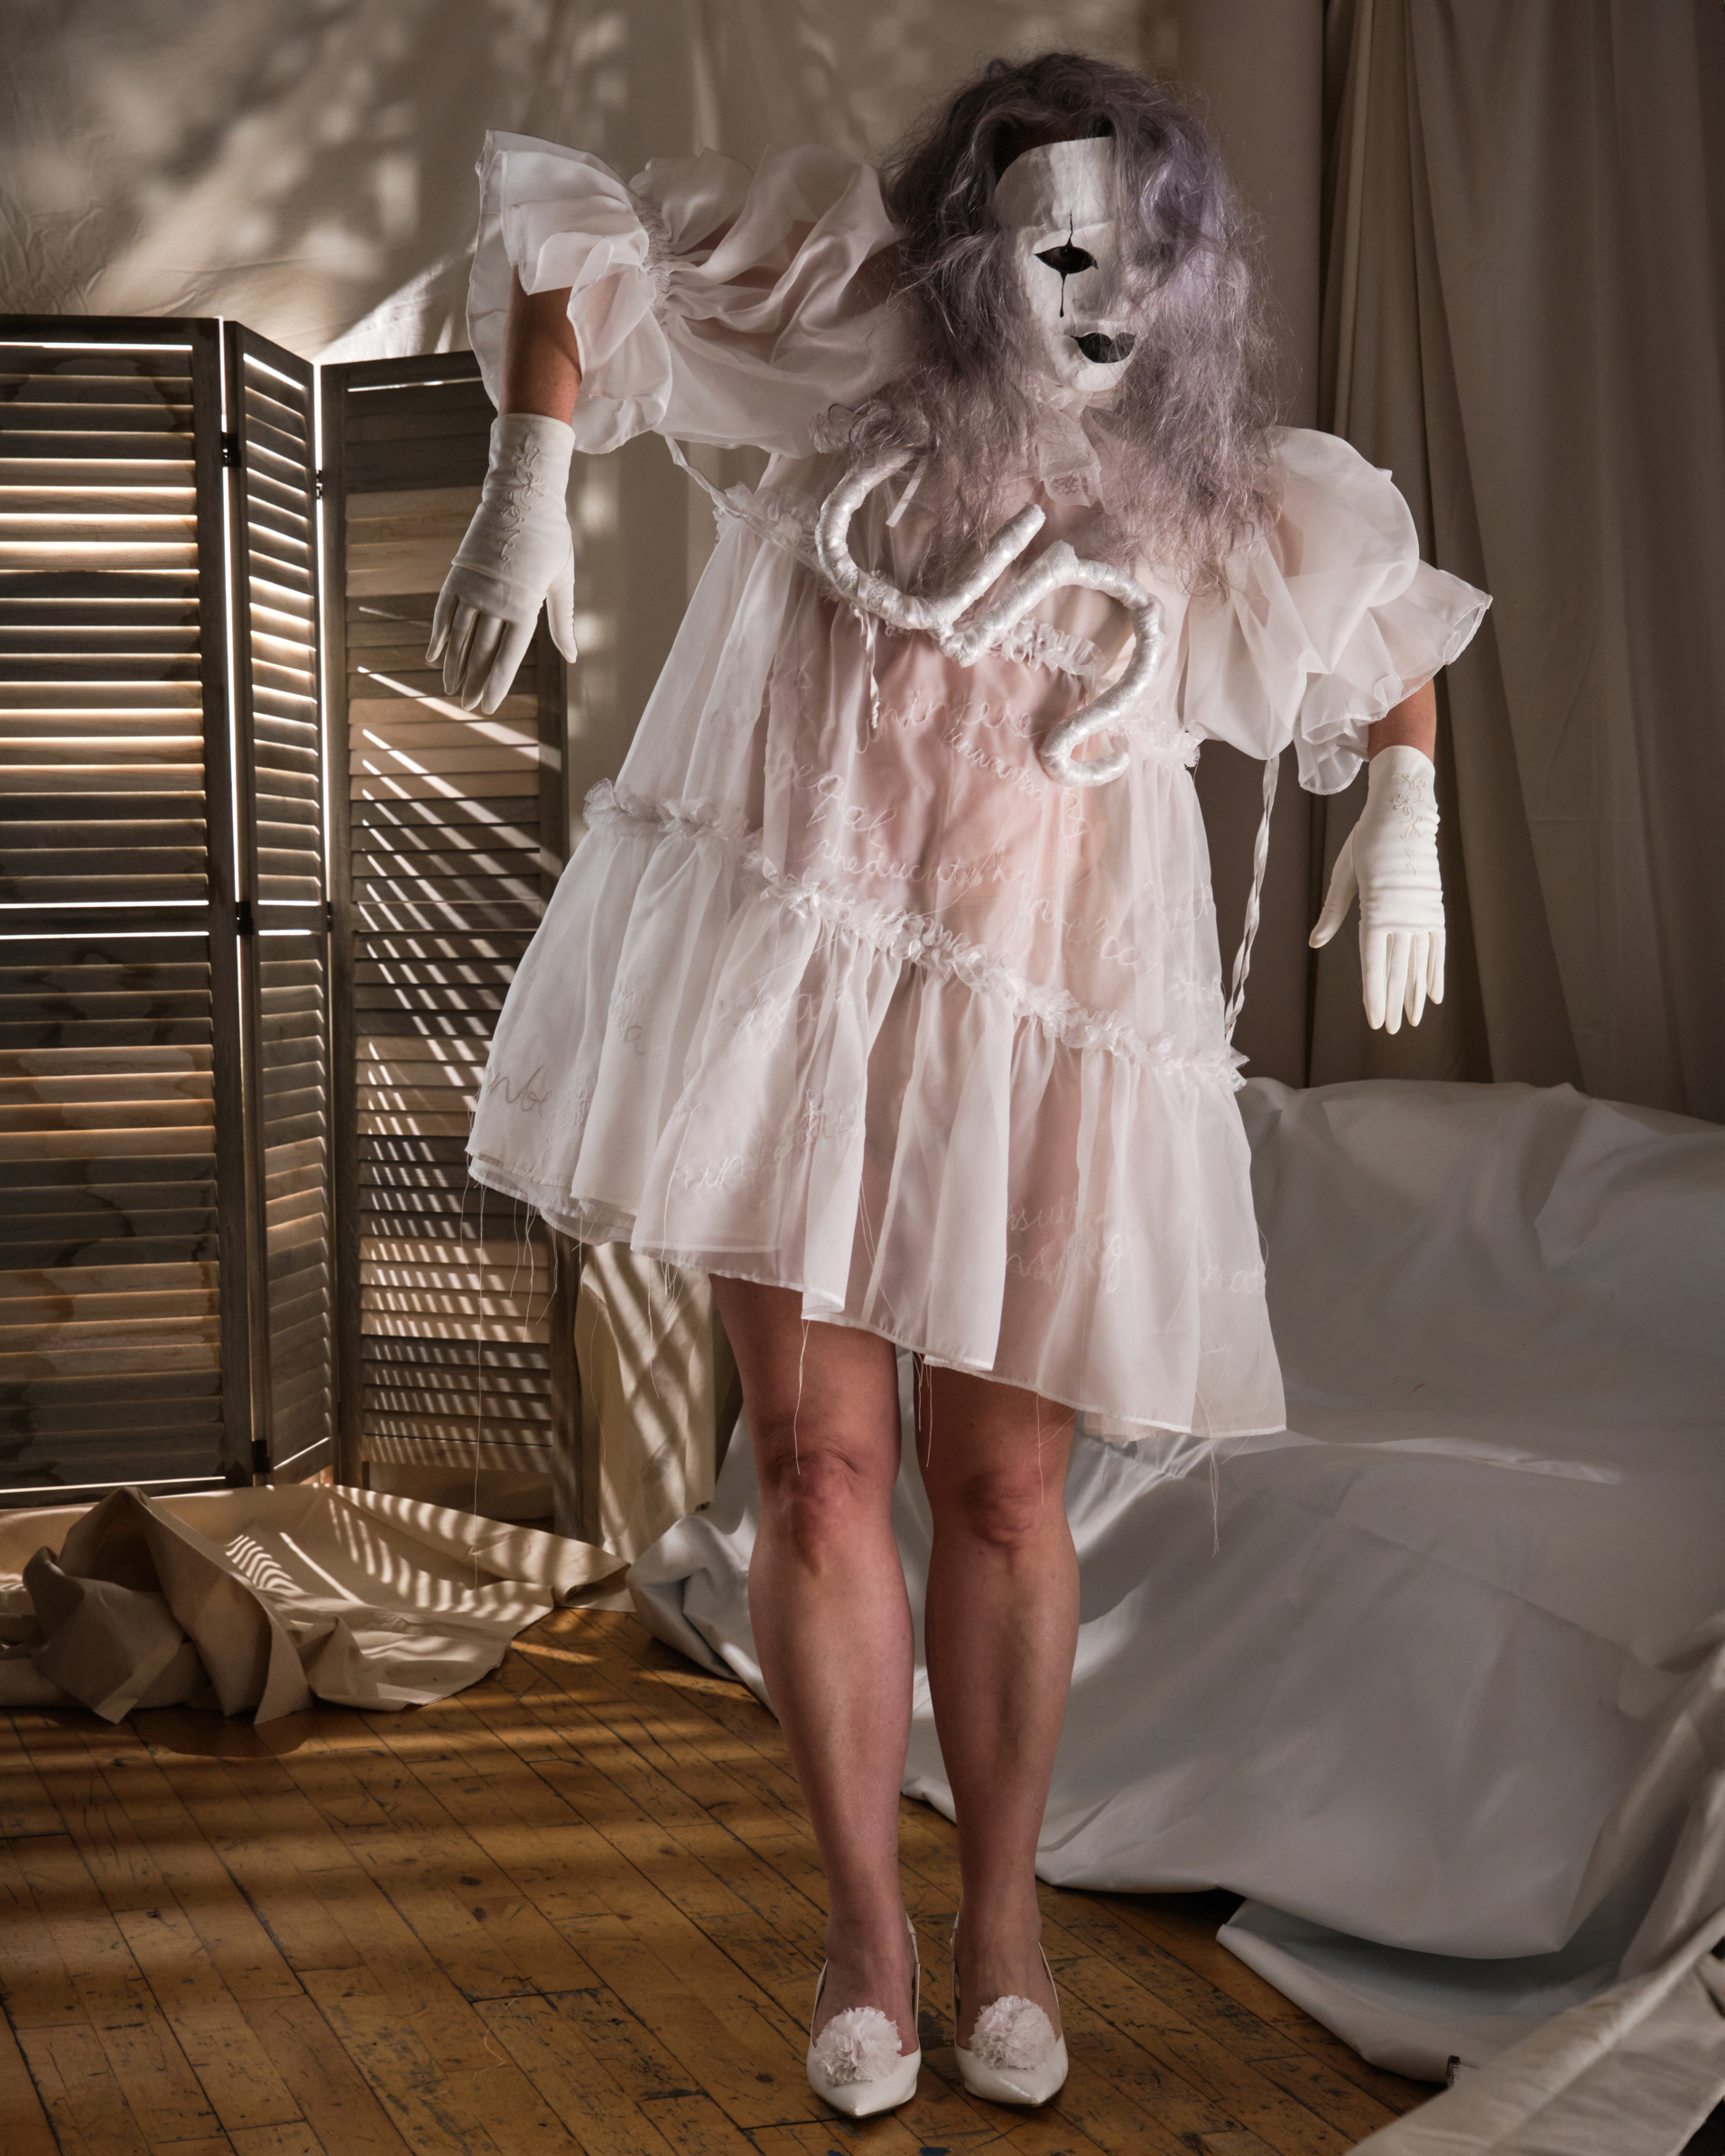
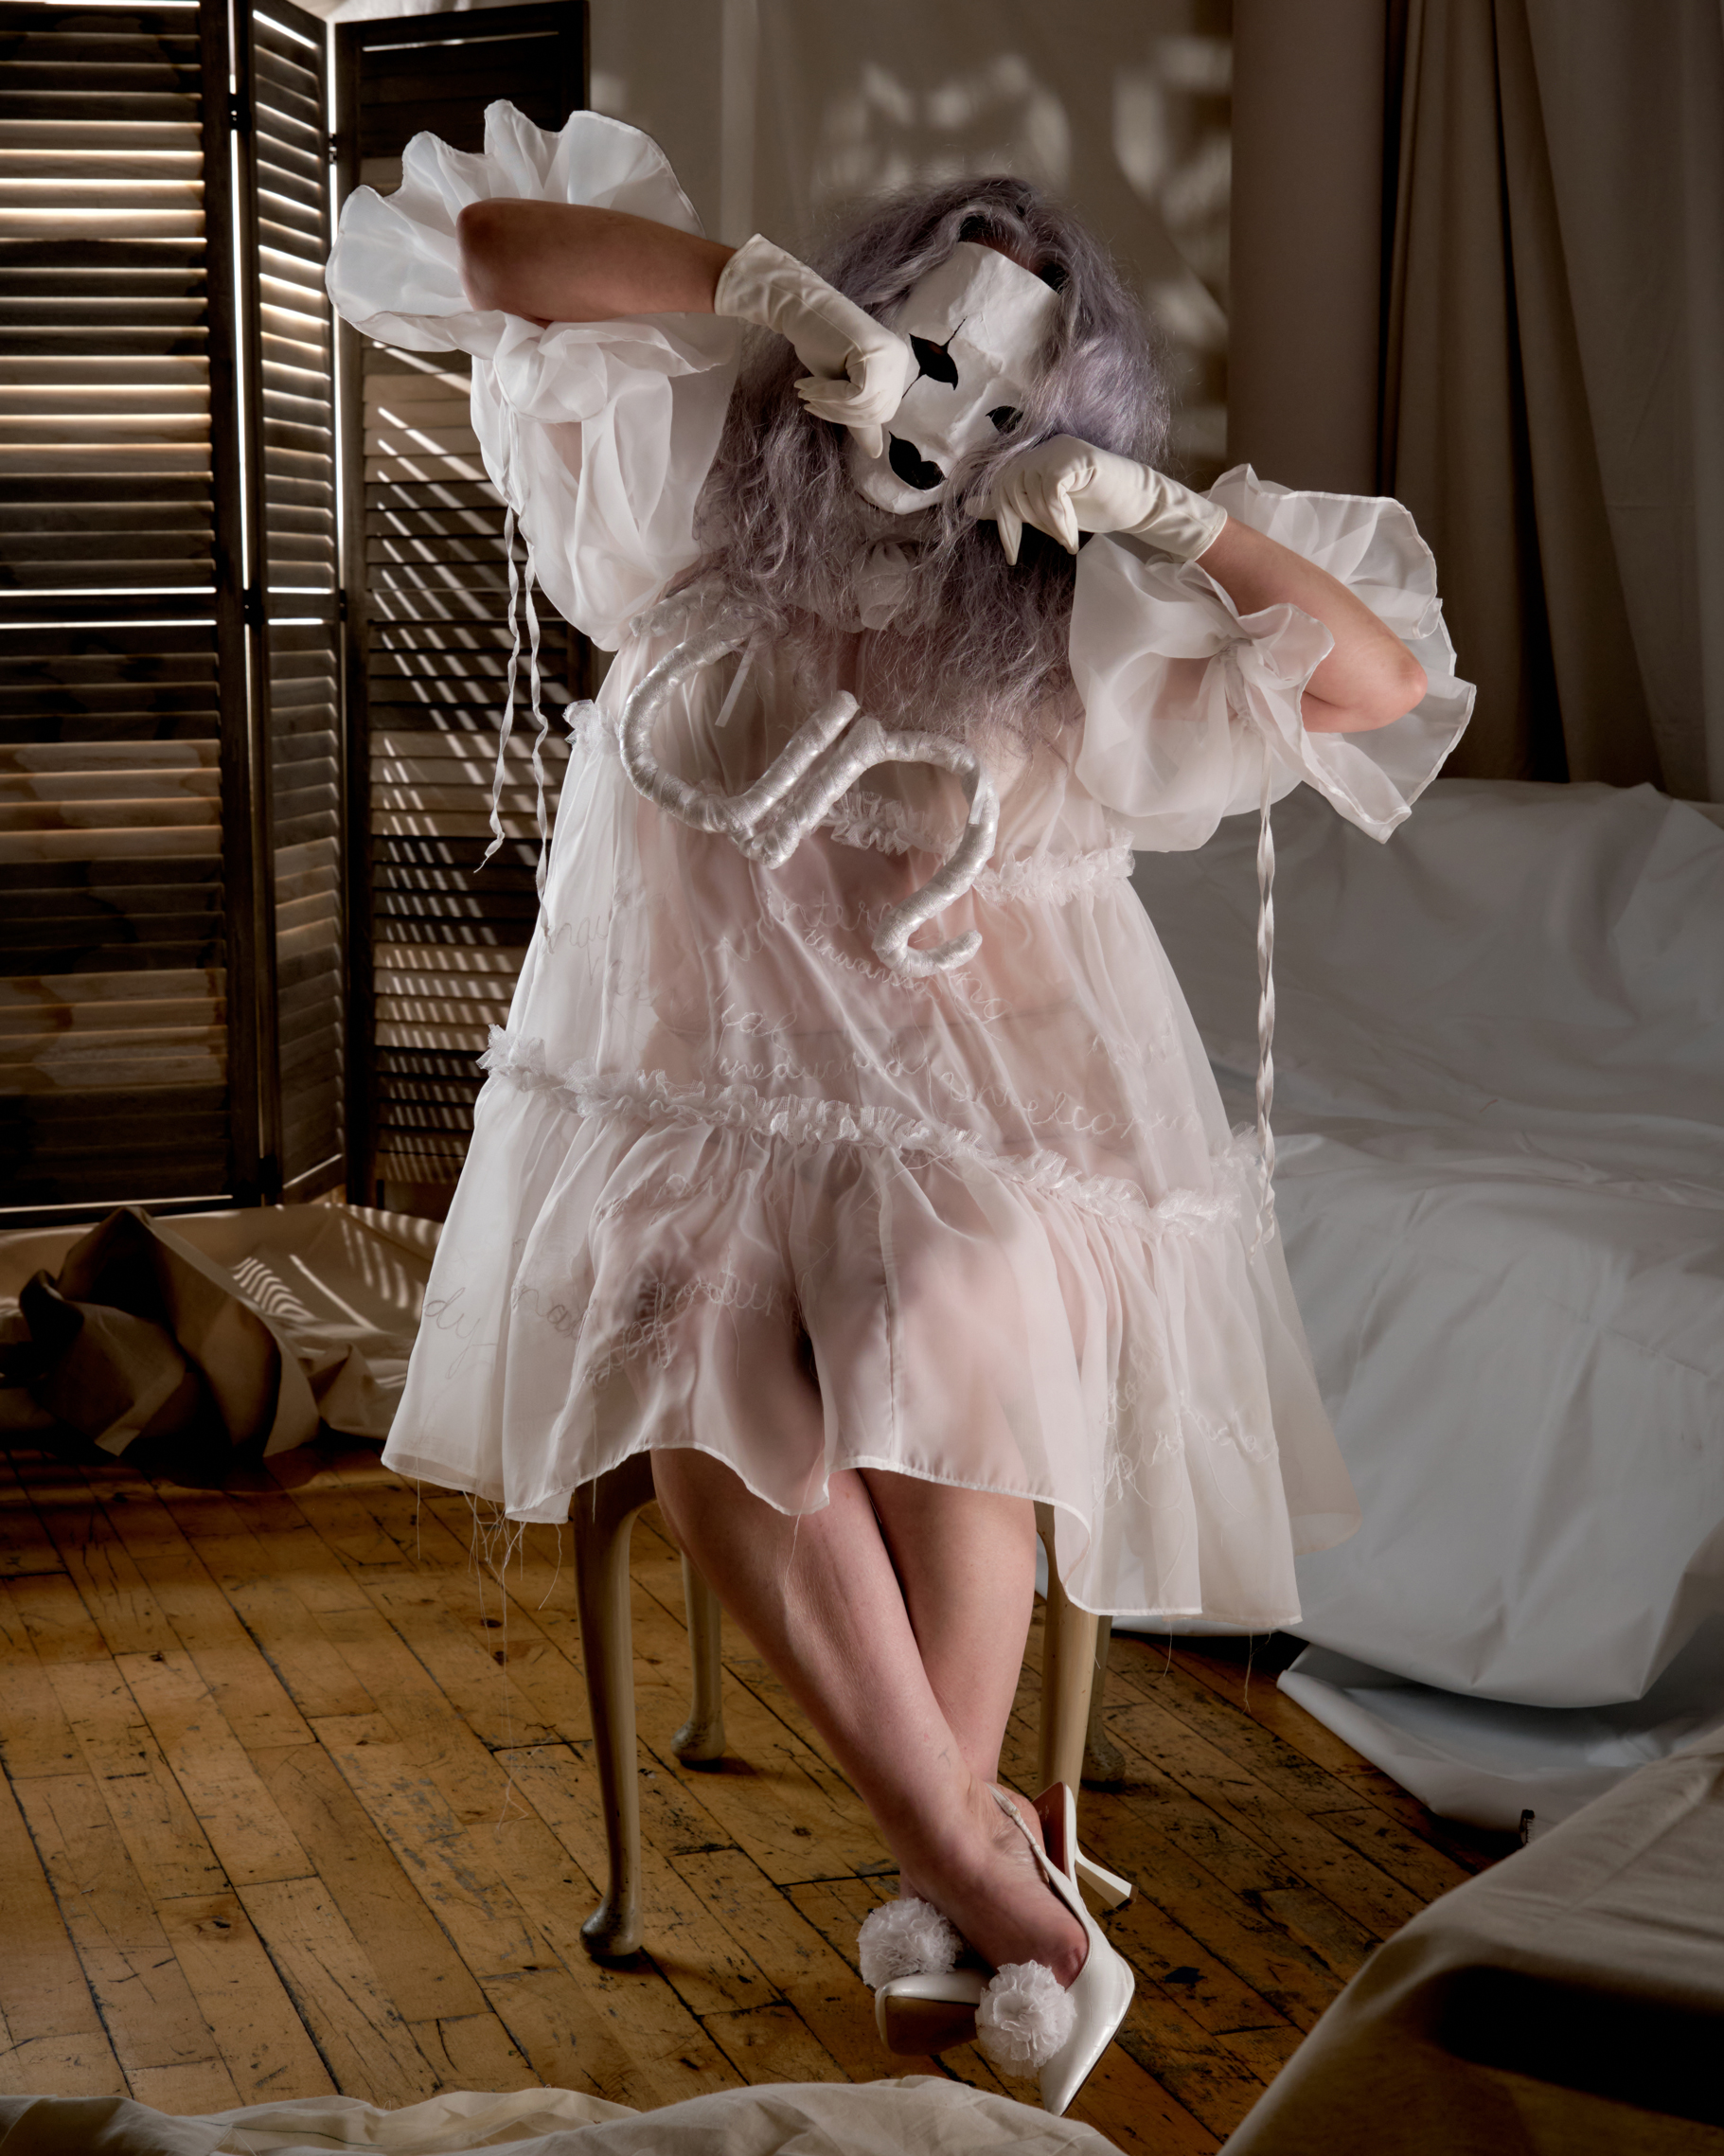
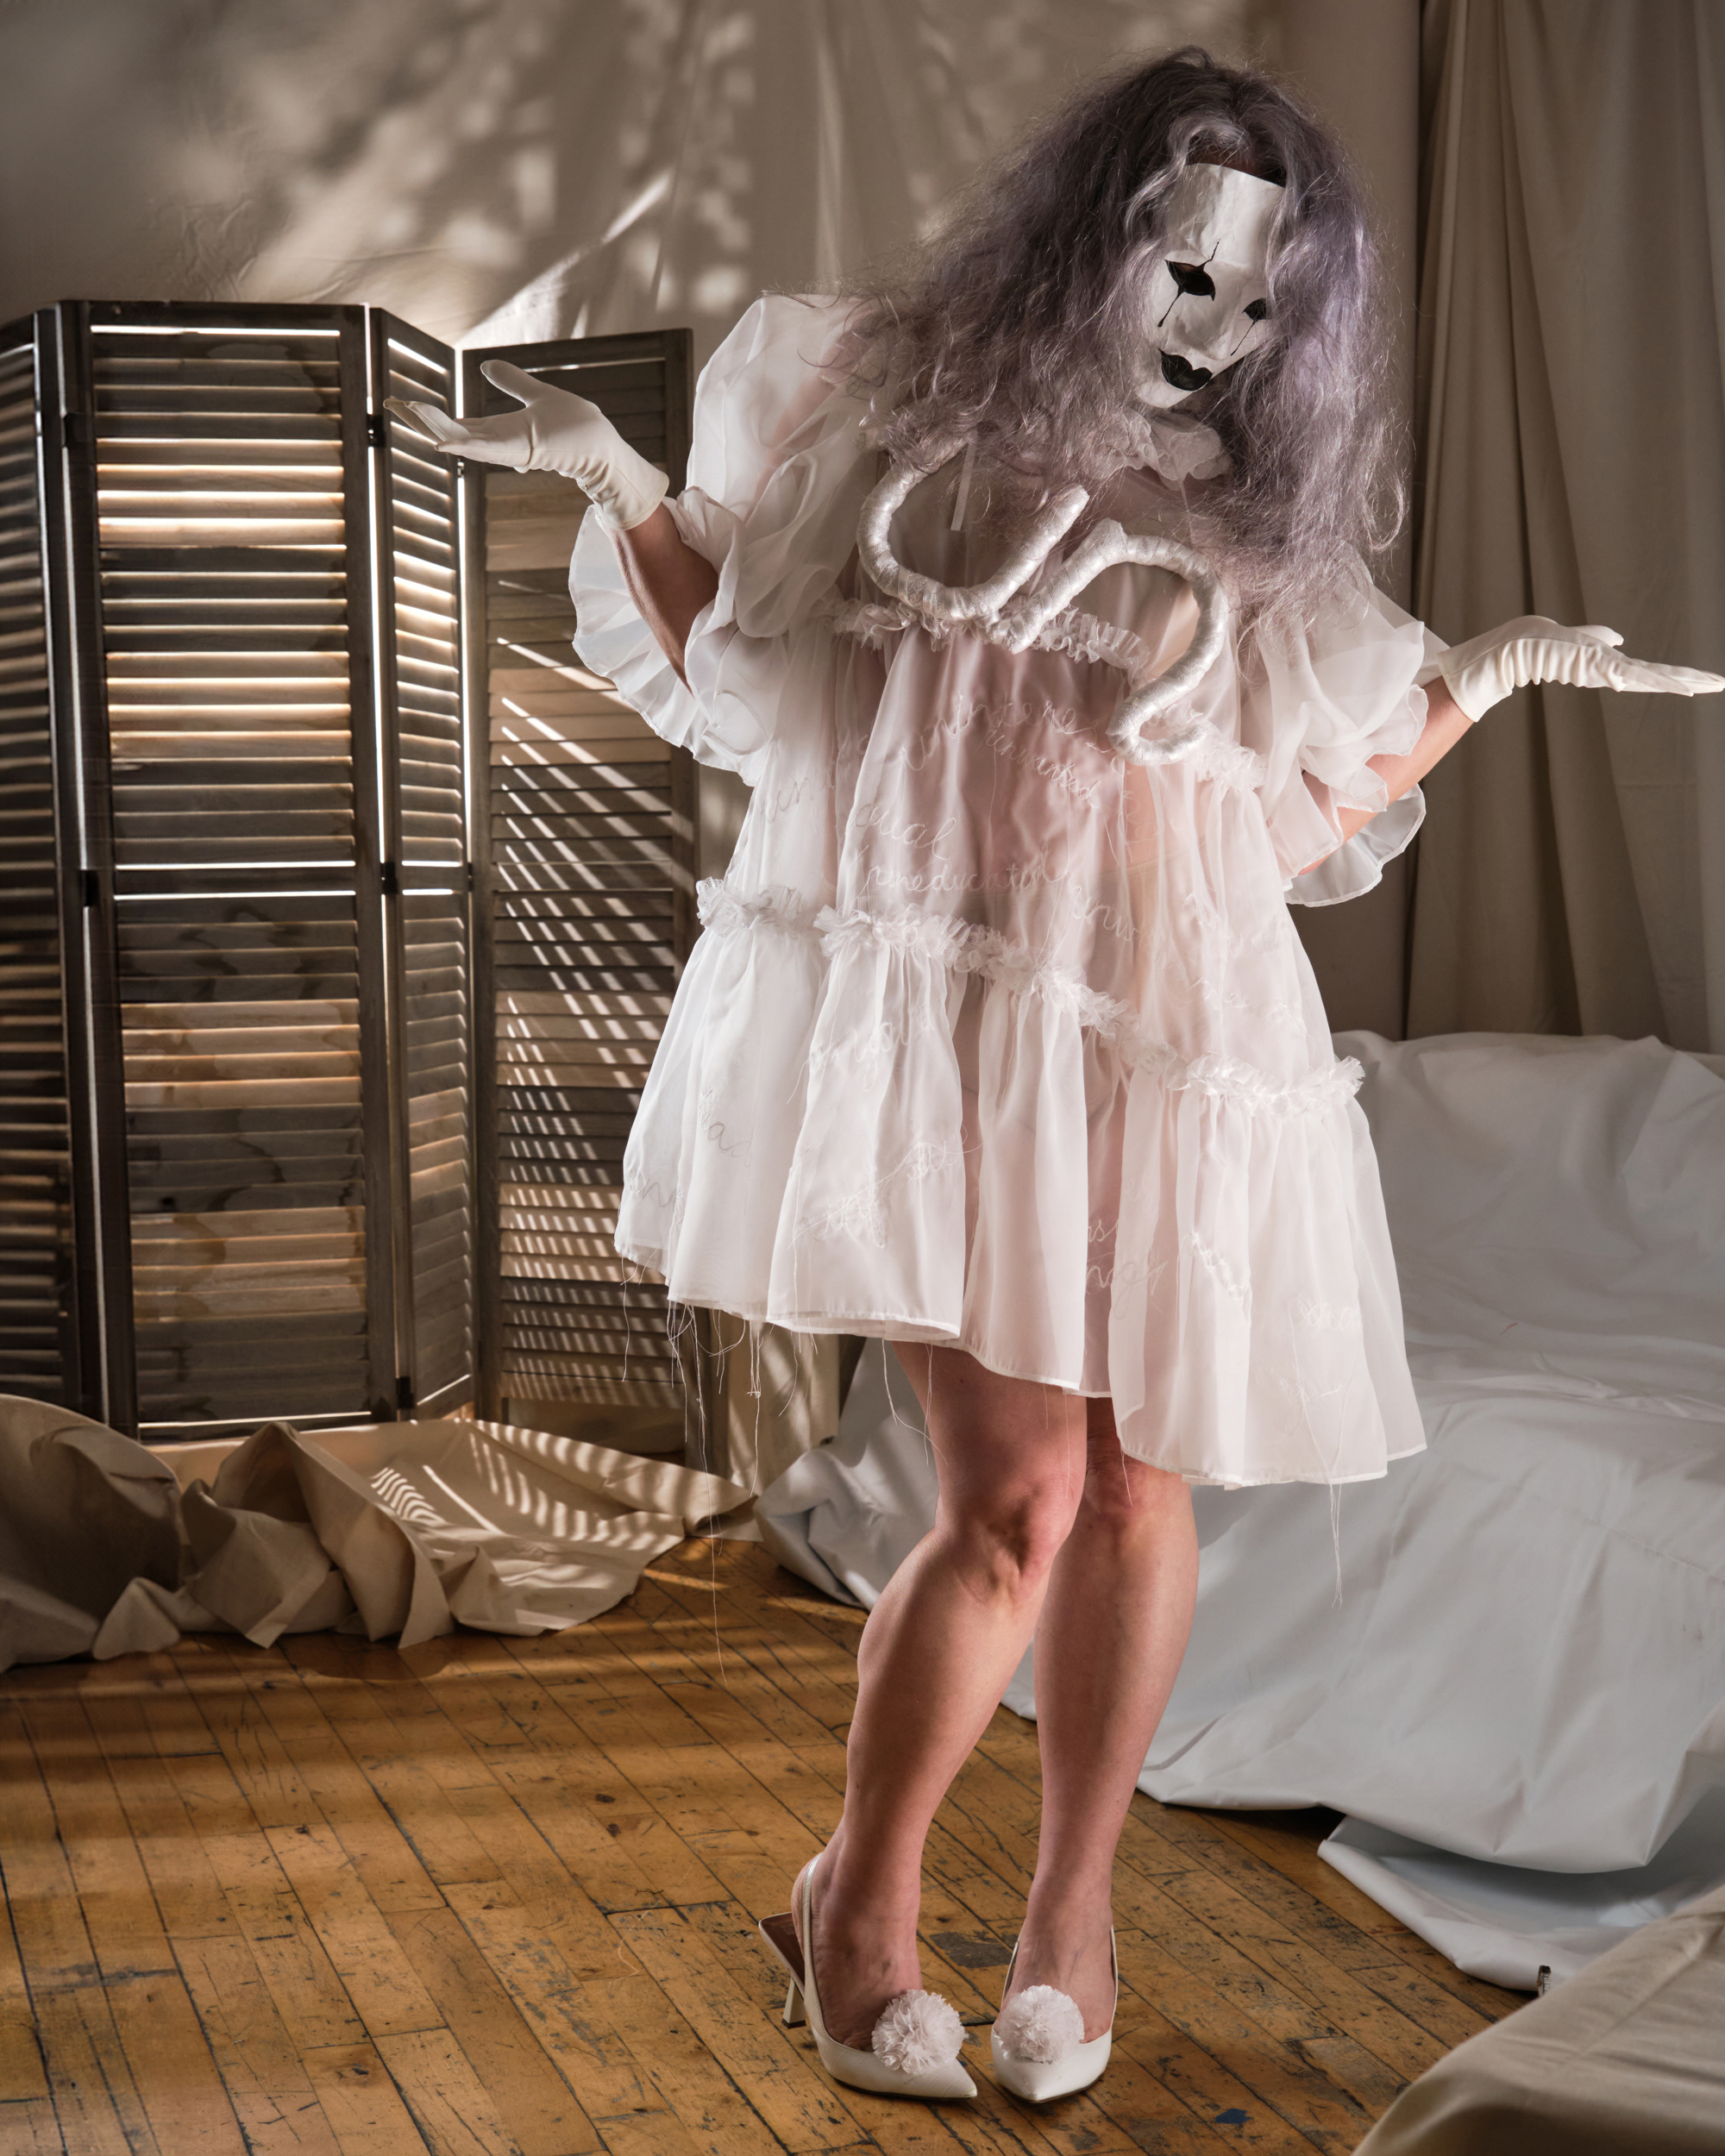
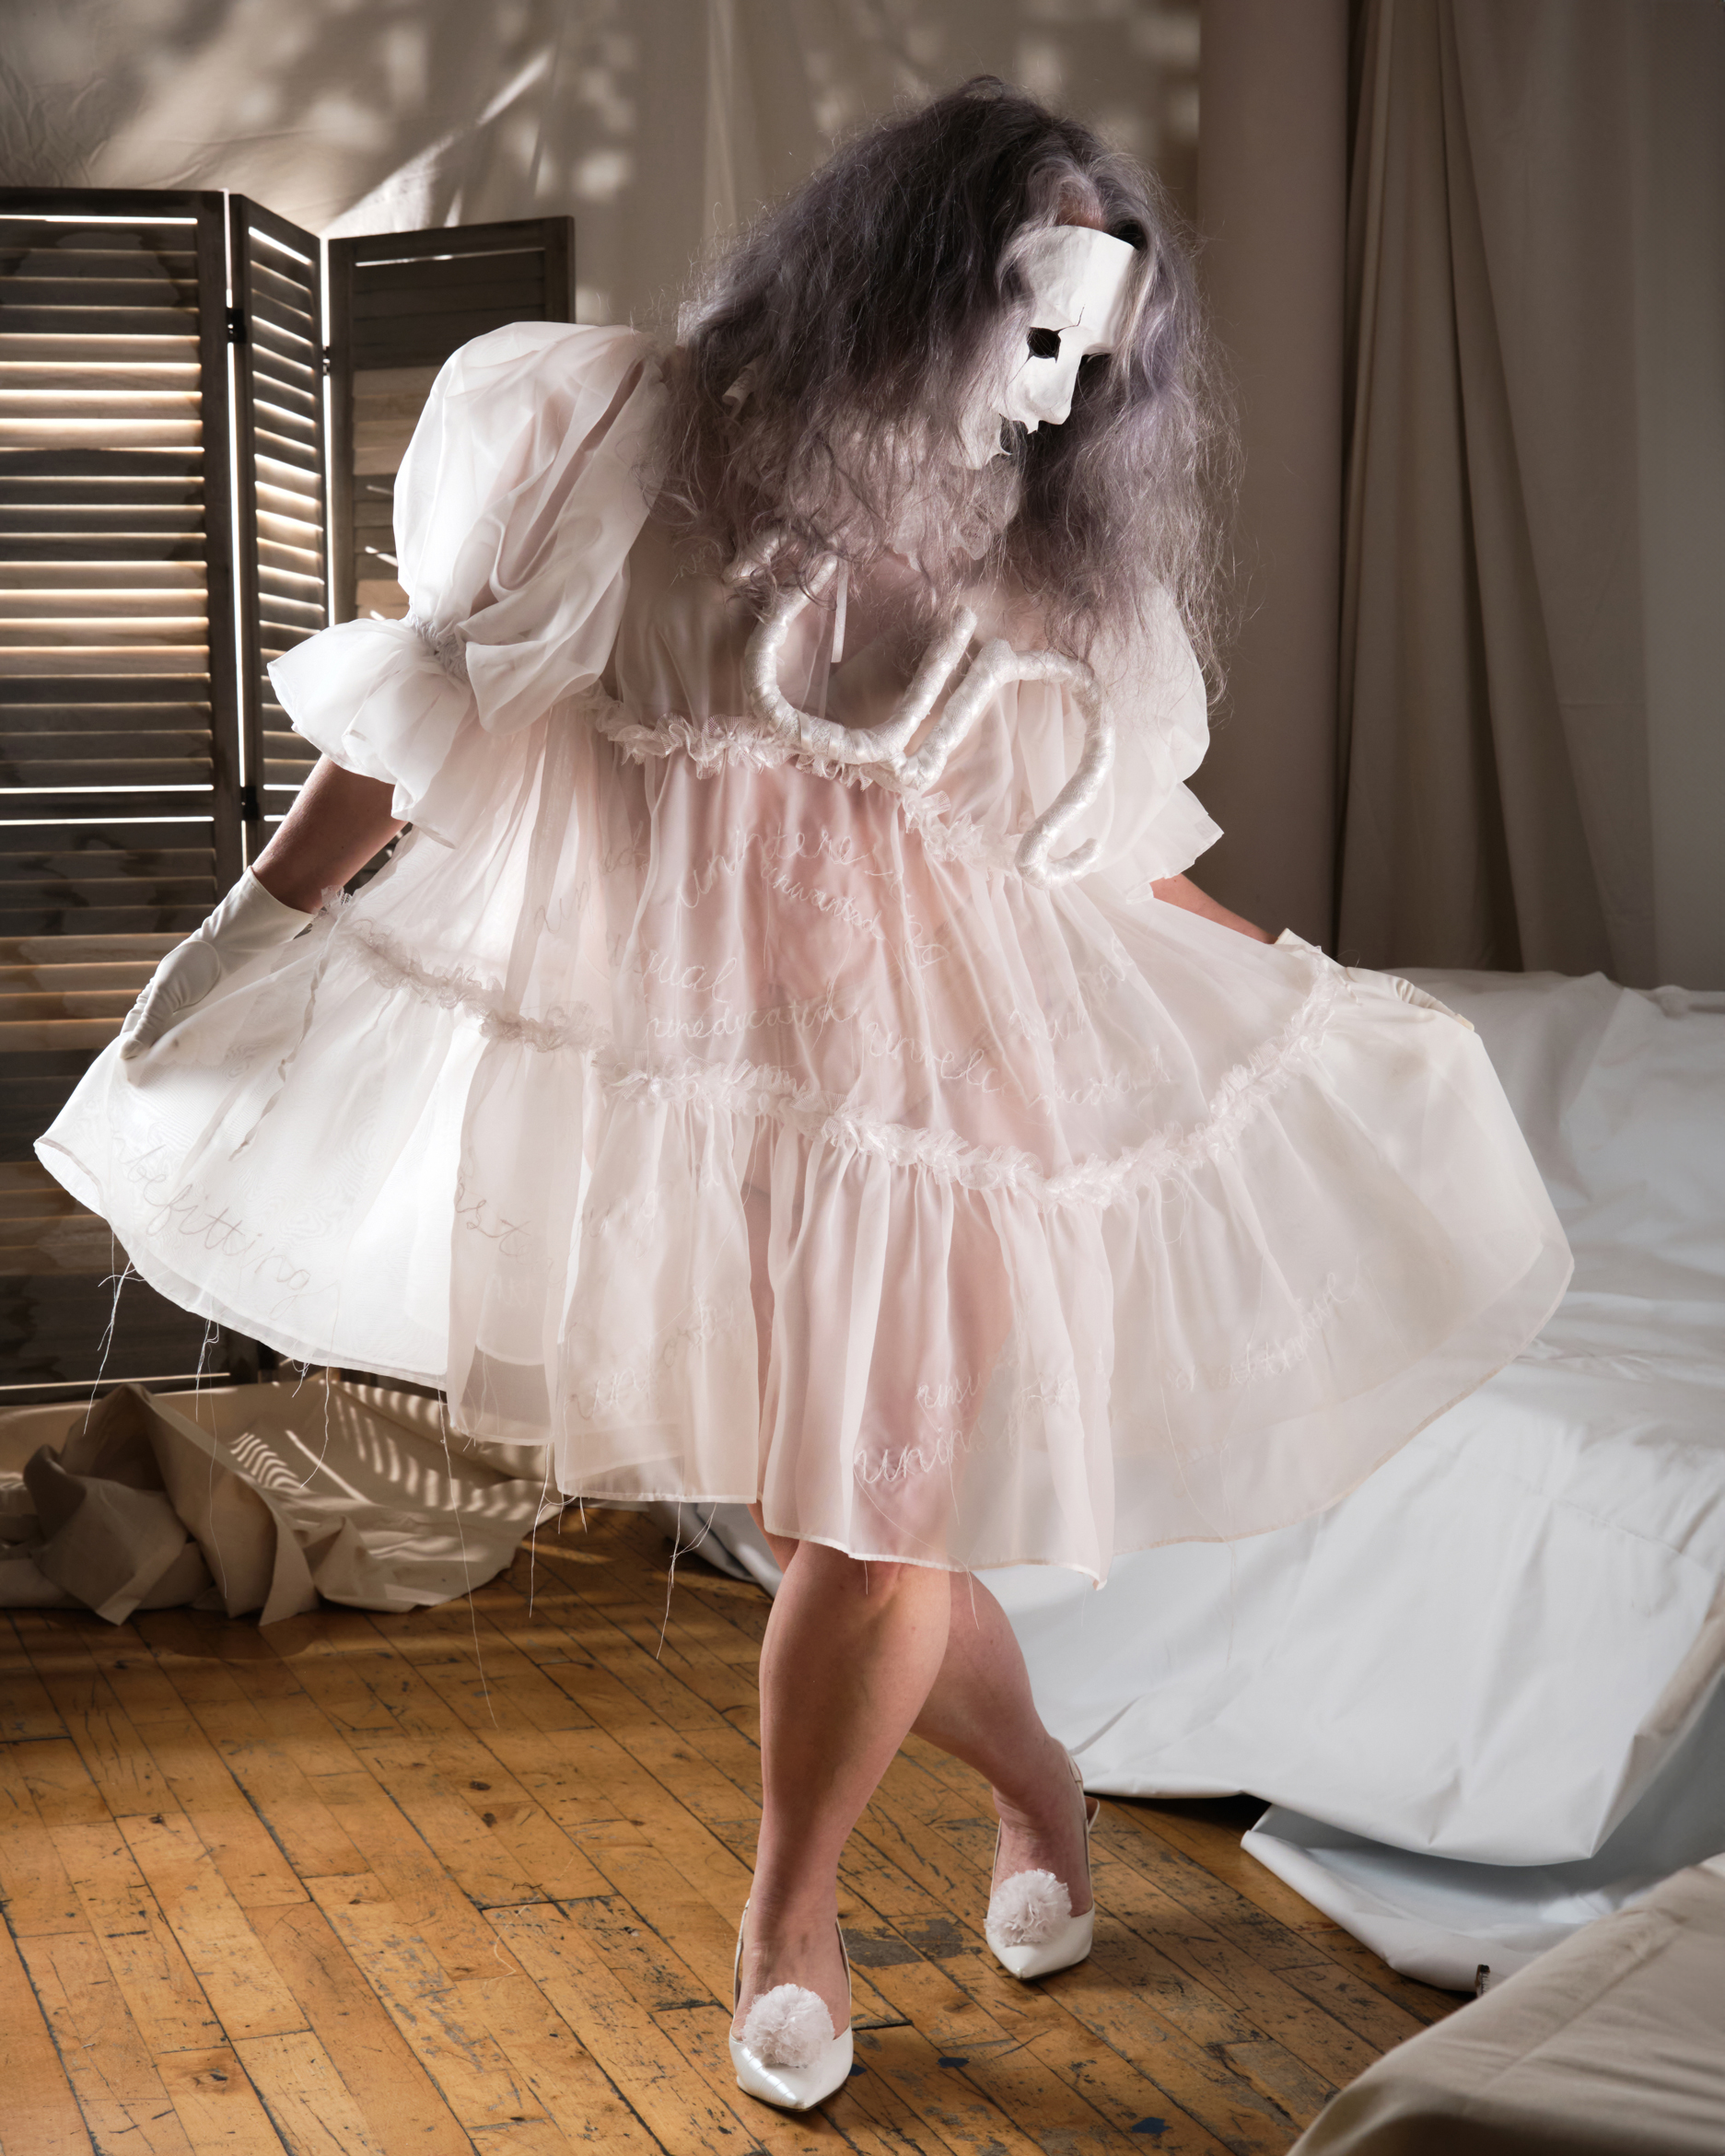
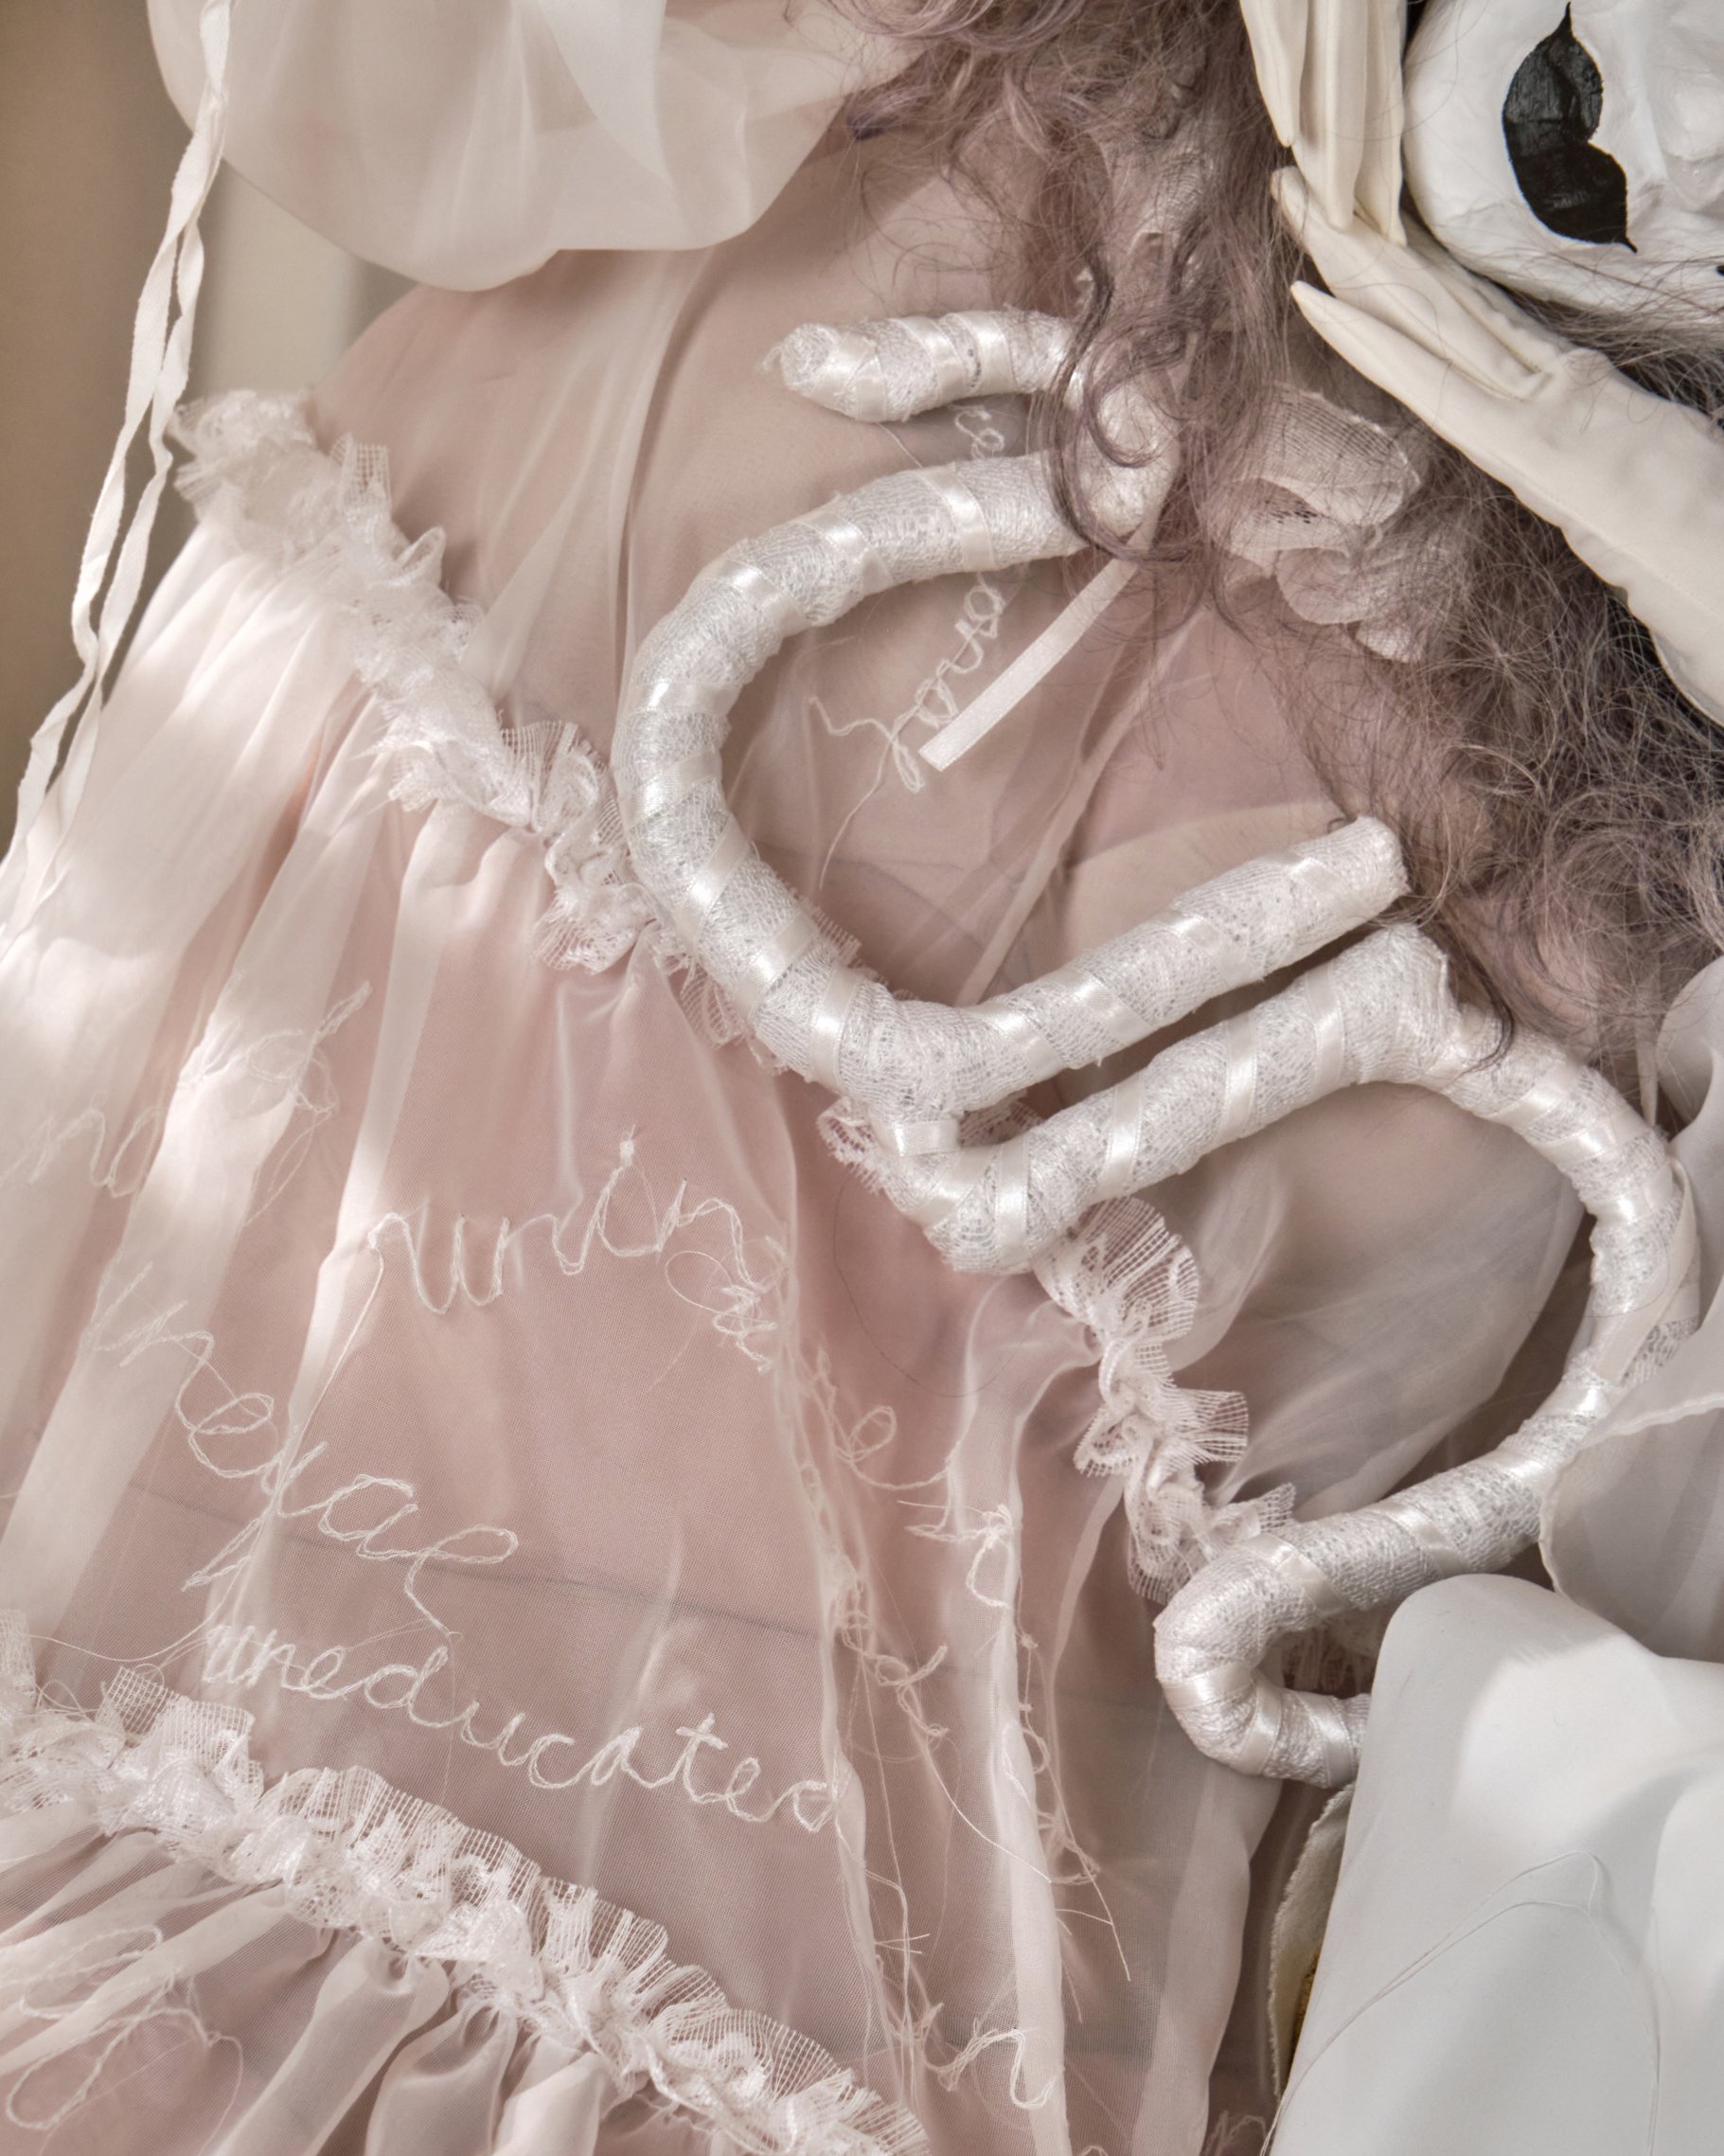
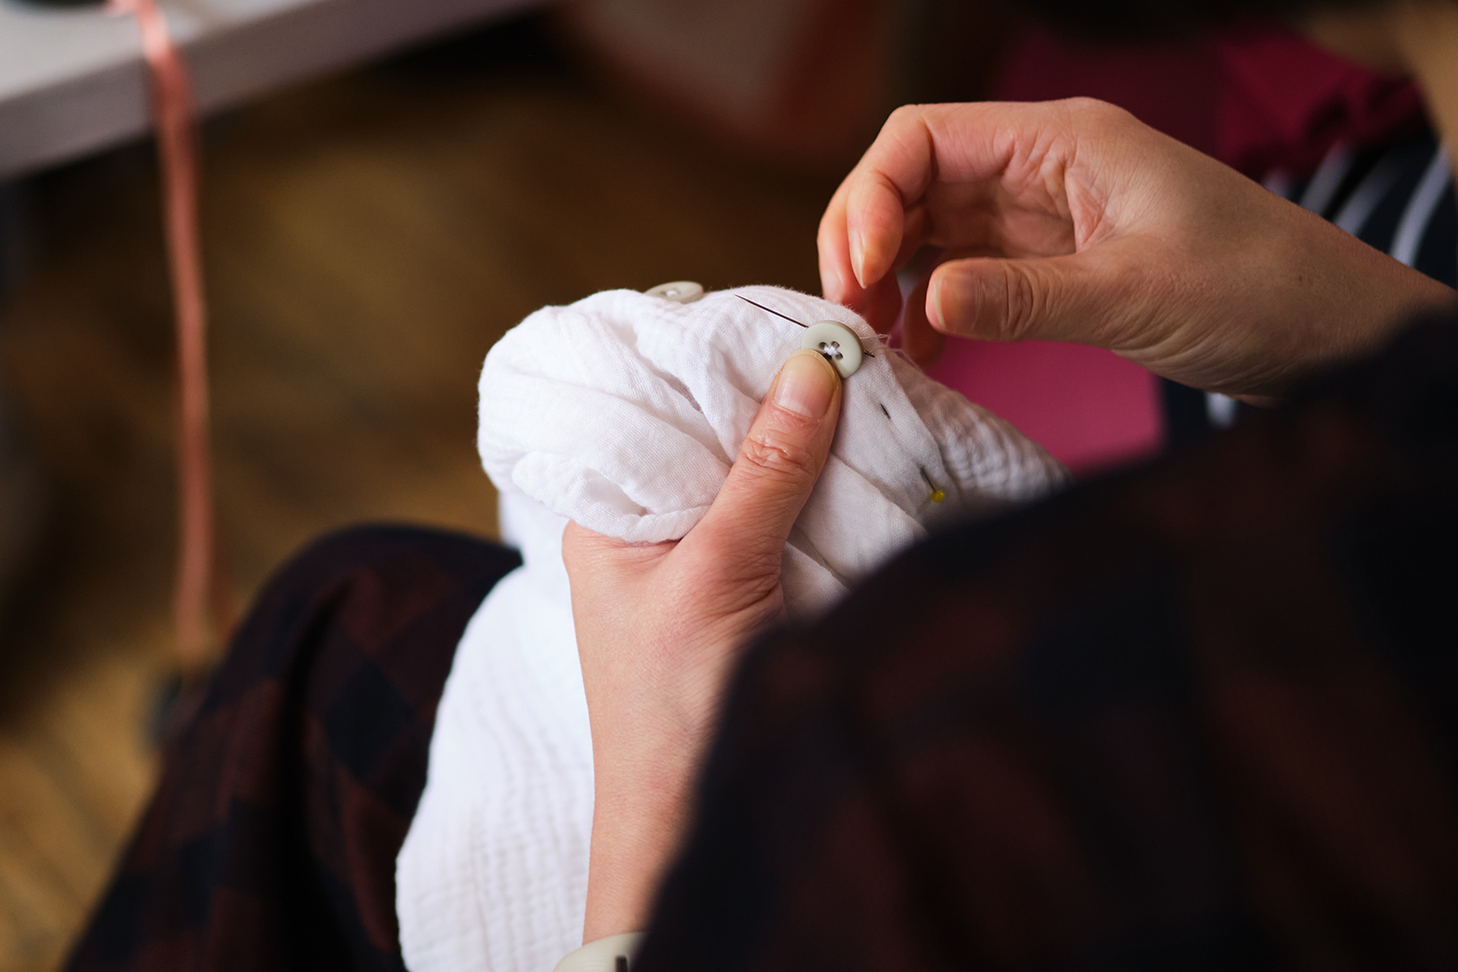
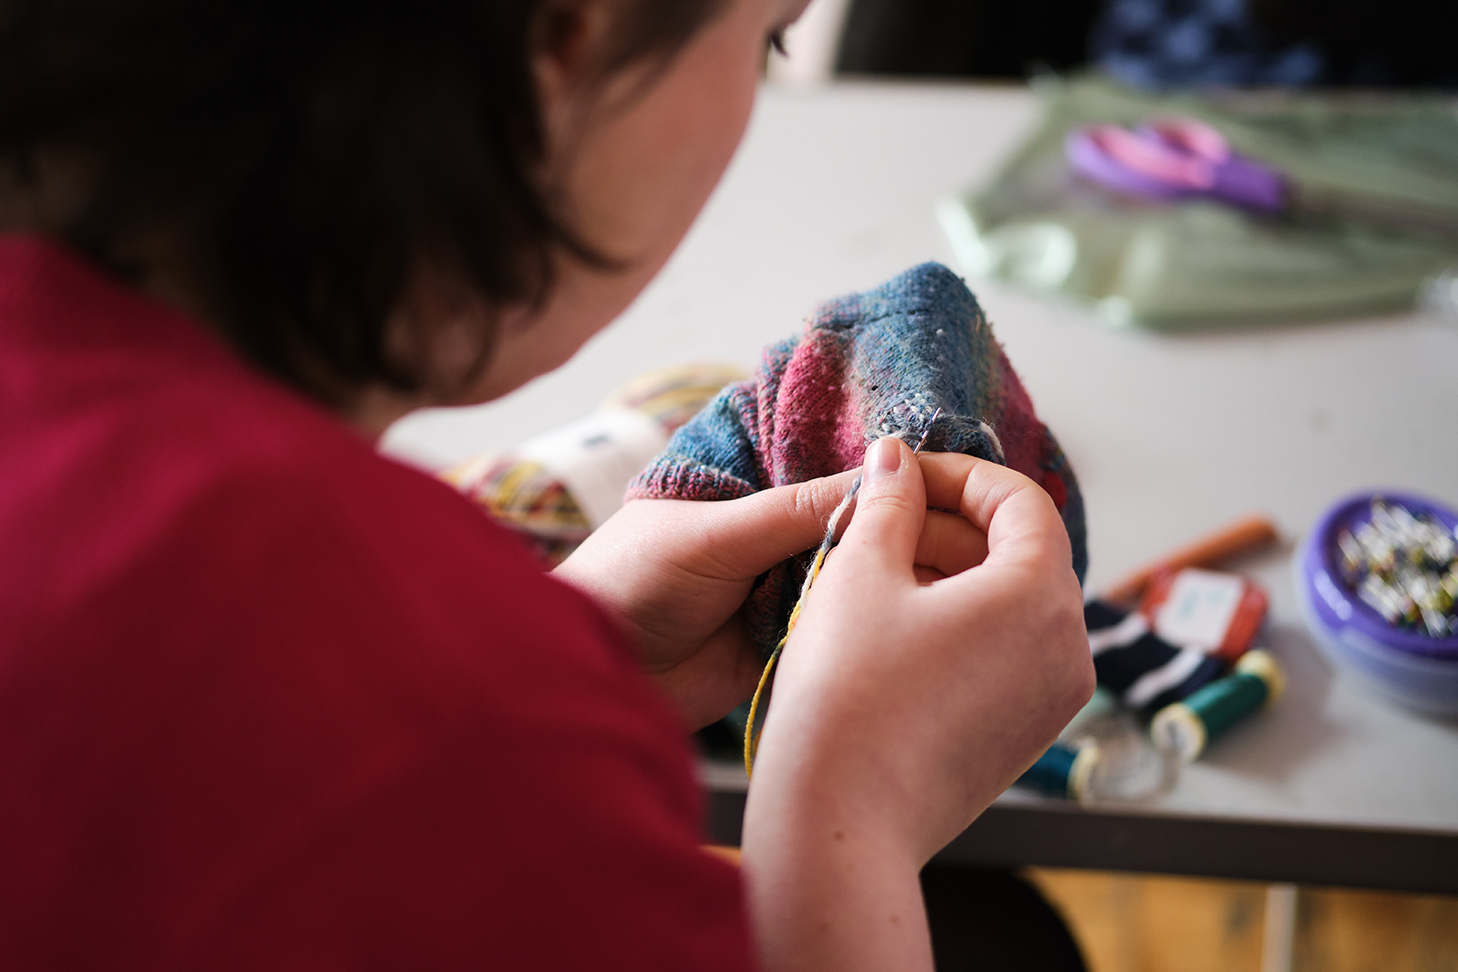
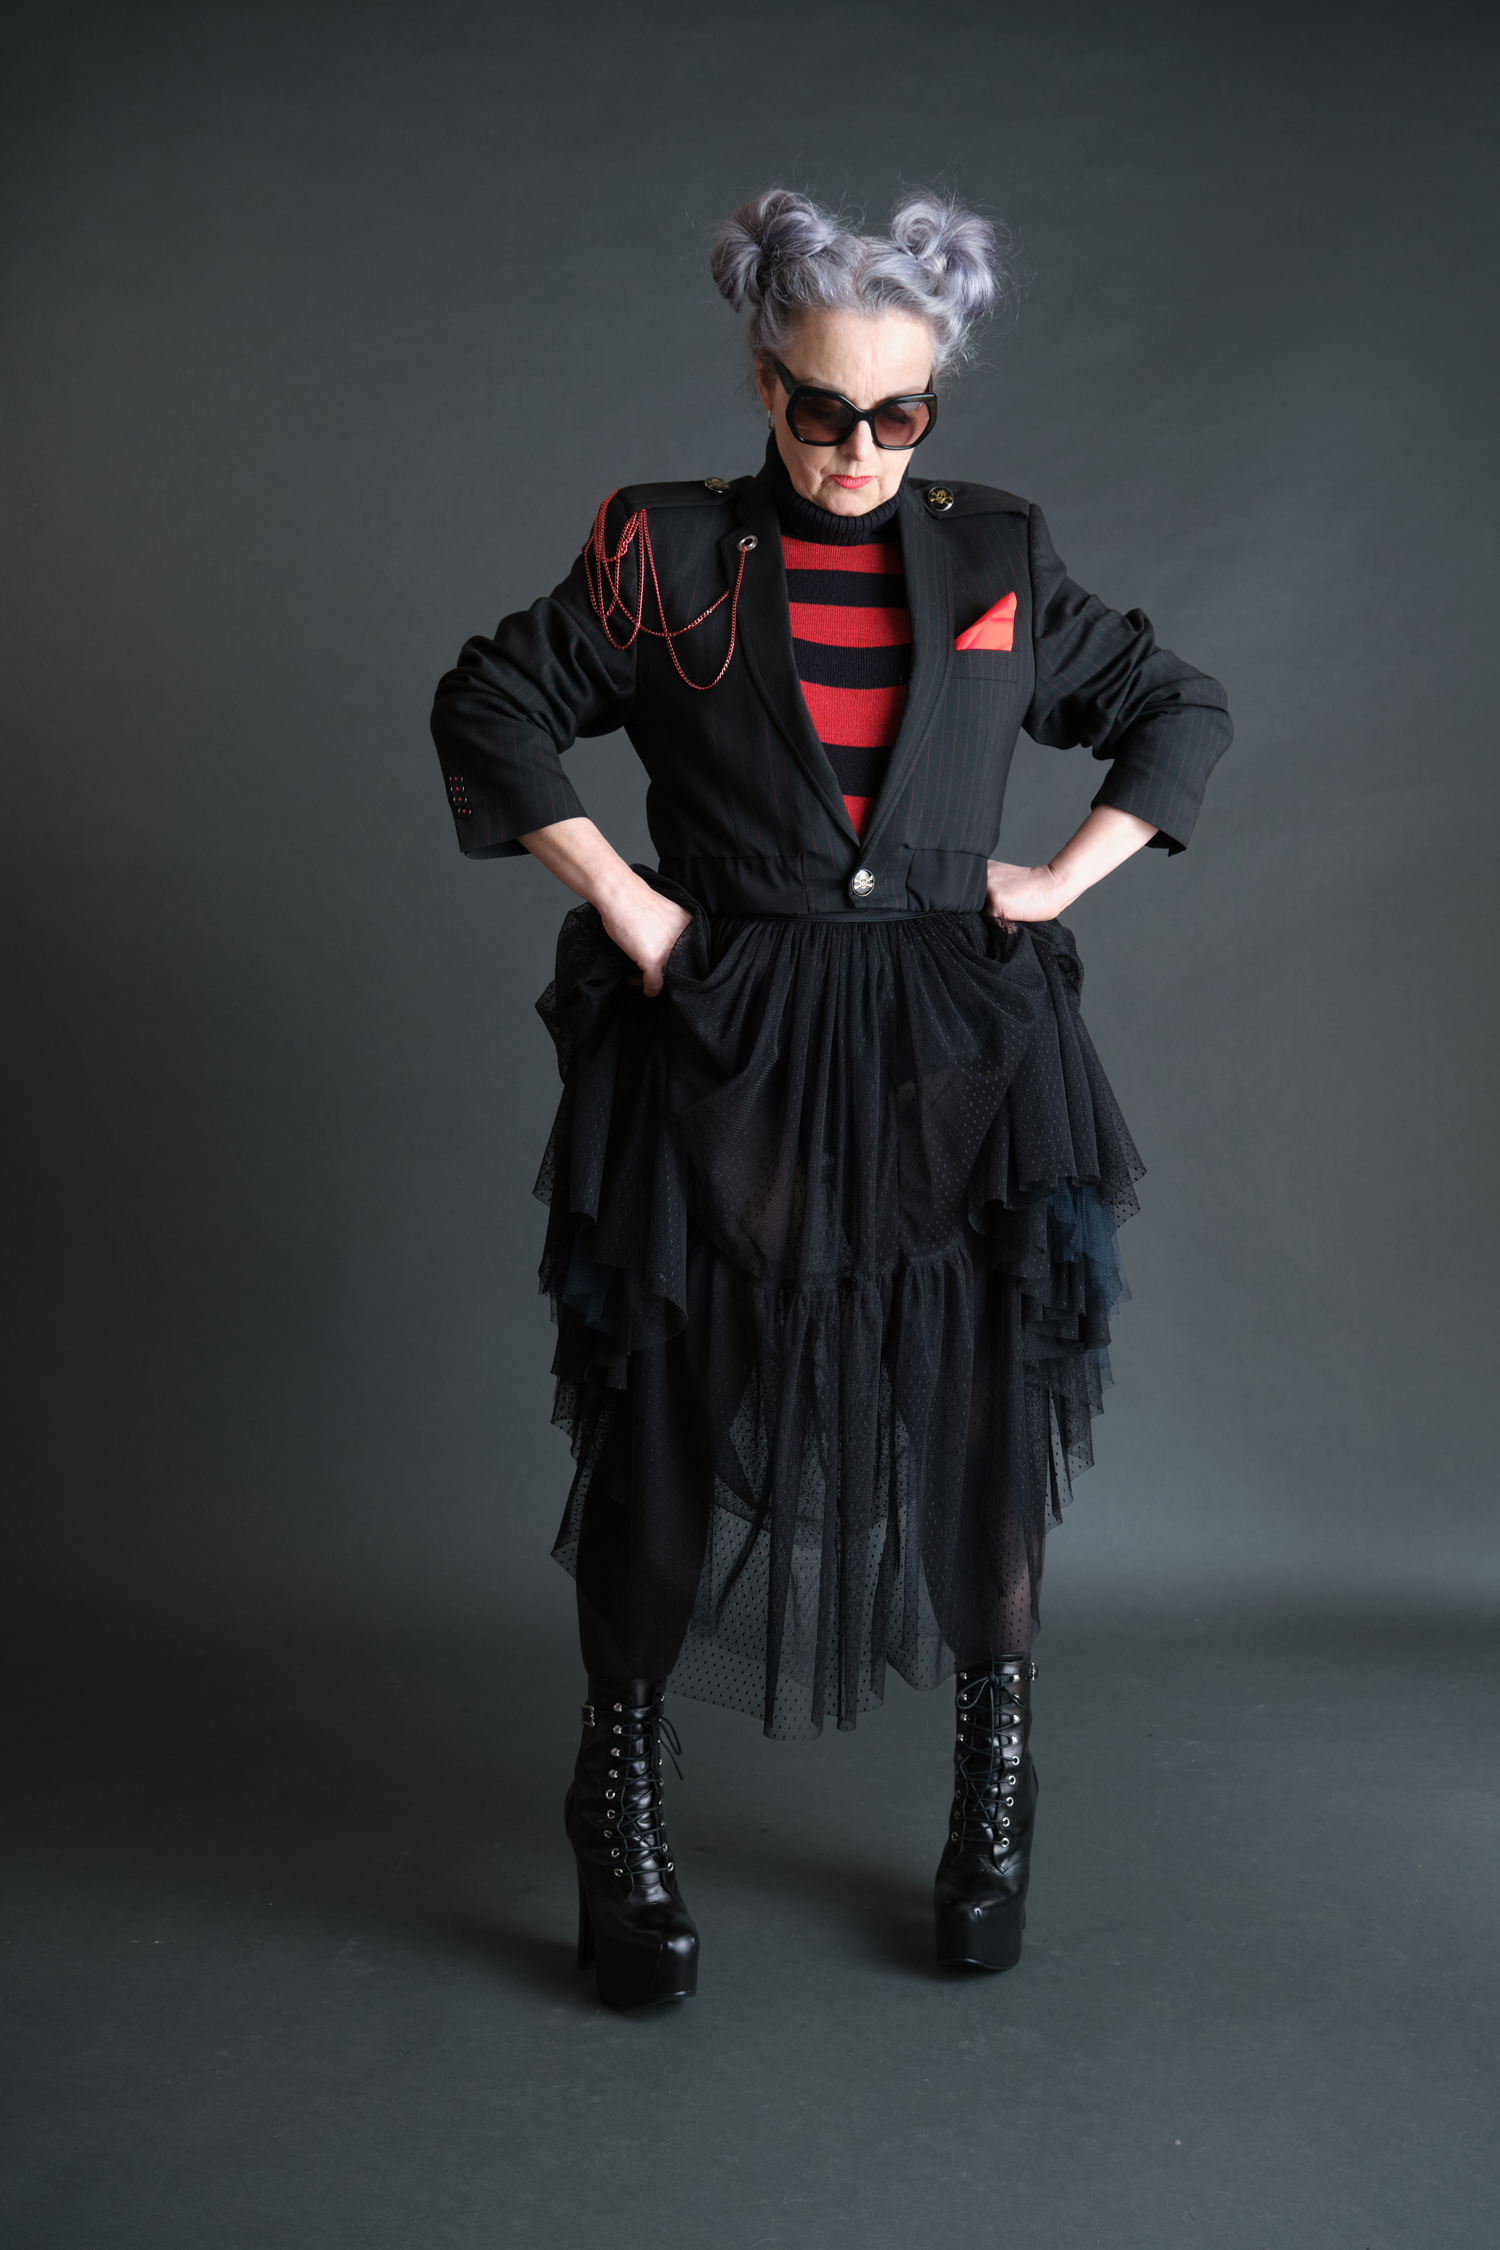
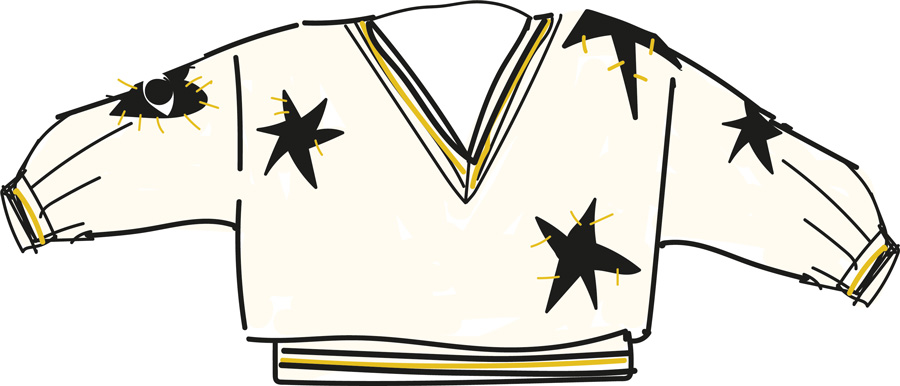
I work with typography a lot in my day-to-day life – designing book covers and laying out interior pages – so it felt completely natural to let text take centre stage here too. There’s something deeply satisfying about cutting letters by hand, especially when they’re imperfect, uneven, and slightly unsettling. My scissors moved carefully through reclaimed white t-shirt cotton, shaping bone-like letters from something soft, familiar and ordinary. That choice of material felt important. A fabric once worn close to someone’s skin now transformed into a message carved into cloth. There’s intimacy in that. And defiance.
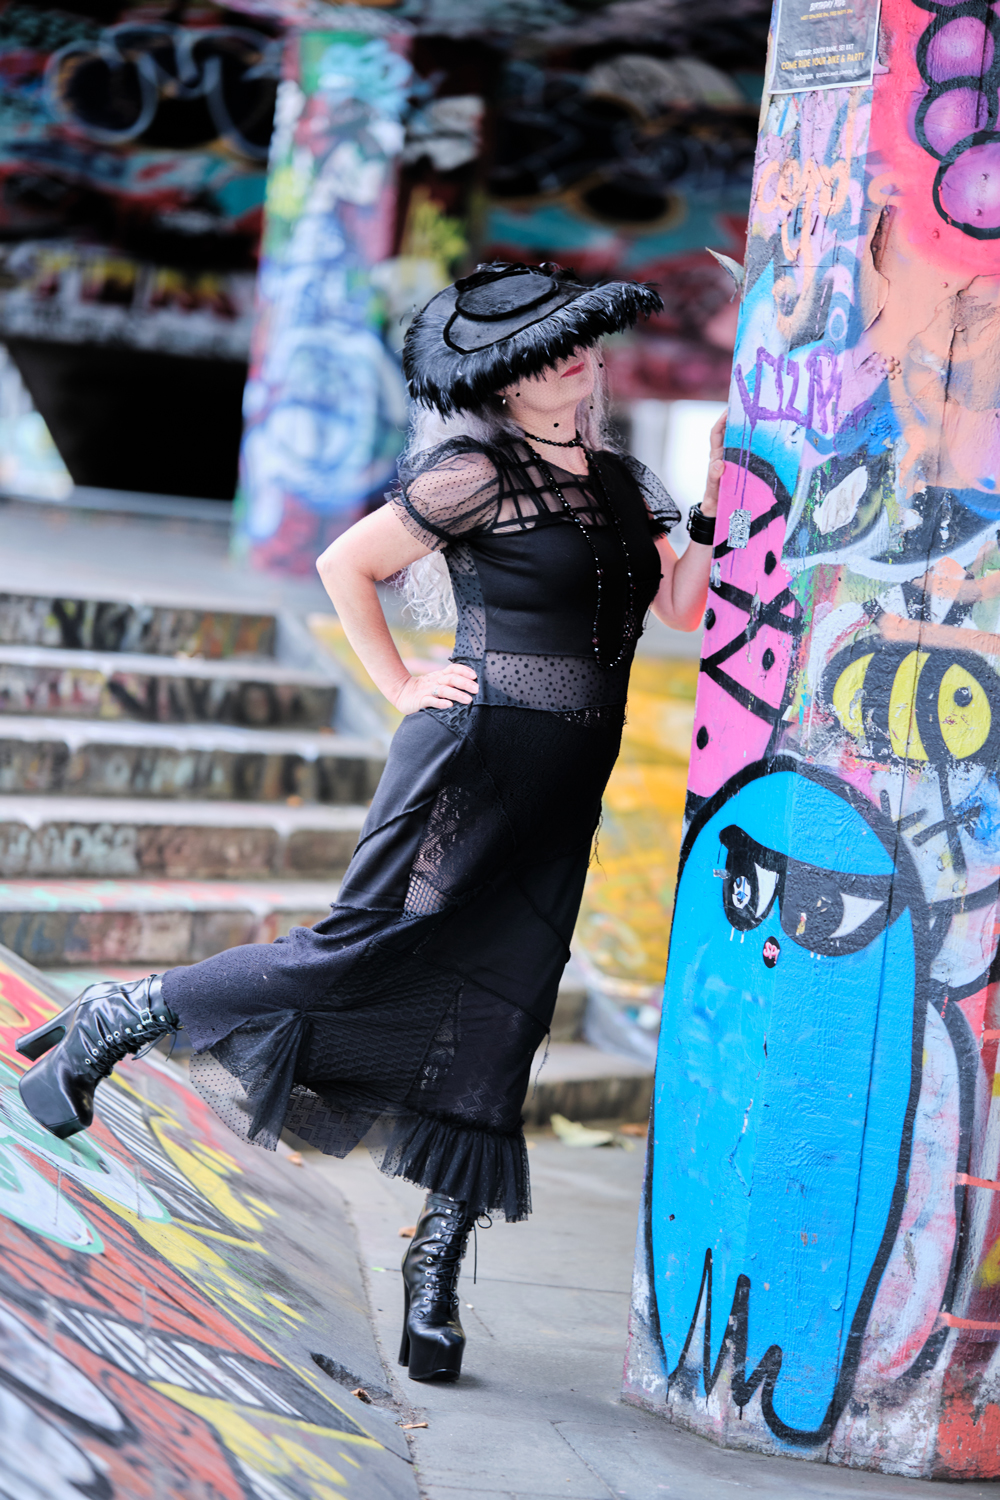
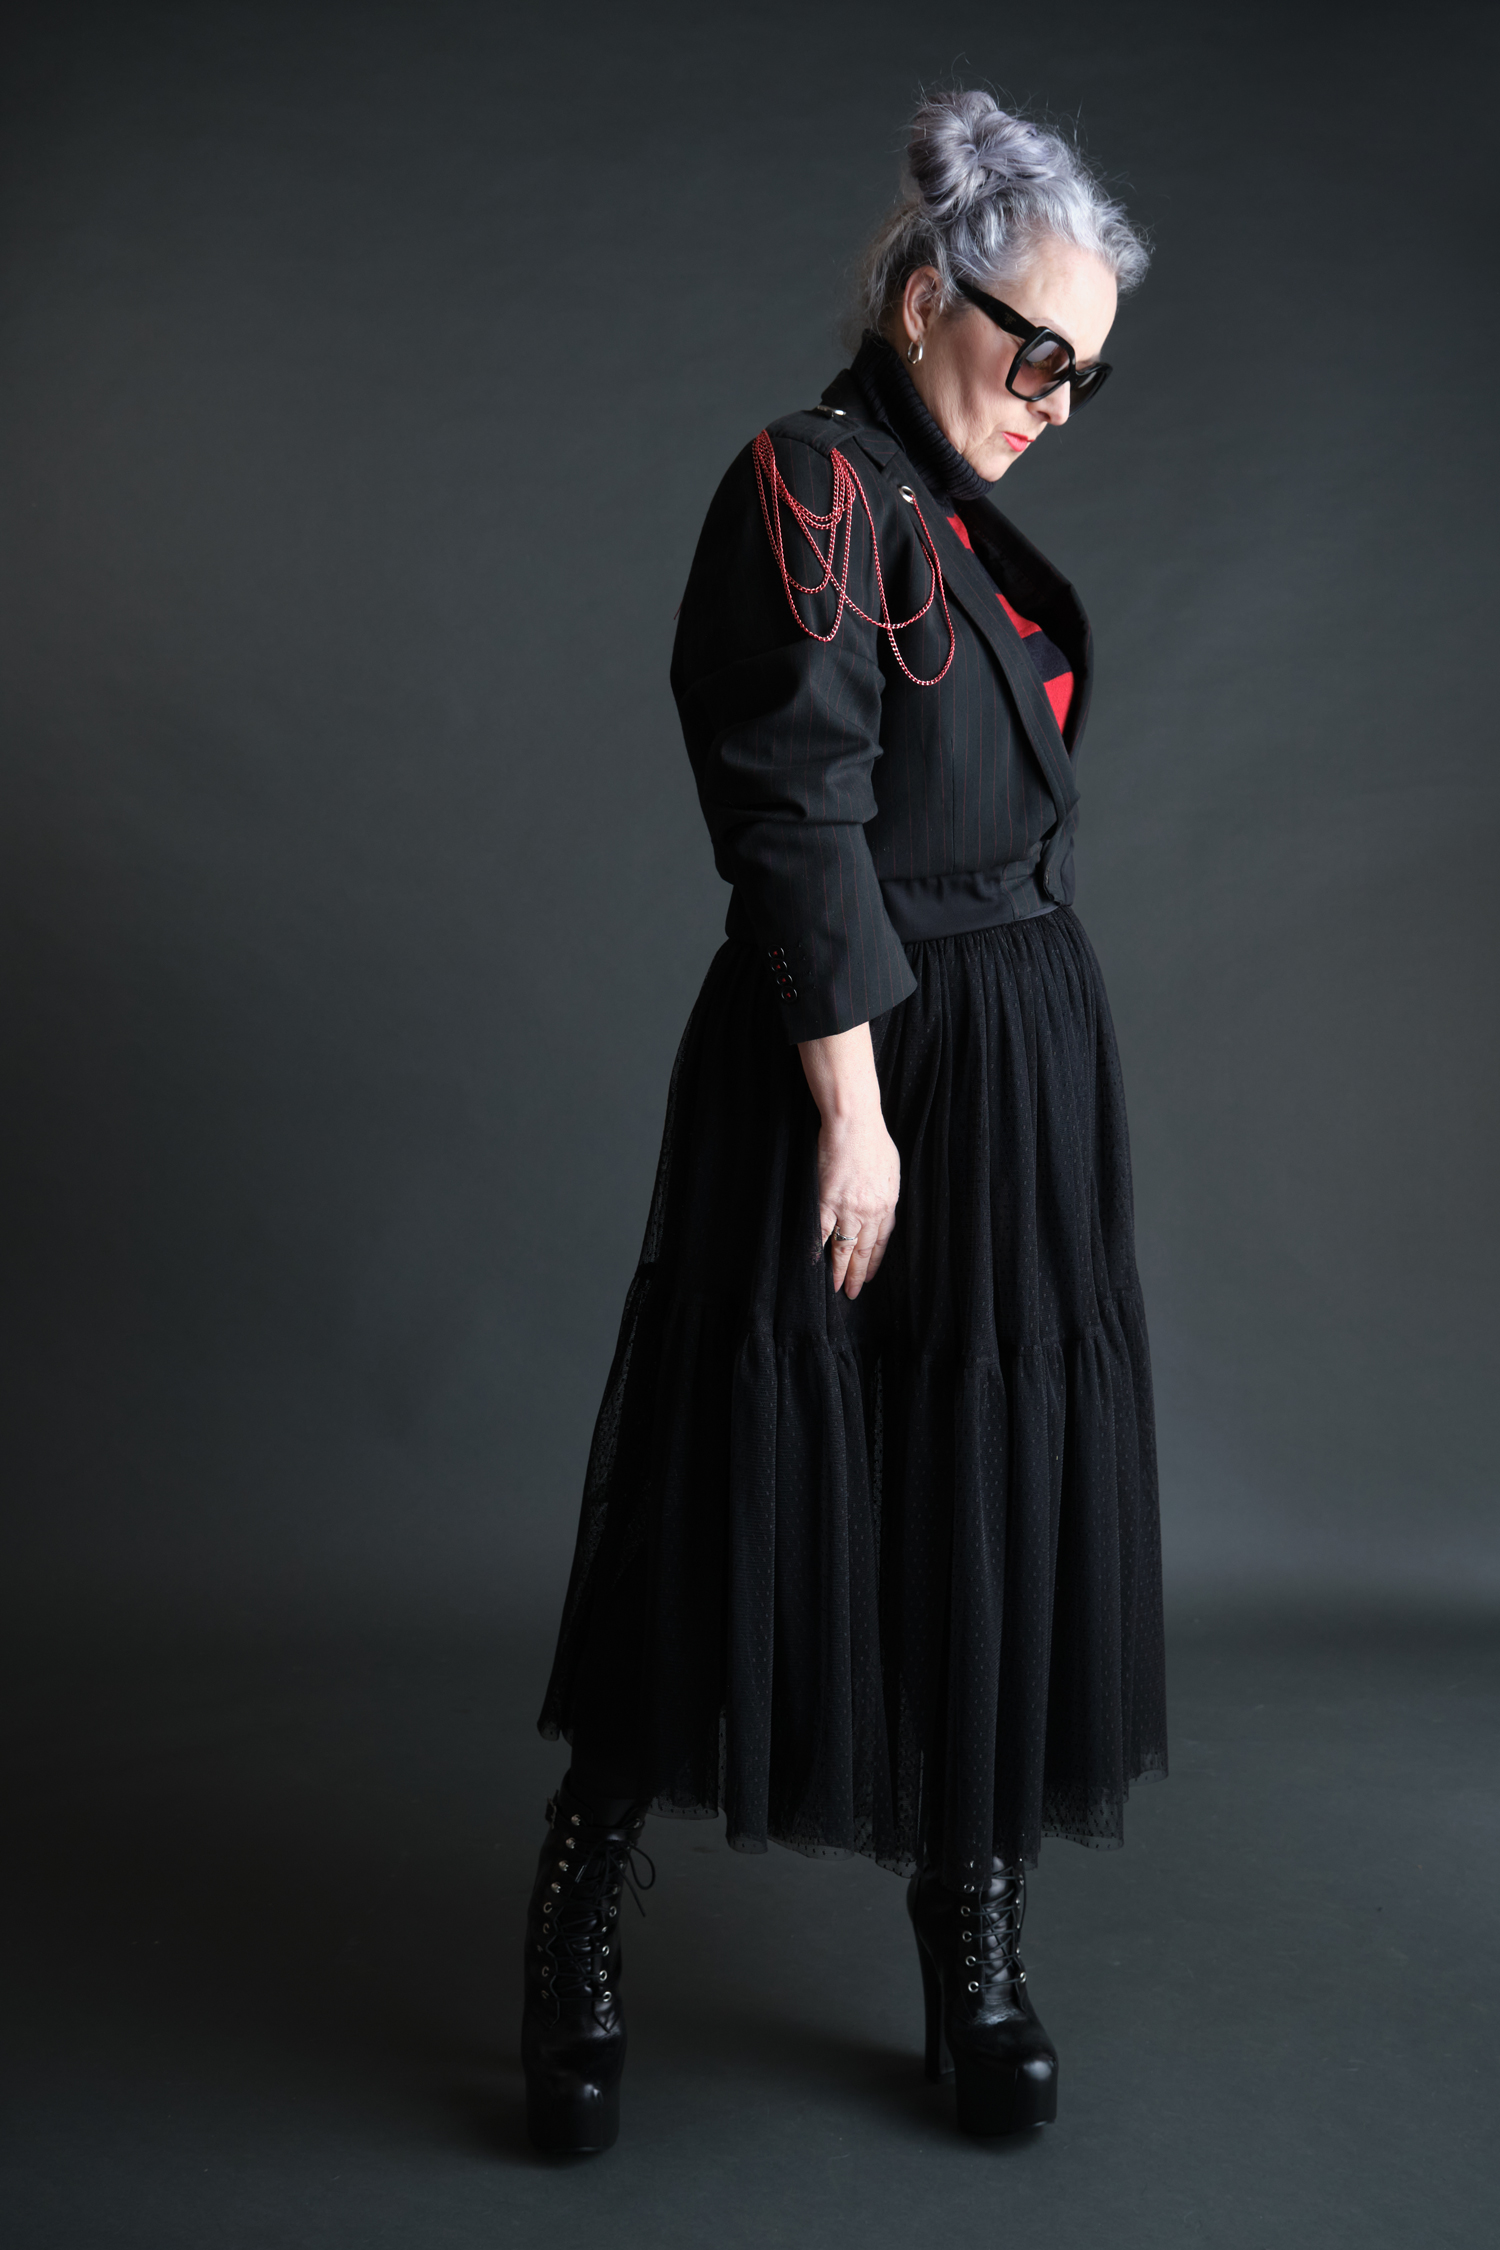
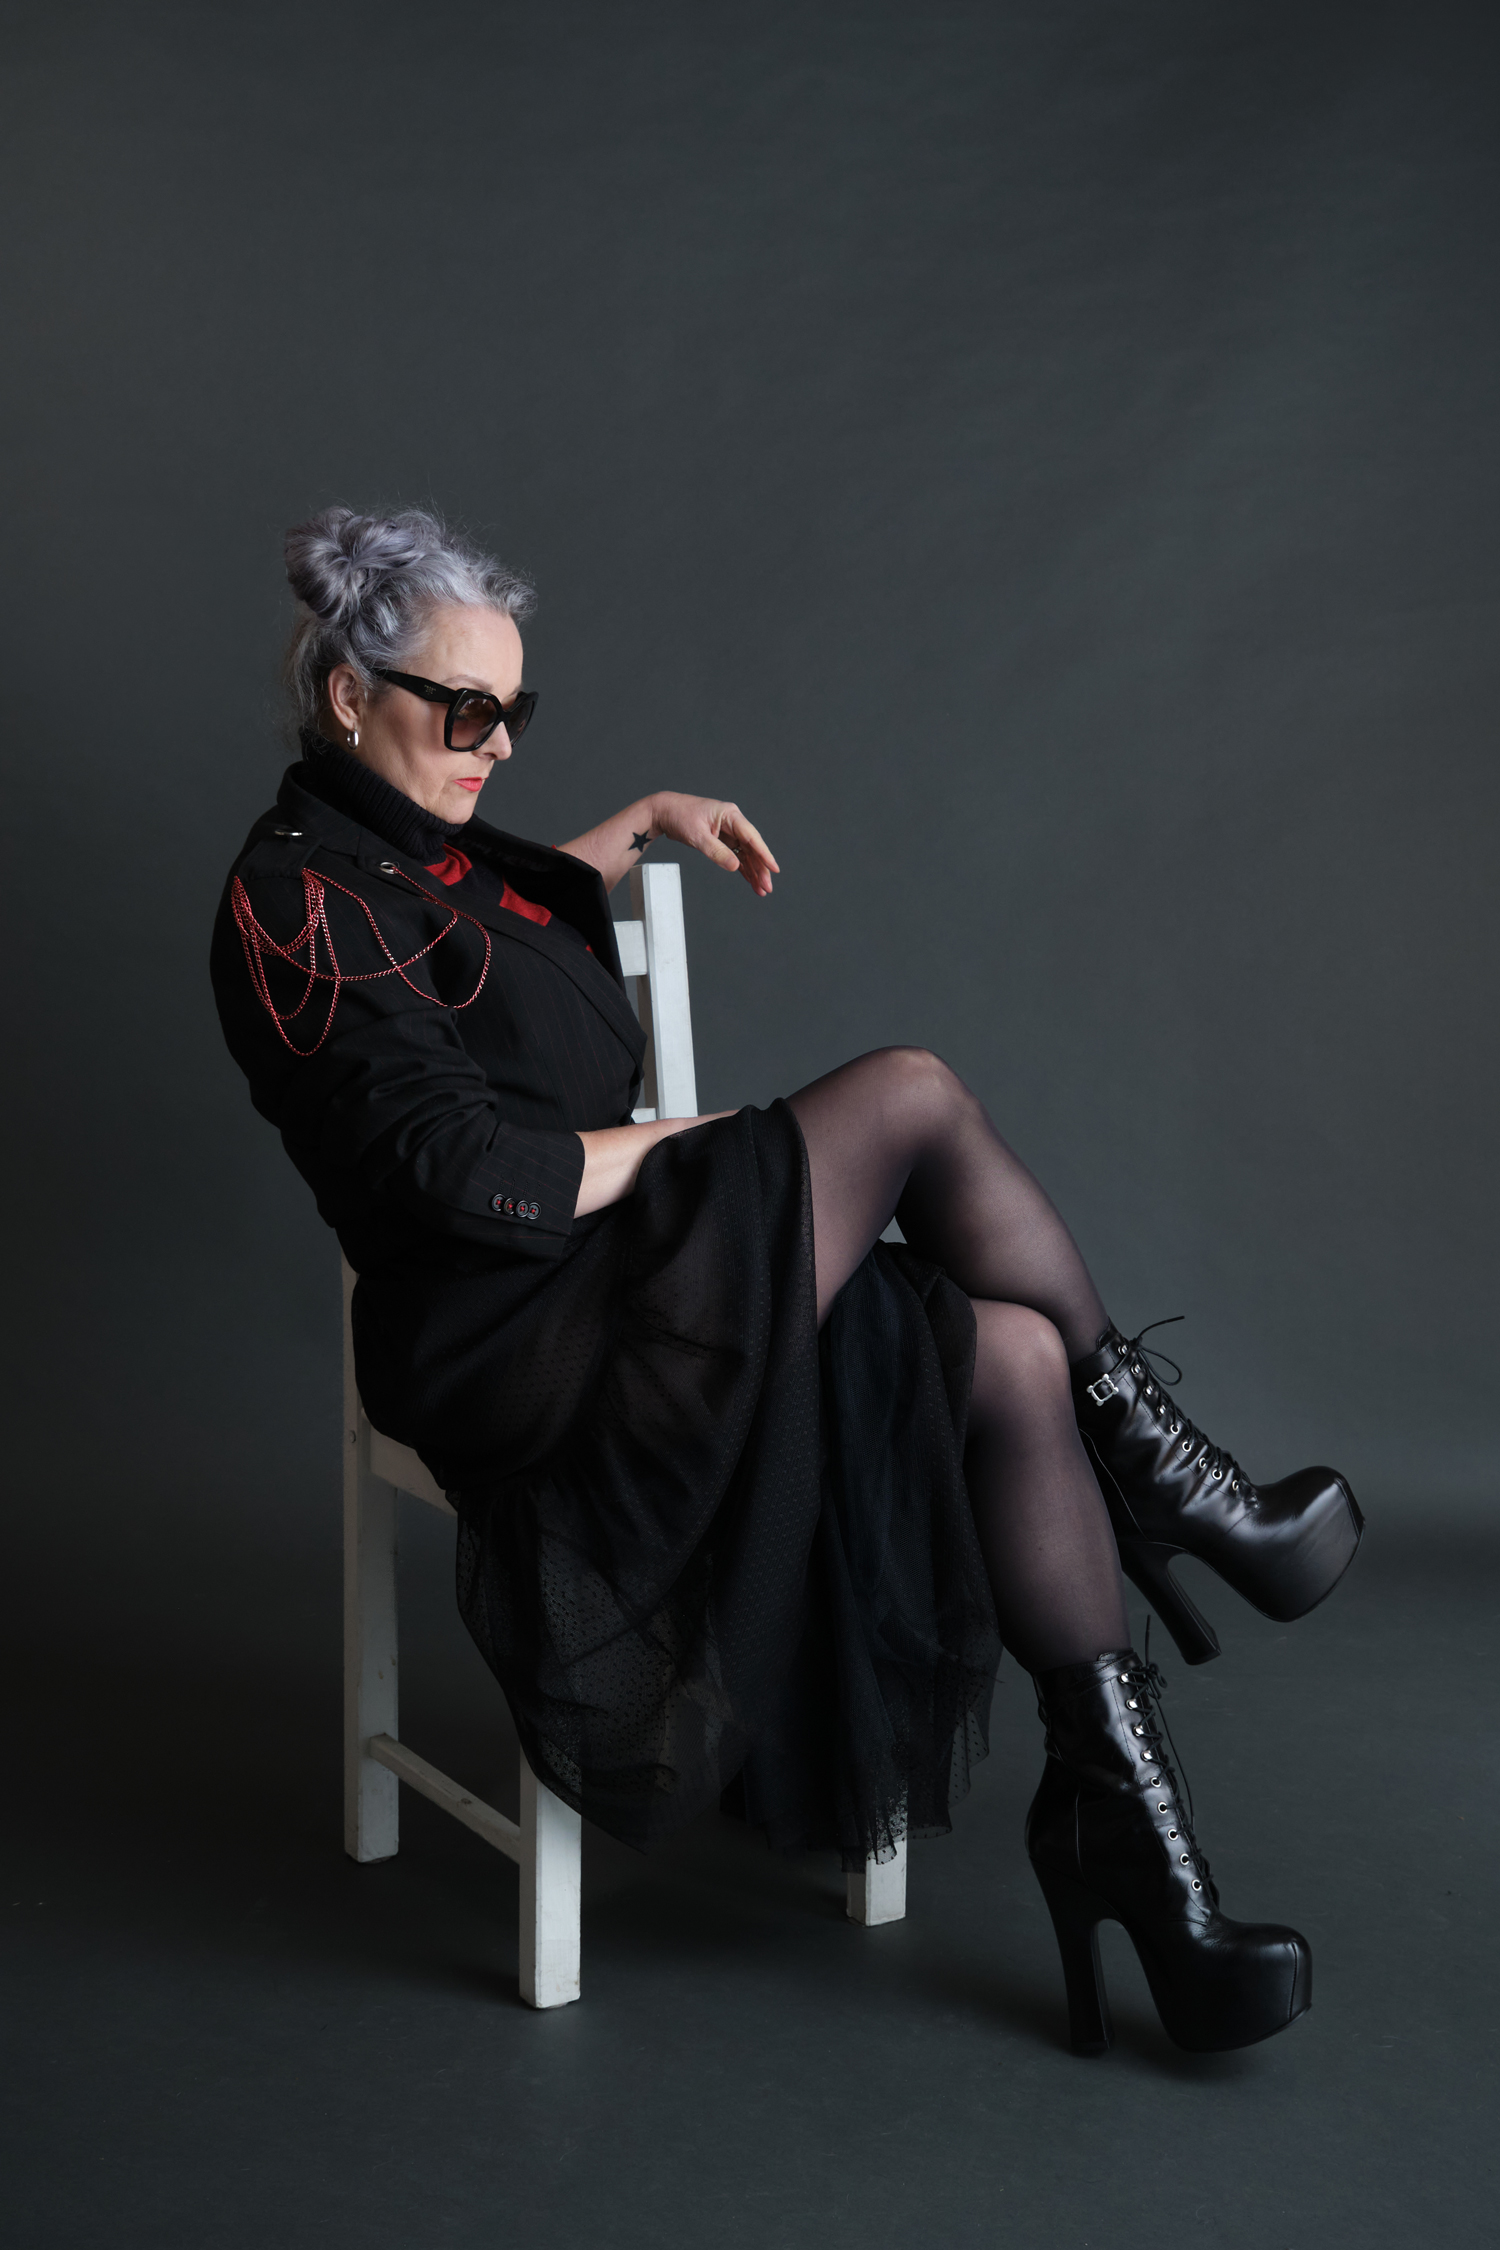
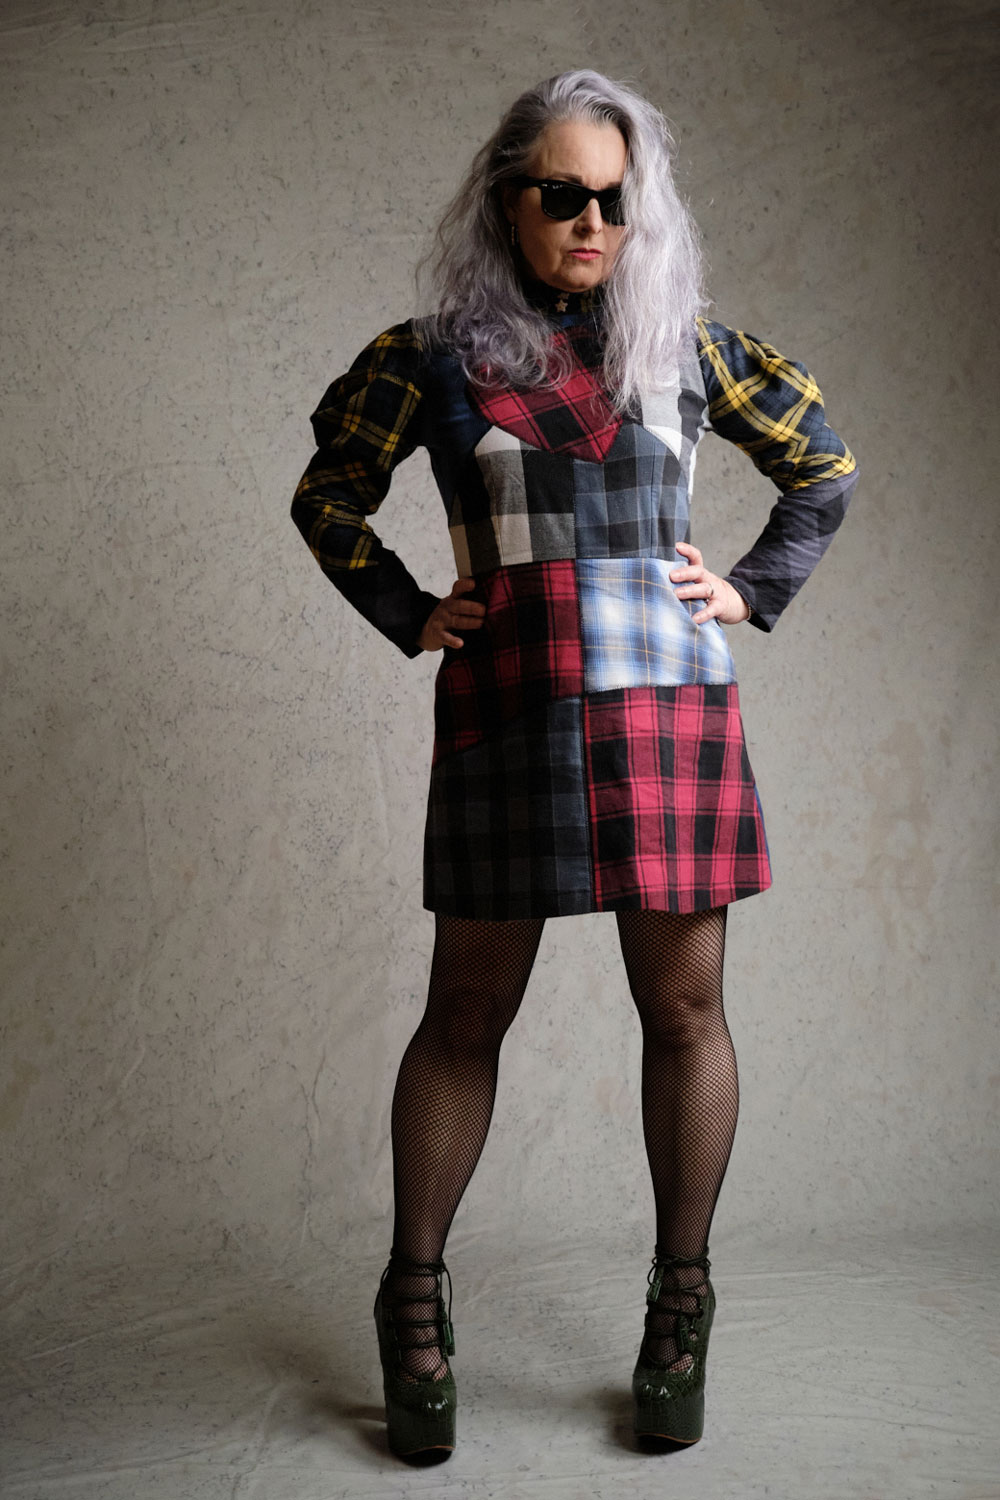
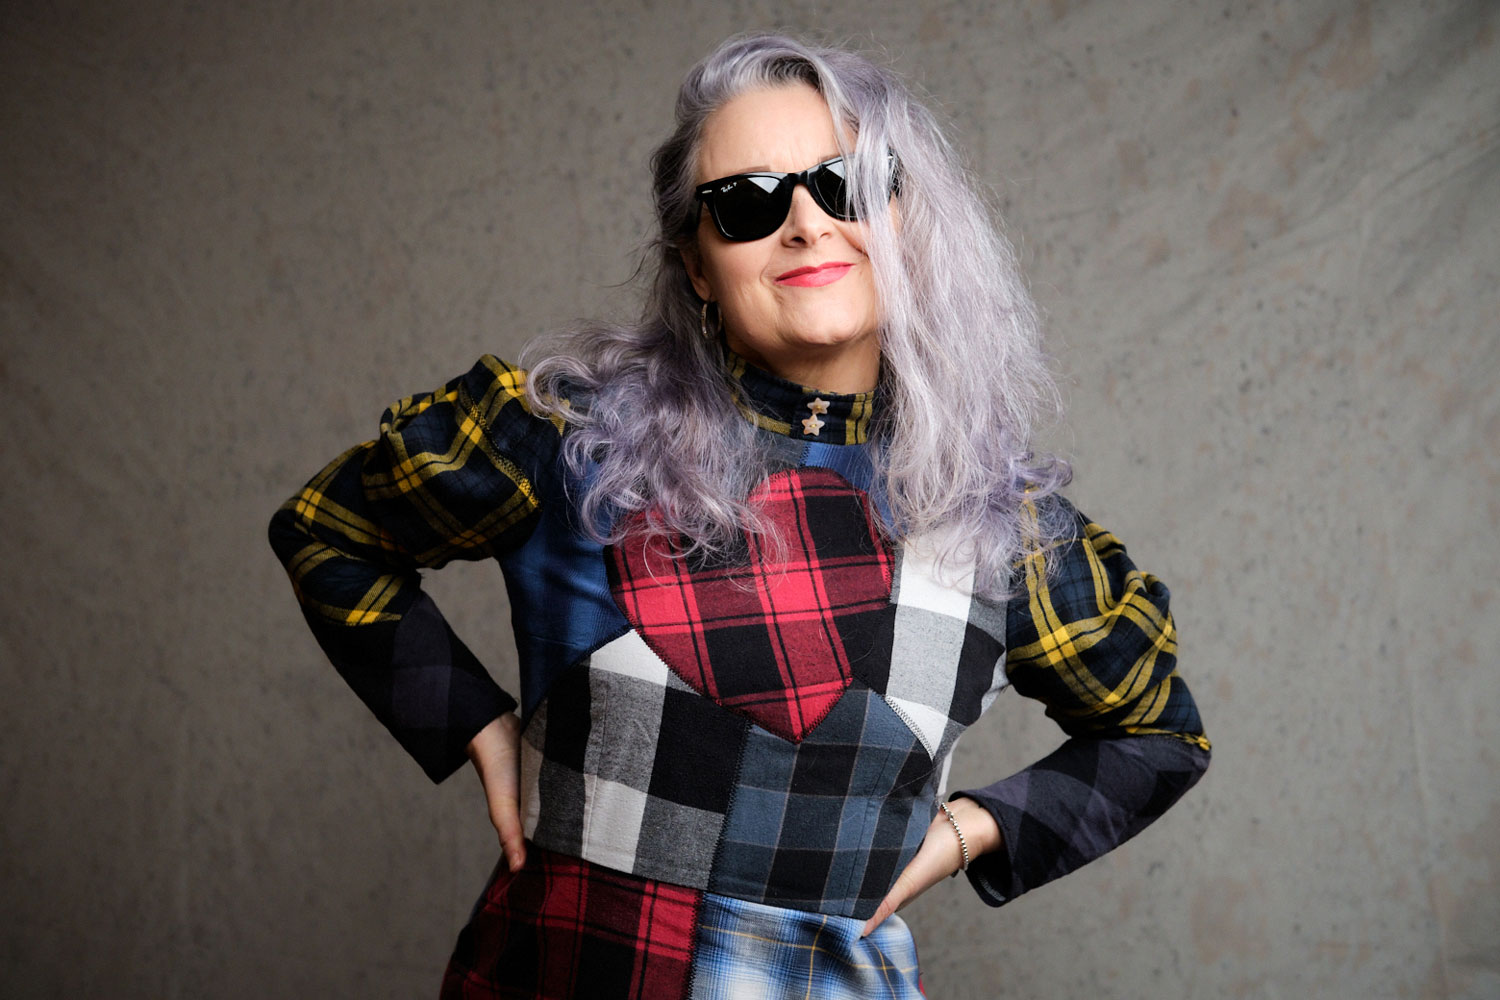
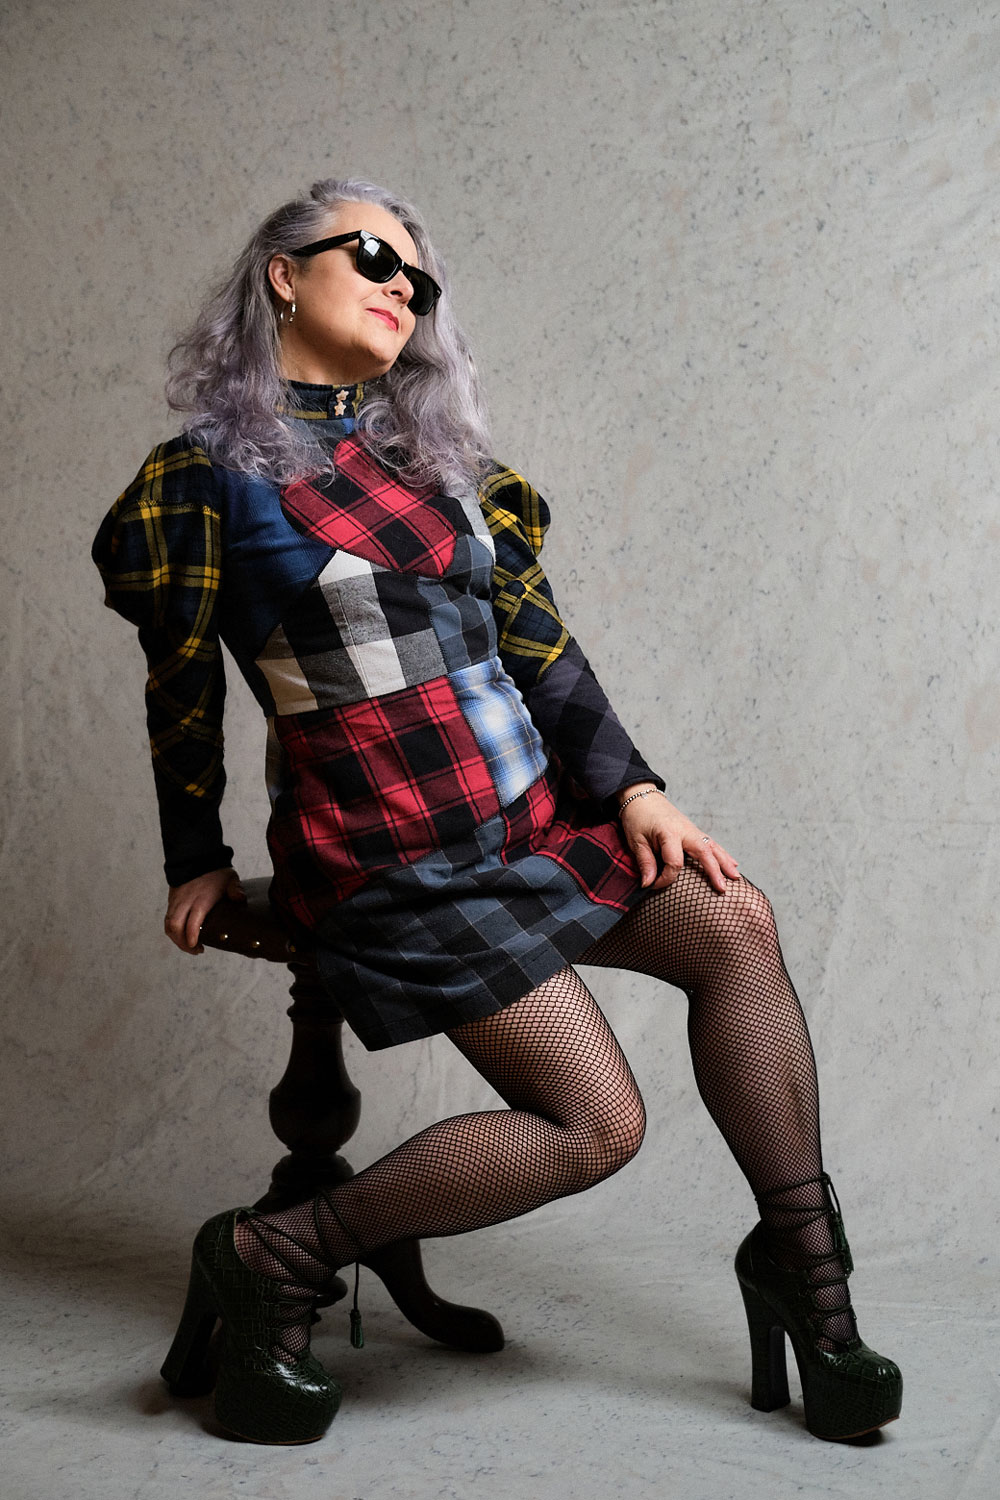
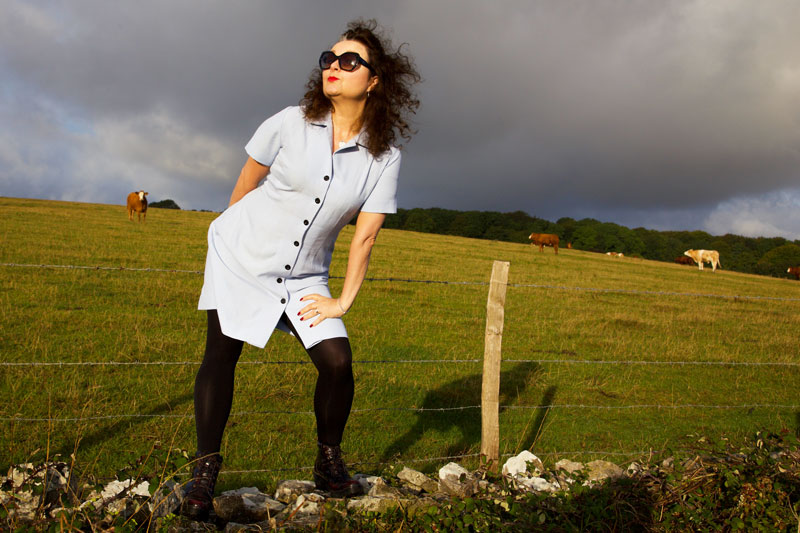
The front offset panel of the dress became the perfect resting place for the words. It sits like a tombstone between two opposing worlds: a glittering, almost celebratory panel on one side, and black lace on the other which I can only really describe as gothic gates of hell. That contrast felt honest. Trauma rarely exists in isolation. It sits alongside normality, sparkle, laughter, productivity. We learn how to carry it while appearing functional, even joyful. This dress needed to hold both truths at once.
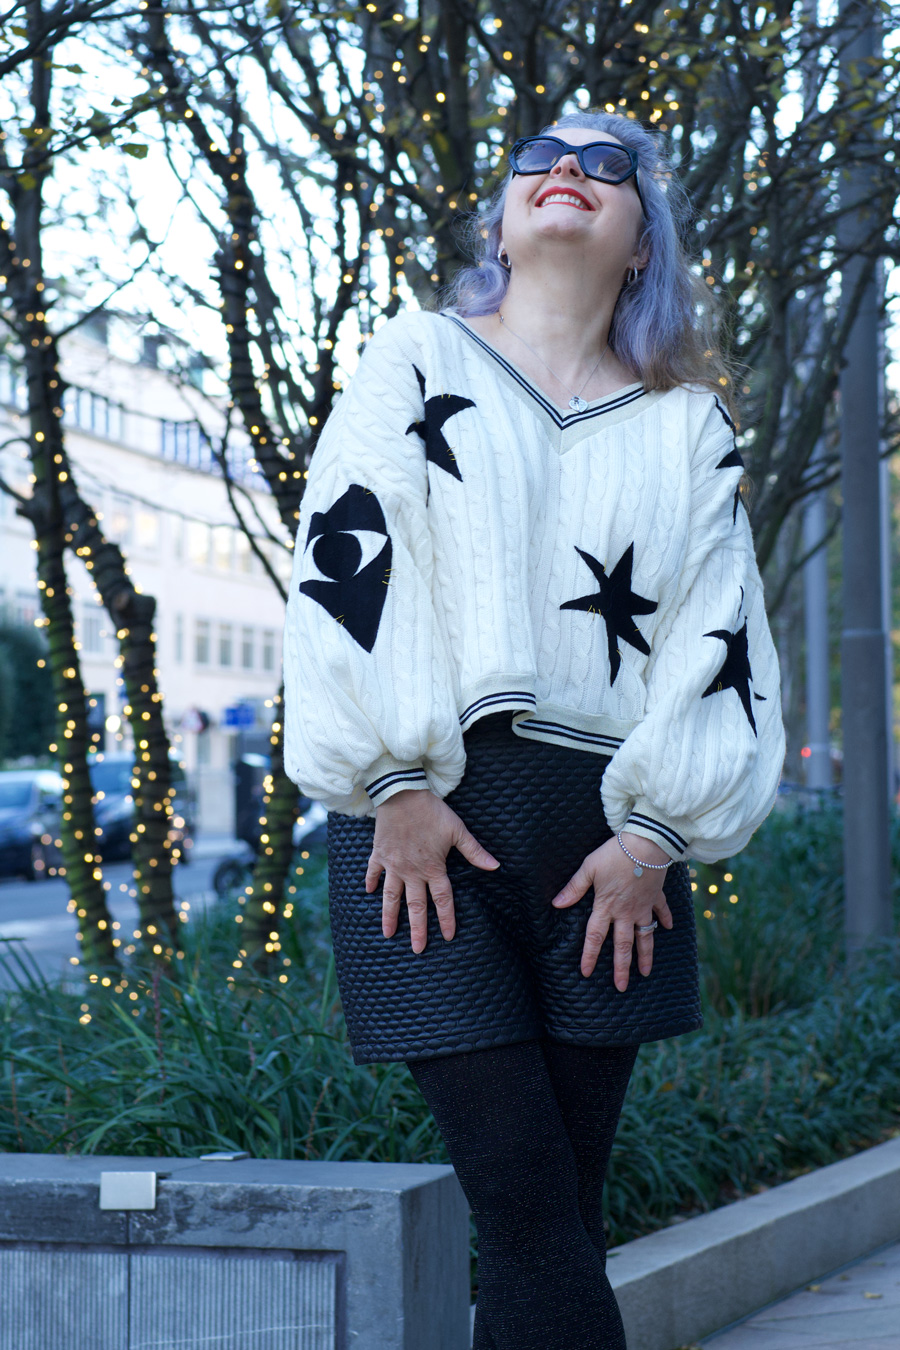
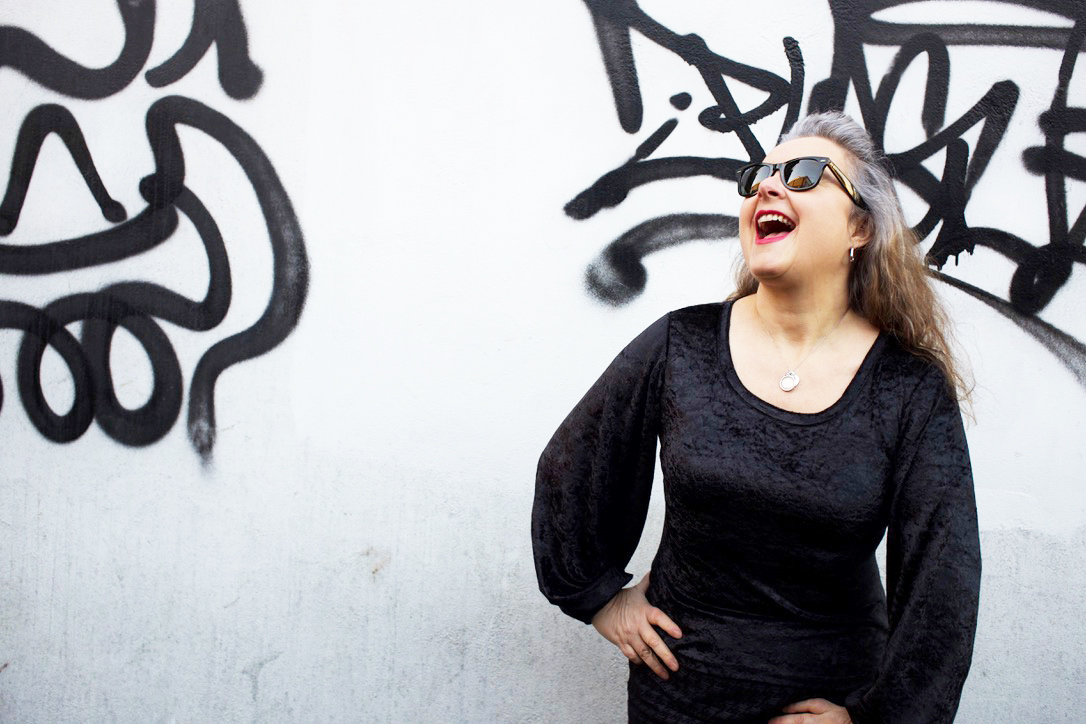
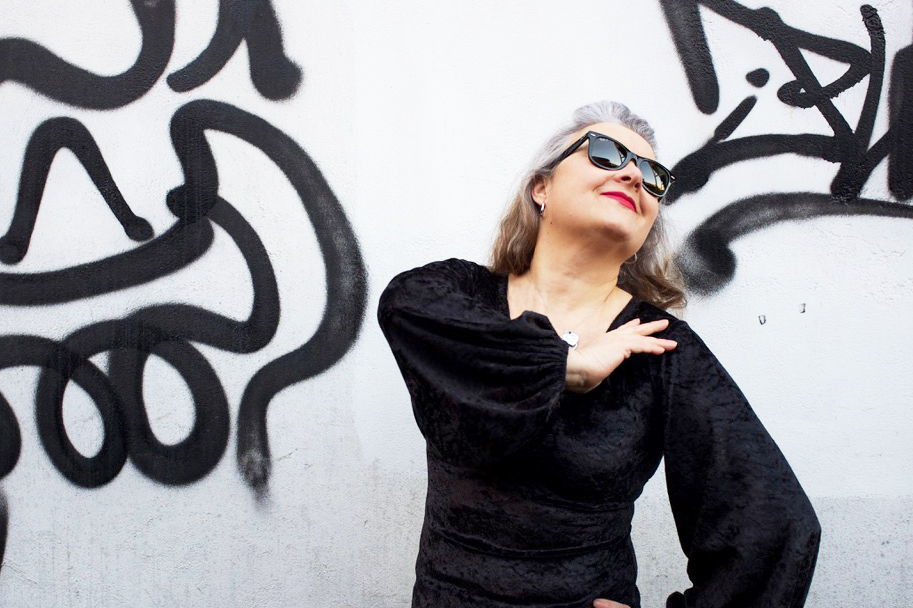
When it came to photographing the piece, I knew I didn’t want my face to be part of the narrative. This was about the dress, the materials, the message. And yet, while handling the red mesh fabric during styling, something unexpected happened. It reminded me of how utterly angry I used to be. And how scared. So I let that fabric become part of the story.
Across my face, I draped a red veil of anger. My eyes are crossed out. Not for modesty. Not for mystery. But for severance. A deliberate refusal. Let him see nothing now.
This is an intensely dark and deeply personal piece. There are many things I still find impossible to articulate out loud. Some memories don’t translate well into spoken language. They sit too heavily in the body. But creating this allowed me to process emotions that have lived quietly under the surface for a very long time. Art, for me, is undeniably therapy. Not in a neat or linear way, but in a physical, embodied one. It gives shape to feelings that don’t yet have words. It allows the hands to lead when the voice cannot.
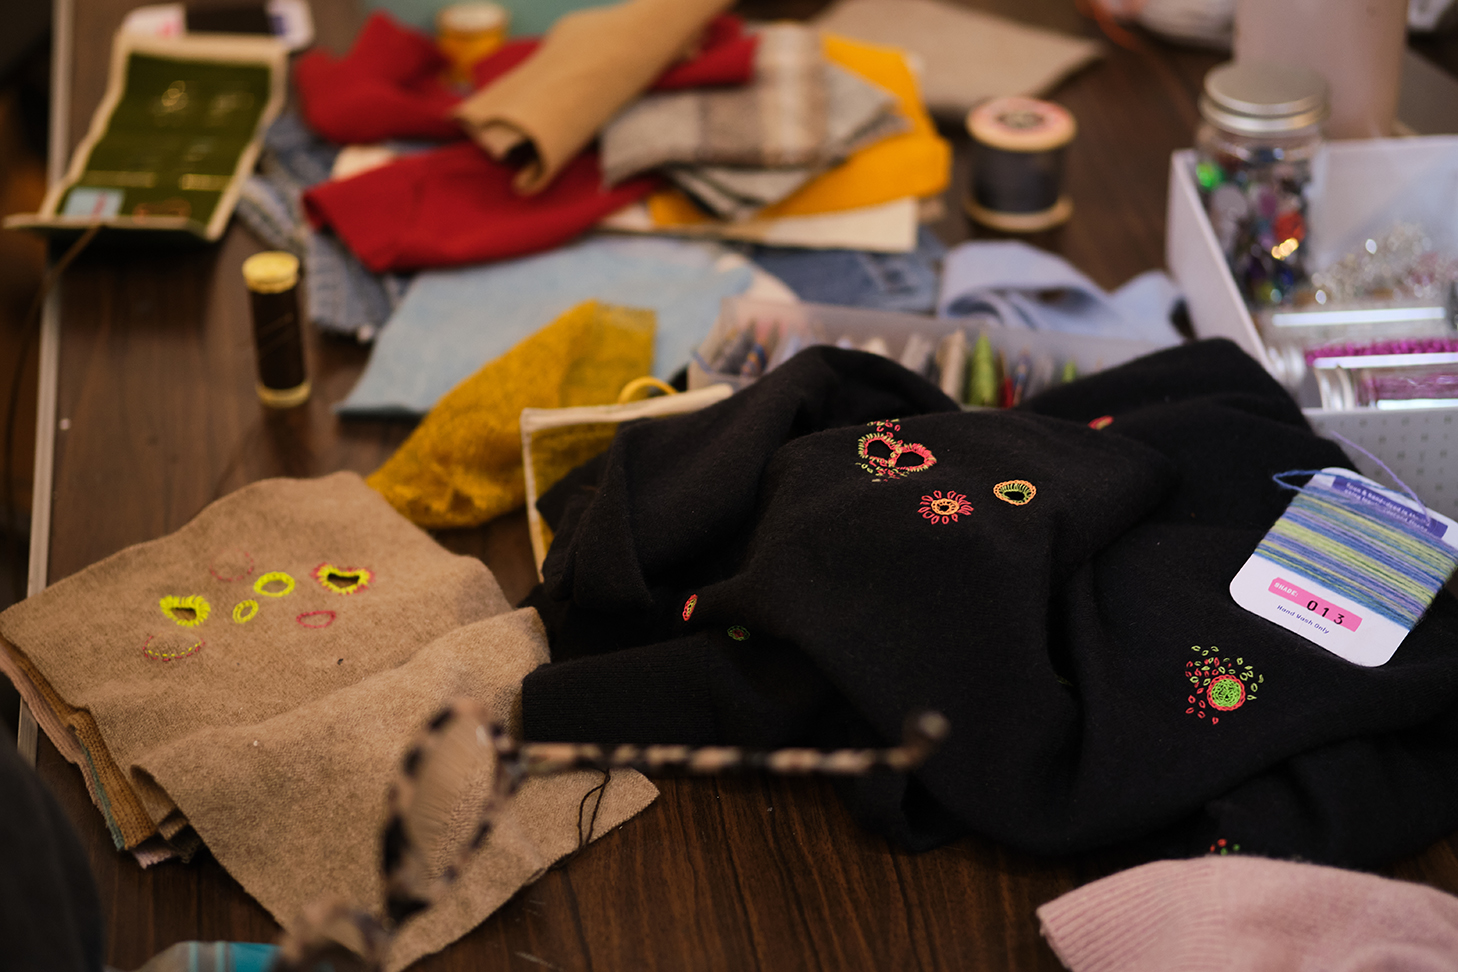
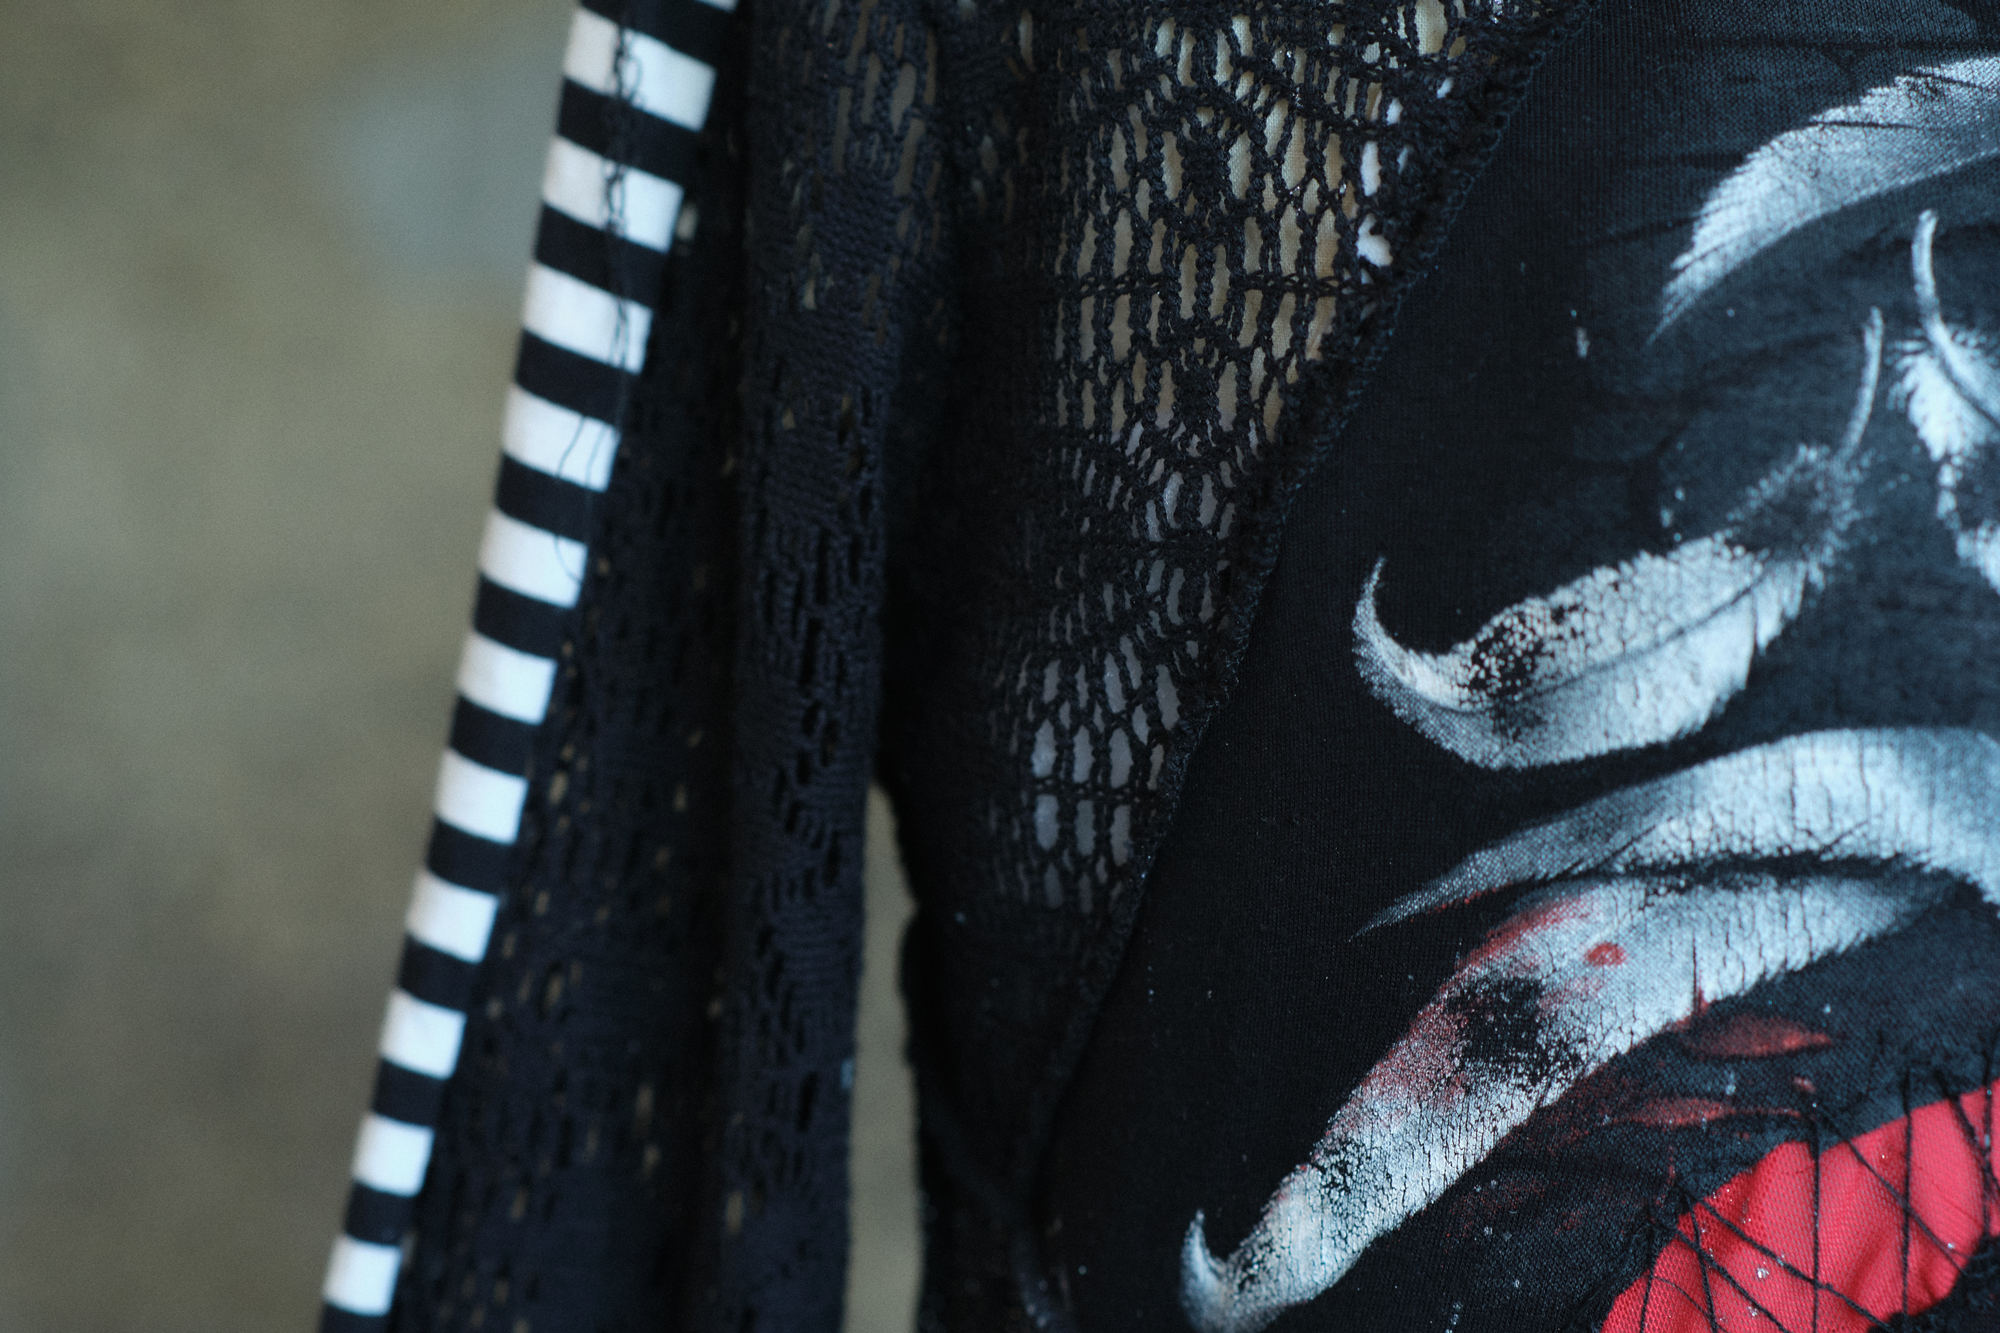
The red crosshatched stitches over the white lettering were made using long stitches and long French tacks which is a technique I absolutely adore once I find my rhythm. There’s something meditative about it, almost trance-like. I repeated the same stitching across the large red “wound” on the front of the dress. Those stitches feel contradictory in the best possible way. Violent and tender. Aggressive and reparative. Much like the process of healing itself.
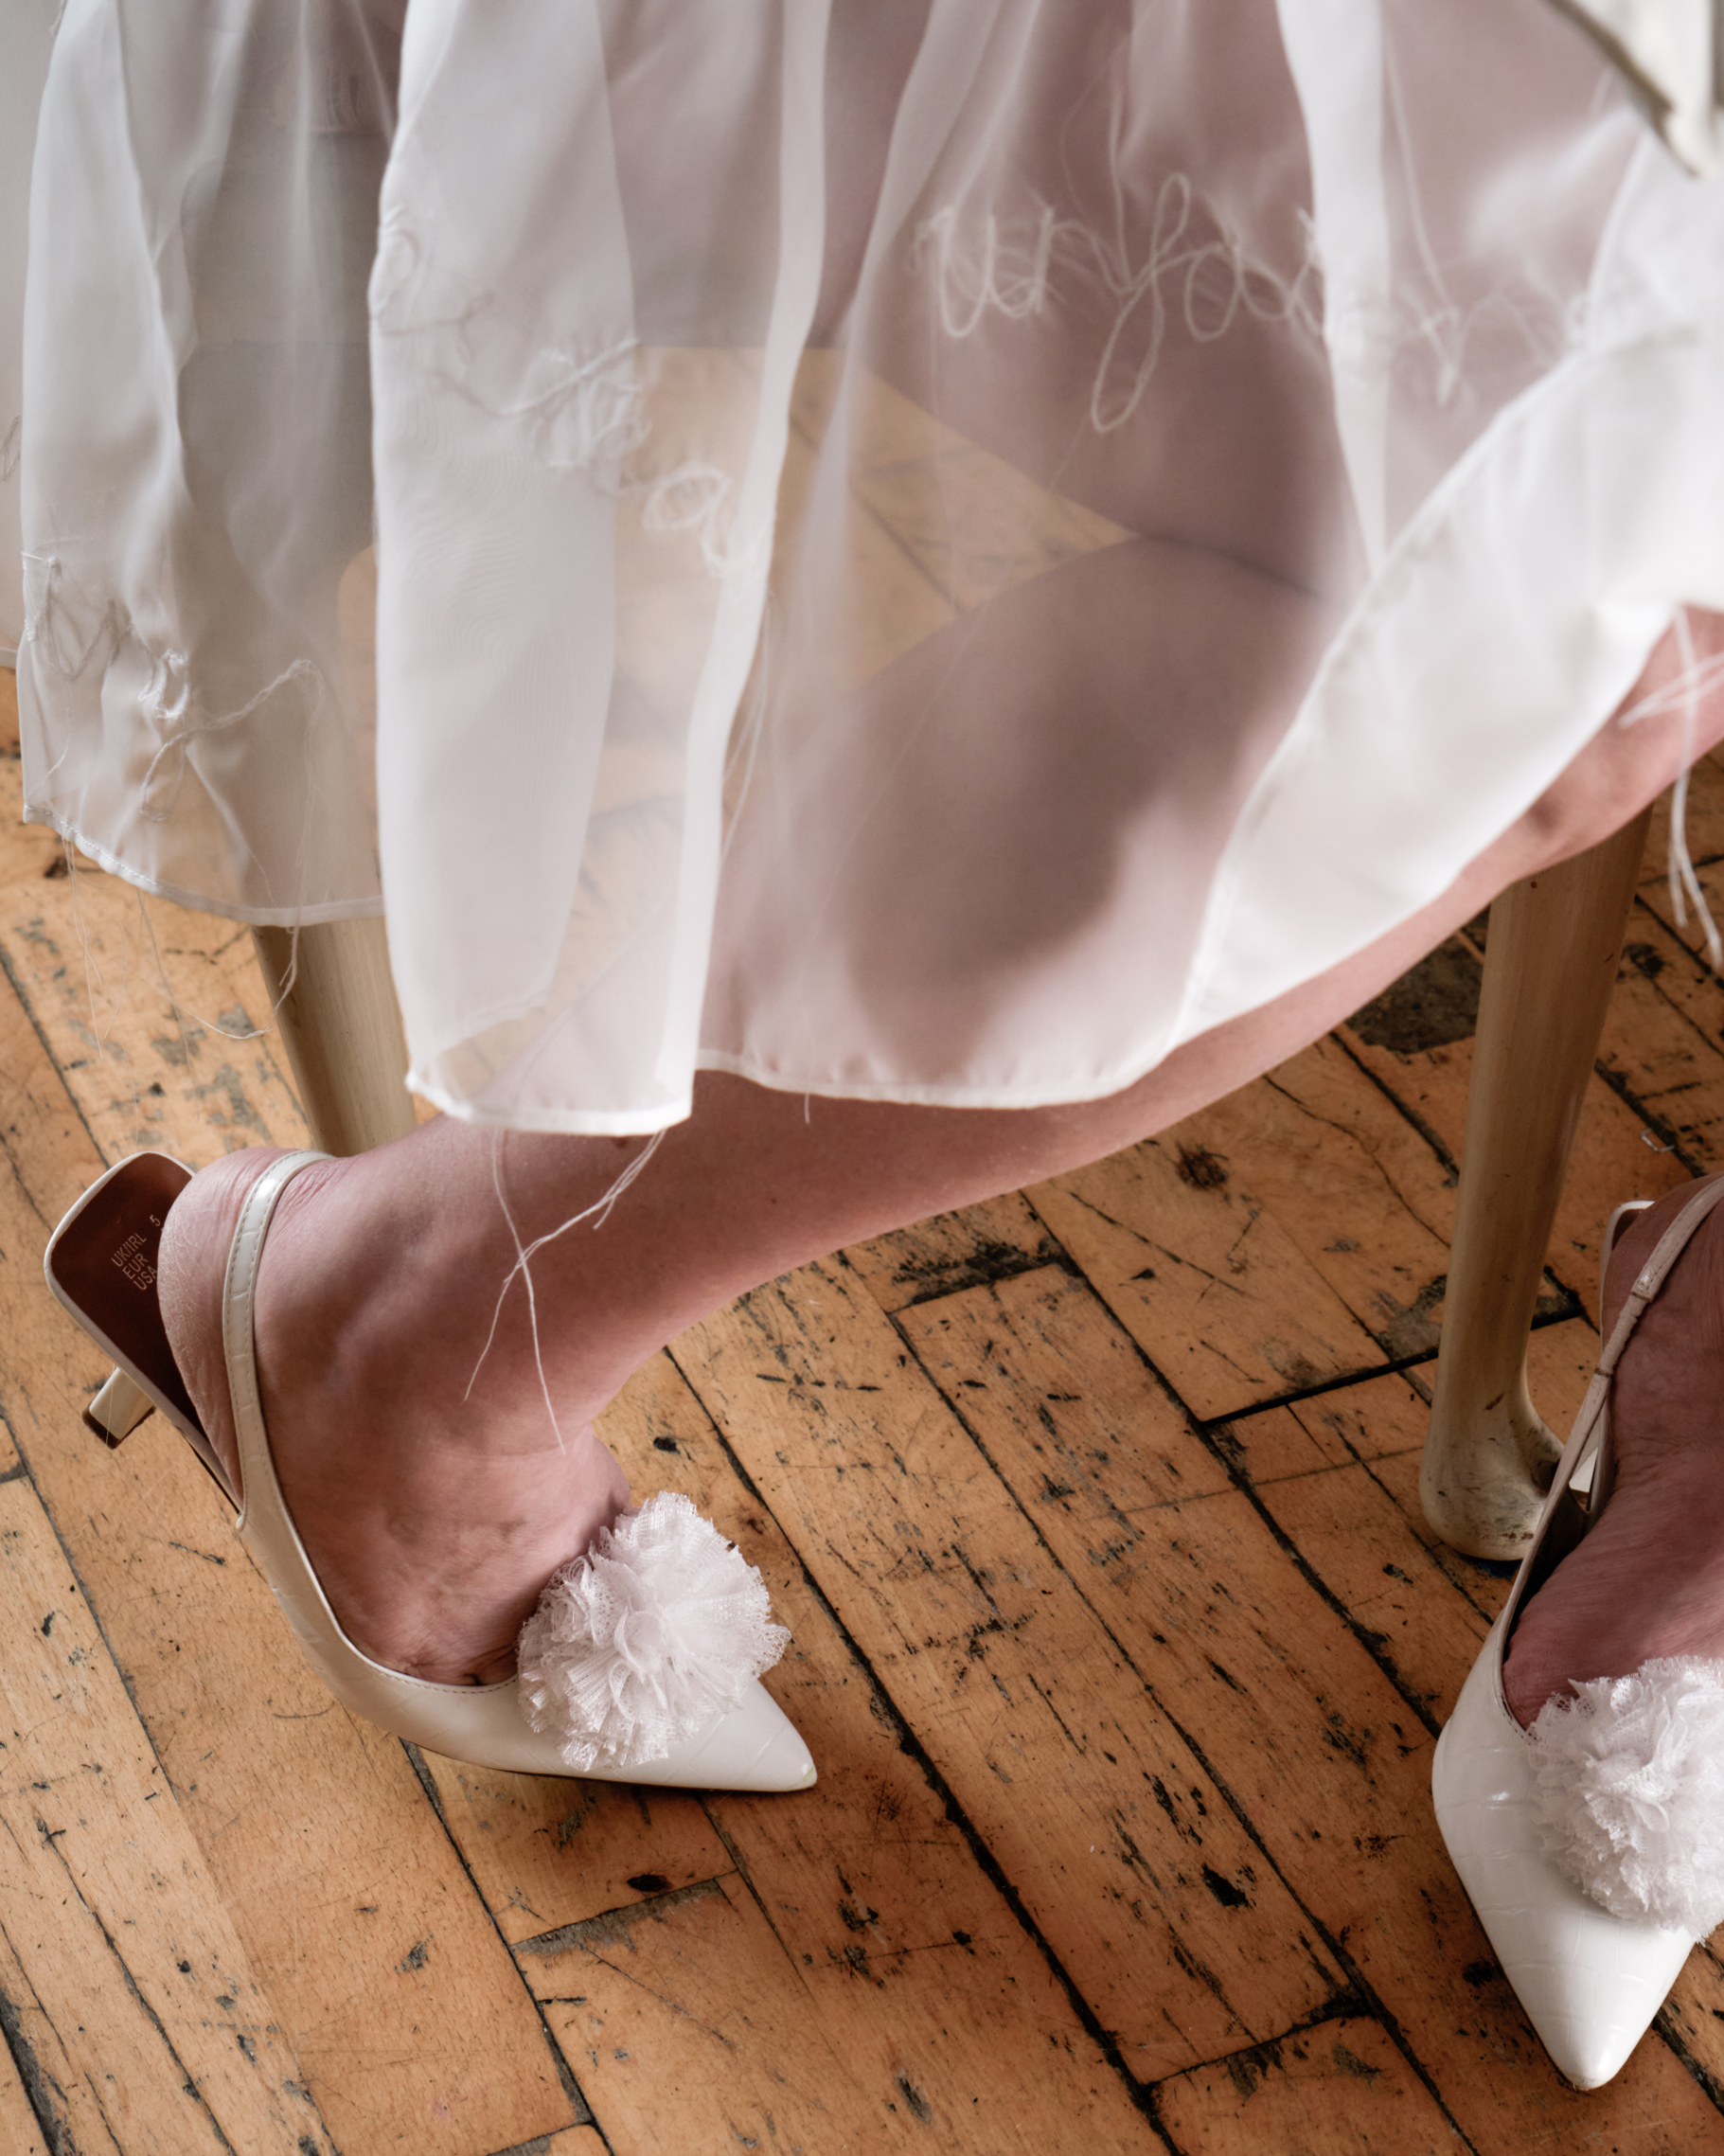
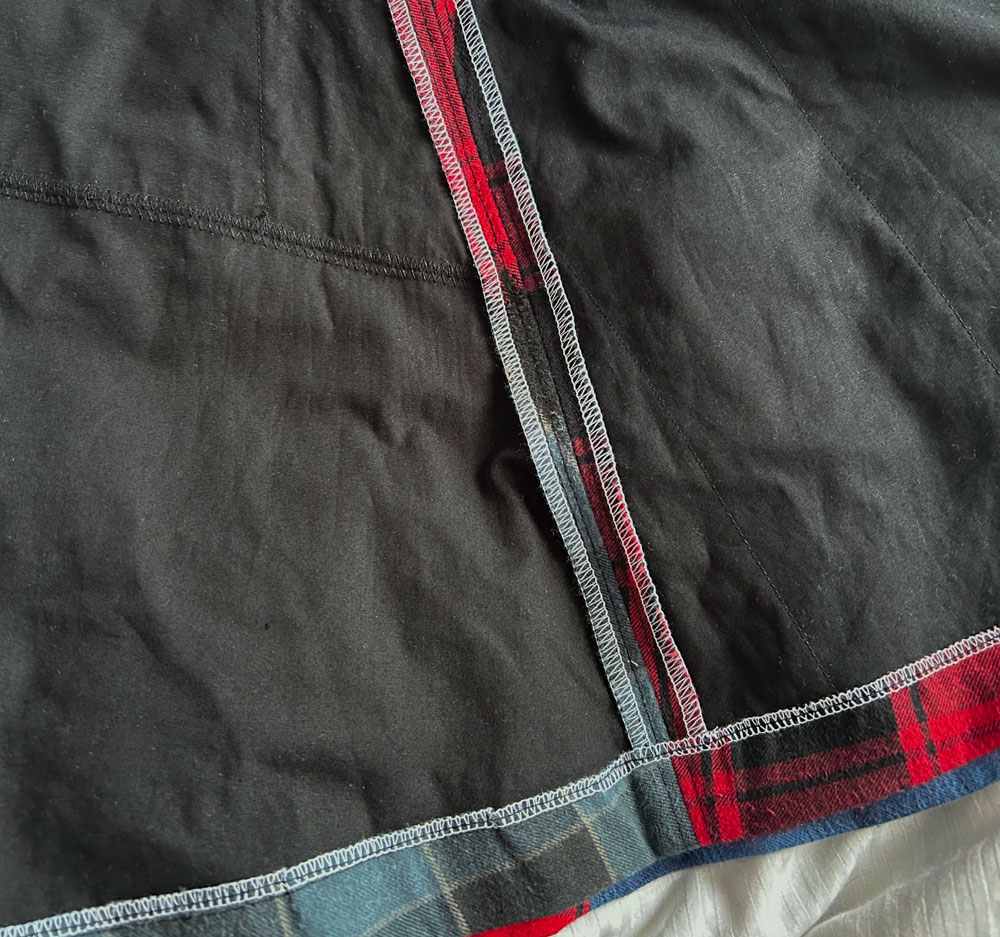
Most of the dress was constructed on the overlocker, with the exception of the gathered sections and the appliquéd text. I deliberately allowed threads to hang loose, unfinished, unresolved. I didn’t want everything tied up neatly. Some things aren’t.
One of my favourite details are the stripy strips down the length of the sleeves. A little nod to Tim Burton, most likely. I distinctly remember giving myself a small excitable clap when I finished them. And when I paused to question why this detail made me so happy, I realised it was because they resemble a ladder. An escape route. A way up and out. Towards the light.
That symbolism wasn’t planned, but it felt significant. A reminder that even when working through darkness, the act of making with your hands can quietly build a way forward.
Nothing new was purchased to make this dress, and that was entirely intentional. I often find my creativity stiffens in the presence of pristine, untouched fabric. There’s too much expectation. Too much pressure to make something “worthy” of the material. Reclaimed fabrics free me from that.
They lower the stakes. They invite play, experimentation, risk. I live near Goldhawk Road in London, surrounded by an overwhelming number of fabric shops, and there was a time when fabric shopping days filled me with excitement. Recently though, I’ve felt far more at ease working with what already exists, allowing the materials to guide the outcome rather than imposing a rigid plan. New fabric would have made this dress too polished. Too controlled. This needed to remain raw.

That said, I’m not anti-new materials. If I were commissioned tomorrow to make a mother of the bride dress, I’d choose the finest fabrics available and enjoy that process immensely. There’s room for both approaches.
But when it comes to art and the pleasure of making clothes purely for myself, I’ll continue to relish the treasures I uncover in charity shops, at boot fairs, and through organised fabric swaps.
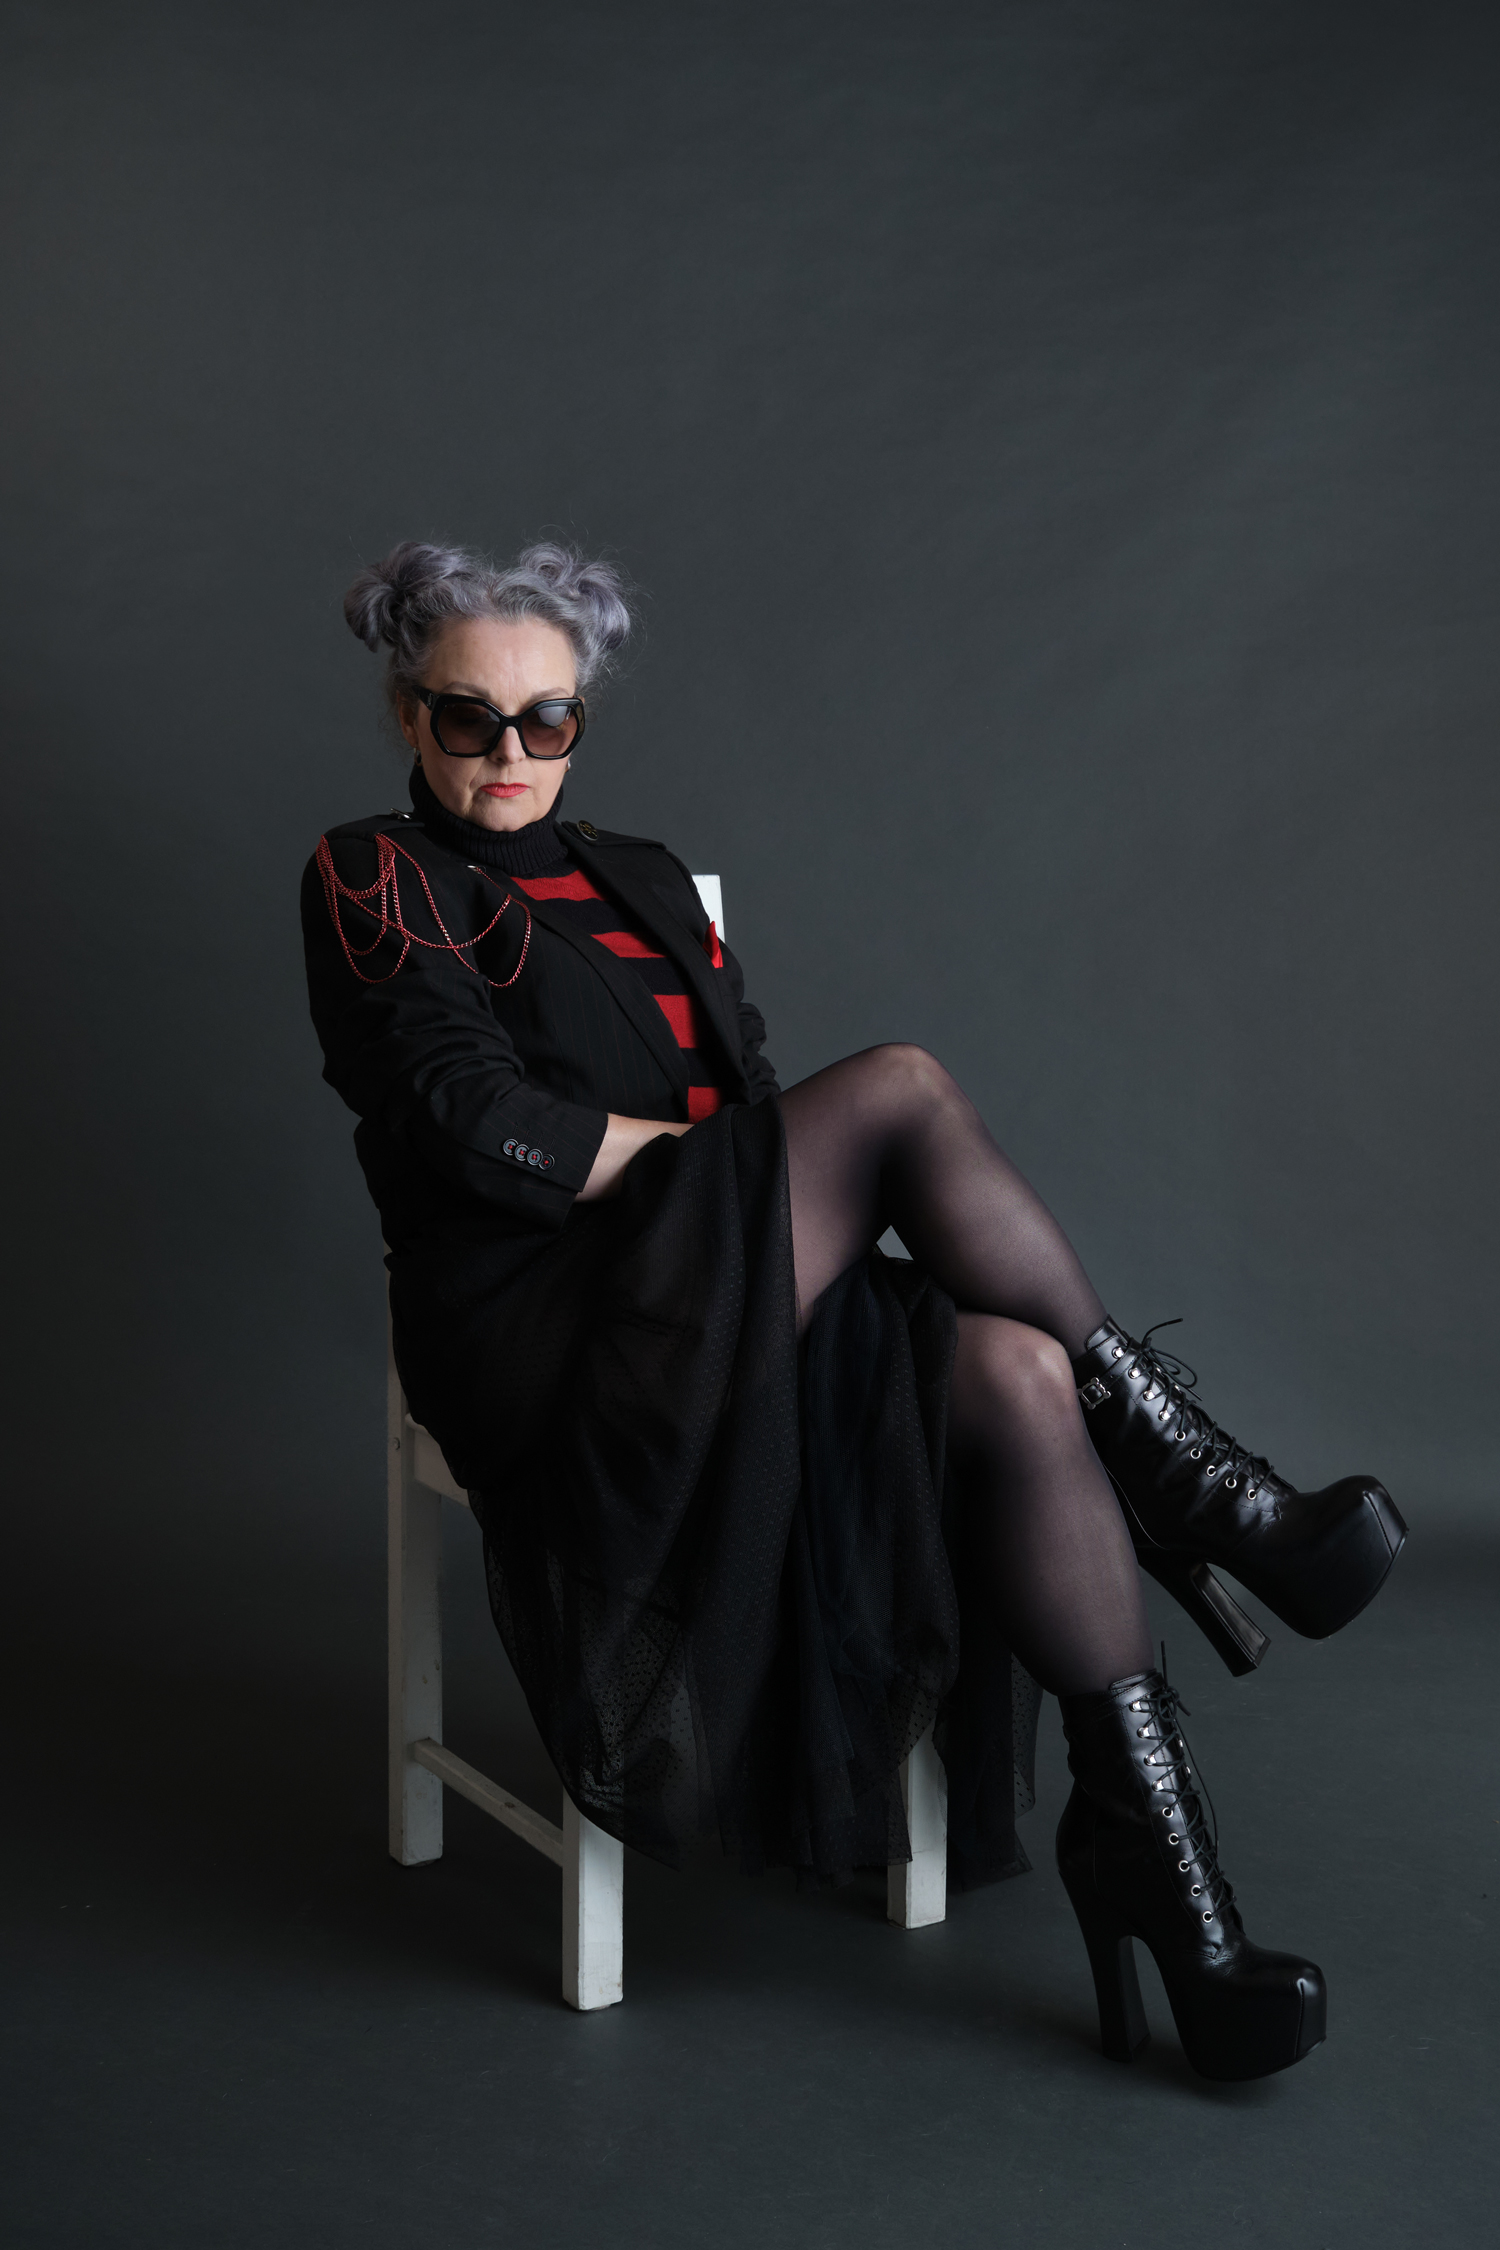
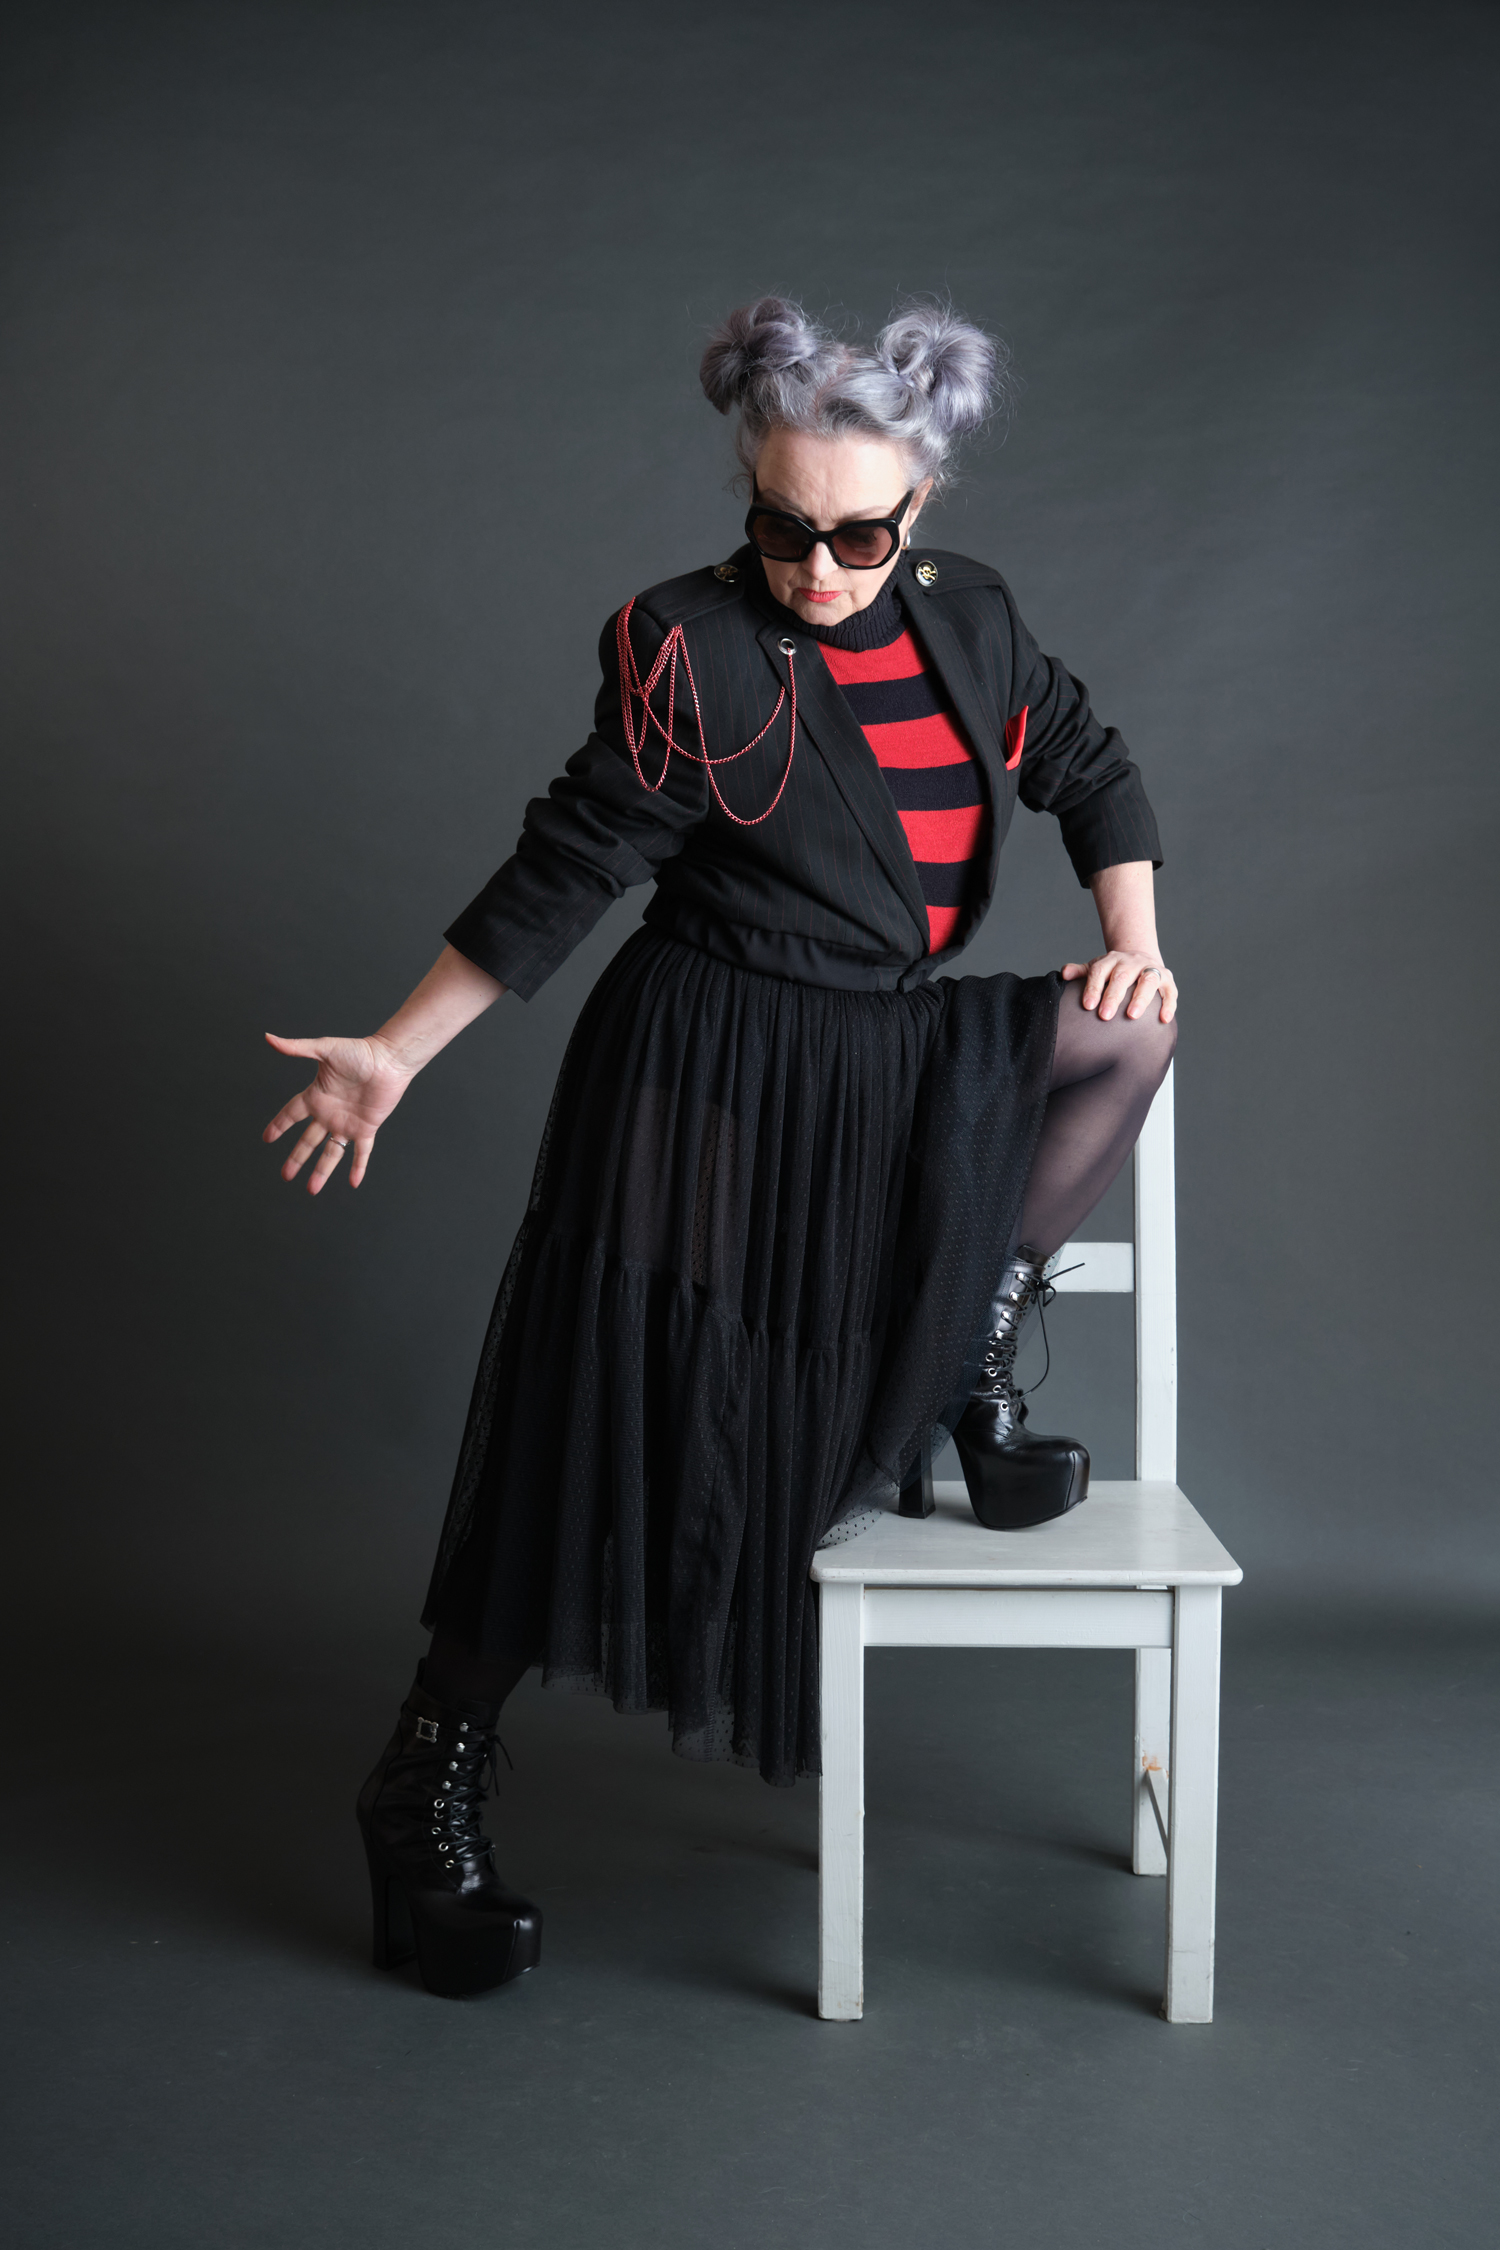
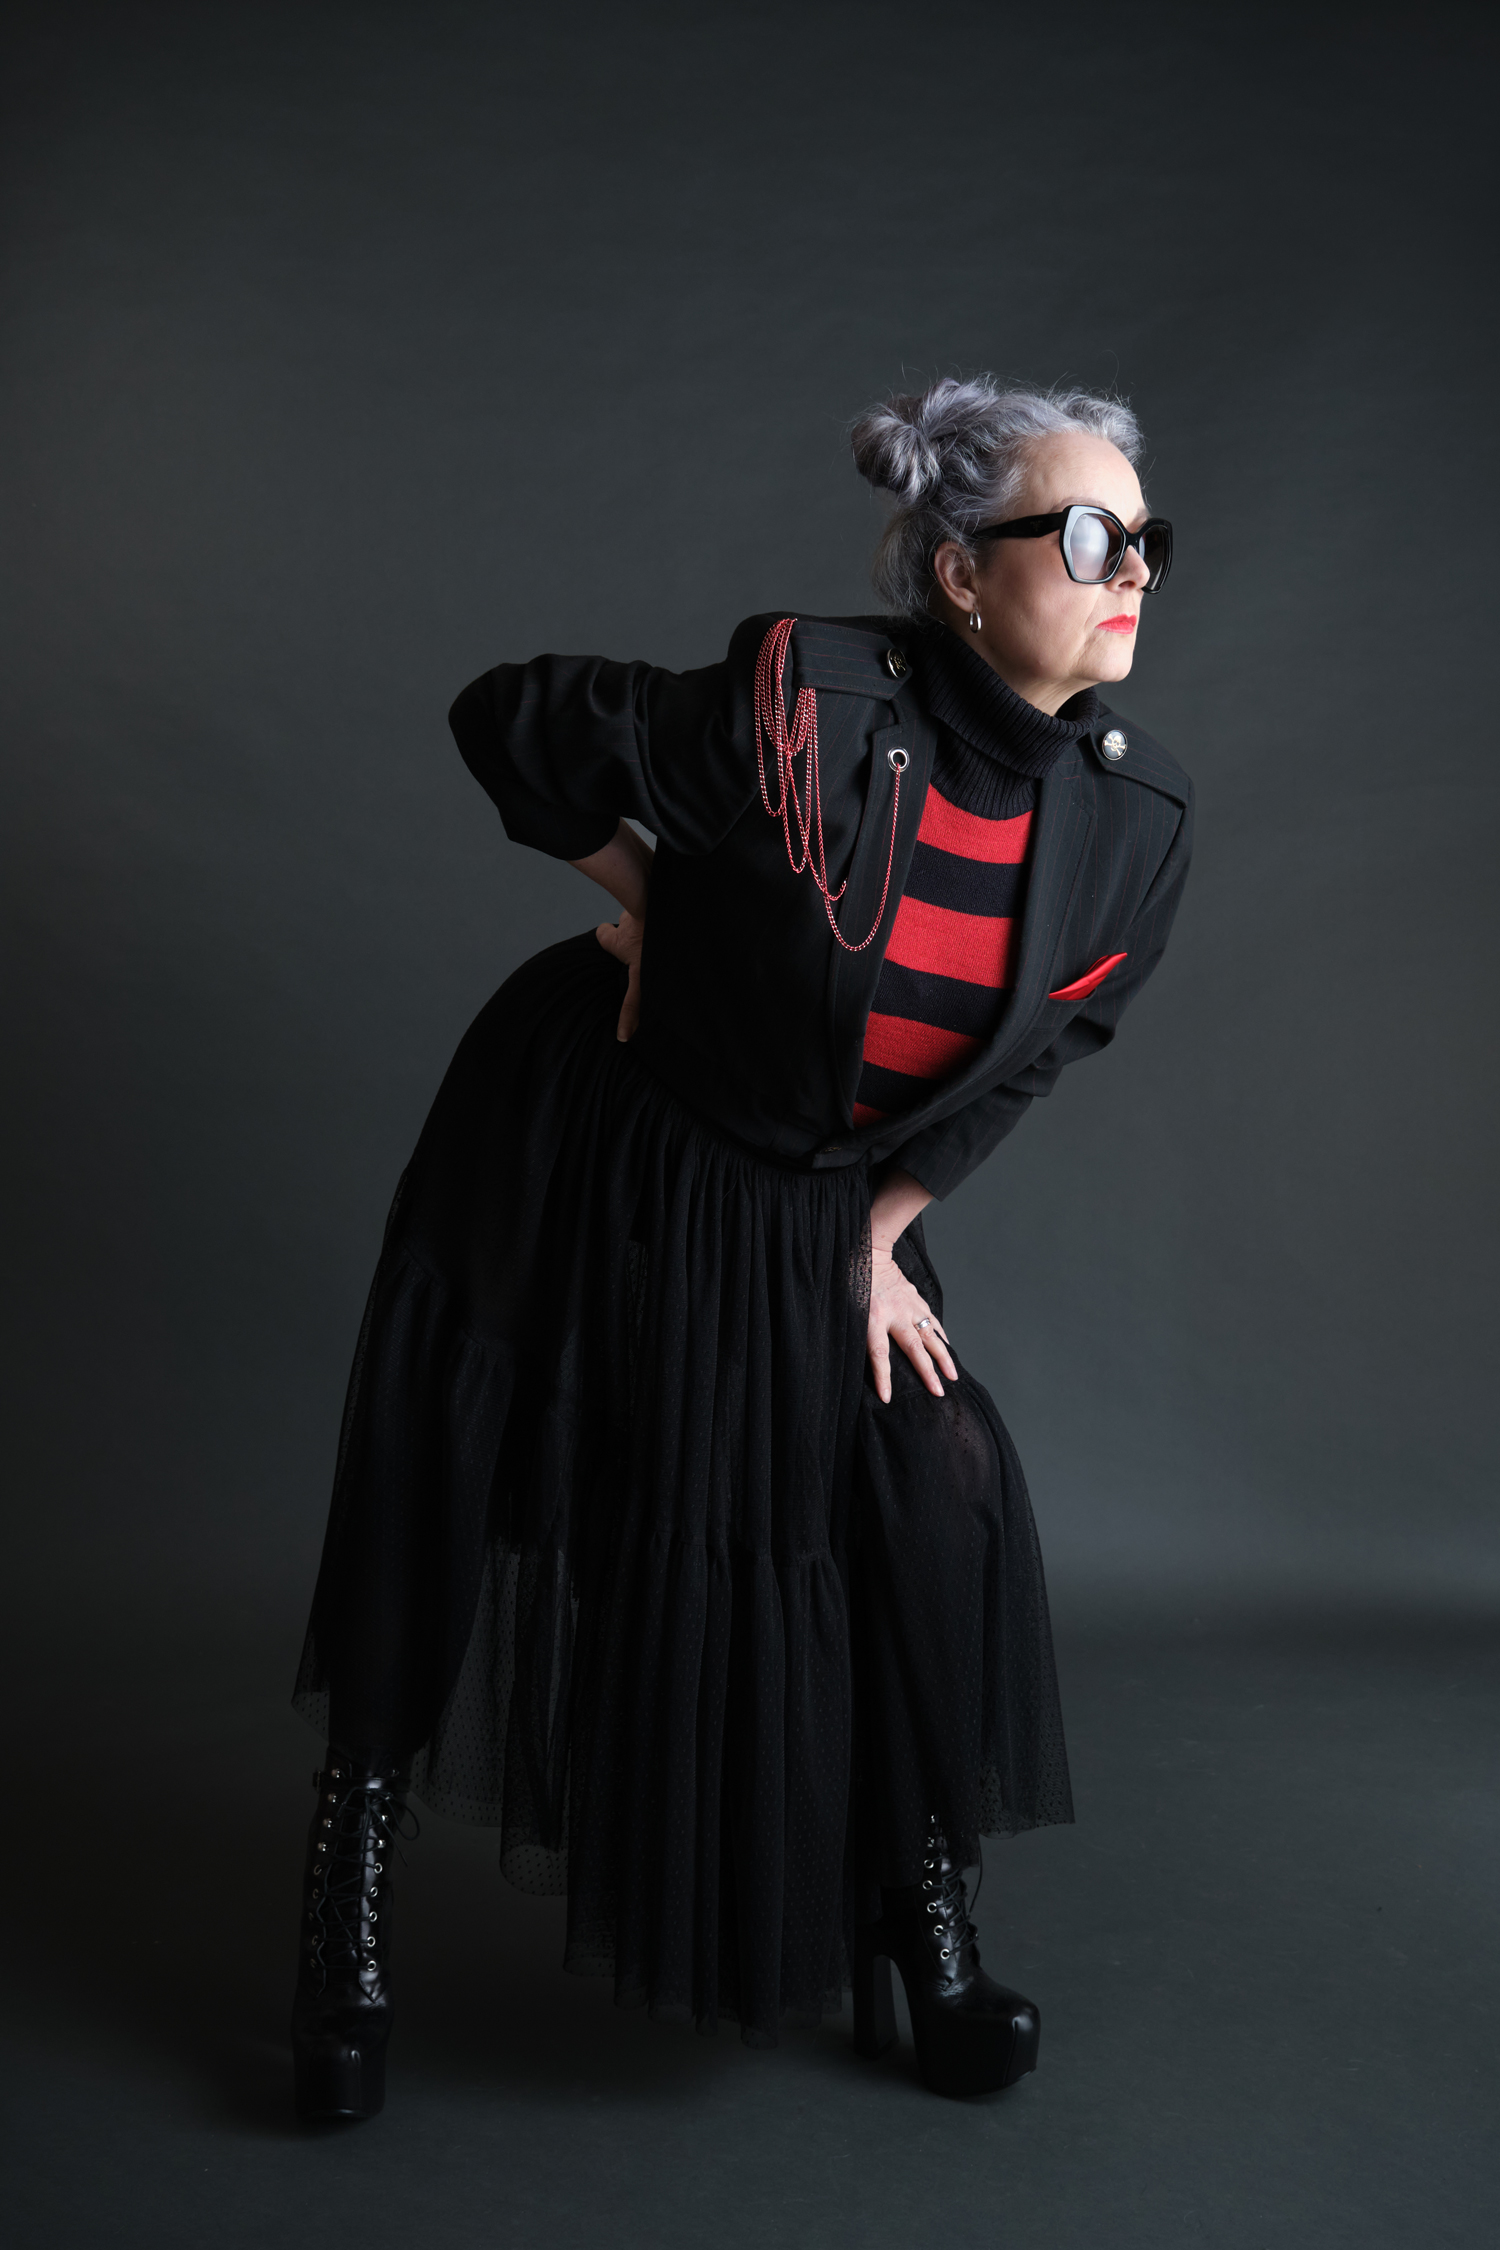
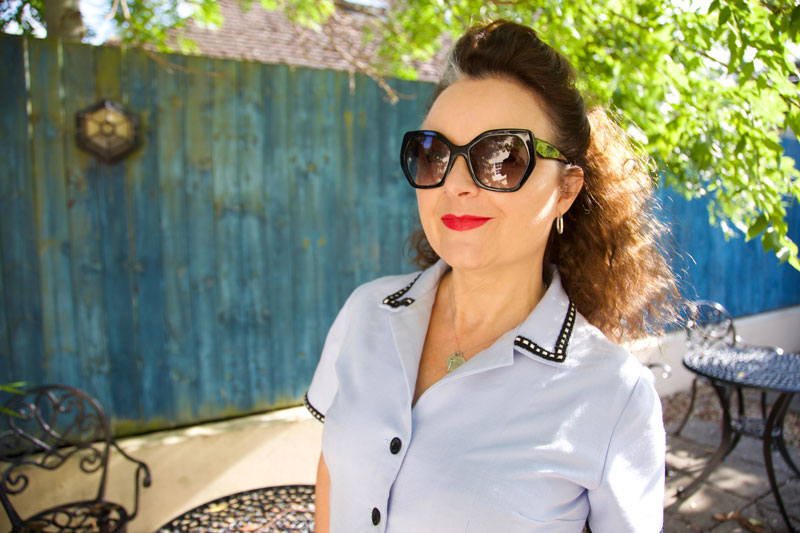
These striking photographs were captured by the ever-brilliant @danieljames.photographic, who somehow managed to honour both the darkness and the strength woven into this piece. He is so clever!