Sabrina, checked and tested!

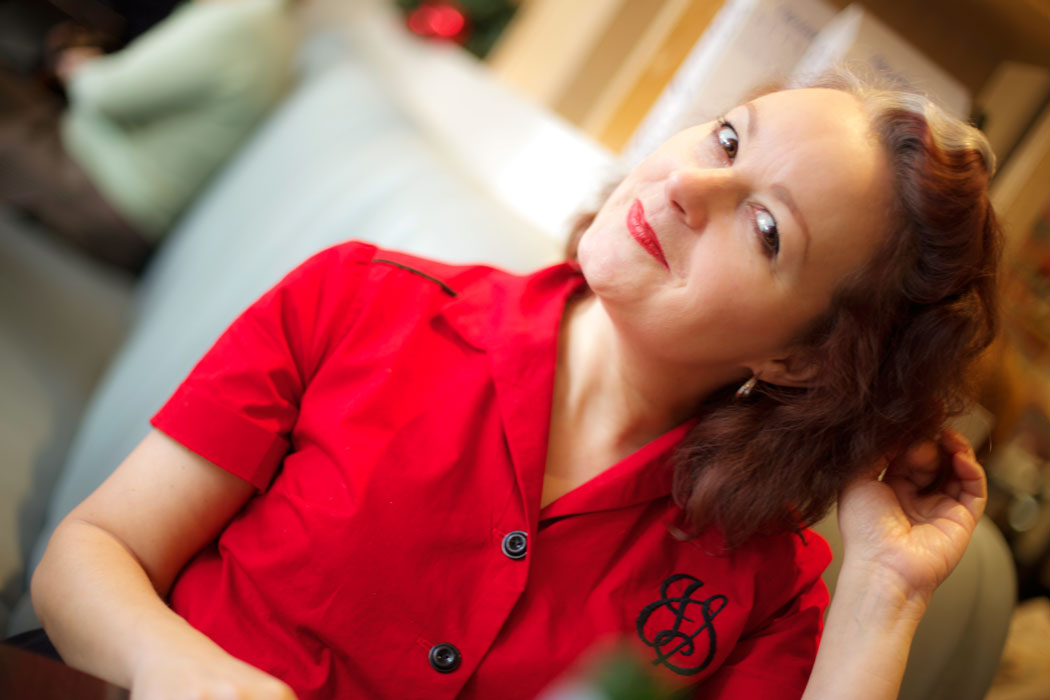
Remember Sabrina Duncan? She was my favourite Charlie’s Angel. She was the leader, the rebellious one. Not the one who spent any amount of time on her flicks. Nor ever to be heard complaining about a broken fingernail and her martial arts skills were unrivalled and unhampered by flares. So cool.

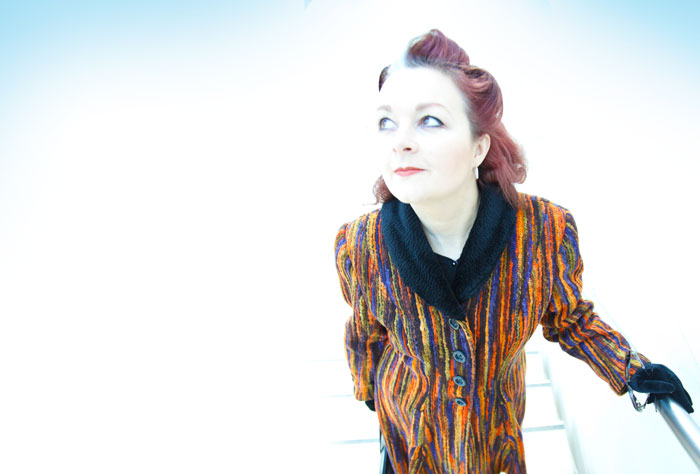
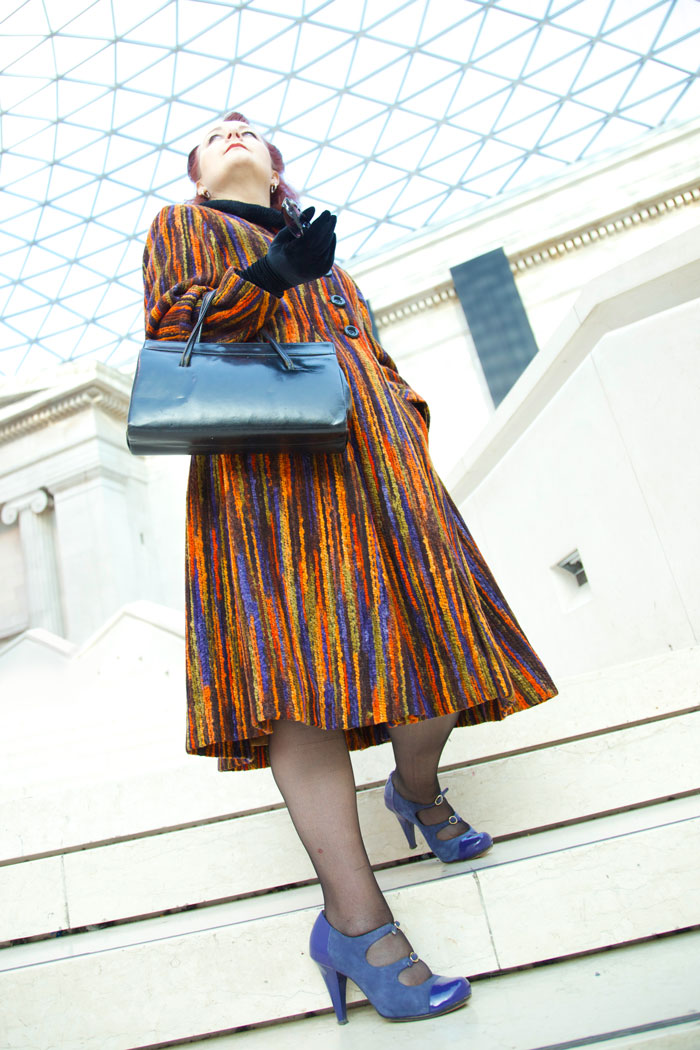
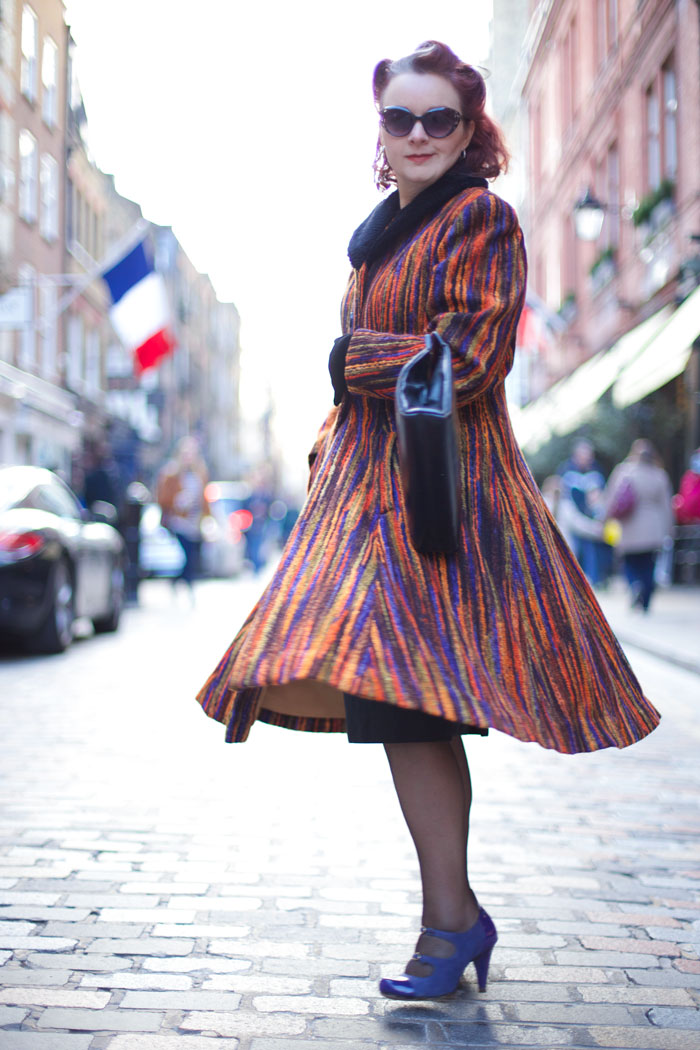
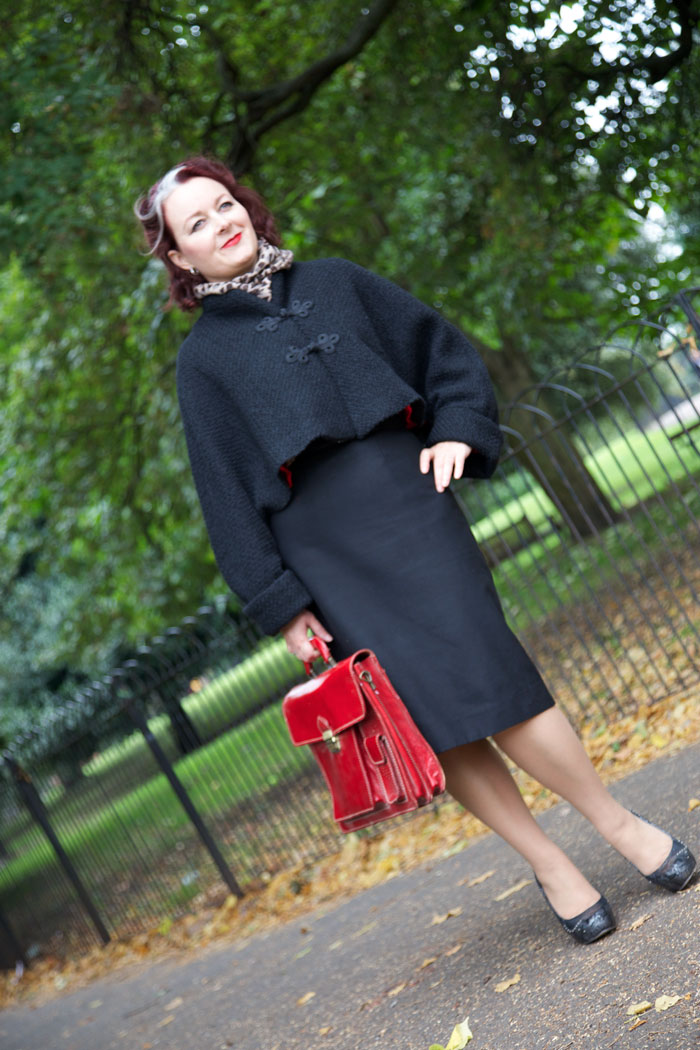
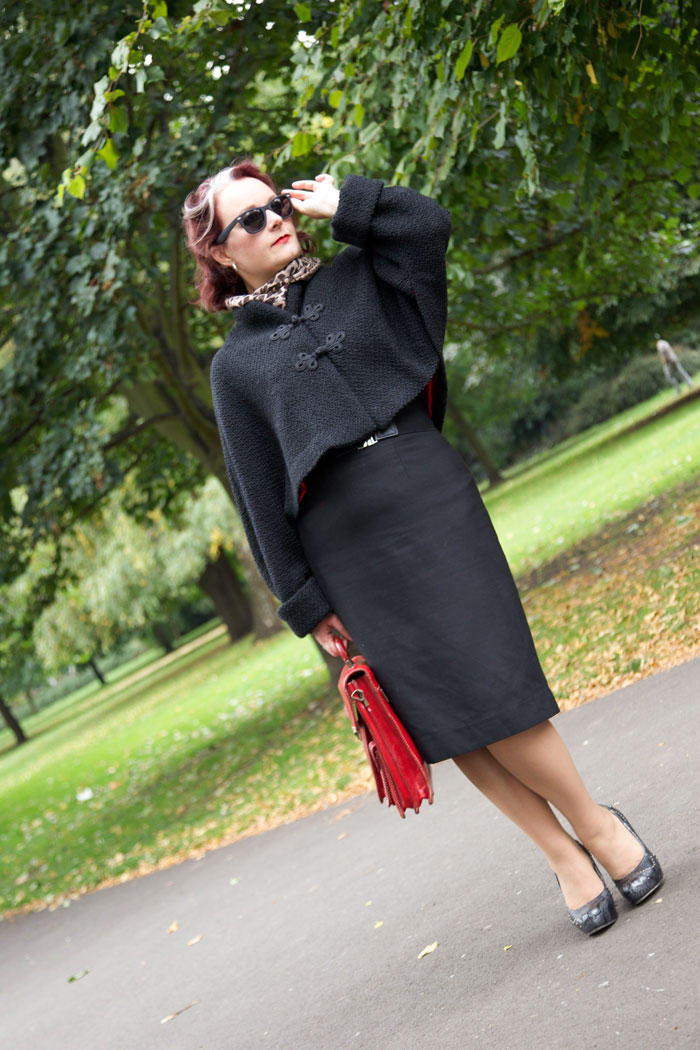
What’s that got to do with the price of fish you may well ask… Well this is my Sabrina dress. This is By Hand London’s latest lady and my new go to dress. Not named in honour of my Sabrina as far as I know but in a roundabout way she led the slightly unorthodox approach to this dress.

Sabrina dress in kensington

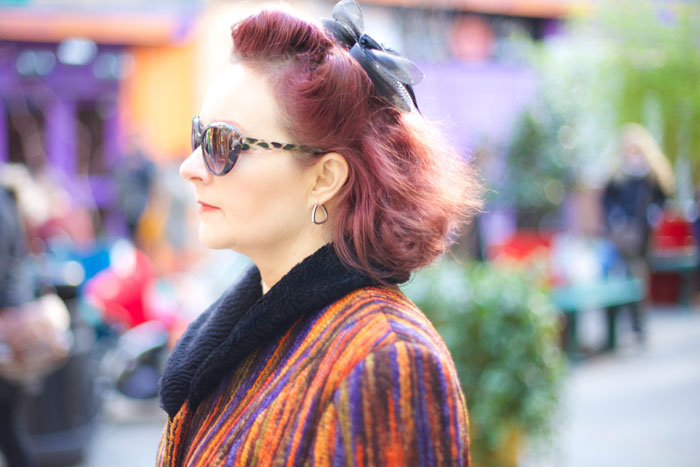
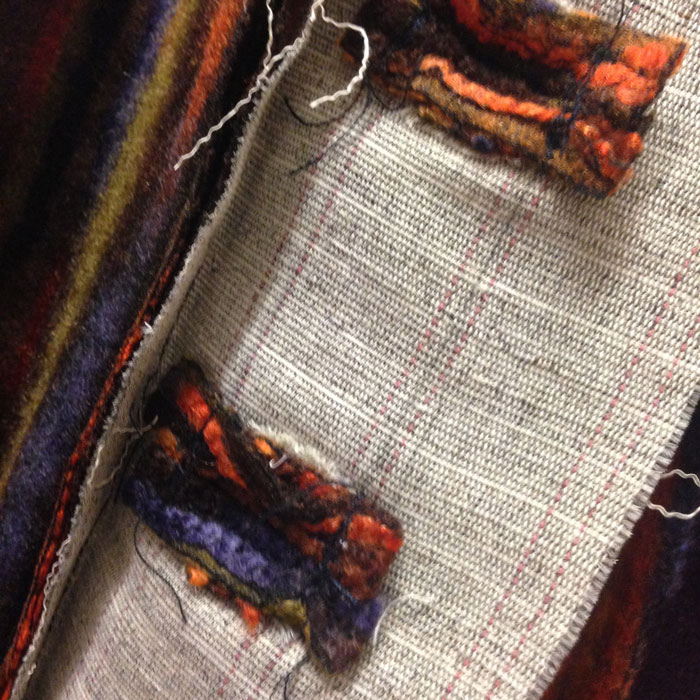
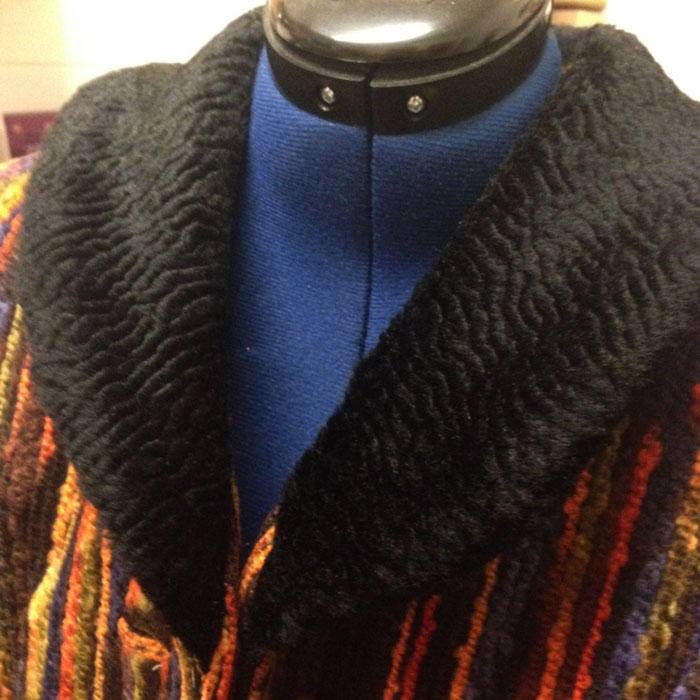
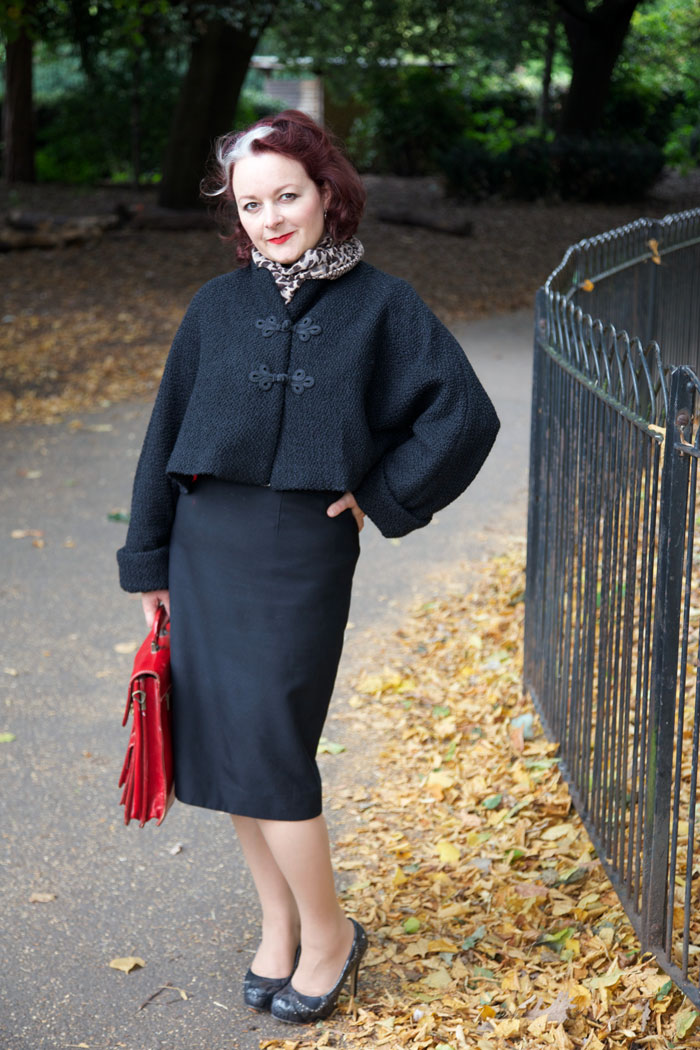
When I was asked if I’d like to pattern-test this one it was a no-brainer. Not only was the dress named after one of my childhood heroines, it had princess seams that presented a perfect project to utilise some of that inspiration that I sucked from the JPG exhibition. A clash of the Tartans!

Not anywhere near as edgy as JPG himself but I love it all the same.
A great chance to kick start the Autumn wardrobe too.

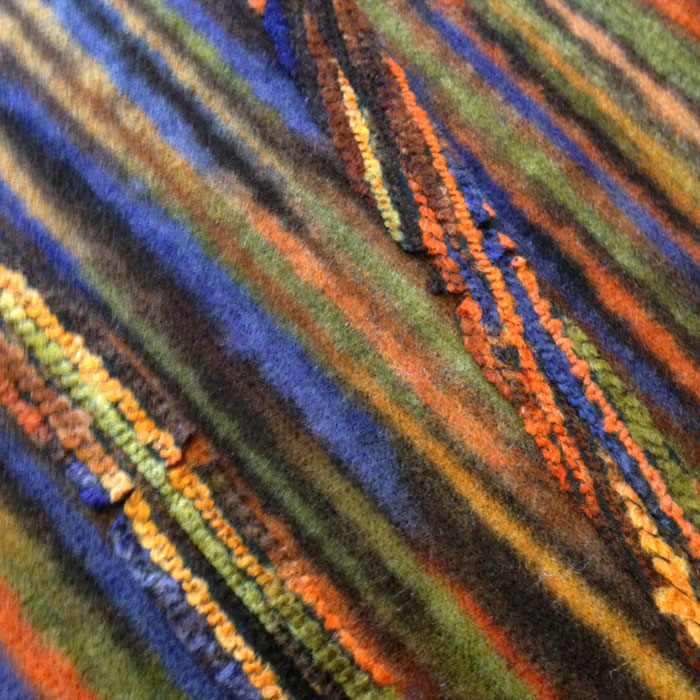
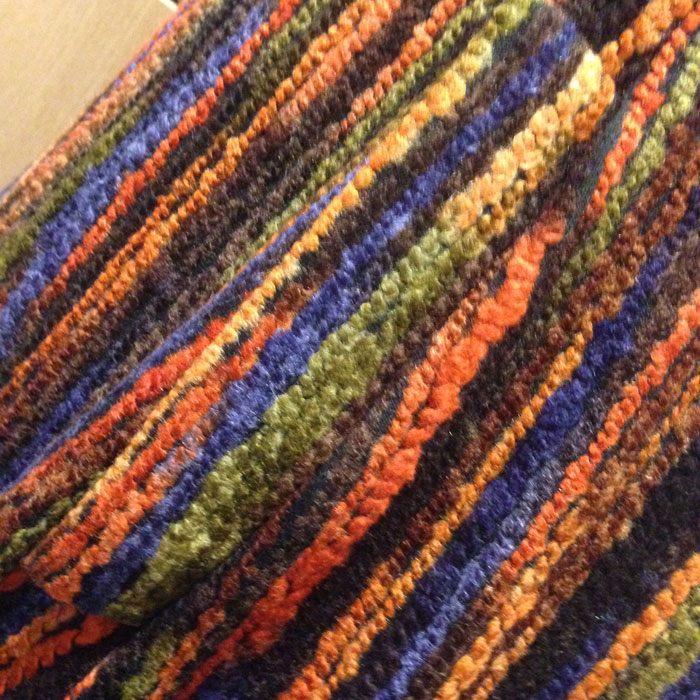
Minerva kindly supplied the fabric and I knew exactly where I was heading to search for the cloth in question. I’d been trawling recently and had seen these two tartans together. Blackwatch and Royal Stewart – such a great contrast that had to work.

Incidentally this is a poly viscose blend. Apparent from the prewash that future laundering of this dress would be a breeze; Hardly creases; A joy to iron. In fact if hung up to dry properly you could almost get away with not ironing at all.

bhl sabrina dress kensington station

I have a few nitpicky personal fitting issues to sort, namely a sway back adjustment and since studying the photos, I think there is some excess in the upper bust. Even though I made a muslin – I was never going to cut right into that fabulous fabric without testing the waters first!– I didn’t pay proper attention to a perfect fit. Plus its quite tricky when you are up late on your own and don’t have eyes in the back of your head. So with that aside, I made this dress straight from the packet. from one size, no adjustments.

It does fray, this fabric, especially when over handled. But given how the seams are pressed sideways, trimmed and overlocked seams were defo the way forward.

You may well ask why I would want to take on the added pressure of pattern-testing. After all, its not like I’ve got any spare time on my hands. Kids and all the outside school activities that get involved in, full time plus overtime self employedness, and contrary to the belief of my kids I don’t employ fairies to cook clean and bottle-wash and of course my night time activities are sewing! It’s not like it’s paid and its not like I’m given any lead time. And so I have even asked myself the same question. But in writing up this post the ‘why” suddenly presented itself to me in a duh sort of way.

sabrina dress stained glass

I have a list longer than both arms of projects I want to sew. Dresses, jackets, suits and hats. Mostly all of them are inspired by a ready-made pattern that have a ready-made image on the front or in the mag. It’s quite difficult to think outside the box when you are presented with something that fundamentally works already. But when you are given a computer generated line drawing or better still a rough fashion sketch of a dress that isn’t even invented yet, that’s more than enough to shake up all those creative juices and set my brain on fire with ideas, mostly above my station I might add. Leather, feathers, fur, gold lame. It doesn’t matter that most of these aren’t realised. They will be in time. It matters that I’m focussing on the textile rather than the design. That bit has already been done for me in this case by the By Hand London Ladies. So I can concentrate on what fabric will work best which will have greater structure, beautiful drape or sharp enough edges to carry it off properly. It excites me. That is all.

bhl sabrina dress phonebox

I don’t think I pushed the boat out too far with this dress but its a start on my journey of discovery. When I presented my Photoshopped image to Vicki at Minerva she was really excited to see the end result and said she’d never seen those two fabrics put together before.

I’d like to try some leather in place of the Blackwatch in the future but even a pvc might be as good. I think Ms Duncan is calling for some added tomboy!

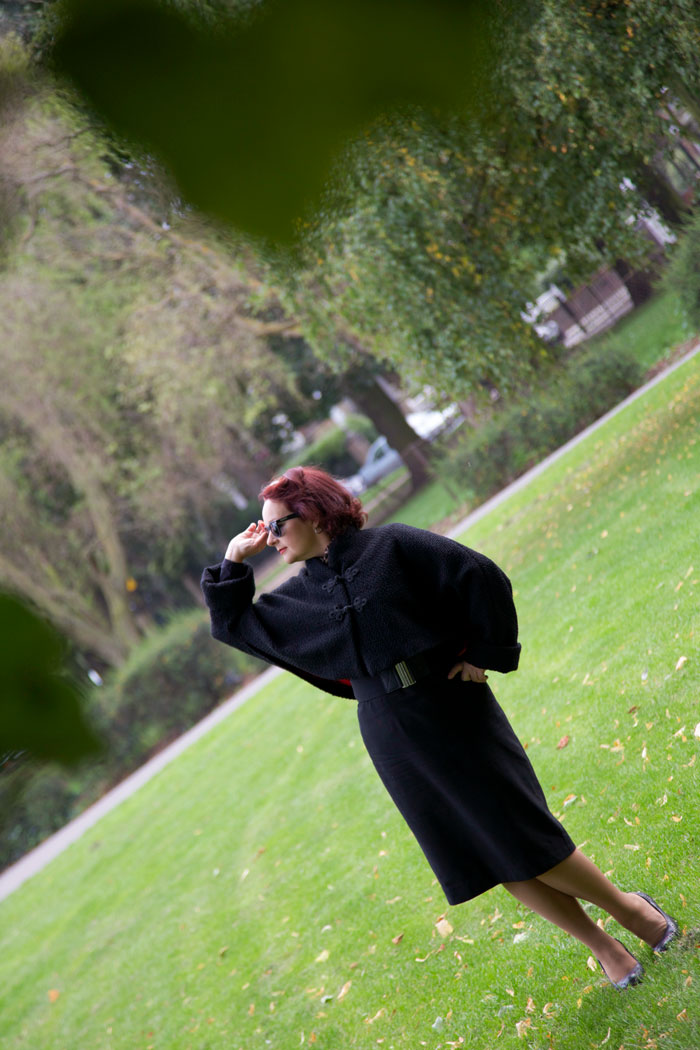
The dress itself is such a flattering and simple shape. Nicely fitted to the waist and charmingly flared to just above the knee. Its also a great base for incorporating a collar, changing a neckline adding some bodice detail.

sabrina dress tube stn

It sews up real quick. Just be careful around the bust shape and watch out for puckers. That happened on my muslin.

It’s unlined. Just has a bodice facing which is all you need really for a medium weight woven. Doesn’t stick to my tights either!

The hem should be kept small to avoid gathering the excess in the flare and I would say that was the trickiest bit.

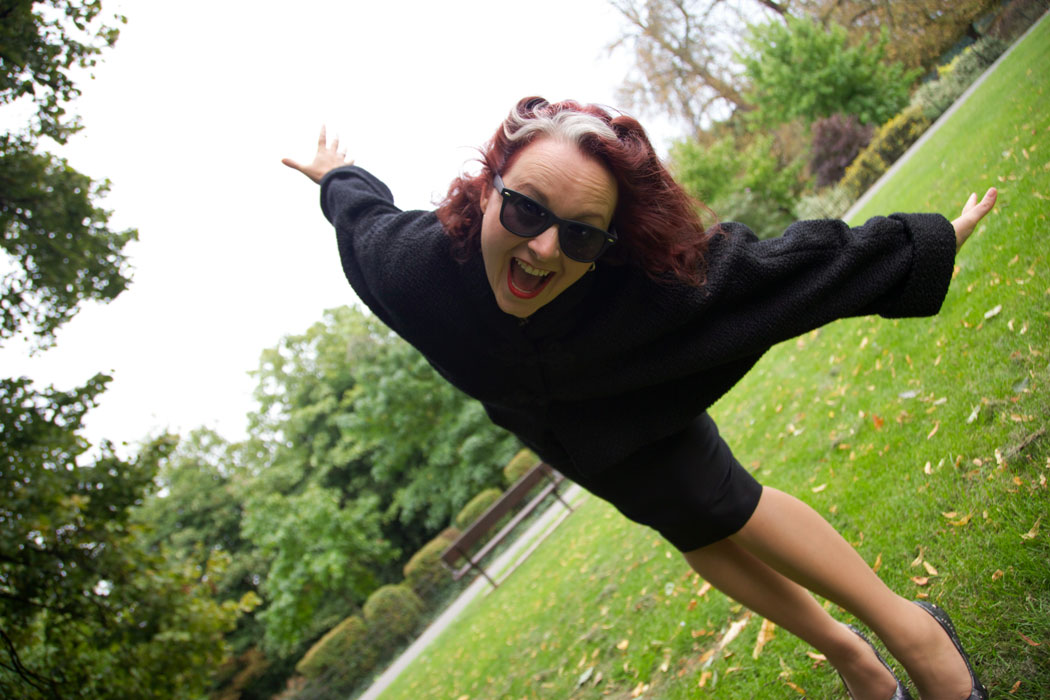
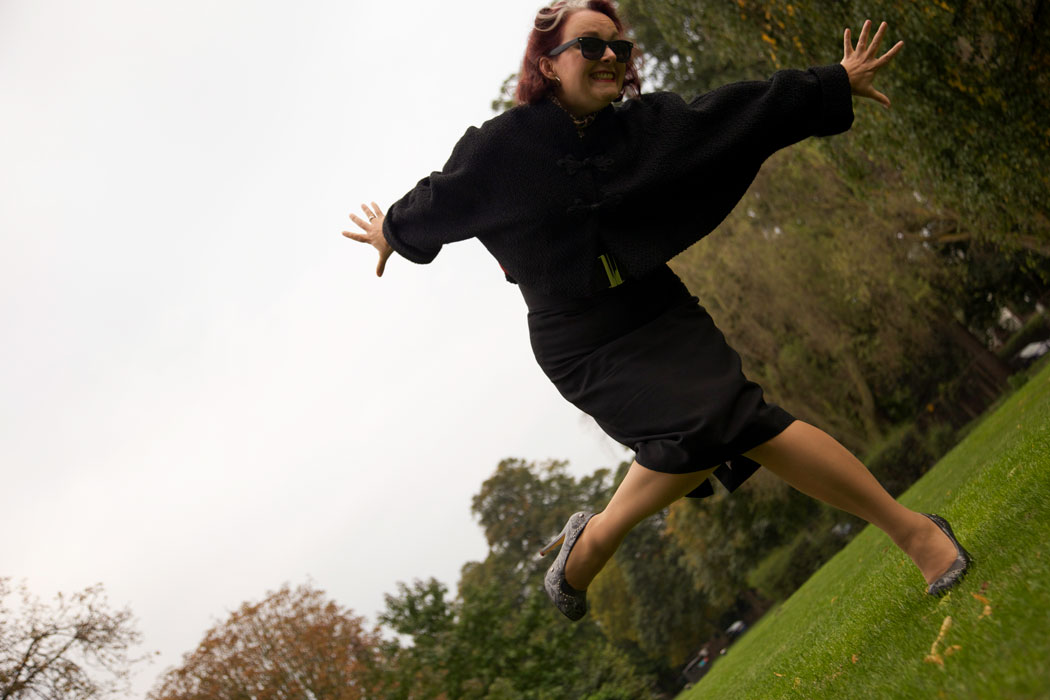
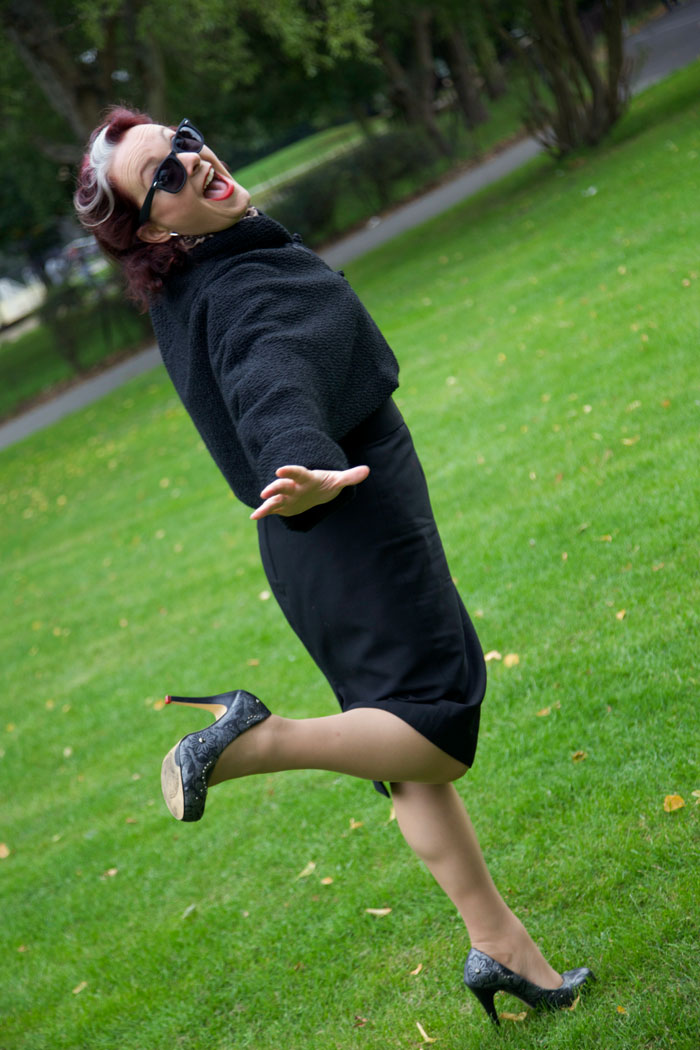
I kid you not its had more wears than any dress in my wardrobe and it’s the newest!

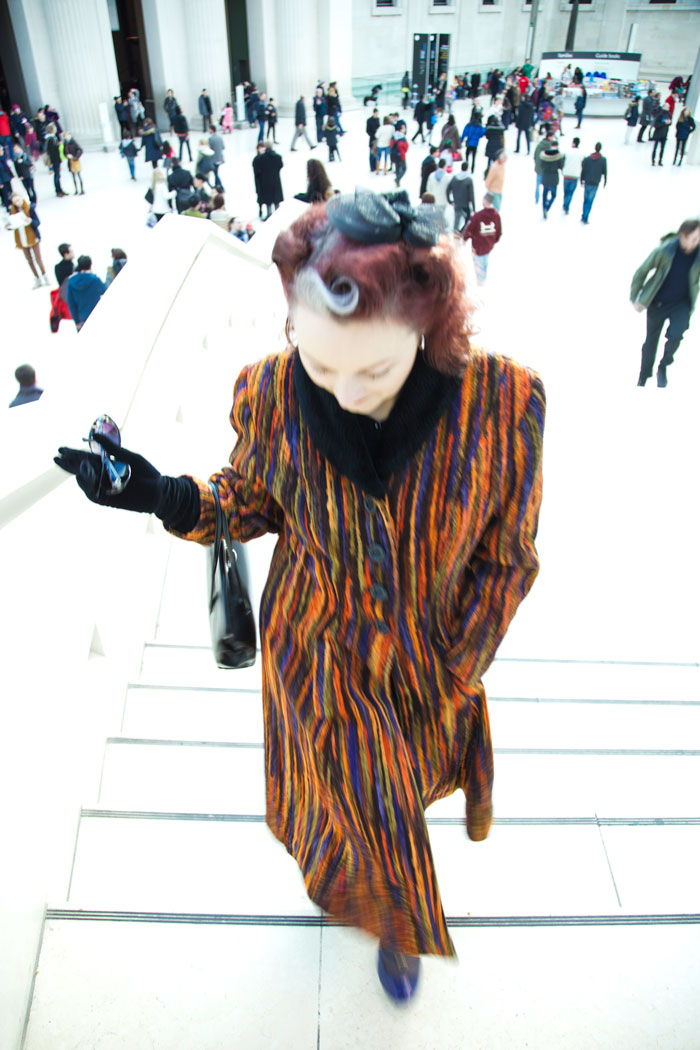
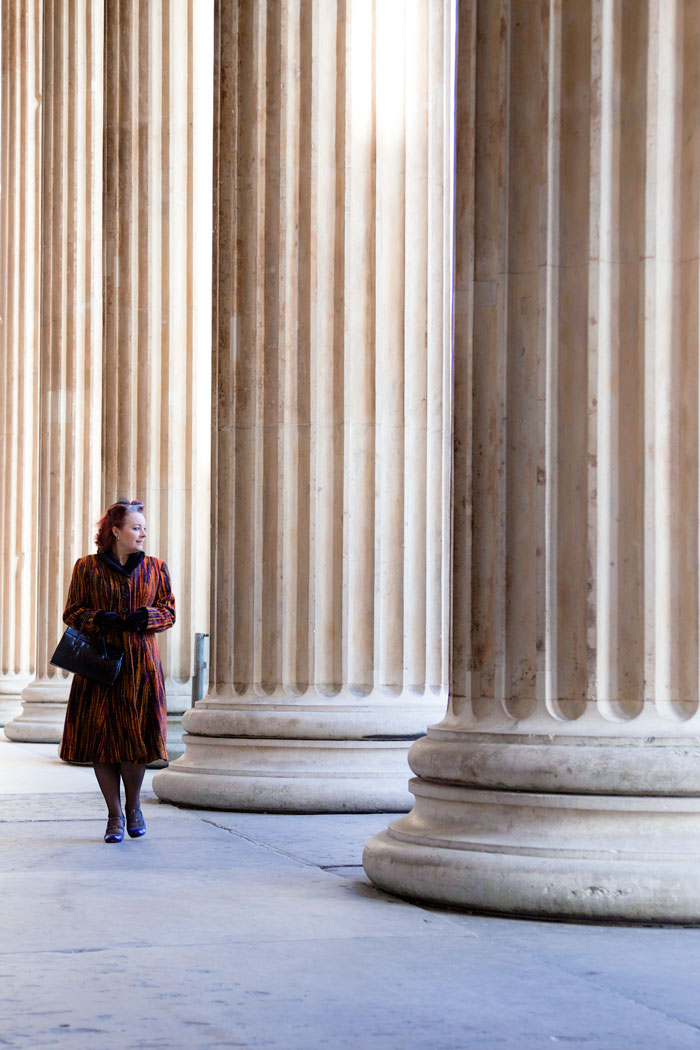
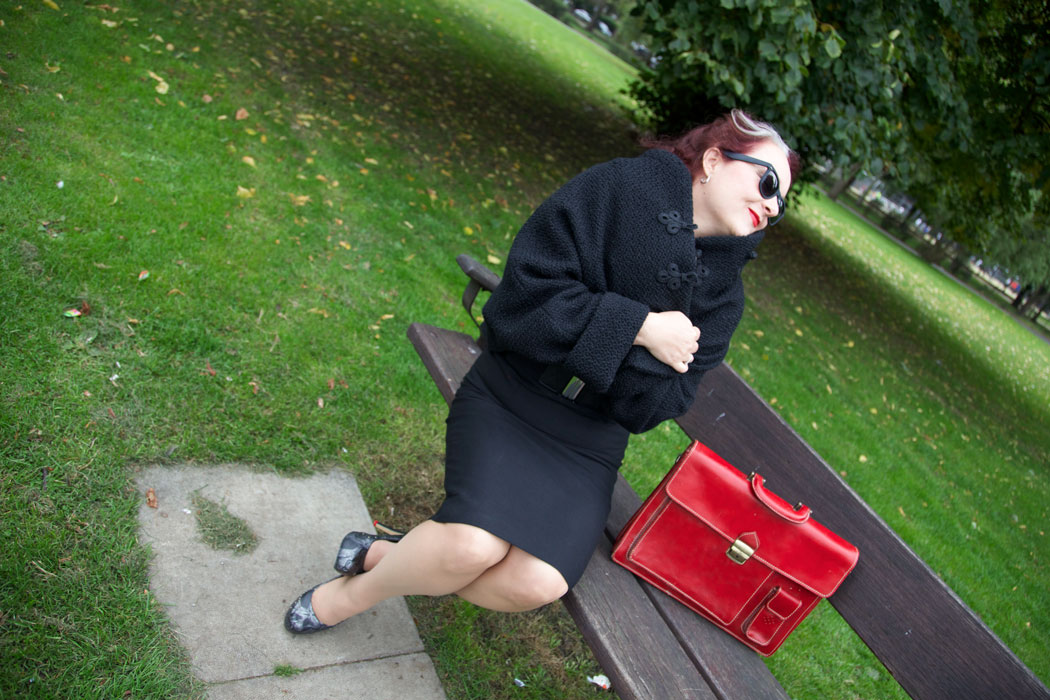
The above shots were taken in and around South Kensington and at the Victoria and Albert museum. That’s my favourite London hangout too by the way!

sabrina dress, victoria and albert museum

We were child- and fancy-free and popped in to see the Horst exhibition. Perfect inspiration for some glamourous dresses and stunningly lit fashion photography. Just Google Horst photographs for an eyeful of awesomness!

sabrina dress at the victoria and albert museum

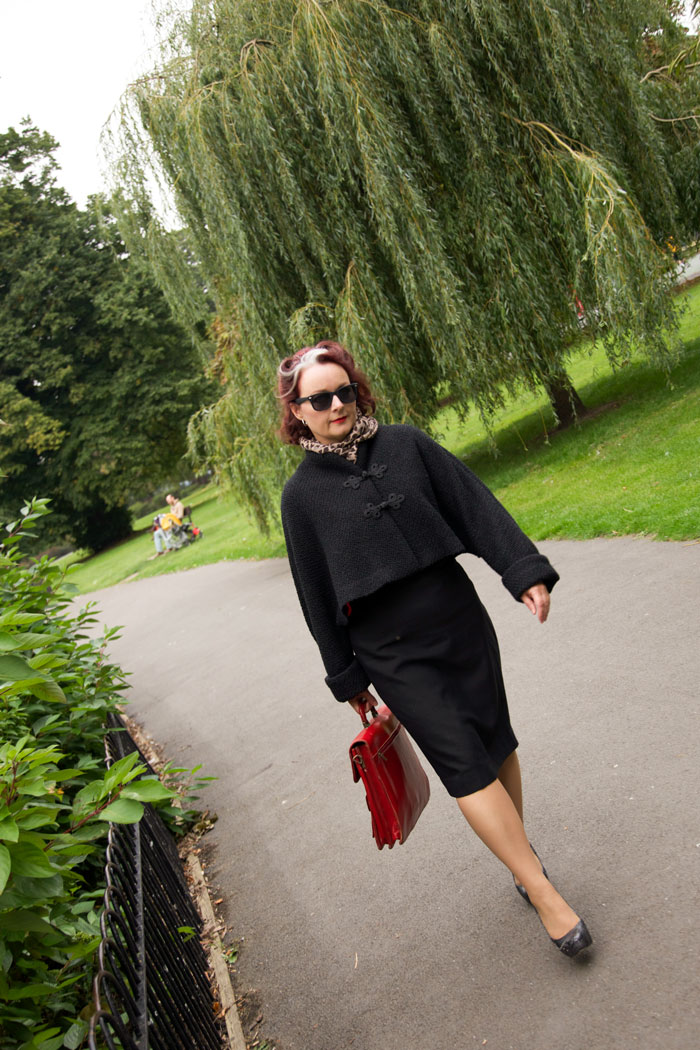
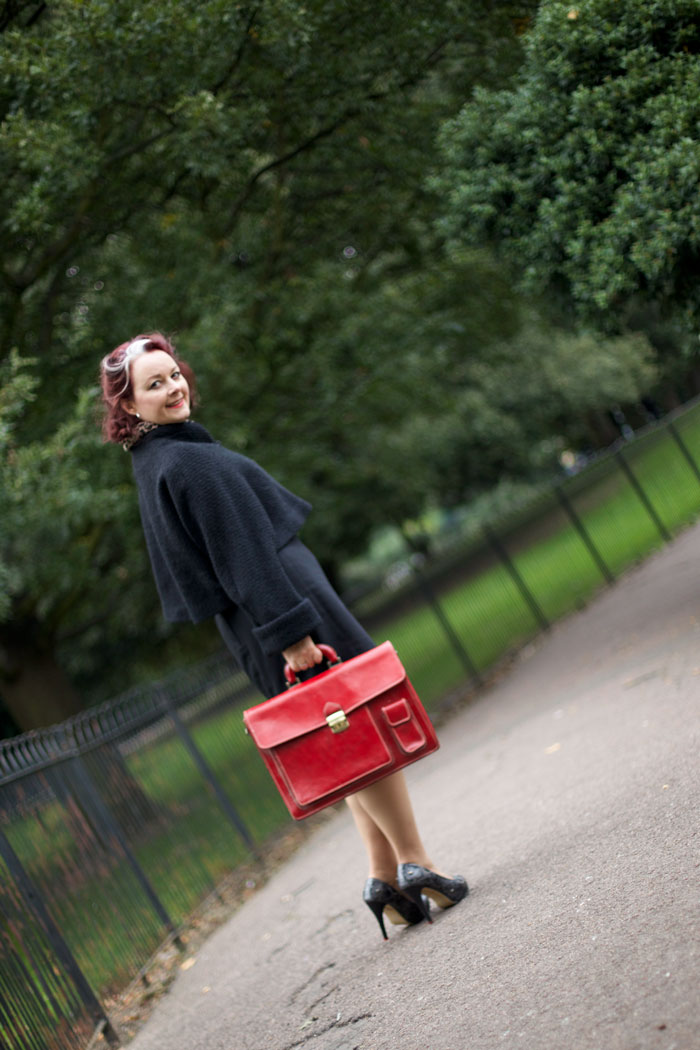
Photography Daniel James Photographic
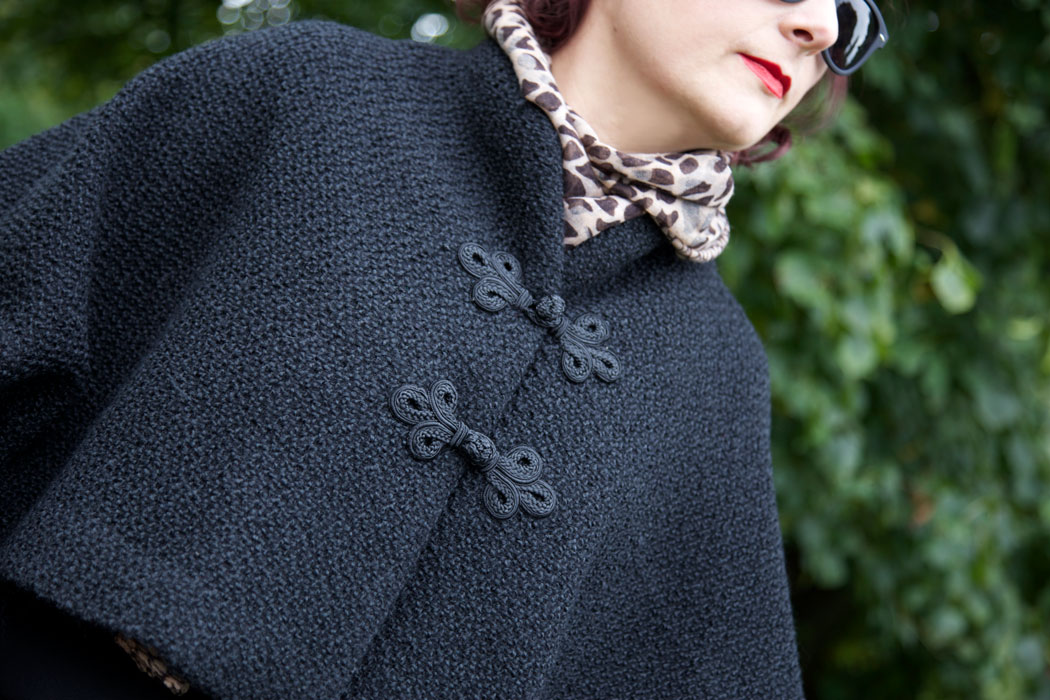
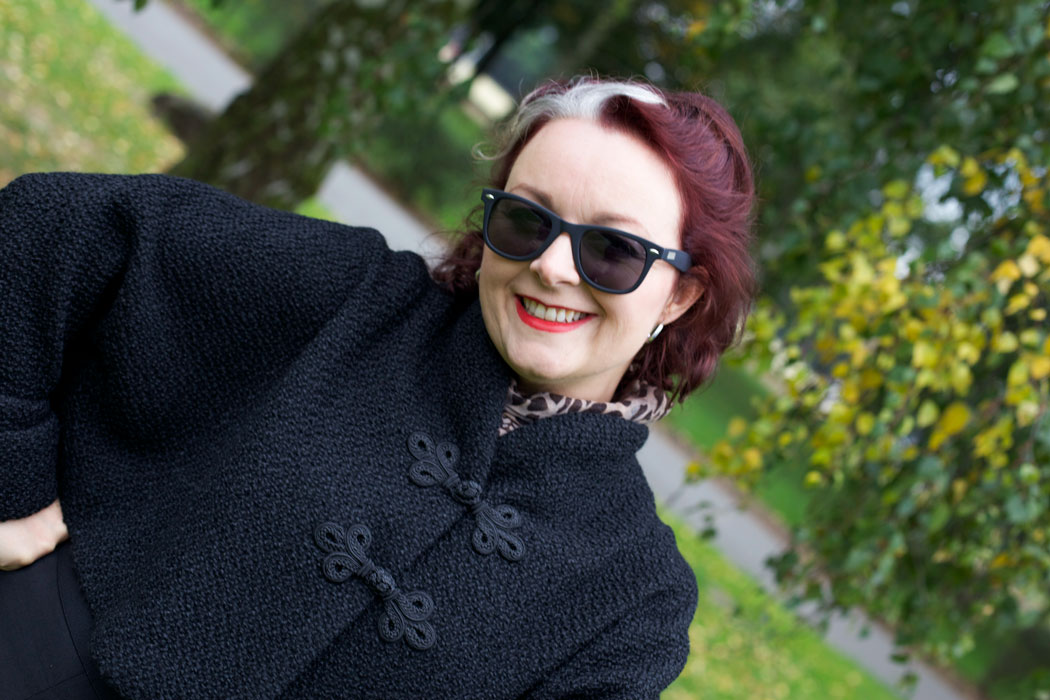
Shoes Lola Ramona
Handbag: FARA Ealing

Burda Brigitte Blouse

First I must apologise for those who have had issues trying to comment on my blog over the last week or so. I won’t bore you with the tecchie issues but suffice to say all is now good at Ooobop HQ! (touch wood!) Thanks for bearing with.

It feels so good to be able to write a post. I knew how much this blog meant to me but didn’t realise quite how much. I found out quick enough when I thought I’d lost nearly 2.5 years of work! I’ve been such a bloomin’ grumpy pants all week, Mr O will tell you for nothing!

I feel like I should be making a bit more of a dramatic re-entrance, but I’m afraid we’ll just have to make do with a humble gingham peasant blouse.

burda gingham boatneck blouse

It’s a very nice gingham peasant blouse though. Care of Burda’s June 2011 edition Mag. It’s also available for download here where it’s featured in a sheer fabric.

I’ve made three sleeveless ones before but this one has long sleeves and no elastic. And it presented a fine oopportunity to create some bias gingham binding around the neckline and cuffs which is always lovely!

burda gingham peasant blouseThe fabric was sold to me as Egyptian cotton, which I had no reason to dispute. It is smooth and cool to the touch and feels like fine quality. But the pyromaniac in me is compelled to do a burn test, always. And the little black crumbly ash that resulted, confirmed the fibres as a poly blend, doh! Win some lose some. Should’ve sniffed a rat at £5.99 really!

But not a worry as it still feels nice against my skin and it’s not snug on the pits so remains a good choice for a warm summer’s day or an office with failed air-con.

The instructions suggested a gathered hem into another bias band but I was nervous about too much poof around my middle and given that I almost always tuck in my tops I just did a standard hem. But, note to self, I didn’t increase the length enough to compensate, and with one wave across the street, it comes untucked, whether I’ve tucked it in my pants or not!

burda gingham peasant blouse

It’s very quick to make if you can even up your gathers quickly. I faffed a bit too much with my gathers as usual, but it still got completed in an evening.

I love the raglan sleeves and the boatneck. So easy to wear. Great with a pencil and equally a circle skirt. And the plan is to make some capri pants one day, just like Burda’s styling, to come somewhere close to that retro Brigitte look.

burda gingham peasant blouse

Peasant blouse: Burda pattern, handmade by ooobop
Skirt: self-drafted & handmade by ooobop
Belt: H&M
Shoes: Rocket Originals
Photography: © Daniel James Photographic


1939 Vintage Simplicity Dress

vintage 1939 dress

It’s been a while since I sewed a proper vintage dress and when I spied 5 gorgeous yards of pretty blue and white print fabric in a charity shop for a fiver, it was a sure sign to unwrap one of my favourite patterns. I bought the fabric thinking that if I screwed up, a fiver was worth the risk. But actually I loved the fabric so much I used some other polycotton, from stash mountain, to rehearse a toile for the bodice first.

Very few alterations were needed. I did a slight FBA to add a bit of shape and added an extra inch to the waistline. I think it fair to say that I manage to pack away a few more calories than those svelte 30s women!

simplicity 3302 pattern pieces

The pattern is a vintage original from 1939: Simplicity 3302. And the condition of the pieces was impeccable. Factory folded and clean. Such an honour to be working with such precious pieces that are 75 years old!

The most surprising thing about this dress is that it takes 5 yards of fabric. At 35 inches wide that is. But it really doesn’t look that extravagant. I’m used to 50s style dresses taking up miles of fabric but the skirt section of this one isn’t even a full circle!

vintage dress simplicity 3302

I kept to the instructions, like the good GTS I am, and I created a neck facing instead of lining. I also decided against overlocking the seams. It somehow seemed wrong! The fabric behaved beautifully and frayed very little so I opted for a spot of pinking! Feels far more authentic and it pressed beautifully flat.

I’m not totally sure what the fabric content is. But on doing a burn test, I was left with a very silky white dust. So the consensus is that it is 100% natural fibre and top notch quality I reckon! It has quite a good drape going on and doesn’t crease too much either which makes me wonder if it is cotton or not. I made a decision not to line it. Mostly because of the gorgeously warm weather we’ve been experiencing but also because it always seems a bit mad to line a natural fabric with a synthetic lining. And I wasn’t about to splash out on silk!

sitting pretty in vintage dress

Having said that. I did use a silk organza for the sleeve stiffeners. You didn’t think those puffs stick out like that, unaided did you?! Quite a clever little trick that involves a circular piece of fabric like tafetta or flannel or organza, folded in half and sewn to the sleeve head before the gathering is done.

silk organza sleeve stiffener

vintage_1939_dress_sleeve_headIt looks a bit comical until you press the seam onto the sleeve and not onto the bodice which I did at first. Didn’t get a shot of that but the look on Dan’s face was priceless!

There is also an inverted pleat that is topstitched at the hem of the sleeve. So neat.

pleat on sleeve

I’d like to say it all went swimmingly but I made quite a big boo boo when I inadvertently cut the back as two pieces and not on the fold. Very easily done when patterns of that era are unprinted, but, regardless, I needed a quick solution as it would have come up too small once I’d seamed it and also, I didn’t have a large enough leftover piece to cut another back piece. Quite a big issue when you get your hands on a unique piece of fabric from a charity shop. It’s not like you can go back and bag another metre!

So… This is a bit bodgie… I made an inch wide length of bias tape from a 2 inch strip that I’d rescued from the selvedge, using my trusty Simplicity Bias Tape Maker Machine. And with half inch seam allowance I sewed it on each centre seam of the back. That effectively joined the back pieces together where they would have sat had there had been a fold!

Luckily the seams are disguised by the busy print so I think I got away with it!

back of vintage 1939 dress

I know my hair do isn’t strictly 1930s and the shoes are far from authentic but it needed a little bit of vintage styling to pull it off. Especially as youngest dort decided it was ‘lovely but very 80s!!’

vintage simplicity 3302 dress

I love the sweetheart neckline. So discreet and so pretty. It doesn’t have any added interfacing so I’m surprised it holds so well. I did clip into those curves good and proper though!

vintage sweetheart necklineI wrestled a bit with the zip. I knew I didn’t want an invisible zip. That seemed a bit wrong too so I opted for a lapped style zip insert. But could I get my head around it… No I bloomin’ couldn’t! I can do it with my eyes closed in the back of a pencil skirt but for some reason I just couldn’t pull it off. So I went for a straightforward zip insertion whereby I basted the seam shut, centred the zip and sewed to seam allowance. I did however prick stitch close to the teeth on the right side.

side zipper

I reluctantly wore my new dress a to a party on Sunday. I didn’t know any of the guests and was a bit worried I’d stick out like a sore thumb (in my 80s dress…. thanks dort!). But my assumptions were way off. Such wonderful food and great music and the most amazing people. My ‘wallflower status’ was upheld!

candy from Black Dwarf Designs
With Candy from Black Dwarf Designs

Oh and hats off to my wonderful fella, Daniel Selway who took the photos and who now finally has a site to host his pictures. Right here, in fact!


Nikita’s Prom Dress

Nikita prom dress title pic

I’m grinning like a Cheshire cat and welling up with pride as I sit poised to write this post. Meet Nikita, the sister of Jessica who was the lovely recipient of my first ever hand-made prom dress.

I knew there was another one on order, a year ago. After all you can’t make for one without the other can you?!

But what joy. What an absolutely pleasure to have another opportunity to make such a special dress. I’ve learned one hellofalot in this last year. Fitting mostly. This little beauty only took two fittings. I quite forget how many Jessica’s one took! I’ve learned not to be scared of cutting into the fabric. Learned how to be honest with measurements, how to be brave with fabric choices and mostly that I CAN make a dress befitting of a princess!

Nik modelling dress by the wooden door

Up until a few weeks ago, all Nikita’s dreams of her school leavers prom were wiped out when her school declared no funds for such frivolities, after all, this year. Everyone was gutted for her. Especially knowing how hard Nik has worked throughout her last school years… despite being asleep for most of them! Normal teenage behaviour you might assume but no, unfortunately for Nikita she suffers with narcolepsy. An awful condition which means she has to take very strong medication to keep awake. Lots of things trigger a collapse. Not least of all a fit of the giggles.

I reprimanded her dad recently, for his insistence on telling jokes one after the other but Nikita assured me it was fine because his jokes were so rubbish! She has the best S.O.H. ever!

It was such a relief when her school confirmed the prom would actually go ahead. But then a little panic set in when I realised I had a couple of weeks to pull off the dress.

Nikita wearing prom dress at Fulham PalaceI think by now you have the right to safely assume that Mr Ooobop, AKA the lovely Daniel Selway has been behind the creation of these blinding photos!

Helped by a scorching summer’s day and the beautiful setting of Fulham Palace, he has blown me away once again with his amazing self-taught skills.

Nikita wears ooobop prom dress at Fulham PalaceThe dress itself is fashioned from the same materials as Jessica’s, only in stronger colours. Red Duchesse Satin and Black polka dot tulle.

The halterneck bodice section is Simplicity 3825. Inspired by Nikita’s leaning towards a Marilyn-esque dress.

simplicity 3823 sewing pattern

I’ve had this pattern in my collection for some time and I’m so glad it came into good use.

I basted a layer of the dotted tulle over the bodice pieces and treated them as one for the outer pieces. Inside the bodice is self lined with the red satin. Its a good medium weight and gave the dress some necessary structure whilst not losing out to optimum swishy drape for the skirt.

Oh just look how divine her smile is!

By the fountain at Fulham Palace

The skirt is a full circle, of course. One can’t pose over street vents if the skirt doesn’t rise above one’s head! But actually a more demure pose was to be found next to a water fountain in the grounds of Fulham Palace!

Nikita sitting by the fountain in her prom dress

And lest I forget! There are the now signatory and obligatory 10 metres of soft-as-you-like dotted tulle that adorn said circle skirt. And no tears this time. I knew what to expect. I knew to pin section by section and I knew to baste… and to breathe!

walking barefoot in Fulham Palace gardens

walking away, barefoot

The back of the dress is genius in design. It has a wonderful elasticated panel which keeps the bodice fitted nice and snug with no gapes. I just love the effect that is created with the gathered netting over the liquid shiny satin.

back of prom dress bodice


ooobop prom dress in the parkI can honestly say that this dress is testament to everything I love about sewing. Not only about what I get out of the whole deal but what everyone else gets too. Nikita loved her dress and I feel so honoured to have made an original number for her. Mummy Tina was delighted to see her daughter have the best time in her new dress, Daddy Tim was very happy that I’d fulfilled the brief of a ‘modest’ dress and we are all so happy with Daniel’s outstanding photos.

Nikita will do well with whatever she choses to do. Of that I am sure. Nothing is going to hold this little lady back!

prom dress front

In the apple orchardAnd the talents didn’t stop there, oh no. Nikita’s lovely sister Jessica did such an amazing job of her make up for the prom and also today before the shoot. I’m so miffed I missed out on todays events. Slogging away in an icy office when I could have been out on location with the dream team in Fulham Palace!

Jessica doing Niks make up

So thank you girlies, for making a crazy sewing lady so happy and thank you Daniel for making my blog so pretty and thank you lovely readers for making it all worth it.

Portrait of Nikita

Camping it up in a Burda Maxi

Burdastyle Maxi DressThis is the Burdastyle Maxi dress from May 2014 issue and it literally took an evening to trace and make, plus a morning to finish seams and hem.

I love the gathered front loop detail created by some clever drafting and a drawstring. The straps are a lovely and incredibly practical feature too. Each strap is folded in half and the fold is attached in position to the front bodice. This creates a double strap which separates over the shoulder where the visual is 4 spaghetti straps at the back. No irritating slips off the shoulder. No embarassing wardrobe malfunctions!

And I have to mention the fabric. I went in asking for linen lawn. I knew it was a bit of an ask and I’d anticipated the screwed-up-face response that I got in each and every shop. I even predicted the suggestion of cotton lawn instead. No, no, no. Burdastyle definitely stated linen lawn. Kind of a contradiction of terms really, so I’m wondering if its a translation thing. Anyone know?

So with no linen lawn and an urgency to make this dress before I went away, I asked if they had anything soft and drapey. No not polyester. Eewww sweaty! Though to be fair it was very soft and drapey. No not cotton. It’s not nearly drapey enough. Too crispy and neat. Apart from the lawn, possibly. But oh the creasing. I was tempted by tangerine muslin. Really tempted. But I’d have to have lined it for modesty purposes and I really couldn’t be arsed. I was about to give up when the viscose was presented as an option. Only in black or white but also only £4.99, with all the softness and drapeyness I could ask for. Bargain! Done!

And what a joy to work with. I took my time to cut it out because it did move around a bit on the table. especially when I was cutting on the bias. It has got a little natural stretch to it. But to be fair. It is drapey, black and relatively casual so no glaring errors are going to cause a stir here.

I made it a couple of weeks ago when I last went camping so this was it’s second trip out into the wilds of West Sussex!

So there I was, minding my own business, floating around the campfire in my new maxi dress, relishing the soft swishes of viscose around my ankles with stars in the sky and Mr O at my feet. Doesn’t really get much better than this . . .

. . . then this happened . . .

Burda Maxi Dress photobombed

Right on cue!

It’s a small miracle I got the first picture sans bombing to be honest!

I was going to leave out the in-seam pockets to hurry the process. I never really got the excitement when other people go on about pockets. But I’m glad I did and boy do I understand now! Torch and lighter in one, cash and phone in the other. Look, no bag!

And who wants serious posy photos any hoos?!

Burdastyle Maxi dress photobombed

You get to see how the straps separate at the back in the picture above. Clever, no?

You can also get an idea of how the elastic at the waist cinches the bodice in to create a much more flattering silhouette than it would have done otherwise!

You must also be feeling my delight at the depth of my in-seam pockets!

The bombing barrage came from nowhere. Actually it came from all angles. Sabotaged good and proper by a gang of onesie-clad cheeky girls!

Photobombed by onesie girls

The absolute cheek of it!

photobombed by the girls

Hang on a minute. Remind me whose shoot this was?

There was only one thing for it . . .

Maxi dress bombs the children

Seriously ladies, this dress is great for camping. It’s great for slinking down the shops too. And methinks in a drapey sandwashed silk it would be super sexy and glamourous, no?!

If you don’t have May’s Burdastyle mag then here’s a link to where you can download a pdf pattern.

And for anyone who is keen to know more about the delights of viscose, here is a fine clarification of the making process and its properties.

Hope you all had fun sewing times this weekend. Or maybe you were out camping it up too?


My Vintage Dreamcoat!

My vintage Dreamcoat

And so I present the focus of all my dreams since first bidding all my hard-earned pennies pounds on vintage Butterick 547. It’s taken nearly seven months to realise the nagging vision that was persistent even throughout my busiest months.

At least 2 of the 7 months, were taken up with searching for the ideal fabric. Quite incredible seeing as I’m a stone’s throw from the Goldhawk Road. I watched London folk on a daily basis, as they paraded their neutral tones around town, and that was inspiration enough to fuel a rebellious approach and lead me to an online supplier of ‘quality coating fabric’ – Fabric Dreams. Of all the samples I requested (which were incidentally free of charge and free of postage!) this non-wool, fabric was my favourite. I confused myself with this choice at first believing a quality coat must be in wool. But I went with gut and gut came good!

vintage Butterick 547

The hardest bit about the construction was having enough space to lay out the pieces. They were huge. I knew I was going to have to lob off the usual 4 inches from the bottom but I wanted to construct the original length in case I had a later moment of maxi-madness!

vintage coat butterick 547

This coat was seriously made in hourly bursts. If I had no hours left at the end of the day, sleep was stolen. I could not have done it any other way. Full time freelanceness which often runs into the evenings, with school runs and domestic chores to boot, means little or no time to sew. But UK weather waits for no seamstress and I was seriously going to freeze my butt off unless I got a wriggle on. Good enough motivation wouldn’t you say?!

vintage coat B547

The only issue with working in hundreds of little shifts is that I probably spend as much time getting stuff out and putting it away as I do on actual sewing time. But hey ho. Got there in the end. I really must stop dreaming about one of the children’s bedrooms being a sewing room. Terrible mother!

vintage dreamcoat

I interrupt this post to big up my amazing and wonderful bestest friend and boyf in the whole world, Daniel. I swear this coat wouldn’t look half as good if it wasn’t for his amazing photography skillz! I owe him so many waistcoats, it’s untrue!!

The other great thing about him being chief Ooobop photographer, is that we get to mooch around London together finding lovely locations. Today was mostly the British Museum. Feel like a bit of a fraud for not actually looking at one single exhibit. But we did have a cultural day at the V&A yesterday, honest guv!

vintage dreamcoat back

The coat is made of eight panels which create such a lovely shape. There was stacks of ease and I think I could have pinched out a bit more but I like how it feels and I wouldn’t want to feel restricted in it at all. Interestingly enough, even though the ‘skirt’ is not a circle, letting it hang overnight, the hemline dropped in the same way. A lengthy process to level up the hem, and check it at least 5 times before cutting, was quite painful but worth it.

vintage coat at the British MuseumLining this coat was quite a chore. Even though I chose a real quality, strong, gold lining, it frayed like Billy-O. So I serged every open seam. Because I can. Because I now have an overlocker BTW!! But because I am a newbie overlockerist I got all smug and complacent with the speed and completely hacked through the side-back panel. I swore a bit. But didn’t have time for a proper sulk. I’d come far too far enough down the line to be crying over torn lining. Luckily for my sanity, I had over-bought said gold lining by a metre and a half and so I cut another piece, dutifully unpicked the ruined one and half an hour or so later it was as if nothing had happened!

An entire evening and a morning was spent entirely hand-sewing in the lining with tiny stitches. Around the armholes, down the side seams, all around the facings and neckline and of course the hems. What joy!

But what warmth!

warm vintage coat

I’ve stubbonly been walking around in my draughty Vogue jacket, lovely as it is, refusing to buy a coat, lest it meant I would never finish this one. But now I have. And boy, it feels good to be warm. Bring on the snow!

Of course the warmth may not have been totally down to the coat. Mr O insisted this was a great photo of me having a cheeky snifter! He’s such a bad influence.

cheeky_snifter

A little wander into Covent Garden was lovely on such a bright winter’s day. This coat is great for twirling in too!

twirling vintage coatAnd a little venture into Neal’s Yard to soak up some more colour, if that was at all possible!

vintage Coat Neals YardThank you all for your support and patience throughout my first coat-making venture. It feels amazing to be wearing something so functional, yet so strikingly original and properly fitted. I won’t divulge cost of this project as it has scared the living pants off me but I can honestly say it was worth every single penny pound!

Vintage coat in progress

And so, six months after my gruelling battle to win this beauty of a pattern, work has begun, in earnest. When I was bidding the for pattern, I had the finished coat, clearly in mind and so to be faced with 19 pattern pieces and the usual vague set of instructions, the fear set in.

Butterick_547

I’ve made a jacket or two, I’ve even tackled the wicked welts. So what was I afraid of? Doing it justice, I think. If I was going to go to the bother of making a coat – not just any old coat, but the coat of my nightly dreams since battle was won – I needed the right fit, the right fabric, the finest construction, let alone the neatest bound buttonholes. (Something I hadn’t yet conquered !)

I live near fabric heaven, The Goldhawk Road. And so finding the right fabric should have been easy, right? Easy enough when your expectations aren’t stationed on the moon! I searched high and low and eventually found this amazingly eccentric fabric, online at ‘Fabric Dreams‘. Quite apt, really! I initially had tangerine wool in mind so I ordered a few different free samples and then sat under the letterbox for all of 4 days!

When they did arrive, it was a no-brainer. Even though the fabulous, firey fabric was 100% not wool (and not just tangerine, but an entire fruitbowl of colours) and the others were, it screamed at me to be given a chance and so I agreed to put it centre stage. After all, if I was ever going to go to the bother of making a coat, there’s no way I wanted it to go unnoticed, oh no!

I even made a toile. Just the body section. And this confirmed my need to loose some circumference. I had my suspicions that the coat would be a little big, and it was, but was worried I’d loose the nipped in shape if I took it in at the top and let it out at the waist (the usual Ooobop sausage-shape adjustment!). So with some careful measuring, re-measuring, a little panicking and some more measuring, I took out half an inch, vertically, all the way down, from each of the front and back pieces. So as not to affect the silhouette of the design. Incidentally, like a good girl, I had pre-traced all the pieces!

And then to cut the real fabric. Ooooo the suspense, the fear, the excitement! The pieces are massive. I know I will eventually chop off about 6 inches but I wanted to start long so I could make that decision later. But that did mean I had to cut out on the floor. My kitchen table just ain’t big enough! And that, in turn, meant I had to wash the floor… doh! Always something to hamper a plan! Still took three roll outs of the fabric and continual shooing of cats.

cutout_on_floor

Honestly, why do they insist on laying where I’m cutting? It’s not like there’s no other piles of fabric in the house!

Cat on fabric

An hour and a pair of stiff legs later, I had a wonderful pile of cut pieces. It’s quite tricky to cut though the ‘corded’ texture but it doesn’t fray.

Yesterday I sewed the main body sections and oooed and arrred as I steamed those seams open. For all it’s 100% not woolness, it presses beautifully. And I haven’t had to clip any curves either.

pressed seams

It was getting late last night and I did hesitate to start on the bound buttonholes but knew my dreams would be sweeter if I at least had a go. So I tried a few tester ones on some scrap fabric using the instructions on the pattern sheet. They were rubbish! So I went to YouTube to find someone who’d show me how. They were rubbish too! And then I remembered Karen’s fabulous Ebook download which proved to be the perfect method and I’d even go as far as saying I loved doing them!

bound buttonholesbound buttonholes reverse

Practising those stood me in good stead for making the welt pockets too!

welt pocketsPretty camouflaged huh?! Thats without the invisible stitching which is yet to be done. I’ll be fishing around for ages trying to find a way in, when it’s finished properly!

I pondered for ages, wondering what kind of collar I should have. Should it be the big dramatic scalloped one? One of the self same fabric to keep it simple or a little furry shawl collar? I opted for the latter, after going round in circles. Mostly in the shower!

Faux fur is fast running out in the Goldhawk Road. The good stuff anyway. I’m told by reliable sources that no more will be ordered as summer stock will soon be on it’s way! So I was well chuffed to find this short pile, soft-as-you-like, faux fur. Works a treat.

faux fur collarThough I’ve made fantastic headway this weekend, there is still a lot of work to be done. The sleeves, the length, the hem, the lining and the facing behind the buttonholes. But it will be worth it I’m sure. I can feel those sub zeros honing in over the next few weeks but hey, bring ’em on. I’m going to be snug as some bugs!

Mini Stanley Pyjamas

Mini stanley pyjamas

Little Miss Ooobop has been hassling me for a pair of PJs for so long, bless her. So yesterday, we set off for the Goldhawk Road to track down the very specific ‘cats and dogs’ fabric that she wanted. But of course, the shops were shut. It was New Years Day, after all! In order to relieve the disappointment (me more than her), we drove off, instead, to get a burger and watch a movie!

Now as luck would have it, for all that was closed in Chiswick High Road, Cath Kidston was open! Like some shining apparition amidst the rainy gloom! And there was a sale on. So we duly picked out some Mini Stanley fabric. No cats but very cute dogs!

Cath Kidston mini stanley pjs by the window

I used this vintage Maudella pattern. It’s not dated but could be 1950s if not 1960s. What would you say?

maudella_3162

I’m still working on convincing LMO to have the matching top to the bottoms but I don’t think a 9 year old can see past the ‘fogey’ images on the pattern sleeve!

I dutifully traced the one pattern piece. This is something I make a habit of nowadays. Just purely out of the respect for a tissue pattern piece that has happily existed for between 50-70 years. I don’t want to be the one who destroys that amount of history!

So including the careful ironing of the pieces, the tracing, the cutting, the making and the finishing touches, it took all of 2 hours. This is largely down to the magic of my new, though very old, overlocker, which was so generously bestowed upon me just before Christmas. I didn’t realise what the implications of having one were, until all the seams were serged and the hem edges neatly finished in a jiffy!

detail of overlocked seams

I am still going to have to work on the fine tunings of the tensions but it will so totally do me for now!

reading a book in mini stanley pjs

LMO has spent the rest of the afternoon in her new PJs and I’m delighted to have completed my first project on just day 2 of the New Year. Here’s hoping its the first of many more projects to come.

jumping in mini stanley pjs

Happy New Year lovely people x

Photography by DJ Photographic

Vintage 50s blouse with monogram

simplicity 2195 blouseThis is vintage Simplicity 2195 . . . or a great substitute for a bowling shirt fit for a game with the Spoolettes! Who are the Spoolettes you may well ask? Well hop over to Sew Dixie Lou to get a little insight.

vintage 50s blouse with monogram

I’m gutted I didn’t get any photos of our fabulous sporting event. But if you want a bit of inside info, Charity Shop Chic has posted some great ones here plus you get to see her amazing bowling shirt refashion too!. We sure did rock Bloomsbury Lanes with all sorts of complimentary comments coming from the staff.

I struggled to find an actual bowling shirt pattern but I’m quite glad I found this one as it works very well as an every day shirt. I wore it to lunch today at Carluccios with Mr O. Teamed with self-drafted half circle skirt and my favourite ankle boots from Office.

simplicity_2195_1

simplicity_2195_4I knew the hand embroidery was going to be a challenge for me. The last time I entertained such a thing was at the age of nine. But I thought this would make a lovely project to take on holiday back in August. (An efficient bit of planning on behalf of those Spoolettes meant that this sewing challenge fitted in superbly with my holiday!)

So first in the suitcase was the needle and thread and a hoop and a half made shirt with a piece of freezer paper ironed in position. As with most things I didn’t spend too much time reading up on the best way to go about this and the only transfer pencil I had was red, so I traced my initials from the original transfer, supplied with the pattern, on to the freezer paper. I couldn’t bear to cut up and ruin the original!

I had, however, read somewhere at some point, that ‘padding stitches’ were a good idea to raise the ‘satin stitches’. And so I set about tracing the edge of the monogram with some small running stitches.

monogram

A long process but not too much hardship when you are sat outside a beautiful Maltese villa, watching your children have so much fun in the pool, whilst all 40 degrees of sunshine warms your toes!

All was going swimmingly until I came to pick off the darned freezer paper. Gah! Never again. It took sooooo long!!

padding stitchesBut once it was off It was a pleasure to sew. A bit wonky here and there but it worked, kinda! Just wish I had used some stabiliser on the reverse to stop the stretching that happened too.

monogram_embroidery

I’ve got plans on making a gingham one, just as the pattern cover pic. Yes I’m still harping on about gingham but I happened across some gorgeous egyptian cotton gingham. Well at least that’s what the lady sold it to me as! But to be perfectly honest, it may be a way down the list as this sub-zero-like weather does not inspire me to make anything other than slankets right now!

simplicity_2195 pattern

Postscript:

I completely forgot that I’d asked the waitress to take the following photo. Feast your eyes on a table full of splendidly hand-made bowling shirts sported by an amazing team of beautiful and talented Spoolettes…

Spoolettes

Vintage 1950 Vogue Jacket

vogue 2934 jacket

And here it is, at last, that tasty little Vogue jacket as inspired by that classy little lady, Ms Nicole Needles. It had to be done. I couldn’t resist!

The pattern is V2934, a reproduction of an original 1950 design. Such a clever and very simple pattern that would whip together so quickly if it weren’t for all the hand stitching. Which, strangely enough, I didn’t mind at all.

vogue 2934 jacket

I’m loving the dolman sleeves and the big cuffs which nicely balance out the short cropped cape-like body.

vogue 2934 jacket

I used sew-in canvas for the interfacing. Really great stuff! It molded beautifully around the neck and shoulders and was the perfect weight to maintain the shape whilst still allowing drape at the front.

vogue 2934 jacket

Initially, I had a slight concern that this shape might make me look like a Weeble, given my lack o height, but I do believe it does nothing of the sort! In fact quite the opposite. It is amazingly flattering for a jacket that is more like a cropped cape and I love it!

vogue 2934 jacket

It is also so warm and so snug. The outer fabric is a wool blend, exact content unknown but at £6 per metre I’m not really that concerned!

But the inside fabric, however…

vogue 2934 jacket

It is the most lavish lining I have ever used. 100% red silk satin, baby! Costing more than the main fabric –but boy does it feel lush.

vogue 2934 jacket

Did you know these things were called frogs? Neither did I till very recently. But they do the job so perfectly. Takes a while to do them up but I’m sure I’ll get quicker with practice!

vogue 2934 jacket

vogue 2934 jacket

vogue 2934 jacket

OK. That’s quite enough of that serious posing Janene. What this jacket really speaks, (apart from sugar-gliders) is aeroplanes!

vogue 2934 jacket

vogue 2934 jacket

vogue 2934 jacket

vogue 2934 jacket

So never let it be said that black jackets are boring! Or indeed difficult to make. If you don’t mind a spot of hand-sewing the old fashioned way this is such a walk in the park.

vogue 2934 jacket

vogue 2934 jacket

Before I sign off I’d just like to give Little Miss O a mention. While we were busy being crazy she was so patiently sitting and drawing the most beautiful picture that I just have to share with you.

drawing at the Park

Pictures by Daniel James Photographic