Kiki’s vintage cushion cover

When my good friend Kiki asked me to make a cushion cover from her late mother’s Biba skirt, I kind of refused. Big time! I love my friend Kiki so much and would do anything for her but cut up a Biba skirt?! She was going to have to drug me first!!!

She texted to say she was on her way with said skirt. It didn’t look like I had a choice. In fact she was at mine before I got back myself! Mr O had a cuppa on the go. I went straight for the wine. This was going to be painful.

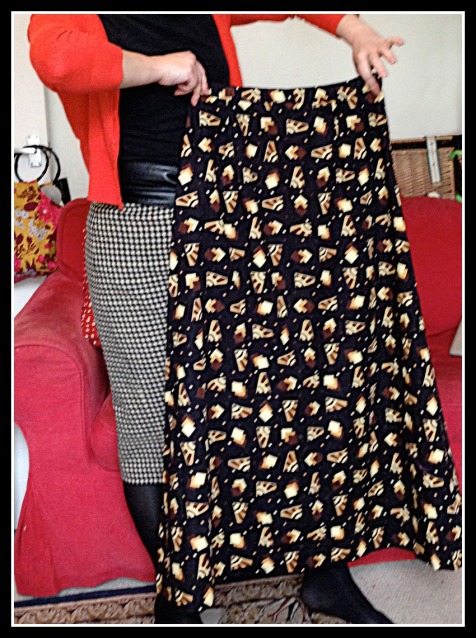
Luckily for me, Kiki gets things muddled all the time. (I really should write a dictionary of exclusive Kiki words and terms. I’m sure it would be a best-seller!) What she meant was that the skirt was a Biba-esque-style maxi skirt that her mum had hand-made in the 70s. She couldn’t see herself in it and to be honest, neither of us could get it over our thighs!

Jean's original skirt

Well. That was a relief but still didn’t make for easy cutting up. But I warmed to the idea that Kiki would get daily pleasure from it being on her sofa instead of folding it away in the attic forever.

There’s quite a lot of fabric going on in a maxi A-line skirt. Plenty enough for a 50cm cushion pad!

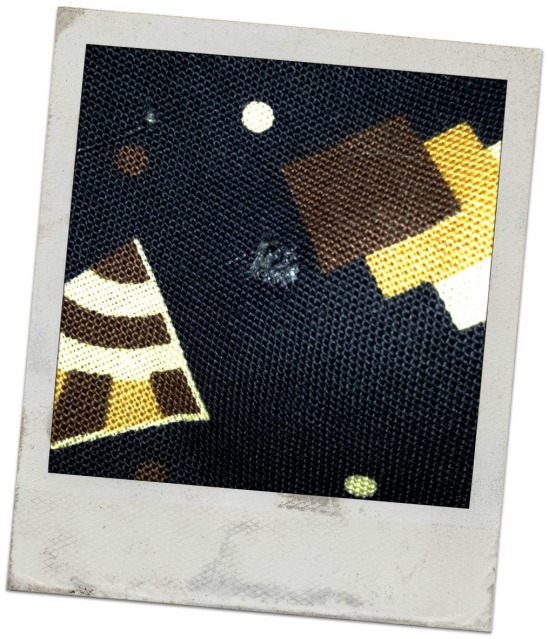
But there was a moth-hole. Typically right in the middle of where I needed to cut.

moth hole

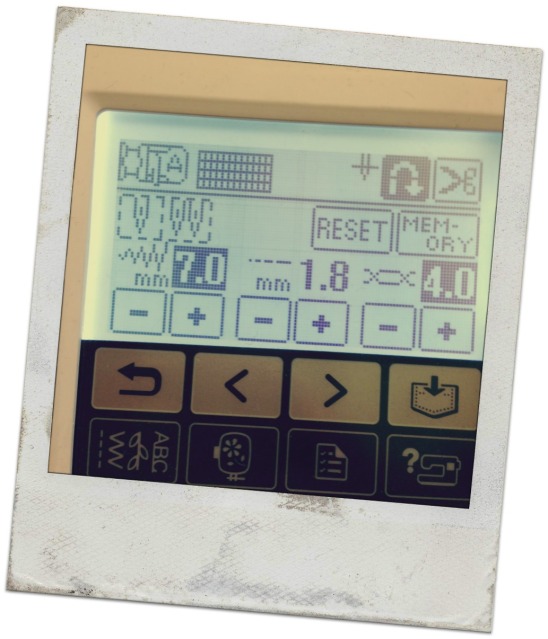
I’ve not used the darning stitch on my machine before now.

darning stitch

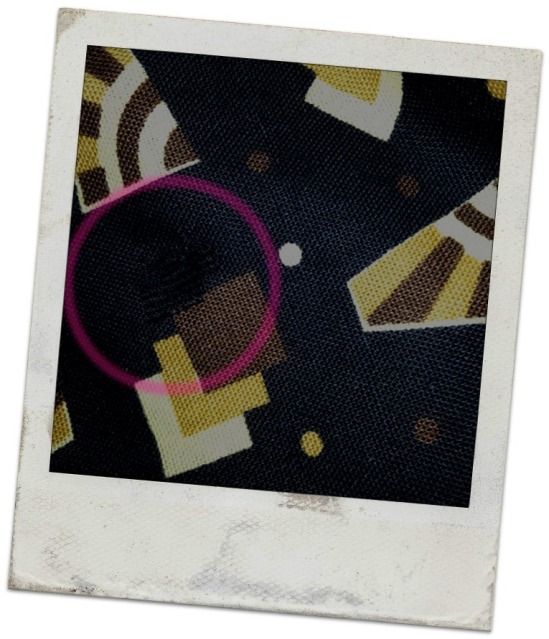
It doesn’t mend totally invisibly but far better than a poke in the eye and a fraying hole!

darned hole

Nothing complicated about the cushion cover itself. Just two squares. Zipper sewn to top edges first. Seamed all round. And Bob’s yer uncle!

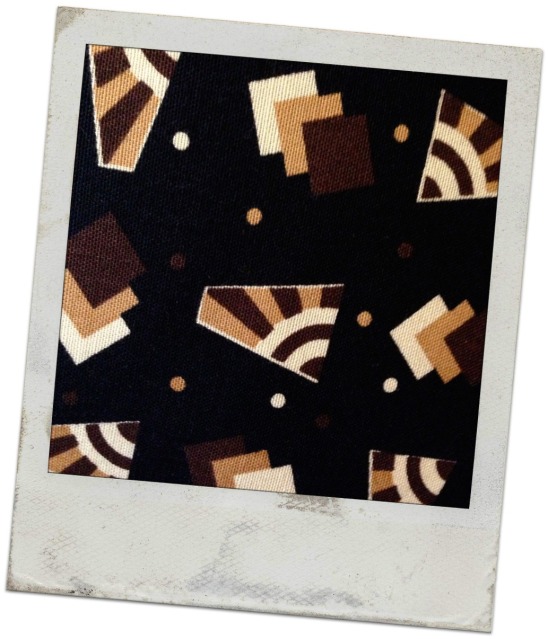
Such a great geometric design on this fabric. It’s great quality cotton furnishing fabric of some kind.

geometric fabric detail

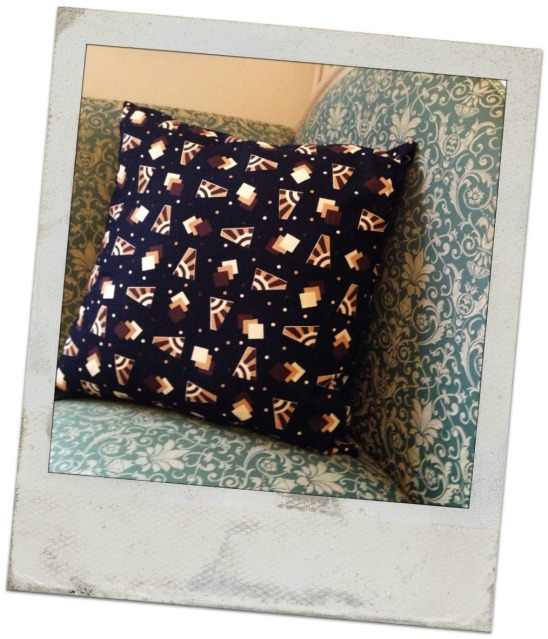
And I have to say – I think it looks great on my sofa! Kiki can take as long as she likes coming to collect it!

finished cushion

How to make a Roman blind / shade

And here is the long awaited tutorial. Sorry I took so long. I completely underestimated how long it would take to put together! Despite the lengthy post, this really is a simple sewing project, involving jus a few lines of straight line sewing. Please do a mock up first to check I haven’t given you a bum-steer! And please do point out anything that is unclear or needs adding.

It does, however require some very careful measuring and a few calculations.

No corners must be cut. The accuracy in the measurements will ensure perfectly fitting and super smooth operating blinds.
Remember: Measure twice (at least!) and cut once!

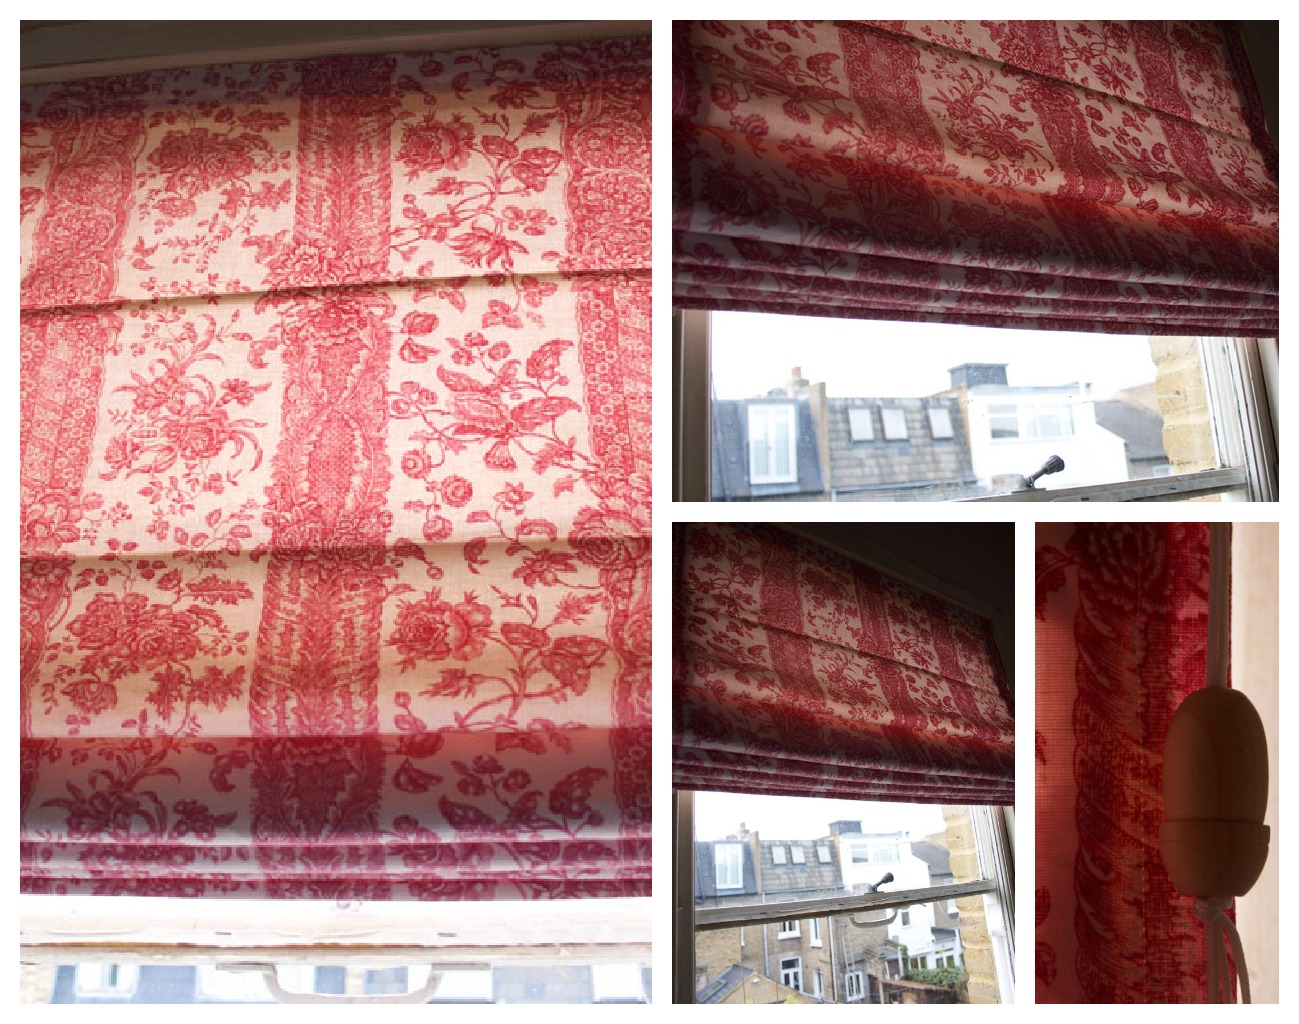
roman shades during day

You will need:
Furnishing weight fabric for the outer
Curtain lining for the backing.
Nylon cord. As a guide I used 9m but yours may be more or less.
Small plastic rings
4 screw eyes
Cleat
Acorn / cord pull.
Strong self adhesive velcro. The width of your window frame or baton.
Wooden doweling or synthetic rods cut to size.


1. Calculate the size and cut your main fabric roman shade step 1
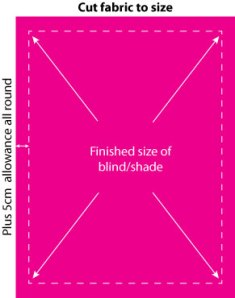
Measure the size that you want your finished blind to be.

Add 5cm side turnings and hem allowances on all sides, to this measurement, and cut your fabric.
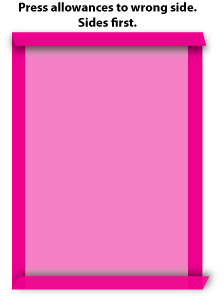

roman shade tutorial step 22. Press Allowances
Press the allowances all round. You could even mitre the corners if you wanted to be really clever… er…I didn’t!
No need to stitch in place at this point. All will become clear!
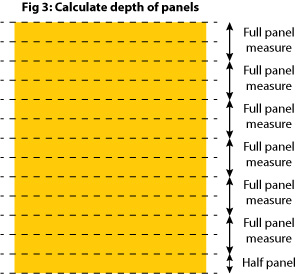


roman shade tutorial step 33. Now to prepare your lining… and some serious sums!
Start with the measurement of the finished size of your blind. This will include allowances of 2.5cm all round.

First work out how many sections/folds you want to incorporate into your blind.
I chose to have 7.
The bottom panel must be half the depth of the others which are equidistant.
To calculate this I doubled 7 (panels) to make 14 and deducted 1 to make 13 and divided this into the finished depth of the blind (150cm in my case)
so:
7 x 2 – 1 = 13
150cm / 13 = 11.5

11.5 is the half size panel at the bottom
The remaining 6 full size panels will be double that at 23cm (see fig 3)

You will also need to accommodate the dowels so extra fabric will be needed to allow for the casings.
Measure the circumference of your dowels and allow a couple of milimeters extra, otherwise you will struggle to get the dowels in the casings.

My casings were 12mm.

12mm x 7 panels = 84mm (8.4cm to be added to the final depth of the lining fabric)

So the finished measurement of the lining fabric to be cut is 80cm (width) x 158.4 (150+8.4)

Always measure twice and cut once!
You can now cut your lining to size.


4. Mark the positions of the panels then hem all round

Mark the positions of the panels, starting with the bottom one, in my case, 11.5cm from the bottom. I chose to mark on the right side with chalk to make the lines easier to follow.

Mark up from this point, the depth of the casing, in my case 12mm. From that point, mark the next full size panel up, in my case, 23cm
Mark the depth of the casing and from that point the next full size panel. Repeat the markings for the rest of the panel.

The side turnings and hem allowance is 2.5cm all round. Fold and press in position.
Sew all round close to the edges of the lining fabric so the rods wont get caught in the seams.


roman shade tutorial step 55. Create casings for rods

With wrong sides together and guide lines matching, fold in between the casing lines and press.

Sew accurately on the marked lines from edge to edge.
Repeat this for the remaining casings.
Your lining is now complete and ready to attach to the main fabric.
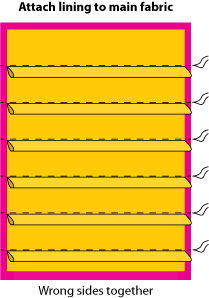

roman shade tutorial step 66. Attach prepared lining to main fabric

Lay the main fabric, as prepared in step 2, wrong side up on a flat surface.

Lay the prepared lining, wrong sides down, on top of the main fabric, making sure it sits 2.5cm in from each edge.

Making sure both layers are perfectly flat, pin together along the casings, so the casings are facing down towards the bottom hem.
Use as many pins as it takes to secure your two pieces together with no bubbles or creases!

Sew neatly and carefully from one side to the other, directly above the casings, sewing both lining and main fabric together.

Hand sew the top edge of the lining to the main fabric. Or machine stitch if you prefer.


7. Attaching the velcro

Stick the loop side (the fluffy side) of the velcro to the top edge of your blind.

Stick the hook side (the spiky side) of the velcro to the top edge of your baton or window.

NB. I used the strongest adhesive velcro I could find, which worked beautifully but to ensure it didn’t separate from the fabric I also hand stitched it.
This is very difficult but worth the effort to strengthen the bond. Do not under any circumstances try to sew it on the machine. The adhesive will totally ruin the needle and get stuck!
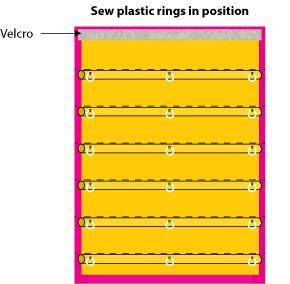

roman shade tutorial step 88. Insert the rods and sew on the rings

Inset a rod into the hem of the main fabric and hand sew the hem of the main fabric to encase it.
This helps to give the base of the blind a bit of weight and keeps it hanging nice and straight.

Hand sew the lining hem over the main fabric hem.

Insert the other rods into the casings and hand stitch the ends closed to stop the dowels falling out.

Hand sew 3 plastic rings to the centre of each dowel casing, one at each end and one in the middle.
It is important that the rings are perfectly aligned with each other.
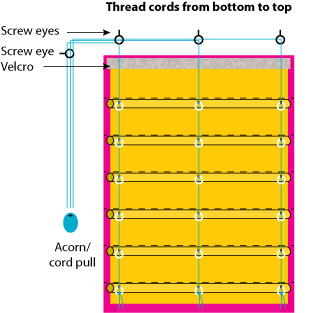

roman shade tutorial step 99. Attaching the cords

Screw 3 screw-eyes into the the underside of your baton or window frame.
They must be aligned with the rings you have attached to your dowel casings.

Attach the 4th screw eye to the side of the window frame, in line with the others.

Attach 3 lengths of nylon cord to the bottom 3 rings. Ensure the knots are tied securely.

Assuming your pull cord is going to be on the right hand side of the window,
run the first length of nylon cord up through the right hand set of rings. It will need to be long enough to do this and then run along the top 3 screw eyes and the side screw eye, down to the cleat, plus a little bit more!
Then run the middle cord up through the rings and allow enough to run through the centre and right hand screw eye, and the side screw eye, down to the cleat, plus a little bit more!
The final cord runs up the rings in the same way, through the top right hand screw eye, through the side screw eye and down to the cleat plus a little bit more!

NB: The screw eyes will sit below the velcro in real life!


10. Attach the blind to the window

You can now attach your blind to the window by pressing the velcro edges together firmly.
Thread the cords as detailed above.
With the blind at the lowered position, carefully make sure that the cords are neatly and precisely lined up. Gently pull on them individually and secure all three cords together at the ends with an ‘acorn’ or cord-pull.
Attach your cleat, proudly raise your blind, marvel at the magical way it folds up and wrap the cord around your cleat. Or lower it and raise it a few more times just for the joyfulness of it all!

Roman blinds/shades for the landing

Well I’ve certainly got that winter nesty feeling. Never thought I’d say it but the rain can tip down as much as it likes. The wind can howl till it’s heart content and who cares if it’s cold as a polar bear’s nose. I am happily inside, toasty and warm, making bread, watching old movies, sewing and putting up my freshly made Roman blinds, or Roman shades if you are anywhere but the UK!

roman shades during day

I’m assuming the fabric is vintage. It had that musty attic smell about it when I landed 5 metres of it, for £10 at a charity shop. But nothing a spruce in the washing machine couldn’t sort.

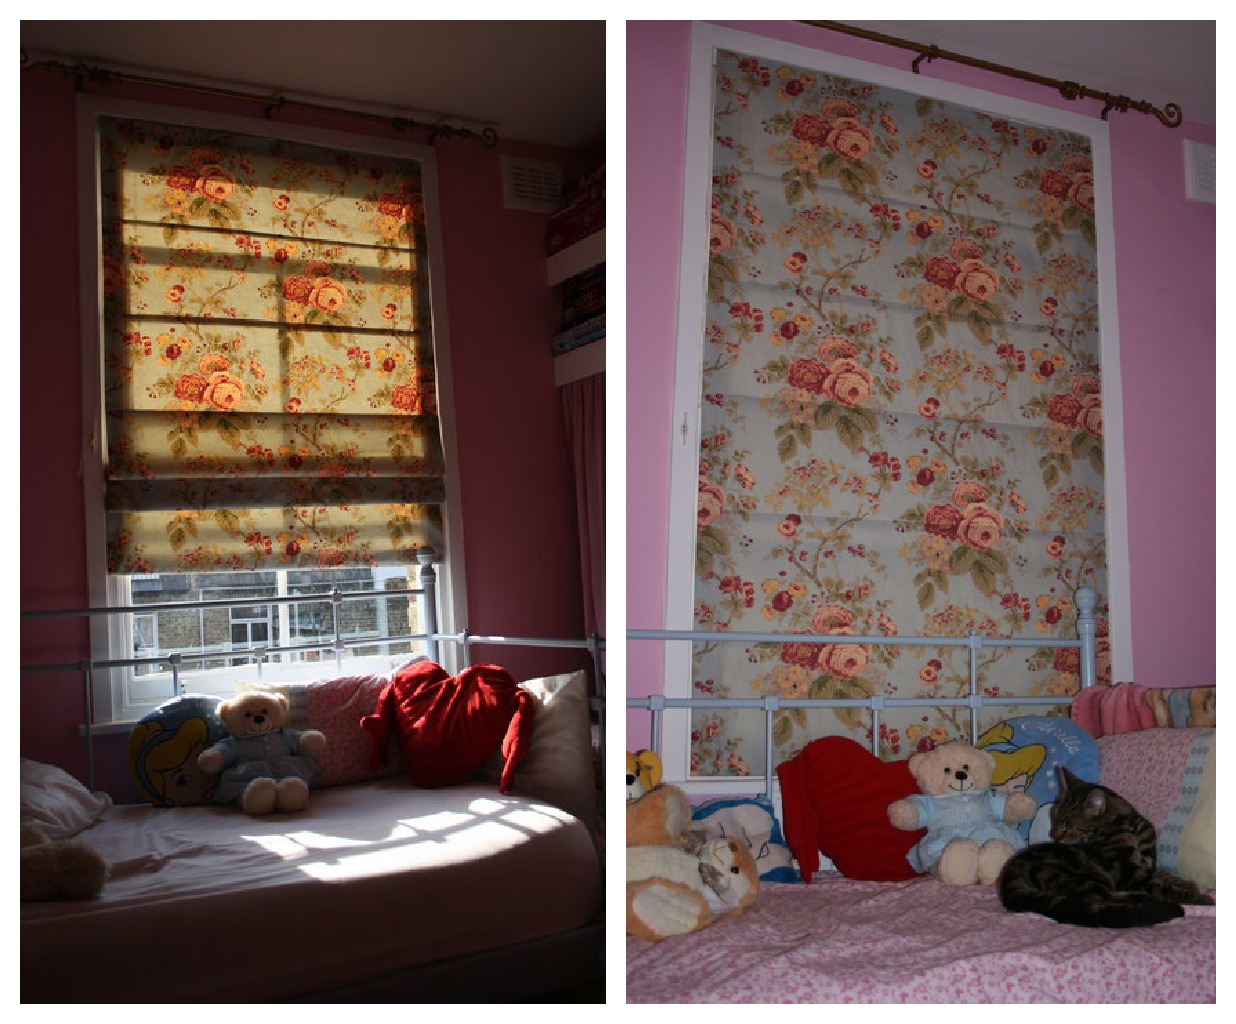
The hardest thing about these darn blinds (or shades) is photographing them! Too light outside and you get too much show through. Too dark and you see nothing!

roman shades in the dark

Too long trying to be arty farty with it all and you get cat-hassle!

roman shade with cat interference

I’ve made these on a couple of occasions before but only posted on Burda. This set I made for Little Miss Ooobop’s room using an remnant of fabric I picked up in a discount fabric store for a fiver:

Roman blinds in rose fabric

And these black ones I made for my eldest daughter… for considerably more pounds:

black roman blinds

This is a great sewing project for a beginner because it only involves sewing in straight lines. But as many times as you make them you still have to measure twice and cut once. Or in my case, five or six times. It’s all in the maths.

For anyone who’s interested I will compile a tutorial. I didn’t take in-progress shots, mainly because I worked in such a horrendous way, spread all out on the living room floor with cats jeopardising the project every step of the way! But I will create some diagrams which should be a lot easier to follow. Just not tonight, ’cause I’m pooped!

Post War British Textile design

fashion and textile museum

Today, I took full advantage of my freelance status, ditched the children for a couple of hours and headed off to the Fashion and Textile Museum, near London Bridge, to see Designing Women: Post War British Textiles exhibition. What a totally self-indulgent treat!

The intro to the exhibition:

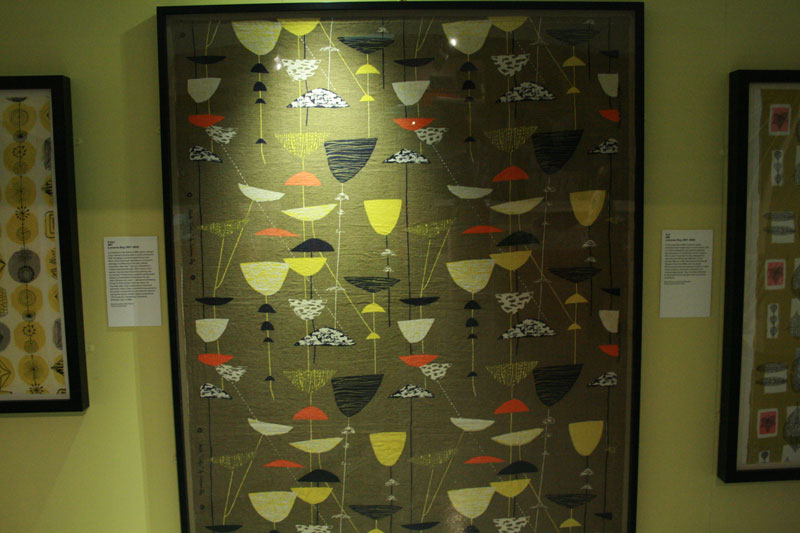
“Britain was at the forefront of international textile design in the 1950s and 1960s. The art of textile design radically changed after the Second World War and three women artists working in England in the 1950s were pivotal in this artistic revolution. The drab days of the War were transformed by the fresh, progressive designs of Lucienne Day (1917–2010), Jacqueline Groag (1903–86) and Marian Mahler (1911– 83). Designing Women: Post-war British textiles showcases their work beginning with Lucienne Day’s ‘Calyx’ pattern of 1951, featured at the Festival of Britain, and moving through textile commissions of the 1960s and 70s. The exhibition features more than 100 works.

Original artist designs with bold abstract pattern, as well as the use of saturated colour, marked a dramatic departure from conventional furnishing fabrics. This new wave of bold textile designs, helped to bring the influences of the art world, in its most recent, refreshing, and largely abstract forms, into the contemporary home.”

The influence of modern art is so strong in all the designs of this period. Its very easy to spot some iconic inspiration from Joan Miró, Alexander Calder and Kandinsky.

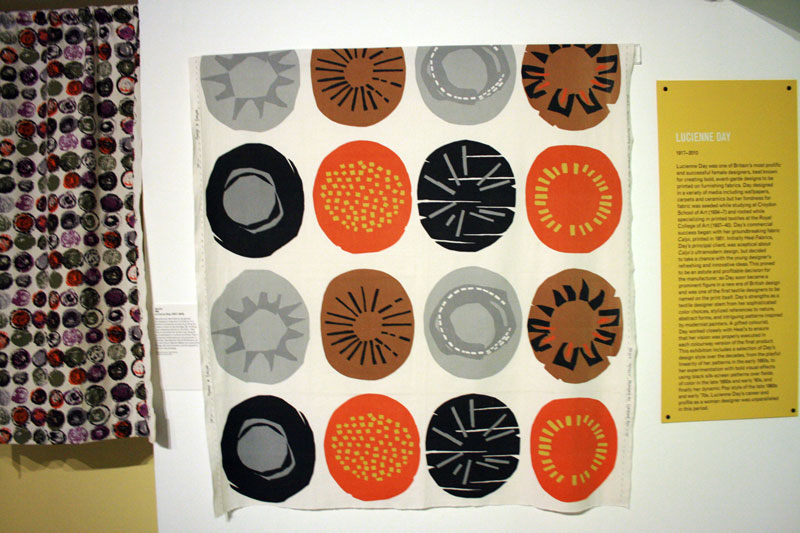
Lucienne Day, wife of Robin Day, was the most prolific and successful of the designers having kick started the ‘revolution’  with her ‘Calyx’ print in 1951.

'Calyx', Lucienne Day  1951
'Calyx', Lucienne Day 1951

Heals, though at first very sceptical, was her first client. The work was considered too modern but the risk proved to be a good and profitable move for both parties. Lucienne Day was the first artist to be credited on the fabric itself.

'Diablo', Lucienne Day, 1962/3
'Apollo', Lucienne Day
'Good Food', Lucienne Day
'Trio', Lucienne Day, 1952

Lucienne didn’t limit herself to fabric, wallpaper and carpet design…

Tea/coffee set, Lucienne Day

Jacqueline Groag was born in Czechoslovakia and emigrated from Vienna to London in 1939. She is one of the key designers in Mid Century Britain having worked with some of the foremost  textile manufacturers and retailers, including John Lewis, Associated American Artists and David Whitehead Ltd. She also produced laminated surface designs for British Overseas Airways Corporation (BOAC). The same company my mum used to make pilots suits for!

Untitled, (Traffic Lights), Jacqueline Goag, 1952
Untitled (Bottles), Jacqueline Groag

This ‘Pebbles’ design by Jacqueline Groag is so nostalgic for me. As I stood in front of it, it took me back to my home in the 1970s. I can’t be sure that it was exactly this design but similar enough to generate some serious flashbacks!  My mum had great taste!

Untitled (Pebbles), Jacqueline Groag, 1952

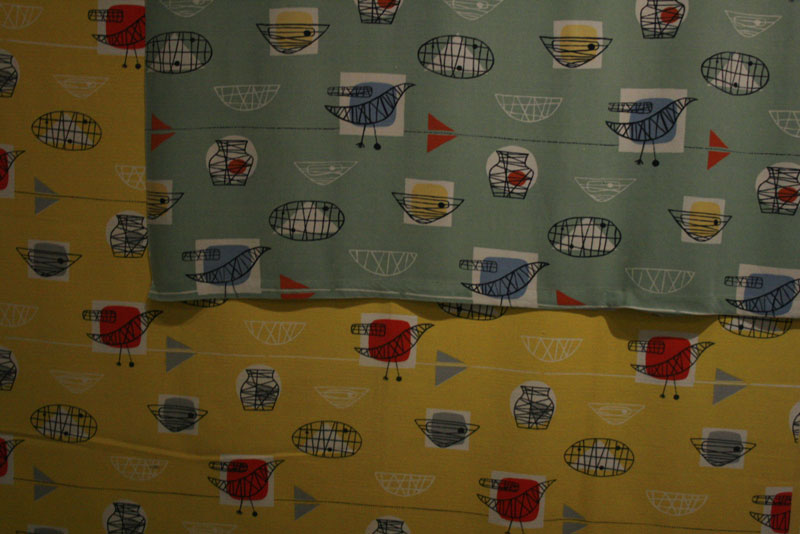
Marian Mahler was Austrian and emigrated to Britain in 1937. As artist and illustrator she combined both skills to generate designs for the younger, yet sophisticated clientele who were looking to create a stylish home. The fabrics were mostly rayon or cotton and the roller printing process made for fast production and an affordable end product. I just love the birds!

'Bird Chair', Marian Mahler, 1952

The temptation to ‘touch’ was too much!!!

'Linear Flowers', Marian Mahler
'Mobiles', Marian Mahler, 1952
Untitled (Sails), Marian Mahler, 1952/3

Paule Vézelay was a painter and her skills transferred beautifully to fabric design. So much so that I think a certain Ms Kiely looks to have drawn some serious inspiration, don’t you think?!

'Composure', Paule Vézelay, 1967
'Crescents', Paule Vézelay, 1956

And I wasn’t expecting to see any of these fabrics in dress form but just look…

Marian Mahler, Linear Flowers dress

dress

I hope you have enjoyed this little preview. I do apologise for the quality of the photos. No flash photography was allowed so they are a bit grainy and really do not give any of the fabrics the justice they deserve!

Well, best I get on with my real work now… the downside of freelanceness!