The Cactus Pot block

quilt block cactus pot

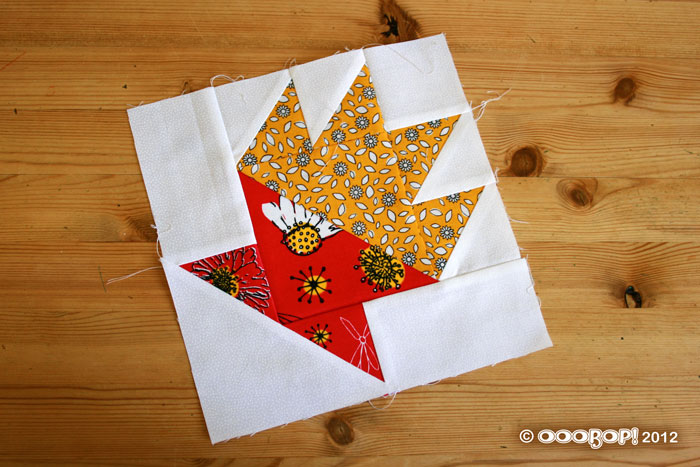
So here is block 9, The Cactus Pot. Apparently very popular in the 1930’s but, despite it’s Art Deco appearance, it actually dates back to the quilts of the 1800s. If the colour balance is altered it becomes more ‘Basket’ or ‘Cake Stand’!

I really like the fabric choice on this one. And with its white background, to be bordered by white, this little cactus is sure to be a pretty thorn among the ‘roses’!

I didn’t have too much trouble putting it together. I just took my time and repeatedly thanked my quarter inch foot! The small triangles were pieced together first, forming squares. Two sets of these were joined to make 2 rectangles. The first of these rectangles was sewn to the diagonal of the large yellow print triangle. A small white square was sewn to the second of the ‘rectangles’ to make a longer rectangle and this was then joined to the other diagonal of the triangle (and the edge of the first made rectangle)

Next up, the large red print triangle was joined to the yellow large yellow print triangle edge. Then the two small red print triangles were sewn to the short edge of the white rectangles. These were then joined to the sides of the block to create a ‘base’ to the pot. The last piece to be added was the large white triangle, across the bottom of the ‘base’.

Lots of pressing in between, and lots of satisfaction when this one was complete!

Block Facts:

Name: Cactus Pot block
History: The block was first published under this name in America, in the Oklaholma Farmer Stockman magazine in 1930. Also known as the Flower Pot.
Level: Some experience necessary for accurate piecing
No. of pieces:16

Progress report:

Block 1: The Double Four Patch
Block 2: The Whirlwind
Block 3: The Sailboat
Block 4: The Shoo-fly
Block 5: The Trafalgar
Block 6: The Windmill
Block 7: The Chequer Square
Block 8: The Diamond Square
Block 9: The Cactus Pot

The Diamond Square block

Diamond square quilt block

The Diamond Square block is number 8. That makes me a tenth of the way there… woohoo!! I wasn’t joking when I said this was going to take me over a year to make! The ‘pile’ (if you can call it that) of completed blocks is slowly growing. and issue 11 of the Art of Quilting has supplied the first batch of sashing (the white fabric that will join them altogether). I have yet to complete blocks 9 and 10 before I begin that task, when I shall then present them as one – a far more interesting post I’m sure!

I am happy to report that this particular block was a breeze. It is based on 2 sets of triangles around a central square. The central square allows for the use of bigger print and with the contrasting outer levels gives a great illusion of a square in a square in a square. All points matched up this time and I particularly like how it worked on the reverse!

diamond square quilt block reverse

Block Facts:

Name: Diamond Square block
History: This block design appears on quilts dating back to the 1870s. It is also known as ‘Pride of Holland’ or ‘Night and Day’
Level: beginner
No. of pieces: 9

Progress report:

Block 1: The Double Four Patch
Block 2: The Whirlwind
Block 3: The Sailboat
Block 4: The Shoo-fly
Block 5: The Trafalgar
Block 6: The Windmill
Block 7: The Chequer Square
Block 8: The Diamond Square

The Chequer Square quilt block

chequer square block

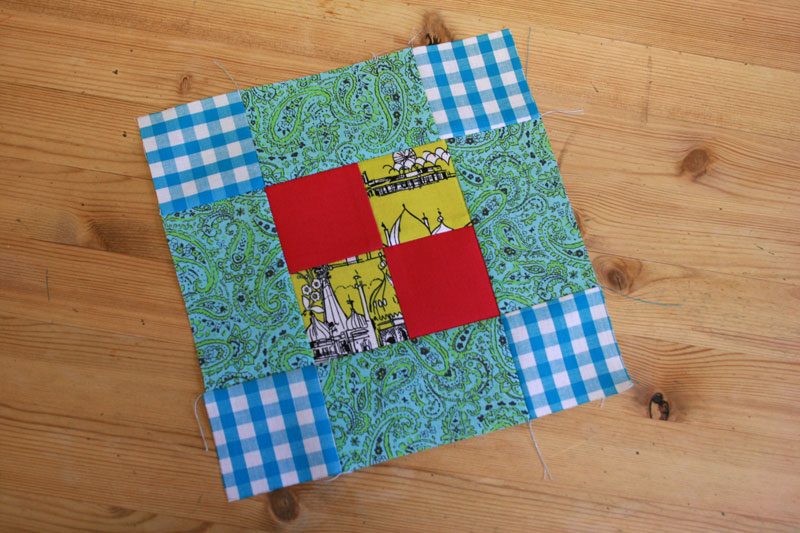
‘A simple combination of squares and rectangles makes this block easy to piece…’ For some, may be! This is the Chequer Square block, number 7 in the series from The Art of Quilting. For sure, it looked easy enough and I was quite looking forward to not having any triangles and points to line up. But I still messed up, doh!

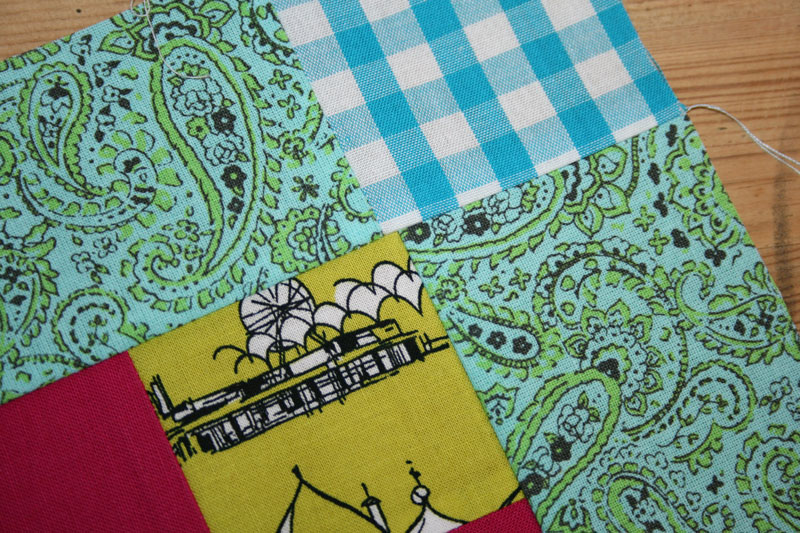
chequer spare block detail

I am trying really hard to ignore the misalignment as I proceed with the other blocks but it is really niggling and I might possibly go back and sort it out… but then again… who’s going to notice this in amongst the other 79 quilt blocks?! 😉 I guess that’s what handmade quilts are all about!

Block Facts:

Name: Chequer Square Block
History: Similar designs, of different dimensions but all based on a simple arrangement of squares and rectangles, can be found on some of the earliest surviving quilts.
Level: beginner
No. of pieces: 12

Progress report:

Block 1: The Double Four Patch
Block 2: The Whirlwind
Block 3: The Sailboat
Block 4: The Shoo-fly
Block 5: The Trafalgar
Block 6: The Windmill
Block 7: The Chequer Square

The Trafalgar quilt block

Trafalgar quilt block

Introducing the Trafalgar quilt block. I knew there was a reason for skipping this one last week… tricky little thing that it was. I can’t believe something so small took a whole hour to achieve!

I’m beginning to recognise the order that these blocks must be sewn but I really had to keep my wits about me for this one. The pink and the blue tapered rectangles must be laid out in opposite directions before they are cut and attention really must be paid to all those points meeting.

I had a bit of trouble ‘chaining’ the triangle pieces as the point of the triangle kept getting ‘chewed’ by the feed dog! I had to make sure the needle was down into the fabric rather than just run into it from the last.

For those not in the know, ‘chaining’ or ‘chain-piecing’ is an efficient way of sewing lots of pairs of pieces together by running them under the presser foot, one after the other, without stopping, taking a few stitches in between each pair. The pairs are then snipped apart with a pair of sharp scissors. I have found this works easiest with squares rather than triangles!

And a big lesson learned for rushing straight into things… I forgot to adjust the position of my needle for the hole in the quarter inch foot is central, one position only. Needless to say the needle snapped on the foot and made me jump!

But I got there in the end with a big sigh of relief. I really was holding my breath for each section join!

Block Facts:

Name: Trafalgar
History: It is a variation on the traditional Nelson’s Victory, which commemorates the British admiral, but in 1945 it was listed as ‘End of the Day’.
Level: Some experience needed to achieve neat joins. (;D)
No. of pieces: 16

Progress report:

Block 1: The Double Four Patch
Block 2: The Whirlwind
Block 3: The Sailboat
Block 4: The Shoo-fly
Block 5: The Trafalgar
Block 6: The Windmill

The Windmill quilt block

Windmill quilt block

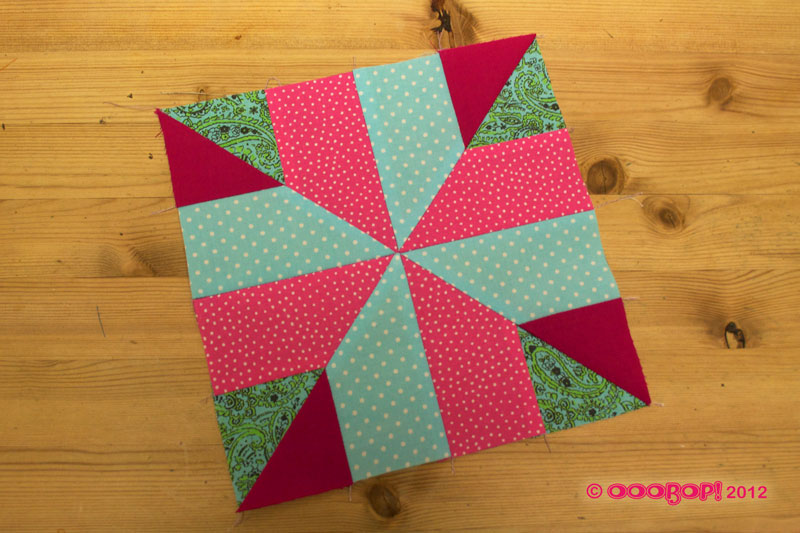
This is the Windmill block and the 6th in the series from the Art of Quilting. I haven’t forgotten number 5, the Trafalgar, I just fancied the colour combo more on this one!

I’m getting a bit quicker with them now. Though I won’t yet reveal how fast as it probably still sounds a bit rubbish! But quilting certainly got easier thanks to MrsC for her recommendation to use a quarter inch foot. I ordered one pronto from Jaycotts, and was wondering why on earth my fabulous new machine didn’t come with one. The process was so much quicker and neater and much easier to control. Feeling all smug that not only did I get some patchwork done this evening, but it all lined up perfectly and according to plan, I went to put my new shiny foot in my special pull down compartment… only to realise I already had one…. doh!

Block Facts:

Name: Windmill
History: Variations of this simple but dynamic block go back to the earliest days of quilt making. Alternative names include Dutch Windmill, Double Pinwheel and Turnstile… all suggesting rotary movement.
Level: Some experience needed to ensure the eight triangle points meet perfectly in the centre. (;-) *some buffing of nails near shoulder*)
No. of pieces: 12

Progress report:

Block 1: The Double Four Patch
Block 2: The Whirlwind
Block 3: The Sailboat
Block 4: The Shoo-fly
Block 6: The Windmill