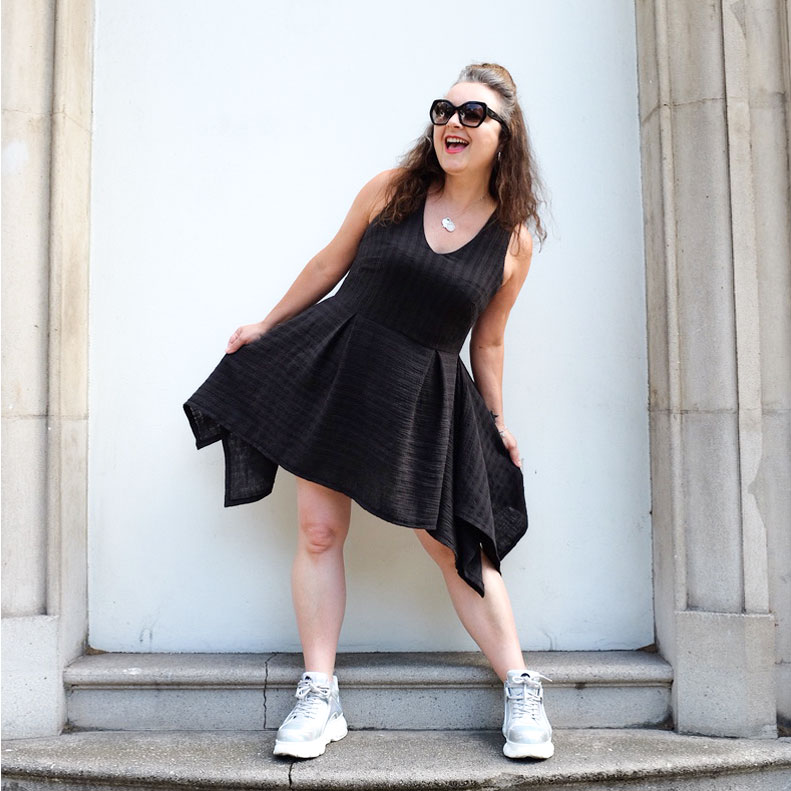
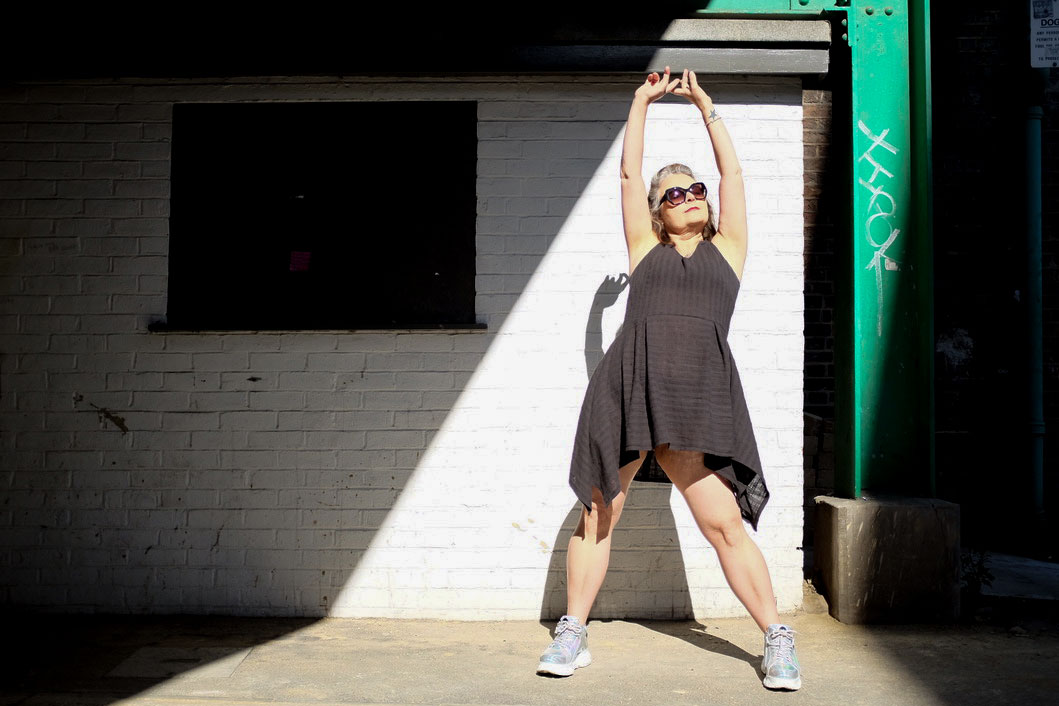
Handkerchief hem dress

ooobop design hankerchief hem dress

Lockdown forced me to buy fabric online. Not my favourite thing to do but needs must when Covid pulls the rug!

I headed straight to Minerva – amazing selection; easy to navigate website and very competitive prices. I’m also a fan of the accompanying videos that showcase the fabric in action so you can get a fair impression of the weight and drape.

I was on a roll with the Shelby rompers, having made a starry one, a tropical one and an upcycled one in relatively quick succession, and my plan was to make a plain one that was a bit more casual and downplayed for those days when you want to be slightly less visible. Read: any excuse to go back to black!

I’m a sucker for black. But even moreso for a black fabric with a texture. And linen is a firm favourite. So I figured this crinkle cotton striped linen gauze would tick all the boxes. Black was sold out unsurprisingly, so I went for charcoal which actually champions those slubs with way more contrast.

But when it arrived I was a bit miffed. It wasn’t at all as I’d imagined. It was a bit scratchy, a bit wonky with it’s loose weave and worst of all, following a prewash it contracted to half the width! That lovely slubby texture totally worked against me, didn’t behave at all like regular linen and was almost elastic! – I was dead scared to make it into a romper. What if one leg ended up longer than the other, lol!

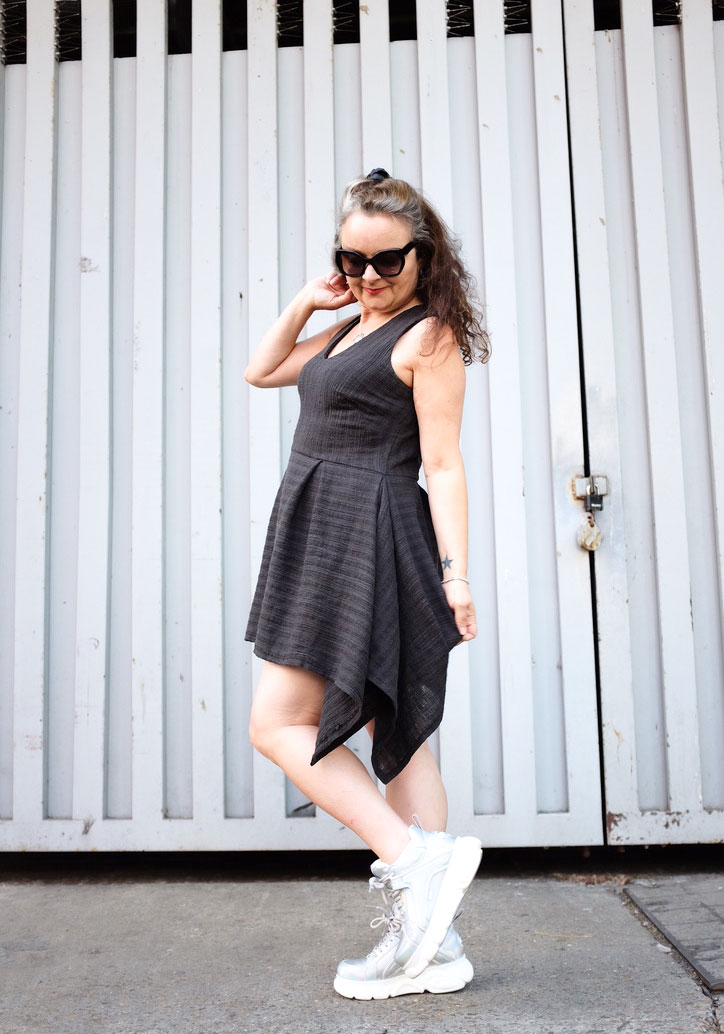
ooobop hankerchief hem dress
Channeling Blondie and Parallel Lines!

Despite the disappointment I rejoiced in the realisation that I’ve come far enough into my dressmaking journey to know when a fabric isn’t going to cut it. And the tantrums are few and far between now, because I’m quicker at finding solutions. Also the fabric completely softened after a prewash and I was more determined than ever to let this fabric do the talking.

So I went off piste. Not accidentally I’m sure because I’ve always got a catalogue of crazy designs in my head and sometimes they make it to a page in my Fashionary book so they’ve got a better chance of being realised. A summer linen dress incorporating a fitted sleeveless bodice, with a v-necklline and a handkerchief skirt would be it’s destiny.

ooobop hankerchief hem dress

I reached for my bodice sloper, added a v-neckline and narrowed the shoulders. I also swung the darts to fashion a double French dart for no good reason other than I’ve never done it before. And I really like the result!

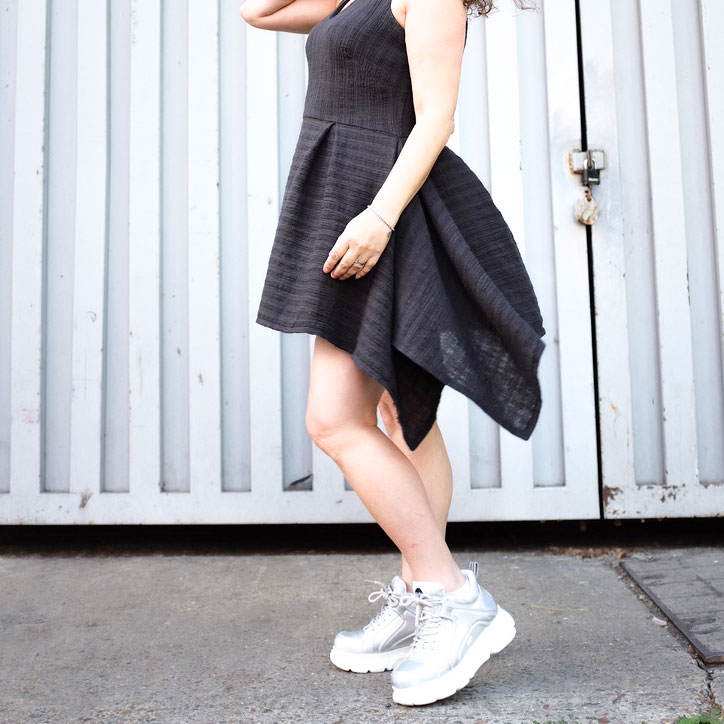
The vertical stripes of this linen lend themselves perfectly to the bodice but I decided to switch the stripes horizontally for the skirt section because I much prefer how horizontal lines fall at the sides. There was precious little worry how it would all hang for cutting it on the cross because I was playing to it’s wonky nature in any case. And it turned out good. In fact more than good. I love it!!

ooobop design hankerchief hem skirt detail

I have to cite a few influences here: Liz from this year’s GBSB for sticking to her alternative fashion style. I realised I was drifting away from mine and she’s unknowingly reeled me right back in! My bestie Laura Bird who loves an All Saints asymmetric number, always sporting an ‘interesting’ dress and Burda Style for first introducing me to a hanky hem!  I made my first maxi dress here and a second silver one here  and they are still my favourites though this is my first short dress with a handkerchief hem.

So how did I cut the skirt?

I decided on the length of the skirt (the depth) and factored in seam allowance and hem.

I made the width of the skirt to the following calculation:

Front piece (cut 1) = half waist measurement + (2x length of skirt) + 8inches for 2 box pleats + (2x hem allowance)

Back piece (cut 2) = quarter waist measurement + (1x length of skirt) + 4inches for 1 box pleat + seam allowance + hem allowance

I marked the centre of the front piece and 4 inches either side to tack the box pleats. I overlocked the bottom of the bodice piece and the top of the skirt pieces before pinning and sewing in place. I sewed up to the side seam on each piece and then sewed the seam allowance of the extra fabric along the top edge. After the centre back edges were overlocked, I inserted an invisible zip and enclosed the top part of the zip with the facing.

Finally I hemmed all four edges of the skirt and mitred the corners. And oh what a neat little finish that is!

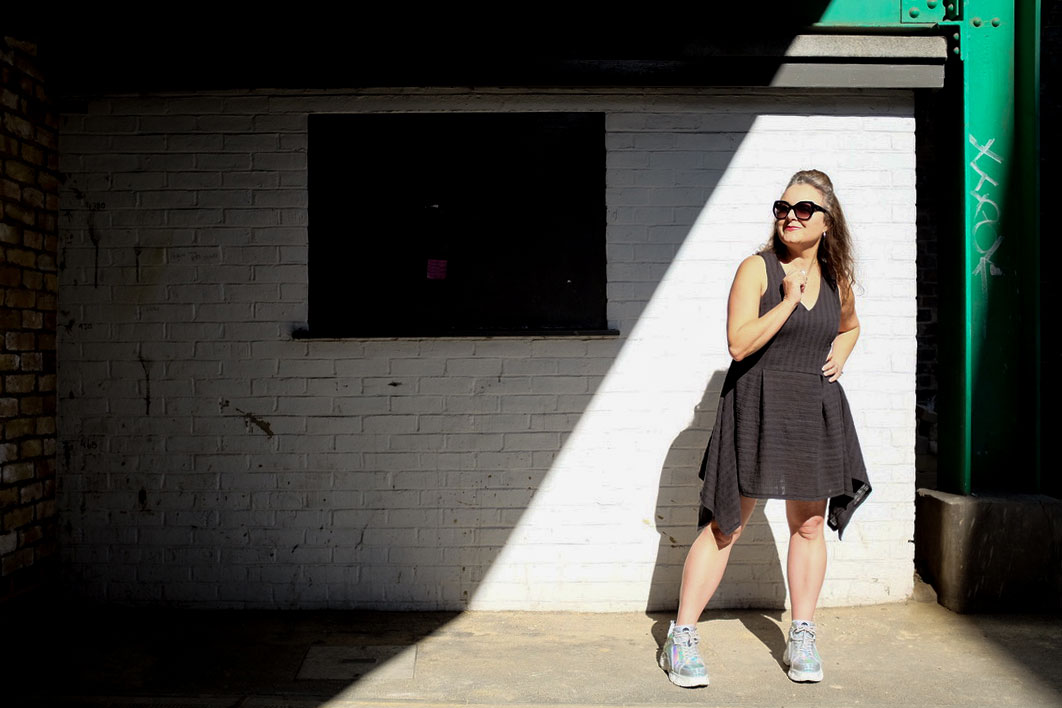
ooobop hankerchief hem dress

I know it’s not the most groundbreaking dress. But I made it to my own order and an image in my head and it really feels good. The fabric feels good against my skin in this heat and I love how carefree it is.

I finished up sewing it yesterday morning in good time for Dan to have a practice with his new camera. (Clever, hey?!) And I’m delighted with the results. Thank you oh clever talented husband of mine!

ooobop hankerchief hem dress

Also…new shoes!!  Buffalo hologram numbers that literally turn rainbow in the sunshine. And yes I know I’m probably channelling 90s Spice Girl. And no… I’m not about to grow up anytime fast!

Knickers big and knickers small

It’s been a while since I made knickers – I made some Burda pin up pants here and here. But this week I had a go at some other varieties from this book: The Secrets of Sewing Lingerie by Katherine Sheers and Laura Standford.

The Secrets of Sewing LIngerie

One of my lovely work colleagues was given this book, but as a knitter rather than a sewer, she thought it would be better placed in my hands and who was I to argue?! It pays to let the whole world know that you are a crazy sewing blogging lady: beautiful sewing things seem to gravitate towards you from all angles! And what a beautiful book this truly is. The photography is gorgeously inspirational and leaves you wanting to make everything in it.

So I started from the beginning, intending to work to the end. And I still might. I just need to overcome a few hurdles.

The first pattern is for a pair of cotton minis, entitled Pretty as a Picnic and they truly are. The fabric suggestion is cotton lawn and I could just imagine how lovely they would be to wear. It’s not my usual style. I’m more partial to a pair of stretchy big pants but ‘pretty’ won me over. I also have a fair bit of printed cotton in my stash and it struck me as a good project to use it up.

cotton minis

I painstakingly followed every instruction which incidentally was very clear and I even basted where suggested, like a good girl – I’m not usually that fastidious! But I had to abandon mission before completion when it became apparent how small they were! Far too mini for me. I think the photo in the book is a shot at an angle which makes them look wider at the sides than they actually are.

So I adjusted the pattern: I added an inch to the depth and a bit extra across the width too. (Gawd knows why I just didn’t trace a size up!) And so I made another pair. Seemed to do the trick but lets just say I’ve worn better. The recovery of the elastic is a bit slack (my bad, probs) and where the fabric is cut on grain there is just no give, so they do feel and look a bit strange. I may give them a third go, cut on the bias and see what happens. I WILL have a pair of pretty minis!

But rather than have a go straight away. I got lured by the cotton French knickers. After all. What could go wrong with those? And even if anything did, I could wear them to bed where no one would see. They are described as natural bed-fellows in any case.

cotton knickers

But why don’t I learn? These are cut on grain too. And I didn’t even pay heed to the need to size up either. I’m seriously such a bozo sometimes!

They look dreadful on me. They are simply too small but yet the waistband extends at least an inch above my natural waistline despite being sold as a ‘softly-fitted style sitting between the natural waist and the hips’. I checked that I’d traced the pattern correctly and I had, so I think that may be an issue with the pattern itself.

That said, I loved the implementation of some of the techniques used. There are French seams throughout. No rtw-style serged seams going on here and the centre front and centre back are pressed in opposite directions so there’s no bulk at the crotch.

knickers french seam

The top edge of the waistband is top-stitched at the fold and at the base of the elastic casing with gives such a neat and professional finish. Exact measurements are given for the casing and the size of the elastic which seems to prevent the elastic from twisting too. Little things certainly please my little mind!

knickers waistband

The coquettish vent is a lovely touch too. There seemed to be a notch missing off the pattern so I just allowed 3 inches which worked just fine.

knickers side vent

But if only they fit!! I’m convinced that these also would be made far better by being cut on the bias and then I realised that there was a version of bias cut silk satin French knickers further on in the book, doh! They use different pattern pieces with shaping at the centre front and back and appear to be much wider in size. I’m confused by this. Why would the bias cut ones need to be bigger? Surely the on-grain version would need to be bigger to account for lack of stretch. Am I missing something?

Anyhoos. I’ll report back once I’ve had a mo to try them out. Because I really really want these to work.

I’ve had a scout round to see if anyone else has had experience in sewing undies from this book but mostly the reviews are of the book itself and not any real findings. So please let me know if you’ve made any and what the outcome was. I’m really keen to know how these patterns have worked for for you.

Oh, and don’t forget to enter the Classic Tailoring Techniques for Menswear book Giveaway if you haven’t done already. Good luck all!


Burda Brigitte Blouse

First I must apologise for those who have had issues trying to comment on my blog over the last week or so. I won’t bore you with the tecchie issues but suffice to say all is now good at Ooobop HQ! (touch wood!) Thanks for bearing with.

It feels so good to be able to write a post. I knew how much this blog meant to me but didn’t realise quite how much. I found out quick enough when I thought I’d lost nearly 2.5 years of work! I’ve been such a bloomin’ grumpy pants all week, Mr O will tell you for nothing!

I feel like I should be making a bit more of a dramatic re-entrance, but I’m afraid we’ll just have to make do with a humble gingham peasant blouse.

burda gingham boatneck blouse

It’s a very nice gingham peasant blouse though. Care of Burda’s June 2011 edition Mag. It’s also available for download here where it’s featured in a sheer fabric.

I’ve made three sleeveless ones before but this one has long sleeves and no elastic. And it presented a fine oopportunity to create some bias gingham binding around the neckline and cuffs which is always lovely!

burda gingham peasant blouseThe fabric was sold to me as Egyptian cotton, which I had no reason to dispute. It is smooth and cool to the touch and feels like fine quality. But the pyromaniac in me is compelled to do a burn test, always. And the little black crumbly ash that resulted, confirmed the fibres as a poly blend, doh! Win some lose some. Should’ve sniffed a rat at £5.99 really!

But not a worry as it still feels nice against my skin and it’s not snug on the pits so remains a good choice for a warm summer’s day or an office with failed air-con.

The instructions suggested a gathered hem into another bias band but I was nervous about too much poof around my middle and given that I almost always tuck in my tops I just did a standard hem. But, note to self, I didn’t increase the length enough to compensate, and with one wave across the street, it comes untucked, whether I’ve tucked it in my pants or not!

burda gingham peasant blouse

It’s very quick to make if you can even up your gathers quickly. I faffed a bit too much with my gathers as usual, but it still got completed in an evening.

I love the raglan sleeves and the boatneck. So easy to wear. Great with a pencil and equally a circle skirt. And the plan is to make some capri pants one day, just like Burda’s styling, to come somewhere close to that retro Brigitte look.

burda gingham peasant blouse

Peasant blouse: Burda pattern, handmade by ooobop
Skirt: self-drafted & handmade by ooobop
Belt: H&M
Shoes: Rocket Originals
Photography: © Daniel James Photographic


Flora in Mitsi Valeria Red

By Hand London Flora dress

How often do you revisit a messed up project to rectify the issues? I can hand on heart say I never have! But in the case of this dress it was wholly necessary and entirely worthwhile.

This is my new By Hand Flora dress and my love for her is as strong as for the other one I posted in March. But this one is the original – the one I pattern tested, and the one I screwed up so much I was embarrassed to send photos of to the girls. I must emphasise that I only had myself to blame. Making wholly unnecessary changes when the pattern clearly needed none!

BHL Flora dress

But I had to put things right because I can’t tell you how gorgeous this fabric is. I couldn’t bear for it to go to waste. It is a beautiful lawn from Ray Stitch, called Mitsi Valeria Red. Thankfully I had just enough left to recreate the bodice. I don’t know what took me so long because it comes together so easily.

Flora dress back view

When the fabric arrived, I had to admit that I had doubts about it being weighty enough to give the skirt section the structure it deserves – The polka dot one is quite a heavy synthetic fabric that juts out in all the right places – but I love how this one elegantly drapes, creating a very different look. Plus it feels so silky and special.

Flora dress bodice

Lucky it wasn’t too windy today. It’s so lightweight that the tiniest gust turns this beauty from demure to downright rude in seconds. I gave an elderly chap near heart failure the last time I went out in it. He didn’t know where to look!

Because of it’s delicate nature it didn’t feel right to create bulky serged seams so I pinked them and boy were those open seams satisfying to press. So crisp and neat and because of the ditsy pattern you cannot see the seam joins at all. A bit like the back section of the blue vintage dress I pieced.

Flora dress back view

This was also a particularly useful discovery as I had to cut the front skirt in two pieces owing to the narrow width of the fabric. It’s quite usual for special quality fabrics to come in narrower widths but ideally the front skirt of this Flora skirt should be cut in one piece from a 60″ wide fabric to avoid a centre seam.

And it kind of goes without saying that the By Hand Flora dress is indeed one of the most twirliest dresses around! It’s gotta be done!

twirling in Flora Dress

Photography by Daniel James Photographic 


Camping it up in a Burda Maxi

Burdastyle Maxi DressThis is the Burdastyle Maxi dress from May 2014 issue and it literally took an evening to trace and make, plus a morning to finish seams and hem.

I love the gathered front loop detail created by some clever drafting and a drawstring. The straps are a lovely and incredibly practical feature too. Each strap is folded in half and the fold is attached in position to the front bodice. This creates a double strap which separates over the shoulder where the visual is 4 spaghetti straps at the back. No irritating slips off the shoulder. No embarassing wardrobe malfunctions!

And I have to mention the fabric. I went in asking for linen lawn. I knew it was a bit of an ask and I’d anticipated the screwed-up-face response that I got in each and every shop. I even predicted the suggestion of cotton lawn instead. No, no, no. Burdastyle definitely stated linen lawn. Kind of a contradiction of terms really, so I’m wondering if its a translation thing. Anyone know?

So with no linen lawn and an urgency to make this dress before I went away, I asked if they had anything soft and drapey. No not polyester. Eewww sweaty! Though to be fair it was very soft and drapey. No not cotton. It’s not nearly drapey enough. Too crispy and neat. Apart from the lawn, possibly. But oh the creasing. I was tempted by tangerine muslin. Really tempted. But I’d have to have lined it for modesty purposes and I really couldn’t be arsed. I was about to give up when the viscose was presented as an option. Only in black or white but also only £4.99, with all the softness and drapeyness I could ask for. Bargain! Done!

And what a joy to work with. I took my time to cut it out because it did move around a bit on the table. especially when I was cutting on the bias. It has got a little natural stretch to it. But to be fair. It is drapey, black and relatively casual so no glaring errors are going to cause a stir here.

I made it a couple of weeks ago when I last went camping so this was it’s second trip out into the wilds of West Sussex!

So there I was, minding my own business, floating around the campfire in my new maxi dress, relishing the soft swishes of viscose around my ankles with stars in the sky and Mr O at my feet. Doesn’t really get much better than this . . .

. . . then this happened . . .

Burda Maxi Dress photobombed

Right on cue!

It’s a small miracle I got the first picture sans bombing to be honest!

I was going to leave out the in-seam pockets to hurry the process. I never really got the excitement when other people go on about pockets. But I’m glad I did and boy do I understand now! Torch and lighter in one, cash and phone in the other. Look, no bag!

And who wants serious posy photos any hoos?!

Burdastyle Maxi dress photobombed

You get to see how the straps separate at the back in the picture above. Clever, no?

You can also get an idea of how the elastic at the waist cinches the bodice in to create a much more flattering silhouette than it would have done otherwise!

You must also be feeling my delight at the depth of my in-seam pockets!

The bombing barrage came from nowhere. Actually it came from all angles. Sabotaged good and proper by a gang of onesie-clad cheeky girls!

Photobombed by onesie girls

The absolute cheek of it!

photobombed by the girls

Hang on a minute. Remind me whose shoot this was?

There was only one thing for it . . .

Maxi dress bombs the children

Seriously ladies, this dress is great for camping. It’s great for slinking down the shops too. And methinks in a drapey sandwashed silk it would be super sexy and glamourous, no?!

If you don’t have May’s Burdastyle mag then here’s a link to where you can download a pdf pattern.

And for anyone who is keen to know more about the delights of viscose, here is a fine clarification of the making process and its properties.

Hope you all had fun sewing times this weekend. Or maybe you were out camping it up too?


Drawstring party bags

ethical drawstring party bag

This weekend my youngest daughter celebrated her 10th birthday with a stand-up paddle boarding session down at Brentford Lock. And oh my did they have fun! The weather was perfect… 25 degrees C for all ye of little faith!

For those of you who haven’t heard of this newish craze, one stands on a board, much like a surf board, and paddles down the river!

paddle boarders on pontoon

They started on their knees and were up on their feet in seconds. Took to it like ducks to water, they did!

So what has this got to do with sewing, or the price of fish, I hear you ask. Well. Let me tell you. This week has been so stupidly busy. More stupidly busy than ever with Mr O working away in Monte Carlo; my work as manic as ever and children with stuff going on! So busy that I forgot to get the party bags. And I’d scare you silly if I described the look I got when I picked up LMO from netball last Friday and admitted that I hadn’t managed to get hold of any.

Don’t panic I said. I have a plan I said.
Which is? she growled.
We’ll make them I said… with a furrow of an eyebrow.
What? All 15 of them?
Why the devil not I said with amazing confidence given my state of pure exhaustion!

So after dinner was done and the plates cleared. Out came the machine and the pinking shears. And a little cottage industry was born. I measured, cut and sewed. LMO pinked and pressed and took charge of threading the cord.

2 hours later, 15 cute little drawstring party bags, fashioned from a second hand John Lewis duvet cover, with cool aeroplane print to boot, stood at ease for a photoshoot!


Instant gratification.

ethical party bags

Now it could be argued that this task was well over the call of duty. That costed out they would have commanded a stupid price. And that a cheap bunch of paper party bags would have totally saved me the bother (Had I remembered to get them). But what I got in exchange for this tiny sewing project was 2 hours of precious one-on-one time with my daughter. Not to mention a cool stash-bust. That cover has been in my fabric box for eons. Oh, and not forgetting the Brownie points for the ethical factor!

I loved teaching her and she loved learning how. We laughed and we sewed and we made ‘the best eco-friendly party bags ever’. That in itself is priceless!

Full party bags


And the winner of the mystery giveaway is . . . !

Before I deliver the news that you’ve all been so patiently waiting for, I must first thank you all so much for your wonderful comments. So many kind and inspirational words. Blushworthy to say the least. And big thank you’s also for the newbies who recently subscribed. A big lovely Oooboppie welcome to you all! 🙂

Ok. Get on with it. I hear you say. Well I guess you should know what was in that mystery black box . . .
giveaway prizeHere it is, in all it’s mysteriousness! The contents of which include:

Burda Magazine, May 2014 issue
Handy service kit for sewing machines and overlockers
3m of novelty London print fabric
2m of polka dot turquoise fabric
3m of black lace
3 spools of Moon thread
3 different coloured pencil chalks

In order to get some fairness and squareness going on, I needed a trusty assistant. And I could think of noone better than Little Miss Ooobop herself. She just got a new haircut so is looking extra cute too!
A little shake of the entries . . .
shaking the entries

A little blindfolded stirring of the entries . . .

blindfolded and stirring the entries

A winner is picked . . .

A winner is picked

And the winner is . . .

and the winner is

Congratulations lovely Simona from Sewing adventures in the attick
The goodies are all yours!

close up winner
I’ll Email you shortly to retrieve a delivery address and will deliver it post-haste!

Self-drafted retro top

retro check top

A couple of months ago, I signed up for a local adult education course to learn how to draft a bodice. The need for a go-to-template is great now. My need to save hours in a day is bigger than ever and so the idea is, that if I have a master block, I won’t have to keep reinventing the wheel, each and every time by having to make alterations to a preprinted bodice pattern. I would also very much like to realise some of these gazillion designs floating around my head and create them for other people too.

The course was cheap. Just £85 for four Saturdays, 10-3. And the teacher was lovely. There were 5 other students at first class and 3 at the last. So we pretty much had one to one teaching for the last session. pattern-drafting tools

To begin, we were instructed to pick a set of body measurements from a table of standardised sizes, that matched closest to our own body measurements. My first furrowing of brow. The whole point of me wanting a custom fit is that I don’t fit standard. Even my shoulders dropped an inch with that first instruction! As is usual for me I just kept shtum. But someone else in the class just couldn’t, and with gusto unabashed, questioned the task out loud! Hoorah for the confident ones!

The teacher assured us it was easier and quicker to go from a standard set of measurements whereby most of the calculations were done already and then make alterations to fit, afterwards.

And so I did as was asked. But the confident one did not! She used her own measurements and although, indeed I finished drafting first, she had a better fitting first toile. Funny, that!

But, with fear of the wind changing, I relaxed my jealous scowl and approached the teacher with questions on how to fit this bodice… that really didn’t fit at all!

She drew on me with red pen. The neckline needed to be made deeper. The side seams taken in; the bust point needed to be moved; the fullness taken out of the bust; the back bodice needed shortening; and the shoulders were too long. Mmmmm…..!

first bodice muslin

OK. Not a problem. In fact quite a few extra lessons in alterations were absorbed in the process so I didn’t feel too robbed.

I made the above adustments and sewed another toile. A better fit but it still needed changes. A third toile and although I knew it still wasn’t perfect. I was determined to draft my actual top and make it before the end of the course. I thought it would be useful to have the teacher hold my way throughout the process. And it was.

I ended up with a completely wearable top. She helped me to draft the collar and showed me how to create the facings. I based the design on a pattern I already owned. Did I just state a distain for reinventing wheels?! There is a method in my madness. I want to be able to create things that I see in pictures, everywhere, armed with a knowledge base of skills to custom fit, rather than have to have a standardised pattern that doesn’t ever fit. And of course this top is a great vintage design and I love it!

self-drafted retro-style top

But there are issues. The underbust is too big and it doesn’t feel perfect enough. In fact it’s true to say that it’s too big all over.

back view of top


The material was a cheap soft cotton with quite a loose weave so that probably didn’t help my fitting issues either. But it is comfy!

I added the zipper at the side, in true vintage stylee and owing to the bias cut funnel-like collar that rolls over the back. I also added a shaped extension to the waistline so that I can tuck it in without bulgy lumps round my middle. I usually wear it tucked in with a wide belt but I wanted to show it in full for the post. I’m quite happy with it hanging out too!

retro check top full length

self-drafted top side view

I made another one up last night, with some alterations. I took a little out of the side seam allowance and made the waist darts more concave at the point. There wasn’t much improvement to be honest. In effect I made the best of a bad job and went to bed in a huff!

I am irritated that with all of the alterations that were made in order that this bodice fits, the pattern pieces are really irregularly shaped now. And owing to the massive darts that were removed horizontally from the back pieces (to reduce the excess fabric), I won’t ever be able to pattern match across the back 🙁

There is no way I am going to be beat though. With renewed vigour, I got up early this morning to draft another from scratch. I used my real body measurements along with some armhole standards, and low and behold it was a pretty close match. I just have to make a couple of small amendments. The armhole gapes at the front and there is a bit too much excess over the bust and so I have cut and closed a dart at the armhole on the pattern, to reduce the gape. The mid-armhole at the back gapes a little too, and I have smoothed the excess up to the shoulder, and remarked the shoulder seam to both front and back pieces.

And best of all, with this new draft I get to have a perfectly straight back seam so I can have a continued pattern across the back if I so please, yay!

Wow! this really is a learning curve.

Hope to share some more new Ooobop designs soon. Ones that actually fit! So come back soon and in the meantime, don’t forget to enter the Giveaway if you haven’t done already. Only 3 days to go!

TTFN x

PS. All credit to Mr O, of course, for the lovely photos and a lovely day out with the children on the Southbank


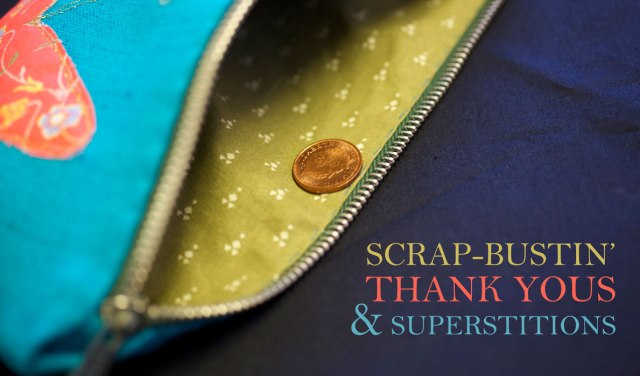
Scrap-bustin’ thank yous and superstitions

scrap busting thank yous and superstitions

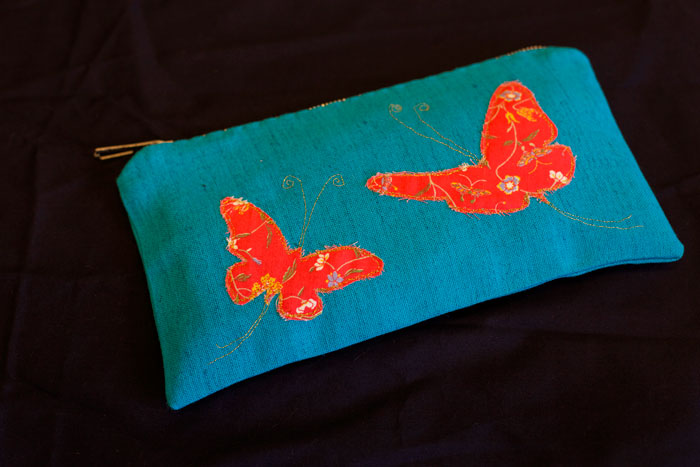
Quality scrap-bustin’ that is! The word scrap doesn’t and shouldn’t be associated with a gorgeous piece of turquoise silk and some beautiful vintage cottons. But scrap-bustin’ it is until I think of something else!

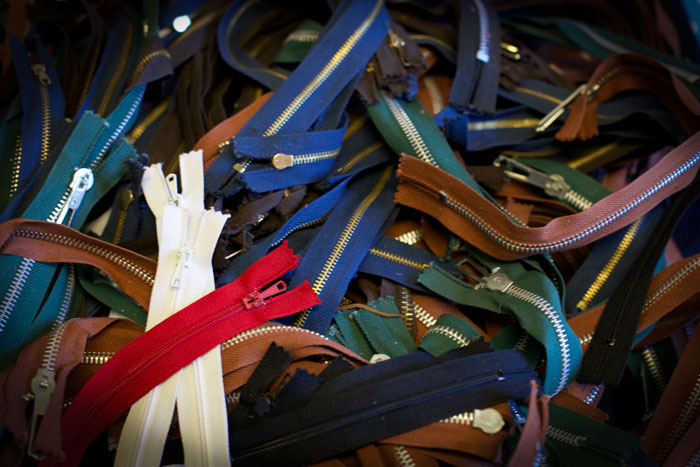
This little zipper pouch was inspired by a combination of prompts. I often frighten myself with all the intended ‘must-have-a-go-ofs’ that lurk in the back of my brain. The first to come to the fore, was a spot of free-motion embroidery. I spotted some lovely work by @thebobbinbird on twitter and that certainly set the ball in motion. I also needed a way of saying ‘thank you’ to my colleague’s mum who kindly donated a sack load of zips to me! (I’m not kidding about the sack. I’m still bringing them home a handful at a time because they weigh a tonne!) And I have been itching, for so long, to incorporate these tiny pieces of beautiful fabric, into a worthwhile project.

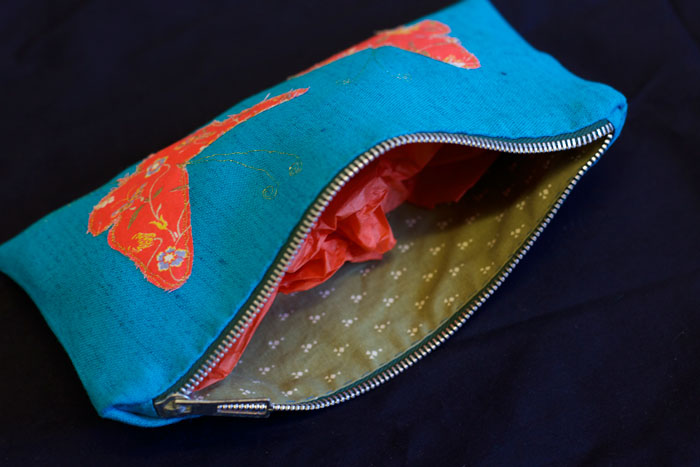
butterfly pouch

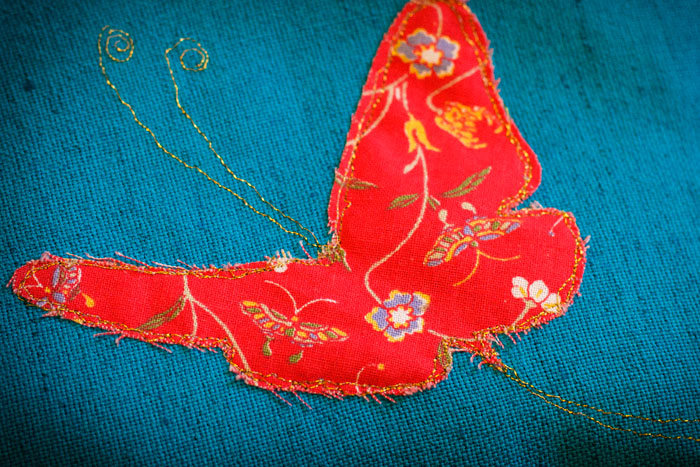
Now this is of course free-motion embroidery in the loosest sense! I pinned the tangerine-print butterfly pieces to the silk, lowered the feed-dog and using Sulky metallic thread and an embroidery foot, I ‘walked’ the stitches, free style, around the butterfly wings and to draw the curly antennae. I really loved the process, as I thought I would, and I’d love to be more adventurous next time. Perhaps even incorporate the technique on a garment or two!

butterfly applique detailI love the free nature of it all. The wonky lines and the fraying edges and the grain of the fabric. Quite a relief from some of the more precise methods usually employed in dressmaking. And oh how those colours pop!

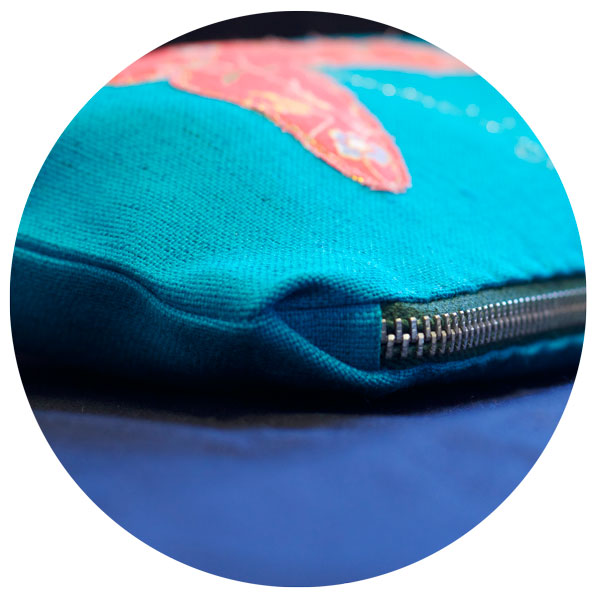
I had to use one of the millions of zips, of course! Would have been daft not to! And I covered the ends of the zip to act as stoppers and also because I had cut the length of the zip to fit.

covered ends of zip

The lining is a gorgeous vintage printed quilting cotton. Again part of another generous donation to me from a lovely friend and neighbour. I made small hand stitches around the opening edge to make sure it didn’t get caught in those rather hefty teeth!

pouch liningAnd the superstition bit? Well I’m not entirely sure how Mrs J will use this pouch. She may well use it as a purse so to be on the safe side I’m including a shiny penny to ensure good luck and prosperity. It is bad luck to give an empty one. Does anyone else do this or is it just me… and my mum who made me believe this?!

I think you may be seeing a lot of zippered projects to come. But if you have seen or employed any innovative uses recently I’d be very interested to hear about them!

zips

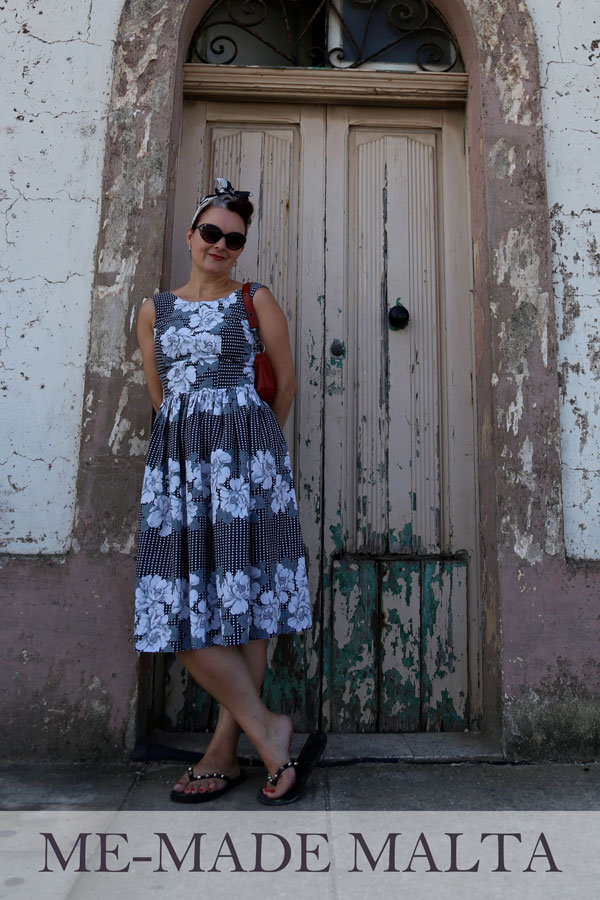
Me-made Malta

Me made in Malta
The Dress That Nearly Wasn’t, dress!

We only just came back last week but wow!… our trip to Malta seems a lifetime in the past.

First time any of us had ever visited the island. Or at least spent any quality time there. And the first time ever we have all been abroad, together as a family! So it was a very precious week indeed.

We stayed in the north, in Mellieha in a beautiful villa with a private pool. It was hot hot hot, even on the day of the storm. Such a fierce one in fact that my eldest daughter’s flight had to make an emergency landing in Sicily, poor love! But all was ok in the end and we certainly made up for lost time when she eventually touched down!

I’m not going to harp on what larks were had or how divine the country is; it’s fascinating history or how peaceful and it was and how immensely friendly the Maltese are… I am simply using this post to express how delighted I was at having some functional me-mades in my suitcase.

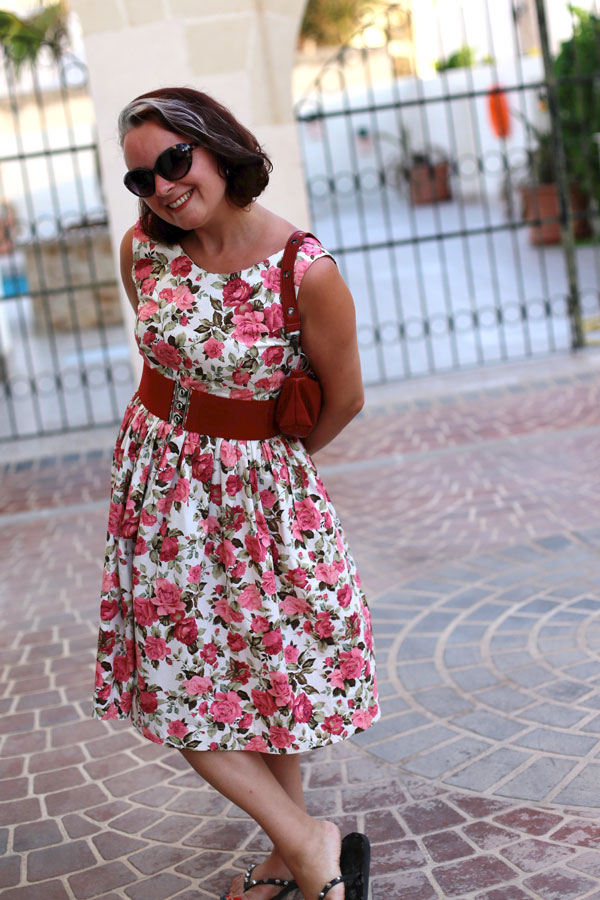
It will probably come as no surprise that the top one, and the two following below are all based on the Elisalex dress by By Hand London!

Love of lawn dress
For the Love of Lawn dress. And a rare picture of me and my lovely, care of smallest dort!
vintage rose Elisalex dress
Vintage Roseprint Elisalex Dress
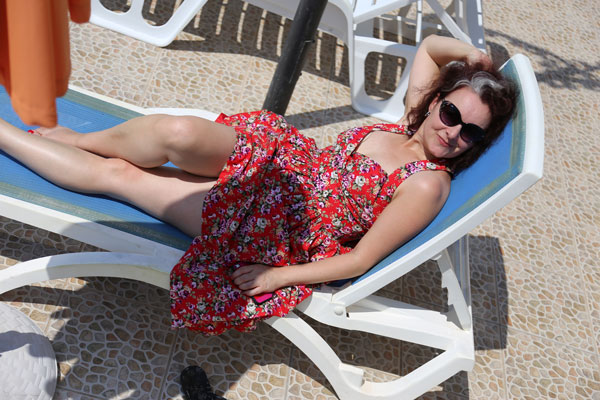
First Summer dress
First Summer dress: Simplicity 2442
70s Dress in Blue, McCalls 2399
70s Dress in Blue, McCalls 2399: A rare picture with my teen son, Alfie

The ubiquitous scabby doorways are so fabulous for showcasing outfits! I wish I could find just one street load of these in London. Ones that wouldn’t have a grumpy resident chasing you off their doorsteps would be a bonus too!

Asides from the usual swimming, sun-worshipping, reading, eating and drinking (sometimes we just changed the order), I did actually manage to get a little sewing in too.

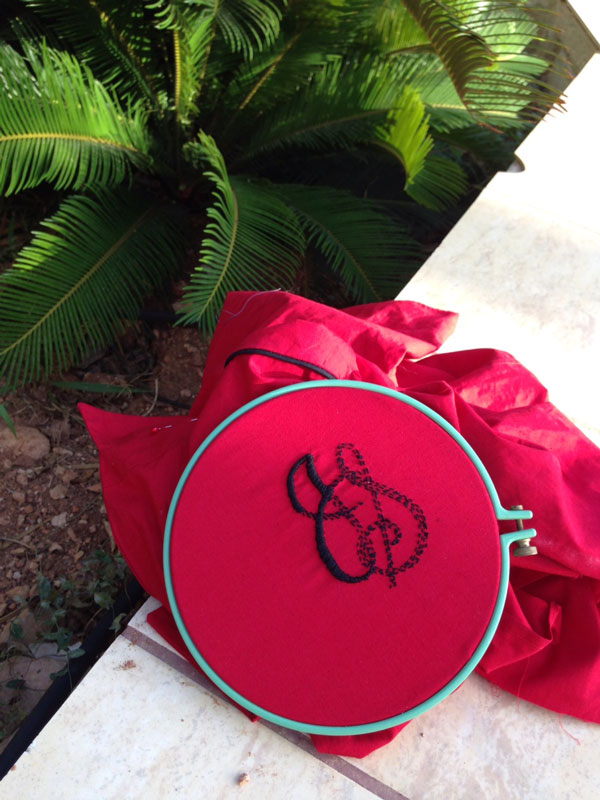
A lickle bit of hand embroidery on a shirt that shall be revealed in all its entirety at a later date:

embroidered initials
Hand embroidered initials

I’m bracing myself for normality next week: kids back to school (yay!) and me back to work (boo!) And I’m getting excited about Autumnal projects. This chilly weather can do all it likes to try and dampen my spirits but it will not triumph over the joy of sewing new things that will keep me warm!!

Happy sewing, peeps! x