Self drafted Turtleneck knit top

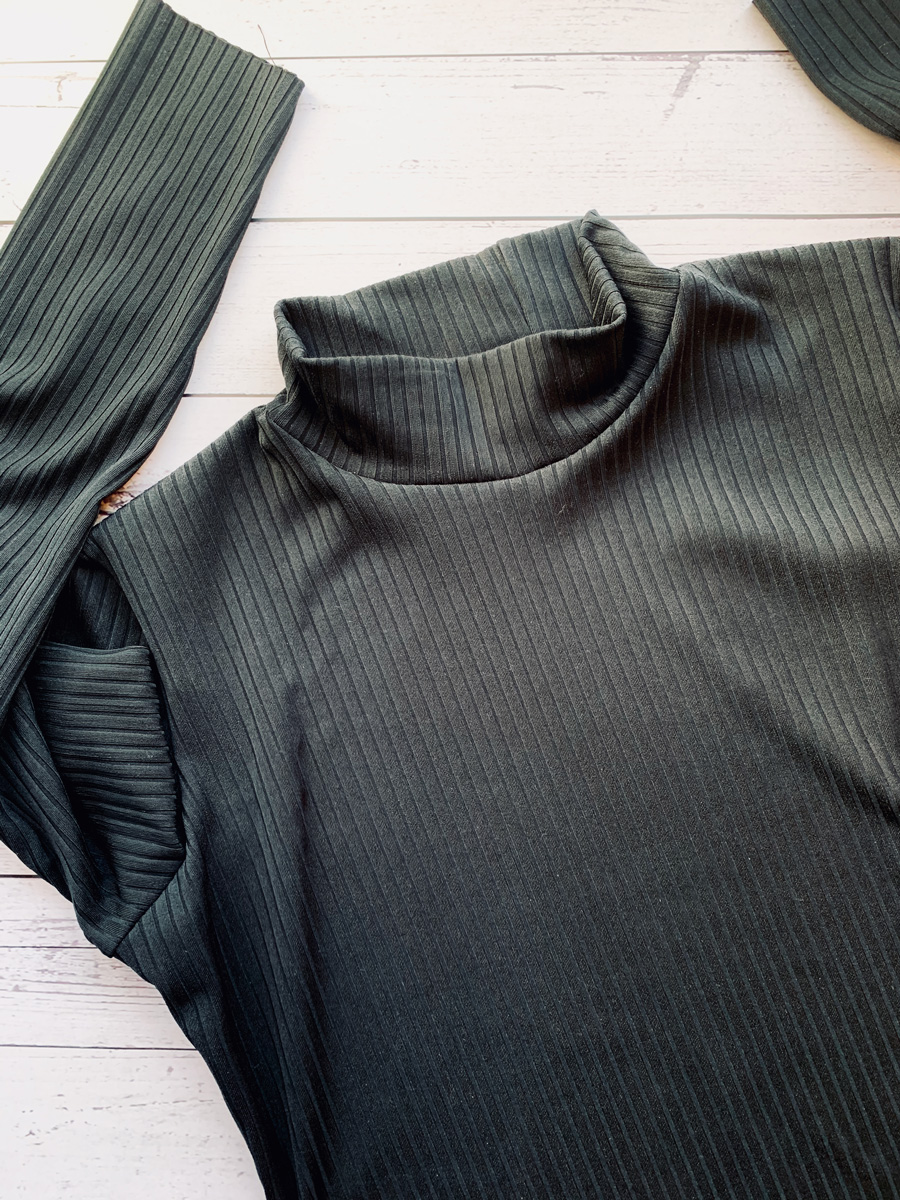
black rib knit top worn with plaid shorts

The last thing I made was this turtleneck rib knit top. Most probably up there with some of the most boring things I’ve made, but actually a top that ticks a lot of boxes.

I self drafted it for one and learned something new in the process. I’ve self drafted a fair few patterns for woven fabric to date, like this Liberty Lawn summer dress, a few shift dresses like this batik one, and more recently my handkerchief hem dress  to name a few. But I’ve never thought to self draft a knit pattern. Why would I? Its akin to reinventing the wheel as there’s so many great basic knit patterns out there. But I do love a challenge. And also have another agenda in the shape of some very special stretch fabric that is still waiting to be made into a well fitting dress so if I master a moulage in knit then I’ll be one step closer to designing a knit dress, right?

Black ribbed knit top flatlay

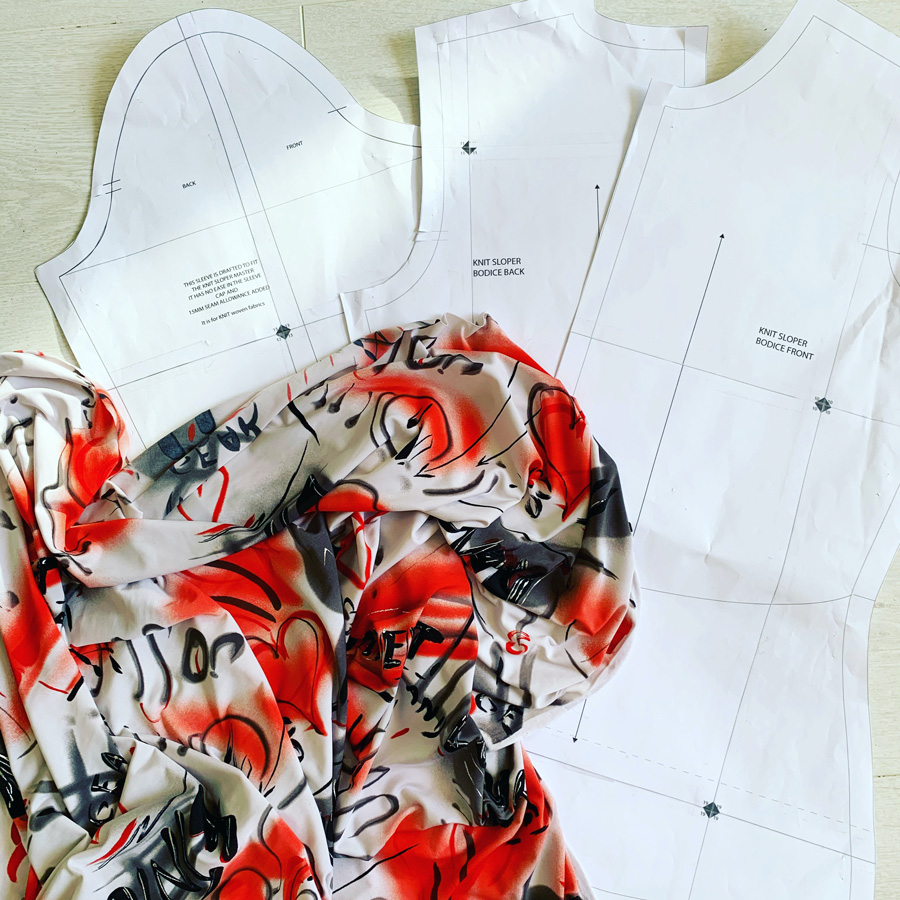
The process was actually very simple. In a nutshell removing the darts and any ease to create a close fitting shell that stretches around the curves of the body. I used my self-drafted woven moulage as a starting point and made the adjustments from there. I found a great lesson on Craftsy, by Suzy Furer and also referred to my favourite sewing book: Patternmaking for Fashion Design by Joseph Armstrong.

knit sloper pattern pieces

I tested it first on some nasty nylon fabric. To be fair I don’t know what the fibre content is but I’m certain there’s not an ounce of natural anything in it! Looks kinda cool with its graffiti design though. But I messed up royally on the turtle neck itself. Such a stoopid mistake. I made it 10% smaller than the neck opening which was fine. Sewed it in a circle to check it would go over my head which was fine too. Then stretched it as I sewed in place, much as I would sew a binding on a scooped neckline. Realising I had excess (as a result of over stretching) I cut off about an inch and a half, maybe even 2 inches more to make it fit. And that was where I went so wrong. I can just about get it over my head but its akin to being slowly strangled if I’m wearing it for more than half an hour!

toile of knit top in a synthetic graffiti print fabric

Everything else was just fine, though. Just made a massive note to self to not mess with the collar piece!

I especially loved that it was all sewn on the overlocker save for the hemming, so was super quick to whip up. One very important thing gleaned from sewing knit tops before is to stabilise the shoulder seam to stop it stretching out. I used some Prym iron on stay tape (aff. link) for the first time and it was so easy to apply in a straight line. Its been subject to a few 40 degree washes since and it’s still totally intact. Definitely no going back to sew-in tape now.

So then I made the black one with ribbed knit I bought in the Minerva sale for a snip! And I love it. Its so versatile – goes with all my skirts and shorts and also is a great under-layer for some of my self-drafted dresses, on a chillier days. Topped with a cardi for an extra layer its a definite win win win!

It’s just so classic, with a nod to retro too and has already had soooo much wear that it will probably wind up being the most sustainable item of clothing in my wardrobe for that reason alone.

I’d love a couple more of these. A leopard print one for sure and perhaps a red one … predictable much! But first I have to make something a bit more exciting. And I’ll tell you all about that real soon.

In the meantime, here’s to boring practical clothes that go with absolutely everything and for a quick sew fix too!

Are you sewing much over lock down? I’m struggling to get as much sew time due to work pressures – everything is taking so much longer so I feel like I’ve lost so many hours in my day. But all things considered, it could certainly be much worse!

Wishing you all well in any case.

Janene x

Almost naked in a McCall’s M7542 Lace top!

M7542 lace top

It won’t surprise you to know that this wasn’t an intended ‘next one on the list’. In fact, to be fair there is no ooobop project list that remains unedited for more than a minute. I even announced a break from self-sewing in my previous post. I am indeed an experienced saboteur of my own plans.

But in this instance I am totally blaming Sam, editor at Sew Now magazine for the delightful interruption of production. She kindly sent me a copy of issue 11, thinking the free pattern, McCall’s M7542 would be ‘very me’. She was very spot on. And I was instantly drawn to view B


The pattern itself is very simple, non-fitted – save a couple of side bust darts, and even though those view B sleeves look dramatically difficult, they are nothing less than a kind of dropped hem circle skirt that falls from the elbow instead of the waist!

So a quick scan of the instructions reaffirmed my plans for not toiling! I just picked the closest size to me and cut the tissue pieces straight out. I didn’t even trace them first. That felt a bit rebellious to be honest. I always trace things off. ‘Just in case’. You know. Or maybe you don’t!

M7542 handmade lace top

All the same, I wasn’t going to go all guns out on some fancy expensive fabric, mind… just in case. So a little trip to Dave the Drapers in Shepherds Bush Market, found me some cheap lace in case it didn’t quite go to plan. And yes that lace is cheap. £1.25m cheap! And. Plus. A gazzillion volts of static electricity told me so!

M7542 handmade lace top

But… hand cream saved the day! I kid you not, just rubbed some in my hands – which are always dry as some bones – and ran the fabric through newly moisturised hands. Just to see. And guess what? Not one single, tiny crackle!

M7542 lace top detail

Now as you can see, the fabric has a fair bit of show-through so my main concern was keeping those seams neat – not so much that my bra would show. Priorities, right?! French-seaming was the way forward and with narrow zigzag stitch to account for a bit of stretch in the lace. I had to concentrate and take time over this as the prospect of unpicking was terrifying and probably impossible tbh. All the little stitches properly embedded and camou’d in the lace. But worth the effort. I just love how the joins are visible.

M7542 lace top and short skirt

The only thing I changed up was substituting the neck facing for a satin bias edging. The binding also edges the opening at the back and I sewed a single large popper at the back for the closure. I had originally considered a rouleau button loop but that seemed like a lot of effort for such little exposure – I wear my hair down most of the time so it’s covered up anyway.

The lace trim just finishes it off nicely. I had no fraying issues, but I didn’t like the harsh edge once cut. The mad thing was that the trim cost nearly twice as much as the fabric, ha!

M7542 lace top

When I first showed Dan this top, on the hanger, his response was Cool! Very Stevie Nicks! But when I put it on, he said Mmmm… too much skin! I agreed and bought a black cami top the next day to up the modesty factor. But then there was a disappointingly lack of detail. So back to the bra and off to Horseguards parade at 6am on Friday morning to shoot it.

M7542 lace top side view

I wore a jacket for the tube journey but still felt, full pelt, the commuter looks of: someone didn’t go home last night! 60 derniers and my handmade quilted skirt ensured decent coverage to my lower half at least.

The walk from Westminster station to St. James’ Park and Horseguards Parade at that time of the morning was just lovely. The morning light was so glorious and the buildings were lit beautifully all around us. So worth getting up at the crack of sparrows!

M7542 lace top and sunglasses

It’s quite incredible that the on same spot where I was being photographed, jousting was once a thing for Henry VIIIs entertainment! There was a fancy guard at the entrance of the arch – one of the Queen’s Lifeguards – but we spared him of early morning hassle, sure that he would need a little break before onslaught of tourist attention.

There were hardly any people around, save the guard, a few (heavily armed) policemen and a few boldly striding city workers. So thankfully no gawpers as I stood, near-naked in the morning light. We took some more alongside the pillared Mall Galleries and a wolf-whistling cyclist signalled it was time to put the jacket back on!

M7542 lace top in Mall

I’ll happily wear it like this to dimly lit gigs and parties but I will have to rethink an undergarment for any day time wear. Maybe it’s a red cami or a boob tube or suchlike. Suggestions very welcome!

I’ve also just managed to enter this in time for #Sleevefest2017, hosted on Instagram by Valentine and Stitch and dream.cut.sew .The challenge runs from now until August 31st 2017 so you’ve still got time to submit your creative sleeve designs. And here’s a link (affiliate) in case you get the same calling for McCalls Ladies Easy Sewing Pattern 7542 Tops with Sleeve Variations.

Happy sewing, everyone! x

M7542 lace top back view


Burda cap-sleeve top and a bit of a whinge-up!

burda style cap sleeve top

Once in a while a sewing project is sent to try us. This particular little smart-arse of a sewing project first lured me from the glossy pages of Burda Style around this time 3 years ago. It presented a cool, stylish-looking basic that could rock any skirt, shorts or pair of strides. Edgy with its contrasting shiny sleeve caps, close-fitting for sleekness of style and a raised neckline for a fierce, designer don’t mess with me touch. I should have got that message first time round really!

My self-imposed rule not to impart cash for cheaply made RTW clothes has been obeyed for a good few years now. And I’d say it’s largely been very easy and fun and rewarding. But to summon up the motivation to make what is fundamentally a basic black staple is much harder than making a pretty dress. That’s way more fun.

I cannot even begin to recount the hours spent on this tiny little top. It was definitely a test of patience. Largely because I didn’t do a muslin so no surprises really.

I decided to stick to the suggested fabric which was crepe satin – luckily there was little needed because this fabric didn’t come cheap either. Read on if you can really bear to listen to my gripes!

burda style 2012 cap sleeve top

First gripe: crepe satin. I will think twice before sewing those stupid shiny sides together in a hurry. They move! But having said that, lucky the shiny sides were inside because they also catch on just about anything that is vaguely rough. Like hands, unfiled nails, pins etc etc. It also frays. And so every seam, every edge had to be overlocked. Do not even attempt this top, in this fabric if you don’t have sufficient means to finish every single edge. And OMG, static alert! I tried this top on at least 10 times to check fit and shape of sleeve etc and the electricity ran at least 240v from root to tip of hair. This firmly remains one of it’s unforgiving factors!

The bust darts are way too low for me. I know, I know, I didn’t toile!

There are two zips involved in this top, or else you’d never get it on. One from the neck edge down the top of the left sleeve. And another under the left arm and down to the hem. Fine in principle, definitely not fine if you want two matching shaped sleeves! I bought a couple of quality invisible zippers from Dalston Mill. I remember thinking at the time that I should perhaps invest in more quality notions. I usually get them from Shepherds Bush market for a snip of the price. But it wasn’t such a good call ater all. Sadly the teeth were metal and so the zips less flexible coupled with the instructions to end the zipper a couple of inches from the hem, I ended up with one sleeve fit for a Gary Glitter tribute and another as a deflated floppy thing. Zipper aside, at that point I realised the sleeves were far too roomy in any case. They seemed to fit snugly on the model which is confusing given my substantial arm girth. So I removed said sleeve zipper and shaved a bit off each of the top sleeve seams to ‘smallen’ the sleeve cap.

Removing the zipper was a mare. Black on black, mostly with a crap lightbulb overhead and from hostile fabric that was just goading me to be snagged.

I put a new cheapo lightweight zipper in but made it run from top to bottom this time. Better but still not brilliant. Plus it took 2 goes to insert. Don’t ask! In hindsight I should have sewed another just to the seam allowance on the wrong side of the opposite sleeve to match the shape better. I may still do this.

The sleeve hems are hand sewn. Catching 1 of those damned threads at a time so it doesn’t make a mess of the right side. And the underarm seams are finished with a self made bias strip, hand sewn to the inside also. Slowly, slowly, catchy monkey!

So then there was the neck facing. Could well have been me but I’m totally blaming those Burda-style translations. I have such a problem with visualising even the simplest written instructions. Give me pictures every time. So after the umpteenth read, I gave up trying to understand and went ahead governed by my own hunches! They were rubbish hunches and I ended up sewing the bottom bit of the facing to the shoulder/top sleeve seam. What is wrong with me? I was all twisted and distorted and I was convinced the facing was the wrong shape!

A right proper meltdown ensued. Foot on the pedal-bin pedal, lid raised, dangled over the sprout peelings and prosecco foils, the whole thing was about to meet its demise!

Saved by a flash of possibility. I spared the wretched thing and spread it inside out on the ironing board to instantly see the issue: The lower end of the facing was meant to be sewn around the armhole… of course!!

cap sleeve top back view

More unpicking. More hand sewing. It worked. Kind of. But even though I’d used a stretch interfacing (My own recommendation, not Burda’s) it doesn’t behave the same as the outer and there is still an element of ‘pull’.

Although the sleeves are too big, the body is a touch too small. I clearly overestimated the stretch in this fabric and underestimated the difference in a petite sizing, which this pattern was. I might possibly get away with it in a dark room with a jacket on!


The hours involved to create something that is at best a black top, have completely taken me by surprise. I seriously could have whipped up a whole dress in as much time!

If I did it again, I’d go up a size and definitely redraft the sleeves.

I’m glad I didn’t give in though and I’m glad I found a way to solve the main issues. I hate being defeated at anything. I don’t often work with fine fabrics and clearly this is something I need more practice in next year. But for now I’m rifling though some good old fashioned vintage dress patterns where suiting and furnishing fabrics are my favourite friends. Onwards and upwards!

Happy New Years Eve, my wonderful readers. Wishing you all a healthy, productive and successful 2016.
With lots of love thrown in for good measure

Janene xxx