Vintage Blackmore 8194 dress

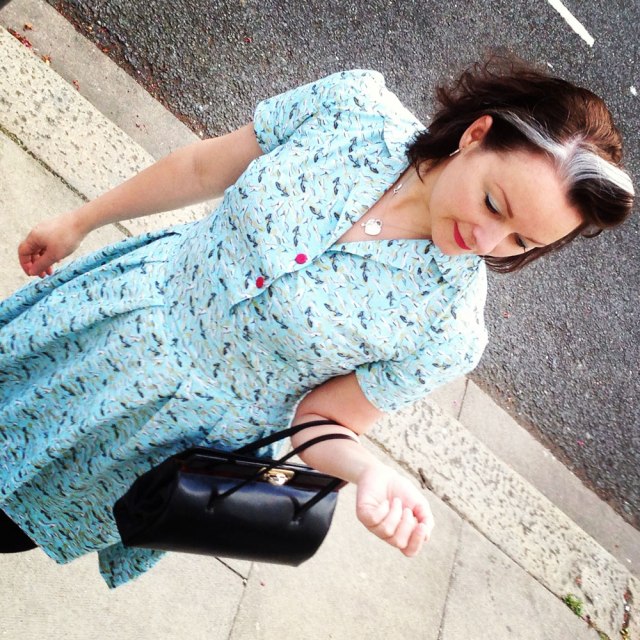
Blackmore 8194 vintage dress

I needed a dress for a wedding. Not just any old wedding but a beautiful Indian wedding where I couldn’t hope to compete with the finery of silks and saris. No pressure, then! I rifled through every kind of fabric and bored all the Goldhawk Road shop owners senseless with my dilemma, during the weeks leading up to the big day.

Blackmore 40s dress

I diligently visited a roll of paisley brocade in A-One Fabrics, three days on the trot, properly umming and arrring out loud. But it wasn’t quite right. I ordered some gorgeous cotton satin roseprint from Minerva thinking … actually who knows what I was thinking. It was all wrong until I spied a roll of drapey green fabric at the back of the shop. 100% polyester it transpires. My inner snob rose to the fore but I bashed it back down when I handled the weight and the smooth silky texture and noted the lack of crease when I screwed it into a ball. And oh the colour! Not to mention the price tag of £4.00 a metre. I wasn’t arguing at all!

I already had this pattern in mind: Blackmore 8194. It’s not dated but I’m guessing late 40s. Vintage Patterns Wikia has it down as 1950s but also claims that Blackmore published paper patterns between 1845 and 1940, so that doesn’t add up!

Blackmore 8194 sewing pattern

I was sold on the waist and hip detail, the softly gathered side fronts that fall from the hip and that cheeky little key hole detail with the bow tie feature.

Blackmore 8194 dress keyhole detail

Incidentally the bow tie itself is some vintage liberty homemade bias binding that I inherited.

I made a quick bodice toile in the original size, half knowing it was too small, but wanting to test the pattern without sleeves. Inevitably I changed my mind and graded the pattern up a size. Redrawing the pattern allowed me to add the seam allowance on too. Something this pattern didn’t allow for which also shows it’s age a bit, I think.

Blackmore 8194 vintage dress

I’m quite used to vintage patterns without markings or seam allowances but one thing that struck me as a bit odd with this one, was an instruction to “Make darts in the back bodice where shown by dotted lines in diagram”. Quite literally the diagram which is the tiny pattern layout illustration on the back of the packet. So it’s anyone’s guess, really!

Inserting the gathered panels into that front skirt panel was a bit tricky but quilting skills have taught me how to clip and pivot at a point, so it wasn’t too terrifying. Again, the instructions are loose: “Gather upper edge of side fronts to fit hip yoke of front as in sketch and stitch together matching VV to VV.” Simples, lol!

Blackmore 8194 inserted panels

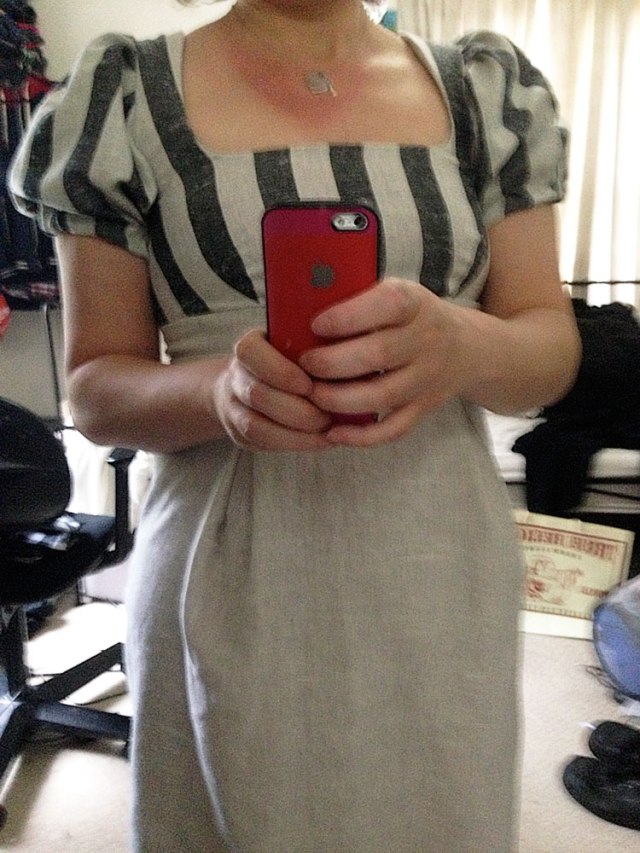
I’m pretty pleased with the outcome. And it worked well for a wedding where colour was the order of the day. But there are niggles: I forgot to add seam allowance to the sleeves which actually doesn’t appear to make much difference but I did sew them on back to front! How much difference that makes will show in the next version which I’d like to make soon while it’s all fresh in my head; The waistline could do with a bit of ease. I like how it’s nipped in but it’s not that comfortable! And although the fabric is nice and drapey, I’d like to try it in a lawn or a lightweight cotton so that the neckline and the darts press sharper. I also neglected to do my usual adjustment to take out the excess fabric from the back bodice. I cheated instead by removing the zip and trimming the centre back seam… not very well!

Blackmore 8194 vintage dress back view

Considering I pretty much sewed this up the day before and was hemming on the morning of the wedding, I think it turned out pretty well. The niggles can so easily be sorted next time round. And to get change from a tenner is such the ‘Brucey bonus’ that I feel it prudent to reward myself with some lovely lawn!

I don’t have any of the official pictures from the day to share as yet but I’m sure you can imagine how stunning all the ladies looked, as did the men in their exquisite flocked and braided coats. I can’t begin to tell you how gorgeous my friend the bride looked. But I did shed actual tears – in a good way – when she walked into the room. Such an honour to have been invited to such a special day. And I’m so glad I went to the bother of making a dress, especially.

Blackmore 1940s dress

Photos by the wonderful Daniel Selway
Location: St Pauls, London
Shoes: Lola Ramona
Handbag: vintage from local Fara Charity Shop

The Big Vintage Sewalong

BVS blogger tour

Have you heard about the Big Vintage Sewalong hosted by Butterick, yet?

It was launched just last week as a fun way to raise some awareness and some funds for a worthwhile cause – The Eve Appeal Charity: to date, the only cancer research charity focussed on improving detection, risk prediciton and prevention of all five gynaecological cancers.

From March to October this year, sewists from across the UK will be encouraged to sew one of the featured vintage dressmaking patterns, ranging from the 1930’s to the 1960’s. Money raised from the sale of each pattern will go to the The Eve Appeal Charity. The selection is amazing, but then I’m hugely biased – I’m a sucker for a vintage pattern! You can browse and purchase yours by clicking on the images below or from the official website: www.vintagesewalong.co.uk

And there will be plenty of opportunity to share your finished garments and follow others using hashtag #bvsewalong and copying in @McCallpatternUK on Twitter or @McCallpatternUK on Instagram.

1930s

1930s dress 1930s skirt 1930s blouse 1930s dress

1940s

1940s dress and jacket 1940s dress 1940s dress

1950s

1950s dress 1950s dress 1950s dress 1950s dress
1950s coat 1950s dress 1950s dress

1960s

1960s dress 1960s dress 1960s 1960s dress and jacket

To support the campaign there’ll be vintage workshops, events in store, a vintage tea party, a special supplement in Love Sewing Magazine and a blogger tour. That’s where I come in – scheduled for June 24th, to reveal my chosen vintage garment from the selection above. Can’t let the cat out of the bag just yet but I can reveal that it will come hand in hand with a giveaway of the self same pattern so be sure to keep tuned for details, because it’s a goodie!!

And here’s the schedule for the blog tour:

11/03/16   Katie at What Katie Sews
25/03/16   Portia at Makery
08/04/16   Kate at The Fold Line
15/04/16   Amy at Almond Rock
29/04/16   Elisalex at By Hand London
13/05/16   Jane at Handmade Jane
27/05/16   Jennifer at The Gingerthread Girl
10/06/16   Lisa at the You Tube Sew Over It
24/06/16   Janene at ooobop
08/07/16   Marie at A Stitching Odyssey
15/07/16   Kerry at Kestrel Makes
22/07/16   Fiona at Diary of a Chainstitcher
29/07/16   Karen at Did You Make That?
05/08/16   Laura at Sew for Victory
12/08/16   Nina at ThumbleNina
19/08/16   Charlotte at English Girl at Home
26/08/16   Gabby at Living on a Shoestring
02/09/16   Rachel at House of Pinheiro
09/09/16   Elena at Randomly Happy
16/09/16   Wendy at Butterick
23/09/16   Winnie at Scruffy Badger Time
30/09/16   Rachel at The Fold Line

The Foldline have posted about it here and to keep up to date with all things Big Vintage Sewalong be sure to visit the official website at: www.vintagesewalong.co.uk

Let me know what ones tickle your fancy and if you have an inkling what my chosen pattern might be!


Handmade Secret Santa pressies

gold bag on the railingsWhen I saw this bag in December’s Burda Style magazine, I just knew it was the one I’d been storing in my head for over a year! I’d seen a very similar 1940s Vogue pattern floating around on the web, time and again but never for sale, at least not with a reasonable sale ticket!

vogue bag hat pattern v9837
Source: http://vintagepatterns.wikia.com/wiki/Vogue_9837

I’d almost resigned to self-draft my own but couldn’t quite get my head around the order of sewing. Didn’t really try hard enough tbh! But Burda saved the day yet again with another simple well-drafted design.

burda pouch bag
Source: Burda Style magazine December 2014

And so when I found out I was to make a Secret Santa pressie for the adorable vintage-wearing Emmie Ink Fairy, it was a given!

The instructions suggested leather, which I did originally go looking for. And believe it or not there is such a great colour choice as well in the Goldhawk Rd! But even after a good rummage, I couldn’t find a gold piece big enough to fit the pieces. I thought two pieces of gold lamb was a bit excessive and then gave up on leather altogether when I couldn’t remember if Emmie was a veggie/vegan. That might have gone down like a lead flipper!

As always it was A1 Fabrics that presented me with a better fabric solution: some lovely soft, gold ‘pleather’. Perfect!
It was an education to work with. A leather needle made light work but boy did we have a fight to press the stuff! Didn’t really think that through properly.

Gold pouch bag

Pleather is plastic, fundamentally, and will melt if it comes into direct contact with a hot iron. I’m not that daft. I did use some parchment paper as a pressing cloth. But it just boinged back the minute I stopped pressing. The heat was being retained and making it too pliable. So I grabbed the nearest ‘clapper’ I could find, in the shape of a heavy book, to slap down on the fabric once I lifted the iron off. It did the job in cooling down the fabric quicker and so holding the press a bit better. Not nearly as well as a woven fabric would have pressed but better than a poke in the eye for sure!

gold pouch bag

Burda’s instructions stopped at a facing but I wanted neater than that, so I made a lining to attach to the bottom of the facing, and of course included an ooobop label! Not such a secret now but I liked it as a finishing touch!

inside gold pouch bag

I stupidly didn’t get a picture of Emmie with it adorning her wrist but it didn’t look out of place with her beautiful pink sparkly dress.

We were at a lovely Christmassy do hosted by the BHL girls. So honoured to be part of the evening with so many wonderfully familiar faces.

We dined and beered at a local-to-me Polish restaurant called Patio. I seriously don’t know how those girls catered so brilliantly for over 30 of us with so many different menu choices. They were amazing.

And look what some gorgeous and not-so-secret Santa made for me!

quilted cup and saucer

I seriously couldn’t believe that someone could have made this quilted cup and saucer but when I realised it was the uber talented Rachel Pinheiro, it all made blinding sense!!

What’s not to love about the colours, the french men in their Breton tops, the moustaches and the candy stripes? Perfect to keep all my sewing notions from rolling around the table while I’m sewing and also for sticking pins and needles in as I go.

Earlier in the day I had been to a work Christmas lunch. Yes I know, 2 Christmas do’s in one day. And I was still standing! One of my secret-santa friends bought me this gorgeous sewing pattern. She is so bloody clever and so thoughtful! I can totally see myself in this dress already!

Vogue V2410 vintage dress pattern

I consider myself truly spoilt. Not just with do’s and gifts but with the plethora of amazing friends that bring me so much joy and make me laugh so much. That’s got to be the best part of any time of the year.

Have you made any gifts this year or is it all just too much?


1939 Vintage Simplicity Dress

vintage 1939 dress

It’s been a while since I sewed a proper vintage dress and when I spied 5 gorgeous yards of pretty blue and white print fabric in a charity shop for a fiver, it was a sure sign to unwrap one of my favourite patterns. I bought the fabric thinking that if I screwed up, a fiver was worth the risk. But actually I loved the fabric so much I used some other polycotton, from stash mountain, to rehearse a toile for the bodice first.

Very few alterations were needed. I did a slight FBA to add a bit of shape and added an extra inch to the waistline. I think it fair to say that I manage to pack away a few more calories than those svelte 30s women!

simplicity 3302 pattern pieces

The pattern is a vintage original from 1939: Simplicity 3302. And the condition of the pieces was impeccable. Factory folded and clean. Such an honour to be working with such precious pieces that are 75 years old!

The most surprising thing about this dress is that it takes 5 yards of fabric. At 35 inches wide that is. But it really doesn’t look that extravagant. I’m used to 50s style dresses taking up miles of fabric but the skirt section of this one isn’t even a full circle!

vintage dress simplicity 3302

I kept to the instructions, like the good GTS I am, and I created a neck facing instead of lining. I also decided against overlocking the seams. It somehow seemed wrong! The fabric behaved beautifully and frayed very little so I opted for a spot of pinking! Feels far more authentic and it pressed beautifully flat.

I’m not totally sure what the fabric content is. But on doing a burn test, I was left with a very silky white dust. So the consensus is that it is 100% natural fibre and top notch quality I reckon! It has quite a good drape going on and doesn’t crease too much either which makes me wonder if it is cotton or not. I made a decision not to line it. Mostly because of the gorgeously warm weather we’ve been experiencing but also because it always seems a bit mad to line a natural fabric with a synthetic lining. And I wasn’t about to splash out on silk!

sitting pretty in vintage dress

Having said that. I did use a silk organza for the sleeve stiffeners. You didn’t think those puffs stick out like that, unaided did you?! Quite a clever little trick that involves a circular piece of fabric like tafetta or flannel or organza, folded in half and sewn to the sleeve head before the gathering is done.

silk organza sleeve stiffener

vintage_1939_dress_sleeve_headIt looks a bit comical until you press the seam onto the sleeve and not onto the bodice which I did at first. Didn’t get a shot of that but the look on Dan’s face was priceless!

There is also an inverted pleat that is topstitched at the hem of the sleeve. So neat.

pleat on sleeve

I’d like to say it all went swimmingly but I made quite a big boo boo when I inadvertently cut the back as two pieces and not on the fold. Very easily done when patterns of that era are unprinted, but, regardless, I needed a quick solution as it would have come up too small once I’d seamed it and also, I didn’t have a large enough leftover piece to cut another back piece. Quite a big issue when you get your hands on a unique piece of fabric from a charity shop. It’s not like you can go back and bag another metre!

So… This is a bit bodgie… I made an inch wide length of bias tape from a 2 inch strip that I’d rescued from the selvedge, using my trusty Simplicity Bias Tape Maker Machine. And with half inch seam allowance I sewed it on each centre seam of the back. That effectively joined the back pieces together where they would have sat had there had been a fold!

Luckily the seams are disguised by the busy print so I think I got away with it!

back of vintage 1939 dress

I know my hair do isn’t strictly 1930s and the shoes are far from authentic but it needed a little bit of vintage styling to pull it off. Especially as youngest dort decided it was ‘lovely but very 80s!!’

vintage simplicity 3302 dress

I love the sweetheart neckline. So discreet and so pretty. It doesn’t have any added interfacing so I’m surprised it holds so well. I did clip into those curves good and proper though!

vintage sweetheart necklineI wrestled a bit with the zip. I knew I didn’t want an invisible zip. That seemed a bit wrong too so I opted for a lapped style zip insert. But could I get my head around it… No I bloomin’ couldn’t! I can do it with my eyes closed in the back of a pencil skirt but for some reason I just couldn’t pull it off. So I went for a straightforward zip insertion whereby I basted the seam shut, centred the zip and sewed to seam allowance. I did however prick stitch close to the teeth on the right side.

side zipper

I reluctantly wore my new dress a to a party on Sunday. I didn’t know any of the guests and was a bit worried I’d stick out like a sore thumb (in my 80s dress…. thanks dort!). But my assumptions were way off. Such wonderful food and great music and the most amazing people. My ‘wallflower status’ was upheld!

candy from Black Dwarf Designs
With Candy from Black Dwarf Designs

Oh and hats off to my wonderful fella, Daniel Selway who took the photos and who now finally has a site to host his pictures. Right here, in fact!


My lovely secret Santa

It takes a special ornament, outside of the colour scheme of ‘no colour at all’ to earn a place on my tree. Yes I hands up to being a total control freak. Especially where my tree is concerned! They know the rules: No toilet roll decorations, no horrid coloured ornaments, and abolutely no tinsel! They respond by ceremoniously gaffa-taping Teddy Crap-Crap to the top of the tree. Teddy Crap-Crap is a rubbish, moth-eaten, hand-knitted teddy in all the rubbish colours of a wrong rainbow. He is as far removed from a fashionista fairy that you can get. They put him at the top where I can’t reach and for all my neighbours to see and point and laugh. I am mostly not amused!

But. Despite my rules of white and glass and glitter and feathers only, this year my Secret Santa gifted me the most thoughtful decoration ever.

secret santa pompom

On first inspection a lovingly hand made red pompom. On a closer second look, a lovely red pompom adorned with buttons and on asking all the right questions I get to find out that all the buttons have been lovingly hand-picked from Taylors, a 100 year old button shop in the heart of the West End of London. They are mostly vintage, 1940’s and 50s glass buttons with a couple of gilt filagree ones thrown in for good measure.

Secret Santa was amazed that I’d never heard of Taylors. I have to say, I actually, really don’t get out much. But now I know about them, They will be hearing from me, I can tell you!

If you can’t make it to the shop, you can order online, but if you just want some virtual shop therapy check out this slide show of photos from the shop. I don’t know how but it takes me there in a real floaty wannabe way!

Now I’d like to ask Secret Santa if she perhaps wove some catnip into this pompom, because Pants the cat is seriously in love with it too!

Pants the cat with pompomHe even did that funny face that boy cats (big cats included) do when they pick up on scent! What’s all that about?!

pants the cat picking up scent

Well, I have to say, its hugely unlikely that I will get a mo to post between now and the big day, so I would like to take this opportunity to wish you all the most wonderful of Christmas wishes and of course the biggest thanks for being part of my ever growing family of fellow sewers and supporters. I love you all xxxxx

Couture Inside Out

I’m fresh back from the ‘Couture Inside Out – 1950s Paris and London’ workshop at the London Fashion and Textile Museum.

Must blog straight away for fear of forgetting anything! After all I forgot notebook and pen in the first place!

First treat of the day was that I got to meet and enjoy this experience with Handmade Jane. It’s always so good to have like-minded people to raise your eyebrows at, make ‘ooo faces’ with, and give knowing looks to, during a lecture!

It was a very informal 2-hour affair with such amazing content divulged by the lovely Dennis. We donned our white cotton gloves and prepared to soak up all the info we could.

The first thing I learned (and remembered) was the definition of ‘haute couture’. (please spare me if I’ve got this wrong!) It is a term used to describe the highest level of hand-sewn, bespoke garments, in Paris by a delegated team of incredibly experienced seamstresses to strict regulations. Interestingly enough it was a term that was originally associated with the fine work of Charles Worth who was an Englishman.

Of course we have couture in the UK but with much more relaxed rules, apparently!

As the garments were presented, on a white covered table, the polite student audience jostled for position to get a better view and a feel and a photo.

First up was Dior. A gasp as the two Dior creations were revealed from under the tissue.

The fact that both were aged: faded, stained and torn, did not deter from the unanimous awe.

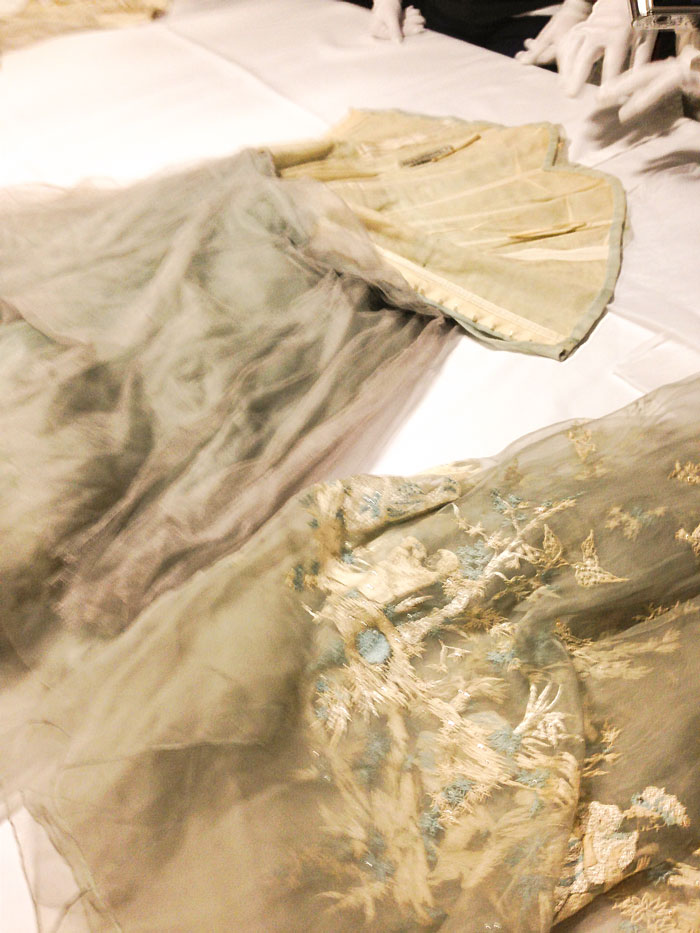
Both dresses were in two pieces which was intriguing. Nothing like a skirt and a top. So much clever scaffolding with fine underskirts attached to the bodices. No waist-stay required.

dior cream dress

Every little bit of both of these dresses were hand-stitched!! Including the tiny rolled hems on all the chiffon layers. Beggars belief!

Please excuse the fuzzy photos taken on a phone whilst being too polite to jostle too much!

dior embroidered dress

dior embroidered dress detail

Next up was a later Dior in a really heavy weight fabric. I will be looking at furnishing fabrics in a totally different light from now on. This was heavier than any curtaining I have ever felt.

It was laid out on the table, ready for inspection! A gorgeously shaped one-piece dress. Made for someone who clearly didn’t eat that much. The waist was super tiny. The seam allowances on the other hand were enormous. At least one and a half inches. All pressed open and hand finished. The fabric had a ridged, pin-tuck like texture. All the rows of which lined up perfectly on the side seams.

dior later dress

No lining, which was a surprise. Though the dress was underlined and interfaced.

dior dress inside

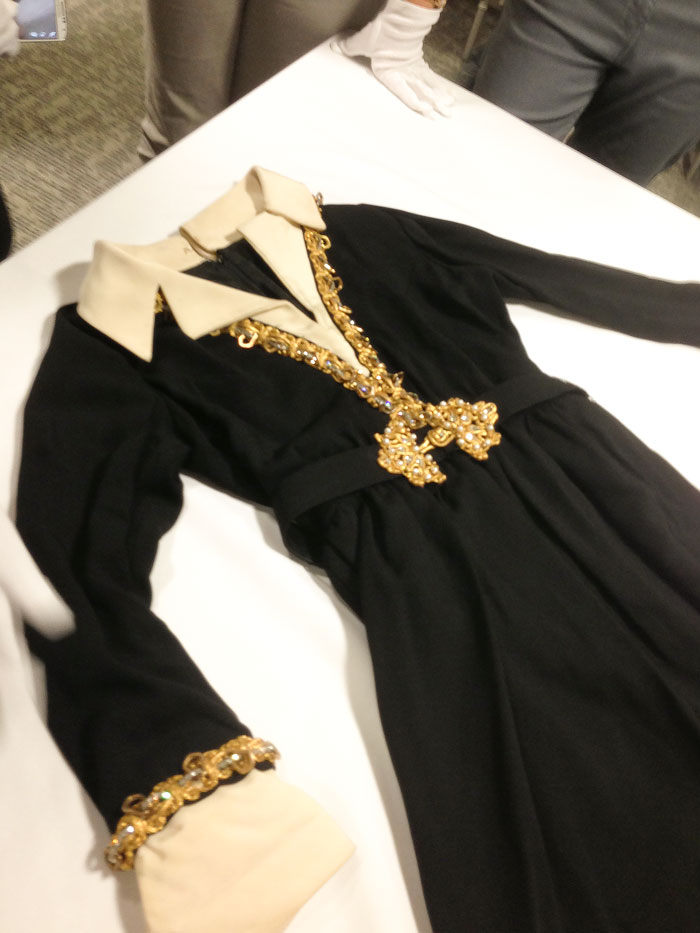
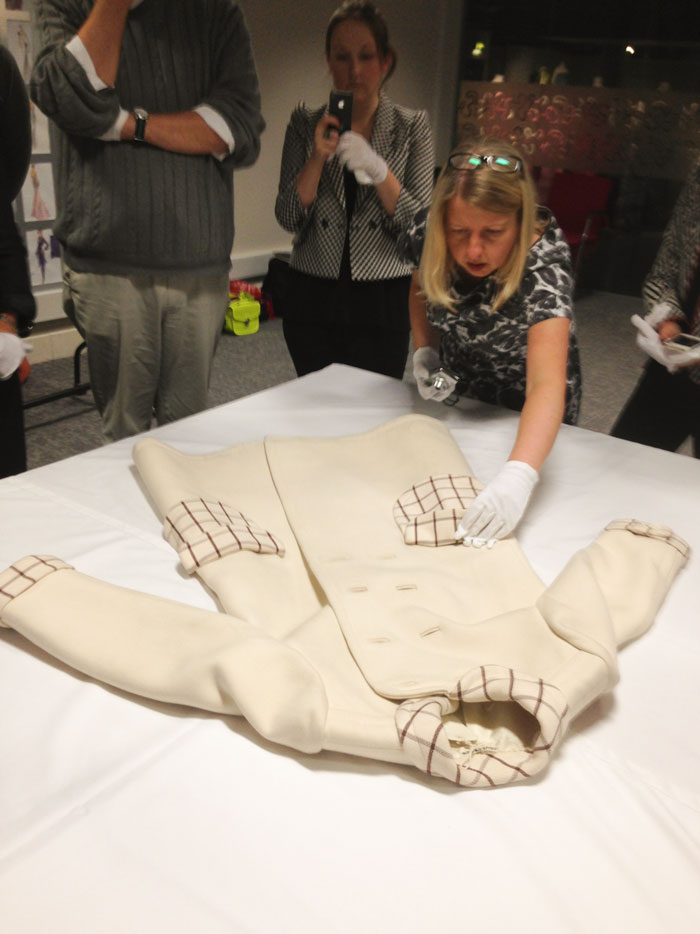
Chanel then graced the table with black contrast dress and two piece skirt suit. Both very classically Chanel.

Chanel black dress

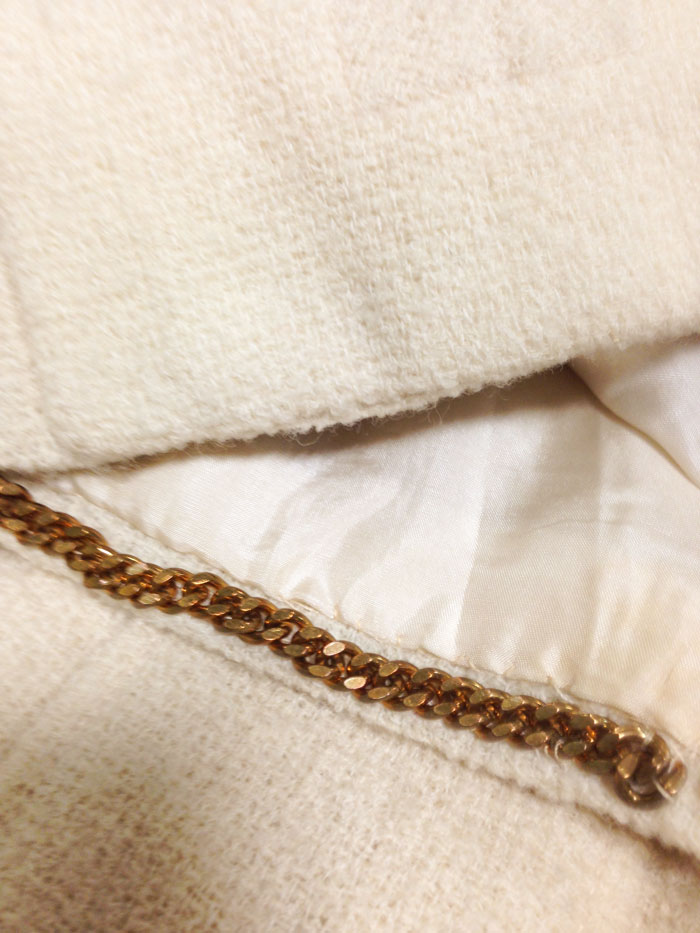
The bling was upfront and out loud on this one but only took shape as a collar detail and chain weight in the hem on the set below.

chanel skirt suit

Chanel only incorporated details if they worked and if they were functional. The little ‘petal’ pockets sit at the hemline, precisely centred with the seams. The chain weights are typically seen in Chanel hemlines. She was obsessed with the way that fabric hung and remained throughout wear and this little trick became one of her many signatures.

chanel_hem_weight

Far removed from the finer details of Chanel but not to be sniffed at, is the work of Balenciaga. This Spanish master draped most of his designs and employed much fewer seams than other designers.

This coat was A blooming Mazing. My rubbishy i-phone photos do not do it any justice whatsoever. Firstly the colour. Secondly the texture of this fabric… OMG. It was hand created to get this incredible effect. And yet the design remained oh so simple. I can’t tell you how much I want this coat!

balenciaga green coat

I didn’t care too much for Balenciaga’s Sarong Dress. But you gotta take your hat off to someone who incorporates so much into the under-scaffolding of something that fundamentally looks like a sarong!

balenciaga sarong

Now, will I get shot for not having heard of Courréges? Probably. As these designs were pretty iconic!

courreges blue dress

Jane got right in there! Impressed by those perfectly bound buttonholes.

courreges coat

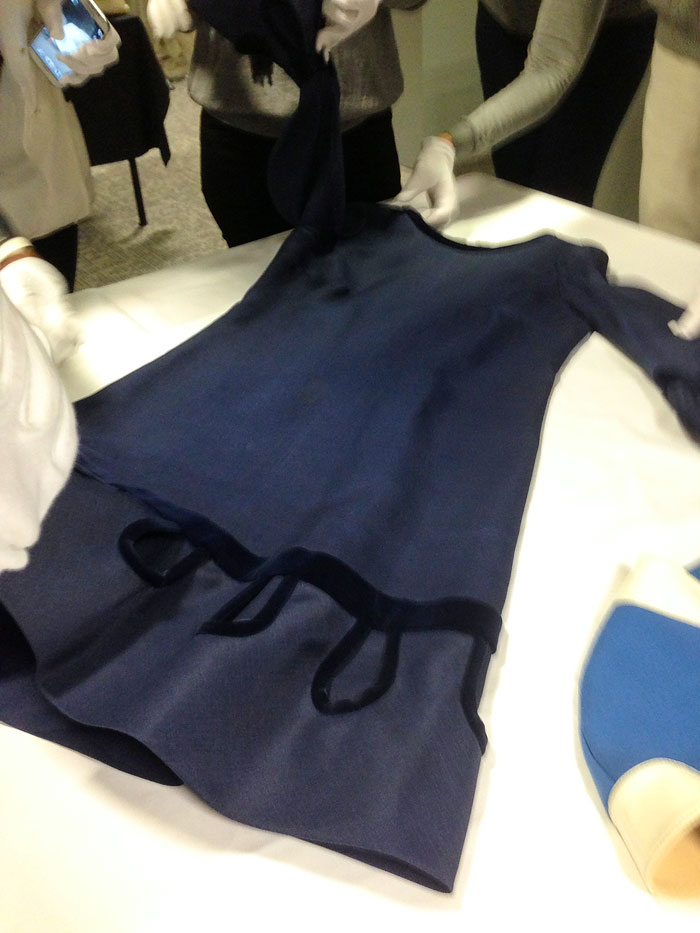
Dennis couldn’t be sure of the fabric that this Pierre Balman dress was made. It kind of felt like the sew in canvas that I recently used to interface my jacket! But it was gorgeous and necessary to keep that amazing shape. There were cutouts trimmed with velvet at the hemline and on the sleeves.

pierre balman dress

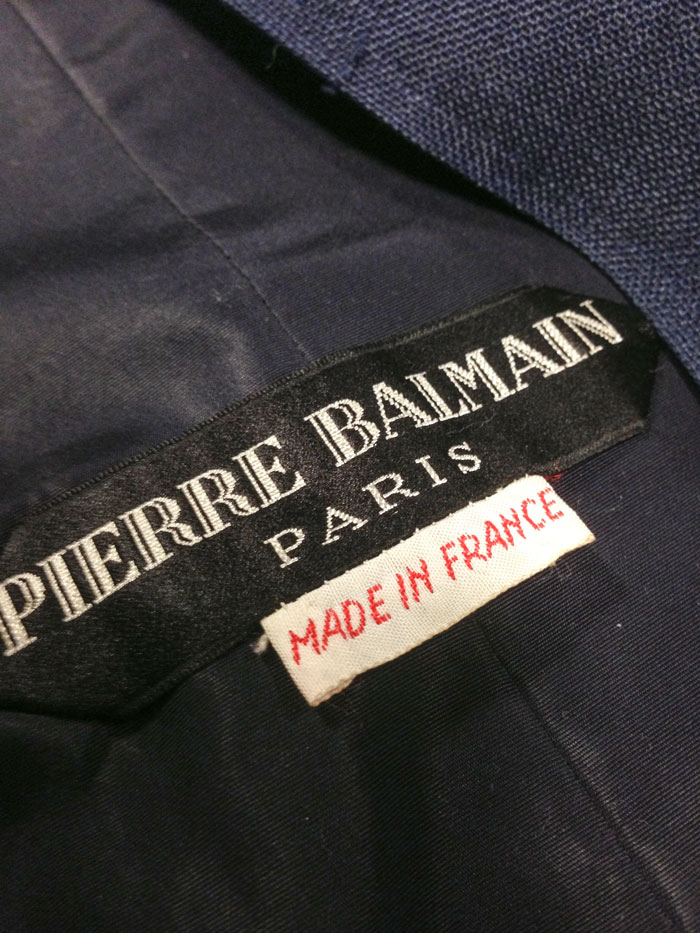
Of course it goes without saying that every detail counts. Balman even ensured that his labels were mitred.

Pierre Balman labels

The following is a really bad picture of the Ellie Saab dress that Halle Berry wore to the Oscars for Best Actress, The Monsters Ball. In stark contrast to the dresses that were 50/60 years older you can see no seam allowances, no underskirts and no hand stitches to speak of. It is undeniably a gorgeous dress and she looked amazing in it, but it is incredible how standards have changed over the years!

Ellie Saab dress

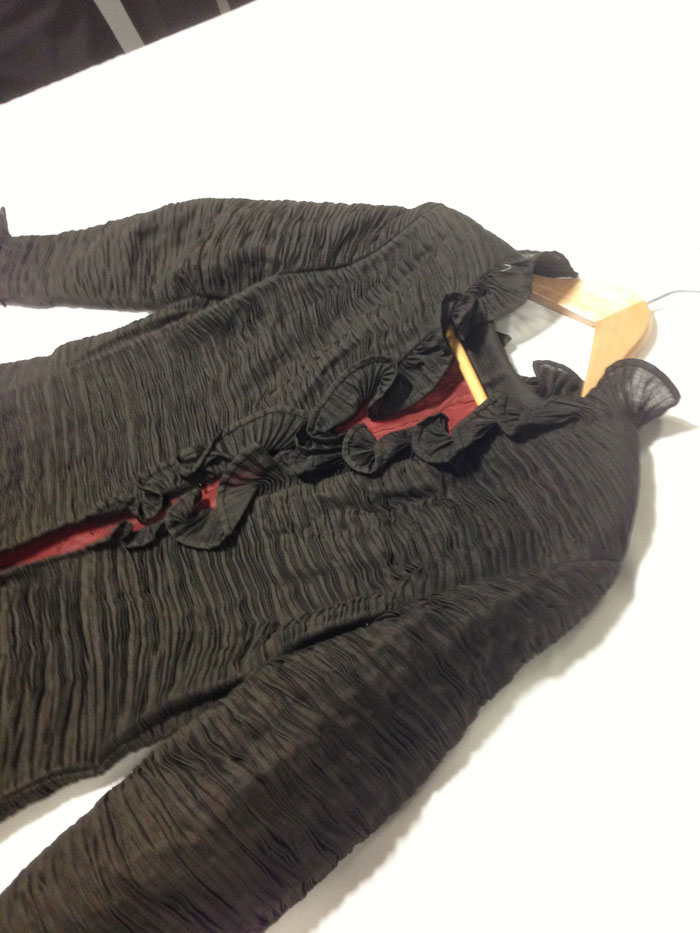
I cannot for the life of me remember who designed this dress but the fine pleating in the linen was unbelievable. An underlayer of shimmering copper gave a depth to the translucent linen and you could also see where the pleating was tacked.

(Thanks to the lovely Angela, I can now confirm it was Sybil Connolly!)

pleated linen dress

detail of pleat dress

Just when you thought you’d seen it all, something very little left me lost for words. If you look closely at all those painstakingly sewn on eyes, you will see that they are all oversewn with thread!

bound eyes

Now it would have been rude not to have mentioned Zandra Rhodes creations at this very museum. She is the founder, after all!

She entered the fashion world as a textile designer and the following two garments are testament to her designs. I’d never be able to carry these off in a million years but you have to admire her total originality in the way that she designed around the design of the fabric instead of sourcing suitable fabrics for a pre-determined design.

zandra Rhodes tunic

Here is her Knitted Circle dress. So called because the fabric design is made up of graphic knitting stitches. I swear there is more fabric in one of the sleeves than in the whole dress!
Zandra Rhodes circular knitted dress

knitted circle design

Both Jane and I left the workshop in a fuzzy reassured kinda way. It made us proud that we hand made our own clothes, albeit perhaps not to the same level of lavishness but there was nothing on show that we could not have handled. Give us a year or two for a deadline and we would gladly knock one up. But perhaps we might delegate the binding of the hook and eyes to someone else!

I did wonder whether I should have posted in so much detail so as not to spoil the experience for future visitors but really, you have to be there to actually see it. You have to feel and you have to hang onto every word that Dennis speaks because he knows everything there is to know!

Half-circle chic

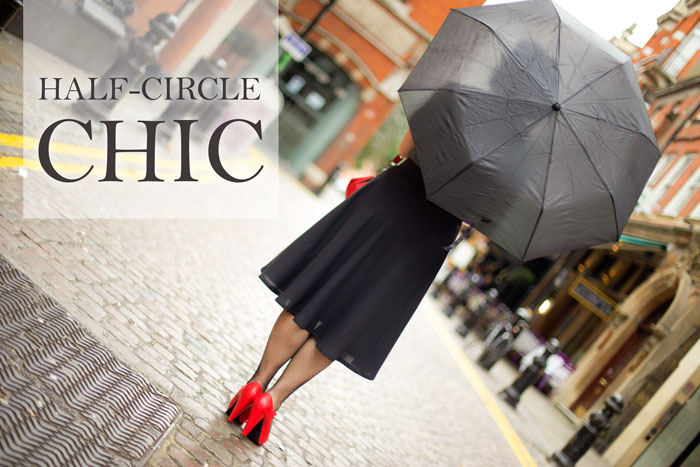
half-circle skirt

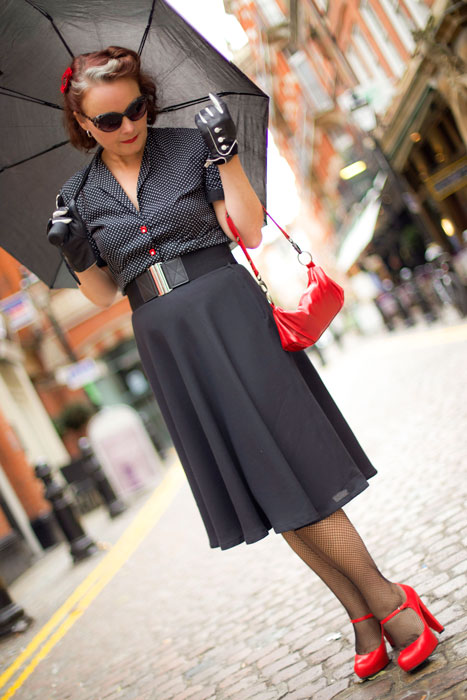
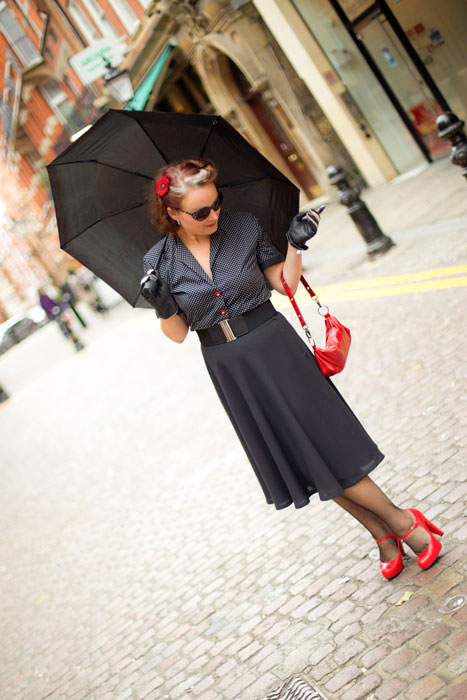
This is my first self-drafted half circle skirt. Made from the finest poly-crepe and lined with some heavy stretch satin because gravity ain’t that clever!

I nearly went for wool crepe which I think would have worked even more beautifully, but the idea of messing up 2 metres @£40 was a little bit more daunting than @£9!

half circle skirt front view

The drape is lovely on the poly and I’m so chuffed with how flattering it is around the hips, but my oh my does that cause nasty stretchy bias hemline issues.

To draft the skirt, cut and sew together is child’s play. And it was a perfect project to practice a lapped zipper too. But to get an even hem on this skirt required patience of some saints. I blogged the other day about my time-starved, light-rationed sewing time so I won’t harp on any more about that but lets just say a massive learning curve was attained with the help of some basic tools, a bit of determination and a few swear words!

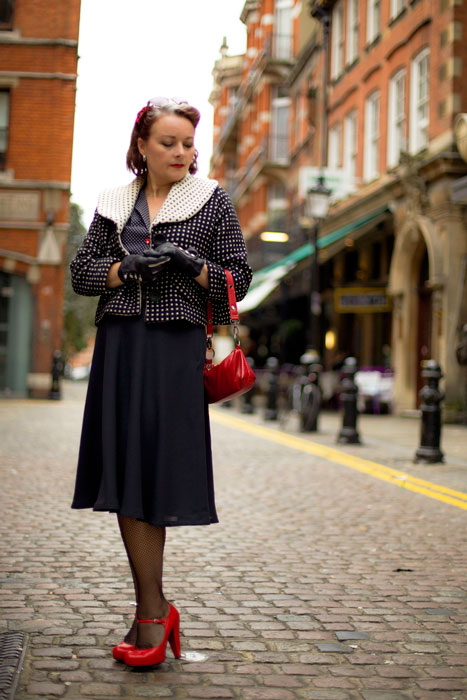
half circle skirt with jacket

half circle skirt front

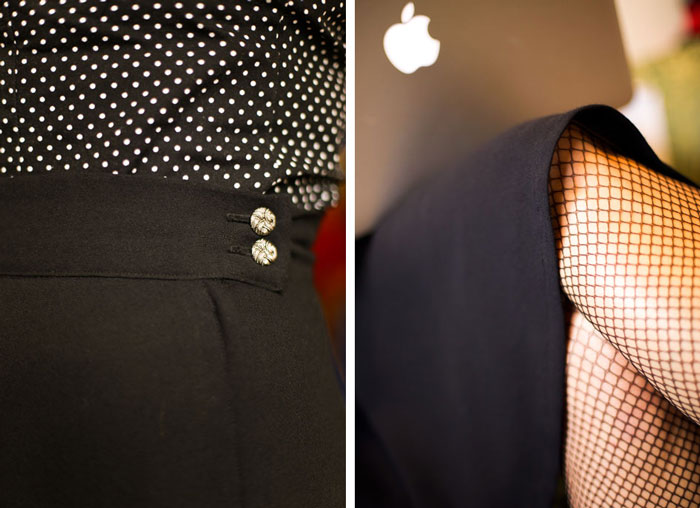
I incorporated 2 buttons as a closure instead of the usual hook and bar and used black bias binding to finish the hem. And no I did not do it by hand!

half circle skirt detail

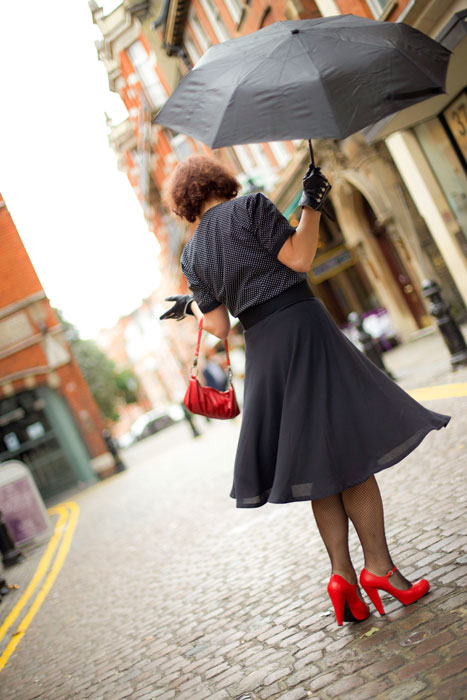
I so needed another black go-to skirt. And it feels right to go back to black. I do love a pencil skirt but I also love how swishy and elegant this one feels. A little bit Grease and a little bit Mad Men but also very much me. I can even run for the bus in it! Just need a few more 50s style blouses or peasant tops to go with it now.

twirling in half circle skirtAmazing photographs by Daniel Selway

Me Made May 13: My final days

So here we are. The final days of Me Made May ’13! I feel quite sad in a way. But relieved. And accomplished. And enlightened. So thank you SoZo for setting this brilliant challenge. I didn’t realize quite what a knock on effect it would have. Or how it would make me feel. I wholly recommend this challenge to anyone who has yet to take the plunge. 

I really didn’t think I would make it to the end of the month. For sure there were repeats and some days no photo evidence at all. In reality, taking a photo of yourself every day is really difficult. Easy at first with all the initial enthusiasm for the challenge but then harder each day as the sun disappears, the hubby sets of earlier for work and the outfits get more tight-fitting the older they are!

But the journey was worth it. It was fantastic to focus each day on each hand made garment and realise where I’ve come from and what I’ve arrived at. Confirmation on what I’ve learned and achieved was invaluable. I don’t have time to stop and think properly about most things these days, especially what I’m going to wear on any particular day. So this was a fantastic excuse for self-indulged focussing, on past experience as well as some future plans. Oh yes, of course the flip side of the coin has meant my project list has increased ten-fold. But hey that list always makes for sweet dreams, if nothing else!

So to wrap up… the final days of  Me Made May ’13.

Jersey cowl neck top

DAY 22: Silk touch jersey cowl top and wool pencil skirt
Neither of these are blogged, I made them so long ago. But the cowl top is made from a free pattern on Burdastyle by Ichigogirl. Its the same as the stripy one I made. The skirt is a Simplicity pattern that my mum gave me to kick start my sewing antics. It has a little vent on the front knee. I didn’t line it, unfortunately and this is something I would never do with wool now. I should really go back and line it. It would hang much better and not stick to my tights!

Day 23 black self-drafted pencil skirt

DAY 23: Black self-drafted pencil skirt
This is possibly the most worn and practical of garments in my wardrobe. It fits like a glove, because I drafted it to my exact measurements. It’s properly lined and the lining is even properly attached to the vent. The waistband incorporates a woven interfacing so it doesn’t roll and is fastened by a hook and bar instead of a rubbish ‘eye’! It was a fantastic learning curve making this skirt. So absolutely worth all the effort that it feels fantastic to wear. I always imagined a whole weeks worth of these to choose from and I still think that is highly necessary. They are perfect work skirts and glam up nicely for a spontaneous evening out too!

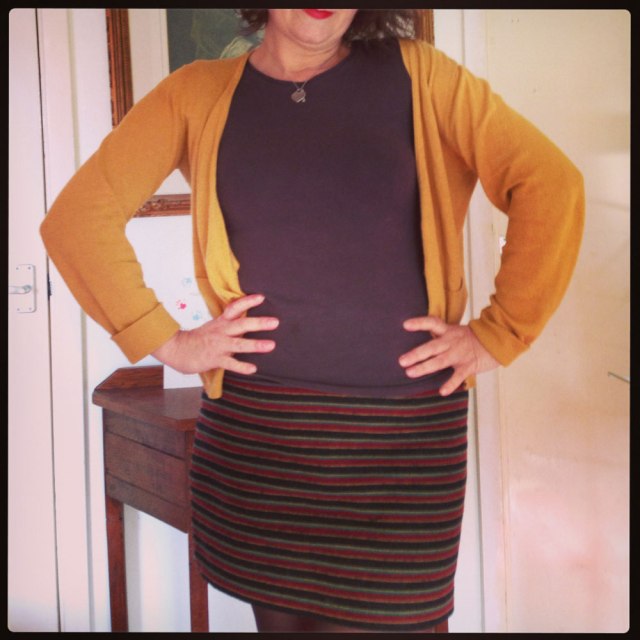
DAY 24: Stripy wool mini A-line skirt
A miserable day. No sunshine at all, so the woolly skirt came back out. No photographer today I’m afraid. I’ve come to realise how much I wear this skirt. Mostly when I can’t think of anything else to wear. It fits; it’s comfortable; it goes with DMs… and it keeps my butt warm!

Day 25 mmm13 Elisalex shortened

DAY 25: The shortened Elisalex
Today was the 20th anniversary of the day my dad died. Always a sad day. But always a good excuse to don a pretty dress and catch up with my wonderful brothers and sisters, nieces and nephews. The cemetery is a bit of a trek from the bus stop so I needed to sport something easy to walk in. Small heels means small skirt in my world so there was only one thing to do. And that was to chop the bottom off my test Elisalex dress! So glad I did. The duvet cover did good! Although I love my longer rosy version, it’s kind of ‘for best’ but this cheeky little version is now a great little throw-on when-the-sun-shines-and-go dress!
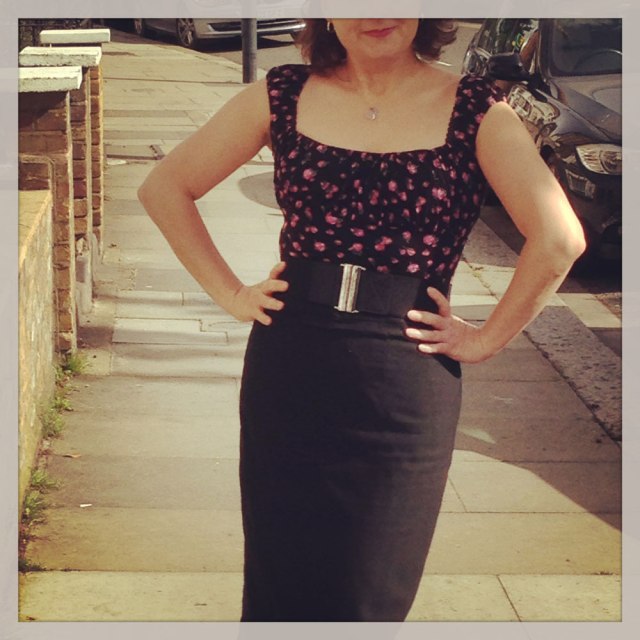
DAY 26: Grey pencil skirt
No photographic evidence today. I wore the first pencil skirt I ever drafted which still fits pretty well. Its lined but has no vent. I was taking things one step at a time back then and to learn to create a vent was information overload! I have to take pigeon steps but it still works. It’s a good staple, though a little boring. It’s days are numbered as soon as the others are on the cutting table!
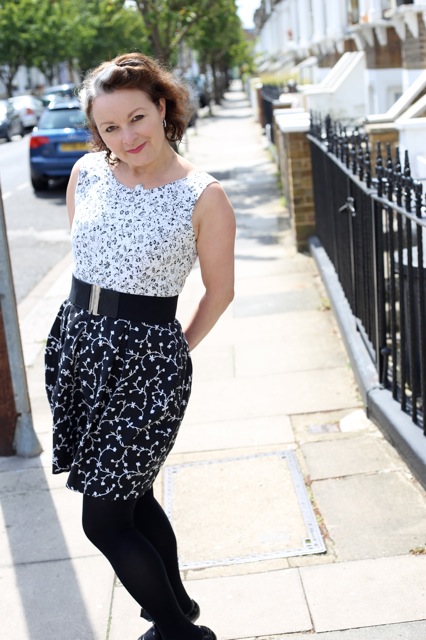
Day 27 goat eating dress

DAY 27: First summer dress of the year
Today we went to the Surrey County Show. An ideal place to sport a full on flowery frock. Not such a great idea to wear in the goat tent though! Note that Mr O sought his photo opportunity before letting me know what was occurring! I still love this dress but I need to take some volume out of the back. I didn’t notice before but it gapes at the zip. I’m pretty sure its a simple fix. And hopefully it will fit better.

Day 28 Danielle dress

DAY 28: Danielle dress
Now here’s a blast from the past. Almost 2 years ago to the day. It was a bit of a squeeze, I can tell you. So much wrong with this dress but I still like the vibe of it. The fabric was a charity shop find, unsure of the content but it’s soooo itchy and scratchy. I thought I was being out there by using red lining but that turned out to be a no-no with the pale open weave fabric on the skirt! I can’t really breathe in this dress and you can tell by the pull across my chest but this dress is a lovely reminder that I should make another that fits in a much lovelier fabric.

Day 29 button back top

DAY 29: Button back retro top
I was fast running out on day 29 so it was a great propmt to rectify some issues with some garments I don’t tend to wear any more. This one in particular was really annoying to wear because I made the neckhole too small. I really liked the jewel neckline but in reality it kind of chokes you to death. Only problem was that the first buttonhole started right at the top, so to lob a centimetre off the neckline would halve my first buttonhole. My need to wear a me-made top spurred on a quick fix and I replaced the buttonhole with a press-stud and sewed the button on top so nobody will ever know!

Day 30 vintage pencil skirt with pockets

DAY 30: Vintage pencil skirt with pockets
Not yet blogged but again, a hurried make out of desperation but boy I’m glad. I’ve been meaning to make this for yonks! It still needs some fine tuning and this is really just a test garment but I will fill in the details when I blog it. But what’s more to say? Its a pencil skirt with pleats and front pockets… hooray!

Day 31 1940s shoe dress

DAY 31: 1940s shoe dress again!
A shameless repeat but one I’m prepared to wear again and again. This is by far one of my favourite dresses. It gets comments from total strangers as I stroll down to Sainsbo’s. It’s cool and comfy and is covered in shoes! This is the item of clothing that I need at least 5 more of. Along with 7 pencils skirts, my wardrobe should have at least 7 of these too!

And so we leave the month of May and venture on to pastures new. A prom dress for my friend’s daughter is on the go, FBA’s and all, a bespoke pencil skirt for my daughter’s birthday present and another that was bid on by my friend at the school auction. (Far too nervous to ask what she bid!)

Thank you as always for your wonderful comments and support x

Me-made May’13: My first week
Me-made May’13: My second week/
Me-made May’13: My third week/

Me Made May 13: My third week

I did it. I actually made 3 weeks of Me Made May ’13! It wasn’t as desperate as I thought it would be and I’ve really enjoyed it! The only thing that has been a bit tricky is getting a photo when the mister has left earlier for work.

Most of the garments I have worn this week have issues. Mostly fitting issues. Things drafted either too big or too small and things that no longer fit because of some unwelcome poundage that crept up over the last year or so! I must learn to create things that fit in the now and not for when the pounds are shed. Because it doesn’t work like that!

Another revelation, which comes as no surprise to me, is that I need more skirts and tops for work. I’ve no shortage of ideas. Just got to pull my finger out!

So here we go. Week 3 of  Me Made May ’13.

pin dot jersey top

DAY 15: Pin dot jersey top
New Look 6753. This is one of the few jersey tops I’ve made. I like how it’s an easy-to-wear casual top but it’s not my favourite top to wear. Perhaps because I made it too big and its defied all my attempts of shrinkage too! I have since been advised to make a size smaller when using stretch fabric. I’m sure I’d love it more if it fit more snuggly. Still better than a Primani top though!

stripy cowl top

DAY 16: Stripy cowl top
This was a great free pattern from the Burdastyle website. Really simple to put together and really easy to wear. I’m not convinced I graded it up properly, or enough for that matter so the cowl isn’t as dramatic as it could have been. But I still like it.

pinstripe wool jacket

DAY 17: Wool pinstripe jacket
This is a pattern from Burdastyle magazine, issue 11/2010. It was my first venture into tailoring and is anything but perfect but it prompted me to delve more into the art of old school tailoring techniques which are now ready to employ when I embark on another. Once again I overestimated the size but that means it’s great to wear with a few layers underneath and boy I needed them today! The pinky mauve pinstripe means it doesn’t really go with much apart from a flooky pinstripe skirt that I owned already!

floral mini skirt

DAY 18: Floral mini skirt
I made this in march last year and it still feels good teamed with Docs and a cardi. Keep meaning to make more of these. They are so simple and so cute and so easy to wear. So long as its none too windy!

tartan shorts

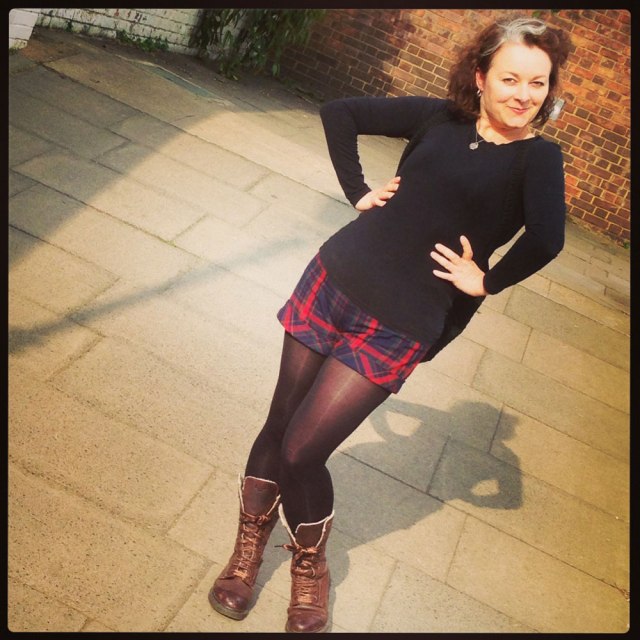
DAY 19: Plaid shorts
I do enjoy wearing these. Despite the fabric going all bobbly on me. Only on the weekend, mind. Won’t catch me in the office with that much leg out! I wore them down to the river pub to meet some friends. The pattern I used was Simplicity 2659. A simple and satisfying overnight make. There will be more of these. It’s just a matter of time. However I will not be using the twill tape facing method. I will draft a properfacing this time. They do need a bit more structure at the waist and front. And I must make them a wee bit bigger next time!

black rose party dress

DAY 20: Black rose party dress
This is me and my lovely fella, the last of the party people, at the end of his spectacular 40th birthday party. It was taken in the wee hours of the morning and so I’m very glad the photo is such poor quality! The dress, which I just about fit into, was whipped up overnight for a party March last year. I have since found some very similar fabric which will be another one of these one day!

DAY 21: Wool check skirt
I didn’t manage to get a photo of today but rest assured it was a me-made kinda day. I wore the same wool check skirt I sported on the second week, day 10. Crazy that May has turned out cold enough to sport a woolly skirt more than once in the space of a couple of weeks.

Can’t believe there’s only one more week left. I think I’m going to have to dig real deep now!

Laters! x

Me-made May’13: My first week
Me-made May’13: My second week/

Me Made May 13: My second week

If I’m honest, I thought that So Zo’s Me Made May ’13 would be an easy 4-poster for the month of May. I really thought it would help to bridge the massive gap between my sporadic makes and make me look more efficient than I actually am. Well, it has been a good gap-bridger for sure, but it hasn’t been a doddle!

I’m sure many of you can relate to the pre-work madness of getting kids off to school, while catching up on the jobs you were meant to do the night before, shouting threats of x-box confiscation if the son doesn’t arise anytime soon, feeding the cats with one hand and signing homework books with the other before getting one’s own butt out the door to work. So throw a rummage through the drawers for a me-made outfit and fluttering of the eyelashes at the general direction of ones hubster for a quick photoshoot into the equation and, well you can imagine what the neighbours must think!

But all that aside. It has been a total eye opener. I have worn things I had completely forgotten about and there has been a realisation of how much I’ve advanced. I may even go back to some of these projects and fix some niggling issues. But I equally might not!

So here we go. Week 2 of  Me Made May ’13.

Vintage wing collar blouse

DAY 8: 1950s wing-collar blouse
Butterick 556. Im still very happy with this blouse even though the shoulder pads have gone all lumpy and weird in the wash! The sleeve heads leave a lot to be desired. I remember thinking at the time that the sleeve looked more gathered than eased into the armscye. I really need to make another but better. So good to wear to work.

Day 9 1940s shoe dress

DAY 9: 1940s Shoe Dress
Butterick 2638. This is the same pattern I used for the red version and with the same issues, ie button placement. I think I prefer the shorter length sleeve. The shoe-print fabric was such a great find from a charity shop. It’s 100% cotton with such a smooth finish. I need more of these dresses.

Day 10 wool check skirt mmm13

DAY 10: Wool check skirt
I wasn’t expecting to include this skirt in May. It’s a blanket-weight wool, an ex-throw in fact, turned pencil skirt! But we all know how the weather in Blighty is a constant surprise! I self-drafted the pattern. I didn’t stay stitch the waistline before adding the waistband, hence why it probably came up a bit bigger and just noticed that the lining peeps at the hem otherwise, quite happy with this one.

Day 11 mmm13

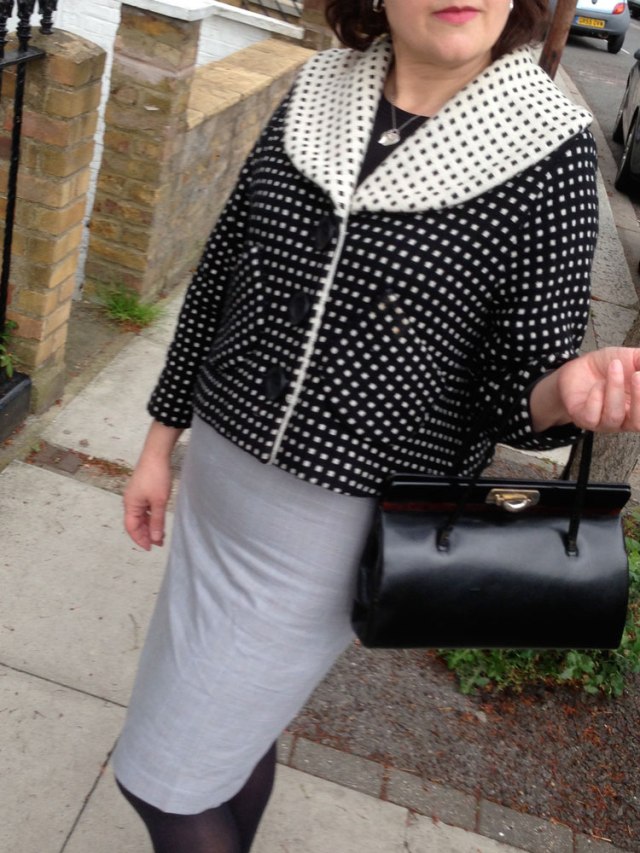
DAY 11: Dotty shawl collar swing jacket
I made this a good couple of years back from a free pattern in Sew magazine. It is a great spring jacket with three-quarter sleeves and I love the fabric. I had to create the buttonholes by hand but apart from that it was very easy to put together as far as I remember. I do enjoy wearing it. Something about the collar makes it feel vintage and glamourous.

DAY 12: Grey pencil skirt
Hubby off to work early + non obliging offspring = no photo! But see photo above. I wore it yesterday too. Don’t judge!

day 13 stripe wool skirt

DAY 13: Stripy wool skirt
You really can tell how chilly it was this week. All the wool came out to play! This is a very simple A-line mini skirt from Burdastyle magazine. The fabric is a twill-backed Italian wool from Ditto Fabrics in Brighton. Very lovely to wear.

Day 14 lace peasant top

DAY 14: Lace-trimmed peasant top
I didn’t think I had much love for this top. Mostly because it’s white and partly because of the lace. But seeing it here with a black skirt and after wallowing in all the lovely comments I got at work, I think I do now. One of the quickest tops to rustle up and tuck into a skirt. I need a red one! 

Feels so good to round up week two. Only a couple of days for week three… eek! See you soon! x