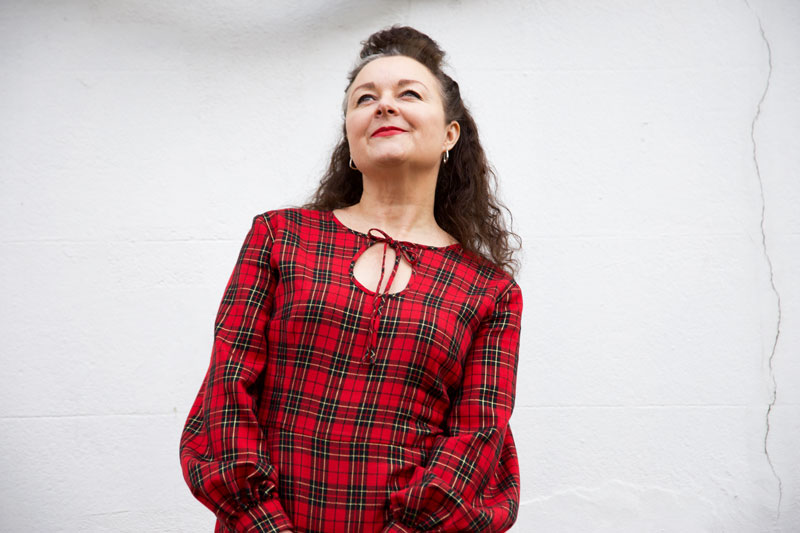
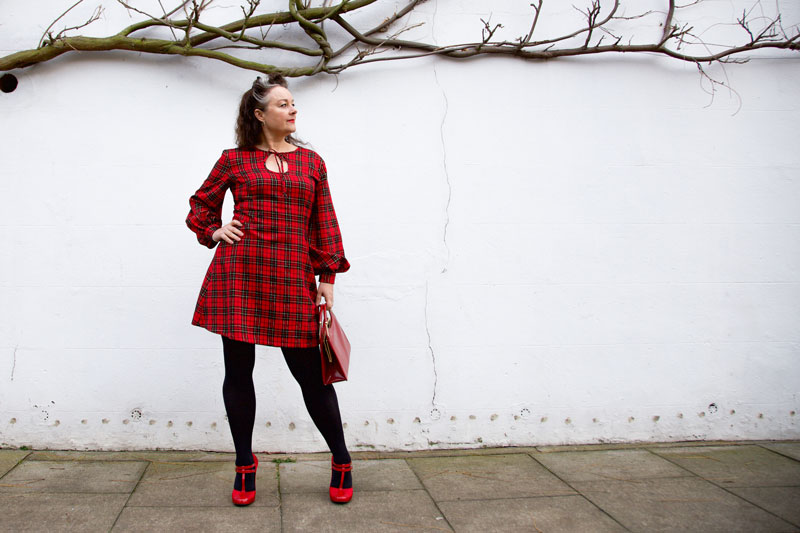
Operation Christmas Dress complete!

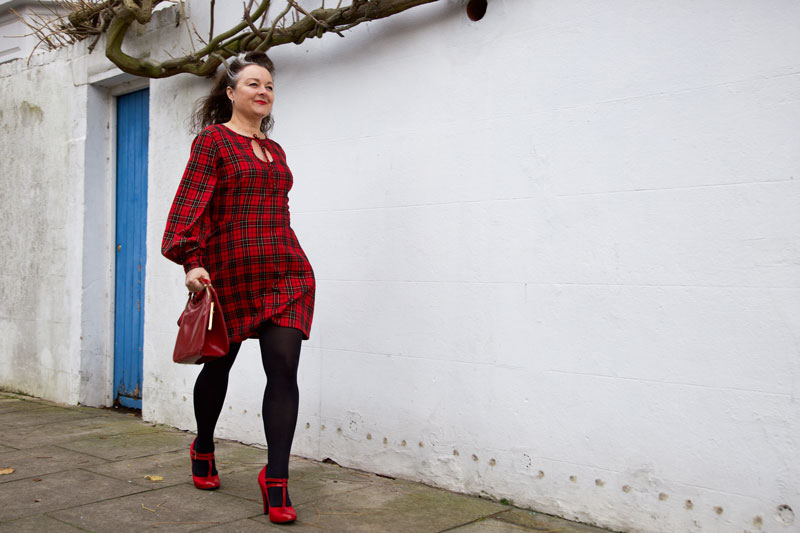
handmade tartan dress with teardrop opening

Hopes were fading to get this dress finished on time for Christmas Day. But the sewing gods were looking down on me, somewhat favourably and I sewed them cuff poppers on quite literally at the stroke of midnight on Christmas Eve.

Oh how I love ‘the night before Christmas’ – When all the shops are shut and there’s nothing more to be got. The street outside is quiet; the Christmas tree lights twinkle at their brightest and that sweet little shot of sherry slips slowly down the hatch! Perfect time of year to have some hand sewing going on in front of a festive telly-box movie, too!

Tartan Christmas dress front

This dress is most definitely worthy of an ooobop original issue number 2. The turtle neck dress I recently made almost had a tear drop neckline but in an effort to walk before I could run, I saved it for this time.

The process was exactly the same:

  • I dreamt the design
  • I drew it in my Fashionary sketch book
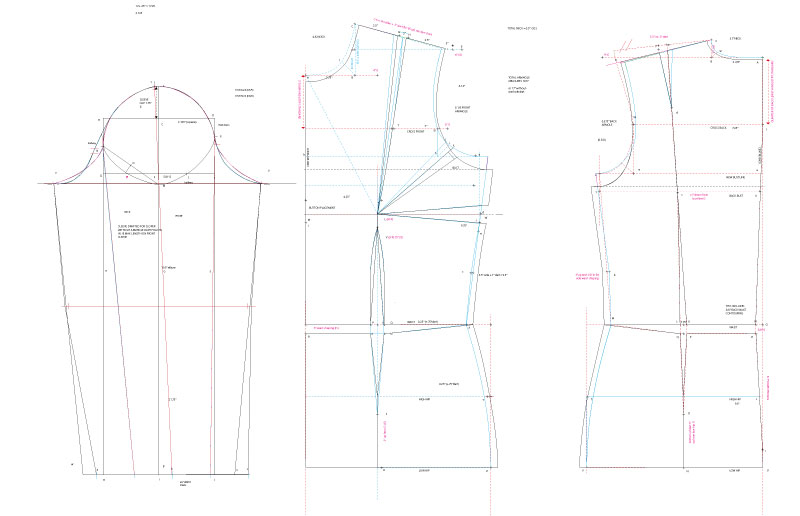
  • I self-drafted the pieces from my previously created blocks, using Adobe Illustrator
  • Printed and tiled the pattern pieces
  • And sewed up the finished article.

This is proving to be my favourite method of dressmaking to date! That said, I’ve got so much still to learn and I’m anticipating some frustrating times ahead so I’ll still be checking out Indi and vintage sewing patterns when I need some respite!

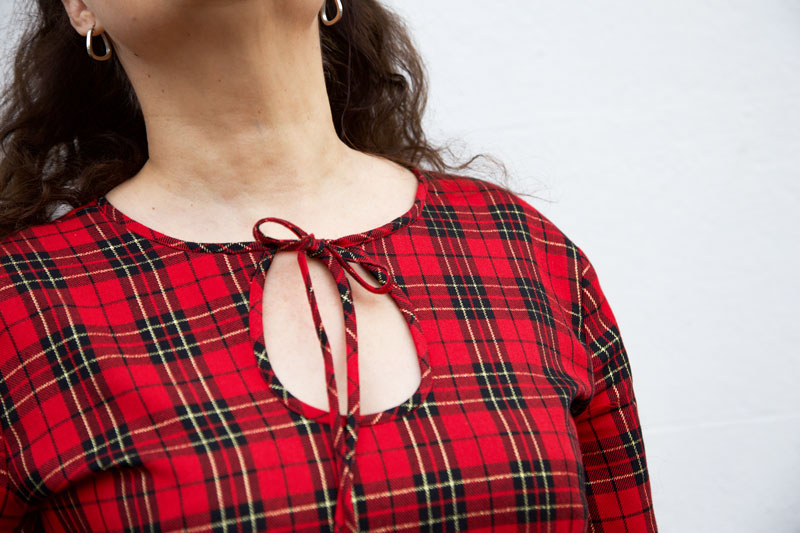
To edge the teardrop – thus avoid lining or facing – I dug out and dusted off the bias tape maker. To be fair I don’t think its much quicker than the manual ironing method but it’s a bit more fun… when it works!

Close up detail of teardrop opening

I’ve messed up many a time binding edges so this time I knew to start with sewing the right side of the binding to the wrong side of edge of the teardrop opening. I used my quarter inch foot for a consistent seam and took it real slow. Any unevenness is corrected when the binding is pressed in position to the front. (It doesn’t matter if it’s a bit wonky on the back because it won’t be seen. The entire reason for starting on the back!) I then clipped the seam in the curved areas before slowly and carefully top-stitching close to the edge on the right side to finish the binding, where it does matter! That final press is so satisfying.

I then used two more folded bias strips to bind the neckline from back to front, concealing the top edges of the teardrop, and continuing the topstitch to the ends to form the ties. I sewed across the ends of the ties to prevent too much fraying. I’m happy for it to fray a little.

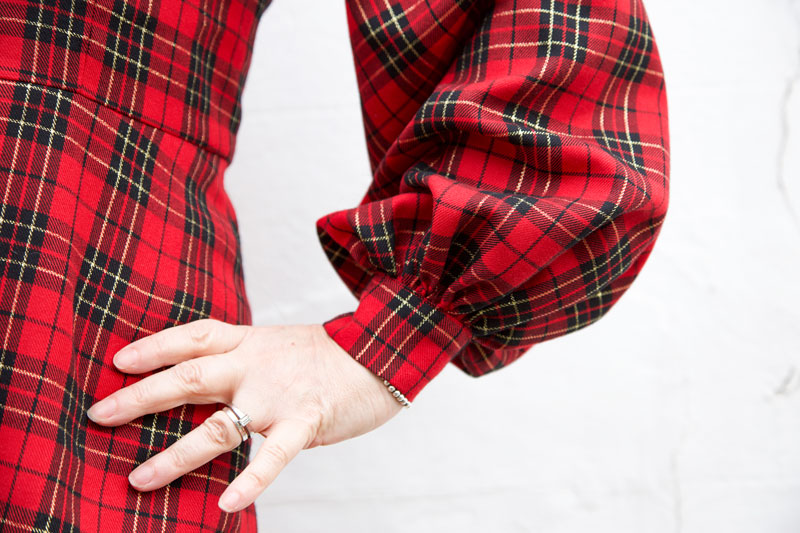
Now lets talk bishop sleeves – Lovely big billowy bishop sleeves! They’re a bit trendy at the moment but to be fair they’ve never been out of favour in my fashion world!

close up of sleeve and cuff

I took my sleeve block piece and similarly to how I flared it last time, created 4 slash points and spread the pieces till the width was a little more than thrice my cuff measurement. I didn’t deduct the length of the cuff from the sleeve as I wanted the fullness to overlap the cuff which it kind of does but the structure in the fabric doesn’t really make it perform as it did in my head!

The cuff is sewn akin to the binding to hide the seam and there’s a small overlap for the poppers.

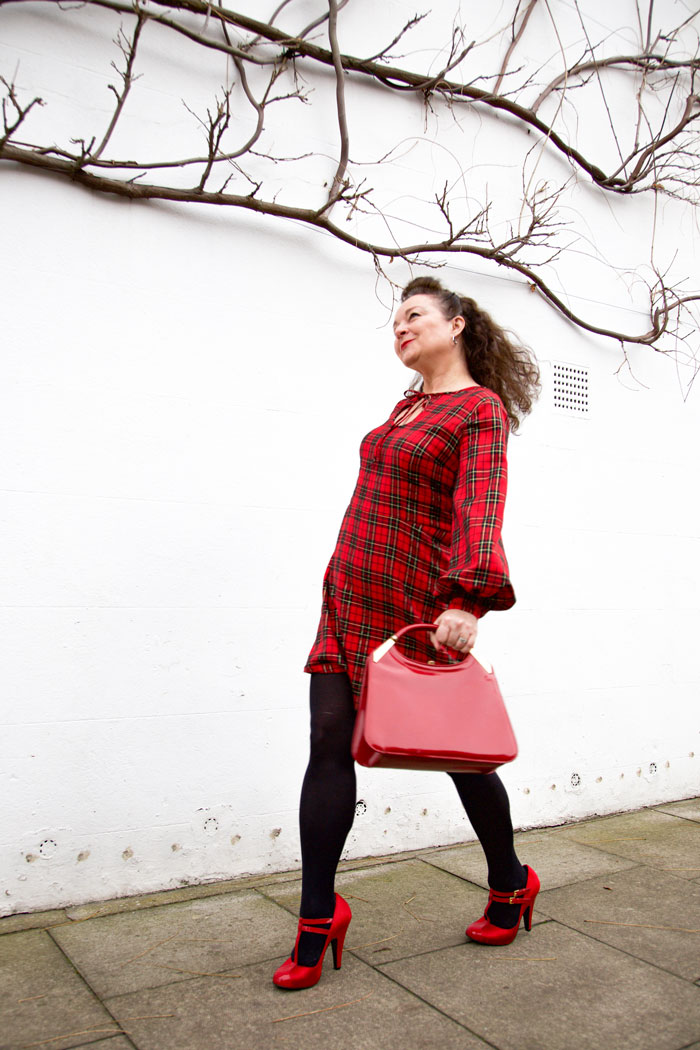
Walking in my new dress

I really want to rehearse another, even more fuller bishop sleeve on a blouse made with a lighter viscose. Just to see how differently it behaves. I really want to add some lovely button loops and buttons to the cuffs too which I didn’t do here mostly because of time restraints, hence the poppers!

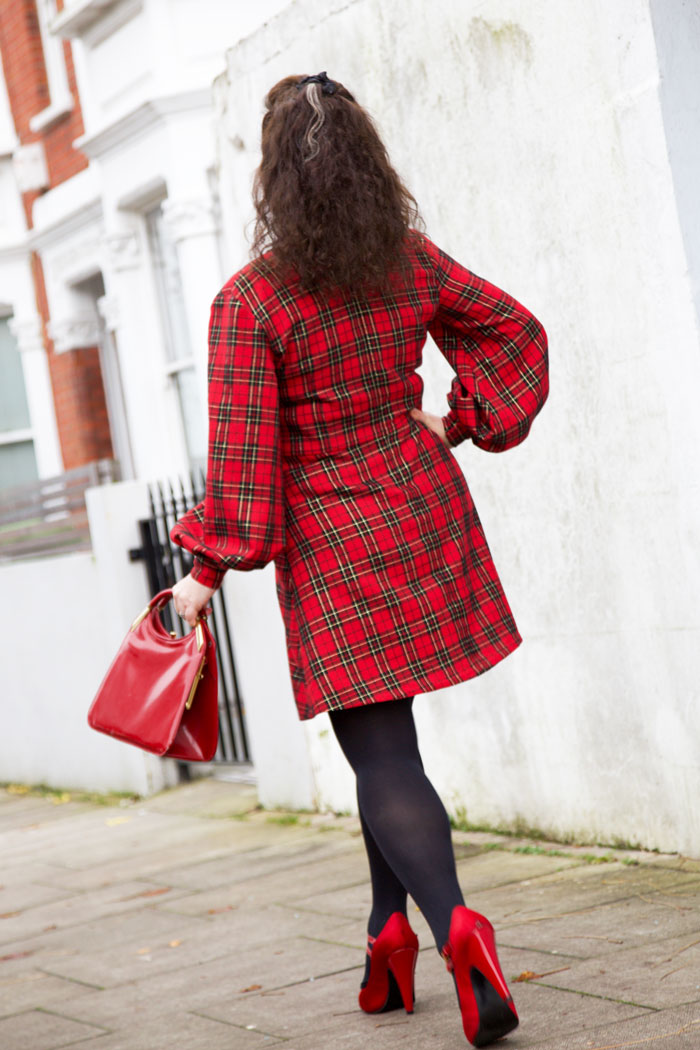
The rest of the dress is constructed the same as the turtle neck one: inserting an invisible zip in the back. And I must add how chuffed I was at just how invisible it turned out with all those checks matching up either side.

Back view of dress

After all that work I didn’t wear it on Christmas Day. I decided to spare it from the cooking splashes and wine spillages and wore it out on Boxing Day instead. Despite it’s festive feel, I will be wearing this dress at every other time of the year and occasion for when tights and sleeves are necessary. The fabric is 100% cotton except for the metallic gold thread and is so comfy to wear. Not surprising that I debated using the fabric for PJs initially!

striding out in my new tartan dress

It carries a lovely little memory too as I purchased the fabric on a sewing blogger meet up organised by @ClaireSews for when @liblib came to visit all the way from Austraila. We chatted over coffee and shopped our little hearts out in the Goldhawk Road. I wasn’t supposed to be buying more but @ella_yvonne convinced me it had my name on it! Always such a treat to meet like-minded sewists IRL.

I’m not holding much hope for completing anything new before New Year so I’ll take this opportunity to wish you all a fabulous, creative and healthy 2020.

All the very best of wishes and lots of love from Janene xxx

Tilly Agnes in French Terry

Tilly and the Buttons Agnes top

Despite my latest drafting adventures, I’m not about to give up on the tried and tested patterns I know and love. And the Agnes top by Tilly and the Buttons is one such gem.

I made it first in 2016, using a black and ivory stripe cotton jersey and it’s been one of my favourite go-to tops ever since. So much so that I didn’t want to change a single thing about it.

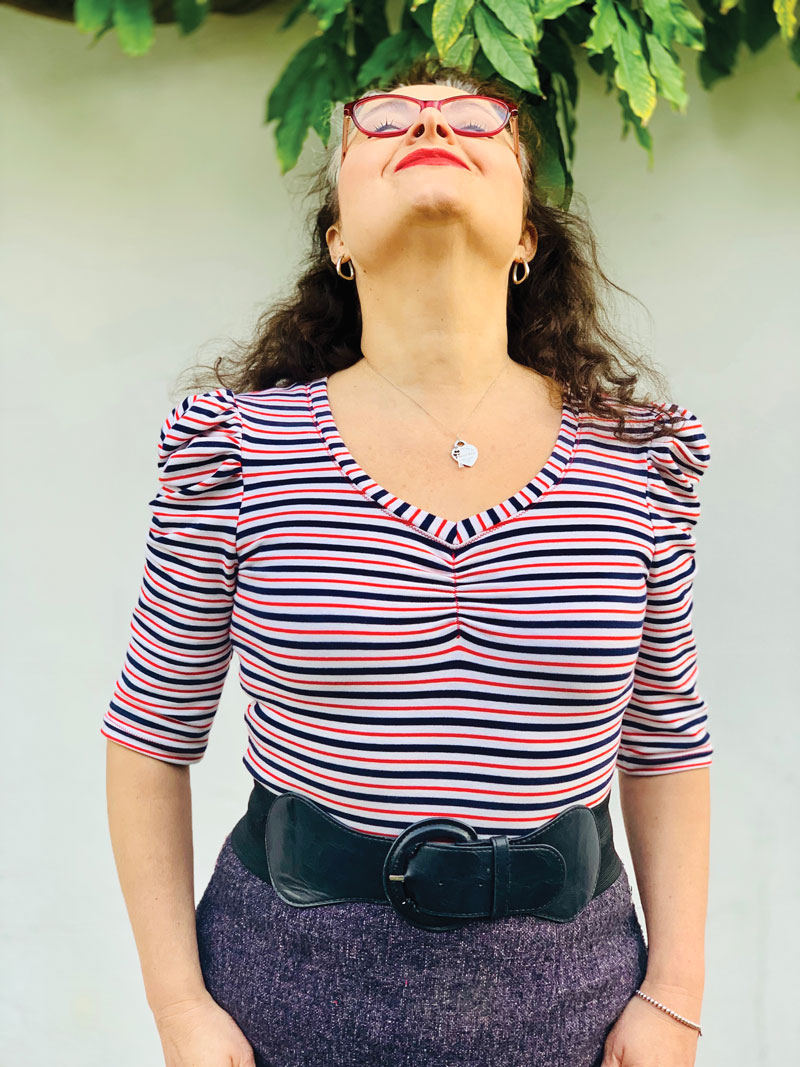
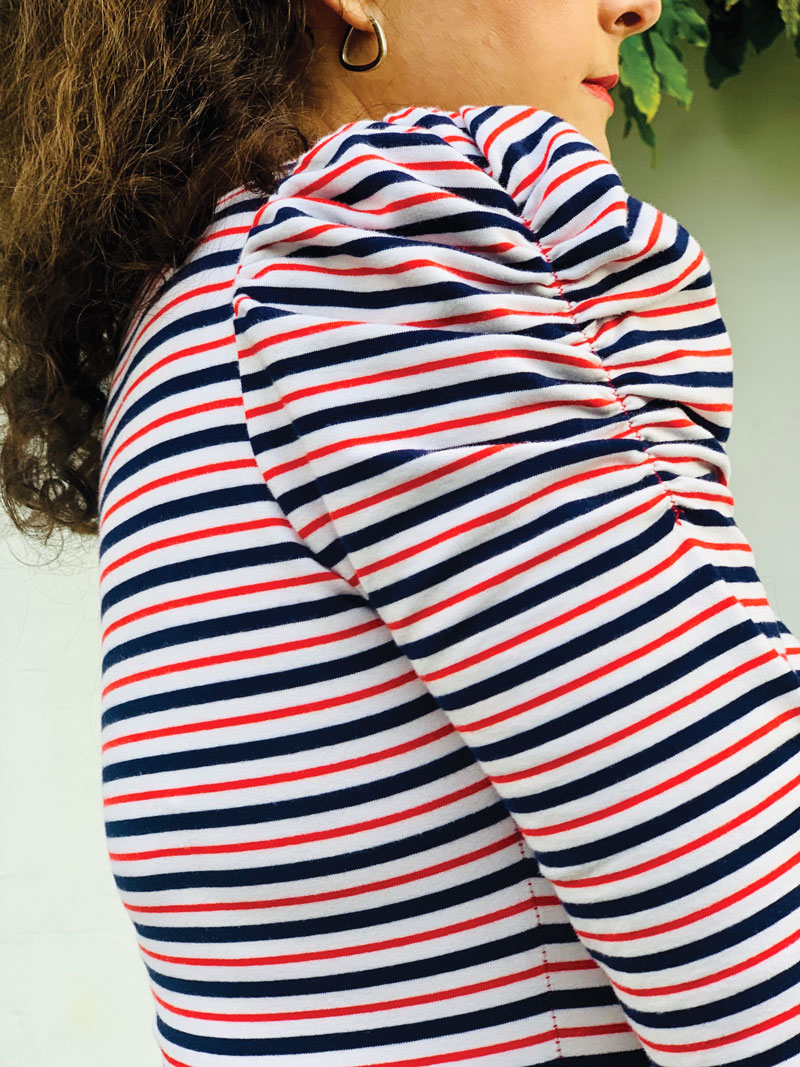
Detail of rouching on the sleeves
Rouching with stripes for max effect!

I just love the silhouette. The statement sleeves take full responsibility for this, of course – such clever drafting and  a simple rouching achieved  by stretching and sewing a short length of 5mm elastic along a guideline inside the upper part of the sleeve. Add to that some gathering on the sleeve cap for extra poof… et voila!

There’s a cheeky bit of rouching down the centre front, too – using the same technique – which is super flattering.

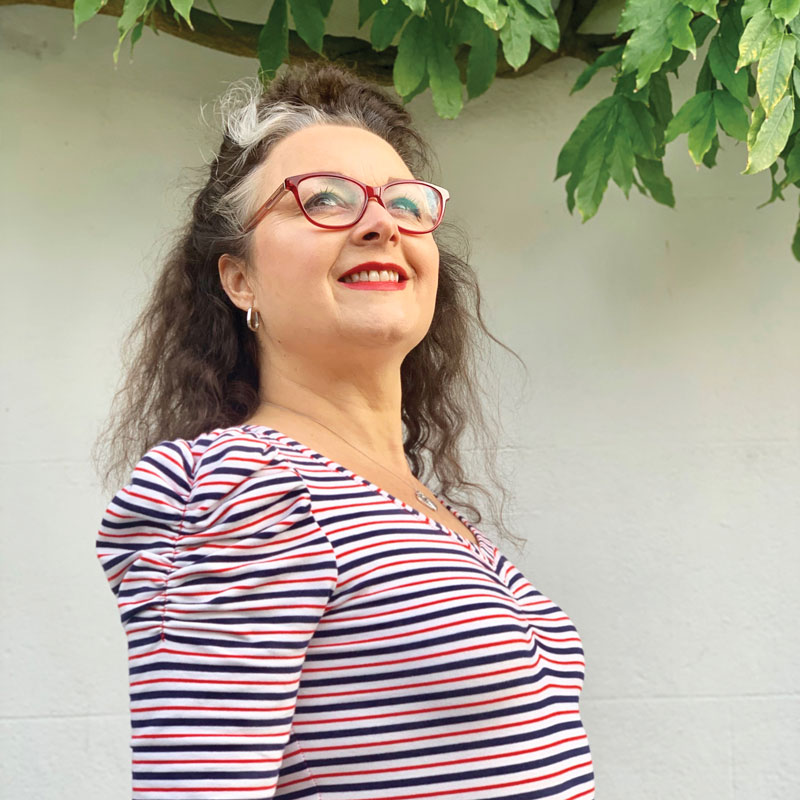
I used a French Terry for this one. A cosy navy, red and white stripe – making it extra French! I scored it at Crafty So and So’s lovely shop in Leicester, which I was so excited to visit the day after I attended their awesome Dressmakers Ball in March this year.

French Terry: One of its sides is flat, while the other side is with cross loops. It can be 100% cotton or be made from a variety of fibres, sometimes with spandex (also known as elastane or lycra). It is often warp knitted, and the term French Terry is colloquially used for all warp knitted Terry – source: Wikipedia

The fabric is a bit weightier than the first one I made, giving those sleeves a bit more structure. However the neckline didn’t work out as well as before. But I think that’s largely due to the neckband being slightly too long and having not stretched quite enough. But it wasn’t a biggie. I nipped in a little dart inside at the centre front and it was sorted in a jiffy. In fact it sharpened the v-line a bit more.

V neck accentuated with a wee dart inside the binding

I confess I was too lazy to bring out the twin needle and not brave enough to sew completely on the overlocker, despite having the option of 4 threads now. I just stuck to the devil I knew and sewed with a regular zig-zag stitch. And amazingly enough, a regular needle. Very surprised I didn’t need to dig out the ball-point!

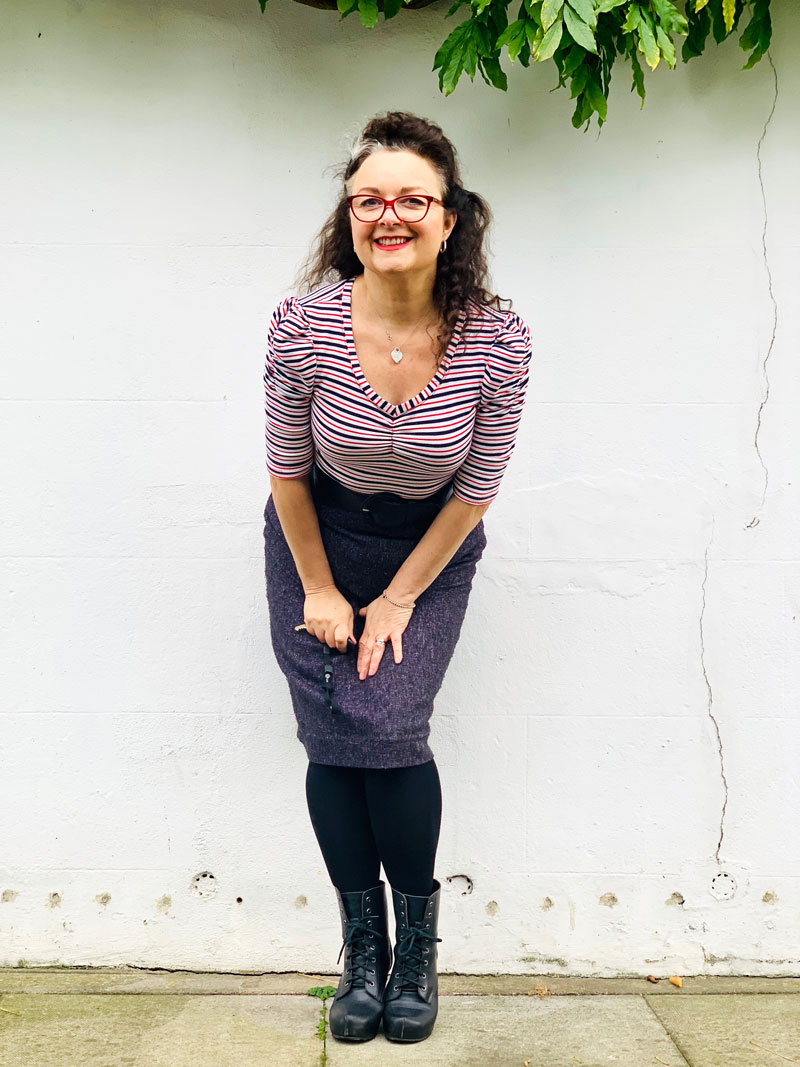
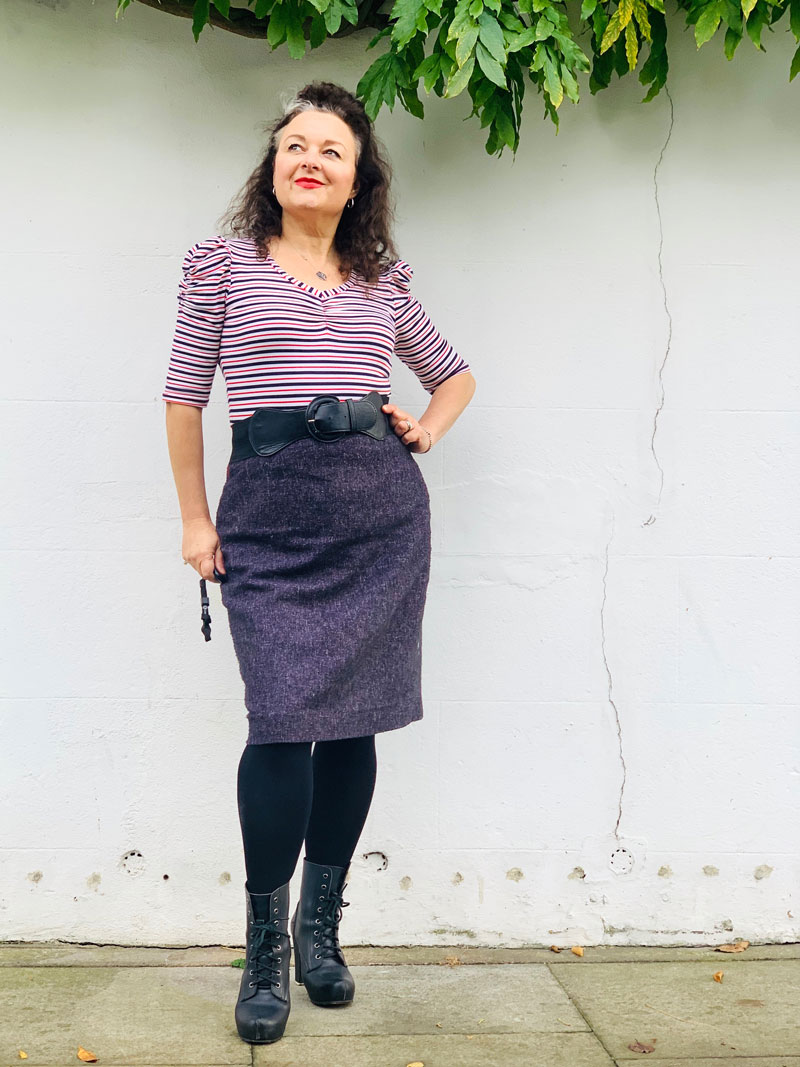
I just love how Agnes brings a bit more style to the table than a regular T. And I love to wear it with a pencil or circle skirt. What other kind of skirts are there?

Worn with a classic pencil skirt

I’m seriously so happy with it. And so in love with French Terry and will definitely seek out more of the same when I come to make another. Which I will.

So much fun in a Tilly Agnes
When you look up and a passer by is mimicking your serious selfie poses!

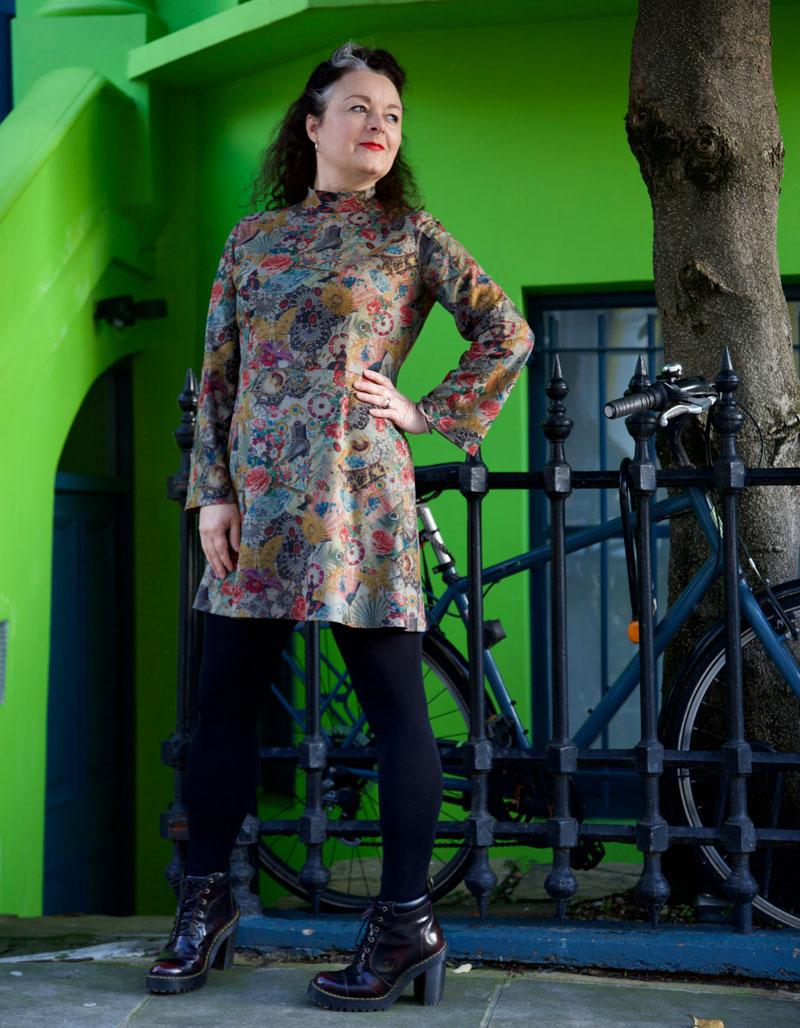
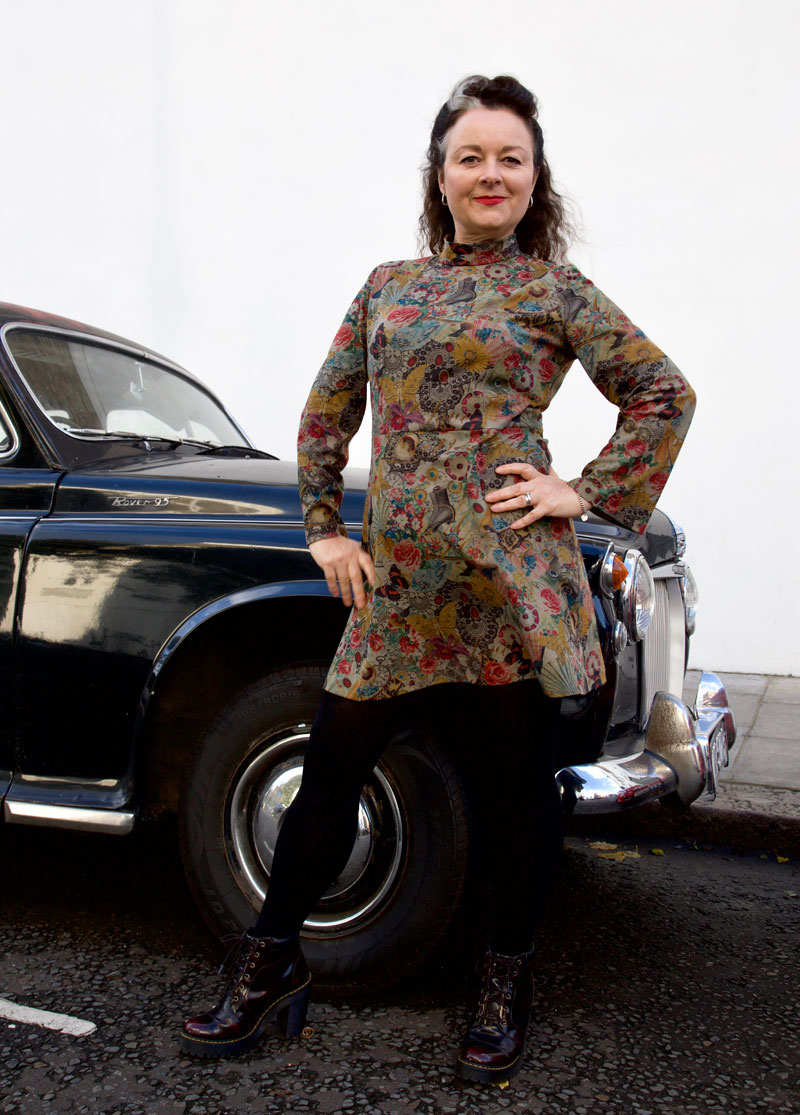
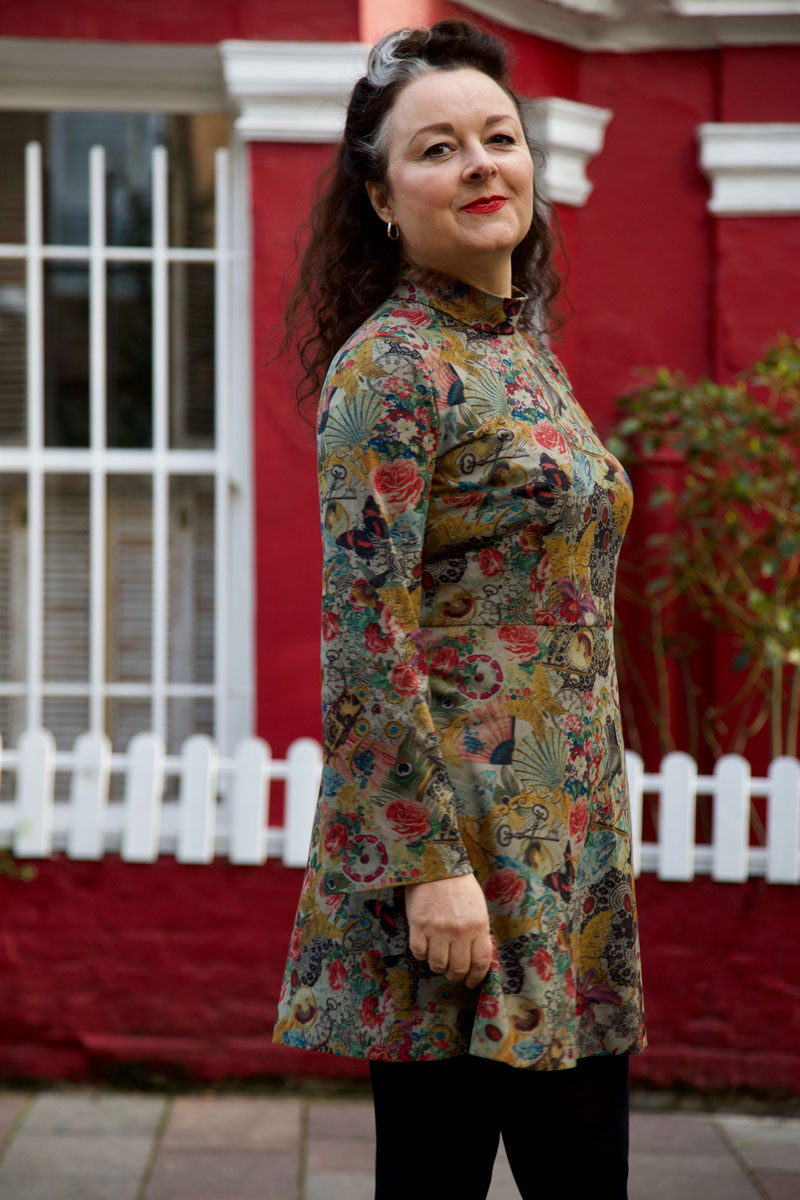
Ooobop original 70s style dress

ooobop original 70s style dress

The thing I love most about sewing is the eternal learning curve. I will always be on a joyful journey of discovery because there is no chance I will ever learn it all in my lifetime but with every little milestone I reach I get a little buzz of excitement which propels me to the next level and this little dress is prime example of my progress.

It might not be the most ground-breaking, couture class garment you’ve ever seen but its mine, all mine – an ooobop original

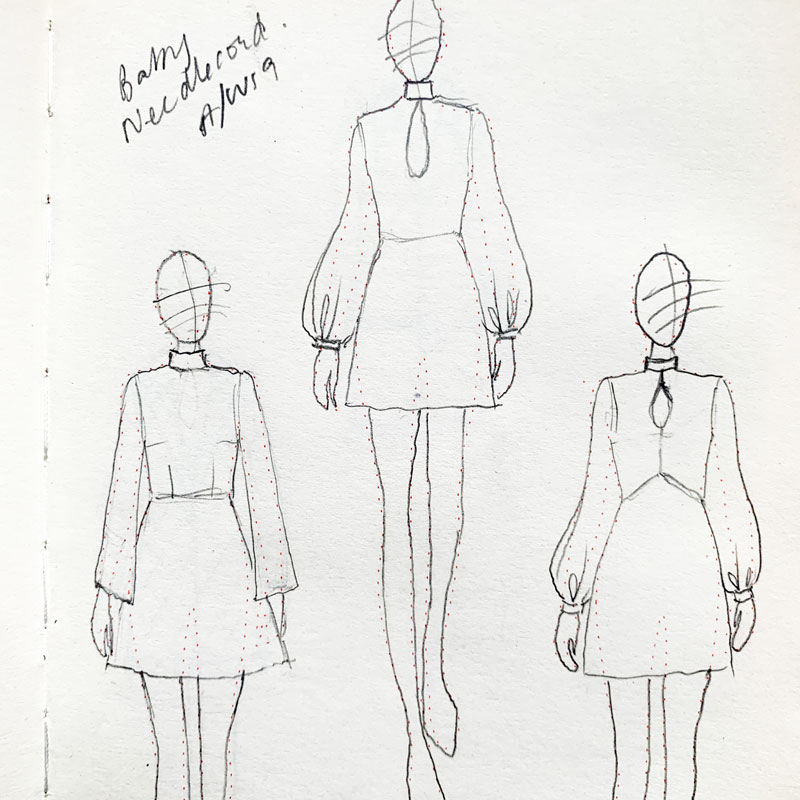
I dreamt it, I drew it, I drafted it, I sewed it.

sketches of the dress
Love drawing the possibilites in my Fashionary sketchbook

For sure, I’ve sewed and drafted for other people but never as successfully for myself. I’ve been bouncing between lessons on Craftsy’s Blueprint and instructions from various pattern-making books but it transpires the reason it took me longer to fit myself was my own dishonesty. Denial of my actual measurements. Reluctance to accept the differing pattern shapes to the examples given. Even cheating my measurements knowing it would look better if I nipped in certain stats. Desperate. IKR!

wearing ooobop original 70s style dress
Striking a pose in Notting Hill

And it just goes to show that you can’t cheat at maths. On the fourth attempt at a moulage (a close fitting blue print from which one adds ease to create a master sloper ) it bloody worked! I was so happy . Literally danced around the room in nowt but a pair of pants and the moulage for a good half hour. And then it dawned on me all the possibilities.

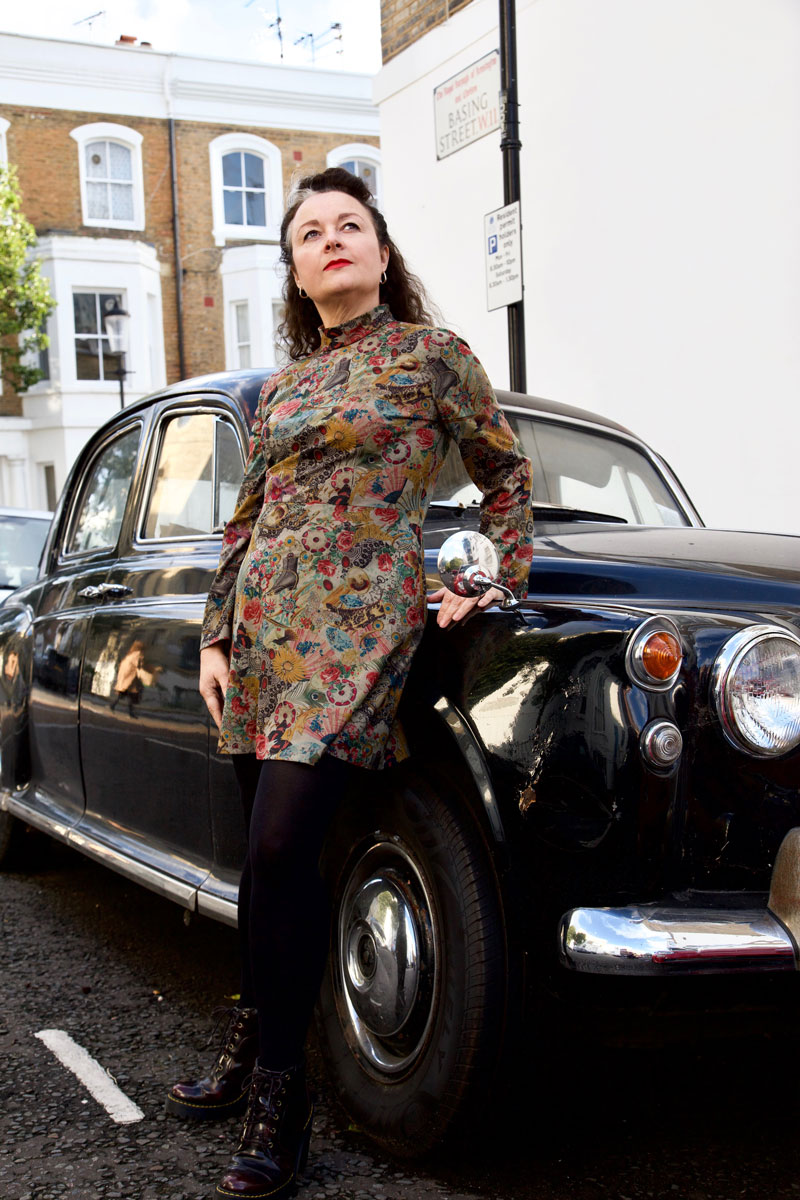
Classic pose with a classic car

But first I had to add ease to create the sloper. Another milestone reached as I’m getting much quicker and more efficient at drafting in Adobe Illustrator. Luckily I use this programme for my job as a graphic designer and can justify the substantial Adobe Creative Suite subscription. But it makes it all the more satisfying that I am getting untold extra benefits from its use. My space is so limited at home and the prospect of getting out and putting away all the giant drafting materials is exhausting in itself, before I’ve even put pencil to paper. Drawing patterns using my laptop and being able to store them digitally thereafter is literally life changing, for me!

Sloper created using Adobe Illustrator

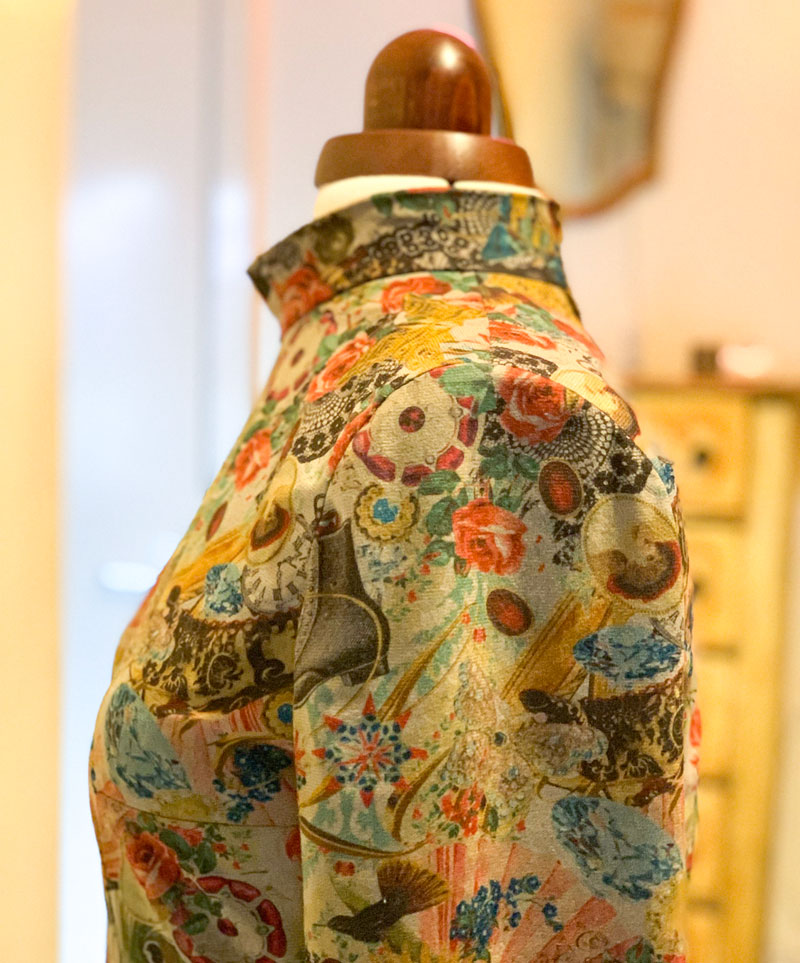
Once I’d drafted the sloper, the only other piece left to draft was the turtle-neck collar. That was a case of simply measuring the neckline and cutting a bias rectangle piece to that length and 6″ wide. It was sewn like a bias binding around the neckline. I left the back edges open to insert a zipper to the top of the neckline then folded the facing part of the collar to the inside and finished by hand.

Striking a different pose with the classic car. Loving the silhouette
I do love the simple silhouette of this dress

I had originally planned an extravagant bishop-style sleeve but I didn’t think I’d have enough fabric for such indulgence, so I settled on a slightly flared sleeve instead – slashing and spreading my sleeve sloper from wrist to sleeve cap.

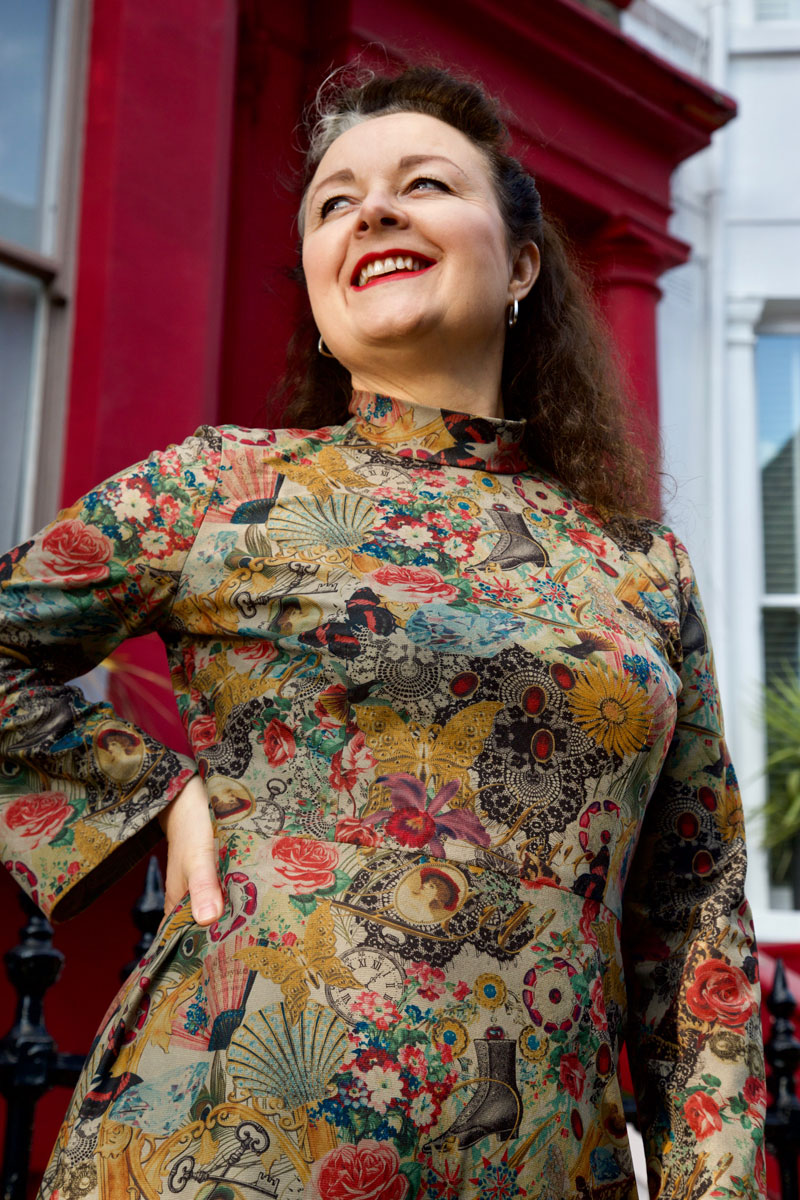
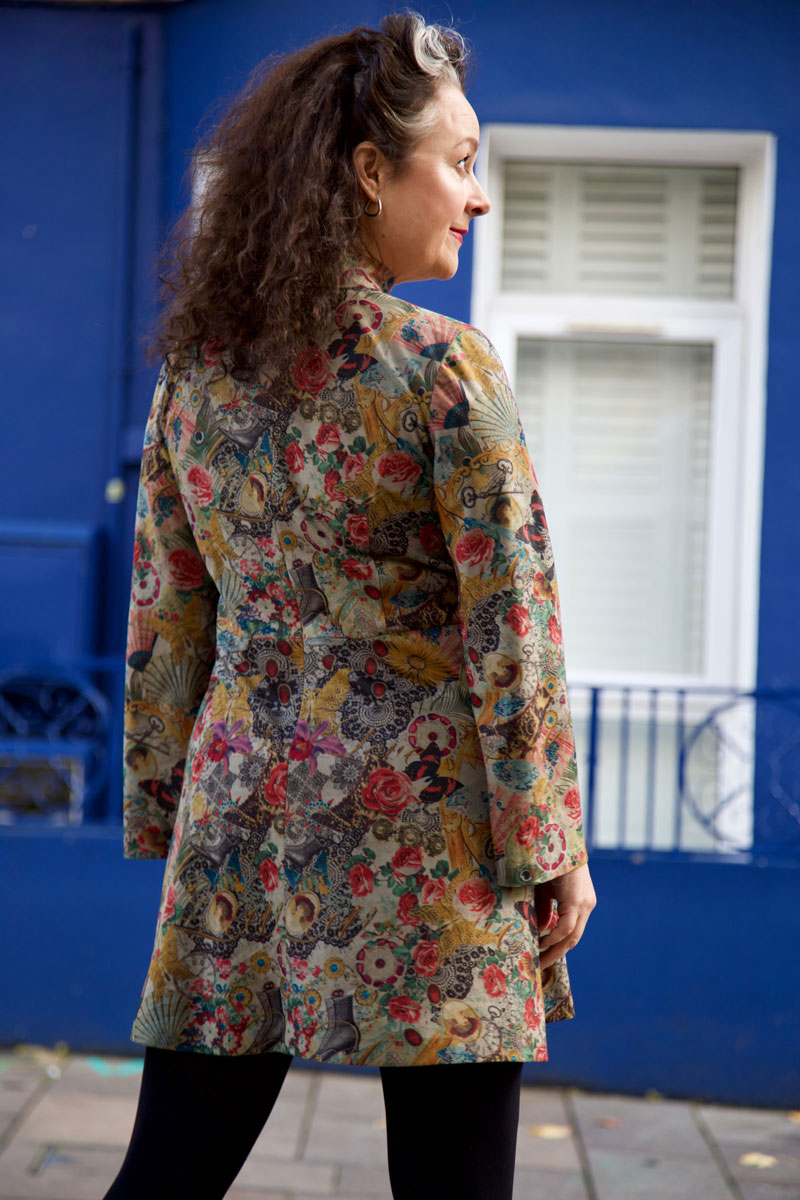
And while on the subject of fabric, let me tell you how I came by such a perfectly suited piece. Every now and then I venture out on a little sewing people meet-up. One of my favourites is  organised the London Stitchers Meet Up.  The last one I attended was held at The Blue Boat in Fulham and involved a fabric swap. Such a great idea to downsize that stash and to swap a piece or two that might not have plan attached, for something that triggers an instant course of action. Interestingly enough I had no plans on bringing any fabric back home. I’m trying to use what I have and not buy/acquire anything new but the stars instantaneously aligned when glanced over Giorgia’s shoulder to see it sat wantingly in the corner.  It was a beautifully soft baby needlecord (I think) with a vintage style montage print. I always maintain I’m more about texture than print but there are always exceptions to the rule. Thanks so much to Lauriane Loves Sewing for bringing it to the table. I do hope I’ve done it justice.

ooobop original 70s style dress

So why am I creating so much more work for myself when there are plenty nuff awesome patterns in the world? Each stage of sewing this dress confirmed what I good idea it was. The notches aligned perfectly. The bust darts hit where they were supposed to, the shoulders finished on my shoulder line. And I confess I stood and I stroked and I marvelled at how well they did, for quite some time.  No puckers, nuffink.

Marvelling at the inset of my sleeve caps

Add to that the waist sitting where it is meant to, no pooling in the small of my back and Bob is definitely my lobster! Gotta love it when an invisible zip becomes super evasive too!

Back view of dress with no pooling

Well I think that’s just enough of me blowing my own trumpet and time for me to big up the talents of my super lovely, supportive husband, Daniel. I’m always the first to run out of steam, just knowing there’ll be a hundred good shots even if I am pulling a stupid face in 50 percent of the contact sheet. But he always want’s just one more. And its always for good reason and I thank him from the bottom of my heart.

Lying on some steps in my 70s style dress
In response to ‘Just one More’!

And he’s available for booking. He loves an event. So good at capturing those  off the cuff, journalistic poses. So if you have an upcoming event and in need of a trusty photographer please do check out his portfolio here or contact him at danieljamesphotographic@gmail.com.

Thanks for swinging by. Your readership and comments mean the world to me and add so much to my journey. Wishing you all a gloriously productive weekend. xxx
Previous attempts at self-drafting:

Vogue 2494 for Mother of the Bride

V2454 Vintage Vogue evening gown

Special occasions call for special dresses and I don’t think I’ve had call to make anything more special than a mother-of-the-bride dress for my daughter’s wedding.

But what would it be? I had a whole years notice but in true ooobop to-the-wire styleee, I left myself a couple of weeks before the big day.

That’s not to say I spent days and weeks and months googling and mulling, dreaming and virtually making in my head, the hundreds of possiblilites.

I really didn’t know what I wanted. But I did know I didn’t want to look like a run-of-the-mill MOTB.

Have you ever googled to see the expected format? Pastel shades, sensible knee-length skirt, coordinating jacket with statutory three-quarters of a sleeve, satin and lace, obligatory big hat, and nude tights… Would I conform? Not a chance!

And then I remembered this gorgeous vintage Vogue pattern that I’d bought before I even knew what kind of special occasion it was going to be for!

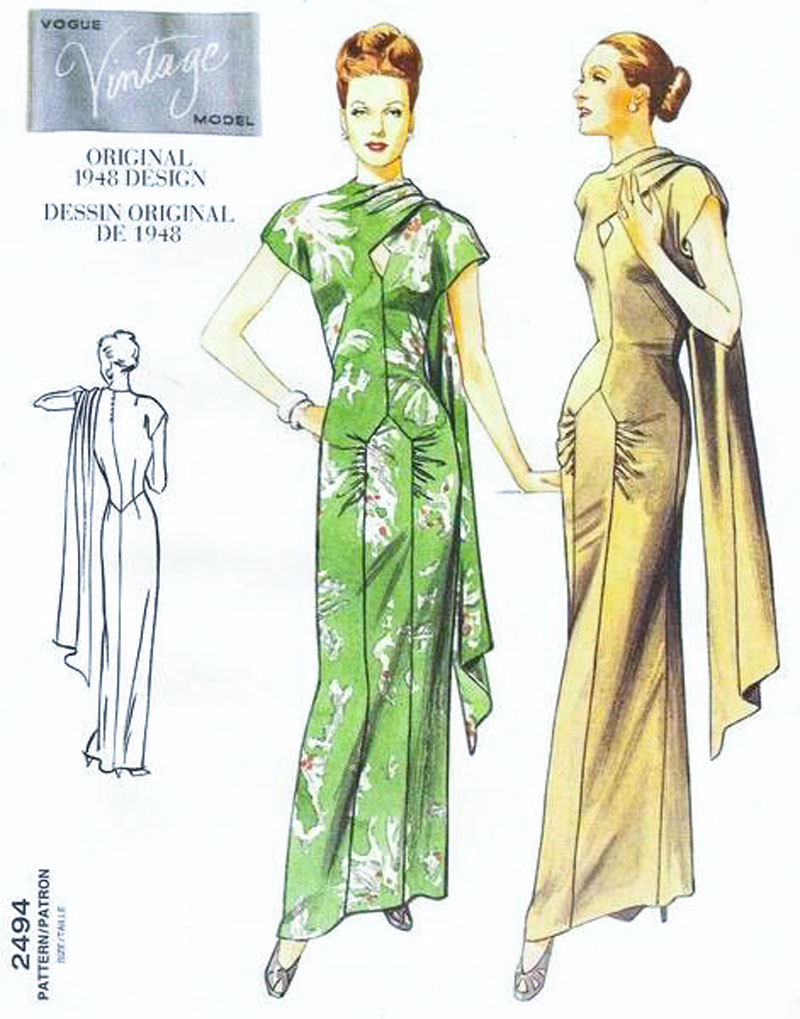
Vintage Vogue V2494 sewing pattern

It’s an original 1948 design. Full of elegance and style. Wasn’t too sure that a five foot four sausage shape could work it as well as the cover girls but the vision was strong and I was so delighted to have made a decision at last. Just had to root through a million other patterns to find it!

The only experience I’ve had sewing vintage Vogue patterns before was the V2934 jacket which I made twice, first here and again (after I lost the first one) here, and more recently the Vogue Designer Original 1486. Interestingly all have the cut-on sleeve element and each of them reasonably uncomplicated to sew.

I anticipated a rocky ride with with the construction and fit of this dress though, especially as I’d left no time at all to properly test it but the beauty of this pattern is that it has ACTUAL body measurements printed on the pieces. And I can’t tell you how grateful I am for this small mercy.

I had full intention of toiling, especially as the plan was to go full on lavish silk satin. Not every day your daughter gets married. I knew the price was going to be hefty. This dress only calls for 3m so I knew at the very least I was looking to spend around £100. But I did the sensible thing of looking around before I committed to the first fabric I found.

V2494 full length dress

John Lewis’ haberdashery department at Westfield, White City had not long opened and so I headed to check out their stock. Got chatting to a lovely sales assistant who was mesmerised by my pattern choice and eager to show me some ‘just-in’ peachskin fabric. I’d heard of it but never had the pleasure of a feel. It draped beautifully and suddenly the option of a more forgiving matt appearance became instantly more appealing, moreover the price of just £8 per metre! It was only available in red. But hey. That was ok. Kind of a no-brainer, really!

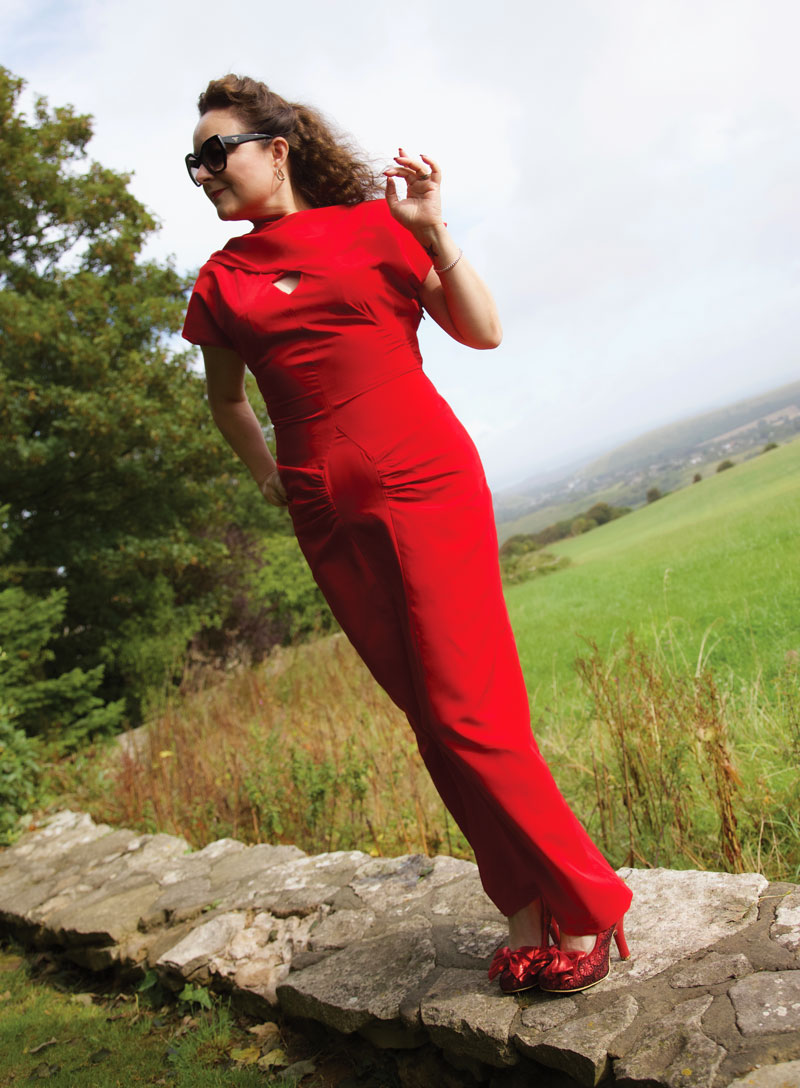
The making up of this dress was deceivingly simple. It was down to my haste that markings were confused and I’m so glad I rehearsed that little diamond opening on a different fabric. As you can imagine, there are a fair few positional points on that front piece and my first attempt saw me reposition it some distance lower than it was meant!

V2494 detail of peephole

Despite the tricky diamond peephole and that lovely inset panel the front, the rest of the construction was a breeze: There is no lining. So the peachskin was a perfect weight to not warrant an underlayer.

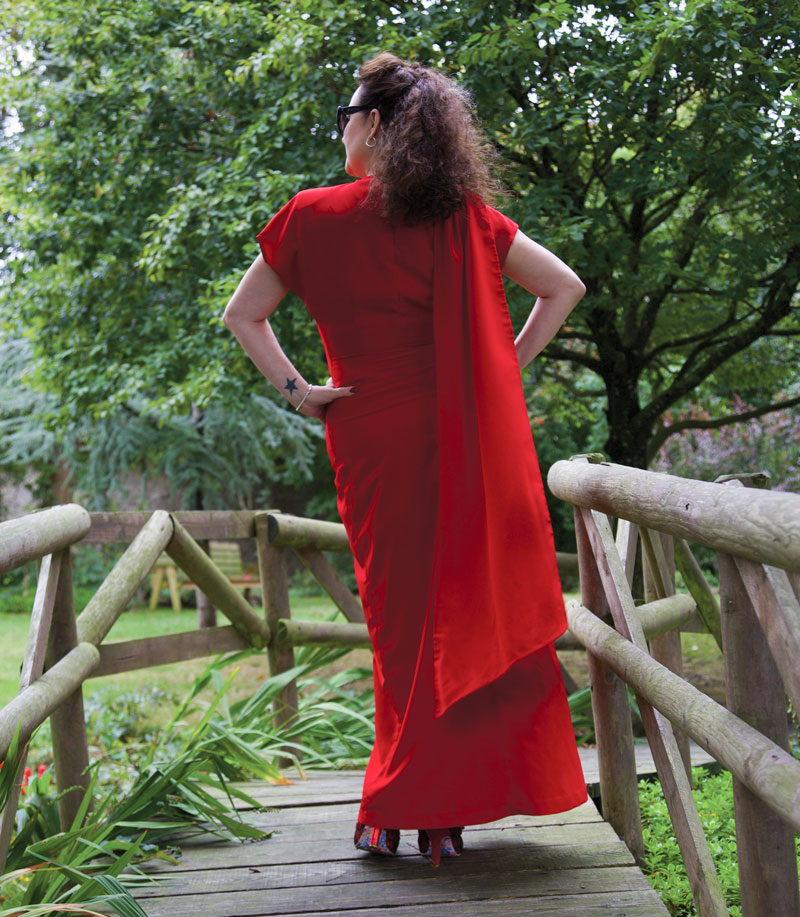
The sleeves are cut on, negating any need for tricky easing or setting in of sleeve caps. And that beautiful drape at the back is connected to the shoulder seam and simply hand tacked to the shoulder once the pleats have been arranged.

There was hand finishing of course: The hem at the hemline, as standard, and the hem of the drapey bit. I knew this would have to be neat as it clearly states on the pattern: “single-layered drape, (wrong side shows)”. So I just took little slip stitches in matching thread all the way round. This is where the fabric let me down a little bit as it syntheticicity wouldn’t allow a decent press and it resembled more of a rolled, rolled hem. But it was ok. Just a little bit annoying. Silk in this instance would have behaved a whole lot better I’m sure.

V2494 back view of dress and over the shoulder drape

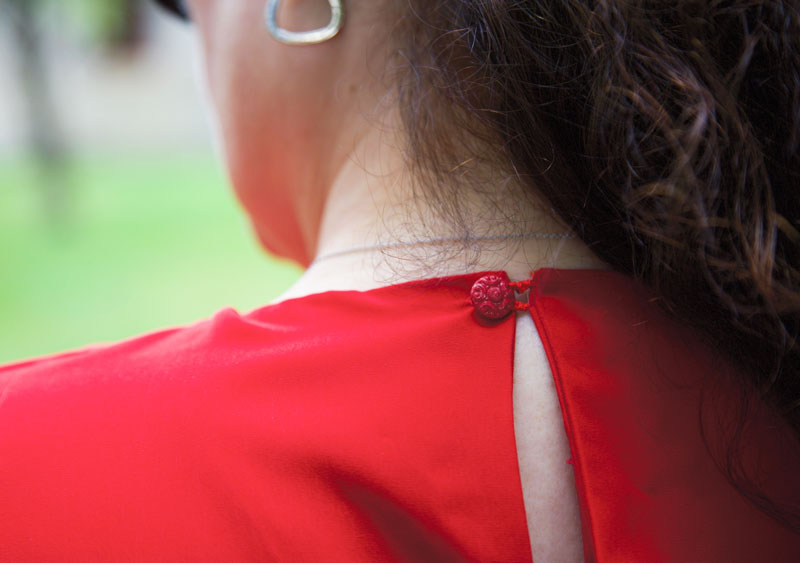
I confess I didn’t fully finish this dress until the morning of the day. Early hours of the morning I was still finishing the hemming and sewing a button loop (rather badly) on the back. I always intended to have just the one little button as opposed to a whole line of them as suggested but still managed to make it wonky! I do love that little vintage button though. It was just waiting for this dress.

V2494 Vogue dress button and loop
V2494 detail of button and button-loop

I didn’t manage to get any suitable full length shots of it on the day hence a reshoot by Daniel almost a year later! It’s a bit tighter on me now than it was on the big day but that’s no surprise as my nerves ensured a low cal intake on the lead up! And to be fair I’m not entirely sure when I’d wear this again. So it’s on with a dress cover and resigned to the back of the ‘drobe until a suitable situation arises.

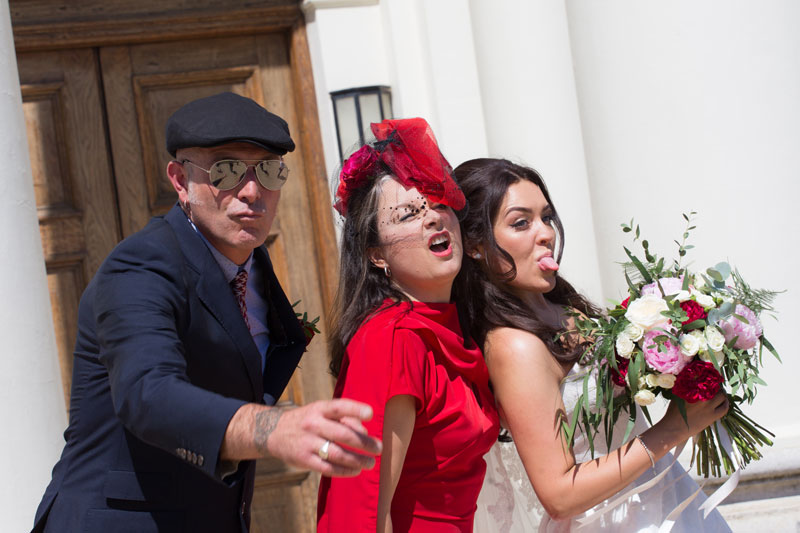
However there was one shot in particular that just about sums up how stylishly and elegantly I carried off that dress – and pretty much sums up the non conformity of our fam! Brilliantly captured by Daniel of course.

V2494 Mother of the bride with bride
V2494 Mother of the bride with bride © danieljamesphotographic

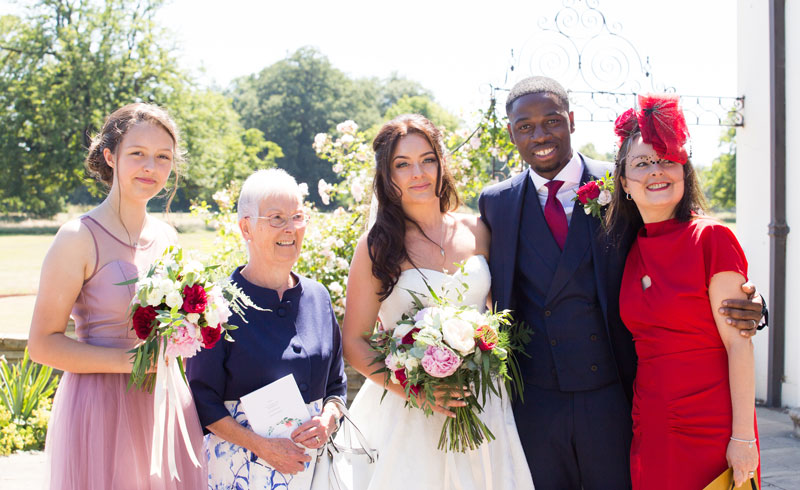
Note that I did succumb to wearing a hat. Not just any old hat, mind – an exquisite and original ‘piece of art’ that was beautifully handmade by my wonderful milliner friend Jayne at Hepsibah Gallery in Hammersmith. Again, I’m not sure I did it as much justice as it deserved but it certainly felt wonderful to wear and made me feel so very important!

From left: Youngest dort, Samaria, my mum (also wearing handmade) my daughter Stephanie, her husband Daniel and me!
Shoes: Irregular Choice (old)

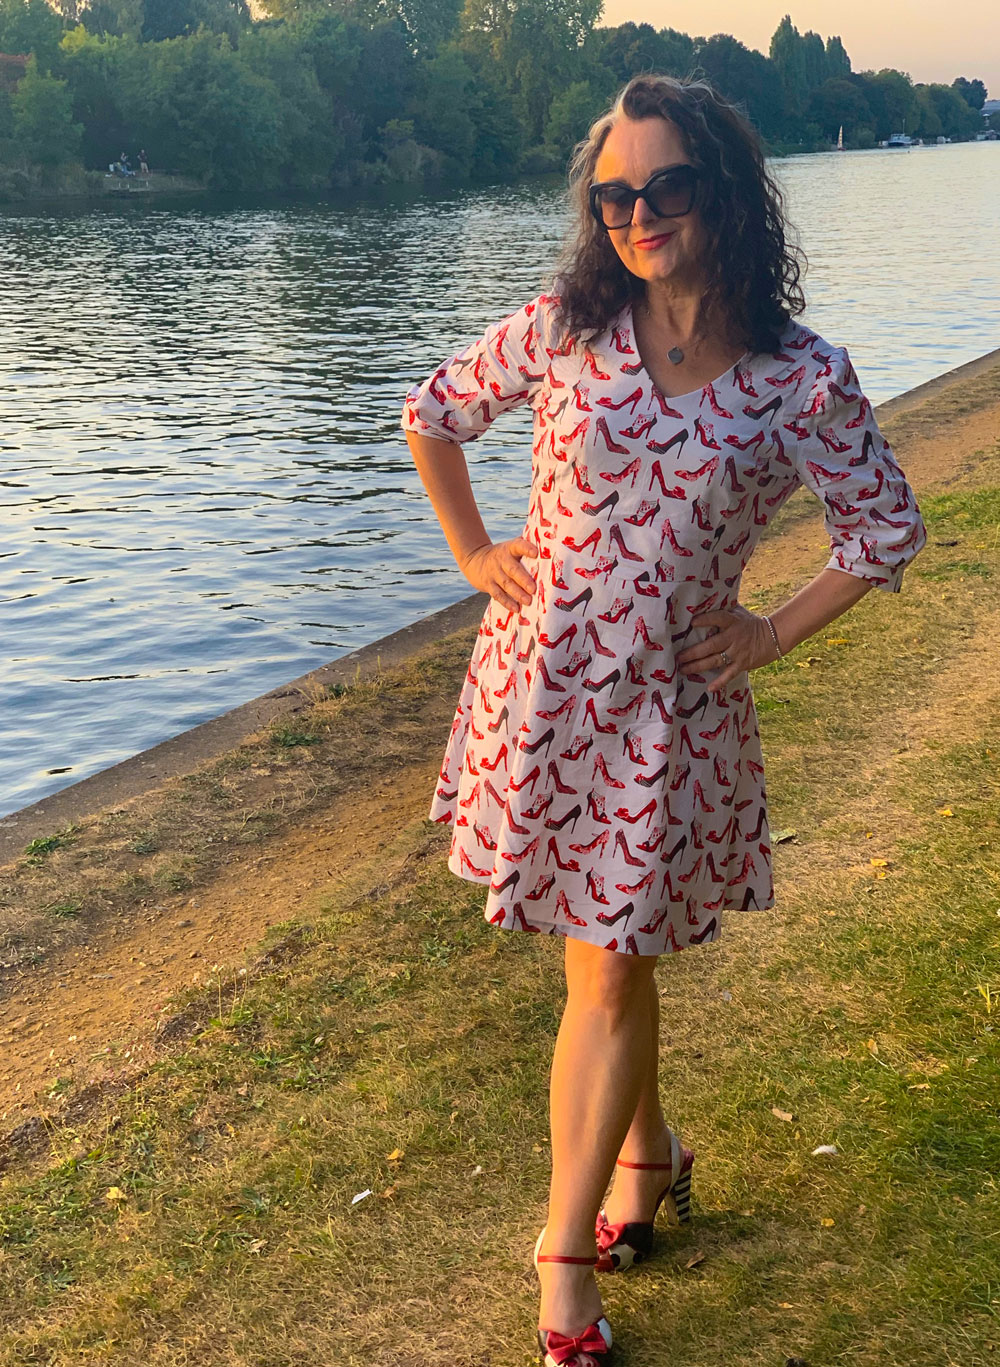
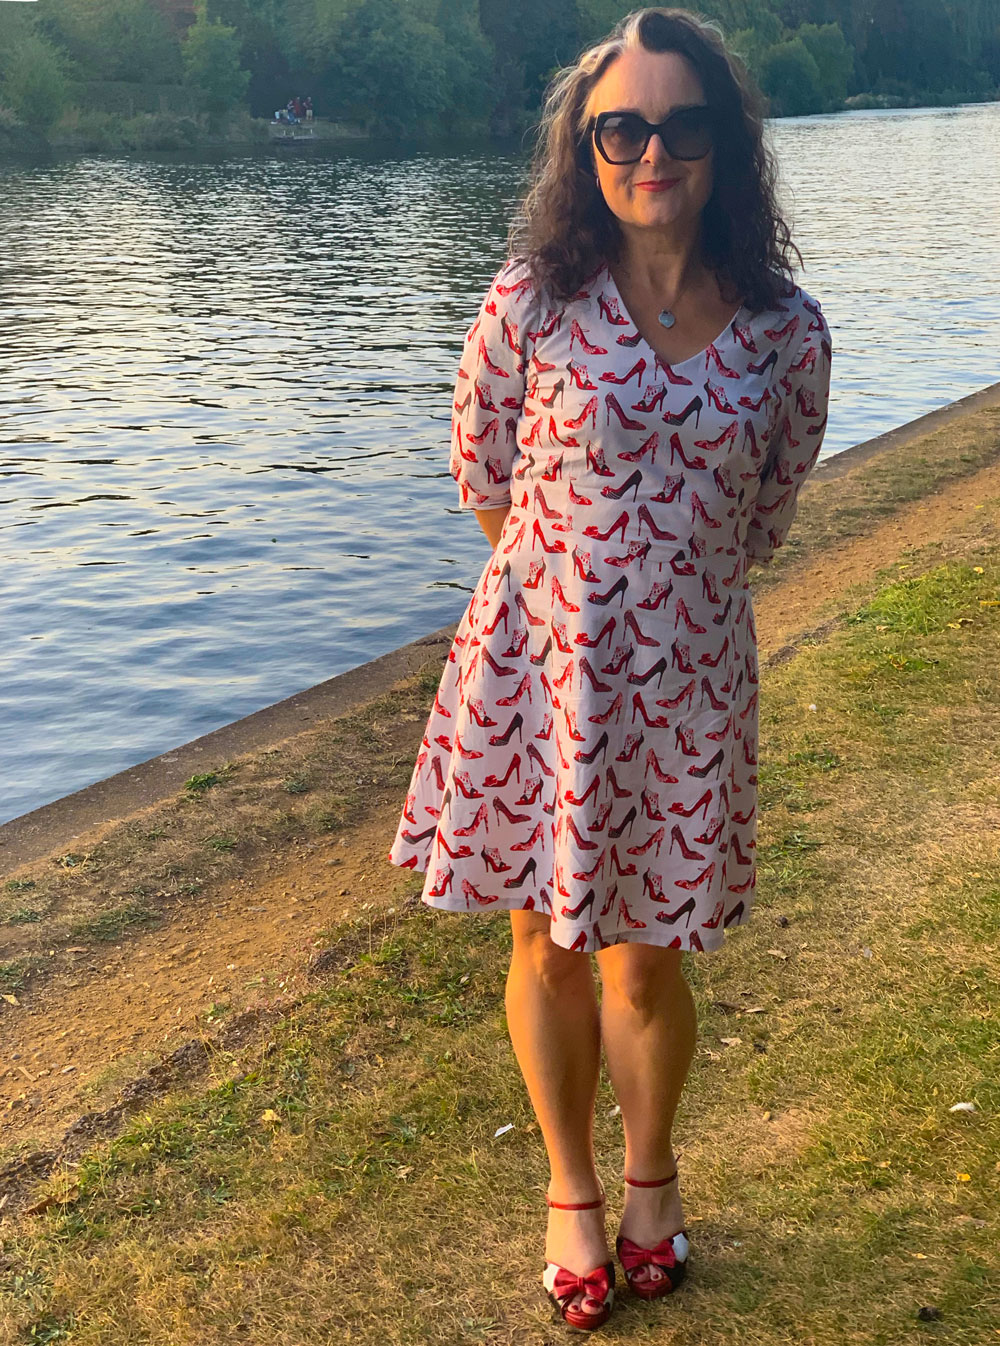
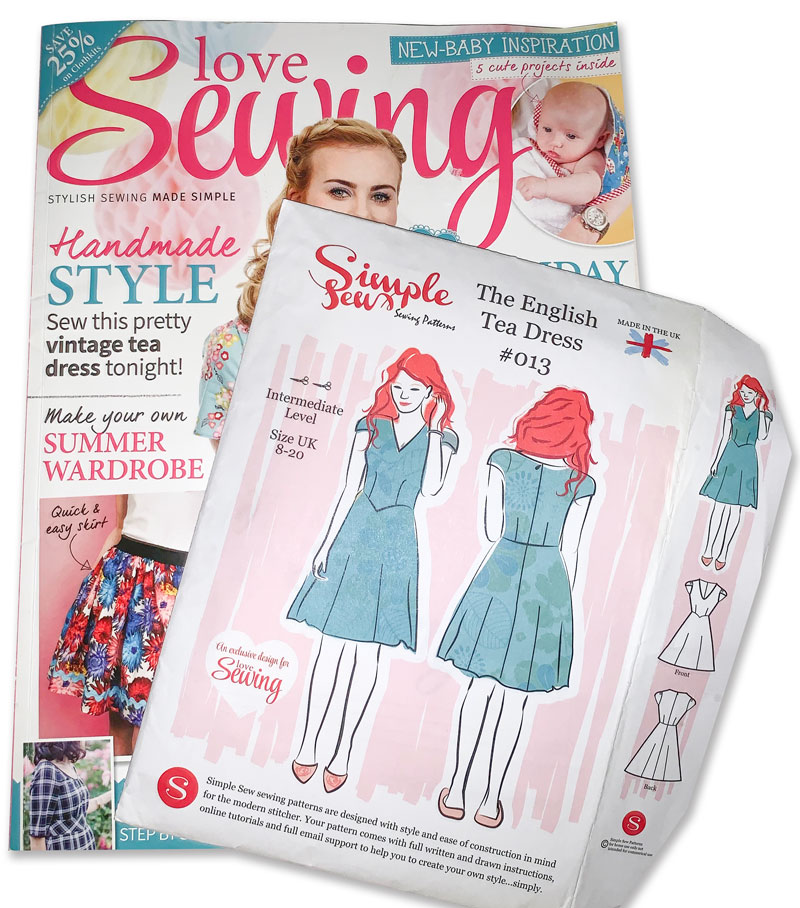
The English Tea Dress #013 by Simple Sew

Simple Sew English Tea dress

This was exactly the kind of pattern I was looking for when I was actually hunting for something else! I’d put it aside (read, under the sofa) as a not-so-taxing project for when I got a few hours down time. The back cover blurb was all-encouraging of this, too.

Like many other sewing people, I’ve been on a mission to work through my stash fabric before buying anything new, in the name of sustainability and also the hope of gaining some floor space in my bedroom!

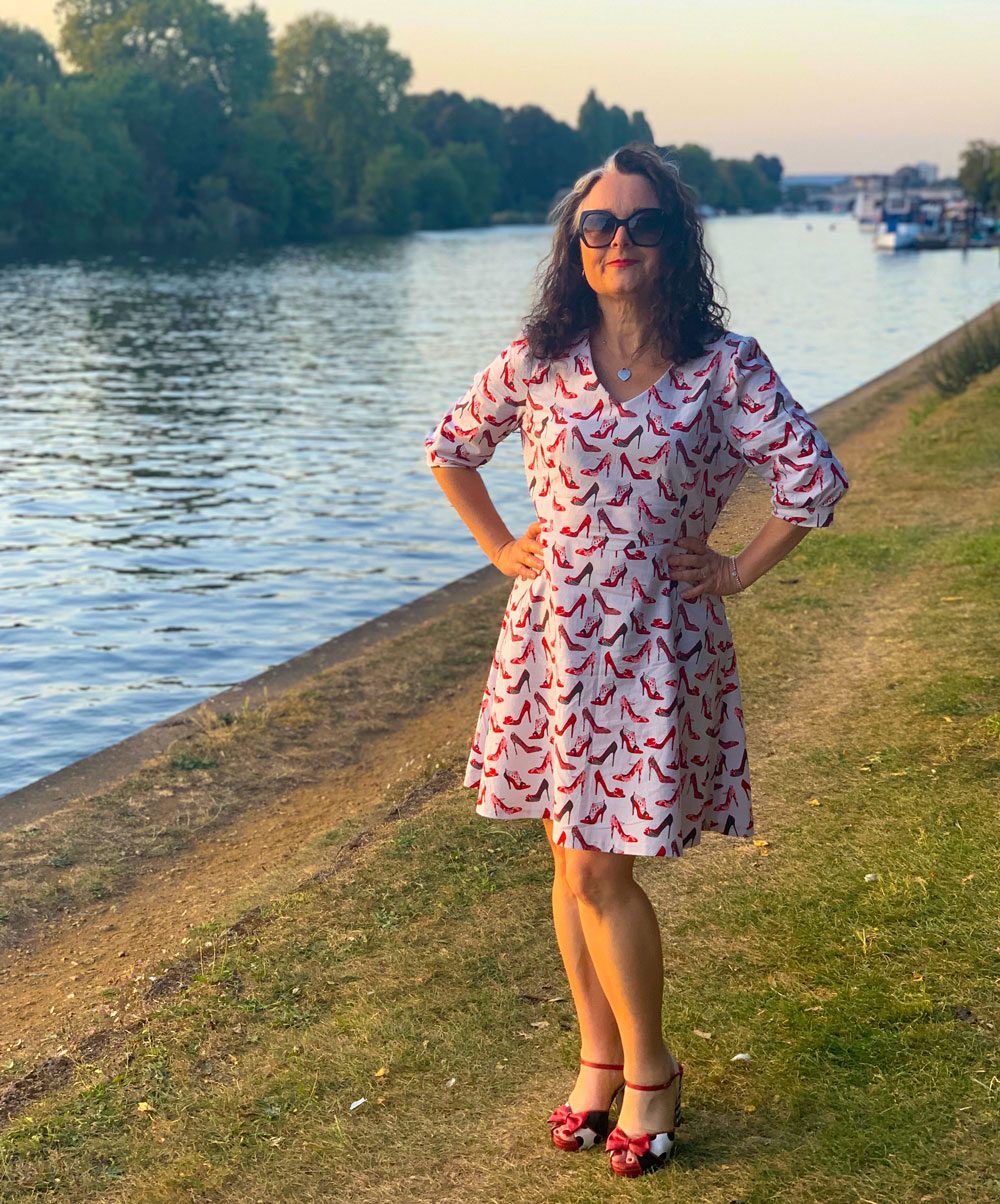
Simple Sew English tea dress

And this dress pattern is perfect for all those 2m lengths I purchased. It requires 1.90m of 60″ fabric for all sizes 8-20 – sleeves and all – which is pretty damned economical really.

Love Sewing Magazine and English Tea Dress sewing pattern

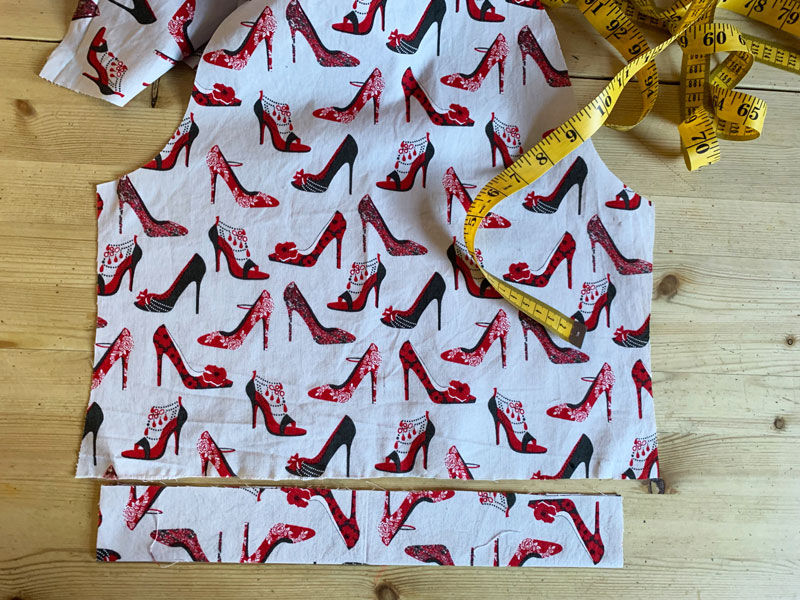
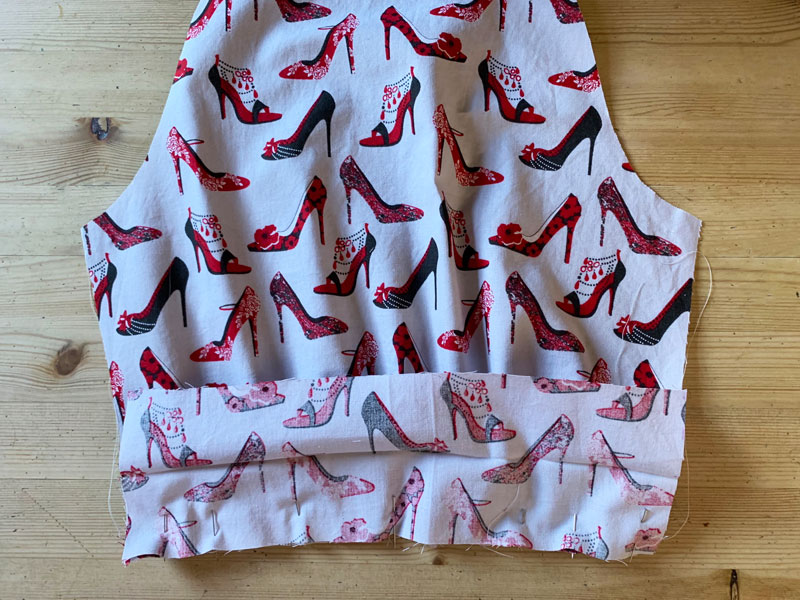
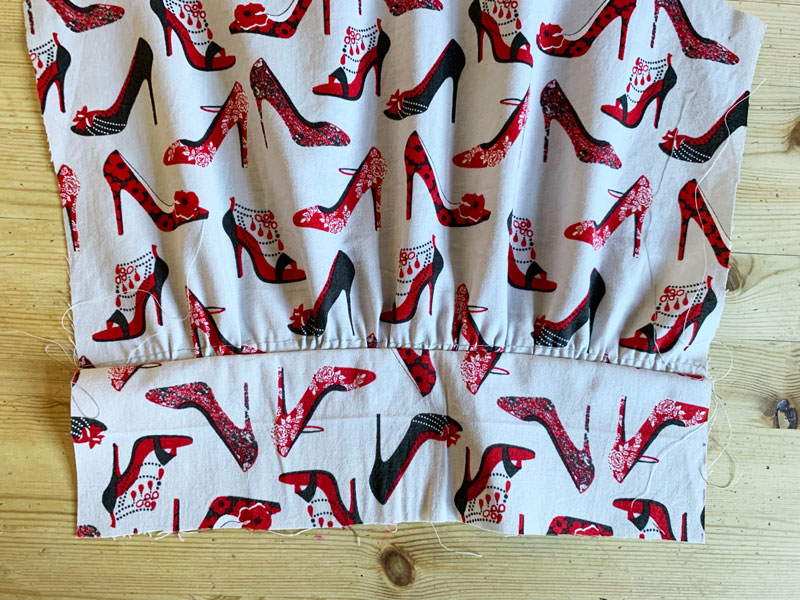
I had 2m of what I believed to be 45″ wide cotton fabric and that almost fitted the bill. I just had to shorten the skirt by 2inches to fit all the pieces on. Especially as I then found out that it was only 43″ wide. I’m guessing it shrunk in a prewash – better to have found out at this stage of the game though! But still I had to count my chickens that all the pieces fitted considering the direction of the design. Upside down shoes would have been disastrous!

All went swimmingly but I’m amazed at the lack of notches on the pattern pieces. There was one to mark the front sleeve placement and ordinarily that’s pretty crucial but in this instance the sleeve pattern folded near enough symmetrically so it wouldn’t have made a spot of difference.

Simple Sew English Tea dress

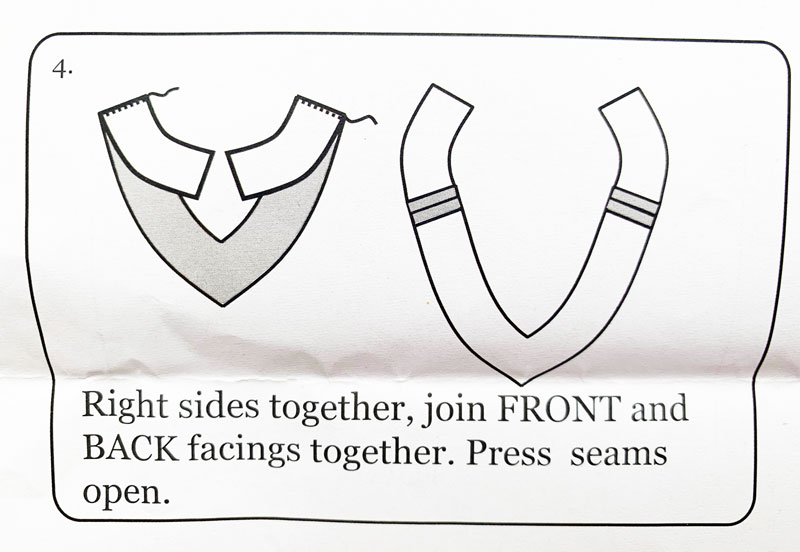
But that was it on the notch front! Piecing the front and back facings together had me thinking, which is a bit lucky as it prompted me to place over the bodice neckline to check I was sewing the pieces together the right way round. It would have been so much more helpful to have a marker on each of the shoulder seams.


TIP#1

Mark notches on the facing pieces so you remember to sew them the correct way round

facing instructions

And if I’m being picky (moi?!), the side seams of the skirt would have benefitted from a notch or two. They are bias-cut and hence a little stretchy so a midway marker would help prevent a potential pucker! I’ve marked mine for future use.


TIP #2

Align skirt pattern pieces at side seams and create notches for more accurate alignment


Adding to the facing part of the story – it was very useful and imperative actually, to include the snip at ‘X’ –the point of the V-neck. It did press nice and flat but I included 2 additional stages here:


TIP #3

Under-stitch the seam allowance to the facing to prevent it from rolling out at the neckline.


and then:


TIP #4

Hand stitch the facing to the shoulder seams to secure it in position stop it from popping out.


I’m being picky again. I know. But from past and bad experience, I can’t stand a flappy facing!

So all went well, despite lack of notches until I got to the sleeve section. And of course I wasn’t content to sew the options illustrated on the packet or in the accompanying issue of Love Sewing magazine (issue 15). Not only because I’m contrary but the 3rd non-illustrated nor photographed option was the best IMHO. The 3rd option being a half length, cuffed variety!

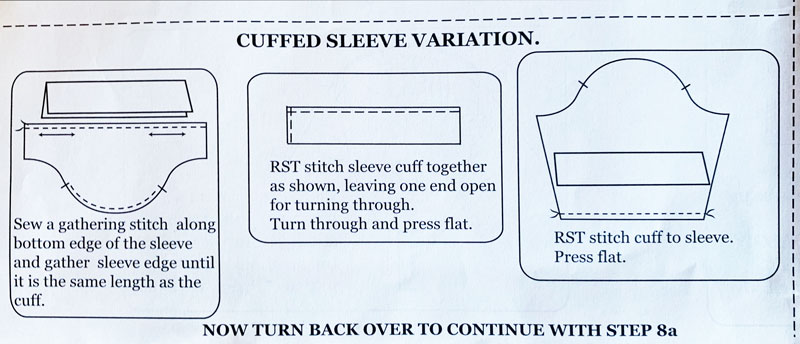
But, forgive me for being old and slow (and of course picky)… but how would you interpret these instructions?

cuffed sleeve instructions

Especially when the cuff was near enough the same length as the bottom of the sleeve. And yes I did double check I’d cut the correct sizes!

cuff piece next to sleeve
Bottom of sleeve not much wider than the cuff piece.

I spent way to much time thinking about this stage and then went off piste with this tip:


TIP #5

Measure your arm circumference, comfortably, just above your elbow and add 1.5cm seam allowance to each end. Trim cuff piece to this measurement. Press in half horizontally to crease the centre/ (ultimately the bottom) of the cuff. Gather the bottom of the sleeve as stated and sew right sides of the gathered edge to the right side of one raw edge of the cuff piece.

cuff piece pinned to sleeve
Cuff piece pinned to sleeve along raw edge. See the crease in the middle.
cuff sewn to sleeve
Cuff sewn to sleeve. Spot the deliberate mistake!

Gather the sleeve head as instructed – although, having said that, it’s not really instructed from where and to where on the pattern piece, so I just mirrored the notch to the back and gathered between the two points. Sew the underarm sleeve seam all the way down to the bottom of the cuff. Press sleeve seam open. Press under 1.5cm on the remaining raw edge of the cuff and then fold the piece to the inside of the sleeve along the pre-pressed fold. Hand-stitch to the inside seam line to form a binding and finish the cuff. Remove gathering stitches and press.

Having worn this dress and seeing how the cuffs have curled, I might also use  a light fusible interfacing to stabilise the cuff next time.


I hand finished the hemline of the skirt, of course. Just because a machined one would irritate me having invested so much time to go lazy at the last hurdle!

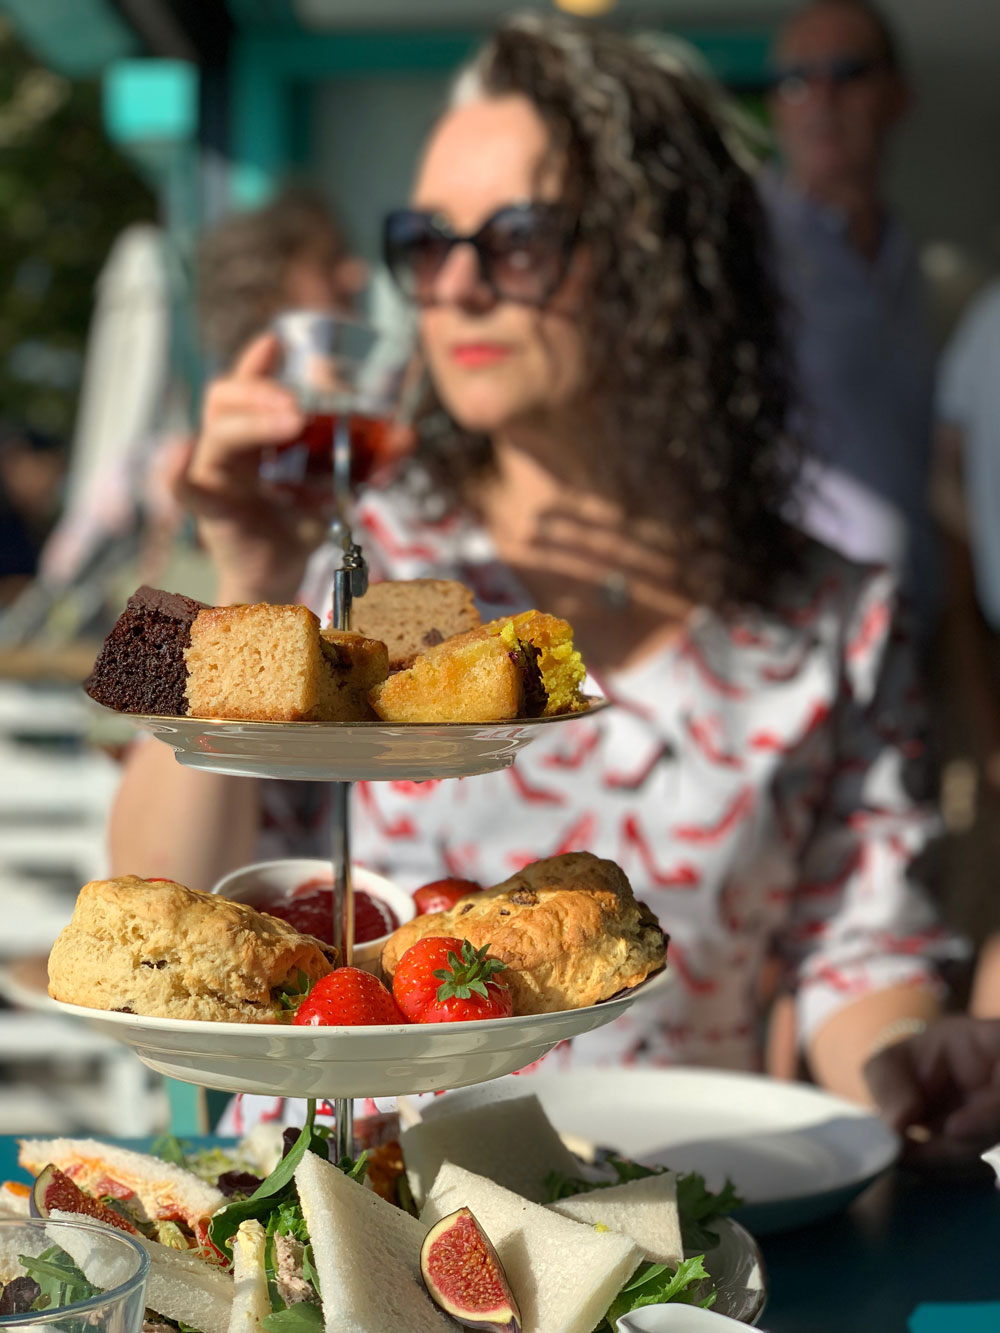
So where do you suppose I might have worn my English tea dress as soon as I made it? No prizes for guessing of course!

Enjoying a vegan cream tea
Vegan cream tea at The Ginger Bees cafe in Kingston-upon-Thames

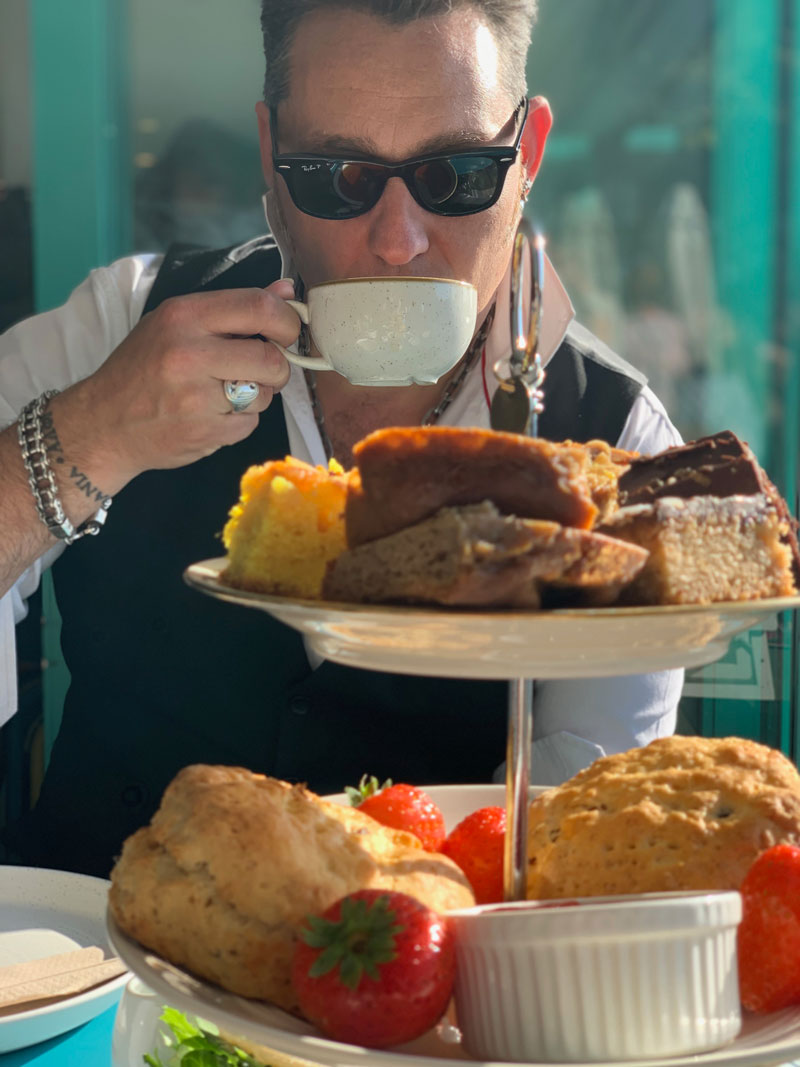
Mr O and I went to The Ginger Bees cafe, Kingston-upon-thames riverside, for the most delicious vegan cream tea. Well, mine was vegan – Mr O went full on full cream!

Mr O and his cream tea
Mr O enjoying his full on full cream, cream tea!

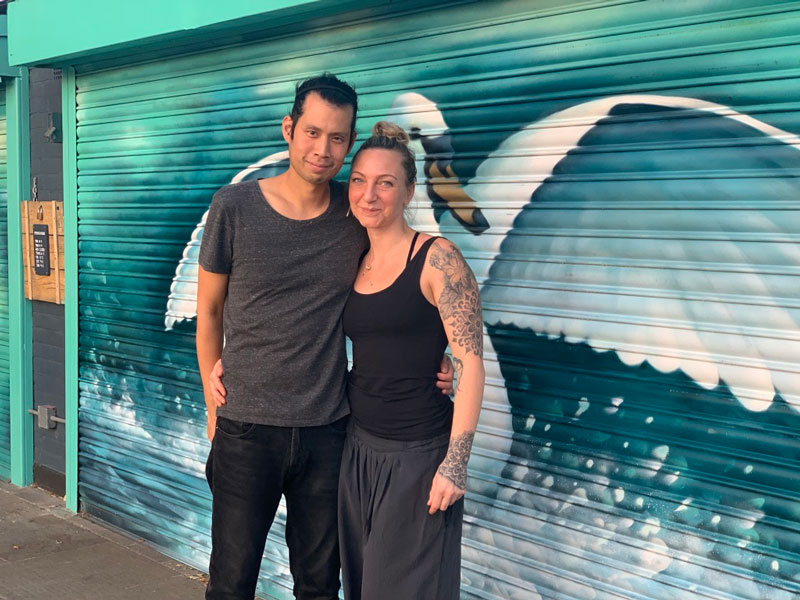
I booked the day before on recommendation and we were not disappointed. The lovely couple who bought the café just a year ago have something very special going on here. Thank you so much Gavin and Beth for looking after us. It was such a treat and the perfect occasion to showcase my new tea dress!

Beth and Gavin, owners of The Ginger Bees Cafe in Kingston-upon-Thames

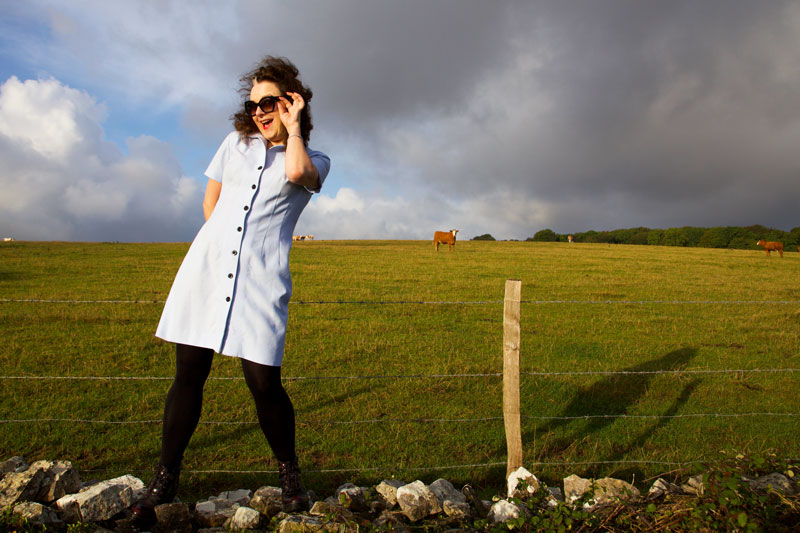
Vintage Simplicity 6772 shirtdress revisited

simplicity 6772 vintage shirt dress

There is joy to be had when you revisit a pattern that you know only needs a couple of tweaks. Even more joyous when the pieces have been sat in a basket, all cut out and are ready for a simple sew-together.

I’d almost forgotten about it. Though to be honest, the main reason for it sitting pretty was that I was unsure about the colour. I liked the pale blue, linen-like fabric when I scored it cheap all that time back from a closing-dowm sale in Ealing, but I just didn’t have a plan and so it took up residency in stash mountain for a very long time before it’s destiny was decided.

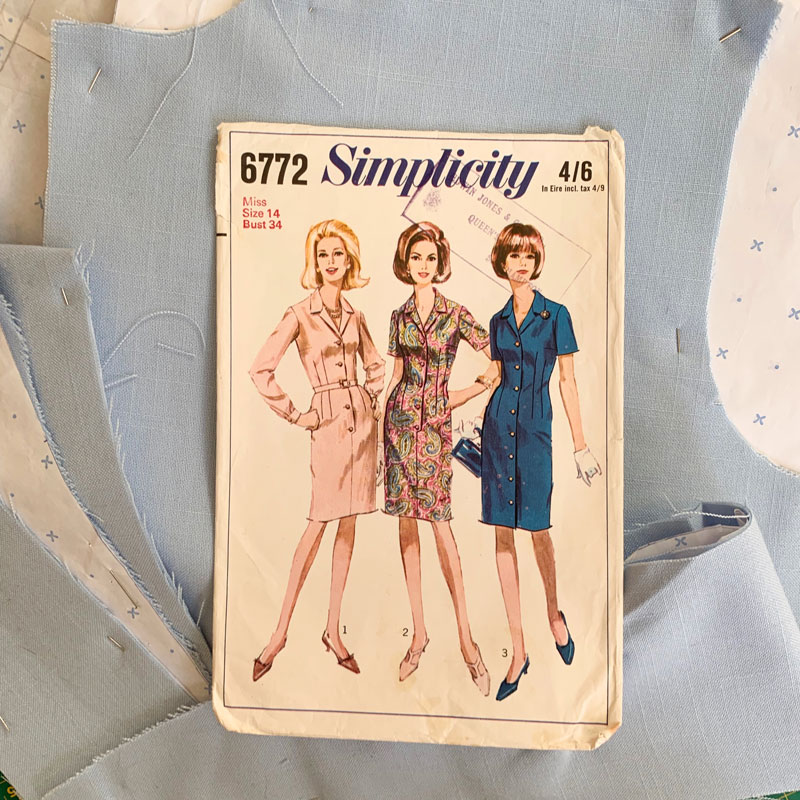
A little burst of consciousness about the wastefulness of my impulse buying spurred me into action to finish any WIPs before buying any more fabric and so I paired it with vintage Simplicity 6772 – one of my favourite vintage shirt dress patterns.

simplicity 6772 sewing pattern

I used this pattern first in 2015 from suiting fabric – my worky shirtdress – which is perfect for an Autumnal wardrobe and it gets a lot of work-wear. This next version was going to be great for those warmer months.

It sewed up beautifully. I took a smidge out of the ease of the sleeve head; shortened the hemline a little and I just loved the way it shaped up with all those darts. I used to hate sewing them but it really doesn’t bother me now especially when on realising how important they are for a great fit. It comes together pretty quickly, with no lining, and precious little hand sewing except for the hem and attaching the under-collar to the neckline.

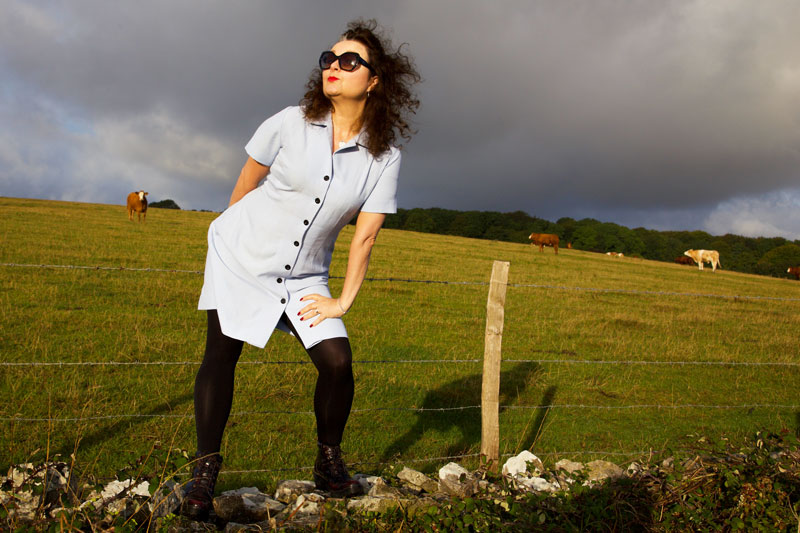
simplicity 6772 handmade shirtdress

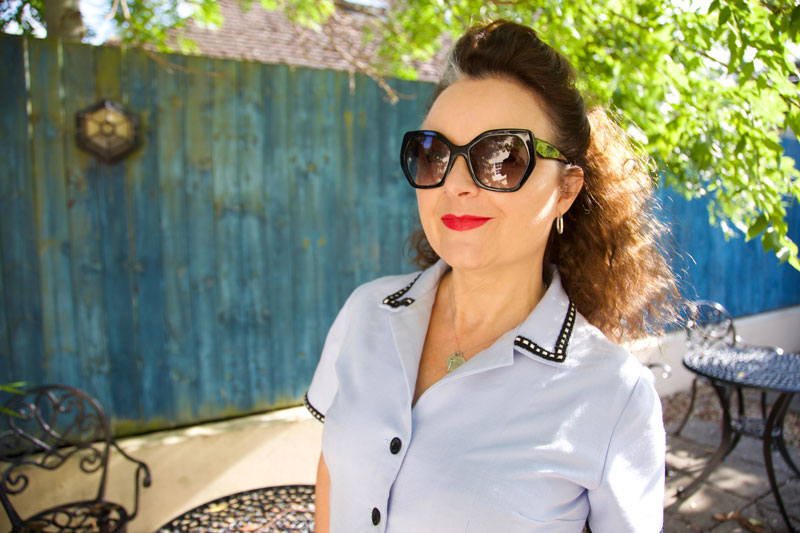
The only thing that bothered me with this pattern and fabric combo was that it looked a little ‘nursey’! I’m so not used to wearing light colours – my usual palette very much centres around red and black – and it was going to take a bit of getting used to, so I added some black buttons to subtract some of the ‘clinical’!

And I’ve been very happy wearing it until a ‘friend’ jokingly asked why I was dressed like a nurse. The cheek of it! Really struck a nerve and I was not best amused!

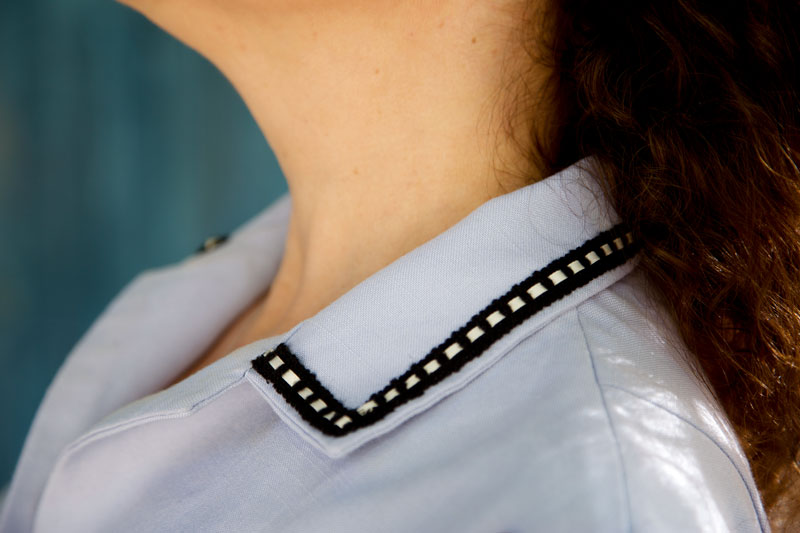
So, not to be defeated, I had a little rummage in the trim box and found some lovely ribbon-insert braid – just enough to edge the collar and sleeves.
I’ve just spent a lovely long weekend away in Devon with Mr O (hence the random poses in fields of cows) and this was a great little hand-sewing project to complete in the hotel room when those ominous black clouds did their thing outside.

ribbon-insert trim on collar

And I’m really happy with the results. I think it’s a little less ‘care-worker’ and much more ’50’s diner waitress’ now. But that’s ok. I can live with that!

simplicity 6772 trimmed collar and sleeves

I’ve got more love for it now. Which is a good thing because this dress is so easy to wear and so flattering, IMHO! All thanks to some great pattern drafting and lots of perfectly placed darts.

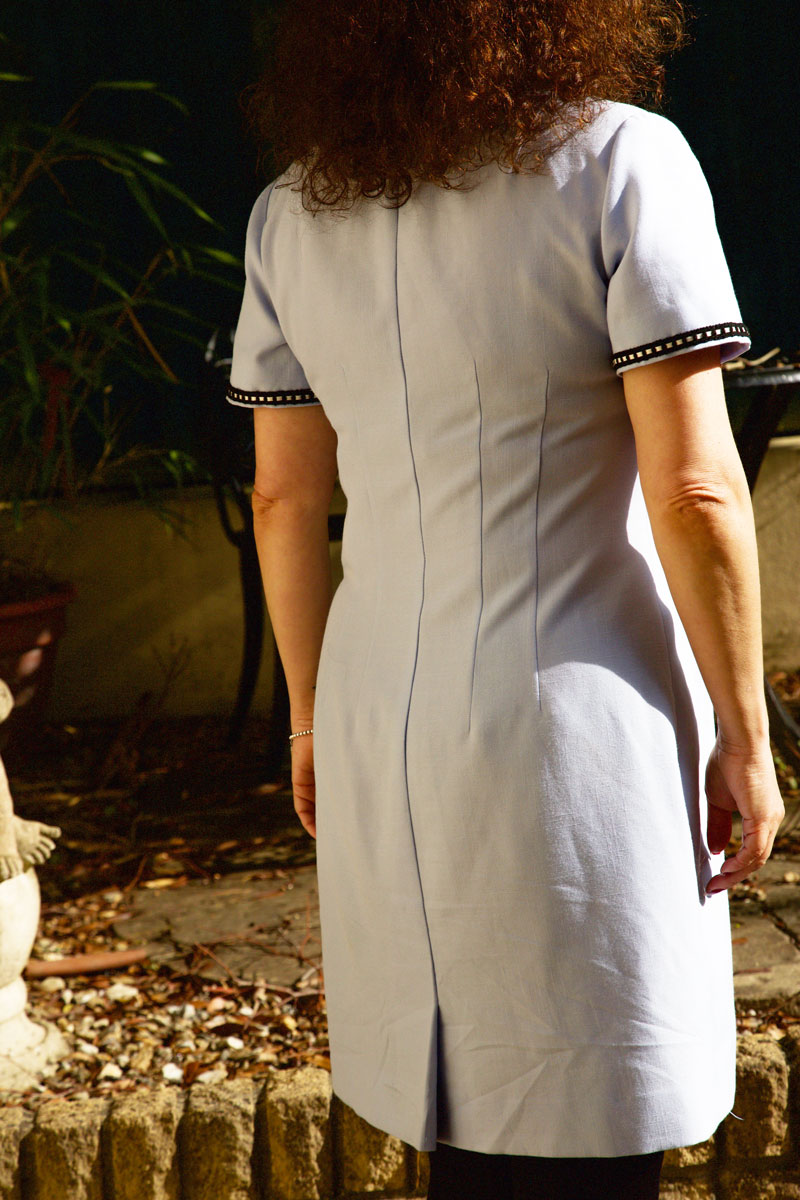
back view of simplicity 6772

The journey of this dress definitely provoked some thinking about my buying habits. My bad, bad buying habits where I’m swayed by a bargain and the belief that a cheap length of fabric will have an ideal use at some point. Unless it’s of fairly good quality and at the very least within my preferred range of colours, it’s not going to be put to use without compromise. And I don’t want compromise. It won’t feel right and that in itself will not be a fair exchange for all the hours of work invested. And also, I’m so over that ugly box tower of fabrics looming over my bed. Lesson learned… I hope!

Photos by Daniel James Photographic

What I wore to the Dressmaker’s Ball 2019

ooobop wearing V8814 dress

‘Get me to the Ball!
‘There is a Disco at the Palace!
‘The rest have gone and I am jealous!’

Just like Roald Dahl’s Revolting Rhyme about Cinderella when she was stropping out about a lack of invite, this is exactly how I was feeling when I learned too late about the first dressmakers ball in 2017.

Needless to say I subscribed to all the hashtags and signed up to get news of the next one and snapped up that ticket as soon as it was live.

The event is organised by team Crafty Sew and So and this year’s was at The City Rooms in Leicester.

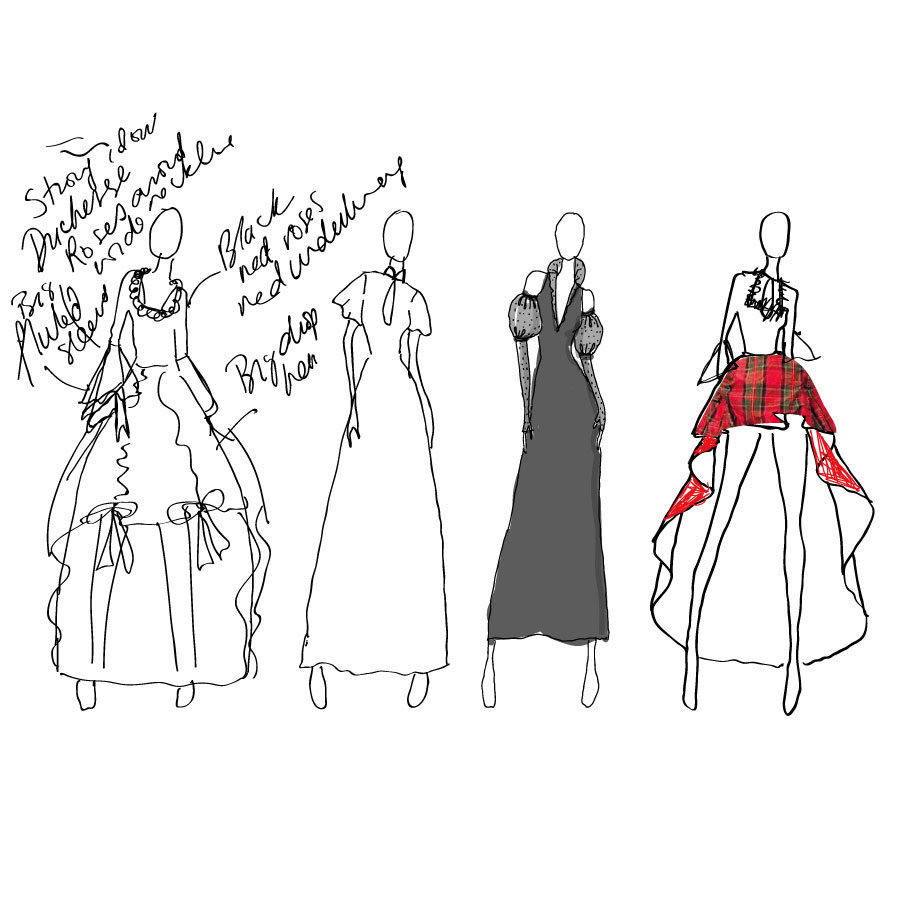
The minute I had that ticket secured, my head flooded with all the possibilities for a free range, self drafted no holds barred gown of dreams, all for me. Elizabethan ruffs, balloon organza sleeves. Crinoline skirt. Bustle perhaps? I had a year after all.

designs for ooobop ballgownTruth be told and no surprises here, I decided on the dress with just over 10 days to go. You know how it goes ~ work, family, work and more work. And I’m a little bit sad to say that my all time avant-garde number ended up straight out of a packet.

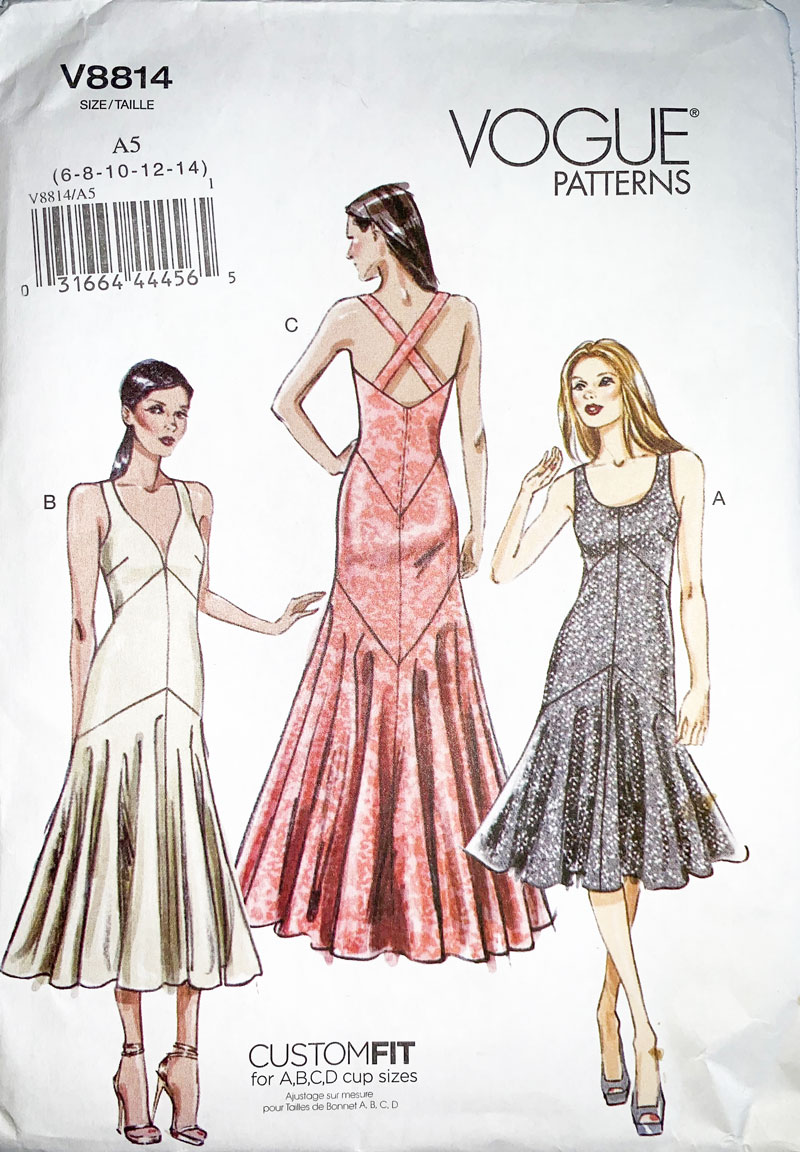
Vogue pattern V8814

A lovely pattern for sure but the proof was in the making: No toile time. No anything time. Time? Definitely a thing of the past. Enjoy it while you can kiddos. It passes you by on the blink of an eye with every added birthday.

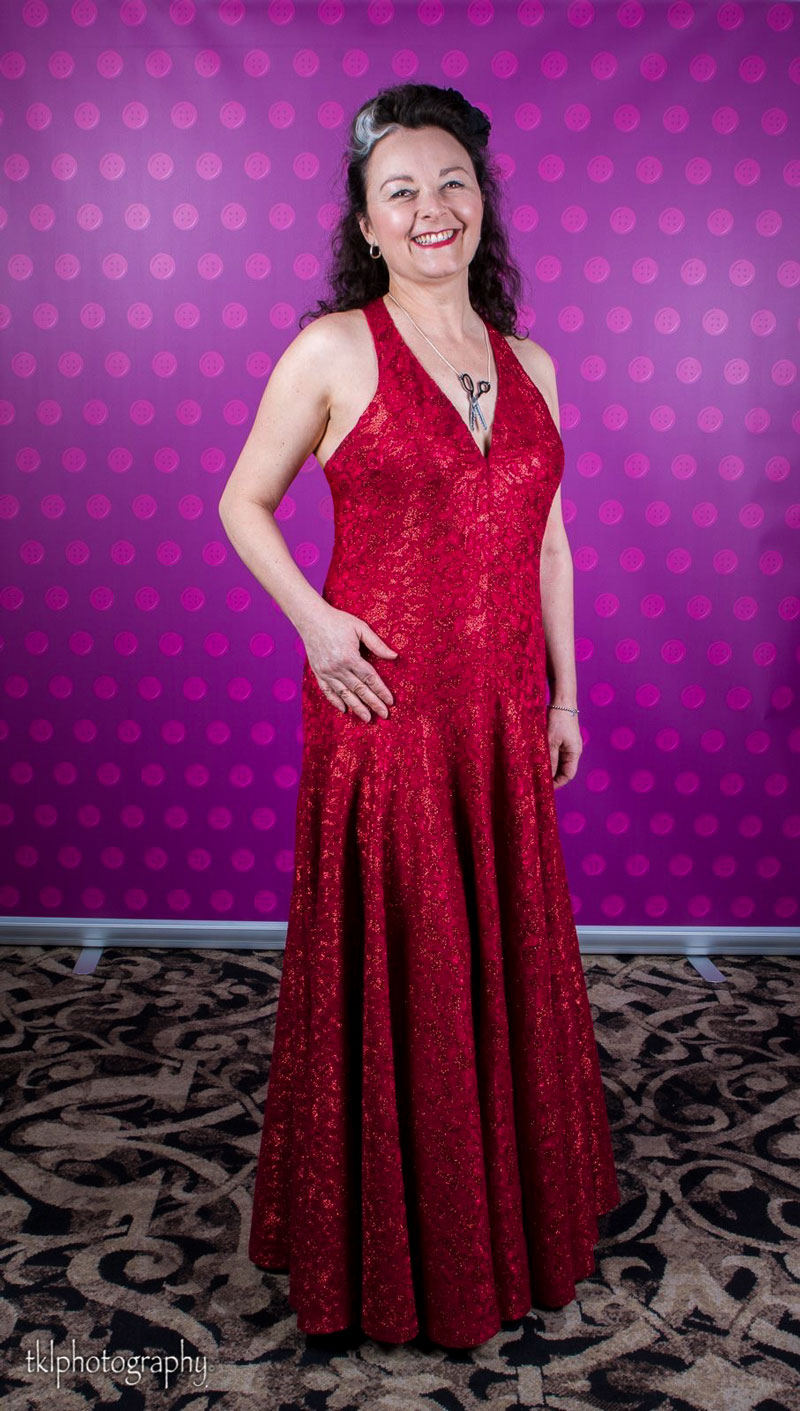
Now let’s discuss this slinky Vogue number V8814. I chose floor length, version C. I was going to a ball after all and visions of slow-mo sweeping skirt-motions danced in my head. I opted for the one with plunging neckline and crossover straps at the back. The bodice is snug to the hips and then all the volley is in the circular skirt.

I am so grateful to those pattern companies who display the finished sizes on the pattern pieces. Lord only knows why quite so much ease has to be added. I’d have swum in the suggested size according to actual stats!

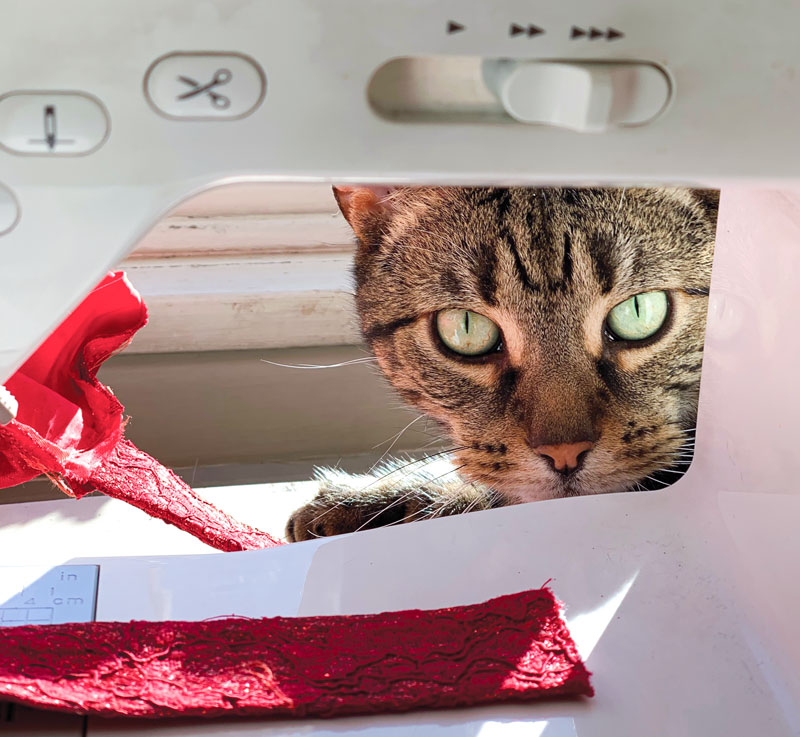
And I am so delighted to have chanced upon a pattern that for all it’s sophistication was a total breeze to put together! The only area that needed fixing was the neckline which gaped a little so I hand-sewed some 5mm wide elastic along the inside of the neckline, stretching slightly to pull it in more to the chest. And the only tricky bit was convincing Pants I didn’t need his help!

Pants the cat helping me sew

I’d bought a singular ticket to the ball just because I worry about making plans with people and then have to cancel due to work commitments. Plus I knew that I would meet people there. The sewing community is such a welcoming and fun place, of that I was certain.

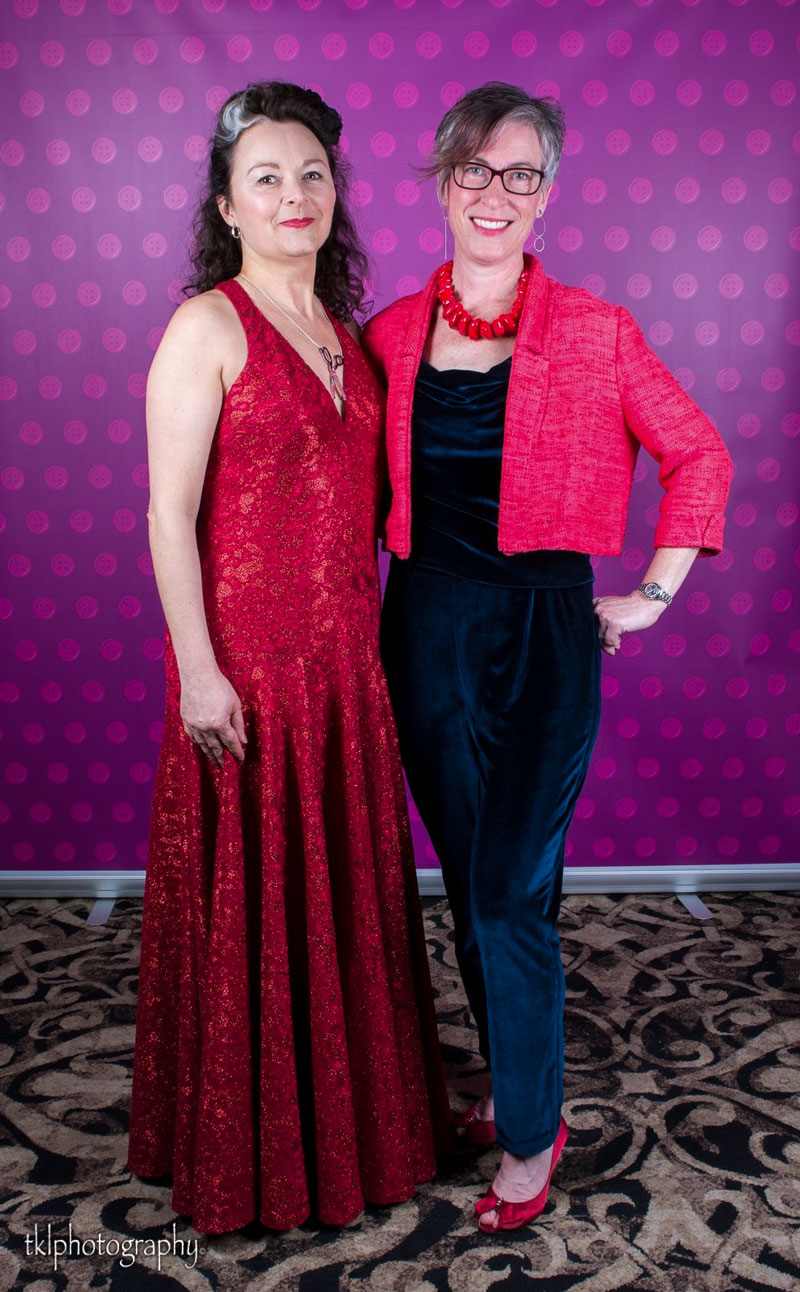
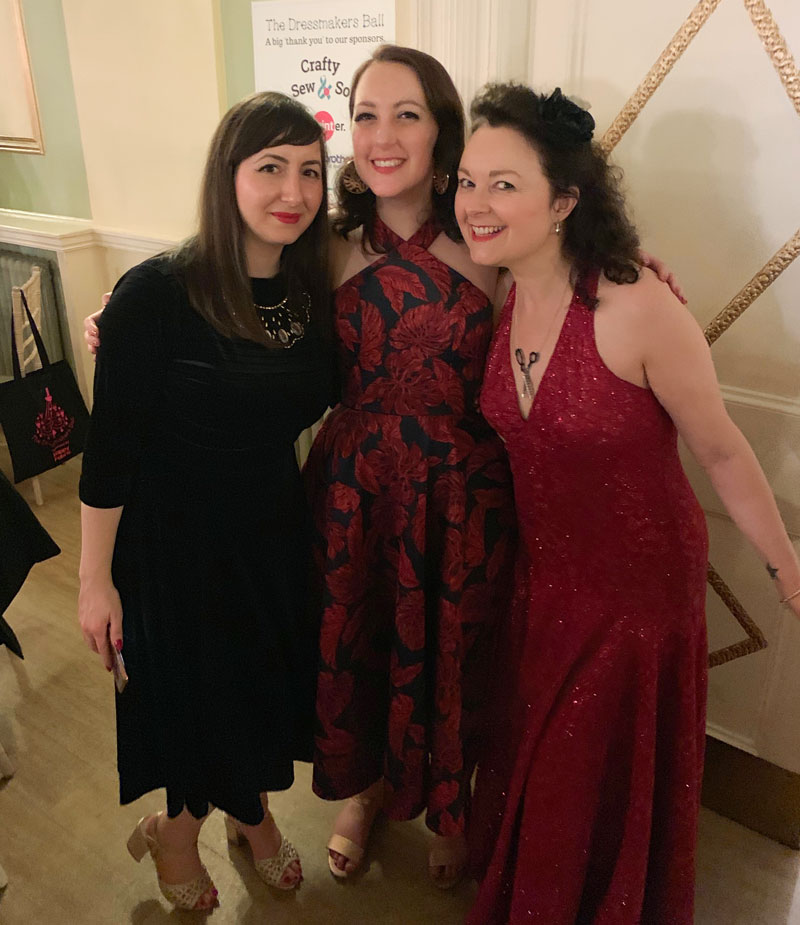
But that didn’t stop me from being self-conscious in front of the photographer. I’m so spoilt by Mr O’s awesome willingness to oblige my blog shots that I forget what it’s like to stand and pose in front of someone you don’t know! Thank you TKL Photography for bearing with me and thank you Tamsin, for posing with me and making me feel a little less awkward!

ooobop with Tamsin from Pimp my Curtains

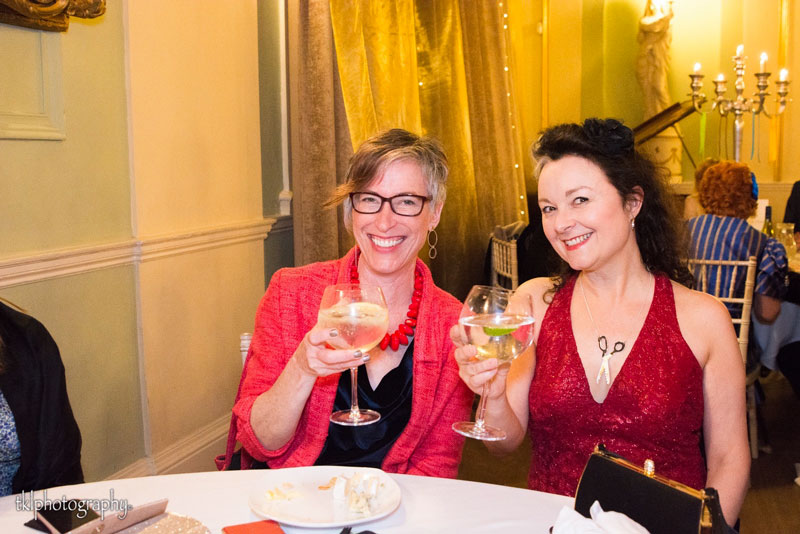
We decided upon fishbowls of gin to relax us even more!

Tamsin and ooobop drinking gin

It was such an amazing evening. A ballroom brimming with stunning guests all adorned in bespoke, handmade attire, dancing to some really cool covers by a brilliant live jazz band. I spent most of the evening gawping at stunning outfits and discussing them, clinking and raising a glass at every opportunity to the brilliant hosts and the awesome sewing community.

And look who else I found: Marie from A Stitching Odyssey and Amy, blogger at Almond Rock and editor of Love Sewing Magazine.

judges at the dressmakers ball 2019

Not at all trying to fraternise with the judges before the catwalk competition – honest, guv!

So why have I taken so long to blog about this dress?

In short.

The fabric.

I’m ashamed by my panic purchase of glittery fabric.

‘I want a dress! I want a coach!
‘And earrings and a diamond brooch!
‘And silver slippers, two of those!
‘And lovely nylon panty hose!

Perfectly weighty and with great drape for the skirt, I chanced upon it in the Goldhawk Road. It appears to be a red lace bonded over a synthetic satin with glitter glued in the gaps of the lace.  I joked about the fire-hazzard potential should I stand too close to a candle, given the probability of not a single natural fibre involved. But it was met with a straight face. The seller was already was unhappy that my need for five yards meant discarding the first couple of metres on the roll as the lace was clearly bonded in sections. Lucky I noticed the join because he sure as hell wasn’t going to point it out!

But I did not question the glitter. 

Recently, my day job has involved lots of work relating to the harmful effects of plastic on the environment, and though I haven’t come across any reference to glitter in the books as yet, this quote by Alice Horton, a research associate at the UK’s Centre for Ecology and Hydrology, jumped out at me and touched a nerve:

“While there is currently no evidence specifically on glitter being bad for the environment, it is likely that studies on glitter would show similar results to those on other microplastics”.

And now I feel bad. For not thinking it through. For the trail of glitter I literally left behind. I don’t exaggerate when I say that I left a red glittery bum shape on my seat when I stood up after dinner. And I’m sorry for anyone who sat in my place afterwards and took a little piece of me home with them.

To this day I’m finding that damned stuff on my shoes, in the carpet, on the cat… It’s never going to go away. And then it’ll end up in the sea and all the poor fishes will be lunching on it.

And I know I can’t un-do it. But I can not-do it again. No more more glitter for me. I need to think before I buy. I just can’t cope with the guilt! Or do you think I’m over-reacting?

Vogue Designer Original 1486

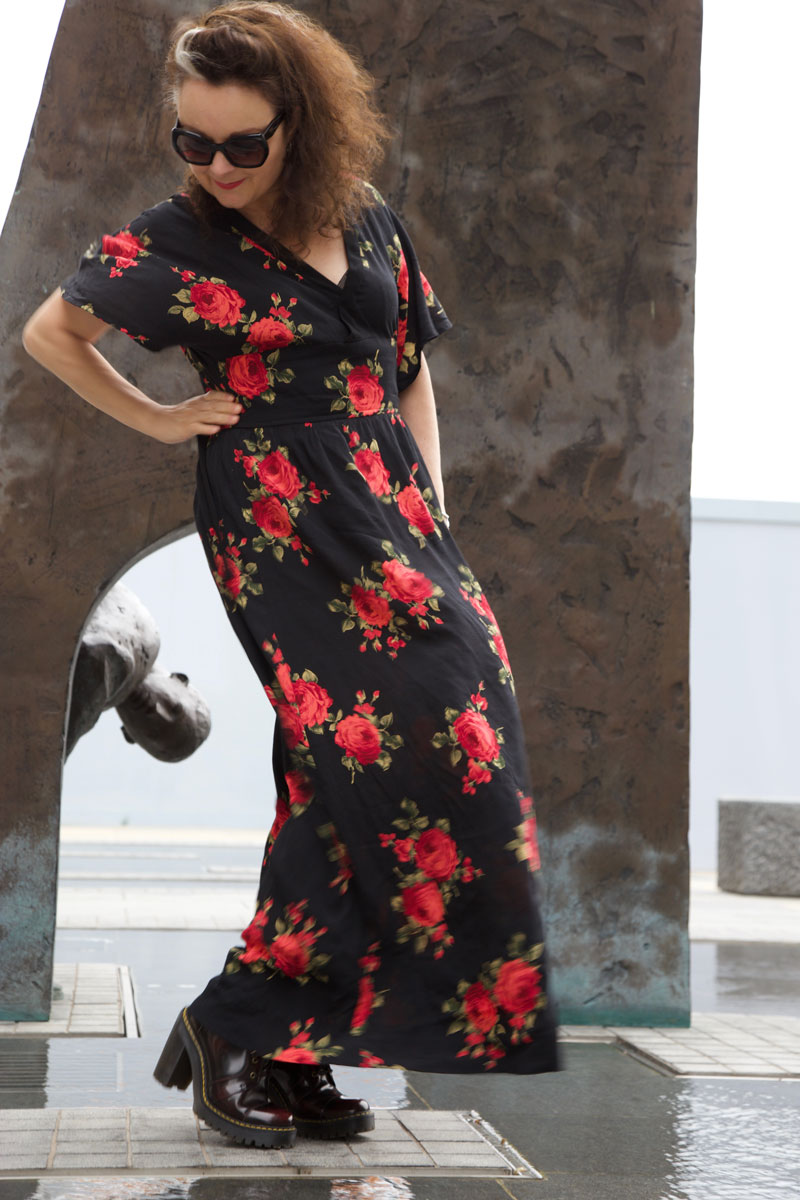
Vogue 1486 rose_dress side view

Now here’s a pattern that’s been hanging around in my stash for a considerable amount of time. And I’m so glad I held onto it because I knew it would do me proud one day.

Vogue 1481 designeroriginal

It’s a Vogue Designer Original by Alberto Fabiani allegedly from 1976. Though the shorter version A on the envelope could easily pass for 1980s.

Alberto Fabiani pronunciation
Tickled by how the pattern envelope feels the need to help with the pronunciation of Fabiani’s name!

I love the simplicity of this dress. A speciality of Fabiani it seems. Cut-on sleeves; a ‘lightly’ gathered skirt;  no lining; extension of neck-binding for ties.

Vogue designer original floor length dress

Vogue 1486 floor length dress

I needed a dress to wear to my friend’s wedding and having made her wedding dress (yes, I promise that’s coming soon!) I didn’t have much time, brain-power or nerve left to deal with anything too complex. So this was the perfect pattern. Least I hoped it would be!

I had no fabric-shopping time either so it had to be made from stash. Surprisingly, for all it’s floor-sweeping sumptuousness it takes a mere 2.4m of 60 inch wide material. – Am I the only one who mixes metric and imperial?

This gorgeous rose-print, poly crepe was literally screaming at me from The Textile Centre‘s stall at the Spring Knitting and Stitching Show earlier this year. It’s got the drapiest of drape but was super easy to sew. Pretty sure I only paid £5 a metre. And jolly lucky I had the nouse to buy 3 metres, not having had a plan for it and all.

Vintage vogue 1486 dress

In the past I have been cautious to trace and preserve my vintage patterns. Partly to preserve as near to perfect, the little packet of history that it is. And potentially so I can sell it on should I want to later. But this envelope wasn’t in such a good state to start with so I dove right in and slashed, spread and taped the original to meet my measurements. It felt a little barbaric but liberating at the same time. And hey, It’s still there for another making, all resized and ready.

So what were my findings?

I threw this out to my Insta-audience to see who might pre-empt some pitfalls with the design. And of course they were blindingly obvious, lol! For such an accomplished designer, and ‘master tailor’ who created exquisite evening gowns for a living, you’d have thunk that Fah-bee-ahny would know what happens when you create a low ‘V’ neckline at the front along with a low ‘V’ back, especially with the ‘help’ from silky, drapey fabric. Let’s just say I was relieved to figure out what happens before I hit the dancefloor at the wedding! Or even as I walked into the church… can you imagine?!

So this was a first for me: some little fasteners attached to the inside shoulder seam to attach to my bra-strap. Just had to make sure the bra strap was tight enough not to slip down, lest… doesn’t bear thinking about!

Vogue 1486 maxi dress

I also sewed that front wrap section down because that in itself was an accident waiting to happen.

The sleeves were another issue. Absolutely love the style of them. Perfectly airy for the sunshiny day that it was. But I’m sure most of my dance moves involved arms by my side. Side-boob city and all that!

Vogue designer original maxi dress

The only other thing, that’s not technically an issue, more of a ‘why would you even do that?’  – was the length of the straps at the back. They are an extension of the binding on the neckline but one extends about 3 times the length of the other. I checked and double checked the instructions, and the notches on the pattern pieces but that’s exactly as it’s intended. A design feature, possibly but… why?! I’m so irritated by it and will definitely make them both the same size if I make it again.

All issues aside. It worked perfectly for a wedding dress guest – sans fashion faux pas – and I’ve worn it again since to another wedding, recently. It’s so easy and comfortable to wear, hardly creases and works for both posh and boho-casual – winner, winner vintage dresser!

vintage vogue long dress

More maxi dresses I’ve made:
A very Shiny Burda Maxi
The one I made for the Marylin Manson gig
The one I made to go camping in

Photography © Daniel Selway

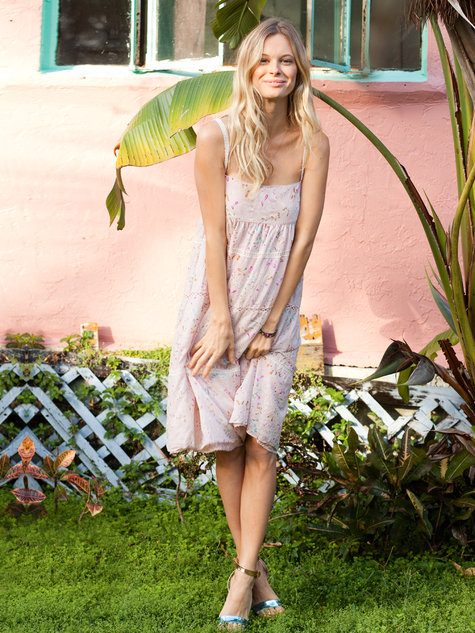
Etta’s embellished sundress

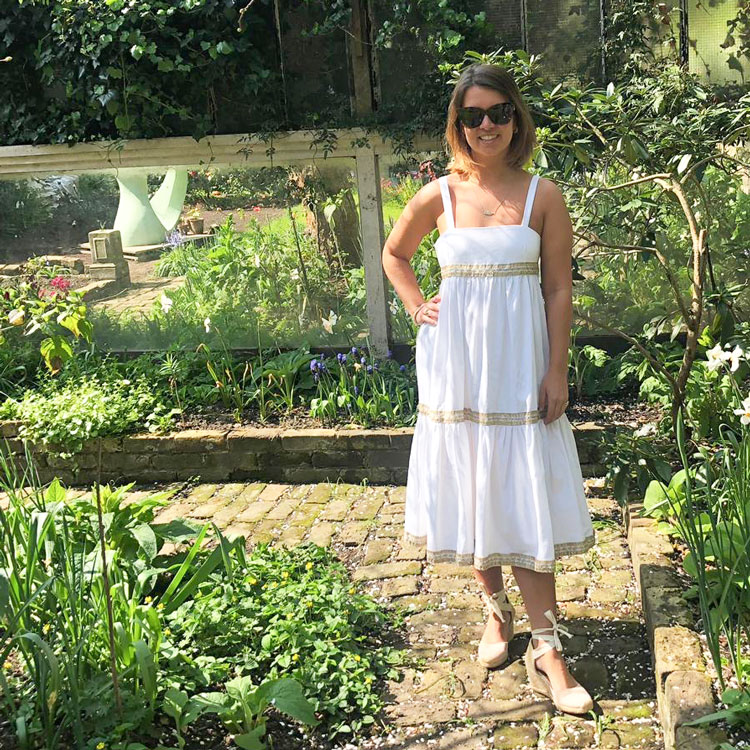
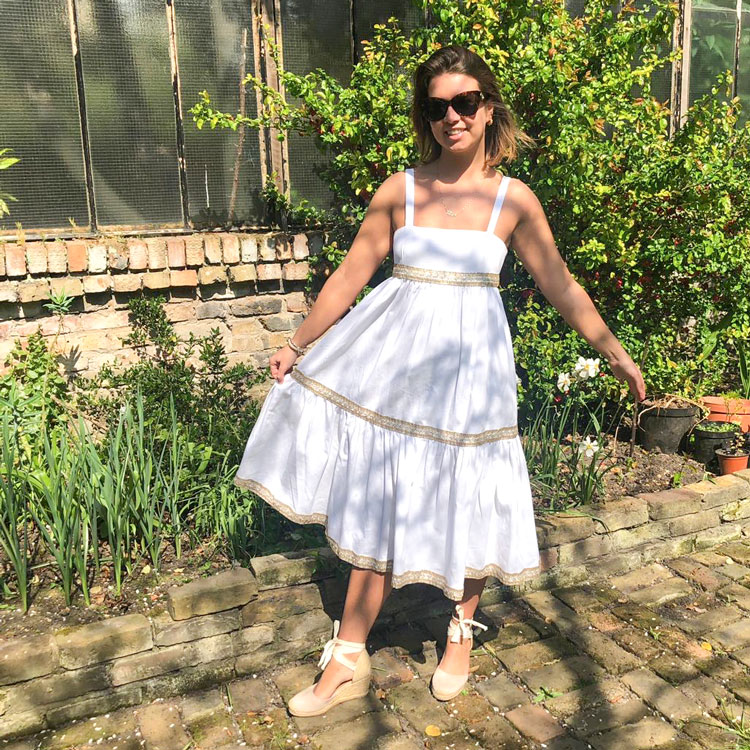
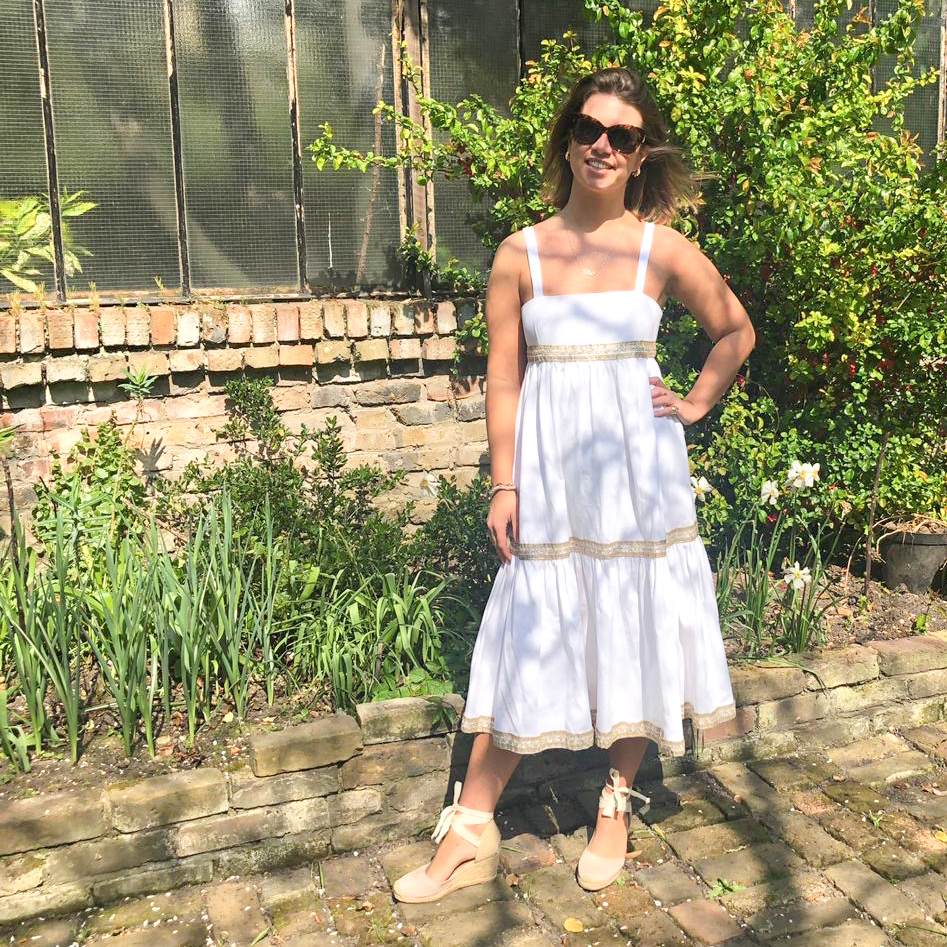
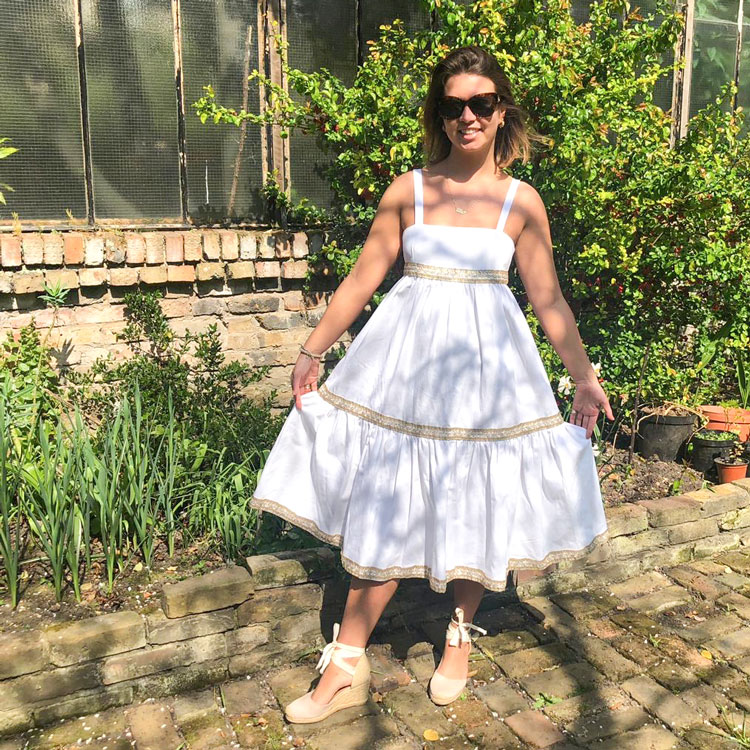
Etta wearing her dress
I’ve taken on a few sewing commissions lately and this dress was very nearly another until it turned into a fabulous collaboration.

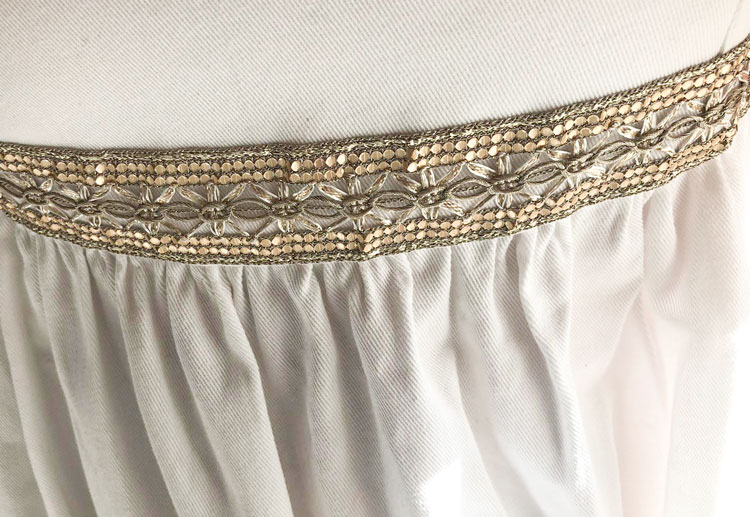
Etta had scored a bagful  of beautiful Asian braids from Portobello market and asked if I could either make her a white tiered-dress or show her how to make one so that she could then embellish with the trims she’d found.

Asian braid

I so love an idea that’s sparked by the decoration! Much like decorating a room to match the cushions!

I haven’t properly ventured down the teaching road to date so I thought I’d give it a bash. And Etta would be a great guinea pig to rehearse my teaching skills!

Sewing a tiered skirt would be the easy bit but I needed a quick and simple bodice pattern to work with and that is totally when my nine-year collection of Burda mags comes into it’s own!  In order to find what I want, I just search up the pattern options online and then note the magazine issue number. I’d like to report that I file my mags in date order to complete the efficient process but sadly that’s not the case!

Took a wee while to get to March 2013 but it was worth it for the perfect sundress bodice pattern. Nice and simple for a beginner too.

Burdastyle dundress

On first inspection I though the skirt part of the dress was made of gathered tiers but that would have been too flooky! Stitched on lace gives the illusion of tiers, here, but Etta wanted the real deal so we just needed to trace the bodice section and we would make our own tiers.

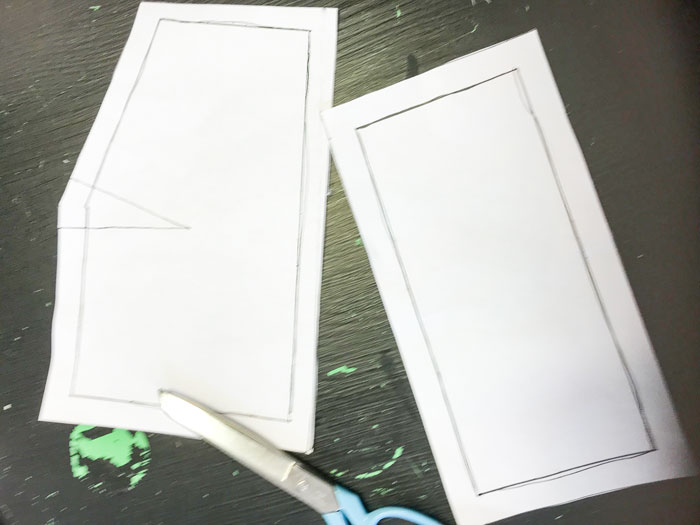
The look on Etta’s face was priceless when I explained we would have to first locate the lines to trace it off!! Luckily for her there were only 2 small pieces and a couple of straps.

bodice pieces

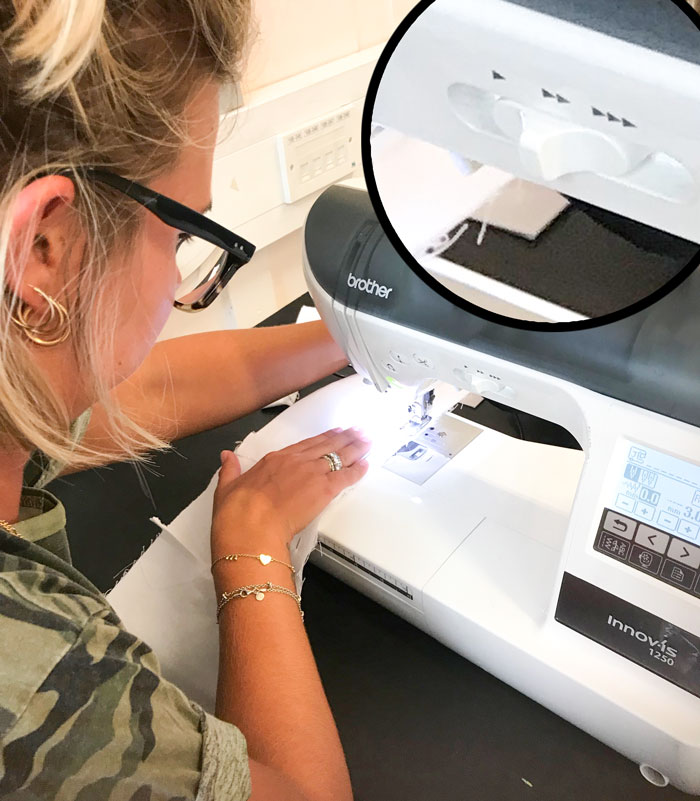
This was to be Etta’s maiden go on a sewing machine. She was a natural!  I must also give credit here to Brother for the 3-speed control on my Innovis 1250. The slow settings are great for stopping the over-enthusiasts from veering off piste!

Brother speed setting

Once the bodice and straps were sewn, Etta put it on so I could measure down to the desired length of the skirt.

To create the tiers we divided that measurement in half and accounted for seam allowance on each section (adding a bit extra for the hem on the bottom tier). Now we had the depth of each tier, I’m pretty sure we took double the width of the base of the bodice for the length of the first tier and doubled the length of the first to get the second.

I showed Etta how to make gathering stitches by using a wide machine stitch either side of the seam line; pulling up the gathers to fit, and then sewing the seams between the gathering lines. It helps to keep the gathering neat and in line.

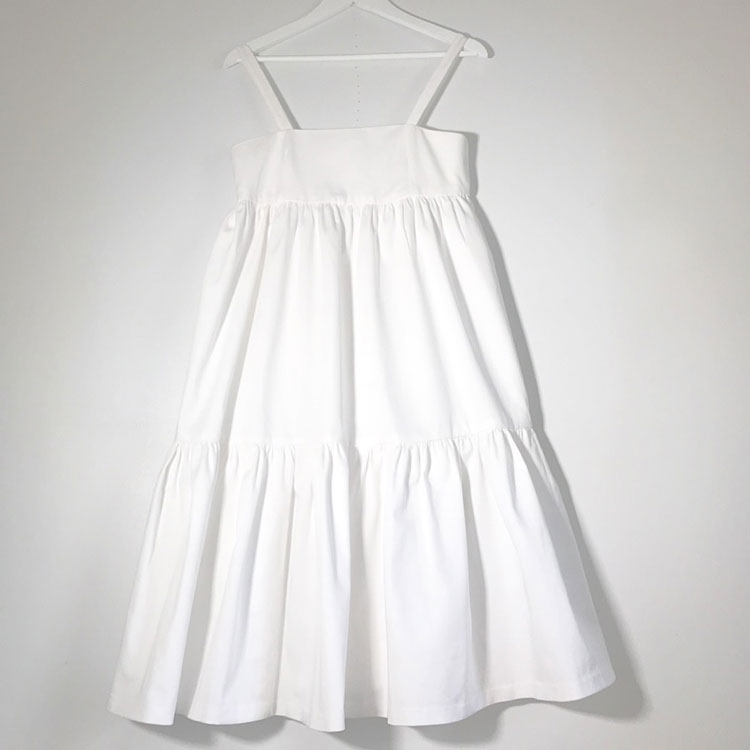
Here’s a photo of what the dress looked like before it was trimmed. Etta had chosen a lovely white cotton twill which had a lovely weight to it.

dress without trims

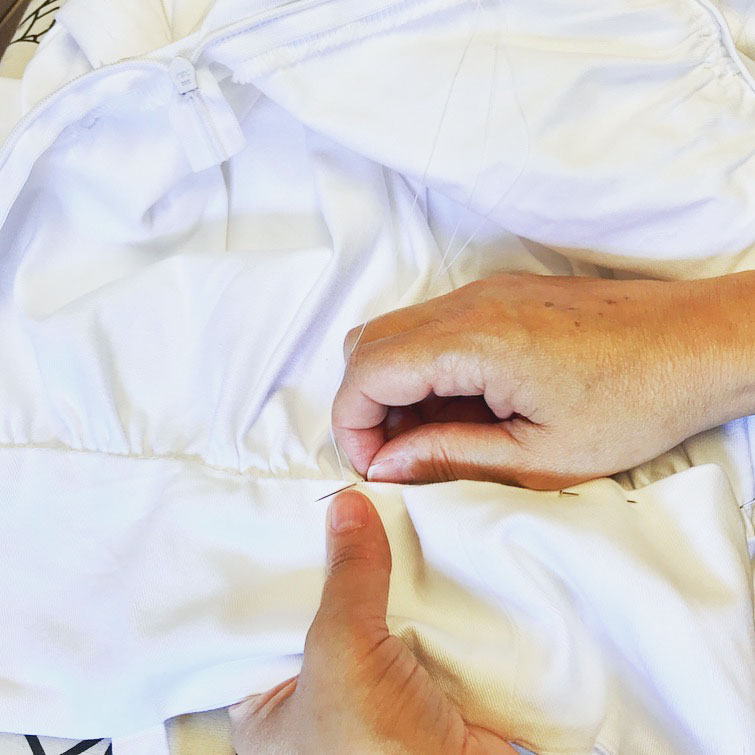
We managed to sew most of the dress in a day, and I took it away to insert the zip and hand sew the bodice to cover the raw edges of the skirt inside. Etta had traced, cut and sewn every other piece herself.

hand finishing the insides

It’s a really interesting experience sharing knowledge. I’m sure all you teachers will be rolling your eyes at me now. For the most part I’m a doer. I rarely look up. And it never occurs to me how far I’ve come either in my day to day job as a designer or indeed my other part time passion as a seamstress. So on the rare occasion when I’m teaching someone I always worry about not knowing enough to share – that the pupil might know more than I’m about to teach – a terrifying thought! Is that a certified phobia?!

In reality the polar opposite has been the case. And I’m always asked lots of questions, to repeat procedure or simply slow down. Which is totally reassuring and absolutely fine by me!!

The deal of this exchange was to be some fabulous photos for my blog. And Etta stepped right up to the mark and took these beauts in her Granny’s lovely garden.

Ettas dress

Ettas dress

Ettas dress

Just love it when a plan comes together… doesn’t she look gorgeous?!

Vintage Butterick coat with added sparkle!

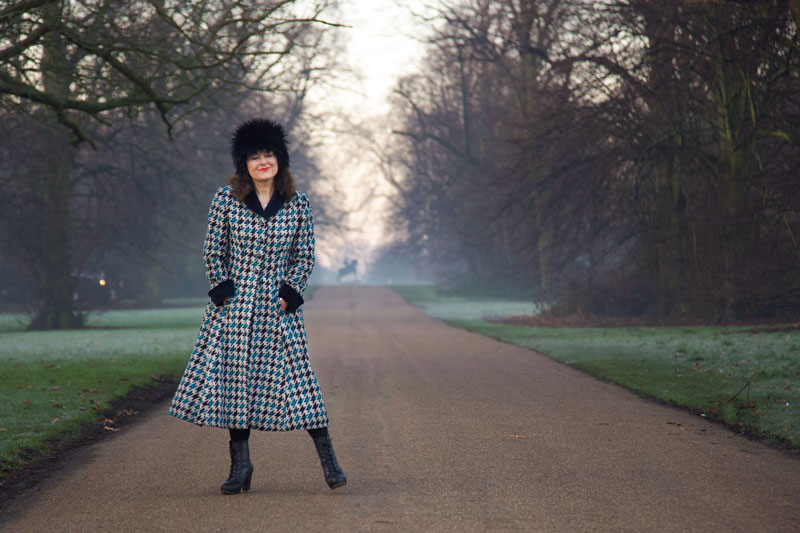
butterick 547 coat by ooobop

Returning to a sewing pattern you’ve worked with before is like turning to an old friend for advice and reassurance – you’re assured of the fit, the skills needed and prepped for pitfalls along the way. Mostly!

And if like me, you paid a pretty penny for the pattern, you’ll get immense satisfaction from apportioning the cost. I won Butterick 547 fair and square by charging straight  in to this crazy bid war! So now the pattern only cost £25 for each coat which sits marginally better, lol!

Butterick 547 coat full length

I made the first version in 2014, truly believing it would be my forever coat – my dreamcoat – but sadly there was an issue with the fabric that I didn’t foresee. So I had to make another in something more stable.

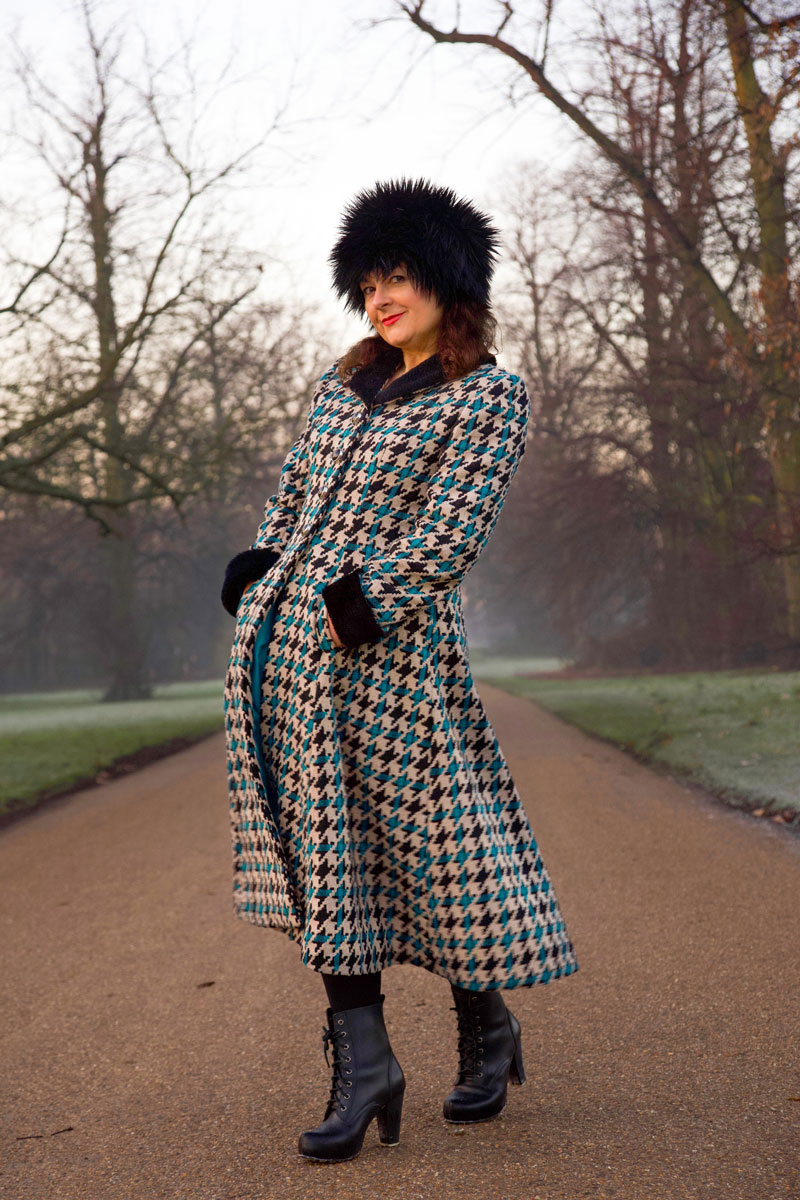
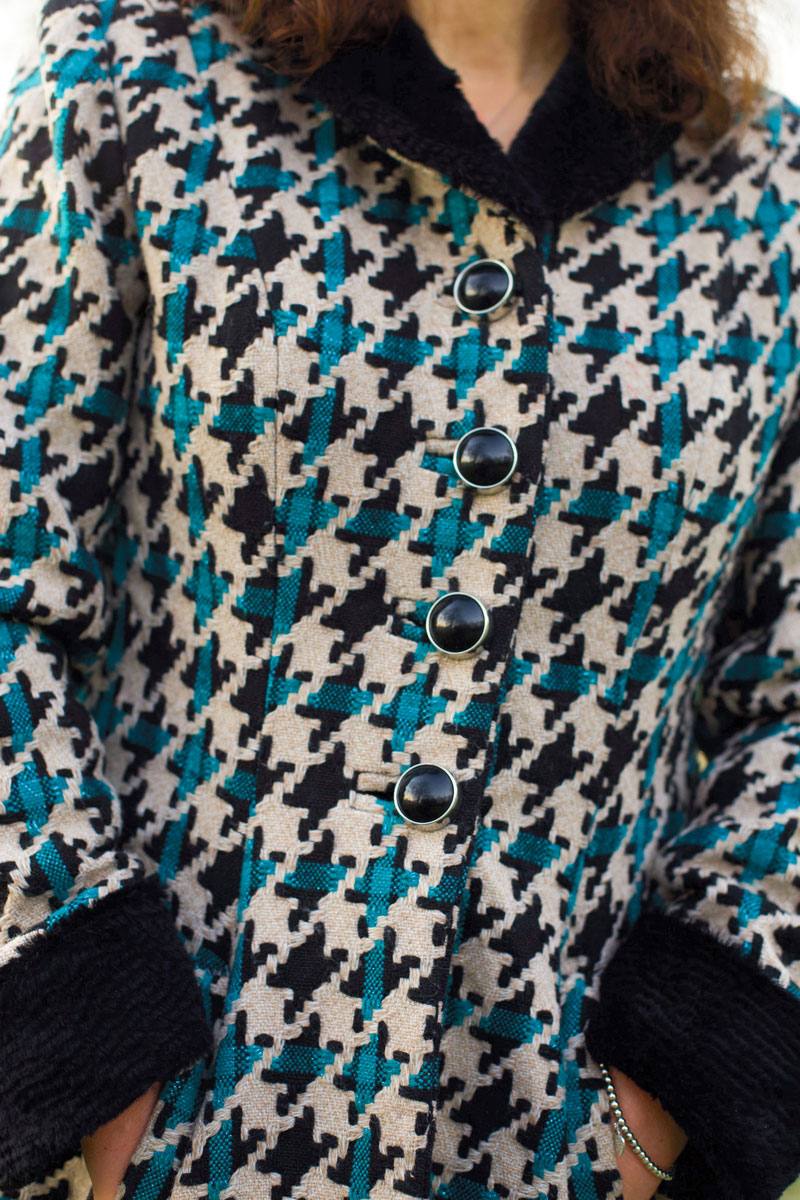
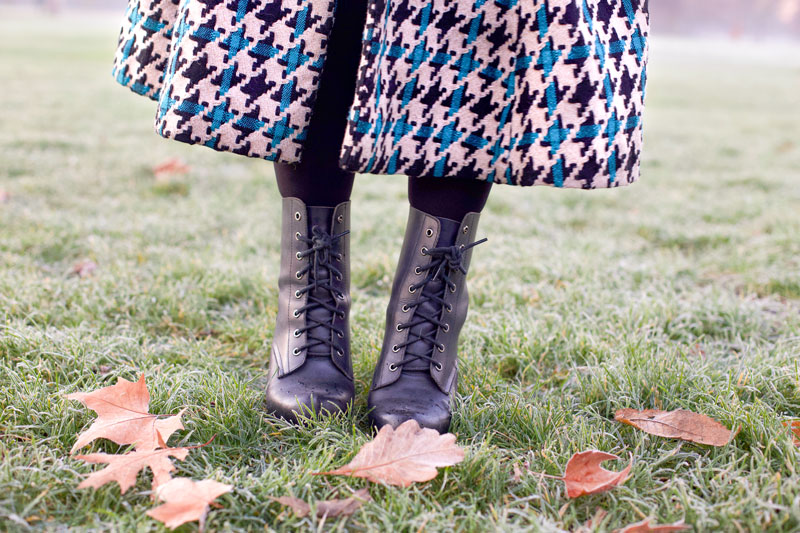
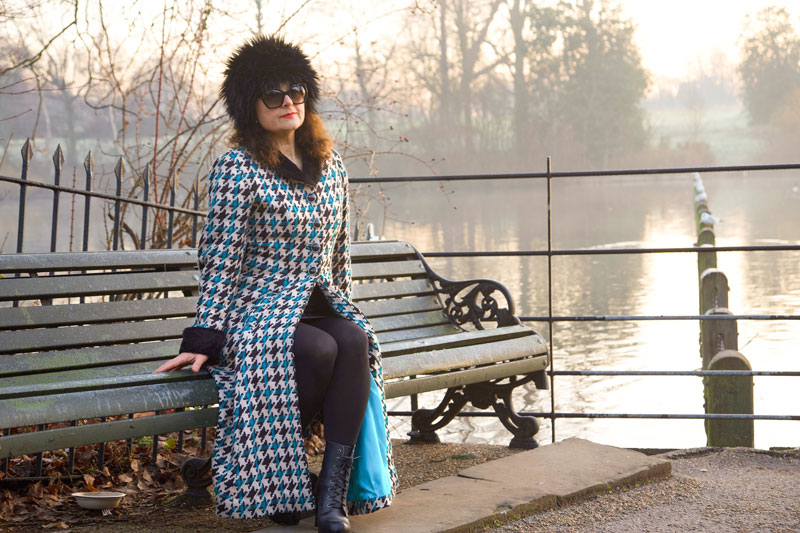
I found the ideal fabric at The Great British Sewing Bee Live show a couple of years back. Pretty sure the seller was M Rosenburg and Son . It’s a fabulous giant dogtooth with teal metallic highlights. It’s got a great weight and a great drape, and it’s stable weave means no stretching or kinking at the hemline.

vintage Butterick coat by ooobop

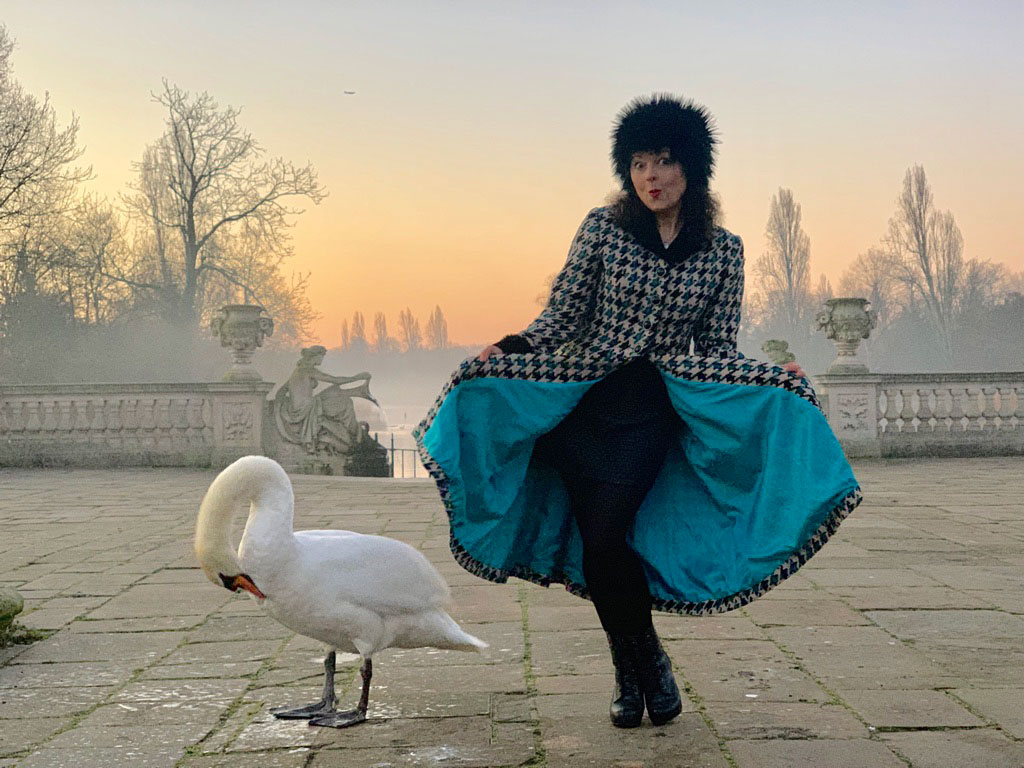
I just adore the fit – snug to the waist and lapping round my legs – the silhouette is truly 50s. Four buttons to the waist allows for the lower ‘skirt’ to separate as I walk along and a flash of the blue lining does everything to attract attention and some lovely comments.

ooobop vintage coat sunrise and swan

butterick 547 vintage coat

Sewing the shell pieces was a breeze but I stalled when it came to the welt pockets and the button holes. They call for a little more concentration and I had to psyche myself up before cracking on with that stage. But I practised on scrap pieces to remind myself of the process. The main thing that worried me was the fraying of the fabric and those tiny welts for such thick fabric. But I remembered seeing how some bloggers employ the help of Prym Fray Check and it definitely helped. In fact ended up using it on all the inside seams too. I know the seams are all ultimately hidden by the lining but sealing those edges just reassured me that it will hold together over time. Nothing to do with an unthreadded overlocker and a dose of lazyitis, I assure you! I also invested in a Clover buttonhole cutter to cut the reverse of the bound buttonholes. I can’t tell you how satisfying that little crunch feels when it bites through the coating to create a perfectly straight line. No faffy snipping with pointy scissors any more!

vintage handmade coat bound buttonholes

I don’t usually go to that much effort for many of the garments I make but I have to say, it’s always worth it. Buttoning up this coat becomes quite the ceremony. Especially with those heavy vintage buttons … feels so good!

butterick 547 button detail

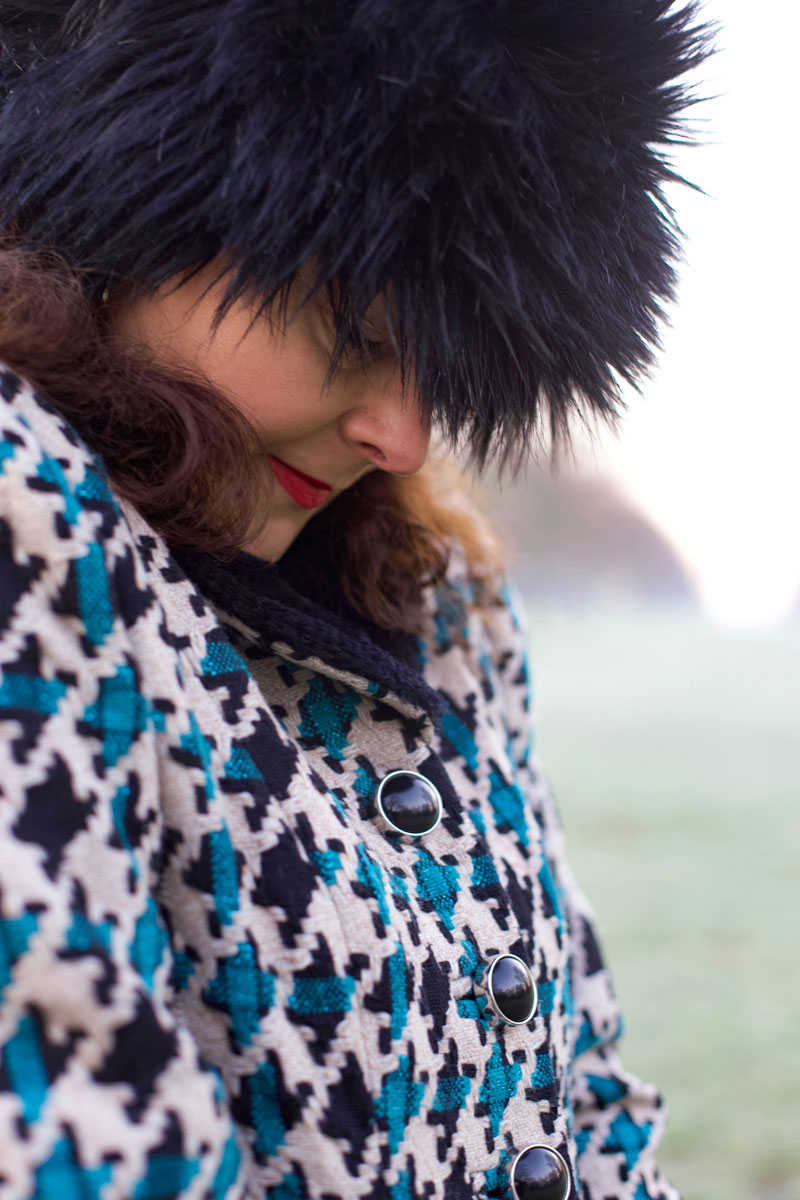
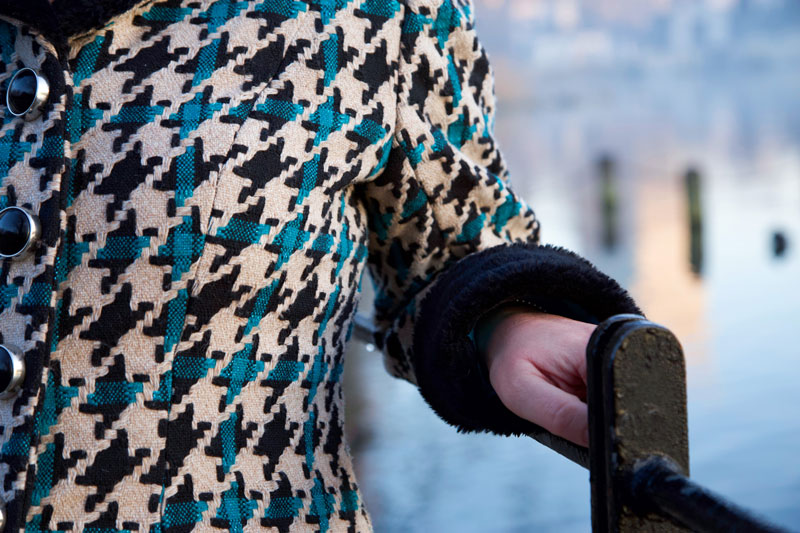
So actually, all the tricky bits were a breeze. But I shouldn’t have been so smug so soon as I had a minor meltdown about the sleeves. (Fat lot of good my old friend is!) I’d shortened them at least an inch too much the first time round and forgot to unfold that pleat in the pattern pieces for this time round. But I was inspired to use the leftover fur for some cuffs. I sewed them on with half the hem allowance and folded them back with an inch of the fluff to the inside (if that makes sense) and voila – the perfect length and actually a stylish feature to compliment the furry lapel. I can also fold them down to extend beyond my fingertips if I forget my gloves!

Vintage coat cuff detail

Butterick 547 collar

Most of all I loved all the hand-stitching on this coat. Sewing on the buttons. Sewing down the welt edges, sewing in the lining and catch-stitching the hem. I found it really satisfying and very relaxing. I just took my time and relished each stitch, very aware at how far I’ve come with finer stitches over the years. A marked difference from the whinges about it being such a chore the first time round.

I love that most people have no idea that this is sewn from a vintage pattern. Which verifies it’s classic style.  It really is timeless and classy and at some point I will make it simply in black for a more formal occasion. And then I can apportion that pattern cost further!

butterick 547 salute

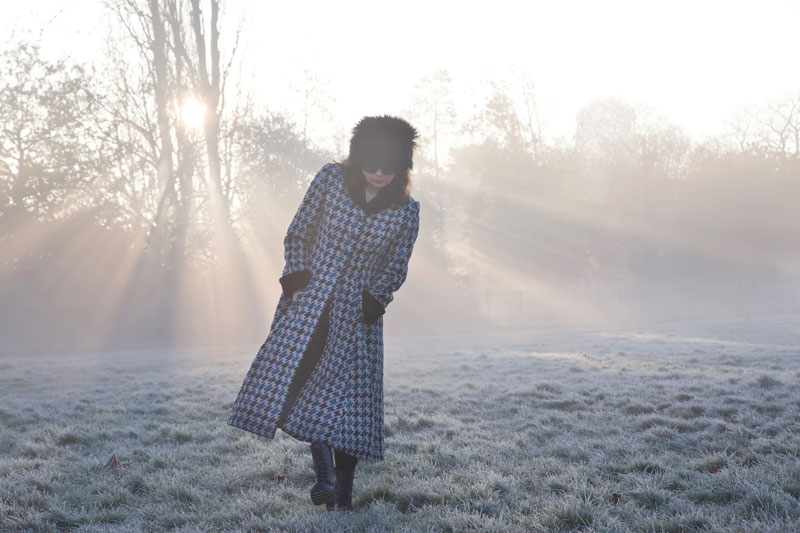
I’m so glad I made it in time for the cold snap. I really hate the cold so much and yet I’ve never got enough of the right clothes. Mainly because I am now completely allergic to buying RTW and I’d sooner sew than knit. But hey, the only numb part of me on the day we shot this coat was my toes!

Lola Ramona boots

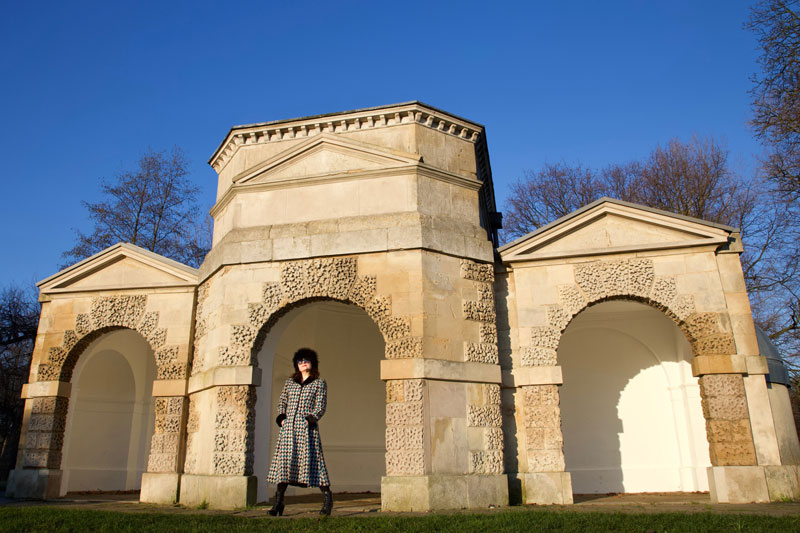
And I have to address the photos of course, taken by my wonderful hubby  – mostly known for his rock and roll bass playing but also a superstar behind the lens. You can see more of his photos at Daniel James Photographic. He was keen as mustard to get up and out before 6 in the morning, taking the bus to Kensington Gardens  and walking to Hyde park before the sun rose. And it was glorious. So pretty and quite breathtaking as the mist rolled in from the Serpentine as  the swans and the Mandarin ducks preened themselves in the golden rays. So magical.

butterick 547 vintage coat

I’ve had a Google to see if anyone else has made this coat up but so far have drawn a blank. Surely I can’t be the only one? Maybe that’s why I ended up paying the earth!

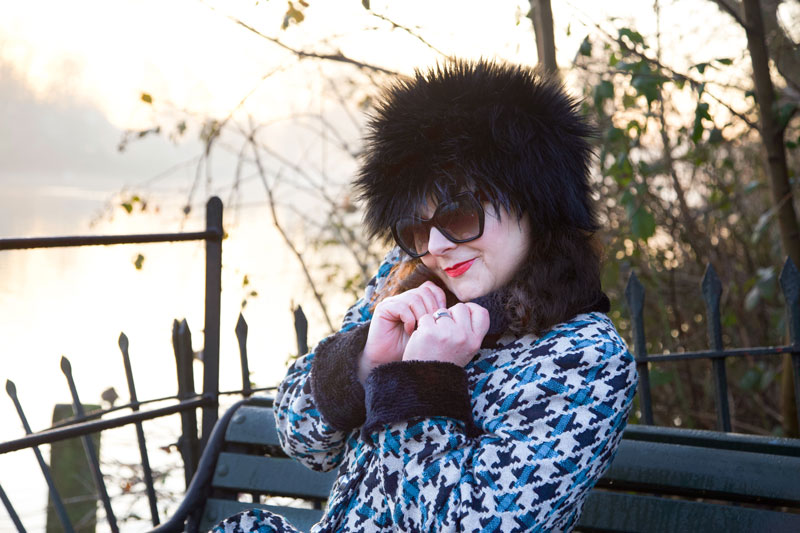
ooobop sitting on a bench

Thanks as always for popping by. Hope you’ve got some lovely plans lined up for the weekend. And I’ll look forward to bumping into some of you at the Spring Knitting and Stitching Show next week… eeek!