Vintage Butterick coat with added sparkle!

butterick 547 coat by ooobop

Returning to a sewing pattern you’ve worked with before is like turning to an old friend for advice and reassurance – you’re assured of the fit, the skills needed and prepped for pitfalls along the way. Mostly!

And if like me, you paid a pretty penny for the pattern, you’ll get immense satisfaction from apportioning the cost. I won Butterick 547 fair and square by charging straight  in to this crazy bid war! So now the pattern only cost £25 for each coat which sits marginally better, lol!

Butterick 547 coat full length

I made the first version in 2014, truly believing it would be my forever coat – my dreamcoat – but sadly there was an issue with the fabric that I didn’t foresee. So I had to make another in something more stable.

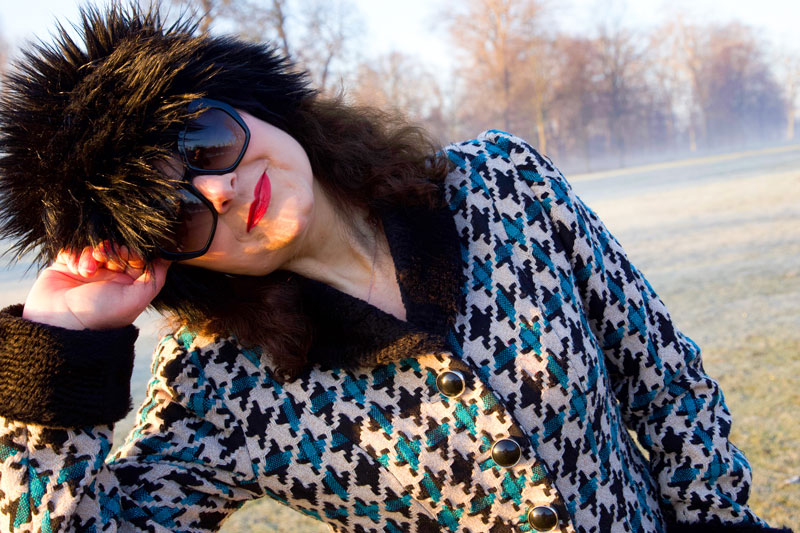
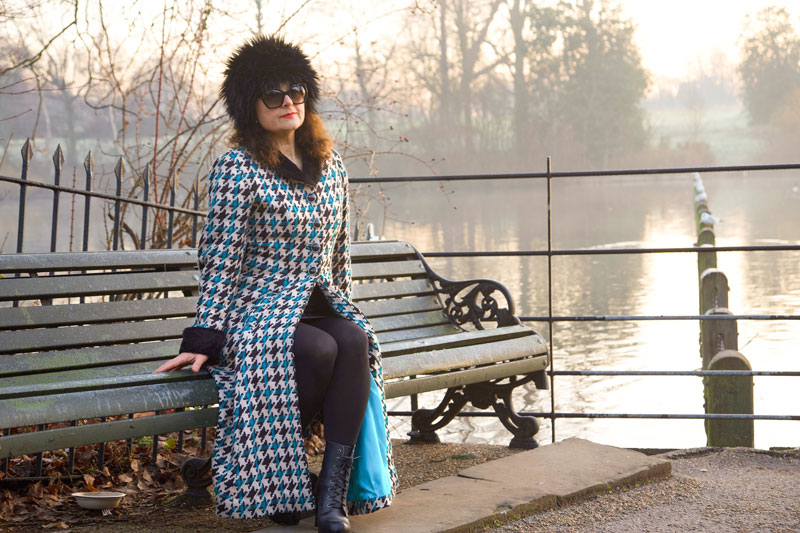
I found the ideal fabric at The Great British Sewing Bee Live show a couple of years back. Pretty sure the seller was M Rosenburg and Son . It’s a fabulous giant dogtooth with teal metallic highlights. It’s got a great weight and a great drape, and it’s stable weave means no stretching or kinking at the hemline.

vintage Butterick coat by ooobop

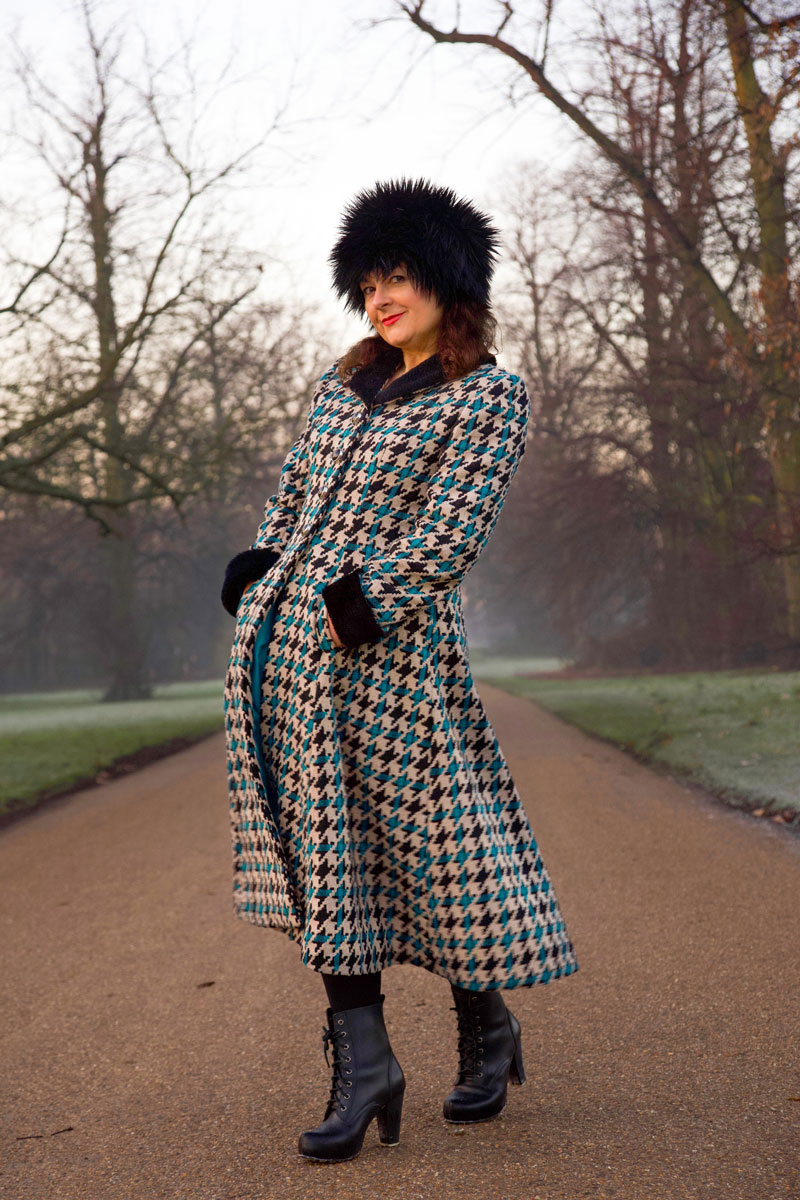
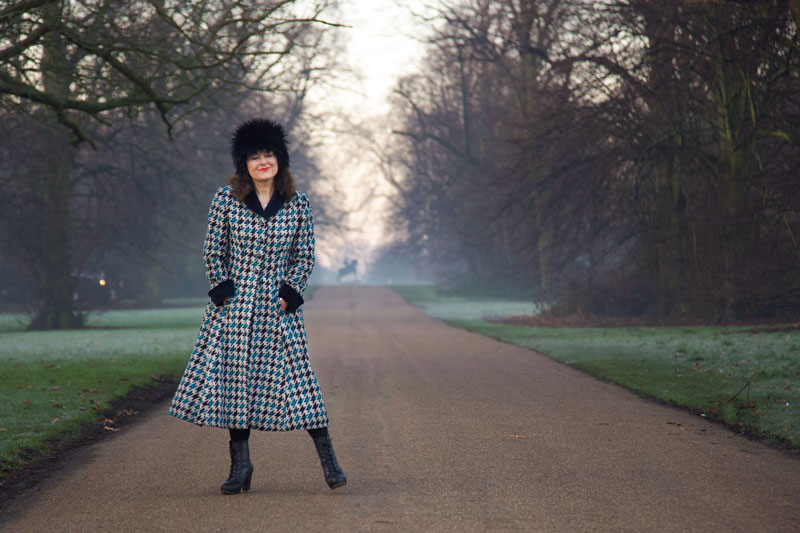
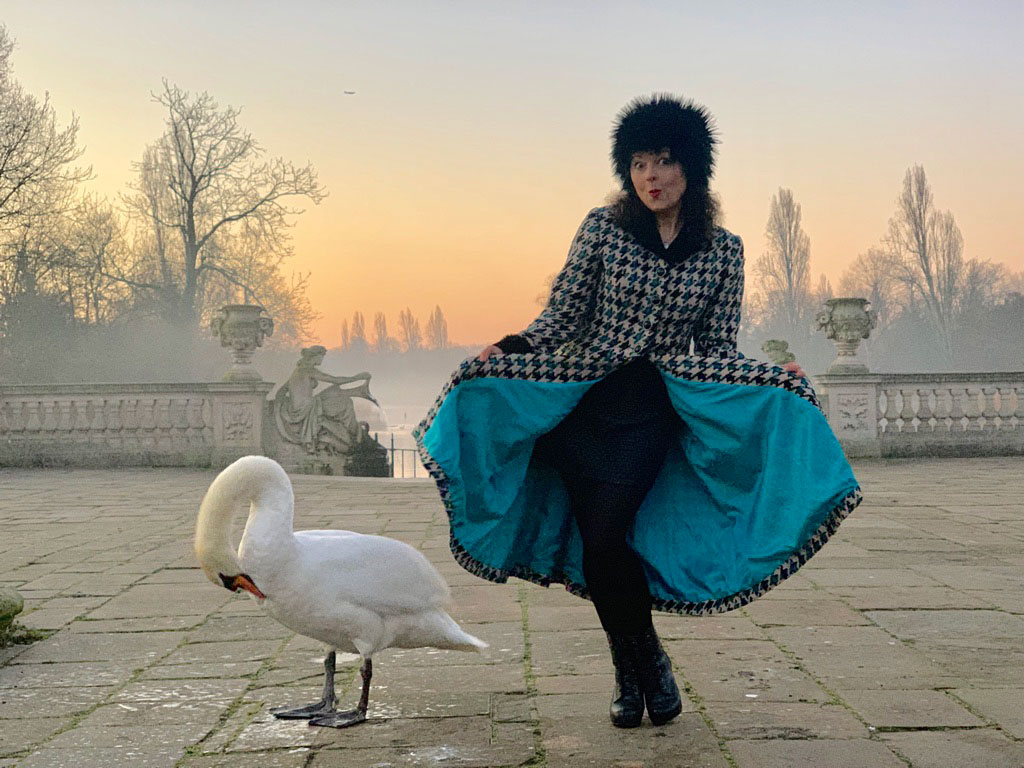
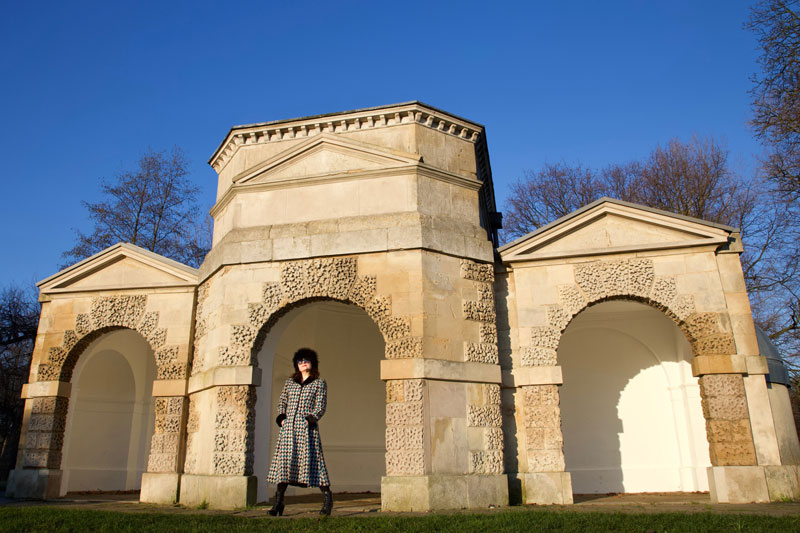
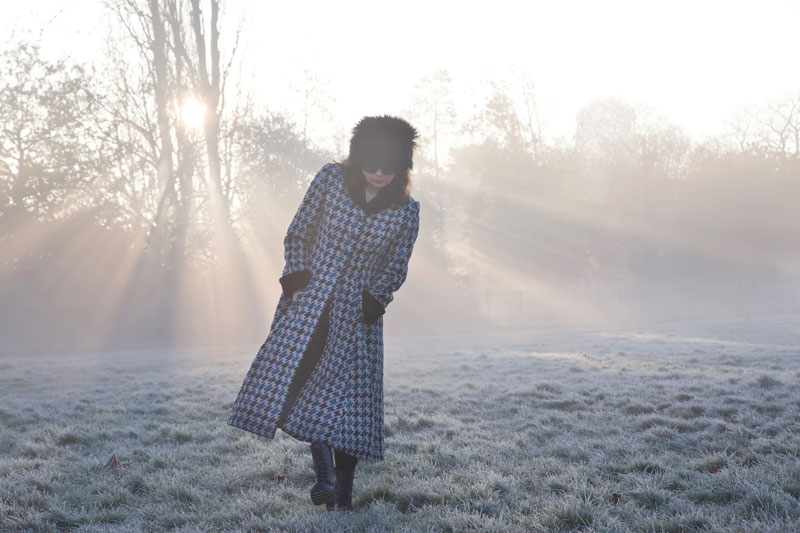
I just adore the fit – snug to the waist and lapping round my legs – the silhouette is truly 50s. Four buttons to the waist allows for the lower ‘skirt’ to separate as I walk along and a flash of the blue lining does everything to attract attention and some lovely comments.

ooobop vintage coat sunrise and swan

butterick 547 vintage coat

Sewing the shell pieces was a breeze but I stalled when it came to the welt pockets and the button holes. They call for a little more concentration and I had to psyche myself up before cracking on with that stage. But I practised on scrap pieces to remind myself of the process. The main thing that worried me was the fraying of the fabric and those tiny welts for such thick fabric. But I remembered seeing how some bloggers employ the help of Prym Fray Check and it definitely helped. In fact ended up using it on all the inside seams too. I know the seams are all ultimately hidden by the lining but sealing those edges just reassured me that it will hold together over time. Nothing to do with an unthreadded overlocker and a dose of lazyitis, I assure you! I also invested in a Clover buttonhole cutter to cut the reverse of the bound buttonholes. I can’t tell you how satisfying that little crunch feels when it bites through the coating to create a perfectly straight line. No faffy snipping with pointy scissors any more!

vintage handmade coat bound buttonholes

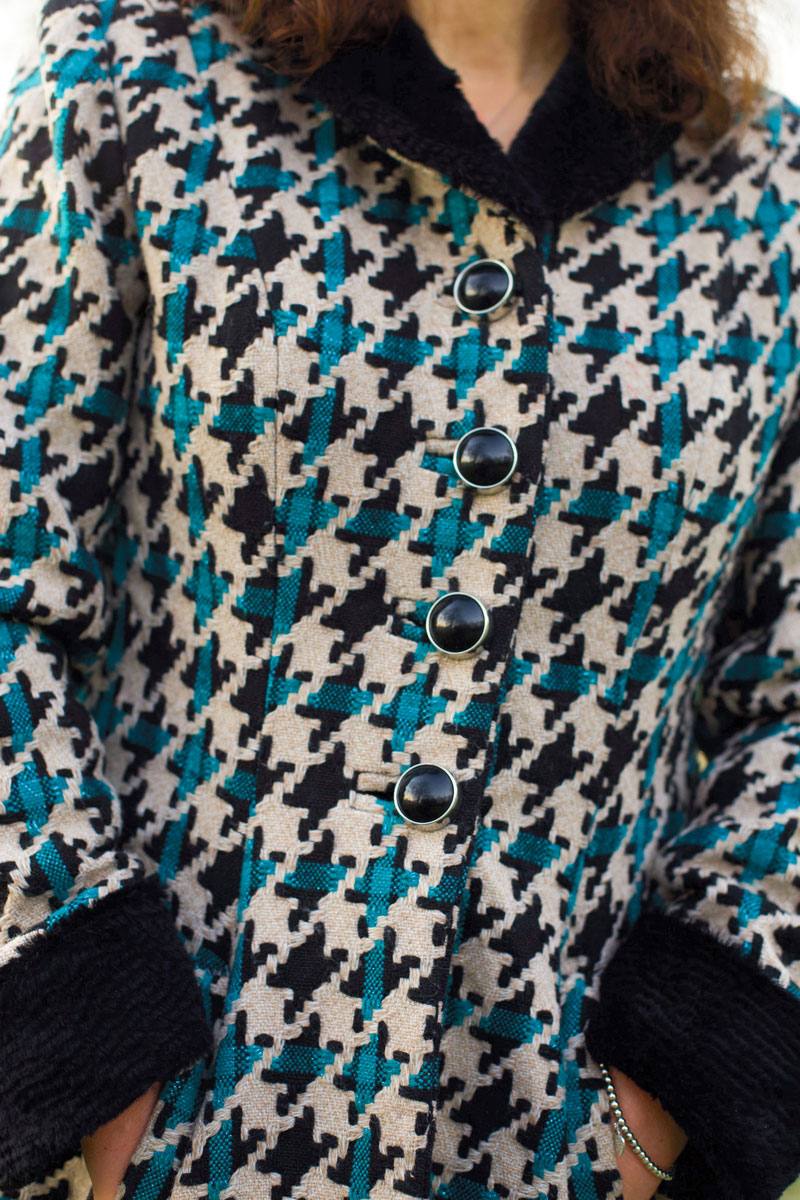
I don’t usually go to that much effort for many of the garments I make but I have to say, it’s always worth it. Buttoning up this coat becomes quite the ceremony. Especially with those heavy vintage buttons … feels so good!

butterick 547 button detail

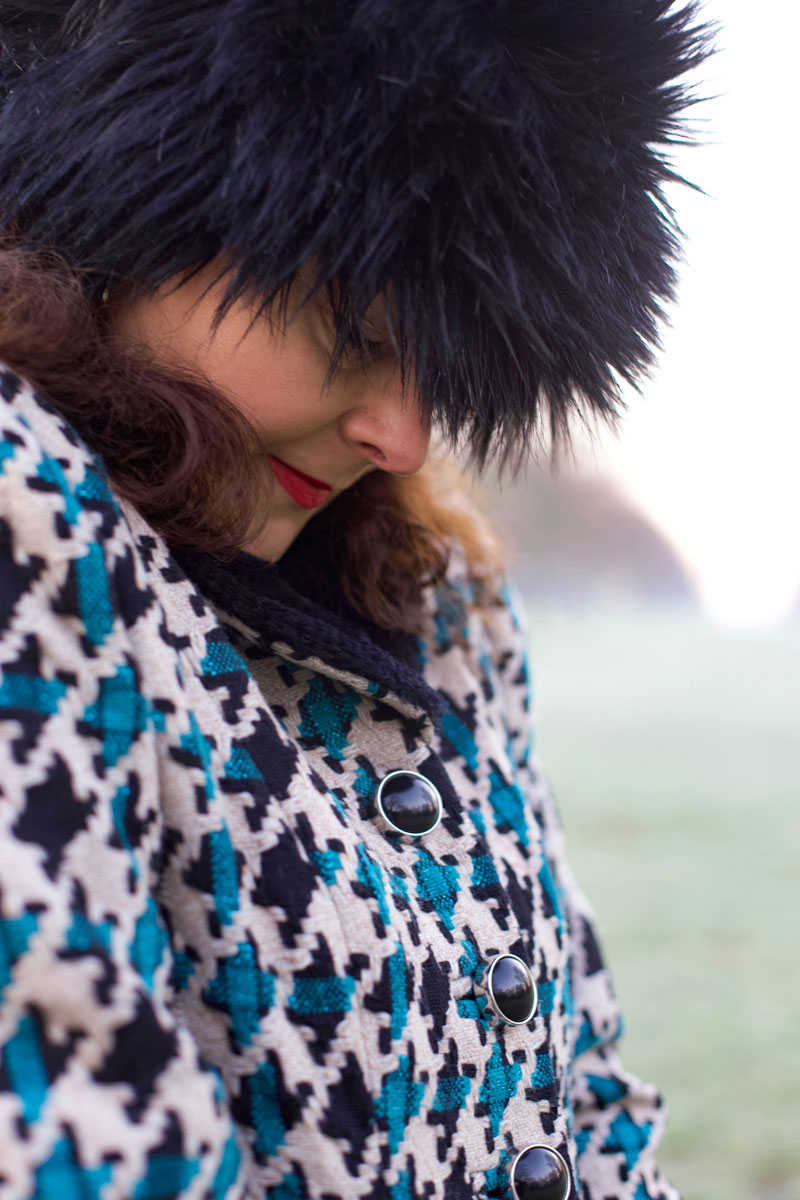
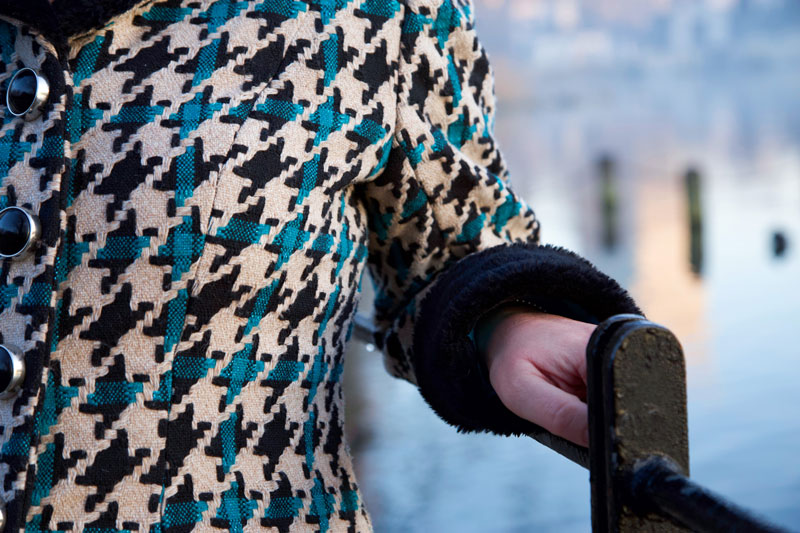
So actually, all the tricky bits were a breeze. But I shouldn’t have been so smug so soon as I had a minor meltdown about the sleeves. (Fat lot of good my old friend is!) I’d shortened them at least an inch too much the first time round and forgot to unfold that pleat in the pattern pieces for this time round. But I was inspired to use the leftover fur for some cuffs. I sewed them on with half the hem allowance and folded them back with an inch of the fluff to the inside (if that makes sense) and voila – the perfect length and actually a stylish feature to compliment the furry lapel. I can also fold them down to extend beyond my fingertips if I forget my gloves!

Vintage coat cuff detail

Butterick 547 collar

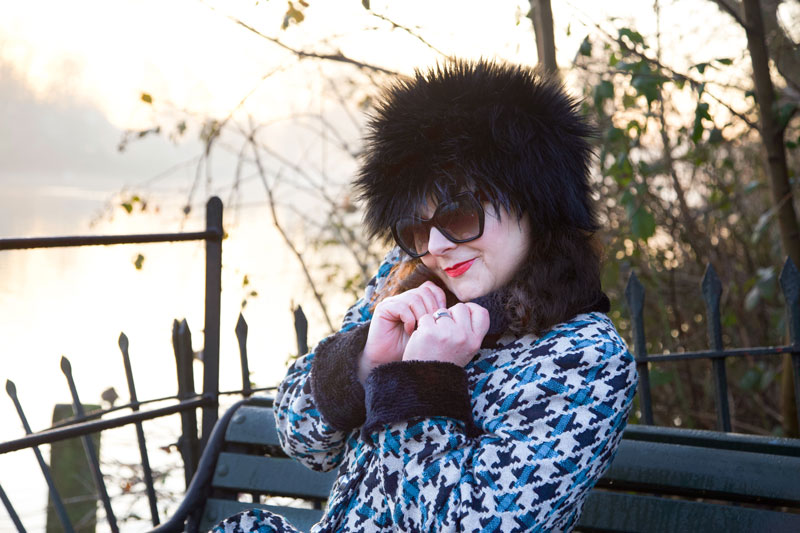
Most of all I loved all the hand-stitching on this coat. Sewing on the buttons. Sewing down the welt edges, sewing in the lining and catch-stitching the hem. I found it really satisfying and very relaxing. I just took my time and relished each stitch, very aware at how far I’ve come with finer stitches over the years. A marked difference from the whinges about it being such a chore the first time round.

I love that most people have no idea that this is sewn from a vintage pattern. Which verifies it’s classic style.  It really is timeless and classy and at some point I will make it simply in black for a more formal occasion. And then I can apportion that pattern cost further!

butterick 547 salute

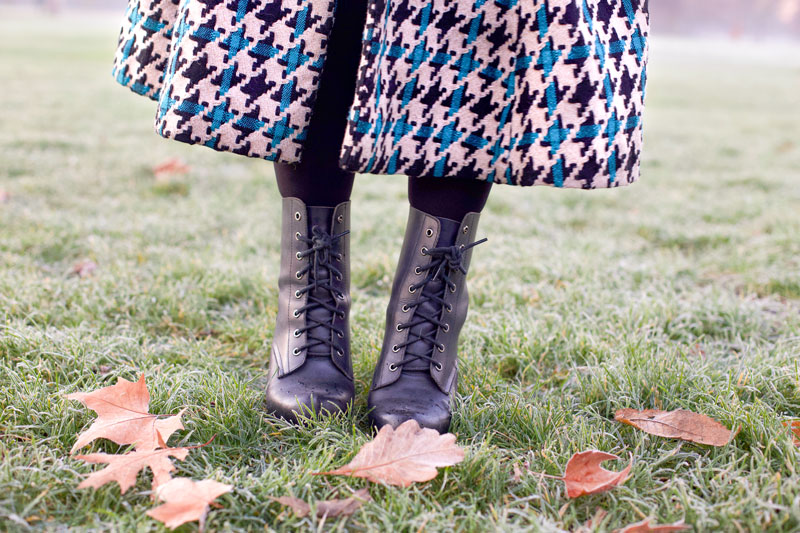
I’m so glad I made it in time for the cold snap. I really hate the cold so much and yet I’ve never got enough of the right clothes. Mainly because I am now completely allergic to buying RTW and I’d sooner sew than knit. But hey, the only numb part of me on the day we shot this coat was my toes!

Lola Ramona boots

And I have to address the photos of course, taken by my wonderful hubby  – mostly known for his rock and roll bass playing but also a superstar behind the lens. You can see more of his photos at Daniel James Photographic. He was keen as mustard to get up and out before 6 in the morning, taking the bus to Kensington Gardens  and walking to Hyde park before the sun rose. And it was glorious. So pretty and quite breathtaking as the mist rolled in from the Serpentine as  the swans and the Mandarin ducks preened themselves in the golden rays. So magical.

butterick 547 vintage coat

I’ve had a Google to see if anyone else has made this coat up but so far have drawn a blank. Surely I can’t be the only one? Maybe that’s why I ended up paying the earth!

ooobop sitting on a bench

Thanks as always for popping by. Hope you’ve got some lovely plans lined up for the weekend. And I’ll look forward to bumping into some of you at the Spring Knitting and Stitching Show next week… eeek!

Pinstripe Spencer Jacket: the inside story

finished jacket by the fountains

First I must thank you all for your lovely comments on my initial post about the finished jacket. I’m so touched and I love that warm and fuzzy feeling I get when they find their way into my mailbox!

So as promised, here is some nitty gritty detail from the project for those that might be considering this jacket for the first time.

Burda jacket #131 11/2012

Though I am pleased overall, with the results. I can’t help being niggled that more tailoring techniques weren’t employed. I’ve only myself to blame. I could have researched them myself but there’s always a next time!

The jacket is cut from pieces #131, Burda Style magazine 11/2010 but the construction details are from #130. The only difference being that I chose the full length sleeves with vents… and proper working buttonholes… glutton for punishment, me!

I made the toile back in February and was intending to make adjustments to the waist only. But I got worried about it’s ‘snugness’ and just went up a size in the end. A little bit chicken perhaps, but also concerned that I was more likely to be wearing a few layers underneath in the colder months!

It is essential that you make a toile. There is so much work involved in this, you don’t want to get to the end to find it doesn’t fit!!!

My first slip up, that I DIDN’T clock until I got round to dealing with it, was the back vent. I am so used to adding the statutory 15mm seam allowance to each edge that I clean forgot to add 4cm as specified, to the vent openings. Doh. I could kick myself. It doesn’t look so bad in the photos but I know that it isn’t created properly. It is intended as a ‘split’ but would have been so much neater with an interfaced proper allowance. So please remember to do this if and when you cut yours! I would even go as far as to make it a vent rather than a split. But that opens another can of worms with the lining!

back split that really wants to be a vent!

The miniature pattern layouts indicate what pieces are to be interfaced with fusible interfacing. I did toy with the idea of sewing traditional interfacing. I liked the idea of employing some traditional skills but I agreed with myself that I was embarking on a big enough journey and that the fusible stuff would be just as good for what I was trying to achieve.

And so the interfaced pieces included: centre front; side front; outer collar stand; under collar; back facing; outer pocket flap; neck and armhole edge of centre back.

The main construction of the body came together very easily. Darts seams and pressing.

But then came my reality check. Welt pockets with flaps. Needless to say I practiced these before the real thing. You can see how I got on with this here. Well worth checking out YouTube or the Burda site for instructions. I challenge anyone to get the gist of welt pockets from the following instructions!! Or it could be just me!!

pocket instructions

I am over the moon at how they turned out in the finished fabric. I don’t intend to put anything in the pockets, for goodness sakes, don’t want to misshapen them! But I am so proud when I slip my hand inside. Feels so special! And no one gets to see that lovely welt under the flap, except moi! Though I have pointed it out to a few of my friends who smile loyally with raised eyebrows!

welt pocket
welt pocket
pocket lining
peek at the pocket lining

Next up was the notched collar. This was actually not as scary as I was anticipating. I did pin and I did baste before stitching and it all worked out just fine. The stitches sank invisibly into the wool when I machined the seam so I didn’t want to risk having to unpick at any point! Neat trimming and clipping is essential and it is also important to take care when you ‘push out your points’ Very easy to push a pointed implement through the point of the lapel, (especially if you are using soft wool) and ruin everything. It’s worth being slow and patient with this part because it is such a lovely sharp feature. You’ll be really chuffed when it comes together at this point.

pointy lapel
pointy lapel and notched collar

There was a suggestion to sew the pointed lapels to the underside of the collar to keep them in place but I didn’t really feel this was necessary for the weight of the fabric I used. I like being able to turn up the collar when its chilly!

Now shall we talk mitred corners? I’m so glad these were included. It makes so much sense and makes such neat corners. Nothing else will ever do from now on! Of course it goes without saying that you won’t survive with these instructions, especially if this is your first time…!

mitred corner instructions

… so I went with these instead!

[youtube http://www.youtube.com/watch?v=rdOSLpZ37kU]

I mitred the sleeve vents and the back vent in the same way. Though I had created a bit of a monster on the back vent by forgetting the extra allowance. Please don’t forget this!!!

back vent mitred corners
not enough SA on the vent but check out those mitred corners baby!

When I came to set in the sleeves I realised I had clean forgot a couple of notches. You will never work out how to inset those sleeves if you forget the notches, I can tell you. Mostly because I tried… and failed… 3 times!!! Till I relented and placed the pattern pieces over the made up sleeves and marked them.

Once I’d put the shoulder pads in, I tried it on and grinned from ear to ear. I was definitely on the home straight! But one niggling factor was that I didn’t like how the sleeve just ‘hung limp’ off the shoulder. I had heard mention of sleeve headings before but obviously never had to take full notice. So I found this little tute in my book Readers Digest: New Complete Guide to Sewing. This book has been so useful and really didn’t let me down this time.

Make a sleeve heading:

Cut 2 pieces of 3 x 5 in (7.3 x 12.5 cm) pieces of lamb’s wool, flannel, or polyester fleece. I had some leftover cotton flannel from my son’s pyjamas. Probably not as weighty or as poofy as lamb’s wool but it was better than nothing!

sleeve cap pieces
sleeve cap pieces

Make a 1 in (2.5 cm) fold on long side of each piece. How lucky is this. My fabric had 1 in square pattern!

sleeve cap fold
sleeve cap fold

Centre and pin heading to wrong side of sleeve cap with fold against seamline, wider half of heading against sleeve.

sleeve cap pinned in position

Whipstitch fold of sleeve heading to sleeve seamline. Heading now supports and rounds out sleeve cap.

without sleeve cap
without sleeve cap

The difference is subtle but is hugely important for my self satisfaction!

with sleeve cap
with sleeve cap

Before I lined the jacket I neatened and pressed all the seams. I did wonder if you have to neaten the raw edges, after all they wont show but I was worried about it fraying inside with wear and if it might eventually have a knock on effect to the seams coming apart. Probably over worrying but better to be safe than sorry was my own conclusion. But here presented my next concern. As much as I pressed this gorgeous wool, the seams would not lie perfectly flat throughout and I knew that would affect the overall shape and create a lumpy lining. And who would want lumpy lining?!

So I decided to stitch the seams down, like a good tailor lady. But hey! Guess what little tailoring trick was missing. NO UNDERLINING!!! Not that I have ever had to underline anything to date. But I have heard about it. I have wondered why you would want to but now it was blindingly obvious. My fabric was sturdy enough to live without it but how much easier would it have been to sew the seams down flat onto an underlining. I will definitely underline next time I make a jacket and I wholly advise you to do this even if you think your fabric is sturdy enough. It makes sense you know!! Fortunately my fabric was quite thick with a forgiving texture!

stitching seams down sans underlining

I found it was much easier to do, over my knee, whilst watching The Paradise! And also safer to stitch onto the interfaced pieces.

stitching seams down on interfaced sections

Hemming was easy with this fabric but be aware that a curvy hemline is naturally created with all those shaped pieces. To take in that excess fabric I just made a couple of tucks either side of the vent, symetrically positioned so that the finished shape was uniform. You’ll notice here that there is no evidence of interfacing. After I hemmed I remembered I was supposed to interface the hems. So I dutifully unpicked all that hand stitching, cut some strips of fusible interfacing, fused it on and re-hemmed. BUT do remember to interface the hem sections of your pieces from the start and NOT at this stage. You know it makes sense 😉

wavy hemline
wavy hemline

So then came the lining. I had pondered a silk lining but the lilac poly satin I found was so lush I looked no further. So long as you remember your ‘ease pleat’ in the centre back, you can’t go far wrong. I can’t give to much advice about this stage because I kind of winged it!!! But what I did remember to do was to push the lining up to the hemline of the outer fabric and roll it down over itself to create more ease and allow for shrinkage. Not that poly lining shrinks but I think its general practice! I did the same on the sleeves. I’m not sure I lined the vents on the sleeves properly but it works… of a fashion!

The buttons were a lucky find, though I was gutted I couldn’t find smaller coconut shell buttons. The two pictured here were way to big even for the front! So sparkly resin shank buttons it was. Lucky to find them in 2 different sizes at Shepherds Bush market. 20p each… a snip!

raspberry buttons
I WILL find a perfect use for those coconut shell buttons!

I created the buttonholes on the machine. Holding my breath as I did so. You know how it is. There’s always a chance of a wayward buttonhole! But next time I would love to try bound buttonholes. Karen did such a beautiful job with hers and I bet it feels far more special to button up with bound ones!

Well here ends my waffly post of niggles. I hope to have been of some help and not too much of a waffling bore!

Have a wonderful weekend all…. wrap up warm!! x