Handkerchief hem dress

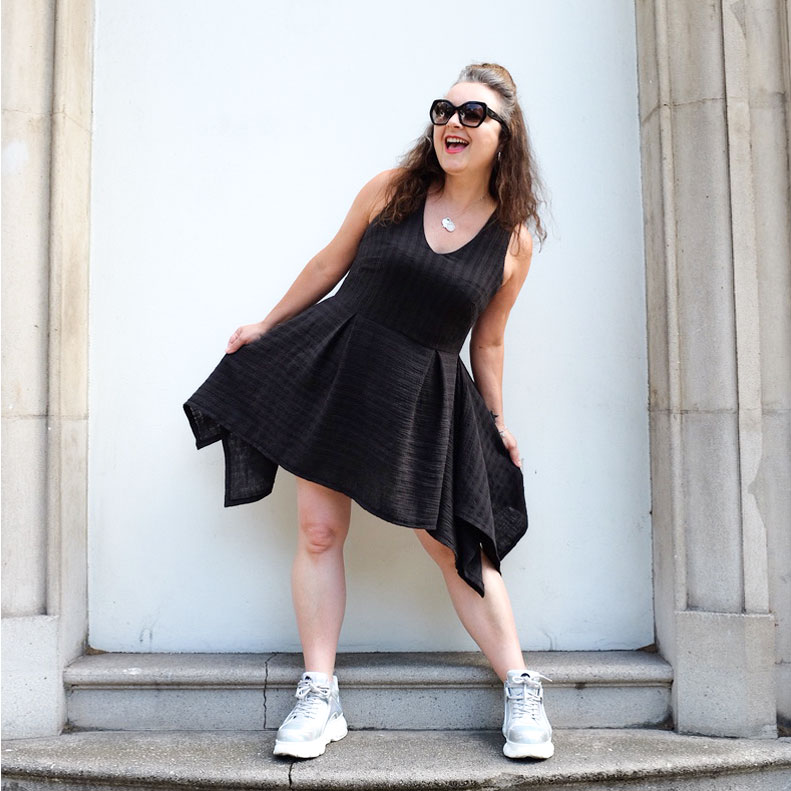
ooobop design hankerchief hem dress

Lockdown forced me to buy fabric online. Not my favourite thing to do but needs must when Covid pulls the rug!

I headed straight to Minerva – amazing selection; easy to navigate website and very competitive prices. I’m also a fan of the accompanying videos that showcase the fabric in action so you can get a fair impression of the weight and drape.

I was on a roll with the Shelby rompers, having made a starry one, a tropical one and an upcycled one in relatively quick succession, and my plan was to make a plain one that was a bit more casual and downplayed for those days when you want to be slightly less visible. Read: any excuse to go back to black!

I’m a sucker for black. But even moreso for a black fabric with a texture. And linen is a firm favourite. So I figured this crinkle cotton striped linen gauze would tick all the boxes. Black was sold out unsurprisingly, so I went for charcoal which actually champions those slubs with way more contrast.

But when it arrived I was a bit miffed. It wasn’t at all as I’d imagined. It was a bit scratchy, a bit wonky with it’s loose weave and worst of all, following a prewash it contracted to half the width! That lovely slubby texture totally worked against me, didn’t behave at all like regular linen and was almost elastic! – I was dead scared to make it into a romper. What if one leg ended up longer than the other, lol!

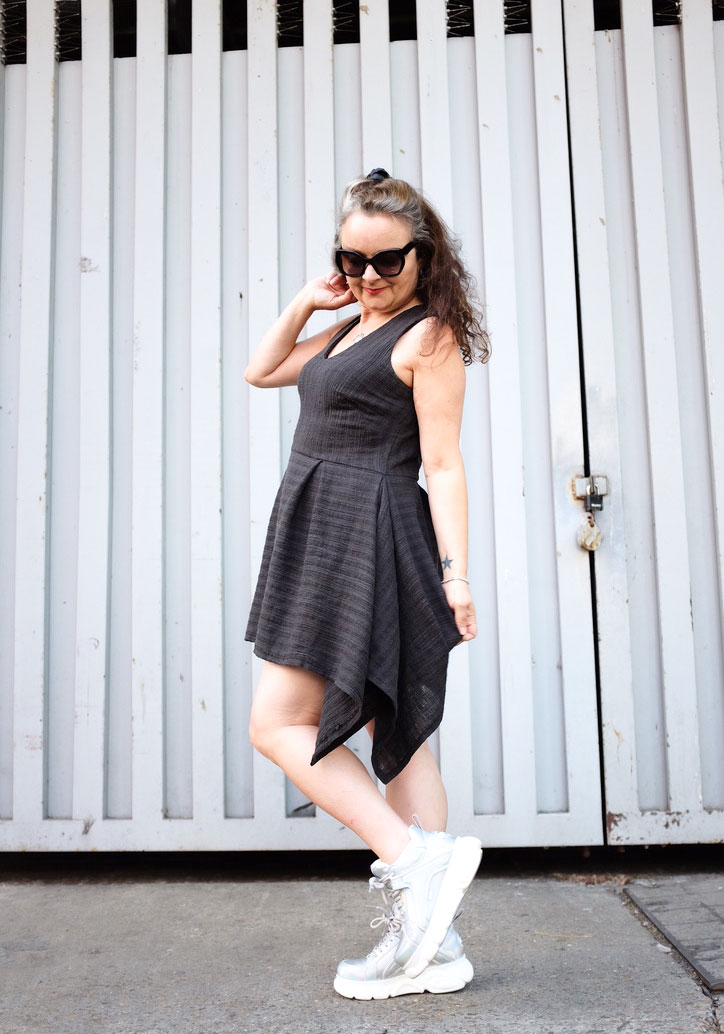
ooobop hankerchief hem dress
Channeling Blondie and Parallel Lines!

Despite the disappointment I rejoiced in the realisation that I’ve come far enough into my dressmaking journey to know when a fabric isn’t going to cut it. And the tantrums are few and far between now, because I’m quicker at finding solutions. Also the fabric completely softened after a prewash and I was more determined than ever to let this fabric do the talking.

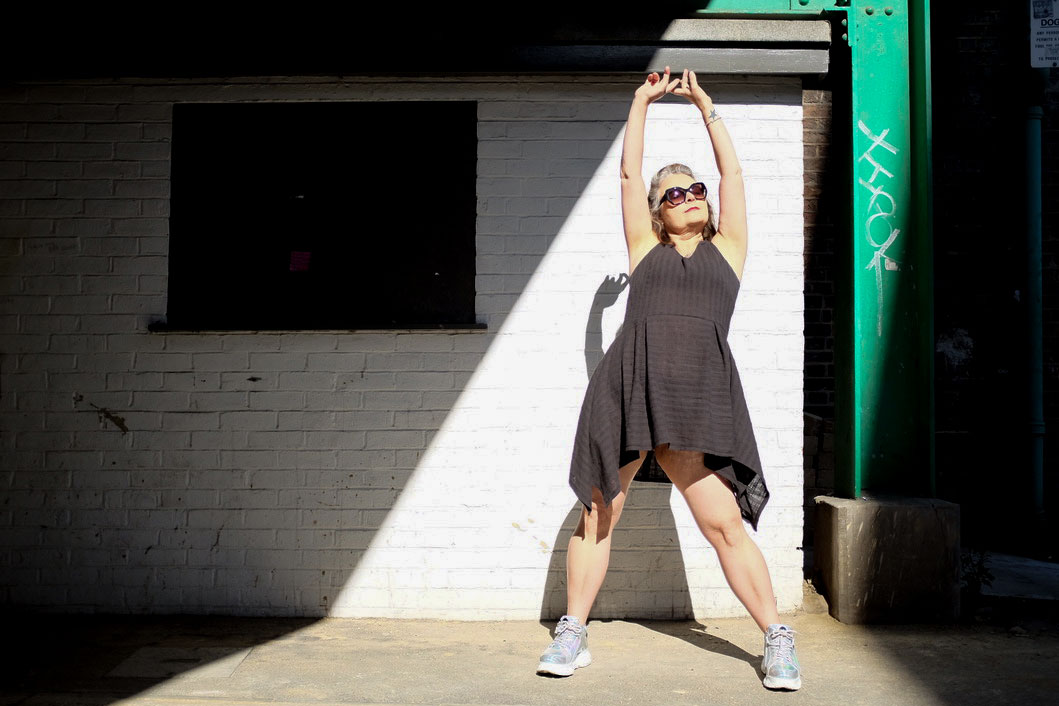
So I went off piste. Not accidentally I’m sure because I’ve always got a catalogue of crazy designs in my head and sometimes they make it to a page in my Fashionary book so they’ve got a better chance of being realised. A summer linen dress incorporating a fitted sleeveless bodice, with a v-necklline and a handkerchief skirt would be it’s destiny.

ooobop hankerchief hem dress

I reached for my bodice sloper, added a v-neckline and narrowed the shoulders. I also swung the darts to fashion a double French dart for no good reason other than I’ve never done it before. And I really like the result!

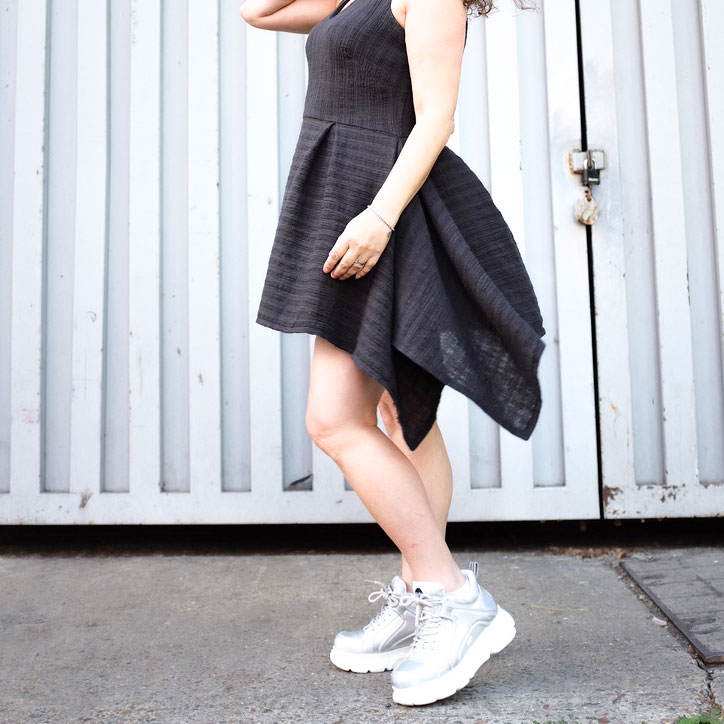
The vertical stripes of this linen lend themselves perfectly to the bodice but I decided to switch the stripes horizontally for the skirt section because I much prefer how horizontal lines fall at the sides. There was precious little worry how it would all hang for cutting it on the cross because I was playing to it’s wonky nature in any case. And it turned out good. In fact more than good. I love it!!

ooobop design hankerchief hem skirt detail

I have to cite a few influences here: Liz from this year’s GBSB for sticking to her alternative fashion style. I realised I was drifting away from mine and she’s unknowingly reeled me right back in! My bestie Laura Bird who loves an All Saints asymmetric number, always sporting an ‘interesting’ dress and Burda Style for first introducing me to a hanky hem!  I made my first maxi dress here and a second silver one here  and they are still my favourites though this is my first short dress with a handkerchief hem.

So how did I cut the skirt?

I decided on the length of the skirt (the depth) and factored in seam allowance and hem.

I made the width of the skirt to the following calculation:

Front piece (cut 1) = half waist measurement + (2x length of skirt) + 8inches for 2 box pleats + (2x hem allowance)

Back piece (cut 2) = quarter waist measurement + (1x length of skirt) + 4inches for 1 box pleat + seam allowance + hem allowance

I marked the centre of the front piece and 4 inches either side to tack the box pleats. I overlocked the bottom of the bodice piece and the top of the skirt pieces before pinning and sewing in place. I sewed up to the side seam on each piece and then sewed the seam allowance of the extra fabric along the top edge. After the centre back edges were overlocked, I inserted an invisible zip and enclosed the top part of the zip with the facing.

Finally I hemmed all four edges of the skirt and mitred the corners. And oh what a neat little finish that is!

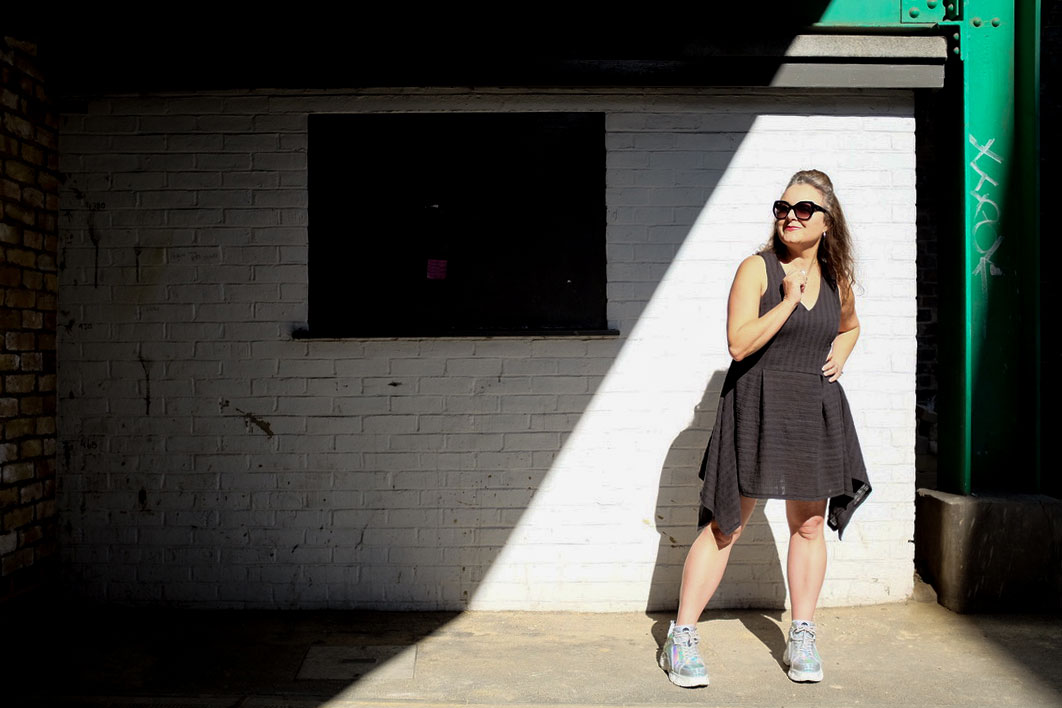
ooobop hankerchief hem dress

I know it’s not the most groundbreaking dress. But I made it to my own order and an image in my head and it really feels good. The fabric feels good against my skin in this heat and I love how carefree it is.

I finished up sewing it yesterday morning in good time for Dan to have a practice with his new camera. (Clever, hey?!) And I’m delighted with the results. Thank you oh clever talented husband of mine!

ooobop hankerchief hem dress

Also…new shoes!!  Buffalo hologram numbers that literally turn rainbow in the sunshine. And yes I know I’m probably channelling 90s Spice Girl. And no… I’m not about to grow up anytime fast!

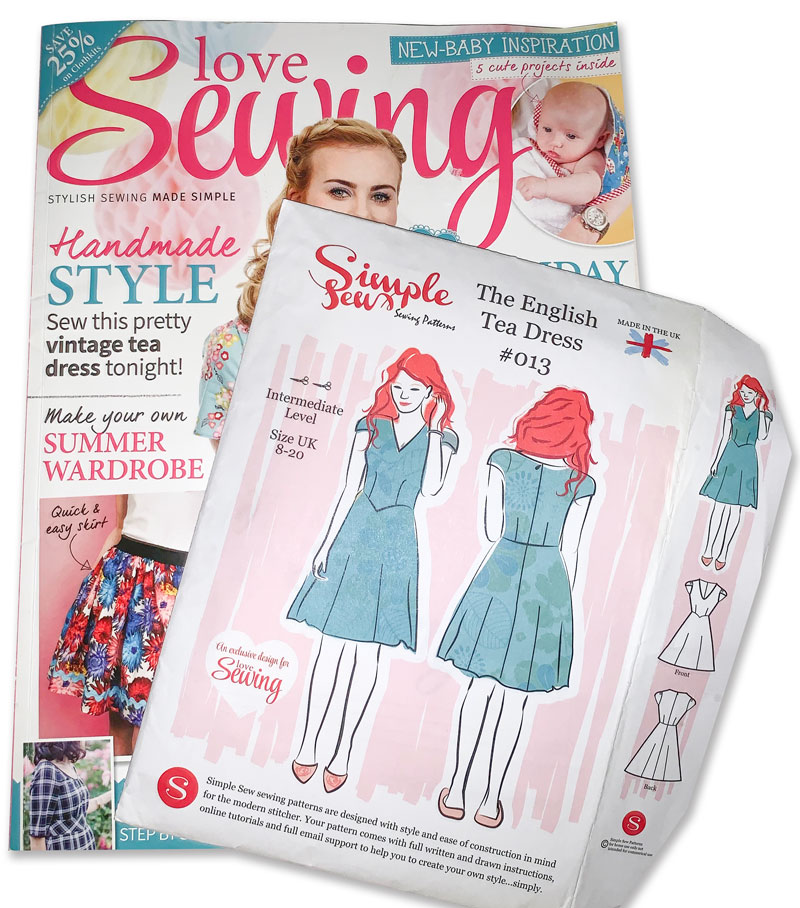
The English Tea Dress #013 by Simple Sew

Simple Sew English Tea dress

This was exactly the kind of pattern I was looking for when I was actually hunting for something else! I’d put it aside (read, under the sofa) as a not-so-taxing project for when I got a few hours down time. The back cover blurb was all-encouraging of this, too.

Like many other sewing people, I’ve been on a mission to work through my stash fabric before buying anything new, in the name of sustainability and also the hope of gaining some floor space in my bedroom!

Simple Sew English tea dress

And this dress pattern is perfect for all those 2m lengths I purchased. It requires 1.90m of 60″ fabric for all sizes 8-20 – sleeves and all – which is pretty damned economical really.

Love Sewing Magazine and English Tea Dress sewing pattern

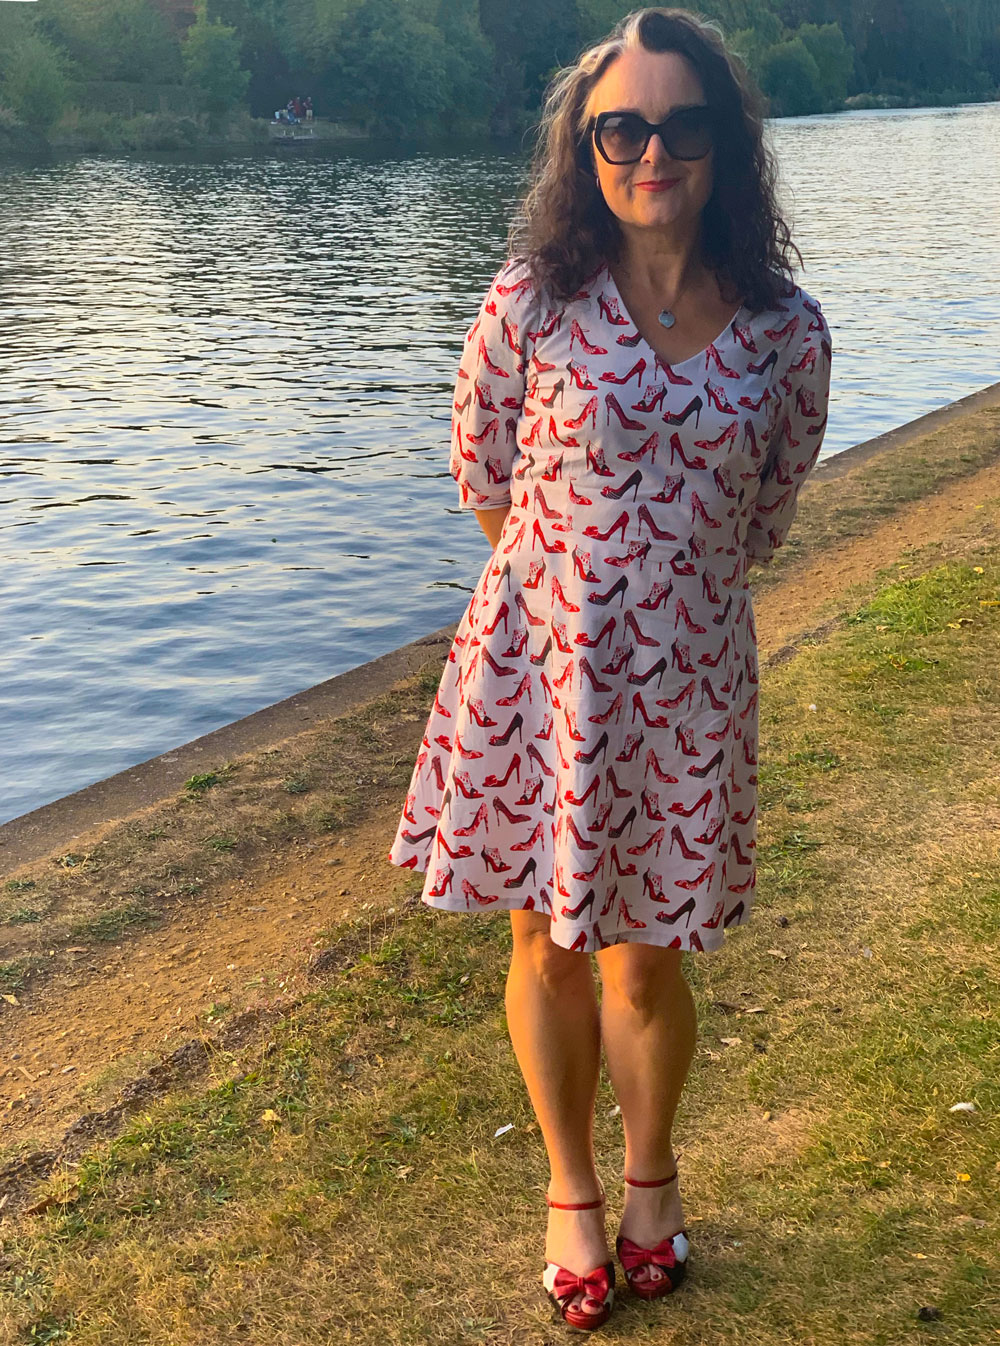
I had 2m of what I believed to be 45″ wide cotton fabric and that almost fitted the bill. I just had to shorten the skirt by 2inches to fit all the pieces on. Especially as I then found out that it was only 43″ wide. I’m guessing it shrunk in a prewash – better to have found out at this stage of the game though! But still I had to count my chickens that all the pieces fitted considering the direction of the design. Upside down shoes would have been disastrous!

All went swimmingly but I’m amazed at the lack of notches on the pattern pieces. There was one to mark the front sleeve placement and ordinarily that’s pretty crucial but in this instance the sleeve pattern folded near enough symmetrically so it wouldn’t have made a spot of difference.

Simple Sew English Tea dress

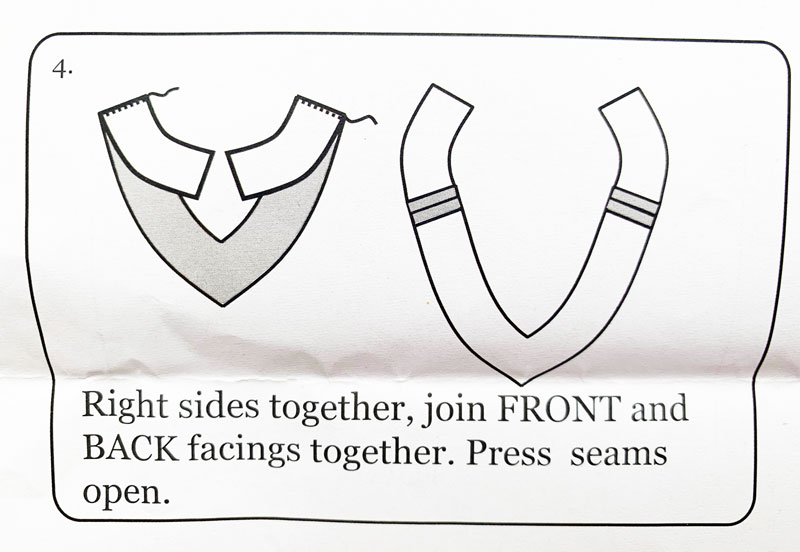
But that was it on the notch front! Piecing the front and back facings together had me thinking, which is a bit lucky as it prompted me to place over the bodice neckline to check I was sewing the pieces together the right way round. It would have been so much more helpful to have a marker on each of the shoulder seams.


TIP#1

Mark notches on the facing pieces so you remember to sew them the correct way round

facing instructions

And if I’m being picky (moi?!), the side seams of the skirt would have benefitted from a notch or two. They are bias-cut and hence a little stretchy so a midway marker would help prevent a potential pucker! I’ve marked mine for future use.


TIP #2

Align skirt pattern pieces at side seams and create notches for more accurate alignment


Adding to the facing part of the story – it was very useful and imperative actually, to include the snip at ‘X’ –the point of the V-neck. It did press nice and flat but I included 2 additional stages here:


TIP #3

Under-stitch the seam allowance to the facing to prevent it from rolling out at the neckline.


and then:


TIP #4

Hand stitch the facing to the shoulder seams to secure it in position stop it from popping out.


I’m being picky again. I know. But from past and bad experience, I can’t stand a flappy facing!

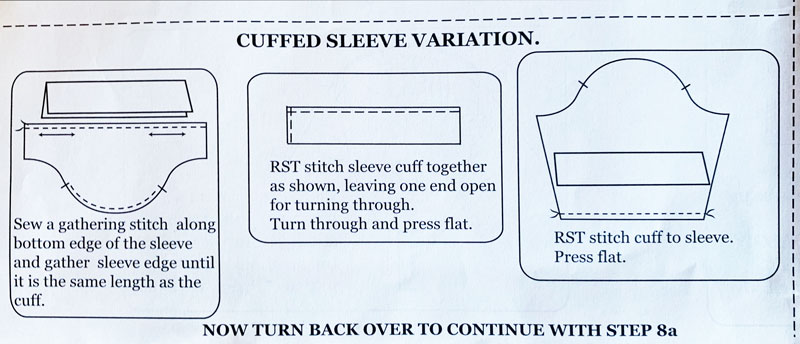
So all went well, despite lack of notches until I got to the sleeve section. And of course I wasn’t content to sew the options illustrated on the packet or in the accompanying issue of Love Sewing magazine (issue 15). Not only because I’m contrary but the 3rd non-illustrated nor photographed option was the best IMHO. The 3rd option being a half length, cuffed variety!

But, forgive me for being old and slow (and of course picky)… but how would you interpret these instructions?

cuffed sleeve instructions

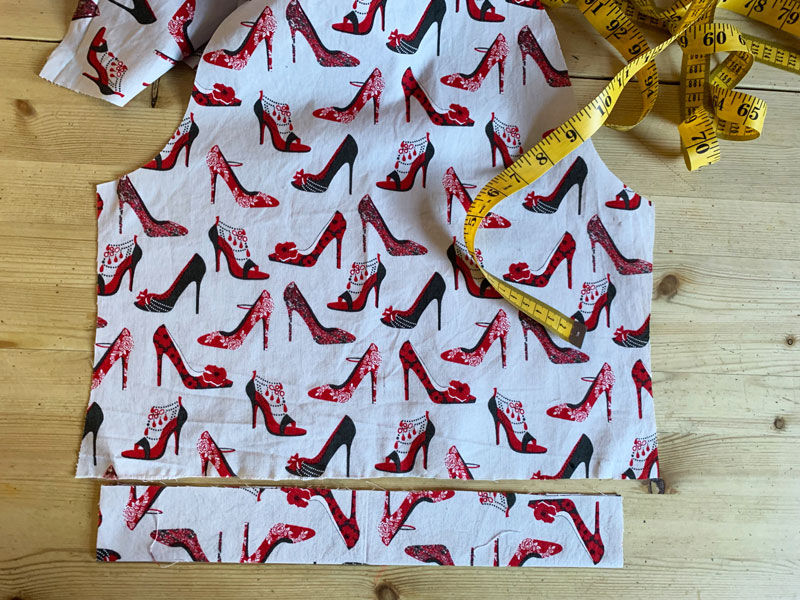
Especially when the cuff was near enough the same length as the bottom of the sleeve. And yes I did double check I’d cut the correct sizes!

cuff piece next to sleeve
Bottom of sleeve not much wider than the cuff piece.

I spent way to much time thinking about this stage and then went off piste with this tip:


TIP #5

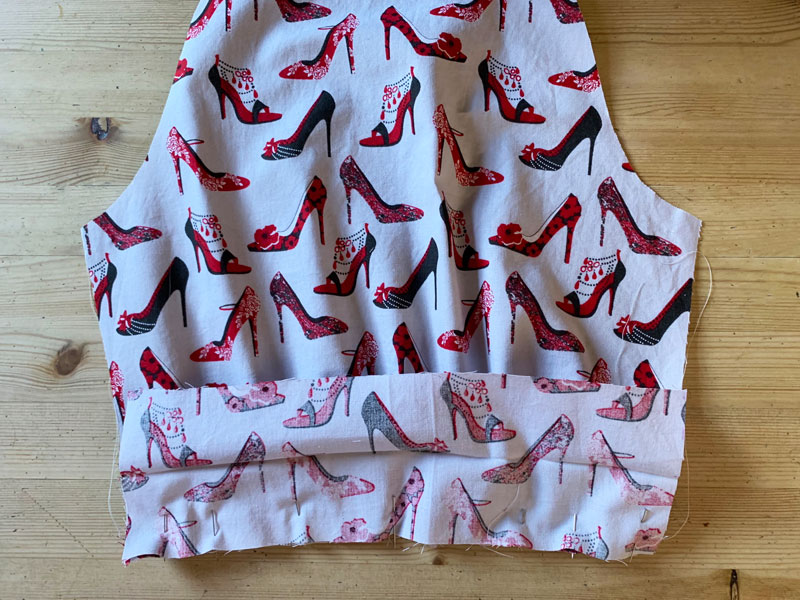
Measure your arm circumference, comfortably, just above your elbow and add 1.5cm seam allowance to each end. Trim cuff piece to this measurement. Press in half horizontally to crease the centre/ (ultimately the bottom) of the cuff. Gather the bottom of the sleeve as stated and sew right sides of the gathered edge to the right side of one raw edge of the cuff piece.

cuff piece pinned to sleeve
Cuff piece pinned to sleeve along raw edge. See the crease in the middle.
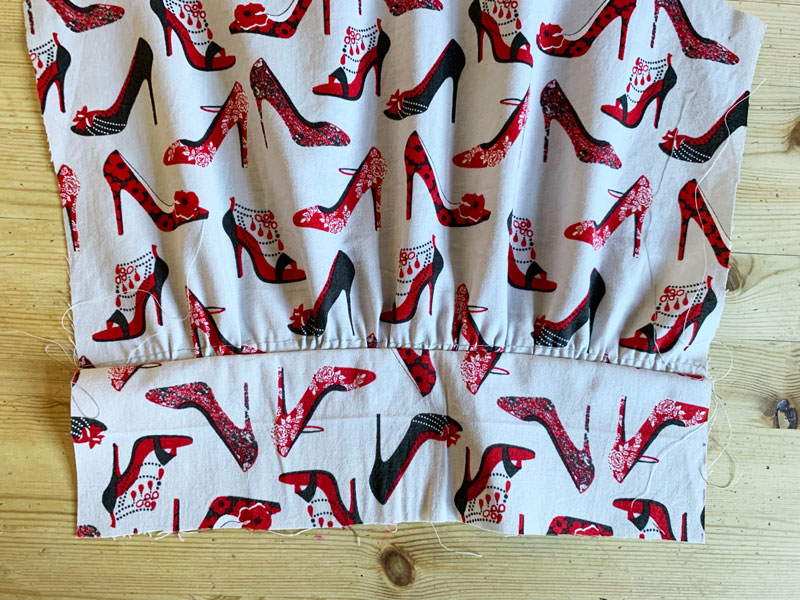
cuff sewn to sleeve
Cuff sewn to sleeve. Spot the deliberate mistake!

Gather the sleeve head as instructed – although, having said that, it’s not really instructed from where and to where on the pattern piece, so I just mirrored the notch to the back and gathered between the two points. Sew the underarm sleeve seam all the way down to the bottom of the cuff. Press sleeve seam open. Press under 1.5cm on the remaining raw edge of the cuff and then fold the piece to the inside of the sleeve along the pre-pressed fold. Hand-stitch to the inside seam line to form a binding and finish the cuff. Remove gathering stitches and press.

Having worn this dress and seeing how the cuffs have curled, I might also use  a light fusible interfacing to stabilise the cuff next time.


I hand finished the hemline of the skirt, of course. Just because a machined one would irritate me having invested so much time to go lazy at the last hurdle!

So where do you suppose I might have worn my English tea dress as soon as I made it? No prizes for guessing of course!

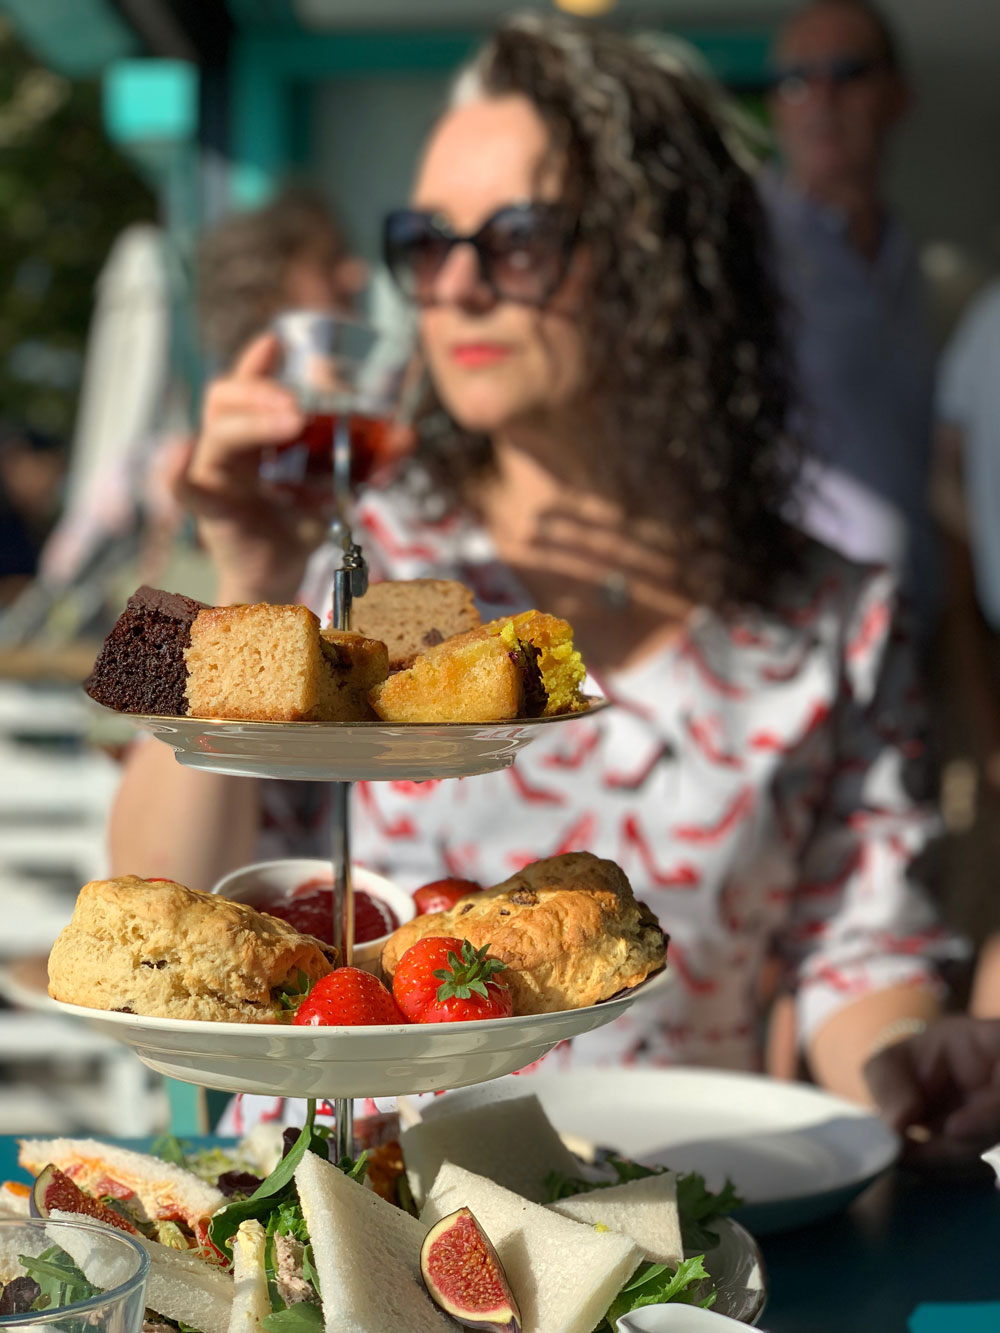
Enjoying a vegan cream tea
Vegan cream tea at The Ginger Bees cafe in Kingston-upon-Thames

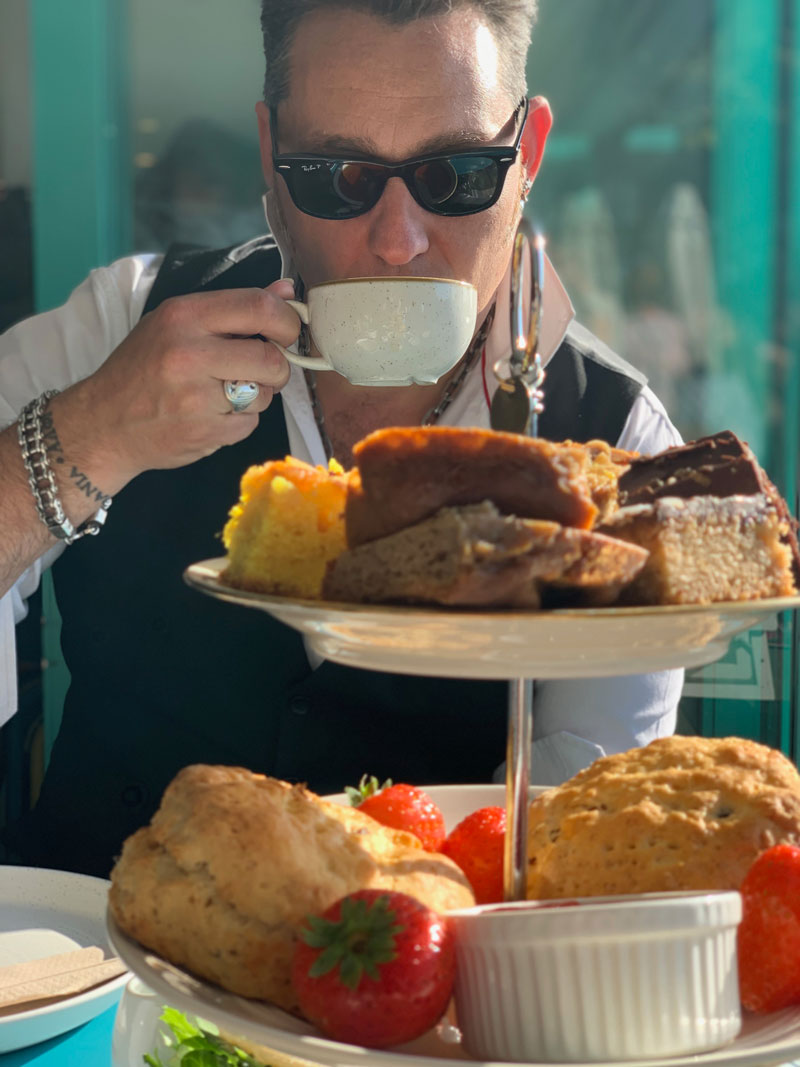
Mr O and I went to The Ginger Bees cafe, Kingston-upon-thames riverside, for the most delicious vegan cream tea. Well, mine was vegan – Mr O went full on full cream!

Mr O and his cream tea
Mr O enjoying his full on full cream, cream tea!

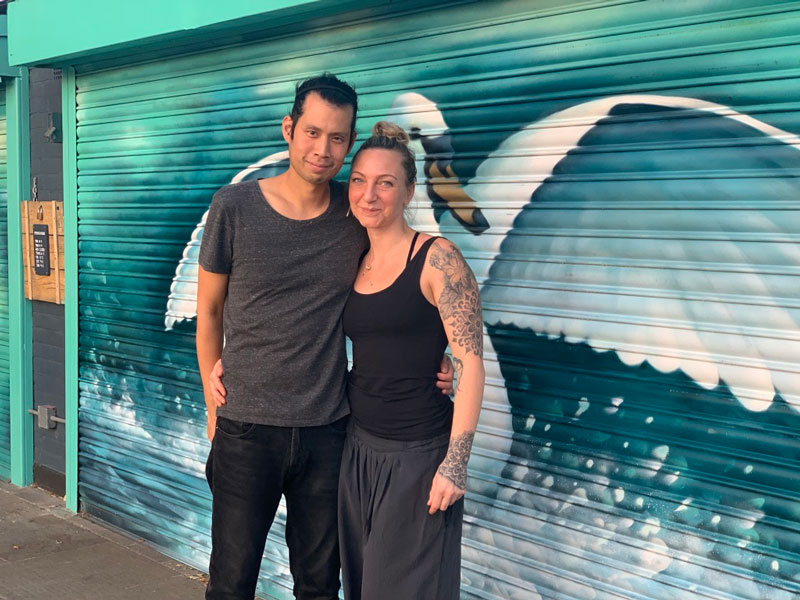
I booked the day before on recommendation and we were not disappointed. The lovely couple who bought the café just a year ago have something very special going on here. Thank you so much Gavin and Beth for looking after us. It was such a treat and the perfect occasion to showcase my new tea dress!

Beth and Gavin, owners of The Ginger Bees Cafe in Kingston-upon-Thames