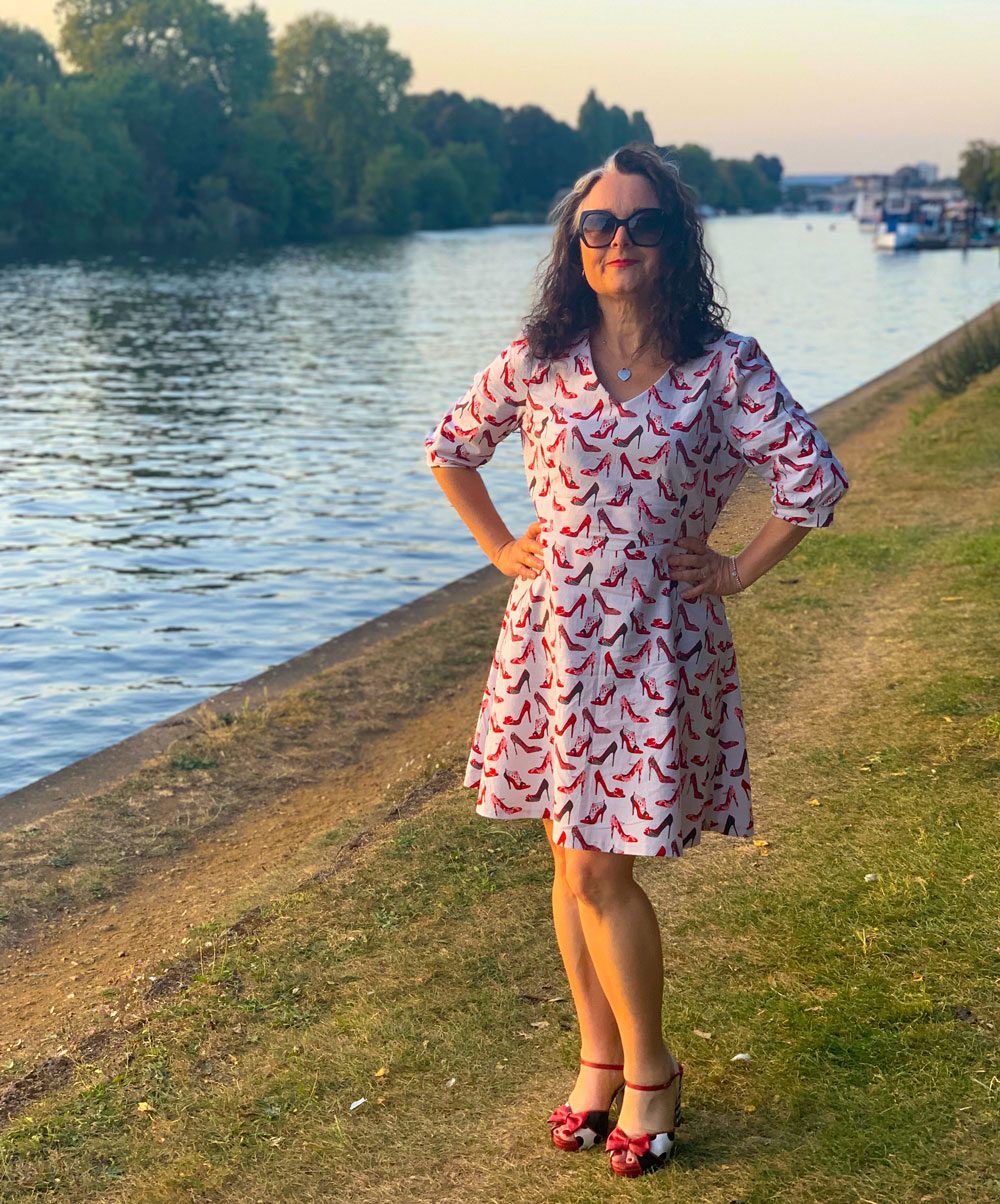
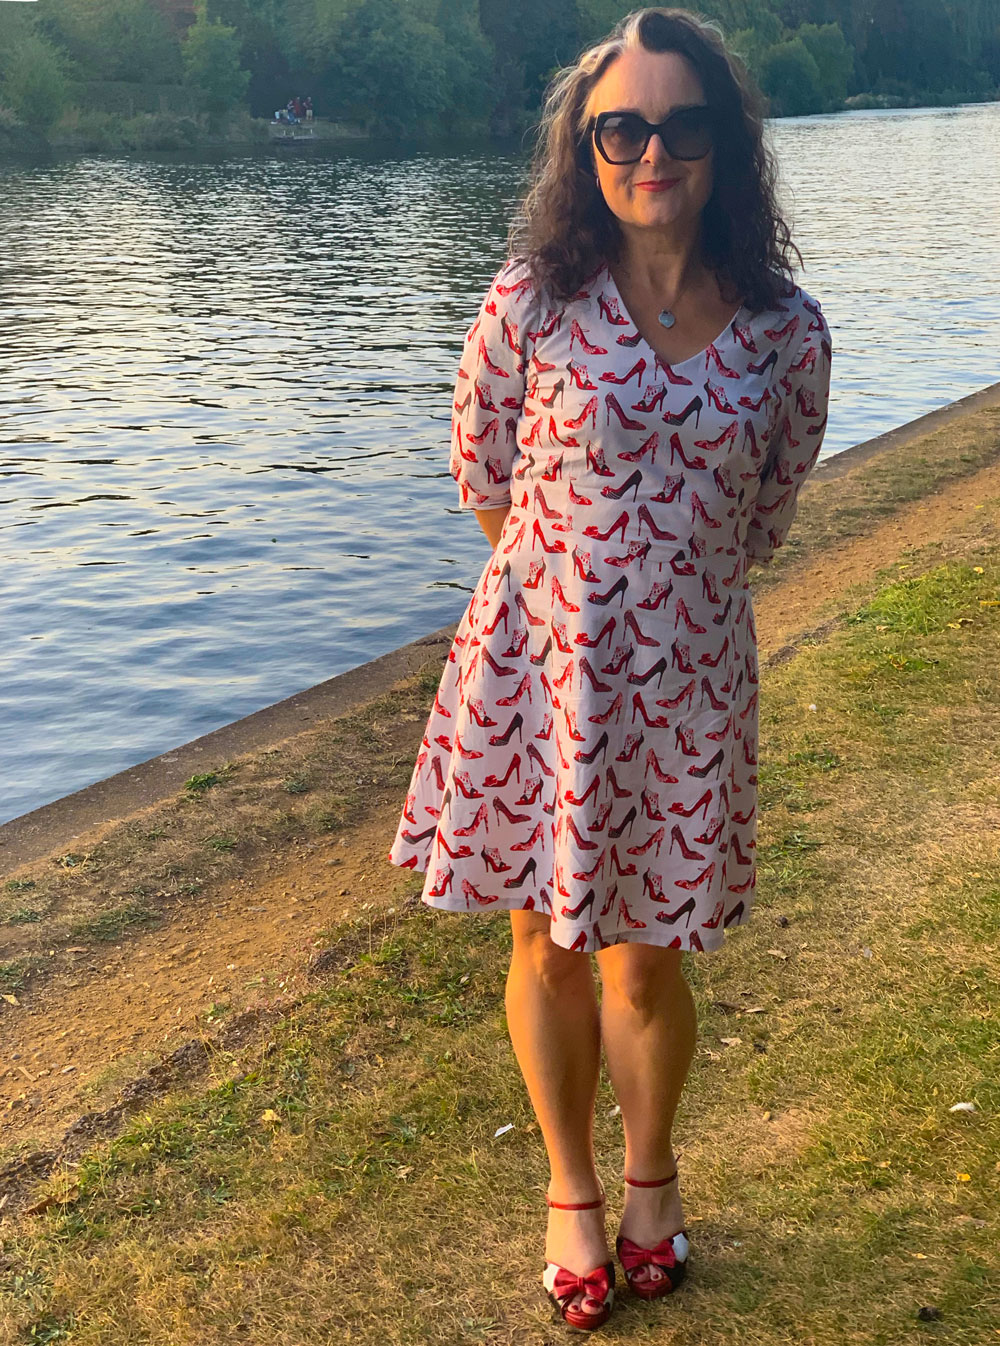
This was exactly the kind of pattern I was looking for when I was actually hunting for something else! I’d put it aside (read, under the sofa) as a not-so-taxing project for when I got a few hours down time. The back cover blurb was all-encouraging of this, too.
Like many other sewing people, I’ve been on a mission to work through my stash fabric before buying anything new, in the name of sustainability and also the hope of gaining some floor space in my bedroom!
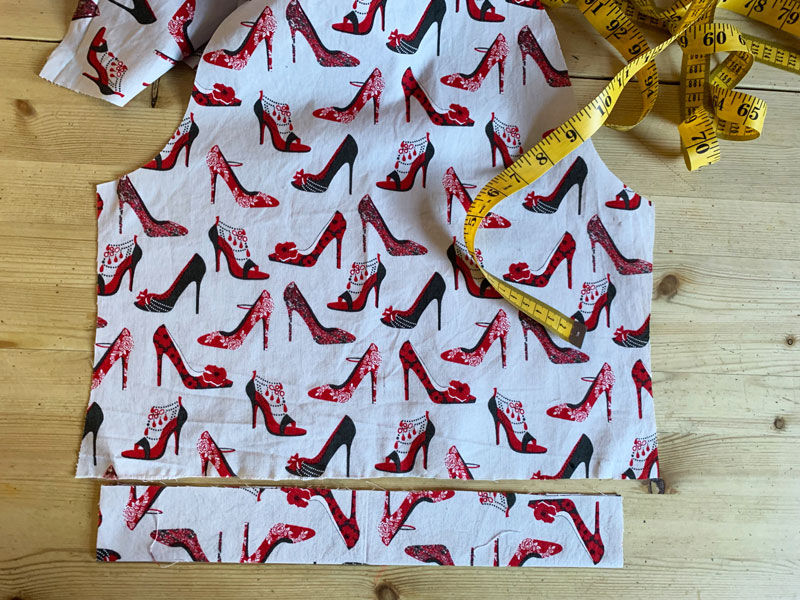
And this dress pattern is perfect for all those 2m lengths I purchased. It requires 1.90m of 60″ fabric for all sizes 8-20 – sleeves and all – which is pretty damned economical really.
I had 2m of what I believed to be 45″ wide cotton fabric and that almost fitted the bill. I just had to shorten the skirt by 2inches to fit all the pieces on. Especially as I then found out that it was only 43″ wide. I’m guessing it shrunk in a prewash – better to have found out at this stage of the game though! But still I had to count my chickens that all the pieces fitted considering the direction of the design. Upside down shoes would have been disastrous!
All went swimmingly but I’m amazed at the lack of notches on the pattern pieces. There was one to mark the front sleeve placement and ordinarily that’s pretty crucial but in this instance the sleeve pattern folded near enough symmetrically so it wouldn’t have made a spot of difference.
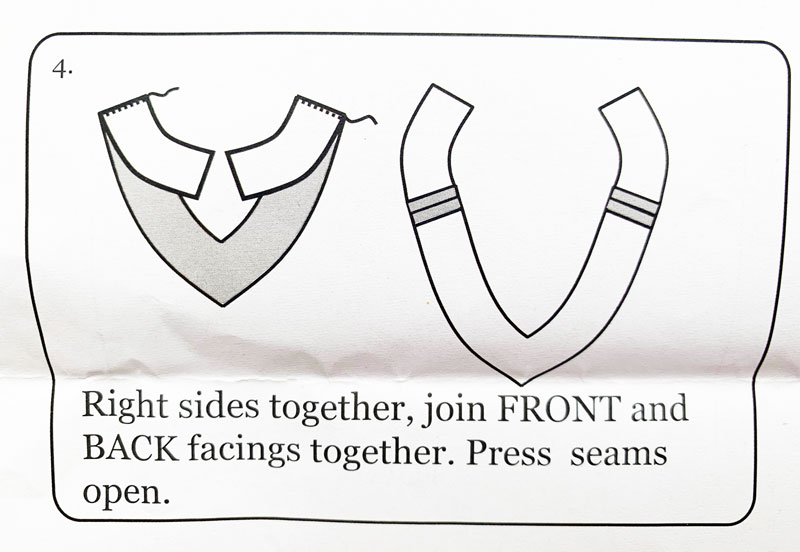
But that was it on the notch front! Piecing the front and back facings together had me thinking, which is a bit lucky as it prompted me to place over the bodice neckline to check I was sewing the pieces together the right way round. It would have been so much more helpful to have a marker on each of the shoulder seams.
TIP#1
Mark notches on the facing pieces so you remember to sew them the correct way round
And if I’m being picky (moi?!), the side seams of the skirt would have benefitted from a notch or two. They are bias-cut and hence a little stretchy so a midway marker would help prevent a potential pucker! I’ve marked mine for future use.
TIP #2
Align skirt pattern pieces at side seams and create notches for more accurate alignment
Adding to the facing part of the story – it was very useful and imperative actually, to include the snip at ‘X’ –the point of the V-neck. It did press nice and flat but I included 2 additional stages here:
TIP #3
Under-stitch the seam allowance to the facing to prevent it from rolling out at the neckline.
and then:
TIP #4
Hand stitch the facing to the shoulder seams to secure it in position stop it from popping out.
I’m being picky again. I know. But from past and bad experience, I can’t stand a flappy facing!
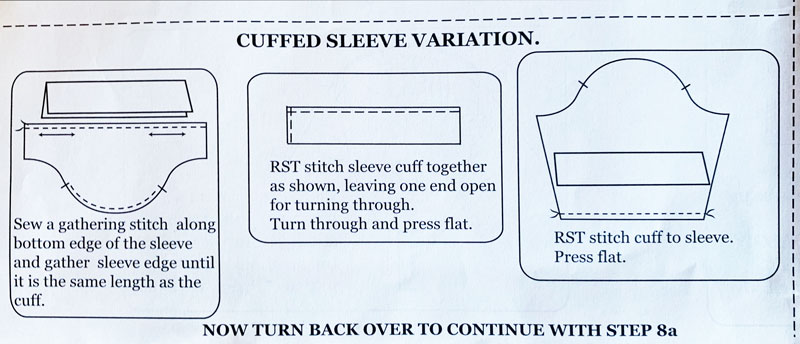
So all went well, despite lack of notches until I got to the sleeve section. And of course I wasn’t content to sew the options illustrated on the packet or in the accompanying issue of Love Sewing magazine (issue 15). Not only because I’m contrary but the 3rd non-illustrated nor photographed option was the best IMHO. The 3rd option being a half length, cuffed variety!
But, forgive me for being old and slow (and of course picky)… but how would you interpret these instructions?
Especially when the cuff was near enough the same length as the bottom of the sleeve. And yes I did double check I’d cut the correct sizes!
Bottom of sleeve not much wider than the cuff piece.
I spent way to much time thinking about this stage and then went off piste with this tip:
TIP #5
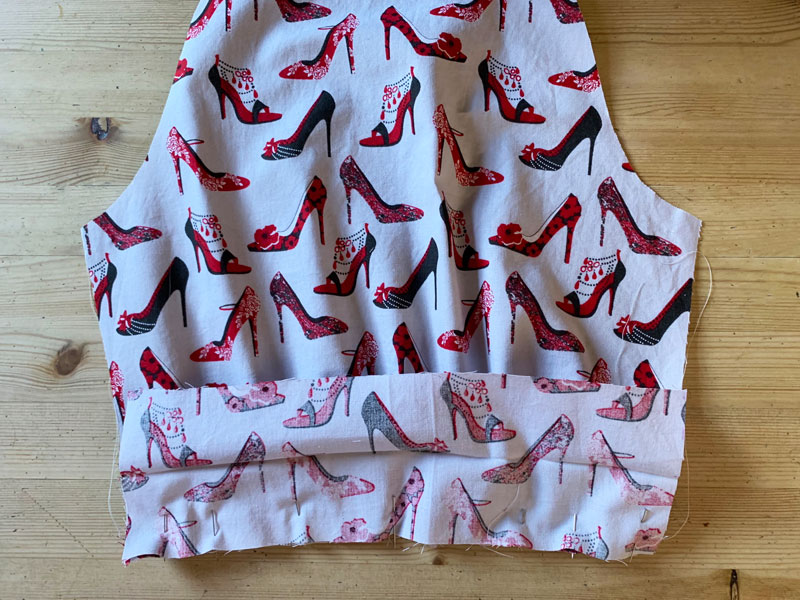
Measure your arm circumference, comfortably, just above your elbow and add 1.5cm seam allowance to each end. Trim cuff piece to this measurement. Press in half horizontally to crease the centre/ (ultimately the bottom) of the cuff. Gather the bottom of the sleeve as stated and sew right sides of the gathered edge to the right side of one raw edge of the cuff piece.
Cuff piece pinned to sleeve along raw edge. See the crease in the middle.Cuff sewn to sleeve. Spot the deliberate mistake!
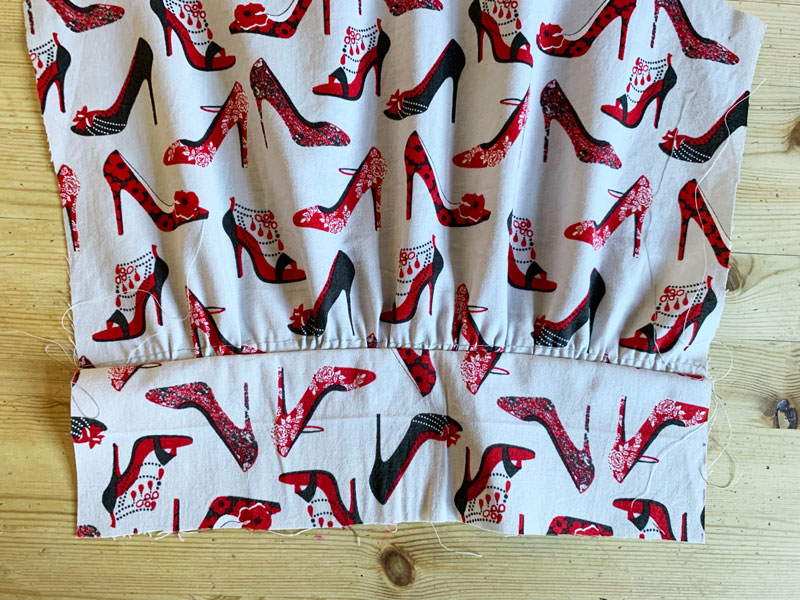
Gather the sleeve head as instructed – although, having said that, it’s not really instructed from where and to where on the pattern piece, so I just mirrored the notch to the back and gathered between the two points. Sew the underarm sleeve seam all the way down to the bottom of the cuff. Press sleeve seam open. Press under 1.5cm on the remaining raw edge of the cuff and then fold the piece to the inside of the sleeve along the pre-pressed fold. Hand-stitch to the inside seam line to form a binding and finish the cuff. Remove gathering stitches and press.
Having worn this dress and seeing how the cuffs have curled, I might also use a light fusible interfacing to stabilise the cuff next time.
I hand finished the hemline of the skirt, of course. Just because a machined one would irritate me having invested so much time to go lazy at the last hurdle!
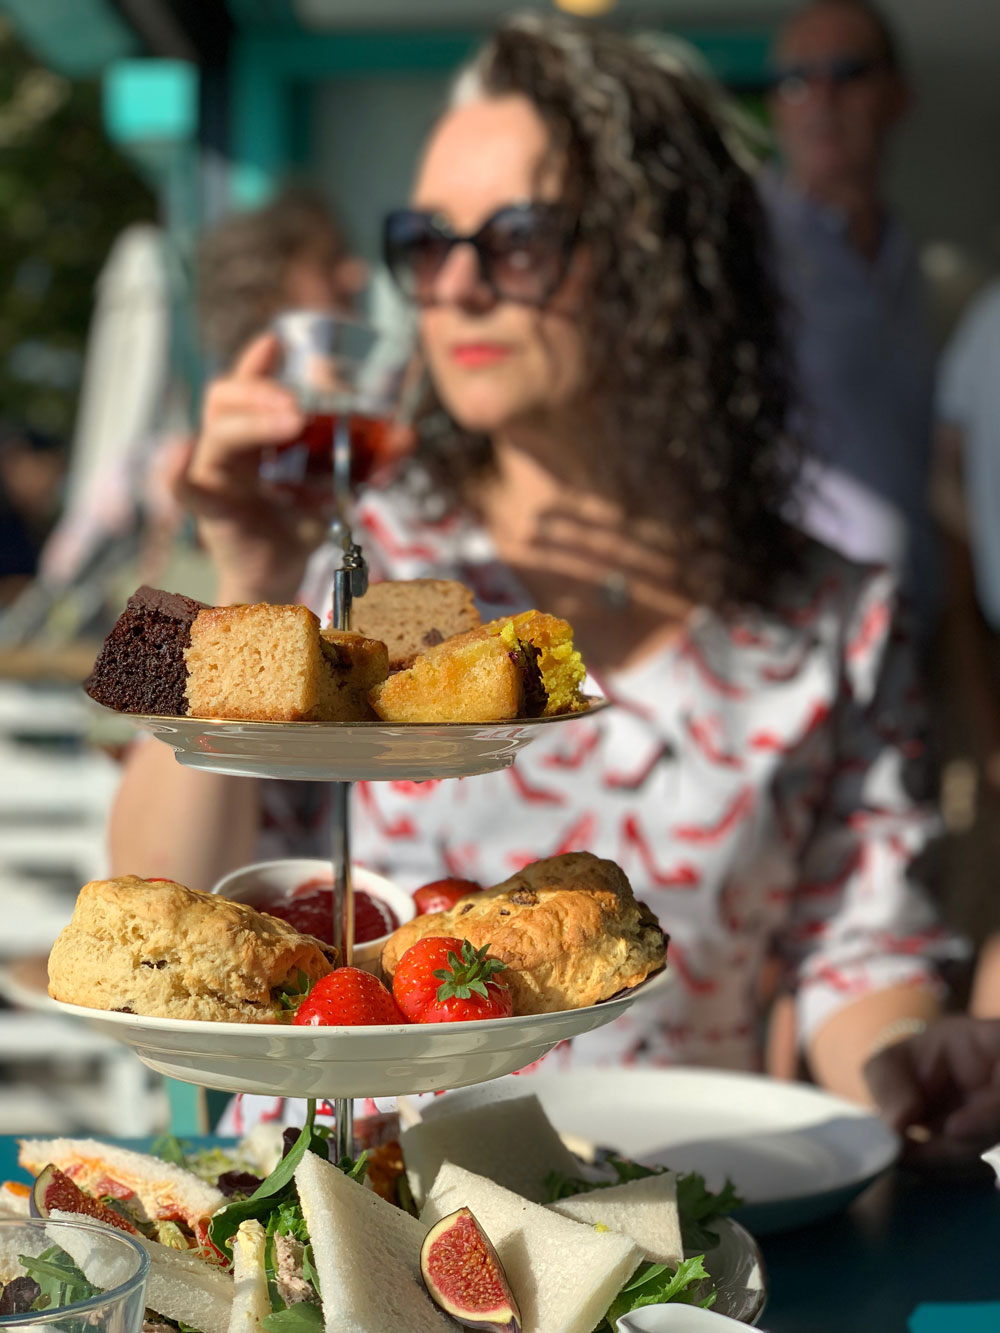
So where do you suppose I might have worn my English tea dress as soon as I made it? No prizes for guessing of course!
Vegan cream tea at The Ginger Bees cafe in Kingston-upon-Thames
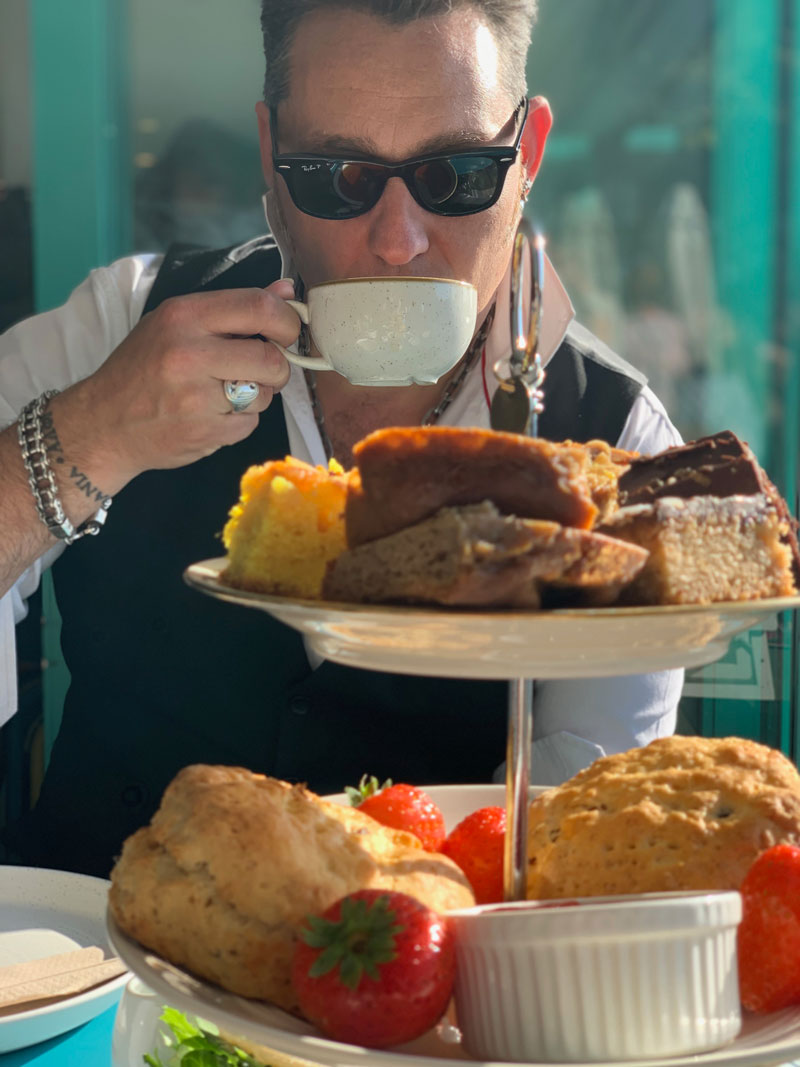
Mr O and I went to The Ginger Bees cafe, Kingston-upon-thames riverside, for the most delicious vegan cream tea. Well, mine was vegan – Mr O went full on full cream!
Mr O enjoying his full on full cream, cream tea!
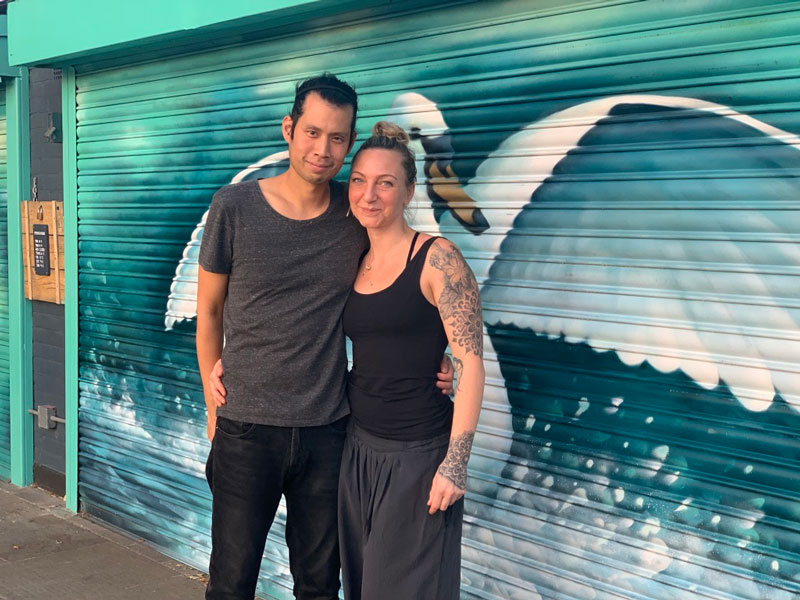
I booked the day before on recommendation and we were not disappointed. The lovely couple who bought the café just a year ago have something very special going on here. Thank you so much Gavin and Beth for looking after us. It was such a treat and the perfect occasion to showcase my new tea dress!
Beth and Gavin, owners of The Ginger Bees Cafe in Kingston-upon-Thames
And finally, after two years of waiting in the wings, and following a match-made fabric and pattern eureka moment, my French Gypsy Dress is finished and worn already.
The pattern is by Sew La Di Da Vintage, and I knew I would love it but I could never quite decide on the fabric. The samples shown on the site and exhibited at the shows I’ve visited are so gorgeous I could never hope to get close. I love the packaging and the styling of all the patterns.
I found the fabric online at Minerva Crafts, which is unusual for me. I much prefer shopping in real life! I have to touch and feel and think about it and walk from shop to shop and talk about it with the assistants before I make a call. But when I found this beaut on a random scroll, I didn’t give a second thought to what it would feel like or indeed what it was for – I just loved the colours and the black background of course. It’s a stretch cotton sateen. Quite sturdy, moderate stretch and a great lack of creasibility!
Thing is, I didn’t connect to two to begin with. And when sometime after I considered pairing them I thought it would be too weighty for the gathered upper bodice and sleeves. Though I knew the skirt would totally benefit from a bit of weight and the silhouette would be awesome.
Then I got busy and all sewing plans were out the window until I got a free weekend. Woohoo! A whole undisturbed Saturday and after a pep talk with my mum it was full steam ahead. She basically said, “What are you so scared of? If it all goes pear shaped you can just get some more fabric.” Which is true of course, if not a little bit wasteful. And I could have tested on something else first but I had a window of opportunity and I wanted a new dress right there and then!
And I couldn’t be more pleased. It fits in all the right places, is flattering and comfortable too.
Construction-wise its really quite simple. The most complicated thing is taking time to make those bodice and sleeve gathers even. I know now after heaps of lazy and rushed gathering attempts in the past, that the key is to sew 2 rows of gathering stitches, either side of the intended seamline and there’s every chance your gathers will keep evenly distributed and pucker free.
I made the binding for the neck and sleeve edges from some leftover black duchesse satin. I was prepared to rip it off if it didn’t work because I wasn’t entirely sure if it was the right kind of fabric for the job. But it was. Just perfectly right, actually!
There is a length of elastic inside the bias casing that starts and ends on the back sleeve seams. This is such a great idea because it allows for the dress to be worn on or off the shoulders and keeps the back bodice pieces completely flat. Incidentally there are no darts in the back pieces of this dress. Instead, the instructions call for a brilliant fitting stage whereby the back seam is pinned to fit and marked with chalk or an erasable pen (you will need a partner for this). Then the seam is machine tacked and pressed open so the creased edges give the perfect guide for zip insertion. It’s such a cool stage of instruction and one that I am definitely going to consider using on future makes. Is this a typical vintage construction method, I wonder?
I’m so happy with the outcome. It brightened a very drizzly day and feels so great to wear. And better still, it’s another strike off my #makenine2018 – wahooo!
I might try poomfing the skirt more with a layered petticoat and styling it up with flowers in my hair. Definitely a contender for what to wear when the Frida Kahlo exhibition hits the V&A this year.
Well it’s back to work tomorrow. But I’ll be returning with a head full of plans. That’s the trouble with a bit of time off!
I needed a dress for a wedding. Not just any old wedding but a beautiful Indian wedding where I couldn’t hope to compete with the finery of silks and saris. No pressure, then! I rifled through every kind of fabric and bored all the Goldhawk Road shop owners senseless with my dilemma, during the weeks leading up to the big day.
I diligently visited a roll of paisley brocade in A-One Fabrics, three days on the trot, properly umming and arrring out loud. But it wasn’t quite right. I ordered some gorgeous cotton satin roseprint from Minerva thinking … actually who knows what I was thinking. It was all wrong until I spied a roll of drapey green fabric at the back of the shop. 100% polyester it transpires. My inner snob rose to the fore but I bashed it back down when I handled the weight and the smooth silky texture and noted the lack of crease when I screwed it into a ball. And oh the colour! Not to mention the price tag of £4.00 a metre. I wasn’t arguing at all!
I was sold on the waist and hip detail, the softly gathered side fronts that fall from the hip and that cheeky little key hole detail with the bow tie feature.
Incidentally the bow tie itself is some vintage liberty homemade bias binding that I inherited.
I made a quick bodice toile in the original size, half knowing it was too small, but wanting to test the pattern without sleeves. Inevitably I changed my mind and graded the pattern up a size. Redrawing the pattern allowed me to add the seam allowance on too. Something this pattern didn’t allow for which also shows it’s age a bit, I think.
I’m quite used to vintage patterns without markings or seam allowances but one thing that struck me as a bit odd with this one, was an instruction to “Make darts in the back bodice where shown by dotted lines in diagram”. Quite literally the diagram which is the tiny pattern layout illustration on the back of the packet. So it’s anyone’s guess, really!
Inserting the gathered panels into that front skirt panel was a bit tricky but quilting skills have taught me how to clip and pivot at a point, so it wasn’t too terrifying. Again, the instructions are loose: “Gather upper edge of side fronts to fit hip yoke of front as in sketch and stitch together matching VV to VV.” Simples, lol!
I’m pretty pleased with the outcome. And it worked well for a wedding where colour was the order of the day. But there are niggles: I forgot to add seam allowance to the sleeves which actually doesn’t appear to make much difference but I did sew them on back to front! How much difference that makes will show in the next version which I’d like to make soon while it’s all fresh in my head; The waistline could do with a bit of ease. I like how it’s nipped in but it’s not that comfortable! And although the fabric is nice and drapey, I’d like to try it in a lawn or a lightweight cotton so that the neckline and the darts press sharper. I also neglected to do my usual adjustment to take out the excess fabric from the back bodice. I cheated instead by removing the zip and trimming the centre back seam… not very well!
Considering I pretty much sewed this up the day before and was hemming on the morning of the wedding, I think it turned out pretty well. The niggles can so easily be sorted next time round. And to get change from a tenner is such the ‘Brucey bonus’ that I feel it prudent to reward myself with some lovely lawn!
I don’t have any of the official pictures from the day to share as yet but I’m sure you can imagine how stunning all the ladies looked, as did the men in their exquisite flocked and braided coats. I can’t begin to tell you how gorgeous my friend the bride looked. But I did shed actual tears – in a good way – when she walked into the room. Such an honour to have been invited to such a special day. And I’m so glad I went to the bother of making a dress, especially.
Photos by the wonderful Daniel Selway. Location: St Pauls, London Shoes: Lola Ramona Handbag: vintage from local Fara Charity Shop
Can you believe this is the summer edition of June 2013? I can’t. I’m wrapped in my fleecy blanky, fingerless gloves no less, shivering my butt off as I point blank refuse to turn the heating on. My toes are curled for no other reason other than I can’t uncurl them because they are frozen solid. Is this weather for real?
I really want to get excited about summer clothes, really I do. But I’m struggling. So if you hear a slightly less enthusiastic tone this month, please bear with!
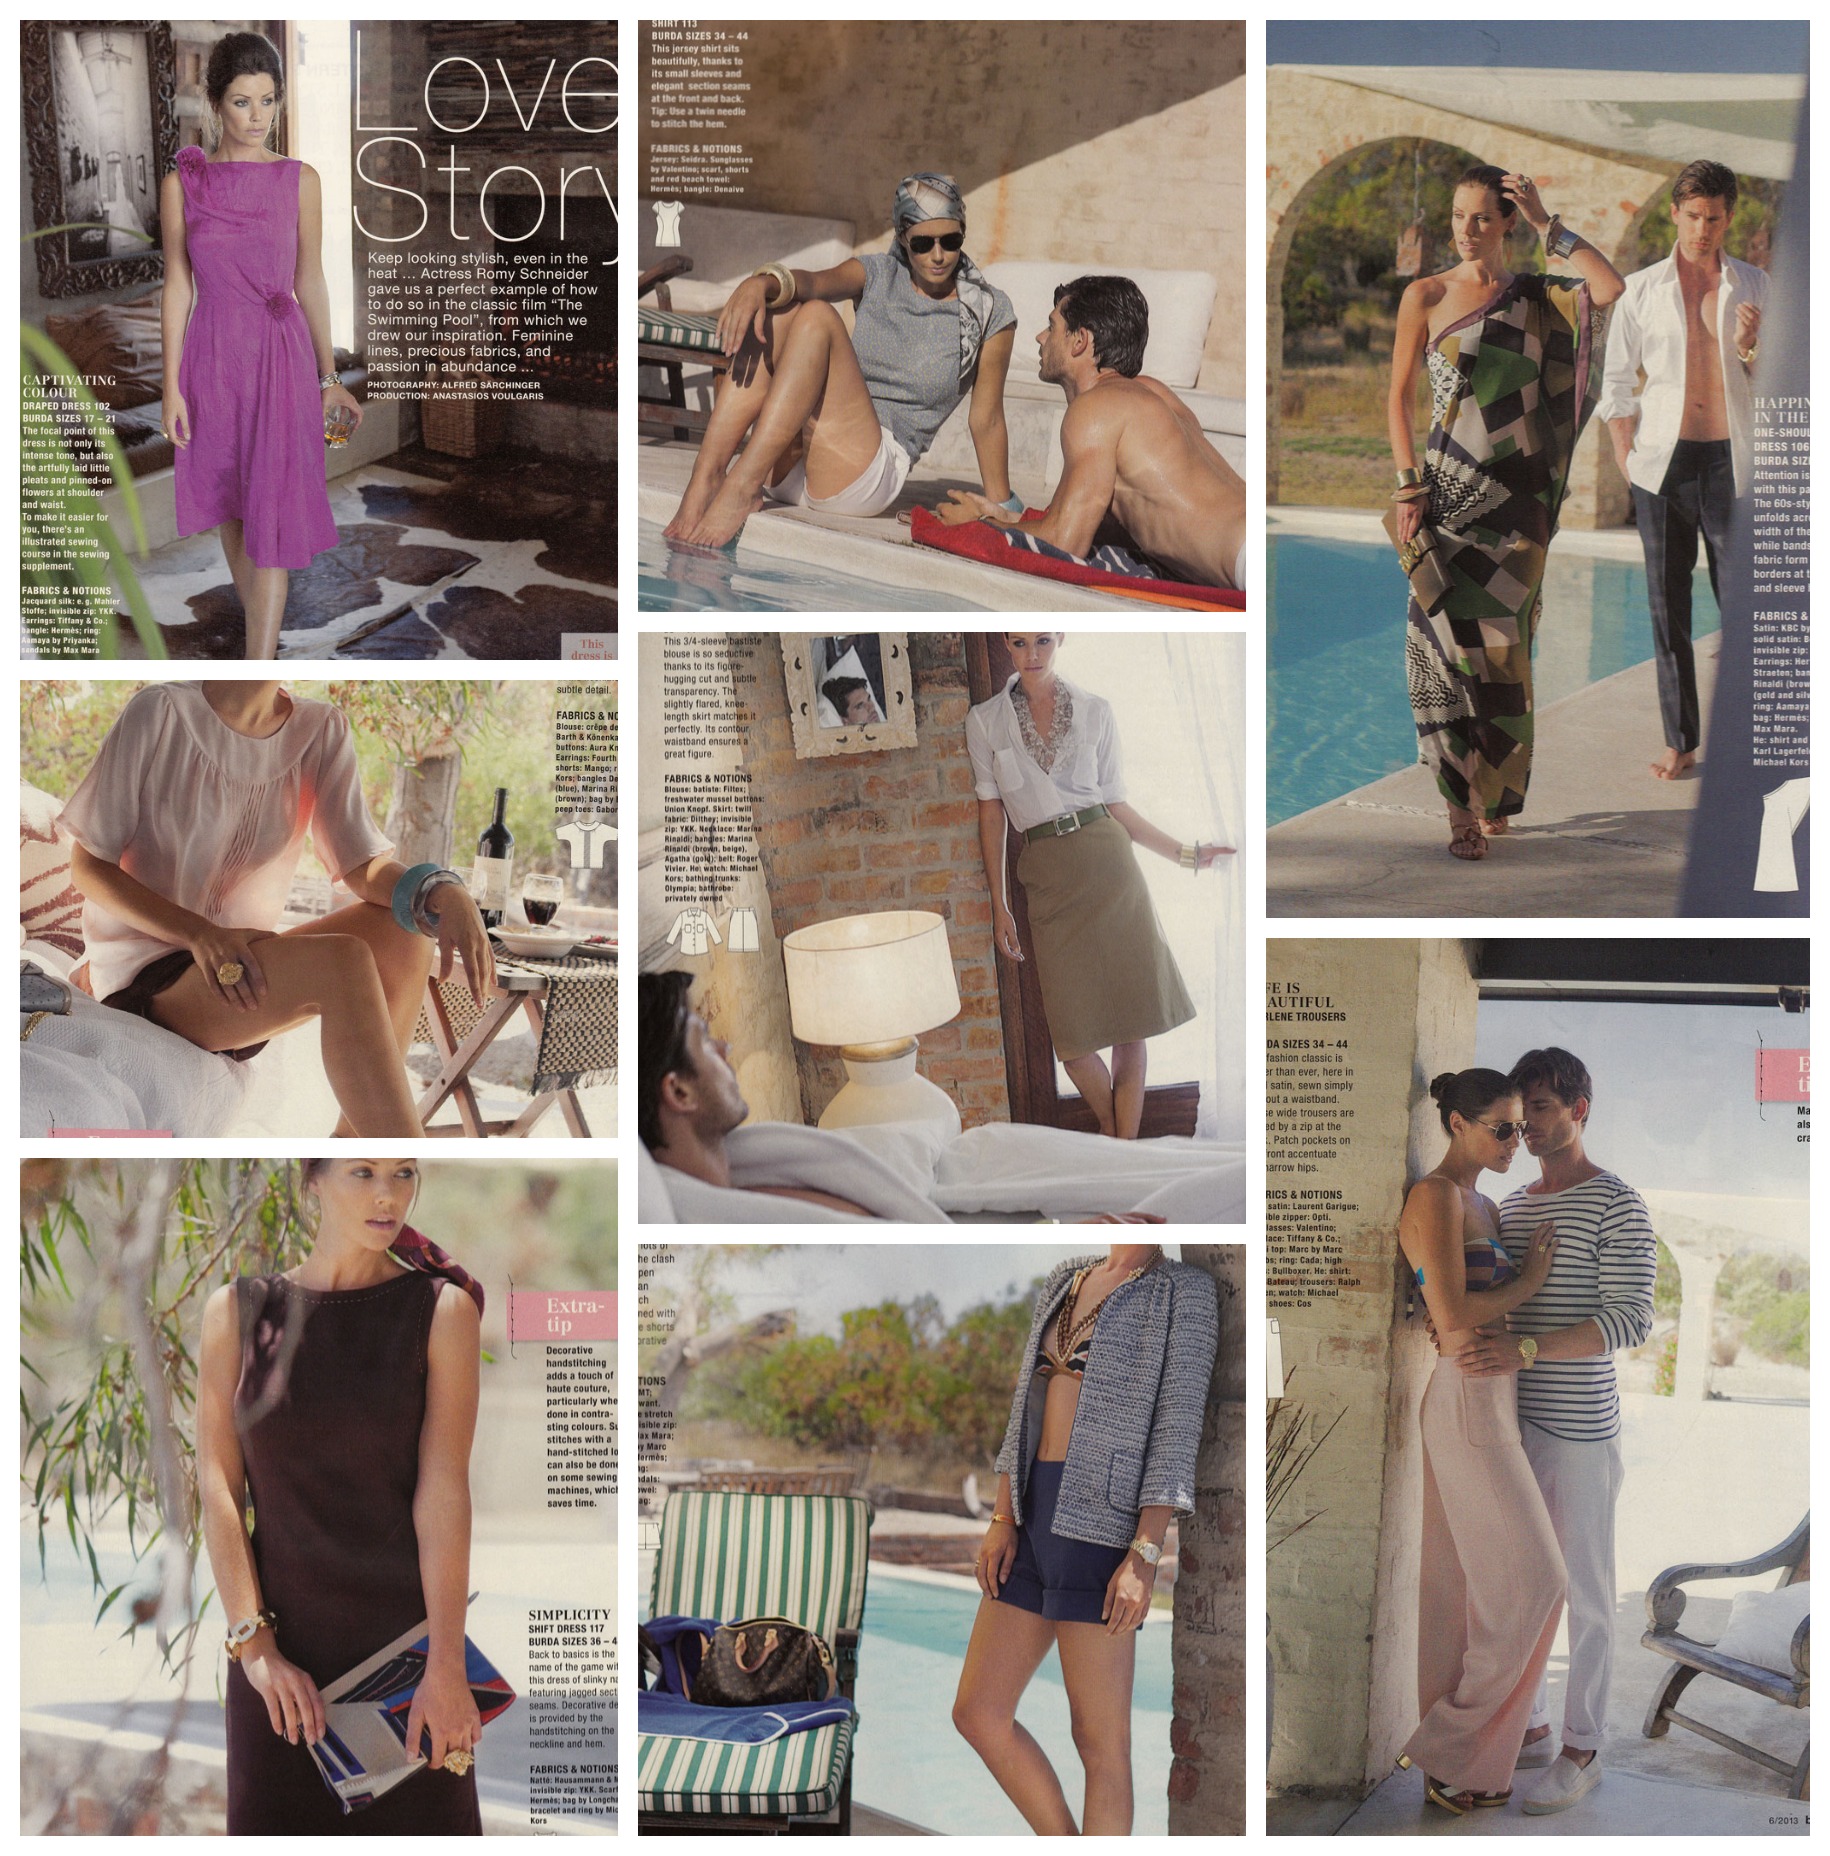
First section up is… Summer Fashion… ha! “Keep looking stylish, even in the heat…” is the opening line of the first intro copy. Ha bloody ha! Rub it in why don’t ya!
Ok. I’m going to try. I actually do really like the hand finishing on the brown shift dress, bottom left (above). Its a great couture technique that I’m thinking of employing on a future wool crepe dress I have planned.
The shorts, centre, bottom row, are not dissimilar to the plaid shorts I made. These ones are made with stretch pique which sounds more comfy. I will defo give these a go as one of my gripes was the lack of facing with with Simplicity ones. I know I could probably draft one but hey, I don’t need to now! A bit difficult to see in the photo (top row, centre pic) but that t-shirt looks to be a good fit with side panels and neat little sleeves. Don’t have an overlocker as yet and I’m wincing at the thought of messy insides so I’ll just hang on a bit for that one until I win the lottery. Boy I can’t believe how much those overlockers are!
My dislikes are the pink pants, bottom right. I love this look on the right kind of body. I don’t have that kind of body, unfortunately so they won’t be appearing on my list anytime soon. As won’t that dress top left corner, funnily enough. I say funnily enough because at first glance it looks like a classy dress. Save the pompoms! But it’s not even the pompoms that are putting me off. I quite like them. Its more the “artfully laid little pleats” that appear on the right shoulder aligned with the left hip. Even from the photo I can see some annoying crosswise folds that would annoy the heck outa me!
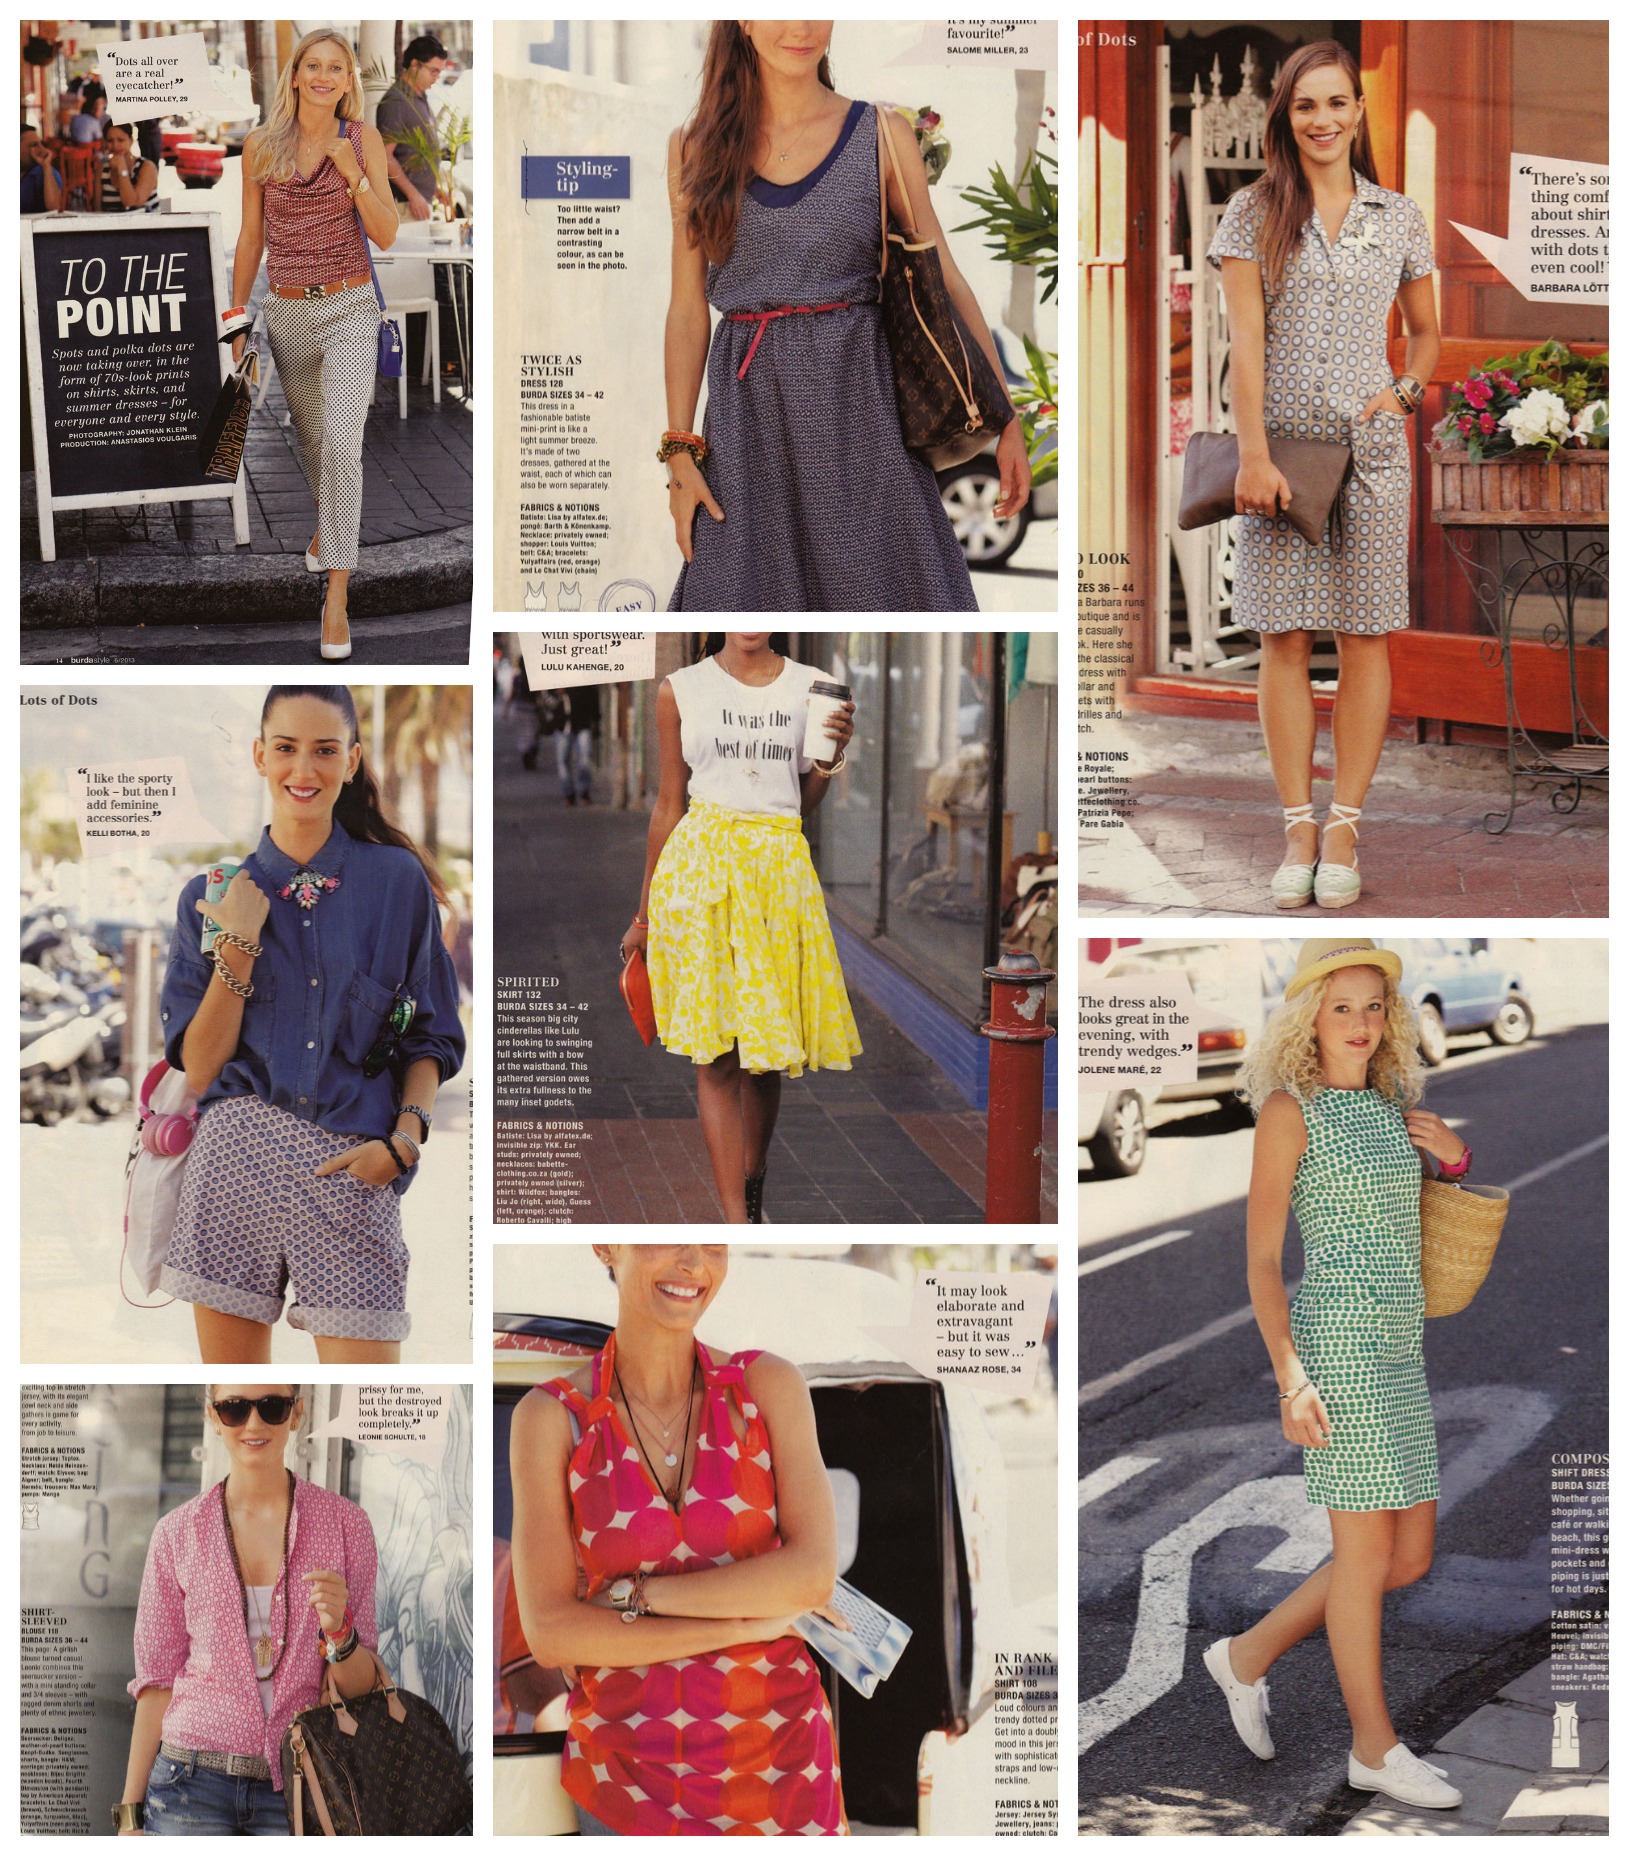
So who doesn’t like lots of dots? That’s the theme for the next section:
I think I can safely say I like everything in this section save the long shorts, first column middle row. Just a bit unflattering and boyish for me. I love the shirt-dress top right, most of all. If Me-Made-May’13 has taught me anything it’s that I need more shirt dresses. I love how comfortable and stylish and edgy they can be. It’s not to do with cutting edge design. More clever choice of fabric that makes a great shirt dress. And I’d love to have one for every day of the week. This is quite a slim-fit one and it sure fits the bill as far as I’m concerned.
The shift dress, bottom right corner, has some great side panels that are piped. I still haven’t attempted piping but this would be a great opportunity to practice. It would also be a great chance to practise some colour blocking too. Employing some block colour in those panels would create a great slimming effect.
The cowl top with gathered sides (top left corner) is a firm fave too. Much more stylish to wear than a plain old T! And I love the yellow swinging full skirt. Perhaps not in yellow though. It’s got plenty inset godets on top of all the gathering. And a big bow at the waistband. Dead funky!
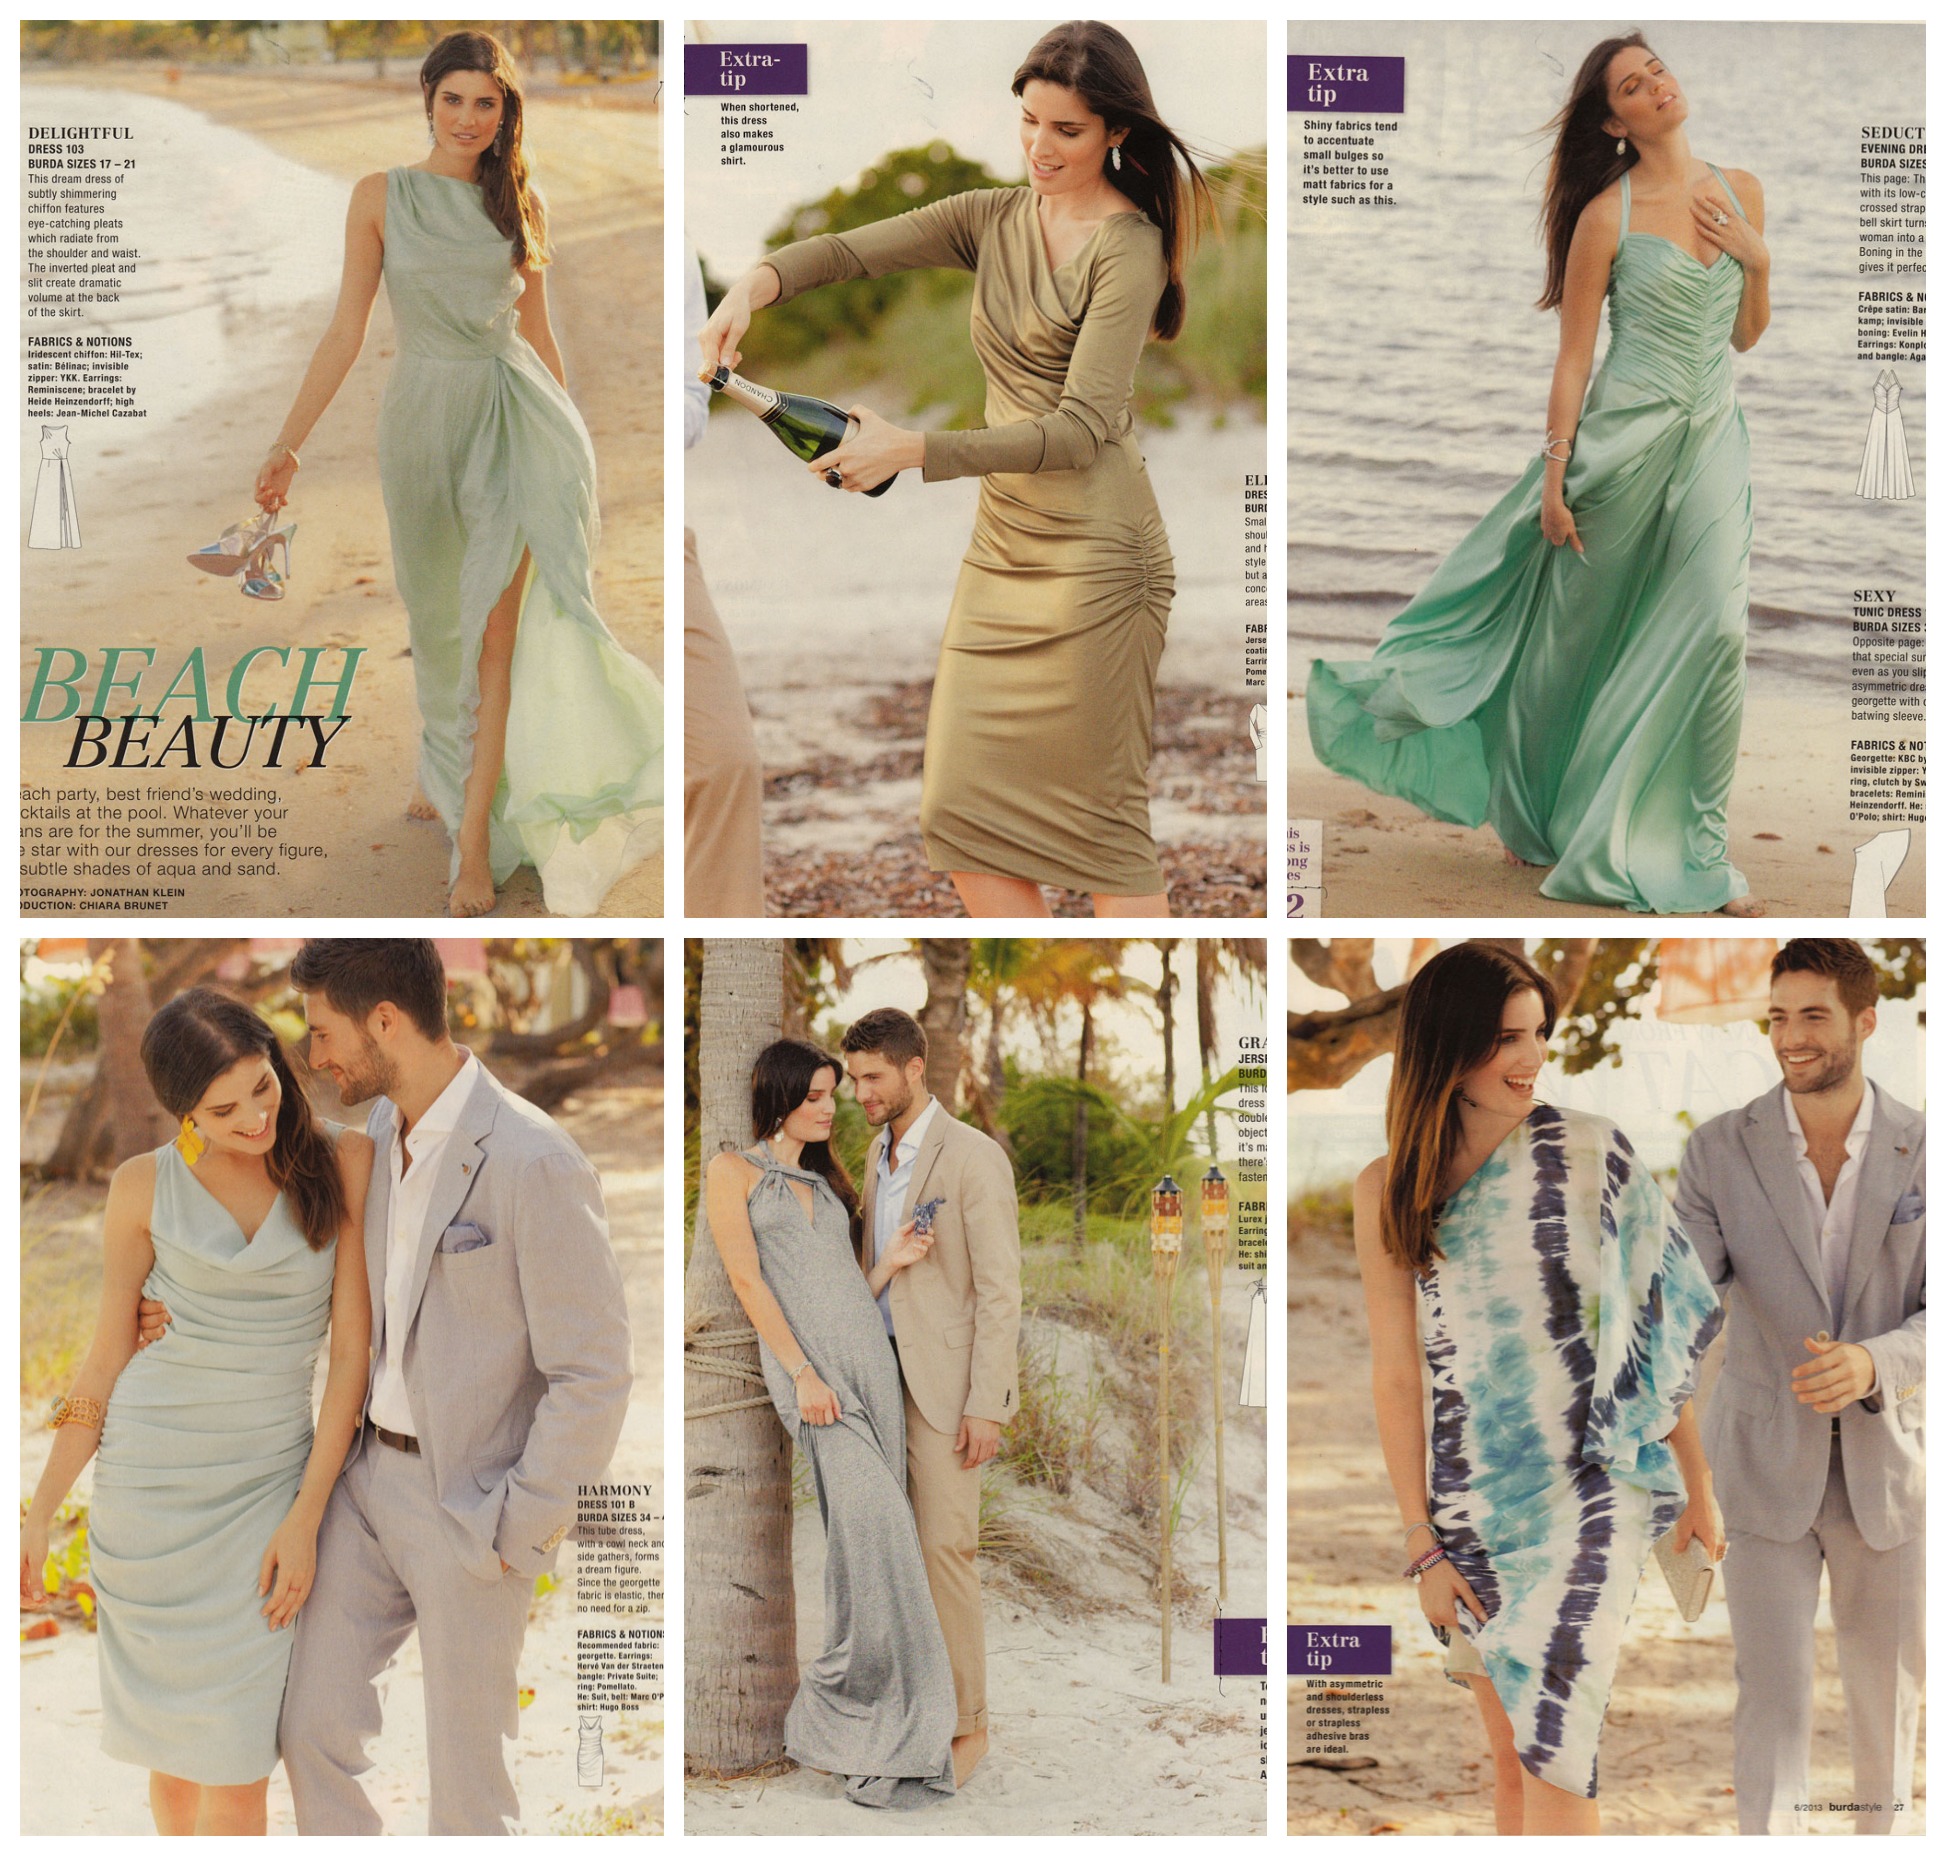
The next section is all about beach wedding/party dresses. I truly have goosebumps right now thinking about how the chiffons and georgettes might feel next to my skin, but there are some pretties…
The cowl neck dress, bottom left corner, is my favourite here. With its side gathers and simple shape I think it could be really flattering and perfect for a few evening cocktails on the beach. The dress, top right, is quite stunning and doesn’t look that difficult to construct but there is some yardage of crèpe satin going on here, so it’s not really for the ‘thrifties’ among us!
I don’t dislike the others. They all have their place. Apart from the strange diagonal pleated bodice dress, top left corner – same issues as that purple dress in the first section. Oh, and that one sleeve wonder dress bottom right corner. Not sure I could handle that!
So, swiftly we move on to ‘Surfer Girl’. Not me. Not any part of it. I have noted there are a lot of runners that sew. Or sewists that run! I wish I could say I was one of those. But I’m not so I will leave judgement in the hands of the “Sporty Spices” of the sewing blogger nation…
That said, the little jersey skirt in the centre, bottom row, could be a quick and easy casual make for holidays and weekends. The jacket is a bit 80s for me, mind!
The Mother & Daughter section is at the very least tweeee!
Would anyone ever consider dressing to match their daughter?
I quite like the dress, top centre. Though it looks a bit starchy in the batiste. I might be inclined to use something slightly drapier. I do really like the idea of printing on the fabric though. That would totally seal the uniqueness of the garments. You could really create some signature pieces with a clever use of design. I just made a skirt, similar to the star-print one, top right corner, but from an old vintage curtain. I love the deep waistband. I need to finish mine but I hope it looks as good as it does on this mummy!
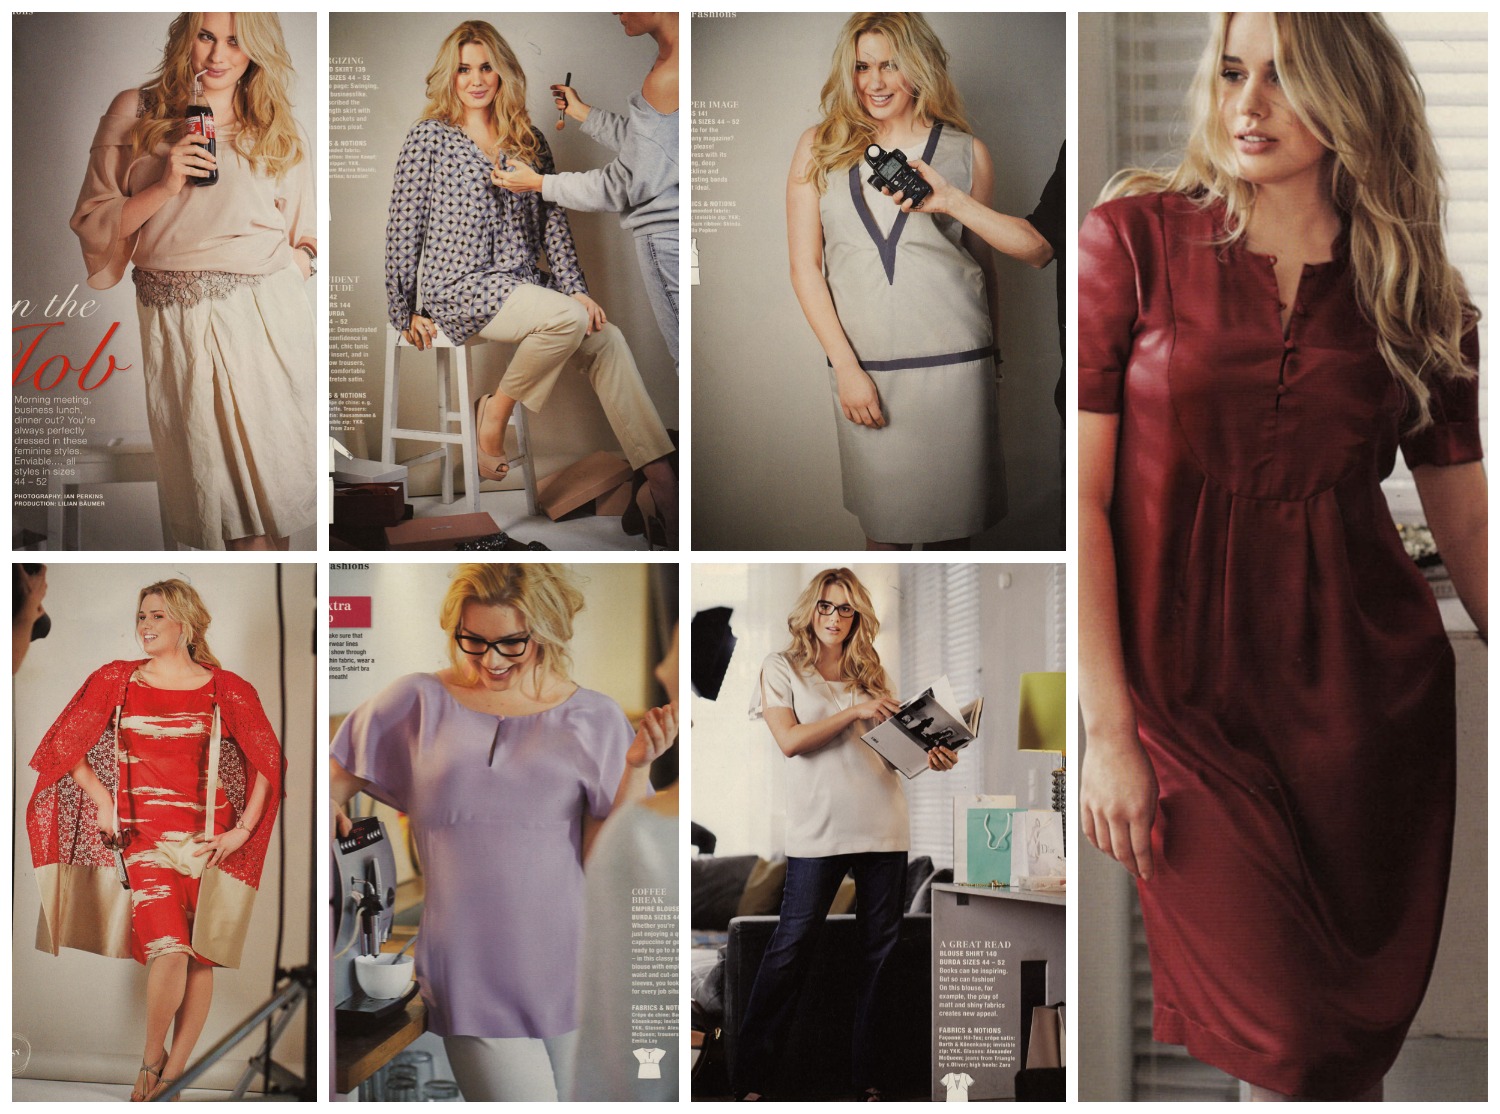
The Plus Section gets as much attention, if not more this month:
I love how each of these designs incorporate clever structured detail to flatter the curviest of bods. Simple lines and crepe satin exude the elegance and the loose cut sleeves and empire waistline of that red dress, bottom left is simple yet stunning. But the one I like most is the red dress on the right. Cute standy up collar and dinky button loops on a fabulous yoke bodice add perfect detail to really versatile dress.
So what do you all think? Any faves? Any absolute disses?
I’m off up the wooden hill to Bedforshire right now. I’ve given up trying to keep warm. But I’m still thinking shirt dress. Perhaps in some rockabilly print that I have in a box somewhere. I’ll dream about it and see how it looks!
Night all. And thanks so much for keeping up with my ramblings x