The making of McCalls M7726 shorts – an unexpected triumph!

M7726 shorts made by ooobop

One of the many reasons I wanted to sew my own clothes was so that I didn’t wind up wearing the same as anyone else. Not to stand out from the crowd necessarily but just so I could be me. 

But every so often the sewing community manages to turn that ideal on its head and makes me want to sew the things other people have made, haha… oh the irony!

M7726 shorts made by ooobop

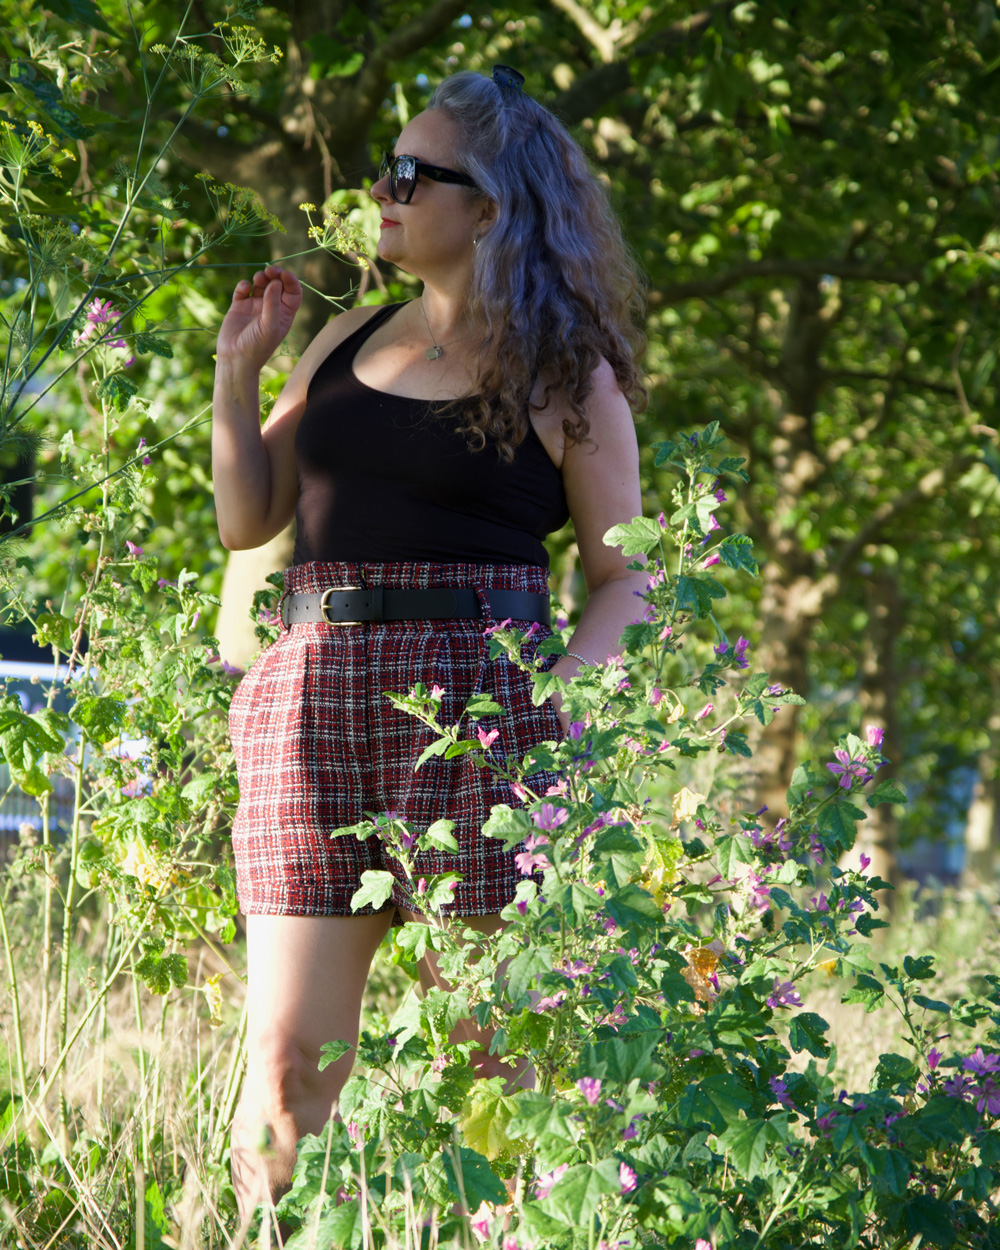
In particular McCalls M7726 shorts. As spied on Giorgia’s Insta feed over at @1stitchforward. I mean, come on…. super classy matching fitted jacket and all! 

In between then and now, I have been careful not to overbuy fabric. It’s crazy to think that I’ve never got the right kind to use, despite a toppling stash. But when I saw a little Chanel suit on the YouTube FF Channel – a fitted jacket and shorts in their signatory bouclé, I think – I remembered some fabric I was saving for a ‘particular something’!

M7726 shorts made by ooobop

Now I’m not trying to pass this awful fabric as bouclé. But I did envision it as giving a similar vibe. Ten out of ten for naivety…!

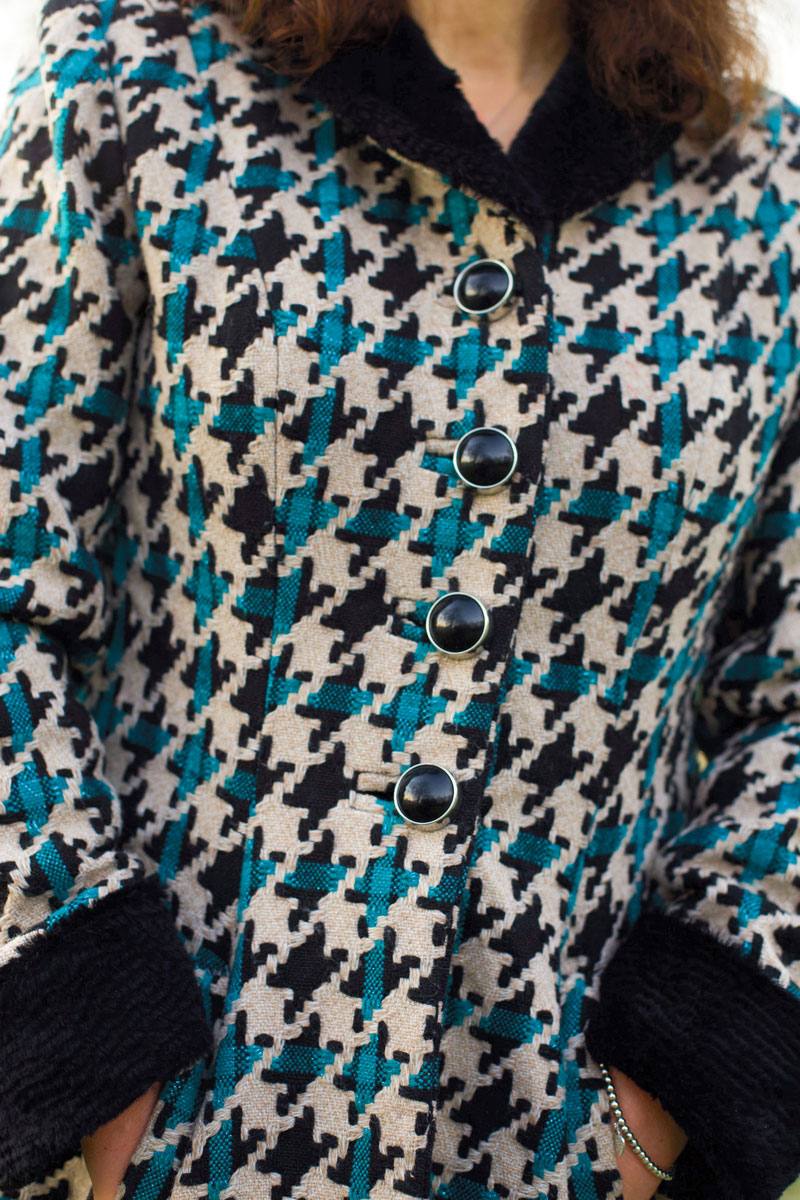
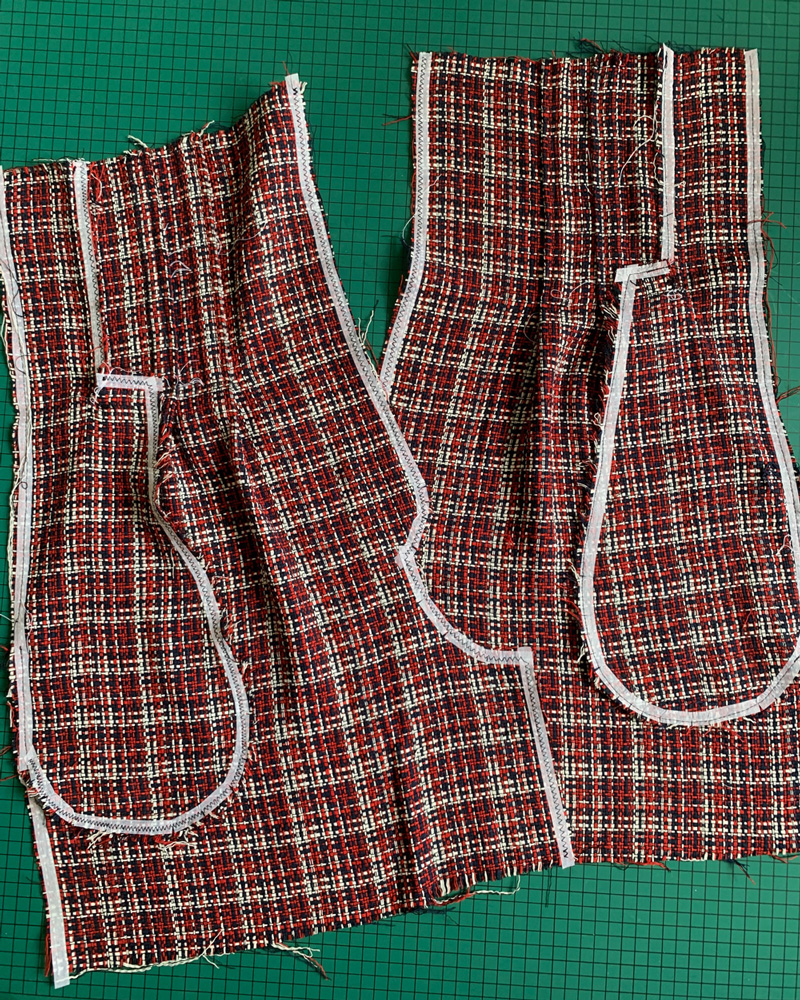
I’ve no idea what this fabric is. But I’m sure you can see from the flat lay below, just how vulnerable to pulling it is. It didn’t take long before I realised it didn’t have a straight grain either! I sulked for a bit. And sweated over countless placements of the pattern pieces. Didn’t matter how I manipulated those bunched criss-crossed threads, they just did as they pleased. So I followed the selvedge for the ‘straight’ and ignored the ‘grain’ because there wasn’t one… seriously frustrating!

M7726 shorts made by ooobop

Once the pieces were cut. I had another sulk because I was convinced they were going to look so wonky. And the fraying! More like unravelling! It is such a loose weave. I abandoned it at this point knowing no amount of overlocking would hold those edges.

And then a brainwave. A roll of Prym seam tape to the rescue. Literally a whole roll! Every edge of every piece I taped down. And then overlocked for good measure. I’m still yet to wash them so I don’t know how well it will hold.

M7726 stabilised pieces

After I did this it was more enjoyable to sew. The impending feeling of failure was much reduced and I serged on. But I definitely ruled out the prospect of a matching jacket!

M7726 shorts made by ooobop

Tailor tacks were many and necessary to align all pieces. Though not fun to pick out at the end! I had to be super careful of not pulling out threads of the actual fabric!

But as the shorts started to take shape, I began to love the project. And I felt pride in not giving up.

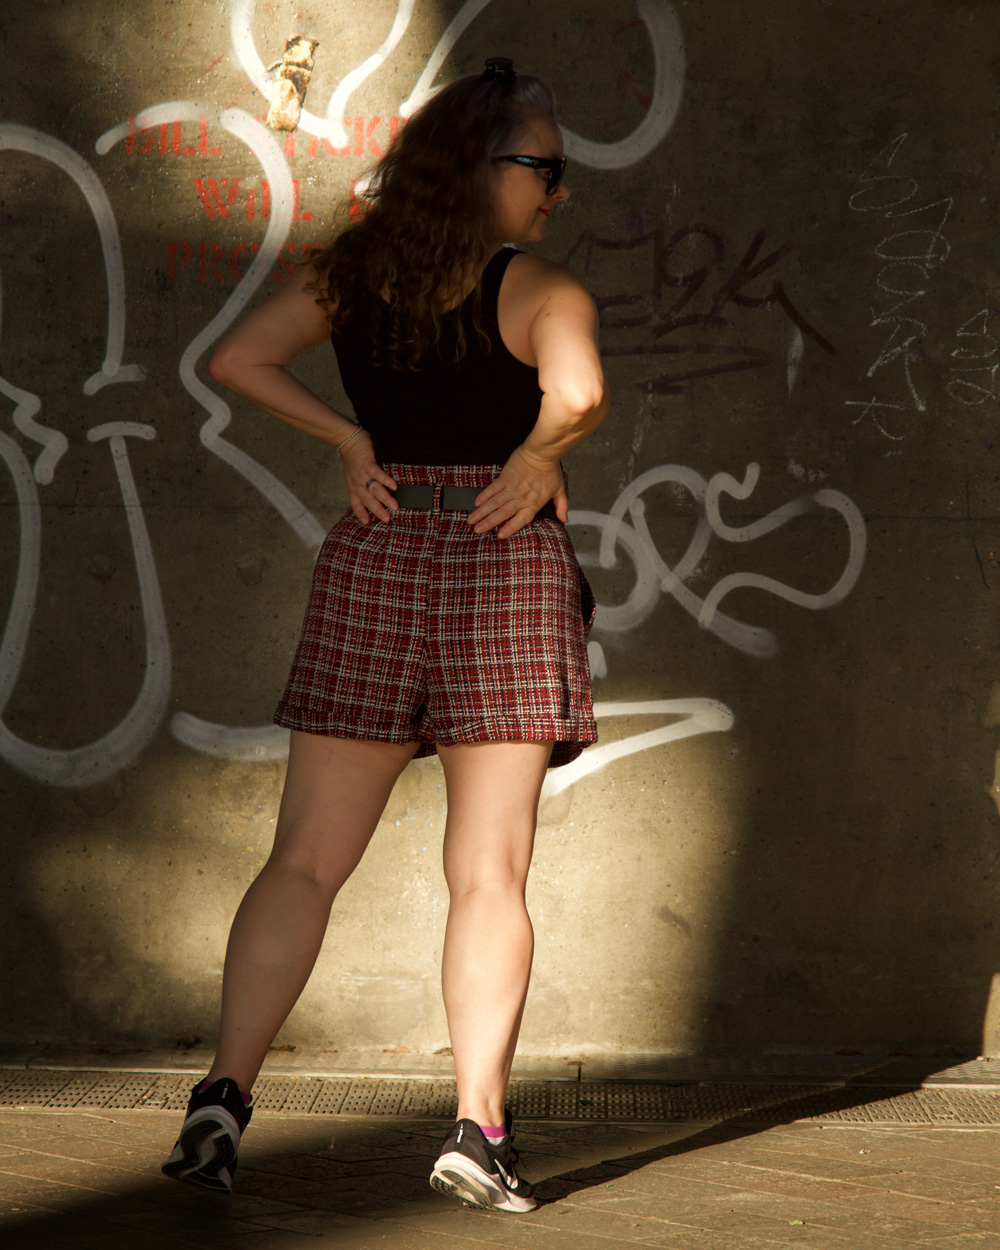
I love how neat those pockets are. Probably due to the stabiliser tape. But the edge stitching gives a sharpness too.

No such word as ‘cant’ !

All was going well and then I had a wobble over the belt loops. How on earth was that going to work in this fabric? With lashings of Prym Fray check. Thats how!

The instructions were to make a long tube and then cut to size. ie: sew along the long edge, trim, turn, edge stitch and cut into 3 separate pieces. In fall-apart fabric? That was going to be a joke. I considered other options and with some great suggestions from IG followers as a safety net, I went ahead to try – just in case it did work. Thanks to that stinky stabiliser, it actually did.

M7726 belt loops for shorts

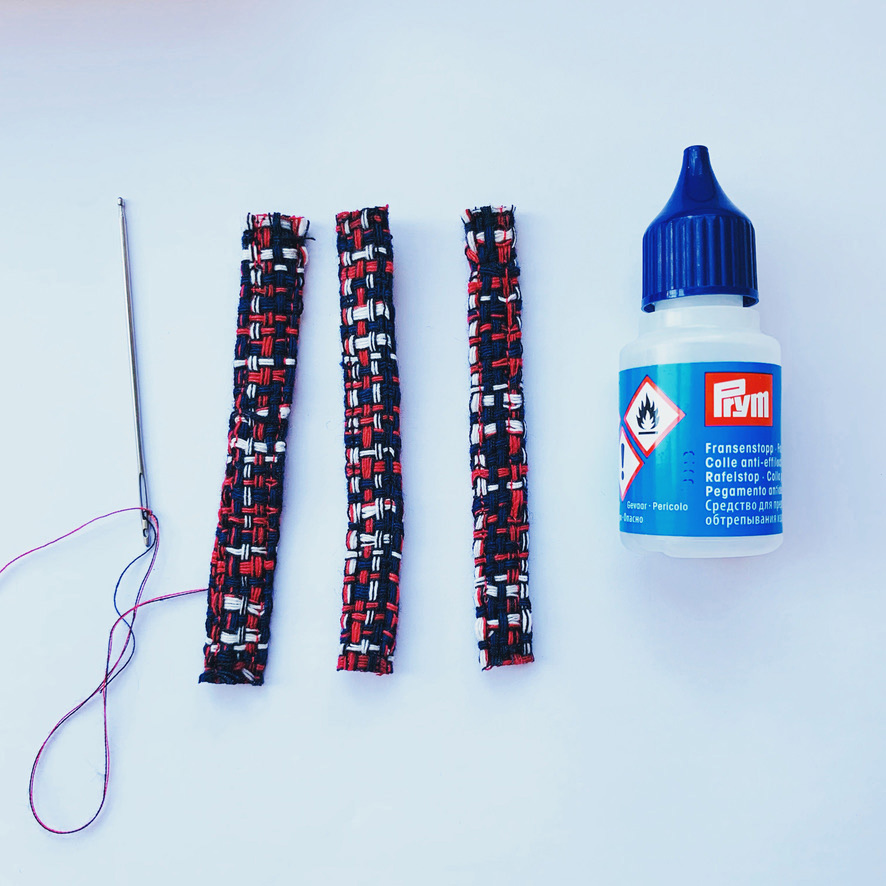
Though the bodkin wanted to poke out between every thread of that fabric tube along the way. Boy I’ve become a determined soul in my old age!

And finally the leg hems. My initial thoughts were not to roll them them up as suggested as I think its a bit of a scruffy finish with the side seams showing and all. I sewed another pair of shorts here – sadly outgrown – whereby bias cuffs were sewn as turn ups. It’s a much neater technique that hides all the raw edges and side seams. But then I had a little think and noticed that the open seams are kind of camouflaged so I opted for the more casual look to the turn up as per instructions.

M7726 shorts made by ooobop

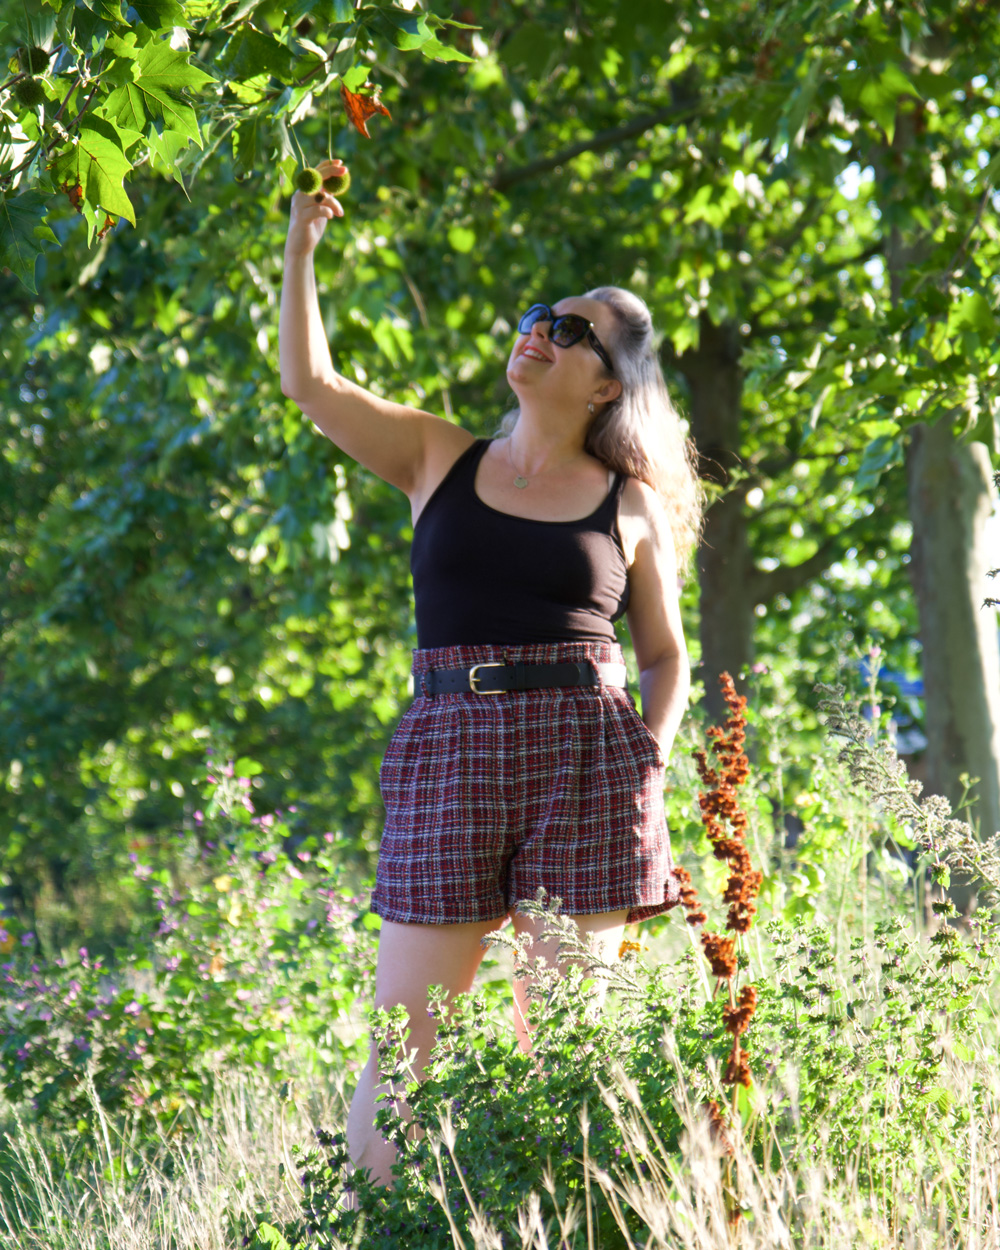
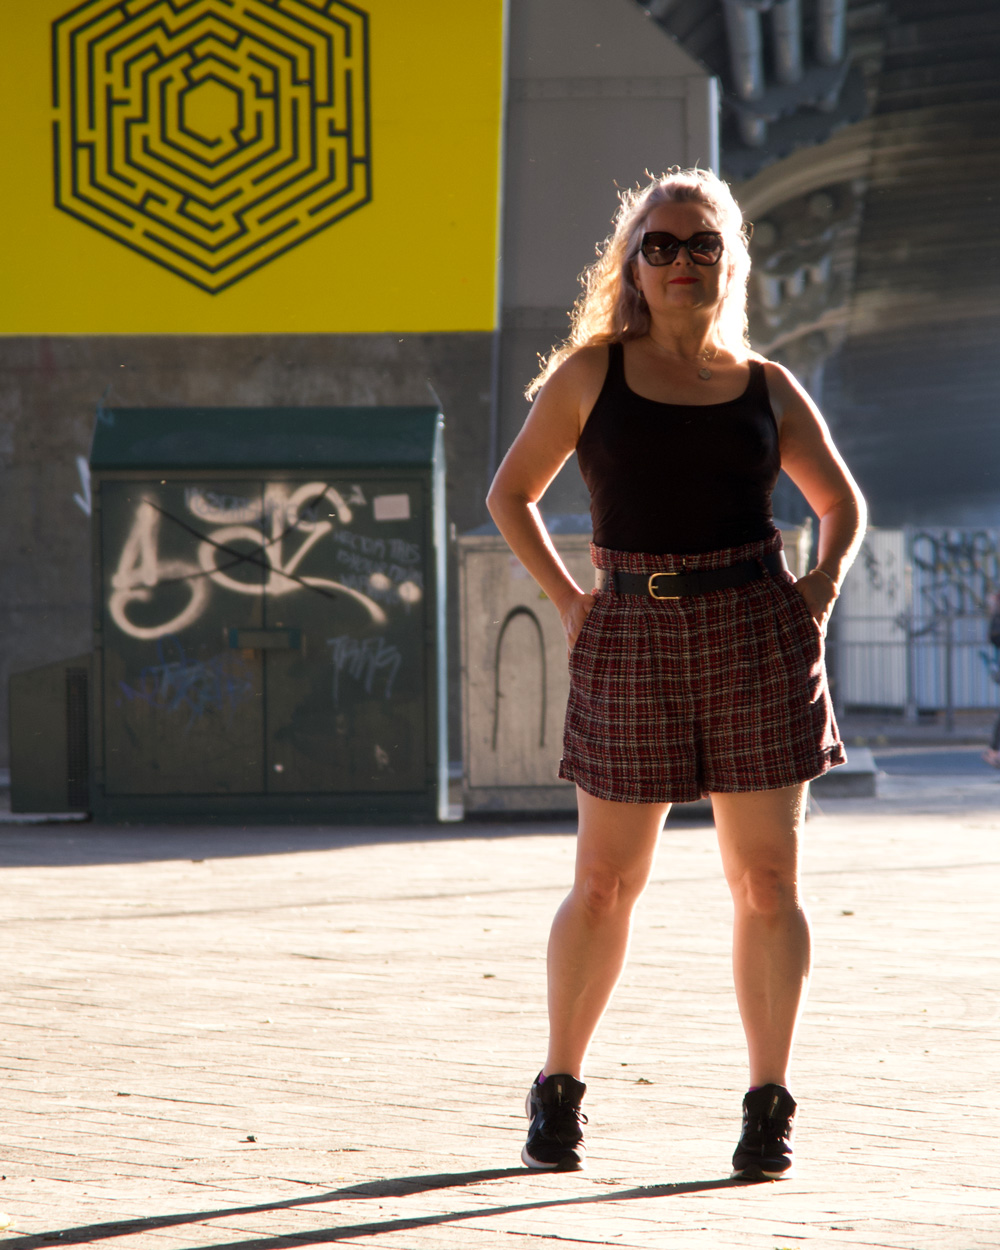
For such a little project there were plenty of painful and lengthy processes but lots of new lessons learned too: Believe it or not, this was the first time I’d sewn a fly zipper, and belt loops! And I’m pretty damned chuffed with the result. I genuinely thought they were heading for the recycling bin so soon into the project and yet now I have a great pair of shorts for all seasons!

M7726 shorts made by ooobop

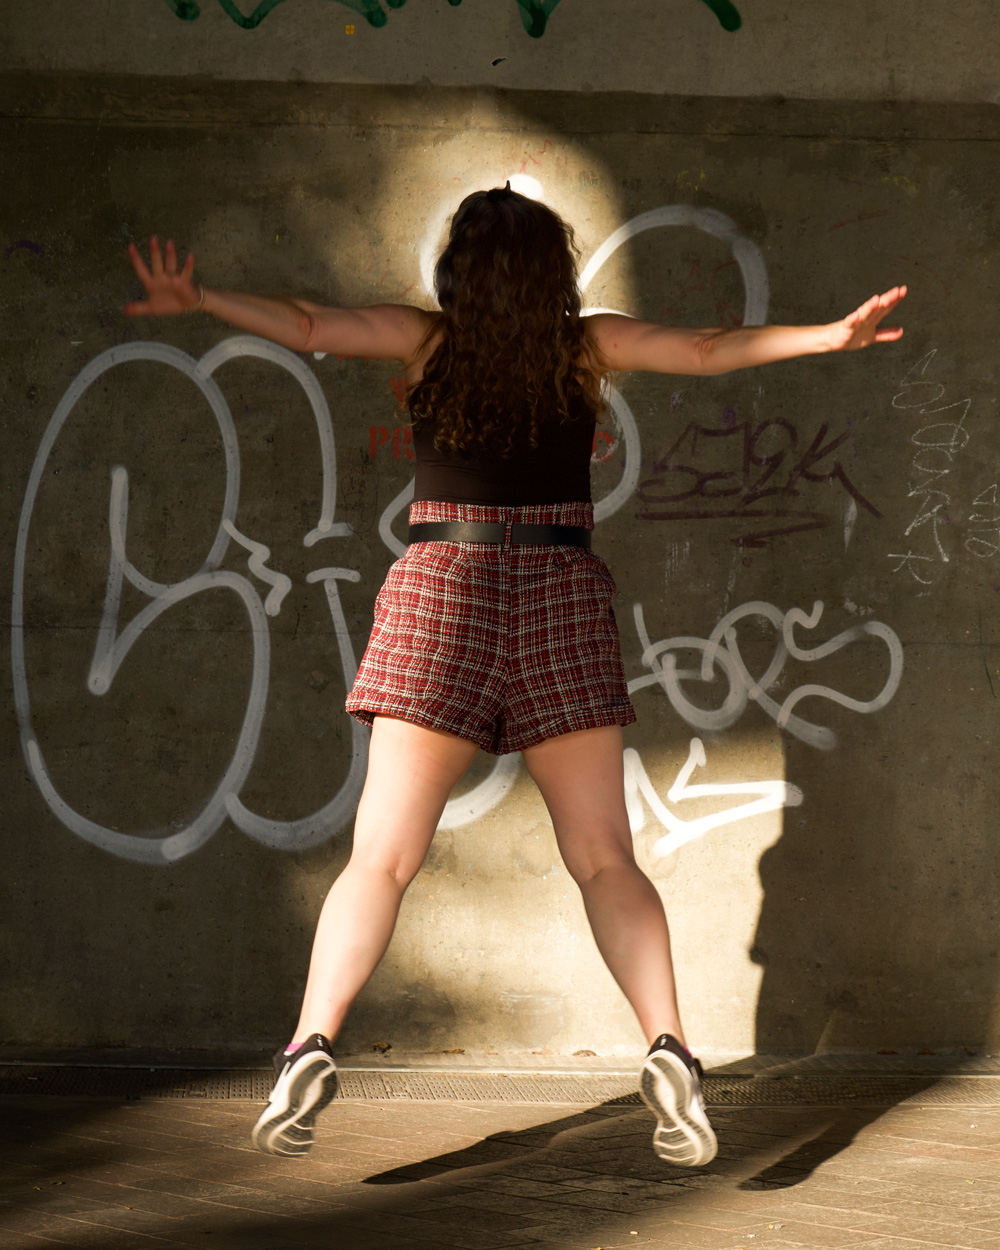
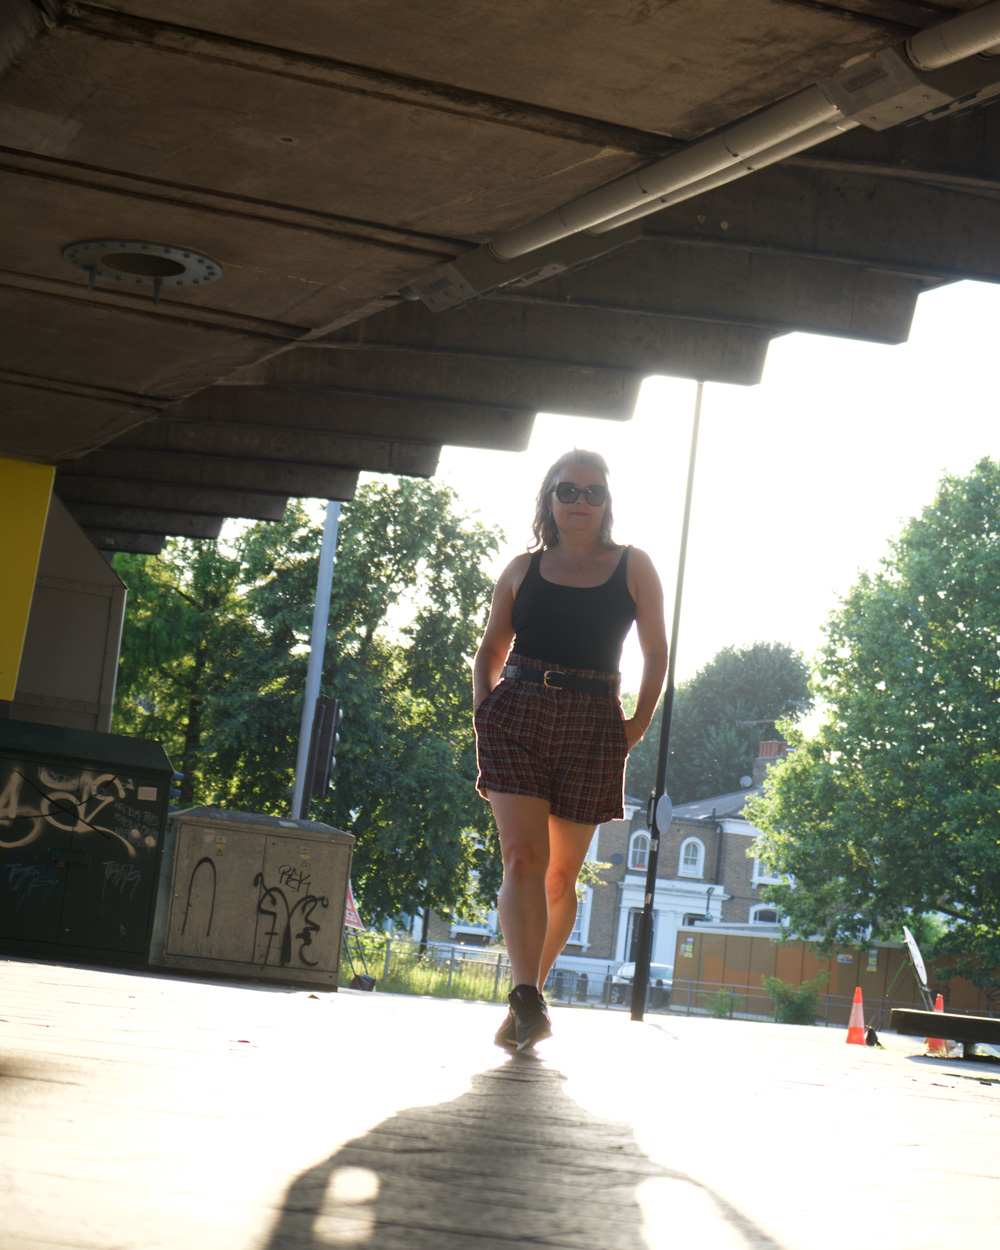
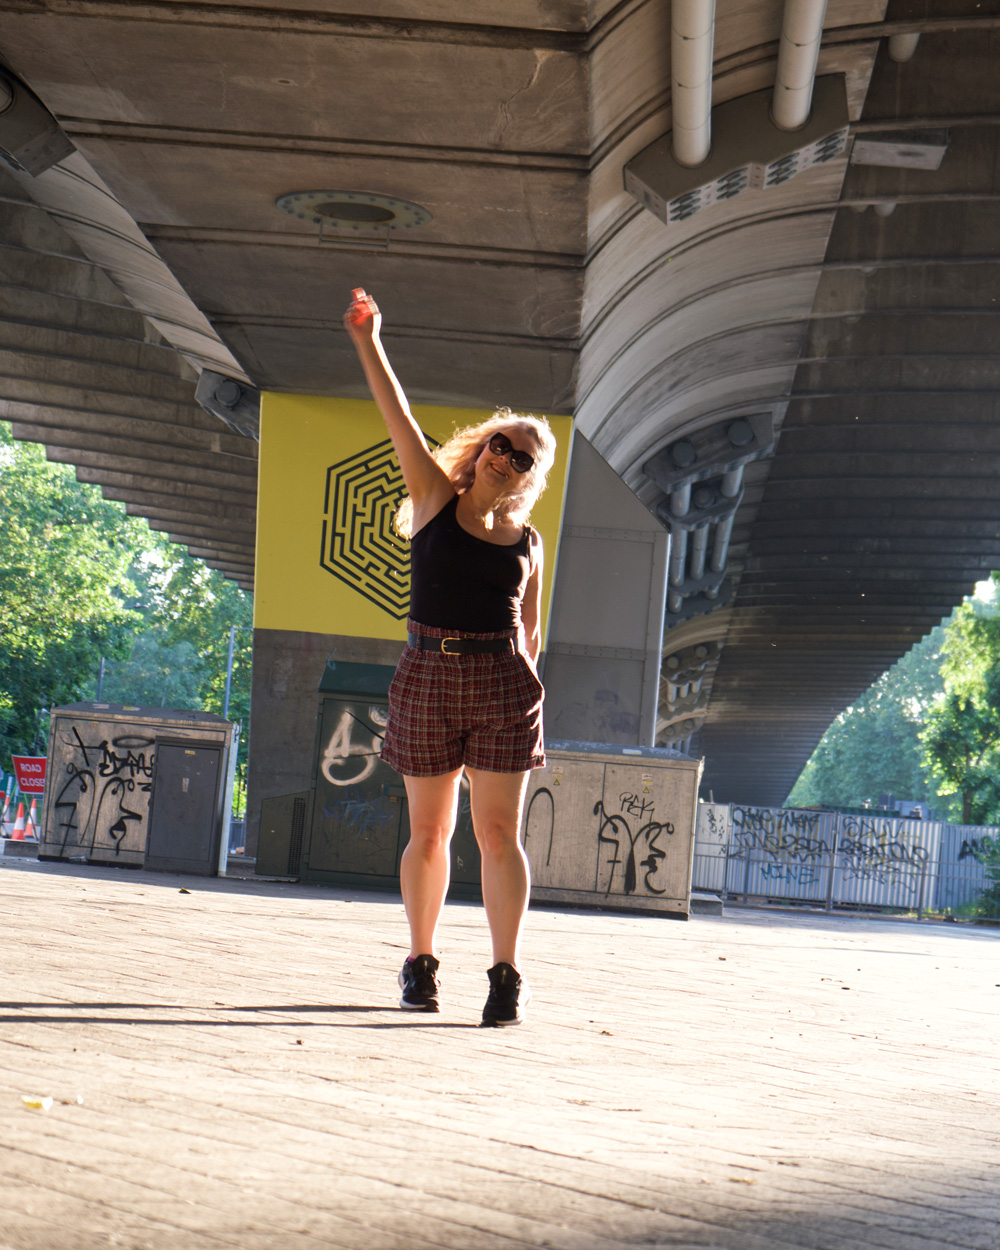
We took a little wander at sundown with Dan to shoot under the flyover at Hammersmith. In truth we didn’t have the energy to go further afield – it was very hot!

I can’t wait to sew these again, in a more stable fabric of course. It will be a breeze. Breeze! Oh how I want actual real life breeze right now. Bring on the storms!

Vintage Butterick coat with added sparkle!

butterick 547 coat by ooobop

Returning to a sewing pattern you’ve worked with before is like turning to an old friend for advice and reassurance – you’re assured of the fit, the skills needed and prepped for pitfalls along the way. Mostly!

And if like me, you paid a pretty penny for the pattern, you’ll get immense satisfaction from apportioning the cost. I won Butterick 547 fair and square by charging straight  in to this crazy bid war! So now the pattern only cost £25 for each coat which sits marginally better, lol!

Butterick 547 coat full length

I made the first version in 2014, truly believing it would be my forever coat – my dreamcoat – but sadly there was an issue with the fabric that I didn’t foresee. So I had to make another in something more stable.

I found the ideal fabric at The Great British Sewing Bee Live show a couple of years back. Pretty sure the seller was M Rosenburg and Son . It’s a fabulous giant dogtooth with teal metallic highlights. It’s got a great weight and a great drape, and it’s stable weave means no stretching or kinking at the hemline.

vintage Butterick coat by ooobop

I just adore the fit – snug to the waist and lapping round my legs – the silhouette is truly 50s. Four buttons to the waist allows for the lower ‘skirt’ to separate as I walk along and a flash of the blue lining does everything to attract attention and some lovely comments.

ooobop vintage coat sunrise and swan

butterick 547 vintage coat

Sewing the shell pieces was a breeze but I stalled when it came to the welt pockets and the button holes. They call for a little more concentration and I had to psyche myself up before cracking on with that stage. But I practised on scrap pieces to remind myself of the process. The main thing that worried me was the fraying of the fabric and those tiny welts for such thick fabric. But I remembered seeing how some bloggers employ the help of Prym Fray Check and it definitely helped. In fact ended up using it on all the inside seams too. I know the seams are all ultimately hidden by the lining but sealing those edges just reassured me that it will hold together over time. Nothing to do with an unthreadded overlocker and a dose of lazyitis, I assure you! I also invested in a Clover buttonhole cutter to cut the reverse of the bound buttonholes. I can’t tell you how satisfying that little crunch feels when it bites through the coating to create a perfectly straight line. No faffy snipping with pointy scissors any more!

vintage handmade coat bound buttonholes

I don’t usually go to that much effort for many of the garments I make but I have to say, it’s always worth it. Buttoning up this coat becomes quite the ceremony. Especially with those heavy vintage buttons … feels so good!

butterick 547 button detail

So actually, all the tricky bits were a breeze. But I shouldn’t have been so smug so soon as I had a minor meltdown about the sleeves. (Fat lot of good my old friend is!) I’d shortened them at least an inch too much the first time round and forgot to unfold that pleat in the pattern pieces for this time round. But I was inspired to use the leftover fur for some cuffs. I sewed them on with half the hem allowance and folded them back with an inch of the fluff to the inside (if that makes sense) and voila – the perfect length and actually a stylish feature to compliment the furry lapel. I can also fold them down to extend beyond my fingertips if I forget my gloves!

Vintage coat cuff detail

Butterick 547 collar

Most of all I loved all the hand-stitching on this coat. Sewing on the buttons. Sewing down the welt edges, sewing in the lining and catch-stitching the hem. I found it really satisfying and very relaxing. I just took my time and relished each stitch, very aware at how far I’ve come with finer stitches over the years. A marked difference from the whinges about it being such a chore the first time round.

I love that most people have no idea that this is sewn from a vintage pattern. Which verifies it’s classic style.  It really is timeless and classy and at some point I will make it simply in black for a more formal occasion. And then I can apportion that pattern cost further!

butterick 547 salute

I’m so glad I made it in time for the cold snap. I really hate the cold so much and yet I’ve never got enough of the right clothes. Mainly because I am now completely allergic to buying RTW and I’d sooner sew than knit. But hey, the only numb part of me on the day we shot this coat was my toes!

Lola Ramona boots

And I have to address the photos of course, taken by my wonderful hubby  – mostly known for his rock and roll bass playing but also a superstar behind the lens. You can see more of his photos at Daniel James Photographic. He was keen as mustard to get up and out before 6 in the morning, taking the bus to Kensington Gardens  and walking to Hyde park before the sun rose. And it was glorious. So pretty and quite breathtaking as the mist rolled in from the Serpentine as  the swans and the Mandarin ducks preened themselves in the golden rays. So magical.

butterick 547 vintage coat

I’ve had a Google to see if anyone else has made this coat up but so far have drawn a blank. Surely I can’t be the only one? Maybe that’s why I ended up paying the earth!

ooobop sitting on a bench

Thanks as always for popping by. Hope you’ve got some lovely plans lined up for the weekend. And I’ll look forward to bumping into some of you at the Spring Knitting and Stitching Show next week… eeek!