
Not the most ground-breaking make but as usual, there is a continued method in my madness!
I have hundreds of really lovely vintage and modern dressmaking patterns and a serious desire to make and wear each one but every so often feel like I’m winging it too much. For sure I get there in the end and it looks great for the camera but as the maker, I know what secrets lie inside!
So I need to rehearse skills on basic garments such as this pencil skirt to improve technique and reassure myself that I am still improving!
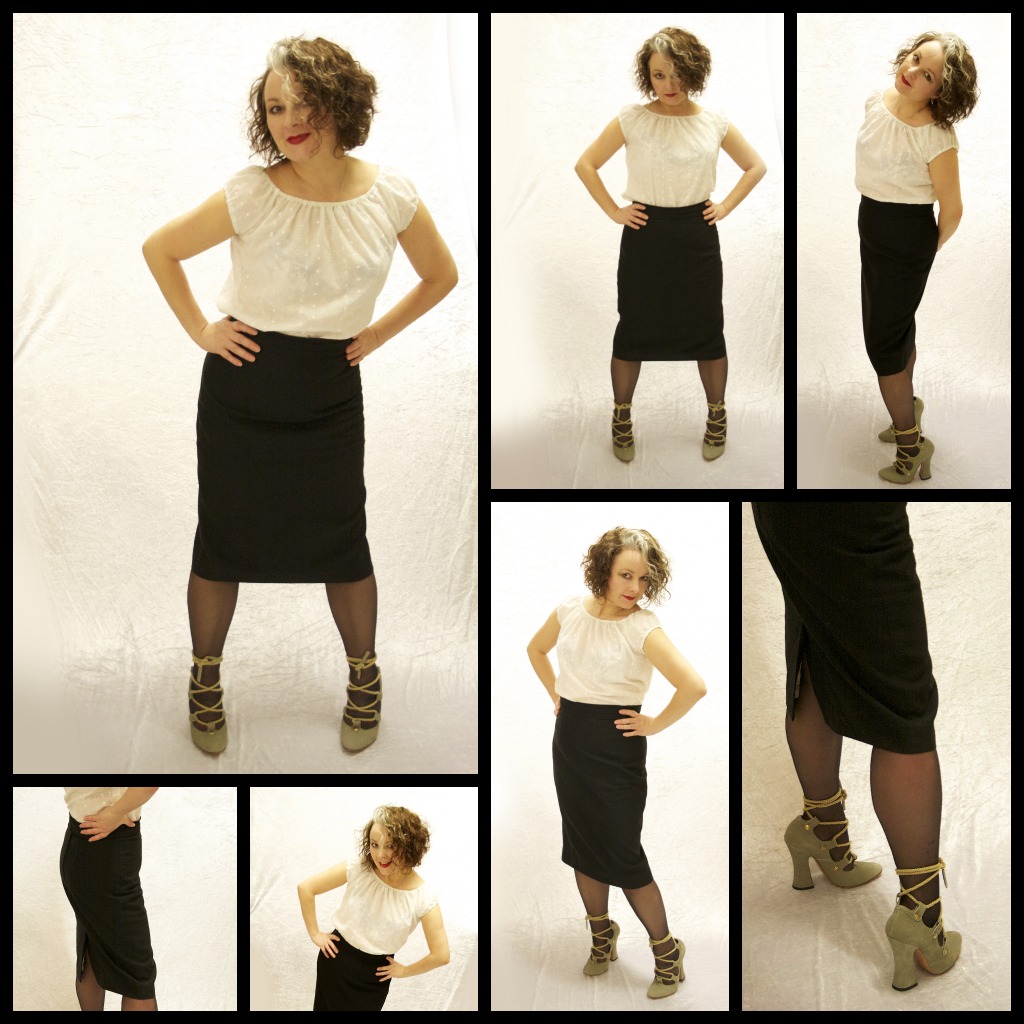
I really enjoy going back to the drawing board sometimes, quite literally! The pattern for this skirt is one I drafted back in August 2012. But I have made quite a few adjustments since then, which I really like, and I think make for a better fit.
- I moved the darts apart slightly on the front.
- I lengthened the skirt to below the knee (ooo get me and my bravery!)
- I tapered the skirt by about 2 inches either side for a more pencilled effect.
- I added a waistband.
- I included a PROPER vent including mitred corners!
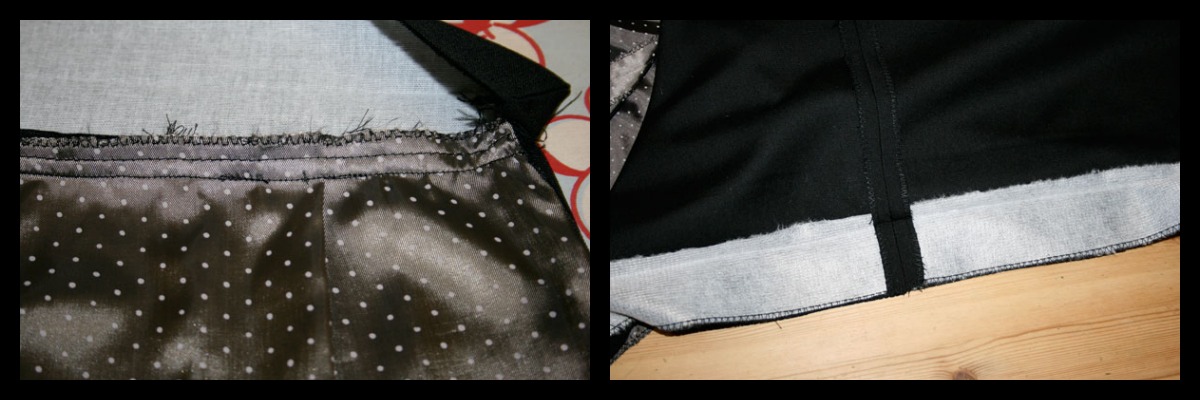
- I made a much better job of the lining and learned how to line the vent.
What I should also have included:
- a hand-picked zipper
- more overlap on the waistband to add a button along with the hook and bar.
On the subject of hook and bar, even that was a revelation. I first used hook and eyes thinking they would suffice. But they really didn’t! They kept coming undone it wouldn’t be too long before they bent out of shape. So I dutifully replaced them with a sew on hook and bar. It’s much better but even though I sewed it in from the edge of the overlap, it still shows, so I need to set it back a bit further.

Nearly didn’t make the effort to do a mitred corner on the vent, but jolly glad I did. Before hemming I sewed the lining, right sides together all the way down the vent edges. Before hemming the skirt outer fabric I carefully unpicked the thread using the eye end of a needle. I used that loose thread to sew invisible stitches to attach the remaining lining once I’d trimmed and hemmed it. Such a neat trick! (And a great excuse to show off my mitred corner!)
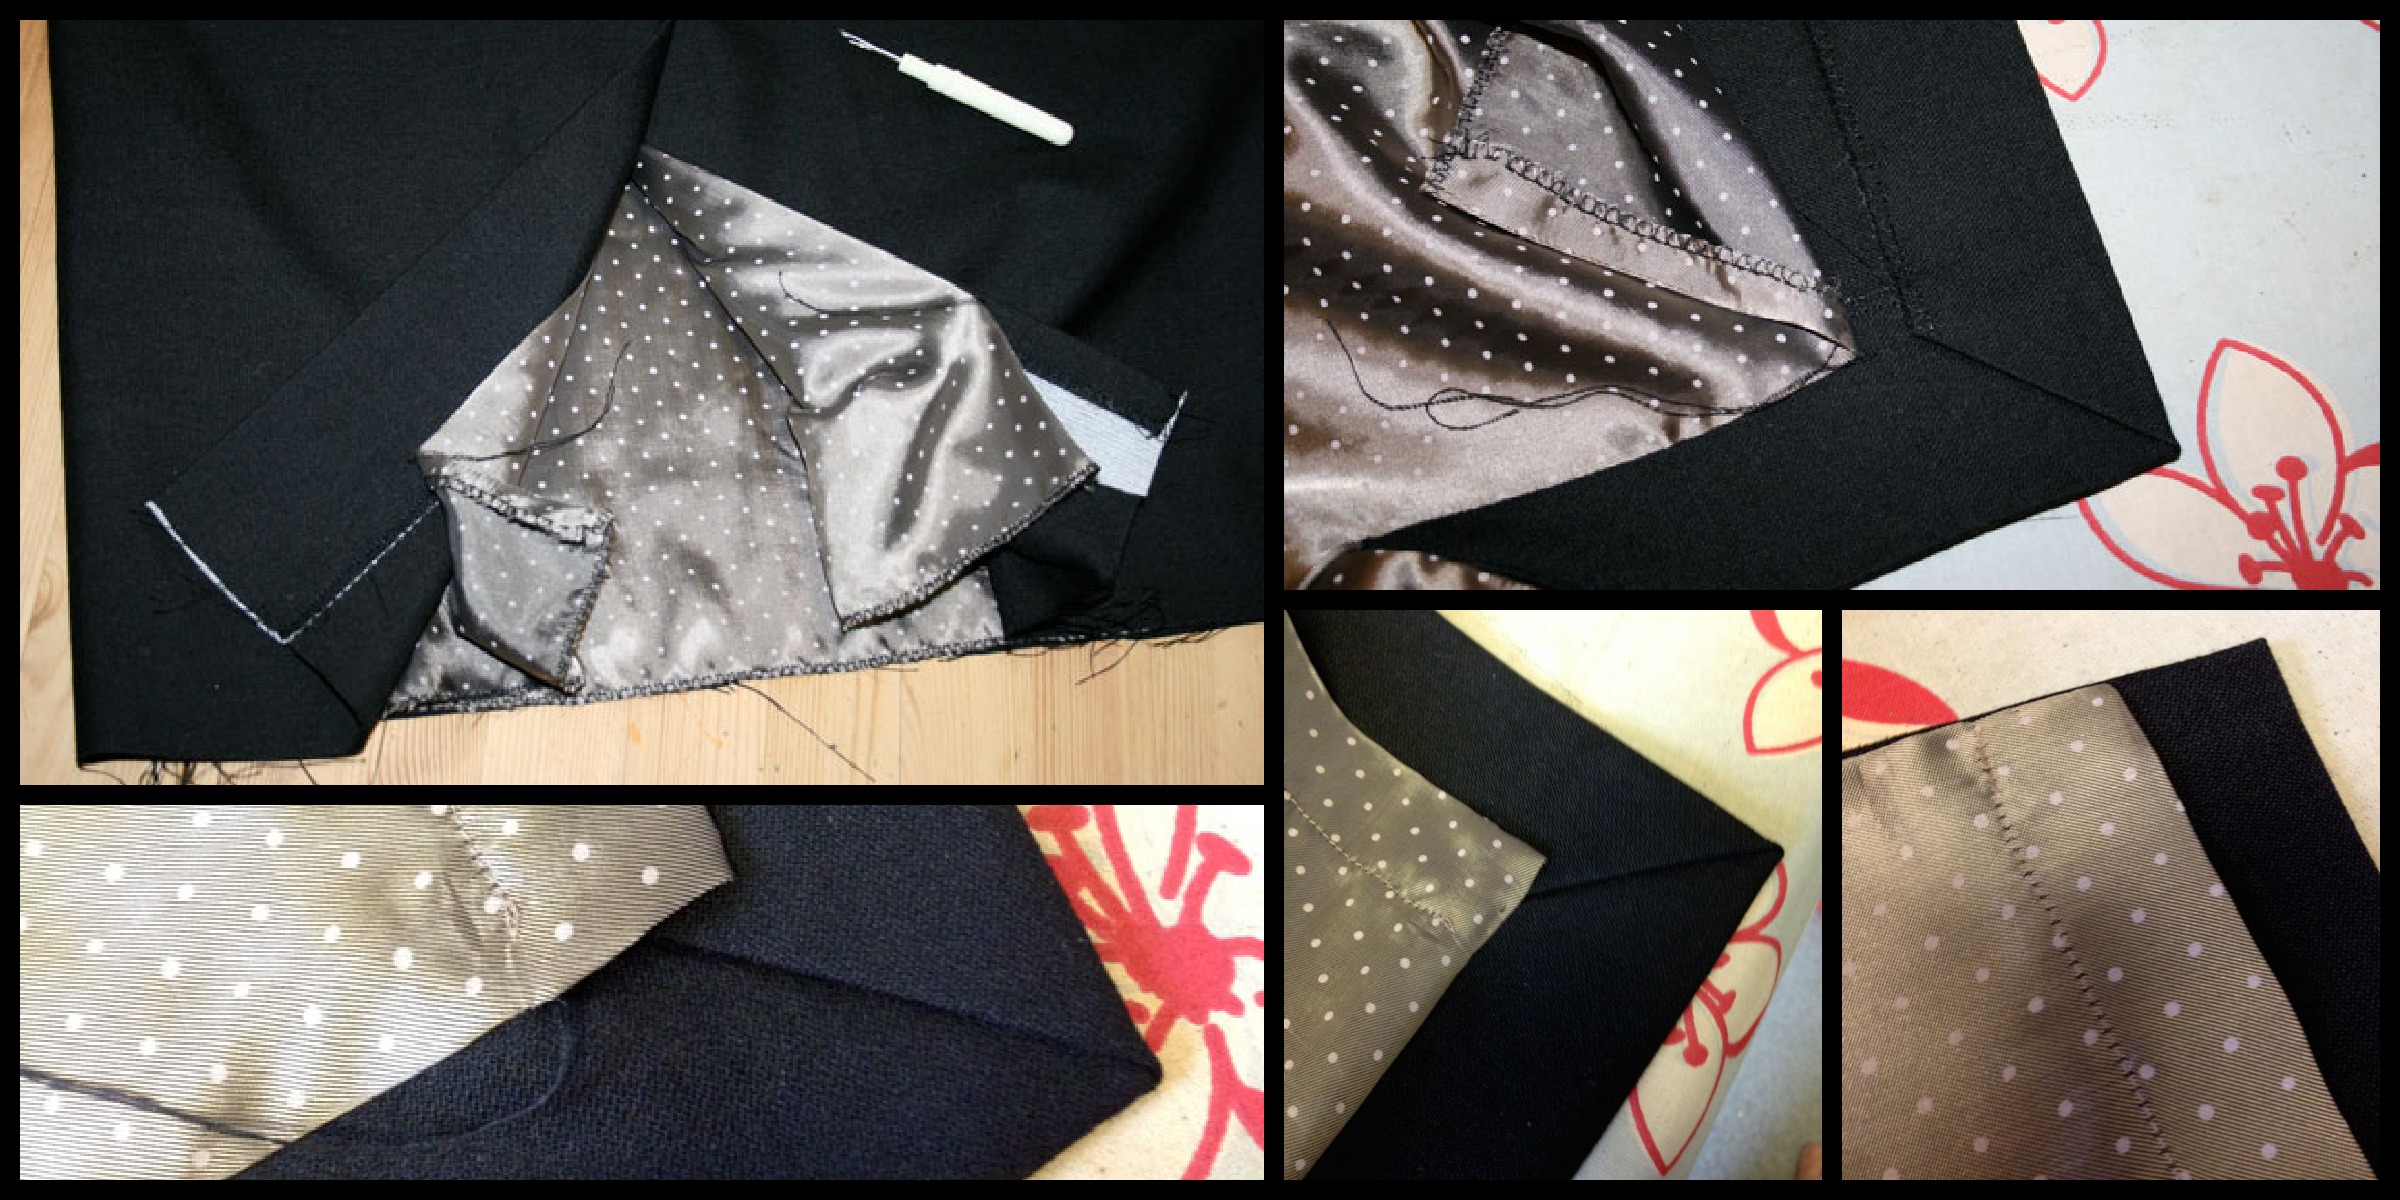
Interfaced waistband and hem using a lovely woven fusible interfacing. Nice and sturdy. Just the ticket!
I didn’t scrimp on the fabric for this skirt. I think you can afford to be a bit more frivolous when you only need a meter of fabric to play with. So I bought some quality British wool and boy does it feel good. A dream to sew up too.
I’m anticipating some questions on lining the vent, and I am really sorry I haven’t included it this time. A combination of no step by step photography and a serious lack of remembering exactly how I did it myself! I know it wasn’t that difficult and I hope to bring that part to you on the next one I make. And I will be making more because it was my original mission to make and own a pencil skirt for every day of the week. Different colours and styles. That would be so cool and not too unachievable!
CREDITS
Mr Ooobop! was of course, my lovely photographer for this and most posts.
Shoes by Vivienne Westwood… oh yes!
Top hand made peasant top that I didn’t get round to blogging!