Swag dress in a Minerva exclusive sweater knit

When Minerva presented their range of exclusive sweater knits to me I was very curious to know what they were like and when this piece of brushwork/giant animal print arrived I wasn’t disappointed. It’s a generous medium weight, very soft and super smooth to touch.

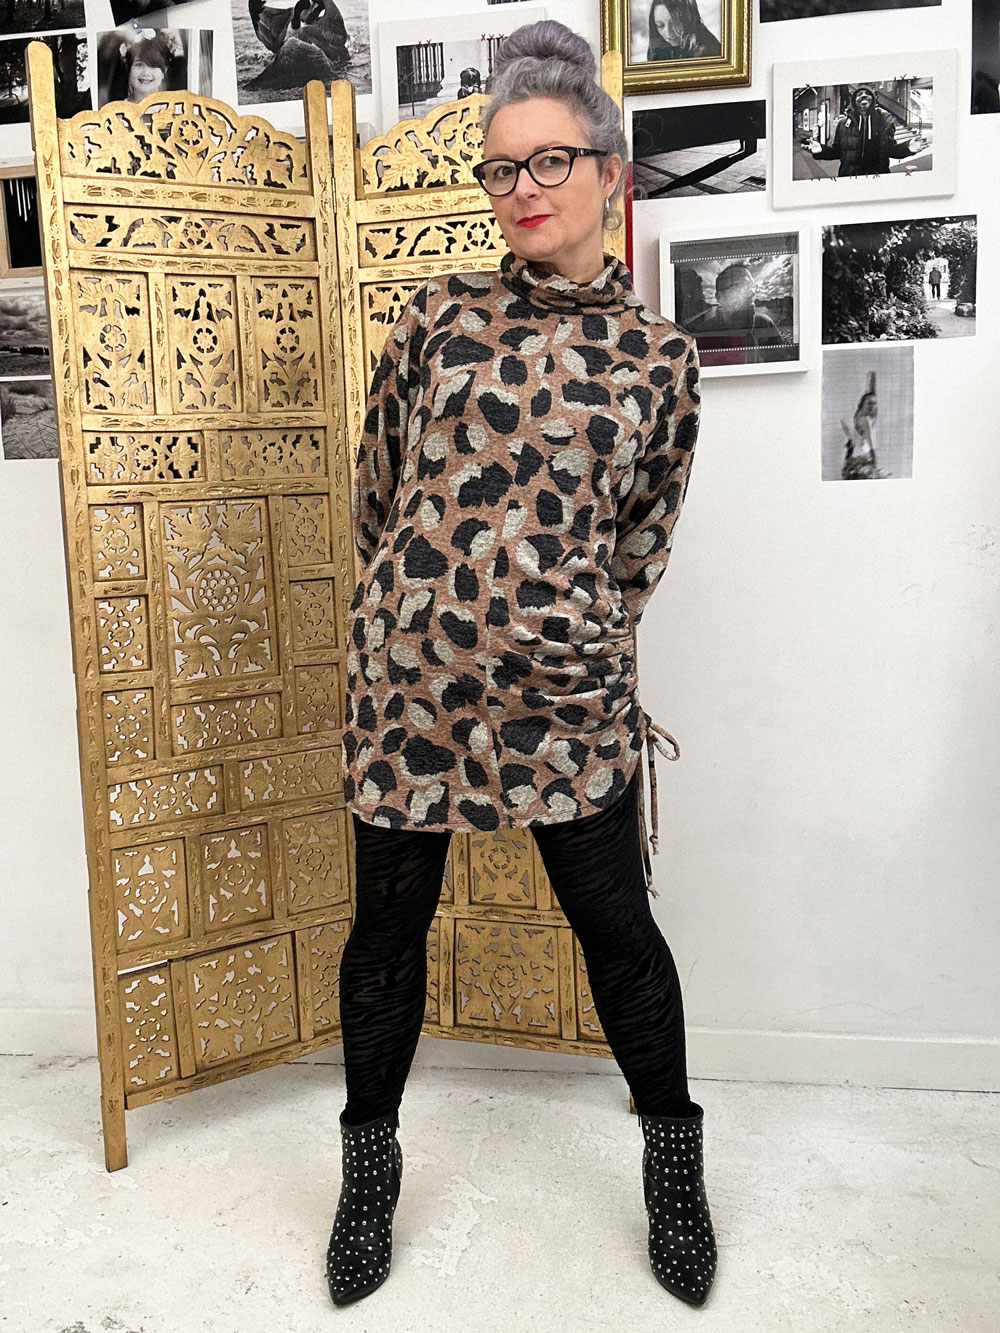
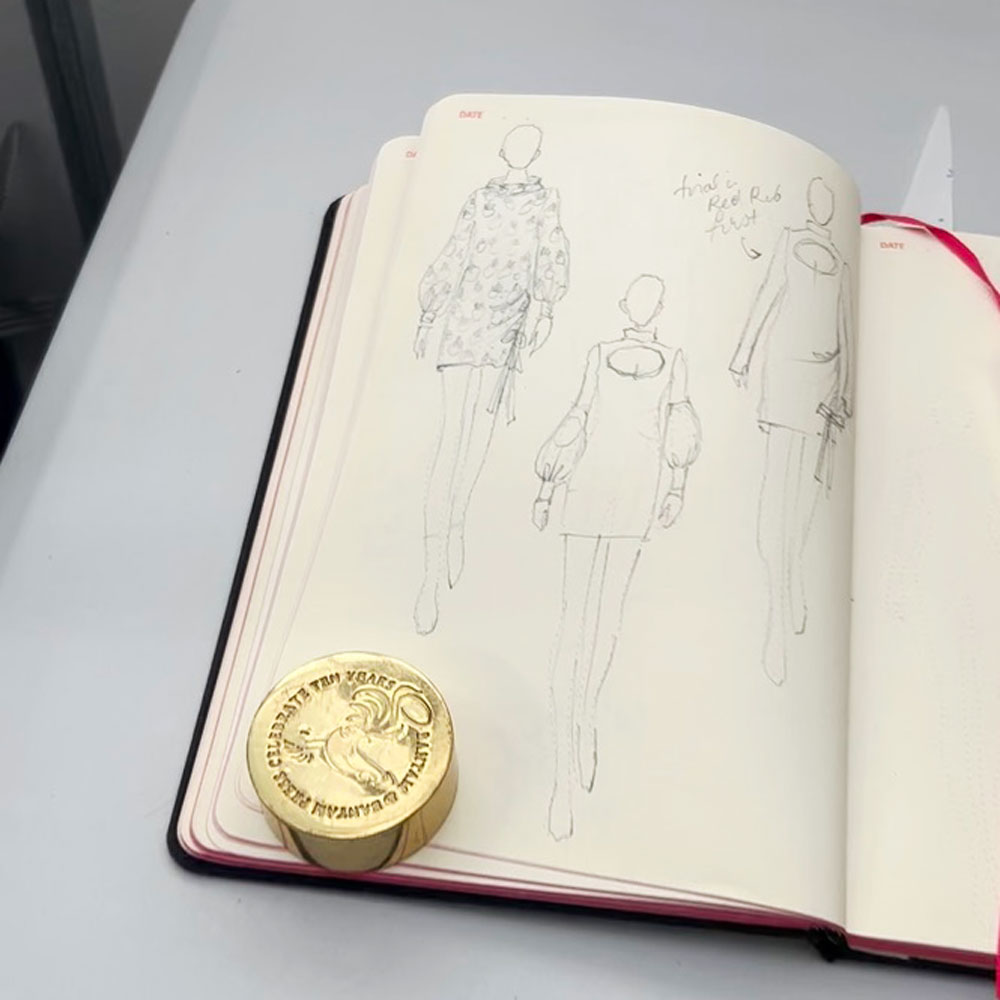
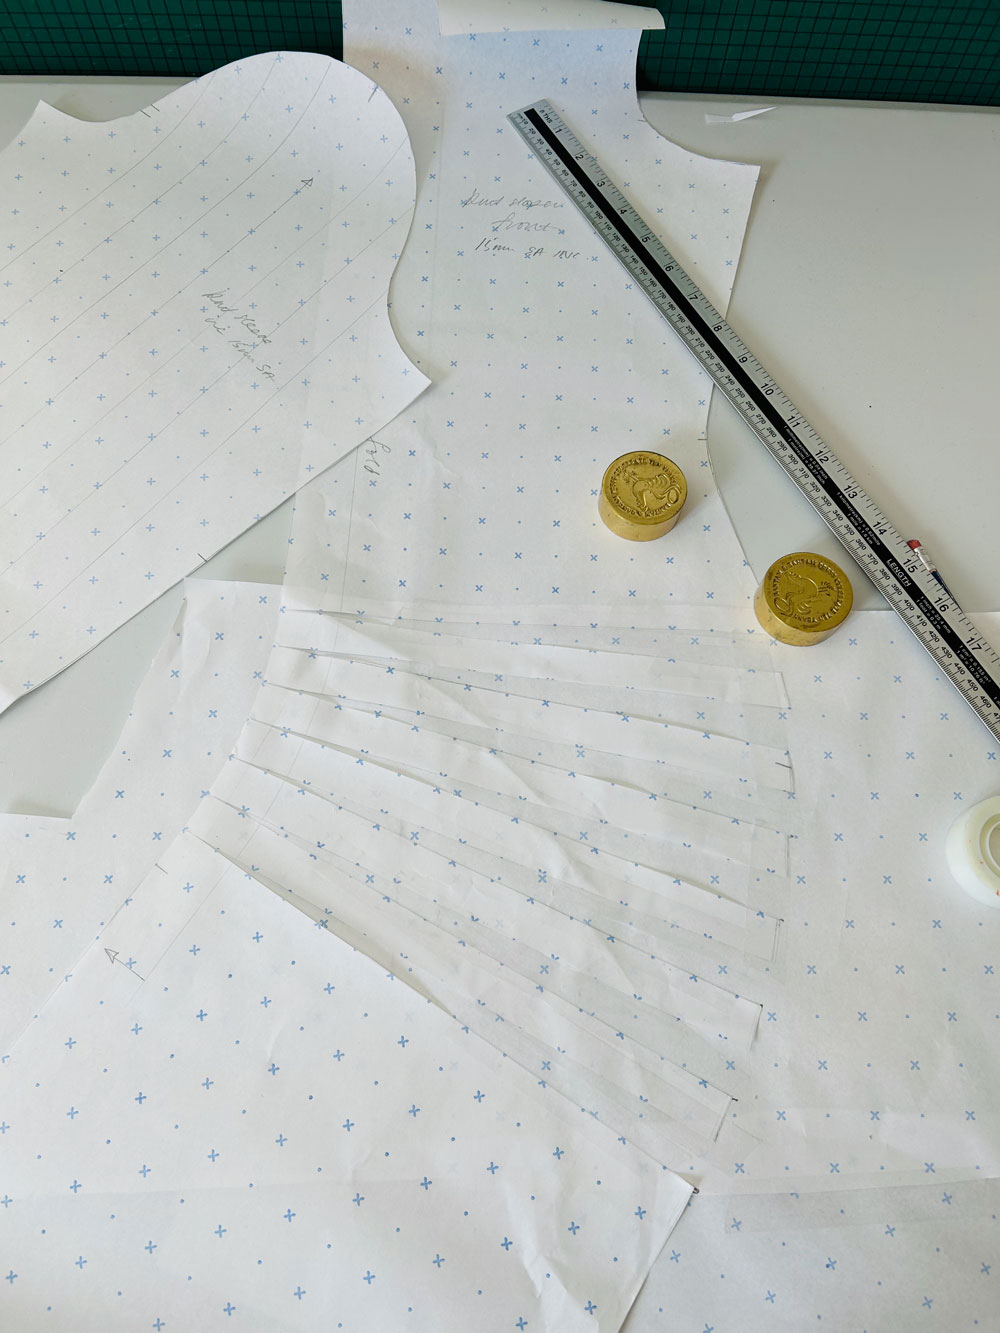
It was definitely worthy of a unique design so I got sketching in my Fashionary book. It’s fair to say that the natural drape of this fabric is what inspired the design. I wanted something cosy with long sleeves and and a high neck for chillier days. My skirts get shorter in the winter so I can embrace statement tights but I wanted a cheeky side detail to make it something other than just a fitted sweater dress.

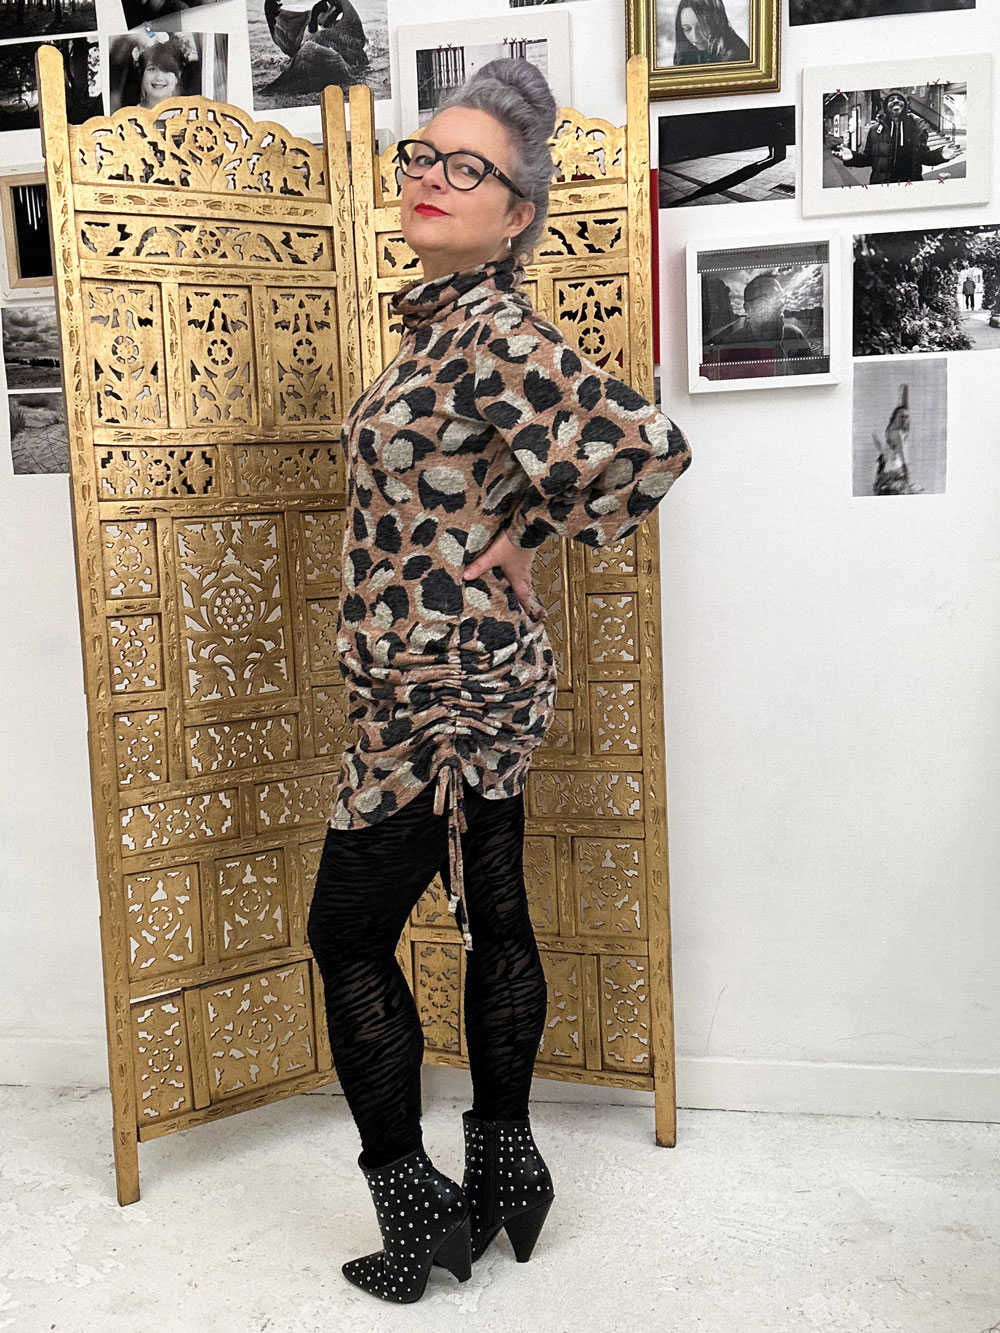
I made a test garment before cutting into the lovely new fabric and I usually make the tester in the same or similar material at least but I had to settle for a cotton jersey as I couldn’t find anything remotely similar in my usual local shops. And needless to say, it didn’t behave in quite the same way. Luckily the Minerva fabric was much more conforming to my design, especially when it came to the funnel neck. I wanted it to crumple down, to reflect the draping at the left hip and it worked sooo much better than on the test version!

To achieve the side drapes, I created channels on the inside for two parallel ties which I secured at the tops. They are simply pulled and tied at the bottom which creates the draped look across the left front and across my left butt cheek! The ties were instrumental in creating an intentional detail rather than a look of ‘I simply haven’t pulled my dress down properly’!

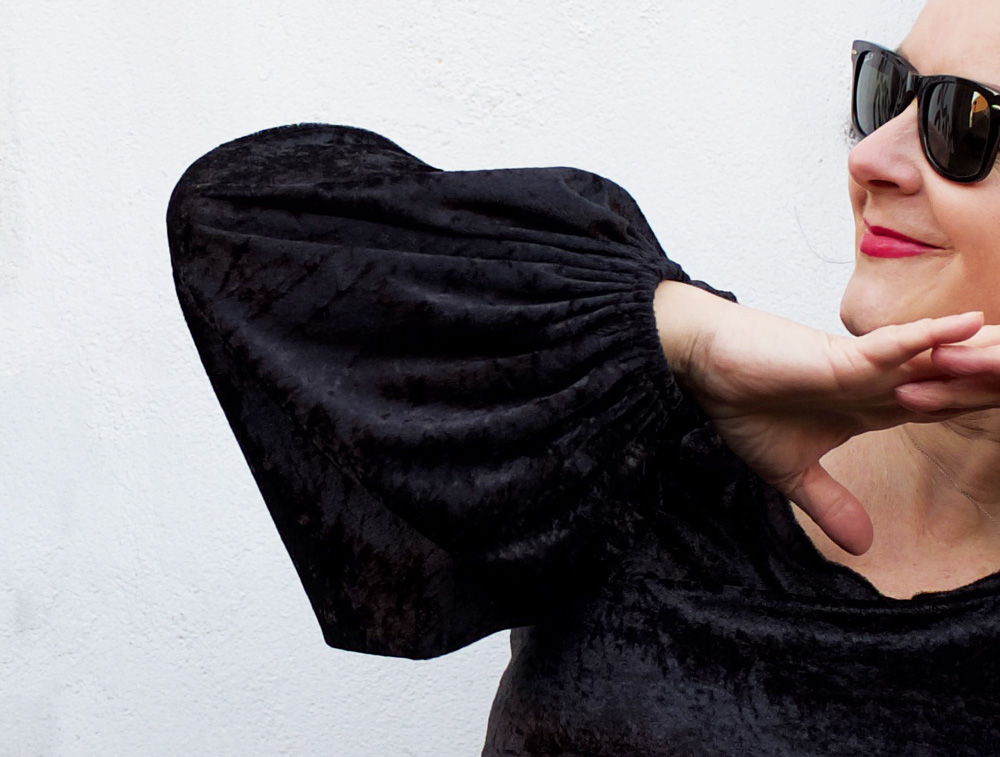
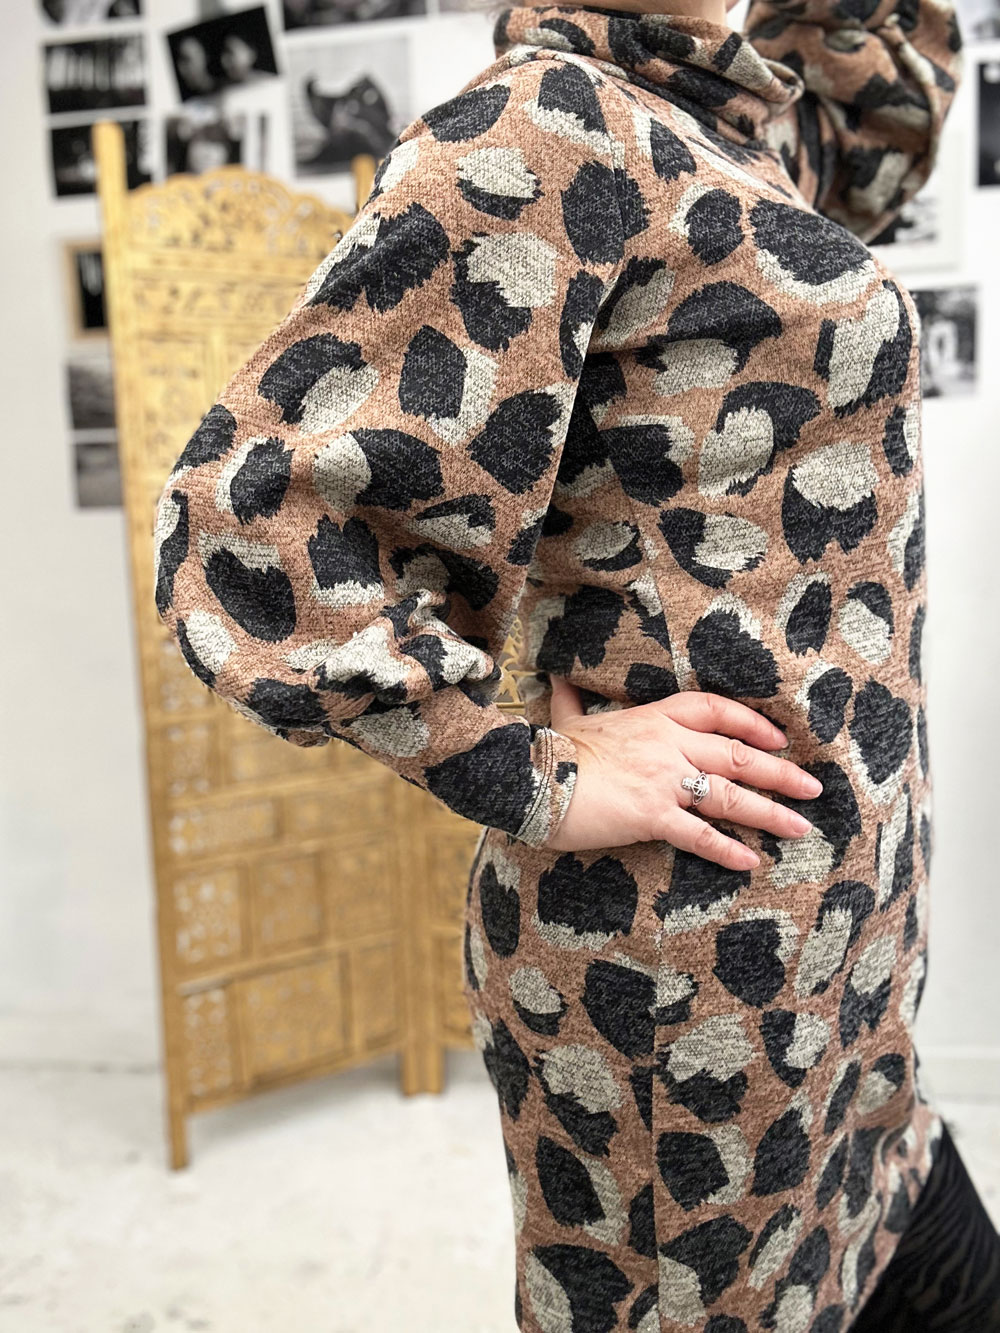
I knew I wanted a statement sleeve of sorts but I didn’t want to go large on the shoulders so bishop sleeves were the best option and this fabric performed perfectly for the job. Incidentally I realised I hadn’t changed my sewing machine needle to a ball point one half way through and that a regular size 80 had done the job just as well. Having said that, the advice is to use a ball-point so best not do as I did, just in case!

I sewed the whole dress with a combo of a wide zigzag and the lightning bolt stitch. All seams were serged afterwards. I find it’s easier to make fit adjustments if needed this way. Although now I’ve nailed the fit, chances are I’ll sew it all up on the overlocker next time for an extra speedy sewing fix!

The hems including sleeves got special treatment with a twin stretch needle. Although, as always that didn’t come without grief! I’ve never managed to make a neat job of it first time. I’ve always ended up with a knotty bobbin thread or clunky stitches. But I was super determined not to end up with a lamo zigzag hem this time. So I addjusted the foot pressure, changed up the stitch length and basically threaded and unthreaded about sixteen times before it finally worked. And I’m so glad I persevered because it looks so much more finished.

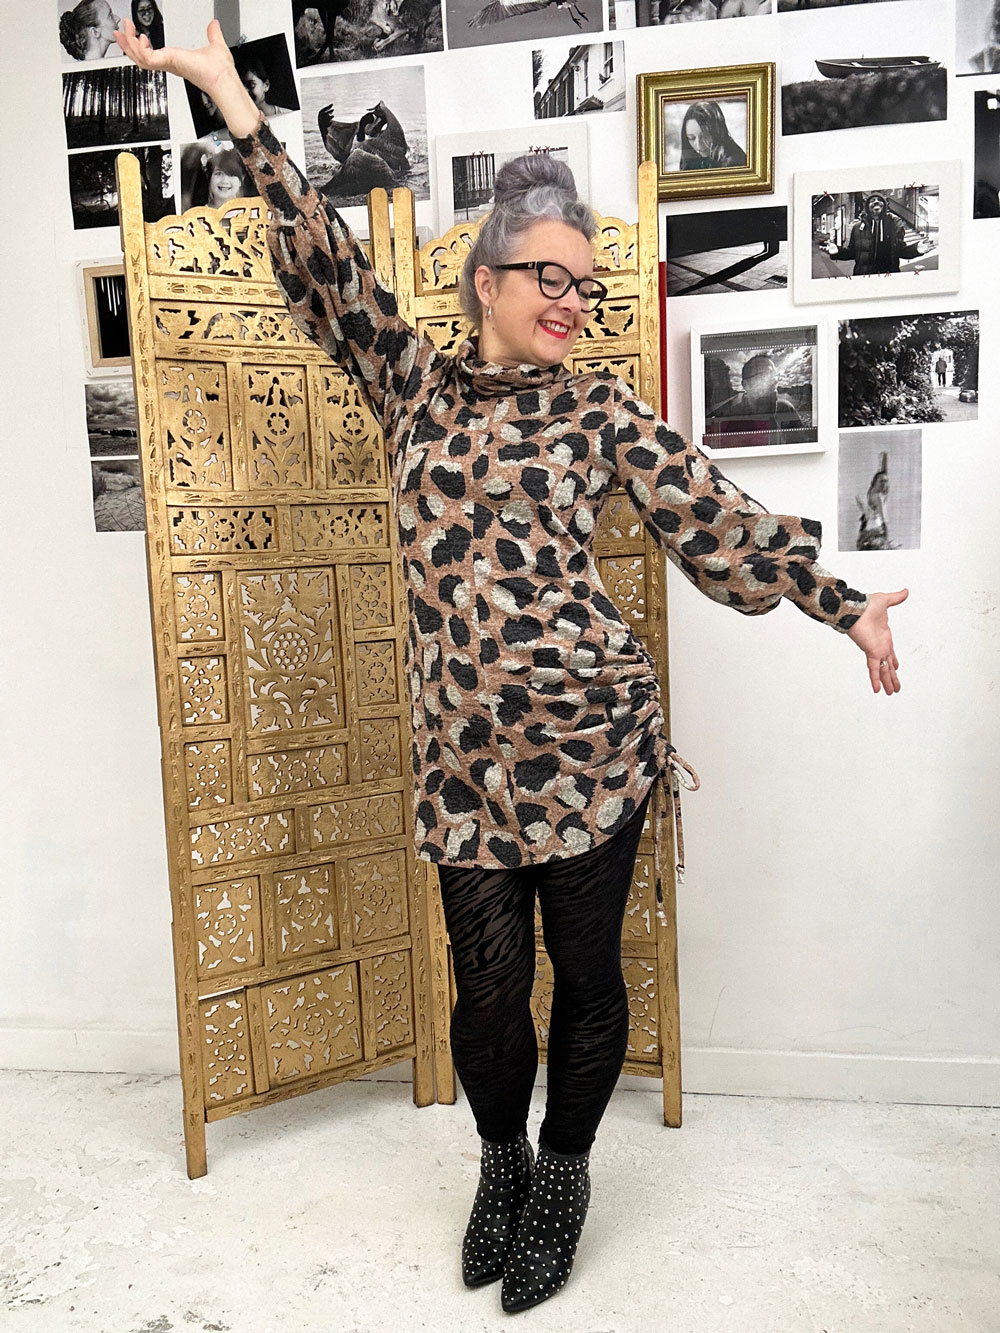
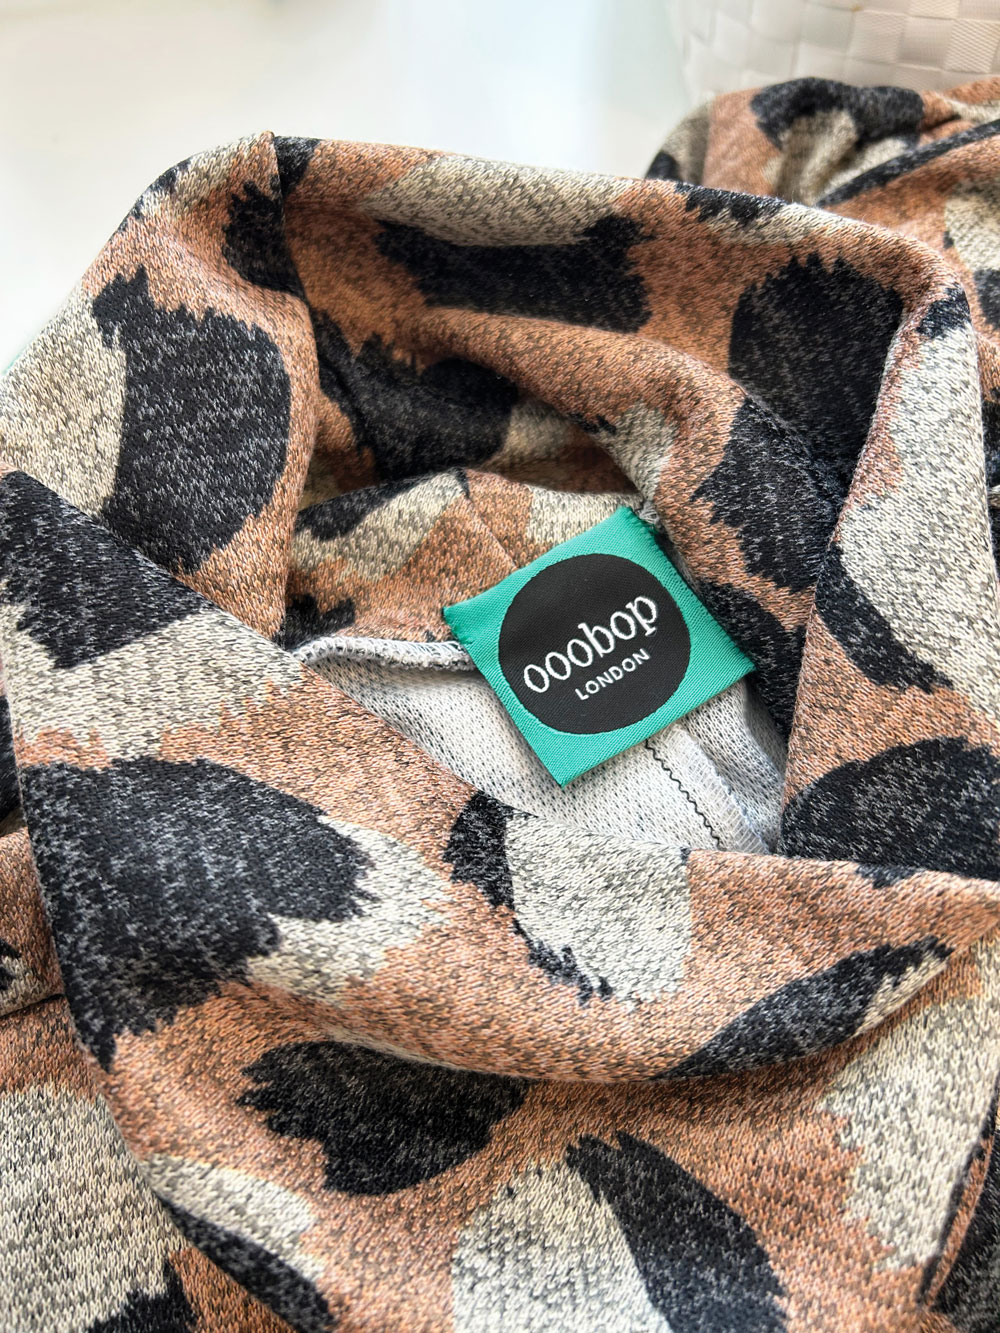
I’m so happy with the result. And I’m warm and toasty and very proud of my exclusive self drafted dress. So much so that it bears not only my ooobop seal of approval label but the lovely Minerva Maker label too! Thanks Minerva. This fabric was such a treat to sew!

Tilly Agnes top with hacked sleeves

Tilly and the Buttons Agnes sleeve hack

I feel like I haven’t posted anything in yonks though I did publish a write up about my By Hand London Rumana Coat over at Minerva. That’s the deal, see. They send me choice fabric, I whip something up and give them an exclusive write-up in exchange. If you haven’t seen it on my instagram grid @ooobop, do hop over to here at my Minerva profile to have a looksee!

The coat was such a lovely project to work on but if you’ve worked on one before, and if you don’t get much time to sew, you’ll know just how long it takes in short bursts. As soon as I finished it I promised myself that my next project would be a quicker one. A Tilly and the Buttons Agnes top – Just the ticket for a swift sew on a spare Saturday morning.

Tilly Agnes top in crushed black velvet

For clarity I cut it out the night before, but seriously, this top was ready to wear by lunchtime.

It helped that I’ve made three others before: One in a navy/ivory striped cotton jersey, a plain black cotton jersey one and a navy/red/ivory striped one in a gorgeous French Terry. Each time I opted for the ruched neckline and those gorgeous puffy sleeves but this time I thought I’d change things up a bit with a bishop sleeve.

To do this, I took the regular full length template and slashed from the hem of the sleeve to the arc of the sleeve cap. I spread the pieces, traced the result and repeated the process again with the new piece to create the flare.

I was tempted to go larger still but was worried the fabric would be too bulky gathered in at the wrist.

Tilly Agnes sleeve hack detail

The fabric is a gorgeous stretch crushed velvet from Fabrics Galore. I bought it eons ago when we were allowed to go actual fabric shopping. It was definitely earmarked for an Agnes and I’m so pleased to have stuck to plan for a change! My only concern was the extent of stretch compared to the jerseys I’d used before.

I measured the bodice pattern pieces and physically stretched the fabric to guesstimate the result and I’m glad to report that it fits. Albeit very snuggly! There would be no hope if there were any remaining mince pies to be had!

Though it has to be said,  I do like the contrast of the close fitting body against the draping sleeves. Luckily!

To sew this top you begin by stabilising the shoulder seams with some tape or ribbon or suchlike. I skipped this stage with one that I made with disastrous results – the shoulder stretched out like Billy-O! So I made sure to obey that instruction this time.

And then on to that neckband. Oh boy was I in for a ‘treat’ this time.  The object is to stretch the doubled over loop of fabric as you stitch it around the neckline. Well, the crushed velvet, as soft and lovely as it is, definitely wasn’t designed for such treatment. And it curled up like a goodun on the raw edge I wanted to sew. It became a nail-biting 8-stage process of pressing, pinning, unpinning, pressing, basting, pressing, sewing and eventually overlocking which thankfully sliced off the curl and the bulk thus making the topstitching way easier. I decided against the ruching at the neckline to avoid tempting fate!

Tilly Agnes top detail of neckline

From this point on it was seriously plain sailing. The sleeves are set in flat. No ease necessary on the cap. The side seams and underarm seams are sewn in one go. I used the overlocker for this – so satisfying! I hemmed the bottom up with a Zigzag stitch, mostly because I’m too lazy to set up another spool and swap out the needle for a twin one! In. Any case the stitches were going to sink in to the velvet so it didn’t really matter.

And finally I cut some Prym 7mm standard elastic (Aff link) just a bit wider than my wrist and wide enough to go over my knuckles plus bit extra for the overlap. (Its all very calculated round here!) I threaded the elastic through a gap in the sleeve hem that I sewed up and zig zagged the overlapped ends before sewing up the gap.

And then my hacked-sleeve Tilly Agnes was ready to go!

Tilly Agnes sleeve hack

I love that she’ll be a staple in place of any boring long sleeve Tee and can be dressed up or down owing to the slightly more luxurious fabric. Just got to remember to pull those sleeves up if I’ve got soup for tea!

And I’m so glad this was as successful as was envisaged because I have just taken delivery of a new length of equally gorgeous stretch velvet from Minerva in leopard print which I can’t wait to make!

Thanks to Daniel for my impromptu photoshoot. We went for a walk trying to avoid people and ended up down the back of the bus garage… such glamour!

Tilly Agnes top with sleeve hack

And thanks to you my lovely reader,  for taking the time to read my ramblings and for your continuing and valued support. Hope you are also managing to find joy in the small things to keep you happy in these weird times.

More soon
Janene x