
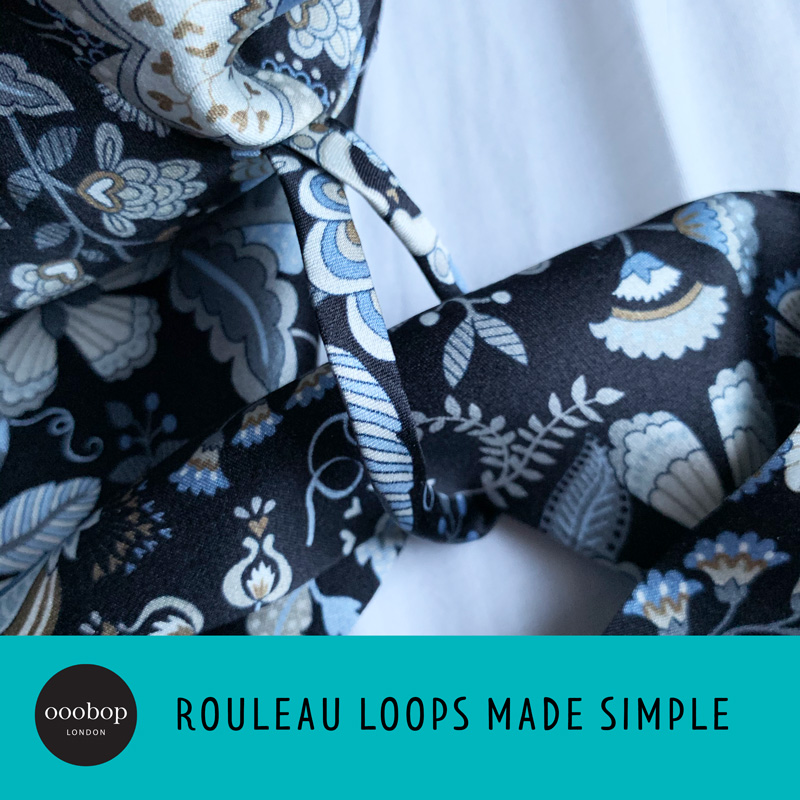
I struggled to make a satisfactory rouleau loop for years and dodged any sewing patterns that involved spaghetti straps, button loops, ties and such decoration. Determined to get the technique nailed for my Vogue Liberty silk dressing gown, I rehearsed the following method with great results. I hope this works for you too!
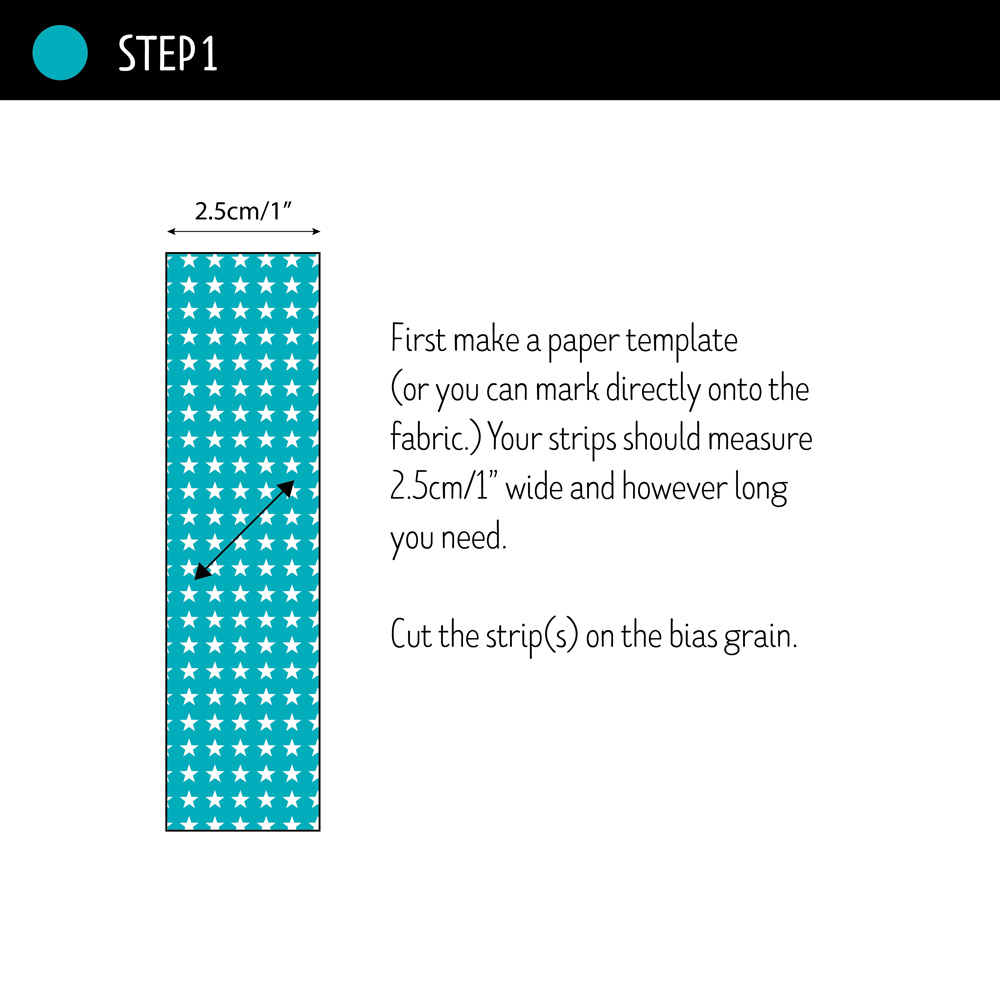
- STEP 1: First make a paper template (or you can mark directly onto the fabric.) Your strips should measure 2.5cm/1” wide and however long you need.
Cut the strip(s) on the bias grain.
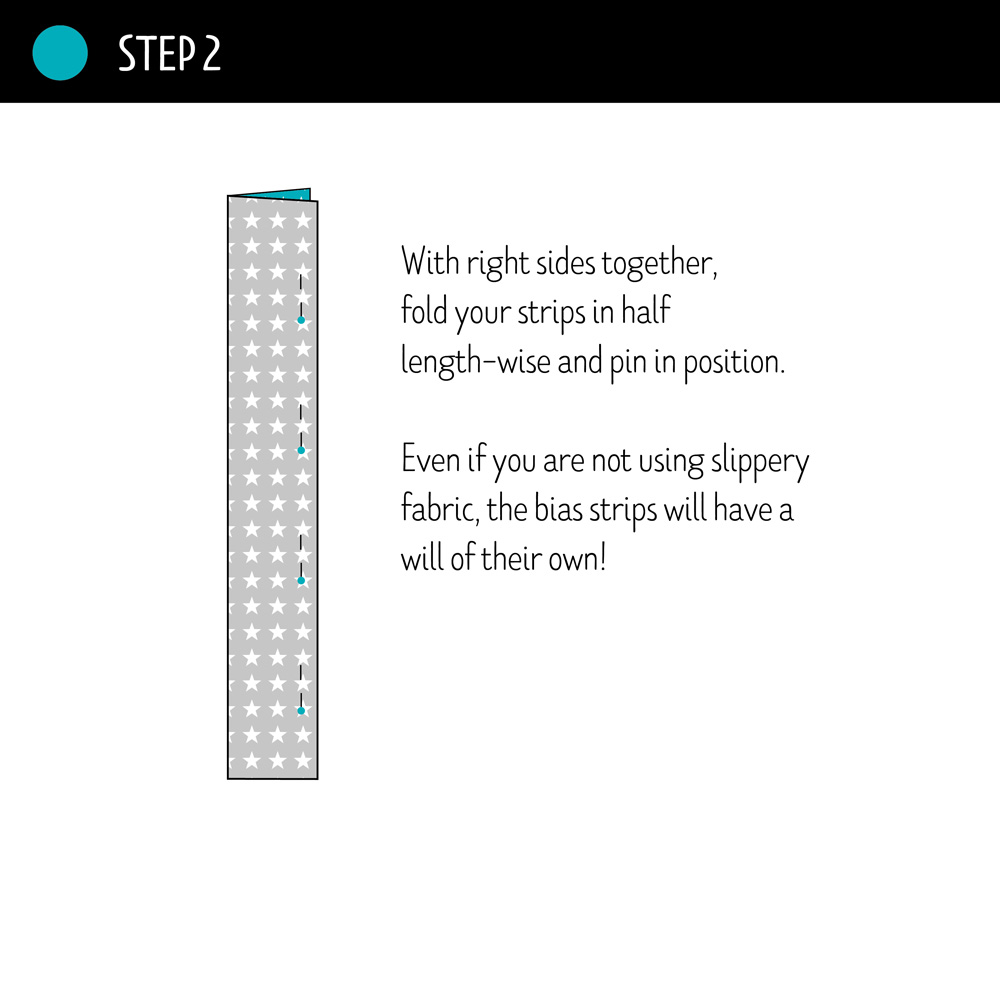
- STEP 2: With right sides together, fold your strips in half length-wise and pin in position. Even if you are not using slippery fabric, the bias strips will have a will of their own!
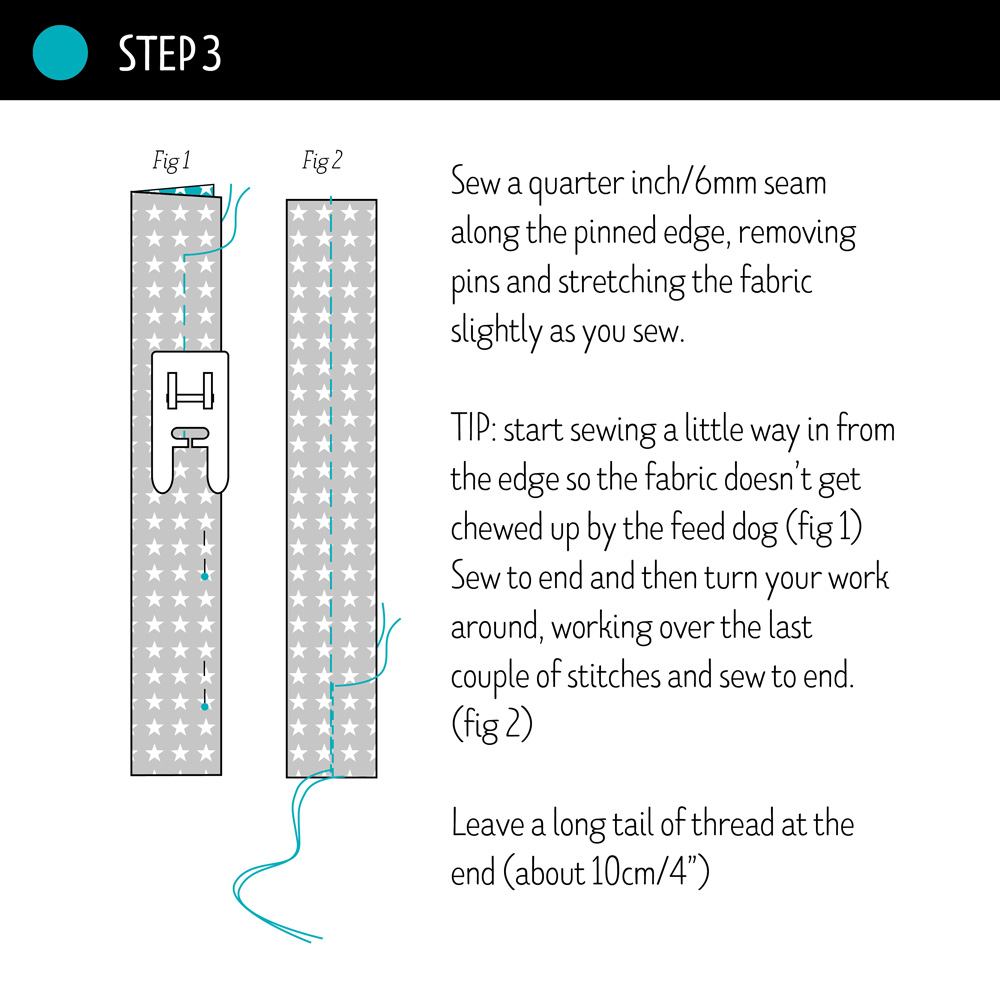
- STEP 3: Sew a quarter inch/6mm seam along the pinned edge, removing pins and stretching the fabric slightly as you sew.
TIP: start sewing a little way in from the edge so the fabric doesn’t get chewed up by the feed dog (fig 1) Sew to end and then turn your work around, working over the last couple of stitches and sew to end. (fig 2)
Leave a long tail of thread at the end (about 10cm/4”)
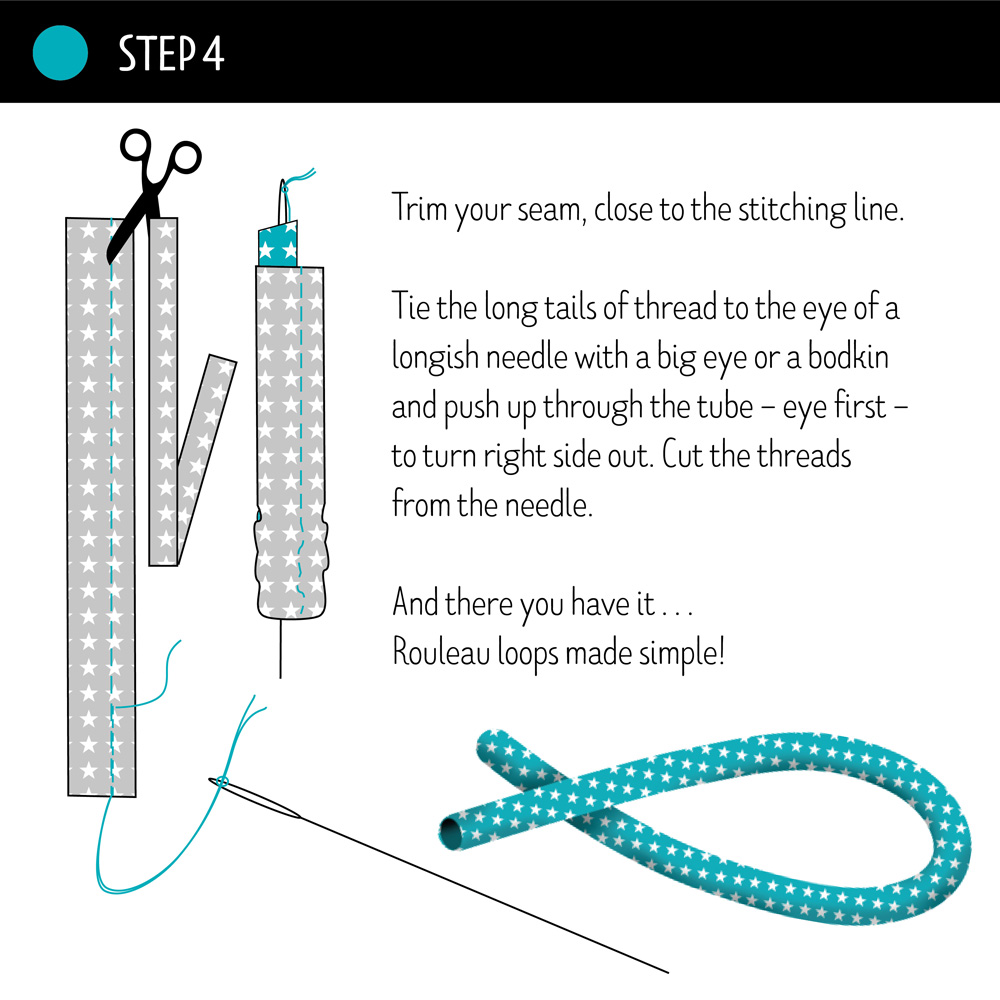
- STEP 4: Trim your seam, close to the stitching line.
Tie the long tails of thread to the eye of a longish needle with a big eye or a bodkin and push up through the tube – eye first – to turn right side out. Cut the threads from the needle.
And there you have it . . . Rouleau loops made simple!
Do let me know if you found the layout of these instructions helpful. I sometimes struggle with photographed instructions and I find illustrated steps are easier to follow but that might just be me!