Vogue robe in a luxurious Liberty silk – my wfh wardrobe is looking better already!

I generally don’t have a go-to order for dressmaking. My thought processes vary according to mood, need and weather. Sometimes choosing pattern first and then pairing an appropriate fabric, sometimes the other way round, especially if I’m fabric shopping in real shops and then an idea will spring to mind while I’m stroking and bouncing and draping and holding all the materials aloft. The latter is a dangerous game though, and hasn’t helped stash mountain at all!

But when Minerva approached me with some Liberty silk offerings I was quick to choose which fabric but wasn’t so quick to pair a pattern. What a gift! But wow… what a blooming responsibility! What pattern would best showcase this heavenly fabric?

I needed a project with damage limitations. It had already arrived at a super work-busy point in time and there was only room for assignment within small allocated time-slots throughout the weeks.

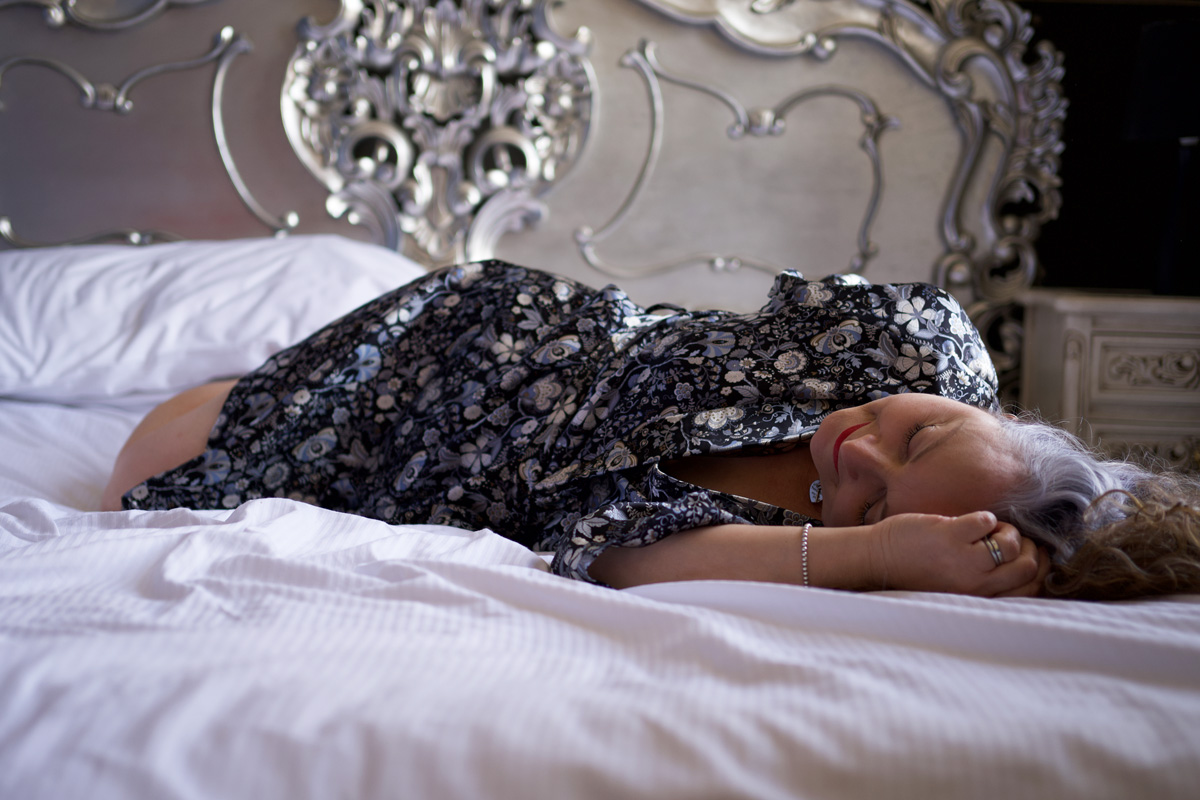
Mood and need and weather came to the fore. I was so tired of shuffling round the house in my tatty old dressing gown. Sometimes I don’t even bother getting out of it to work – there’s actually no need when I’m working from home and nobody is going to see me. But a silk robe would have me sitting more upright, feeling so much better about myself, plus it’s getting warmer so I really don’t need to be enveloped in velour anymore. I had a need to swan around in silk! And a robe would be simple, right?!

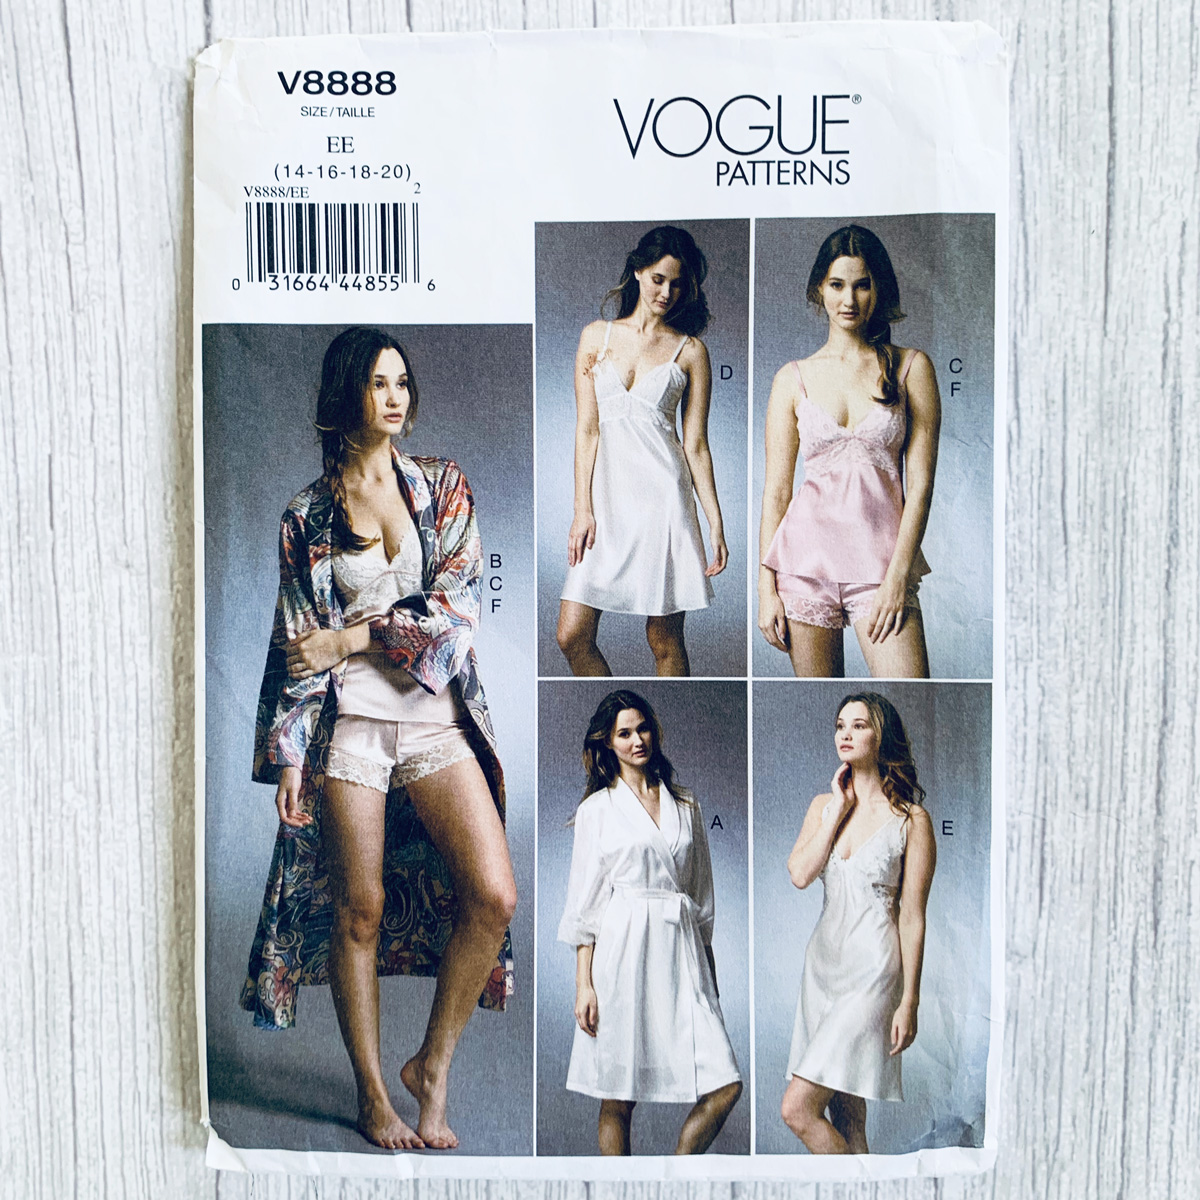
In an ideal world I’d have drafted the pattern myself. I’m getting quite fond of the maths. But with time not on my side that wasn’t going to be a great option because it would need toiling, too. So a quick scout on the web presented me with V8888. A delightful selection of nightwear to accompany a very stylish robe. I ordered it from Minerva.

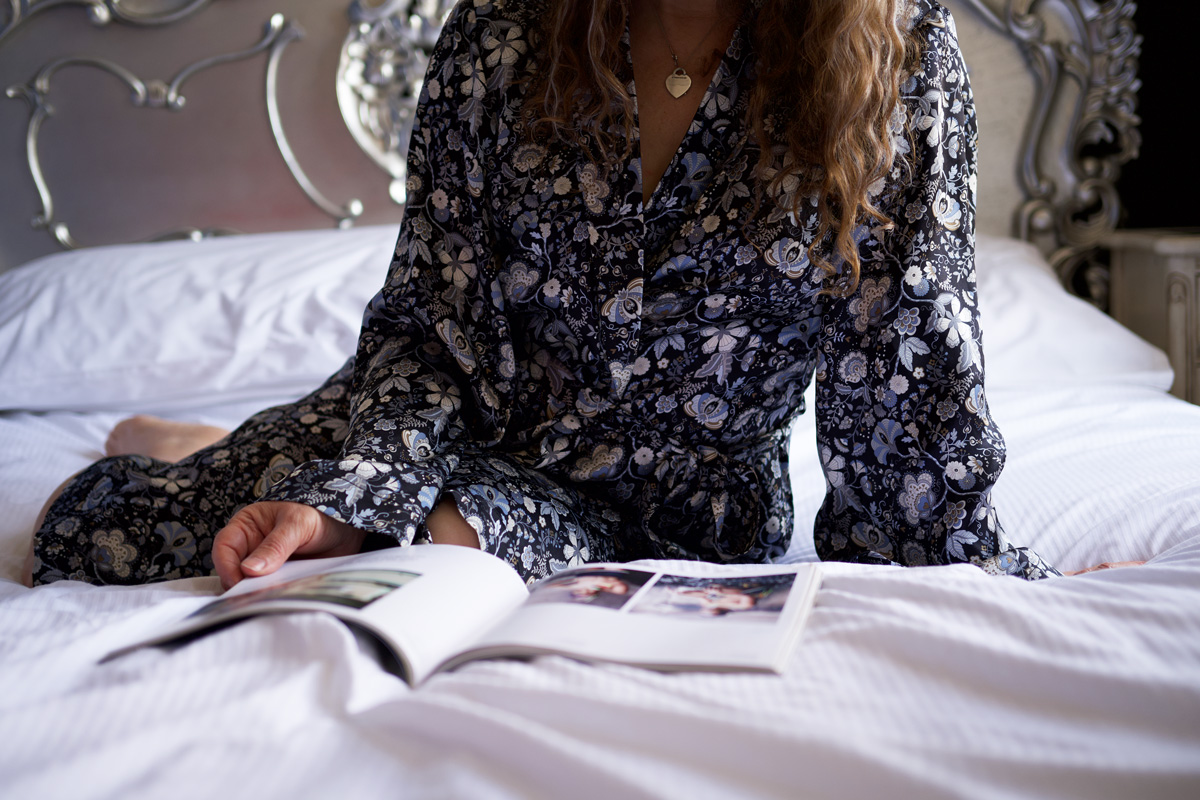
I also ordered a very large cutting mat and a new blade for my Fiskars rotary cutter. I’ve worked with silk satin only once before and it was a slippery beast. My scissors slid around the dining room table and I was cursing at every snip. But weighted down and cut slowly and carefully with said cutter, this time I had no problems at all. I was amazed at how little it frayed, especially with all the extra handling involved. Most of the seams except for the armholes are sewn with a French seam. And because I only had one shot of this, I checked and double-checked and triple-checked each side and pairing of seams before sewing. It was totally worth it of course because the inside is so neat and the robe so much stronger as a result.

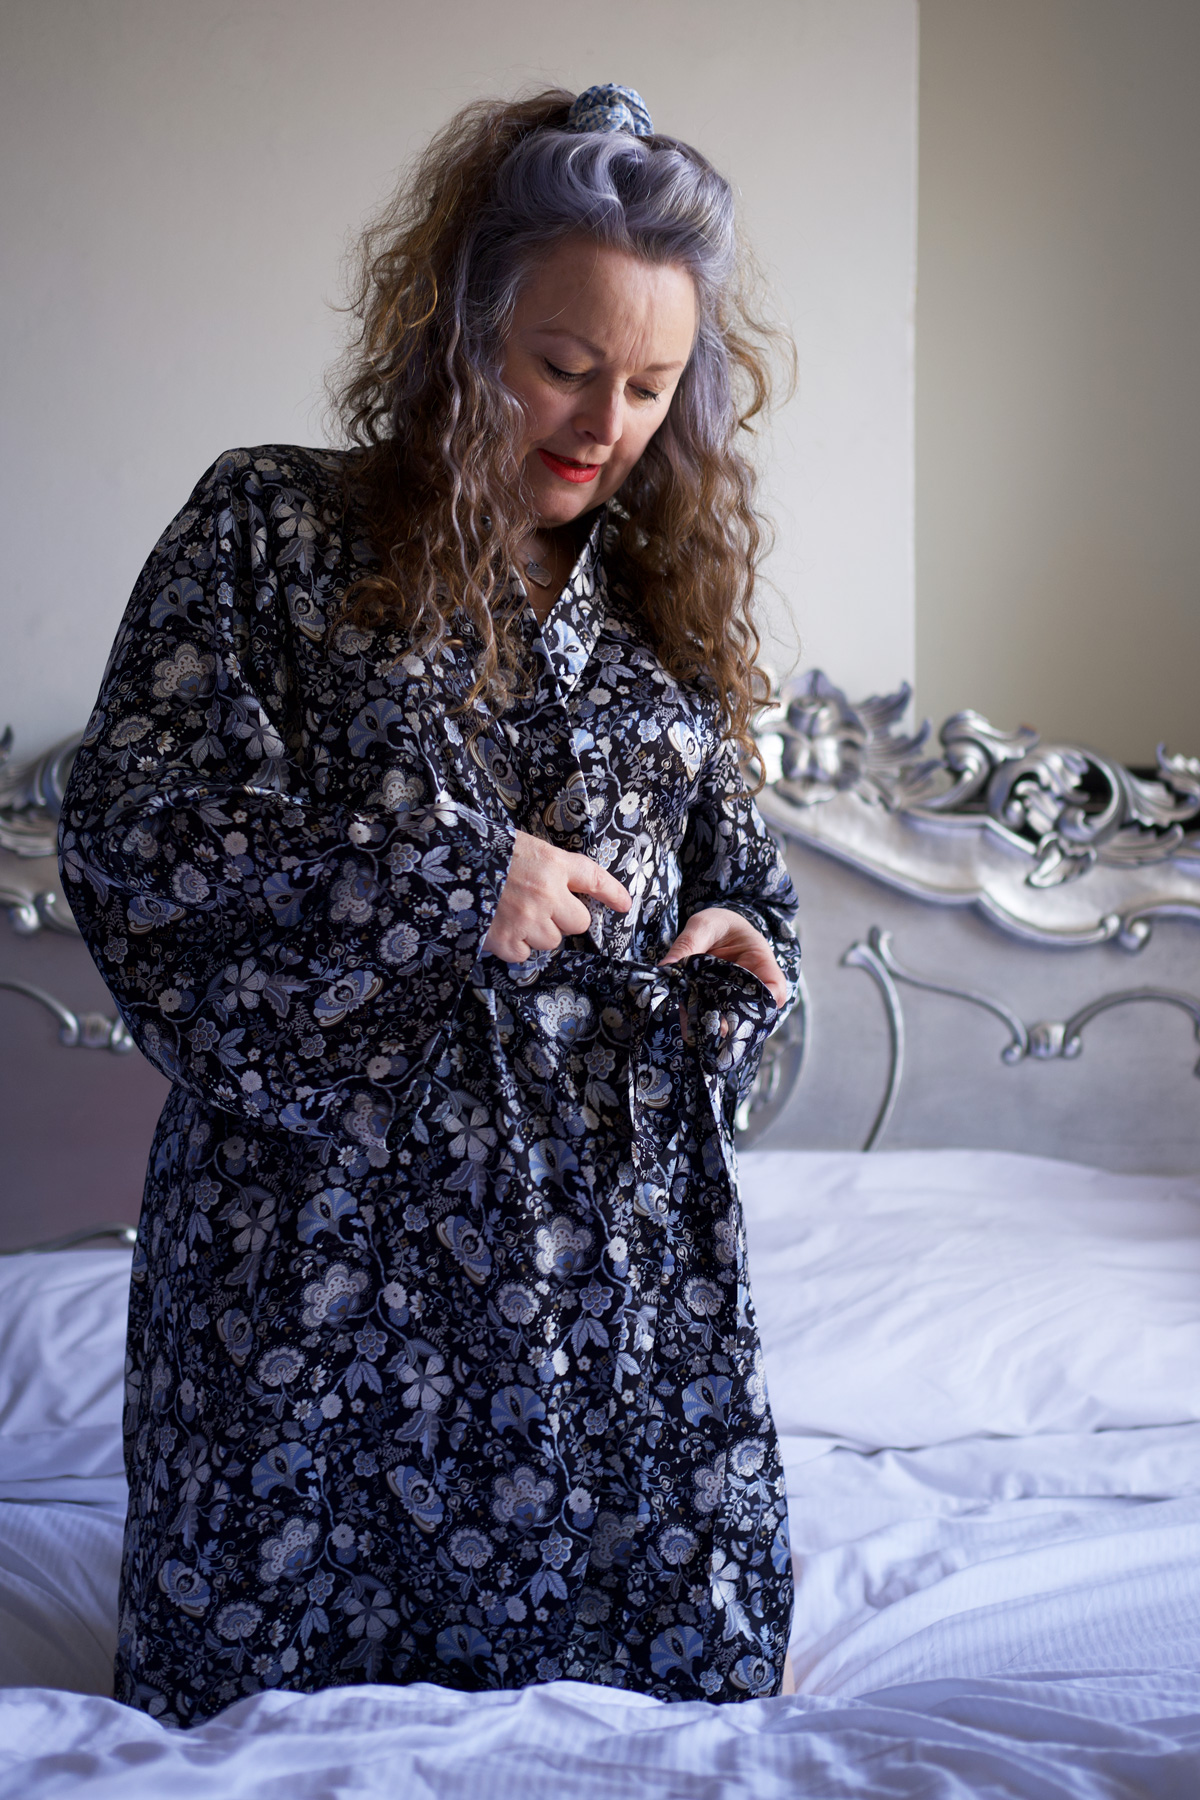
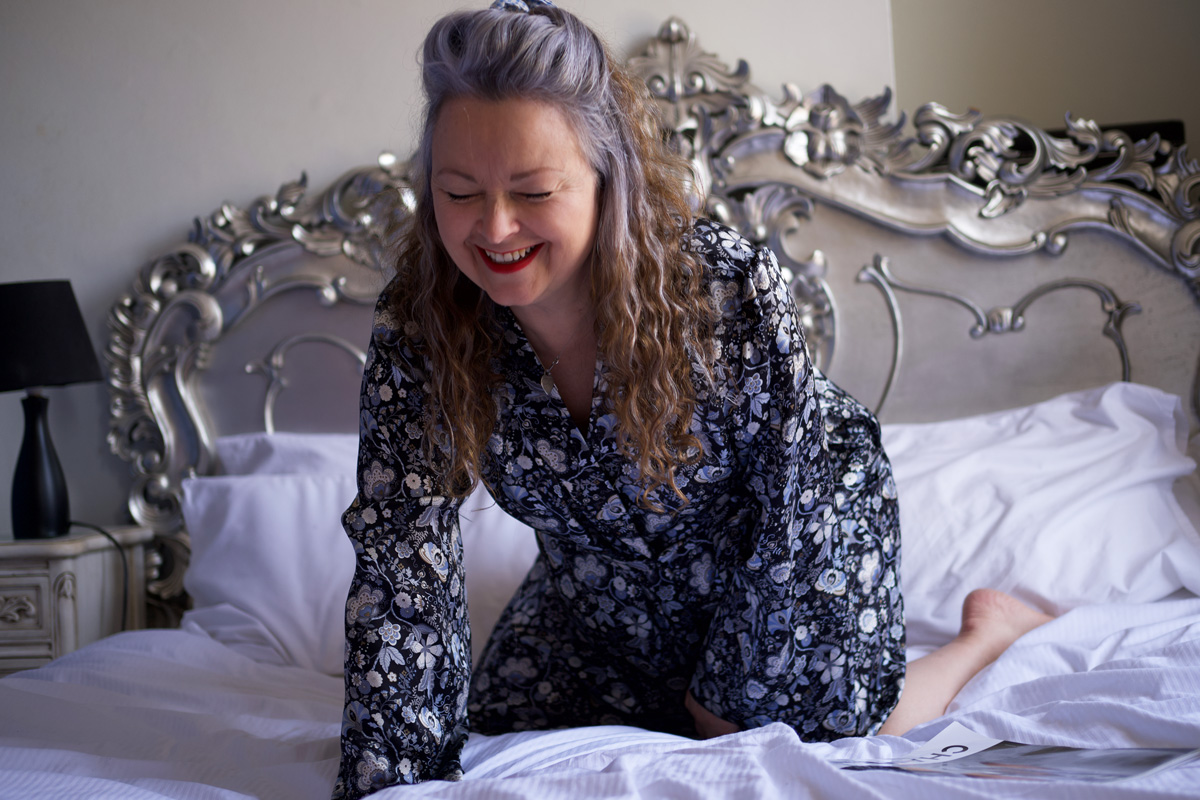
I chose the longer sleeves for the shorter version of the robe. Because I like that look and it’s way more classy. The shorter sleeves involved a band of lace at the hem and that would have been far too fussy for the design of this fabric. I wanted to keep it as simple as possible.

But I had not anticipated all the rouleau loops. Haha. There was me, thinking simple robe tied at the waist with a belt. The belt was actually such a joy to make and press. So satisfying. But the loops I left for another day. And another day. Until I didn’t really have many days left to submit the finished article!

So I cracked on. And fell at the first hurdle. My smallest loop turner was too fat. The smallest drinking straw I had in the kitchen drawer (for the drinking straw/kebab stick trick) was too fat as well. So I remembered a trick my mum taught me, by tying the long threads left at the end of the seam to the end of a bodkin, or large-eye needle, and pulling through, eye of needle first. So satisfying that I was weirdly excited to do the rest and even made a little graphic tutorial for my sister in law!

There are two inside ties – one front left and the other inside right side seam. There are two belt loops inset on each side seam and there is a thread loop at the right front opening. I’m thinking of doing a tutorial for that too as it was quite fun to do.

I am so grateful to Minerva for the opportunity to sew with this fabric because it has definitely delivered some more valuable experience as well as a super luxurious wfh outfit! I must admit I was terrified of cutting into it at first but once I got going, any fear was allayed, largely due to the quality of those threads. It’s so stable, on grain and not at all like the silk I previously sewed that was fragile enough to catch on the rough skin of my hands! Liberty silk is most definitely worth its price point.

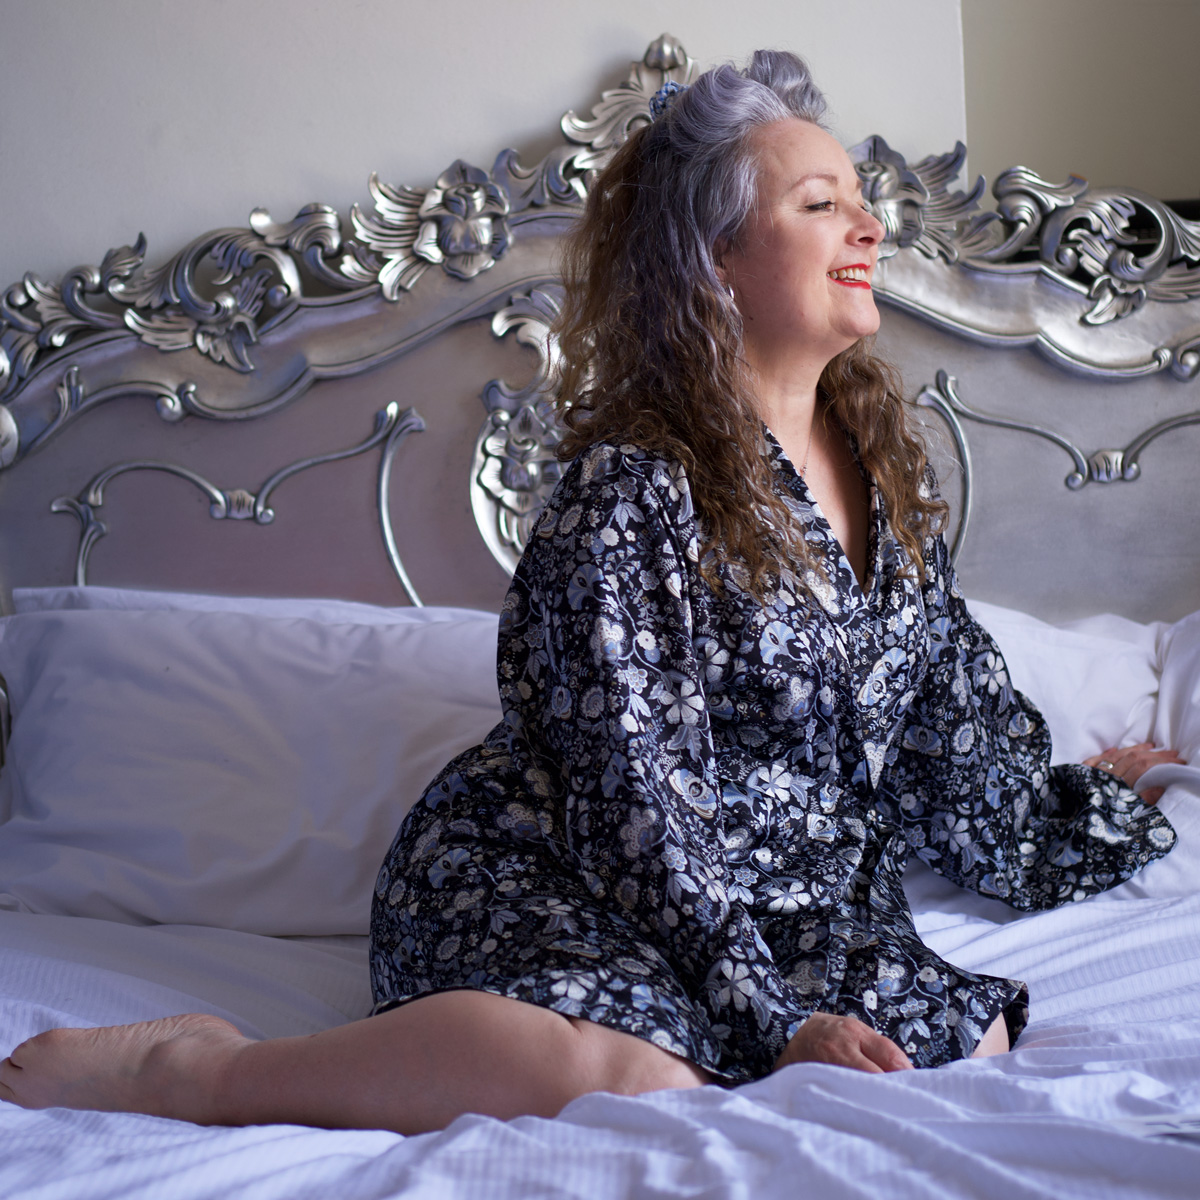
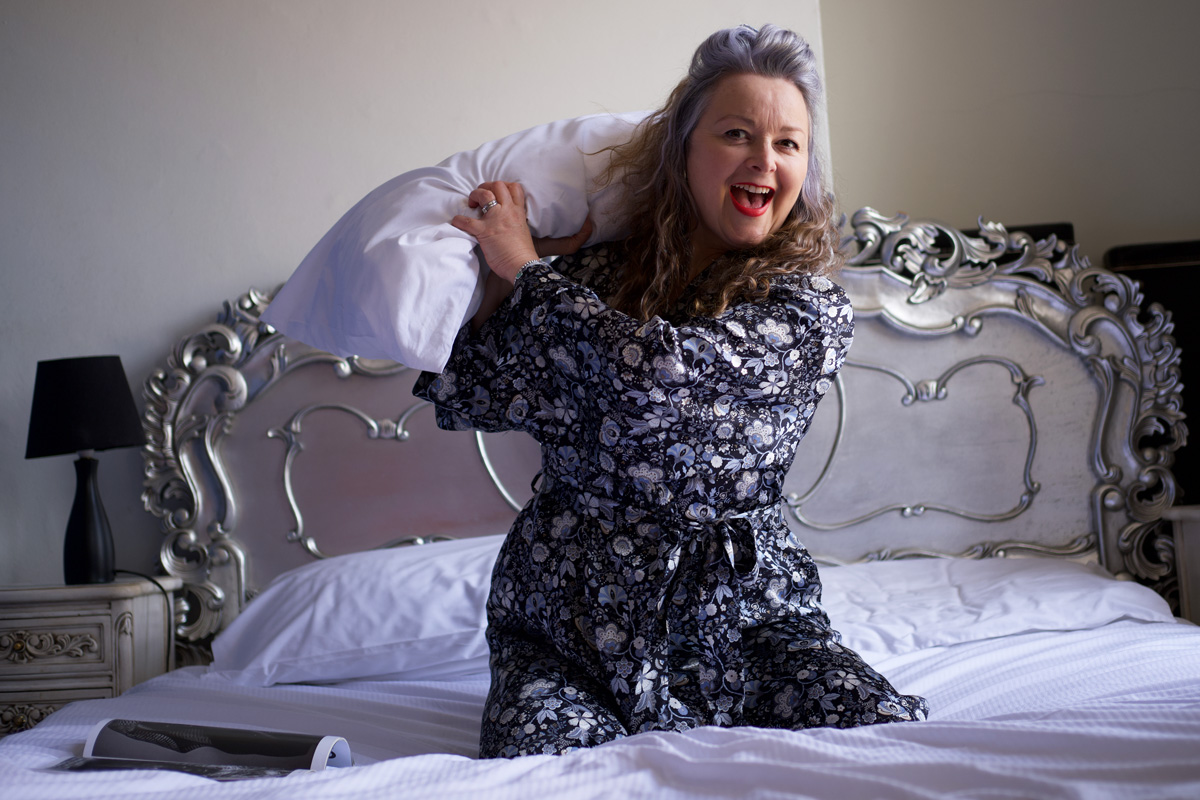
And just to note, it does make me sit straighter, it feels amazing to wear and it has got me out of doing the washing up!

Daniel is of course the man behind the lens and this was such a fun shoot. The look on my daughter’s face was priceless when she poked her head around the bedroom door to see what we were up to. Even more so when Dan said ‘Its not what it looks like’!! Haha. We are so doing our best at being embarrassing parents!

Please note: I am an Ambassador for Minerva and the fabric was given to me free of charge in exchange for a review. I purchased the pattern and all notions required. To see the original article and more of my Minerva Makes. Please visit my Minerva profile.

Vogue Cocktail Hour dress V9241

V9241 cocktail dress

cocktail hour eve appeal

The first time I’d heard of the Eve Appeal was when I took part in last year’s Vintage Sewalong campaign. They are the ONLY UK  national charity that raises awareness and funding research into the five gynaecological cancers so it wasn’t too much of an ask for me to join in the Cocktail Hour once again, and help McCalls promote a range of Vogue patterns that raise good money for such a great cause.

Last year I made Retro Butterick 5813 for the Big Vintage Sewalong 2016. This year I chose Vogue 9241, a fabulous design by Kathryn Brenne.

V9241_PATTERN_COVER

A little bit Helena Bonham Carter, A little bit Anne Robinson, perhaps… but totally full of character and no doubt a talking point at a cocktail party. Sadly the only cocktail party I’ve ever been invited to was the one at The Knitting and Stitching Show at Ally Pally and I was typically too busy with work to attend. Though I prefer to think that I have been to loads and they were so good, I’ve clean forgotten all about them!

But if I do ever get another invite (nudge, nudge) I would be proud to wear this dress. It would rock a room of standard LBDs and not leave without comment.

I chose this design because of that awesome collar, of course, and because it reminded me of my birthday dress – the skirt section at least – and I considered using silk dupion, the same. But not only do I not like doing things twice, I find the suction of creativity too much to bear if I copy what’s on the packet. ie a red silk dress. I felt like black would have hidden too  much of the detail so I went a bit off piste and used a pinstripe suiting fabric instead, lol!

V9241_cocktail_dress_4

I wanted those pinstripes to emphasise the godets and that collar. Actual stripes would have been a bit too cray-cray (mmmm…. maybe next time though?!) I really wasn’t 100% sure it would turn out as special in what is effectively a boring cheap suiting fabric!

But it did. And I am so happy. Which is lucky really because I hadn’t left any time to change it up!
This dress really isn’t as complicated as it looks. I wouldn’t go as far as to say it’s a doddle but really just more time-consuming than anything. It needs a fair bit of yardage too so watch out if you’ve got any big ideas on fancy pants fabric. It could end up costing an arm and both legs!
V9241_cocktail_dress_5
One thing which I must point out is that there is an error on the layout and pattern pieces. The instructions say to cut 2 of front which threw me a bit because there was no reference to use it anywhere. The layout plan indicated the same. I wondered if it could be a facing/lining of sorts but a quick Tweet message to McCalls confirmed it was an error and that they had contacted the US office to amend.
This pattern has a massive amount of ease. It’s so helpful to have body measurements and corresponding size table on the packet but better still to clock the ease on the pattern pieces themselves. Not all pattern companies do this so kudos to Vogue. With that info at hand, I realised I could afford to drop a whole dress size. I’d suspected I might have to do this because the pattern image itself looks a little bit roomy. I like things more snug, like a hug!
V9241_cocktail_dress_6
The collar is sewn front to facing, then the wire is sewn to the seam allowance of the outer curved edge before turning out. The wire is sewn in using a wide-ish zigzag stitch making sure to keep the needle either side of the wire. Requires a fair bit of concentration. Frightened the bloody life out of me when I took my eye off the ball and the needle clonked on the wire!
V9241_wired_collar
This is the second time in a month that I’ve had the need for animation wire, the first being for the wings of Amelia Fangs outfit. I ordered some more off Amazon. Affiliate link here:

I ordered all three weights as I really wasn’t sure what constituted ‘medium weight’. Initially I tried the lightest one but it was a bit flimsy so I opted for the 2mm diameter.
I’ve been having a lot of fun positioning the collar in all sorts of ways. But there would be more fun I’m sure if my fabric was sturdier or interfaced to give it a bit more structure. I could go totally could go totally Maleficent! This pinstripe stuff is very soft with quite a bit of drape which still works well, mind.
V9241_cocktail_dress collar
The skirt is all about the godets. How do you even say that? Godettes or godays? A little care is needed to insert the points accurately into the open seams of the bodice but if you’ve ever made quilt blocks with inset seams you will be walking it!
I noted the length was kinda granny for me. So I lobbed 4 inches off before I cut it out. And it reaches just shy of knee length now. But by nature of how the godets are tied up inside, I can just as easily lower the hem a couple of inches or so if I must be more demure!
I pretty much followed the instructions to the T but I could have done with taking some of the excess out of the back bodice length – that’s always an issue for me. But skirt seciton moves around and drapes so unusually, I don’t think it’s a biggie! And I hand stitched the bias facings of the armholes, rather than topstitch as instructed. Call me old fashioned!
V9241_cocktail_dress_3
So I am the last entry on the Vogue Patterns Bloggers Calendar 2017. I initially thought that was the best position to be in but the mash-up of anxiety and inspiration was building with each gorgeous post that popped up, every month.  In case you didn’t catch them all, click here to the amazing contributions from all the fabulous sewing bloggers. I just love how everyone has put an individual spin on their own cocktail dresses.
I do hope that some or one of these at least will inspire you to buy a pattern from the Cocktail Hour selection and rustle one up for yourself. Or maybe even buy one for a gift for a sewing friend. All helps towards the amazing work done by the Eve Appeal.
Thanks to The Foldline for including me in the line up, to Dan for the fabulous photos and also to Aska and Tom at the Thatched House in Hammersmith for allowing us to shoot them in their lovely pub.
 

The audition dress!

V8280 audition dress

I made this dress last weekend to wear to an audition on Friday. I’m afraid I can not speak of the adventures it had or the reaction it got as I am sworn to a confidentiality agreement so I can only tell of the making of the dress itself!

V8280 Roland Mouret dress

I’m sure, for most of you lovely sewing people out there, you have already guessed it to be the Roland Mouret knock off by Vogue – pattern no V8280 – the Galaxy Dress. But perhaps it wasn’t instantly recognisable without its signature sleeves.

V8280 galaxy dress

On reading lots of reviews about how the sleeves would be best placed on a pitch against the New York Giants, I did run up a quick toile to test out their outrageousness. I wasn’t too scared by them but I wanted this dress to be right and not feel too self-conscious in it! So I went for Vew A. It looks a bit boring on the envelope but I do believe this is probably the classiest dress I’ve made to date.

v8280 sewing pattern

Might have something to do with fabric choice though. I’ve come to realise that the longer I keep up this sewing lark, the more choosy I’m getting about quality of materials. For sure I still love a charity shop find but in truth, nothing beats shopping specifically for the most appropriate fabric. I needed to impress with this dress so it had to be good stuff. I chose wool crepe and silk lining. Oh what luxury! I have really started something now! Just look at the texture in that wool…

wool crepe texture

I love the way that it pressed so beautifully yet didn’t crease too much when it was worn.The wool crepe was £15.99 and the silk lining £6.99 a metre from one of my favourite fabric shops in the Goldhawk Road. Probably my most expensive make, around £42 in total but the blow was softened after I checked the prices of similar wool and silk in Berwick Street, London…. more like £30 – £80 a metre!!!!

If I’d have had the time, I would have made a full toile to check the sizing properly. I overestimated the sizing of the bodice and ended up taking it in by 3 inches under the arms. I will definitely take it down a size next time. And oh yes, there will be a next time!

This is also my first experience working with a modern Vogue pattern. I have heeded the warning of others about their ‘vague’ instructions, but I found this one to be very simple to put together. Bearing in mind I didn’t go for the sleeves!

Once you get the hang of the ‘flanges’… lol – or once you get used to calling them ‘flanges’ – it will all make perfect sense. And they do help to create a very flattering neckline. I chose the sweetheart neckline just because I think its more feminine and reminiscent of  glamourous ’40s ladies.

sweetheart neckline

Working with this fabric was a dream and made inserting a zip and lining up darts and seams, a breeze.

v8280 back view

invisible zipper

There were no instructions to fully line the dress, only to line the bodice. But from past experience I know I will never get away with an unlined skirt. My biggest fashion blunder was to take my coat off in the entrance to a party only to find out my unlined dress had ridden all the way up to my armpits. The worst (or most life-saving moment) of that was that another guest had to tell me. Otherwise I’d have strutted my stuff onto the dance floor like a complete fool, outdoing any Bridget Jones moment! And so I cut the lining, the same as the skirt but with an additional half inch added to the side of each piece. I sewed the back seam from the zipper opening to the top of the vent and the side seams but didn’t make the darts. I pinned the waist of the lining to seam allowance of the skirt section, first pinning at the side seams, then to the back openings, with one pin at the centre front. I then folded pleats at the dart positions and pinned those in place before sewing to the seam allowance all round.

I’m not entirely sure this was the best way forward. There may be more professional ways of doing this but it worked, for me, anyhows!

I bound the hem with bias tape and machine hemmed the lining. Tricky old stuff, silk lining. Seems to carry far more static than poly lining, when ironed. But boy does it feel good! Raising one’s own standards is very amusing!!

bound hem

And all that is left to say is thank you once again to Mr Ooobop! for being amazing in every way. Not only does he dutifully take lovely photos for me, he is the most amazing support for my often waining morale and makes me so happy… gush gush!

He will insist on a leg shot though!

side detail on tights