Home-made maternity belt, circa 1940!

I was just searching for a date on this pattern so I could update my vintage pattern collection page with this little beauty…

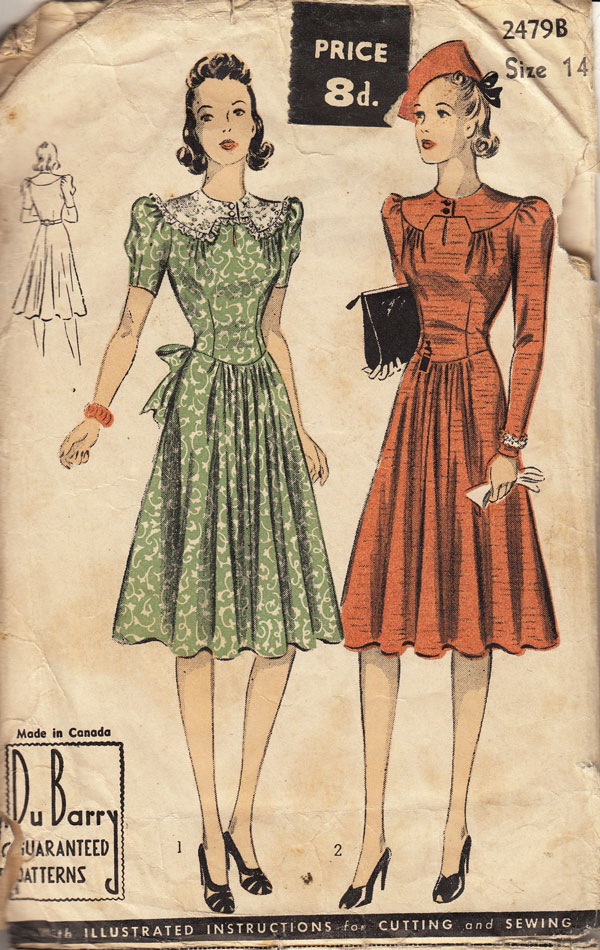
Du Barry 2479B…when out popped this little cutting which tickled me, I must say:

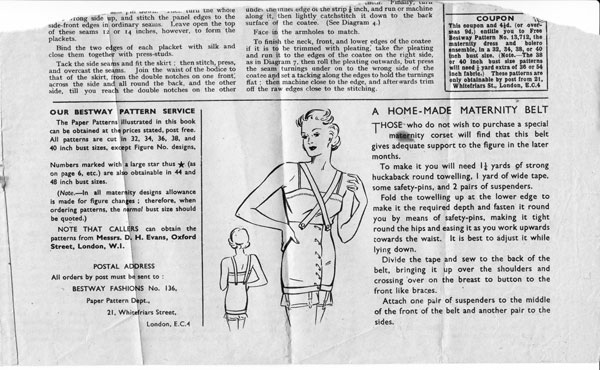
home made maternity belt circa 1940
home made maternity belt circa 1940 (click on image to enlarge)

If you do try this at home, remember “It is best to adjust it while lying down.”

In the latter months?!! I can just imagine trying to get up off the bed, like some ungainly upside-down tortoise.

And there’s me thinking the 1940s was all about glamour, inside and out! Doh! It’s a wonder all 1940s babies weren’t born squished like Flat Stanley!

Incidentally, I didn’t find an actual date. I’m assuming (once again) that this pattern dates 1940ish but any more accurate hunches are appreciated.

Vintage patterns on Ebay… but not for the faint-hearted.

Mostly I am not very good at bidding on Ebay. Which is a good thing because I could very easily spend a fortune on vintage patterns and fabric. Don’t get me wrong. I do win bids, but at a price. The original quest for a vintage pattern at a bargain becomes a fight with an undisclosed bidder whom I  won’t let get the better of me. And thus the whole bargain thing goes right out the window.

Well it depends how you look at it I guess. I am currently ‘watching’ Vintage 1940s, 1950s job lot of sewing patterns & ephemera 30+ patterns.

My original bid was for £30. That’s what I was willing to pay and if I lost then that should have been the end of it. But no. Somebody had the cheek to outbid me. So I upped it to £42.02. That should trick ’em, I thought! Then, when they up their bid to £40 they will think I’ve bid a lot higher, and give up, and let me have all those lovely patterns. But no. They’ve gone to £52.69 and there is 13 minutes remaining. I am actually biting my nails. What do I do? Hang on in there? Bid at the last minute? But at what price? That’s £22.69 more than I wanted to spend. But they’ve got to be worth at least £5 each, surely. That makes £150. I’m so not paying that. Going to go for £70 top whack.12 minutes, 30 seconds to go. My heart thinks I’ve just run around the block at least 5 times. £75.27 in the maximum bid box. That should do the trick…..just in case they’ve got plans on £70. 10 minutes 36, shall I ‘place bid’ now? No. Hold tight. They might be thinking the same. Its been a while since I’ve bid. They will think I’ve lost interest. 7 minutes 8 seconds. Do I really want these. Haven’t I got enough already? Maybe. But I wont be beat. Especially by someone who refuses to reveal their identity! 6 m 9s. Not yet. Hold back. Don’t give them time to respond…

I left it ’til 20 seconds to go. And I confirmed my max bid at £75.27… knowing I shouldn’t really. £53.69 accepted. Phew! glad it wasn’t the full max bid…and I pipped that bidder to the post… oh yeah… oh yeah!

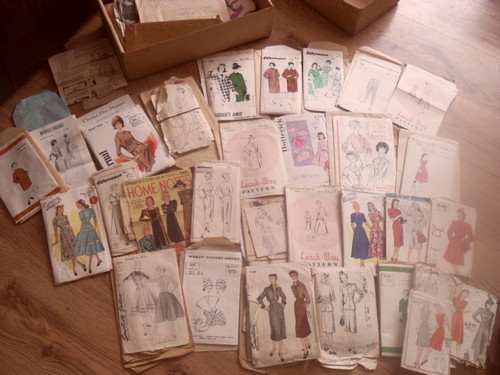
Here is a section of my prize haul which I won, just now, fair and square (… oh yeah!):

1940s and 1950s patterns won on EbayWhen they arrive for real I will give them the proper photoshoot they deserve. Not sure I can cope with that amount of stress again in a hurry. And really, I do now have enough patterns… I do now have enough patterns… I do now have enough patterns… don’t I?


1940s shirt dress revisited

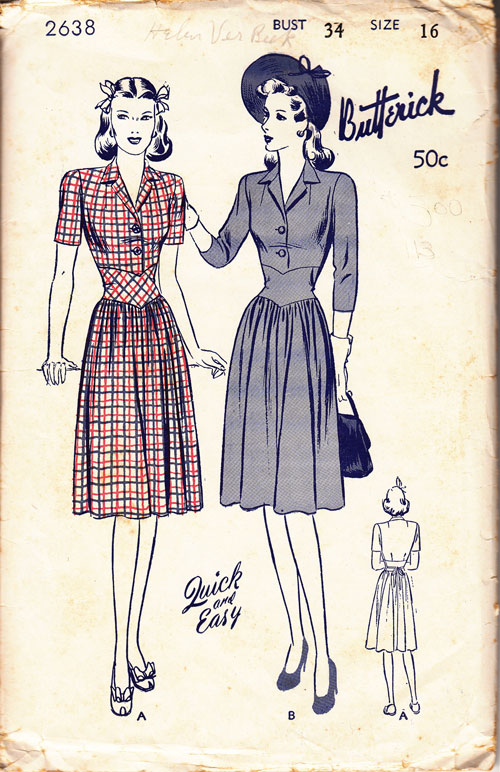
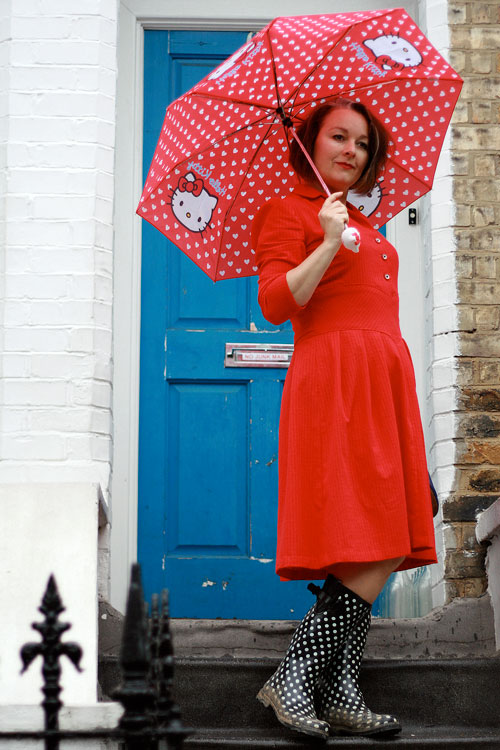
1940s red shirt dress

I always wondered why, with all the patterns in the world, would I ever make one twice? In the case of my peasant tops, here and here, I can only say it was because they were dead easy and required little brainpower, perfect for a late night sew. But in the case of this dress, the rationale was purely because I’ve never had a dress I feel so at home in! I had in my head, that I was a simple shift dress girl but actually I think I’m more of a shirt-dress girl!
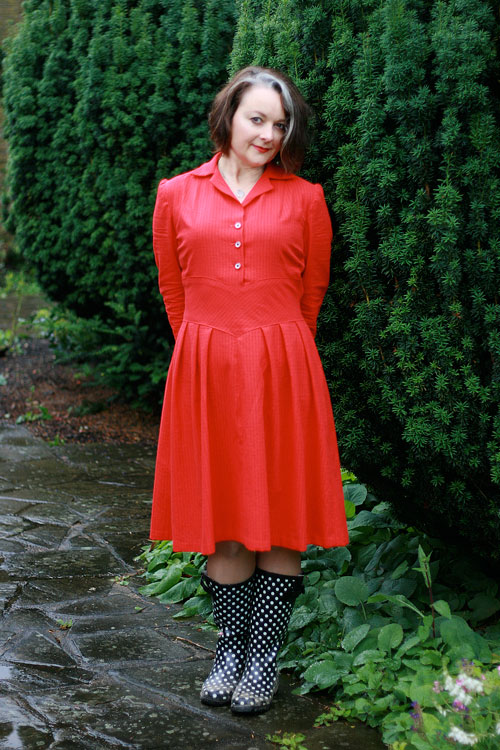
1940s red shirt dress

Without the association of the pattern, I wonder if anyone would guess it dated back to the 1940s? Do you think it’s obvious? Or have I been looking at vintage patterns for so long now, I think they are the norm?! Perhaps if I were to style it with appropriate accessories: hat, bag and gloves, it might give the game away, but – dressed traditionally sporting wellies and a brolly – I think it also crosses over as a modern shirt dress too.

I’d like to tell you what this fabric is but I have no idea! It’s red and it’s 100% cotton for sure. Kind of like a cheesecloth seersucker but not, and vaguely reminiscent of my candlewick beadspread I had as a child… without the little soft threads that pulled out oh-so satisfyingly easily! I thought it might be ribbed cotton. I’ve heard that mentioned before but I really haven’t a clue. It was kindly donated to me by a friend who desperately needed to get rid of a big bag of fabric… I could never be like that! And I knew what ‘the red’ was destined for immediately.
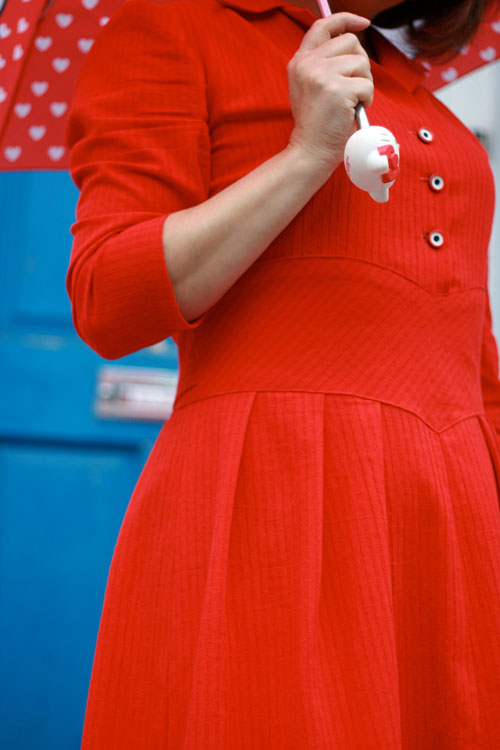
1940s shirt dress detail

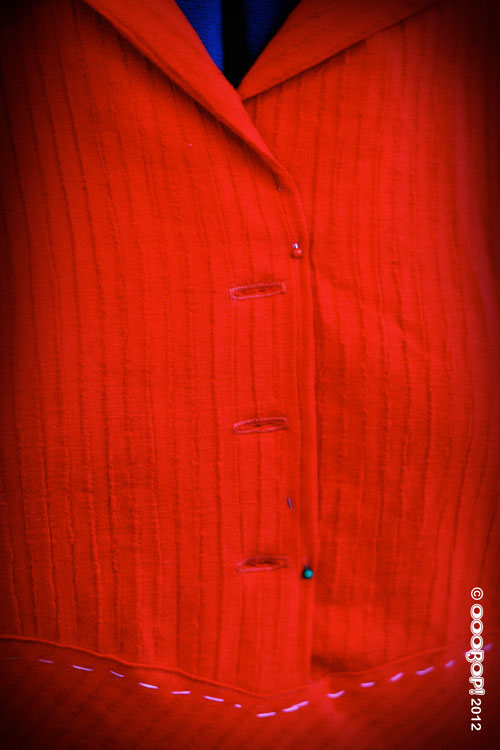
It came together sweetly as before with the addition of a few minor changes. I added a third button just because I love the little ‘targets’ and two didn’t showcase them enough. They cost £2.45 for six, bought at the London Vintage Fashion, Textiles and Accessories Fair, September 2011 and I think they are vey happy on this dress!
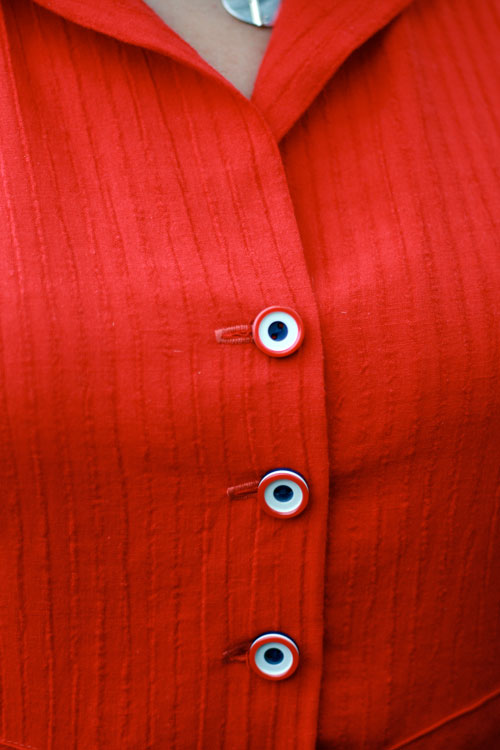
target button detail

I made it an extra inch longer, but really could have gone for 2 inches… oooh, I am getting brave in my old age!
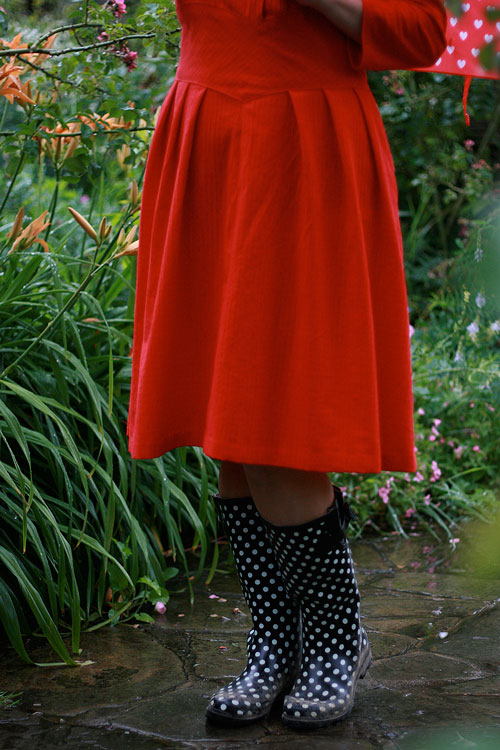
length of skirt

I also added an extra inch around the midriff, knowing the struggle I have to get the dress on, over my head and judging by the photos of the last dress, it does look a bit snug. But it was highly unnecessary on this version. The mystery fabric, unlike the shoe fabric, has a lot more give and resulted in little poofy bits at the sides. I put it on the mannequin and looked at it for a few days, wondering if I could get away with it. I probably could have done, but it would have annoyed the hell out of me!
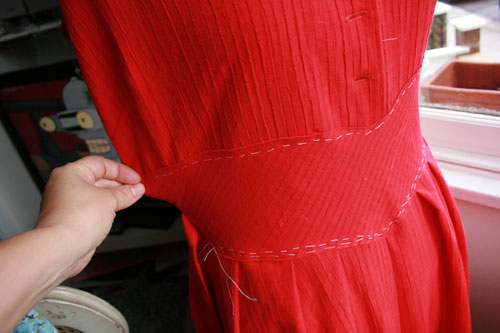
dress before alteration

And so… I sensibly turned the dress inside out and chalked and basted where I wanted the new line of stitching to be. Namely half an inch in from the original seam, starting from just above the waist, in a straight line up to the armscye. I tried it on again and was much happier with the silhouette.

Dutifully, I removed the basting and unpicked the topstitching where the midriff meets the bodice. I sewed the new side seams on the bodice over the chalkines. Sewed the new side seam on the right side of the midriff section and trimmed the left side opening to match (where the zipper goes).

I must be getting better at this. I would never have had the patience to do that a few years ago! But it was of course, worth it and now I am a happier bunny!

Here is a picture of the zip in the side seam. Once I’d sewn one size of the zipper in place, I made sure to make chalk marks where the midriff needed to line up. I pinned the second side of the zip to those marks first and then pinned the rest. Worked like a treat!
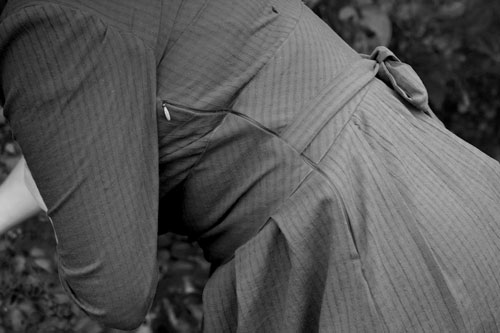
zipper detail

I opted for longer sleeves this time. Not full length, just three quarters. Mr Ooobop! thinks they will annoy me being so fitted and I have a little tendency to agree but I wanted to see how it affected the overall look.

I’m intrigied by the construction of the sleeve with darts to shape the lower arm. I guess this is a vintage thing because, to date, I have not come across these in a modern pattern.
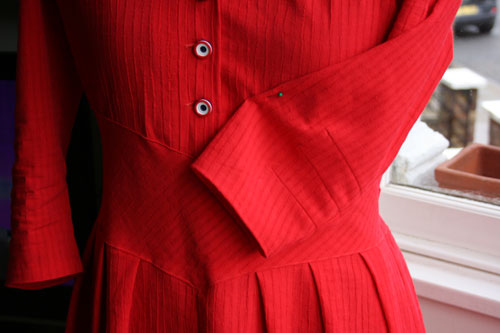
vintage sleeve darts

Allowing for adjustments, this dress did seem to take longer than the first. About 5 evenings after work, spread over a couple of weeks. I have been really keen to see it finished but not so keen that I wanted to rush it and ruin it! And in any case I had to wait for Mr Ooobop! to be around to do his usual photo magic . . . and for the sun to come out! Well, we gave up waiting for the sunshine!
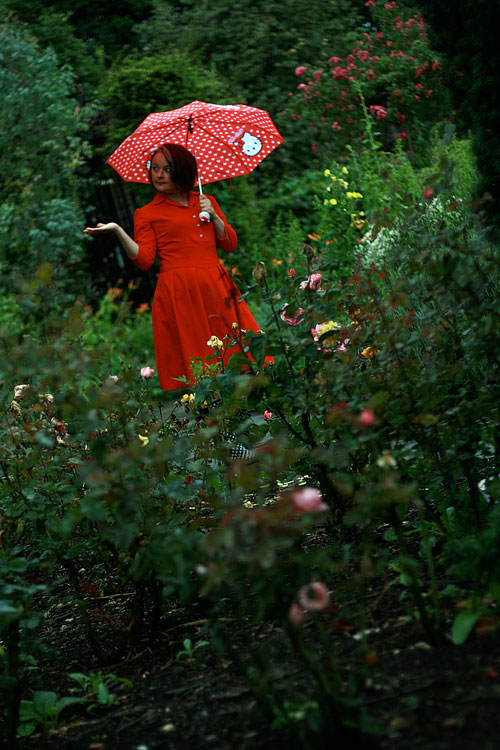
1940s red dress in the rain

I’m sure that this little revisitation wont be the last but I do have an incredibly long list of other ‘wannamakes’ to tend to first, so its back into the envelope and into the box ’til next time!

Do you like to revisit a favourite pattern or do you prefer to try something new every time?
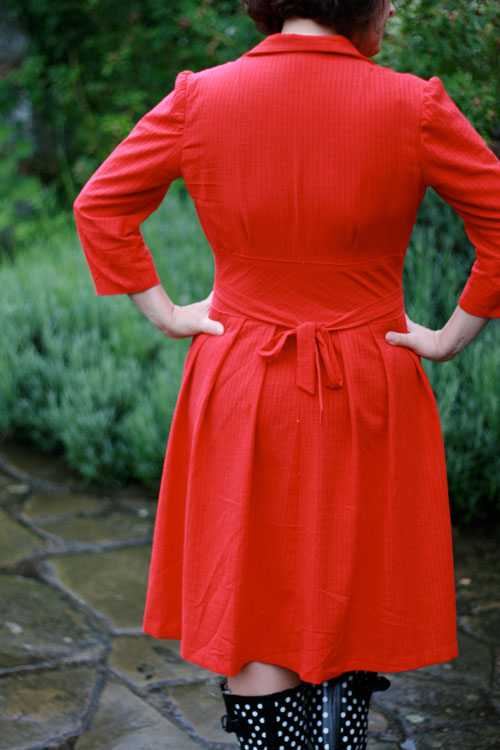
back of dress

butterick 2638

Horizontal or vertical buttonholes?

horizontal buttonholes

I’m in the process of making a second version of the 1940s shirt dress I made in May, and I’ve been prompted into wondering (ie arguing with Mr Ooobop!) whether it is usual to make horizontal or vertical buttonholes on a garment. I couldn’t bear the quandary any longer!

So I did a little research and came up with the following…

  • Horizontal ones allow for a little more expansion. The button can slide along the opening without distorting the buttonhole as much as a vertical one.
  • It’s easier to sew buttons in position, following a column of vertical buttonholes as there is a little  more room for manoeuvre, but you have to sew them on more accurately to meet the positions of the end points of horizontal buttonholes.
  • Horizontal buttonholes generally can’t be placed on a shirt placket band as there is not enough room for them to sit comfortably and so vertical ones are used.
  • Exceptions include the collar and cuffs where there is more stress, then you will find a horizontal one. And in the case of more expensive shirts, the bottommost button too!
  • Horizontal buttonholes take a bit longer to create as the foot needs to be repositioned and position measured each time, whereas its easier to shift the position down each time for vertical ones. I’m thinking this is a reason for mass produced garments having vertical ones.
  • Horizontal buttonholes stay buttoned more securely. Any stress across the garment opening, pulls the button into the the end of the buttonhole, where the button stops.
  • It is a little less-fiddly to button up with vertical buttonholes.
  • Most vintage patterns are marked for the buttonholes to be created horizontally.

So there you have it… fascinating, hey?! It doesn’t prove much except that you can seemingly create them however you like… so long as it works for you and your choice of garment!

I’m going with horizontal ones and now feel much happier about doing so. Apart from the fact that it makes me feel a bit rebellious, (and that I won the argument) I like that it’s a little bit of authenticity for this little 40s number.

Which way round do you sew your buttonholes? Any reason different from the above?

I’m hoping to have said dress all finished and blogged by the weekend so bring on the sunshine so Mr Ooobop! can take some sunny shots!

Maudella 1223, button wrap skirt

maudella 1223 pattern

This pattern is one of Audrey’s collection which I singled out immediately as a great skirt to dress up or down. I’m assuming it’s 1960s but certainly a classic and timeless style in my book! It has been waiting patiently in line to be made and completely jumped the project queue when I remembered the amazing buttons that Mr Ooobop! found for me in Portobello Market.

maudella 1223 skirt

I didn’t want anything more complicated than black for the skirt and so I set out for a metre of cotton sateen. It has a little bit of stretch in it which makes for a comfy fit. But it is a bit of a collector of cat fluff I’ve since discovered!

The instructions didn’t call for a lining and so I didn’t make one. But that was clearly a bad move. It sticks horribly to my tights and rides up when I’m walking so I am either going to have to go back and line it at a later date or get me a slip! My mum would think this highly amusing as I did my very best to avoid wearing one when I was younger… tantrums and all!

I shortened it by 5 inches which seems to be usual for me when it comes to a vintage patterns. That said, it is still below my knee, a conscious decision, to keep it a vintage length but I’m more used to shorter length skirts and this length takes a bit of getting used to. I will have to wear it with heels so it doesn’t look to ‘grannyish’!

maudella 1223 skirt front

I wasn’t too sure how to measure off the pattern to check for any adjustments needed but given the button wrap around detail, the position of the buttons can be moved to add or take away an inch or two. I must learn to sew buttons on with my machine. This was the only tedious part but other than that I managed to whip it up in a couple of hours. I do regret not binding the hem or the seams. I think it would look much nicer. But I did sew the hem by hand. It would have been sacrilegious to machine hem in any case!

maudella 1223 button detail

I have worn the skirt to work already and got some lovely comments. But I really must decide on lining/slip before I wear it again. Just don’t tell my mum!