
What do you gift an incredibly lovely, clever, successful and well-travelled friend who doesn’t really care for ‘stuff’?
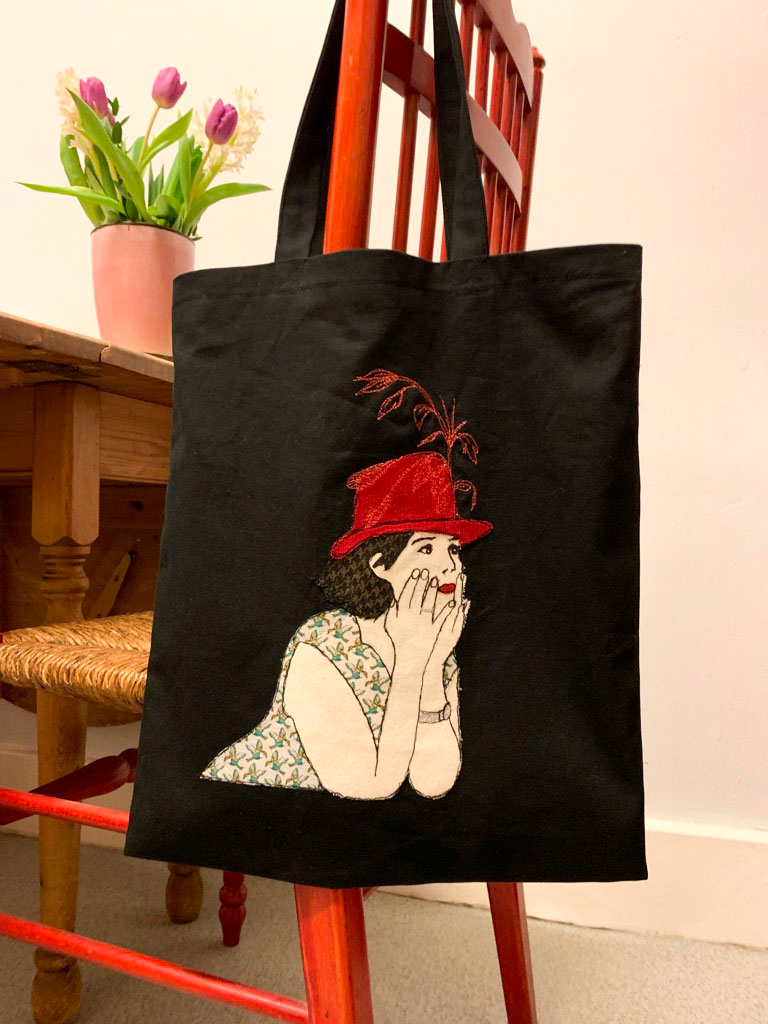
I didn’t know either but I figured something handmade and personalised would be the answer. So I set about creating a tote bag with an appliquéd portrait of the ‘birthday girl’ on the front.
To be fair I’m sure this bag still counts as ‘stuff’ but with a nod to usefulness at least!
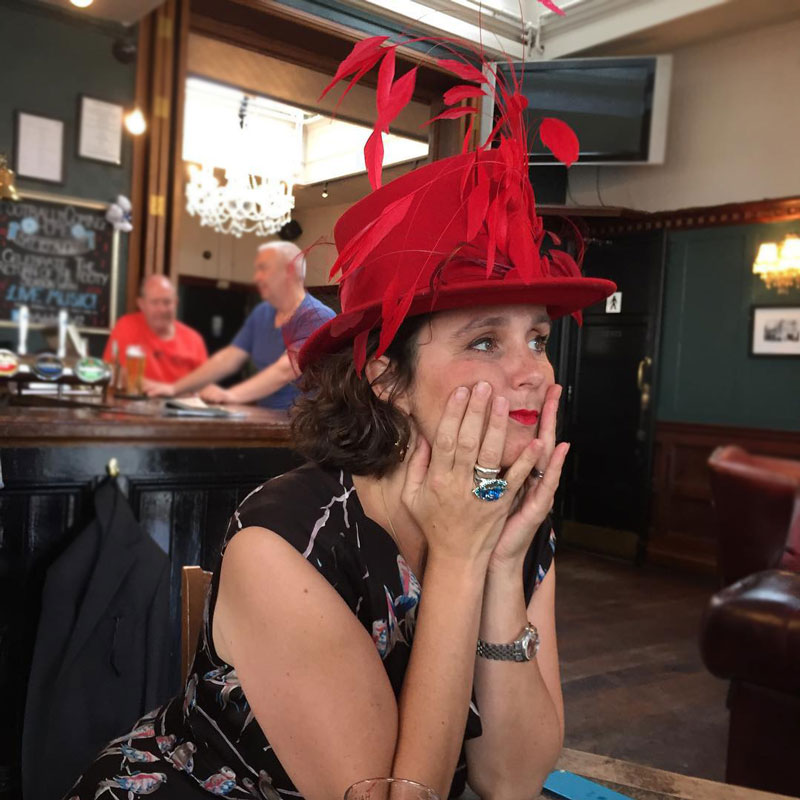
I took the photo of Katy at the pub where we met before we set off for the wedding of our mutual friends. She looked amazing in her gorgeous hat that was made by our amazing milliner friend, Jayne Hepsibah. And it seemed to me an all-round perfect pose for a stitched portrait.
This project has been on my reminder list for weeks. But (note to self) January is a ridiculously busy month in the world of children’s publishing and in my capacity as a freelancer this basically results in all work and absolutely no play. Read no sewing time at all!!
So, true to form, I started making it in the morning and had it ready for the party that evening!
It’s a pretty time-consuming but relatively simple process.
I enlarged the image to the correct size, on screen and then flipped it (so she was facing in the opposite direction) before printing out a copy on regular plain printer paper. I scribbled on the reverse with an HB pencil to create a carbon layer and then drew around the key areas of the image to leave a traced line onto the backing paper of some double-sided fusible webbing.
I cut around these pieces with extra allowance before ironing into the reverse of my selected fabric pieces. That way, when they were trimmed, each piece was as accurate as poss and the sticky bit reached to all the edges and points.
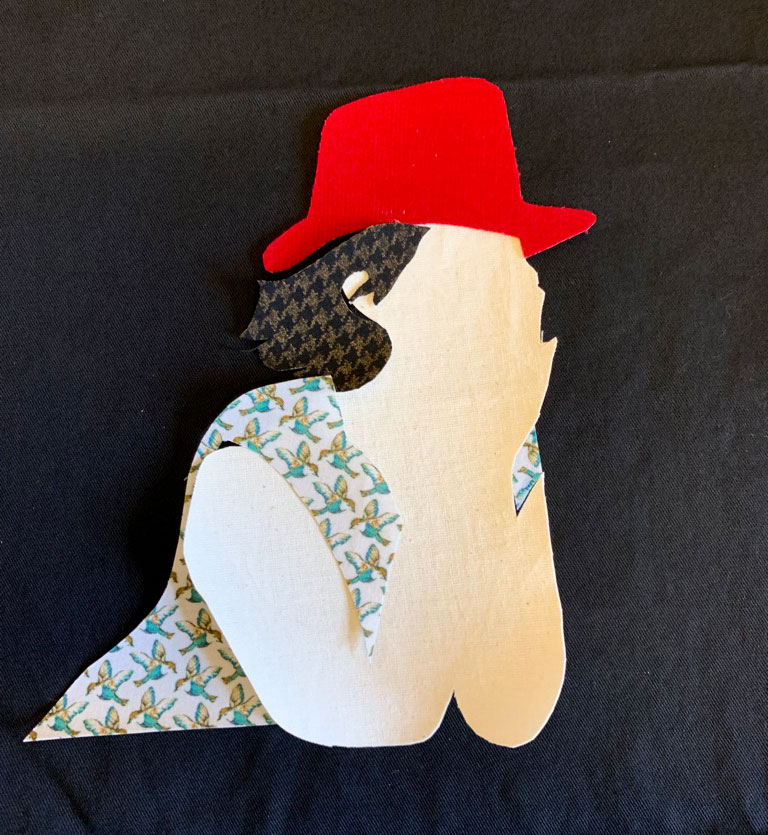
Then I ironed them in position on the bag front piece in order that there was a little overlap in places. It was so satisfying to see it come together at this point.
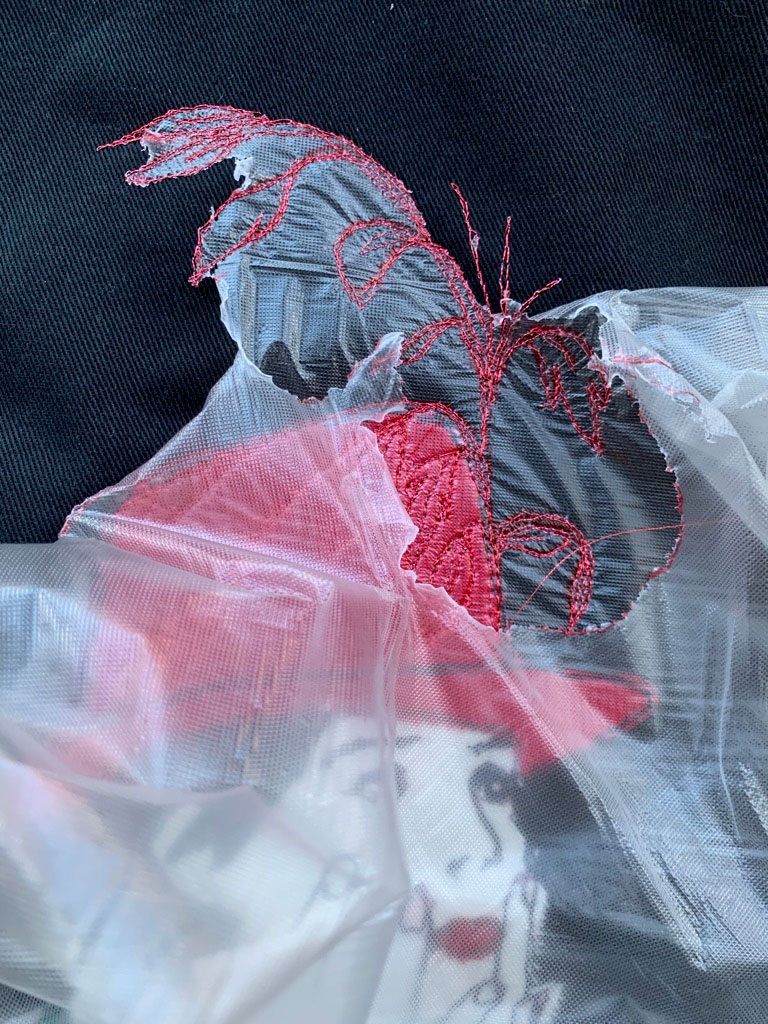
And then for the machine embroidery I used a regular black polyester thread. (Moon brand) with a white embroidery bobbin thread. I believe you can get it in black too but white seemed to work fine with no show-through. I also delighted in using some water-soluble stabiliser which is just amazing.

I used a Sharpie pen to draw the linework onto the stabiliser and then overlaid it onto the working area before sandwiching all into an embroidery hoop. Luckily my hoop just about fits under the presser foot so I could ‘draw’ all the finer detail using the freehand embroidery foot. Black thread for the most part. And then silver metalic thread for the ring and watch, metallic red for the feathers. Worked a treat. No puckering. No skipped Stitches.
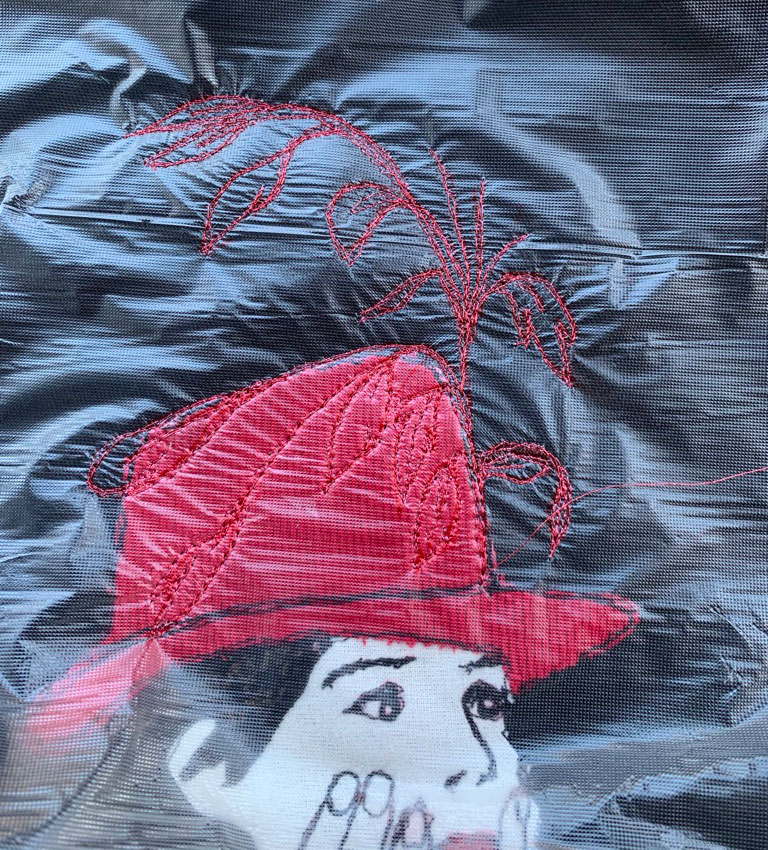
Even more satisfying was the action of peeling away the stabiliser. The little remaining fragments are washed away with cold water. Like magic!
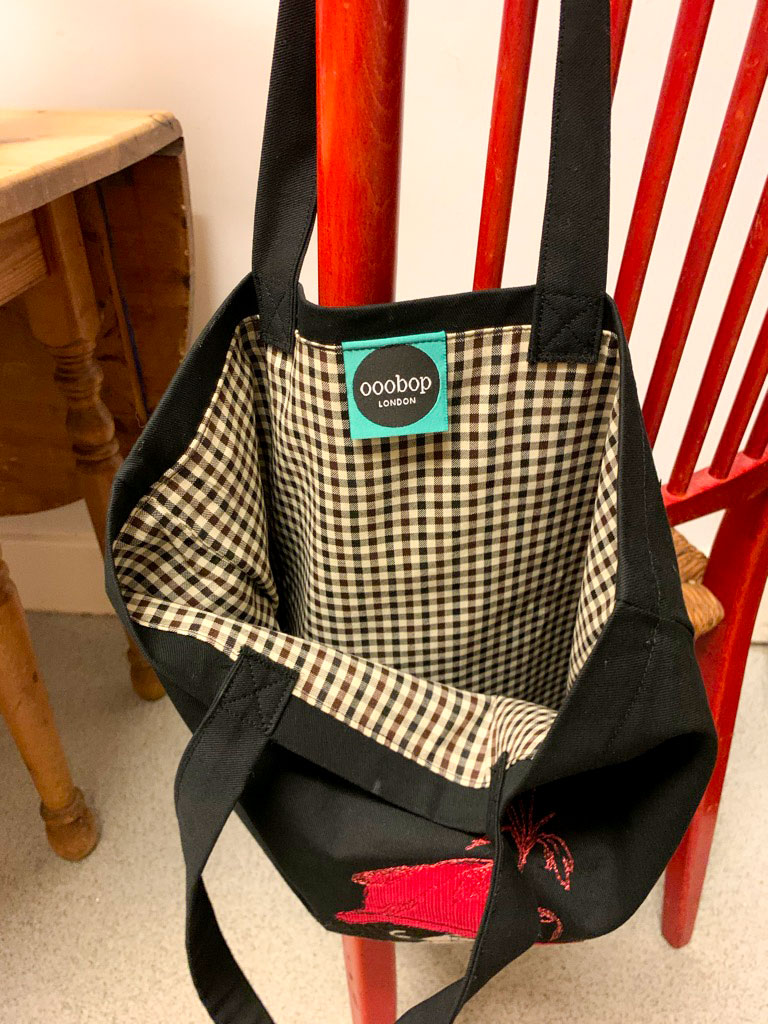
Once dried, I sewed up the bag using some black cotton twill from stash and included a gingham lining and an ooobop label of authenticity, of course!
I’m so pleased with the result. Not least of all because it documents fond memory of a lovely day we spent together, but it includes some memories in the fabric, too:
The calico is from a toile of a favourite dress; the hat is leftover from the red corduroy dress I made for my granddaughter and the silk lips are from my memade 50th birthday dress. All small scraps I couldn’t bear to part with but that now have the best use!
I loved making this so so much. Guilt-ridden in fact, for the joy it’s given me in the process of creating and giving. Add to that all the memories that bubbled to the surface along the way and you end up with a bag full of sentimentality.
Here’s to good friends, great parties and an eternal basket of spectacularly inspired sewing projects!