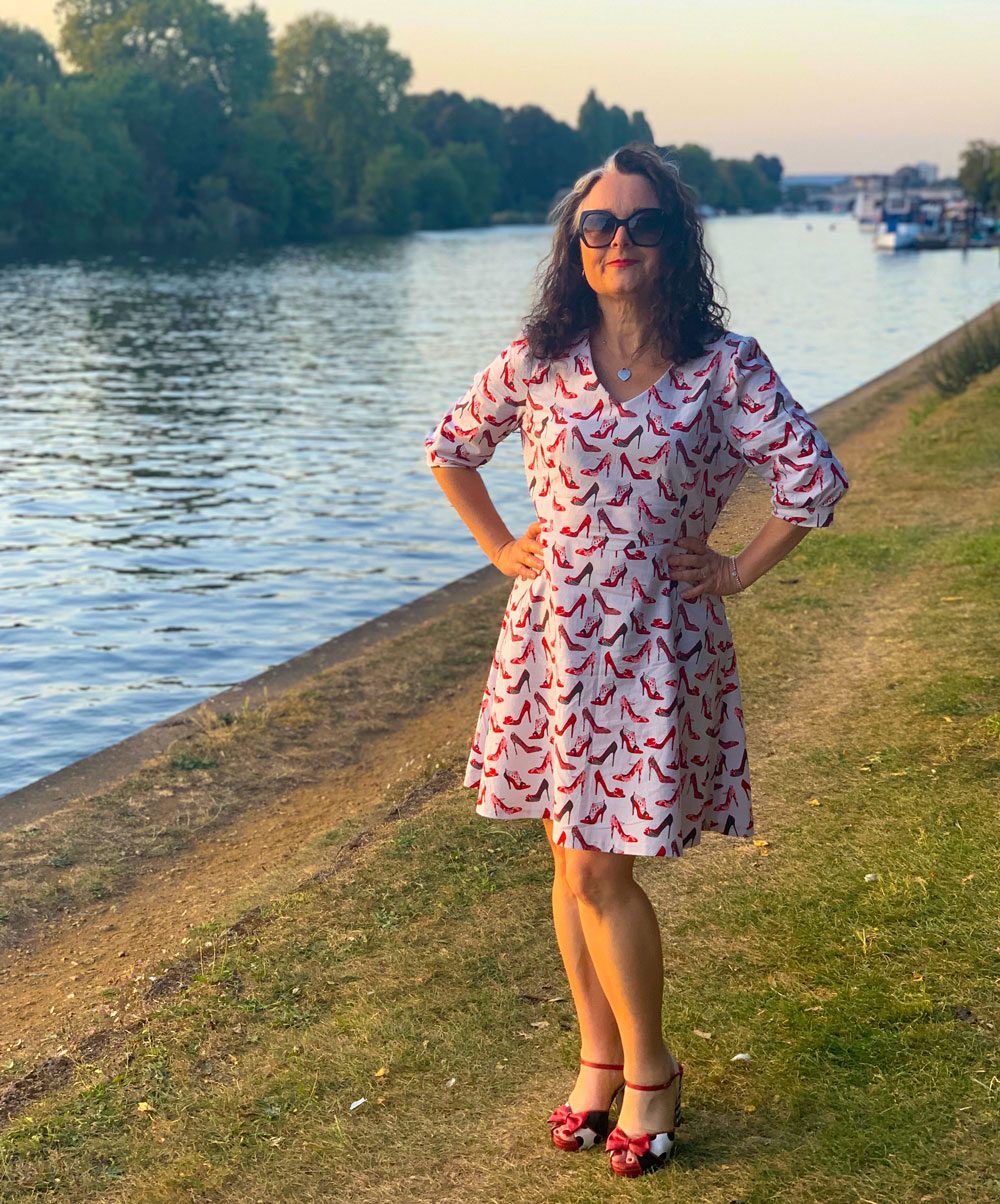
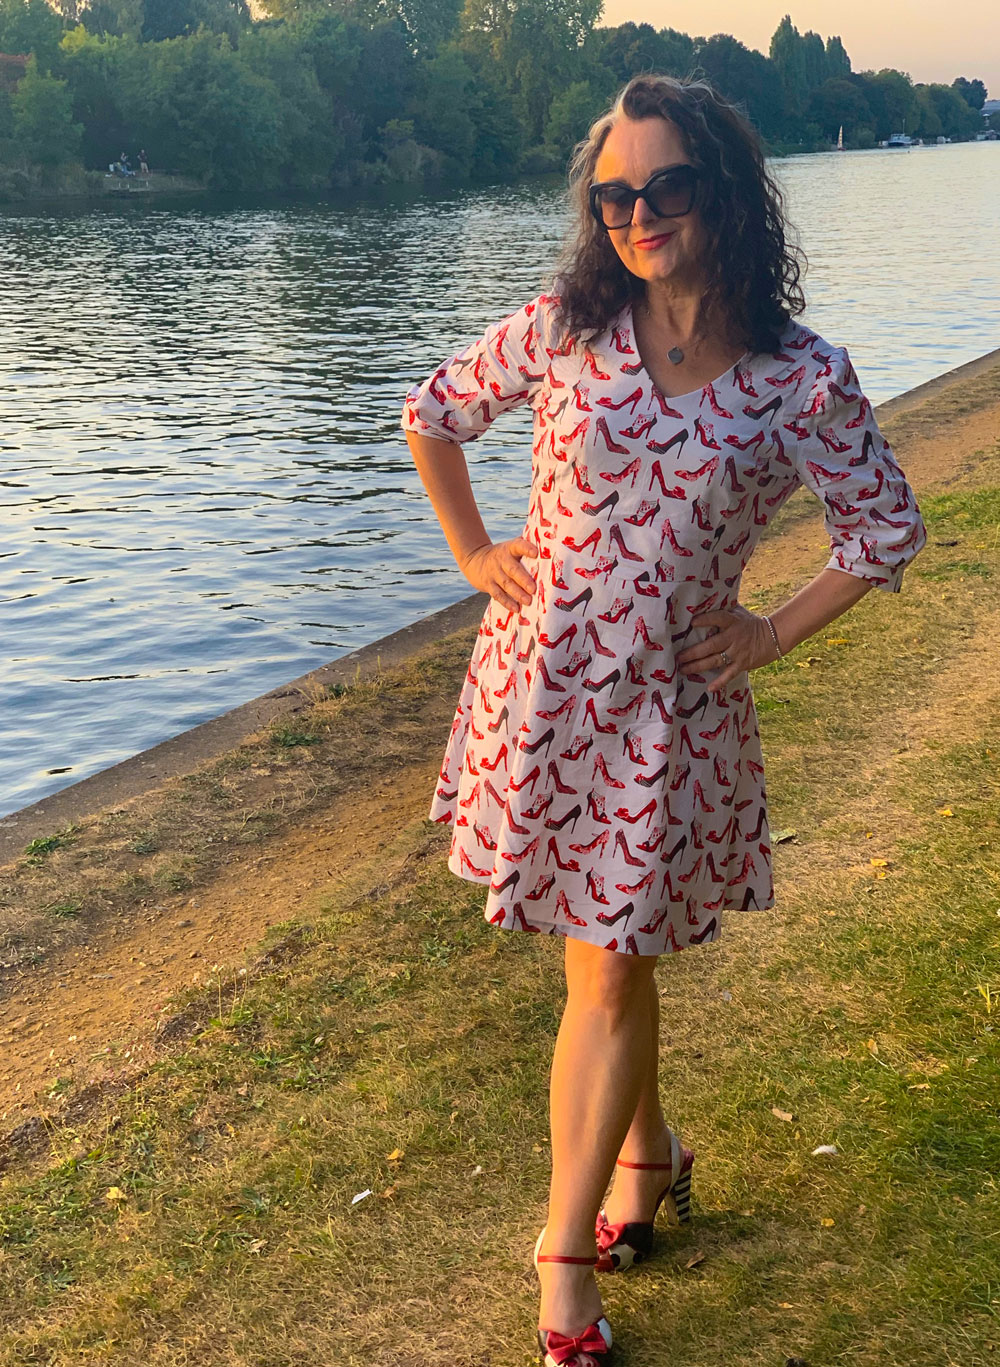
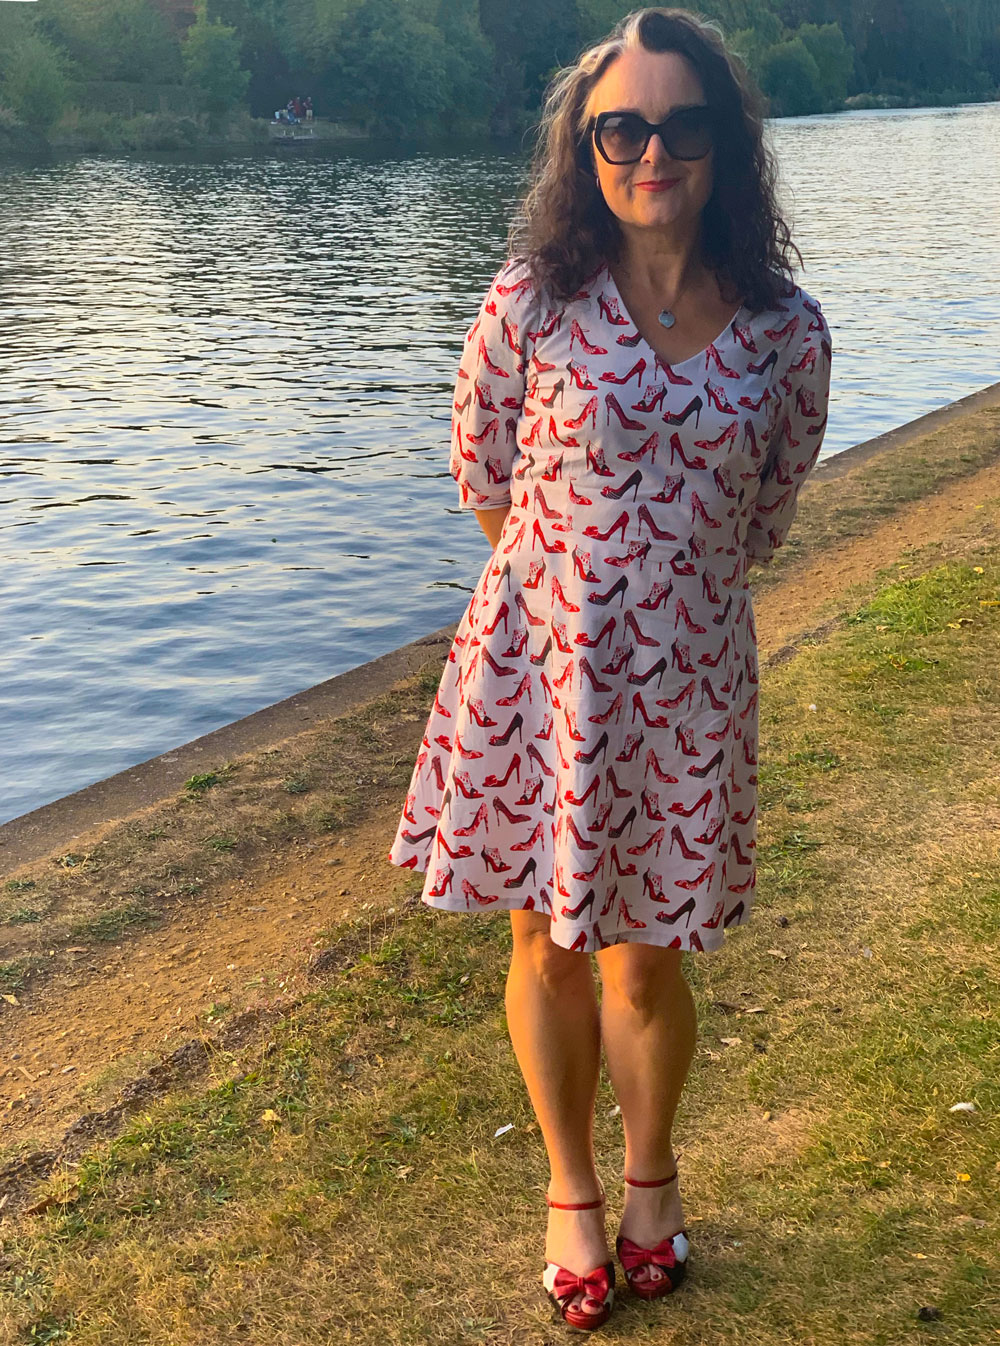
This was exactly the kind of pattern I was looking for when I was actually hunting for something else! I’d put it aside (read, under the sofa) as a not-so-taxing project for when I got a few hours down time. The back cover blurb was all-encouraging of this, too.
Like many other sewing people, I’ve been on a mission to work through my stash fabric before buying anything new, in the name of sustainability and also the hope of gaining some floor space in my bedroom!
And this dress pattern is perfect for all those 2m lengths I purchased. It requires 1.90m of 60″ fabric for all sizes 8-20 – sleeves and all – which is pretty damned economical really.
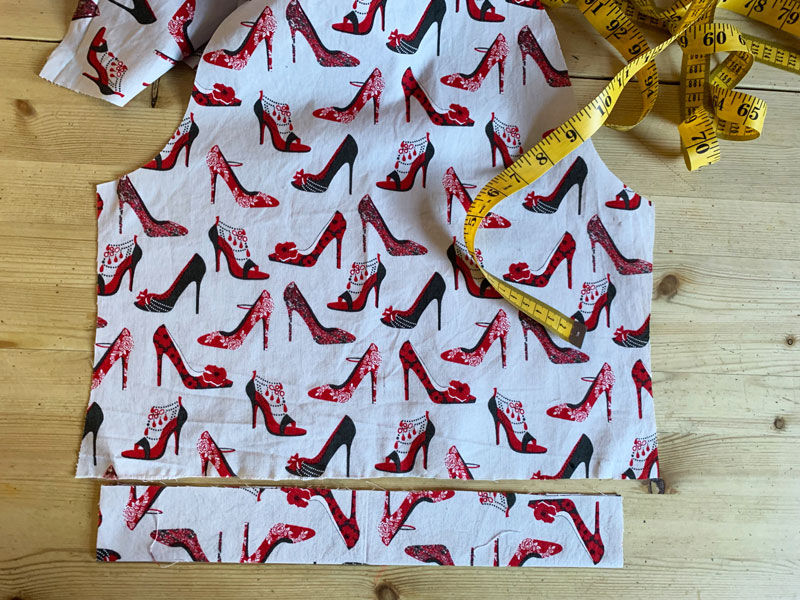
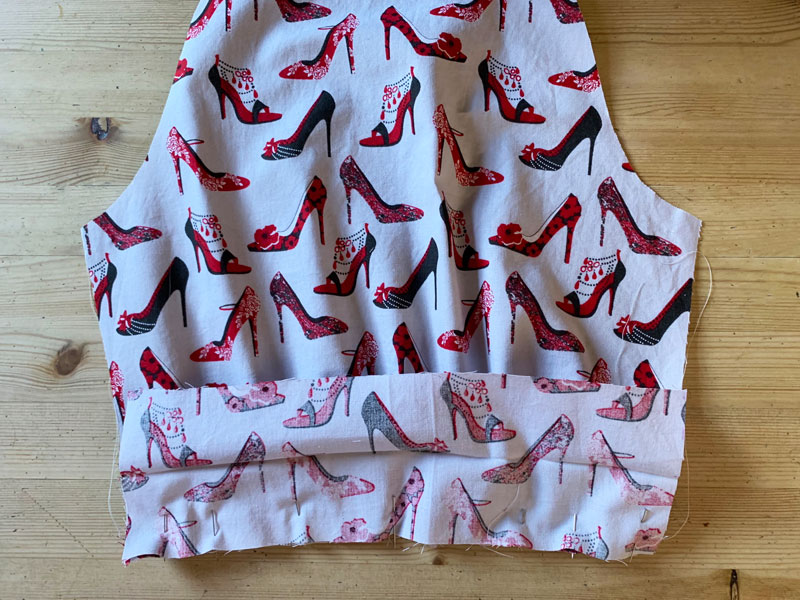
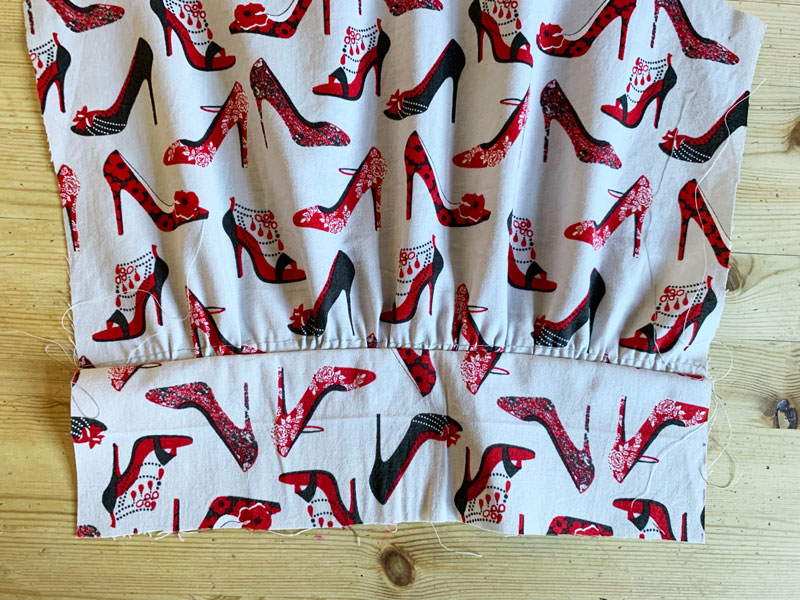
I had 2m of what I believed to be 45″ wide cotton fabric and that almost fitted the bill. I just had to shorten the skirt by 2inches to fit all the pieces on. Especially as I then found out that it was only 43″ wide. I’m guessing it shrunk in a prewash – better to have found out at this stage of the game though! But still I had to count my chickens that all the pieces fitted considering the direction of the design. Upside down shoes would have been disastrous!
All went swimmingly but I’m amazed at the lack of notches on the pattern pieces. There was one to mark the front sleeve placement and ordinarily that’s pretty crucial but in this instance the sleeve pattern folded near enough symmetrically so it wouldn’t have made a spot of difference.
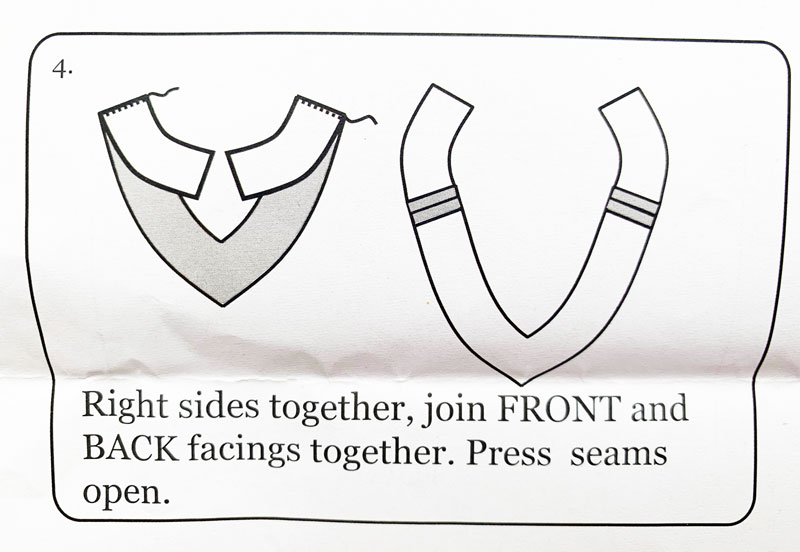
But that was it on the notch front! Piecing the front and back facings together had me thinking, which is a bit lucky as it prompted me to place over the bodice neckline to check I was sewing the pieces together the right way round. It would have been so much more helpful to have a marker on each of the shoulder seams.
TIP#1
Mark notches on the facing pieces so you remember to sew them the correct way round
And if I’m being picky (moi?!), the side seams of the skirt would have benefitted from a notch or two. They are bias-cut and hence a little stretchy so a midway marker would help prevent a potential pucker! I’ve marked mine for future use.
TIP #2
Align skirt pattern pieces at side seams and create notches for more accurate alignment
Adding to the facing part of the story – it was very useful and imperative actually, to include the snip at ‘X’ –the point of the V-neck. It did press nice and flat but I included 2 additional stages here:
TIP #3
Under-stitch the seam allowance to the facing to prevent it from rolling out at the neckline.
and then:
TIP #4
Hand stitch the facing to the shoulder seams to secure it in position stop it from popping out.
I’m being picky again. I know. But from past and bad experience, I can’t stand a flappy facing!
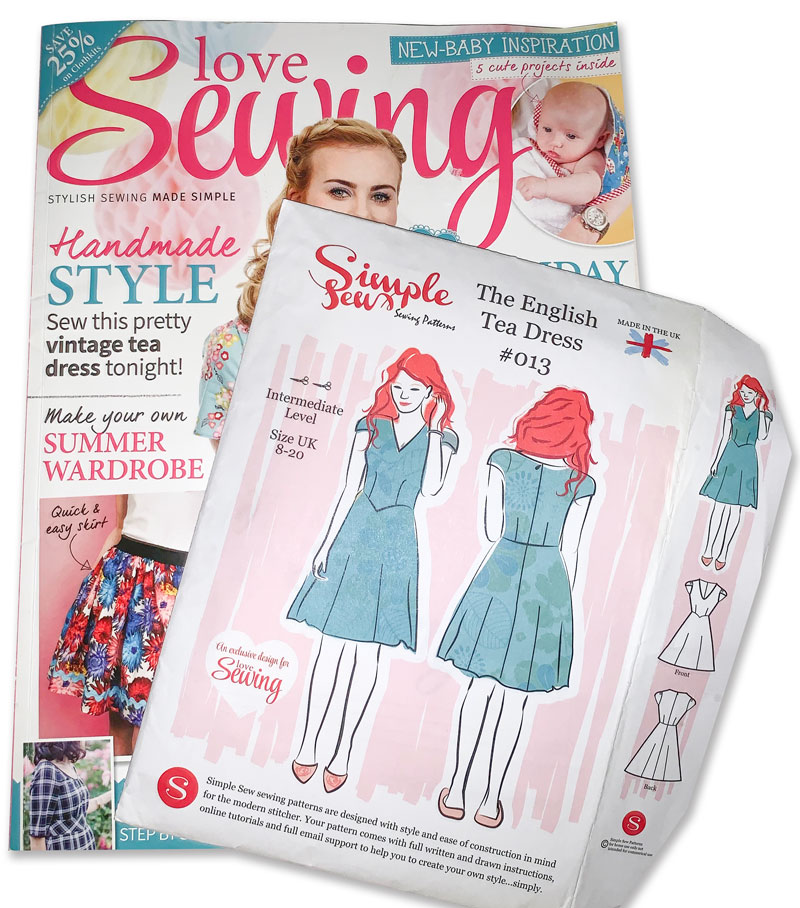
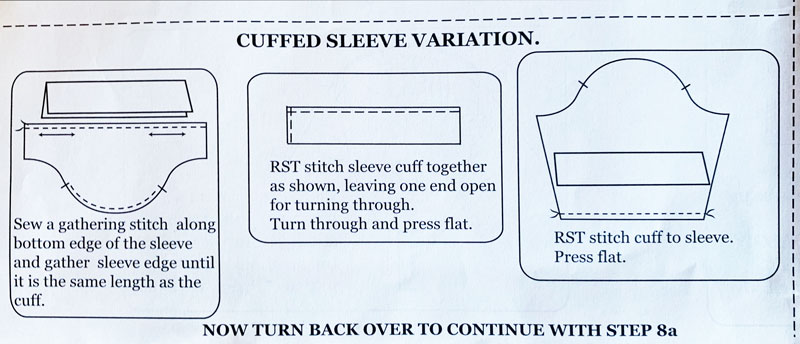
So all went well, despite lack of notches until I got to the sleeve section. And of course I wasn’t content to sew the options illustrated on the packet or in the accompanying issue of Love Sewing magazine (issue 15). Not only because I’m contrary but the 3rd non-illustrated nor photographed option was the best IMHO. The 3rd option being a half length, cuffed variety!
But, forgive me for being old and slow (and of course picky)… but how would you interpret these instructions?
Especially when the cuff was near enough the same length as the bottom of the sleeve. And yes I did double check I’d cut the correct sizes!
Bottom of sleeve not much wider than the cuff piece.
I spent way to much time thinking about this stage and then went off piste with this tip:
TIP #5
Measure your arm circumference, comfortably, just above your elbow and add 1.5cm seam allowance to each end. Trim cuff piece to this measurement. Press in half horizontally to crease the centre/ (ultimately the bottom) of the cuff. Gather the bottom of the sleeve as stated and sew right sides of the gathered edge to the right side of one raw edge of the cuff piece.
Cuff piece pinned to sleeve along raw edge. See the crease in the middle.Cuff sewn to sleeve. Spot the deliberate mistake!
Gather the sleeve head as instructed – although, having said that, it’s not really instructed from where and to where on the pattern piece, so I just mirrored the notch to the back and gathered between the two points. Sew the underarm sleeve seam all the way down to the bottom of the cuff. Press sleeve seam open. Press under 1.5cm on the remaining raw edge of the cuff and then fold the piece to the inside of the sleeve along the pre-pressed fold. Hand-stitch to the inside seam line to form a binding and finish the cuff. Remove gathering stitches and press.
Having worn this dress and seeing how the cuffs have curled, I might also use a light fusible interfacing to stabilise the cuff next time.
I hand finished the hemline of the skirt, of course. Just because a machined one would irritate me having invested so much time to go lazy at the last hurdle!
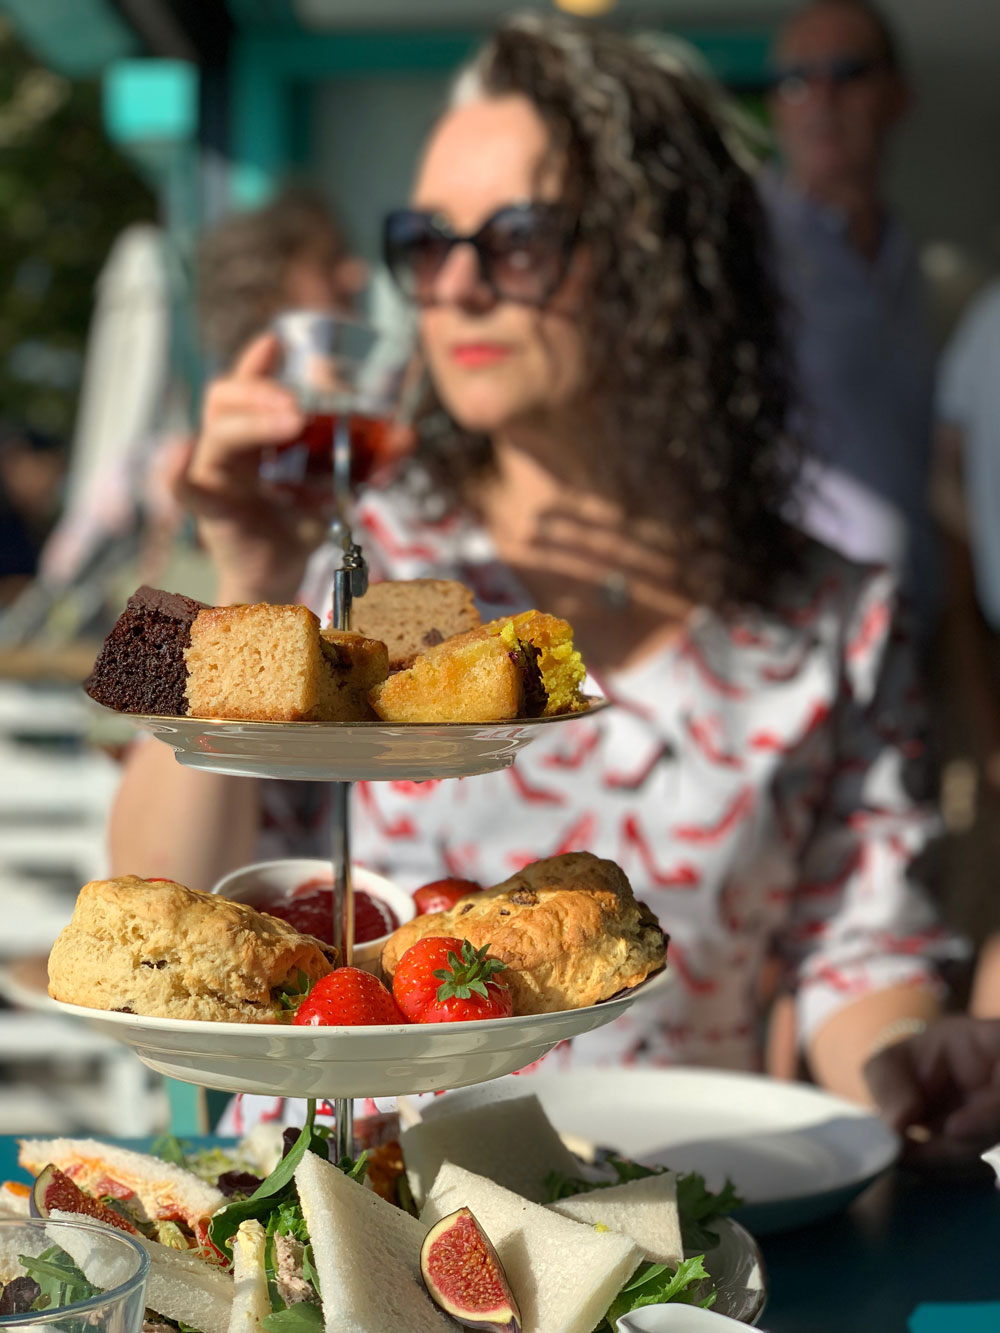
So where do you suppose I might have worn my English tea dress as soon as I made it? No prizes for guessing of course!
Vegan cream tea at The Ginger Bees cafe in Kingston-upon-Thames
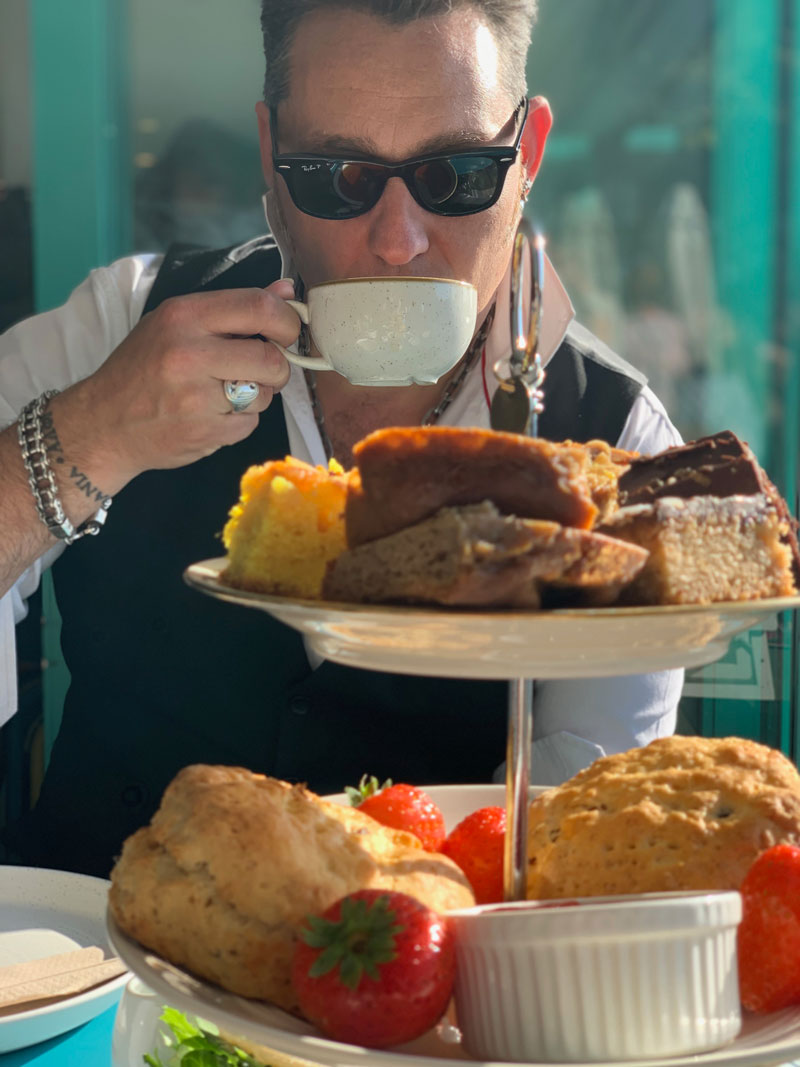
Mr O and I went to The Ginger Bees cafe, Kingston-upon-thames riverside, for the most delicious vegan cream tea. Well, mine was vegan – Mr O went full on full cream!
Mr O enjoying his full on full cream, cream tea!
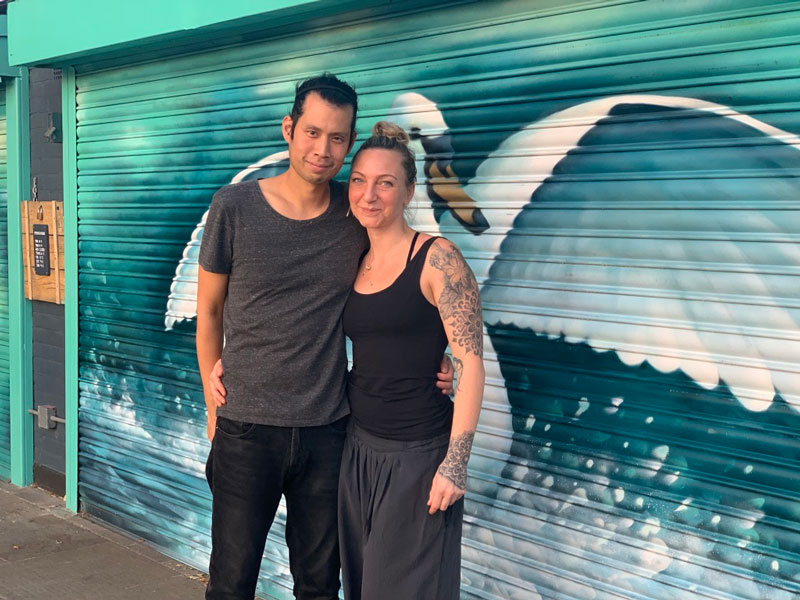
I booked the day before on recommendation and we were not disappointed. The lovely couple who bought the café just a year ago have something very special going on here. Thank you so much Gavin and Beth for looking after us. It was such a treat and the perfect occasion to showcase my new tea dress!
Beth and Gavin, owners of The Ginger Bees Cafe in Kingston-upon-Thames
What a gorgeous day it was in London today. I couldn’t believe that I actually didn’t need a coat for the first time this year. I can even feel a little after-sun tingle on my skin.
And what perfect timing I might add, to showcase my first summer dress of 2013!
My Mister and I, along with our trusty assistant, LMO, decided to take a walk over Hammersmith Bridge to take the photos. And to stop for some lovely lunch at The Bridge in Barnes. (highly recommended, I might add!)
Hammersmith Bridge is my favourite bridge of all. A Shame we didn’t get any of it in its entirety but if you Google it, there are a gazillion great pictures of it out there.
What I didn’t know about it was that there are some ‘viewing benches’ on the bridge itself. Scarily placed right up to the roadside but with such a lovely view of the river. And obvs a great place to take a picture!
Amazing how much prettier the Thames looks when there’s a bit of sunshine!
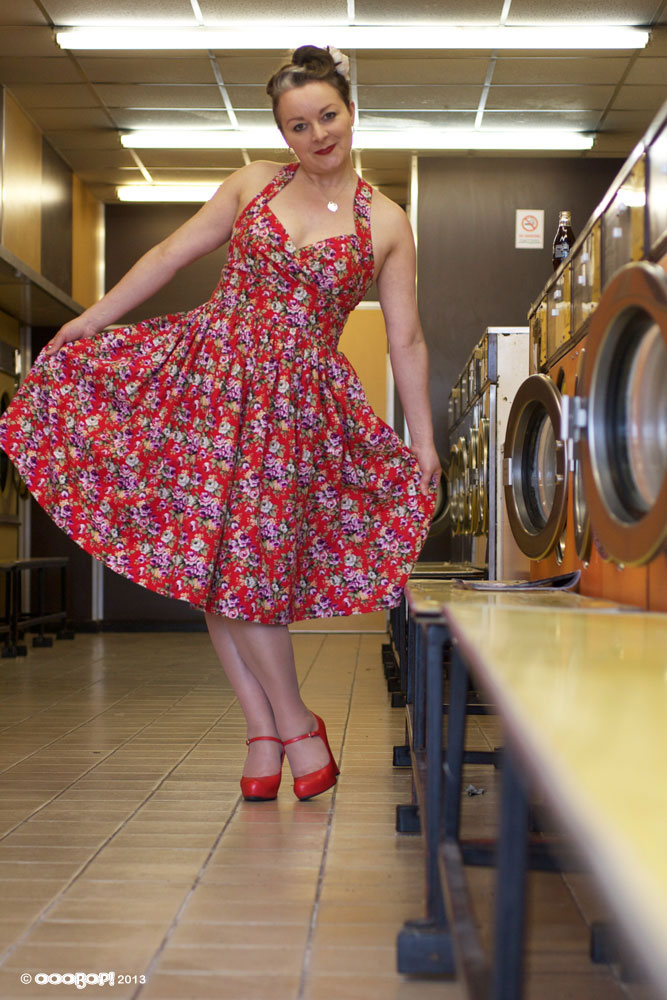
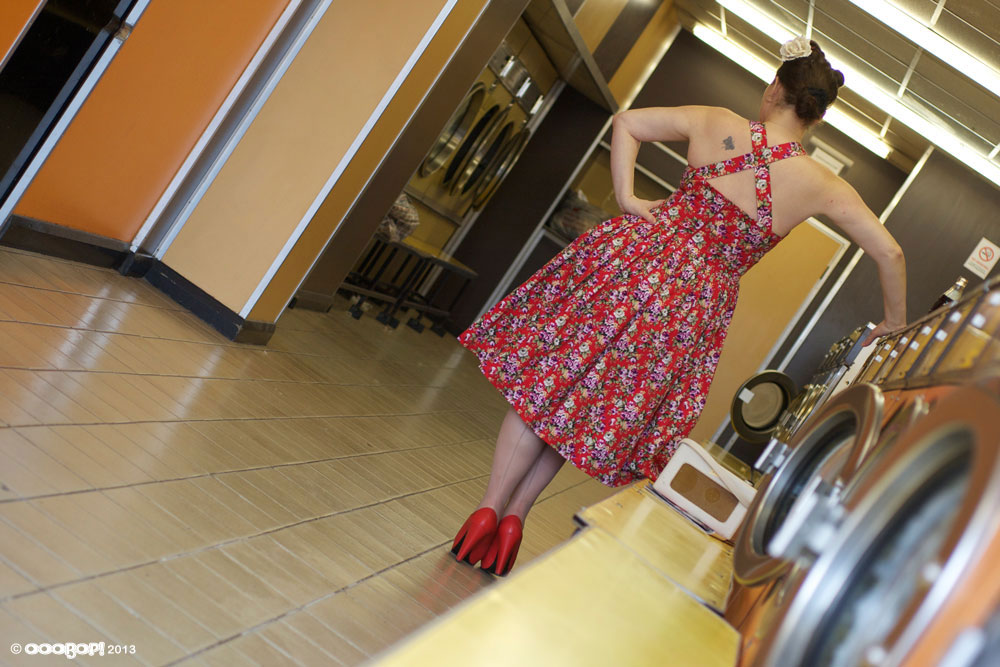
From Hammersmith Bridge Mr Ooobop insisted we take some shots in the Launderette. Not the most glamourous of locations but I’m so happy that it helped to project the vintage feel of the dress.
The dress itself is half derived from Simplicity 2442. I used this pattern for the bodice section:
I was the lucky recipient of this, plus a whole bunch of other goodies from Sew Magazine when I won Star Letter, back in October 2011. You can see the generous prize haul here.
I did have my doubts concerning gaping necklines and dodgy pleat placements but all it took to get over the fear was one toile, which also helped to reassure that it wasn’t going to take too long to whip up either. I can’t say exactly how long it took because I have been sewing in such little bursts over the last few weeks, in between shed loads of work.
I love the crossover straps at the back but I must find me a decent strapless bra. I’ve just tucked in the straps of my regular bra so they don’t show. But there was a going concern that it would end up round my waist at one point!
This pic is Mr O’s fave. Personally I think I look a little psychotic!
After much deliberation, mostly on Twitter, I decided to add a dirndl skirt to the bodice. I didn’t like how the suggested skirt was neither full nor straight. I felt it wasn’t extreme enough for the fabric I’d chosen or the vintage vibe that I wanted. I considered a circle skirt and nearly went for that, fearing too much bulk around my waist but I needed more than 3m to achieve that.
A dirndl still gives a great shape. I think you just have to make sure that the bodice is not too long otherwise the fullness sits over the belly and that’s not a good look on anyone!
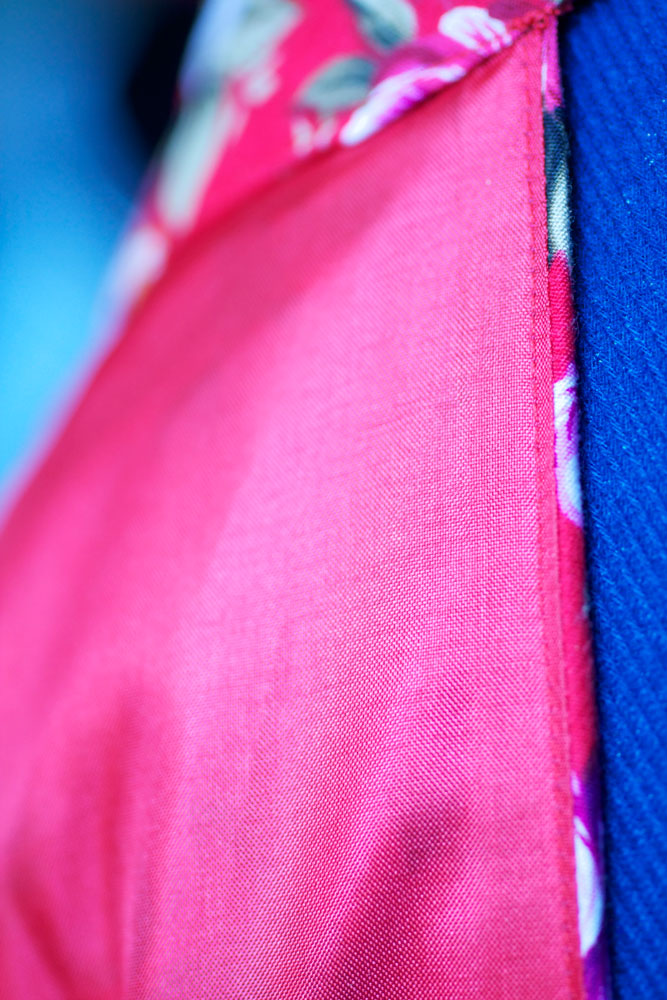
I lined the whole dress in red. I wasn’t going to line the skirt section at first but I remembered how, as full as skirts are, if they are made of cotton they cling like Billy-o to your tights! I also added a bit of ease in the depth of the midriff lining to prevent the outer fabric of the midriff from puckering.
I also took great care in under-stitching the lining on the bodice top edge so it didn’t peek out.
I’m so happy with how this dress turned out. The bodice fits and feels great. Can’t wait to try with a circle skirt and perhaps even a long evening dress in some silk velvet? As if my list isn’t long enough!!
I can’t possibly round off this post without a shout out to the amazing Dolly Clacket. She without doubt has been a massive inspiration whilst I’ve been dreaming up this dress. If you haven’t had the pleasure of seeing her wonderful 50s style tea dresses, hop over and have an oggle. They are gorgeous!